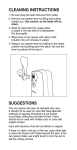
1
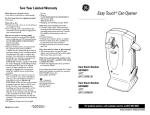
Two Year Limited Warranty
What does your warranty cover?
• Any defect in material or workmanship.
For how long after the original purchase?
• Two years.
What will we do?
• Provide you with a new, or at our option, a
reconditioned unit.
• The exchange unit is warranted for the
remainder of your product’s original twoyear warranty period.
How do you make a warranty claim?
• Return product to nearest WAL ★ MART
store or ship unit via UPS Ground Service
CUSTOMER SERVICE DEPARTMENT
233 Fortune Blvd,
Milford MA 01757
• All parts of this product are guaranteed
for a period of two years as follows:
– Within the first 24 months from date of
purchase, subject to the conditions below,
manufacturer will repair or replace the
product if it is defective in workmanship
providing it is returned to manufacturer,
freight prepaid, with PROOF OF
PURCHASE and date, together with $5.00
for return shipping and handling charges.
• Carefully pack the item in its original
carton or other suitable box to avoid
damage in shipping. We recommend
using the original carton and packing
materials.
• Before packing your unit for return, be
sure to enclose: your name, full address
with zip code and telephone number, a
dated sales receipt or PROOF OF
PURCHASE (if the unit was a gift, provide
a statement and the date received), your
$5.00 check for return shipping and
handling, and the model number of the
unit and the problem you are having.
(Enclose in an envelope and tape directly
to the unit before the box is sealed).
• Manufacturer recommends you ship the
package U.P.S. ground service for tracking
purposes.
• All shipping charges must be prepaid
428-945/106623
8
Easy Touch ® Can Opener
by you.
• Ship to:
CUSTOMER SERVICE DEPARTMENT
233 Fortune Blvd,
Milford MA 01757
• Shipping and handling charges: $5.00
What does your warranty not cover?
• Customer instruction. This instruction
manual provides information regarding
operating instructions and user controls.
For additional information, ask your
dealer.
• Commercial use.
• Damage from misuse, abuse, or neglect.
• Products which have been modified or
incorporated into other products.
• Products purchased or serviced outside
the USA.
How does state law relate to this warranty?
• This warranty gives you specific legal
rights, and you may also have other rights
which vary from state to state.
What if you purchased this product in the
USA and encounter a problem while using
it outside the USA?
• Follow the shipping directions provided
for warranty claims.
For products purchased outside the United
States and Canada, see dealer for warranty.
WAL ★ MART Stores, Inc.
Bentonville, AK 72716
is a trademark of
General Electric Company
and is used under the license by
WAL ★ MART Stores, Inc.
Bentonville, AR 72716
WAL ★ MART Stores, Inc.
Bentonville, AR 72716
Item Stock Number
GE106623
UPC:
681131066235
Can Opener Safety. . . . . . . . . . . . 2
Know Your Can Opener . . . . . . . . 3
Mounting Your Can Opener . . . . 3
Mounting Template . . . . . . . . . . . 4
Mounting Directions . . . . . . . . . . 4
6/00
How to Open Cans . . . . . . . . . . . . 6
How to Sharpen Knives . . . . . . . 7
How to Open Bottles . . . . . . . . . . 7
How to Clean Blade Assembly . 7
Customer Assistance . . . . . . . . . 8
For product service, call customer service at (877) 207-0923
GE106623 • UPC 681131066235
Know Your Can Opener
Can Opener Safety
IMPORTANT SAFEGUARDS
In order to prevent the risk of fire, electric shock, burns or other injury or
damage, follow these instructions carefully. When using electrical appliances,
basic safety precautions should always be followed including the following:
1. Read all instructions.
2. To protect against risk of electrical
shock, do not immerse cord, plug
or motor unit in water or other
liquid.
3. Close supervision is necessary when
any appliance is used by or near
children.
4. Unplug from outlet when not in
use, before putting on or taking off
parts, and before cleaning.
5. Avoid contacting moving parts.
6. Do not operate any appliance with a
damaged cord or plug, or after the
appliance malfunctions or is
dropped or damaged in any
manner. Call Customer Service
Dept. (see warranty) to return for
examination, repair, or electrical or
mechanical adjustment.
7. The use of attachments not
recommended or sold by the
manufacturer may cause fire,
electric shock or injury.
8. Do not use outdoors.
9. Do not let cord hang over edge of
table or counter, or contact hot
surfaces, including the stove.
10. Do not open pressurized (aerosoltype) cans or cans of flammable
liquids, such as lighter fluids.
11. Do not mount the unit over or near
any portion of a heating or cooking
appliance or a sink or basin.
12. To reduce the risk of fire or electric
shock, do not operate any heating
appliance beneath the mounted
unit.
Consumer Safety Information
THIS APPLIANCE IS INTENDED FOR HOUSEHOLD USE ONLY.
2
1
Piercing Lever
2
Cutting Blade
3
Feed Wheel
4
Can Rest
5
Knife Sharpener
6
Bottle Opener
1
2
3
4
5
6
Mounting Your Can Opener
Where To Mount Your Can Opener
Your can opener is designed to be installed under a cabinet.
Do not attempt to open cans until it has been properly mounted.
SAVE THESE INSTRUCTIONS!
This appliance has a polarized plug
(one blade is wider than the other).
As a safety feature, this plug will fit in a
polarized outlet only one way. If the
plug does not fit fully in the outlet,
reverse the plug. If it still does not fit,
Parts and Features
contact a qualified electrician. Do not
attempt to defeat this safety feature.
CAUTION: To reduce the risk of electric
shock, do not immerse the can opener in
water.
Hints For Selecting Location
• Can opener may be mounted under
wood or metal cabinets. Do not
attempt to open cans until it has
been properly mounted.
• Hold can opener in various
locations, making sure to allow room
for operation of lever and bottle
opener. Evaluate its appearance and
convenience, keeping in mind your
normal kitchen routine.
• Locate near an electrical outlet so
the cord does not come in contact
with other appliances or workspace.
• Do not mount can opener over a
sink, range or other heating
appliance or operate any heating
appliance beneath the can opener.
3
Mounting Directions
1. Cabinet with overhang:
Fold the template along the dashed
line. Line up the edge of the
template to the edge of the cabinet
on the underside, then tape in
place.
Cabinet without overhang:
Fold template along the outside
edge of the bold line. Line up the
edge of template to the edge of the
cabinet on the underside, then tape
in place.
2. Mark the center of the four holes
through the template using a sharp
point (nail or awl).
3. Remove template and drill four
3/16" holes where marked.
CAUTION: Always use safety glasses
when drilling to avoid eye injury.
✁
(cut here)
✁
(cut here)
MOUNTING TEMPLATE
Mark the CENTER of the holes here.
Align edge of paper with side of cabinet or wall.
Align edge of paper with side of cabinet or wall.
2.559 inches
Front edge of cabinet (with overhang)
Align edge of paper with front edge of cabinet (without overhang).
4
5
How to Mount Can Opener
The following parts are included for installing the can opener:
4 Phillips recessed flat-head screws
4 plastic washers
1 Cord clip
1 Template to position drilled holes
(provided)
Tools required:
Drill with a 3⁄16" bit
Phillips screwdriver
1. Place the hole template (provided),
on the bottom shelf of cabinet as
directed. Make sure it is face-up and
lined up with the front of the
cabinet, as indicated on the
template. Mark the center of the
holes with sharp point by pushing
through the crosshairs. Remove the
template and drill four 3⁄16" holes at
marked points. CAUTION: Always use
safety glasses when drilling to avoid
injuries to eyes. Keep the template for
future use.
2. Using the Phillips screwdriver, insert
each screw and washer through the
topside of the cabinet into the can
opener holes (See above drawing).
Make sure the cord is aligned through
the slot on the back of the unit.
3. A cord clip is provided to keep cord
out of sight, away from the work
area. Plug in and clip as desired. To
secure, peel off paper backing of
cord clip and press in place. Surface
must be clean, dry and free of dust
and grease.
NOTE: Always leave can opener
unplugged when not in use.
How To Open Cans
1. Plug cord into 120 volt, AC outlet.
2. Raise piercing lever, tilt can so that
the rim of the can rests on the edge
of the feed wheel, lower the lever
until the blade pierces the can.
3. Press lever down all the way to pierce
lid and start cutting action. “Power
Pierce” feature: When you press
lever, motor will start rotating can for
easier piercing.
4. Let go of lever and can opener will
continue cutting and will stop
automatically when can has been
opened. (It is normal for motor to
occasionally continue cutting action
for a few seconds after lid has been
6
completely
severed.)
5. To remove
can, grasp
can firmly
and raise
lever.
Carefully
slide lid from
magnet and dispose of properly.
PLEASE NOTE:
Unit will not open rimless cans. If there is
a dent in the rim of the can, open other
end. Never open or eat the contents of a
dented, bulging or punctured can.
How to Sharpen Knives
Do not attempt to sharpen hollow ground blades or those with serrated edges
1. Be sure knife is clean and free of
grease.
2. Place heel of knife into the guide
slot located on the left side of the
can opener. Lightly draw the blade
towards you, applying a slight
downward pressure. Repeat this
procedure four to five times to put
on a “factory sharp” edge.
How to Open Bottles
1. Insert bottle into bottle opener
making sure the prying edge is
placed between the edge of the
bottle cap and the top of the bottle.
2. Grasp bottle tightly with one hand.
3. Slowly and carefully move the bottle
from right to left, making sure the
prying edge begins to separate the
bottle cap from the bottle.
4. If done correctly, the bottle cap
should now easily remove from the
bottle.
How to Clean Blade Assembly
1. Unplug cord.
2. Wipe can opener with a damp cloth.
Clean around blade area with
toothpick or cotton swab if necessary.
HINT: Cutting mechanism may collect food or paper from can labels, and should be
cleaned frequently to maintain optimum performance.
7
Two Year Limited Warranty
What does your warranty cover?
• Any defect in material or workmanship.
For how long after the original purchase?
• Two years.
What will we do?
• Provide you with a new, or at our option, a
reconditioned unit.
• The exchange unit is warranted for the
remainder of your product’s original twoyear warranty period.
How do you make a warranty claim?
• Return product to nearest WAL ★ MART
store or ship unit via UPS Ground Service
CUSTOMER SERVICE DEPARTMENT
233 Fortune Blvd,
Milford MA 01757
• All parts of this product are guaranteed
for a period of two years as follows:
– Within the first 24 months from date of
purchase, subject to the conditions below,
manufacturer will repair or replace the
product if it is defective in workmanship
providing it is returned to manufacturer,
freight prepaid, with PROOF OF
PURCHASE and date, together with $5.00
for return shipping and handling charges.
• Carefully pack the item in its original
carton or other suitable box to avoid
damage in shipping. We recommend
using the original carton and packing
materials.
• Before packing your unit for return, be
sure to enclose: your name, full address
with zip code and telephone number, a
dated sales receipt or PROOF OF
PURCHASE (if the unit was a gift, provide
a statement and the date received), your
$5.00 check for return shipping and
handling, and the model number of the
unit and the problem you are having.
(Enclose in an envelope and tape directly
to the unit before the box is sealed).
• Manufacturer recommends you ship the
package U.P.S. ground service for tracking
purposes.
• All shipping charges must be prepaid
428-945/106623
8
Easy Touch ® Can Opener
by you.
• Ship to:
CUSTOMER SERVICE DEPARTMENT
233 Fortune Blvd,
Milford MA 01757
• Shipping and handling charges: $5.00
What does your warranty not cover?
• Customer instruction. This instruction
manual provides information regarding
operating instructions and user controls.
For additional information, ask your
dealer.
• Commercial use.
• Damage from misuse, abuse, or neglect.
• Products which have been modified or
incorporated into other products.
• Products purchased or serviced outside
the USA.
How does state law relate to this warranty?
• This warranty gives you specific legal
rights, and you may also have other rights
which vary from state to state.
What if you purchased this product in the
USA and encounter a problem while using
it outside the USA?
• Follow the shipping directions provided
for warranty claims.
For products purchased outside the United
States and Canada, see dealer for warranty.
WAL ★ MART Stores, Inc.
Bentonville, AK 72716
is a trademark of
General Electric Company
and is used under the license by
WAL ★ MART Stores, Inc.
Bentonville, AR 72716
WAL ★ MART Stores, Inc.
Bentonville, AR 72716
Item Stock Number
GE106623
UPC:
681131066235
Can Opener Safety. . . . . . . . . . . . 2
Know Your Can Opener . . . . . . . . 3
Mounting Your Can Opener . . . . 3
Mounting Template . . . . . . . . . . . 4
Mounting Directions . . . . . . . . . . 4
6/00
How to Open Cans . . . . . . . . . . . . 6
How to Sharpen Knives . . . . . . . 7
How to Open Bottles . . . . . . . . . . 7
How to Clean Blade Assembly . 7
Customer Assistance . . . . . . . . . 8
For product service, call customer service at (877) 207-0923
GE106623 • UPC 681131066235