1
Rev. 318
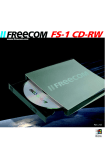
FREECOM FX-50
Freecom FX-50
GB
USB 2.0
or
USB 2.0 + FireWire *
USB and FireWire connection to the computer:
* Depends on model
2
Table of Contents
U SERS
MANUAL
GB
System Requirements ......................................................................... Page
5
Precautionary Measures and General Notes ..................................... Page
8
C HAPTER 1:
Initial operation .................................................................................. Page
7
C HAPTER 2:
Driver Installation ............................................................................... Page
9
C HAPTER 3:
CD Recording Software ...................................................................... Page 12
C HAPTER 4:
Troubleshooting ................................................................................. Page 15
© 2003 Freecom Technologies
3
FREECOM FX-50
Dear user!
GB
Welcome to the Freecom FX-50 installation. Before you install the device, we
would like to ask you to carefully read the following instructions and take them
into consideration, especially, when making changes to your system.
With the purchase of this device you have aquired a drive that can be connected
to any PC or Mac with the appropriate interface.
Freecom Technologies Germany
www.freecom.com
Warning !
All rights reserved. The products named in this manual are only used for identification
purposes and may be trademarks or registered trademarks of the respective
companies. This device was designed for home or office use.
Warning! This device is equipment complying with EN55022 class A. This equipment
can cause radio disturbances in a residential area. If this is the case, the user has to
take appropriate measures and assume all responsibility and costs for. It may not
be used near or with any life-sustaing systems.
Freecom Technologies is not liable for any damages that may occur from the use of
a Freecom system. All rights reserved. We reserve the right to upgrade our products
in keeping with technological advances.
4
System Requirements
Hardware Requirements (PC)
Pentium III, Celeron 700 MHz or faster
at least 128 MB RAM (265 MB recommended)
USB interface (USB 1.1 or USB 2.0*) or 1394 (FireWire / i.LINK) interface**
a CD-ROM drive or internet connection for driver installation
at least 400 MB of free hard disk space (5 GB recommended)
GB
Software Requirements (PC)
Windows 98 SE
Windows ME
Windows 2000
Windows XP
Minimum System Requirements (Mac)
Power Macintosh® with Mac® OS 9.1 or later, or Mac OS X (min v10.1.2)***
USB interface (USB 2.0* recommended) or FireWire interface **
128 MB of RAM (256 MB recommended)
Minimum 400 MB free hard disk space (5 GB recommended)
QuickTime® 4.0 or later
*
For maximum performance of the Freecom FX-50 DVD Recorder, both computer
system and software must support USB 2.0 or IEEE 1394 (FireWire). Connecting the
Freecom FX-50 DVD Recorder to a USB-1 interface will limit the recording speed to 4x.
** Depend on model
*** May require minor adjustments to the configuration of your operating system,
additional hard disk space, and/or updates to hardware component drivers. Results
may vary based on your equipment.
5
FREECOM FX-50
Supported media
GB
DVD+RW
DVD+R
CD-RW
CD-R
MiniCD (8cm)
MiniDVD+RW (8cm)
The DVD +/- drive also supports DVD-R and DVD-RW media
Precautionary Measures and General Notes
6
After transport, particularly at low outside temperatures, condensation can
form which can lead to a malfunction. For that reason, you should not begin
operation until the drive and CDs have reached room temperature.
Operate the Freecom drive only in a horizontal position, to prevent damage
to the media or the mechanical parts.
Operate the device only at temperatures ranging from 5 - 50 °C.
Do not use the device in a dusty and humid environment.
Protect the drive from shocks and other mechanical effects!
The device should not be operated in the vicinity of strong electromagnetic
radiation sources (loudspeakers, mobile telephones etc.).
Due to the high data transfer rates, the cable length should not exceed 1 m.
Error-free transmission cannot be guaranteed with longer cables.
Initial Operation - Brief Description
C HAPTER 1: Initial Operation - Brief Description
GB
1. Plug in the connection cable to the FX-50.
2. Connect the power cable supplied to the designated power connector on the
Freecom drive.
1
3. Plug the power supply of the Freecom drive into the power outlet.
4. Connect the other end of the connection cable to the USB port/FireWire port
on the PC.
5. To complete the rest of the installation procedure:
(only Windows 98:) After you have connected the FX-50, please start with the
driver installation, as described in chapter 2 on page 11.
(only MacOS 9.x:) Please install the Toast software, before connecting the
FX-5 to your computer. For further instructions see chapter 3.1 (Installing the
Toast Software for Mac). Since MacOS 9.x supports only USB 1.1 your FX-50
will be recognised as a USB 1.1 device.
Under Windows ME / 2000 / XP and MacOS X a separate Freecom driver is not
required. The drivers for Windows ME, Windows 2000 and Windows XP will
be installed automatically by the operating system after plugging in the
Freecom FX-50 into the USB or FireWire port of the computer.
(USB/FireWire version)
7
FREECOM FX-50
1.1 Assigning the drive letter
GB
After successfully completing the installation of the Freecom FX-50, a new drive
letter is assigned automatically (the first available letter after the internal hard
drives). This can shift the drive letter of an internal CD-ROM drive (for example,
'D' to 'E'). If this leads to problems, it is possible to change the drive letter
assignment as follows:
1
- under Windows 98 and ME:
1. Click on "Start" - "Settings" - "Control Panel".
2. Click on "System".
3. Select "Device Manager" and click on "CD-ROM" or "Drive".
4. Click on the Freecom FX-50, then on "Properties" - "Settings". (The currently
assigned drive letter as well as the reserved drive letters will then be
displayed.)
5. Under "Reserved Drive Letter" enter a drive letter, for example "F" for the
Freecom FX-50 as the "First drive letter" and "F" again as the "Last drive
letter".
6. Confirm your selection with "OK". When you restart your computer, the
Freecom FX-50 will be assigned the letter F in "My Computer".
- under Windows 2000 and XP:
1. Click "Start" - "Settings" - "Control Panel" - "Administration" - "Computer
Administration".
2. Click "Disk Maintenance" and then select the Freecom drive.
3. In the "Operation" menu ("Action" in Windows XP), select All Tasks and then
click Change drive letter and path.
4. In the next window, click "Change" and select a drive letter in Assign the
following drive letters.
5. Click "Yes" to confirm your change.
1.2 Operating Freecom drives
Freecom drives are just as easy to use as an internal device.
One big advantage of Freecom devices is their portability. By connecting to the
cable interface, it is very easy to use the drive with various computer systems.
To insert and remove media (CDs, DVDs, CD-Rs, CD-RWs), press the eject button.
(This is only active when the drive is ready for operation.)
When inserting a media, please make sure that the printed side is facing up. Do
not touch the underside of the media. Fingerprints can lead to read errors or
even make your media unusable.
8
Initial Operation - Brief Description
CHAPTER 2: Driver Installation
GB
Under Windows ME / 2000 / XP a separate Freecom driver is not required. The
drivers for Windows ME, Windows 2000 and Windows XP will be installed
automatically by the operating system after plugging the Freecom FX-50 into
the USB or FireWire port of the computer.
2
2.1 USB version
Driver installation under Windows 98 SE
Your FX-50 is fully backwards compatible with USB 1.1. The installation for USB
1.1 is the same as described below for USB-2.
1. Insert the Freecom "Manual and Driver" CD into the CD-ROM drive.
2. Connect your Freecom FX-50 to the USB connector of your notebook or
computer.
3. The "Add New Hardware Wizard" opens and a "USB 2.0 Device" (USB-2 Host
Controller) or a "USB2-IDE Controller" (USB 1.1 connector) is found.
Click on "Next".
4. In the next window select "Search for the best driver for your device.
(Recommended)".
Click on "Next".
5. Make sure that the checkbox "CD-ROM drives" is activated in the next
window. Continue by clicking on "Next".
9
FREECOM FX-50
6. The Hardware Wizard finds a "Freecom FX-50".
GB
2
By clicking on "Next" the necessary files will be installed. Afterwards click on
"Finish". The "Add New Hardware" Wizard opens again saying a new "USB
Mass Storage" Device is found.
Please repeat the steps described above to finish the installation.
10
Initial Operation - Brief Description
2.2 FireWire version
GB
Installation under Windows 98 SE
Note: FireWire (IEEE 1394) is only supported by Windows 98 SE (and
above). If you are using an older version, you must first update
Windows.
2
1. The driver database is loaded automatically after you have connected the
FireWire cable to the PC.
2. Now place the "Windows 98 Installation CD" in your internal CD-ROM drive.
3. The "Hardware assistant" window appears on the screen. Click on "Next".
4. Select the item "Search for the best driver for the device" (Recommended)
and confirm with "Next".
5. Make sure that the checkbox "CD-ROM drives" is activated in the next
window. Continue by clicking on "Next".
6. The next window shows the driver file found on the CD-ROM. Confirm with
"Next".
7. Click on "Finish" in the next window.
8. In order for the changes to take effect, you must restart your computer.
Note: You can plug the drive in and unplug it at the FireWire port while
the PC is running. The drive will be recognized automatically under "My
Computer" when it is reconnected ("hot plug & play").
11
FREECOM FX-50
CHAPTER 3: Installing the Writing Software
GB
After installing the USB drivers, your Freecom FX-50 DVD Recorder is now able
to read CD or DVD-ROMs. To record a blank DVD or CD, you must first install the
writing software. We recommend using the software which has been provided
with your drive.
3
To install the recording software, insert the FX Manual and Installation CD, select
the INSTALL SOFTWARE option and in the next menu select ROXIO EASY CD
CREATOR.
Note: If you wish to use other software, please find out from the
supplier whether his products support the Freecom FX-50 DVD Recorder.
3.1 Installation of Recording software for MacOS
To record CDs or DVDs, the included Roxio Toast software should be installed.
The Toast installer is on the FX-50 Manual and Installation CD.
Insert and open this CD. Select the ROXIO TOAST option and doubbleclick on the
installer icon and follow the instructions on screen.
3.2 Special Instructions before Writing a CD or DVD
You should realize that writing optical disks is principally a compact data
transmission procedure which can be disrupted by even the smallest mechanical disturbance.
Never clean the FX-50 drive with a commercially available CD, DVD or a CDROM cleaning set. This can damage the drive.
Recordable CDs/DVDs (blanks) are more sensitive than commercially available
CD or DVDs. Use only a solvent-free, non-abrasive marker when writing on
a CD.
Do not stick any conventional labels on the DVD- or CD-Recordables , since
the adhesive can attack the medium. Special labels for CD-/DVD-R media are
available in retail computer stores. Never remove a label from a CD-/DVD-R
media otherwise you will damage the protective layer and make the Disk
unusable.
The drive recognizes the medium as soon as it is placed into the drive. CD-R
media are compatible with the vast majority of CD-ROM drives and CD audio
players and work in most DVD-ROM drives. DVDs created on this DVD
Recorder can be viewed on nearly all DVD players and DVD-ROM drives.
Recommendation: For optimal results, use Freecom blank CD's, available
via your local reseller or at www.freecom.com.
12
Installing the CD Recording Software
3.3 Preparing to write a Disk
GB
Before creating a Disk:
1. By clicking "Start" - "Programs" - "Accessories" - "System Tools" -"ScanDisk"
check your hard disk with the ScanDisk program.
3
2. By clicking "Start" - "Programs" - "Accessories" - "System Tools" - "Disk
Defragmenter" defragment your hard disk.
other preparations:
Deactivating automatic recognition of Disks (in the Device Manager under
Windows 98/ME/2000/XP)
Deactivating the screen saver
Log out of the network before starting the writing procedure (if applicable)
Deactivate your modem
No sleep mode setting / no multitasking
Closing all open windows and other running programs
Close any virus and disc management software
3.4 Procedure for writing Disks
There are two procedures for creating and writing your Disks.
Mastering
Packet Writing
3.4.1 The Mastering procedure
is a process for creating data CDs and Audio CDs. Data is compiled onto a "Master
CD" in one (single session) or several (multisession) writing procedures. During
these procedures, the data is made compatible according to various industry
norms, allowing for example audio CDs to be read by any CD player. The standards
for new technology (for CD, video etc.) are prepared for data storage in special
readable formats. Special programs such as "Easy Creator", "WinOnCD",
"CEQuadrat ToGo!", "Nero Burning ROM" are necessary to convert data into
these specified formats. These types of programs are necessary for writing data
CDs in ISO 9660 and Joliet formats as well as for writing audio CDs, Mixed Mode
CDs and Photo CDs.
Note: Data CDs in Joliet format are only readable under Windows 95, 98,
ME, NT 4.0, 2000 and Windows XP.
13
FREECOM FX-50
3.4.2 The Packet Writing procedure
GB
can be used to create CD without starting a special mastering program. The
Packet Writing procedure allows to use blank CD in combination with the
Universal Disc Format (UDF) as an additional hard disk or floppy disk. Standard
software for packet writing e.g. "Direct CD" (Roxio), "InCD" (Nero Burning
ROM). Afterwards the writing procedure can be started.
3
Files can be written directly from any Windows application (e.g. Microsoft Word)
to the CD using the same procedure as writing to the hard disk. Files can also be
copied to CD using the Windows Explorer.
Note: We recommend using the software which has been provided with
your drive. If you wish to use other software, please find out from the
supplier whether his products support the Freecom Recorder.
Afterwards, you can start the writing procedure by simply dragging the file to
be written in the Explorer/File Manager (Drag&Drop Principle), assuming there
is a UDF-formatted blank disk in your drive.
A medium can only be written once with the CD-R drive and previously written
files can be deleted but not overwritten. The great advantage of the drive in
conjunction with a CD-RW medium is that it allows you to rewrite the medium.
Note: Please note that the mastering procedure and the packet writing
procedure can only be used seperately, therefore a mixing of these
procedures on one CD-RW is not possible.
3.5 Peculiarities when writing audio CDs
Please note that some older CD player models principally cannot read self-written
CDs.
The drive must be set to Single Session and Fixing, if possible, also Track-atOnce.
If you do not have enough hard disk space, you can try to write single tracks one
at a time.
Note: Audio files must have the proper format (stereo, 16 bit and 44.1
Hz sampling frequency) and must be supported by the writing software,
for example, *.wav. Some programs offer conversion functions.
Soundcards and the software that come with them can also be used.
14
Troubleshooting
C HAPTER 4: Troubleshooting
GB
General problems (depending on the type of connection)
If you still have problems getting your Freecom drive to function properly
despite having installed it correctly, then please check whether
the cable is properly connected to your Freecom drive
the drive is being supplied with power
the tray can be opened and closed
your system meets the hardware requirements (see pages 5/6)
4
If audio playback does not work, please check if
the loudspeaker is properly connected
the cables are firmly connected
the loudspeaker control on the amplifier or on the active loudspeakers is
correctly set
the audio software is correctly installed.
Note: Please note that Freecom FX-50 must never be cleaned with a lens
cleaning set!
Freecom Internet Service
Freecom Technologies have the following service available on the Internet at
www.freecom.com
Online information about technical problems
current product information
Drivers, driver updates and software information
Forum
15