1
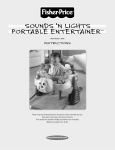
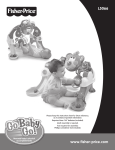
Soothing Dreams
TM
Monitor
with Remote Control
Model Number: 71597
For proper set-up and use, please read these instructions.
Please keep this instruction sheet for future reference,
as it contains important information.
Transmitter is electrically powered.
Remote control receiver is powered by the AC adaptor (included, plugs
into standard household outlets 120V AC). Remote control receiver
also runs on battery power (9V alkaline battery - not included).
Requires one PR12 light bulb (included).
An adult must install the battery (if used) and replace the light bulb.
Tool needed for battery installation and
co m
light bulb replacement: Phillips screwdriver.
ic e.
r
p
r
fishe
www.
2
IMPORTANT!
CAUTION
This product cannot replace
responsible adult supervision.
• This product is not intended to be used as a medical monitor
and its use should not replace adult supervision.
• Test sound reception of remote control receiver before first-time
use and whenever you change location of transmitter.
• To prevent entanglement:
- Never place transmitter in a crib or playpen. Keep transmitter
and remote control receiver out of baby’s reach.
- Never use extension cords with the AC adaptor.
• Never use transmitter or remote control receiver near water
(ie.: bathtub, sink, laundry tub or wet basement, etc.).
• Always use transmitter and remote control receiver where there is
adequate ventilation. To prevent overheating, keep transmitter and
remote control receiver away from heat sources such as radiators,
heat registers, direct sunlight, stoves, amplifiers, or other appliances
which produce heat.
• Never attempt to modify this product.
Consumer Information
Occasionally a consumer may experience a problem with one of our
products. If this should happen, please call us toll-free, rather than
return this product to the store. Usually, we can solve the problem
over the telephone or send you replacement parts.
Please call Fisher-Price® Consumer Relations, toll-free at
1-800-432-KIDS, between 8 AM - 6 PM EST, Monday through Friday.
Hearing-impaired consumers using TTY/TDD equipment,
please call 1-800-382-7470.
Or write to:
Fisher-Price® Consumer Relations
636 Girard Avenue
East Aurora, New York 14052
3
Remote Control Receiver
Battery Installation (Optional)
9V (6LR61)
SHOWN ACTUAL SIZE
Battery
Compartment Door
• Locate battery compartment door on back of remote control receiver.
• Loosen screw in battery compartment door with a Phillips screwdriver.
Lift to remove battery compartment door.
• Snap terminals of a fresh, 9V alkaline battery into remote control
receiver connectors.
• Replace battery compartment door and tighten screw.
Do not over-tighten.
Battery Tips
• Remove the battery during long periods of non-use. Always
remove an exhausted battery from the product. Battery leakage
and corrosion can damage this product. Dispose of battery safely.
• Do not dispose of the battery in a fire. The battery may explode
or leak.
• Never short circuit the battery terminals.
• A non-rechargeable battery is not to be recharged.
• Only a battery of the same or equivalent type as recommended in
the “Battery Installation” instructions is to be used.
• If a removable rechargeable battery is used, it is only to be charged
under adult supervision.
• A rechargeable battery is to be removed from the product before
it is charged.
• If you use a battery charger, it should be examined regularly for
damage to the cord, plug, enclosure and other parts. Do not use
a damaged battery charger until it has been properly repaired.
4
Testing Sound Reception
Test transmitter transmission and
remote control receiver reception.
Power/Volume Dial
Power/Volume
Dial
Power
Indicator
Place remote control receiver in
room in which you intend to use it.
Rotate power/volume dial to turn
power on. Adjust remote control
receiver location.
Place transmitter in room in which
you intend to use it. Rotate transmitter power/volume dial to turn power
on. Turn on a radio.
BUZZZZ
Power
Indicator
Adjust
Channel
STATIC
• Variable light display lights when
sound is received by remote
control receiver:
- One or two dots light for
shallow sounds.
- Three or more dots light for
louder sounds.
• If you experience interference
(buzzing or static, etc.) while using
one channel setting, switch both
units to other channel. Selecting
a channel is usually a one time
adjustment.
Hint: All four dots in remote control receiver variable light display light:
- If you turn remote control receiver power on before transmitter power. You will
also hear static noise. Turn volume down and turn transmitter power on.
- If the remote control receiver is too far away from the transmitter. Move the remote
control receiver closer to the transmitter.
- If loud sounds are transmitting.
5
Setup & Use
8
2
3
1
7
1
4
6
Back View
Transmitter
Transmitter
6
5
Remote Control
Receiver
Setup & Use
IMPORTANT! Test sound reception of this monitor before first time
use and whenever you change location of transmitter (see page 5).
1 Set transmitter channel switch to same channel as remote
control receiver.
2 Place transmitter in same room with child. Point microphone
directly toward crib or play area.
3 Unwrap and fully extend power cord for best transmission.
Insert power cord plug into wall outlet.
4 Rotate transmitter power/volume dial to turn power on.
Power indicator lights.
5 Choose a soothing mode:
SFX
Light only
Light and Music
Light and Nighttime Nature Sounds
6 Choose a light mode:
Ceiling Light Show
Night Light
7 If you chose Ceiling Light Show (
), adjust projector
on the back of transmitter so that it projects on ceiling
over baby’s crib.
8 Press soothing button on transmitter to activate your
selection. Rotate power/volume dial to adjust volume.
Light/music/nature sounds will turn on for about five
minutes and then automatically turn off. If you’d like to
immediately turn off light/music/nature sounds, press
soothing button on transmitter again.
Hint: If you do not want light/music/nature sounds on after presetting
transmitter, do not press soothing button on transmitter.
7
Setup & Use
9
11
10
8
Setup & Use
9 Place remote control receiver where you will see or hear it.
10 Unwrap and fully extend AC adaptor cord for best reception.
Insert AC adaptor jack into remote control receiver socket and
plug into wall outlet.
Note: To use a 9V alkaline battery for power source, refer to
“Remote Control Receiver Battery Installation” instructions
on page 4.
11 Rotate remote control receiver power/volume dial to turn
power on. Power indicator lights. Rotate power/volume dial
to adjust volume.
Note: AC adaptor is 120 VAC, 60Hz, 3W input; 6 VDC 100mA output;
center positive polarity; plug OD is 5.5 mm, plug ID is 1.5 mm.
9
Setup & Use
Nature
Sounds
Night Light
Ceiling Light
Show
Night Light
with Music or
Nature Sounds
Nature
Sounds
Ceiling Light
Show with Music
or Nature Sounds
• To soothe baby, press and hold soothing button (Soothe) on remote
control receiver for about two seconds. Your baby enjoys what you
have selected.
• Light/music/nature sounds will turn off after approximately five minutes.
To turn back on, simply press and hold soothing button (Soothe) on
remote control receiver for about two seconds.
IMPORTANT! It takes a few seconds for the transmitter to receive a signal
from the remote control receiver. Be sure to press and hold the soothing
button on the remote control receiver for about two seconds.
10
Setup & Use
“Wah, Wah,
Wah…”
“Mommy is
coming…”
“Mommy is
coming…”
• To talk to baby, press talk button (Talk) and speak into microphone
on remote control receiver. Release talk button (Talk) after you have
finished talking.
Hint: If light/music/nature sounds are playing when you press talk button (Talk),
you will temporarily turn them off. Light/music/nature sounds turn back on after
you are finished pressing talk button (Talk).
11
Replacing the Light Bulb (Glass Bulb)
IMPORTANT! Should light bulb become non-functional, you are
advised to remove and replace it. This should be carried out away
from child’s sleep or play area.
1
Light Bulb
Compartment Door
3
C
B
A
Reflector
Lens
• Loosen screws in light bulb
compartment door with a
Phillips screwdriver.
• Lift to remove light bulb
compartment door.
• While pressing lens of reflector
A , lift it B from light bulb
compartment cover.
• Remove and properly discard
light bulb C .
• Replace light bulb with a
new PR12 or equivalent
light bulb.
Note: When replacing light
bulb, be sure to discard light
bulb properly. Beware of
cracked or broken glass.
Hint: You may need to fit a flat
edged object to pry light bulb
compartment door up.
2
Retainer
• Turn light bulb compartment
door so that inside faces up.
• Loosen and remove two
screws in the retainer with
a Phillips screwdriver.
• Remove retainer.
12
4
Notch
6
Light Bulb
Compartment Door
Tab
Groove
• At an angle, fit reflector over
new light bulb.
• Align notch in reflector with
tab in light bulb receptacle.
• Push reflector lens slightly
and fit reflector edges
into grooves in light bulb
compartment cover.
• Fit light bulb compartment
door into back of transmitter.
Press light bulb compartment
door to “snap” into place.
• Tighten screws in light bulb
compartment door with
Phillips screwdriver. Do not
over-tighten.
5
• Replace retainer and insert
two screws.
• Tighten screws with a Phillips
screwdriver. Do not over-tighten.
13
Problems & Solutions
Circuit Breaker
5
“Ma, ma, ma.
Da, da, da…”
3
4
“That doesn’t
sound right. Maybe
we should check the
transmitter.”
6
Z
BUZZZ
Z
BUZZZZ
BUZZZZZ
1
14
2
Problems & Solutions
PROBLEMS
SOLUTIONS
1 Transmitter power indicator
1 Turn transmitter power on.
2 You hear static or buzzing from
2 Make sure channel switches on
not lit.
Power indicator lights.
remote control receiver.
both transmitter and remote
control receiver are set to
same channel.
3 Transmitter power indicator
3 Make sure light switch that
not lit.
controls power flow to wall
outlet is on.
4 Transmitter power indicator
4 Check transmitter power cord
5 Transmitter power indicator
5 Power is off because circuit breaker
6 You hear static or buzzing
6 Check all five solutions above.
plug-to-outlet connection.
not lit.
for baby’s room is off. Make sure
house fuses and circuit breakers
are on.
not lit.
and all four dots lit on remote
control receiver.
Any one or more of these solutions
should solve the problem.
Hint: If, after checking all of these solutions, you believe that your transmitter power
cord or AC adaptor is is damaged, please call Fisher-Price® at 1-800-432-KIDS.
15
Problems & Solutions
“Did you read
about…”
“That’s gotta
be coming from
next door…”
PROBLEM
You can hear conversations or sounds from other homes.
16
“Wah, Wah,
Wah…”
“That must
be Susie
next door…”
“I better get
off the phone,
she’s up…”
“Wah, Wah,
Wah…”
“Wah, Wah,
Wah…”
“Did you read
about…”
SOLUTION
There is signal interference due to other nursery monitors on same
channel or cordless telephone use. Change channel switches on
both transmitter and remote control receiver to eliminate source
of interference.
Hints:
- Do not use more than one transmitter and one receiver at same time
in same household.
- Always remember that you are using public airwaves when using
your monitor. Conversations, even from rooms near transmitter, may
broadcast to other nursery monitors, radios, cordless telephones, or
scanners outside your home. To protect privacy of your home, always
turn transmitter off when not in use.
17
Problems & Solutions
“Uh-oh, maybe I
should move closer
to the house.”
STATIC
STATIC
STATIC
SOLUTION
PROBLEM
You hear static or buzzing because
remote control receiver is out of
range of transmitter.
Move remote control receiver
closer to transmitter.
Note: Range varies depending
on surrounding conditions such
as noise levels, physical obstructions and signal interference.
Hint: If you cannot hear your child and all four dots do not light, your remote
control receiver battery is weak. Replace remote control receiver battery with
a fresh, 9V alkaline battery or use AC adaptor for power source.
18
Care
Excess dirt in transmitter and remote control receiver microphone will hamper
transmission of sound. Clean outer surface of transmitter and remote control
receiver with a cloth lightly dampened with a mild cleaning solution. Never
immerse transmitter, remote control receiver or AC adaptor.
FCC Note (United States Only)
This equipment has been tested and found to comply with the limits for a
Class B digital device, pursuant to part 15 of the FCC rules. These limits are
designed to provide reasonable protection against harmful interference in a
residential installation. This equipment generates, uses and can radiate radio
frequency energy and, if not installed and used in accordance with the
instructions, may cause harmful interference to radio communications.
However, there is no guarantee that interference will not occur in a particular
installation. If this equipment does cause harmful interference to radio or
television reception, which can be determined by turning the equipment off
and on, the user is encouraged to try to correct the interference by one or
more of the following measures:
- Reorient or relocate the receiving antenna.
- Increase the separation between the equipment and receiver.
- Connect the equipment into an outlet on a circuit different from that to
which the receiver is connected.
- Consult the dealer or an experienced radio/TV technician for help.
CAUTION: Changes or modifications not expressly approved by the manufacturer responsible for compliance could void the user’s authority to operate
the equipment.
Soothing Dreams™ with Remote Control Monitor
Model Number: 71597
This device complies with Part 15 of the FCC Rules. Operation is subject to the
following two conditions: (1) This device may not cause harmful interference and
(2) this device must accept any interference received, including interference that
may cause undesired operation.
Soothing Dreams™ with Remote Control Monitor
Consumer Affairs Department
636 Girard Avenue
East Aurora, New York 14052
19
One (1) Year Limited Warranty
Fisher-Price, Inc., 636 Girard Avenue, East Aurora, New York 14052 warrants that
the Soothing Dreams™ Monitor with Remote Control is free from all defects in
material and workmanship when used under normal conditions for a period of
one (1) year from the date of purchase. Should the product fail to perform properly, we will repair or replace it at our option, free of charge. Purchaser is responsible for shipping the product to Consumer Relations at the address indicated
above and for all associated freight and insurance cost. Fisher-Price, Inc., will bear
the cost of shipping the repaired or replaced item to you. This warranty is void if
the owner repairs or modifies the product. This warranty excludes any liability
other than that expressly stated above including but not limited to any incidental or consequential damages.
SOME STATES DO NOT ALLOW THE EXCLUSION OR LIMITATION OF INCIDENTAL
OR CONSEQUENTIAL DAMAGES, SO THE ABOVE LIMITATION OR EXCLUSION MAY
NOT APPLY TO YOU.
THIS WARRANTY GIVES YOU SPECIFIC LEGAL RIGHTS, AND YOU MAY ALSO HAVE
OTHER RIGHTS WHICH MAY VARY FROM STATE TO STATE.
If you have any questions about this product:
In Canada, call 1-800-567-7724, or write to: Mattel Canada Inc., 6155 Freemont Blvd.,
Mississauga, Ontario L5R 3W2.
In Great Britain, telephone 01628 500303.
In Australia, Mattel Australia Pty. Ltd., 658 Church Street, Locked Bag #870,
Richmond, Victoria 3121 Australia. Consumer Advisory Service 1-800-800-812
(valid only in Australia).
Fisher-Price, Inc., a subsidiary of Mattel, Inc., East Aurora, New York 14052, U.S.A.
©2001 Mattel, Inc. All Rights Reserved.
® and ™ designate U.S. trademarks of Mattel, Inc.
Printed in China
71597pr-0920