1
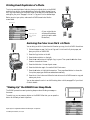
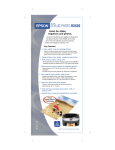
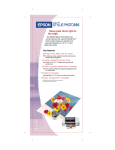
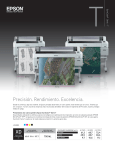
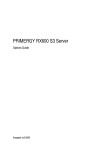
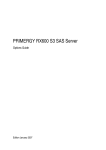
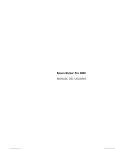
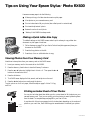
Tips on Using Your Epson Stylus® Photo RX600
Here are some easy ways to do the following:
■
Make a quick copy of a letter-size document on plain paper
■
View photos on your camera’s memory card
■
Print an index sheet of all your photos (also called a proof or contact sheet)
■
Print exact duplicates of a photo
■
Restore the colors of an old photo
■
“Wake up” the RX600 from sleep mode
Making a Quick Letter-Size Copy
The default settings on the RX600 screens make it quick and easy to copy a letter-size
document on plain paper. Here’s how:
1. Follow the steps on page 21 of your User’s Guide to load plain paper and place your
document on the RX600.
2. Press the Copy button on the left.
3. Press the x Color or x B&W button to copy.
Viewing Photos from Your Memory Card
Here’s how to view photos from your memory card on the RX600 screen:
1. Insert your memory card in the correct slot on the RX600.
2. Press the Memory Card button to view the Memory Card menu.
3. Press the u or d buttons to highlight Basic Print 4 x 6”. Then press the l or r
buttons to choose Select Print.
4. Press the OK button.
5. The RX600 screen displays the first, second, and last photo on the card.
6. Press the l or r buttons to move through the photos.
To print a photo on 4 x 6-inch paper, follow the steps on page 1 of How To Copy
and Print.
Last
First
Second
Printing an Index Sheet of Your Photos
You can print an index sheet (also called a proof or contact sheet) of all the photos on your
camera’s memory card. Then you can quickly print the photos you want by selecting them
from the sheet. For complete steps, see page 88 in your User’s Guide.
It may take a bit of time to process and print the index sheet, depending on the number of
photos on your card. Also, the RX600 may print several sheets to include all your photos.
Index
sheet
CPD-17879
Printing Exact Duplicates of a Photo
To print an exact duplicate of a photo, place your original photo on the RX600,
press the Copy button, then press the Menu button and select BorderFree as
the Copy Layout setting on the RX600 screen. Also select the correct BorderFree
settings for your print. See page 1 of How To Copy and Print for detailed steps.
Before you print your photo, make sure the RX600 screen looks like the
screen below.
BorderFree
AutoFitPage
Paper type and
size, and print
quality
(If your original photo
contains white borders,
you don’t need to select
BorderFree.)
Restoring the Color in an Old 4 × 6 Photo
You can bring an old 4 × 6 photo back to life when you copy it on the RX600. Here’s how:
1. Follow the steps on page 1 of How to Copy and Print to load 4 × 6 photo paper, and
place your photo on the RX600.
2. Press the Copy button on the left.
3. Press the Menu button on the right.
4. Press the u or d buttons to highlight Copy Layout. Then press the l button three
times to choose Multi-Photo.
5. Press the OK button. You see a layout screen.
6. Press the OK button again. You see the Multi-Photo menu.
7. Press the d button to highlight Restoration. Then press the l button to choose On.
Your photo paper type and size are selected automatically.
8. Press the x Color button and follow the instructions on the RX600 screen to copy and
restore your photo.
You can also restore the color in an old film strip photo or slide; see page 95 of your User’s
Guide for details.
“Waking Up” the RX600 From Sleep Mode
The RX600 protects its screen by entering sleep mode and floating a message on
the screen.
To wake it up, you can press any button on the RX600. After that you can press the
button for the task you want to perform.
Epson Stylus is a registered trademark of Seiko Epson Corporation.
© 2004 Epson America, Inc. 2/04
Press any button to