1
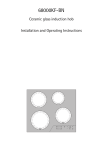
C67600K
Ceramic glass induction hob
Installation and Operating Instructions
Dear customer,
Please read these operating instructions carefully.
Pay particular attention to the section “Safety information” on the first
few pages. Please retain these operating instructions for later reference. Pass them on to possible new owners of the appliance.
1
3
2
The following symbols are used in the text:
Safety instructions
Warning: Information concerning your personal safety.
Important: Information on how to avoid damaging the appliance.
Information and practical tips
Environmental information
1. These numbers indicate step by step how to use the appliance.
2. …
3. …
These operating instructions contain information on steps you can take
yourself to rectify a possible malfunction. Refer to the section “What to
do if...”.
In the event of any technical problems please contact your nearest customer service centre at any time. (Addresses and telephone numbers
may be found in the appendix under "Customer Service Centres“).
You should also refer to the section "Service".
Printed on recycled paper.
Thinking ecologically means acting ecologically …
42
Contents
Operating Instructions . . . . . . . . . . . . . . . . . . . . . . . . . . . . . . . . . . . . .
45
Safety . . . . . . . . . . . . . . . . . . . . . . . . . . . . . . . . . . . . . . . . . . . . . . . . . . . . . . . . . 45
Disposal . . . . . . . . . . . . . . . . . . . . . . . . . . . . . . . . . . . . . . . . . . . . . . . . . . . . . . . 48
The Key Features of Your Appliance . . . . . . . . . . . . . . . . . . . . . . . . . . . . . . 49
Description of the Appliance . . . . . . . . . . . . . . . . . . . . . . . . . . . . . . . . . . . . .
Cooking zones and control panel. . . . . . . . . . . . . . . . . . . . . . . . . . . . . . . . . . .
Function and the Way the Induction Cooking Zone Works . . . . . . . . . . . . .
The Digital Displays . . . . . . . . . . . . . . . . . . . . . . . . . . . . . . . . . . . . . . . . . . . . . .
Cooking Zone Safety Cut-out. . . . . . . . . . . . . . . . . . . . . . . . . . . . . . . . . . . . . .
Suitable Kitchenware for Induction Cooking Zones. . . . . . . . . . . . . . . . . . . .
Pots and pans for rapid-glowing standard cooking zones . . . . . . . . . . . . . .
50
50
51
51
52
53
54
Before Using for the First Time. . . . . . . . . . . . . . . . . . . . . . . . . . . . . . . . . . . 55
Initial Cleaning. . . . . . . . . . . . . . . . . . . . . . . . . . . . . . . . . . . . . . . . . . . . . . . . . . 55
Operating the Hob . . . . . . . . . . . . . . . . . . . . . . . . . . . . . . . . . . . . . . . . . . . . . .
Touch Control Sensor Field . . . . . . . . . . . . . . . . . . . . . . . . . . . . . . . . . . . . .
Switching On the Appliance . . . . . . . . . . . . . . . . . . . . . . . . . . . . . . . . . . . .
Switching Off the Appliance. . . . . . . . . . . . . . . . . . . . . . . . . . . . . . . . . . . .
Cooking Zone Selection . . . . . . . . . . . . . . . . . . . . . . . . . . . . . . . . . . . . . . . .
Heat Setting Selection . . . . . . . . . . . . . . . . . . . . . . . . . . . . . . . . . . . . . . . . .
Activating the power function . . . . . . . . . . . . . . . . . . . . . . . . . . . . . . . . . .
Switching the Casserole Zone On and Off. . . . . . . . . . . . . . . . . . . . . . . . .
Switching off a Cooking Zone . . . . . . . . . . . . . . . . . . . . . . . . . . . . . . . . . .
Cooking with the Automatic Heating-Up Function . . . . . . . . . . . . . . . . .
Cooking without the Automatic Heating-Up Function . . . . . . . . . . . . . .
Residual Heat Indicator . . . . . . . . . . . . . . . . . . . . . . . . . . . . . . . . . . . . . . . .
Locking/Unlocking the Control Panel. . . . . . . . . . . . . . . . . . . . . . . . . . . . .
Timer . . . . . . . . . . . . . . . . . . . . . . . . . . . . . . . . . . . . . . . . . . . . . . . . . . . . . . .
56
56
56
56
57
57
58
59
60
61
63
63
64
65
Uses, Tables and Tips . . . . . . . . . . . . . . . . . . . . . . . . . . . . . . . . . . . . . . . . . . . .
Advice on Cooking with and without Automatic Warm up . . . . . . . . . . . . .
Chart for Setting the Cooking Zones . . . . . . . . . . . . . . . . . . . . . . . . . . . . .
Chart for the Automatic Heating-Up Feature. . . . . . . . . . . . . . . . . . . . . .
67
67
68
69
Cleaning and Care . . . . . . . . . . . . . . . . . . . . . . . . . . . . . . . . . . . . . . . . . . . . . .
Advantages for Cleaning and Caring for the Induction Cooking Zone . . . .
Hob . . . . . . . . . . . . . . . . . . . . . . . . . . . . . . . . . . . . . . . . . . . . . . . . . . . . . . . . . . .
Hob Frame . . . . . . . . . . . . . . . . . . . . . . . . . . . . . . . . . . . . . . . . . . . . . . . . . . . . .
70
70
70
71
43
What to do if … . . . . . . . . . . . . . . . . . . . . . . . . . . . . . . . . . . . . . . . . . . . . . . . . 72
Rectifying faults . . . . . . . . . . . . . . . . . . . . . . . . . . . . . . . . . . . . . . . . . . . . . . 72
Installation Instructions . . . . . . . . . . . . . . . . . . . . . . . . . . . . . . . . . . .
Technical Data . . . . . . . . . . . . . . . . . . . . . . . . . . . . . . . . . . . . . . . . . . . . . . . . . .
Regulations, Standards, Directives . . . . . . . . . . . . . . . . . . . . . . . . . . . . . . . . . .
Safety Instructions for the Installer. . . . . . . . . . . . . . . . . . . . . . . . . . . . . . . . .
Electrical Connection. . . . . . . . . . . . . . . . . . . . . . . . . . . . . . . . . . . . . . . . . . . . .
Service
. . . . . . . . . . . . . . . . . . . . . . . . . . . . . . . . . . . . . . . . . . . . . . . . . . . . . . 81
Assembly . . . . . . . . . . . . . . . . . . . . . . . . . . . . . . . . . . . . . . . . . . . . . . . . . . . .
44
75
75
76
77
78
124
Operating Instructions
1 Safety
The safety aspects of this appliance comply with accepted technical
standards and the German Appliance Safety Law. However, as manufacturers we also believe it is our responsibility to familiarise you with the
following safety instructions.
Electrical Safety
3
• The installation and connection of the new appliance must only be
carried out by qualified personnel.
• Repairs to the appliance are only to be carried out by approved service engineers. Repairs carried out by inexperienced persons may cause
injury or serious malfunctioning. If your appliance needs repairing,
please contact your local customer center or your dealer.
Please follow these instructions, otherwise the warranty will not cover
any damage that may occur.
• Flush-mounted appliances may only be operated following installation in suitable installation cabinets and workplaces which conform
to the relevant standards. This ensures sufficient protection against
contact for electrical units as required by the VDE [Association of
German Electrical Engineers].
• If your appliance malfunctions or if fractures, cracks or splits appear:
– switch off all cooking zones,
– disconnect the hob from the electricity supply.
Child Safety
The cooking zones will become hot when you cook. Therefore, always
keep small children away from the appliance.
Safety During Use
• This appliance may only be used for normal cooking and frying in the
home. It is not designed for commercial or industrial purposes.
• Do not use the hob to heat the room.
• Take care when plugging electric appliances into mains sockets near
the hob. Connection leads must not come into contact with the hot
surface.
45
• Overheated fats and oils catch fire quickly. You should supervise
cooking when preparing foods in fat or oil (e.g. chips).
• Switch off the cooking zones after use.
Special Notes on Induction Cooking Zones
3
• Scientific studies have shown that patients who are fitted with implanted pacemakers are not normally affected or put at risk by our
induction cooking zones.
The distance between the body and the cooking zone should, however, never be less than 30 cm!
• Electromagnetic fields can affect electronic circuits and interfere
with portable transistor radios.
• Do not put magnetically rechargeable objects (e.g., credit cards, cassettes) on the glass ceramic surface while one or more induction
cooking zones are in use!
• Do not put any metallic objects (e.g., spoons, pan lids) on the induction surface as they can be warmed up when the induction surface is
in use.
Some cookware can produce noises when used on induction cooking
zones. This is not a fault in the hob and its function will not be impaired in any way as a result.
Safety When Cleaning
• For safety reasons do not clean the appliance with a steam jet or high
pressure cleaner.
• Clean the hob in accordance with the maintenance and cleaning instructions in this manual.
To Avoid Damaging Your Appliance
• Do not use the hob as a work surface or for storage.
• Do not operate the cooking zones when there is no pan or the pans
are empty.
• Ceramic glass is insensitve to temperature shock and very robust;
however it is not unbreakable. Especially sharp and hard objects that
fall on the cooking surface can damage it.
• Do not use cast iron pans or pans with a rough, burred or damaged
base. Scratching may occur if the pans are slid across the surface.
• Do not place any pans on the hob frame. Scratching and damage to
the paint may occur.
46
• Make sure that no acidic liquids, e.g. vinegar, lemon or descaling
agents, are spilt onto the hob frame, since these cause dull spots.
• If sugar or a preparation with sugar comes into contact with the hot
cooking zone and melts there it must be cleaned off immediately
with a scraper while it is still hot. If it cools, the surface may be damaged when it is removed.
• Keep all items and materials that can melt away from the ceramic
glass surface, e.g. plastics, aluminium foil, or oven foils. If something
of this nature should melt onto the ceramic glass surface, it must also
be removed immediately using the scraper.
47
2 Disposal
Disposing of the packaging material
All materials used can be fully recycled.
Plastics are marked as follows:
• >PE< for polyethylene, as used for the outer wrapping and the bags
inside.
• >PS< for polystyrene foam, e.g., as used for the padding materials.
They are completely free of CFCs.
Disposal of old appliances
1
48
Warning: Before disposing of old appliances please make them inoperable so that they cannot be the source of danger.
To do this, disconnect the appliance from the mains supply and remove the mains lead.
To protect the environment, it is important that worn out appliances
are disposed of in the correct manner.
• The appliance must not be disposed of with household rubbish.
• You can obtain information about collection dates or public refuse
disposal sites from your local refuse department or council.
The Key Features of Your Appliance
• Ceramic glass cooking surface: The appliance has a ceramic glass
cooking surface including two rapid-heating cooking zones with special high-performance radiant elements, and two induction cooking
zones. With the induction method, the base of the cooking vessel is
heated first, not the ceramic glass.
• Sensor fields: Your appliance is operated using Touch Control sensor
fields.
• Cleaning: The advantage of the ceramic glass cooking surface and
the sensor fields is their accessibility for cleaning. The smooth, flat
surface is easy to clean.
• On/Off sensor field: The “On/Off” sensor field provides the appliance
with a separate mains switch. Touching this switches the power supply on or off completely.
• Control and function indicators: Digital indicators or control lamp
provide information about settings made, functions activated, as well
as any residual heat of the corresponding cooking zone.
• Safety cut-out: A safety cut-out ensures that all cooking zones
switch off automatically after a period of time if the setting has not
been changed.
• Power device: With this device the power for the appropriate cooking rings can be temporarily increased.
• Keep warm setting: 1 is the setting for keeping foods warm.
• Residual heat indicator: An h for residual heat is shown in the display if the cooking zone becomes so hot that there is a risk of burning.
• Multipurpose cooking zone: The hob is equipped with a multipurpose/casserole cooking zone. Depending on the setting, it can be used
as a round or oval cooking zone, e.g. for oval casseroles or for keeping
dishes or food warm.
• Timer: All zones can be automatically switched off using the integrated timer. When the end of the cooking time has been reached,
the cooking zone switches off.
49
Description of the Appliance
Cooking zones and control panel
Radiated heat cooking zone 1200 W
Induction cooking zone 2200 W
with power function 3000 W
Heat setting displays
Cooking zone selection
50
Radiated heat cooking zone 2400 W
Touch-Control-Panel
Induction cooking zone 1400 W
Cooking zone displays
Timer operation
Display Timer
Timer
Power function/
Casserole zone Heat setting
activation selector + and -
Lock with
control indicator
Mains button
On/Off
Function and the Way the Induction Cooking Zone Works
A copper wire induction coil is beneath the ceramic glass cooking surface. This generates electromagnetic fields, which act directly on the
base of the pots and pans and not, as with other heating up methods,
first heating the ceramic glass. This means that the base of the pan is
immediately heated up, which saves time and energy.
Since the heat required for cooking is generated directly in the base of
the pan the cooking zone itself hardly warms up. It only receives the reflected heat from the pan base.
3
Note:
If there is no pot or pan on the cooking zone there is no energy transfer
(heating up) and therefore gives protection against the cooking zones
being switched on accidentally.
A cooling fan is an integral part of this hob and comes on automatically depending on the temperature of the induction cooking zone. The
cooling fan works in two speed levels depending on usage. The cooling
fan will continue to run for a short period after the cooking zone has
been switched off.
The Digital Displays
Digits 1 to 9 and four different letters can appear in the display.
• The digits show the cooking stage set:
1= Lowest capacity
9 = Highest capacity
1
• The following letters and functions are displayed for all cooking
zones:
h = Residual Heat Display
Danger! Cooking zone still hot; it extinguishes when the cooking zone
has cooled down. This display appears only if the cooking zone is
switched off.
a = Automatic heating-up (possible for all cooking zones)
is lit, if the cooking zone is set to automatic heating-up; (is lit until the
automatic feature switches over to the set continued cooking stage).
_ = Lights up when the automatic switch-off function has been activated (also see “What to do if ...?”).
51
1
The following letters and functions are displayed only with the two induction cooking zones.
f = Error display
flashes if the cooking zone is activated and
– no pan is on the cooking zone or
– unsuitable pots and pans are used
p = Power function
lights up when the Power function is activated.
The Power function supplies extra-high heating capacity. It can be activated for the front left cooking zone.
1
Cooking Zone Safety Cut-out
If one of the cooking zones is not switched off after a certain time or if
the heat setting is not changed, the corresponding cooking zone
switches itself off automatically.
h appears in the ring display for all rings that are switched on, and _
after they have cooled down.
The rings are switched off at:
• Heat setting
1-2
after 6 hours
• Heat setting
3-4
after 5 hours
• Heat setting
5
after 4 hours
• Heat setting
6-9
after 1.5 hours
3
If one or more cooking zones switch off before the times indicated see
section “What to do if …”.
Cancelling the Safety Cut-out
To cancel the activated safety cut-out the appliance must be switched
off and then on again using the ON/OFF I sensor field. After this the
cooking zones are again ready for use.
Switching Off for Other Reasons
Liquid that boils over onto the control panel causes all cooking zones to
switch off immediately.
If you place a wet cloth on the control panel it has the same effect. In
both cases the appliance has to be switched on again using the mains
switch I after removing the liquid or cloth.
52
Suitable Kitchenware for Induction Cooking Zones
Pots and Pans
• In principle all pots and pans with magnetic bases are suitable. These
are steel, steel-enamel as well as cast-iron pots and pans.
• High grade steel pans with a mixed metal base (sandwich base, e.g.
Tefal with an aluminium/copper base) are suitable for induction only
if the manufacturer has expressly marked them as such. In that case
they have a ferromagnetic percentage in the base.
• If you wish to use a special type of pan (e.g. a pressure cooker, simmering pan, wok, etc.), please observe the manufacturer's instructions.
• Aluminium, copper, brass, stainless steel pots and pans (unless specifically designated as suitable for induction), glass, ceramic or porcelain
are not suitable for induction cooking zones. The cooking zone reacts
as if it were being used without a pot or pan: Error code f.
Look for the label: Suitable for induction!
Suitability Test
If you are not sure if a pot or pan is suitable for cooking or frying on
the induction cooking zone you can check this as follows:
• Place a pot filled with a little water (3-5 mm filling height) on the
cooking zone.
Switch the cooking zone to full power (switch setting 9).
Caution: The pan base of suitable kitchenware heats up within a
few seconds!
• You can also check this with a magnet. If it remains fixed to the base
the pan is suitable for induction cooking zones.
Pan Size
Up to a certain limit the induction cooking zone adapts itself to the
size of the pan base diameter. However, the pan base diameter must be
of a minimum size, depending on the size of the cooking zone.
Diameter of the cooking zone 14,5 cm:
Diameter of the pan base at least 12 cm
Diameter of the cooking zone 18 cm:
Diameter of the pan base at least 14,5 cm
Diameter of the cooking zone 21 cm:
Diameter of the pan base at least 18 cm
53
Note:
Please note the diameter of the pan base when buying new pans,
since the manufacturers usually specify the top edge diameter of their
pans.
Automatic Pan Sensing
The induction cooking zone does not function when unsuitable pans
are used.
If the cooking zone is switched on without a suitable pan on it f
flashes in the digital display of the cooking zone.
After about 10 minutes the cooking zone switches itself off automatically. _ appears in the digital display.
Also when overheating occurs (e.g. heating up a pan that is empty) or
with faults in the electronics the display _ is lit. The cooking zone
switches itself off automatically.
To be able to use it again the cooking zone must have been first
switched off and then reset to the required heat setting.
Pots and pans for rapid-glowing standard cooking zones
1
54
• On principle all pots and pans with level bases are suitable for radiant
heat cooking zones. You can recognise good quality pans by the base
of the pan, and not from the material from which the pan is made.
• The base should be as thick and flat as possible. Rough bases (e.g. cast
iron pots) scratch the hob surfaces when they are slid about.
• Pots with aluminium or copper bases can cause metallic discolouring
on the ceramic glass surface, which is very difficult or impossible to
remove.
• The saucepan base and cooking zone should be the same size.
Attention! Avoid letting enamel saucepans and frying pans boil dry.
The base could be damaged and then scratch the cooking surface when
slid. Saucepans and frying pans with sharp edges and burrs will also
scratch.
Before Using for the First Time
me
Initial Cleaning
1
Wipe the ceramic glass surface with a damp cloth.
Important: Do not use any caustic, abrasive cleaners! The surface could
be damaged.
55
Operating the Hob
Touch Control Sensor Field
To operate the Touch Control sensor field place your finger from above
flat onto the required field until the appropriate displays come on or go
out or the required function is carried out.
Switching On the Appliance
The entire appliance is switched on using the “On/Off” n sensor field.
Touch the “On/Off” sensor field for approx. 2 seconds.
3
The digital displays will show j and the decimal point will flash.
Once the “On/Off” sensor field has been operated to switch on the appliance, one of the cooking zones must be selected within approx.
10 seconds using the cooking zone selection buttons. Otherwise the appliance switches off again for safety reasons.
Switching Off the Appliance
To switch off the appliance completely activate the “On/Off” n sensor
field.
Touch the “On/Off” sensor field for approx. 1 second.
56
3
When an individual cooking zone or the entire hob is switched off, any
residual heat is shown with an h (for “Hot”) in the digital display for
the appropriate cooking zones.
Cooking Zone Selection
To select the required cooking zone touch the corresponding sensor
field for approx. one second.
3
A zero with a decimal point will light up in the appropriate cooking
zone display window 0.
The decimal point indicates that settings may only be made for this
cooking zone.
Heat Setting Selection
For setting and adjusting the heat setting (1 to 9) for the selected
cooking zone.
Use sensor field + to increase the heat setting.
Lower the heat setting with sensor field -.
57
3
If several cooking zones are being used simultaneously, the required
cooking zone must be selected by touching the appropriate sensor field
before adjusting the heat setting. The decimal point in the display
shows which cooking zone has been selected.
Activating the power function
3
1
58
In order to switch on the power function (front left cooking zone only), the cooking zone must be selected (decimal point in the display).
Touch the ”Power function” sensor field p. p appears in the display
and the power function has now been activated.
The power function will be activated for a maximum of 10 minutes.
Following this the cooking zone will automatically switch to heat level 9.
The power function can be switched off in the following way:
• Touching the ”Power function” sensor field p.
• Touching the sensor field -.
While the power function of the front left cooking zone is active, the
front right induction cooking zone can be operated at a maximum heat
setting of 7.
If a higher setting than 7 (e.g., 8, 9 or A) is set for the front right cooking zone, the heat setting display will alternately show the heat setting
selected and 7. As soon as the power function has ended (max. 10 minutes), the front right cooking zone will change automatically to the
previously set heat setting.
Switching the Casserole Zone On and Off
1. Select the appropriate cooking zone.
2. Set the required heat setting.
3. To switch the casserole zone on or off place your finger flat on the
“booster” touch control sensor field, until the control indicator comes
on or goes off.
59
Switching off a Cooking Zone
1. Select the required cooking zone with the cooking zone sensor fields.
2. Touch sensor fields + and - simultaneously to switch off or turn sensor field - back to zero.
3
60
A cooking zone may only be switched off when the decimal point is on
in the cooking zone display.
Cooking with the Automatic Heating-Up Function
All four cooking zones of the cooking field can be controlled in nine
stages and have an automatic heating-up function:
– 1, Lowest heat setting
– 9, Highest heat setting
– a, Heating-up function.
With the automatic heating-up function (a), the cooking zone operates for a certain time at full capacity and then automatically switches
back to the heat setting selected for further cooking.
The duration of the automatic heating-up function depends on the
heat setting selected for further cooking.
1. Select the required cooking zone with the cooking zone sensor fields.
The decimal point in the associated display field illuminates.
2. With the + or - sensor fields set the cooking stage 9. Stop briefly and
touch the + sensor field again.
61
a lights up in the heat setting display.
3. Next, touch the sensor field - and set the required continued heat setting 1 to 8. The heat setting selected for further cooking is then displayed.
3
62
After 5 seconds, a appears in the display again instead of the heat
setting selected for further cooking. The heat setting is displayed
again after the heating-up time has ended.
If you select a higher heat setting when the automatic function is in
operation, e.g. from 3 to 5, the previous heating-up time is taken into
account. If you select a lower setting, then the automatic function is
brought to an immediate end. If you start cooking again on a cooking
zone that is still warm, the automatic heating-up function uses the residual heat. This saves time and energy.
Cooking without the Automatic Heating-Up
Function
2
1. For heating up/browning, select a high power.
2. As soon as steam forms or the fat is hot, switch back to the required
heat setting for the remainder of the cooking time.
3. Reset to zero in order to end cooking.
Note:
When cooking with the induction cooking zone you should take into
account that
– the heating-up times are reduced by the direct energy transfer to the
pan!
– the cooking process stops immediately after the cooking zone is
switched off (no boiling over!)
Residual Heat Indicator
2
1
1
When an individual cooking zone or the entire hob is
switched off, any residual heat is shown with an h (for
“Hot”) in the digital display for the appropriate cooking
zones.
Even after the cooking zone has been switched off, the
residual heat indicator only goes out when the cooking zone is cold.
You can use the residual heat for melting and keeping food warm.
Important! As long as the residual heat indicator is illuminated, there
is a risk of burns.
Important! If the power supply is interrupted the h symbol will also
go out and information about residual heat will no longer be available.
However, it may still be possible to burn yourself. This can be avoided
by taking care when near the hob.
63
Locking/Unlocking the Control Panel
With the exception of the “On/Off” sensor field the control panel can
be locked at any required time during cooking in order to prevent adjusting the settings such as when wiping over with a cloth. This
function is also suitable as a child safety feature.
1. Touch the „lock“ sensor field until the control indicator comes on.
3
64
2. To release the lock touch the „lock“ sensor field again continuously until the control indicator goes out.
Child safety feature! If the hob is completely switched off using the
“On/Off” sensor field while the lock is on, then the lock will still be active when the hob is switched on again. To reactivate the cooking
zones, the locking function must be cancelled as described above.
Timer
A cooking duration can be set with the integrated timer for all cooking
zones. When the end of the cooking duration is reached, the cooking
zone switches itself off automatically.
1. Using the cooking zone sensor field, select the required cooking zone
and set the required heat setting.
2. Touch the TIMER W sensor field to activate the timer function for this
cooking zone. 00 will appear in the display.
3. Using the + or - sensor fields set or adjust the required period of time
until the zone is to switch off automatically (eg. 15 minutes).
After a few seconds the timer will start automatically and will show
how much time remains before it will switch off.
In addition, the “Timer active” display for the relevant cooking zone will
light up, e.g. the top left control indicator corresponds to the rear left
cooking zone.
At the end of the set cooking time, the cooking zone will switch off automatically and an acoustic signal will sound.
4. Touch the TIMER W sensor field to switch off the signal and control indicator.
65
3
To set the timer more quickly, leave your finger on the + or - sensor
field until the required time is reached.
If the - sensor field is operated first, the time setting will begin at
99 minutes; if the + sensor field is operated first, the time setting will
begin at 1 minute.
Displaying the remaining cooking time
If you select a cooking zone which is in timer mode, the cooking time
still remaining appears in the timer display window.
Using the timer to measure short periods of time
(“Minute Minder”).
1
Important! None of the cooking zones should be set with the Timer!
1. Touch the "On/Off" sensor field for around two seconds.
The digital display _ flashes.
2. Touch the TIMER W sensor field to activate the Timer function.
3. Using the + or - sensor fields, set the desired length of time (for example, 20 minutes).
The Timer begins to run after a few seconds, and indicates the time remaining.
When the set time has elapsed, an audible signal is sounded.
4. Touch the TIMER W sensor field, to switch off the signal.
Ending the timer function prematurely
There are two ways of switching off the timer early:
Switching off the cooking zone and timer simultaneously
1. Select the desired cooking zone using the cooking zone buttons.
2. Touch the + and - buttons simultaneously: The cooking zone and
timer will switch off.
Switching off the timer - leaving the cooking zone active
1. Select the desired cooking zone using the cooking zone buttons.
2. Touch the “Timer” button again.
3. Touch the + and - buttons simultaneously:
– Only the timer will switch off.
– The cooking zone will stay on.
66
Uses, Tables and Tips
Advice on Cooking with and without Automatic Warm up
The automatic warm up function is suitable for:
• dishes that start off cold, are heated up at high power and do not
need to be continually watched when cooking on the selected heat
setting,
• dishes that are put in a hot frying pan.
The automatic warm up function is not suitable for:
• goulash, beef olives and similar braised dishes that need continual
turning until browned correctly, have liquid added and are then
braised until cooked,
• dumplings, pasta dishes with large amounts of liquid,
• cooking with pressure cookers,
• very large quantities of soup/stew with more than 2 litres of liquid.
General notes:
• When cooking without the automatic warm up function, we recommend the use of a high heat setting to warm up the food (using the
- button) and then leave the dish to finish cooking at an appropriate
lower heat setting.
• You can use the 1 heat setting for keeping food warm.
• Take special note of the results when you first use the appliance! You
can then decide which heat setting is the best for "your dishes" in the
"quantities you are accustomed to preparing" with "your pans". You
will then quickly appreciate the advantages of the automatic function and will feel relaxed about using your new hob.
Tables
Note:
The figures given in the following tables are for guidance. The switch
setting required for cooking depends on the quality of the pots and
pans and on the type and quantity of the foodstuffs.
67
Chart for Setting the Cooking Zones
Heat setting
suitable for
9 or P
Heating Up
Heating up large quantities of water,
cooking pasta
7-9
Heavy Browning
Deep-frying pommes frites (chips),
browning meat, e.g. goulash,
frying, e.g. potato fritters
frying pieces of loin, steaks
Mild Frying
Frying meat, schnitzel,
cordon bleu, chops, pancakes,
rissoles, roux, mild
roasting, fried sausages, liver, eggs,
deep-frying doughnuts.
Boil
Cooking larger quantities of food,
stews and soups,
steaming potatoes,
cooking meat stock or bouillon
6-7
4-5
Steaming
3-4
Steaming
2-3
Simmering
Simmering rice or milk-based dishes,
steaming smaller quantities of potatoes
or vegetables, heating up ready-toserve meals.
1-2
Melting
Fluffy omelettes, egg royale,
Sauce hollandaise, keeping dishes
warm, melting butter, chocolate, gelatine
0
68
Steaming vegeables or
braising meat
cooking rice pudding
Off setting
Chart for the Automatic Heating-Up Feature
Example foods
Cooking
processes
Heat setting Duration
Notes/tips
Steaks
Heavy
browning
A7 to A8
per pan 820 min.
Turn occasionally
Schnitzel,
Rissoles, Fried
eggs, Grilled
Sausages
Roasting
A6 to A7
per pan 1020 min.
Turn occasionally
Pancakes, thin
pancakes
Baking
A6 to A7
bake contin- Turn occasionally
uously
Soups
Boil
A3 to A5
40-150 min.
Up to 3 litres liquid
plus ingredients
Potatoes,
vegetables
Steaming
A3 to A5
20-60 min.
Do not use much liquid
e.g.: max. ¼ litre water for 750 g potatoes
Vegetables
Stewing, defrosting
A2 to A4
20-45 min.
Add a little liquid
(some spoonfulls) if required
Rice, millet,
buckwheat
Simmering
A2 to A3
25-50 min.
Add at least double the
quantity of liquid to
the rice etc. Stir occasionally
Ready meals,
stews
Heating up
A2 to A3
10-30 min.
Depending on the
quantity
adapt the setting
Fluffy omeThickening
lettes, egg royale
1 to A2
10-20 min.
Chocolate/but- melting
ter/gelatine
1 to A2
5-25 min.
Without bain-marie
Stir occasionally!
69
Cleaning and Care
Advantages for Cleaning and Caring for the Induction
Cooking Zone
2
The cleaning effort for induction ceramic glass cooking surfaces is considerably less than for cooking surfaces with radiant heating:
– The induction cooking zone reacts faster to switching down and off.
Boiling over and burning in of dishes is avoided to a large degree.
– The temperaturs on the ceramic glass surface are clearly lower with
inductive cooking than with the conventional radiant heating systems.
Since the heat is generated in the pan, food or foodstuffs possibly on
the glass ceramic surface are not burnt in as badly.
Hob
1
3
Important: Cleaning agents must not come into contact with the hot
ceramic glass surface! All cleaning agents must be removed with plenty
of clean water after cleaning because they can have a caustic effect
when the rings are next heated!
Do not use any aggressive cleaners such as grill or oven sprays, coarse
scourers or abrasive pan cleaners.
Clean the ceramic glass surface after each use when it is warm to the
touch or cold. This will avoid spillages becoming burnt on.
Remove scale and water marks, fat spots and discolouration with a metallic shimmer using a commercially available ceramic glass or stainless
steel cleaner such as “Hob Brite”.
Light Soiling
1. Wipe the ceramic glass surface with a damp cloth and a little washing
up liquid.
2. Then rub dry with a clean cloth. Remnants of cleaner must not be left
on the surface.
3. Thoroughly clean the entire ceramic glass cooking surface once a week
with a commercially available ceramic glass or stainless steel cleaner.
4. Then wipe the ceramic glass surface using plenty of clean water and
rub dry with a clean fluff-free cloth.
70
Stubborn Soiling
3
1. To remove food that has boiled over
or stubborn splashes, use a glass
scraper.
2. Place the glass scraper at an angle
to the ceramic glass surface.
3. Remove soiling by sliding the blade.
You can obtain glass scrapers and
ceramic glass cleaners from specialist retailers.
1
Problem Dirt
1. Remove burnt-on sugar, melted plastic, aluminium foil or other meltable
materials with a glass scraper immediately and while still hot.
1
3
Important: There is a risk of burning
yourself when the glass scraper is
used on a hot cooking zone!
2. Then clean the hob normally when it
has cooled down.
If the cooking zone on which something has melted has already cooled
down, warm it up again for cleaning.
Scratches or dark marks on the ceramic glass surface, caused for example by a pan base with sharp edges, cannot be removed. However, they
do not impair the function of the hob.
Hob Frame
1
Important! Do not put vinegar, lemon-juice or scale removers on the
hob frame, otherwise dull spots will appear.
1. Wipe the frame with a damp cloth and a little washing up liquid.
2. Soften dried dirt with a wet cloth. Then wipe off and rub dry.
71
What to do if …
Rectifying faults
1
It is possible that faults have been caused by a minor error, which you
can correct yourself with the help of the following instructions. Do not
attempt any further repairs if the following instructions do not help in
each specific case.
Warning! Repairs to the appliance are only to be carried out by approved service engineers. Improperly effected repairs may result in considerable risk to the user. If your appliance needs repairing, please
contact your specialist dealer or customer service.
If the ceramic glass hob is broken, please quote the 3-digit number on
the glass hob when contacting customer service.
What to do if …
… the appliance develops a fault or the ceramic glass hob is broken
or cracked.
– Switch off all cooking zones.
– Switch off the fuse for the cooking zone or take it out.
… the cooking zones are not working.
Check whether
– the appropriate fuse in the house installation (fuse box) is intact. If
fuses are triggered more than once, call a qualified electrician.
– the appliance is switched on properly,
– the control lights on the operating panel are illuminated,
– the appropriate cooking zone is switched on,
– the cooking zones are set to the desired heat (see chapter “Cooking”),
– the safety shut-down for the cooking zones has triggered (see chapter “Safety devices”).
… the cooking zones will not switch on.
Check whether
– the operating panel is locked (see chapter “Locking the operating
panel”).
– a period of more than 10 seconds elapses after operating the “On/
Off” switch and before the selected cooking zone comes on (see
chapter “Switching on the appliance”.)
– the sensor fields may be partially covered by a damp cloth or by liquid.
72
… the residual heat indicator suddenly fails to operate except for
_ or h.
Check whether
– the “On/Off” switch was activated by mistake.
– the sensor fields may be partially covered by a damp cloth, liquid or
similar.
– the safety shut-down was activated.
… the letter _ or h is still displayed by the residual heat indicator
after switching off the cooking zones.
Check whether
– the cooking zone has only been on for a short time and is therefore
not yet hot enough.
If the cooking zone is hot, please ring customer service.
… a cooking zone cannot be switched off
Check whether
– the sensor fields may be partially covered by a damp cloth or by liquid.
– the lock mechanism is switched on.
… a cooking zone cannot be switched on
Check whether
– the lock mechanism is switched on.
… the indicator f is flashing
Check whether
– the pan is located on the correct cooking zone,
– the diameter of the pan base is too small for the cooking zone,
– the pan is suitable for induction.
… _ appears on the display
Check whether
– the cooking zone has overheated.
switch off the appropriate cooking zone and let it cool down. Try
switching on the cooking zone again using a suitable pan after a few
minutes.
– the automatic switch-down for the cooking zone has triggered.
You can reactivate the cooking zone by switching it off and on briefly.
73
… the power function cannot be switched on
– Switch off the cooking zone for approx. 10 minutes.
If this fault occurs repeatedly check whether
– the requisite ventilation area between the work surface and the unit
facing underneath it has been covered over.
– the requisite ventilation area (25 cm2) was observed when the appliance was installed (see chapter “Installation”).
74
Installation Instructions
1
Important! The new appliance may only be installed and connected by
qualified personnel.
Please observe this instruction, otherwise the warranty will not cover
any damage that may occur.
Technical Data
Appliance dimensions
Width
Depth
Height
570 mm
500 mm
55 mm
Worktop cut-out dimensions
Width
Depth
Corner radius
560 mm
490 mm
R5
Cooking rings
Position
Front left
Diameter
210mm
Rear left
Rear right
Front right
145mm
170/265mm
145mm
Power
2200W
(Power function
3000 W)
1200W
1500/2400W
1400W
Note: The quoted power consumption may vary according to size and
material of pans used.
Connection voltage
Max. total connection value
230 V ~ 50Hz
7,2kW
75
Regulations, Standards, Directives
This appliance meets the following standards:
• EN 60 335-1 and EN 60 335-2-6
relating to the safety of electrical appliances for household use and
similar purposes and
• EN 60350, or DIN 44546 / 44547 / 44548
relating to the operating features of electric cookers, hobs, ovens,
and grills for household use.
• EN 55014-2
• EN 55014
• EN 61000-3-2
• EN 61000-3-3
• relating to basic requirements for electro-magnetic compatibility
protection (EMC).
5
This appliance complies with the following EU Directives:
• 73/23/EWG dated 19.02.1973 (Low Voltage Directive)
• 89/336/EWG dated 03./05.1989 (EMC Directive including Amending
Directive 92/31/EWG).
76
1
Safety Instructions for the Installer
• A device must be provided in the electrical installation which allows
the appliance to be disconnected from the mains at all poles with a
contact opening width of at least 3 mm.
Suitable isolation devices include line protecting cut-outs, fuses
(screw type fuses are to be removed from the holder), earth leakage
trips and contactors.
• In respect of fire protection, this appliance corresponds to type Y
(EN 60 335-2-6). Only this type of appliance may be installed with a
high cupboard or wall on one side.
• Drawers may not be fitted underneath the hob.
• The installation must guarantee shock protection.
• The kitchen unit in which the appliance is fitted must satisfy the stability requirements of DIN 68930.
• For protection against moisture, all cut surfaces are to be sealed with
a suitable sealant.
• On tiled work surfaces, the joints in the area where the hob sits must
be completely filled with grout.
• On natural, artificial stone, or ceramic tops, the snap action springs
must be bonded in place with a suitable artificial resin or mixed adhesive.
• Ensure that the seal is correctly seated in the frame and that it is
seated against the work surface without leaving any gaps. Additional
silicon sealant must not be applied; this will make removal more difficult when servicing.
• The hob must be pressed out from below when removed.
77
Electrical Connection
1
78
Before connecting, check that the nominal voltage of the appliance,
that is the voltage stated on the rating plate, corresponds to the available supply voltage. The rating plate is located on the lower casing of
the hob.
The heating element voltage is AC230V~. The appliance also works
perfectly on older networks with AC220V~.
The hob is to be connected to the mains using a device that allows the
appliance to be disconnected from the mains at all poles with a contact
opening width of at least 3 mm, eg. automatic line protecting cutout,earth leakage tripsorfuse.
A type H05VV-F cable or one with a higher grade must be used as the
mains connecting cable.
The connection must be carried out as shown in the diagram. The connecting links should be fitted according to the appropriate connection
diagram. The earth lead is connected to terminal E. The earth lead
must be longer than leads carrying electric current.
The cable connections must be made in accordance with regulations and the terminal screws tightened securely.
Finally, the connecting cable is to be secured with the mains cable cleat
and the covering closed by pressing firmly (lock into place).
Before switching on for the first time, any protective foil or stickers
must be removed from the glass ceramic surface.
Once connected to the mains supply check that all cooking zones are
ready for use by briefly switching each on in turn at the maximum setting.
79
80
Service
In the “What to do if …” section a number of malfunctions are listed
that you can rectify yourself Look there first if a fault occurs.
Is it a technical fault?
If so, please contact your customer service centre. (You will find addresses and telephone numbers in the section “Customer Service Centres”.)
Always prepare in advance for the discussion. This will make diagnosis
of the problem easier and also make it easier to decide if a customer
service visit is necessary:
Please make a note of the following information as accurately as possible:
• What form does the fault take?
• Under what circumstances does the fault occur?
Prior to the telephone call it is important that you make a note of the
following appliance code numbers
that are given on the rating plate:
• model description,
• PNC code (9 digits),
• S No code (8 digits).
We recommend that you record the
code numbers here so that you always have them to hand:
Model:
. . . . . . . . . . .
PNC:
. . . . . . . . . . .
S-No:
. . . . . . . . . . .
When do you incur costs even during the warranty period?
• if you could have remedied the fault yourself using the fault table
(see section “What to do if …”),
• if the customer service technician has to make several journeys because he was not provided with all the relevant information before
his visit and therefore, forexample, has to fetch spare parts. These
multiple trips can be avoided if you prepare your phone call as described above.
81
Montage / Assembly / Montage
124
125
Ausbau
Removal
Démontage
126
From the Electrolux Group. The world´s No.1 choice.
The Electrolux Group is the world´s largest producer of powered appliances for kitchen, cleaning and outdoor
use. More than 55 million Electrolux Group products (such as refrigerators, cookers, washing machines,
vacuum cleaners, chain saws and lawn mowers) are sold each year to a value of approx. USD 14 billion in more
than 150 countries around the world.
AEG Hausgeräte GmbH
Postfach 1036
D-90327 Nürnberg
http://www.aeg.hausgeraete.de
© Copyright by AEG
822 947 345-B-270802-10
Änderungen vorbehalten
Subject to change without notice
Sous réserve de modifications