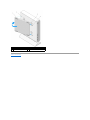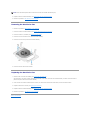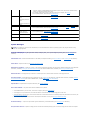
1
Dell™ OptiPlex™ FX160/160 Service Manual Working on Your Computer
System Setup
Selective USB
Reinstalling Software
Troubleshooting
Computer Stand
Covers
Hard Drive Assembly (Optional)
NVRAM Module
Wireless Card
I/O Board
Power Supply
Processor Heatsink Assembly
Memory
Coin-Cell Battery
Cable Guide
Antenna
System Board Assembly
Getting Help
Finding Information
Model DC01T
Notes, Notices, and Cautions
NOTE: A NOTE indicates important information that helps you make better use of your computer.
CAUTION: A CAUTION indicates potential damage to hardware or loss of data if instructions are not followed.
WARNING: A WARNING indicates a potential for property damage, personal injury, or death.
If you purchased a Dell™ n Series computer, any references in this document to Microsoft® Windows® operating systems are not applicable.
Information in this document is subject to change without notice.
© 2008 Dell Inc. All rights reserved.
Reproduction of this material in any manner whatsoever without the written permission of Dell Inc. is strictly forbidden.
Trademarks used in this text: Dell, the DELL logo, and OptiPlex are trademarks of Dell Inc.; Intel is registered trademarks of Intel Corporation in the U.S. and other countries;
Microsoft, Windows, Windows Vista, the Windows Start button, and Outlook are registered trademarks of Microsoft Corporation in the United States and/or other countries.
Other trademarks and trade names may be used in this document to refer to either the entities claiming the marks and names or their products. Dell Inc. disclaims any
proprietary interest in trademarks and trade names other than its own.
September 2009 Rev. A01
Back to Contents Page
About Your Computer
Dell™ OptiPlex™ FX160 Service Manual Front View
Back View
Front View
1 power button
2
side cover
3 USB 2.0 connectors (2)
4
computer stand
5 headphone connector
6
microphone
connector
7 diagnostic lights (see "Diagnostic Lights" on
page 26 for information about light codes)
8
Wi-Fi indicator
9 hard drive indicator
10 network activity
indicator
Back View
1 wireless antenna (optional)
2
serial connector
3 DVI connector
4
VGA connector
5 USB 2.0 connectors (4)
6
PS/2 keyboard
connector
NOTE: See Selective USB for information about
using selective USB ports.
7 power connector
8
9 PS/2 mouse connector
10 network connector
(RJ-45)
Back to Contents Page
security cable slot
Back to Contents Page
Antenna
Dell™ OptiPlex™ FX160/160 Service Manual Removing the Antenna
Replacing the Antenna
Removing the Antenna
1.
Perform the procedure in Before Working on Your Computer.
2.
Remove the hard drive bracket assembly, if installed (see Removing the Hard Drive Bracket Assembly).
3.
Remove the WLAN card (see Removing the Wireless Card).
4.
Remove the antenna cable from under the metal tab on the back panel.
WARNING: Ensure that the antenna wires are in the center of the antenna bushing before pressing the bushing tabs together. If the wires are
pushed to the side, they may become damaged when the bushing tabs are pressed.
5.
On the inside of the chassis, squeeze the bushings together and at the same time, carefully pull the antenna out the back of the computer.
1
wireless antenna
2
antenna holder
3
antenna bushing tabs (2)
4
metal tab over wire mesh
Replacing the Antenna
1.
Remove the plug, if installed, from the opening for the antenna in the back panel.
2.
If missing, install an antenna holder in the opening for the antenna in the back panel.
3.
Route the antenna wires through the antenna holder on the back of the chassis.
4.
5.
Align the antenna bushing with the antenna holder of the back panel so that when you flip up the antenna, it will be above the computer (when the
computer is in vertical orientation).
Push the antenna bushing tabs through the antenna holder until the tabs snap into place.
1
antenna holder
2
bushing tabs
3
wire mesh
6.
Replace the WLAN card (see Replacing the Wireless Card).
7.
Route the antenna cable under the tab on the back of the chassis so that the wire mesh surrounding the cable is under the tab.
8.
Replace the hard drive bracket assembly if it was removed (see Replacing the Hard Drive Bracket Assembly).
9.
Perform the procedure in After Working on Your Computer.
Back to Contents Page
Back to Contents Page
Working on Your Computer
Dell™ OptiPlex™ FX160/160 Service Manual Recommended Tools
Before Working on Your Computer
After Working on Your Computer
This document provides procedures for removing and installing the components in your computer. Unless otherwise noted, each procedure assumes that:
l
You have performed the steps in this section.
l
You have read the safety information that shipped with your computer.
l
When replacing a component, you have already removed the original, if installed.
NOTE: The color of your computer and certain components may appear differently than shown in this document.
Recommended Tools
The procedures in this document may require the following tools:
l
Small flat-blade screwdriver
l
Phillips #1 and Phillips #2 screwdrivers
l
Small plastic scribe
l
Flash BIOS update (see the Dell Support website at support.dell.com)
Before Working on Your Computer
Use the following safety guidelines to help protect your computer from potential damage and to help ensure your own personal safety.
WARNING: Before working inside your computer, read the safety information that shipped with your computer. For additional safety best
practices information, see the Regulatory Compliance Homepage at www.dell.com/regulatory_compliance.
WARNING: Some components become very hot during normal operation. Allow system components to cool before touching them.
CAUTION: Many repairs may only be done by a certified service technician. You should only perform troubleshooting and simple repairs as
authorized in your product documentation, or as directed by the online or telephone service and support team. Damage due to servicing that is not
authorized by Dell is not covered by your warranty. Read and follow the safety instructions that came with the product.
CAUTION: To avoid electrostatic discharge, ground yourself by using a wrist grounding strap or by periodically touching an unpainted metal
surface, such as a connector on the back of the computer.
CAUTION: When handling your computer, use care not to damage the wireless antenna.
CAUTION: Handle components and cards with care. Do not touch the components or contacts on a card. Hold a card by its edges or by its metal
mounting bracket. Hold a component such as a processor by its edges, not by its pins.
CAUTION: When disconnecting a cable, pull on the cable's connector or on its strain-relief loop, not on the cable itself. For cable connectors with
locking tabs, press inward on the locking tabs to release the connector. When connecting a cable, ensure that the connectors are correctly
oriented and aligned to avoid damage to the connector and/or the connector's pins.
1.
Ensure that the work surface is flat and clean to prevent the computer surfaces from being scratched.
2.
Shut down your computer.
l
®
®
In Microsoft Windows XP, and Windows XP Embedded: click Start® Shut down® Shut down.
l
In Microsoft Windows Vista®, click Start
, click the arrow
icon, and then click Shut Down to turn off your computer.
NOTE: Ensure that the computer is off and not in a power management mode. If you cannot shut down the computer using the operating system,
press and hold the power button for 6 seconds.
3.
Disconnect your computer and all attached devices from their electrical outlets.
CAUTION: To disconnect a network cable, first unplug the cable from your computer, and then unplug it from the network wall jack.
4.
Disconnect any network cables from the computer.
5.
If applicable, remove the computer stand (see Removing the Computer Stand).
WARNING: To guard against electrical shock, always unplug your computer from the electrical outlet before removing the computer cover.
6.
Remove the computer cover (see Removing the Computer Cover).
After Working on Your Computer
After you complete any replacement procedures, ensure you connect any external devices, cards, cables, etc. before turning on your computer.
1.
Replace the computer cover (see Replacing the Computer Cover).
2.
Replace the computer stand (see Replacing the Computer Stand).
CAUTION: To connect a network cable, first plug the cable into the network device and then plug it into the computer
3.
Connect a network cable to your computer, if necessary.
4.
Connect your computer and all attached devices to their electrical outlets.
5.
Turn on your computer.
Back to Contents Page
Back to Contents Page
Cable Guide
Dell™ OptiPlex™ FX160/160 Service Manual Removing the Cable Guide
Replacing the Cable Guide
Removing the Cable Guide
1.
Remove the screw that secures the cable guide to the system board.
2.
Lift the guide out of the computer.
Replacing the Cable Guide
1.
Align the cable guide screw hole with the hole on the system board.
2.
Secure the cable guide to the system board with the screw.
.
Back to Contents Page
Back to Contents Page
Coin-Cell Battery
Dell™ OptiPlex™ FX160/160 Service Manual Removing the Coin-Cell Battery
Replacing the Coin-Cell Battery
One of two types of coin-cell battery sockets is provided with the your computer. One type has retaining clips that wrap along the sides of the battery to hold
it in the socket. The other type has a single retaining hook that holds the battery in place.
Removing the Coin-Cell Battery
CAUTION: BIOS setup options revert to the factory default settings when the coin- cell battery is replaced. Before replacing the coin-cell battery,
record system BIOS options for future reference. Refer to the BIOS Setup Utility Options.
1.
2.
Perform the procedure in Before Working on Your Computer.
Depending on the type of battery socket that is provided with your computer, either push the top edge of the battery to out of the retaining clips along
the sides of the socket until it can be lifted out, or push back the retaining hook and lift the battery out of the socket.
Replacing the Coin-Cell Battery
WARNING: A coin-cell battery can explode of installed incorrectly. Replace the battery only with the type recommended by Dell. Discard used
batteries according to the manufacturer's instructions.
1.
1
Slide the battery into the battery socket a slight angle to bypass the retaining clip(s)
coin-cell battery socket
coin-cell battery
2.
Position the battery upright such that it is seated properly and securely held in place by the retainers.
3.
Perform the procedure in After Working on Your Computer.
4.
Restart your computer and enter the BIOS setup to configure option settings as needed (see Entering the BIOS Setup Utility).
Back to Contents Page
2
Back to Contents Page
Covers
Dell™ OptiPlex™ FX160/160 Service Manual Removing the Computer Cover
Replacing the Computer Cover
Removing the Side Cover
Replacing the Side Cover
Removing the Computer Cover
WARNING: Always unplug your computer from the electrical outlet before removing the computer cover.
WARNING: Some components become very hot during normal operation. Allow system components to cool before touching them.
1.
Disconnect the security cable from the computer (if present).
2.
Place the computer in a horizontal position.
3.
If necessary, move the antenna so that it does not obstruct access to the cover screw.
4.
Remove the two screws from the back of the computer.
5.
Slide the cover toward the front of the computer and lift it off.
1
screw (2)
2
security cable slot
Replacing the Computer Cover
1.
Place the computer in a horizontal position.
2.
Place the computer cover on top of the computer.
The tab with the security cable slot should be toward the back of the computer, and the cover should be approximately 1/4 inch from the system lock
tabs being aligned.
3.
Slide the cover toward the back of the computer until the system lock tabs are aligned.
4.
Replace the two screws that secure the cover to the chassis.
5.
Reattach the security cable to your computer, if necessary.
Removing the Side Cover
1.
1
Lift the back edge of the side cover away from the chassis, then slip the hooks under the front edge of the side cover out of the slots on the side of the
chassis.
side cover
2
side cover hooks slots
Replacing the Side Cover
1.
2.
With the side cover at a 30-degree angle to the chassis, slip the hooks under the front edge of the side cover into the slots for the side cover on the left
side of the chassis.
Swing the back edge of the side cover into the chassis to engage the pegs under the back edge of the cover with the chassis retainers.
1
peg (2)
2
peg retainer (2)
3
side cover hooks (2)
4
side cover hook slots(2)
Back to Contents Page
Back to Contents Page
Finding Information
Dell™ OptiPlex™ FX160/160 Service Manual NOTE: Some features or media may be optional and may not ship with your computer. Some features or media may not be available in certain countries.
NOTE: Additional information may ship with your computer.
Document/Media/Label
Contents
Service Tag Express Service Code
l
The Service Tag/Express Service Code is located on your computer and on the BIOS
Setup Utility screen.
l
Use the Service Tag to identify your computer when you use
support.dell.com or contact support.
Enter the Express Service Code to direct your call when
contacting support
NOTE: Your Service Tag/Express Service Code is located on your
computer.
Drivers and Utilities Media
l
l
The Drivers and Utilities media is a CD or DVD that may have shipped with your
computer.
A diagnostic program for your computer
Drivers for your computer
NOTE: Drivers and documentation updates can be found at
support.dell.com.
l
Readme files
NOTE: Readme files may be included on your media to provide lastminute updates about technical changes to your computer or
advanced technical-reference material for technicians or
experienced users.
Operating System Media
l
Reinstall your operating system
l
Warranty information
Terms and Conditions (U.S. only)
Safety instructions
Regulatory information
Ergonomics information
End User License Agreement
The Operating System media is a CD or DVD that may have shipped with your computer.
Safety, Regulatory, Warranty, and Support Documentation
l
This type of information may have shipped with your computer. For additional
regulatory information, see the Regulatory Compliance Homepage on www.dell.com at
the following location: www.dell.com/regulatory_compliance.
l
Dell™ Technology Guide
l
l
l
l
l
About your operating system
Using and maintaining devices
Understanding technologies such as RAID, Internet,
Bluetooth® wireless technology, e-mail, networking, and
more.
l
Provides your operating system product key.
l
The Dell Technology Guide is available at support.dell.com.
Microsoft
®
®
Windows License Label
Your Microsoft Windows License is located on your computer.
Back to Contents Page
Back to Contents Page
Hard Drive Assembly (Optional)
Dell™ OptiPlex™ FX160/160 Service Manual Removing the Hard Drive Bracket Assembly
Replacing the Hard Drive Bracket Assembly
Removing the Hard Drive
Replacing the Hard Drive
Removing the Hard Drive Fan
Replacing the Hard Drive Fan
Removing the Hard Drive Bracket Assembly
1.
Loosen the two captive bracket screws on system board and remove the screw that secures the bracket to the back panel.
1
SATA hard drive power cable
2
fan cable
3
SATA data cable
4
bracket screw
5
captive screws (2)
2.
Carefully lift up the bracket assembly and disconnect the cables from the system board.
a.
Disconnect the hard drive SATA data cable from the system board.
b.
Disconnect the SATA hard drive power cable from the system board.
c.
Disconnect the hard drive fan cable from the system board.
Replacing the Hard Drive Bracket Assembly
1.
Connect the hard drive cables to the system board (see System Board Connectors).
a.
Connect the hard drive SATA data cable to the system board.
NOTE: Ensure that the SATA power cable is routed under the hard drive bracket cable retaining clip.
2.
b.
Connect the SATA hard drive power cable to the system board.
c.
Connect the hard drive fan cable to the system board.
Set the bracket assembly in place on the system board, aligning the two captive screws in the bracket feet with the screw holes in the system board,
and the hole at the top of the bracket with the screw hole at the top of the chassis back panel.
NOTE: Check cable routing before securing the hard drive bracket to the system board. Ensure that cables are not pinched when the bracket is in place.
3.
.
Tighten the two captive screws that secure the bracket assembly to the system board and replace the screw that secures the bracket to the back
panel.
1
SATA hard drive power cable
2
fan cable
3
cable retaining clip
4
SATA data cable
5
bracket screw
6
captive screws (2)
Removing the Hard Drive
1.
Perform the procedure in Before Working on Your Computer.
2.
Remove the hard drive bracket assembly (see Removing the Hard Drive Bracket Assembly).
3.
Disconnect the SATA data/power cable from the hard drive.
4.
Remove the four screws that secure the hard drive to the hard drive bracket assembly.
1
screws (4)
2
hard drive connector
3
rubber grommets (4)
4
hard drive bracket assembly
5.
Lift the hard drive out of the assembly.
Replacing the Hard Drive
NOTE: Replacement hard drive kits may be shipped with rubber grommets. These grommets must be replaced if any are damaged or missing from the
hard drive bracket assembly.
1.
Replace all rubber grommets on the hard drive bracket that are damaged or missing.
2.
Place the hard drive in the carrier with the label facing up and the cable connectors toward the open end of the bracket.
3.
Secure the hard drive to the bracket assembly, affixing the four screws through the rubber grommets.
4.
Connect the SATA data/power cable to the hard drive.
NOTE: Ensure that the SATA power cable is routed under the hard drive bracket cable retaining clip.
5.
Replace the hard drive bracket assembly (see Replacing the Hard Drive Bracket Assembly).
6.
Perform the procedure in After Working on Your Computer.
Removing the Hard Drive Fan
1.
Perform the procedure in Before Working on Your Computer.
1.
Remove the hard drive bracket assembly (see Removing the Hard Drive Bracket Assembly).
2.
Remove the hard drive, if installed (see Removing the Hard Drive).
3.
Remove the screw on the bottom of the hard drive bracket assembly.
4.
Remove the screw on the top of hard drive bracket assembly.
5.
Remove the fan from the hard drive bracket.
Replacing the Hard Drive Fan
1.
Position the fan in the hard drive bracket (see Removing the Hard Drive Fan).
The screw hole on one corner of the fan should be under the tab on the bottom of the hard drive bracket assembly. The other screw hole should be
placed on the post of the hard drive bracket assembly.
2.
Secure the fan to the hard drive bracket with two screws, one inserted from below the hard drive bracket, and one inserted from above.
3.
Replace the hard drive if removed (see Replacing the Hard Drive).
4.
Replace the hard drive bracket assembly (see Replacing the Hard Drive Bracket Assembly).
5.
Perform the procedure in After Working on Your Computer.
Back to Contents Page
Back to Contents Page
Processor Heatsink Assembly
Dell™ OptiPlex™ FX160/160 Service Manual Removing the Processor Heatsink Assembly
Replacing the Processor Heatsink Assembly
Removing the Processor Heatsink Assembly
1.
Perform the procedure in Before Working on Your Computer.
2.
Remove the hard drive bracket assembly, if installed (see Removing the Hard Drive Bracket Assembly).
3.
Loosen the two captive screws that secure the processor heatsink assembly to the system board.
WARNING: The heatsink can become very hot during normal operation. Allow the heatsink to cool before touching it.
4.
Lift the processor heatsink assembly out of the computer.
Replacing the Processor Heatsink Assembly
CAUTION: Apply new thermal grease to the heatsink surface when installing the heatsink assembly onto a different system board. New thermal
grease is critical for ensuring adequate thermal bonding, which is necessary for optimal processor performance.
1.
2.
If installing the heatsink assembly onto a different system board, clean the thermal interface material or thermal grease from the surface of the heatsink
and apply new thermal grease as needed.
Align the two captive screws on the processor heatsink assembly with the screw holes on the system board.
.
3.
Tighten the two captive screws to secure the processor heatsink assembly to the system board.
4.
Replace the hard drive bracket assembly if it was removed (see Replacing the Hard Drive Bracket Assembly).
5.
Perform the procedure in After Working on Your Computer.
Back to Contents Page
Back to Contents Page
Getting Help
Dell™ OptiPlex™ FX160/160 Service Manual Obtaining Assistance
Problems With Your Order
Product Information
Returning Items for Warranty Repair or Credit
Before You Call
Contacting Dell
Obtaining Assistance
WARNING: Before working inside your computer, read the safety information that shipped with your computer. For additional safety best
practices information, see the Regulatory Compliance Homepage at www.dell.com/regulatory_compliance.
If you experience a problem with your computer, you can complete the following steps to diagnose and troubleshoot the problem:
1.
See "Solving Problems" on page 43 for information and procedures that pertain to the problem your computer is experiencing.
2.
See "Dell Diagnostics" on page 38 for procedures on how to run Dell Diagnostics.
3.
Fill out the Diagnostics Checklist.
4.
5.
Use Dell's extensive suite of online services available at Dell Support (support.dell.com) for help with installation and troubleshooting procedures. See
Online Services for a more extensive list of Dell Support online.
If the preceding steps have not resolved the problem, see Contacting Dell.
NOTE: Call Dell Support from a telephone at or near the affected computer so that the support staff can assist you with any necessary procedures.
NOTE: Dell's Express Service Code system may not be available in all countries.
When prompted by Dell's automated telephone system, enter your Express Service Code to route the call directly to the proper support personnel. If you do
not have an Express Service Code, open the Dell Accessories folder, double-click the Express Service Code icon, and follow the directions.
For instructions on using the Dell Support, see Technical Support and Customer Service.
NOTE: Some of the following services are not always available in all locations outside the continental U.S. Call your local Dell representative for
information on availability.
Technical Support and Customer Service
Dell's support service is available to answer your questions about Dell™ hardware. Our support staff uses computer-based diagnostics to provide fast,
accurate answers.
To contact Dell's support service, see Before You Call, and then see the contact information for your region or go to support.dell.com.
DellConnect™
DellConnect is a simple online access tool that allows a Dell service and support associate to access your computer through a broadband connection, diagnose
your problem and repair it all under your supervision. For more information, go to support.dell.com and click DellConnect.
Online Services
You can learn about Dell products and services at the following websites:
www.dell.com
www.dell.com/ap (Asian/Pacific countries only)
www.dell.com/jp (Japan only)
www.euro.dell.com (Europe only)
www.dell.com/la (Latin American and Caribbean countries)
www.dell.ca (Canada only)
You can access Dell Support through the following websites and e-mail addresses:
l
Dell Support websites:
support.dell.com
support.jp.dell.com (Japan only)
support.euro.dell.com (Europe only)
l
Dell Support e-mail addresses:
[email protected]
[email protected]
[email protected] (Latin America and Caribbean countries only)
[email protected] (Asian/Pacific countries only)
l
Dell Marketing and Sales e-mail addresses:
[email protected] (Asian/Pacific countries only)
[email protected] (Canada only)
l
Anonymous file transfer protocol (FTP):
ftp.dell.com – log in as user anonymous, and use your e-mail address as your password
AutoTech Service
Dell's automated support service—AutoTech—provides recorded answers to the questions most frequently asked by Dell customers about their laptop and
desktop computers.
When you call AutoTech, use your touch-tone telephone to select the subjects that correspond to your questions. For the telephone number to call for your
region, see Contacting Dell.
Automated Order-Status Service
To check on the status of any Dell products that you have ordered, you can go to support.dell.com, or you can call the automated order-status service. A
recording prompts you for the information needed to locate and report on your order. For the telephone number to call for your region, see Contacting Dell.
Problems With Your Order
If you have a problem with your order, such as missing parts, wrong parts, or incorrect billing, contact Dell for customer assistance. Have your invoice or
packing slip available when you call. For the telephone number to call for your region, see Contacting Dell.
Product Information
If you need information about additional products available from Dell, or if you would like to place an order, visit the Dell website at www.dell.com. For the
telephone number to call for your region or to speak to a sales specialist, see Contacting Dell.
Returning Items for Warranty Repair or Credit
Prepare all items being returned, whether for repair or credit, as follows:
1.
Call Dell to obtain a Return Material Authorization Number, and write it clearly and prominently on the outside of the box.
For the telephone number to call for your region, see Contacting Dell. Include a copy of the invoice and a letter describing the reason for the return.
2.
3.
Include a copy of the Diagnostics Checklist (see Diagnostics Checklist), indicating the tests that you have run and any error messages reported by the
Dell Diagnostics (see "Dell Diagnostics" on page 38).
Include any accessories that belong with the item(s) being returned (power cables, software floppy disks, guides, and so on) if the return is for credit.
4.
Pack the equipment to be returned in the original (or equivalent) packing materials.
You are responsible for paying shipping expenses. You are also responsible for insuring any product returned, and you assume the risk of loss during shipment
to Dell. Collect On Delivery (C.O.D.) packages are not accepted.
Returns that are missing any of the preceding requirements will be refused at Dell's receiving dock and returned to you.
Before You Call
NOTE: Have your Express Service Code ready when you call. The code helps Dell's automated-support telephone system direct your call more efficiently.
You may also be asked for your Service Tag (located on the back or bottom of your computer).
Remember to fill out the Diagnostics Checklist (see Diagnostics Checklist). If possible, turn on your computer before you call Dell for assistance and call from a
telephone at or near the computer. You may be asked to type some commands at the keyboard, relay detailed information during operations, or try other
troubleshooting steps possible only at the computer itself. Ensure that the computer documentation is available.
WARNING: Before working inside your computer, read the safety information that shipped with your computer. For additional safety best
practices information, see the Regulatory Compliance Homepage at www.dell.com/regulatory_compliance.
Diagnostics Checklist
Name:
Date:
Address:
Phone number:
Service Tag (bar code on the back or bottom of the computer):
Express Service Code:
Return Material Authorization Number (if provided by Dell support technician):
Operating system and version:
Devices:
Expansion cards:
Are you connected to a network? Yes No
Network, version, and network adapter:
Programs and versions:
See your operating system documentation to determine the contents of the system's start-up files. If the computer is connected to a printer, print each file.
Otherwise, record the contents of each file before calling Dell.
Error message, beep code, or diagnostic code:
Description of problem and troubleshooting procedures you performed:
Contacting Dell
For customers in the United States, call 800-W W W-DELL (800-999-3355).
NOTE: If you do not have an active Internet connection, you can find contact information on your purchase invoice, packing slip, bill, or Dell product
catalog.
Dell provides several online and telephone-based support and service options. Availability varies by country and product, and some services may not be
available in your area. To contact Dell for sales, technical support, or customer service issues:
1.
Visit support.dell.com, and verify your country or region in the Choose A Country/Region drop-down menu at the bottom of the page.
2.
Click Contact Us on the left side of the page, and select the appropriate service or support link based on your need.
3.
Choose the method of contacting Dell that is convenient for you.
Back to Contents Page
Back to Contents Page
I/O Board
Dell™ OptiPlex™ FX160/160 Service Manual Removing the I/O Board
Replacing the I/O Board
Removing the I/O Board
1.
Perform the procedure in Before Working on Your Computer.
2.
Remove the two screws that secure the I/O board to the chassis.
1
screws (2)
2
cable guide
3.
Carefully lift the I/O board out of the computer, ensuring the three cables are clear of the cable guide.
4.
Disconnect the three cables (Audio, USB and Front Panel) from the I/O board.
Replacing the I/O Board
1.
Connect the three I/O board cables (Audio, USB, and Front Panel) to the I/O board.
1
front panel connector
2
audio connector
3
USB connector
4
I/O board
2.
3.
Place the cables under the cable guide metal tab, and align the holes in the I/O board with the screw holes on the chassis, ensuring that the middle of
the I/O board rests in the metal clip.
Secure the I/O board to the chassis with two screws.
1
cable guide metal tab
4.
metal clip
Perform the procedure in After Working on Your Computer.
Back to Contents Page
2
Back to Contents Page
Memory
Dell™ OptiPlex™ FX160/160 Service Manual Removing a Memory Module
Replacing a Memory Module
Your computer supports one or two memory modules.
NOTE: Your computer supports non-ECC, 667 MHz or 800 MHz, DDR2 SDRAM only. It supports memory module sizes of 512 MB (for embedded Linux
operating systems only), 1 GB, and 2 GB. When 800 MHz memory is installed, your computer operates at 667 MHz. See support.dell.com for more
information.
Removing a Memory Module
1.
Perform the procedure in Before Working on Your Computer.
2.
Carefully spread apart the securing clips on each end of the memory module connector until the memory module pops out.
1 DIMM_1 memory connector
2 DIMM_2 memory
connector
3 securing clip (two per connector, white –
DIMM_1, black – DIMM_2)
3.
Remove the memory module from the connector.
Replacing a Memory Module
NOTE: If your computer contains a single memory module, it must be inserted in the DIMM_1 memory connector. The DIMM_1 connector has white
securing clips.
1.
Place the module in the memory module connector, and align the notch in the module with the tab on the connector.
NOTE: If the memory module is not installed properly, the computer may not boot. No error message indicates this failure.
2.
Press down on the module until the securing clips lock into place. If the clips do not click into place, remove the module and reinstall it.
.
1 DIMM_1 memory
2 tab in memory connector
connector
3 DIMM_2 memory
connector
3.
Perform the procedure in After Working on Your Computer.
Back to Contents Page
4 securing clip (two per connector, white –
DIMM_1, black – DIMM_2)
Back to Contents Page
NVRAM Module
Dell™ OptiPlex™ FX160/160 Service Manual Removing the NVRAM Module
Replacing the NVRAM Module
Removing the NVRAM Module
1.
Perform the procedure in Before Working on Your Computer.
2.
Remove the hard drive bracket assembly, if installed (see Removing the Hard Drive Bracket Assembly).
3.
Remove the screw that secures the NVRAM module to the system board with a Phillips #1 screwdriver.
1
NVRAM module
4.
Lift the NVRAM module straight up from the system board.
Replacing the NVRAM Module
1.
Align the NVRAM module connectors with the connectors on the system board and push down (see System Board Connectors).
2.
Secure the NVRAM module to the system board with the screw.
3.
Replace the hard drive bracket assembly if it was removed (see Replacing the Hard Drive Bracket Assembly).
4.
Perform the procedure in After Working on Your Computer.
.
Back to Contents Page
Back to Contents Page
Power Supply
Dell™ OptiPlex™ FX160/160 Service Manual Removing the Power Supply
Replacing the Power Supply
Removing the Power Supply
1.
Perform the procedure in Before Working on Your Computer.
WARNING: The power supply can become very hot during normal operation. Allow the power supply to cool before touching it.
2.
Disconnect the 12V power supply connector from the system board (see System Board Connectors).
1
power supply 12V connector
2
back panel screw
3
power supply
4
chassis screw
3.
Remove the back panel screw.
4.
Remove the chassis screw.
5.
Slide the power supply slightly toward the front of the computer and lift up out of the chassis.
Replacing the Power Supply
1.
1
Place the power supply in the chassis and slide it back against the back panel.
back panel screw
2
chassis screw
2.
Secure the power supply with a back panel screw and the chassis screw.
3.
Connect the 12V power supply connector to the system board (see System Board Connectors).
4.
Perform the procedure in After Working on Your Computer.
Back to Contents Page
Back to Contents Page
Reinstalling Software
Dell™ OptiPlex™ FX160/160 Service Manual Drivers
Restoring Your Operating System
User Accounts and Passwords
CAUTION: To install or update software on your computer, you must be logged in with administrative privileges. Use extreme care when
operating your computer with administrative privileges to prevent damage to the system software.
NOTE: Microsoft® Windows® XP Embedded is available on the OptiPlex FX160 system only.
Drivers
Identifying Drivers
Microsoft® Windows® XP Embedded and Windows XP
1.
2.
Locate the list of devices for your computer:
a.
Click Start® Control Panel.
b.
If the Control Panel window appears in Category View (Pick a category), switch to Classic View (icon view).
c.
Double-click System icon.
d.
In the System window, click the Hardware tab, then click Device Manager.
Scroll down the list to see if any device has an exclamation point or Other device (a yellow circle with a [! or ?]) on the device icon.
If an exclamation point or question mark is next to the device name, you may need to reinstall the driver or install a new driver (see Reinstalling Drivers
and Utilities).
Microsoft Windows Vista® 1.
Locate the list of devices for your computer:
a.
Click the Windows Vista Start button
b.
Click Properties® Device Manager.
, and right-click Computer.
NOTE: The User Account Control window may appear. If you are an administrator on the computer, click Continue; otherwise, contact your
administrator to continue.
2.
Scroll down the list to see if any device has an exclamation point (a yellow circle with a [!]) on the device icon.
If an exclamation point is next to the device name, you may need to reinstall the driver or install a new driver (see Reinstalling Drivers and Utilities).
Reinstalling Drivers and Utilities
CAUTION: The Dell Support website at support.dell.com and the Drivers and Utilities media provide approved drivers for your computer. If you
install drivers obtained from other sources, your computer might not work correctly.
Returning to a Previous Device Driver Version
Microsoft Windows XP and Windows XP Embedded
1.
Locate the list of devices for your computer:
a.
Click Start® Control Panel.
b.
If the Control Panel window appears in Category View (Pick a category), switch to Classic View (icon view).
c.
Double-click the System icon.
d.
In the System Properties window, click the Hardware tab, and then click Device Manager.
2.
Right-click the device for which the new driver was installed and click Properties.
3.
Click the Drivers tab® Roll Back Driver.
If Roll Back Driver does not resolve the problem, use System Restore (see Restoring Your Operating System) to return your computer to the operating state
that existed before you installed the new driver.
Microsoft Windows Vista
1.
Click the Windows Vista Start button
2.
Click Properties® Device Manager.
, and right-click Computer.
NOTE: The User Account Control window may appear. If you are an administrator on the computer, click Continue; otherwise, contact your
administrator to enter the Device Manager.
3.
Right-click the device for which the new driver was installed and click Properties.
4.
Click the Drivers tab® Roll Back Driver.
If Roll Back Driver does not resolve the problem, use System Restore (see Restoring Your Operating System) to return your computer to the operating state
that existed before you installed the new driver.
Manually Reinstalling Drivers
Microsoft Windows XP and Windows XP Embedded
1.
Locate the list of devices for your computer:
a.
Click Start® Control Panel.
b.
If the Control Panel window appears in Category View (Pick a category), switch to Classic View (icon view).
c.
Double-click the System icon.
d.
In the System Properties window, click the Hardware tab, and then click Device Manager.
2.
Right-click the device for which you need a driver, and click Update Driver.
3.
Follow the instructions on the Hardware Update Wizard screens to either install the driver from a local source, or to search the Web for a driver.
Microsoft Windows Vista
1.
Click the Windows Vista Start button
2.
Click Properties® Device Manager.
, and right-click Computer.
NOTE: The User Account Control window appears. If you are an administrator on the computer, click Continue; otherwise, contact your
administrator to continue.
3.
Double-click the type of device for which you are installing the driver (for example, Audio or Video).
4.
Double-click the name of the device for which you are installing the driver.
5.
Click the Driver tab® Update Driver® Browse my computer for driver software.
6.
Click Browse and browse to the location to which you previously copied the driver files.
7.
Click the name of the driver® OK® Next.
8.
Click Finish and restart your computer.
Restoring Your Operating System
Depending on your system configuration, you can restore your operating system in the following ways:
l
l
l
For systems with the operating system installed on NVRAM module, the operating system can be re-imaged.
Microsoft® Windows System Restore (available only on computers that have hard drives and are running Windows Vista) returns your computer to an
earlier operating state without affecting data files. Use System Restore as the first solution for restoring your operating system and preserving data
files.
If you received the Operating System media with your computer, you can use it to restore your operating system. However, using the Operating System
media deletes all data on the hard drive. This option requires an external optical drive to run the media.
Re-imaging Operating Systems Installed on NVRAM
To restore, update, or install an operating system installed on the NVRAM module, refer to the re-imaging documentation for your computer at
support.dell.com.
Restoring Microsoft Windows Operating Systems on Hard Drives
NOTE: The procedures in this document were written for the Windows default view and may not apply if you set your Dell computer to the Windows
Classic view.
Starting System Restore
Windows XP
1.
Click Start® All Programs® Accessories® System Tools® System Restore.
2.
Click either Restore my computer to an earlier time or Create a restore point.
3.
Click Next and follow the remaining on-screen prompts.
Windows Vista
1.
Click the Windows Vista Start button
2.
In the Start Search box, type System Restore and press <Enter>.
.
NOTE: The User Account Control window may appear. If you are an administrator on the computer, click Continue; otherwise, contact your
administrator to continue the desired action.
3.
Click Next and follow the remaining prompts on the screen.
Undoing the Last System Restore (Windows Vista Only)
CAUTION: Before you undo the last system restore, save and close all open files and exit any open programs. Do not alter, open, or delete any
files or programs until the system restoration is complete.
1.
Click the Windows Vista Start button
2.
In the Start Search box, type System Restore and press <Enter>.
.
3.
Click Undo my last restoration and click Next.
Restoring Your Operating System Using the Operation System Media
Before you Begin
If you are considering reinstalling the Windows operating system to correct a problem with a newly installed driver, first try using Windows Device Driver
Rollback. See Returning to a Previous Device Driver Version. If Device Driver Rollback does not resolve the problem, then use Microsoft Windows System
Restore to return your operating system to the operating state it was in before you installed the new device driver. See Restoring Microsoft Windows
Operating Systems on Hard Drives.
CAUTION: Before performing the installation, back up all data files on your primary hard drive. For conventional hard drive configurations, the
primary hard drive is the first drive detected by the computer.
To reinstall Windows, you need the Dell™ Operation System media and the Dell Drivers and Utilities media.
NOTE: .The Dell Drivers and Utilities media contains drivers that were installed during the assembly of the computer. Use the Dell Drivers and Utilities
media to load any required drivers. Depending on the region from which you ordered your computer, or whether you requested the media, the Dell
Drivers and Utilities media and Operating System media may not ship with your computer.
Reinstalling Windows XP or Windows Vista
The reinstallation process can take 1 to 2 hours to complete. After you reinstall the operating system, you must also reinstall the device drivers, virus
protection program, and other software.
1.
Save and close any open files and exit any open programs.
2.
Insert the Operating System disc.
3.
If the Install Windows message appears, click Exit.
4.
Restart the computer.
When the DELL logo appears, press <F12> immediately.
NOTE: If you wait too long and the operating system logo appears, continue to wait until you see the Microsoft® Windows® desktop; then, shut down
your computer and try again.
NOTE: The next steps change the boot sequence for one time only. On the next start-up, the computer boots according to the devices specified in the
system setup program...
5.
When the boot device list appears, highlight CD/DVD/CD-RW Drive and press <Enter>.
Press any key to Boot from CD-ROM, and follow the instructions on the screen to complete the installation.
User Accounts and Passwords
CAUTION: The user account name and password security feature in Windows XP Embedded, Windows XP, and Windows Vista helps you to
protect your computer against unauthorized access by those who would extract your personal information or damage the system. Dell strongly
advises you to change your operating system user account name and passwords frequently to maintain the effectiveness of this security feature.
Passwords for Windows XP Embedded
If you ordered your computer preloaded with Windows XP Embedded, your computer is configured with user account names and passwords. Refer to
support.dell.com for more information.
Changing Account Names and Passwords in Windows
NOTE: To add/remove/change the account name or privileges of a user with Administrative or user level privileges, you must be logged into the
operating system as a user with administrative level privileges. If you are logged into the system with user level privileges, you can change only your
password.
Windows XP Embedded
1.
Click Start ® Control Panel.
2.
If the Control Panel window appears in Category View (Pick a category), switch to Classic View (icon view).
3.
Click Administrative Tools ® UserManager.
4.
In the left pane, click either Users or Groups, then double-click the name whose attributes you want to change.
Windows XP
1.
Click Start® Control Panel.
2.
If the Control Panel window appears in Category View (Pick a category), switch to Classic View (icon view).
3.
Click User Accounts.
4.
Click the User Name whose password or privileges you want to change, and follow the on-screen instructions.
Windows Vista
1.
Click the Windows Vista Start button
2.
Click Control Panel ® User Accounts.
3.
Click the item on the screen that you want to change.
Back to Contents Page
.
Back to Contents Page
Computer Stand
Dell™ OptiPlex™ FX160/160 Service Manual Removing the Computer Stand
Replacing the Computer Stand
Removing the Computer Stand
1.
Gently press down on the metal tab at the back of the computer.
2.
Slide the stand toward the back of the computer approximately 1/4 of an inch.
3.
Remove the stand from the computer.
Replacing the Computer Stand
1.
2.
Grasp the computer by the top of the chassis.
With the part of the stand that has the clip at the back of the computer, align the tabs on the stand with the slots in the bottom of the chassis and
insert the tabs into the chassis.
The stand should overlap the back of the computer by approximately 1/4 of an inch.
3.
Slide the stand toward the front of the computer until it snaps into place.
Back to Contents Page
Back to Contents Page
System Board Assembly
Dell™ OptiPlex™ FX160/160 Service Manual System Board Connectors
Removing the System Board Assembly
Replacing the System Board
System Board Connectors
1
memory connector (DIMM_1)
2
memory connector (DIMM_2)
3
battery (BATTERY)
4
audio connector (AUDIOF1)
5
USB connector (USBF1)
6
setup jumper (SETUP_LOCK)
7
front panel connector
(FRONTPANEL)
8
SATA data cable connector (SATA_1)
9
NVRAM module connector
(SATA_0)
10 clear CMOS jumper (RTCRST)
11 clear password jumper
(PSWD)
12 WLAN connector (MINIA1)
13 fan connector (FAN_CPU)
14 screw holes (3)
15 12V power connector (PWR1)
16 SATA hard-drive power connector
(SATAPWR1)
17 CPU
Removing the System Board Assembly
CAUTION: BIOS options setup in a new system board may not be the same as those setup on the system board you are replacing. To retain the
same BIOS option settings, record the current system BIOS option settings for future reference. Refer to BIOS Setup Utility Options for more
information.
1.
Perform the procedure in Before Working on Your Computer.
2.
Remove the hard drive bracket assembly, if installed (Removing the Hard Drive Bracket Assembly).
3.
Remove the NVRAM module, if installed (see Removing the NVRAM Module).
4.
Remove the wireless card, if installed (see Removing the Wireless Card).
5.
Remove the memory module(s) (see Removing a Memory Module).
6.
Remove the processor heatsink assembly (see Removing the Processor Heatsink Assembly).
7.
Remove the I/O board (see Removing the I/O Board).
8.
Disconnect the I/O board cables from the system board.
9.
Disconnect the 12V power supply connector from the system board (see System Board Connectors).
10.
Remove the cable guide (see Removing the Cable Guide).
11.
Remove the two screws on the back corners of the system board that secure it to the chassis.
1
cable guide retaining screw
2
system board retaining screw (2)
NOTE: When removing the system board from the chassis, the thermal gap pad between the chassis and the processor may not allow the system board
to lift out freely. You may have to break the bond between the gap pad and the bottom of the system board. Keep the gap pad with the chassis.
12.
Carefully lift the front edge of the system board remove the board from the chassis.
Replacing the System Board
1.
Move the system board into the chassis at about a 30-degree angle, aligning the connectors on the back edge of the board with the cutouts on the
back panel, then lower the system board into place.
2.
Replace the cable guide (see Replacing the Cable Guide).
3.
Replace the two screws on the back corners of the system board that secure it to the chassis (see System Board Connectors).
4.
Connect the 12V power supply connector to the system board.
5.
Replace the I/O board (see Replacing the I/O Board).
6.
Connect the I/O board cables to the system board.
7.
Replace the cable guide (see Replacing the Cable Guide)
8.
Replace the memory module(s) (see Replacing a Memory Module).
9.
Replace the wireless card if it was removed (see Replacing the Wireless Card).
10.
Replace the NVRAM module if it was removed (see Replacing the NVRAM Module).
11.
Replace the processor heatsink assembly (see Replacing the Processor Heatsink Assembly).
12.
Replace the hard drive bracket assembly if it was removed (see Replacing the Hard Drive Bracket Assembly).
13.
Perform the procedure in After Working on Your Computer.
14.
Restart your computer and enter the BIOS setup to configure parameter settings as needed (see Entering the BIOS Setup Utility).
Back to Contents Page
Back to Contents Page
System Setup
Dell™ OptiPlex™ FX160/160 Service Manual Overview
Boot Sequence
Entering the BIOS Setup Utility
Clearing Forgotten Passwords
BIOS Setup Utility Screens
Clearing CMOS Settings
BIOS Setup Utility Options
Flashing the BIOS
Setup Lock
Overview
Use the BIOS Setup Utility to:
l
To change the system configuration information after you add, change, or remove any hardware in your computer
l
Enable or disable system board devices
l
Enable or disable security features
Before you use the BIOS Setup Utility, it is recommended that you write down the BIOS settings for future reference.
CAUTION: Unless you are an expert computer user, do not change the settings for this program. Certain changes can make your computer work
incorrectly.
Entering the BIOS Setup Utility
1.
Turn on (or restart) your computer.
2.
When the DELL™ logo is displayed, promptly press <F2> repeatedly until a BIOS screen opens. NOTE: The Dell logo appears very quickly, so you must watch for it to display. If you press <F2> before you are prompted, the computer cannot
acknowledge the keystroke.
3.
If you wait too long and the initial Dell screen closes, allow the operating system to completely startup. Then, shut down your computer and try again.
BIOS Setup Utility Screens
The BIOS Setup Utility screens display current or changeable configuration information for your computer. Information on the screen is divided into three
areas: the options list, active options field, and key functions.
BIOS screen (change screens with left- and right-arrow keys)
Options List — This field appears on the left side of the BIOS Setup Utility screen.
The field is a scrollable list containing parameters that define the configuration of
your computer.
Option Field — This field contains information about each option. In
this field you can view your current setting, options, and default and
make changes to your settings.
Scroll up and down the list with the up- and down-arrow keys. As an option is
highlighted, the Option Field displays more information about that option and the
option's current and available settings.
Key Functions — This field appears below the Option Field and lists
keys and their functions within the active options list.
BIOS Setup Utility Options
NOTE: Depending on your computer and installed devices, the items listed in this section may not appear, or may not appear exactly as listed.
System
System Time
Allows the user to set the system time and date from within the BIOS.
System Date
System Info
Lists system information such as the computer name, and other system-specific information. It includes the BIOS version number and the
service tag and asset number for support purposes
Processor
Identifies whether the computer's processor supports Hyper-Threading and lists the processor type, processor bus speed, processor ID,
Info
clock speed, and L2 cache.
Memory Info
Indicates amount of installed memory, memory speed, channel mode, and type of memory installed.
Boot Sequence
Specifies the boot sequence for device types.
Drives
Displays the SATA drives in the system (SATA -0, NVRAM; SATA-1, hard disk drive), drive operation and SMART reporting state.
Onboard Devices
Displays the enable status of system board components.
Performance
Displays the enable status of the hyperthreading feature, CPUID value, and HDD acoustic mode.
Security
Displays the enable status of passwords controlling access to BIOS setup and hard disk drive.
Power Management
AC Recovery
Specifies how the system reacts after a power loss (Off, On, Last (previous state))
Auto Power On Specifies when to use the Auto Power Time setting (Off, Everyday, Weekdays)
Auto Power
Time
Specifies a time to turn the system on.
Low Power
Mode
Allows the NIC to be disabled when the system is in hibernate mode or off.
Remote Wake
Up
Allows the system to wake from suspend state. This option is dependent on the setting of other options.
Suspend Mode
Selects the power management suspend mode.
Maintenance
Displays the service tag, ASF power management, and Event log.
ImageServer
Specifies network location for an ImageServer and enables On-demand Desktop Streaming (ODDS) settings.
POST Behavior
Specifies options for the Fast Boot, Numlock key, POST hotkeys and keyboard error reporting during startup.
Setup Lock
NOTE: The Setup Lock feature is available on the OptiPlex FX160 system only.
Setup lock (SETUP_LOCK, see System Board Connectors) is a hardware feature that interacts with the settings of the BIOS Admin Password option, the BIOS
Password Changes option, and the hardware Password jumper (PSWD) to produce a specific behavior of the Setup screens. The most common settings are
listed in the table below.
Admin
Password
Password Changes
setting
Password Jumper
Installed
Setup Lock Jumper
Installed
Setup Behavior
No
N/A
No
Yes
l
l
l
Yes
Unlocked
Yes
N/A
l
l
Yes
Locked
Yes
N/A
l
l
User: view Setup options only
Administrator: can modify Setup options
Passwords cleared and cannot be set
User: can view, and can only set/change the System and
HDD passwords
Administrator: can modify options after entering proper
password
User: view Setup options only
Administrator: can modify options after entering proper
password
Boot Sequence
Your computer can boot from any of the following device types:
l
Removable Drives — The computer attempts to boot from an external device such as a floppy drive.
l
Hard Disk Drive — The computer attempts to boot from an internal drive such as the NVRAM module (SATA-0 port) or hard disk drive (SATA-1 port).
l
CD/DVD Drive — The computer attempts to boot from the CD or DVD drive. CD and DVD drives are external devices.
l
USB Drive — The computer attempts to boot from a bootable USB drive. Insert the memory device into a USB port and restart the computer.
l
Network Drive — The computer may receive its operating system from a network drive, such as an ImageServer.
Changing Boot Sequence for Future Boots
When establishing the boot sequence, first establish the boot order of devices within device type groups, then select the boot order of device types.
1.
Enter the BIOS Setup Utility (see Entering the BIOS Setup Utility).
2.
Use the left- and right-arrow keys to navigate to the System screen.
3.
Use the down-arrow key to highlight Boot Sequence, and press <Enter> to open the sub screen.
NOTE: Write down your current boot sequence in case you want to restore it.
4.
5.
6.
Set up the boot priority of devices in device types:
a.
Use the down- and up-arrow keys to highlight Removable Drives and press <Enter>. If a drive is not installed, press <Esc> to return to the Boot
Sequence sub screen.
b.
On the Removable Drives screen, use the up- and down- arrow keys to highlight 1st Drive, and then press <Enter>.
c.
In the Options pop-up window, use the up- and down-arrow keys to highlight the preferred first removable device, or select Off to disable it, and
then press <Enter>. Repeat this sub-step for the 2nd, 3rd, etc. Drives, if listed. Press <Esc> to return to the Boot Sequence sub screen.
d.
Repeat this step for each of the remaining device types: Hard Disk Drives, USB Drives, CD/DVD Drives, and Network Drives.
Set up the boot priority of device types:
a.
On the Boot Sequence sub screen, use the up- and down-arrow keys to highlight 1st Boot Device, and press <Enter> to open the Options popup window.
b.
In the Options pop-up window, use the up- and down-arrow keys to highlight the preferred 1st Boot Device type, and press <Enter>. The 1st
Boot Device is the primary device type to boot from.
c.
Repeat this step for the 2nd, 3rd, 4th, and 5th Boot Devices to establish the boot sequence order of device types the computer will attempt to
boot from.
Press <F10> and then press <Enter> to save your settings and reboot your system.
Select Specific Boot Device
During system startup, you can select any bootable device, such as an internal or external hard drive, an external CD or DVD drive, USB memory key, or
external floppy drive, without changing the boot device sequence in the BIOS. This feature is useful when booting to an external DVD drive to run Dell
Diagnostics from the Dell Drivers and Utilities media, and returning to your normal boot sequence during the next system startup.
1.
Turn on (or restart) your computer.
2.
When the Dell logo appears, promptly press <F12> repeatedly until the Boot Device Menu appears.
If you wait too long and the operating system logo appears, continue to load the system until you see the operating system desktop. Then shut down
your computer and try again.
3.
Use the up- and down-arrow keys to select the device you want to boot to, and then press <Enter>.
Clearing Forgotten Passwords
WARNING: Before working inside your computer, read the safety information that shipped with your computer. For additional safety best
practices information, see the Regulatory Compliance Homepage at www.dell.com/regulatory_compliance.
CAUTION: This process erases both the system and administrator passwords.
1.
Perform the procedure in Before Working on Your Computer.
2.
Remove the jumper from the password jumper (PSWD) pins on the system board (see System Board Connectors).
3.
Perform the procedure in After Working on Your Computer.
4.
Restart your computer and allow it to boot to the operating system desktop.
5.
Shut down your computer.
6.
Perform the procedure in Before Working on Your Computer.
7.
Replace the jumper on the password jumper (PSWD) pins.
8.
Perform the procedure in After Working on Your Computer.
NOTE: This procedure enables the password feature. When you enter the BIOS Setup Utility, both system and administrator password options appear
as Not Set—meaning that the password feature is enabled but no password is assigned.
9.
10.
Restart your computer and enter Setup (see Entering the BIOS Setup Utility).
Assign new system and/or administrator password(s).
Clearing CMOS Settings
WARNING: Before working inside your computer, read the safety information that shipped with your computer. For additional safety best
practices information, see the Regulatory Compliance Homepage at www.dell.com/regulatory_compliance.
1.
Perform the procedure in Before Working on Your Computer.
NOTE: The computer must be disconnected from the electrical outlet to clear the CMOS setting.
2.
Reset the current CMOS settings:
a.
Locate the clear CMOS jumper (RTCRST) pins and the password jumper (PSWD) pins on the system board (see System Board Connectors).
b.
Remove the jumper from the password jumper (PSWD) pins and place it on the clear CMOS jumper (RTC_RST) pins.
c.
Wait 30 seconds.
d.
Remove the jumper from the clear CMOS jumper (RTC_RST) pins and place it onto the password jumper (PSWD) pins.
3.
Perform the procedure in After Working on Your Computer.
4.
Reboot your computer.
5.
Your computer will emit beeps, and then issue a CMOS checksum error. Press <F1> to continue.
Flashing the BIOS
CAUTION: When installing BIOS software, use only the BIOS software indicated for your computer.
The BIOS Setup Utility resides within the BIOS on the system board. If you install a new system board, you may need to update (or flash) the BIOS.
1.
Turn on the computer.
2.
Locate the latest BIOS update file for your computer at support.dell.com.
3.
Click Download Now to download the file.
4.
If the Export Compliance Disclaimer window appears, click Yes, I Accept this Agreement.
The File Download window appears.
5.
Click Save this program to disk, and then click OK.
The Save In window appears.
6.
Click the down arrow to view the Save In menu, select Desktop, and then click Save.
The file downloads to your desktop.
7.
Click Close if the Download Complete window appears.
The file icon appears on your desktop and is titled the same as the downloaded BIOS update file.
8.
Double-click the file icon on the desktop and follow the instructions on the screen.
Back to Contents Page
Back to Contents Page
Dell™ OptiPlex™ FX160/160 Service Manual NOTE: A NOTE indicates important information that helps you make better use of your computer.
CAUTION: A CAUTION indicates potential damage to hardware or loss of data if instructions are not followed.
WARNING: A WARNING indicates a potential for property damage, personal injury, or death.
If you purchased a Dell™ n Series computer, any references in this document to Microsoft® Windows® operating systems are not applicable.
Information in this document is subject to change without notice.
© 2008 Dell Inc. All rights reserved.
Reproduction of this material in any manner whatsoever without the written permission of Dell Inc. is strictly forbidden.
Trademarks used in this text: Dell, the DELL logo, and OptiPlex are trademarks of Dell Inc.; Intel is registered trademarks of Intel Corporation in the U.S. and other countries;
Microsoft, Windows, Windows Vista, the Windows Start button, and Outlook are registered trademarks of Microsoft Corporation in the United States and/or other countries.
Other trademarks and trade names may be used in this document to refer to either the entities claiming the marks and names or their products. Dell Inc. disclaims any
proprietary interest in trademarks and trade names other than its own.
September 2009 Rev. A01
Back to Contents Page
Back to Contents Page
Troubleshooting
Dell™ OptiPlex™ FX160/160 Service Manual Tools
Dell Diagnostics
Solving Problems
Dell Technical Update Service
WARNING: Before working inside your computer, read the safety information that shipped with your computer. For additional safety best
practices information, see the Regulatory Compliance Homepage at www.dell.com/regulatory_compliance.
WARNING: Always unplug your computer from the electrical outlet before opening the computer cover.
Tools
Power Lights
The power button light located on the front of the computer illuminates and blinks or remains solid to indicate different states:
l
If the power light is blue and the computer is not responding, see Diagnostic Lights.
l
If the power light is blinking blue, the computer is in standby mode. Press a key on the keyboard, move the mouse, or press the power button to
resume normal operation.
l
If the power light is off, the computer is either turned off or is not receiving power.
l
l
¡
Reseat the power cable into both the power connector on the back of the computer and the electrical outlet.
¡
If the computer is plugged into a power strip, ensure that the power strip is plugged into an electrical outlet and that the power strip is turned
on.
¡
Bypass power protection devices, power strips, and power extension cables to verify that the computer turns on properly.
¡
Ensure that the electrical outlet is working by testing it with another device, such as a lamp.
¡
Ensure that the 12V power cable and front panel cable are securely connected to the system board (see System Board Connectors).
If the power light is steady amber, a device may be malfunctioning or incorrectly installed.
¡
Remove and then reinstall the memory modules (see Memory).
¡
Remove and then reinstall the NVRAM module, if installed (see NVRAM Module).
¡
Remove and then reinstall the wireless card, if installed (see Wireless Card).
Eliminate interference. Some possible causes of interference are:
¡
Power, keyboard, and mouse extension cables
¡
Too many devices on a power strip
¡
Multiple power strips connected to the same electrical outlet
Diagnostic Lights
WARNING: Before working inside your computer, read the safety information that shipped with your computer. For additional safety best
practices information, see the Regulatory Compliance Homepage at www.dell.com/regulatory_compliance.
To help troubleshoot a problem, your computer has four diagnostic lights labeled 1, 2, 3, and 4 on the front panel. When the computer starts normally, the
lights flash, and then turn off. If the computer malfunctions, use the sequence of the lights to help identify the problem.
NOTE: After the computer completes POST, all four lights turn off before booting to the operating system.
Diagnostic Light Codes During POST
Light Pattern
Problem Description
Suggested Resolution
The computer is in a normal off
condition or a possible preBIOS failure has occurred.
l
l
Plug the computer into a working electrical outlet and press the power button (see Power
Problems).
If the problem persists, contact Dell (see Contacting Dell).
A possible BIOS failure has
occurred; the computer is in
the recovery mode.
l
l
Clear CMOS (see Clearing CMOS Settings)
Re-flash the BIOS or install a BIOS update (see Flashing the BIOS) and restart the computer.
If the problem persists, contact Dell (see Contacting Dell).
A possible processor failure
has occurred.
l
Contact Dell (see Contacting Dell).
Memory modules are detected,
but a memory failure has
occurred.
l
If two memory modules are installed, remove the modules (see Removing a Memory Module), then
reinstall one module (see Replacing a Memory Module) and restart the computer. If the computer
starts normally, continue to install additional memory modules (one at a time) until you have
identified a faulty module or reinstalled all modules without error.
If available, install working memory of the same type into your computer (see Memory).
If the problem persists, contact Dell (see Contacting Dell).
l
l
l
A possible PCI device failure
has occurred.
l
If a wireless card is installed, remove the card (see Removing the Wireless Card) an restart your
computer. If the problem disappears, install a new wireless card.
If the problem persists, contact Dell (see Contacting Dell).
A possible graphics failure has
occurred.
l
Contact Dell (see Contacting Dell).
A possible storage device
failure has occurred.
l
If a hard drive is installed, reseat the drive's power and data cable connectors (see Removing the
Hard Drive Bracket Assembly) and restart your computer.
If a NVRAM module is installed, reseat the module (see NVRAM Module) and restart your computer.
If the problem persists, contact Dell (see Contacting Dell).
l
l
l
A possible USB failure has
occurred.
l
No memory modules are
detected.
l
l
Reinstall all USB devices, check cable connections, and then restart the computer.
If the problem persists, contact Dell (see Contacting Dell).
l
If two memory modules are installed, remove the modules (see Removing a Memory Module), then
reinstall one module (see Replacing a Memory Module) and restart the computer. If the computer
starts normally, continue to install additional memory modules (one at a time) until you have
identified a faulty module or reinstalled all modules without error.
If available, install working memory of the same type into your computer (see Memory).
If the problem persists, contact Dell (see Contacting Dell).
System board failure has
occurred.
l
Contact Dell (see Contacting Dell).
Memory modules are detected,
but a memory configuration or
compatibility error exists.
l
l
Ensure that no special requirements for memory module/connector placement exist (see Memory).
Ensure that the memory you are using is supported by your computer (see Memory).
If the problem persists, contact Dell (see Contacting Dell).
A possible system board
resource and/or hardware
failure has occurred.
l
Contact Dell (see Contacting Dell).
Another failure has occurred.
l
If a hard drive is installed, reseat the drive's power and data cable connectors (see Hard Drive
Assembly (Optional)) and restart your computer.
If a NVRAM module is installed, reseat the module (see NVRAM Module) and restart your computer.
If there is an error message on the screen identifying a problem with a device (such as the hard
drive), check the device to make sure it is functioning properly.
If the operating system is attempting to boot from a device (such as a CD/DVD drive), check BIOS
settings to ensure the boot sequence is correct for the devices installed on your computer.
If the problem persists, contact Dell (see Contacting Dell).
l
l
l
l
l
l
Beep Codes
Your computer may emit a series of beeps during start-up if the monitor cannot display errors or problems. For example, one possible beep code may consist
of three short, repeated beeps indicating that the computer has encountered a possible system board failure.
If your computer emits a series of beeps during start-up:
1.
Write down the beep code.
2.
Run the Dell Diagnostics to further identify the problem. (see Dell Diagnostics).
Code
(repetitive
short beeps)
Description
Suggested Resolution
1
BIOS checksum failure.
Possible system board
failure.
l
Contact Dell (see Contacting Dell).
2
No memory modules are
detected.
l
If two memory modules are installed, remove the modules (see Removing a Memory Module), then
reinstall one module (see Replacing a Memory Module) and restart the computer. If the computer starts
l
normally, continue to install additional memory modules (one at a time) until you have identified a faulty
module or reinstalled all modules without error.
If available, install working memory of the same type into your computer (see Memory).
If the problem persists, contact Dell (see Contacting Dell).
l
If the problem persists, contact Dell (see Contacting Dell).
l
Ensure that no special requirements for memory module/connector placement exist (see Memory).
Ensure that the memory you are using is supported by your computer (see Memory).
If the problem persists, contact Dell (see Contacting Dell).
l
3
Possible system board
failure.
Time-Of-Day Clock test
failure
Keyboard controller test
failure
4
RAM Read/Write failure.
l
l
5
Real time clock failure.
Possible battery or
system board failure.
l
l
Replace the battery (see Replacing the Coin-Cell Battery).
If the problem persists, contact Dell (see Contacting Dell).
6
Video BIOS Test Failure.
l
Contact Dell (see Contacting Dell).
7
CPU Cache test failure
l
Contact Dell (see Contacting Dell).
System Messages
NOTE: If the message you received is not included below, see the documentation for either the operating system or the program that was running
when the message appeared.
Alert! Previous attempts at booting this system have failed at checkpoint [nnnn]. For help in resolving this problem, please note this checkpoint and
contact Dell Technical Support — The computer failed to complete the boot routine three consecutive times for the same error (see Contacting Dell for
assistance).
CMOS checksum error — Possible motherboard failure or RTC battery low. Replace the battery (see Coin-Cell Battery or see Contacting Dell for assistance).
CPU fan failure — Replace the CPU fan (see Removing the Hard Drive Fan).
Diskette Drive 0 seek failure — A cable may be loose, or the computer configuration information may not match the hardware configuration. Check HDD cable
connections, if installed (Removing the Hard Drive Bracket Assembly) and reseat the NVRAM module, if installed (see Removing the NVRAM Module).
Diskette read failure — The floppy disk may be defective or a cable may be loose. Check the cable connections to the floppy disk device.
Hard-disk read failure — Possible HDD failure during HDD boot test (see Contacting Dell for assistance). Check HDD cable connections, if installed (Removing
the Hard Drive Bracket Assembly) and reseat the NVRAM module, if installed (see Removing the NVRAM Module)
Keyboard failure — Keyboard failure or keyboard cable loose (see Keyboard Problems).
No boot device available — The system cannot detect a bootable device or partition.
l
If the NVRAM module is your boot device, ensure that it is properly seated (see NVRAM Module).
l
If the floppy drive is your boot device, ensure that the cables are connected and that a bootable floppy disk is in the drive.
l
If the hard drive is your boot device, ensure that the cables are connected and that the drive is installed properly and partitioned as a boot device (see
Hard Drive Assembly (Optional)).
l
Enter the BIOS Setup Utility and ensure that the boot sequence information is correct (see Entering the BIOS Setup Utility).
No timer tick interrupt — A chip on the system board might be malfunctioning or motherboard failure (see Contacting Dell for assistance).
Non-system disk or disk error — Replace the floppy disk with one that has a bootable operating system or remove the floppy disk and restart the computer.
Not a boot diskette — Insert a bootable floppy disk and restart your computer.
NOTICE – Hard Drive SELF MONITORING SYSTEM has reported that a parameter has exceeded its normal operating range. Dell recommends that you
back up your data regularly. A parameter out of range may or may not indicate a potential hard drive problem. — S.M.A.R.T error, possible HDD failure.
This feature can be enabled or disabled in BIOS setup.
USB over current error — There are issues with a USB device that is connected to the computer. Refer to troubleshooting documentation for the device.
Hardware Troubleshooter
If a device is either not detected during the operating the BIOS Setup Utility or is detected but incorrectly configured, you can use the Hardware
Troubleshooter to resolve the incompatibility.
Microsoft Windows XP Embedded:
A hardware troubleshooting utility is not included within Windows XP Embedded. It is provided through an Internet connection.
1.
Log into your system as a user with administrative privileges.
2.
Click Start® Help and Support.
3.
Click Hardware.
4.
In the Hardware frame, click the device with which you are having a problem and then press <Enter>.
5.
In the search results, select the option that best describes the problem and follow the remaining troubleshooting steps.
Microsoft Windows XP:
1.
Click Start® Help and Support.
2.
Type hardware troubleshooter in the search field and press <Enter> to start the search.
3.
In the Fix a Problem section, click Hardware Troubleshooter.
4.
In the Hardware Troubleshooter list, select the option that best describes the problem and click Next to follow the remaining troubleshooting steps.
Microsoft Windows Vista:
1.
Click the Windows Vista start button
2.
Type hardware troubleshooter in the search field and press <Enter> to start the search.
, and click Help and Support.
3.
In the search results, select the option that best describes the problem and follow the remaining troubleshooting steps.
Dell Diagnostics
WARNING: Before working inside your computer, read the safety information that shipped with your computer. For additional safety best
practices information, see the Regulatory Compliance Homepage at www.dell.com/regulatory_compliance.
When to Use the Dell Diagnostics
If you experience a problem with your computer, perform the checks in Troubleshooting, and then run the Dell Diagnostics before contacting Dell for
assistance.
Start the Dell Diagnostics from your hard drive or from the Drivers and Utilities media provided with your computer.
NOTE: The Drivers and Utilities media is optional and may not ship with your computer. An external optical drive is required to use this media.
NOTE: The Dell Diagnostics only operate on Dell computers.
Starting the Dell Diagnostics From Your Hard Drive
Before running the Dell Diagnostics, enter the BIOS Setup Utility to review your computer's configuration information, and ensure that the device you want to
test is displayed in the BIOS Setup Utility and is active.
NOTE: If your computer does not display a screen image, contact Dell (see Contacting Dell).
1.
Ensure that the computer is connected to an electrical outlet that is known to be working properly.
2.
Turn on (or restart) your computer.
3.
When the DELL logo appears, press <F12> immediately.
NOTE: Keyboard failure may result when a key is held down for extended periods of time. To avoid possible keyboard failure, press and release <F12>
in even intervals to open the Boot Device Menu.
NOTE: If you wait too long and the operating system logo appears, allow the operating system to boot, then shut off your computer and try again.
4.
Use the up- and down-arrow keys to select PSA+ from the boot menu and then press <Enter>.
The computer runs the PSA (Pre-boot System Assessment), a series of initial tests of your system board, keyboard, display, memory, hard drive, etc.
NOTE: The Pre-boot System Assessment may take several minutes to complete.
l
Answer any questions that appear. If prompted, opt to run all memory tests.
l
If failures are detected, write down the error code(s) and see Contacting Dell.
l
If the Pre-boot System Assessment completes successfully, the following message appears: "Booting Dell Diagnostic Utility Partition.
Press any key to continue."
NOTE: If you see a message stating that no diagnostics utility partition has been found, run the Dell Diagnostics from your Drivers and Utilities media
(see Starting the Dell Diagnostics From the Drivers and Utilities Media).
5.
Press any key to start the Dell Diagnostics from the diagnostics utility partition on your hard drive.
6.
Press <Tab> to select Test System and then press <Enter>.
NOTE: It is recommended that you select Test System to run a complete test on your computer. Selecting Test Memory initiates the extended memory
test, which can take up to thirty minutes or more to complete. When the test completes, record the test results and then press any key to return to the
previous menu.
7.
At the Dell Diagnostics Main Menu, left-click with the mouse, or press <Tab> and then <Enter>, to select the test you want to run (see Dell Diagnostics
Main Menu).
NOTE: Write down any error codes and problem descriptions exactly as they appear and follow the instructions on the screen.
8.
After all tests have completed, close the test window to return to the Dell Diagnostics Main Menu.
9.
Close the main menu window to exit the Dell Diagnostics and restart the computer.
Starting the Dell Diagnostics From the Drivers and Utilities Media
Before running the Dell Diagnostics, enter the BIOS Setup Utility (see Entering the BIOS Setup Utility) to review your computer's configuration information, and
ensure that the device you want to test is displayed in the BIOS Setup Utility and is active.
1.
Connect an external optical drive to the computer.
2.
Insert the Drivers and Utilities media into the optical drive.
3.
Restart your computer.
4.
When the DELL logo appears, press <F12> immediately.
NOTE: Keyboard failure may result when a key is held down for extended periods of time. To avoid possible keyboard failure, press and release <F12>
in even intervals to open the Boot Device Menu.
NOTE: If you wait too long and the operating system logo appears, continue to wait until you see the Microsoft Windows desktop, then shut down your
computer and try again.
5.
When the boot device list appears, use the up- or down- arrow keys to highlight CD/DVD/CD-RW Drive then press <Enter>.
NOTE: Using the one-time boot menu changes the boot sequence for the current boot only. Upon restart, the computer boots according to the
boot sequence specified in the BIOS Setup Utility.
6.
Press any key to confirm that you want to start from the CD/DVD.
7.
Type 1 to Run the 32 Bit Dell Diagnostics.
8.
At the Dell Diagnostics Main Menu, type 1 to select Dell 32-bit Diagnostics for Resource CD (graphical user interface).
9.
Press <Tab> to select Test System and then press <Enter>.
NOTE: It is recommended that you select Test System to run a complete test on your computer. Selecting Test Memory initiates the extended
memory test, which can take up to thirty minutes or more to complete. When the test completes, record the test results and then press any key to
return to the previous menu.
10.
At the Dell Diagnostics Main Menu, left-click with the mouse, or press <Tab> and then <Enter>, to select the test you want to run (see Dell Diagnostics
Main Menu).
NOTE: Write down any error codes and problem descriptions exactly as they appear and follow the instructions on the screen.
11.
After all tests have completed, close the test window to return to the Dell Diagnostics Main Menu.
12.
Close the main menu window to exit the Dell Diagnostics and restart the computer.
13.
Remove the Drivers and Utilities media from the optical drive.
Dell Diagnostics Main Menu
After the Dell Diagnostics loads the following menu appears:
Option
Function Test Memory Run the stand-alone memory test
Test System
Run system diagnostics
Exit
Exit the diagnostics
Press <Tab> to select the test you want to run and then press <Enter>.
NOTE: It is recommended that you select Test System to run a complete test on your computer. Selecting Test Memory initiates the extended memory
test, which can take up to thirty minutes or more to complete. When the test completes, record the test results and then press any key to return to this
menu.
After Test System is selected, the following menu appears:
Option
Function Express Test
Performs a quick test of devices in the system. This typically can take 10 to 20 minutes.
NOTE: The Express Test requires no interaction on your part. Run Express Test first to increase the possibility of tracing a problem quickly.
Extended Test Performs a thorough check of devices in the system. This typically can take an hour or more.
NOTE: The Extended Test periodically requires your input to answer specific questions.
Custom Test
Use to test a specific device or customize the tests to be run.
Symptom Tree This option allows you to select tests based on a symptom of the problem you are having. This option lists the most common symptoms.
NOTE: It is recommended that you select Extended Test to perform a more thorough check of devices in the computer.
For any problem encountered during a test, a message appears with an error code and a description of the problem. Write down the error code and problem
description exactly as it appears and follow the instructions on the screen. If you cannot resolve the problem, contact Dell (see Contacting Dell).
NOTE: When contacting Dell support, have your Service Tag ready. The Service Tag for your computer is located at the top of each test screen.
The following tabs provide additional information for tests run from the Custom Test or Symptom Tree option:
Tab
Function Results
Displays the results of the test and any error conditions encountered.
Errors
Displays error conditions encountered, error codes, and the problem description.
Help
Describes the test and any requirements for running the test.
Configuration Displays the hardware configuration for the selected device.
The Dell Diagnostics obtains configuration information for all devices from the BIOS, memory, and various internal tests, and displays the
information in the device list in the left pane of the screen.
NOTE: The device list may not display the names of all components installed on your computer or all devices attached to your computer.
Parameters
Allows you to customize the test, if applicable, by changing the test settings.
Solving Problems
Follow these tips when troubleshooting your computer:
l
If you added or removed a part before the problem started, review the installation procedures and ensure that the part is correctly installed.
l
If a peripheral device does not work, ensure that the device is properly connected.
l
If an error message appears on the screen, write down the exact message. This message may help support personnel diagnose and fix the problem(s).
l
If an error message occurs in a program, see the program's documentation.
NOTE: The procedures in this document were written for the Windows default view, so they may not apply if you set your Dell™ computer to the Windows Classic view.
Battery Problems
WARNING: There is a danger of a new battery exploding if it is incorrectly installed. Replace the battery only with the same or equivalent type
recommended by the manufacturer. Discard used batteries according to the manufacturer's instructions.
WARNING: Before working inside your computer, read the safety information that shipped with your computer. For additional safety best
practices information, see the Regulatory Compliance Homepage at www.dell.com/regulatory_compliance.
Replace the battery — If you have to repeatedly reset time and date information after turning on the computer, or if an incorrect time or date displays during
start-up, replace the battery (see Coin-Cell Battery). If the battery still does not work properly, contact Dell (see Contacting Dell).
Drive Problems
WARNING: Before working inside your computer, read the safety information that shipped with your computer. For additional safety best
practices information, see the Regulatory Compliance Homepage at www.dell.com/regulatory_compliance.
Ensure that Microsoft® Windows® Recognizes the drive —
Windows XP Embedded:
l
Right-click the Start button and then click Explore.
Windows XP:
l
Click Start and click My Computer.
Windows Vista®:
l
Click the Windows Vista Start button
and click Computer.
If the drive is not listed, perform a full scan with your antivirus software to check for and remove viruses. Viruses can sometimes prevent Windows from
recognizing the drive.
Check cable connections — Check the HDD cable connections (see Hard Drive Assembly (Optional)), and NVRAM module (see NVRAM Module) to ensure that
they are seated properly.
Clean the drive or disc — use commercially available disc cleaning materials to ensure the disc and optical drive are clean.
Run the Hardware Troubleshooter — See Hardware Troubleshooter.
Run the Dell Diagnostics — See Dell Diagnostics.
Optical drive problems (optional, external)
NOTE: High-speed optical drive vibration is normal and may cause noise, which does not indicate a defect in the drive or the media.
NOTE: Because of different regions worldwide and different disc formats, not all DVD titles work in all DVD drives.
Adjust the Windows volume control —
l
Click the speaker icon in the lower-right corner of your screen.
l
Ensure that the volume is turned up by clicking the slidebar and dragging it up.
l
Ensure that the sound is not muted by clicking any boxes that are checked.
Check the speakers — See Sound and Speaker Problems.
Problems writing to an optical drive
Close other programs — The optical drive must receive a steady stream of data during the writing process. If the stream is interrupted, an error occurs. Try closing all programs before you write to the optical drive.
Turn off standby mode in Windows before writing to a disc — Search for the keyword standby in Windows Help and Support for information on power
management modes.
Hard drive problems
Run Check Disk — Windows XP Extended:
1.
Log in to the system as a user with administrative privileges.
2.
Right-click the Start button, and click Explore.
3.
In the Folders list, right-click the disk you want to check (OS(C:), or OS(D:), or etc.) and click Properties.
4.
Click Tools® Check Now.
5.
Click Scan for and attempt recovery of bad sectors and click Start.
6.
If a disk problem is found, follow the screen instructions to fix the problem.
Windows XP:
1.
Click Start and click My Computer.
2.
Right-click Local Disk C:.
3.
Click Properties® Tools® Check Now.
4.
Click Scan for and attempt recovery of bad sectors and then click Start.
5.
If a disk problem is found, follow the screen instructions to fix the problem.
Windows Vista:
1.
Click Start
2.
Right-click Local Disk C:.
and click Computer.
3.
Click Properties® Tools® Check Now.
The User Account Control window may appear. If you are an administrator on the computer, click Continue; otherwise, contact your administrator to
continue the desired action.
4.
Follow the instructions on the screen.
E-Mail and Internet Problems
WARNING: Before working inside your computer, read the safety information that shipped with your computer. For additional safety best
practices information, see the Regulatory Compliance Homepage at www.dell.com/regulatory_compliance.
Check the Microsoft Outlook® Express security settings — If you cannot open your e-mail attachments:
1.
In Outlook Express, click Tools® Options® Security.
2.
Click Do not allow attachments to remove the checkmark, as needed.
Ensure that you are connected to the Internet — Ensure that you have subscribed to an Internet provider. With the Outlook Express e-mail program open,
click File. If Work Offline has a checkmark next to it, click the checkmark to remove it and connect to the Internet. For help, contact your Internet service
provider.
Error Messages
WARNING: Before working inside your computer, read the safety information that shipped with your computer. For additional safety best
practices information, see the Regulatory Compliance Homepage at www.dell.com/regulatory_compliance.
If the error message is not listed, see the documentation for the operating system or the program that was running when the message appeared.
A filename cannot contain any of the following characters: \ / : * ? " < > | — Do not use these characters in filenames.
A required .DLL file was not found — The program that you are trying to open is missing an essential file. To remove and then reinstall the program:
Windows XP and XP Embedded:
1.
Attempt to remove the program with the program's uninstall utility, if provided. If that is unsuccessful, continue with the following steps.
2.
Log in to the system as a user with administrative privileges.
3.
Attempt to remove the program with the program's uninstall utility. If that is unsuccessful, continue with the following steps.
4.
Click Start® Control Panel® Add or Remove Programs.
5.
Click the program you want to remove.
6.
Click Remove or Change/Remove.
7.
See the program documentation for installation instructions.
Windows Vista:
1.
Click Start
® Control Panel® Programs® Programs and Features.
2.
Select the program you want to remove.
3.
Click Uninstall.
4.
See the program documentation for installation instructions.
drive letter :\ is not accessible. The device is not ready — The drive cannot read the disk. Insert a disk into the drive and try again.
Insert bootable media — Insert a bootable floppy disk, CD, or DVD.
Non-system disk error — Remove the floppy disk from the floppy drive and restart your computer.
Not enough memory or resources. Close some programs and try again — Close all windows and open the program that you want to use. In some cases,
you may have to restart your computer to restore computer resources. If so, run the program that you want to use first.
Operating system not found — Contact Dell (see Contacting Dell).
Keyboard Problems
WARNING: Before working inside your computer, read the safety information that shipped with your computer. For additional safety best
practices information, see the Regulatory Compliance Homepage at www.dell.com/regulatory_compliance.
Check the keyboard cable — l
Ensure that the keyboard cable is firmly connected to the computer.
l
Shut down the computer, reconnect the keyboard cable, and then restart the computer.
l
Ensure that the cable is not damaged or frayed and check cable connectors for bent or broken pins. Straighten any bent pins.
l
Remove any keyboard extension cables and connect the keyboard directly to the computer.
Test the keyboard — Connect a properly working keyboard to the computer, then try using the keyboard.
Run the Hardware Troubleshooter — See Hardware Troubleshooter.
Lockups and Software Problems
WARNING: Before working inside your computer, read the safety information that shipped with your computer. For additional safety best
practices information, see the Regulatory Compliance Homepage at www.dell.com/regulatory_compliance.
The computer does not start up
Check the diagnostic lights — See Diagnostic Lights.
Ensure that the power cable is firmly connected to the computer and to the electrical outlet The computer stops responding
CAUTION: You may lose data if you are unable to perform an operating system shutdown.
Turn the computer off — If you are unable to get a response by pressing a key on your keyboard or moving your mouse, press and hold the power button for
at least 8 to 10 seconds (until the computer turns off), and then restart your computer.
A program stops responding
End the program — 1.
Press <Ctrl><Shift><Esc> simultaneously to access the Task Manager.
2.
Click the Applications tab.
3.
Click to select the program that is no longer responding.
4.
Click End Task.
A program crashes repeatedly
NOTE: Most software includes installation instructions in its documentation or on a floppy disk, CD, or DVD.
Check the software documentation — If necessary, uninstall and then reinstall the program.
A program is designed for an earlier Windows operating system
Run the Program Compatibility Wizard — Windows XP Embedded:
A Program Compatibility Wizard is not provided within Windows XP Embedded. It is available through an Internet connection to the Microsoft website. To use
this feature:
1.
Click Start® Control Panel® Help and Support.
2.
Under the Pick a task heading, click Find compatible hardware and software for Window XP.
3.
Follow the instructions on the screen.
Windows XP:
The Program Compatibility Wizard configures a program so that it runs in an environment similar to non-XP operating system environments.
1.
Click Start® All Programs® Accessories® Program Compatibility Wizard® Next.
2.
Follow the instructions on the screen.
Windows Vista:
The Program Compatibility Wizard configures a program so that it runs in an environment similar to non-Windows Vista operating system environments.
1.
Click Start
2.
In the welcome screen, click Next.
® Control Panel® Programs® Use an older program with this version of Windows.
3.
Follow the instructions on the screen.
A solid blue screen appears
Turn the computer off — If you are unable to get a response by pressing a key on your keyboard or moving your mouse, press and hold the power button for
at least 8 to 10 seconds (until the computer turns off), and then restart your computer.
Other software problems
Check the software documentation or contact the software manufacturer for troubleshooting information —
l
Ensure that the program is compatible with the operating system installed on your computer.
l
Ensure that your computer meets the minimum hardware requirements needed to run the software. See the software documentation for information.
l
Ensure that the program is installed and configured properly.
l
Verify that the device drivers do not conflict with the program.
l
If necessary, uninstall and then reinstall the program.
Back up your files immediately Use a virus-scanning program to check the hard drive, floppy disks, CDs, or DVDs Save and close any open files or programs and shut down your computer through the Start menu Memory Problems
WARNING: Before working inside your computer, read the safety information that shipped with your computer. For additional safety best
practices information, see the Regulatory Compliance Homepage at www.dell.com/regulatory_compliance.
If you receive an insufficient memory message — l
Save and close any open files and exit any open programs you are not using to see if that resolves the problem.
l
See the software documentation for minimum memory requirements. If necessary, install additional memory (see Memory).
l
Reseat the memory modules (see Memory) to ensure that your computer is successfully communicating with the memory.
l
Run the Dell Diagnostics (see Dell Diagnostics).
If you experience other memory problems — l
Reseat the memory modules (see Memory) to ensure that your computer is successfully communicating with the memory.
l
Ensure that you are following the memory installation guidelines (see Memory).
l
Ensure that the memory you are using is supported by your computer. For more information about the type of memory supported by your computer,
see Memory.
l
Run the Dell Diagnostics (see Dell Diagnostics).
Mouse Problems
WARNING: Before working inside your computer, read the safety information that shipped with your computer. For additional safety best
practices information, see the Regulatory Compliance Homepage at www.dell.com/regulatory_compliance.
Check the mouse cable — l
Ensure that the cable is not damaged or frayed and check cable connectors for bent or broken pins. Straighten any bent pins.
l
Remove any mouse extension cables, and connect the mouse directly to the computer.
l
Verify that the mouse cable connector is seated properly.
Restart the computer — 1.
Simultaneously press <Ctrl><Esc> to display the Start menu.
2.
Press <u>, press the up- and down-arrow keys to highlight Shut down or Turn Off, and then press <Enter>.
3.
After the computer turns off, reconnect the mouse cable.
4.
Turn on the computer.
Test the mouse — Connect a properly working mouse to the computer, then try using the mouse.
Check the mouse settings — Windows XP and Windows XP Embedded:
1.
Click Start® Control Panel.
2.
If the Control Panel window appears in Category View (Pick a category), switch to Classic View (icon view).
3.
Click Mouse.
4.
Adjust the settings as needed.
Windows Vista:
1.
Click Start
2.
Adjust the settings as needed.
® Control Panel® Hardware and Sound® Mouse.
Reinstall the mouse driver — See Reinstalling Drivers and Utilities.
Run the Hardware Troubleshooter — See Hardware Troubleshooter.
Network Problems
WARNING: Before working inside your computer, read the safety information that shipped with your computer. For additional safety best
practices information, see the Regulatory Compliance Homepage at www.dell.com/regulatory_compliance.
Check the network activity indicator on the front of the computer — If the activity indicator is off, the network is not active. Check the network cable
connection on the back of the computer to ensure the connector is seated properly.
Check the network cable connector — Ensure that the network cable is firmly inserted into the network connector on the back of the computer and the
network jack.
Check the network lights on the back of the computer — If the Activity LED flashes yellow with network activity, and the Link LED is:
l
Green – indicates a 10 Mbps connection
l
Orange – indicates a 100 Mbps connection
l
Yellow – indicates a 1000 Mbps connection
If either the Activity LED or Link LED is off, no network communication is occurring. Replace the network cable. Restart the computer and log on to the network
again.
Check your network settings — Contact your network administrator or the person who set up your network to verify that your network settings are correct
and that the network is functioning.
Run the Hardware Troubleshooter — See Hardware Troubleshooter.
Power Problems
WARNING: Before working inside your computer, read the safety information that shipped with your computer. For additional safety best
practices information, see the Regulatory Compliance Homepage at www.dell.com/regulatory_compliance.
If the power light is blue and the computer is not responding — See Diagnostic Lights.
If the power light is blinking blue — The computer is in standby mode. Press a key on the keyboard, move the mouse, or press the power button to resume
normal operation.
If the power light is off — The computer is either turned off or is not receiving power.
l
Reseat the power cable in the power connector on the back of the computer and the electrical outlet.
l
Bypass power strips, power extension cables, and other power protection devices to verify that the computer turns on properly.
l
Ensure that any power strips being used are plugged into an electrical outlet and are turned on.
l
Ensure that the electrical outlet is working by testing it with another device, such as a lamp.
l
Ensure that the 12V power cable and front panel cable are securely connected to the system board (see System Board Connectors).
If the power light is steady amber — A device may be malfunctioning or incorrectly installed.
l
Remove and then reinstall all memory modules (see Memory).
l
Remove and then reinstall the NVRAM module, if installed (see NVRAM Module).
l
Remove and then reinstall the wireless card, if installed (see Wireless Card).
Eliminate interference — Some possible causes of interference are:
l
Power, keyboard, and mouse extension cables
l
Too many devices connected to the same power strip
l
Multiple power strips connected to the same electrical outlet
Printer Problems
WARNING: Before working inside your computer, read the safety information that shipped with your computer. For additional safety best
practices information, see the Regulatory Compliance Homepage at www.dell.com/regulatory_compliance.
NOTE: If you need technical assistance for your printer, contact the printer's manufacturer.
Check the printer documentation — See the printer documentation for setup and troubleshooting information.
Ensure that the printer is turned on Check the printer cable connections — l
See the printer documentation for cable connection information.
l
Ensure that the printer cables are securely connected to the printer and the computer.
Test the electrical outlet — Ensure that the electrical outlet is working by testing it with another device, such as a lamp.
Verify that the printer is recognized by Windows —
Windows XP and Windows XP Embedded:
1.
Click Start® Control Panel
2.
If the Control Panel window appears in Category View (Pick a category), switch to Classic View (icon view).
3.
Double-click Printers and Faxes.
4.
If the printer is listed, right-click the printer icon.
5.
Click Properties® Ports. For a USB printer connected directly to your computer, ensure that the Print to the following port(s): setting is USB.
Windows Vista:
1.
Click Start
® Control Panel® Hardware and Sound® Printer.
2.
If the printer is listed, right-click the printer icon.
3.
Click Properties® Ports.
4.
Adjust the settings, as needed.
Reinstall the printer driver — See the printer documentation for information on reinstalling the printer driver.
Scanner Problems
WARNING: Before working inside your computer, read the safety information that shipped with your computer. For additional safety best
practices information, see the Regulatory Compliance Homepage at www.dell.com/regulatory_compliance.
NOTE: If you need technical assistance for your scanner, contact the scanner's manufacturer.
Check the scanner documentation — See the scanner documentation for setup and troubleshooting information.
Unlock the scanner — Ensure that your scanner is unlocked (if the scanner has a locking tab or button).
Restart the computer and try the scanner again Check the cable connections — l
See the scanner documentation for information on cable connections.
l
Ensure that the scanner cables are securely connected to the scanner and the computer.
Verify that the scanner is recognized by Microsoft Windows — Windows XP Embedded:
1.
Click Start® Control Panel.
2.
If the Control Panel window appears in Category View (Pick a category), switch to Classic View (icon view).
3.
Double-click System® Hardware® Device Manger.
4.
If your scanner is listed in any category, Windows recognizes the scanner.
Windows XP:
1.
Click Start® Control Panel® Scanners and Cameras.
2.
If your scanner is listed, Windows recognizes the scanner.
Windows Vista:
1.
Click Start
2.
If the scanner is listed, Windows recognizes the scanner.
® Control Panel® Hardware and Sound® Scanners and Cameras.
Reinstall the scanner driver — See the scanner documentation for instructions.
Sound and Speaker Problems
WARNING: Before working inside your computer, read the safety information that shipped with your computer. For additional safety best
practices information, see the Regulatory Compliance Homepage at www.dell.com/regulatory_compliance.
No sound from speakers
NOTE: The volume control in MP3 and other media players may override the Windows volume setting. Always check to ensure that the volume on the
media player(s) has not been turned down or off.
Check the speaker cable connections — Ensure that the speakers are connected as shown on the setup diagram supplied with the speakers.
Ensure that the speakers are turned on — See the setup diagram supplied with the speakers. If your speakers have volume controls, adjust the volume,
bass, or treble to eliminate distortion.
Adjust the Windows volume control — Click or double-click the speaker icon in the lower-right corner of your screen. Ensure that the volume is turned up and
that the sound is not muted.
Disconnect headphones from the headphone connector — Sound from the speakers is automatically disabled when headphones are connected to the
computer's front-panel headphone connector.
Test the electrical outlet — Ensure that the electrical outlet is working by testing it with another device, such as a lamp.
Eliminate possible interference — Turn off nearby fans, fluorescent lights, or halogen lamps to check for interference.
Run the speaker diagnostics Reinstall the sound driver — See Drivers.
Run the Hardware Troubleshooter — See Hardware Troubleshooter.
No sound from headphones
Check the headphone cable connection — Ensure that the headphone cable is securely inserted into the headphone connector.
Adjust the Windows volume control — Click or double-click the speaker icon in the lower-right corner of your screen. Ensure that the volume is turned up and
that the sound is not muted.
Mouse Problems
Check the mouse settings —
1.
Click Start® Control Panel® Printers and Other Hardware® Mouse.
2.
Try adjusting the settings.
Check the mouse cable — Shut down the computer. Disconnect the mouse cable, check it for damage, and firmly reconnect the cable.
If you are using a mouse extension cable, disconnect it and connect the mouse directly to the computer.
Check the BIOS Setup Utility program settings — Verify that the BIOS Setup Utility lists the correct device for the pointing device option. (The computer
automatically recognizes a USB mouse without making any setting adjustments.) See the BIOS Setup Utility Screens.
Test the mouse controller — To test the mouse controller (which affects pointer movement) and the operation of the mouse buttons, run the Mouse test in
the Pointing Devices test group in the Dell Diagnostics (see Dell Diagnostics).
Reinstall the mouse driver — See Reinstalling Drivers and Utilities.
Video and Monitor Problems
WARNING: Before working inside your computer, read the safety information that shipped with your computer. For additional safety best
practices information, see the Regulatory Compliance Homepage at www.dell.com/regulatory_compliance.
The screen is blank
NOTE: For troubleshooting procedures, see the monitor's documentation.
The screen is difficult to read
Check the monitor cable connection — l
Ensure that the monitor cable connector is properly attached to the video connector.
l
Remove any video extension cables and connect the monitor directly to the computer.
l
Swap the computer and monitor power cables to determine if the monitor's power cable is defective.
l
Check the connectors for bent or broken pins (it is normal for monitor cable connectors to have missing pins).
Check the monitor power light —
l
If the power light is lit or blinking, the monitor has power.
l
If the power light is off, firmly press the button to ensure that the monitor is turned on.
l
If the power light is blinking, press a key on the keyboard or move the mouse to resume normal operation.
Test the electrical outlet — Ensure that the electrical outlet is working by testing it with another device, such as a lamp.
Check the diagnostic lights — See Diagnostic Lights.
Check the monitor settings — See the monitor documentation for instructions on adjusting the contrast and brightness, demagnetizing (degaussing) the
monitor, and running the monitor self-test.
Move the monitor away from external power sources — Fans, fluorescent lights, halogen lamps, and other electrical devices can cause the screen image to
appear shaky. Turn off nearby devices to check for interference.
Rotate the monitor to eliminate sunlight glare and possible interference Adjust the Windows display settings — Windows XP and Windows XP Embedded:
1.
Right-click anywhere on the system desktop (not on an icon or within any window), and click Properties.
2.
Click the Settings tab.
3.
Try different settings for Screen resolution and Color quality.
Windows Vista:
1.
Click Start
® Control Panel® Hardware and Sound® Personalization® Display Settings.
2.
Adjust Resolution and Colors settings, as needed.
Dell Technical Update Service
The Dell Technical Update service provides proactive e-mail notification of software and hardware updates for your computer. The service is free and can be
customized for content, format, and how frequently you receive notifications.
To enroll for the Dell Technical Update service, go to support.dell.com/technicalupdate.
Back to Contents Page
Back to Contents Page
Selective USB
Dell™ OptiPlex™ FX160/160 Service Manual Overview
Enabling Selective USB
Overview
Selective USB allows administrators to restrict two USB ports to support only a keyboard and a mouse and disable all other USB ports.
When using a selective USB port, you must connect the keyboard and mouse to the specific USB ports before booting the computer. A keyboard (without a
USB hub) is required for the system to boot. When Selective USB is enabled and either the keyboard or mouse is removed the Selective USB feature
automatically disables the designated ports.
1 Port 1 – mouse selective USB
port
2 Port 0 – keyboard selective USB
port
Enabling Selective USB
1.
Turn off the computer.
2.
Connect authorized USB devices in the selective USB ports.
3.
Turn on the computer and press <F2> to enter the BIOS Setup Utility (see Entering the BIOS Setup Utility).
4.
Use the Onboard Devices screen to enable Selective USB.
When enabled, the two selective USB ports will function with authorized USB devices only. All other USB ports will be disabled.
NOTE: If a mouse is not attached to USB port 1, the port is disabled.
5.
Save the settings and reboot the computer.
During POST, the BIOS will check whether authorized USB devices are connected to the selective USB ports. If the devices are connected, the computer
boots as normal. If devices are not connected, the computer prompts you to connect the authorized USB devices and reboot the system.
NOTE: If you disconnect a device from the selective USB port, the port becomes disabled. To re-enable the port, connect the device, power off, and
reboot the system.
Back to Contents Page
Back to Contents Page
Wireless Card
Dell™ OptiPlex™ FX160/160 Service Manual Removing the Wireless Card
Replacing the Wireless Card
Removing the Wireless Card
1.
Perform the procedure in Before Working on Your Computer.
2.
Remove the hard drive bracket assembly, if installed (Removing the Hard Drive Bracket Assembly).
3.
Pull back the metal tab until the wireless card pops up at a 45-degree angle.
1
wireless card
2
metal tab
4.
Pull the wireless card out of the system board connector.
5.
Disconnect the antenna cables from the wireless card.
Replacing the Wireless Card
1.
1
Connect the white antenna cable to the connector marked with the white triangle, and connect the black antenna cable to the connector labeled with a
black triangle.
2.
Insert the wireless card into the WLAN connector on the system board at a 45-degree angle.
3.
Press the card downward until the metal clip snaps into place.
antenna wires
2
tab and metal mesh sleeve
4.
Route the antenna cable to ensure that the metal mesh sleeve on the cable is secured by the tab on the back panel.
5.
Replace the hard drive bracket assembly if it was removed (see Replacing the Hard Drive Bracket Assembly).
6.
Perform the procedure in After Working on Your Computer.
Back to Contents Page