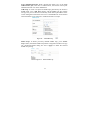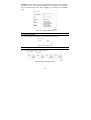
1
D-Link™ DGS-1248T WebSmart 48-Port 10/100/1000Mbps + 4 Combo SFP(Mini GBIC) Gigabit Switch Manual Second Edition Building Networks for People RECYCLABLE Information in this document is subject to change without notice. © 2004 D-Link Computer Corporation. All rights reserved. i Reproduction in any manner whatsoever without the written permission of D-Link Computer Corporation is strictly forbidden. Trademarks used in this text: D-Link and the D-LINK logo are trademarks of D-Link Computer Corporation; Microsoft and Windows are registered trademarks of Microsoft Corporation. Other trademarks and trade names may be used in this document to refer to either the entities claiming the marks and names or their products. D-Link Computer Corporation disclaims any proprietary interest in trademarks and trade names other than its own. FCC Warning This equipment has been tested and found to comply with the limits for a Class A digital device, pursuant to Part 15 of the FCC Rules. These limits are designed to provide reasonable protection against harmful interference when the equipment is operated in a commercial environment. This equipment generates, uses, and can radiate radio frequency energy and, if not installed and used in accordance with this user’s guide, may cause harmful interference to radio communications. Operation of this equipment in a residential area is likely to cause harmful interference in which case the user will be required to correct the interference at his own expense. CE Mark Warning This is a Class A product. In a domestic environment, this product may cause radio interference in which case the user may be required to take adequate measures. Warnung! ii Dies ist ein Produkt der Klasse A. Im Wohnbereich kann dieses Produkt Funkstoerungen verursachen. In diesem Fall kann vom Benutzer verlangt werden, angemessene Massnahmen zu ergreifen. Precaución! Este es un producto de Clase A. En un entorno doméstico, puede causar interferencias de radio, en cuyo case, puede requerirse al usuario para que adopte las medidas adecuadas. Attention! Ceci est un produit de classe A. Dans un environnement domestique, ce produit pourrait causer des interférences radio, auquel cas l`utilisateur devrait prendre les mesures adéquates. Attenzione! Il presente prodotto appartiene alla classe A. Se utilizzato in ambiente domestico il prodotto può causare interferenze radio, nel cui caso è possibile che l`utente debba assumere provvedimenti adeguati. VCCI Warning iii TABLE OF CONTENT About This Manual ......................................................................................... 1 Purpose ....................................................................................................... 1 Terms/Usage ............................................................................................... 1 Introduction..................................................................................................... 2 Gigabit Ethernet Technology ...................................................................... 2 Fast Ethernet Technology ........................................................................... 3 Switching Technology ................................................................................ 3 VLAN (Virtual Local Area Network)......................................................... 4 Features....................................................................................................... 4 Unpacking and Installation ............................................................................. 6 Unpacking................................................................................................... 6 Installation .................................................................................................. 6 Rack Mounting ........................................................................................... 7 Connecting Network Cable......................................................................... 8 AC Power.................................................................................................... 8 Identifying External Components ................................................................... 9 Front Panel.................................................................................................. 9 LED Indicator ............................................................................................. 9 Reset ........................................................................................................... 9 Rear Panel ................................................................................................. 10 Understanding LED Indicators ..................................................................... 11 Power and System LEDs .......................................................................... 11 Ports 1~48 Status LEDs ............................................................................ 11 mini-GBIC Port 45F ~ 48F LEDs............................................................. 12 Configuration ................................................................................................ 13 Installing the Web Management Utility.................................................... 13 Discovery List........................................................................................... 14 Monitor List .............................................................................................. 14 iv Device Setting........................................................................................... 16 Toolbar...................................................................................................... 17 Configuring the Switch ............................................................................. 18 Login......................................................................................................... 18 Setup Menu ............................................................................................... 20 Configuring Setup Setting......................................................................... 20 Port Settings.......................................................................................... 21 VLAN Settings (Virtual Local Area Network) ..................................... 22 Trunk Setting ........................................................................................ 24 Mirror Setting........................................................................................ 25 Spanning Tree Setting........................................................................... 26 SNMP Setting ....................................................................................... 28 Jumbo Frame Setting ............................................................................ 32 QoS Setting ........................................................................................... 32 Device Status ........................................................................................ 33 Statistics ................................................................................................ 34 System Setting ...................................................................................... 36 Trap Setting........................................................................................... 37 Password Setting................................................................................... 38 Backup Setting ...................................................................................... 38 Reset Setting ......................................................................................... 39 Logout....................................................................................................... 39 Technical Specifications ............................................................................... 40 Warranty and Registration Information Warranty and Registration Information (USA Only) v ABOUT THIS MANUAL Congratulations on your purchase of the DGS-1248T Web Smart 48-Port 10/100/1000Mbps Gigabit Switch. This device integrates 1000Mbps Gigabit Ethernet, 100Mbps Fast Ethernet, and 10Mbps Ethernet network capabilities in a highly flexible package. Purpose This manual discusses how to install your 48-Port 10/100/1000Mbps Gigabit Web Smart Switch. Terms/Usage In this manual, the term “Switch” (first letter upper case) refers to your Web Smart Switch, and “switch” (first letter lower case) refers to other Ethernet switches. 1 INTRODUCTION This chapter describes the features of the DGS-1248T Web Smart 48-Port 10/100/1000Mbps Gigabit Switch and some background information about Ethernet/Fast Ethernet/Gigabit Ethernet switching technology. Gigabit Ethernet Technology Gigabit Ethernet is an extension of IEEE 802.3 Ethernet utilizing the same packet structure, format, and support for CSMA/CD protocol, full-duplex, flow control, and management objects, but with a tenfold increase in theoretical throughput over 100-Mbps Fast Ethernet and a hundredfold increase over 10-Mbps Ethernet. Since it is compatible with all 10-Mbps and 100-Mbps Ethernet environments, Gigabit Ethernet provides a straightforward upgrade without wasting a company’s existing investment in hardware, software, and trained personnel. The increased speed and extra bandwidth offered by Gigabit Ethernet are essential to coping with the network bottlenecks that frequently develop as computers and their busses get faster and more users use applications that generate more traffic. Upgrading key components, such as your backbone and servers to Gigabit Ethernet can greatly improve network response times as well as significantly speed up the traffic between your subnets. Gigabit Ethernet enables fast optical fiber connections to support video conferencing, complex imaging, and similar data-intensive applications. Likewise, since data transfers occur 10 times faster than Fast Ethernet, servers outfitted with Gigabit Ethernet NIC’s are able to perform 10 times the number of operations in the same amount of time. In addition, the phenomenal bandwidth delivered by Gigabit Ethernet is the most cost-effective method to take advantage of today and tomorrow’s rapidly improving switching and routing internetworking technologies. And with expected advances in the coming years in silicon technology and digital signal processing that will enable Gigabit Ethernet to eventually operate over unshielded twisted-pair (UTP) cabling, outfitting your network with a powerful 1000-Mbps-capable backbone/server connection creates a flexible foundation for the next generation of network technology products. 2 Fast Ethernet Technology The growing importance of LANs and the increasing complexity of desktop computing applications are fueling the need for high performance networks. A number of high-speed LAN technologies have been proposed to provide greater bandwidth and improve client/server response times. Among them, 100BASE-T (Fast Ethernet) provides a non-disruptive, smooth evolution from the current 10BASE-T technology. The non-disruptive and smooth evolution nature, and the dominating potential market base, virtually guarantees cost-effective and high performance Fast Ethernet solutions. 100Mbps Fast Ethernet is a standard specified by the IEEE 802.3 LAN committee. It is an extension of the 10Mbps Ethernet standard with the ability to transmit and receive data at 100Mbps, while maintaining the CSMA/CD Ethernet protocol. Since the 100Mbps Fast Ethernet is compatible with all other 10Mbps Ethernet environments, it provides a straightforward upgrade and takes advantage of the existing investment in hardware, software, and personnel training. Switching Technology Another approach to pushing beyond the limits of Ethernet technology is the development of switching technology. A switch bridges Ethernet packets at the MAC address level of the Ethernet protocol transmitting among connected Ethernet or Fast Ethernet LAN segments. Switching is a cost-effective way of increasing the total network capacity available to users on a local area network. A switch increases capacity and decreases network loading by dividing a local area network into different segments, which do not compete with each other for network transmission capacity. The switch acts as a high-speed selective bridge between the individual segments. The switch, without interfering with any other segments, automatically forwards traffic that needs to go from one segment to another. By doing this the total network capacity is multiplied, while still maintaining the same network cabling and adapter cards. 3 Switching LAN technology is a marked improvement over the previous generation of network bridges, which were characterized by higher latencies. Routers have also been used to segment local area networks, but the cost of a router, the setup, and maintenance required make routers relatively impractical. Today switches are an ideal solution to most kinds of local area network congestion problems. VLAN (Virtual Local Area Network) A VLAN is a group of end-stations that are not constrained by their physical location and can communicate as if a common broadcast domain, a LAN. The primary utility of using VLAN is to reduce latency and need for routers, using faster switching instead. Other VLAN utility includes: Security: Security is increased with the reduction of opportunity in eavesdropping on a broadcast network because data will be switched to only those confidential users within the VLAN. Cost Reduction: VLANs can be used to create multiple broadcast domains, thus eliminating the need of expensive routers. Features 48×10/100/1000Mbps Auto-negotiation Gigabit Ethernet ports 4 x 1000Mbps SFP(Mini GBIC) (Auto-Sense) for optional SFP(Mini GBIC) transceiver to extend distance, share with 4 1000BASE-T ports All RJ-45 ports support auto MDI/MDIX, so there is no need to use cross-over cables or an up-link port Half-duplex transfer mode for connection speed 10Mbps and 100Mbps Full-duplex transfer mode for connection speed of 10Mbps, 100Mbps, and 1000Mbsps Wire speed reception and transmission Store-and-Forward switching scheme capability to support rate adaptation and ensure data integrity Up to 16K unicast addresses entities per device, self-learning, and table aging 1632KBytes packet buffer 4 Supports IEEE 802.3x flow control for full-duplex mode ports Supports 802.1Q VLAN Supports IEEE 802.1p QoS Supports Trunk Supports Port-mirroring Support Jumbo-frame setting Supports IEEE 802.1D Spanning Tree protocol Support Simple Network Management Protocol (SNMP) Supports MIB for: RFC1213 MIB II. Private MIB. Supports Port-setting for Speed/Disable, Flow control Easy configuration via Web Browser Easy setting via Web Management Utility Standard 19” Rack-mount size 5 UNPACKING AND INSTALLATION This chapter provides unpacking and installation information for the Switch. Unpacking Open the shipping cartons of the Switch and carefully unpacks its contents. The carton should contain the following items: One DGS-1248T Web Smart 48-Port 10/100/1000Mbps Gigabit Switch One AC power cord, suitable for your area’s electrical power connections Four rubber feet to be used for shock cushioning Screws and two mounting brackets CD-ROM with Web Management Utility and Manual If any item is found missing or damaged, please contact your local reseller for replacement. Installation The site where you install the hub stack may greatly affect its performance. When installing, consider the following pointers: Install the Switch in a fairly cool and dry place. See Technical Specifications for the acceptable temperature and humidity operating ranges. Install the Switch in a site free from strong electromagnetic field generators (such as motors), vibration, dust, and direct exposure to sunlight. Leave at least 10cm of space at the front and rear of the hub for ventilation. Install the Switch on a sturdy, level surface that can support its weight, or in an EIA standard-size equipment rack. For information on rack installation, see the next section, Rack Mounting. 6 When installing the Switch on a level surface, attach the rubber feet to the bottom of each device. The rubber feet cushion the hub and protect the hub case from scratching. Figure 1. Attach the adhesive rubber pads to the bottom Rack Mounting The Switch can be mounted in an EIA standard-size, 19-inch rack, which can be placed in a wiring closet with other equipment. Attach the mounting brackets at the Switch’s front panel (one on each side), and secure them with the provided screws. Figure 2. Combine the Switch with the provided screws Then, use screws provided with the equipment rack to mount each Switch in the rack. Figure 3. Mount the Switch in the rack 7 Connecting Network Cable The Switch supports 1000Mbps Gigabit Ethernet that runs in Auto-negotiation mode and 10Mbps Ethernet or 100Mbps Fast Ethernet that runs both in half- and full-duplex mode and 1000Mbps Gigabit Ethernet runs in full-duplex mode using four pair of Category 5 Cable. These RJ-45 ports are Auto-MDI type port. The Switch can auto transform to MDI-II or MDI-X type, so you can just make an easy connection that without worrying if you are using a standard or crossover RJ45 cable. There are 4 additional SFP/mini-GBIC slots for optional SFP/mini-GBIC modules. AC Power The Switch uses the AC power supply 100-240V AC, 50-60 Hz. The power switch is located at the rear of the unit adjacent to the AC power connector and the system fan. The Switch’s power supply will adjust to the local power source automatically and may be turned on without having any or all LAN segment cables connected. 8 IDENTIFYING EXTERNAL COMPONENTS This chapter describes the front panel, rear panel, and LED indicators of the Switch. Front Panel The figure below shows the front panels of the Switch. 10/100/1000 Base-T Twisted-Pair Ports w/ LED Indicators ┌─────────────────────────────┐ └──┘ SFP(Mini GBIC) Ports Figure 4. Front panel of 48-Port Gigabit Ethernet Switch LED Indicator Comprehensive LED indicators display the status of the Switch and the network (see the LED Indicators chapter below). 1000BASE-T Twisted Pair Ports (Port 1~48) The DGS-1248T is equipped with fourty-eight Gigabit twisted pair ports that are auto negotiable 10/100/1000Mbps and also support auto MDI/MDIX crossover detection. These ports can operate in half- and full-duplex modes. SFP(Mini GBIC) Ports (Option Port 45~48) The Switch is equipped with Four SFP(Mini GBIC) ports, supporting optional 1000BASE-X SFP(Mini GBIC) transceivers. Note: When the port is set to “Forced Mode”, Auto MDI/MDIX will be disabled. Reset The Reset button is used to reset all settings back to the factory defaults. Note: Be sure that you record the settings of your device, or else all settings will be erased when pressing the “Reset” button. 9 Rear Panel Figure 5. Rear panel of the Switch AC Power Connector: This is a three-pronged connector that supports the power cord. Plug in the female connector of the provided power cord into this connector, and the male into a power outlet. Supported input voltages range from 100-240V AC at 50-60Hz. 10 UNDERSTANDING LED INDICATORS The front panel LEDs provides instant status feedback, and helps monitor and troubleshoot when needed. Figure 6. LED indicators of the Switch Power and System LEDs POWER: System Power Indicator On : When the Power LED lights on, the Switch is receiving power. Off : When the Power turns off or the power cord has an improper connection. CPU: Management Indicator Blinking : When the CPU is working, the CPU LED is blinking. On/Off : The CPU is not working. Ports 1~48 Status LEDs Link/ACT: Link/Activity On : When the Link/ACT LED lights on, the respective port is successfully connected to an Ethernet network. Blinking : When the Link/ACT LED is blinking, the port is transmitting or receiving data on the Ethernet network. Off : There is no link. 11 Speed: Green : When the Speed LED lights green, the respective port is connected to a 1000Mbps Gigabit Ethernet network. Amber : When the Speed LED lights amber, the respective port is connected to a 100Mbps Fast Ethernet network. Off : When the Speed LED lights off, the respective port is connected to a 10Mbps Fast Ethernet network. mini-GBIC Port 45F ~ 48F LEDs Link/ACT: On : Blinking Off When the mini-GBIC module is installed and connected to a network, the Link LED lights on. When the LED is blinking, the port is transmitting or receiving data on the network. : No mini-GBIC module is installed or connected to a network. 12 CONFIGURATION Through the Web Browser you can configure the Switch functions such as VLAN, Trunking, QoS… etc. With the attached Web Management Utility, you can easily discover all Web Managed Switches, assign the IP Address, change the password, and upgrade with new firmware. Installing the Web Management Utility The following provides instructions guiding you through the installations of the Web Management utility. 1. Insert the Utility CD in the CD-ROM Drive. 2. From the Start menu on the Windows desktop, choose Run. 3. In the Run dialog box, type D:\Web Management Utility\setup.exe (D:\ depends where your CD-ROM drive is located) and click OK. 4. Follow the on-screen instructions to install the utility. 5. Upon completion, go to Program Files -> web_management_utility and execute the Web Management utility. (Figure 7.) Figure 7. Web Management Utility The Web Management Utility was divided into four parts, Discovery List, Monitor List, Device Setting, and Toolbar function, for detailed instructions, follow the section below. 13 Discovery List This is the list where you can discover all the Web managed devices in the entire network. By pressing the “Discovery” button, you can list all the Web Managed devices in the discovery list. Double click or press the “Add to monitor list” button to select a device from the Discovery List to the Monitor List. System word definitions in the Discovery List: z z z z z z z z z MAC Address: Shows the device MAC Address. IP Address: Shows the current IP address of the device. Protocol version: Shows the version of the Utility protocol. Product Name: Shows the device product name. System Name: Shows the appointed device system name. Location: Shows where the device is located. Trap IP: Shows the IP where the Trap is to be sent. Subnet Mask: Shows the Subnet Mask set of the device. Gateway: Shows the Gateway set of the device. Monitor List All the Web Smart Devices in the Monitor List can be monitored; you can also receive traps and show the status of the device. System word definitions in the Monitor List: z z z z z z S: Shows the system symbol of the WebSmart represents a device that is not alive. IP Address: Shows the current IP address of the device. MAC Address: Shows the device MAC Address. Protocol version: Shows the version of the Utility protocol. Product Name: Shows the device product name. System Name: Shows the appointed device system name. 14 device, z Location: Shows where the device is located. z Trap IP: Shows the IP where the Trap is to be sent. z Subnet Mask: Shows the Subnet Mask set of the device. z Gateway: Shows the Gateway set of the device. View Trap: The Trap function can receive the events that occur on the Switch in the Monitor List. There is a light indicator behind the “View Trap” button. When the light is green, it means that there is no trap transmitted, and when it is red, it means that there is new trap transmitted, reminding us to view the trap. (Figure 8) Figure 8. When the “View Trap” button is clicked, a Trap Information window will pop up. It will display the trap information including the Symbol, Time, Device IP, and the Event occurred. (Figure 9) The symbol “ ” represents the trap signal; this symbol will disappear after you review and click on the event record. Figure 9. Note: In order to receive Trap information, the Switch has to be configured with Trap IP and Trap Events in the Web browser, which are available in the Trap Setting Menu (see Page 45 for details). Add Item: To add a device to the Monitor List manually, enter the IP Address of the device that you want to monitor. Delete Item: To delete the device in the Monitor List. 15 Device Setting You can set the device by using the function key in the Device Setting Dialog box. Configuration Setting: In this Configuration Setting, you can set the IP Address, Subnet Mask, Gateway, Set Trap to (Trap IP Address), System name, and Location. Select the device in the Discovery list or Monitor List and press this button, then the Configuration Setting window will pop up (Figure 10). After filling in the data that you want to change, you must fill in the password and press the “Set” button to process the data change immediately. The default password of this 48-Port 10/100/1000Mbps Gigabit Ethernet Web Smart Switch configuration is “admin.” Figure 10. Configuration Setting Password Change: You can use this when you need to change the password. Fill in the required passwords in the dialog boxes and press the “Set” button to process the password change immediately. Figure 11. Password Change 16 Firmware Upgrade: When the device has a new function, there will be a new firmware to update the device; use this function to upgrade the firmware Figure 12. Web Access: Double click the device in the Monitor List or select a device in the Monitor List and press the “Web Access” button to access the device in Web browser. Toolbar The toolbar in the Web Management Utility has four main tabs: File, View, Options, and Help. In the “File TAB”, there is Monitor Save, Monitor Save As, Monitor Load, and Exit. Monitor Save: To record the settings of the Monitor List to the default settings so that when you open the Web Management Utility the next time, it will automatically load the default recorded setting. z Monitor Save As: To record the setting of the Monitor List to an appointed filename and file path. z Monitor Load: To manually load the setting file of the Monitor List. z Exit: To exit the Web Management Utility. In the “View TAB”, there are the view log and clear log functions: the view log function will help you display trap settings. z View Log: To display the event of the Web Management Utility and the device. z Clear Log: To clear the log. 17 In the “Option TAB”, there is the Refresh Time function. This function helps you to refresh the time for monitoring the device. Choose 15 secs, 30 secs, 1 min, 2 min, and 5 min to select the time for monitoring. In the “Help TAB”, there is About function, it will show out the version of the Web Management Utility. Configuring the Switch The Web Smart 48-Port 10/100/1000Mbps Gigabit Switch has a Web GUI interface for smart switch configuration. The Switch can be configured through the Web Browser. A network administrator can manage, control, and monitor the Switch from the local LAN. This section indicates how to configure the Switch to enable its smart functions including: Port Setting (Speed/Disable and Flow Control) Virtual LAN Group setting (VLAN) Trunk Port Mirroring QoS SNMP Jumbo Frame System Setting Device status and Statistics Login Before you configure this device, note that when the Web Smart Switch is configured through an Ethernet connection, make sure the manager PC is set on same the IP network. For example, when the default network address of the default IP address of the Web Smart Switch is 192.168.0.1, then the manager PC should be set at 192.168.0.x (where x is a number between 2 and 254), and the default subnet mask is 255.255.255.0. Open Internet Explorer 5.0 or above Web browser. Enter the IP address http://192.168.0.1 (the factory-default IP address setting) into the address location. Figure 13. 18 Or through the Web Management Utility, you do not need to remember the IP Address. Select the device shown in the Monitor List of the Web Management Utility to settle the device on the Web Browser. When the following dialog page appears, enter the default password "admin" and press Login to enter the main configuration window. Figure 14. After entering the password, the main page appears, and the screen will display the device status. Figure 15. Device Status 19 Setup Menu When the main page appears, find the Setup menu in the left side of the screen (Figure 16). Click on the setup item that you want to configure. There are fifteen options: Port Settings, VLAN Settings, Trunk Setting, Mirror Setting, QoS Setting, Spanning Tree Setting, SNMP Setting, Jumbo Frame Setting, Device Status, Statistic, System Settings, Trap Setting, Password Setting, Backup Setting and Reset Setting as shown in the Main Menu screen. Figure 16. Setup menu Configuring Setup Setting Find that there are eight items, including Port Settings, VLAN Settings, Trunk Settings, Mirror Settings, QoS Setting, Spanning Tree Setting, SNMP Setting and Jumbo Frame Setting in Setup menu. 20 Port Settings In the Port Settings menu (Figure 17), this page will display each port’s status. Press the ID parameter to set each port’s Speed, Flow Control, Default priority, and Link Status. When you need to renew the posted information, press the “Refresh” button. The Link Status in the screen will display the connection speed and duplex mode; otherwise this dialog box will display down when the port is disconnected. Figure 17. Port Setting Note 1: Be sure to reset the Gigabit port when transferring the media type (Fiber to Copper or Copper to Fiber). Note 2: The priority of Gigabit Fiber port is higher than Copper. 21 To change the port setting, click on the ID parameter to enter the selected port to configure its Speed/Disable and Flow control. Figure 18. Port Setting Speed/Disable: This setting has six modes—100M Full, 100M Half, 10M Full, 10M Half, Auto and Disable—for speed or port disable selections. Flow Control: This setting determines whether or not the Switch will be handling flow control. Set Flow Control to Enable for avoiding data transfer overflow. If it is set to Disable, there is either no flow control or other hardware/software management. When the port is set to forced mode, the flow control will automatically be set to Disable. Default Priority: The Default Priority is specific the 802.1P QoS priority level to related port, all of the received data packet will follow the Default Priority level forwarding data packet to other port. VLAN Settings (Virtual Local Area Network) A VLAN is a collection of switch ports that make up a single broadcast domain. You can configure a VLAN for a single switch, or for multiple switches. When you create a VLAN, you can control traffic flow and ease the administration of moves, adds, and changes on the network, by eliminating the need to change physical cabling. On VLAN settings, there are two main settings, VID Table Setting, Port VLAN Setting, and Port Egress Setting. 22 VID Table Setting: Select the VID group that you set. When you select VID Table Setting, press “Add new VID” to create new VID group, from port 01 ~ port 48, select Untag Port, Tag Port, or Not Member for each port. To save the VID group, press “Apply” button. To remove the selected VID group, select the VID group and press “Remove the VID” button. To modify the VID group setting, select the VID group and change the setting, and press “Apply” button to save the settings. Figure 19. VID Table Setting Port VID Setting: When you select Port VLAN setting, fill in each port’s PVID value between 1 and 4094. Figure 20. 23 Port Egress Setting: The Port Egress is used to set the 802.1Q VLAN Egress rule in each port; the selected port will include the TCI (Tag Control Information) data packets. Figure 21. Port Egress Setting Trunk Setting The Trunk function enables the Switch to cascade two or more devices with larger bandwidths. There are ten Trunking groups to be set, and there are default ports in each member. Click “Enable” to use the trunk function, select the ports in each member to be trunk, and click “Apply” to activate the selected trunk group. Figure 22. Trunk Setting Be sure that the selected trunk setting port is connected to the device with a same VLAN group. 24 Mirror Setting Port Mirroring is a method of monitoring network traffic that forwards a copy of each incoming and/or outgoing packet from one port of a network switch to another port where the packet can be studied. It enables the manager to keep close track of switch performance and alter it if necessary. Configuring the port mirroring by assigning a source port from which to copy all packets and a sniffer port where those packets will be sent. The selections of the sniffer mode are as follows: TX (transmit) mode: This mode will duplicate the data transmitted from the source port and forward it to the sniffer port. RX (receive) mode: This mode will duplicate the data sent to the source and forward it to the sniffer port. Both (transmit and receive) mode: This mode will duplicate both the data transmitted from and data sent to the source port, then it will forward the data to the sniffer port. Figure 23. Mirror Setting 25 Spanning Tree Setting This Switch supports the 802.1d Spanning Tree Protocol. Every segment will have a single path to the root bridge. All bridges listen for BPDU packets. However, BPDU packets are sent more frequently - with every Hello packet. BPDU packets are sent even if a BPDU packet was not received. Therefore, each link between bridges is sensitive to the status of the link. Ultimately this difference results in faster detection of failed links, and thus faster topology adjustment. A draw-back of 802.1d is this absence of immediate feedback from adjacent bridges. Figure 24. Spanning Tree Setting 26 STP Function: To selecting enable or disable STP function on the Switch. Bridge Priority: This value between 0 and 65535 to specify the priority for forwarding packets. The lower the value, the higher the priority. The default is 32768. Bridge Max Age: This value may be set to ensure that old information does not endlessly circulate through redundant paths in the network, preventing the effective propagation of the new information. Set by the Root Bridge, this value will aid in determining that the Switch has spanning tree configuration values consistent with other devices on the bridged LAN. If the value ages out and a BPDU has still not been received from the Root Bridge, the Switch will start sending its own BPDU to all other switches for permission to become the Root Bridge. If it turns out that your switch has the lowest Bridge Identifier, it will become the Root Bridge. The user may choose a time between 6 and 40 seconds. The default value is 20. Bridge Hello Time: The user may set the time interval between transmission of configuration messages by the root device, thus stating that the Switch is still functioning. A time between 1 and 10 seconds may be chosen, with a default setting of 2 seconds. Bridge Forward Delay: The maximum amount of time (in seconds) that the root device will wait before changing states. The user may choose a time between 4 and 30 seconds. The default is 15 seconds. Port Path Cost: This defines a metric that indicates the relative cost of forwarding packets to specified port list. The value between 1 and 65535 to determine the cost. The lower the number, the greater the probability the port will be chosen to forward packets. The default value is 10. Port Path Priority: Select a value between 0 and 255 to specify the priority for a specified port for forwarding packets. The lower the value, the higher the priority. The default is 128. 27 SNMP Setting Simple Network Management Protocol (SNMP) is an OSI Layer 7 (Application Layer) designed specifically for managing and monitoring network devices. SNMP enables network management stations to read and modify the settings of gateways, routers, switches, and other network devices. Use SNMP to configure system features for proper operation, monitor performance and detect potential problems in the Switch, switch group or network. Managed devices that support SNMP include software (referred to as an agent), which runs locally on the device. A defined set of variables (managed objects) is maintained by the SNMP agent and used to manage the device. These objects are defined in a Management Information Base (MIB), which provides a standard presentation of the information controlled by the on-board SNMP agent. SNMP defines both the format of the MIB specifications and the protocol used to access this information over the network. The Switch supports the SNMP versions 1. In SNMP v.1, user authentication is accomplished using 'community strings', which function like passwords. The remote user SNMP application and the Switch SNMP must use the same community string. SNMP packets from any station that has not been authenticated are ignored (dropped). The default community strings for the Switch used for SNMP v.1 management access are: public - Allows authorized management stations to retrieve MIB objects. private - Allows authorized management stations to retrieve and modify MIB objects. Traps Traps are messages that alert network personnel of events that occur on the Switch. The events can be as serious as a reboot (someone accidentally turned OFF the Switch), or less serious like a port status change. The Switch generates traps and sends them to the trap recipient (or network manager). Typical traps include trap messages for Device boot up, Authentication Failure, Port status change and Abnormal transmit/receive data packet error. 28 MIBs Management and counter information are stored by the Switch in the Management Information Base (MIB). The Switch uses the standard MIB-II Management Information Base module. Consequently, values for MIB objects can be retrieved from any SNMP-based network management software. In addition to the standard MIB-II, the Switch also supports its own proprietary enterprise MIB as an extended Management Information Base. The proprietary MIB may also be retrieved by specifying the MIB Object Identifier. MIB values can be either read-only or read-write. Enabled / Disabled: To selecting enable or disable SNMP function on the Switch. SNMP Community / Trap: To configure the SNMP Community or SNMP Trap configuration. Configure SNMP Community: Figure 25. SNMP Community Setting Add Group: To add a SNMP Community group, press “Add Group” button, the Add SNMP Community configuration window will pop out; fill in the community name and assign the community enable read_only or read_write. Press “Apply” button to execute the setting. Figure 26. Add SNMP Community group 29 Delete Group: To delete previously defined SNMP Community group, press “Delete Group” button, the Delete SNMP Community configuration window will pop out; checked the delete dialog box. Press “Apply” to delete the selected SNMP Community Group. Figure 27. Delete SNMP Community group Modify Group: To modify previously defined SNMP Community group, click on the ID parameter to enter to the selected SNMP Community Group to configure its community name and community enable. Press “Apply” to save change of the SNMP Community Group. Figure 28. Modify SNMP Community group Configure SNMP Trap: Figure 29. Configure SNMP Trap Setting 30 Trap authentication fail: When checked the dialog box of the Trap authentication fail, when fail to authentication, the Switch will trap the authentication fail even to the SNMP host. Add Trap: To create a recipient of SNMP traps generated by the Switch’s SNMP agent, press “Add Trap” button, and the SNMP Trap Set window will pop out; you can fill in the community name and trap IP address of the remote management station that will serve as the SNMP host for the Switch and checked the events selection to enabled selected event traps. Figure 30. Add SNMP Trap Delete Trap: To delete previously defined SNMP Trap, press “Delete Trap” button, the Delete SNMP Trap Delete configuration window will pop out; checked the delete dialog box. Press “Apply” to delete the selected SNMP Trap setting. Figure 31. Delete SNMP Trap 31 Modify Trap: To modify previously defined SNMP Trap, click on the ID parameter to enter to the selected SNMP Trap to configure its community name, IP address and events. Press “Apply” to save change of the SNMP Trap. Figure 32. Modify SNMP Trap Jumbo Frame Setting To enable or disable the Jumbo Frame function on the Switch. Figure 33. Jumbo frame setting QoS Setting To set the Switch QoS base on IEEE 802.1p, Figure 34. 802.1P-based QoS Setting 32 Device Status Click on the “Status” button to display the device status on this screen. It will display the System Status, Port Status, VLAN Status, Trunk Status, and Mirror Status. Press “Refresh” when you need to renew the posted information. Figure 35 33 Statistics The Statistics Menu screen will show the status of each port packet count. Figure 36 For detailed packet information, click on the ID parameter as in Figure 37. 34 Figure 37. Port Statistic 35 System Setting The System Setting includes the System name, Location name, Login Timeout, IP Address, Subnet Mask, and Gateway. Through the Web Management Utility, you can easily recognize the device by using the System Name and the Location Name. The Login Timeout is to set the idle time-out for security issues. When there is no action in running the Web Smart Utility and it times out, you must re-login to Web Smart Utility before you set the Utility. Fill in the IP Address, Subnet Mask and Gateway for the device. Figure 38. 36 Trap Setting The Trap Setting enables the device to monitor the Trap through the Web Management Utility, set the Trap IP Address of the manager where the trap to be sent. Figure 39. Trap Setting System Events: Monitoring the system’s trap. Device Bootup: a trap when booting up the system. Illegal Login: a trap when there is using a wrong password login, and it will record from where the IP to be login. Fiber Port Events: Monitoring the Fiber port status. Link Up/Link Down: a trap when there is linking status happens in fiber port. Abnormal* Receive Error: a trap when there are receive data error in fiber port. Abnormal* Transmit Error: a trap when there are transmit data error in fiber port. Copper Port Events: Monitoring the Copper port status. Link Up/Link Down: a trap when there is linking status happens in copper port. Abnormal* Receive Error: a trap when there are receive data error in copper port. Abnormal* Transmit Error: a trap when there are transmit data error in copprt port. Abnormal*: 50 error packet count within 10 seconds. 37 Password Setting Password is the invaluable tool for the manager to secure the Web Management Switch. You can use this function to change the password. If you forget the password, press the “Reset” button in the rear panel of the Switch. The current setting includes VLAN, Port Setting… etc. will be lost and the Switch will be restored to the default setting. Figure 40. Set Password Backup Setting The backup tools help you to backup the current setting of the Switch. Once you need to backup the setting, press the “Backup” button to save the setting. To restore a current setting file to the device, you must specify the backup file and press the “Restore” button to process the setting of the recorded file. Figure 41. Backup Setting Note: When restoring a recorded file, the current password will not be erased. 38 Reset Setting The Factory Reset button helps you to reset the device back to the default setting from the factory. Be aware that the entire configuration will be reset; the IP address of the device will be set to the default setting of 192.168.0.1. Figure 42. Reset Setting Logout When you select this function, the Web configuration will log out and return to first Login page. Figure 43. Logout 39 TECHNICAL SPECIFICATIONS General Standards IEEE 802.3 10BASE-T Ethernet IEEE 802.3u 100BASE-TX Fast Ethernet IEEE 802.3ab 1000BASE-T Gigabit Ethernet IEEE 802.3x Full Duplex Flow Control IEEE 802.3z 1000BASE-SX/LX Gigabit Ethernet Protocol Data Transfer Rate CSMA/CD Ethernet: 10Mbps (half-duplex), 20Mbps (full-duplex) Fast Ethernet: 100Mbps (half-duplex), 200Mbps (full-duplex) Gigabit Ethernet: 2000Mbps (full-duplex) Star 10BASET: 2-pair UTP Cat. 3, 4, 5; up to 100m 100BASE-TX: 2-pair UTP Cat. 5; up to 100m 1000BASE-T: 4-pair UTP Cat. 5; up to 100m Fiber module: mini-GBIC Fiber module 48 × 10/100/1000Mbps Auto-MDIX RJ-45 ports 4 × mini-GBIC fiber slots Topology Network Cables Number of Ports Physical and Environmental AC inputs Power Consumption Temperature 100-240V AC, 50-60 Hz internal universal power supply 68.88 Watts (Max) Humidity Dimensions EMI: Operating: 0° ~ 40° C (32° ~ 104° F), Storage: -10° ~ 70° C (14° ~ 158° F) Operating: 10% ~ 90%, Storage: 5% ~ 90% 440 x 310 x 44 mm (W x H x D) (17.3 x 12.2 x 1.7 in) FCC Class A, CE Mark Class A, VCCI Class A Safety: CUL 40 Performance Transmits Method: Filtering Address Table: Packet Filtering/Forwarding Rate: MAC Learning: Address Store-and-forward 8K entries per device 10Mbps Ethernet: 14,880/pps 100Mbps Fast Ethernet: 148,800/pps 1000Mbps Gigabit Ethernet: 1,488,000/pps Automatic update Transmits Method: Store-and-forward RAM Buffer: 1632KBytes per device 41 Subject to the terms and conditions set forth herein, D-Link Systems, Inc. (“D-Link”) provides this Limited Warranty: • • Only to the person or entity that originally purchased the product from D-Link or its authorized reseller or distributor, and Only for products purchased and delivered within the fifty states of the United States, the District of Columbia, U.S. Possessions or Protectorates, U.S. Military Installations, or addresses with an APO or FPO. Limited Warranty: D-Link warrants that the hardware portion of the D-Link product described below (“Hardware”) will be free from material defects in workmanship and materials under normal use from the date of original retail purchase of the product, for the period set forth below (“Warranty Period”), except as otherwise stated herein. • • • Hardware (excluding power supplies and fans): Five (5) Years Power supplies and fans: One (1) Year Spare parts and spare kits: Ninety (90) days The customer's sole and exclusive remedy and the entire liability of D-Link and its suppliers under this Limited Warranty will be, at D-Link’s option, to repair or replace the defective Hardware during the Warranty Period at no charge to the original owner or to refund the actual purchase price paid. Any repair or replacement will be rendered by D-Link at an Authorized D-Link Service Office. The replacement hardware need not be new or have an identical make, model or part. D-Link may, at its option, replace the defective Hardware or any part thereof with any reconditioned product that D-Link reasonably determines is substantially equivalent (or superior) in all material respects to the defective Hardware. Repaired or replacement hardware will be warranted for the remainder of the original Warranty Period or ninety (90) days, whichever is longer, and is subject to the same limitations and exclusions. If a material defect is incapable of correction, or if D-Link determines that it is not practical to repair or replace the defective Hardware, the actual price paid by the original purchaser for the defective Hardware will be refunded by D-Link upon return to D-Link of the defective Hardware. All Hardware or part thereof that is replaced by D-Link, or for which the purchase price is refunded, shall become the property of D-Link upon replacement or refund. Limited Software Warranty: D-Link warrants that the software portion of the product (“Software”) will substantially conform to D-Link’s then current functional specifications for the Software, as set forth in the applicable documentation, from the date of original retail purchase of the Software for a period of ninety (90) days (“Software Warranty Period”), provided that the Software is properly installed on approved hardware and operated as contemplated in its documentation. D-Link further warrants that, during the Software Warranty Period, the magnetic media on which D-Link delivers the Software will be free of physical defects. The customer's sole and exclusive remedy and the entire liability of D-Link and its suppliers under this Limited Warranty will be, at D-Link’s option, to replace the non-conforming Software (or defective media) with software that substantially conforms to D-Link’s functional specifications for the Software or to refund the portion of the actual purchase price paid that is attributable to the Software. Except as otherwise agreed by D-Link in writing, the replacement Software is provided only to the original licensee, and is subject to the terms and conditions of the license granted by D-Link for the Software. Replacement Software will be warranted for the remainder of the original Warranty Period and is subject to the same limitations and exclusions. If a material non-conformance is incapable of correction, or if D-Link determines in its sole discretion that it is not practical to replace the non-conforming Software, the price paid by the original licensee for the non-conforming Software will be refunded by D-Link; provided that the non-conforming Software (and all copies thereof) is first returned to DLink. The license granted respecting any Software for which a refund is given automatically terminates. Non-Applicability of Warranty: The Limited Warranty provided hereunder for Hardware and Software portions of D-Link's products will not be applied to and does not cover any refurbished product and any product purchased through the inventory clearance or liquidation sale or other sales in which D-Link, the sellers, or the liquidators expressly disclaim their warranty obligation pertaining to the product and in that case, the product is being sold "As-Is" without any warranty whatsoever including, without limitation, the Limited Warranty as described herein, notwithstanding anything stated herein to the contrary. Submitting A Claim: The customer shall return the product to the original purchase point based on its return policy. In case the return policy period has expired and the product is within warranty, the customer shall submit a claim to D-Link as outlined below: • The customer must submit with the product as part of the claim a written description of the Hardware defect or Software nonconformance in sufficient detail to allow D-Link to confirm the same, along with proof of purchase of the product (such as a copy of the dated purchase invoice for the product) if the product is not registered. • The customer must obtain a Case ID Number from D-Link Technical Support at 1-877-453-5465, who will attempt to assist the customer in resolving any suspected defects with the product. If the product is considered defective, the customer must obtain a Return Material Authorization (“RMA”) number by completing the RMA form and entering the assigned Case ID Number at https://rma.dlink.com/. • After an RMA number is issued, the defective product must be packaged securely in the original or other suitable shipping package to ensure that it will not be damaged in transit, and the RMA number must be prominently marked on the outside of the package. Do not include any manuals or accessories in the shipping package. D-Link will only replace the defective portion of the product and will not ship back any accessories. • The customer is responsible for all in-bound shipping charges to D-Link. No Cash on Delivery (“COD”) is allowed. Products sent COD will either be rejected by D-Link or become the property of D-Link. Products shall be fully insured by the customer and shipped to D-Link Systems, Inc., 17595 Mt. Herrmann, Fountain Valley, CA 92708. D-Link will not be held responsible for any packages that are lost in transit to D-Link. The repaired or replaced packages will be shipped to the customer via UPS Ground or any common carrier selected by D-Link. Return shipping charges shall be prepaid by DLink if you use an address in the United States, otherwise we will ship the product to you freight collect. Expedited shipping is available upon request and provided shipping charges are prepaid by the customer. D-Link may reject or return any product that is not packaged and shipped in strict compliance with the foregoing requirements, or for which an RMA number is not visible from the outside of the package. The product owner agrees to pay D-Link’s reasonable handling and return shipping charges for any product that is not packaged and shipped in accordance with the foregoing requirements, or that is determined by D-Link not to be defective or non-conforming. What Is Not Covered: The Limited Warranty provided herein by D-Link does not cover: Products that, in D-Link’s judgment, have been subjected to abuse, accident, alteration, modification, tampering, negligence, misuse, faulty installation, lack of reasonable care, repair or service in any way that is not contemplated in the documentation for the product, or if the model or serial number has been altered, tampered with, defaced or removed; Initial installation, installation and removal of the product for repair, and shipping costs; Operational adjustments covered in the operating manual for the product, and normal maintenance; Damage that occurs in shipment, due to act of God, failures due to power surge, and cosmetic damage; Any hardware, software, firmware or other products or services provided by anyone other than D-Link; and Products that have been purchased from inventory clearance or liquidation sales or other sales in which D-Link, the sellers, or the liquidators expressly disclaim their warranty obligation pertaining to the product. While necessary maintenance or repairs on your Product can be performed by any company, we recommend that you use only an Authorized D-Link Service Office. Improper or incorrectly performed maintenance or repair voids this Limited Warranty. Disclaimer of Other Warranties: EXCEPT FOR THE LIMITED WARRANTY SPECIFIED HEREIN, THE PRODUCT IS PROVIDED “AS-IS” WITHOUT ANY WARRANTY OF ANY KIND WHATSOEVER INCLUDING, WITHOUT LIMITATION, ANY WARRANTY OF MERCHANTABILITY, FITNESS FOR A PARTICULAR PURPOSE AND NON-INFRINGEMENT. IF ANY IMPLIED WARRANTY CANNOT BE DISCLAIMED IN ANY TERRITORY WHERE A PRODUCT IS SOLD, THE DURATION OF SUCH IMPLIED WARRANTY SHALL BE LIMITED TO THE DURATION OF THE APPLICABLE WARRANTY PERIOD SET FORTH ABOVE. EXCEPT AS EXPRESSLY COVERED UNDER THE LIMITED WARRANTY PROVIDED HEREIN, THE ENTIRE RISK AS TO THE QUALITY, SELECTION AND PERFORMANCE OF THE PRODUCT IS WITH THE PURCHASER OF THE PRODUCT. Limitation of Liability: TO THE MAXIMUM EXTENT PERMITTED BY LAW, D-LINK IS NOT LIABLE UNDER ANY CONTRACT, NEGLIGENCE, STRICT LIABILITY OR OTHER LEGAL OR EQUITABLE THEORY FOR ANY LOSS OF USE OF THE PRODUCT, INCONVENIENCE OR DAMAGES OF ANY CHARACTER, WHETHER DIRECT, SPECIAL, INCIDENTAL OR CONSEQUENTIAL (INCLUDING, BUT NOT LIMITED TO, DAMAGES FOR LOSS OF GOODWILL, LOSS OF REVENUE OR PROFIT, WORK STOPPAGE, COMPUTER FAILURE OR MALFUNCTION, FAILURE OF OTHER EQUIPMENT OR COMPUTER PROGRAMS TO WHICH D-LINK’S PRODUCT IS CONNECTED WITH, LOSS OF INFORMATION OR DATA CONTAINED IN, STORED ON, OR INTEGRATED WITH ANY PRODUCT RETURNED TO D-LINK FOR WARRANTY SERVICE) RESULTING FROM THE USE OF THE PRODUCT, RELATING TO WARRANTY SERVICE, OR ARISING OUT OF ANY BREACH OF THIS LIMITED WARRANTY, EVEN IF D-LINK HAS BEEN ADVISED OF THE POSSIBILITY OF SUCH DAMAGES. THE SOLE REMEDY FOR A BREACH OF THE FOREGOING LIMITED WARRANTY IS REPAIR, REPLACEMENT OR REFUND OF THE DEFECTIVE OR NON-CONFORMING PRODUCT. THE MAXIMUM LIABILITY OF D-LINK UNDER THIS WARRANTY IS LIMITED TO THE PURCHASE PRICE OF THE PRODUCT COVERED BY THE WARRANTY. THE FOREGOING EXPRESS WRITTEN WARRANTIES AND REMEDIES ARE EXCLUSIVE AND ARE IN LIEU OF ANY OTHER WARRANTIES OR REMEDIES, EXPRESS, IMPLIED OR STATUTORY. Governing Law: This Limited Warranty shall be governed by the laws of the State of California. Some states do not allow exclusion or limitation of incidental or consequential damages, or limitations on how long an implied warranty lasts, so the foregoing limitations and exclusions may not apply. This Limited Warranty provides specific legal rights and you may also have other rights which vary from state to state. Trademarks: D-Link is a registered trademark of D-Link Systems, Inc. Other trademarks or registered trademarks are the property of their respective owners. Copyright Statement: No part of this publication or documentation accompanying this product may be reproduced in any form or by any means or used to make any derivative such as translation, transformation, or adaptation without permission from D-Link Corporation/D-Link Systems, Inc., as stipulated by the United States Copyright Act of 1976 and any amendments thereto. Contents are subject to change without prior notice. Copyright 2004 by D-Link Corporation/D-Link Systems, Inc. All rights reserved. CE Mark Warning: This is a Class A product. In a residential environment, this product may cause radio interference, in which case the user may be required to take adequate measures. FCC Statement: This equipment has been tested and found to comply with the limits for a Class A digital device, pursuant to part 15 of the FCC Rules. These limits are designed to provide reasonable protection against harmful interference in a commercial installation. This equipment generates, uses, and can radiate radio frequency energy and, if not installed and used in accordance with the instructions, may cause harmful interference to radio communication. However, there is no guarantee that interference will not occur in a particular installation. Operation of this equipment in a residential environment is likely to cause harmful interference to radio or television reception. If this equipment does cause harmful interference to radio or television reception, which can be determined by turning the equipment off and on, the user is encouraged to try to correct the interference by one or more of the following measures: • • • • Reorient or relocate the receiving antenna. Increase the separation between the equipment and receiver. Connect the equipment into an outlet on a circuit different from that to which the receiver is connected. Consult the dealer or an experienced radio/TV technician for help. For detailed warranty information applicable to products purchased outside the United States, please contact the corresponding local D-Link office. Product Registration Register online your D-Link product at http://support.dlink.com/register/ Product registration is entirely voluntary and failure to complete or return this form will not diminish your warranty rights. International Offices U.S.A 17595 Mt. Herrmann Street Fountain Valley, CA 92708 TEL: 1-800-326-1688 URL: www.dlink.com Canada 2180 Winston Park Drive Oakville, Ontario, L6H 5W1 Canada TEL: 1-905-8295033 FAX: 1-905-8295223 URL: www.dlink.ca Europe (U. K.) 4th Floor, Merit House Edgware Road, Colindale London NW9 5AB U.K. TEL: 44-20-8731-5555 FAX: 44-20-8731-5511 URL: www.dlink.co.uk Germany Schwalbacher Strasse 74 D-65760 Eschborn Germany TEL: 49-6196-77990 FAX: 49-6196-7799300 URL: www.dlink.de France No.2 all’ee de la Fresnerie 78330 Fontenay le Fleury France TEL: 33-1-30238688 FAX: 33-1-30238689 URL: www.dlink.fr Netherlands Weena 290 3012 NJ, Rotterdam Netherlands Tel: +31-10-282-1445 Fax: +31-10-282-1331 URL: www.dlink.nl Belgium Rue des Colonies 11 B-1000 Brussels Belgium Tel: +32(0)2 517 7111 Fax: +32(0)2 517 6500 URL: www.dlink.be Italy Via Nino Bonnet n. 6/b 20154 – Milano Italy TEL: 39-02-2900-0676 FAX: 39-02-2900-1723 URL: www.dlink.it Spain Avenida Diagonal, 593-95, 9th floor 08014 Barcelona Spain TEL: 34 93 4090770 FAX: 34 93 4910795 URL: www.dlink.es Portugal Rua Fernando Pahla 50 Edificio Simol 1900 Lisbon Portugal TEL: +351 21 8688493 URL: www.dlink.es Czech Republic Vaclavske namesti 36, Praha 1 Czech Republic TEL :+420 (603) 276 589 URL: www.dlink.cz Switzerland Glatt Tower, 2.OG CH-8301 Glattzentrum Postfach 2.OG Switzerland TEL : +41 (0) 1 832 11 00 FAX: +41 (0) 1 832 11 01 URL: www.dlink.ch Greece 101, Panagoulis Str. 163-43 Helioupolis Athens, Greece TEL : +30 210 9914 512 FAX: +30 210 9916902 URL: www.dlink.gr Luxemburg Rue des Colonies 11, B-1000 Brussels, Belgium TEL: +32 (0)2 517 7111 FAX: +32 (0)2 517 6500 URL: www.dlink.be Poland Budynek Aurum ul. Walic-w 11 PL-00-851 Warszawa Poland TEL : +48 (0) 22 583 92 75 FAX: +48 (0) 22 583 92 76 URL: www.dlink.pl Hungary R-k-czi-t 70-72 HU-1074 Budapest Hungary TEL : +36 (0) 1 461 30 00 FAX: +36 (0) 1 461 30 09 URL: www.dlink.hu Sweden P.O. Box 15036, S-167 15 Bromma Sweden TEL: 46-(0)8564-61900 FAX: 46-(0)8564-61901 URL: www.dlink.se Singapore 1 International Business Park #03-12 The Synergy Singapore 609917 TEL: 65-6774-6233 FAX: 65-6774-6322 URL: www.dlink-intl.com Denmark Naverland 2, DK-2600 Glostrup, Copenhagen Denmark TEL: 45-43-969040 FAX: 45-43-424347 URL: www.dlink.dk Australia 1 Giffnock Avenue North Ryde, NSW 2113 Australia TEL: 61-2-8899-1800 FAX: 61-2-8899-1868 URL: www.dlink.com.au Norway Karihaugveien 89 N-1086 Oslo Norway TEL: +47 99 300 100 FAX: +47 22 30 95 80 URL: www.dlink.no India D-Link House, Kurla Bandra Complex Road Off CST Road, Santacruz (East) Mumbai - 400098 India TEL: 91-022-26526696/56902210 FAX: 91-022-26528914 URL: www.dlink.co.in Finland Latokartanontie 7A FIN-00700 HELSINKI Finland TEL: +358-10 309 8840 FAX: +358-10 309 8841 URL: www.dlink.fi Middle East (Dubai) P.O.Box: 500376 Office: 103, Building:3 Dubai Internet City Dubai, United Arab Emirates Tel: +971-4-3916480 Fax: +971-4-3908881 URL: www.dlink-me.com Turkey Ayazaga Maslak Yolu Erdebil Cevahir Is Merkezi 5/A Ayazaga – Istanbul Turkiye TEL: +90 212 289 56 59 FAX: +90 212 289 76 06 URL: www.dlink.com.tr Egypt 19 El-Shahed Helmy, El Masri Al-Maza, Heliopolis Cairo, Egypt TEL:+202 414 4295 FAX:+202 415 6704 URL: www.dlink-me.com Israel 11 Hamanofim Street Ackerstein Towers, Regus Business Center P.O.B 2148, Hertzelia-Pituach 46120 Israel TEL: +972-9-9715700 FAX: +972-9-9715601 URL: www.dlink.co.il LatinAmerica Isidora Goyeechea 2934 Ofcina 702 Las Condes Santiago – Chile TEL: 56-2-232-3185 FAX: 56-2-232-0923 URL: www.dlink.cl Brazil Av das Nacoes Unidas 11857 – 14- andar - cj 141/142 Brooklin Novo Sao Paulo - SP - Brazil CEP 04578-000 (Zip Code) TEL: (55 11) 21859300 FAX: (55 11) 21859322 URL: www.dlinkbrasil.com.br South Africa Einstein Park II Block B 102-106 Witch-Hazel Avenue Highveld Technopark Centurion Gauteng Republic of South Africa TEL: 27-12-665-2165 FAX: 27-12-665-2186 URL: www.d-link.co.za Russia Grafsky per., 14, floor 6 Moscow 129626 Russia TEL: 7-095-744-0099 FAX: 7-095-744-0099 #350 URL: www.dlink.ru China No.202,C1 Building, Huitong Office Park, No. 71, Jianguo Road, Chaoyang District, Beijing 100025, China. TEL +86-10-58635800 FAX: +86-10-58635799 URL: www.dlink.com.cn Taiwan 2F, No. 119, Pao-Chung Rd. Hsin-Tien, Taipei Taiwan TEL: 886-2-2910-2626 FAX: 886-2-2910-1515 URL: www.dlinktw.com.tw Headquarters 2F, No. 233-2, Pao-Chiao Rd. Hsin-Tien, Taipei Taiwan TEL: 886-2-2916-1600 FAX: 886-2-2914-6299 URL: www.dlink.com.tw Registration Card All Countries and Regions Excluding USA Print, type or use block letters. Your name: Mr./Ms_____________________________________________________________________________ Organization: ________________________________________________ Dept. ____________________________ Your title at organization: ________________________________________________________________________ Telephone: _______________________________________ Fax:________________________________________ Organization's full address: ______________________________________________________________________ ____________________________________________________________________________________________ Country: _____________________________________________________________________________________ Date of purchase (Month/Day/Year): _______________________________________________________________ Product Model Product Serial No. * Product installed in type of computer * Product installed in computer serial No. (* Applies to adapters only) Product was purchased from: Reseller's name: ______________________________________________________________________________ Telephone: _______________________________________ Answers to the following questions help us to support your product: 1. Where and how will the product primarily be used? Home Office Travel Company Business Home Business Personal Use 2. How many employees work at installation site? 1 employee 2-9 10-49 50-99 100-499 500-999 1000 or more 3. What network protocol(s) does your organization use ? XNS/IPX TCP/IP DECnet Others_____________________________ 4. What network operating system(s) does your organization use ? D-Link LANsmart Novell NetWare NetWare Lite SCO Unix/Xenix PC NFS 3Com 3+Open Cisco Network Banyan Vines DECnet Pathwork Windows NT Windows 98 Windows 2000/ME Windows XP Others__________________________________________ 5. What network management program does your organization use ? D-View HP OpenView/Windows HP OpenView/Unix SunNet Manager Novell NMS NetView 6000 Others________________________________________ 6. What network medium/media does your organization use ? Fiber-optics Thick coax Ethernet Thin coax Ethernet 10BASE-T UTP/STP 100BASE-TX 1000BASE-T Wireless 802.11b and 802.11g wireless 802.11a Others_________________ 7. What applications are used on your network? Desktop publishing Spreadsheet Word processing CAD/CAM Database management Accounting Others_____________________ 8. What category best describes your company? Aerospace Engineering Education Finance Hospital Legal Insurance/Real Estate Manufacturing Retail/Chain store/Wholesale Government Transportation/Utilities/Communication VAR System house/company Other________________________________ 9. Would you recommend your D-Link product to a friend? Yes No Don't know yet 10.Your comments on this product? __________________________________________________________________________________________ __________________________________________________________________________________________