1
Cisco IP Interoperability and
Collaboration System
Server Installation Guide
Release 1.0(1)
Corporate Headquarters
Cisco Systems, Inc.
170 West Tasman Drive
San Jose, CA 95134-1706
USA
http://www.cisco.com
Tel: 408 526-4000
800 553-NETS (6387)
Fax: 408 526-4100
Text Part Number: OL-8155-01
THE SPECIFICATIONS AND INFORMATION REGARDING THE PRODUCTS IN THIS MANUAL ARE SUBJECT TO CHANGE WITHOUT
NOTICE. ALL STATEMENTS, INFORMATION, AND RECOMMENDATIONS IN THIS MANUAL ARE BELIEVED TO BE ACCURATE BUT
ARE PRESENTED WITHOUT WARRANTY OF ANY KIND, EXPRESS OR IMPLIED. USERS MUST TAKE FULL RESPONSIBILITY FOR
THEIR APPLICATION OF ANY PRODUCTS.
THE SOFTWARE LICENSE AND LIMITED WARRANTY FOR THE ACCOMPANYING PRODUCT ARE SET FORTH IN THE INFORMATION
PACKET THAT SHIPPED WITH THE PRODUCT AND ARE INCORPORATED HEREIN BY THIS REFERENCE. IF YOU ARE UNABLE TO
LOCATE THE SOFTWARE LICENSE OR LIMITED WARRANTY, CONTACT YOUR CISCO REPRESENTATIVE FOR A COPY.
The Cisco implementation of TCP header compression is an adaptation of a program developed by the University of California, Berkeley (UCB) as
part of UCB’s public domain version of the UNIX operating system. All rights reserved. Copyright © 1981, Regents of the University of California.
NOTWITHSTANDING ANY OTHER WARRANTY HEREIN, ALL DOCUMENT FILES AND SOFTWARE OF THESE SUPPLIERS ARE
PROVIDED “AS IS” WITH ALL FAULTS. CISCO AND THE ABOVE-NAMED SUPPLIERS DISCLAIM ALL WARRANTIES, EXPRESSED
OR IMPLIED, INCLUDING, WITHOUT LIMITATION, THOSE OF MERCHANTABILITY, FITNESS FOR A PARTICULAR PURPOSE AND
NONINFRINGEMENT OR ARISING FROM A COURSE OF DEALING, USAGE, OR TRADE PRACTICE.
IN NO EVENT SHALL CISCO OR ITS SUPPLIERS BE LIABLE FOR ANY INDIRECT, SPECIAL, CONSEQUENTIAL, OR INCIDENTAL
DAMAGES, INCLUDING, WITHOUT LIMITATION, LOST PROFITS OR LOSS OR DAMAGE TO DATA ARISING OUT OF THE USE OR
INABILITY TO USE THIS MANUAL, EVEN IF CISCO OR ITS SUPPLIERS HAVE BEEN ADVISED OF THE POSSIBILITY OF SUCH
DAMAGES.
CCSP, CCVP, the Cisco Square Bridge logo, Follow Me Browsing, and StackWise are trademarks of Cisco Systems, Inc.; Changing the Way We
Work, Live, Play, and Learn, and iQuick Study are service marks of Cisco Systems, Inc.; and Access Registrar, Aironet, ASIST, BPX, Catalyst,
CCDA, CCDP, CCIE, CCIP, CCNA, CCNP, Cisco, the Cisco Certified Internetwork Expert logo, Cisco IOS, Cisco Press, Cisco Systems, Cisco
Systems Capital, the Cisco Systems logo, Cisco Unity, Empowering the Internet Generation, Enterprise/Solver, EtherChannel, EtherFast,
EtherSwitch, Fast Step, FormShare, GigaDrive, GigaStack, HomeLink, Internet Quotient, IOS, IP/TV, iQ Expertise, the iQ logo, iQ Net Readiness
Scorecard, LightStream, Linksys, MeetingPlace, MGX, the Networkers logo, Networking Academy, Network Registrar, Packet, PIX, Post-Routing,
Pre-Routing, ProConnect, RateMUX, ScriptShare, SlideCast, SMARTnet, StrataView Plus, TeleRouter, The Fastest Way to Increase Your Internet
Quotient, and TransPath are registered trademarks of Cisco Systems, Inc. and/or its affiliates in the United States and certain other countries.
All other trademarks mentioned in this document or Website are the property of their respective owners. The use of the word partner does not imply
a partnership relationship between Cisco and any other company. (0502R)
Copyright © 2005 Cisco Systems, Inc. All rights reserved.
C O N T E N T S
Introduction vii
Audience vii
Organization viii
Related Documentation viii
Cisco CallManager Documentation ix
Cisco 7800 Series Media Convergence Servers Documentation x
Cisco IP Phone Documentation x
Cisco Land Mobile Radio over IP x
Cisco Security Agent x
Cisco IOS Documentation x
Document Notes and Conventions xi
Obtaining Documentation xii
Cisco.com xii
Product Documentation DVD xii
Ordering Documentation xiii
Documentation Feedback xiv
Cisco Product Security Overview xiv
Reporting Security Problems in Cisco Products xv
Obtaining Technical Assistance xv
Cisco Technical Support & Documentation Website xvi
Submitting a Service Request xvi
Cisco IPICS Server Installation Guide
OL-8155-01
iii
Contents
Definitions of Service Request Severity xvii
Obtaining Additional Publications and Information xviii
CHAPTER
1
Overview 1-1
Installation Overview 1-1
Installed Components 1-4
System Requirements 1-4
Hardware Requirements 1-4
PMC Requirements 1-5
Cisco IP Phone Requirements 1-5
Software Requirements 1-6
CHAPTER
2
Installing the Cisco IPICS Server Software 2-1
Before You Begin 2-1
Obtaining the IP Addresses for Your Cisco IPICS System 2-2
Preinstallation Checklist 2-2
Installing the Cisco Linux Operating System 2-3
Installing Cisco IPICS Server Software 2-24
Installing the Cisco IPICS Server Software at the Server 2-25
Installing Cisco IPICS from a Remote Location 2-38
Manually Installing CSA 2-46
Preparing to Use Cisco IPICS 2-47
Checking the Installation 2-47
Managing Your Licenses 2-49
Obtaining Your License File 2-49
Purchasing Additional Licenses 2-54
Uploading the Cisco IPICS Licenses 2-55
Managing Licenses with the Ops Views Feature 2-57
Tracking Your License Consumption 2-57
Cisco IPICS Server Installation Guide
iv
OL-8155-01
Contents
Generating the Cisco IPICS PMC Application Installer 2-58
CHAPTER
3
Upgrading Cisco IPICS 3-1
Performing the Upgrade from a CD 3-2
Performing the Upgrade from a Downloaded File 3-10
Transferring the Upgrade File to the Server 3-10
Performing the Upgrade at the Server 3-12
Performing the Upgrade from a Remote Location 3-17
CHAPTER
4
Uninstalling Cisco IPICS 4-1
Uninstalling Cisco IPICS from the Cisco IPICS Server 4-2
Uninstalling Cisco IPICS from a Remote Location 4-5
CHAPTER
5
Troubleshooting the Installation 5-1
Cisco IPICS Installation Issues 5-2
No Ports Are Listed in the Network Device Control Menu 5-2
Cannot Connect to the Server after Installation 5-3
Authorization Error after Installation 5-4
Error Displays When Performing Remote Installation 5-6
Uninstalling CSA 5-7
INDEX
Cisco IPICS Server Installation Guide
OL-8155-01
v
Contents
Cisco IPICS Server Installation Guide
vi
OL-8155-01
Preface
Introduction
The Cisco IPICS Server Installation Guide provides you with the information that
you need to install the Cisco IP Interoperability and Collaboration System
(IPICS) 1.0(1) server software. System administrators should review the
information in this document to learn how to prepare for the Cisco IPICS server
software installation and recover from any errors that might occur.
Audience
The Cisco IPICS Server Installation Guide targets system administrators who
install, configure, and operate the Cisco IPICS server software and the
Cisco Linux operating system.
Cisco IPICS Server Installation Guide
OL-8155-01
vii
Preface
Organization
Organization
This document is organized as follows:
Chapter 1, “Overview”
The introduction provides an overview of
the Cisco IPICS server software
installation. This chapter also includes
information about the system
requirements for Cisco IPICS.
Chapter 2, “Installing the Cisco
IPICS Server Software”
This chapter describes the steps involved
in installing the Cisco Linux operating
system, and the Cisco IPICS server
software and its components.
Chapter 3, “Upgrading Cisco
IPICS”
This chapter describes the steps that you
need to follow to upgrade the
Cisco IPICS server software.
Chapter 4, “Uninstalling Cisco
IPICS”
This chapter describes the steps that you
follow to uninstall the Cisco IPICS server
software.
Chapter 5, “Troubleshooting the
Installation”
This chapter includes troubleshooting
tips for server installation issues.
Related Documentation
For more information about Cisco IPICS server software and the Cisco IPICS
Push-to-Talk Management Center (PMC) application, see the following
documentation:
•
Cisco IPICS Server Administration Guide, Release 1.0(1)—This document
contains information about the key configuration, operation, and
management tasks for the Cisco IPICS server.
•
Cisco IPICS PMC Installation and User Guide, Release 1.0(1)—This
document describes how to install, configure, manage, and operate the Cisco
IPICS PMC application
Cisco IPICS Server Installation Guide
viii
OL-8155-01
Preface
Related Documentation
•
Cisco IPICS PMC Quick Start Guide, Release 1.0(1)—This document
provides tips and quick references for the most frequently used procedures
that a user can perform on the Cisco IPICS PMC.
•
Cisco IPICS PMC Debug Reference Quick Start Guide, Release 1.0(1)—This
document provides a quick reference for troubleshooting and debugging the
Cisco IPICS PMC.
•
Cisco IPICS Troubleshooting Guide, Release 1.0(1)—This document
includes reference material for system administrators about how to maintain
and troubleshoot the Cisco IPICS system.
•
Cisco IPICS Backup and Restore Guide, Release 1.0(1)—This document
describes the administrative procedures that you use to backup and restore the
database files on the Cisco IPICS server.
•
Cisco IPICS Command Line Interface, Release 1.0(1)—This document
describes the commands that you can use from the command line interface
(CLI) to obtain information or to change settings for the Cisco IPICS PMC.
•
Release Notes for Cisco IPICS Release 1.0(1)—This document contains a
description of the new and changed features, important notes, caveats, and
documentation updates for Cisco IPICS release 1.0(1).
•
Cisco IPICS Compatibility Matrix—This document contains information
about compatible hardware and software that is supported for use with
Cisco IPICS.
•
Cisco IPICS 1.0(1) Resources Card (Documentation Locator)—This
document includes a summary of the documentation that is available for
Cisco IPICS release 1.0(1).
To access the documentation suite for Cisco IPICS, see the following URL:
http://www.cisco.com/univercd/cc/td/doc/product/cis/c_ipics/index.htm
Cisco CallManager Documentation
For information about Cisco CallManager, see the documentation at this URL:
http://www.cisco.com/univercd/cc/td/doc/product/voice/c_callmg/index.htm
Cisco IPICS Server Installation Guide
OL-8155-01
ix
Preface
Related Documentation
Cisco 7800 Series Media Convergence Servers Documentation
For information about Cisco 7800 Series Media Convergence Servers, see the
MCS data sheets at this URL:
http://www.cisco.com/en/US/products/hw/voiceapp/ps378/products_data_sheets
_list.html
Cisco IP Phone Documentation
For information about Cisco IP Phones, see the documentation at this URL:
http://www.cisco.com/univercd/cc/td/doc/product/voice/c_ipphon/index.htm
Cisco Land Mobile Radio over IP
For information about Cisco Land Mobile Radio (LMR) over IP, see the
documentation at this URL:
http://www.cisco.com/univercd/cc/td/doc/product/software/ios123/123newft/123
t/123t_7/lmrip/index.htm
Cisco Security Agent
For information about Cisco Security Agent (CSA), see the documentation at this
URL:
http://www.cisco.com/univercd/cc/td/doc/product/vpn/ciscosec/index.htm
Cisco IOS Documentation
The Cisco IOS software documentation set describes the tasks and commands
necessary to configure certain system components and other Cisco products, such
as access servers, routers, and switches. Each configuration guide can be used in
conjunction with its corresponding command reference.
For information about Cisco IOS software configuration, see the documentation
at this URL:
Cisco IPICS Server Installation Guide
x
OL-8155-01
Preface
Document Notes and Conventions
http://www.cisco.com/univercd/cc/td/doc/product/software/
Document Notes and Conventions
This document uses the following conventions for instructions and information:
Note
Caution
Means reader take note. Notes contain helpful suggestions or references to
materials not contained in this document.
This caution symbol means reader be careful. In this situation, you might do
something that could result in equipment damage or loss of data.
Table 1
Conventions
Convention
Description
boldface font
Commands and keywords appear in boldface.
italic font
Command input for which you supply the values
appear in italics.
[
]
Optional keywords and default responses to system
prompts appear within square brackets.
{x | x | x}
A choice of keywords (represented by x) appears in
braces separated by vertical bars. You must select
one.
string
A nonquoted set of characters. Do not use quotation
marks around the string or the string will include the
quotation marks.
^ or Ctrl
Represent the key labeled Control. For example,
when you read ^D or Ctrl-D, you should hold down
the Control key while you press the D key.
screen
font
Examples of information displayed on the screen.
Cisco IPICS Server Installation Guide
OL-8155-01
xi
Preface
Obtaining Documentation
Table 1
Conventions (continued)
Convention
Description
boldface screen
Information that you must enter is in boldface
screen font.
font
italic screen font
Arguments for which you supply values are in italic
screen font.
Obtaining Documentation
Cisco documentation and additional literature are available on Cisco.com. Cisco
also provides several ways to obtain technical assistance and other technical
resources. These sections explain how to obtain technical information from Cisco
Systems.
Cisco.com
You can access the most current Cisco documentation at this URL:
http://www.cisco.com/techsupport
You can access the Cisco website at this URL:
http://www.cisco.com
You can access international Cisco websites at this URL:
http://www.cisco.com/public/countries_languages.shtml
Product Documentation DVD
Cisco documentation and additional literature are available in the Product
Documentation DVD package, which may have shipped with your product. The
Product Documentation DVD is updated regularly and may be more current than
printed documentation.
The Product Documentation DVD is a comprehensive library of technical product
documentation on portable media. The DVD enables you to access multiple
versions of hardware and software installation, configuration, and command
Cisco IPICS Server Installation Guide
xii
OL-8155-01
Preface
Obtaining Documentation
guides for Cisco products and to view technical documentation in HTML. With
the DVD, you have access to the same documentation that is found on the Cisco
website without being connected to the Internet. Certain products also have .pdf
versions of the documentation available.
The Product Documentation DVD is available as a single unit or as a subscription.
Registered Cisco.com users (Cisco direct customers) can order a Product
Documentation DVD (product number DOC-DOCDVD=) from the Ordering tool
or Cisco Marketplace.
Cisco Ordering tool:
http://www.cisco.com/en/US/partner/ordering/
Cisco Marketplace:
http://www.cisco.com/go/marketplace/
Ordering Documentation
Beginning June 30, 2005, registered Cisco.com users may order Cisco
documentation at the Product Documentation Store in the Cisco Marketplace at
this URL:
http://www.cisco.com/go/marketplace/
Cisco will continue to support documentation orders using the Ordering tool:
•
Registered Cisco.com users (Cisco direct customers) can order
documentation from the Ordering tool:
http://www.cisco.com/en/US/partner/ordering/
•
Instructions for ordering documentation using the Ordering tool are at
this URL:
http://www.cisco.com/univercd/cc/td/doc/es_inpck/pdi.htm
•
Nonregistered Cisco.com users can order documentation through a local
account representative by calling Cisco Systems Corporate Headquarters
(California, USA) at 408 526-7208 or, elsewhere in North America, by
calling 1 800 553-NETS (6387).
Cisco IPICS Server Installation Guide
OL-8155-01
xiii
Preface
Documentation Feedback
Documentation Feedback
You can rate and provide feedback about Cisco technical documents by
completing the online feedback form that appears with the technical documents
on Cisco.com.
You can send comments about Cisco documentation to [email protected].
You can submit comments by using the response card (if present) behind the front
cover of your document or by writing to the following address:
Cisco Systems
Attn: Customer Document Ordering
170 West Tasman Drive
San Jose, CA 95134-9883
We appreciate your comments.
Cisco Product Security Overview
Cisco provides a free online Security Vulnerability Policy portal at this URL:
http://www.cisco.com/en/US/products/products_security_vulnerability_policy.ht
ml
From this site, you can perform these tasks:
•
Report security vulnerabilities in Cisco products.
•
Obtain assistance with security incidents that involve Cisco products.
•
Register to receive security information from Cisco.
A current list of security advisories and notices for Cisco products is available at
this URL:
http://www.cisco.com/go/psirt
If you prefer to see advisories and notices as they are updated in real time, you
can access a Product Security Incident Response Team Really Simple Syndication
(PSIRT RSS) feed from this URL:
http://www.cisco.com/en/US/products/products_psirt_rss_feed.html
Cisco IPICS Server Installation Guide
xiv
OL-8155-01
Preface
Obtaining Technical Assistance
Reporting Security Problems in Cisco Products
Cisco is committed to delivering secure products. We test our products internally
before we release them, and we strive to correct all vulnerabilities quickly. If you
think that you might have identified a vulnerability in a Cisco product, contact
PSIRT:
•
Emergencies — [email protected]
An emergency is either a condition in which a system is under active attack
or a condition for which a severe and urgent security vulnerability should be
reported. All other conditions are considered nonemergencies.
•
Nonemergencies — [email protected]
In an emergency, you can also reach PSIRT by telephone:
Tip
•
1 877 228-7302
•
1 408 525-6532
We encourage you to use Pretty Good Privacy (PGP) or a compatible product to
encrypt any sensitive information that you send to Cisco. PSIRT can work from
encrypted information that is compatible with PGP versions 2.x through 8.x.
Never use a revoked or an expired encryption key. The correct public key to use
in your correspondence with PSIRT is the one linked in the Contact Summary
section of the Security Vulnerability Policy page at this URL:
http://www.cisco.com/en/US/products/products_security_vulnerability_policy.ht
ml
The link on this page has the current PGP key ID in use.
Obtaining Technical Assistance
Cisco Technical Support provides 24-hour-a-day award-winning technical
assistance. The Cisco Technical Support & Documentation website on Cisco.com
features extensive online support resources. In addition, if you have a valid Cisco
Cisco IPICS Server Installation Guide
OL-8155-01
xv
Preface
Obtaining Technical Assistance
service contract, Cisco Technical Assistance Center (TAC) engineers provide
telephone support. If you do not have a valid Cisco service contract, contact your
reseller.
Cisco Technical Support & Documentation Website
The Cisco Technical Support & Documentation website provides online
documents and tools for troubleshooting and resolving technical issues with Cisco
products and technologies. The website is available 24 hours a day, at this URL:
http://www.cisco.com/techsupport
Access to all tools on the Cisco Technical Support & Documentation website
requires a Cisco.com user ID and password. If you have a valid service contract
but do not have a user ID or password, you can register at this URL:
http://tools.cisco.com/RPF/register/register.do
Note
Use the Cisco Product Identification (CPI) tool to locate your product serial
number before submitting a web or phone request for service. You can access the
CPI tool from the Cisco Technical Support & Documentation website by clicking
the Tools & Resources link under Documentation & Tools. Choose Cisco
Product Identification Tool from the Alphabetical Index drop-down list, or click
the Cisco Product Identification Tool link under Alerts & RMAs. The CPI tool
offers three search options: by product ID or model name; by tree view; or for
certain products, by copying and pasting show command output. Search results
show an illustration of your product with the serial number label location
highlighted. Locate the serial number label on your product and record the
information before placing a service call.
Submitting a Service Request
Using the online TAC Service Request Tool is the fastest way to open S3 and S4
service requests. (S3 and S4 service requests are those in which your network is
minimally impaired or for which you require product information.) After you
describe your situation, the TAC Service Request Tool provides recommended
Cisco IPICS Server Installation Guide
xvi
OL-8155-01
Preface
Obtaining Technical Assistance
solutions. If your issue is not resolved using the recommended resources, your
service request is assigned to a Cisco engineer. The TAC Service Request Tool is
located at this URL:
http://www.cisco.com/techsupport/servicerequest
For S1 or S2 service requests or if you do not have Internet access, contact the
Cisco TAC by telephone. (S1 or S2 service requests are those in which your
production network is down or severely degraded.) Cisco engineers are assigned
immediately to S1 and S2 service requests to help keep your business operations
running smoothly.
To open a service request by telephone, use one of the following numbers:
Asia-Pacific: +61 2 8446 7411 (Australia: 1 800 805 227)
EMEA: +32 2 704 55 55
USA: 1 800 553-2447
For a complete list of Cisco TAC contacts, go to this URL:
http://www.cisco.com/techsupport/contacts
Definitions of Service Request Severity
To ensure that all service requests are reported in a standard format, Cisco has
established severity definitions.
Severity 1 (S1)—Your network is “down,” or there is a critical impact to your
business operations. You and Cisco will commit all necessary resources around
the clock to resolve the situation.
Severity 2 (S2)—Operation of an existing network is severely degraded, or
significant aspects of your business operation are negatively affected by
inadequate performance of Cisco products. You and Cisco will commit full-time
resources during normal business hours to resolve the situation.
Severity 3 (S3)—Operational performance of your network is impaired, but most
business operations remain functional. You and Cisco will commit resources
during normal business hours to restore service to satisfactory levels.
Severity 4 (S4)—You require information or assistance with Cisco product
capabilities, installation, or configuration. There is little or no effect on your
business operations.
Cisco IPICS Server Installation Guide
OL-8155-01
xvii
Preface
Obtaining Additional Publications and Information
Obtaining Additional Publications and Information
Information about Cisco products, technologies, and network solutions is
available from various online and printed sources.
•
Cisco Marketplace provides a variety of Cisco books, reference guides,
documentation, and logo merchandise. Visit Cisco Marketplace, the company
store, at this URL:
http://www.cisco.com/go/marketplace/
•
Cisco Press publishes a wide range of general networking, training and
certification titles. Both new and experienced users will benefit from these
publications. For current Cisco Press titles and other information, go to Cisco
Press at this URL:
http://www.ciscopress.com
•
Packet magazine is the Cisco Systems technical user magazine for
maximizing Internet and networking investments. Each quarter, Packet
delivers coverage of the latest industry trends, technology breakthroughs, and
Cisco products and solutions, as well as network deployment and
troubleshooting tips, configuration examples, customer case studies,
certification and training information, and links to scores of in-depth online
resources. You can access Packet magazine at this URL:
http://www.cisco.com/packet
•
iQ Magazine is the quarterly publication from Cisco Systems designed to
help growing companies learn how they can use technology to increase
revenue, streamline their business, and expand services. The publication
identifies the challenges facing these companies and the technologies to help
solve them, using real-world case studies and business strategies to help
readers make sound technology investment decisions. You can access iQ
Magazine at this URL:
http://www.cisco.com/go/iqmagazine
or view the digital edition at this URL:
http://ciscoiq.texterity.com/ciscoiq/sample/
Cisco IPICS Server Installation Guide
xviii
OL-8155-01
Preface
Obtaining Additional Publications and Information
•
Internet Protocol Journal is a quarterly journal published by Cisco Systems
for engineering professionals involved in designing, developing, and
operating public and private internets and intranets. You can access the
Internet Protocol Journal at this URL:
http://www.cisco.com/ipj
•
Networking products offered by Cisco Systems, as well as customer support
services, can be obtained at this URL:
http://www.cisco.com/en/US/products/index.html
•
Networking Professionals Connection is an interactive website for
networking professionals to share questions, suggestions, and information
about networking products and technologies with Cisco experts and other
networking professionals. Join a discussion at this URL:
http://www.cisco.com/discuss/networking
•
World-class networking training is available from Cisco. You can view
current offerings at this URL:
http://www.cisco.com/en/US/learning/index.html
Cisco IPICS Server Installation Guide
OL-8155-01
xix
Preface
Obtaining Additional Publications and Information
Cisco IPICS Server Installation Guide
xx
OL-8155-01
C H A P T E R
1
Overview
This chapter provides an overview of the Cisco IPICS server software installation.
It also contains information about system requirements for the Cisco IPICS server
software and the PMC application.
This chapter includes the following sections:
•
Installation Overview, page 1-1
•
Installed Components, page 1-4
•
System Requirements, page 1-4
Installation Overview
The Cisco IPICS server software is installed on supported Cisco Media
Convergence Systems (MCS) servers. The installation process involves first
installing the Cisco Linux operating system and then installing the Cisco IPICS
server software. All of the software that you need for Cisco IPICS is contained on
two CDs that are packaged with the product.
You would typically perform the Cisco Linux and Cisco IPICS installations in the
same session, although you can choose to install the operating system and then
install the Cisco IPICS server software at a later time.
The software that installs the Cisco Linux operating system and Cisco IPICS
server software is mostly automated, but it does require some user interaction to
complete. The installation procedures include the following steps:
Cisco IPICS Server Installation Guide
OL-8155-01
1-1
Chapter 1
Overview
Installation Overview
Installation CD
Step
Description
Cisco Linux operating system
Cisco Linux Setup Utility
This procedure disables default
features on the server that may be
incompatible with Cisco Linux.
Cisco Linux Package
Installation
In this phase, the installer overwrites
the hard drive and installs files on the
server. A progress window displays as
the files are installed.
GRUB bootloader
This process loads the operating system
image as the first step in a process
called firstboot. Cisco Linux runs
firstboot only once, just after the
operating system is installed for the
first time.
Cisco Linux Configuration
and Setup
In these steps, you set the date and time
and create an administrative user.
Entering the GNOME
username/password
These windows allow you to log in as
root using the password supplied by
Cisco.
Ethernet port configuration
In this procedure, you assign the IP
address for the server, create a DNS
name (optional), and reactivate the
Ethernet port.
Cisco IPICS Server Installation Guide
1-2
OL-8155-01
Chapter 1
Overview
Installation Overview
Installation CD
Step
Description
Cisco IPICS server software
Introduction
This window provides introductory
information about the installation.
End User License Agreement
This window allows you to review the
license agreement for the Cisco IPICS
server software.
Choice of the install set
This step describes the three
installation options on the Cisco IPICS
installation CD and allows you to
choose one of the types.
Password change for the root
user
This step allows you to change the
default Cisco Linux password.
Password creation for the
ipicsadmin user
This step allows you to create a
password for the ipicsadmin user, who
has limited Cisco Linux privileges.
Password creation for the
informix user
This step allows you to create a
password for the informix user, who
has limited Cisco Linux privileges,
which are related to the Informix
database files and folders.
Preinstallation summary
In this step, a window displays
information such as the version of
Cisco IPICS that you are installing, the
installation directory, and the disk
space requirement for the installation.
Package installation
In this step, a window displays that
shows the progress of the installation
and what Cisco IPICS files the installer
is writing to the server.
Option to restart the server
This step allows you to choose between
restarting the server immediately or at a
later time.
Cisco IPICS Server Installation Guide
OL-8155-01
1-3
Chapter 1
Overview
Installed Components
Installed Components
The Cisco IPICS installation includes the following components:
•
Cisco IPICS Administration Console (Cisco IPICS version 1.0(1))
•
Cisco IPICS Data Store (IBM Informix Database Server version 10.0)
•
Cisco Security Agent version 4.5
•
Tomcat service
System Requirements
This section describes the hardware and software requirements for the Cisco
IPICS server. This section includes the following topics:
•
Hardware Requirements, page 1-4
•
Software Requirements, page 1-6
Hardware Requirements
The hardware components required to deploy Cisco IPICS include a server on
which you install the Cisco IPICS server software. For users of land mobile radio
(LMR) systems to communicate in Cisco IPICS conferences, you must deploy
one or more routers that are equipped with T1 network modules.
Table 1-1 lists hardware components that Cisco supports for use with the
Cisco IPICS server software:
Table 1-1
Hardware Requirement
Hardware Component
Supported Models
Cisco servers
Cisco Media Convergence Server (MCS), model
MCS-7825-H1-S31, with 2GB memory
Cisco Media Convergence Server (MCS), model
MCS-7845-H1-S31 with 4 GB memory
Cisco IPICS Server Installation Guide
1-4
OL-8155-01
Chapter 1
Overview
System Requirements
Table 1-1
Hardware Requirement (continued)
Hardware Component
Supported Models
Cisco Integrated Service
Routers
Cisco 2811
Cisco 3725
Cisco 3845
T1 network modules
VWIC-MFT1-2T1 in a 2811 or 3845 VIC/WIC slot,
with internal digital signal processor (PVDM2-64)
NM-HDV2/NM-HDV2-2T1 in a 2811, 3725, or
3845 with digital signal processor (PVDM2-64)
Analog ports
VIC2-2E/M in a 2811 or 3845 VIC/WIC slot, with
internal digital signal processor (PVDM2-64)
NM-HD-2V (or 2VE) with VIC2-2E/M 3725 and
NM slots in 2811, 3725, or 3845
PMC Requirements
The minimum PMC requirements includes the following items:
•
300 MHz Pentium III class PC, including Mobile Pentium
•
256 MB RAM
•
16 MB free space
•
Network interface card
Cisco IP Phone Requirements
Cisco IPICS allows virtual talk group (VTG) participation of the following
models of Cisco IP Phones by enabling these phones to work with Cisco IPICS as
IP phone multicast client devices:
•
Cisco IP Phone 7960
•
Cisco IP Phone 7970
Cisco IPICS Server Installation Guide
OL-8155-01
1-5
Chapter 1
Overview
System Requirements
Software Requirements
This section lists the software requirements for using Cisco IPICS.
Internet Browser
The Cisco IPICS Administration Console, the graphical user interface (GUI) for
the server software, requires that you use Microsoft Internet Explorer version
6.0.2 or later.
Router Software
You must install Cisco IOS 12.4T software on any gateway router you use with
Cisco IPICS.
PMC Software
Minimum requirements are Windows 2000 Professional SP4 or Windows XP
Professional SP2.
Cisco IP Phone Firmware
This release of Cisco IPICS requires the following minimum versions of Cisco
CallManager and Cisco IP Phone firmware:
•
Cisco CallManager, version 4.1(2)
•
Cisco IP Phone 7960, version 7.2(3)
•
Cisco IP Phone 7970, version 7.0(1)
Cisco IPICS Server Installation Guide
1-6
OL-8155-01
C H A P T E R
2
Installing the Cisco IPICS Server
Software
This chapter describes the procedures you need to follow to install the
Cisco Linux operating system and the Cisco IPICS server software. There are also
tasks you must complete before you begin the installation. After you complete the
installation procedures for Cisco Linux and Cisco IPICS, there are additional
tasks you must accomplish before you can use the Cisco IPICS software.
This chapter includes the following sections:
•
Before You Begin, page 2-1
•
Installing the Cisco Linux Operating System, page 2-3
•
Installing Cisco IPICS Server Software, page 2-24
•
Preparing to Use Cisco IPICS, page 2-47
Before You Begin
This section describes the tasks that are necessary to prepare for the Cisco Linux
operating system and Cisco IPICS installations. This section includes the
following topics:
•
Obtaining the IP Addresses for Your Cisco IPICS System, page 2-2
•
Preinstallation Checklist, page 2-2
Cisco IPICS Server Installation Guide
OL-8155-01
2-1
Chapter 2
Installing the Cisco IPICS Server Software
Before You Begin
Obtaining the IP Addresses for Your Cisco IPICS System
To facilitate communications between your users, your Cisco IPICS system
requires a supply of IP addresses that can be reached by all users in your network
domain.
Cisco IPICS requires a multicast address for each of the following purposes:
•
When you create a PTT channel. You can use a channel to bring an LMR
signal into Cisco IPICS or to provide a meeting place for a group of PMC or
Cisco IP Phone users.
•
When you activate a VTG.
Consult your network administrator to obtain IP addresses for the following
Cisco IPICS purposes:
•
Multicast addresses for your channels and VTGs.
•
For your routers, obtain a small subnet and then take addresses from it.
•
The address for the Cisco IPICS server must be a static, local IP address that
is advertised on the network. Cisco IPICS clients such as PMCs and
Cisco IP Phones must have the static address of the Cisco IPICS server to
maintain communication.
For information on how to use the IP addresses to configure Cisco IPICS, refer to
the Cisco IPICS Server Administration Guide.
Preinstallation Checklist
Before you begin the installation, ensure that you have performed the following
tasks:
Preinstallation Tasks
Checkoff
Check that the power cords on your server and monitor are securely
attached and plugged in to a power source.
Attach an Ethernet network cable to the NIC1 port on your server.
Cisco strongly recommends that you attach an uninterruptible power
supply (UPS) to your system and ensure that the UPS is operating
correctly.
Cisco IPICS Server Installation Guide
2-2
OL-8155-01
Chapter 2
Installing the Cisco IPICS Server Software
Installing the Cisco Linux Operating System
Preinstallation Tasks (continued)
Checkoff
Check that your monitor cable connector is appropriate for the
connector on the server. VGA analog and VGA digital are common
connector types, but are not compatible with each other without the
proper adapter.
Ensure that you have obtained the IP address, subnet mask, default
gateway and DNS server (optional) information for the Cisco IPICS
server from your network administrator.
Before you begin the installation process, check the power settings on
your monitor to make sure that the display is not configured with any
timeout values.
Note
If your display times out while you are performing the
installation and you can no longer see the progress on your
monitor, move your mouse to restore the display. Make sure
that you do not press any keys on the keyboard in an effort to
restore your display; pressing keys without being able to view
the information on the display can cause undesirable results.
Check that you have both CDs from the Cisco IPICS installation
package.
Installing the Cisco Linux Operating System
Cisco IPICS runs on Cisco Linux, which is based on the Red Hat Enterprise Linux
AS 3 operating system (OS). This section describes the steps to install the
Cisco Linux operating system. You may install the Cisco IPICS server software
any time after you finish the Cisco Linux installation.
To perform this installation, you must have the Cisco Linux installation CD that
was included with your product package. The Cisco Linux installation should take
approximately 15-20 minutes.
Note
The Cisco Linux installation includes a procedure to disable the Intel SATA RAID
controller option and the virtual install disk, which are default features of the
Cisco MCS 7825 and Cisco MCS 7845. The Redundant Array of Disks (RAID) is
a combination of multiple small, independent disk drives that create an array. This
Cisco IPICS Server Installation Guide
OL-8155-01
2-3
Chapter 2
Installing the Cisco IPICS Server Software
Installing the Cisco Linux Operating System
array of drives appears to the server as a single logical storage unit or drive.
The virtual install disk is a holding place within the system ROM that contains
embedded boot drivers. These boot drivers assist in completing the operating
system installation.
The Cisco Linux operating system that is provided with Cisco IPICS does not
support RAID or the virtual install disk. Because RAID and virtual install disk are
enabled by default as part of the factory settings, you must disable these features.
To install Cisco Linux, perform the following procedure:
Procedure
Step 1
Turn the server on by pushing the power button that is located on the front of the
server.
Step 2
Insert the Cisco Linux installation CD into the Cisco MCS disk drive.
Step 3
If you are installing the Cisco Linux operating system on the Cisco MCS
7825-H1-S31, you must disable SATA software RAID and the Virtual Install
Disk. If you have the Cisco MCS 7845, you do not have to disable these features
and can proceed to Step k.
To enter the System Maintenance menu, follow these steps:
a.
Listen closely to the sounds that you hear from the server and watch your
monitor as the server boots.
b.
When you hear the server beep and see the message, “Press F10 to enter
System Maintenance Menu,” press F10.
The System Maintenance menu displays with the following choices:
– Setup Utility—This menu provides access to configuration utilities with
which you can change settings for server components, such as the SATA
Software RAID and the Virtual Install Disk.
– Inspect Utility—This menu provides access to statistical information
about the server and its components, such as PCI Device Info and a
System Memory Map.
– Diagnostic Utility—This menu includes utilities you can use to perform
diagnostic tests on the server, such as a memory test or a CPU test.
c.
To choose Setup Utility from the System Maintenance menu, press Enter.
Cisco IPICS Server Installation Guide
2-4
OL-8155-01
Chapter 2
Installing the Cisco IPICS Server Software
Installing the Cisco Linux Operating System
The ROM-Based Setup Utility displays. The Utility provides information
about the server in the right pane, such as the model number, serial number
(S/N), and other product information.
The left pane displays a menu of settings, which you can access by pressing
the Up Arrow and Down Arrow keys.
d.
From the Setup Utility menu, press the Down Arrow key to highlight
Advanced Options and then press Enter.
The Advanced Options menu displays.
e.
Press the Down Arrow key to highlight Virtual Install Disk
When you highlight Virtual Install Disk, the current status displays below the
menu.
f.
If the status displays as Disabled, proceed to Step h.
If the Virtual Install Disk displays as Enabled, change the Configuration
Selection. To change the selection, press Enter to open the menu and then
press the Down Arrow key to highlight Disabled.
g.
To confirm your choice, press Enter again.
The Virtual Install Disk setting displays as Disabled.
h.
From the Advanced Options Menu, press the Down Arrow key to highlight
SATA Software Raid.
The current status displays below the menu.
i.
If the status displays as Disabled, proceed to Step k.
If the SATA Software Raid status displays as Enabled, press Enter to open
the menu and press the Down Arrow key to highlight Disabled.
j.
To confirm your choice, press Enter again.
k.
To close the menus and exit the utility, press Esc twice.
l.
To confirm the exit and save your changes, press F10.
If you press any other key, you will be returned to the Main Menu of the Setup
Utility.
The server begins to boot from the CD. This time, when the system beeps, let it
continue to boot from the CD.
The Cisco Linux installation displays the CD version and the option to overwrite
the hard drive. See Figure 2-1 for an example of this message.
Cisco IPICS Server Installation Guide
OL-8155-01
2-5
Chapter 2
Installing the Cisco IPICS Server Software
Installing the Cisco Linux Operating System
Note
The CD version that displays reflects the version of Cisco Linux, not the
Cisco IPICS server software.
Figure 2-1
Step 4
Overwrite Hard Drive Message
To overwrite the hard drive and install Cisco Linux files, follow these steps:
a.
When the system prompts you to overwrite the hard drive, enter Y and then
press Enter.
The Cisco Linux Installation Progress window displays information about the
version of Cisco Linux that you are installing. A table displays the progress
of the installation and the number of software packages that remain to be
installed. See Figure 2-2 for an example of this window.
Cisco IPICS Server Installation Guide
2-6
OL-8155-01
Chapter 2
Installing the Cisco IPICS Server Software
Installing the Cisco Linux Operating System
Figure 2-2
Cisco Linux Installing Packages Window
The Cisco Linux installer first formats the file system and then proceeds with
installing the software packages.
Note
The file system formatting and package installation takes
approximately 12 minutes. However, the screen may be appear
unresponsive for a few minutes after the package installation
completes. This period of inactivity occurs because the system must
complete background security processes.
The MCS server ejects the installation CD and the Installation Complete
window displays (see Figure 2-3 for an example of the Installation Complete
window).
b.
Remove the CD from the drive.
Cisco IPICS Server Installation Guide
OL-8155-01
2-7
Chapter 2
Installing the Cisco IPICS Server Software
Installing the Cisco Linux Operating System
Note
Figure 2-3
c.
Installation Complete Window
(Optional) Click Release Notes or press Alt-R to view the technical
information related to this release of Cisco Linux.
Note
d.
Keep your installation CD in a safe location, so that you can reinstall
the operating system, if necessary.
Although the window indicates that the installation is complete (see
Figure 2-3 for an example of this window), you still must complete
several more tasks before you can proceed to the Cisco IPICS server
software installation. The remaining steps in this section describe the
process of configuring the Cisco Linux operating system.
To close the window and reboot the server, click Exit or press Alt-E.
Cisco IPICS Server Installation Guide
2-8
OL-8155-01
Chapter 2
Installing the Cisco IPICS Server Software
Installing the Cisco Linux Operating System
The server reboots.
Note
During the bootup process a GRUB version window displays. The
window times out in a few seconds. Let the time expire and boot process
continue.
The Linux hardware detection utility window displays with a message that it has
detected the Intel SATA Controller in your server. The utility allows you to
configure controller.
Step 5
Press any key to configure the controller before the window times out.
A Hardware Added window displays and states that the Intel SATA Controller was
added to your system. The window displays the following options:
Step 6
•
Configure the device—This option specifies the default.
•
Ignore the device—No configuration is added to the system, but you would
not be prompted if the system detected the controller again when you restart
the server in the future.
•
Do nothing—No configuration is added to the system and you would be
notified again if the system detects the controller the next time you restart the
server.
To configure the hardware detection utility, press Enter to accept the default and
configure the controller.
A Cisco Linux Welcome window displays. See Figure 2-4 for an example of this
window.
Cisco IPICS Server Installation Guide
OL-8155-01
2-9
Chapter 2
Installing the Cisco IPICS Server Software
Installing the Cisco Linux Operating System
Figure 2-4
Step 7
Cisco Linux Welcome Window
To proceed with the setup of Cisco Linux, follow these steps:
a.
At the Welcome window, click Next.
The Date and Time Window displays. See Figure 2-5 for an example of this
window.
Cisco IPICS Server Installation Guide
2-10
OL-8155-01
Chapter 2
Installing the Cisco IPICS Server Software
Installing the Cisco Linux Operating System
Figure 2-5
b.
Caution
Date and Time Window
In the Date pane, use the arrows to navigate to the correct month and year and
then click the current day of the month. Then, in the Time pane, use the
arrows to set the Hour, Minute, and Second to the current time.
Make sure that you only perform system date changes before you install the
Cisco IPICS server software. Cisco IPICS does not support any modification of
the system date in the operating system after the Cisco IPICS server software has
been installed. Therefore, it is very important that you check your system date to
ensure that it properly reflects your local date and time. If the system date is not
properly set to your local date and time, you must adjust it before you install the
Cisco IPICS server software. If you try to change the system date and time after
you install the software, you will invalidate your license and cause the system to
become inoperable.
Cisco IPICS Server Installation Guide
OL-8155-01
2-11
Chapter 2
Installing the Cisco IPICS Server Software
Installing the Cisco Linux Operating System
Note
c.
Cisco IPICS does not support the Network Time Protocol (NTP)
feature.
To continue with the installation, click Next.
The System User window displays.
Note
The system user you create in Step d is a non-administrative user that
has limited capabilities in Cisco Linux. For example, this user can
browse the directories on the server, including the Cisco IPICS
directories, and open configuration files to view them. However, the
system user, by default, cannot modify configuration files.
See Figure 2-6 for an example of the window.
Cisco IPICS Server Installation Guide
2-12
OL-8155-01
Chapter 2
Installing the Cisco IPICS Server Software
Installing the Cisco Linux Operating System
Figure 2-6
System User Window
d.
To create a non-administrator user for the Cisco Linux system, enter the name
for the user into the Username field.
e.
Press Tab to move to the other fields:
•
The Full Name field is optional.
•
The Password and Confirm Password fields are required. The password must
contain at least six characters.
Note
f.
Be aware that Cisco IPICS does not support the use of network
authentication functionality.
To continue with the setup, click Next.
The Additional CDs window displays. See Figure 2-7 for an example.
Cisco IPICS Server Installation Guide
OL-8155-01
2-13
Chapter 2
Installing the Cisco IPICS Server Software
Installing the Cisco Linux Operating System
Figure 2-7
Additional CDs Window
.
Note
g.
Because Cisco IPICS does not support the use of third-party plug-ins
and applications, documentation CDs, or add-ons, do not click any of
the Install buttons in the Additional CDs window.
To continue with the setup, click Next.
The Finish Setup window displays. See Figure 2-8 for an example of this
window.
Cisco IPICS Server Installation Guide
2-14
OL-8155-01
Chapter 2
Installing the Cisco IPICS Server Software
Installing the Cisco Linux Operating System
Figure 2-8
h.
Finish Setup Window
To continue, click Next.
The GNOME login window displays with a Username field. See Figure 2-9
for an example.
Cisco IPICS Server Installation Guide
OL-8155-01
2-15
Chapter 2
Installing the Cisco IPICS Server Software
Installing the Cisco Linux Operating System
Figure 2-9
Note
Step 8
GNOME Username Field
In Step 8, ensure that you log in as the root user and not the system user
that you created earlier in the installation. If you do not log in as root, you
cannot configure the Ethernet port.
Enter root in the Username field and press Enter.
The GNOME login window displays with a password field.
Step 9
Enter cisco in the Password field and press Enter.
The Cisco Linux desktop displays.
Note
While Cisco supplies the root password to use in this part of the
installation, the Cisco IPICS installation provides an opportunity to
change this password to ensure system security.
Cisco IPICS Server Installation Guide
2-16
OL-8155-01
Chapter 2
Installing the Cisco IPICS Server Software
Installing the Cisco Linux Operating System
Step 10
You must now configure the Ethernet port in your server that you will use for
Cisco IPICS. To configure the port, follow these steps:
a.
Open a terminal window to enter commands. To do so, open the Red Hat
menu on the Cisco Linux desktop by clicking the Red Hat icon.
b.
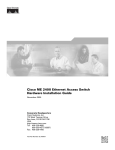
Choose System Tools > Network Device Control. See Figure 2-10 for an
example of the menu.
Figure 2-10
Using the Red Hat Menu
The Network Device Control window displays at least one active port. See
Figure 2-11 for an example of the window.
Note
Your server may have more than one Ethernet port. If so, choose eth0.
Also, ensure that your Ethernet cable is plugged into NIC1 and not
NIC2.
Cisco IPICS Server Installation Guide
OL-8155-01
2-17
Chapter 2
Installing the Cisco IPICS Server Software
Installing the Cisco Linux Operating System
Figure 2-11
c.
Network Device Control Window
To configure the port, click the eth0 device from the list and then click
Configure.
The Network Configuration window displays. See Figure 2-12 for an
example of the window.
Cisco IPICS Server Installation Guide
2-18
OL-8155-01
Chapter 2
Installing the Cisco IPICS Server Software
Installing the Cisco Linux Operating System
Figure 2-12
d.
Network Configuration Window
To continue with the configuration, click eth0 again and then click Edit.
The Ethernet Device window displays. See Figure 2-13 for an example of the
window.
Cisco IPICS Server Installation Guide
OL-8155-01
2-19
Chapter 2
Installing the Cisco IPICS Server Software
Installing the Cisco Linux Operating System
Figure 2-13
e.
Ethernet Device Window
To enter a static IP address for eth0, click the Statically set IP addresses
option.
The Statically set IP addresses fields become active.
Note
For Cisco IPICS to function properly, the Cisco IPICS server must
have a static IP address.
Cisco IPICS Server Installation Guide
2-20
OL-8155-01
Chapter 2
Installing the Cisco IPICS Server Software
Installing the Cisco Linux Operating System
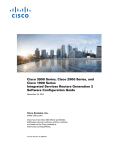
Figure 2-14
Entering the Static IP Address
f.
In the Address field, enter the static IP address.
g.
Press Tab to enter information into the Subnet Mask and Default Gateway
Address fields. See Figure 2-14 for an example and the “Obtaining the IP
Addresses for Your Cisco IPICS System” section on page 2-2 for more
information.
h.
To continue with the configuration, click OK.
Note
Creating a Domain Name Service (DNS) name for the server is
optional. If you want to enter DNS information for eth0, continue to
Step i.
If you do not want to enter DNS information, proceed to Step m.
i.
To enter DNS information for this port, click the DNS tab.
Cisco IPICS Server Installation Guide
OL-8155-01
2-21
Chapter 2
Installing the Cisco IPICS Server Software
Installing the Cisco Linux Operating System
Figure 2-15
Entering DNS Information
j.
In the Hostname field, enter a name for the system. Then, press Tab.
k.
In the Primary DNS field, enter the IP addresses for primary DNS server for
your network. Then press Tab.
l.
If your network has secondary and tertiary DNS servers, enter those IP
address, using the Tab key to move between fields. If you do not have
secondary and tertiary DNS servers, continue to Step m.
m.
To close the Ethernet Device window, click X.
A window displays and allows you to save your changes.
n.
Click Yes to save your changes.
The system displays a message that indicates that you may want to restart
network services or restart the system.
o.
To close the message window, click OK.
The Network Device Control window displays that eth0 is inactive (see
Figure 2-15 for an example of the window).
Cisco IPICS Server Installation Guide
2-22
OL-8155-01
Chapter 2
Installing the Cisco IPICS Server Software
Installing the Cisco Linux Operating System
Figure 2-16
p.
Network Device Control Window
To activate eth0, click Activate.
The status for eth0 changes to active.
Note
q.
If this is not a fresh install of Cisco Linux, eth0 should already be
active. If the port is active, proceed to Step q.
Click Close.
Cisco Linux activates eth0 and closes the window. The Cisco Linux desktop
displays.
Step 11
To restart the server so that the installation completes successfully, follow these
steps:
a.
To open the Log Out window, click the Red Hat menu and choose Log Out.
The Log Out window displays.
b.
Choose Restart the Computer. Then, click OK or press Enter.
The server reboots and returns you to GNOME Login window.
Step 12
To log in, enter the username as root and press Enter.
Step 13
Enter the password as cisco and press Enter.
The Cisco Linux desktop displays.
Cisco IPICS Server Installation Guide
OL-8155-01
2-23
Chapter 2
Installing the Cisco IPICS Server Software
Installing Cisco IPICS Server Software
Step 14
To verify network connectivity, follow these steps:
a.
To open a terminal window, click the Red Hat menu and choose System
Tools > Terminal
b.
To ping another server on the network, enter the following command:
ping <destination IP address>
where destination IP address represents the default gateway address, or an IP
address of another server on the network.
If the ping is not successful, troubleshoot the network connectivity with your
network administrator.
Step 15
To locate the hardware MAC address so that you can obtain your Cisco IPICS
license, follow these steps:
a.
To view the MAC address for your hardware, enter the following command:
[root] #ifconfig -a
Information displays about the network interface cards.
b.
Locate the eth0 heading and note the HWaddr field. This is the MAC address
for the server. Note this information so that you can use it to obtain your
license for Cisco IPICS. For more information, see the “Obtaining Your
License File” section on page 2-49.
c.
To close the terminal window, click X.
The Cisco Linux operating system installation is now complete. You can continue
with the installation of the Cisco IPICS server software. If you do not want to
install Cisco IPICS immediately, you can resume the installation at a later time.
To install the Cisco IPICS server software, see the “Installing Cisco IPICS Server
Software” section on page 2-24.
Installing Cisco IPICS Server Software
To install the Cisco IPICS server, you must have successfully completed the
Cisco Linux operating system installation. For more information on installing
Cisco Linux, see the “Installing the Cisco Linux Operating System” section on
page 2-3.
Cisco IPICS Server Installation Guide
2-24
OL-8155-01
Chapter 2
Installing the Cisco IPICS Server Software
Installing Cisco IPICS Server Software
You can install the Cisco IPICS server software by using the installation CD at the
Cisco IPICS server or you may install it remotely by copying the installer file to
the server.
This installation procedure includes a choice of the following install options:
•
Typical—This option installs the Cisco IPICS server software, including
CSA
•
Custom—This option allows you to install the Cisco IPICS server software
without CSA
•
Upgrade—For information on performing an upgrade of the Cisco IPICS
server software, see Chapter 3, “Upgrading Cisco IPICS”
If you choose not to install CSA during the Cisco IPICS server software
installation, you can install CSA any time after the Cisco IPICS installation is
complete.
This section includes the following topics:
•
Installing the Cisco IPICS Server Software at the Server, page 2-25
•
Installing Cisco IPICS from a Remote Location, page 2-38
•
Manually Installing CSA, page 2-46
Installing the Cisco IPICS Server Software at the Server
To perform the Cisco IPICS server software installation, you must have the
Cisco IPICS installation CD that was included with your product package.
Caution
Make sure that you only perform system date changes before you install the
Cisco IPICS software. Cisco IPICS does not support any modification of the
system date in the operating system after the Cisco IPICS software has been
installed. Therefore, it is very important that you check your system date to ensure
that it properly reflects your local date and time. If the system date is not properly
set to your local date and time, you must adjust it before you install the
Cisco IPICS software. If you try to change the system date and time after you
install the software, you will invalidate your license and cause the system to
become inoperable.
Cisco IPICS Server Installation Guide
OL-8155-01
2-25
Chapter 2
Installing the Cisco IPICS Server Software
Installing Cisco IPICS Server Software
For information about setting the date and time as part of the operating system
installation, see the “Installing Cisco IPICS Server Software” section on
page 2-24.
Note
You must log in with root privileges to perform the Cisco IPICS installation. If
you attempt to run the installation from any other user ID, the installation returns
an error and exits.
To install the Cisco IPICS server software, perform the following procedure:
Procedure
Step 1
To log in to the Cisco Linux operating system, enter root in the username field of
the Login window and press Enter.
Cisco Linux displays a window with a password field.
Step 2
Enter your root password and press Enter. The default password is cisco.
The Cisco Linux desktop displays.
Step 3
Insert the Cisco IPICS installation CD into the Cisco MCS disk drive.
The Cisco IPICS CD icon displays on the desktop. See Figure 2-17 for an
example.
Cisco IPICS Server Installation Guide
2-26
OL-8155-01
Chapter 2
Installing the Cisco IPICS Server Software
Installing Cisco IPICS Server Software
Figure 2-17
Step 4
Cisco IPICS CD Icon
To open the CD contents, double-click the CD icon.
Cisco Linux displays a window that shows the Cisco IPICS installer file. See
Figure 2-18 for an example.
Cisco IPICS Server Installation Guide
OL-8155-01
2-27
Chapter 2
Installing the Cisco IPICS Server Software
Installing Cisco IPICS Server Software
Figure 2-18
Step 5
Installer File on the Cisco IPICS CD
To start the installation, double-click the installer icon.
Cisco Linux displays a message window that offers options to display or run the
installer file. See Figure 2-19 for an example of the window.
Cisco IPICS Server Installation Guide
2-28
OL-8155-01
Chapter 2
Installing the Cisco IPICS Server Software
Installing Cisco IPICS Server Software
Figure 2-19
Step 6
Run or Display Message Window
When you are prompted to run or display the file contents, click Run in Terminal.
The Cisco IPICS installer window displays with an introduction to the process.
See Figure 2-20 for an example of the window.
Note
If you click Run, rather than Run in Terminal, there is a delay of
approximately 3 minutes while the installer completes background
security processes, such as extracting the necessary files for the
installation. During this delay, the screen may be appear unresponsive. Do
not click Run or Run in Terminal again or you will start an additional
instance of the installer.
Cisco IPICS Server Installation Guide
OL-8155-01
2-29
Chapter 2
Installing the Cisco IPICS Server Software
Installing Cisco IPICS Server Software
Figure 2-20
Step 7
Introduction in the Installer Window
To continue with the installation, click Next.
The Cisco IPICS installer displays the End User License Agreement.
Step 8
Use the scroll bar in the License Agreement pane to view the entire agreement.
Read and review the license agreement; then, click the I accept the terms of the
License Agreement radio button. Then, click Next.
Note
You can only continue with the installation if you accept the End User
License Agreement.
The Choose Install Set window displays with the following installation option
(see Figure 2-21 for an example of the window):
•
Typical—This option installs Cisco IPICS server software with CSA
•
Customize—This option allows you to choose whether to install Cisco IPICS
server software with or without CSA
Cisco IPICS Server Installation Guide
2-30
OL-8155-01
Chapter 2
Installing the Cisco IPICS Server Software
Installing Cisco IPICS Server Software
•
Upgrade—This option installs an upgrade to a previously installed version of
Cisco IPICS server software
Figure 2-21
Step 9
Install Set Window
To install Cisco IPICS with the CSA, choose Typical. Then, click Next.
Note
If you decide not to install CSA with the installation of this server
software, you can manually install CSA at a later time. For more
information, see the “Manually Installing CSA” section on page 2-46. For
information about manually uninstalling CSA, see the “Uninstalling
CSA” section on page 5-7.
The Cisco IPICS installer displays the Password Change Panel for the root user.
See Figure 2-22 for an example. The root user has complete privileges in the
Cisco Linux environment.
Cisco IPICS Server Installation Guide
OL-8155-01
2-31
Chapter 2
Installing the Cisco IPICS Server Software
Installing Cisco IPICS Server Software
Caution
For security reasons, Cisco strongly recommends that you change the root
password from the default password that was supplied in your product package.
Figure 2-22
Step 10
Caution
Password Panel for root User
To change the root user password, enter a new password in the first password
field.
When you enter your new root user password, make sure that you only use
passwords that begin with a-z, A-Z or 0-9. Cisco IPICS does not support the use
of special characters as the first character in the root password. If you enter a
special character as the first character in the root password, your root login will
become inoperable and you will need to boot the system in the single user mode
to change the root password and reinstall Cisco IPICS to resolve the problem.
For information about single user mode and changing the root password, see
Appendix A, “Changing the Cisco Linux Root Password.”
Cisco IPICS Server Installation Guide
2-32
OL-8155-01
Chapter 2
Installing the Cisco IPICS Server Software
Installing Cisco IPICS Server Software
Step 11
To confirm the new password, press Tab and type the password again. Then, click
Next.
The Cisco IPICS installer displays the Password Change Panel for the ipicsadmin
user.
Note
Step 12
Caution
After you complete the installation, you can change the password for the
Cisco Linux root user at any time. For more information about changing
the root user password, see Appendix A, “Changing the Cisco Linux Root
Password.”.
Repeat Step 10 and Step 11 for the ipicsadmin user and then for the informix user.
These users have the following capabilities:
•
The ipicsadmin user has limited capability in the Cisco Linux environment.
This user can start, stop and restart the Tomcat service and browse the
Cisco IPICS directories on the server machine.
•
The informix user can perform all database-related activities, such as backup
and restore. The informix user cannot, however, cannot perform activities
related to the Tomcat service, such as starting or stopping the Tomcat service.
Never change the password for the informix user outside of the Cisco IPICS
installer. If you need to change the informix password, you should only do so
when performing a Cisco IPICS installation or upgrade. When you manually
change the informix password, the Cisco IPICS Administration Console becomes
unusable.
The Cisco IPICS installer displays the Preinstallation Summary. See Figure 2-23
for an example.
The Preinstallation Summary displays the following information:
•
The product name and version
•
The destination folder for the installation
•
Disk space information, including:
– The amount of space required for the installation
– The available space on the disk
Cisco IPICS Server Installation Guide
OL-8155-01
2-33
Chapter 2
Installing the Cisco IPICS Server Software
Installing Cisco IPICS Server Software
Figure 2-23
Step 13
Preinstallation Summery
To begin installing Cisco IPICS files, click Next.
The Installation Progress window displays, showing the files and folders being
written to the disk. See Figure 2-24 for an example.
Note
The Cisco IPICS server software installation typically takes about 20
minutes to complete.
Cisco IPICS Server Installation Guide
2-34
OL-8155-01
Chapter 2
Installing the Cisco IPICS Server Software
Installing Cisco IPICS Server Software
Figure 2-24
Step 14
Cisco IPICS Installation Progress Window
When the file installation completes, the Cisco IPICS Install Complete window
displays. See Figure 2-25 for an example of the window. This window lists the
directory in which Cisco IPICS was installed, along with the URL where you may
access the Cisco IPICS Administration Console.
Cisco IPICS Server Installation Guide
OL-8155-01
2-35
Chapter 2
Installing the Cisco IPICS Server Software
Installing Cisco IPICS Server Software
Figure 2-25
Step 15
Install Complete Window
To continue, click Next.
The Restart Computer window displays to provide you the option of restarting the
computer now or at a later time. See Figure 2-26 for an example.
Cisco IPICS Server Installation Guide
2-36
OL-8155-01
Chapter 2
Installing the Cisco IPICS Server Software
Installing Cisco IPICS Server Software
Figure 2-26
Step 16
Restart Computer Window
At the Restart Computer window, choose from the following options:
•
If you want to reboot the computer immediately, click the Restart Now radio
button and then click Done. The computer reboots after you click Done.
•
If you want to reboot the computer later, click the Restart Later radio button
and then click Done. The installer closes this window and returns you to the
Cisco Linux desktop.
Note
If you choose the Restart Later option, be sure to complete the restart
before you attempt to log in to Cisco IPICS. Cisco IPICS processes, such
as the Tomcat service and Informix database, will not start without
rebooting the server.
Cisco IPICS Server Installation Guide
OL-8155-01
2-37
Chapter 2
Installing the Cisco IPICS Server Software
Installing Cisco IPICS Server Software
Installing Cisco IPICS from a Remote Location
You may find it necessary or desirable to perform the Cisco IPICS server software
installation from a remote location on your network. This section describes the
method for installing Cisco IPICS from a PC that is connected to the network.
Before you start the remote installation, you must transfer the installer file from
the Cisco IPICS installation CD to the Cisco IPICS server. You use the one of the
following methods to transfer the file:
•
Place the CD (or have someone place it for you) in the Cisco IPICS server and
copy the installer file to the server
•
Place the CD in a PC and transfer the installer file to the Cisco IPICS server
by using an FTP client software program, such as SSH Tectia File Transfer
Client
After you transfer the file to the Cisco IPICS server, you can execute the installer
from an SSH Tectia Client window with the -i console option.
To install the Cisco IPICS server software from a remote location, perform the
following procedure:
Procedure
Step 1
Perform one of the following procedures to transfer the Cisco IPICS installer file
to the Cisco IPICS server:
Copying the File from the CD Drive in the Server
a.
Place the Cisco IPICS installation CD in the disk drive of the Cisco IPICS
server or have someone place the CD in the drive for you.
b.
To connect remotely to the Cisco IPICS server from your PC, open the SSH
Tectia Client by choosing Start > All Programs > SSH Tectia Client >
SSH Tectia Client.
c.
To open a window for entering the server IP address, click Quick Connect.
The Connect to Remote Host window displays.
d.
In the Host field, enter the DNS name or the IP address for your Cisco IPICS
server. Then, press Tab.
e.
In the User Name field, enter root. Then, click Connect.
Cisco IPICS Server Installation Guide
2-38
OL-8155-01
Chapter 2
Installing the Cisco IPICS Server Software
Installing Cisco IPICS Server Software
The Enter Password window displays.
f.
Enter the root password and then click OK.
An SSH Tectia Client window displays.
g.
To see the contents of the CD, enter the following commands:
[root] #cd /mnt/cdrom
[root] #ls -l
The name of the Cisco IPICS installer file displays with a .bin extension.
h.
To copy the file to your root directory, enter the following command:
[root] #cp /mnt/cdrom/<name of Cisco IPICS installer file>.bin .
where name of Cisco IPICS installer file represents the name of the .bin file
that was displayed in Step g.
The file copies from the CD to your root directory.
Transferring the File from the your PC to the Server
a.
Place the Cisco IPICS installation CD in the CD drive of your PC.
b.
Open the SSH Tectia File Transfer Client by choosing Start >
All Programs > SSH Tectia Client > SSH Tectia Client - File Transfer.
The SSH Tectia File Transfer window displays. The desktop of your PC
displays in the left pane.
c.
To open a window for entering the server IP address, click Quick Connect.
The Connect to Remote Host window displays.
d.
In the Host field, enter the DNS name or the IP address for your Cisco IPICS
server. Then, press Tab.
e.
In the User Name field, enter root. Then, click Connect.
The Enter Password window displays.
f.
Enter the root password and then click OK.
The SSH Tectia File Transfer Client connects to the Cisco IPICS server and
displays the contents of the root directory in the right pane of the window.
g.
In the left pane of the window, navigate to the directory on your PC to which
you saved the upgrade file.
Cisco IPICS Server Installation Guide
OL-8155-01
2-39
Chapter 2
Installing the Cisco IPICS Server Software
Installing Cisco IPICS Server Software
h.
To initiate the copy procedure, drag the upgrade file from the left pane of the
window to the right pane.
A progress window displays while the file copies to the server. When the copy
completes, the upgrade file displays in the right pane.
i.
Step 2
To close the SSH Tectia File Transfer Client, click X.
To connect to the Cisco IPICS server, open an SSH Tectia Client window on your
PC by performing the following procedure:
a.
To open the SSH Tectia Client, click Start and choose All Programs >
SSH Tectia Client > SSH Tectia Client.
The SSH Tectia Client displays.
b.
To open a connection to the Cisco IPICS server, click Quick Connect.
The Connect to Remote Host window displays.
c.
In the Host field, enter the DNS name or the IP address for your Cisco IPICS
server. Then, press Tab.
d.
In the User Name field, enter root. Then, click Connect.
The Enter Password window displays.
e.
Enter the root password and then click OK.
After the login completes, the SSH Tectia Client displays a root prompt for
the Cisco IPICS server.
Step 3
To view the files in the root directory, enter the following command and press
Enter:
[root] #ls -l
Step 4
Locate the installer file, install_ipics_x_x.bin, where the x_x variable represents
the version of Cisco IPICS you are installing.
Step 5
To begin the installation, type the following command and then press Enter:
[root] #./<name of installer file>.bin -i console
where name of upgrade file represents the name of the .bin file you transferred to
the server.
The window displays a message that informs you that the installer is extracting.
See Figure 2-27 for an example of the message. Please wait while the server
extracts the files.
Cisco IPICS Server Installation Guide
2-40
OL-8155-01
Chapter 2
Installing the Cisco IPICS Server Software
Installing Cisco IPICS Server Software
Figure 2-27
Starting the Remote Installation
After the files are extracted, the installer displays an introduction. See Figure 2-28
for an example.
Figure 2-28
Step 6
Introduction to the Remote Installation
To continue, press Enter.
The first page of the End User License Agreement displays. There are
approximately eight pages to the agreement.
Step 7
Read each page and press Enter when you finish.
At the end of the final page of the End User License Agreement, the installer
prompts you to accept the terms of the license agreement.
Step 8
If you accept the terms, press Y and Enter.
The Choose Install Set menu displays. You can choose from the following
options:
•
Typical—This option installs Cisco IPICS server software with CSA
•
Customize—This option allows you to choose whether to install Cisco IPICS
server software with or without CSA
Cisco IPICS Server Installation Guide
OL-8155-01
2-41
Chapter 2
Installing the Cisco IPICS Server Software
Installing Cisco IPICS Server Software
•
Upgrade—This option installs an upgrade to a previously installed version of
Cisco IPICS server software
Figure 2-29
Step 9
Install Set Options
To choose the Typical option, press Enter.
Note
If you decide not to install CSA with this installation of Cisco IPICS
server software, you can manually install CSA at a later time. For more
information, see the “Manually Installing CSA” section on page 2-46. For
information about manually uninstalling CSA, “Uninstalling CSA”
section on page 5-7.
The installer prompts you to enter a new password for the root user.
Step 10
Caution
Enter a root password that is at least six characters in length. Then, press Enter.
When you enter your new root user password, make sure that you only use
passwords that begin with a-z, A-Z or 0-9. Cisco IPICS does not support the use
of special characters as the first character in the root password. If you enter a
special character as the first character in the root password, your root login will
become inoperable and you will need to boot the system in the single user mode
to change the root password and reinstall Cisco IPICS to resolve the problem.
For information about single user mode and changing the root password, see
Appendix A, “Changing the Cisco Linux Root Password.”
The installer prompts you to re-enter the root password.
Step 11
Enter the root password again and press Enter.
Cisco IPICS Server Installation Guide
2-42
OL-8155-01
Chapter 2
Installing the Cisco IPICS Server Software
Installing Cisco IPICS Server Software
The installer prompts you to enter a password for the ipicsadmin user.
Step 12
Caution
Repeat Step 10 and Step 11 for the ipicsadmin user and the informix user. These
users have the following capabilities:
•
The ipicsadmin user has limited capability in the Cisco Linux environment.
This user can start, stop and restart the Tomcat service and browse the
Cisco IPICS directories on the server machine.
•
The informix user can perform all database-related activities, such as backup
and restore. The informix user cannot, however, cannot perform activities
related to the Tomcat service, such as starting or stopping the Tomcat service.
Never change the password for the informix user outside of the Cisco IPICS
installer. If you need to change the informix password, you should only do so
when performing a Cisco IPICS installation or upgrade. When you manually
change the informix password, the Cisco IPICS Administration Console becomes
unusable.
The Cisco IPICS installer displays the Preinstallation Summary. See Figure 2-30
for an example.
The Preinstallation Summary displays the following information:
•
The product name and version
•
The destination folder for the installation
•
Disk space information, including:
– The amount of space required for the installation
– The available space on the disk
Cisco IPICS Server Installation Guide
OL-8155-01
2-43
Chapter 2
Installing the Cisco IPICS Server Software
Installing Cisco IPICS Server Software
Figure 2-30
Step 13
Preinstallation Summary
To continue, press Enter.
The installation process begins. Figure 2-31 shows an example of the installation
progress indicator.
Figure 2-31
Installation Progress Indicator
The Cisco IPICS Install Complete message displays. See Figure 2-32 for an
example of the window. This window lists the directory in which Cisco IPICS was
installed, along with the URL where you may access the Cisco IPICS
Administration Console.
Cisco IPICS Server Installation Guide
2-44
OL-8155-01
Chapter 2
Installing the Cisco IPICS Server Software
Installing Cisco IPICS Server Software
Figure 2-32
Install Complete Message
To continue, press Enter.
The Restart Computer page displays an option for you to restart the server now or
later. See Figure 2-33 for an example.
Figure 2-33
Step 14
Restart Computer Option
To restart the computer now, press Enter.
A broadcast message from root displays an announcement that the system will
reboot in one minute. See Figure 2-34 for an example. After one minute, another
broadcast message displays another announcement that the system is rebooting.
Cisco IPICS Server Installation Guide
OL-8155-01
2-45
Chapter 2
Installing the Cisco IPICS Server Software
Installing Cisco IPICS Server Software
Figure 2-34
Cisco Linux Reboot Broadcast Messages
When the system reboots, the connection to the server is disrupted.
Step 15
To close the SSH Tectia Client window, click X.
Manually Installing CSA
If you did not install CSA at the time of the Cisco IPICS server software
installation, you can perform the CSA installation manually at any time. To install
CSA manually, perform the following procedure:
Procedure
Step 1
Log in to the Cisco IPICS server with root privileges.
The Cisco Linux desktop displays.
Step 2
To open a terminal window, click the Red Hat menu and choose System Tools >
Terminal
A terminal window displays.
Step 3
Install the Linux kernel source package by entering the following command:
[root] #rpm -Uv kernel-source-2.4.21-32.0.1.EL.i386.rpm
Step 4
Change directory to the /tmp directory by entering the following command:
[root] #cd /tmp
Step 5
Enter the following command to untar the CSAStandAlone.tar file and place the
extracted copy in the /tmp/CSCOcsa directory:
Cisco IPICS Server Installation Guide
2-46
OL-8155-01
Chapter 2
Installing the Cisco IPICS Server Software
Preparing to Use Cisco IPICS
[root tmp] #tar xvf /root/CSAStandAlone.tar
Step 6
Navigate to the /CSCOcsa directory by entering the following command:
[root tmp] #cd CSCOcsa
Step 7
To install the CSA software, enter the following command:
[root CSCOcsa] #sh install_rpm.sh
Step 8
Enter the following command to restart the server and complete the installation:
[root] #reboot
For information about manually uninstalling CSA, see the “Uninstalling CSA”
section on page 5-7.
Preparing to Use Cisco IPICS
Now that you have completed the Cisco IPICS installation, complete the
following tasks, so that you can begin using the software:
•
Checking the Installation, page 2-47
•
Managing Your Licenses, page 2-49
•
Generating the Cisco IPICS PMC Application Installer, page 2-58
For information on other Cisco IPICS setup and configuration tasks, refer to the
Cisco IPICS Server Administration Guide.
Checking the Installation
When you complete the Cisco IPICS server software installation, you should be
able to access the Cisco IPICS Administration Console by using a browser. You
can test the installation by opening a browser and logging in to the Administration
Console.
Note
There may be a delay of a few minutes before users can access the
Administration Console after the Cisco IPICS server restarts.
Cisco IPICS Server Installation Guide
OL-8155-01
2-47
Chapter 2
Installing the Cisco IPICS Server Software
Preparing to Use Cisco IPICS
To access the Cisco IPICS Administration Console from a browser and check the
installation, perform the following procedure:
Procedure
Step 1
Open a browser window on your PC.
Step 2
In the Address field, enter either the static IP address or the DNS name that you
established for your Cisco IPCIS server in the “Installing the Cisco Linux
Operating System” section on page 2-3:
http://<static IP address or DNS name>
The Cisco IPICS Login window displays.
Step 3
Log in by using the Username, ipics, and the password, cisco123.
Note
The ipics user has all privileges in Cisco IPICS and can perform any of
the setup and configuration tasks.
The Manage License window of the Cisco IPICS Administration Console
displays with a message that you must upload a license file before you can use the
software. See Figure 2-35 for an example.
Figure 2-35
Cisco IPICS Manage License Window
Cisco IPICS Server Installation Guide
2-48
OL-8155-01
Chapter 2
Installing the Cisco IPICS Server Software
Preparing to Use Cisco IPICS
To obtain your license file, see the “Obtaining Your License File” section on
page 2-49.
Managing Your Licenses
Cisco IPICS manages the number of concurrent PMC and Cisco IP Phone users
and the number of active voice ports with the license manager. As you use
Cisco IPICS, the license manager tracks the number of PMC users and
Cisco IP Phone users who are logged in at one time and the number of voice ports
that are currently active. The number of users or voice ports cannot exceed the
number of licenses that you have.
When you finish the Cisco IPICS installation, you can use the Product
Authorization Key that was included in your Cisco IPICS product package to
obtain a license file. You can then upload the license file to the Cisco IPICS server
and begin using the system.
After you begin using Cisco IPICS, you may find that you require more user or
voice port licenses. You can increase the number of licenses by purchasing more
from Cisco. Cisco IPICS does not support removal or reduction of the number of
licenses.
This section includes the following topics:
•
Obtaining Your License File, page 2-49
•
Purchasing Additional Licenses, page 2-54
•
Uploading the Cisco IPICS Licenses, page 2-55
•
Managing Licenses with the Ops Views Feature, page 2-57
•
Tracking Your License Consumption, page 2-57
When you install Cisco IPICS, you may log in the Administration Console, but
you cannot operate any features, such as configuring channels or creating VTGs,
until you upload the licenses.
Obtaining Your License File
Your Cisco IPICS product package includes a Software License Claim Certificate
that contains a Product Authorization Key (PAK), which is uniquely created from
your sales order. You use this key to obtain licenses for your Cisco IPICS
installation.
Cisco IPICS Server Installation Guide
OL-8155-01
2-49
Chapter 2
Installing the Cisco IPICS Server Software
Preparing to Use Cisco IPICS
After you upload your licenses and begin using Cisco IPICS, the license manager
component monitors the concurrent usage of PMC users, Cisco IP Phone users,
and active ports. If you find that you need additional licenses, you can purchase
them from Cisco. For information on purchasing additional licenses, see the
“Purchasing Additional Licenses” section on page 2-54.
You can order your initial licenses any time after you begin the installation
process.
To use your PAK to obtain your Cisco IPICS licenses, perform the following
procedure:
Procedure
Step 1
Locate your Software License Claim Certificate that was included in your
Cisco IPICS product package. Look for the Product Authorization Key at the
bottom of this certificate.
Note
Step 2
If you ordered your Cisco IPICS server software directly from Cisco,
your package may include only one Product Authorization Key. However,
if you purchased Cisco IPICS through a distributor or reseller, you should
have several individual packages, each with its own Product
Authorization Key. In this case, you must process all of your Product
Authorization Keys individually. Cisco sends you a license file for each
one.
Retrieve the MAC address that you noted during the Cisco Linux operating
system installation. If you misplaced the information, you can use one of the
following methods to obtain it:
Obtain the MAC address using the Network Device Control window
To gather the MAC address information from the Network Device Control
window, follow these steps:
a.
Log in to the Cisco IPICS server with root privileges.
b.
Open Network Device Control window to view information about the server
hardware. To do so, open the Red Hat menu on the Cisco Linux desktop and
click the Red Hat icon.
Cisco IPICS Server Installation Guide
2-50
OL-8155-01
Chapter 2
Installing the Cisco IPICS Server Software
Preparing to Use Cisco IPICS
c.
Choose System Tools > Network Device Control. See Figure 2-10 for an
example of the menu.
Figure 2-36
Using the Red Hat Menu
The Network Device Control window displays at least one active port. See
Figure 2-11 for an example of the window.
Note
Figure 2-37
Your server may have more than one Ethernet port. If so, choose eth0.
Network Device Control Window
Cisco IPICS Server Installation Guide
OL-8155-01
2-51
Chapter 2
Installing the Cisco IPICS Server Software
Preparing to Use Cisco IPICS
d.
To open the Network Configuration window, click the eth0 device from the
list and then click Configure.
The Network Configuration window displays. See Figure 2-12 for an
example of the window.
Figure 2-38
e.
Network Configuration Window
To open the Ethernet Device Window, click eth0 again and then click Edit.
The Ethernet Device window displays.
f.
To view the MAC address for eth0, click the Hardware Device tab.
The MAC displays in the Bind to MAC Address field.
g.
Click X in each of the windows to close them.
Obtain the MAC address with a Cisco Linux command:
To gather the information using a Cisco Linux command, perform the following
procedure:
a.
Log in to the Cisco IPICS server with root privileges.
Cisco IPICS Server Installation Guide
2-52
OL-8155-01
Chapter 2
Installing the Cisco IPICS Server Software
Preparing to Use Cisco IPICS
b.
Open a terminal window to enter commands. To do so, open the Red Hat
menu on the Cisco Linux desktop by clicking the Red Hat icon and choosing
System Tools > Terminal.
A terminal window displays.
c.
To view the MAC address for your hardware, enter the following command:
[root] #ifconfig -a
Information displays about the network interface cards.
Step 3
d.
Locate the eth0 heading and note the HWaddr field. This is the MAC address
for the server.
e.
To log out of the server, enter Exit at the command line and press Enter.
f.
To close the terminal window, click X.
Access Cisco.com using one of the following URLs:
•
If you are a registered user of Cisco.com, use this URL:
http://www.cisco.com/go/license
•
If you are not a registered user of Cisco.com, use this URL:
http://www.cisco.com/go/license/public
After you process your license order at Cisco.com, Cisco sends you an e-mail with
the license file as an attachment.
Note
Step 4
Cisco IPICS does not support the edit or modification of the license file
name or file contents in any capacity. If you change or overwrite the
license file name, you may invalidate your license and cause the system
to operate incorrectly.
Use the attached license file to upload licenses to Cisco IPICS after you finish the
installation.
If you processed several separate Product Authorization Keys, then you would
receive several e-mail responses with a license file attached to each. When you
upload these files, Cisco IPICS adds the licenses from each file and monitors your
system activity according to the total number.
Cisco IPICS Server Installation Guide
OL-8155-01
2-53
Chapter 2
Installing the Cisco IPICS Server Software
Preparing to Use Cisco IPICS
For information about uploading the license files, see the “Uploading the
Cisco IPICS Licenses” section on page 2-55.
Purchasing Additional Licenses
After you begin using Cisco IPICS, you may find that you need additional
licenses, so that you can provide access to more PMC or Cisco IP Phone users or
accommodate more voice ports. You can purchase additional licenses from Cisco
and then process them in the same way as the licenses that came with your original
Cisco IPICS purchase.
When you need to purchase additional licenses, perform the following procedure:
Procedure
Step 1
Visit http://www.cisco.com or contact your reseller to purchase the additional
licenses.
Cisco processes your order and mails you a package that contains a license
certificate with a new Product Authorization Key.
Note
This Product Authorization Key is different than the one that you used to
process your original Cisco IPICS licenses.
Step 2
Locate the MAC address information for your hardware. If you have misplaced it
or you have new hardware, follow the procedure in Step 2 of the “Obtaining Your
License File” section on page 2-49 to retrieve the MAC address.
Step 3
To process your license file, follow the procedure in Step 3 of the “Obtaining Your
License File” section on page 2-49
Step 4
To upload the license file to Cisco IPICS, see the “Uploading the Cisco IPICS
Licenses” section on page 2-55.
After you upload your license file, the license manager processes the new licenses
and updates your total number of licences.
Cisco IPICS Server Installation Guide
2-54
OL-8155-01
Chapter 2
Installing the Cisco IPICS Server Software
Preparing to Use Cisco IPICS
Uploading the Cisco IPICS Licenses
When you receive your license file(s), you can upload them by accessing the
Manage License window of the Cisco IPICS Administration Console.
Note
When you upload the license file, Cisco IPICS places the file in the following
directory:
/opt/cisco/ipics/tomcat/current/webapps/ipics_server/license
To upload a license file, perform the following procedure:
Procedure
Step 1
Open a browser window on your PC.
Step 2
In the Address field, enter either the static IP address or the DNS name that you
established for your Cisco IPCIS server in the “Installing the Cisco Linux
Operating System” section on page 2-3:
http://<static IP address or DNS name>
The Cisco IPICS Login window displays.
Step 3
Log in by using the Username, ipics, and the password, cisco123.
The Manage License window displays.
Step 4
In the Add a License area, click Browse.
A navigation window displays files and folders on your PC.
Step 5
Navigate to the location where you saved the .LIC license file that you received
as an attachment from Cisco. Then, select the file and click Open.
The file name displays in the License File field.
Step 6
Click Upload to upload the file into the Cisco IPICS database. If you choose not
to upload this file, click Cancel.
A message displays with the status of the license file upload.
Step 7
To refresh the Cisco IPICS License Manager so that it recognizes the new
licenses, click Apply.
Cisco IPICS Server Installation Guide
OL-8155-01
2-55
Chapter 2
Installing the Cisco IPICS Server Software
Preparing to Use Cisco IPICS
Figure 2-39
Refreshing the License Window
The license manager processes the new licenses and updates your total number of
licences in the Configured Licenses area of the Manage License window.
Step 8
If you uploaded a license for the ops views feature, you must restart the Tomcat
service before you can use ops views. To restart the Tomcat service, follow these
steps:
a.
Log in to the Cisco IPICS server with root user privileges.
The Cisco Linux desktop displays.
b.
To enter a CLI command, open a Cisco Linux terminal window by clicking
the Red Hat menu and choosing System Tools > Terminal.
A terminal window displays.
c.
Enter the following command at the prompt:
[root] #/etc/init.d/ipics_tomcat restart
After stopping, and then again after starting, the Tomcat service, Cisco Linux
displays the message, [OK].
Note
There may be a delay of a few minutes before users can access the
Administration Console after the Tomcat service restarts.
For more information on Cisco IPICS licenses and the ops views feature, refer to
the Cisco IPICS Server Administration Guide.
Cisco IPICS Server Installation Guide
2-56
OL-8155-01
Chapter 2
Installing the Cisco IPICS Server Software
Preparing to Use Cisco IPICS
Managing Licenses with the Ops Views Feature
When the ops views feature is enabled on the server, the system displays a Cisco
Ops View entry under the Configured License area in the Administration Console
License window, along with the word “Licensed” to indicate that the ops views
functionality has been enabled. (When ops views is not enabled, this entry
displays “Not Licensed.”)
Note
When ops views is not enabled, Cisco IPICS displays the number of available
licenses and concurrent usage information in the License browser window, which
does not reflect real-time data. The data that displays in this window shows the
usage at the time that the license window was last accessed. To view the most
current license information, make sure that you refresh your browser window
often.
Tracking Your License Consumption
Cisco IPICS uses the following criteria to determine license consumption for
ports and PMC usage:
•
Cisco IPICS Ports Usage—A configured channel or activated VTG consumes
a port license. After the channel is deleted or the VTG is deactivated, the
server releases the license and makes it available for use.
Cisco IPICS bases license usage for ports on the unique combination of a
multicast address and a location; that is, if a channel has two multicast
addresses that are assigned to the channel, two licenses are used. If one of the
multicast addresses is removed, the system releases one of the licenses so that
the port now consumes one license.
Note
•
Be aware that an inactive VTG (VTG template) consumes a license
when a policy triggers (activates) that VTG. Therefore, if the number
of licenses has been exceeded, the policy will not be able to activate
the VTG. Make sure that the server has a sufficient number of licenses
available for the configuration of policies.
Cisco IPICS PMC Usage—A PMC user consumes a license each time that the
user logs in to a PMC session.
Cisco IPICS Server Installation Guide
OL-8155-01
2-57
Chapter 2
Installing the Cisco IPICS Server Software
Preparing to Use Cisco IPICS
If the same PMC user logs in to multiple PMC sessions from different PMC
client machines, that user will consume multiple licenses (one for each PMC
session).
Note
If all Cisco IPICS licenses have been used, PMC user access to the
system will be interrupted. Make sure that you are aware of the
current status of PMC licenses and that additional user licenses are
purchased and installed immediately if this situation occurs.
Generating the Cisco IPICS PMC Application Installer
Cisco IPICS allows a user to download the PMC application installer from the
Administration Console to a PMC client machine. After the user installs the PMC
software, Cisco IPICS manages the automatic download of updates to the
application. The Manage PMC window of the Administration Console allows a
Cisco IPICS system administrator to upload version updates to the Cisco IPICS
server and manage the distribution of the current and previous PMC versions to
PMC users.
Before a user can access the installer from the Cisco IPICS server, you must first
use the Administration Console to generate the installer. This procedure places the
application onto the server, so that the PMC users can easily download the PMC
application. When you generate the PMC installer, the Cisco IPICS server also
writes the IP address of the server into the installer. Then, after the user downloads
and installs the software, the PMC application can locate the server to log in.
To generate a new PMC installer for your system, perform the following
procedure:
Procedure
Step 1
Open a browser window on your PC.
Step 2
In the Address field, enter either the static IP address or the DNS name that you
established for your Cisco IPCIS server in the “Installing the Cisco Linux
Operating System” section on page 2-3:
http://<static IP address or DNS name>
The Cisco IPICS Login window displays.
Cisco IPICS Server Installation Guide
2-58
OL-8155-01
Chapter 2
Installing the Cisco IPICS Server Software
Preparing to Use Cisco IPICS
Step 3
Log in with system administrator privileges. You may also log in with the
Username, ipics, and the password, cisco123.
The User tab displays of the Administration Console displays.
Step 4
From the System Administrator tab, click the PMC Installer link.
The Manage PMC Installer window displays with information about the last time
and date that the installer was generated.
Figure 2-40
Manage PMC Installer Window
Step 5
Choose the server IP address from the drop-down list box.
Step 6
Click Generate PMC Installer.
A message displays to inform you whether the PMC installer was successfully
generated.
For more information on managing PMCs, refer to the Cisco IPICS Server
Administration Guide.
Cisco IPICS Server Installation Guide
OL-8155-01
2-59
Chapter 2
Installing the Cisco IPICS Server Software
Preparing to Use Cisco IPICS
Cisco IPICS Server Installation Guide
2-60
OL-8155-01
C H A P T E R
3
Upgrading Cisco IPICS
When Cisco releases a new version of Cisco IPICS, you receive the upgrade in
one of two ways:
•
Downloading an installer by following the link that Cisco provides you when
an upgrade becomes available. You would then use a Secure File Transfer
Protocol (SFTP) utility program to transfer the file to the Cisco IPICS server.
This section includes a procedure that describes how to use the SSH Tectia
File Transfer Client to accomplish this task.
•
Using an installation CD, so that you can upgrade in the same way as you
would install Cisco IPICS.
The Cisco IPICS upgrade procedure installs new application software files, but
preserves your database and log files. Cisco recommends that you back up your
files before you begin the upgrade procedure. For information on backing up files,
refer to the Cisco IPICS Backup and Restore Guide.
This chapter provides information about the procedures that you need to follow to
upgrade Cisco IPICS after you have initially installed the system. This chapter
includes the following sections:
•
Performing the Upgrade from a CD, page 3-2
•
Performing the Upgrade from a Downloaded File, page 3-10
Cisco IPICS Server Installation Guide
OL-8155-01
3-1
Chapter 3
Upgrading Cisco IPICS
Performing the Upgrade from a CD
Performing the Upgrade from a CD
When Cisco provides an upgrade to Cisco IPICS, you may receive a CD so that
you can perform the upgrade in a similar manner to the way that you performed
the original Cisco IPICS installation.
Note
Before you begin the upgrade procedure, back up your data and log files. For more
information, refer to the Cisco IPICS Backup and Restore Guide.
To upgrade Cisco IPICS from a CD, perform the following procedure:
Procedure
Step 1
To log in to the Cisco Linux operating system on the Cisco IPICS server, enter
root in the Username field of the Login window and press Enter.
Cisco Linux displays a window with a password field.
Step 2
Enter your root password and press Enter.
The Cisco Linux desktop displays.
Step 3
Back up your data and log files. For more information, refer to the
Cisco IPICS Backup and Restore Guide.
Step 4
Insert the Cisco IPICS installation CD into the Cisco MCS disk drive.
If you did not install CSA, or if CSA is not running on the Cisco IPICS server,
continue to Step 6.
If you installed CSA, a window displays a message about the removable media
you placed in the disk drive and allows you to continue or terminate the mounting
of the CD.
Step 5
To continue with the upgrade, click the Yes radio button and then click Apply.
Note
You must click Yes and Apply before the time limit of the window expires
or CSA will terminate the application by default.
The Cisco IPICS CD icon displays on the desktop. See Figure 3-1 for an example.
Cisco IPICS Server Installation Guide
3-2
OL-8155-01
Chapter 3
Upgrading Cisco IPICS
Performing the Upgrade from a CD
Figure 3-1
Step 6
Cisco IPICS CD Icon
To open the CD contents, double-click the CD icon.
Cisco Linux displays a window that shows the Cisco IPICS installer file. See
Figure 3-2 for an example.
Note
Please wait while the server is processing your request.
Cisco IPICS Server Installation Guide
OL-8155-01
3-3
Chapter 3
Upgrading Cisco IPICS
Performing the Upgrade from a CD
Figure 3-2
Step 7
Installer File on the Cisco IPICS CD
To start the installation, double-click the installer icon.
Cisco Linux displays a message window that offers options to display or run the
installer file. See Figure 3-3 for an example.
Cisco IPICS Server Installation Guide
3-4
OL-8155-01
Chapter 3
Upgrading Cisco IPICS
Performing the Upgrade from a CD
Figure 3-3
Step 8
Run or Display Message Window
When you are prompted to run or display the file contents, click Run in Terminal.
Note
If you click Run, rather than Run in Terminal, there is a delay of
approximately 3 minutes while the installer completes background
security processes, such as extracting the necessary files for the
installation. During this delay, the screen may be appear unresponsive. Do
not click Run or Run in Terminal again or you will start an additional
instance of the installer.
A message window displays and indicates that the installer has detected a
previous version of Cisco IPICS exists on your server. See Figure 3-4 for an
example of the window. You can choose from the following options:
•
Continue—Proceeds with a full installation and overwrites your current
installation, including the contents of your database and any files that were
backed up to the default backup directory, /devices
•
Exit—Exits from the installation
Cisco IPICS Server Installation Guide
OL-8155-01
3-5
Chapter 3
Upgrading Cisco IPICS
Performing the Upgrade from a CD
•
Upgrade—Upgrades your Cisco IPICS server software to the new version,
but leaves your database and the data in the /devices directory intact
Figure 3-4
Step 9
Upgrade Available Message
To continue with the upgrade, click Upgrade.
The Cisco IPICS installer window displays with an introduction to the process.
See Figure 3-5 for an example of the window.
Cisco IPICS Server Installation Guide
3-6
OL-8155-01
Chapter 3
Upgrading Cisco IPICS
Performing the Upgrade from a CD
Figure 3-5
Step 10
Introduction in the Installer Window
To continue with the installation, click Next.
The Cisco IPICS installer displays the End User License Agreement.
Step 11
Use the scroll bar in the License Agreement pane to view the entire agreement.
After you read the entire agreement text, click the I accept the terms of the
License Agreement option. Then, click Next.
Note
You can only continue with the installation if you accept the End User
License Agreement.
The Choose Install Set window displays with the following installation options:
•
Typical—This option installs Cisco IPICS server software with CSA
•
Customize—This option allows you to choose whether to install Cisco IPICS
server software with or without CSA
•
Upgrade—This option installs an upgrade to a previously installed version of
Cisco IPICS server software
Cisco IPICS Server Installation Guide
OL-8155-01
3-7
Chapter 3
Upgrading Cisco IPICS
Performing the Upgrade from a CD
Step 12
To upgrade Cisco IPICS, choose Upgrade. Then, click Next.
The Cisco IPICS installer displays the Preinstallation Summary. See Figure 3-6
for an example.
The Preinstallation Summary displays the following information:
•
The product name and version
•
The destination folder for the installation
•
Disk space information, including:
– The amount of space required for the installation
– The available space on the disk
Figure 3-6
Step 13
Preinstallation Summery
To continue, click Next.
The installer prompts you to enter a new password for the informix user.
Step 14
Enter an informix password that is at least six characters in length. Then, press
Enter.
The installer prompts you to re-enter the informix password.
Cisco IPICS Server Installation Guide
3-8
OL-8155-01
Chapter 3
Upgrading Cisco IPICS
Performing the Upgrade from a CD
Step 15
Caution
Enter the informix password again and press Enter.
Never change the password for the informix user outside of the Cisco IPICS
installer. If you need to change the informix password, you should only do so
when performing a Cisco IPICS installation or upgrade. When you manually
change the informix password, the Cisco IPICS Administration Console becomes
unusable.
The Installation Progress window displays, showing the files and folders being
written to the disk.
When the upgrade completes, the Cisco IPICS Install Complete window displays.
See Figure 3-7 for an example.
Figure 3-7
Step 16
Install Complete Window
To close the installer and complete the upgrade, press Enter.
The installer closes this window and returns you to the Cisco Linux desktop.
Cisco IPICS Server Installation Guide
OL-8155-01
3-9
Chapter 3
Upgrading Cisco IPICS
Performing the Upgrade from a Downloaded File
Performing the Upgrade from a Downloaded File
If Cisco makes an upgrade file available on a Cisco website, you must download
the upgrade file to your PC and then transfer it to the Cisco IPICS server.
After you place the upgrade file on the server, you can choose to use the graphical
installer utility to perform the upgrade or you can perform the upgrade remotely,
using the console option.
This section includes the following topics:
•
Transferring the Upgrade File to the Server, page 3-10
•
Performing the Upgrade at the Server, page 3-12
•
Performing the Upgrade from a Remote Location, page 3-17
Transferring the Upgrade File to the Server
When you transfer the upgrade file to the Cisco IPICS server, you place the file in
the root directory, where you can access it from the server or from a remote
location on the network.
To download the file from a website and transfer it to the server, perform the
following procedure:
Procedure
Step 1
From your PC, open a browser and enter in the Address field the URL Cisco
provides to access the download link that Cisco provides to you.
Step 2
Click the download link.
Step 3
When you are prompted to open or save the file, click Save.
A Save As window displays, that shows files and folders on your computer.
Step 4
Navigate to the C:\temp directory. See Figure 3-8 for an example.
Cisco IPICS Server Installation Guide
3-10
OL-8155-01
Chapter 3
Upgrading Cisco IPICS
Performing the Upgrade from a Downloaded File
Figure 3-8
Step 5
Saving the Upgrade File to Your Computer
Click Save.
The file downloads to the directory that you specified.
Step 6
Open the SSH Tectia File Transfer Client by choosing Start > All Programs >
SSH Tectia Client > SSH Tectia Client - File Transfer.
The SSH Tectia File Transfer window displays. The desktop of your PC displays
in the left pane.
Step 7
To open a window for entering the server IP address, click Quick Connect.
The Connect to Remote Host window displays.
Step 8
In the Host field, enter the DNS name or the IP address for your Cisco IPICS
server. Then, press Tab.
Step 9
In the User Name field, enter root. Then, click Connect.
The Enter Password window displays.
Step 10
Enter the root password and then click OK.
Cisco IPICS Server Installation Guide
OL-8155-01
3-11
Chapter 3
Upgrading Cisco IPICS
Performing the Upgrade from a Downloaded File
The SSH Tectia File Transfer Client connects to the Cisco IPICS server and
displays the contents of the root directory in the right pane of the window.
Step 11
In the left pane of the window, navigate to the directory on your PC to which you
saved the upgrade file.
Step 12
To initiate the copy procedure, drag the upgrade file from the left pane of the
window to the right pane.
A progress window displays while the file copies to the server. When the copy
completes, the upgrade file displays in the right pane.
Step 13
To close the SSH Tectia File Transfer Client, click X.
Performing the Upgrade at the Server
When you perform the upgrade directly from the server, you use a Cisco Linux
terminal window. The procedure in this section assumes that you have transferred
the upgrade file to the root directory of the Cisco IPICS server. If you have not
already performed this step, see the “Transferring the Upgrade File to the Server”
section on page 3-10.
Note
Before you begin the upgrade procedure, back up your data and log files. For more
information, refer to the Cisco IPICS Backup and Restore Guide.
To perform the upgrade at the Cisco IPICS server, perform the following
procedure:
Procedure
Step 1
Log in to the Cisco IPICS server with root privileges.
The Cisco Linux desktop displays.
Step 2
To open a terminal window, click the Red Hat menu and choose System Tools >
Terminal
A terminal window displays.
Step 3
To view the upgrade file, type the following command and then press Enter:
Cisco IPICS Server Installation Guide
3-12
OL-8155-01
Chapter 3
Upgrading Cisco IPICS
Performing the Upgrade from a Downloaded File
[root] #ls -al
The contents of the root directory display in the window.
Step 4
To begin the upgrade, enter the following command:
[root] #./<name of upgrade file>.bin
where name of upgrade file represents the name of the .bin file that you
downloaded and transferred to the server.
A message window displays and indicates that the installer has detected a
previous version of Cisco IPICS exists on your server. See Figure 3-9 for an
example of the window. You can choose from the following options:
•
Continue—Proceeds with a full installation and overwrites your current
installation, including the contents of your database and any files that were
backed up to the default backup directory, /devices
•
Exit—Exits from the installation
•
Upgrade—Upgrades your Cisco IPICS server software to the new version,
but leaves your database and the data in the /devices directory intact
Figure 3-9
Step 5
Upgrade Available Message
To continue with the upgrade, click Upgrade.
Cisco IPICS Server Installation Guide
OL-8155-01
3-13
Chapter 3
Upgrading Cisco IPICS
Performing the Upgrade from a Downloaded File
The Cisco IPICS installer window displays with an introduction to the process.
See Figure 3-10 for an example.
Figure 3-10
Step 6
Introduction in the Installer Window
To continue with the upgrade, click Next.
The Cisco IPICS installer displays the End User License Agreement.
Step 7
Use the scroll bar in the License Agreement pane to view the entire agreement.
After you read the entire agreement text, click the I accept the terms of the
License Agreement option. Then, click Next.
Note
You can only continue with the installation if you accept the End User
License Agreement.
The Choose Install Set window displays with the following installation options:
•
Typical—This option installs Cisco IPICS server software with CSA
•
Customize—This option allows you to choose whether to install Cisco IPICS
server software with or without CSA
Cisco IPICS Server Installation Guide
3-14
OL-8155-01
Chapter 3
Upgrading Cisco IPICS
Performing the Upgrade from a Downloaded File
•
Step 8
Upgrade—This option installs an upgrade to a previously installed version of
Cisco IPICS server software
To upgrade Cisco IPICS, choose Upgrade. Then, click Next.
The Cisco IPICS installer displays the Preinstallation Summary. See Figure 3-6
for an example.
The Preinstallation Summary displays the following information:
•
The product name and version
•
The destination folder for the installation
•
Disk space information, including:
– The amount of space required for the installation
– The available space on the disk
Figure 3-11
Preinstallation Summery
The installer prompts you to enter a new password for the informix user.
Step 9
Enter a informix password that is at least six characters in length. Then, press
Enter.
Cisco IPICS Server Installation Guide
OL-8155-01
3-15
Chapter 3
Upgrading Cisco IPICS
Performing the Upgrade from a Downloaded File
The installer prompts you to re-enter the informix password.
Step 10
Caution
Enter the informix password again and press Enter.
Never change the password for the informix user outside of the Cisco IPICS
installer. If you need to change the informix password, you should only do so
when performing a Cisco IPICS installation or upgrade. When you manually
change the informix password, the Cisco IPICS Administration Console becomes
unusable.
The Installation Progress window displays, showing the files and folders being
written to the disk. When the upgrade completes, the Cisco IPICS Install
Complete window displays. See Figure 3-7 for an example of the window.
Figure 3-12
Step 11
Install Complete Window
To close the installer and complete the upgrade, press Enter.
Cisco IPICS Server Installation Guide
3-16
OL-8155-01
Chapter 3
Upgrading Cisco IPICS
Performing the Upgrade from a Downloaded File
Performing the Upgrade from a Remote Location
Cisco IPICS allows you to perform an upgrade remotely, using the SSH Tectia
Client on a PC. This upgrade process includes all of the steps that you would
follow if you performed the procedure at the server. However, this procedure
displays all of your instructions in text, rather than in the graphic format of the
installer utility.
The procedure in this section assumes that you have transferred the upgrade file
to the Cisco IPICS server. If you have not completed the download and transfer,
see the “Transferring the Upgrade File to the Server” section on page 3-10
Note
Before you begin the upgrade procedure, back up your data and log files. For more
information, refer to the Cisco IPICS Backup and Restore Guide.
To perform the upgrade from a network PC, perform the following procedure:
Procedure
Step 1
From a PC, click Start > All Programs > SSH Tectia Client > Secure Tectia
Client.
The SSH Tectia Client displays.
Step 2
Click Quick Connect on the button bar.
The Connect to Remote Host window displays.
Step 3
In the Host field, enter into the DNS name or the IP address for your Cisco IPICS
server. Then, press Tab.
Step 4
In the User Name field, enter root. Then, click Connect.
The Enter Password window displays.
Step 5
Enter the root password and then click OK.
An SSH Tectia Client window displays.
Step 6
To view the upgrade file, type the following command and then press Enter:
[root] #ls -l
The contents of the root directory display in the window.
Step 7
To begin the upgrade, type the following command and then press Enter:
Cisco IPICS Server Installation Guide
OL-8155-01
3-17
Chapter 3
Upgrading Cisco IPICS
Performing the Upgrade from a Downloaded File
[root] #./<name of upgrade file>.bin -i console
where name of upgrade file represents the name of the .bin file you downloaded
and transferred to the server.
The window displays a message that informs you that the installer is extracting.
The extraction may take up to two minutes to complete.
A message displays and indicates that the installer has detected a previous version
of Cisco IPICS exists on your server. You can choose from the following options:
Step 8
•
Upgrade—Upgrades your Cisco IPICS server software to the new version,
but leaves your database and the data in the /devices directory intact.
•
Exit—Exits from the installation.
•
Continue—Proceeds with a full installation and overwrites your current
installation, including the contents of your database and any files that were
backed up to the default backup directory, /devices.
To choose the Upgrade option, press Enter.
The first page of the End User License Agreement displays. There are
approximately eight pages to the agreement.
Step 9
Read each page and press Enter when you finish.
At the end of the final page of the End User License Agreement, a question
displays that asks if you accept the terms of the license agreement.
Step 10
If you accept the terms, press Y and Enter.
The Choose Install Set menu displays. You can choose from the following
options:
Step 11
•
Typical—This option installs Cisco IPICS server software with CSA
•
Customize—This option allows you to choose whether to install Cisco IPICS
server software with or without CSA
•
Upgrade—This option installs an upgrade to a previously installed version of
Cisco IPICS server software
To choose the Upgrade option, press Enter.
The Preinstallation Summary displays.
Step 12
To continue, press Enter.
The installer prompts you to enter a new password for the informix user.
Cisco IPICS Server Installation Guide
3-18
OL-8155-01
Chapter 3
Upgrading Cisco IPICS
Performing the Upgrade from a Downloaded File
Step 13
Enter a informix password that is at least six characters in length. Then, press
Enter.
The installer prompts you to re-enter the informix password.
Step 14
Caution
Enter the informix password again and press Enter.
Never change the password for the informix user outside of the Cisco IPICS
installer. If you need to change the informix password, you should only do so
when performing a Cisco IPICS installation or upgrade. When you manually
change the informix password, the Cisco IPICS Administration Console becomes
unusable.
The upgrade process install files. When the file installation completes, the screen
displays a message that the upgrade is complete.
The installer quits and returns you to a SSH Tectia Client prompt.
Step 15
To exit the SSH Tectia Client window, enter Exit at the command line and then
press Enter.
Cisco IPICS Server Installation Guide
OL-8155-01
3-19
Chapter 3
Upgrading Cisco IPICS
Performing the Upgrade from a Downloaded File
Cisco IPICS Server Installation Guide
3-20
OL-8155-01
C H A P T E R
4
Uninstalling Cisco IPICS
This chapter provides information about the procedures that you need to follow to
the Cisco IPICS server software. You can perform the uninstallation procedure in
one of the following ways:
•
From the Cisco IPICS server by using a Cisco Linux terminal window
•
From a remote PC on the network by using SSH Tectia Client or similar
software
This chapter includes the following sections:
•
Uninstalling Cisco IPICS from the Cisco IPICS Server, page 4-2
•
Uninstalling Cisco IPICS from a Remote Location, page 4-5
The Cisco IPICS uninstallation procedure removes all of the components and
directories that were created during the Cisco IPICS installation. If you intend to
reinstall Cisco IPICS at a later time, you should back up your database and log
files before you begin the uninstall process.
For information on backing up files, refer to the Cisco IPICS Backup and Restore
Guide.
Note
If a VTG or other conference is in progress using a Cisco IPICS resource, such as
a Router Media Service (RMS), that conference will not be interrupted when you
uninstall Cisco IPICS. However, if you then reinstall Cisco IPICS and add the
RMS that hosts that conference, Cisco IPICS clears the voice ports, disconnecting
the participants. So, before uninstallation, you should warn users that
communications will be temporarily disrupted.
Cisco IPICS Server Installation Guide
OL-8155-01
4-1
Chapter 4
Uninstalling Cisco IPICS
Uninstalling Cisco IPICS from the Cisco IPICS Server
Uninstalling Cisco IPICS from the Cisco IPICS Server
To uninstall Cisco IPICS directly from the Cisco IPICS server, perform the
following procedure:
Procedure
Step 1
Log in to the Cisco IPICS server with root privileges.
The Cisco Linux desktop displays.
Step 2
To locate the uninstaller file, follow these steps:
a.
To open the root directory, double-click the Root’s Home icon.
The contents of the /root directory display.
b.
To open the ipics_db directory, double-click the ipics_db icon.
The contents of the /opt/cisco/ipics/ipics_db directory display.
c.
To navigate to the /opt/cisco/ipics directory, click Up.
The contents of the /opt/cisco/ipics directory display.
d.
To open the uninstaller directory, double-click the uninstaller icon.
The contents of the /opt/cisco/ipics/uninstaller directory display.
e.
Step 3
Locate the uninstaller icon, labeled uninstall_ipics_x_x, where the x_x
variable represents the version of Cisco IPICS you are uninstalling.
To begin the uninstallation process, double-click the uninstall_ipics_x_x icon.
Cisco Linux displays a message window that offers options to display or run the
installer file.
Step 4
To open the installer, click Run in Terminal.
The installer displays a message about the information that will be overwritten
during the uninstall process. See Figure 4-1 for an example of the window.
Cisco IPICS Server Installation Guide
4-2
OL-8155-01
Chapter 4
Uninstalling Cisco IPICS
Uninstalling Cisco IPICS from the Cisco IPICS Server
Figure 4-1
Step 5
Caution
Introduction Window of the Uninstaller
To continue with the uninstallation, click Uninstall. To exit from the
uninstallation, click Cancel.
Be aware that the Cisco IPICS uninstallation process permanently removes the
Cisco IPICS software and deletes the Cisco IPICS data that the server stores in the
/devices directory. If you need to save your data, make sure that you click Cancel
to cancel the uninstallation process; then, copy your data to another location.
After you have preserved a copy of your data, you can restart the uninstallation
process.
The uninstaller begins and uninstalls the Cisco IPICS components, such as the
Informix database and the Tomcat service. See Figure 4-2 for an example of the
window.
Cisco IPICS Server Installation Guide
OL-8155-01
4-3
Chapter 4
Uninstalling Cisco IPICS
Uninstalling Cisco IPICS from the Cisco IPICS Server
Figure 4-2
Uninstallation Progress
When the uninstaller finishes removing files, the Uninstall Complete window
displays.
Cisco IPICS Server Installation Guide
4-4
OL-8155-01
Chapter 4
Uninstalling Cisco IPICS
Uninstalling Cisco IPICS from a Remote Location
Figure 4-3
Step 6
Uninstall Complete Window
To close the Uninstaller window, click Done.
The window closes and you are returned to the Cisco Linux desktop.
Step 7
To exit the SSH Tectia Client window, enter Exit at the command line and then
press Enter.
Uninstalling Cisco IPICS from a Remote Location
It may be necessary or desirable for you to perform the Cisco IPICS server
software uninstallation from a remote location on your network. This section
describes the method for uninstalling Cisco IPICS from a PC that is connected to
the network.
To uninstall the Cisco IPICS server software from a PC on the network, perform
the following procedure:
Cisco IPICS Server Installation Guide
OL-8155-01
4-5
Chapter 4
Uninstalling Cisco IPICS
Uninstalling Cisco IPICS from a Remote Location
Procedure
Step 1
On your PC, open the SSH Tectia Client by choosing Start > All Programs >
SSH Tectia Client > SSH Tectia Client.
The SSH Tectia Client displays. The desktop of your PC displays in the left pane.
Step 2
To open a window for entering the server IP address, click Quick Connect on the
button menu.
The Connect to Remote Host window displays.
Step 3
In the Host field, enter into the DNS name or the IP address for your Cisco IPICS
server. Then, press Tab.
Step 4
In the User Name field, enter root. Then, click Connect.
The Enter Password window displays.
Step 5
Enter the root password and then click OK.
The SSH Tectia Client connects to the Cisco IPICS server and displays a
command prompt for the root user.
Step 6
To change directories, enter the following command and press Enter:
[root] #cd /opt/cisco/ipics/uninstaller
Step 7
To view the files in the /uninstaller directory, enter the following command and
press Enter:
[root] #ls -l
Step 8
Locate the uninstaller file, uninstall_ipics_x_x, where the x_x variable represents
the version of Cisco IPICS you are uninstalling.
Step 9
To begin the uninstallation process, enter the following command and press
Enter:
[root] #./uninstall_ipics_x_x -i console
The uninstaller displays a caution that states that the uninstall procedure will
permanently remove Cisco IPICS and will delete all backed up Cisco IPICS data
and logs that are stored in the Cisco IPICS installation folder.
Step 10
Take one of the following actions:
•
If you want to cancel the procedure and return to the root prompt, press
Ctrl-C.
•
If you want to continue with the uninstallation, press Enter.
Cisco IPICS Server Installation Guide
4-6
OL-8155-01
Chapter 4
Uninstalling Cisco IPICS
Uninstalling Cisco IPICS from a Remote Location
If you press Enter, the uninstallation proceeds and the uninstaller displays
information about the processes that it is shutting down and removing. See
Figure 4-4 for an example of the uninstallation information.
Figure 4-4
Uninstallation Progress
When the uninstaller finishes removing the Cisco IPICS files and folders, an
Uninstall Complete message displays and informs you that the server is about to
restart. See Figure 4-5 for an example of the message.
Figure 4-5
Uninstall Complete Message
Cisco IPICS Server Installation Guide
OL-8155-01
4-7
Chapter 4
Uninstalling Cisco IPICS
Uninstalling Cisco IPICS from a Remote Location
Step 11
To close the SSH Tectia Client window, click X.
Cisco IPICS Server Installation Guide
4-8
OL-8155-01
C H A P T E R
5
Troubleshooting the Installation
This chapter provides information about basic troubleshooting tips and error
messages that you may encounter during the installation of the Cisco Linux
operating system or the Cisco IPICS server software.
This chapter includes the following sections:
Caution
•
Cisco IPICS Installation Issues, page 5-2
•
Uninstalling CSA, page 5-7
Make sure that you only perform system date changes before you install the
Cisco IPICS software. Cisco IPICS does not support any modification of the
system date in the operating system after the Cisco IPICS software has been
installed. Therefore, it is very important that you check your system date to ensure
that it properly reflects your local date and time. If the system date is not properly
set to your local date and time, you must adjust it before you install the
Cisco IPICS software. If you try to change the system date and time after you
install the software, you will invalidate your license and cause the system to
become inoperable.
For information about setting the date and time as part of the operating system
installation, see the “Installing Cisco IPICS Server Software” section on
page 2-24.
Cisco IPICS Server Installation Guide
OL-8155-01
5-1
Chapter 5
Troubleshooting the Installation
Cisco IPICS Installation Issues
Cisco IPICS Installation Issues
The issues that are described in this section may occur during or as a result of
installing the Cisco Linux operating system or the Cisco IPICS server software.
This section includes the following topics:
•
No Ports Are Listed in the Network Device Control Menu, page 5-2
•
Cannot Connect to the Server after Installation, page 5-3
•
Authorization Error after Installation, page 5-4
•
Error Displays When Performing Remote Installation, page 5-6
No Ports Are Listed in the Network Device Control Menu
Problem When you open the Network Device Control window to configure the
Ethernet port, no ports are listed.
Solution In the “Installing the Cisco Linux Operating System” section on
page 2-3, you probably logged in (during Step 8) with the system user ID and
password that you created (in the Cisco Linux setup, Step 7).
To continue with the installation, you must log out and then log back in as the root
user. To return to the Network Device Control window as the root user, perform
the following procedure:
Procedure
Step 1
Close the current Network Device Control window by clicking Close.
Step 2
Before you can log in as root, you must log out as the system user. To log out,
click the Red Hat menu and then choose Log Out.
The Log Out window displays.
Step 3
Choose Log Out and then click OK.
Cisco Linux logs you out and then displays a new login window.
Step 4
Enter root in the Username field and press Enter.
Step 5
Enter cisco in the Password field and press Enter.
Cisco IPICS Server Installation Guide
5-2
OL-8155-01
Chapter 5
Troubleshooting the Installation
Cisco IPICS Installation Issues
Step 6
Open a terminal window to enter commands by clicking the Red Hat icon on the
Cisco Linux desktop and choosing System Tools > Network Device Control.
The Network Device Control Menu displays and shows the Ethernet port(s) on the
server.
Cannot Connect to the Server after Installation
Problem After you install Cisco IPICS, you enter the static IP address for the
Cisco IPICS server into a browser and you cannot contact the server.
Solution The Tomcat service may not be running.
To troubleshoot this problem, perform the following procedure:
Procedure
Step 1
To log in to the Cisco Linux operating system on the Cisco IPICS server, enter
root in the Username field of the Login window and press Enter.
Cisco Linux displays a window with a password field.
Step 2
Enter your root password and press Enter.
The Cisco Linux desktop displays.
Step 3
To verify that the static IP address, subnet mask and default gateway are properly
configured, perform the following procedure:
a.
To open a terminal window, click the Red Hat menu and choose System
Tools > Terminal
b.
To send a signal to another server on the network, enter the following
command:
ping <default gateway IP address>
where default gateway IP address represents the default gateway address for
your network.
c.
If the ping command is successful, log in to another server on the network and
attempt to ping this Cisco IPICS server.
Cisco IPICS Server Installation Guide
OL-8155-01
5-3
Chapter 5
Troubleshooting the Installation
Cisco IPICS Installation Issues
If the ping command is not successful, troubleshoot the network connectivity
with your network administrator.
Step 4
Ensure that the Tomcat service is running by performing the following procedure:
a.
To check the status of the Tomcat service, in the terminal window you opened,
enter the following command:
[root] #ps -ef | grep tomcat
If the Tomcat service is running properly, the grep command returns a process
similar to the following example:
root
5270
1 2 11:30 ?
00:01:33
/opt/cisco/ipics/jre/bin/java -server -Xms64m -Xmx256m -DMP_DATA=
-Djava.security.auth.login.config==/opt/cisco/ipics/tomcat/
security/
.java.login.config
-Djava.security.auth.policy==/opt/cisco/ipics/tomcat/security/
.java.policy -Djava.util.logging.manager=org.apache.juli.
If the Tomcat service is not running, the response to the grep command is
similar to the following example:
root
b.
5773
5723
0 12:29 pts/1
00:00:00 grep tomcat
Manually start the Tomcat service by entering the following command at the
prompt:
[root] #/etc/init.d/ipics_tomcat start
If the start command is successful, Cisco Linux displays [OK].
If the start command returns an error, see the
Cisco IPICS Troubleshooting Guide.
Authorization Error after Installation
Problem After installing Cisco IPICS, you log in to the Administration Console
and receive an authorization error.
Solution One of the following situations may have occurred:
•
You may have entered an incorrect user name or password
•
The Informix database may not have started
Cisco IPICS Server Installation Guide
5-4
OL-8155-01
Chapter 5
Troubleshooting the Installation
Cisco IPICS Installation Issues
To check the database, perform the following procedure:
Procedure
Step 1
Before you check the database status, verify that you entered the correct user
name and password, and that the Caps Lock setting is not on.
Step 2
To log in to the Cisco Linux operating system on the Cisco IPICS server, enter
root in the Username field of the Login window and press Enter.
Cisco Linux displays a window with a password field.
Step 3
Enter your root password and press Enter.
The Cisco Linux desktop displays.
Step 4
To open a terminal window, click the Red Hat menu and choose System Tools >
Terminal
A terminal window displays.
Step 5
Enter the following command at the prompt:
[root] #ps -ef | grep oninit
If the Informix database is not running, the response to the grep command is
similar to the following example:
root
Step 6
5773
5723
0 12:29 pts/1
00:00:00 grep oninit
Manually start the Informix database by entering the following command at the
prompt:
[root] #/etc/init.d/ipics_db start
If the start command is successful, Cisco Linux displays [OK].
If the start command returns an error, Refer to the Cisco IPICS Troubleshooting
Guide.
Cisco IPICS Server Installation Guide
OL-8155-01
5-5
Chapter 5
Troubleshooting the Installation
Cisco IPICS Installation Issues
Error Displays When Performing Remote Installation
Problem When you start the Cisco IPICS server software installation from an SSH
Tectia Client window on a network PC, the installer displays an error similar to
the following example:
Example 5-1
Remote Installation Error
Invocation of this Java Application has caused an
InvocationTargetException. This application will now exit. (LAX)
Stack Trace:
java.awt.HeadlessException:
No X11 DISPLAY variable was set, but this program performed an
operation which requires it.
at java.awt.GraphicsEnvironment.checkHeadless(Unknown Source)
at java.awt.Window.<init>(Unknown Source)
at java.awt.Frame.<init>(Unknown Source)
at java.awt.Frame.<init>(Unknown Source)
at javax.swing.JFrame.<init>(Unknown Source)
at com.zerog.ia.installer.LifeCycleManager.f(DashoA8113)
at com.zerog.ia.installer.LifeCycleManager.g(DashoA8113)
at com.zerog.ia.installer.LifeCycleManager.a(DashoA8113)
at com.zerog.ia.installer.Main.main(DashoA8113)
at sun.reflect.NativeMethodAccessorImpl.invoke0(Native Method)
at sun.reflect.NativeMethodAccessorImpl.invoke(Unknown Source)
at sun.reflect.DelegatingMethodAccessorImpl.invoke(Unknown
Source)
at java.lang.reflect.Method.invoke(Unknown Source)
at com.zerog.lax.LAX.launch(DashoA8113)
at com.zerog.lax.LAX.main(DashoA8113)
This Application has Unexpectedly Quit: Invocation of this Java
Application has caused an InvocationTargetException. This application
will now exit. (LAX)
Solution This error occurs when you invoke the installer file without the -i console
argument. Ensure that you enter the following command:
[root] #./<name of installer file>.bin -i console
Cisco IPICS Server Installation Guide
5-6
OL-8155-01
Chapter 5
Troubleshooting the Installation
Uninstalling CSA
Uninstalling CSA
There may be situations where you need to manually uninstall CSA. You perform
the uninstallation from a Cisco Linux terminal on the Cisco IPICS server.
To remove CSA from the server, perform the following procedure:
Procedure
Step 1
Log in to the Cisco IPICS server with root privileges.
The Cisco Linux desktop displays.
Step 2
To open a terminal window, click the Red Hat menu and choose System Tools >
Terminal
A terminal window displays.
Step 3
To uninstall CSA, enter the following command:
[root] #rpm -ev `rpm -qf /opt/CSCOcsa/bin/ciscosecd`
Note
Step 4
Be sure to use the back-quote key (‘), located on the keyboard below the
~.
Restart the server by entering the following command:
[root] #reboot
If you decide to reinstall CSA, see the “Manually Installing CSA” section on
page 2-46.
For information about using CSA, see the Cisco Security Agent documentation at
the following URL:
http://www.cisco.com/univercd/cc/td/doc/product/vpn/ciscosec/csa/index.htm
Cisco IPICS Server Installation Guide
OL-8155-01
5-7
Chapter 5
Troubleshooting the Installation
Uninstalling CSA
Cisco IPICS Server Installation Guide
5-8
OL-8155-01
A P P E N D I X
A
Changing the Cisco Linux
Root Password
You can change the password for the Cisco Linux root user, as needed, by
performing the following procedure:
Note
Your new password must be a minimum of six characters and cannot be based on
a dictionary word.
Procedure
Step 1
Log in to the Cisco IPICS server with root privileges.
The Cisco Linux desktop displays.
Step 2
Open a terminal window by clicking the Red Hat menu and choosing System
Tools > Terminal.
A terminal window displays.
Step 3
To temporarily disable the Cisco Linux restrictions for changing the root
password, enter the following command:
[root] #sh /root/.security/unimmunize.sh
Step 4
To create a new root password, enter the following command:
[root] #passwd
Cisco Linux informs you that it is changing the password for the root user.
Step 5
At the New Password prompt, enter a new root password and press Enter.
Cisco IPICS Server Installation Guide
OL-8155-01
A-1
Appendix A
Changing the Cisco Linux Root Password
When you enter your password, no characters display for security reasons.
Step 6
At the Retype New Password prompt, enter the new password again and press
Enter.
Step 7
Upon password confirmation, the system displays the following message:
passwd: all authentication tokens updated successfully.
Step 8
To reenable the Cisco Linux restrictions for changing the root password, enter the
following command:
[root] #sh /root/.security/immunize.sh
Step 9
Close the terminal window by clicking X.
You are returned to the Linux desktop.
Cisco IPICS Server Installation Guide
A-2
OL-8155-01
G L O S S ARY
A
activated
A VTG state that indicates that the SIP (unicast) line or multicast line is fully
operational. The PTT and volume indicators appear highlighted.
activating
A VTG state that becomes effective when the Activate button is clicked. The
Activate button appears highlighted while the other PMC buttons remain in an
inactive state as the system attempts to activate and connect.
activation button
This button toggles activate and deactivate functionality on the PMC. Click this
button on the PMC to activate a channel (to call out); click it again to deactivate
the channel.
active virtual talk
group
A virtual talk group (VTG) becomes active when Cisco IPICS commits global
resources, such as a multicast address and any necessary dial-in peers, so that the
participants in the VTG can communicate with each other.
Administration
Console
The graphical user interface (GUI) in the Cisco IPICS server software through
which authorized Cisco IPICS users can manage and configure Cisco IPICS
resources, events and VTGs.
autonomous
system
A radio system under one administrative control; also known as a management
domain. This system is usually mapped to an agency.
B
backward
compatibility
The ability of newer radio equipment to operate within an older system
infrastructure or to directly intercommunicate with an older radio unit. The term
usually applies to digital radios that are also capable of analog signal
transmission.
Cisco IPICS Server Installation Guide
OL-8155-01
GL-1
Glossary
bandwidth
The difference between the highest and lowest frequencies that are available for
network signals. The term also describes the rated throughput capacity of a
specific network medium or protocol. Bandwidth specifies the frequency range
that is necessary to convey a signal measured in units of hertz (Hz). For example,
voice signals typically require approximately 7 kHz of bandwidth and data
traffic typically requires approximately 50 kHz of bandwidth.
base station
A land station in the land mobile radio service. In the personal communication
service, the common name for all the radio equipment that is located at one fixed
location and used for serving one or several calls.
C
CAI
common air interface. The standard for the digital wireless communications
medium that is employed for P25-compliant radio systems and equipment. The
standard for P25 Phase I incorporates Frequency Division Multiple Access
(FDMA) technology.
call delay
The delay that occurs when there is no idle channel or facility available to
immediately process a call that arrives at an automatic switching device.
call setup time
The time that is required to establish a circuit-switched call between users or
terminals.
carrier
A wave that is suitable for modulation by an information-bearing signal.
CAS
channel associated signaling. The transmission of signaling information within
the voice channel. CAS signaling often is referred to as robbed-bit signaling
because user bandwidth is being robbed by the network for other purposes.
channel
A communication path that is wide enough to permit a single RF transmission.
Multiple channels can be multiplexed over a single cable in certain
environments. See PTT channel.
channel capacity
The maximum possible information transfer rate through a channel, subject to
specified constraints.
channel folder
A logical grouping of channels
Cisco IPICS Server Installation Guide
GL-2
OL-8155-01
Glossary
channel spacing
The distance from the center of one channel to the center of the
next-adjacent-channel. Typically measured in kilohertz.
Cisco CallManager
The software-based call-processing component of the Cisco IP telephony
solution. Cisco CallManager extends enterprise telephony features and
functions to packet telephony network devices, such as Cisco IP Phones, media
processing devices, VoIP gateways, and multimedia applications.
Cisco IPICS
Cisco IP Interoperability and Collaboration System. The Cisco IPICS system
provides an IP standards-based solution for voice interoperability by
interconnecting voice channels, talk groups, and VTGs to bridge
communications amongst disparate systems.
Cisco IPICS server
Provides the core functionality of the Cisco IPICS system. The Cisco IPICS
server software runs on the Linux operating system on selected Cisco Media
Convergence Server (MCS) platforms. The server software includes an incident
management framework administration GUI that enables dynamic resource
management for users, channels, and VTGs.
Cisco IP Phone
A full-featured telephone that provides voice communication over an IP
network. A user can participate in a PTT channel or VTG by using a Cisco IP
Phone as a PTT device.
Cisco Security
Agent
Provides threat protection for server and desktop computing systems (endpoints)
by identifying, preventing, and eliminating known and unknown security threats.
CLI
command-line interface. An interface that allows the user to interact with the
operating system by entering commands and optional arguments.
codec
coder-decoder.
1. Integrated circuit device that typically uses pulse code modulation to
transform analog signals into a digital bit stream and digital signals back into
analog signals.
2. In Voice over IP, Voice over Frame Relay, and Voice over ATM, a DSP
software algorithm that is used to compress/decompress speech or audio signals.
conference of
conferences
A conference that consists of two or more VTGs.
Cisco IPICS Server Installation Guide
OL-8155-01
GL-3
Glossary
conventional radio
system
A non-trunked system that is similar to telephone party-line in that the user
determines availability by listening for an open channel.
COR
carrier operated relay. A signal from a receiver that indicates that the receiver is
receiving a signal and that the receiver is not squelched.
coverage
In radio communications, the geographical area that is within the range of, or
that is covered by, a wireless radio system to enable service for radio
communications. Also referred to as service delivery area.
D
delay time
The sum of waiting time and service time in a queue.
decrypt
Cryptographically restore ciphertext to the plaintext form it had before
encryption.
decryption
Reverse application of an encryption algorithm to encrypted data, thereby
restoring that data to its original, unencrypted state.
dial peer
Addressable call endpoint. In Voice over IP, there are two kinds of dial peers:
POTS and VoIP.
digital ID
A numeric identifier that is chosen by a Cisco IPICS user and stored in the user
profile. Cisco IPICS uses this ID and a numeric password to authenticate a
Cisco IP Phone user.
digital modulation
technique
A technique for placing a digital data sequence on a carrier signal for subsequent
transmission through a channel.
dispatcher
The Cisco IPICS dispatcher is responsible for setting up the VTG templates,
activating the VTGs to begin conferences, and adding and/or removing
participants in VTG templates and active VTGs. The dispatcher also monitors
the active VTGs and events, can mute and unmute users, as necessary, and sets
up system policies.
Cisco IPICS Server Installation Guide
GL-4
OL-8155-01
Glossary
DS0
digital service zero (0). Single timeslot on a DS1 (also known as T1) digital
interface—that is, a 64-kbps, synchronous, full-duplex data channel, typically
used for a single voice connection on a PBX.
dynamic regrouping A trunking system feature that allows multiple radios to be placed upon a
specific talk group without manual manipulation of the programming of the
radios. Dynamic regrouping is initiated through a system control console and
transmitted to the radio via the trunking systems control channel.
E
E&M
recEive and transMit (or ear and mouth). The E&M interface provides voice
signals from radio channels, which are then mapped to IP multicast or unicast.
The E&M interface provides the most common form of analog trunking.
1. Trunking arrangement that is generally used for two-way switch-to-switch or
switch-to-network connections. Cisco's analog E&M interface is an RJ-48
connector that allows connections to PBX trunk lines (tie lines). E&M also is
available on E1 and T1 digital interfaces.
2. A type of signaling that is traditionally used in the telecommunications
industry. Indicates the use of a handset that corresponds to the ear (receiving)
and mouth (transmitting) component of a telephone.
encipher
To convert plain text into an unintelligible form by using a cipher.
encode
To modify information into the required transmission format.
encryption
Application of a specific algorithm so as to alter the appearance of data and make
it incomprehensible to unauthorized users.
event
An active VTG in the Cisco IPICS solution.
Cisco IPICS Server Installation Guide
OL-8155-01
GL-5
Glossary
F
FDM
frequency-division multiplexing. Technique whereby information from multiple
channels can be allocated bandwidth on a single wire based on frequency.
FDMA
frequency-division multiple access. A a channel access method in which
different conversations are separated onto different frequencies. FDMA is
employed in narrowest bandwidth and multiple-licensed channel operations.
FLEXlm
Cisco software that enforces licensing on certain systems; FLEXlm ensures that
Cisco IPICS software will work only on the supported and licensed hardware.
floor control
The standard mechanism for Push-to-Talk speaker arbitration.
frame
A logical grouping of information sent as a data link layer unit over a
transmission medium. Often refers to the header and the trailer, used for
synchronization and error control, that surround the user data contained in the
unit. The terms cell, datagram, message, packet, and segment also describe
logical information groupings at various layers of the OSI reference model.
frequency
For a periodic function, frequency represents the number of cycles or events per
unit of time.
frequency
assignment
Assignment that is given to a radio station to use a radio frequency or radio
frequency channel under specified conditions.
frequency hopping
The repeated switching of frequencies during radio transmission according to a
specified algorithm, intended to minimize unauthorized interception or jamming
of telecommunications.
frequency
modulation
Modulation technique in which signals of different frequencies represent
different data values.
frequency sharing
The assignment to or use of the same radio frequency by two or more stations
that are separated geographically or that use the frequency at different times.
Cisco IPICS Server Installation Guide
GL-6
OL-8155-01
Glossary
G
gateway
Device that performs an application-layer conversion of information from one
protocol stack to another. In Cisco IPICS, the gateway component includes LMR
gateways, which functionality is usually installed as an additional feature in a
supported Cisco router. LMR gateways provide voice interoperability between
radio and non-radio networks by bridging radio frequencies to IP multicast
streams.
GRE
generic routing encapsulation. Tunneling protocol that can encapsulate a wide
variety of protocol packet types inside IP tunnels, creating a virtual
point-to-point link to Cisco routers at remote points over an IP internetwork. By
connecting multiprotocol subnetworks in a single-protocol backbone
environment, IP tunneling that uses GRE allows network expansion across a
single-protocol backbone environment. GRE is generally used to route multicast
traffic between routers.
H
H.323
Defines a common set of codecs, call setup and negotiating procedures, and
basic data transport methods to allow dissimilar communication devices to
communicate with each other by using a standardized communication protocol.
high-band
frequency
Refers to the higher frequency levels in the VHF band, typically 138-222 MHz.
Hoot ‘n’ Holler
(Hootie)
A communications system where the loudest and most recent talker or talkers are
mixed into one multicast output stream. Also known as hootie, these networks
provide “always on” multiuser conferences without requiring that users dial in
to a conference.
Cisco IPICS Server Installation Guide
OL-8155-01
GL-7
Glossary
i
I
inactive VTG
A VTG that is stored for use. The Cisco IPICS server stores inactive VTGs so
that they can be automatically activated by a policy or manually activated by a
dispatcher.
incident
management
framework
A software framework that includes an adaptable GUI to facilitate resources,
such as users, radio channels, cameras, and sensor information, for delivery that
is based upon policy or incident needs.
interference
The effect of unwanted energy due to one or a combination of emissions,
radiation, or inductions upon reception in a radio communication system,
manifested by any performance degradation, misinterpretation, or loss of
information, which could be extracted in the absence of such unwanted energy.
interoperability
The capability of equipment manufactured by different vendors to communicate
with each other successfully over a network.
IPSec
IP Security. A framework of open standards that provides data confidentiality,
data integrity, and data authentication between participating peers. IPSec
provides these security services at the IP layer. IPSec uses IKE to handle the
negotiation of protocols and algorithms based on local policy and to generate the
encryption and authentication keys to be used by IPSec. IPSec can protect one
or more data flows between a pair of hosts, between a pair of security gateways,
or between a security gateway and a host.
K
keepalive
A message that is sent by one network device to inform another network device
that the virtual circuit between the two devices is still active.
key
The parameter that defines an encryption code or method.
kilohertz (kHz)
A unit of frequency that denotes one thousand Hz.
Cisco IPICS Server Installation Guide
GL-8
OL-8155-01
Glossary
L
latch
The PMC functionality that allows a Cisco IPICS user to lock in a PTT channel.
linear modulation
A radio frequency transmission technique that provides the physical transport
layer of a radio system. This technology is compatible in digital and analog
system environments and supports channel bandwidths of 5 kHz to 50 kHz.
LMR
Land Mobile Radio. A Land Mobile Radio (LMR) system is a collection of
portable and stationary radio units that are designed to communicate with each
other over predefined frequencies. They are deployed wherever organizations
need to have instant communication between geographically dispersed and
mobile personnel.
location
In Cisco IPICS, location signifies reachability; meaning, channels or users who
are associated with the same location can communicate with each other without
additional network configuration. Location may refer to a physical or virtual
location, as defined in the server.
low-band frequency Lower frequency levels in the VHF band, typically 25–50 MHz.
M
megahertz (MHz)
A unit of frequency denoting one million Hz.
modulation
The process, or result of the process, of varying a characteristic of a carrier in
accordance with an information-bearing signal.
multicast
Single packets that are copied by the network and sent to a specific subset of
network addresses. Multicast refers to communications that are sent between a
single sender and multiple recipients on a network.
multicast address
A single address that may refer to multiple network devices.
multicast
address/port
Cisco IPICS uses this type of connection to enable the PMC to directly tune in
to the multicast channel.
Cisco IPICS Server Installation Guide
OL-8155-01
GL-9
Glossary
multicast pool
Multicast IP addresses that are defined as part of a multicast pool. Cisco IPICS
allocates a multicast address from this pool of resources when a dispatcher
activates a VTG.
multiplexing
The combination of two or more information channels on to a common
transmission medium. In electrical communications, the two basic forms of
multiplexing are time-division multiplexing (TDM) and frequency-division
multiplexing (FDM).
mute
This functionality that enables a dispatcher to mute a PMC user from talking or
transmitting voice on one or more channels. The dispatcher can mute the
microphone of the user or both the microphone and the speaker.
mutual aid channel
A national or regional channel that has been set aside for use only in mutual aid
interoperability situations. Restrictions and guidelines governing usage usually
apply.
N
narrowband
channels
Channels that occupy less than 20 kHz.
National Public
Safety Planning
Advisory
Committee
The committee that was established to conduct nationwide planning and
allocation for the 821–824 MHz and 866–869 MHz bands.
The United States executive branch agency that serves as the principal advisor
National
Telecommunication to the president on telecommunications and information policies and that is
s and Information
responsible for managing the federal government’s use of the radio spectrum.
Administration
network
An interconnection of communications entities.
Cisco IPICS Server Installation Guide
GL-10
OL-8155-01
Glossary
NAT
Network Address Translation. Provides a mechanism for translating addresses
that are not globally unique into globally routable addresses for connection to
the Internet.
not activated
A VTG state that becomes effective when the Activate button is clicked a second
time (to deactivate the channel) or if the connection terminates. No PMC buttons
appear highlighted.
O
offline mode
When the connection to the server goes offline, the PMC enters offline mode.
Offline mode enables continuous communication during periods of server
downtime. Using offline mode requires at least one successful login to the
server.
operator
The Cisco IPICS operator is responsible for setting up and managing users,
configuring access privileges, and assigning user roles and ops views.
ops view
operational view. A Cisco IPICS feature that provides the ability to organize
users, user groups, channels, channel groups, VTGs, and policies into different
user-definable views. While ops views are maintained separately by the
Cisco IPICS system administrator, this functionality also allows multiple
entities to use one Cisco IPICS server to enable resource sharing across multiple
ops views, according to business need.
OTAR
over-the-air re-keying. Provides the ability to update or modify over radio
frequency the encryption keys that are programmed in a mobile or portable
radio.
P
packet
A logical grouping of information that includes a header that contains control
information. Usually also includes user data.
Cisco IPICS Server Installation Guide
OL-8155-01
GL-11
Glossary
packet switching
The process of routing and transferring data by using addressed packets so that
a channel is occupied during the transmission of the packet only. Upon
completion of the transmission, the channel is made available for the transfer of
other traffic.
PIM
Protocol Independent Multicast. Multicast routing architecture that allows the
addition of IP multicast routing on existing IP networks. PIM is unicast routing
protocol independent and can be operated in two modes: PIM dense mode and
PIM sparse mode.
PIM dense mode
One of the two PIM operational modes. PIM dense mode is data-driven and
resembles typical multicast routing protocols. Packets are forwarded on all
outgoing interfaces until pruning and truncation occurs. In dense mode,
receivers are densely populated, and it is assumed that the downstream networks
want to receive and will probably use the datagrams that are forwarded to them.
The cost of using dense mode is its default flooding behavior. Sometimes called
dense mode PIM or PIM DM.
PIM sparse mode
One of the two PIM operational modes. PIM sparse mode tries to constrain data
distribution so that a minimal number of routers in the network receive it.
Packets are sent only if they are explicitly requested at the RP (rendezvous
point). In sparse mode, receivers are widely distributed, and the assumption is
that downstream networks will not necessarily use the datagrams that are sent to
them. The cost of using sparse mode is its reliance on the periodic refreshing of
explicit join messages and its need for RPs. Sometimes called sparse mode PIM
or PIM SM.
PMC
Push-to-Talk Management Center. A standalone PC-based software application
that simulates a handheld radio to enable PTT functionality for PC users. This
application enables Cisco IPICS PMC end-users, dispatch personnel, and
administrators to participate in one or more VTGs at the same time.
PMC ID
The unique ID that the Cisco IPICS server generates for each PMC to track
requests between the PMC and the server and to verify and manage concurrent
PMC usage for licensing requirements.
policy
An association of events or triggers to an action. Policies can include a set
sequence of actions, such as activating VTGs.
Cisco IPICS Server Installation Guide
GL-12
OL-8155-01
Glossary
policy channel
A channel that can be set up by the dispatcher and configured as a designated
channel; that is, a channel that is always open to enable your interaction with the
dispatcher.
portalization
A web programming paradigm for customizing the interface and functionality of
a client application.
protocol
A set of unique rules that specify a sequence of actions that are necessary to
perform a communications function.
PTT
Push-to-talk. A signal to a radio transmitter that causes the transmission of radio
frequency energy.
PTT channel
A channel consists of a single unidirectional or bidirectional path for sending
and/or receiving signals. In the Cisco IPICS solution, a channel represents one
LMR gateway port that maps to a conventional radio physical radio frequency
(RF) channel.
PTT channel button
The button on the PMC that you click with your mouse, or push, and hold to talk.
You can use the latch functionality on this button to talk on one or more channels
at the same time.
PTT channel group
A logical grouping of available PTT channels that can be used for categorization.
Q
QoS
quality of service. A measurement of performance for a transmission system,
including transmission quality and service availability.
queue
Represents a set of items that are arranged in sequence. Queues are used to store
events occurring at random times and to service them according to a prescribed
discipline that may be fixed or adaptive.
queuing delay
In a radio communication system, the queuing delay specifies the time between
the completion of signaling by the call originator and the arrival of a permission
to transmit to the call originator.
Cisco IPICS Server Installation Guide
OL-8155-01
GL-13
Glossary
R
radio channel
Represents an assigned band of frequencies sufficient for radio communication.
The bandwidth of a radio channel depends upon the type of transmission and its
frequency tolerance.
radio equipment
Any equipment or interconnected system or subsystem of equipment (both
transmission and reception) that is used to communicate over a distance by
modulating and radiating electromagnetic waves in space without artificial
guide. This equipment does not include microwave, satellite, or cellular
telephone equipment.
receive indicator
The indicator on the PMC that blinks green when traffic is being received.
remote connection
Cisco IPICS uses this type of connection to provide SIP-based trunking into the
RMS component, which is directly tuned into the multicast channel.
RF
radio frequency. Any frequency within the electromagnetic spectrum that is
normally associated with radio wave propagation. RF generally refers to
wireless communications with frequencies below 300 GHz.
RF repeater
An analog device that amplifies an input signal regardless of its nature (analog
or digital). Also, a digital device that amplifies, reshapes, retimes, or performs a
combination of any of these functions on a digital input signal for
retransmission.
RMS
router media service. Component that enables the Cisco IPICS PMC to remotely
attach to a VTG. It also provides support for remotely attaching (combining) two
or more VTGs through its loopback functionality. The RMS mixes multicast
channels in support of VTGs and it mixes remote PMC SIP-based (unicast)
connections to a multicast channel or VTG. The RMS can be installed as a
stand-alone component (RMS router) or as an additional feature that is installed
in the LMR gateway.
RTP
Real-Time Transport Procotol. Commonly used with IP networks to provide
end-to-end network transport functions for applications transmitting real-time
data, such as audio, video, or simulation data, over multicast or unicast network
services.
Cisco IPICS Server Installation Guide
GL-14
OL-8155-01
Glossary
S
scanning
A subscriber unit feature that automatically allows a radio to change channels or
talk groups to enable a user to listen to conversations that are occurring on
different channels or talk groups.
SDM
Security Device Manager. A web-based integrated router application, provides a
user-friendly GUI for configuring security features in Cisco routers.
Cisco IPICS uses SDM to configure voice ports and LMR functions on LMR
gateways.
secure flag
A PTT channel indicator that identities a channel as a secure PTT channel.
service delivery area See coverage.
signal
The detectable transmitted energy that carries information from a transmitter to
a receiver.
skin
Skins form the appearance of the PMC. In Cisco IPICS, skins are customizable
and available in various options, including 4-channel and 8-channel mouse and
touch screen formats.
speaker arbitration
The procedure that is used to determine the active audio stream in a Push-to-Talk
system.
spectrum
The usable radio frequencies in the electromagnetic distribution. The following
frequencies have been allocated to the public safety community:
High HF 25–29.99 MHz
Low VHF 30–50 MHz
High VHF 150–174 MHz
Low UHF 406.1–420/450–470 MHz
UHF TV Sharing 470–512 MHz
700 MHz 764–776/794–806 MHz
800 MHz 806–824/851–869 MHz.
squelch
An electric circuit that stops input to a radio receiver when the signal being
received is too weak to be anything but noise.
Cisco IPICS Server Installation Guide
OL-8155-01
GL-15
Glossary
stored VTG
Also referred to as inactive VTG.
subscriber unit
A mobile or portable radio unit that is used in a radio system.
system
administrator
The Cisco IPICS system administrator is responsible for installing and setting up
Cisco IPICS resources, such as servers, routers, multicast addresses, locations,
and PTT channels. The system administrator also creates ops views, manages the
Cisco IPICS licenses and PMC versions, and monitors the status of the system
and its users via the activity log files.
system architecture The design principles, physical structure, and functional organization of a land
mobile radio system. Architectures may include single site, multi-site,
simulcast, multicast, or voting receiver systems.
T
T1
Digital WAN carrier facility. T1 transmits DS-1-formatted data at 1.544 Mbps
through the telephone-switching network, using alternate mark inversion (AMI)
or binary 8 zero suppression (B8ZS) coding.
T1 loopback
Allows mapping from multicast to unicast so that unicast phone calls can be
patched into an LMR or into other multicast audio streams. A loopback is
composed of two of the available T1 interfaces.
talk group
A subgroup of radio users who share a common functional responsibility and,
under normal circumstances, only coordinate actions among themselves and do
not require radio interface with other subgroups.
TCP
Transmission Control Protocol. A connection-oriented transport layer protocol
that provides reliable full-duplex data transmission. TCP is part of the TCP/IP
protocol stack.
TDMA
time division multiple access. Type of multiplexing where two or more channels
of information are transmitted over the same link by allocating a different time
interval (“slot” or “slice”) for the transmission of each channel; that is, the
channels take turns to use the link.
Cisco IPICS Server Installation Guide
GL-16
OL-8155-01
Glossary
terminal
A device capable of sending, receiving, or sending and receiving information
over a communications channel.
throughput
The number of bits, characters, or blocks passing through a data
communications system, or a portion of that system.
TIA/EIA-102
standards
A joint effort between government and industry to develop voice and data
technical standards for the next generation of public safety radios.
tone control
The process of sending a 2175 Hz inband tone with voice transmission to control
receiving radios remotely. An inband tone can be used to control functions such
as frequency selection and channel monitoring.
transmit indicator
The indicator on the PMC that blinks red when traffic is being transmitted.
trunk
A physical and logical connection between two switches across which network
traffic travels. In telephony, a trunk is a phone line between two central offices
(COs) or between a CO and a PBX.
trunked (system)
Systems with full feature sets in which all aspects of radio operation, including
RF channel selection and access, are centrally managed.
trunked radio
system
Integrates multiple channel pairs into a single system. When a user wants to
transmit a message, the trunked system automatically selects a currently unused
channel pair and assigns it to the user, decreasing the probability of having to
wait for a free channel.
U
Cisco IPICS Server Installation Guide
OL-8155-01
GL-17
Glossary
user
The Cisco IPICS user may set up personal login information, download the PMC
application, customize the PMC skin, and specify communication preferences
that are used to configure audio devices. By using a predefined user ID and
profile, the user can participate in PTT channels and VTGs by using the PMC or
a supported Cisco IP Phone model. Users may have one or more Cisco IPICS
roles, such as system administrator, operator or dispatcher.
unicast
Specifies point-to-point transmission, or a message sent to a single network
destination.
V
VAD
Voice Activity Detection. When VAD is enabled on a voice port or on a dial peer,
only audible speech is transmitted over the network. When VAD is enabled on
Cisco IPICS, the PMC only sends voice traffic when it detects your voice.
virtual channel
A virtual channel is similar to a channel but a radio system may not be attached.
By creating a virtual channel, participants who do not use physical handheld
radios to call into a VTG become enabled by using the PMC application or
Cisco IP Phone 7960 or Cisco IP Phone 7970.
voice
interoperability
Voice interoperability enables disparate equipment and networks to successfully
communicate with each other.
VoIP
Voice over Internet Protocol. By digitalizing and packetizing voice streams,
VoIP provides the capability to carry voice calls over an IP network with
POTS-like functionality, reliability, and voice quality.
volume indicator
The volume indicator on the PMC that shows the current volume level on the
channel in a graphical format.
volume up/down
buttons
The buttons on the PMC that let you control the volume level.
Cisco IPICS Server Installation Guide
GL-18
OL-8155-01
Glossary
VOX
Voice-operated transmit. A keying relay that is actuated by sound or voice
energy above a certain threshold and sensed by a connected acousto-electric
transducer. VOX uses voice energy to key a transmitter, eliminating the need for
push-to-talk operation.
VTG
virtual talk group. A VTG can contain any combination of channels, channel
groups, users, and user groups. A VTG can also contain other VTGs.
VTG template
Before becoming active, a VTG is in an inactive state as a VTG template. The
server stores VTG templates so that they can be automatically activated by a
policy or manually activated by a dispatcher. Also known as a preconfigured
VTG.
W
wavelength
The representation of a signal as a plot of amplitude versus time.
wideband channel
Channels that occupy more than 20 kHz.
Cisco IPICS Server Installation Guide
OL-8155-01
GL-19
Glossary
Cisco IPICS Server Installation Guide
GL-20
OL-8155-01
I N D EX
A
Cisco IPICS installer
Choose Install Set window 2-30
Additional CDs window, Cisco Linux 2-14
copying file from CD to server root 2-38
address, obtaining for Cisco IPICS 2-2
End User License Agreement 2-30
analog ports, types supported for Cisco
IPICS 1-5
executing from a remote location 2-38
authorization error after server installation 5-4
Installation Progress window 2-34
Install Complete window 2-35, 2-44
Password Panel 2-31
Preinstallation Summary Window 2-33, 2-43
B
Restart Computer window 2-36
bootloader, GRUB 1-2
browser, cannot connect to server after
installing Cisco IPICS 5-3
transferring file from PC to server 2-39
Cisco IPICS installer file 2-27
Cisco IPICS license
locating MAC address 2-50
C
CallManager documentation ix
caution, described xi
changing password with passwd command A-1
checking Cisco IPICS installation 2-47
checklist, preinstallation 2-2
Choose Install Set window 2-30
Cisco.com, accessing to obtain license file 2-53
Cisco Integrated Service Routers 1-5
Cisco IOS documentation x
Cisco IPICS installation, checking 2-47
purchasing additional 2-54
uploading to Cisco IPICS server 2-55
Cisco IPICS uninstallation
about 4-1
from remote location 4-5
Cisco IPICS upgrade
from CD 3-2
from remote location 3-17
from the server 3-12
methods 3-1
performing from file download 3-10
Cisco IPICS Server Installation Guide
OL-8155-01
IN-1
Index
transferring installer file to server 3-10
conventions xi
Cisco IP Phones documentation x
Cisco Land Mobile Radio (LMR)
documentation x
MCS servers x
Domain Name Service name, Cisco IPICS
server 2-21
Cisco MCS servers 1-4
Cisco Security Agent
choosing install set with 2-30
manually installing 2-46
E
End User License Agreement, Cisco IPICS 1-3,
2-30
Cisco Security Agent documentation x
Complete install option, Cisco IPICS 2-30
error
components, Cisco IPICS installed 1-4
authorization after server installation 5-4
configuration
starting remote installation 5-6
Ethernet port 1-2
eth0
activating 2-22
Linux 1-2
configuring 2-18, 2-52
conventions, document xi
Ethernet Device window 2-19, 2-52
Ethernet port, configuring 1-2, 2-17
D
Ethernet port, none display in Network Device
Control Menu 5-2
database, Informix
checking 5-4
manually starting 5-5
Date and time, setting in Linux 2-10
disk space 2-33, 2-43, 3-8, 3-15
F
Finish Setup window, Linux 2-15
DNS name, for Cisco IPICS server 2-21
documentation
CallManager ix
Cisco IOS x
Cisco IP Phones x
Cisco Land Mobile Radio (LMR) x
G
GNOME login window, Linux 2-15
GNOME username and password window 1-2
GRUB bootloader 1-2
Cisco Security Agent x
Cisco IPICS Server Installation Guide
IN-2
OL-8155-01
Index
H
L
hardware, locating MAC address 2-24
license, Cisco IPICS
consumption 2-57
license manager 2-49
I
locating MAC address 2-24
ifconfig command, using to obtain MAC
address 2-24, 2-52
Informix database
ops view 2-57
purchasing additional 2-54
checking 5-4
License Agreement, accepting the Cisco
IPICS 2-30, 3-7, 3-14
manually starting 5-5
license file, uploading 2-55
installation, cannot connect to server after 5-3
license manager 2-49
Installation Progress window, Cisco
IPICS 2-34
Linux
Install Complete window, Cisco IPICS
installer 2-35, 2-44
installer, generating the PMC 2-58
configuration and setup 1-2
Setup Utility 1-2
login window, GNOME 2-15
installer file, Cisco IPICS 2-27
installer icon
M
Cisco IPICS installation 2-28
Cisco IPICS upgrade 3-4
Installing Packages window, Linux 2-7
install set, choosing Cisco IPICS 1-3
MAC address, obtaining 2-24, 2-50
MCS servers documentation x
multicast addresses, obtaining for Cisco IPICS
uses 2-2
install set options, Cisco IPICS 2-30
Introduction window, Cisco IPICS 1-3
IP address
choosing for Cisco IPICS server 2-21
obtaining for Cisco IPICS 2-2
Statically setting option 2-20
ipicsadmin user 2-33
N
Network Device Control window 2-22
Linux 2-17, 2-51
using to obtain MAC address 2-50
non-administrator user, creating Linux 2-13
Cisco IPICS Server Installation Guide
OL-8155-01
IN-3
Index
note, described xi
Red Hat menu 2-17, 2-51
remote installation, error when starting 5-6
remote location, installing Cisco IPICS
from 2-38
O
ops views, licensing and 2-57
requirements
Cisco IP Phone 1-5
hardware 1-4
P
PMC 1-5
Package installation window
software 1-6
Cisco IPICS 1-3
Restart Computer window, Cisco IPICS
installer 1-3, 2-36
Linux 1-2
root
passwd command, Cisco Linux A-1
changing password after installation A-1
password
changing for root after installation A-1
changing password in Cisco IPICS
installer 1-3, 2-31
changing for root during installation 1-3, 2-31
logging in as, GNOME login window 2-16,
5-2
creating ipicsadmin 1-3, 2-33
logging in as before Cisco IPICS
installation 2-26
GNOME 1-2
Password Panel, Cisco IPICS installer 2-31, 2-33
routers, types supported for Cisco IPICS 1-5
ping command, using to verify network
connectivity 2-24
PMC application installer, generating 2-58
S
ports
configuring 1-2, 2-17
types supported for Cisco IPICS 1-5
Preinstallation Summary, Cisco IPICS 1-3, 2-33,
SATA Software RAID
about 2-3
and MCS model 2-4
disabling 2-5
2-43
servers, models supported for Cisco IPICS 1-4
Setup Utility, Linux 1-2, 2-4
R
System Maintenance menu, Linux 2-4
RAID, SATA Software 2-3
System User window, Linux 2-12
Cisco IPICS Server Installation Guide
IN-4
OL-8155-01
Index
uploading license file 2-55
T
URL, Cisco IPICS server 2-35, 2-44
T1 network modules, types supported for Cisco
IPICS 1-5
username, GNOME 1-2
Tomcat service, checking 5-3
troubleshooting
authorization error after installation 5-4
authorization error on login 5-4
cannot connect to server 5-3
cannot reach server from browser 5-3
V
verifying Cisco IPICS installation 2-47
verifying network connectivity 2-24
VTG, interrupting during uninstallation 4-1
database not running 5-4
error when starting remote installation 5-6
incorrect username or password 5-4
no Ethernet ports display after Cisco Linux
installation 5-2
W
Welcome window, Linux 2-10
Tomcat service not running 5-3
Typical install option, Cisco IPICS 2-30
U
uninstalling Cisco IPICS
about 4-1
from remote location 4-5
upgrade, Cisco IPICS
from CD 3-2
from remote location 3-17
from the server 3-12
transferring installer file to server 3-10
Upgrade option, Cisco IPICS installer 2-30
upgrading Cisco IPICS server software 3-1
Cisco IPICS Server Installation Guide
OL-8155-01
IN-5
Index
Cisco IPICS Server Installation Guide
IN-6
OL-8155-01