1
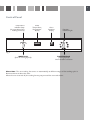
SV 210 .. - Multifunction Oven
Manual for Installation, Use and Maintenance
Customer Care Department • The
Group Ltd. • Harby Road • Langar • Nottinghamshire • NG13 9HY
T : 01949 862 012 F : 01949 862 003 E : [email protected] W : www.cda.eu
2
Important
This appliance is designed and manufactured solely for the cooking of domestic (household) food and
is not suitable for any non domestic application and therefore should not be used in a commercial
environment.
The appliance guarantee will be void if the appliance is used within a non domestic environment i.e. a semi
commercial, commercial or communal environment.
The CDA Group Ltd cannot be held responsible for injuries or losses caused by incorrect use or installation
of this product. Please note that CDA reserve the right to invalidate the guarantee supplied with this
product following incorrect installation or misuse of the appliance.
Appliance Information:
Please enter the details on the appliance rating plate below for reference, to assist CDA Customer Care in
the event of a fault with your appliance and to register your appliance for guarantee purposes.
Appliance Model
Serial Number
Declaration of CE Conformity
This oven has been designed, constructed and marketed in compliance with:
- Safety requirements of EU Directive “Low Voltage” 2006/95/EC;
- Protection requirements of EU Directive “EMC” 2004/108/EC;
- Requirements of EU Directive 93/68/EEC.
Important Information for Correct Disposal of the Product in Accordance with
EC Directive 2002/96/EC.
At the end of its working life, the product must not be disposed of as urban
waste. It must be taken to a special local authority differentiated waste
collection centre or to a dealer providing this service.
Disposing of a household appliance separately avoids possible negative
consequences for the environment and health deriving from inappropriate
disposal and enables the constituent materials to be recovered to obtain
significant savings in energy and resources. As a reminder of the need to
dispose of household appliances separately, the product is marked with a
crossed-out wheeled dustbin.
3
Before Using for the First Time
– Read the instructions carefully before installing and using the appliance.
– After unpacking the appliance, check that it is not damaged. In case of doubt, do not use the appliance
and contact your supplier or a qualified engineer.
– Remove all the packing materials (i.e. plastic bags, polystyrene foam, etc.) and do not leave it around within
easy reach of children, as these may cause serious injuries. The packaging materials are recyclable.
– Do not attempt to modify the technical characteristics of the appliance, as it may become dangerous
to use.
– The appliance should be installed and all the electrical connections made by a qualified engineer in
compliance with local regulations in force and following the manufacturer's instructions.
Important Precautions and Recommendations
for Use of Electrical Appliances
Use of any electrical appliance implies the necessity to follow a series of fundamental rules. In particular:
– never touch the appliance with wet hands or feet;
– do not operate the appliance barefooted;
– do not allow children or disabled people to use the appliance without your supervision.
The manufacturer cannot be held responsible for any damages caused by improper, incorrect or
unreasonable use of the appliance.
Using the Oven for the First Time
You are advised to carry out the following operations:
– Assemble the interior of the oven as described under the heading “Cleaning and maintenance”
– Switch the empty oven ON at maximum temperature for about two hours to eliminate traces of grease
and smell from the components.
–Let the oven cool down, switch off the electrical supply, then clean the inside of the oven with a cloth
soaked in water and neutral detergent and dry thoroughly.
4
Important Safeguards and Recommendations
– Do not carry out any cleaning or maintenance without first disconnecting the appliance from the
electrical supply.
– During and after use of the oven, certain parts will become very hot. Do not touch hot parts.
– After use always ensure that the control knobs are in the OFF position ( - ).
– Household appliances are not intended to be played with by children.
– Keep children away from the oven during use.
– Children, or persons with a disability which limits their ability to use the appliance, should have a
responsible person to instruct them in its use. The instructor should be satisfied that they can use the
appliance without danger to themselves or their surroundings.
– WARNING
When correctly installed, your product meets all safety requirements laid down for this type of product
category. However special care should be taken around the rear or the underneath of the appliance
as these areas are not designed or intended to be touched and may contain sharp or rough edges, that
may cause injury.
– Fire Risk! Do not store inflammable materials inside the oven.
– Always use oven gloves when removing the shelves and food trays from the oven whilst hot.
– Clean the oven regularly and do not allow fat or oils to build up in the oven base or trays. Remove
spillages as soon as they occur.
– Do not line the oven walls with aluminium foil. Do not place baking trays or the drip tray on the base
of the oven chamber.
– Always stand back from the oven when opening the oven door to allow steam and hot air to escape
before removing the food.
– Do not hang towels, dishcloths or other items on the cooker or its handle – as this could be a fire
hazard.
– Make sure that electrical cords connecting other appliances in the proximity cannot become entrapped
in the oven door.
– Before disposing of an unwanted appliance, it is recommended that it is made inoperative and that all
potentially hazardous parts are made harmless.
– Important: This appliance has been designed for domestic use only. The appliance is NOT suitable for
use within a semi-commercial, commercial or communal environment.
– Safe food handling: leave food in the oven for as short a time as possible before and after cooking.
This is to avoid contamination by organisms which may cause food poisoning. Take particular care
during warmer weather.
– Do not operate your appliance by means of an external timer or separate remote-control system.
5
Oven Features
General Features
This multifunction oven has 4 heating elements which allow you to choose between 6 cooking
programmes:
– Lower element 1300 W
– Upper element 1000 W
– Grill element
2000 W
– Circular element
2200 W
Note:
Before using your new oven, it is necessary to condition your oven.
Heat the oven on maximum for 60 minutes in the position 2
and
eliminate possible traces of grease on the heating elements.
Then heat the oven for another 15 minutes in the grill position 6
VENTILATED GRILL COOKING and GRILLING AND “AU GRATIN”.
5
(for another 60 minutes) to
as explained in the chapters
Warning:
The door is hot, use the handle.
ATTENTION - MOST IMPORTANT
Pay special attention not to touch the hot heating element inside the oven cavity.
6
Operating Principles
Heating and cooking in the MULTI-FUNCTION oven are obtained in the following ways:
a. by Normal convection
The heat is produced by the upper and lower heating elements.
b. by Forced convection
The air inside the oven is warmed by a circular heating element at the back of the oven.
Hot air is then moved around the oven by a fan near the heating element.
Food can be placed inside a cold oven because it heats up quickly. The heat is evenly distributed
throughout the oven allowing for different dishes to be cooked simultaneously.
c. by Semi-forced convection
The heat produced by the upper and lower heating elements is distributed throughout the oven by the
fan.
d. by Radiation
The heat is radiated by the infrared grill element.
e. by Radiation and ventilation
The radiated heat from the infrared grill element is distributed throughout the oven by the fan.
f. by Ventilation
The food is defrosted by using the fan only function without heat.
Attention: the oven door becomes very hot during operation.
Keep children away.
7
Control Panel
Temperature
indicator lamp
(Lit: operation of the
heating elements)
Clock,
Temperature,
Programmer
display
Oven
functions
display
Function
indicator light
MODE
FUNCTION
0
8
1
7
2
6
3
5
4
Fig. 1
MODE knob
(Push or turn right/left)
FUNCTION knob
(Turn right/left)
Oven functions selection
Please Note: The oven cooling fan comes on automatically at different stages of the cooking cycle. It
blows out warm air above the door.
When the oven is turned off, the cooling fan may stay on until the oven cools down.
8
SYMBOL
Lit = minute minder in operation
Flashing = countdown completed by the
minute minder
SYMBOL
Lit = semi-automatic or automatic
cooking programmed
Flashing = semi-automatic or automatic
cooking completed
SYMBOL
Lit = cooking function in operation
(not lit for light or defrost)
Flashing = semi-automatic or automatic
cooking completed
Fig. 2
PUSH selection
Progressive selection
(each time the knob is pushed)
TURN selection
Turn to the left to
decrease the numbers
on the left display
Turn to the right to
increase the numbers
on the left display
NOTE: The knob is very sensitive and
may feel loose to the touch. Do not force
it beyond the “ ” and “ ” symbols.
9
• Oven switched off:
- Time of day (normal status)
- Time of day and residual oven temperature alternating (oven temperature above 50°C)
DIGITS
• Oven switched on (light function)
- Time of day
- Time of day and residual oven temperature alternating (oven temperature above 50°C)
• Oven switched on (defrost function)
-“
”
-“
” and residual oven temperature alternating (oven temperature above 50°C)
• Oven switched on (cooking functions - not light or defrost):
- Set temperature with “ ” flashing (the oven is pre-heating)
- Time of day and set temperature alternating (the oven is at the set temperature)
OVEN SWITCHED OFF
1st
2 nd
Timer
Setting time of day
OVEN SWITCHED ON
1st
2 nd
3 rd
Timer
Duration of a
cooking program
Stop time of a
cooking program
10
Selecting the Cooking Functions and the
Temperature
MODE
knob
Oven
Oven
functions
function
display
Left
display
Oven light
only
FUNCTION
knob
1
2
3
It is not possible
to set the
temperature
4
5
Turn the knob to
the left or to the
right to decrease
or increase the
temperature
6
7
8
Fig. 3
Turn the knob
clockwise or
anticlockwise
to select the
oven function
11
Electronic Controller Features
It performs the following functions:
– 24 hours clock with illuminated display.
– Timer (minute minder: up to 600 minutes - 10 hours).
– Programme for semi-automatic oven cooking (up to 600 minutes - 10 hours - of cooking time).
– Programme for automatic oven cooking (up to 600 minutes - 10 hours - of cooking time).
– Oven functions and temperature selection.
– Each setting operated by the MODE knob is automatically processed about 4 seconds after the last
selection.
IMPORTANT NOTE: The first time the oven is used or after a power failure the clock is automatically set
to 12:00 (“12:00” appears on the left display).
WARNING: Set the time of day otherwise it is not possible to use the oven.
Setting Time of Day
The controller is provided with an electronic clock with illuminated figures showing the hour and
minutes.
IMPORTANT: The time of day can be set only when the oven is turned off (FUNCTION knob in
the “0” OFF position).
To set the time:
– Select “hour” on the left display by using the MODE knob.
– While the hour and “hour” alternate on the left display turn the MODE knob to the right or to the left
to set the time. The new time alternates with “hour” for a few seconds until the new time is set.
IMPORTANT: After a power failure, check the function knob is in the “0” OFF position before setting
the time of day.
12
Turning the Oven on and Off
To turn the oven ON:
– Turn the FUNCTION knob to the right or to the left to set the desired cooking function.
“On” appears for some seconds on the left display.
To change the temperature turn the MODE knob to the right or to the left.
– When completing the pre-heating three beeps indicate that the oven is at the set temperature
To turn the oven OFF:
– Turn the FUNCTION knob to the “0” OFF position. “OFF” appears for some seconds on the left display
and three beeps indicate that the oven is turned off.
WARNING - IMPORTANT NOTE
Do not turn the oven off if you have set it for automatic or semi-automatic cooking. This
operation will cancel the programmed cooking.
Only the timer (minute minder) operates with the oven turned off.
Selecting the Volume of the Beeps
– To select the volume of the beeps, turn the MODE knob to the left when the oven is turned off.
Using the Timer (Minute Minder)
You can use the timer at any time, even when the oven is not in use or switched off. The timer does not
turn the oven off. Remember to turn off the oven manually. The timer can be set for up to 600 minutes
(10 hours).
To set the timer:
– Select “bELL” on the left display by using the MODE knob.
– While “bELL” and “---’” alternate on the display turn the MODE knob to the right or to the left to set
the time in minutes. The set time alternates with “bELL” for a few seconds until the timer is set.
– To reset the time turn the MODE knob to the left until “---’” appears on the display.
– The symbol “ ” appears on the left display and the countdown starts immediately.
– To check the countdown select “bELL” on the left display by using the MODE knob; the time is indicated
(for a few seconds) in minutes.
– When the time is up, the timer will beep. Push the MODE knob to turn it off.
NOTE:
The timer also operates if the oven, after selection, is turned OFF. The timer can also be set if
the oven not switched on.
13
Using the Oven - Cooking Functions
Turn on the oven as indicated in the “TURNING THE OVEN ON AND OFF” chapter. Select the oven
function and temperature as indicated in the previous pages.
IMPORTANT: the cooking function and temperature can be modified at any time during the
normal, semi-automatic or automatic cooking.
1
Oven Lamp
Only the oven light comes on and the relative symbol is lit in the functions display.
The oven light remains on in all cooking modes. During automatic cooking, the lamp is switched off
before the oven starts to operate.
2
Traditional Convection Cooking
The upper and lower heating elements are switched on.
The heat is diffused by natural convection and the temperature must be set between 50 and 250°C.
The pre-heating temperature is set at 200°C.
To change the temperature, follow the instructions in the “SELECTING THE COOKING FUNCTIONS
AND THE TEMPERATURE” chapter.
Recommended for:
For foods which require the same cooking temperature both internally and externally, i. e. roasts, spare
ribs, meringue, etc.
3
Grilling
The infrared heating element is switched on. The heat is diffused by radiation.
Use with the oven door closed and the temperature between 50 and 200°C maximum.
The pre-heating temperature is set at 200°C.
To change the temperature, follow the instructions in the “SELECTING THE COOKING FUNCTIONS
AND THE TEMPERATURE” chapter.
Recommended for:
Intense grilling action for browning, crisping, “au gratin”, toasting, etc.
For correct use see the “USE OF THE GRILL” chapter.
The external parts of the oven become hot during operation.
Keep children well out of reach.
14
4
Defrosting Frozen Foods
The fan only switches on and the left display shows “dEF”.
It is not possible to set the temperature.
Recommended for:
To rapidly defrost frozen food; 1 kilogram requires about one hour. The defrosting times vary according to
the quantity and type of food to be defrosted.
5
Hot Air Cooking
The circular heating element and the fan are switched on.
The heat is diffused by forced convection and the temperature can be set between 50 and 250°C.
The pre-heating temperature is set at 175°C.
To change the temperature, follow the instructions in the “SELECTING THE COOKING FUNCTIONS
AND THE TEMPERATURE” chapter.
Recommended for:
For foods that must be well done on the outside and tender or rare on the inside, i. e. lasagna, lamb, roast
beef, whole fish, etc.
6
Ventilated Grill Cooking
The infrared heating element and the fan are switched on.
The heat is mainly diffused by radiation and distributed by the fan throughout the oven.
Use with the oven door closed and the temperature between 50 and 175°C maximum.
The pre-heating temperature is set at 175°C.
To change the temperature, follow the instructions in the “SELECTING THE COOKING FUNCTIONS
AND THE TEMPERATURE” chapter.
Recommended for:
For fast browning and sautéing, i. e. veal steak, steak, hamburger, etc. For correct use see the “GRILLING
AND AU GRATIN” chapter.
The external parts of the oven become hot during operation.
Keep children well out of reach.
15
7
Maintaining Temperature Cooking or Slowly Heating Foods
The upper element and the circular element connected in series, and the fan are switched on.
The pre-heating temperature is set at 75°C.
The temperature must be regulated between 50° and 150°C maximum.
To change the temperature, follow the instructions in the “SELECTING THE COOKING FUNCTIONS
AND THE TEMPERATURE” chapter.
Recommended for:
To keep foods hot after cooking.
To slowly heat already cooked foods.
8
Convection Cooking with Fan
The upper and lower heating elements and the fan are switched on. The heat from the top and the bottom
is diffused by fan convection.
The temperature can be set between 50 and 250°C.
The pre-heating temperature is set at 175°C.
To change the temperature, follow the instructions in the “SELECTING THE COOKING FUNCTIONS
AND THE TEMPERATURE” chapter.
Recommended for:
For foods of large volume and quantity which require the same internal and external degree of cooking;
e.g. rolled roasts, turkey, legs, cakes, etc.
16
Using the Oven Manually
Turn the oven ON as indicated in the “TURNING THE OVEN ON AND OFF” chapter.
Operate the oven manually by selecting the oven function and temperature as indicated in the “SELECTING
THE COOKING FUNCTIONS AND THE TEMPERATURE” chapter.
The oven will start to operate immediately.
If “A” symbol is shown on the left display (semi-automatic or automatic cooking selected), then you
need to cancel the preset automatic cooking as indicated in the “CANCELLING A SET PROGRAMME”
chapter.
Turn OFF the oven as indicated in the “TURNING THE OVEN ON AND OFF” chapter.
Cancelling a set Programme
To cancel a set programme (“A” symbol activated on the left display):
– Select “dur” on the left display by using the MODE knob. While “dur” and the cooking time (in minutes)
alternate turn the MODE knob to the left until “---’” appears on the display.
– A set programme is also cancelled when the oven is switched OFF. At the next power up the oven is not
programmed.
IMPORTANT: If the oven is ON, remember to switch it off manually otherwise it does not stop
operating in the set mode.
17
Using the Oven Automatically
Use automatic cooking to automatically turn the oven on, cook, and then turn the oven off.
1. Check the clock shows the correct time.
2. Select the function and temperature. The oven will come on.
3. Decide how long the food will take to cook, allowing time for pre-heating if necessary.
4. Select “dur” (duration) on the left display by using the MODE knob. While “dur” and “---’” alternate
turn the MODE knob to the right or to the left to set the time in minutes (maximum 600 minutes).
The set minutes alternate with “dur” for a few seconds until the time is set.
To reset turn the MODE knob to the left until “---’” appears on the display.
5. Decide the time you would like the oven to turn off; select “End” on the left display by using the MODE
knob. While “End” and the time alternate turn the MODE knob to the right or to the left to set the end
of cooking time (hour and minutes).
The set time alternates with “End” for a few seconds until the time is set.
If there is time to wait before cooking starts, “A” will show in the left display and the oven will switch off
but is now set for automatic cooking.
If you are already at home to turn the oven on and only want the oven to turn off automatically, start
cooking as normal, then follow step 4 or step 5 to set a time to stop the oven.
When automatic cooking starts, “
” will be displayed and the oven will turn on.
– To see the remaining cook time, follow step 4 up to display “dur” (duration).
– To see the set stop time, follow step 5 up to display “End”.
- To cancel automatic or semi-automatic cooking at any time see chapter “CANCELLING A SET
PROGRAMME”.
When the stop time is reached the timer will beep, “A” and “ ” will flash:
– Push the MODE knob to stop the beeping.
– Turn OFF the oven as indicated in the “TURNING THE OVEN ON AND OFF” chapter.
Attention: after a power failure any automatic or semi-automatic programme is cancelled.
Turn off the oven manually.
During an automatic or semi-automatic cooking programme it is possible to change the
cooking function and the temperature at any time.
18
Cooking Advice
Sterilization
Sterilization of foods to be conserved, in full and hermetically sealed jars, is done in the following way:
a. Set the switch to position 5
.
b. Set the thermostat knob to position 185 °C and preheat the oven.
c. Fill the dripping pan with hot water.
d. Set the jars onto the dripping pan making sure they do not touch each other and the door and set the
thermostat knob to position 135 °C.
When sterilization has begun, that is, when the contents of the jars start to bubble, turn off the oven and
let cool.
Reheat Food
Set the 8
function and the temperature at 150° C.
Bread becomes fragrant again if wet with a few drops of water and put into the oven for about 10
minutes.
Cooking Different Dishes at the Same Time
By setting the 5
or 8
functions the ventilated oven allows you to cook different types of food
at the same time.
Fish, cakes and meat can be cooked together without the smells and flavours mixing.
Please ensure that:
– The cooking temperatures must be as close as possible with a maximum difference of 20°-25°C between
the different foods.
– Different dishes must be placed in the oven at different times according to the cooking time required for
each one. This type of cooking obviously provides a considerable saving on time and energy.
Roasting
To obtain classical roasting, please remember:
– that it is advisable to maintain a temperature between 180 and 200 °C.
– that the cooking time depends on the quantity and the type of foods.
Use of the Grill
Choose 3
function and set the temperature between 50 and 200°C maximum.
Leave to warm up for approximately 5 minutes with the door closed.
Introduce the food to be cooked, positioning the rack as close to the grill as possible.
The dripping pan should be placed under the rack to catch the cooking juices and fats.
Always grill with the oven door closed.
Do not grill for longer than 30 minutes at any one time.
Attention: the oven door becomes very hot during operation. Keep children away.
19
Grilling and “Au Gratin”
Grilling may be done by selecting the function 6
because the hot air completely envelops the food
that is to be cooked.
Set the temperature between 50 and 175°C maximum and after having preheated the oven, simply
place the food on the grid.
Close the door and let the oven operate until grilling is done.
Adding a few dabs of butter before the end of the cooking time gives the golden “au gratin” effect.
Always grill with the oven door closed.
Do not grill for longer than 30 minutes at any one time.
Attention: the oven door becomes very hot during operation. Keep children away.
Error Codes on the Left Display
If an error message appears on the left display (e.g. "E001", "E002"......,
"E064", "E128" - "E" letter followed by three numbers):
1. Switch off the oven and disconnect it from the mains.
2. Reconnect the oven and turn it on.
3. Wait for about two minutes and if the problem does not appear the oven
can be used.
4. If the problem does not disappear repeat step from 1 to 3.
5. If the problem continues, disconnect the oven from the mains and contact
your Authorised Service Centre.
Display off or not Correctly Operating
If left display or functions display are only partially lit or not lit
1. Switch off the oven and disconnect it from the mains.
2. Reconnect the oven and turn it on.
3. Wait for about two minutes and if the problem does not appear the oven can be used.
4. If the problem does not disappear repeat step from 1 to 3.
5. If the problem continues, disconnect the oven from the mains and contact your Authorised Service
Centre.
20
Do’s and do not’s
– Do always grill with the oven door closed.
– Do read the user instructions carefully before using the oven for first time.
– Do allow the oven to heat for one and a half hours, before using for the first time, in order to expel any
smell from the new oven insulation, without the introduction of food.
– Do clean your oven regularly.
– Do remove spills as soon as they occur.
– Do always use oven gloves when removing food shelves and trays from the oven.
– Do not allow children near the oven when in use.
– Do not allow fat or oils to build up in the oven trays, or oven base.
– Do not place cooking utensils or plates directly onto the oven base.
– Do not grill food containing fat without using the grid.
– Do not cover the grilling grid with aluminium-foil.
– Do not use the oven tray for roasting.
– Do not place hot enamel parts in water. Leave them to cool first.
– Do not allow vinegar, coffee, milk, saltwater, lemon or tomato juice to remain in contact with enamel
parts (inside the oven and on the oven tray).
– Do not use abrasive cleaners or powders that will scratch the surfaces and the enamel.
– Do not attempt to repair the internal workings of your oven.
– Do remove the protective film before the first use.
– Fire risk! Do not store flammable material in the oven.
For Your Safety
The product should only be used for its intended purpose which is for the
cooking of domestic foodstuffs.
Under no circumstances should any external covers be removed for servicing
or maintenance except by suitably qualified personnel.
Important Notes
Installation, and any demonstration, information or adjustments are not
included in the warranty.
The oven must be installed by a suitably qualified and registered person in
accordance with the relevant Standards.
ATTENTION:
The appliance gets
very hot, mainly
around the cooking
areas. It is very
important that
children are not
left alone in the
kitchen when you are
cooking.
21
Care and Maintenance
It is advisable to clean when the appliance is cold and especially for cleaning
the enamelled parts.
Avoid leaving alkaline or acidic substances (lemon juice, vinegar, etc.) on the
surfaces.
Avoid using cleaning products with a chlorine or acidic base.
WARNING
When correctly installed, your product meets all safety requirements
laid down for this type of product category. However special care
should be taken around the rear or the underneath of the appliance
as these areas are not designed or intended to be touched and may
contain sharp or rough edges, that may cause injury.
Inside of Oven
The oven should always be cleaned after use when it has cooled down.
The cavity should be cleaned using a mild detergent solution and warm water.
Suitable proprietary chemical cleaners may be used after first consulting with
the manufacturers recommendations and testing a small sample of the oven
cavity. Abrasive cleaning agents or scouring pads/cloths should not be used
on the cavity surface.
NOTE: The manufacturers of this appliance will accept no responsibility for
damage caused by chemical or abrasive cleaning.
Enamelled Parts
All the enamelled parts must be cleaned with a sponge and soapy water only
or other non-abrasive products.
Dry preferably with a micro fibre or soft cloth.
IMPORTANT:
Before any operation
of cleaning and
maintenance
disconnect the
appliance from the
electrical supply.
ATTENTION:
Let the oven cool
down and pay special
attention no to touch
the hot heating
elements inside the
oven cavity.
22
Stainless Steel, Aluminium, Painted Parts and Silk-screen
Printed Surfaces
Clean using an appropriate product. Always dry thoroughly.
Stainless steel surfaces: can be cleaned with an appropriate stainless steel
cleaner.
IMPORTANT: these parts must be cleaned very carefully to avoid scratching
and abrasion. You are advised to use a soft cloth and neutral soap.
CAUTION:
Do not use abrasive
substances or nonneutral detergents as
these will irreparably
damage the surface.
Glass Control Panel (Models with Glass Control Panel)
Clean using an appropriate product. Always dry thoroughly.
Do not use harsh abrasive cleaners or sharp metal scrapers to clean the control
panel since they can scratch the surface, which may result in shattering of the
glass.
CAUTION:
Do not use a steam
cleaner because the
moisture can get into
the appliance thus
make it unsafe.
CAUTION:
Do not store
flammable material
in the oven.
CAUTION:
Do not use harsh
abrasive cleaners or
sharp metal scrapers
to clean the oven
door glass since
they can scratch the
surface, which may
result in shattering
of the glass.
23
Replacing the Halogen Oven Light
WARNING: Ensure the appliance is switched off before replacing the lamp to avoid the
possibility of electric shock.
– Let the oven cavity and the heating elements to cool down;
– Switch off the electrical supply;
– Remove the protective cover C (fig. 4);
– Replace the halogen lamp B with a new one suitable for high temperatures
having the following specifications: 230V and same power (check watt
power as stamped in the lamp itself) of the replaced lamp.
IMPORTANT WARNING: Never replace the bulb with bare hands;
contamination from your fingers can cause premature failure.
WRONG
Always use a clean cloth or gloves.
– Refit the protective cover;
Note: Oven bulb replacement is not covered by your guarantee.
CORRECT
B
Fig. 4
C
24
Assembling and Dismantling of the Side Runner Frames
– Assemble the wire racks to the oven walls using the 2 screws (Fig. 5).
– Slide the tray and rack into the runners (Fig. 6). The rack must be fitted so that the safety catch, which
stops it sliding out, faces the inside of the oven.
– To dismantle, operate in reverse order.
Fig. 5
Fig. 6
25
Oven Door
Removing the Oven Door
The oven door can easily be removed as follows:
– Open the door to the full extent (fig. 7a).
– Open the lever A completely on the left and right hinges (fig.
7b).
– Hold the door as shown in fig. 7.
– Gently close the door (fig. 7c) until left and right hinge levers A
are hooked to part B of the door (fig. 7b).
– Withdraw the hinge hooks from their location following arrow
C (fig. 7d).
– Rest the door on a soft surface.
Fig. 7a
– To replace the door, repeat the above steps in reverse order.
A
A
B
B
Fig. 7b
Fig. 7c
C
C
Fig. 7
Fig. 7d
26
Oven Door - Removable Inner Pane of Glass
Cleaning the Panes of Glass
The oven door is fitted with no. 2 panes:
– no. 1 outside;
– no. 1 inner;
To clean the panes on both sides it is necessary to remove the
inner pane as follows.
Do not use harsh abrasive cleaners or sharp metal scrapers to
clean the oven door glass since they scratch the surface, which
may result in shattering of the glass.
Removing the Inner Pane of Glass
Fig. 8
The oven door has two panes. To clean these, you need to remove
the inner pane.
A
A
1. Lock the door open:
– Fully open the oven door (fig. 8).
– Fully open the lever A on the left and right hinges (Fig 9).
– Gently close the door (Fig. 10) until the left and right hinges
are hooked to part B of the door (Fig. 9).
2. Remove the inner pane:
– Remove the seal G by unhooking the no. 3 fixing hooks (fig.
11).
– Gently pull out the inner pane of glass (Fig. 12).
– Clean the glass with an appropriate cleaner. Dry thoroughly,
and place on a soft surface.
B
B
Fig. 9
Now you can also clean the inside of the outer glass.
Fig. 10
G
G
Fig. 11
Fig. 12
27
Replacing the Inner Pane of Glass
1. Make sure the door is locked open (see fig. 10).
2. Replace the inner pane:
– Check that the four rubber pads are in place (D in Fig. 13).
– Check that you are holding the pane the correct way. You
should be able to read the wording on it as it faces you.
– Insert the pane in the left E and right F slide guides (fig. 14),
and gently slide it to the retainers H (fig. 15).
–Reassemble the seal G in the correct way (fig. 16) by hooking
the no. 3 fixing hooks in the proper holes (fig. 17).
– Unlock the oven door by opening it completely and closing
the lever A on the left and right hinges (Fig. 18).
D
Fig. 13
EE
F
Fig. 14
G
G
Fig. 16
H
H
Fig. 15
Fig. 17
The oven door
has a sealed
gasket in the
top part.
It is normal the opened gap between
the top edge of the inner glass and the
sealed gasket. This allows the cooling
air circulation.
A
A
Fig. 18
28
ADVICE FOR THE INSTALLER
Important
Appliance installation and maintenance must only be carried out by QUALIFIED TECHNICIANS
and in compliance with the local safety standards.
• Failure to observe this rule will invalidate the warranty.
• Always disconnect the appliance from the electrical supply before carrying out any maintenance
operations or repairs.
• The walls surrounding the oven must be made of heat-resistant material.
• Taking care NOT to lift the oven by the door handle.
WARNING
When correctly installed, your product meets all safety requirements laid down for this type
of product category.
However special care should be taken around the rear or the underneath of the appliance as
these areas are not designed orintended to be touched and may contain sharp or rough edges,
that may cause injury.
29
Important
50
The oven can be fitted in standard units,
width and depth 60 cm.
Installation requires a compartment as
illustrated in figures 19 and 20.
On the lover side, the oven must lay on
supports standing the oven weight.
585
560
Fig. 19
560
min
591
536
in
594
0m
55
0
54
594
Fig. 20
20
30
To ensure internal ventilation, aeration channels must be provided as illustrated in the figures 21 and 22.
50 mm
600
30 mm
Fig. 21
50
Fig. 22
550
31
Fixing the Oven
Introduce the oven into the furniture opening and fix it with screws (not supplied) as figure 23.
It is essential that the oven rests on a surface which will support its weight, as the screw fixing is only
complementary.
Note
It is essential that when installing your oven adequate air circulation is allowed for within the installation.
See figures 21 - 22.
Inadequate air circulation may greatly impair the performance of your oven and may effect adjacent
cabinets due to an increase in temperature.
Caution
Do not lift this oven by the door handle
Adjust the hinges of furniture doors adjacent to the oven to allow a 4-5 mm gap between the furniture
door and the oven frame.
Fig. 23
32
IMPORTANT:
– To avoid damage to the lower trim please note the following instructions.
– The lower trim is designed to allow for good air circulation and the correct opening of the oven door.
– To ensure the trim is not damaged due to the appliance being placed on the floor, the appliance should
be suitably supported as in below illustrations.
– After installation the appliance door should be slowly opened to ensure no damage has occurred.
– No responsibility for lower trim damage will be accepted if these instructions have not been followed.
OVEN
OvenDOOR
Door
Lower TRIM
Trim
LOWER
AIR
AirFLOW
Flow
Fig. 24
33
Mains Electricity Connection
Incorrect installation may be dangerous and the manufacturer can not be held responsible.
Warning! This appliance must be earthed The manufacturer declines all responsibility for any
problem caused by failure to observe this rule.
THIS APPLIANCE MUST BE CONNECTED TO THE MAINS SUPPLY BY A COMPETENT PERSON, USING
FIXED WIRING VIA A DOUBLE POLE SWITCHED FUSE SPUR OUTLET AND PROTECTED BY A 13A
FUSE.
We recommend that the appliance is connected by a qualified electrician, who is a member of the
N.I.C.E.I.C. and who will comply with the I.E.E. and local regulations.
The wires in the mains lead of this appliance are coloured in accordance with the following code:
Green & Yellow = Earth, Blue = Neutral, Brown = Live.
As the colours of the wires in the mains lead for the appliance
may not correspond with the coloured markings identifying the
terminals connecting to the fuse spur, proceed as follows:
DOUBLE POLE SWITCHED
FUSE SPUR OUTLET
•The wire which is coloured green and yellow must be
connected to the terminal marked E (Earth) or coloured
green.
•The wire which is coloured blue must be connected to the
terminal marked N (Neutral), or coloured black.
FUSE
ON
• The wire which is coloured brown must be connected to the
terminal marked L (Live), or coloured red.
Note: Use a 13A Fuse
Assembly and electrical connection should be carried out by
specialised personnel.
When installing this product we recommend you seek the help of
another individual.
Fig. 25
USE A 13 AMP FUSE
34
Connection of the Power Supply Cable
Unhook the terminal board cover by inserting a screwdriver into the two hooks “A” (fig. 26).
Open the cable gland by unscrewing screw “F” (fig. 27), unscrew the terminal screws and remove the
cable.
The new supply cable, of suitable type and section, is connected to the terminal board following the
diagram of fig. 28.
F
A
Fig. 26
Feeder Cable Section
Type H05RR-F
230 V~
Fig. 27
230 V
E
N
L
3 x 1.5 mm2
L
N
E
Fig. 28
Earth
Neutral
Live
35
Appliance Servicing
CDA provide a quality and effective after-sales service to cover all your servicing needs.
Please attach your receipt to this page for safekeeping.
Please help us to help you by having the following information available when booking a service-call:
1. Model type, make and model – see the product data plate.
2. Evidence of installation / purchase date
3. Retailer where appliance was purchased
4. Clear and concise details of the fault
5. Full address including postcode and any contact phone numbers
Contact telephone numbers
CDA Customer Care Department
– Telephone: 01949 862012
– Fax: 01949 862003
– Email: [email protected]
Guarantee
CDA appliances carry a five-year parts and a one-year labour guarantee.
CDA will repair or replace any defect or part attributable to faulty material or workmanship. Within the
first year this will be free of both labour and parts charges. After the first year and within five years, the
parts will be supplied free of charge provided that the repair is carried out by an agent authorised by CDA
and the labour will be charged at the commercial rate applicable at the time of repair.
The appliance must have been installed by a suitably qualified person and in accordance with the
manufacturer’s instructions and current legislation. The guarantee does not cover faults caused by the
incorrect fitting of appliances.
Limit of Cover
– The guarantee does not cover cosmetic damage e.g. discolouration or oxidisation.
– Proof of purchase or installation date must be produced before a service-call will be booked.
– The appliance must be used for domestic purposes only. Appliances used for commercial or professional
purposes are not covered by the guarantee. Commercial warranty is available at extra cost.
– The appliance must not be modified or tampered with or repair attempted by any unauthorised
person.
– The guarantee does not cover damage caused in transit or by misuse, accident, abuse or neglect.
– The guarantee does not cover routine maintenance.
– Use of parts not supplied or recommended by |C|D|A| will invalidate the warranty.
– Rubber seals, filters, removable glass parts, control knobs and buttons, fuses and light bulbs will need
replacing periodically and are not covered by the guarantee.
– Second-hand or reconditioned appliances are not covered by the guarantee.
The conditions under which this guarantee is offered are in addition to the statutory rights of the domestic
purchaser and these statutory rights are not affected by this guarantee.
CDA reserve the right to change specification without prior notice.
Cod. 1103531 - ß3
To contact our Customer Care Department, or for Service,
please contact us on the details below.
Customer Care Department • The
Group Ltd. • Harby Road • Langar • Nottinghamshire • NG13 9HY
T : 01949 862 012 F : 01949 862 003 E : [email protected] W : www.cda.eu