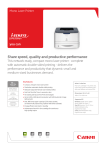
1
Fax_US.book Page 1 Monday, January 28, 2002 6:03 PM
Fax Driver Guide
with Cover Sheet Editor
Fax Driver Ver 1.70
Please read this guide before operating this equipment.
After you finish reading this guide, store it in a safe place for future reference.
ENG
Fax_US.book Page 3 Monday, January 28, 2002 6:03 PM
Fax Driver Guide
with Cover Sheet Editor
Fax_US.book Page i Monday, January 28, 2002 6:03 PM
How This Manual Is Organized
Chap 1
Before You Start
1
Chap 2
Getting Started
2
Chap 3
Using the Fax Driver Options
3
Chap 4
Using Canon Cover Sheet Editor
4
Chap 5
Special Fax Driver Options
5
Chap 6
Appendix
6
Provides information about additional software used with the fax driver.
7
8
• A considerable effort has been made to make sure that this manual is free of inaccuracies and omissions.
• However, as we are constantly improving our products, if you need an exact specification, please contact Canon.
Fax_US.book Page ii Monday, January 28, 2002 6:03 PM
Contents
Preface . . . . . . . . . . . . . . . . . . . . . . . . . . . . . . . . . . . . . . . . . . . . . . . . . . . . . . vi
How to Use This Manual . . . . . . . . . . . . . . . . . . . . . . . . . . . . . . . . . . . . . . . . vi
Symbols Used in This Manual . . . . . . . . . . . . . . . . . . . . . . . . . . . . . . . . . . vi
Keys Used in This Manual . . . . . . . . . . . . . . . . . . . . . . . . . . . . . . . . . . . . . vi
Displays Used in This Manual . . . . . . . . . . . . . . . . . . . . . . . . . . . . . . . . . .vii
Abbreviations Used in This Manual . . . . . . . . . . . . . . . . . . . . . . . . . . . . . .vii
Trademarks. . . . . . . . . . . . . . . . . . . . . . . . . . . . . . . . . . . . . . . . . . . . . . . . . . viii
Chapter1
Before You Start
Introduction . . . . . . . . . . . . . . . . . . . . . . . . . . . . . . . . . . . . . . . . . . . . . . . . .1-2
System Requirements . . . . . . . . . . . . . . . . . . . . . . . . . . . . . . . . . . . . . . . . .1-3
Where to Find Help . . . . . . . . . . . . . . . . . . . . . . . . . . . . . . . . . . . . . . . . . . .1-4
Chapter2
Getting Started
Installing the Software . . . . . . . . . . . . . . . . . . . . . . . . . . . . . . . . . . . . . . . .2-2
Installing the Fax Driver . . . . . . . . . . . . . . . . . . . . . . . . . . . . . . . . . . . . . .2-2
To Install Using the Installer (Dynamic Installation) . . . . . . . . . . . . . .2-3
To Install Using the Installer (Standard Installation) . . . . . . . . . . . . . .2-8
To Install an Alternate Fax Driver (for Windows NT 4.0/
2000/XP). . . . . . . . . . . . . . . . . . . . . . . . . . . . . . . . . . . . . . . . . . . . . .2-15
To Install Using the Add Printer Wizard . . . . . . . . . . . . . . . . . . . . . .2-17
Installing Canon NetSpot Suite Service . . . . . . . . . . . . . . . . . . . . . . . . .2-20
Updating the Existing Fax Driver . . . . . . . . . . . . . . . . . . . . . . . . . . . . . .2-22
To Update Using the Installer. . . . . . . . . . . . . . . . . . . . . . . . . . . . . .2-22
To Update Using the Add Printer Wizard . . . . . . . . . . . . . . . . . . . . .2-23
Updating the Alternate Fax Driver (for Windows NT 4.0/2000/XP) . . . .2-26
For Windows NT 4.0 . . . . . . . . . . . . . . . . . . . . . . . . . . . . . . . . . . . . .2-26
For Windows 2000/XP . . . . . . . . . . . . . . . . . . . . . . . . . . . . . . . . . . .2-27
Uninstalling the Fax Driver . . . . . . . . . . . . . . . . . . . . . . . . . . . . . . . . . . .2-29
Specifying the Installed Fax Memory. . . . . . . . . . . . . . . . . . . . . . . . . . . .2-31
Chapter3
Using the Fax Driver Options
Faxing a Document . . . . . . . . . . . . . . . . . . . . . . . . . . . . . . . . . . . . . . . . . . .3-2
Sending a Document . . . . . . . . . . . . . . . . . . . . . . . . . . . . . . . . . . . . . . . .3-2
Sending to a Remote Memory Box . . . . . . . . . . . . . . . . . . . . . . . . . . . . .3-5
ii
Fax_US.book Page iii Monday, January 28, 2002 6:03 PM
Specifying Recipients . . . . . . . . . . . . . . . . . . . . . . . . . . . . . . . . . . . . . . . . . 3-9
Adding a New Name and Fax Number . . . . . . . . . . . . . . . . . . . . . . . . . . 3-9
Adding a Recipient from the Address Book. . . . . . . . . . . . . . . . . . . . . . 3-10
Defining the Address Book Entries . . . . . . . . . . . . . . . . . . . . . . . . . . . . . 3-12
Defining a Person Entry. . . . . . . . . . . . . . . . . . . . . . . . . . . . . . . . . . . . . 3-12
To Add a New Person . . . . . . . . . . . . . . . . . . . . . . . . . . . . . . . . . . . 3-12
To Edit a Person Entry . . . . . . . . . . . . . . . . . . . . . . . . . . . . . . . . . . . 3-15
To Delete a Person Entry . . . . . . . . . . . . . . . . . . . . . . . . . . . . . . . . . 3-16
Defining a Group . . . . . . . . . . . . . . . . . . . . . . . . . . . . . . . . . . . . . . . . . . 3-17
To Add a New Group . . . . . . . . . . . . . . . . . . . . . . . . . . . . . . . . . . . . 3-17
To Edit a Group . . . . . . . . . . . . . . . . . . . . . . . . . . . . . . . . . . . . . . . . 3-19
To Delete a Group . . . . . . . . . . . . . . . . . . . . . . . . . . . . . . . . . . . . . . 3-21
Registering Additional Address Books. . . . . . . . . . . . . . . . . . . . . . . . . . 3-22
Attaching a Cover Sheet to a Fax . . . . . . . . . . . . . . . . . . . . . . . . . . . . . . 3-25
Chapter4
Using Canon Cover Sheet Editor
What Is Cover Sheet Editor? . . . . . . . . . . . . . . . . . . . . . . . . . . . . . . . . . . . 4-2
Installing Cover Sheet Editor . . . . . . . . . . . . . . . . . . . . . . . . . . . . . . . . . . . 4-3
Installing Cover Sheet Editor . . . . . . . . . . . . . . . . . . . . . . . . . . . . . . . . . . 4-3
Starting Cover Sheet Editor. . . . . . . . . . . . . . . . . . . . . . . . . . . . . . . . . . . 4-5
Uninstalling Cover Sheet Editor. . . . . . . . . . . . . . . . . . . . . . . . . . . . . . . . 4-6
Opening, Saving, and Closing a File . . . . . . . . . . . . . . . . . . . . . . . . . . . . . 4-7
Opening a File . . . . . . . . . . . . . . . . . . . . . . . . . . . . . . . . . . . . . . . . . . . . . 4-7
To Create a New File . . . . . . . . . . . . . . . . . . . . . . . . . . . . . . . . . . . . . 4-7
To Open a Saved Cover Sheet . . . . . . . . . . . . . . . . . . . . . . . . . . . . . 4-8
Saving and Closing a File . . . . . . . . . . . . . . . . . . . . . . . . . . . . . . . . . . . . 4-8
To Save a New File. . . . . . . . . . . . . . . . . . . . . . . . . . . . . . . . . . . . . . . 4-8
To Save an Existing File . . . . . . . . . . . . . . . . . . . . . . . . . . . . . . . . . . . 4-9
To Close a File . . . . . . . . . . . . . . . . . . . . . . . . . . . . . . . . . . . . . . . . . . 4-9
Creating an Original Cover Sheet . . . . . . . . . . . . . . . . . . . . . . . . . . . . . . 4-10
Inserting Text . . . . . . . . . . . . . . . . . . . . . . . . . . . . . . . . . . . . . . . . . . . . . 4-10
Adjusting Text Properties . . . . . . . . . . . . . . . . . . . . . . . . . . . . . . . . . . . . 4-11
To Change the Font . . . . . . . . . . . . . . . . . . . . . . . . . . . . . . . . . . . . . 4-11
To Change the Font Size . . . . . . . . . . . . . . . . . . . . . . . . . . . . . . . . . 4-11
To Change the Font Color . . . . . . . . . . . . . . . . . . . . . . . . . . . . . . . . 4-11
To Apply Bold Formatting to Text . . . . . . . . . . . . . . . . . . . . . . . . . . . 4-11
To Apply Italic Formatting to Text. . . . . . . . . . . . . . . . . . . . . . . . . . . 4-12
To Underline Text . . . . . . . . . . . . . . . . . . . . . . . . . . . . . . . . . . . . . . . 4-12
To Align Text to the Left, Center, and Right . . . . . . . . . . . . . . . . . . . 4-12
To Specify the Text Properties . . . . . . . . . . . . . . . . . . . . . . . . . . . . . 4-13
To Specify the Text Box Properties . . . . . . . . . . . . . . . . . . . . . . . . . 4-14
Specifying Fields . . . . . . . . . . . . . . . . . . . . . . . . . . . . . . . . . . . . . . . . . . 4-15
To Insert Sender and Recipient Information Fields
When Editing Text . . . . . . . . . . . . . . . . . . . . . . . . . . . . . . . . . . . . . . 4-16
iii
Fax_US.book Page iv Monday, January 28, 2002 6:03 PM
To Insert Sender and Recipient Information Fields When
Not Editing Text . . . . . . . . . . . . . . . . . . . . . . . . . . . . . . . . . . . . . . . .4-17
To Insert Repeating Fields for Specifying Multiple Recipients. . . . .4-17
To Insert Borders Between Repeating Fields. . . . . . . . . . . . . . . . . .4-18
To Insert Remark and Comment Fields When Editing Text . . . . . . .4-19
To Insert Remark and Comment Fields When Not Editing Text . . . .4-19
Creating Objects . . . . . . . . . . . . . . . . . . . . . . . . . . . . . . . . . . . . . . . . . .4-19
To Draw Lines. . . . . . . . . . . . . . . . . . . . . . . . . . . . . . . . . . . . . . . . . .4-19
To Draw Rectangles . . . . . . . . . . . . . . . . . . . . . . . . . . . . . . . . . . . . .4-20
To Draw Rounded Rectangles . . . . . . . . . . . . . . . . . . . . . . . . . . . . .4-20
To Draw Ovals . . . . . . . . . . . . . . . . . . . . . . . . . . . . . . . . . . . . . . . . .4-20
To Insert Images. . . . . . . . . . . . . . . . . . . . . . . . . . . . . . . . . . . . . . . .4-21
Editing Objects. . . . . . . . . . . . . . . . . . . . . . . . . . . . . . . . . . . . . . . . . . . .4-21
To Select an Object . . . . . . . . . . . . . . . . . . . . . . . . . . . . . . . . . . . . .4-21
To Move an Object within the Same Cover Sheet . . . . . . . . . . . . . .4-21
To Move an Object to a Different Cover Sheet . . . . . . . . . . . . . . . . .4-22
To Resize an Object . . . . . . . . . . . . . . . . . . . . . . . . . . . . . . . . . . . . .4-22
To Copy an Object by Dragging . . . . . . . . . . . . . . . . . . . . . . . . . . .4-23
To Copy an Object by Using Button or Menu Commands. . . . . . . .4-23
To Duplicate an Object. . . . . . . . . . . . . . . . . . . . . . . . . . . . . . . . . . .4-24
To Delete an Object . . . . . . . . . . . . . . . . . . . . . . . . . . . . . . . . . . . . .4-24
To Group Objects . . . . . . . . . . . . . . . . . . . . . . . . . . . . . . . . . . . . . . .4-25
Specifying Object Properties . . . . . . . . . . . . . . . . . . . . . . . . . . . . . . . . .4-25
Arranging Objects . . . . . . . . . . . . . . . . . . . . . . . . . . . . . . . . . . . . . . . . .4-26
To Change the Display Order of Objects . . . . . . . . . . . . . . . . . . . . .4-26
To Align Multiple Objects . . . . . . . . . . . . . . . . . . . . . . . . . . . . . . . . .4-27
Specifying Grid Options . . . . . . . . . . . . . . . . . . . . . . . . . . . . . . . . . . . . .4-28
To Show Grids . . . . . . . . . . . . . . . . . . . . . . . . . . . . . . . . . . . . . . . . .4-28
To Snap Objects to Grid. . . . . . . . . . . . . . . . . . . . . . . . . . . . . . . . . .4-28
To Specify Grid Properties . . . . . . . . . . . . . . . . . . . . . . . . . . . . . . . .4-29
Printing a Cover Sheet . . . . . . . . . . . . . . . . . . . . . . . . . . . . . . . . . . . . . . .4-31
Registering an Original Cover Sheet as a Template . . . . . . . . . . . . . . . .4-32
Chapter5
Special Fax Driver Options
Using the Job Accounting Feature . . . . . . . . . . . . . . . . . . . . . . . . . . . . . .5-2
About Job Accounting . . . . . . . . . . . . . . . . . . . . . . . . . . . . . . . . . . . . . . .5-2
Specifying the ID and Password for Job Accounting . . . . . . . . . . . . . . . .5-2
Faxing with Job Accounting (for Windows 95/98/Me). . . . . . . . . . . . . . . .5-4
Faxing with Job Accounting (for Windows NT 4.0/2000/XP) . . . . . . . . . .5-5
With [Allow Password Setting] Selected . . . . . . . . . . . . . . . . . . . . . .5-5
With [Allow Password Setting] Not Selected . . . . . . . . . . . . . . . . . . .5-5
Presetting the Fax Transmission Time. . . . . . . . . . . . . . . . . . . . . . . . . . . .5-7
iv
Fax_US.book Page v Monday, January 28, 2002 6:03 PM
Chapter6
Appendix
Additional Software. . . . . . . . . . . . . . . . . . . . . . . . . . . . . . . . . . . . . . . . . . . 6-2
Canon Port Setting Tool . . . . . . . . . . . . . . . . . . . . . . . . . . . . . . . . . . . . . . 6-2
Device Status Extension . . . . . . . . . . . . . . . . . . . . . . . . . . . . . . . . . . . . . 6-2
Index . . . . . . . . . . . . . . . . . . . . . . . . . . . . . . . . . . . . . . . . . . . . . . . . . . . . . . . 6-3
v
Fax_US.book Page vi Monday, January 28, 2002 6:03 PM
Preface
Thank you for purchasing the Canon product. Please read this manual thoroughly before
operating the product in order to familiarize yourself with its capabilities, and to make the
most of its many functions. After reading this manual store it in a safe place for future
reference.
How to Use This Manual
Symbols Used in This Manual
The following symbols are used in this manual to explain procedures, restrictions,
handling cautions, and also contain instructions that should be observed for safety.
IMPORTANT Indicates operational requirements and restrictions. Be sure to read
these items carefully in order to operate the machine correctly, and to
avoid damage to the machine.
NOTE
Indicates a clarification of operations or contains additional
explanations for a procedure. Reading these is highly recommended.
Keys Used in This Manual
The symbols and key names used in this manual are expressed in the following
way:
• Buttons
on Computer Operation Screens .......... the [OK] button
• Buttons on toolbars ............................................ the [
] (New) button
vi
Fax_US.book Page vii Monday, January 28, 2002 6:03 PM
Displays Used in This Manual
Screenshots of computer operation screens used in this manual may differ from the
ones you actually see depending on the model or options that come with your
machine.
The keys or buttons which you should press are marked with
below.
, as shown
When multiple buttons or keys can be pressed, they will be highlighted and
mentioned in the order in which they should be pressed.
4
In the first dialog box of the Fax Driver Setup Wizard, click the
[Next] button, and then follow the instructions on the screen.
Click this button for
operation
Abbreviations Used in This Manual
In this manual, product names and model names are abbreviated as follows:
Microsoft® Windows® 95 operating system is referred to as Windows 95.
Microsoft® Windows® 98 operating system is referred to as Windows 98.
Microsoft® Windows® Millennium Edition operating system is referred to as
Windows Me.
Microsoft® Windows NT® operating system is referred to as Windows NT.
Microsoft® Windows® 2000 operating system is referred to as Windows 2000.
Microsoft® Windows® XP operating system is referred to as Windows XP.
Novell NetWare® is referred to as NetWare.
vii
Fax_US.book Page viii Monday, January 28, 2002 6:03 PM
Trademarks
Canon, the Canon logo, GP, imageRUNNER, iR, LBP, and NetSpot are trademarks
of Canon Inc.
PCL and HP-GL are trademarks of Hewlett-Packard Company.
Microsoft, the Windows logo, Windows, and Windows NT are registered trademarks
of Microsoft Corporation in the United States and/or other countries.
NetWare® and Novell are registered trademarks of Novell, Inc.
IPX/SPX is a trademark of Novell, Inc.
©1996 Novell, Inc., all rights reserved.
Other product and company names herein may be the trademarks of their
respective owners.
Copyright 2002 by Canon, Inc. All rights reserved.
No part of this publication may be reproduced or transmitted in any form or by any
means, electronic or mechanical, including photocopying and recording, or by any
information storage or retrieval system without the prior written permission of
Canon, Inc.
viii
Fax_US.book Page 1 Monday, January 28, 2002 6:03 PM
Before You Start
1
CHAPTER
This chapter provides an explanation of the system environments required for using the fax
driver. It also explains where to find help and information regarding the installation and use of
this driver.
Introduction . . . . . . . . . . . . . . . . . . . . . . . . . . . . . . . . . . . . . . . . . . . . . . . . . . . . . . . . . . . . 1-2
System Requirements . . . . . . . . . . . . . . . . . . . . . . . . . . . . . . . . . . . . . . . . . . . . . . . . . . . 1-3
Where to Find Help. . . . . . . . . . . . . . . . . . . . . . . . . . . . . . . . . . . . . . . . . . . . . . . . . . . . . . 1-4
1-1
Fax_US.book Page 2 Monday, January 28, 2002 6:03 PM
Introduction
The fax driver gives users of Microsoft Windows 95, Windows 98, Windows
Millennium Edition, Windows NT Version 4.0, Windows 2000, or Windows XP
(hereafter called Windows 95/98/Me/NT 4.0/2000/XP) operating systems the ability
to make full use of the fax function of the printer. If your printer is equipped with the
optional fax subsystem, the fax driver enables you to access the fax device.
Before You Start
1
IMPORTANT
• The fax options are available only when a fax board is installed in your printer.
• The Fax Driver Version 1.70 is available for the following Canon products:
- imageRUNNER 3300/2800/2200
- imageRUNNER 3300i
- iR3250
- imageRUNNER 400/330
- imageRUNNER 210
- GP225/GP200
- GP215/GP200
- GP55/GP30
• For imageRUNNER 3300i, install the iR2200-3300 fax driver.
1-2
Introduction
Fax_US.book Page 3 Monday, January 28, 2002 6:03 PM
System Requirements
■ Software
Microsoft Windows 95, Microsoft Windows 98, Microsoft Windows Me, Microsoft Windows
NT 4.0, Microsoft Windows 2000, or Microsoft Windows XP.
■ Computer
Any computer on which Microsoft Windows 95, Microsoft Windows 98, Microsoft Windows
Me, Microsoft Windows NT 4.0, Microsoft Windows 2000, or Microsoft Windows XP runs
properly.
System Requirements
1-3
1
Before You Start
The fax driver for Windows 95/98/Me/NT 4.0/2000/XP can be used in the following
system environments.
Fax_US.book Page 4 Monday, January 28, 2002 6:03 PM
Where to Find Help
Here’s where to get immediate help if you have problems installing or using the fax
driver.
Before You Start
1
■ README. TXT file
The hints, limitations, and restrictions you need to be aware of when installing and using
your fax driver are included in the README.TXT file provided with the driver.
■ Online Help
You can locate additional help for questions you may have regarding your fax in the online
Help file provided with the driver software. In the [Properties] dialog box, you can click the
[Help] button to display additional information about every feature and option in the fax
driver. You can also click the [ ] (Help) button in the upper right corner of most dialog
boxes, and then click a specific item in the dialog box for help on that item.
■ Canon Authorized Dealers or Service Providers
If the online Help file does not provide the information you need, contact your Canon
authorized dealer or Canon authorized service provider.
1-4
Where to Find Help
Fax_US.book Page 1 Monday, January 28, 2002 6:03 PM
Getting Started
2
CHAPTER
This chapter provides instructions for installing the software and specifying the installed fax
memory.
Installing the Software . . . . . . . . . . . . . . . . . . . . . . . . . . . . . . . . . . . . . . . . . . . . . . . . . . . 2-2
Installing the Fax Driver . . . . . . . . . . . . . . . . . . . . . . . . . . . . . . . . . . . . . . . . . . . . . . . . . . . . . . . .2-2
Installing Canon NetSpot Suite Service . . . . . . . . . . . . . . . . . . . . . . . . . . . . . . . . . . . . . . . . . . .2-20
Updating the Existing Fax Driver . . . . . . . . . . . . . . . . . . . . . . . . . . . . . . . . . . . . . . . . . . . . . . . .2-22
Updating the Alternate Fax Driver (for Windows NT 4.0/2000/XP). . . . . . . . . . . . . . . . . . . . . . .2-26
Uninstalling the Fax Driver . . . . . . . . . . . . . . . . . . . . . . . . . . . . . . . . . . . . . . . . . . . . . . . . . . . . .2-29
Specifying the Installed Fax Memory . . . . . . . . . . . . . . . . . . . . . . . . . . . . . . . . . . . . . . . 2-31
2-1
Fax_US.book Page 2 Monday, January 28, 2002 6:03 PM
Installing the Software
This section provides instructions for installing the software.
Installing the Fax Driver
Before using the fax function of your printer, you must install the fax driver for your
printer.
Getting Started
2
You can install fax drivers by following various procedures.
Refer to the figure below in order to decide which procedure is needed and read the
corresponding pages in this manual.
With the Installer
Without the Installer
To search automatically
for the port of a network
printer
See “To Install Using the
Installer (Dynamic
Installation),” on p. 2-3.
To set manually the port
of a printer
See “To Install Using the
Installer (Standard
Installation),” on p. 2-8.
See “To Install Using the
Add Printer Wizard,”
on p. 2-17.
IMPORTANT
• For Windows NT 4.0/2000/XP, log in (enter a user name and password as a means of
user authentication to start a computer session or access to a service) as Administrator
when you install the driver.
• For imageRUNNER 400/300, only System Version 2.0 (or later) supports Fax Driver
Version 1.20 (or later).
• If older versions of the drivers are already installed on your computer, it is recommended
that you use the Installer to update the existing drivers simultaneously when installing
new ones. If you want to update the existing drivers without adding new drivers, see
“Updating the Existing Fax Driver,” on p. 2-22. To check the version of the existing drivers,
open the [Properties] dialog box, and then click the [About] button on the [Configuration]
sheet or the [Edit Address Book] sheet.
2-2
Installing the Software
Fax_US.book Page 3 Monday, January 28, 2002 6:03 PM
To Install Using the Installer (Dynamic Installation)
If you are using a printer connected to a network using a TCP/IP protocol, you can
automatically search for a port to install the fax driver according to the following
procedure.
IMPORTANT
• You can search only for printers connected within the same subnet (network with the
same network ID) as the computer being used.
1 Insert the Fax Driver Software CD-ROM into the CD-ROM
drive.
2
3
4
Double-click the [My Computer] icon, and then double-click
the [CD-ROM] icon.
Double-click the [Fax_Drivers], [us_eng], and [faxsetup] folder
icons. Then double-click the [Setup.exe] icon to start the
installation.
In the first dialog box of the Fax Driver Setup Wizard, click the
[Next] button, and then follow the instructions on the screen.
Installing the Software
2-3
2
Getting Started
NOTE
• If you are using a local printer or a printer connected to a network using a protocol other
than TCP/IP, see “To Install Using the Installer (Standard Installation),” on p. 2-8.
Fax_US.book Page 4 Monday, January 28, 2002 6:03 PM
5
Select [Search for Network Port to Install], and then click the
[Next] button.
Getting Started
2
6
If you want to install NetSpot Suite Service together with the
fax driver, select [Canon NetSpot Suite Service], and then
click the [Next] button.
NOTE
• If Canon NetSpot Suite Service is already installed on your computer, this dialog
box does not appear.
• For imageRUNNER 3300/2800/2200, imageRUNNER 3300i and iR3250, Canon
NetSpot Suite Service is needed to enable the fax driver to set up the printer
configuration automatically or to use the Job Accounting feature.
2-4
Installing the Software
Fax_US.book Page 5 Monday, January 28, 2002 6:03 PM
Click the [Add/Delete] button to select the driver you want to
install.
2
Getting Started
7
A list of network faxes found by the search displays in the [Add/Delete Faxes for
Driver Installation] dialog box.
NOTE
• Confirm that each printer found by the search is equipped with a fax board before
installing a fax driver.
Installing the Software
2-5
Fax_US.book Page 6 Monday, January 28, 2002 6:03 PM
8
Select the fax you want to install from the [Fax List]. Then click
the [Add to the Fax List for Driver Installation] button. If you
want to select all the faxes searched for, click the [Select All]
button.
Getting Started
2
The faxes you selected are added to [Fax List for Driver Installation].
To delete a fax that you do not want to install from [Fax List for Driver Installation],
select the fax, and then click the [Delete] button.
9
10
2-6
Click the [OK] button in the [Add/Delete Faxes for Driver
Installation] dialog box.
Check that the drivers you want to install are shown in the [Fax
Driver Setup Wizard] dialog box.
Installing the Software
Fax_US.book Page 7 Monday, January 28, 2002 6:03 PM
11
If you want to specify the fax settings including the name, shared
fax setting or default fax setting, select [Set Fax Information], and
then click the [Next] button.
If you do not want to specify these settings, click the [Next] button,
and then skip to step 13.
Getting Started
2
12
Specify the name, shared fax settings, or default fax settings, and
then click the [Next] button.
Installing the Software
2-7
Fax_US.book Page 8 Monday, January 28, 2002 6:03 PM
13
Verify the installation settings, and then click the [Start] button.
Getting Started
2
NOTE
• When you add a new fax driver, any previous version of a Canon fax driver already
installed is also updated automatically.
14
After the files have been copied, click the [Exit] button to finish the
installation.
The printer icon is displayed in the [Printers] folder. The driver is now installed.
To Install Using the Installer (Standard Installation)
To install a fax driver by selecting the existing printer port manually, perform the
Standard Installation. Also if you are using a local printer, follow the procedure
below.
You can also install a network printer or set up a shared printer by following the
procedure below.
NOTE
• If you are using a printer connected to a network using a TCP/IP protocol, you can
automatically search for a port to install the fax driver. For instructions, see “To Install
Using the Installer (Dynamic Installation),” on p. 2-3.
1 Insert the Fax Driver Software CD-ROM into the CD-ROM
drive.
2-8
Installing the Software
Fax_US.book Page 9 Monday, January 28, 2002 6:03 PM
3
4
Double-click the [My Computer] icon, and then double-click
the [CD-ROM] icon.
Double-click the [Fax_Drivers], [us_eng], and [faxsetup] folder
icons. Then double-click the [Setup.exe] icon to start the
installation.
In the first dialog box of the Fax Driver Setup Wizard, click the
[Next] button, and then follow the instructions on the screen.
Installing the Software
2-9
2
Getting Started
2
Fax_US.book Page 10 Monday, January 28, 2002 6:03 PM
5
Select [Manually Set Port to Install], and then click the [Next]
button.
Getting Started
2
6
Select [Raster/PCL5e Fax Driver], and then click the [Next]
button. If you want to install NetSpot Suite Service together
with the fax driver, select both [Raster/PCL5e Fax Driver] and
[Canon NetSpot Suite Service].
NOTE
• If Canon NetSpot Suite Service is already installed on your computer, this dialog
box does not appear.
• For imageRUNNER 3300/2800/2200, imageRUNNER 3300i and iR3250, Canon
NetSpot Suite Service is needed to enable the fax driver to set up the printer
configuration automatically or to use the Job Accounting feature.
2-10
Installing the Software
Fax_US.book Page 11 Monday, January 28, 2002 6:03 PM
7
Select [Add Faxes and Update Drivers], and then click the
[Next] button.
Getting Started
2
NOTE
• This dialog box appears only when drivers that can be installed with the Installer
are already installed. Otherwise, proceed to step 8.
• When you add a new fax driver, any previous version of a Canon fax driver already
installed is also updated automatically.
8
Click the [Add/Delete] button to select the driver you want to
install.
The [Add/Delete Faxes for Driver Installation] dialog box displays.
Installing the Software
2-11
Fax_US.book Page 12 Monday, January 28, 2002 6:03 PM
9
Select the driver you want to install from [Fax List]. Then click
the [Add to the Fax List for Driver Installation] button.
Getting Started
2
The fax driver you selected is added to [Fax List for Driver Installation].
To delete a driver that you do not want to install from [Fax List for Driver
Installation], select the driver, and then click the [Delete] button.
10
11
2-12
Click the [OK] button in the [Add/Delete Faxes for Driver Installation]
dialog box.
Check that the driver you want to install is selected in the [Fax Driver
Setup Wizard] dialog box. Then click the [Next] button.
Installing the Software
Fax_US.book Page 13 Monday, January 28, 2002 6:03 PM
12
Set the desired port.
Getting Started
2
NOTE
• If more than one fax driver is selected, this dialog box will reappear to enable
selection of different ports for other faxes.
● If you want to set a standard port
▼ Select [Use Standard Port] from [Port Settings], and then click the [Settings]
button.
▼ Select the printer port you want to use from the list, and then click the [OK]
button.
▼ Click the [Next] button.
● If you want to set a port for a network printer
▼ Select [Use Network Printer] from [Port Settings], and then click the [Settings]
button.
Installing the Software
2-13
Fax_US.book Page 14 Monday, January 28, 2002 6:03 PM
▼ Select the network printer, and then click the [OK] button.
Getting Started
2
▼ Click the [Next] button.
● If you want to add a port
▼ Select [Add Port] from [Port Settings], and then click the [Settings] button.
▼ Select the printer port you want to add, and then click the [OK] button.
▼ Specify the settings for the port you want to add in the dialog box displayed.
▼ Click the [Next] button.
2-14
Installing the Software
Fax_US.book Page 15 Monday, January 28, 2002 6:03 PM
13
Verify the installation settings, and then click the [Start] button.
Getting Started
2
NOTE
• When you add a new fax driver, any previous version of a Canon fax driver already
installed is also updated automatically.
14
After the files have been copied, click the [Exit] button to finish the
installation.
The printer icon is displayed in the [Printers] folder. The driver is now installed.
To Install an Alternate Fax Driver (for Windows NT 4.0/2000/XP)
If you are using one or more shared printers on Windows NT4.0/2000/XP, you can
install an alternate fax driver. Installing an alternate fax driver enables you to install
a fax driver on a client PC via a network.
To specify the settings for the shared fax, follow the procedure below.
NOTE
• If an old version of the alternate fax driver is installed, it is necessary to update it
manually. For instructions on how to do this, see “Updating the Alternate Fax Driver (for
Windows NT 4.0/2000/XP),” on p. 2-26.
1 Start the Installer, and then follow the instructions in the
dialog boxes.
See steps 1 to 12 of “To Install Using the Installer (Dynamic Installation),” on p. 23, or steps 1 to 12 of “To Install Using the Installer (Standard Installation),” on p.
2-8.
Installing the Software
2-15
Fax_US.book Page 16 Monday, January 28, 2002 6:03 PM
2
Select [Use as Shared Fax], and then click the [Details] button.
Getting Started
2
The [Detailed Settings for Shared Fax] dialog box displays.
3
2-16
Enter a share name, specify the operating system on which
the driver will run, and then click the [OK] button.
Installing the Software
Fax_US.book Page 17 Monday, January 28, 2002 6:03 PM
4
In the [Fax Driver Setup Wizard] dialog box, click the [Next]
button.
Getting Started
2
5
Follow the instructions in the dialog boxes or message box to
complete the installation.
See steps 13 to 14 of “To Install Using the Installer (Dynamic Installation),” on p.
2-3, or steps 13 to 14 of “To Install Using the Installer (Standard Installation),” on
p. 2-8.
To Install Using the Add Printer Wizard
To install a fax driver from the [Printers] folder in the Windows Control Panel, follow
the procedure below.
NOTE
• If you install a new fax driver using the Add Printer Wizard, it is necessary to update all
existing Canon fax drivers manually. To do this, see “To Update Using the Add Printer
Wizard,” on p. 2-23.
1 Click the [Start] button, point to [Settings], and then click
[Printers].
2
In the [Printers] folder, double-click the [Add Printer] icon to
start the Add Printer Wizard, and then follow the instructions
on the screen to continue the installation.
Installing the Software
2-17
Fax_US.book Page 18 Monday, January 28, 2002 6:03 PM
3
Insert the Fax Driver Software CD-ROM into the CD-ROM
drive, and then click the [Have Disk] button.
Getting Started
2
4
Click the [Browse] button to select the folder of the driver you
want to install, and then click the [OK] button.
You can select the driver from the following folders on the CD-ROM.
- Windows 95/98/Me: \Fax_Drivers\us_eng\fax\win9x_me
- Windows NT 4.0:
\Fax_Drivers\us_eng\fax\winnt40
- Windows 2000/XP: \Fax_Drivers\us_eng\fax\win2k_xp
2-18
Installing the Software
Fax_US.book Page 19 Monday, January 28, 2002 6:03 PM
5
Select your fax model from [Printers], and then click the [Next]
button.
6
Getting Started
2
Follow the instructions on the screen to continue, and then
click the [Finish] button to start copying the files.
The printer icon is displayed in the [Printers] folder. The driver is now installed.
Installing the Software
2-19
Fax_US.book Page 20 Monday, January 28, 2002 6:03 PM
Installing Canon NetSpot Suite Service
For imageRUNNER 3300/2800/2200, imageRUNNER 3300i, and iR3250, Canon
NetSpot Suite Service is needed to enable the fax driver to set up the printer
configuration automatically and to use the Job Accounting feature. When using the
Installer, Canon NetSpot Suite Service can be installed together with the fax driver.
(See “Installing the Fax Driver,” beginning on p. 2-2.) However, in the following
cases, install Canon NetSpot Suite Service according to the procedure below.
• If you install the fax driver using the Add Printer Wizard
2
Getting Started
• If you install only the fax driver using the Installer
1 Insert the Fax Driver Software CD-ROM into the CD-ROM
drive.
2
3
4
2-20
Double-click the [My Computer] icon, and then double-click
the [CD-ROM] icon.
Double-click the [Fax_Drivers], [us_eng], and [faxsetup] folder
icons. Then double-click the [Setup.exe] icon to start the
installation.
In the first dialog box of the Fax Driver Setup Wizard, click the
[Next] button, and then follow the instructions on the screen.
Installing the Software
Fax_US.book Page 21 Monday, January 28, 2002 6:03 PM
5
Select [Manually Set Port to Install], and then click the [Next]
button.
Getting Started
2
6
7
Select [Canon NetSpot Suite Service], and then click the
[Next] button.
After the files have been copied, click the [Exit] button to quit
the installation.
Canon NetSpot Suite Service is now installed.
Installing the Software
2-21
Fax_US.book Page 22 Monday, January 28, 2002 6:03 PM
Updating the Existing Fax Driver
IMPORTANT
• It is recommended that you use the Installer to add new fax drivers or to update the
existing ones.
To Update Using the Installer
If you use the Installer to install new fax drivers, the Installer updates the existing
ones at the same time that the new drivers are installed.
2
Getting Started
You can also update the existing drivers already installed without having to add a
new driver by following the procedure below.
1 Start the Installer, and then follow the instructions in the
dialog boxes.
See steps 1 to 6 of “To Install Using the Installer (Standard Installation),” on p. 28.
2
2-22
Select [Update Drivers], and then click the [Next] button.
Installing the Software
Fax_US.book Page 23 Monday, January 28, 2002 6:03 PM
3
Verify the installation settings, and then click the [Start]
button.
Getting Started
2
4
After the files have been copied, click the [Exit] button to quit
the installation.
The fax drivers already installed are now updated.
To Update Using the Add Printer Wizard
If you add new drivers using the Add Printer Wizard instead of the Installer, follow
the procedure below to update all the existing drivers.
1 Insert the Fax Driver Software CD-ROM into the CD-ROM
drive.
2
3
4
Click the [Start] button, point to [Settings], and then click
[Printers].
In the [Printers] folder, right-click the fax icon for your fax, and
then click [Properties].
Click the [Details] tab (Windows 95/98/Me), [General] tab
(Windows NT 4.0), or [Advanced] tab (Windows 2000/XP).
Installing the Software
2-23
Fax_US.book Page 24 Monday, January 28, 2002 6:03 PM
5
Click the [New Driver] button, and then follow the instructions
on the screen.
Getting Started
2
NOTE
• For Windows NT 4.0, take note of the fax name displayed for [Driver].
6
Click the [Have Disk] button to specify the path of the driver in
the CD-ROM, and then follow the instructions on the screen.
For Windows 95/98/Me/2000/XP, the fax driver is updated.
For Windows 95/98/Me/2000/XP, skip to step 8.
For Windows NT 4.0, proceed to step 7.
2-24
Installing the Software
Fax_US.book Page 25 Monday, January 28, 2002 6:03 PM
7
If a message box appears asking if you want to replace the
existing driver, select [Replace existing driver], and then click
the [OK] button.
Getting Started
2
The fax driver is updated.
NOTE
• Check if the fax name has been changed. If so, rename the fax with its original
name, which you have taken note of in step 5. For example, you may see the fax
name being changed in the following way: from “Canon iR2200-3300 (FAX)” to
“Canon iR2200-3300 (FAX) (Copy 2).”
8
9
10
11
Repeat steps 1 to 7 for all other existing drivers.
Restart the computer.
Check the printer configuration settings in the [Configuration] sheet
(Windows 95/98/Me) or [Device Settings] sheet (Windows NT 4.0/
2000/XP), and then reconfigure them if they have been changed.
Install Canon NetSpot Suite Service if you want to use the Job
Accounting feature or to set up the printer configuration
automatically.
For instructions on installing Canon NetSpot Suite Service, see “Installing Canon
NetSpot Suite Service,” on p. 2-20.
Installing the Software
2-25
Fax_US.book Page 26 Monday, January 28, 2002 6:03 PM
Updating the Alternate Fax Driver (for Windows NT 4.0/
2000/XP)
If you use a shared fax, it is necessary to update an alternate fax driver by following
the procedure below.
For Windows NT 4.0
2
Getting Started
1 Click the [Start] button, point to [Settings], and then click
[Printers].
2
3
4
2-26
In the [Printers] folder, right-click the fax icon for your fax, and
then click [Properties].
In the [Properties] dialog box, click the [Sharing] tab.
Select the alternate fax driver you want to update, and then
click the [OK] button.
Installing the Software
Fax_US.book Page 27 Monday, January 28, 2002 6:03 PM
5
6
When a message appears prompting you to insert the CDROM, insert the Fax Driver Software CD-ROM into the CDROM drive, and then click the [OK] button.
Click the [Browse] button to specify the path of the driver in
the CD-ROM, and then click the [OK] button.
The alternate fax driver is updated.
For Windows 2000/XP
1 Click the [Start] button, point to [Settings], and then click
[Printers] (Windows 2000) or [Printers and Faxes] (Windows
XP).
2
Click [Server Properties] on the [File] menu to open the [Print
Server Properties] dialog box, and then display the [Drivers]
sheet.
Installing the Software
2-27
2
Getting Started
IMPORTANT
• To use the updated fax driver on the client PC, first uninstall the current fax driver,
and then double-click the shared fax icon for the updated alternate fax driver on the
Server PC.
Fax_US.book Page 28 Monday, January 28, 2002 6:03 PM
3
Select the alternate fax driver you want to update, and then
click the [Update] button (Windows 2000) or [Replace] button
(Windows XP).
Getting Started
2
4
5
When a message appears prompting you to insert the CDROM, insert the Fax Driver Software CD-ROM into the CDROM drive, and then click the [OK] button.
Click the [Browse] button to specify the path of the driver in
the CD-ROM, and then click the [OK] button.
The alternate fax driver is updated.
IMPORTANT
• To use the updated fax driver on the client PC, first uninstall the current fax driver,
and then double-click the shared fax icon for the updated alternate fax driver on the
Server PC.
2-28
Installing the Software
Fax_US.book Page 29 Monday, January 28, 2002 6:03 PM
Uninstalling the Fax Driver
It is recommended that you use the Uninstaller in the Fax Driver Software CD-ROM
to delete unnecessary drivers.
1 Insert the Fax Driver Software CD-ROM into the CD-ROM
drive.
3
4
5
Double-click the [My Computer] icon, and then double-click
the [CD-ROM] icon.
Double-click the [Fax_Drivers], [us_eng], and [faxsetup] folder
icons.
In the [faxsetup] folder, double-click the [uninstall.exe] icon to
start the uninstallation.
In the [Delete Fax] dialog box, select the fax name you want to
delete, and then click the [Delete] button.
Installing the Software
2-29
Getting Started
2
2
Fax_US.book Page 30 Monday, January 28, 2002 6:03 PM
Click the [Yes] button to confirm the deletion.
7
Click the [Exit] button in the [Delete Fax] dialog box.
Getting Started
2
6
2-30
Installing the Software
Fax_US.book Page 31 Monday, January 28, 2002 6:03 PM
Specifying the Installed Fax Memory
Before sending a document by fax, you need to specify the amount of fax memory
installed in your fax.
1 Click the [Start] button, point to [Settings], and then click
[Printers].
2
3
In the [Printers] folder, right-click the fax icon for your fax, and
then click [Properties].
In the [Properties] dialog box, click the [Configuration] tab.
The [Configuration] sheet is displayed.
Specifying the Installed Fax Memory
2-31
2
Getting Started
NOTE
• For imageRUNNER 3300/2800/2200, imageRUNNER 3300i, iR3250, and GP55/GP30,
specifying the fax memory is not required.
Fax_US.book Page 32 Monday, January 28, 2002 6:03 PM
4
5
Select the amount of memory from [FAX Memory].
Click the [OK] button.
The installed memory size is specified.
Getting Started
2
2-32
Specifying the Installed Fax Memory
Fax_US.book Page 1 Monday, January 28, 2002 6:03 PM
Using the Fax Driver Options
3
CHAPTER
This chapter provides instructions for faxing a document, and specifying various settings for
faxing documents.
Faxing a Document. . . . . . . . . . . . . . . . . . . . . . . . . . . . . . . . . . . . . . . . . . . . . . . . . . . . . . 3-2
Sending a Document . . . . . . . . . . . . . . . . . . . . . . . . . . . . . . . . . . . . . . . . . . . . . . . . . . . . . . . . . .3-2
Sending to a Remote Memory Box . . . . . . . . . . . . . . . . . . . . . . . . . . . . . . . . . . . . . . . . . . . . . . .3-5
Specifying Recipients . . . . . . . . . . . . . . . . . . . . . . . . . . . . . . . . . . . . . . . . . . . . . . . . . . . . 3-9
Adding a New Name and Fax Number . . . . . . . . . . . . . . . . . . . . . . . . . . . . . . . . . . . . . . . . . . . .3-9
Adding a Recipient from the Address Book. . . . . . . . . . . . . . . . . . . . . . . . . . . . . . . . . . . . . . . .3-10
Defining the Address Book Entries . . . . . . . . . . . . . . . . . . . . . . . . . . . . . . . . . . . . . . . . . 3-12
Defining a Person Entry . . . . . . . . . . . . . . . . . . . . . . . . . . . . . . . . . . . . . . . . . . . . . . . . . . . . . . .3-12
Defining a Group . . . . . . . . . . . . . . . . . . . . . . . . . . . . . . . . . . . . . . . . . . . . . . . . . . . . . . . . . . . .3-17
Registering Additional Address Books . . . . . . . . . . . . . . . . . . . . . . . . . . . . . . . . . . . . . . 3-22
Attaching a Cover Sheet to a Fax . . . . . . . . . . . . . . . . . . . . . . . . . . . . . . . . . . . . . . . . . . 3-25
3-1
Fax_US.book Page 2 Monday, January 28, 2002 6:03 PM
Faxing a Document
This section explains how to fax a document and how to send a document to the
memory box of the recipient’s fax.
Sending a Document
To send a document by fax, follow the procedure below.
Using the Fax Driver Options
3
1 In the application, with the document open, select [Print] to
print your document.
2
3-2
In the [Print] dialog box, select your fax from [Name], and then
click the [Properties] button.
Faxing a Document
Fax_US.book Page 3 Monday, January 28, 2002 6:03 PM
3
Specify the various settings in the [Edit Address Book],
[Register Cover Sheet], and [Special] sheets, and then click
the [OK] button.
4
Using the Fax Driver Options
3
Click the [OK] button in the [Print] dialog box.
Faxing a Document
3-3
Fax_US.book Page 4 Monday, January 28, 2002 6:03 PM
5
In the [Send FAX] sheet, specify the name and fax number of
the fax recipient, and then click the [Add to Recipient List]
button.
Using the Fax Driver Options
3
3-4
Faxing a Document
Fax_US.book Page 5 Monday, January 28, 2002 6:03 PM
6
In the [Cover Sheet] sheet, specify a format for the cover
sheet attachment.
7
Using the Fax Driver Options
3
Click the [OK] button in the [Properties] dialog box.
The fax is sent to the specified recipients.
Sending to a Remote Memory Box
This mode is useful for sending a confidential document by fax. Documents to be
sent and stored in the memory box of the recipient's fax require the specified
subaddress and password.
For details about the subaddress, see “Chapter 2 Basic Fax Usage” in the Facsimile
Guide.
NOTE
• This option is available only for imageRUNNER 3300/2800/2200, imageRUNNER 3300i,
and iR3250.
• Obtain the subaddress and password of the memory box of the recipient's fax from the
recipient.
1 In the application, with the document open, select [Print] to
print your document.
Faxing a Document
3-5
Fax_US.book Page 6 Monday, January 28, 2002 6:03 PM
2
3
In the [Print] dialog box, select your fax from [Name], and then
click the [Properties] button.
Specify the various settings in the [Edit Address Book],
[Register Cover Sheet], or [Special] sheet, and then click the
[OK] button.
Using the Fax Driver Options
3
4
5
3-6
Click the [OK] button in the [Print] dialog box.
In the [Send FAX] sheet, specify the name and fax number of
the recipient.
Faxing a Document
Fax_US.book Page 7 Monday, January 28, 2002 6:03 PM
6
Click the [Settings] button.
The [Advanced Functions Settings] dialog box opens.
7
8
Select [Use Subaddress], enter the subaddress and password
of the memory box of the recipient’s fax, and then click the
[OK] button.
Click the [Add to Recipient List] button.
Faxing a Document
3-7
Using the Fax Driver Options
3
Fax_US.book Page 8 Monday, January 28, 2002 6:03 PM
9
In the [Cover Sheet] sheet, specify the format for the cover
sheet attachment.
Using the Fax Driver Options
3
10
Click the [OK] button in the [Properties] dialog box.
The document is sent to and stored in the memory box of the recipient’s fax.
NOTE
• The data can be output only when the correct password is specified on the
recipient’s fax.
3-8
Faxing a Document
Fax_US.book Page 9 Monday, January 28, 2002 6:03 PM
Specifying Recipients
You can specify the names and fax numbers to whom you want to send a fax by
adding them to the [Recipient List]. You can add recipients by:
• Entering a new name and a new fax number in [Recipient Name] and [Fax Number].
• Selecting a recipient in the [Select from Address Book] dialog box.
3
Using the Fax Driver Options
Adding a New Name and Fax Number
1 Display the [Send FAX] sheet.
For details on how to access the [Properties] dialog box, see “Sending a
Document,” on p. 3-2.
2
Enter the name and fax number you want to add in [Recipient
Name] and [Fax Number].
Specifying Recipients
3-9
Fax_US.book Page 10 Monday, January 28, 2002 6:03 PM
3
Click the [Add to Recipient List] button.
The new recipient is displayed in [Recipient List].
Adding a Recipient from the Address Book
1 Display the [Send FAX] sheet.
Using the Fax Driver Options
3
For details on how to access the [Properties] dialog box, see “Sending a
Document,” on p. 3-2.
3-10
Specifying Recipients
Fax_US.book Page 11 Monday, January 28, 2002 6:03 PM
2
Click the [Select from Address Book] button.
The [Select Recipient from Address Book] dialog box opens.
3
Using the Fax Driver Options
3
Select the address book you want to use from [Address
Books].
NOTE
• If you want to use an address book other than Canon Fax Driver Address Book,
register the book before using it. (See “Registering Additional Address Books,” on
p. 3-22.)
4
5
Select an entry, and then click the [Add to Recipient List]
button.
Click the [OK] button in the [Select Recipient from Address
Book] dialog box.
The new recipient is displayed in [Recipient List] in the [Send FAX] sheet.
Specifying Recipients
3-11
Fax_US.book Page 12 Monday, January 28, 2002 6:03 PM
Defining the Address Book Entries
This section provides instructions for defining person and group entries in the [Edit
Address Book] sheet.
Defining a Person Entry
Clicking the [Add Person] button in the [Edit Address Book] sheet opens the [Add
Person] dialog box for defining a new person entry. You see the same dialog box
under the title [Edit Person], if you click the [Edit] button in the [Edit Address Book]
sheet when a person entry is selected from [Address Book]. The [Edit Person]
dialog box enables you to change information on an existing person entry.
Using the Fax Driver Options
3
To Add a New Person
1 Display the [Edit Address Book] sheet.
For details on how to access the [Properties] dialog box, see “Sending a
Document,” on p. 3-2.
3-12
Defining the Address Book Entries
Fax_US.book Page 13 Monday, January 28, 2002 6:03 PM
2
Click the [Add Person] button.
The [Add Person] dialog box opens.
3
4
Using the Fax Driver Options
3
Enter information about the new person, such as [Recipient
Name] and [Company].
Enter the fax number.
You can enter two fax numbers: a primary number and a secondary number.
5
6
Enter information about the fax numbers in each respective
[Description].
If you want to send documents to the memory box of the
recipient’s fax, click the [Settings] button.
The [Advanced Functions Settings] dialog box opens.
If you do not want to use this option, skip to step 8.
Defining the Address Book Entries
3-13
Fax_US.book Page 14 Monday, January 28, 2002 6:03 PM
NOTE
• The Subaddress option is available only for imageRUNNER 3300/2800/2200,
imageRUNNER 3300i, and iR3250.
7
Select [Use Subaddress for Primary Number] and/or [Use
Subaddress for Secondary Number], enter the subaddress
and the password of the recipient’s fax, and then click the
[OK] button.
Using the Fax Driver Options
3
NOTE
• Obtain the subaddress and password of the memory box of the recipient's fax from
the recipient.
8
9
Enter any additional information about the person in
[Keyword].
Click the [OK] button to create the new person entry.
NOTE
• When you specify two fax numbers for one person, two entries for that person
display in [Address Book].
3-14
Defining the Address Book Entries
Fax_US.book Page 15 Monday, January 28, 2002 6:03 PM
To Edit a Person Entry
1 Display the [Edit Address Book] sheet, and then select
[Person] under [Show].
Using the Fax Driver Options
3
For details on how to access the [Properties] dialog box, see “Sending a
Document,” on p. 3-2.
All person entries display in [Address Book].
Defining the Address Book Entries
3-15
Fax_US.book Page 16 Monday, January 28, 2002 6:03 PM
2
Select the person you want to edit, and then click the [Edit]
button.
The [Edit Person] dialog box opens.
Using the Fax Driver Options
3
3
4
Update the information if necessary.
Click the [OK] button to modify the selected person entry.
To Delete a Person Entry
1 Select the person entry you want to delete from [Address
Book].
2
3-16
Click the [Delete] button.
Defining the Address Book Entries
Fax_US.book Page 17 Monday, January 28, 2002 6:03 PM
Defining a Group
Clicking the [Add Group] button in the [Edit Address Book] sheet opens the [Add
Group] dialog box for defining a new group. A group can contain both persons and
other groups. You see the same dialog box under the title [Edit Group], if you click
the [Edit] button in the [Edit Address Book] sheet when a group entry is selected
from Address Book.
The [Edit Group] dialog box enables you to change information on an existing group
entry.
To Add a New Group
3
Using the Fax Driver Options
1 Display the [Edit Address Book] sheet.
For details on how to access the [Properties] dialog box, see “Sending a
Document,” on p. 3-2.
Defining the Address Book Entries
3-17
Fax_US.book Page 18 Monday, January 28, 2002 6:03 PM
2
Click the [Add Group] button.
The [Add Group] dialog box opens.
Using the Fax Driver Options
3
3
4
Enter the new group name.
Select persons or groups as members of the new group from
[Available Recipients], and then click the [Add to Group]
button.
To remove an entry from [Current Group Members], select it, and then click the
[Remove from Group] button.
5
3-18
Click the [OK] button to create the new group entry.
Defining the Address Book Entries
Fax_US.book Page 19 Monday, January 28, 2002 6:03 PM
To Edit a Group
1 Display the [Edit Address Book] sheet, and then select
[Group] under [Show].
Using the Fax Driver Options
3
For details on how to access the [Properties] dialog box, see “Sending a
Document,” on p. 3-2.
All group entries display in [Address Book].
Defining the Address Book Entries
3-19
Fax_US.book Page 20 Monday, January 28, 2002 6:03 PM
2
Select the group you want to edit, and then click the [Edit]
button.
The [Edit Group] dialog box opens.
Using the Fax Driver Options
3
3
4
Change the group name if necessary.
Edit the group.
● To add a person or a group to the selected group
▼ Select the person or group you want to add from [Available Recipients], and
then click the [Add to Group] button.
● To remove a member of the selected group
▼ Select the person or group you want to remove from [Current Group Members],
and then click the [Remove from Group] button.
5
3-20
Click the [OK] button to modify the selected group entry.
Defining the Address Book Entries
Fax_US.book Page 21 Monday, January 28, 2002 6:03 PM
To Delete a Group
1 Select the group entry you want to delete from [Address
Book].
Click the [Delete] button.
3
Using the Fax Driver Options
2
Defining the Address Book Entries
3-21
Fax_US.book Page 22 Monday, January 28, 2002 6:03 PM
Registering Additional Address Books
You can select fax recipients from address books other than the Canon Fax Driver
Address Book if they are registered with the fax driver. Follow the procedure below
to register the address books you want to use.
NOTE
• You can register the Messaging API Address Book and the Windows Address Book.
Using the Fax Driver Options
3
1 Display the [Special] sheet.
For details on how to access the [Properties] dialog box, see “Sending a
Document,” on p. 3-2.
2
Click the [Address Books] button.
The [Address Books] dialog box opens.
3-22
Registering Additional Address Books
Fax_US.book Page 23 Monday, January 28, 2002 6:03 PM
Click the [Register] button.
3
The [Register Address Book] dialog box opens.
4
Select an address book you want to register from [Available
Address Books], and then click the [OK] button.
The dialog box corresponding to the selected address book opens.
5
Specify the required settings in the dialog box.
For detailed information about an item in the dialog box, click the [
] (Help)
button and then the specific item in the dialog box you want to know about.
Registering Additional Address Books
3-23
Using the Fax Driver Options
3
Fax_US.book Page 24 Monday, January 28, 2002 6:03 PM
6
Click the [OK] button in the dialog box.
The registered address book is added to [Address Book List] in the [Address
Books] dialog box.
Using the Fax Driver Options
3
7
3-24
Click the [OK] button in the [Address Books] dialog box.
Registering Additional Address Books
Fax_US.book Page 25 Monday, January 28, 2002 6:03 PM
Attaching a Cover Sheet to a Fax
This section provides instructions for attaching a cover sheet to a fax you send.
1 Display the [Cover Sheet] sheet.
Using the Fax Driver Options
3
For details on how to access the [Properties] dialog box, see “Sending a
Document,” on p. 3-2.
2
Select an option for attaching the cover sheet to the fax under
[Cover Sheet Attachment].
NOTE
• For GP225/GP200 under Windows NT 4.0, [Different Sheet to Each Recipient] is
not available.
3
Select a cover sheet template from [Style].
Attaching a Cover Sheet to a Fax
3-25
Fax_US.book Page 26 Monday, January 28, 2002 6:03 PM
4
Click the [Settings] button to specify the items to include on
the cover sheet.
The [Item Settings] dialog box opens.
5
Display the [Sender] sheet, click the check boxes to select the
information you want to print on the cover sheet, and then
enter the information in the text boxes for the selected items.
You can select the following check boxes:
- Sender Name
- Company
- Dept./Div.
- Fax Number
Using the Fax Driver Options
3
NOTE
• You can save the information entered in the [Sender] sheet in a file by clicking the
[Save Sender] button. Also, you can import the information by using the [Import
Sender] button, instead of entering the sender information each time you send a
fax.
3-26
Attaching a Cover Sheet to a Fax
Fax_US.book Page 27 Monday, January 28, 2002 6:03 PM
Display the [Recipient] sheet, and then click the check boxes
to select the information you want to print on the cover sheet.
You can select the following check boxes:
- Recipient Name
- Company
- Dept./Div.
- Fax Number
3
Using the Fax Driver Options
6
NOTE
• The information of the recipients specified in the [Send FAX] sheet prints on the
cover sheet.
Attaching a Cover Sheet to a Fax
3-27
Fax_US.book Page 28 Monday, January 28, 2002 6:03 PM
7
Display the [Logo] or [Signature] sheet.
Using the Fax Driver Options
3
8
9
10
11
12
13
14
3-28
Select [Print with Logo] or [Print with Signature] to include a
logo or signature on the cover sheet.
Click the [Browse] button, and then select a bitmap logo or
signature file name in [File Name].
Specify the magnification and position of the selected logo or
signature.
Click the [OK] button in the [Item Settings] dialog box.
Select [Remark], and then select a remark from the drop-down list
box or enter a remark.
Enter any other information you want to include on the cover sheet
in [Comment to Include].
Click the [Preview] button if you want to see the preview image on
the cover sheet.
Attaching a Cover Sheet to a Fax
Fax_US.book Page 29 Monday, January 28, 2002 6:03 PM
Click the [OK] button.
The specified cover sheet is attached to the fax when the fax is sent.
3
Using the Fax Driver Options
15
Attaching a Cover Sheet to a Fax
3-29
Fax_US.book Page 1 Monday, January 28, 2002 6:03 PM
Using Canon Cover Sheet Editor
4
CHAPTER
This chapter provides instructions for installing Canon Cover Sheet Editor, launching the
editor, and creating and registering original cover sheets.
What Is Cover Sheet Editor? . . . . . . . . . . . . . . . . . . . . . . . . . . . . . . . . . . . . . . . . . . . . . . 4-2
Installing Cover Sheet Editor . . . . . . . . . . . . . . . . . . . . . . . . . . . . . . . . . . . . . . . . . . . . . . 4-3
Installing Cover Sheet Editor . . . . . . . . . . . . . . . . . . . . . . . . . . . . . . . . . . . . . . . . . . . . . . . . . . . .4-3
Starting Cover Sheet Editor . . . . . . . . . . . . . . . . . . . . . . . . . . . . . . . . . . . . . . . . . . . . . . . . . . . . .4-5
Uninstalling Cover Sheet Editor . . . . . . . . . . . . . . . . . . . . . . . . . . . . . . . . . . . . . . . . . . . . . . . . . .4-6
Opening, Saving, and Closing a File . . . . . . . . . . . . . . . . . . . . . . . . . . . . . . . . . . . . . . . . 4-7
Opening a File . . . . . . . . . . . . . . . . . . . . . . . . . . . . . . . . . . . . . . . . . . . . . . . . . . . . . . . . . . . . . . .4-7
Saving and Closing a File. . . . . . . . . . . . . . . . . . . . . . . . . . . . . . . . . . . . . . . . . . . . . . . . . . . . . . .4-8
Creating an Original Cover Sheet. . . . . . . . . . . . . . . . . . . . . . . . . . . . . . . . . . . . . . . . . . 4-10
Inserting Text . . . . . . . . . . . . . . . . . . . . . . . . . . . . . . . . . . . . . . . . . . . . . . . . . . . . . . . . . . . . . . .4-10
Adjusting Text Properties . . . . . . . . . . . . . . . . . . . . . . . . . . . . . . . . . . . . . . . . . . . . . . . . . . . . . .4-11
Specifying Fields . . . . . . . . . . . . . . . . . . . . . . . . . . . . . . . . . . . . . . . . . . . . . . . . . . . . . . . . . . . .4-15
Creating Objects . . . . . . . . . . . . . . . . . . . . . . . . . . . . . . . . . . . . . . . . . . . . . . . . . . . . . . . . . . . .4-19
Editing Objects. . . . . . . . . . . . . . . . . . . . . . . . . . . . . . . . . . . . . . . . . . . . . . . . . . . . . . . . . . . . . .4-21
Specifying Object Properties . . . . . . . . . . . . . . . . . . . . . . . . . . . . . . . . . . . . . . . . . . . . . . . . . . .4-25
Arranging Objects . . . . . . . . . . . . . . . . . . . . . . . . . . . . . . . . . . . . . . . . . . . . . . . . . . . . . . . . . . .4-26
Specifying Grid Options . . . . . . . . . . . . . . . . . . . . . . . . . . . . . . . . . . . . . . . . . . . . . . . . . . . . . . .4-28
Printing a Cover Sheet . . . . . . . . . . . . . . . . . . . . . . . . . . . . . . . . . . . . . . . . . . . . . . . . . . 4-31
Registering an Original Cover Sheet as a Template . . . . . . . . . . . . . . . . . . . . . . . . . . . . 4-32
4-1
Fax_US.book Page 2 Monday, January 28, 2002 6:03 PM
What Is Cover Sheet Editor?
Canon Cover Sheet Editor is software for creating original fax cover sheet
templates for use with a Canon fax driver.
After registering cover sheets created with this software in your fax driver, you can
use them with any fax. If you specify fields instead of manually entering data for
sender or recipient information, the actual sender or recipient information that you
select in the fax driver is automatically entered in the cover sheet when the fax is
sent.
With the Canon Cover Sheet Editor, you can do the following:
4
Using Canon Cover Sheet Editor
• Insert text using different fonts, font styles, and font sizes into a cover sheet.
• Insert a variety of objects, such as drawings and images, into a cover sheet.
• Use the field feature for creating cover sheets for sending faxes to multiple recipients.
• Add fields for specifying remarks and comments in addition to the sender and recipient
information fields.
• Easily edit the display order and position of objects, and group different objects.
• Align objects on a grid while you work with them.
4-2
What Is Cover Sheet Editor?
Fax_US.book Page 3 Monday, January 28, 2002 6:03 PM
Installing Cover Sheet Editor
This section explains how to install and uninstall Canon Cover Sheet Editor.
Installing Cover Sheet Editor
To install the Canon Cover Sheet Editor, follow the procedure below.
1 Insert the Fax Driver Software CD-ROM into the CD-ROM
4
2
3
Using Canon Cover Sheet Editor
drive.
Double-click the [My Computer] icon, and then double-click
the [CD-ROM] icon.
Double-click the [Fax_Drivers], [us_eng], and [cse] folder
icons. Then double-click the [Setup] icon to start the
installation.
Installing Cover Sheet Editor
4-3
Fax_US.book Page 4 Monday, January 28, 2002 6:03 PM
4
In the first dialog box of the Installer, click the [Next] button,
and then follow the instructions on the screen to continue the
installation.
Using Canon Cover Sheet Editor
4
5
In the dialog box for selecting a setup type, select [Complete]
or [Custom], and then click the [Next] button.
NOTE
• If you select [Custom] in the dialog box for selecting [Setup Type], you can specify
the directory in which Canon Cover Sheet Editor is to be installed.
4-4
Installing Cover Sheet Editor
Fax_US.book Page 5 Monday, January 28, 2002 6:03 PM
6
Click the [Install] button to start copying the files.
Using Canon Cover Sheet Editor
4
Starting Cover Sheet Editor
To start the Canon Cover Sheet Editor, follow the procedure below.
1 Click the [Start] button, point to [Programs], [Canon], and
[Cse], and then click [Cover Sheet Editor].
Canon Cover Sheet Editor starts.
Installing Cover Sheet Editor
4-5
Fax_US.book Page 6 Monday, January 28, 2002 6:03 PM
Uninstalling Cover Sheet Editor
If it becomes necessary to uninstall the Canon Cover Sheet Editor, follow the
procedure below.
1 Click the [Start] button, point to [Settings], and then click
[Control Panel].
2
4
Using Canon Cover Sheet Editor
3
In the [Add/Remove Programs] dialog box in the [Control
Panel], select [Canon Cover Sheet Editor], and then click the
[Add/Remove] button.
When the [InstallShield Wizard] dialog box appears, follow the
instructions on the screen.
Canon Cover Sheet Editor is uninstalled.
4-6
Installing Cover Sheet Editor
Fax_US.book Page 7 Monday, January 28, 2002 6:03 PM
Opening, Saving, and Closing a File
This section explains how to create, open, save, and close files.
Opening a File
To Create a New File
To create a new cover sheet, follow the procedure below.
] (New) button on the toolbar.
You can also select [New] from the [File] menu.
The [New] dialog box opens.
2
Select a paper size for the new cover sheet, and then click the
[OK] button.
The New Cover Sheet screen appears.
Opening, Saving, and Closing a File
4-7
Using Canon Cover Sheet Editor
1 Click the [
4
Fax_US.book Page 8 Monday, January 28, 2002 6:03 PM
To Open a Saved Cover Sheet
You can open a saved cover sheet by specifying its file name.
Follow the procedure below.
1 Click the [
] (Open) button on the toolbar.
You can also select [Open] from the [File] menu.
The [Open] dialog box opens.
2
NOTE
• Clicking [Preview] displays an image of the selected cover sheet.
4
Using Canon Cover Sheet Editor
Specify the file name of the cover sheet that you want to open.
3
Click the [Open] button.
The selected cover sheet appears.
Saving and Closing a File
To Save a New File
If you save a cover sheet, you can later register it in the fax driver for use as an
original cover sheet.
1 Select [Save as] from the [File] menu.
The [Save as] dialog box opens.
2
Enter a name for the file in [File name], specify the location
where you want to save the file, and then click the [Save]
button.
The file extension is automatically set to “cse.”
NOTE
• The [Save as] dialog box also appears if you click the [
] (Save) button on the
toolbar or select [Save] from the [File] menu when saving a newly created cover
sheet for the first time.
4-8
Opening, Saving, and Closing a File
Fax_US.book Page 9 Monday, January 28, 2002 6:03 PM
To Save an Existing File
Follow the procedure below to save an existing cover sheet after editing it.
1 Click the [
] (Save) button on the toolbar.
You can also select [Save] from the [File] menu.
IMPORTANT
• To preserve the existing file also, select [Save As] and select a different name or
location for saving the edited file. Selecting [Save] would overwrite the existing file.
To Close a File
Follow the procedure below to close a currently open cover sheet without exiting
the Canon Cover Sheet Editor.
1 Click the lower of the two [
] (Close) buttons at the top-right
corner of the Canon Cover Sheet Editor main window.
You can also select [Close] from the [File] menu.
NOTE
• If you close a cover sheet that has not been saved after editing, a message
appears asking whether you want to save the changes. Click the [Yes] button to
save the changes, or the [No] button if you do not want to save changes. Click the
[Cancel] button if you do not want to close the cover sheet.
Opening, Saving, and Closing a File
4-9
Using Canon Cover Sheet Editor
4
Fax_US.book Page 10 Monday, January 28, 2002 6:03 PM
Creating an Original Cover Sheet
This section explains how to insert text, adjust text properties, specify fields, create
objects, adjust objects, and specify grid options in order to create an original cover
sheet.
Inserting Text
You can insert text and numbers into the cover page. The properties of any text or
the text box itself can also be changed. To edit the text, change to the edit mode by
clicking anywhere inside of a text box, and then place the cursor on the text that you
want to edit.
Using Canon Cover Sheet Editor
4
1 Click the [
] (Text Box) button on the toolbar.
You can also select [Text Box] from the [Insert] menu.
2
Drag the pointer on the area of the cover sheet where you
want to insert text.
A square or rectangular text box appears.
3
Click inside the text box.
The cursor for editing text appears.
4
4-10
Enter the desired text.
Creating an Original Cover Sheet
Fax_US.book Page 11 Monday, January 28, 2002 6:03 PM
Adjusting Text Properties
You can change text properties whenever you want. When you change text
properties, all text inside the selected text box is affected.
NOTE
• Text properties for field settings inside a text box are also changed according to the text
properties you specified. For details on field features, see “Specifying Fields,” on p. 4-15.
To Change the Font
1 Click inside the text box.
The text box is now ready for editing.
2
Using Canon Cover Sheet Editor
4
Select the desired font from [Font] on the toolbar.
To Change the Font Size
1 Click inside the text box.
The text box is now ready for editing.
2
Select the desired font size from [Size] on the toolbar.
You can also enter the desired font size directly into [Size].
To Change the Font Color
1 Click inside the text box.
The text box is now ready for editing.
2
Select the desired font color from [Color] on the toolbar.
To Apply Bold Formatting to Text
1 Click inside the text box.
The text box is now ready for editing.
Creating an Original Cover Sheet
4-11
Fax_US.book Page 12 Monday, January 28, 2002 6:03 PM
2
Click the [
] (Bold) button on the toolbar.
To undo the bold formatting, click the [
] (Bold) button once more.
To Apply Italic Formatting to Text
1 Click inside the text box.
The text box is now ready for editing.
2
Click the [
] (Italic) button on the toolbar.
To undo the italic formatting, click the [
4
] (Italic) button once more.
Using Canon Cover Sheet Editor
To Underline Text
1 Click inside the text box.
The text box is now ready for editing.
2
Click the [
] (Underline) button on the toolbar.
To undo the underlining, click the [
] (Underline) button once more.
To Align Text to the Left, Center, and Right
1 Click inside the text box.
The text box is now ready for editing.
2
4-12
Click the [ ] (Align Left), [
Right) button on the toolbar.
Creating an Original Cover Sheet
] (Align Center), or [
] (Align
Fax_US.book Page 13 Monday, January 28, 2002 6:03 PM
To Specify the Text Properties
You can specify all of the properties for text inside a text box simultaneously.
[Preview] inside the [Text Properties] dialog box displays a preview of how the text
would appear with the currently selected settings. Use it as a guide when specifying
settings.
1 Click inside the text box.
The text box is now ready for editing.
Click the [
] (Properties) button on the toolbar.
You can also select [Properties] from the [Edit] menu.
4
The [Text Properties] dialog box opens.
3
Select [Font], [Font Style], and [Size] from the respective list
boxes.
You can also enter the desired font size directly into [Size].
4
Select [Strikethrough] or [Underline] to draw a line through or
to underline text.
Creating an Original Cover Sheet
4-13
Using Canon Cover Sheet Editor
2
Fax_US.book Page 14 Monday, January 28, 2002 6:03 PM
5
6
7
Select the desired text color from [Color].
Specify [Alignment] for the text.
Click the [OK] button.
To Specify the Text Box Properties
Follow the procedure below to specify the type of border, border color, and
background color of the selected text box.
1 Click anywhere on the border of the text box.
4
Using Canon Cover Sheet Editor
The border of the text box is selected.
2
Click the [
] (Properties) button on the toolbar.
You can also select [Properties] from the [Edit] menu.
You can also display the [Text Box Properties] dialog box by double-clicking
anywhere on the border of the text box.
The [Text Box Properties] dialog box opens.
3
4
Select the desired border type from [Line Style].
Specify the [Width] setting to set the thickness of the border.
NOTE
• The [Width] setting is available only when [Line Style] is set to [Solid].
4-14
Creating an Original Cover Sheet
Fax_US.book Page 15 Monday, January 28, 2002 6:03 PM
5
6
7
Select the desired color of the border from [Color].
Select the desired background color for the text box from [Fill
in].
Click the [OK] button.
Specifying Fields
Fields are objects in the cover sheet that you can replace with data when sending a
fax. Actual sender and recipient information as specified in the fax driver is
automatically inserted in the corresponding fields on the cover sheet during
transmission.
• Available fields:
- Sender information: Name, Fax Number, Company, Dept./Div.
- Recipient information: Name, Fax Number, Company, Dept./Div.
- Other information: Remark, Comment
Creating an Original Cover Sheet
4-15
4
Using Canon Cover Sheet Editor
You can show sender or fax recipient information such as the name, fax number,
company name, and department/division name on the cover sheet using a feature
called a “field.”
Fax_US.book Page 16 Monday, January 28, 2002 6:03 PM
A recipient information field that contains multiple values is called a “repeating
field.” This feature is convenient for using the same cover sheet to send faxes to
multiple recipients.
The repeating field is used to insert data for every recipient specified in the fax
driver.
4
Using Canon Cover Sheet Editor
In addition to the [Sender Information] and [Recipient Information] fields, you can
also insert [Remark] and [Comment] fields on the cover sheet. When the fax is sent,
information specified in the fax driver such as [Urgent] or [Confidential] is inserted
in the [Remark] field, and comments specified in the fax driver are entered in the
[Comment] field.
To Insert Sender and Recipient Information Fields When Editing Text
1 Inside the text box, place the cursor where you want to insert
the field.
2
Click the [Insert] menu, point to [Sender Information] or
[Recipient Information], and then select the field such as
[Name], [Fax Number], [Company], and [Dept./Div.] that you
want to insert.
The selected field is inserted.
NOTE
• If you select [Insert All], all of the available fields for sender or recipient information
are inserted simultaneously. The fields are inserted in this order: [Name], [Fax
Number], [Company], and [Dept./Div.]. You can change the position of the fields as
needed.
4-16
Creating an Original Cover Sheet
Fax_US.book Page 17 Monday, January 28, 2002 6:03 PM
To Insert Sender and Recipient Information Fields When Not Editing
Text
1 Click the [Insert] menu, point to [Sender Information] or
[Recipient Information], and then select the field such as
[Name], [Fax Number], [Company], and [Dept./Div.] that you
want to insert.
2
Drag the pointer on the area of the cover sheet where you
want to insert the field.
A square or rectangular text box containing the selected field appears.
To Insert Repeating Fields for Specifying Multiple Recipients
Follow the procedure below to show information for multiple recipients on the cover
sheet when sending a fax.
1 Insert the desired recipient information field, such as [Name],
[Fax Number], [Company], and [Dept./Div.].
2
3
Inside the text box, place the cursor to the left of the field that
you want to repeat.
Click the [Insert] menu, point to [Recipient Information], and
then click [Begin Repeat].
The [Begin Repeat] field is inserted.
4
Inside the text box, place the cursor to the right of the field
that you want to repeat.
Creating an Original Cover Sheet
4-17
4
Using Canon Cover Sheet Editor
NOTE
• If you select [Insert All], all of the available fields for sender or recipient information
are inserted simultaneously. The fields are inserted in this order: [Name], [Fax
Number], [Company], and [Dept./Div.]. You can change the position of the fields as
needed.
Fax_US.book Page 18 Monday, January 28, 2002 6:03 PM
5
Click the [Insert] menu, point to [Recipient Information], and
then click [End Repeat].
The [End Repeat] field is inserted.
The field between the [Begin Repeat] and [End Repeat] fields is replaced with
multiple recipients’ information when sending a fax.
NOTE
• The text box may not be able to accommodate all of the actual data for a repeating field if
a large number of recipients are specified for sending a fax. In this case, a new page is
automatically created and data that does not fit into the text box displays from the top of
the new page.
To Insert Borders Between Repeating Fields
When you specify a repeating field for recipient information, you can also select to
insert borders between the values for easier reading.
Using Canon Cover Sheet Editor
4
1 Click the [Insert] menu, point to [Recipient Information], and
then click [Borders].
The [Border Settings] dialog box opens.
2
Select [Insert a Border Between Repeats] to insert borders
between multiple values in a repeating recipient information
field.
If you do not want to insert borders between the values, clear this check box, and
then click the [OK] button.
3
4
4-18
Select the type of line to use as the border from [Line Style].
Specify the [Width] setting to set the thickness of the borders.
Creating an Original Cover Sheet
Fax_US.book Page 19 Monday, January 28, 2002 6:03 PM
NOTE
• The [Width] setting is available only when [Line Style] is set to [Solid].
5
6
Select the desired color of the borders from [Color].
Click the [OK] button.
To Insert Remark and Comment Fields When Editing Text
1 Inside the text box, place the cursor where you want to insert
the field.
From the [Insert] menu, select either [Remark] or [Comment].
The [Remark] field or the [Comment] field is inserted depending on your selection.
To Insert Remark and Comment Fields When Not Editing Text
1 From the [Insert] menu, select either [Remark] or [Comment].
2 Drag the pointer on the area of the cover sheet where you
want to insert the field.
A square or rectangular text box containing the selected field appears.
Creating Objects
You can draw lines, rectangles, rounded rectangles, or ovals on the cover sheet.
You can also change their properties once they are drawn.
To Draw Lines
1 Click the [
] (Line) button on the toolbar.
You can also select [Line] from the [Drawing] menu.
2
Drag the pointer on the area of the cover sheet where you
want to draw the line.
Creating an Original Cover Sheet
4-19
Using Canon Cover Sheet Editor
2
4
Fax_US.book Page 20 Monday, January 28, 2002 6:03 PM
To Draw Rectangles
1 Click the [
] (Rectangle) button on the toolbar.
You can also select [Rectangle] from the [Drawing] menu.
2
Drag the pointer on the area of the cover sheet where you
want to draw the rectangle.
To draw a square, hold down the [SHIFT] key while dragging.
To Draw Rounded Rectangles
1 Click the [
4
] (Rounded Rectangle) button on the toolbar.
Using Canon Cover Sheet Editor
You can also select [Rounded Rectangle] from the [Drawing] menu.
2
Drag the pointer on the area of the cover sheet where you
want to draw the rounded rectangle.
To draw a rounded square, hold down the [SHIFT] key while dragging.
You can adjust the degree of the curve or the roundness of the corners of the
rounded rectangle by clicking anywhere outside the newly created rounded
rectangle to deselect it, clicking the rounded rectangle again to reselect it, and
then dragging the inner handle in its upper right corner to change the degree of
the curve.
To Draw Ovals
1 Click the [
] (Oval) button on the toolbar.
You can also select [Oval] from the [Drawing] menu.
2
Drag the pointer on the area of the cover sheet where you
want to draw the oval.
To draw a circle, hold down the [SHIFT] key while dragging.
4-20
Creating an Original Cover Sheet
Fax_US.book Page 21 Monday, January 28, 2002 6:03 PM
To Insert Images
1 Click the [
] (Image) button on the toolbar.
You can also select [Image] from the [Insert] menu.
The [Open] dialog box opens.
2
Specify the file name of the bitmap file that you want to insert.
NOTE
• Clicking the [Preview] button opens the [Preview] dialog box, where an image of the
selected bitmap file is displayed.
4
Click the [Open] button.
Using Canon Cover Sheet Editor
3
Editing Objects
You can copy, move, and delete objects such as lines, rectangles, rounded
rectangles, ovals, images, and text boxes on the cover sheet.
To Select an Object
1 Click the object that you want to select.
You can also drag the pointer completely over the object.
The object is selected.
NOTE
• You can also select multiple objects by holding down the [SHIFT] key and clicking
each object that you want to select, or by dragging the pointer completely over the
objects. If you want to deselect any of the objects you selected, hold down the
[SHIFT] key, and then click the objects that you want to deselect.
To Move an Object within the Same Cover Sheet
1 Select the object that you want to move.
NOTE
• You can select multiple objects and move them at the same time.
Creating an Original Cover Sheet
4-21
Fax_US.book Page 22 Monday, January 28, 2002 6:03 PM
2
Drag the selected object to the desired location.
You can also use any of the four arrow keys [←], [↑], [→], or [↓] to move the
object in the desired direction in 0.1 mm increments.
NOTE
• Hold down the [SHIFT] key while dragging to move the object horizontally or
vertically only.
• Hold down the [CTRL] key while dragging to copy the selected object and drag the
copy to the desired location.
• When [Snap to Grid] is specified, holding down the [SHIFT] key while pressing an
arrow key moves the object in the direction of the arrow in half-grid space
increments. If [Snap to Grid] is not specified, holding down the [SHIFT] key while
pressing an arrow key moves the object in the direction of the arrow in 2.0 mm
increments.
4
Using Canon Cover Sheet Editor
To Move an Object to a Different Cover Sheet
1 Select the object that you want to move.
NOTE
• You can select multiple objects and move them at the same time.
2
Click the [
] (Cut) button on the toolbar.
You can also select [Cut] from the [Edit] menu.
3
Display the second cover sheet.
NOTE
• If the second cover sheet is open, you can select it from the [Window] menu.
4
Click the [
] (Paste) button on the toolbar.
You can also select [Paste] from the [Edit] menu.
The selected object is moved to the active cover sheet.
To Resize an Object
1 Select the object whose size you want to change.
4-22
Creating an Original Cover Sheet
Fax_US.book Page 23 Monday, January 28, 2002 6:03 PM
NOTE
• You can select multiple objects and change all of their sizes at the same time.
2
Drag any handle on the selected object to change its size.
NOTE
• The shape of the pointer changes depending on which handle you place it over.
- Dragging the handles on the top and bottom sides of the object changes its
height.
- Dragging the handles on the left and right sides of the object changes its width.
- Dragging the handles on the corners of the object changes both its height and
width.
To Copy an Object by Dragging
1 Select the object that you want to copy.
NOTE
• You can select multiple objects and copy them at the same time.
2
Hold down the [CTRL] key, and then drag the selected object
to the desired location.
NOTE
• Dragging the selected object without holding down the [CTRL] key moves the
object to the new location instead of copying it.
To Copy an Object by Using Button or Menu Commands
You can use button and menu commands to copy an object such as a line,
rectangle, rounded rectangle, oval, image, or text box on the same cover sheet or to
another cover sheet.
Follow the procedure below.
1 Select the object that you want to copy.
NOTE
• You can select multiple objects and copy them at the same time.
Creating an Original Cover Sheet
4-23
Using Canon Cover Sheet Editor
4
Fax_US.book Page 24 Monday, January 28, 2002 6:03 PM
2
Click the [
] (Copy) button on the toolbar.
You can also select [Copy] from the [Edit] menu.
3
If you want to copy the object to a different cover sheet,
display the second cover sheet.
NOTE
• If the second cover sheet is open, you can select it from the [Window] menu.
4
Click the [
] (Paste) button on the toolbar.
4
The selected object is copied.
Using Canon Cover Sheet Editor
You can also select [Paste] from the [Edit] menu.
NOTE
• You cannot copy an object to a different cover sheet by dragging.
• To copy text, drag the pointer over the text to select it, and then use the [
]
(Copy) button or [Copy] command to copy it. Then click the [
] (Paste) button or
select the [Paste] command. If you want to copy text within the same text box, hold
down the [CTRL] key while dragging the selected text.
To Duplicate an Object
Duplicating enables you to copy and paste an object in one operation.
1 Select the object that you want to duplicate.
NOTE
• You can select multiple objects and duplicate them at the same time.
2
Click the [
] (Duplicate) button on the toolbar.
You can also select [Duplicate] from the [Edit] menu.
The selected object is duplicated.
To Delete an Object
1 Select the object that you want to delete.
4-24
Creating an Original Cover Sheet
Fax_US.book Page 25 Monday, January 28, 2002 6:03 PM
NOTE
• You can select multiple objects and delete them at the same time.
2
Click the [
] (Delete) button on the toolbar.
You can also select [Delete] from the [Edit] menu, or press the [DELETE] key on
the keyboard.
The selected object is deleted.
To Group Objects
You can edit or handle multiple objects that are grouped together as a single object.
You can move, copy, or change the size of grouped objects in a single operation.
You can also simultaneously modify the properties of all objects in the group.
1 While holding down the [SHIFT] key, select all the objects that
you want to group.
2
Click the [
] (Group) button on the toolbar.
You can also select [Group] from the [Layout] menu.
You can ungroup objects by selecting the group of objects that you want to
ungroup and clicking the [
] (Ungroup) button on the toolbar or selecting
[Ungroup] from the [Layout] menu.
Specifying Object Properties
Follow the procedure below to change the line style, line color, and background
color of objects such as lines, rectangles, rounded rectangles, ovals and images.
1 Select the object whose properties you want to change.
NOTE
• You can select multiple objects and change their properties at the same time.
2
Click the [
] (Properties) button on the toolbar.
You can also select [Properties] from the [Edit] menu, or display the [Object
Properties] dialog box by double-clicking the selected object.
The [Object Properties] dialog box opens.
Creating an Original Cover Sheet
4-25
Using Canon Cover Sheet Editor
4
Fax_US.book Page 26 Monday, January 28, 2002 6:03 PM
3
4
Select the desired line type for the object from [Line Style].
Specify the [Width] setting to set the thickness of the line.
NOTE
• The [Width] setting is available only when [Line Style] is set to [Solid].
5
6
Using Canon Cover Sheet Editor
4
Select the desired line color for the object from [Color].
Select the desired background color for the object from [Fill
in].
NOTE
• [Fill in] cannot be specified if the selected object is either a line or an image.
7
Click the [OK] button.
Arranging Objects
You can rearrange the order and appearance of objects such as lines, rectangles,
rounded rectangles, ovals, images, and text boxes on the cover sheet.
To Change the Display Order of Objects
When multiple objects overlap, you can specify the order in which they overlap. Use
the following four commands to change the order of display of overlapping objects.
• [Bring to Front] - Moves the selected object to the front.
• [Send to Back] - Moves the selected object to the back.
• [Bring Forward] - Moves the selected object one level higher.
• [Send Backward] - Moves the selected object one level lower.
1 Select the object whose display order you want to change.
NOTE
• You can select multiple objects and change the order of display for all of them at
the same time.
• If the object you want to select lies behind other objects and thus is hidden from
view, press the [TAB] key repeatedly until the object you want is selected. You can
4-26
Creating an Original Cover Sheet
Fax_US.book Page 27 Monday, January 28, 2002 6:03 PM
also select in reverse order by holding down the [SHIFT] key while pressing the
[TAB] key.
2
Click the [ ] (Bring to Front), [ ] (Send to Back), [ ]
(Bring Forward), or [ ] (Send Backward) button on the
toolbar.
NOTE
• You can also select [Bring to Front], [Send to Back], [Bring Forward], or [Send
Backward] from the [Layout] menu.
To Align Multiple Objects
Use the following commands to change the alignment of the selected objects.
• [Align Left] - Aligns the left edge of all objects along the left edge of the last selected object.
• [Align Center] - Aligns the left-right center axis of all objects along the left-right center axis
of the last selected object.
• [Align Right] - Aligns the right edge of all objects along the right edge of the last selected
object.
• [Align Top] - Aligns the top edge of all objects along the top edge of the last selected object.
• [Align Middle] - Aligns the top-bottom center axis of all objects along the top-bottom center
axis of the last selected object.
• [Align Bottom] - Aligns the bottom edge of all objects along the bottom edge of the last
selected object.
1 While holding down the [SHIFT] key, select the objects that
you want to align.
Select the object to be used as the point of reference last.
NOTE
• If you drag the pointer to select multiple objects, the object positioned at the front is
used as the point of reference.
Creating an Original Cover Sheet
4-27
4
Using Canon Cover Sheet Editor
You can align multiple selected objects according to their left edge, right edge, top
edge, bottom edge, or center in one operation. The position of the last selected
object becomes the point of reference of alignment.
Fax_US.book Page 28 Monday, January 28, 2002 6:03 PM
2
Click the [ ] (Align Left), [ ] (Align Center), [
Right), [ ] (Align Top), [ ] (Align Middle), or [
Bottom) button on the toolbar.
] (Align
] (Align
You can also click the [Layout] menu, point to [Distribute Horizontally] or
[Distribute Vertically], and then select the type of alignment you want.
Specifying Grid Options
The grid function is useful for arranging created objects.
To Show Grids
You can display grids on the cover sheet to help you create and arrange objects.
4
Using Canon Cover Sheet Editor
1 On the toolbar, click the [
] (Show Grids) button to activate
the grid.
You can also activate the command by clicking [Show Grids] from the [View]
menu.
Hide the grids by clicking the activated [ ] (Show Grids) button to deactivate it
or by clicking [Show Grids] from the [View] menu.
To Snap Objects to Grid
If you activate the [Snap to Grid] setting for the cover sheet, objects are aligned
along the grid when they are moved or resized on the cover sheet.
1 On the toolbar, click the [
] (Snap to Grid) button to activate
it.
You can also activate the command by clicking [Snap to Grid] from the [View]
menu.
Deactivate the [Snap to Grid] setting by clicking the activated [
Grid) button or by clicking [Snap to Grid] from the [View] menu.
] (Snap to
NOTE
• [Snap to Grid] is available only after this setting is specified. It does not affect
objects that are modified before this setting is specified.
4-28
Creating an Original Cover Sheet
Fax_US.book Page 29 Monday, January 28, 2002 6:03 PM
To Specify Grid Properties
Follow the procedure below to specify the properties for the grid on the cover sheet,
such as type, color, and spacing. You can also specify whether to display the grid
and whether to snap objects to grid.
1 Select [Grid Properties] from the [View] menu.
The [Grid Properties] dialog box opens.
2
Select [Show Grids].
Using Canon Cover Sheet Editor
4
Clear the check box if you do not want to display the grid.
NOTE
• Clearing this check box disables the [Type], [Color], and [Spacing] settings.
3
4
Select [Dotted] or [Dashed].
Click the button to the right of [Color].
The [Color Setting] dialog box opens.
Creating an Original Cover Sheet
4-29
Fax_US.book Page 30 Monday, January 28, 2002 6:03 PM
5
Select a color to use as the grid’s basic color in the [Color
Setting] dialog box.
4
Using Canon Cover Sheet Editor
NOTE
• You can also create your own color by clicking on a color that is closest to the color
you want, and then clicking the [Define Custom Colors] button. In the color matrix
that appears, click the color you want. Adjust the luminosity of the color, and then
click the [Add to Custom Colors] button.
6
7
Click the [OK] button in the [Color Setting] dialog box.
Specify the [Horizontal] and [Vertical] spacing for the grid.
NOTE
• You can change the unit of measure for the spacing in the [Unit Setting] dialog box
displayed by selecting [Unit] from the [View] menu.
8
To align objects along the grid, select [Snap to Grid].
To deactivate [Snap to Grid], clear the check box.
9
Click the [OK] button.
NOTE
• Clicking the [Restore Defaults] button in the [Grid Properties] dialog box restores all
[Grid Properties] settings for the cover sheet to their default values.
4-30
Creating an Original Cover Sheet
Fax_US.book Page 31 Monday, January 28, 2002 6:03 PM
Printing a Cover Sheet
Follow the procedure below to print the cover sheet.
1 Click the [
] (Print) button on the toolbar.
You can also select [Print] from the [File] menu.
The [Print] dialog box opens.
4
Select the printer, and then click the [OK] button.
As necessary, click the [Properties] button to specify detailed print settings.
3
Specify the number of copies to print.
NOTE
• [All] is the only active selection for the [Print range] setting because the cover sheet
consists of only one page.
4
Click the [OK] button.
Printing a Cover Sheet
4-31
Using Canon Cover Sheet Editor
2
Fax_US.book Page 32 Monday, January 28, 2002 6:03 PM
Registering an Original Cover Sheet as a
Template
You can register the cover sheet created with Canon Cover Sheet Editor with the
fax driver for use as a template.
1 Click the [Start] button, point to [Settings], and then click
[Printers].
2
Using Canon Cover Sheet Editor
4
3
4-32
In the [Printers] folder, right-click the fax icon for your fax, and
then click [Properties] (Windows 95/98/Me), [Document
Default] (Windows NT4.0), or [Printing Preferences] (Windows
2000/XP).
Display the [Register Cover Sheet] sheet.
Registering an Original Cover Sheet as a Template
Fax_US.book Page 33 Monday, January 28, 2002 6:03 PM
4
Click the [Register] button.
The [Register Cover Sheet] dialog box opens.
Select the cover sheet template file, and then click the [Open]
button.
The selected template is added to [Style] in the [Register Cover Sheet] sheet.
NOTE
• In addition to the default templates, you can add up to 30 templates to the fax
driver.
Registering an Original Cover Sheet as a Template
4-33
4
Using Canon Cover Sheet Editor
5
Fax_US.book Page 1 Monday, January 28, 2002 6:03 PM
Special Fax Driver Options
5
CHAPTER
This chapter provides instructions for using Job Accounting features, and for setting the time to
send a fax.
Using the Job Accounting Feature . . . . . . . . . . . . . . . . . . . . . . . . . . . . . . . . . . . . . . . . . . 5-2
About Job Accounting . . . . . . . . . . . . . . . . . . . . . . . . . . . . . . . . . . . . . . . . . . . . . . . . . . . . . . . . .5-2
Specifying the ID and Password for Job Accounting . . . . . . . . . . . . . . . . . . . . . . . . . . . . . . . . .5-2
Faxing with Job Accounting (for Windows 95/98/Me) . . . . . . . . . . . . . . . . . . . . . . . . . . . . . . . . .5-4
Faxing with Job Accounting (for Windows NT 4.0/2000/XP) . . . . . . . . . . . . . . . . . . . . . . . . . . . .5-5
Presetting the Fax Transmission Time . . . . . . . . . . . . . . . . . . . . . . . . . . . . . . . . . . . . . . . 5-7
5-1
Fax_US.book Page 2 Monday, January 28, 2002 6:03 PM
Using the Job Accounting Feature
This section explains Job Accounting, how to specify the ID and password for Job
Accounting, and how to fax with Job Accounting.
About Job Accounting
Job Accounting enables you to count the fax totals for each department or user for
management purposes, under an ID and a password assigned to each department
or user.
A document will be faxed only when the specified ID and password are verified as
valid. Job Accounting is available for imageRUNNER 3300/2800/2200,
imageRUNNER 3300i, and iR3250.
Special Fax Driver Options
5
Specifying the ID and Password for Job Accounting
In order to fax documents using the Job Accounting feature, follow the procedure
below to specify the ID and password.
IMPORTANT
• It is necessary to install Canon NetSpot Suite Service to use the Job Accounting feature.
(See “Installing Canon NetSpot Suite Service,” on p. 2-20.)
5-2
Using the Job Accounting Feature
Fax_US.book Page 3 Monday, January 28, 2002 6:03 PM
1 Display the [Configuration] sheet (Windows 95/98/Me) or
[Device Settings] sheet (Windows NT 4.0/2000/XP). Then click
the [Get Device Status] button to confirm that [Job
Accounting] is selected, or manually select [Job Accounting]
and [Allow Password Setting] if desired.
Special Fax Driver Options
5
For details on how to access the [Properties] dialog box, see “Sending a
Document,” on p. 3-2.
2
Click the [Settings] button to open the [ID/Password Settings]
dialog box, and then enter the [ID] and [Password].
Using the Job Accounting Feature
5-3
Fax_US.book Page 4 Monday, January 28, 2002 6:03 PM
NOTE
• The ID and password can be changed when faxing a document only if [Confirm ID/
Password when Sending Fax] is selected in the [ID/Password Settings] dialog box.
• For Windows NT 4.0/2000/XP, you can specify the password in the [ID/Password
Settings] dialog box only when [Allow Password Setting] is selected in the [Device
Settings] sheet.
• You can leave [Password] blank.
3
4
Click the [Verify] button to confirm that the specified ID and
password are valid.
Click the [OK] button.
Faxing with Job Accounting (for Windows 95/98/Me)
5
Special Fax Driver Options
To fax with Job Accounting, follow the procedure below.
1 In the application, select [Print], and then click the
[Properties] button in the [Print dialog] box.
2
3
4
Specify the various settings in the [Properties] dialog box.
Click the [OK] button to close the [Properties] dialog box, and
then click the [OK] button in the [Print] dialog box.
If the [Confirm ID/Password] dialog box opens, enter the ID
and the password, and then click the [OK] button.
The document is printed under the specified ID and password.
5-4
Using the Job Accounting Feature
Fax_US.book Page 5 Monday, January 28, 2002 6:03 PM
NOTE
• The [Confirm ID/Password] dialog box opens only if [Confirm ID/Password when
Sending Fax] is selected in the [ID/Password Settings] dialog box. Otherwise, the
document is printed under the previously specified ID and password.
• You can leave [Password] blank.
Faxing with Job Accounting (for Windows NT 4.0/2000/XP)
The procedure for faxing with Job Accounting differs depending on whether [Allow
Password Setting] is selected in the [Device Settings] sheet.
With [Allow Password Setting] Selected
The password for Job Accounting can be specified in advance in the [ID/Password
Settings] dialog box.
1 In the application, select [Print], and then click the
[Properties] button in the [Print] dialog box.
2
3
Specify the various settings in the [Properties] dialog box.
Click the [OK] button to close the [Properties] dialog box, and
then click the [OK] button in the [Print] dialog box.
The document is faxed under the specified ID and password.
With [Allow Password Setting] Not Selected
The password for Job Accounting cannot be specified in the [ID/Password Settings]
dialog box.
1 In the application, select [Print], and then click the
[Properties] button in the [Print] dialog box.
2
3
Specify the various settings in the [Properties] dialog box.
Click the [OK] button to close the [Properties] dialog box, and
then click the [OK] button in the [Print] dialog box.
Using the Job Accounting Feature
5-5
Special Fax Driver Options
5
Fax_US.book Page 6 Monday, January 28, 2002 6:03 PM
4
In the [Confirm ID/Password] dialog box, enter the password,
and if necessary change the ID.
NOTE
• You can leave [Password] blank.
5
Click the [OK] button.
The document is faxed under the specified ID and password.
Special Fax Driver Options
5
5-6
Using the Job Accounting Feature
Fax_US.book Page 7 Monday, January 28, 2002 6:03 PM
Presetting the Fax Transmission Time
By temporarily storing data in the printer, you can set the time at which a fax will be
sent.
NOTE
• This feature is available for only imageRUNNER 3300/2800/2200 and imageRUNNER
3300i.
1 In the application, with the document open, select [Print] to
print your document.
The [Print] dialog box opens.
3
In the [Print] dialog box, select your fax from [Name], and then
click the [OK] button.
In the [Send FAX] sheet, specify the name and fax number of
the fax recipient, and then click the [Add to Recipient List]
button.
Presetting the Fax Transmission Time
5-7
Special Fax Driver Options
2
5
Fax_US.book Page 8 Monday, January 28, 2002 6:03 PM
4
Select [Set the Time to Send], and then specify the time to
send a fax.
Special Fax Driver Options
5
5
Click the [OK] button in the [Properties] dialog box.
The data is stored temporarily in the printer, and the fax is sent at the specified
time.
5-8
Presetting the Fax Transmission Time
Fax_US.book Page 1 Monday, January 28, 2002 6:03 PM
Appendix
6
CHAPTER
This chapter provides information about additional software used with the fax drivers.
Additional Software. . . . . . . . . . . . . . . . . . . . . . . . . . . . . . . . . . . . . . . . . . . . . . . . . . . . . . 6-2
Canon Port Setting Tool . . . . . . . . . . . . . . . . . . . . . . . . . . . . . . . . . . . . . . . . . . . . . . . . . . . . . . . .6-2
Device Status Extension. . . . . . . . . . . . . . . . . . . . . . . . . . . . . . . . . . . . . . . . . . . . . . . . . . . . . . . .6-2
Index . . . . . . . . . . . . . . . . . . . . . . . . . . . . . . . . . . . . . . . . . . . . . . . . . . . . . . . . . . . . . . . . . 6-3
6-1
Fax_US.book Page 2 Monday, January 28, 2002 6:03 PM
Additional Software
This section explains additional software used with the fax driver.
Canon Port Setting Tool
The Canon Port Setting Tool enables you to identify the network address for the
device installed in your computer. Use Canon Port Setting Tool when the [Get
Device Status] option in the fax driver does not work properly.
1 In Windows Explorer, double-click the [Program Files],
[Canon], and then [Portset] folder icons.
2
Appendix
6
In the [Portset] folder, double-click the [Portset.exe] icon to
start Canon Port Setting Tool.
NOTE
• Canon Port Setting Tool is installed with Canon NetSpot Suite Service.
• For more information about using Canon Port Setting Tool, see the online Help. To
display the online Help, start Canon Port Setting Tool, and then click the [Help]
button.
Device Status Extension
When you use a shared fax on Windows 2000/XP, you can browse information on
the shared fax and manage fax jobs through a web browser.
Installing Device Status Extension on Windows 2000/XP enables you to browse
detailed information on faxes supporting Device Status Extension. Device Status
Extension also enables you to start NetSpot Console from the [Device Status
Extension] window to set up faxes.
For instructions on installing and using Device Status Extension, see the
README.TXT file.
6-2
Additional Software
Fax_US.book Page 3 Monday, January 28, 2002 6:03 PM
Index
A
Address Book Entries ............................................................................................................... 3-12
Attaching a Cover Sheet to a Fax ............................................................................................. 3-25
C
Canon Cover Sheet Editor, Using ............................................................................................... 4-1
Creating an Original Cover Sheet ................................................................................... 4-10
Installing ........................................................................................................................... 4-3
Printing a Cover Sheet .................................................................................................... 4-31
Registering an Original Cover Sheet .............................................................................. 4-32
D
Defining a Group ...................................................................................................................... 3-17
To Add a New Group ...................................................................................................... 3-17
To Delete a Group .......................................................................................................... 3-21
To Edit a Group .............................................................................................................. 3-19
Defining a Person Entry ............................................................................................................ 3-12
To Add a New Person ..................................................................................................... 3-12
To Delete a Person Entry ................................................................................................ 3-16
To Edit a Person Entry .................................................................................................... 3-15
F
Faxing a Document ..................................................................................................................... 3-2
I
Installing Canon NetSpot Suite Service .................................................................................... 2-20
Installing the Fax Driver .............................................................................................................. 2-2
Index
6-3
Appendix
6
Fax_US.book Page 4 Monday, January 28, 2002 6:03 PM
J
Job Accounting ................................................................................................................... 5-2, 5-4
Faxing with Job Accounting .............................................................................................. 5-4
Specifying the ID and Password for Job Accounting ........................................................ 5-2
L
log in ........................................................................................................................................... 2-2
P
Presetting the Fax Transmission Time ........................................................................................ 5-7
S
Shared Fax, setting of ............................................................................................................... 2-15
Specifying Recipients
Adding a New Name and Fax Number ............................................................................. 3-9
Adding a Recipient from the Address Book .................................................................... 3-10
Specifying the Installed Fax Memory ........................................................................................ 2-31
Appendix
6
U
Uninstalling the Fax Driver ........................................................................................................ 2-29
Updating an Existing Fax Driver
Using the Add Printer Wizard .......................................................................................... 2-23
Using the Installer ........................................................................................................... 2-22
Updating the Alternate Fax Driver ............................................................................................. 2-26
6-4
Index
Fax_US.book Page 1 Monday, January 28, 2002 6:03 PM
CANON INC.
30-2, Shimomaruko 3-chome, Ohta-ku, Tokyo 146-8501, Japan
CANON U.S.A., INC.
One Canon Plaza, Lake Success, NY 11042, U.S.A.
CANON CANADA INC.
6390 Dixie Road Mississauga, Ontario L5T 1P7, Canada
CANON EUROPA N.V.
Bovenkerkerweg 59-61 P.O. Box 2262, 1180 EG Amstelveen, The Netherlands
CANON FRANCE S.A.
17, quai du President Paul Doumer 92414 Courbevoie Cedex, France
CANON COMMUNICATION & IMAGE FRANCE S.A. (Pour les utilisateurs de l imprimante laser uniquement)
102, avenue du General de Gaulle 92257 La Garenne-Colombes Cedex, France
CANON (U.K.) LTD.
Woodhatch, Reigate, Surrey, RH2 8BF, United Kingdom
CANON DEUTSCHLAND GmbH
Europark Fichtenhain A10, 47807 Krefeld, Germany
CANON ITALIA S.p.A.
Palazzo L Strada 6 20089 Milanofiori Rozzano (MI) Italy
CANON LATIN AMERICA, INC.
703 Waterford Way Suite 400 Miami, Florida 33126 U.S.A.
CANON AUSTRALIA PTY. LTD
1 Thomas Holt Drive, North Ryde, Sydney, N.S.W. 2113, Australia
CANON SINGAPORE PTE. LTD.
79 Anson Road #09-01/06, Singapore 079906
CANON HONGKONG CO., LTD
9/F, The Hong Kong Club Building, 3A Chater Road, Central, Hong Kong
FA7-3717-010
C CANON INC. 2002
MADE IN JAPAN