1
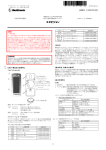
Zone Perfect Plus
Zoning
Systems
USER’S
INFORMATION
MANUAL
7
A9644
NOTE TO
INSTALLER:
This manual
must be
left with the
equipment user.
Introduction
Congratulations! As the owner of Bryant’s Zone Perfect Plus zoning system, you have made a commitment to improving your indoor comfort. Zone Perfect Plus allows your heating and cooling system to follow your schedule and provide greater comfort in
areas which are difficult to heat or cool. Here’s how it works: Your Bryant dealer has divided your home or business into zones
which are controlled separately. Instead of setting one temperature for the entire house or business, you can select a different temperature for each of your zones. With the help of your dealer, and by following the easy, step-by-step instructions in this guide, you
will begin to enjoy the benefits of your Zone Perfect Plus system.
LCD DISPLAY
KEYPAD
UP & DOWN BUTTONS
A98154
—2—
Table of Contents
Introduction. . . . . . . . . . . . . . . . . . . . . . . . . . . . . . . . . . . . . . . . . . . . . . . . . . . . . . . . . . . . . . . . . . . . . . . . . . . . . . . . . . . . . . . 2
Quick Start . . . . . . . . . . . . . . . . . . . . . . . . . . . . . . . . . . . . . . . . . . . . . . . . . . . . . . . . . . . . . . . . . . . . . . . . . . . . . . . . . . . . . . . 3
Planning Your Comfort Schedule. . . . . . . . . . . . . . . . . . . . . . . . . . . . . . . . . . . . . . . . . . . . . . . . . . . . . . . . . . . . . . . . . . . . . . 4
Comfort Charts . . . . . . . . . . . . . . . . . . . . . . . . . . . . . . . . . . . . . . . . . . . . . . . . . . . . . . . . . . . . . . . . . . . . . . . . . . . . . . . . . . 5–6
Programming Your Comfort Schedule. . . . . . . . . . . . . . . . . . . . . . . . . . . . . . . . . . . . . . . . . . . . . . . . . . . . . . . . . . . . . . . 7–11
Using Your System. . . . . . . . . . . . . . . . . . . . . . . . . . . . . . . . . . . . . . . . . . . . . . . . . . . . . . . . . . . . . . . . . . . . . . . . . . . . . 12–15
Overriding the Program Settings . . . . . . . . . . . . . . . . . . . . . . . . . . . . . . . . . . . . . . . . . . . . . . . . . . . . . . . . . . . . . . . . . . . . . 16
Controlling Your Indoor Humidity. . . . . . . . . . . . . . . . . . . . . . . . . . . . . . . . . . . . . . . . . . . . . . . . . . . . . . . . . . . . . . . . . 17–20
Using Your Smart Sensors . . . . . . . . . . . . . . . . . . . . . . . . . . . . . . . . . . . . . . . . . . . . . . . . . . . . . . . . . . . . . . . . . . . . . . . . . . .21
Frequently Asked Questions. . . . . . . . . . . . . . . . . . . . . . . . . . . . . . . . . . . . . . . . . . . . . . . . . . . . . . . . . . . . . . . . . . . . . . . . . 22
Comfort Chart. . . . . . . . . . . . . . . . . . . . . . . . . . . . . . . . . . . . . . . . . . . . . . . . . . . . . . . . . . . . . . . . . . . . . . . . . . . . . . . . . . . . .23
Quick Start
The quick start procedure, as outlined below, allows you to begin using your system before you learn all the details of system
operation. This setup may be done by you or your dealer. For the best comfort and energy-saving results, we recommend that you
read through this owner’s guide and design the system to match your schedule and your comfort requirements.
To begin enjoying the benefits of your Zone Perfect Plus zoning system, locate the user interface and follow the steps outlined below.
Set the current day and time as follows:
1.
2.
3.
4.
Press the Next Day button until the current day of the week is shown.
Press the Set Time/Temp button until the TIME icon flashes.
Press the up or down buttons until the desired time is shown, making sure that the AM or PM time is correct.
Press the End key to exit.
Set the system as follows:
1.
2.
3.
4.
Press the Mode button to select Heat or Cool.
Press the up or down button until the desired temperature is displayed.
Press the Hold button.
Press the All Zone button if this desired temperature is needed for every zone. Otherwise press the Next Zone button, and follow
steps 2 and 3 for each zone.
—3—
Planning Your Comfort Schedule
To give you an idea of how to use your new Zone Perfect Plus system, let’s take the example of a 2-zone house that has been divided
into a living area (Zone #1 — family room, kitchen, etc.) and a sleeping area (Zone #2 — bedrooms).
For Zone #1, first decide what time each of the 4 periods begin for each day of the week. In this example, the living areas are occupied during the weekday from 7:00–9:00 AM and from 5:00–11:00 PM where the desired heating temperature for winter operation
is 68° and the desired cooling temperature for summer operation is 74°. During the other periods of the day, this zone is unoccupied
and coded as “OUT,” and will not be conditioned unless the temperature drops below 60° or rises above 85° in that zone during that
time.
ZONE #
Wake
Time / Heat° / Cool°
Day
Time / Heat° / Cool°
Evening
Time / Heat° / Cool°
Sleep
Time / Heat° / Cool°
Monday
Tuesday
Wednesday
Thursday
Friday
Saturday
Sunday
A96438
For Zone #2, the sleeping areas are unoccupied during the day, and the temperatures are set back during the night.
ZONE #
Wake
Time / Heat° / Cool°
Day
Time / Heat° / Cool°
Evening
Time / Heat° / Cool°
Sleep
Time / Heat° / Cool°
Monday
Tuesday
Wednesday
Thursday
Friday
Saturday
Sunday
A96439
In this example, the weekend pattern changes to reflect that the living areas (ZONE #1) are in use during the day. Comfort Charts
on the follow pages will allow you to track the conditions in your home or business. Take a few minutes to complete a schedule for
each of your zones.
—4—
COMFORT CHART
ZONE #
Wake
Time / Heat° / Cool°
Day
Time / Heat° / Cool°
Evening
Time / Heat° / Cool°
Sleep
Time / Heat° / Cool°
Wake
Time / Heat° / Cool°
Day
Time / Heat° / Cool°
Evening
Time / Heat° / Cool°
Sleep
Time / Heat° / Cool°
Wake
Time / Heat° / Cool°
Day
Time / Heat° / Cool°
Evening
Time / Heat° / Cool°
Sleep
Time / Heat° / Cool°
Wake
Time / Heat° / Cool°
Day
Time / Heat° / Cool°
Evening
Time / Heat° / Cool°
Sleep
Time / Heat° / Cool°
Monday
Tuesday
Wednesday
Thursday
Friday
Saturday
Sunday
ZONE #
Monday
Tuesday
Wednesday
Thursday
Friday
Saturday
Sunday
ZONE #
Monday
Tuesday
Wednesday
Thursday
Friday
Saturday
Sunday
ZONE #
Monday
Tuesday
Wednesday
Thursday
Friday
Saturday
Sunday
A96440
NOTE: The OUT function may be used for any periods that are not occupied. Desired temperatures do not need to be set and are
displayed as “--”.
—5—
COMFORT CHART
ZONE #
Wake
Time / Heat° / Cool°
Day
Time / Heat° / Cool°
Evening
Time / Heat° / Cool°
Sleep
Time / Heat° / Cool°
Wake
Time / Heat° / Cool°
Day
Time / Heat° / Cool°
Evening
Time / Heat° / Cool°
Sleep
Time / Heat° / Cool°
Wake
Time / Heat° / Cool°
Day
Time / Heat° / Cool°
Evening
Time / Heat° / Cool°
Sleep
Time / Heat° / Cool°
Wake
Time / Heat° / Cool°
Day
Time / Heat° / Cool°
Evening
Time / Heat° / Cool°
Sleep
Time / Heat° / Cool°
Monday
Tuesday
Wednesday
Thursday
Friday
Saturday
Sunday
ZONE #
Monday
Tuesday
Wednesday
Thursday
Friday
Saturday
Sunday
ZONE #
Monday
Tuesday
Wednesday
Thursday
Friday
Saturday
Sunday
ZONE #
Monday
Tuesday
Wednesday
Thursday
Friday
Saturday
Sunday
A96441
NOTE: The OUT function may be used for any periods that are not occupied. Desired temperatures do not need to be set and are
displayed as “--”.
—6—
Programming Your Comfort Schedule
Now that you have completed your own comfort chart you are ready to start programming with the convenient user interface.
The label on the back cover of this owner’s manual is provided to write in the numbers and descriptions of each zone. The label can
then be removed from the back cover and affixed to the inside of the user interface door.
During the programming process you will enter the starting time, the desired heating and cooling temperatures for each time period,
the day, and the zone. To assist you, pictures of the keypad and LCD display are provided for each step. The button or combination
of buttons that are pressed along with the corresponding section of the display that will be affected are highlighted in each picture.
This will quickly show you when you have performed the step correctly.
If you followed our quick start procedure, you will need to proceed as follows before moving on to Step 1 of programming your
system:
1. If the All Zone function was used to set one temperature for all zones, press the All Zone button to release the All Zone function.
2. Press the Hold button to release the Hold function.
3. If All Zone was not used, you may need to remove the Hold function from each zone. Press the Next Zone button to move to
the next zone, then press the Hold button to release the Hold function. Continue through all zones.
You are now ready to begin programming.
Step 1
Press the Program button.
A98155
Step 2
Press the Next Zone button until Zone 1 appears on the LCD display.
A98156
—7—
Step 3
Press the Next Day button until Monday (Mo) is displayed.
A98157
Step 4
Press the Next Period button until the WAKE period is displayed.
A98158
Step 5
Press the Set Time/Temp button until the TIME icon is flashing.
A98159
—8—
Step 6
Using the Zone 1 information from your Comfort Chart, start programming Monday’s schedule beginning with the WAKE period.
Press the up or down button until the desired starting time for that period is displayed, making sure that the AM or PM is correct.
A96451
Step 7
Press the Set Time/Temp button until the HEAT icon is flashing.
A98160
Step 8
Press the up or down button until the desired heating temperature for that period is displayed.
A96459
—9—
Step 9
If that zone is going to be unoccupied press the Out button.
A98161
Step 10
Press the Set Time/Temp button until the COOL icon is flashing. Press the up or down button until the desired cooling temperature
for that period is displayed.
A98162
You have now programmed the time and the heating and cooling desired temperatures for Zone 1, Monday, WAKE.
—10—
Press the Next Period button until the DAY period is displayed. Repeat Steps 5–10 to set the starting time and the desired heating
and cooling temperatures for Zone 1, Monday, DAY. Continue the process for the EVE and SLEEP periods.
HINT
If a period has the same desired temperatures as the
previous period, press the copy period button. Then
change the starting time to reduce the number of
keystrokes.
A98163
Now all of Zone 1, Monday has been programmed.
Press the Next Day button until Tuesday (Tu) is displayed and repeat Steps 4–10.
HINT
If Tuesday has the same settings as Monday, press the
copy day button, and move on to Wednesday.
A98164
Continue to program the remaining days of the week.
After you have finished with Zone 1, press the Next Zone button and repeat the same process for the remaining zone or zones.
HINT
If the next zone has the same settings as the previous
zone, press the copy period and copy day buttons at the
same time to copy the entire zone.
A98165
When you have finished entering your comfort chart schedule, review the program by repeating periods, days, and zones. Then press
the End button to exit the program.
—11—
Using Your System
Now that you have completed programming your comfort schedule, it is time to use your system.
There are 2 operating modes: normal operation and programming mode. Unless you are programming the times or temperatures of
a zone, the user interface will be in the normal operating mode.
Setting the current day:
If it is not already correct, press the Next Day button until the current day of the week is shown.
A98166
Setting the current time:
1. Press the Set Time/Temp button until the TIME icon flashes.
2. Press the up or down buttons until the desired time is shown, making sure that AM or PM is correct.
3. When you are finished, press the End button to exit. (It will automatically exit after 15 seconds.)
A98167
—12—
Selecting the system mode:
1. Press the Mode button until you reach the desired mode.
2. For an air conditioning system select: OFF, HEAT, COOL, or AUTO.
3. For a heat pump system select: OFF, HEAT, COOL, AUTO, or EHEAT.
A98168
OFF — no mode is selected, and the system is off
HEAT — heating only
COOL — cooling only
AUTO — the system will heat or cool as needed
EHEAT — emergency heat for heat pump applications only
Selecting the fan mode:
1. Press the Fan button to select either automatic fan operation (AUTO), in which the fan only runs when the
equipment is on, or continuous fan operation (ON.)
A98169
—13—
Viewing the temperatures in each zone:
Press the Next Zone button to view the zone temperature and desired temperatures for each zone.
ZONE
TEMPERATURE
HEATING
DESIRED
TEMPERATURE
COOLING
DESIRED
TEMPERATURE
A98170
Clean filter feature:
Your Zone Perfect Plus system reminds you when to change or clean your filter. It tracks how many hours your
equipment has been operating and displays a CLEAN FILTER icon when it is time to change it. Once you have
changed the filter, press the Out and Hold buttons at the same time to reset this feature.
A98171
—14—
Displaying the outdoor air temperature:
If you purchased this option with your Zone Perfect Plus system, press the up and down buttons at the same time
to view the temperature outside your home or business. If 2 dashes appear (- -), your system does not include
this feature.
A96476
—15—
Overriding the Program Settings
Sometimes it may be desirable to override the program settings without changing the program.
Turning a zone off:
On occasion it may be desirable to turn a zone off. For example, you may have a sunroom that is only used during the summer season,
or a workshop that may only be conditioned in the winter.
1. To turn off a zone during cooling operation, press the up button until “OF” is displayed (above 90°).
2. To turn off a zone during heating operation, press the down button until “OF” is displayed (below 40°).
OFF is a permanent override for that zone, and Hold will be displayed in the LCD. To turn the zone back on, press the up or down button
until the desired temperature is displayed.
Temporarily overriding the program settings in a particular zone until the next period:
Perhaps you have guests and the temperature in that zone is getting too warm. You can temporarily change the desired temperature for that
period.
1. Press the Next Zone button until the new desired zone is displayed.
2. Press the up or down buttons to the new desired temperature, or
3. If necessary, press the Out button to change the zone to occupied or unoccupied (minimal heating or cooling).
Overriding the program settings in a particular zone for an indefinite period of time:
If you have a zone that is a guest room, you may have the temperature in that zone set back to avoid sending unneeded conditioning to
that room. Now you have a guest. There is a quick method to override the setting for that zone.
1.
2.
3.
4.
Press the Next Zone button until the desired zone is displayed.
Press the Hold button.
Press the Set Time/Temp button to select the heat or cool desired temperature.
Press the up or down buttons to change the desired temperature.
A98172
To set all zones to the same desired temperature for an indefinite period of time:
If you are going on vacation, you may want to change the desired temperature to conserve energy. There is a way to do this without
reprogramming your schedules.
1. Press the Next Zone button until the zone with the desired temperature is displayed.
2. Press the All Zone button, and all the remaining zones will now have two dashes in place of the desired temperature display. These zones will now have the same desired temperature as the primary zone that was chosen.
3. Press the Hold button.
—16—
Controlling Your Humidity
Your Zone Perfect Plus system allows you to control the indoor humidity if you have optional equipment such as a humidifier or a
variable speed system. If you do not have these options, you can still view the indoor humidity in your home or business as well as
dehumidify your home or business while on vacation to prevent moisture damage. Check with your dealer to determine your equipment features and limitations.
Depending upon where you live or work and the season of the year, you may need to humidify or dehumidify the air in your home
or business. With your new zoning system, you can control indoor humidity through your user interface instead of having several
different controls.
Viewing the indoor humidity:
A96475
1. Press the up and down buttons simultaneously. First the outdoor air temperature will be shown, then the indoor humidity.
Programming the humidification setpoint (optional feature for use with a humidifier):
1. Press the Set Time/Temp and Fan buttons at the same time to enter the humidity programming mode.
A98173
—17—
2. Press the Set Time/Temp button until the lower setpoint is flashing.
3. Press the up or down button to raise or lower the desired humidity setting as needed. This can be set from 10–45 percent or off.
A96466
4. Press the Fan button to select between:
a. FAN icon on—when humidification is needed, the fan and humidifier will be turned on.
b. FAN icon off—when humidification is needed, the humidifier and the fan will be turned on only while heating.
Selection a will provide maximum humidifying capability, but because the heat source is not on, the air may feel cold.
Selection b saves water and will provide adequate humidification under normal circumstances. The figure shows
Selection a FAN will not be displayed with Selection b.
A98174
5. If your system includes the optional outdoor air temperature sensor, press the Mode button to select between:
a. AUTO icon on—as the outdoor temperature decreases, the humidification setpoint automatically decreases to prevent
excess moisture buildup on windows in colder weather. The humidification setpoint changes with the outdoor
temperature.
b. AUTO icon off—the humidification setpoint does not change with outdoor temperature. The figure shows Selection a
AUTO will not be displayed with Selection b.
A98175
6. Press the End button at any time to exit the humidity programming function.
—18—
Programming the dehumidification setpoint (optional feature for use with variable speed
equipment):
1. Press the Set Time/Temp and Fan buttons at the same time to enter the humidity programming mode.
2. Press the Set/Time button until the upper setpoint is flashing.
A98176
3. Press the up or down arrows to raise or lower the desired setting. This can be set from 50–90 percent or off.
4. Press the End button at any time to exit the humidity programming function.
Programming your system for the Cool to Dehumidify function:
The dehumidification feature is designed for use with variable speed indoor equipment. However, if you have standard equipment or live or work in a very humid climate, you can choose to run your cooling equipment more often to remove excess moisture from the air. The Cool to Dehumidity feature allows the system to turn on the air conditioning as needed to try to reach the
dehumidification setpoint, while only lowering your indoor temperature 3 degrees. So, if you have set your cooling desired
temperature at 76° and your dehumidification setpoint at 65 percent, the system will turn on the air conditioning to try to reach the
65 percent, allowing the temperature to drop to no less then 73° in your home or business. To activate this function, follow the
steps below:
1. Press the Set Time/Temp and Fan buttons at the same time to enter the humidity programming mode.
2. Press the Set Time/Temp button until the upper setpoint is flashing.
3. Press the up or down arrows to raise or lower the desired setting. This can be set from 50–90 percent or off.
4. Press the Mode button and the COOL icon will be displayed.
5. Press the End button at any time to exit the humidity programming function.
A98177
—19—
Programming your system to dehumidify while on vacation:
If you are traveling or your home or business will be unoccupied for some period of time, you may want to occasionally run
the air conditioner to prevent moisture damage. This feature is particularly important in very humid regions.
Following the five steps listed in the previous section, adjust the dehumidification setpoint to your desired setting and activate
the “Cool to Dehumidify” function. Make sure the COOL icon is displayed. Press the End key to exit the humidity programing function.
From the normal operation mode, press the Hold, Out, and All Zone buttons in that order to program all zones to an unoccupied
status. Until you return, the air conditioning equipment will be turned on as necessary to reach the dehumidification setpoint,
but it will not drop the indoor temperature lower than 70°F. In order for this function to work properly, it must be used with
the “Cool to Dehumidify” feature.
Humidity Control is an additional enhancement to your Zone Perfect Plus system. You may choose not to use this feature because
of equipment limitations, geographic location, or personal preference.
—20—
Using Your Smart Sensors
If you purchased optional smart or interactive sensors with your Zone Perfect Plus system, you have the ability to control the temperature of a zone at that zone’s location. Suppose you have a guest bedroom, and it’s used infrequently. With a smart sensor in the
zone, a guest can adjust the temperature as needed for their comfort without changing the program at the user interface.
A97187
Changing the desired temperature:
1. The current temperature in that zone will be displayed in the LCD.
2. Press the UP or DOWN button to display the desired temperature for that zone. The LCD will
display the current mode of operation, either heat or cool.
3. Press the UP or DOWN button again as needed until the new desired temperature is shown.
4. Press SET TEMP button to change temperature between COOL desired temperature and HEAT
desired temperature.
A97188
5. Pressing HOLD button will hold the desired temperature setting indefinitely. Pressing HOLD
button again removes the hold function.
A97190
6. Pressing OUT button will program the zone as being unoccupied. Pressing OUT button
again changes the zone to occupied. When a zone is set to OUT, desired temperature will be
displayed as dashes when the UP and DOWN buttons are pressed.
OUT
OUT
COOL
DESIRED TEMP
A97242
Viewing the outdoor temperature and indoor humidity:
1. Pressing both UP and DOWN buttons simultaneously will display the outdoor temperature,
if this feature is included, and the indoor humidity. Outdoor temperature will be displayed
first for 5 sec, followed by humidity for 5 sec. Smart Sensor will then return to normal. The
humidity value will be the humidity level as measured at the user interface.
A97192
Note: If the All Zone feature has been enabled from the user interface, you will not be able to
override the settings at the smart sensor location. The desired temperature will be displayed as dashes when the UP and DOWN buttons are pressed. You must first remove
the All Zone function by pressing the ALL ZONE button on the user interface.
Smart Sensor display
with ALL ZONE enabled
A Smart Sensor does not remove or transfer features from User Interface. It only provides
a location within zone where access is provided to some of User Interface features. Any
input that can be provided at Smart Sensor can also be provided at User Interface.
—21—
A97647
Frequently Asked Questions:
What if I go on vacation?
One option is to change your program. However, it might be easier to override the program by pressing the Next Zone button until
the desired zone is displayed (Zone 1 is recommended for convenience). Press the Set Time/Temp buttons until the heat icon flashes,
then press the up or down arrows to change the desired heating temperature. Repeat this step for the cooling temperature. Press the
Hold button to lock in these settings for that zone. Press the All Zone button to hold these same settings for all the remaining zones.
When you return from vacation press the All Zone button then the Hold button to return to the programmed settings.
What if I have guests, and I need to temporarily change the temperature?
Press the Next Zone button until the desired zone is displayed. Press the Set Time/Temp button until the heat or cool icon is flashing.
Press the up and down buttons until the desired temperatures are displayed. These settings will stay in effect until the next period.
If you need to override the temperatures for more than one period, press the Hold button. Press the Hold button again to return the
system to programmed settings.
What if I have a guest room or a zone that is programmed to OUT, and now it is occupied?
You can temporarily bypass the program as follows: Press the next zone until the desired zone is displayed. Press the Out button to
change the status to occupied. Press the up and down buttons until the desired temperatures are displayed. These settings will stay
in effect until the next period. If you need to override the settings for more than 1 period, press the Hold button. Press the Hold button
again to return the system to the programmed settings.
What if I know that I will not be home during a period that I scheduled as occupied?
Press the Next Zone button until the desired zone is displayed. Press the Out button to change that period to unoccupied. Press the
Hold button if you need to maintain the OUT feature for more than 1 period. Press the Hold button again to return the system to
programmed settings. Change other zones if necessary.
What if I have indoor pets, should I program a period to OUT?
You will need to decide what is best for your particular situation. The OUT function is used when zones are unoccupied. Those
zones will not normally be conditioned unless the temperature in that zone drops below 60° or rises above 85°. Even if a zone is
coded to OUT, it is unlikely that the zone will reach either of these extremes.
How can I save money on my energy bills?
In order to improve energy savings, program your unoccupied zone periods to OUT so those zones will not be conditioned when
you are not there or are not using them. Also, set back the temperature at night to limit conditioning while you are asleep.
Why is conditioned air entering a zone that I programmed as OUT? Doesn’t this waste energy?
Your Zone Perfect Plus system has been designed to protect your heating and cooling equipment. Occasionally if 1 small zone is
requesting less conditioned air than the equipment is producing, it may “dump” this excess air into an unoccupied zone. This is not
unusual and serves as a protection device for your equipment. Since the system is satisfying the minimum demand requirements, no
extra energy is wasted.
What if my power goes out, will I lose my program?
No. However, it is recommended that you record your program schedule on the comfort chart, and keep it along with this guide in
a convenient place.
What if my display shows an E, a number, or a ”--” instead of the temperature?
An error has occurred in your system. Note the error number, and promptly contact your dealer with this information.
Why does my system turn on before a scheduled temperature change?
Your dealer has enabled the smart recovery feature. It provides a gradual temperature transition from one period to the next for added
comfort and savings.
—22—
COMFORT CHART
ZONE #
Wake
Time / Heat° / Cool°
Day
Time / Heat° / Cool°
Evening
Time / Heat° / Cool°
Sleep
Time / Heat° / Cool°
Wake
Time / Heat° / Cool°
Day
Time / Heat° / Cool°
Evening
Time / Heat° / Cool°
Sleep
Time / Heat° / Cool°
Wake
Time / Heat° / Cool°
Day
Time / Heat° / Cool°
Evening
Time / Heat° / Cool°
Sleep
Time / Heat° / Cool°
Wake
Time / Heat° / Cool°
Day
Time / Heat° / Cool°
Evening
Time / Heat° / Cool°
Sleep
Time / Heat° / Cool°
Monday
Tuesday
Wednesday
Thursday
Friday
Saturday
Sunday
ZONE #
Monday
Tuesday
Wednesday
Thursday
Friday
Saturday
Sunday
ZONE #
Monday
Tuesday
Wednesday
Thursday
Friday
Saturday
Sunday
ZONE #
Monday
Tuesday
Wednesday
Thursday
Friday
Saturday
Sunday
A96440
NOTE: The OUT function may be used for any periods that are not occupied. Desired temperatures do not need to be set and are
displayed as “--”.
—23—
Cancels: OM17-15
© 1998 Bryant Heating & Cooling Systems, 7310 W. Morris St. Indpls., IN 46231
—24—
Printed in U.S.A.
Catalog No. 809-601
OM17-20
2-98