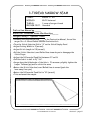
1
Mastering the BERNINA BERNINA 2500 SERIES OWNER’S GUIDECLASS WORKBOOK SECTION A LETS START WITH THE BASICS 1999 BERNINA of America SECTION A – LETS START WITH THE BASICS MACHINE SET UP • Identifying the Serger Parts – Instruction Manual pg.___ • Attaching the Foot Control and Power Cord – Instruction Manual pg.____ • Assembling the Thread Stand – Instruction Manual pg.___ • The Waste Collector • Power Switch – Instruction Manual pg.___ • Light Switch– Instruction Manual pg.___ • The Looper Cover – Instruction Manual pg.___ Loopers – what are they? – Instruction Manual pg.___ Tool Storage Safety Feature – machine won’t sew when the Cover is open • Swing Out Presser Foot – Instruction Manual pg.___ For easier threading For easier removal and insertion of Needles Safety feature – the machine won’t sew Use the Needle Stop Button to raise the Needles Raise the Presser Foot Swing the Presser Foot to the left • Free Arm Cover – Instruction Manual pg.___ For serging tubular projects Slides off to engage free arm THREADS – Instruction Manual pg.___ • Types to use • The importance of quality threads NEEDLES – Instruction Manual pg.___ • Always start with a new Needle • Match the Needle to the fabric and thread – Instruction Manual pg.___ • Change the Needle often • Using the Needle Inserter • Loosening/re-tightening Needle screws STITCH SELECTION DIAL – STITCH SELECTION PANEL • Selecting stitches • Understanding the code – Instruction Manual pg.___ 1999 BERNINA of America page 2 NEEDLE STOP BUTTON – Instruction Manual pg.___ • Needle Up - Overlock sewing • Needle Down – Cover/Chain Stitch sewing CONVERSION TO OVERLOCK SEWING • Conversion Chart – Instruction Manual pg.___ • The Converter Arm Use the Needle Stop Button to lower the Needles • Removing the Cover/Chain Stitch Extension Plate – Instruction Manual pg.___ • Installing the Knife Guard – Instruction Manual pg.___ • Raising/Lowering the Knife Arm– Instruction Manual pg.___ • Rotating the Upper Knife into Cutting Position– Instruction Manual pg.___ THREADING FOR OVERLOCK SERGING • Cone Holders and Spool Caps – Instruction Manual pg.___ Cone Holders used for large cones of serger thread Turn the Cone Holders upside down for the larger based cone threads. Spool Caps used for “normal” sewing thread and decorative thread spools • Raise the Presser Foot when threading Releases the pressure on the tension disks • The Threading Path – Instruction Manual pg.___ Use the road map inside the Looper Cover as a quick reference guide. • Threading the First Thread Guide on All Threads – Instruction Manual pg.___ Wrap the thread from left to right to lock the thread into the guide. • Threading Order First – Upper Looper This thread lies against the body of the serger. Second – Lower Looper Third – Center Needle Fourth – Left Needle • Thread the Upper Looper – Instruction Manual pg.___ • Thread the Lower Looper – Instruction Manual pg.___ The Lower Looper Auto Threader – Instruction Manual pg.___ Rotate the Handwheel to bring the Looper to the right before engaging the Looper Threader • Thread the Center Needle -– Instruction Manual pg.___ • The Needle Clamp Guide – Instruction Manual pg.___ • Optional - Using the Quick Needle Threader from a BERNINA sewing machine. • Thread the Left Needle – Instruction Manual pg.___ 1999 BERNINA of America page 3 TEST SEWING – Instruction Manual pg.___ •Lift the Toe to place the fabric under the Presser Foot •Lift the Presser Foot for thick fabric or when accurate fabric placement is needed. •Chain off the fabric. •Use the built in Thread Cutter to cut the Thread Chain. 1999 BERNINA of America page 4 TENSION THEORY A BALANCED 4-THREAD STITCH Instruction Manual pg.___ Serger Library Tips and Tricks FABRIC: NEEDLES: THREAD: PRESSER FOOT: Firm fabric 6” X 6” 80/12 Universal 4 cones of serger thread (yellow,green,blue,red) Standard •Turn the Stitch Selection Dial to select “A” on the Stitch Display panel. •Thread the serger for a 4-thread Overlock stitch using thread colors to match the Color-Coded Threading Path on the serger. •Fold the fabric in half to 3” X 6”. •To begin stitching, lift the front of the Presser Foot with your right thumb and slide the fabric under the Presser Foot. Release the tip of the Presser Foot and begin serging. •Serge to the end of the fabric. •Continue stitching off the fabric until you have a 3”- 4” Thread Chain. •Locate the Thread Cutter on the left side of the serger and cut the thread chain (from right to left). •Examine the serger stitch formation and compare it to the balanced stitch graphic on page__ of the Instruction Manual. •Read the information under Fine Tuning on page__ of the Instruction Manual for information about the stitch formation and correcting any stitch irregularities. •Make any necessary tension adjustments and serge another row of stitching. •Trim and mount the sample. 1999 BERNINA of America page 5 ADJUSTING TENSIONS FABRIC: NEEDLES: THREAD: PRESSER FOOT: 6 pieces of firm woven fabric 3” X 4” 1 piece of light weight woven cotton 3” X 4” 80/12 Universal 4 cones of serger thread (yellow,green,blue,red) Standard Instruction Manual pg.____ Serger Library – Tips and Tricks LOWER LOOPER •Turn the Stitch Selection Dial to select “A” on the Stitch Display panel. •Thread the serger for a 4-thread Overlock stitch using thread colors to match the Color-Coded Threading Path on the serger. •Fold each piece of the firm fabric to 1½” X 4” and set aside. •Locate the Fine Tuning levers on the front of the serger. From left to right these levers adjust tension for the Left Needle, the Center Needle, the Upper Looper or Right Needle, and the Lower Looper. •Adjust the Lower Looper Fine Tuning Lever to increase (up) the tension on the Looper thread. •Place the first piece of folded fabric under the Presser Foot with the fold to the right and serge to the end of the fabric, cutting off the fold. •Examine the sample. The Looper threads do not lock on the edge of the fabric. The Upper Looper thread is pulled tightly to the back of the stitch. The Left Needle thread may be pulled to the back of the stitch. •Trim, label, and mount the sample. •Turn the Stitch Selection Dial to “B” and then to “A” to return tensions to normal. •Adjust the Lower Looper Fine Tuning Lever to decrease (down) the tension on the Looper thread. •Serge the second piece of folded fabric, cutting off the fold. •Examine the sample. The Looper threads do not lock on the edge of the fabric. The Lower Looper thread is visible on the face of the fabric. The Looper threads are very loose. •Label, trim, and mount the sample. 1999 BERNINA of America page 6 UPPER LOOPER •Turn the Stitch Selection Dial to “B” and then to “A” to return tensions to normal. •Adjust the Upper Looper Fine Tuning Lever to increase (up) the tension on the Looper thread. •Serge the third piece of folded fabric, cutting off the fold. •Examine the sample. The Looper threads do not lock on the edge of the fabric. The Lower Looper thread is pulled tightly to the front of the stitch. •Label, trim, and mount the sample. •Turn the Stitch Selection Dial to “B” and then to “A” to return tensions to normal. •Adjust the Upper Looper Fine Tuning Lever to decrease (down) the tension on the Looper thread. •Serge the fourth piece of folded fabric, cutting off the fold. •Examine the sample. The Looper threads do not lock on the edge of the fabric. The Upper Looper thread is visible on the back of the fabric. The Looper threads are very loose. •Label, trim, and mount the sample. •Turn the Stitch Selection Dial to “B” and then to “A” to return tensions to normal. 1999 BERNINA of America page 7 CENTER NEEDLE •Adjust the Center Needle Fine Tuning Lever to decrease (down) the tension on the Needle thread. •Serge the fifth piece of folded fabric cutting off the fold. •Examine the sample. The Needle thread forms a large loop on the back of the fabric. •Label, trim, and mount the sample. •Turn the Stitch Selection Dial to “B” and then to “A” to return tensions to normal. LEFT NEEDLE •Adjust the Left Needle Fine Tuning Lever to decrease (down) the tension on the Needle thread. •Serge the sixth piece of fabric cutting off the fold. •Examine the sample. The Needle thread forms a large loop on the back of the fabric. •Label, trim, and mount the sample. •Turn the Stitch Selection Dial to “B” and then to “A” to return tensions to normal. Both Needles •Adjust both the Left and Center Needle Fine Tuning Levers to increase (up) the tension on the Needle threads. •Fold the piece of lightweight woven cotton fabric to 1½” X 4”. •Serge the folded fabric, cutting off the fold. •Examine the sample. The stitch is puckering the fabric. •Label, trim, and mount the sample. •Turn the Stitch Selection Dial to “B” and then to “A” to return tensions to normal. 1999 BERNINA of America page 8 STITCH LENGTH ADJUSTMENT FABRIC: NEEDLES: THREAD: PRESSER FOOT: Firm fabric 6” X 6” 80/12 Universal 4 cones of serger thread Standard Instruction Manual pg.___ •Fold the fabric in half to 3” X 6”. •Using a Fabric Marker, divide the fabric into four equal sections along the folded edge. •Turn the Stitch Selection Dial to select “A” on the Stitch Display panel. •Thread the serger for a 4-thread Overlock stitch. •Locate the Stitch Length Dial on the right end of the machine. •Turn the Stitch Length Dial to 4. •Serge to the first mark along the folded edge of the fabric, trimming the folded edge as you serge. •Turn the Stitch Length Dial, adjusting the Stitch Length to 3 and serge to the second mark. •Adjust Stitch Length to 2 and serge to the third mark. •Adjust Stitch Length to 1 and serge to the end of the fabric. •Mark the Stitch Length settings on the sample. •Compare the Stitch Length sample to the Balanced 4-thread sample to see how Stitch Length affects the balance of the Overlock stitch. •Trim and mount the sample. 1999 BERNINA of America page 9 CUTTING WIDTH ADJUSTMENTS Instruction Manual pg,___ FABRIC: NEEDLES: THREAD: PRESSER FOOT: Firm fabric 6” X 6” 80/12 Universal 4 cones of serger thread Standard •Fold the fabric in half to 3” X 6”. •Divide and mark the fabric into 3 equal sections along the folded edge. •Turn the Stitch Selection Dial to select “A” on the Stitch Selection Panel. •Turn the Stitch Length Dial to 2.5 (normal). •Thread the serger for a 4-thread Overlock stitch. •Locate the Cutting Width adjustment Dial. •Rotate the Upper Knife up. •Adjust Cutting Width to 3. •Rotate the Upper Knife down into Cutting Position. •Serge to the first mark on the fabric, stopping when the Knife edge is on the mark. •Adjust Cutting Width to 2 and serge to the second mark. •Adjust the Cutting Width to 1 and serge to the end of the fabric. •Mark the Cutting Width settings on the sample. •Rotate the Upper Knife up. •Adjust Cutting Width to 2 (normal). •Rotate the Upper Knife down into Cutting Position. •Compare the Cutting Width sample to the Balanced 4-thread sample to see how Cutting Width affects the balance of the Overlock stitch. •Trim and mount the sample. 1999 BERNINA of America page 10 DIFFERENTIAL FEED FABRICS THAT STRETCH FABRIC: NEEDLES: THREAD: PRESSER FOOT: 3 pieces ribbing each cut 2”cut the length of the fabric 5” cut the width of the fabric 80/12 Universal 4 cones of serger thread Standard Instruction Manual pg.___ Bernette Advanced Guide Workbook pg.___ •Turn the Stitch Selection Dial to “A” on the Stitch Selection Panel. •Thread the serger for a 4-thread Overlock stitch. •Adjust Stitch Length to 2.5 (normal). •Locate the Differential Feed Dial on the right end of the machine and adjust to “N”(normal). •Serge two of the ribbing pieces together along the 5” side. •Turn the Differential Feed Dial to 2. •Stitching along the 5” side, serge the remaining ribbing to the other side of the piece. •Return the Differential Feed Dial to “N” (normal). •Compare the seams to see how Differential Feed settings reduce stretching. •Trim and mount the sample. 1999 BERNINA of America page 11 DIFFERENTIAL FEED FABRICS THAT PUCKER FABRIC: NEEDLES: THREAD: PRESSER FOOT: Batiste 3” X 6” 80/12 Universal 4 cones of serger thread Standard Instruction Manual pg.____ Bernette Advanced Guide Workbook pg.____ Serger Library – Construction Basics •Using a Fabric Marker, divide the fabric in half along the 6” edge. •Turn the Stitch Selection Dial to “A” on the Stitch Selection Panel. •Thread the serger for a 4-thread Overlock stitch. •Adjust the Stitch Length to 2.5 (normal). •Serge to the mark. •Adjust the Differential Feed Dial to 0.7. •Serge to the end of the fabric. •Return the Differential Feed Dial to “N” (normal). •Compare the two stitchings to see how the Differential Feed settings can reduce fabric puckering. •Trim and mount the sample. 1999 BERNINA of America page 12 DIFFERENTIAL FEED Gathering and Easing FABRIC: NEEDLES: THREAD: PRESSER FOOT: Medium weight woven cotton 3” X 12” 80/12 Universal 4 cones of serger thread Standard Instruction Manual pg.___ Bernette Advanced Guide Workbook pg.___ •Using a Fabric Marker divide the fabric into 3 equal sections along the 12” side. •Turn the Stitch Selection Dial to “A” on the Stitch Selection Panel. •Thread the serger for a 4-thread Overlock stitch. •Turn the Differential Feed Dial to 2. •Serge to the first mark. •Adjust Stitch Length to 4 and serge to the second mark. •Locate the Fine Tuning Levers for the left and Center Needles. • Move the Fine Tuning Levers up to increase the Needle tensions. •Serge to the end of the fabric. •Return the Differential Feed to “N” (normal). •Return the Stitch Length to 2.5 (normal). •Turn the Stitch Selection Dial to “B” and then to “A” to return tensions to normal. •Mark the sample: Differential Feed 2; Differential Feed 2 & Stitch Length 4; Differential Feed 2 & Stitch Length 4 & Increased Needle tension. •Trim and mount the sample. 1999 BERNINA of America page 13 SECURING THE SEAM Instruction Manual pg.___ Bernette Advanced Guide Workbook pg.___ Serger Library Tips and Tricks FABRIC: NEEDLES: THREAD: PRESSER FOOT: Medium weight cotton 4” X 6” 80/12 Universal 4 cones of serger thread Standard •Turn the Stitch Selection Dial to “A” on the Stitch Selection Panel. •Thread the serger for a 4-thread Overlock stitch. Note – If you are using a Wavy Rotary Cutter or pinking shears to trim the samples, do all trimming before beginning to sew this sample. •Fold the fabric in half to 2” X “6” and place the fabric under the Presser Foot. •Take 2-3 stitches on the fabric. •Locate the Needle Stop Button on the front of the serger (left side). •Press the Needle Stop Button to lower the Needles into the fabric. •Raise the Presser Foot and with your left hand gently pull the Thread Chain around the Needles to the Knife. •Lower the Presser Foot and continue serging (cutting off the excess Thread Chain) until you are one (1) stitch off the end of the fabric. •Locate the Rolled Hem Selection Lever on the right side of the cloth plate. •Pull the Rolled Hem Selection Lever towards you, releasing the Thread Chain from the stitch finger. •Raise the Presser Foot and carefully flip the fabric over so that the Lower Looper side of the previously serged seam will be overstitched. •Place the fabric under the Presser Foot so that the first stitch will enter the fabric when you begin stitching. •Slide the Rolled Hem Selection Lever towards the body of the serger. •Serge for about 1”, overstitching the previous stitching. Guide the fabric so as not to cut the previous stitching. Option - Rotate the Upper Knife up. •Raise the Toe of the Presser Foot and rotate the fabric 90° clockwise. •Serge off the edge of the fabric. •If the Knife is up, rotate the Upper Knife down into the Cutting Position. •Mount the sample. 1999 BERNINA of America page 14 Cut out SERGING A TUBULAR PROJECT FABRIC: NEEDLES: THREAD: PRESSER FOOT: Instruction Manual pg.___ Bernette Advanced Guide Workbook pg.___ Firm fabric 3” X 12” 80/12 Universal 4 cones of serger thread Standard •Turn the Stitch Selection Dial to “A” on the Stitch Selection Panel. •Thread the serger for a 4-thread Overlock stitch. •With right sides together, seam the fabric into a tube along the 3” side. •Press the seam to one side. (The Upper Looper thread is the right side of the seam.) •On one 12” side of the tube, cut away a 2” X ¼” section of fabric. •Locate and remove the Free-Arm/Cloth Plate Cover (left side of the serger). •Raise the Presser Foot. •Position the tube of fabric around the free-arm and under the Presser Foot with the Knife in the center of the cutout. •Lower the Presser Foot and serge around the tube, cutting off ¼”. Stop serging when the Knife enters the cutout. •Rotate the Knife up. •Continue serging to complete the circle, overlapping the previous stitching by 1”. •Raise the Presser Foot and rotate the fabric clockwise. •Lower the Presser Foot and serge off the edge of the fabric. •Return the Knife to the normal Cutting Position. •Return the Free-Arm/Cloth Plate Cover to the machine. •Trim and mount the sample. 1999 BERNINA of America page 15 The Care and Feeding of Your BERNINA Serger Cleaning and Oiling Instruction Manual pg.___ •Clip all threads at the Thread Guide Support. •Lift the Presser Foot to release (open) the Thread Tension Disks. •Gently pull the threads from the serger. Always remove the threads in the direction of sewing. If you encounter any resistance, stop and rotate the Handwheel slightly to release the threads from around the Loopers. •Open the Looper Cover. •Rotate the Upper Knife up. •Using a Vacuum Cleaner Adapter or a 1” Cosmetic Brush, remove all lint and fluff from the Looper, Knife and Feed Dog areas of the machine. •Following the Oiling Guide inside the Looper Cover, place a drop of oil on each of the two Oiling Points. •Remove old Needles and replace them with new Needles. •Rotate the Upper Knife down into the Cutting Position. Replacing the Knifes Instruction Manual pg.___ ! Serger Knives cut fabric as it is stitched. Just as shears can become dull through repeated use, serger Knives are also dulled as they cut fabric. ! If the Knives begin to “chew” instead of cut, consider replacing the Lower Knife. ! If you sew over pins and cut them or run into them with the serger Knives, both Knives should be replaced. ! Your Authorized BERNINATechnician will need to replace the Upper Knife for you. 1999 BERNINA of America page 16 TO REPLACE THE LOWER KNIFE: DO THIS ONLY WHEN NECESSARY, NOT DURING YOUR NEW OWNER’S CLASSES. •Turn the serger off and unplug the Power Cord from the machine. •Rotate the Handwheel until the Needles are in their highest position. •Raise the Presser Foot. •Swing the Presser Foot to the left. •Open the Looper Cover. •Rotate the Upper Knife up. •With the tip of your finger, assess the level of the Lower Knife in relation to the Throat Plate. •Locate the Set Screw and Clamp holding the Lower Knife in place. •Loosen the Set Screw and Clamp. •Rotate the Clamp out of the way. •Remove the damaged/dulled Lower Knife Blade. •Insert a new Lower Knife Blade into the Groove. •Rotate the Clamp into position. •Snug the screw to hold the Knife in place. •With the tip of your finger, access the level of the Lower Knife in relation to the Throat Plate. Slide the Lower Knife up/down until the upper edge of the Knife is correctly positioned in relation to the Throat Plate. •Tighten the Set Screw. •Check the upper edge of the Knife to see that it hasn’t shifted. •Return the Presser Foot to the sewing position. •Rotate the Upper Knife down into Cutting Position. 1999 BERNINA of America page 17 WISH LIST Lets Start with the Basics •Carrying Case •Bernette Advanced Guide Workbook and Supplement I •Serger Cone Thread color________ color________ color________ color________ •Needles size____ and type____ size____ and type____ size____ and type____ size____ and type____ •Quick Needle Threader •Seam sealant •Fabric Marking Pen •Rotary Cutter •Wavy Cutting blade •BERNINA 14” ruler •BERNINA Cutting Mat •Fabric Glue Stick •Large Eye Tapestry/Darning Needles •Point Well Taken by Garbers and O'Brien •Vacuum Cleaner Attachment •1” Wide Cosmetic Brush 1999 BERNINA of America page 18 SECTION B – 4-THREAD TECHNIQUES GENERAL CONSTRUCTION SEAMING • Use a 4-thread Overlock stitch for most fabrics The Right Needle stitching helps to prevent fabric rolling within the serger stitch. • Accurate seaming Attach the Right Hand Seam Guide when working with standard patterns requiring a 5/8” seam allowance – Instruction Manual pg.____ Adjust the Guide from the Left Needle. Use a 6” Ruler/Gauge to measure. • Secure seam ends if you will not be stitching across them again. • Adjust Presser Foot Pressure for very thick or thin fabrics –Instruction Manual pg.____ SERGING KNITS • Use Ballpoint or Stretch Needles to prevent damage to the fabric. • Woolly Nylon in the Loopers adds to the stretch of the serger stitch. • Stitch Selection Panel Position “B” automatically adjusts tensions for Woolly Nylon. • Adjust Stitch Length to 3 for most seam applications. • To prevent fabric stretching during sewing Differential Feed –Instruction Manual pg.____ Presser Foot Pressure –Instruction Manual pg.____ Built-In Tape Guide -–Instruction Manual pg.____ SERGING WOVENS • Use Universal, Sharp or Microtex Needles. • Match the serger cone thread to the fabric’s fiber content and color. • Adjust Stitch Length to 2.5 for medium to heavy fabrics. • Adjust Stitch Length to 2 for lightweight fabrics. • Whenever possible work with opposing seams (one seam allowance pressed to the left and one seam allowance pressed to the right) as you join seamed pieces together. 1999 BERNINA Of America Section B - page1 OPTIONAL PRESSER FEET The Elasticator Foot – Instruction Manual for Elasticator For attaching elastic from 5-12mm (¼” to ½”) wide. Adjust Presser Foot Pressure to “H” –Instruction Manual pg.____ Adjust Stitch Length to 4. Gathering Attachment – Instruction Sheet for Gathering Attachment What affects gathering? Type and weight of fabric Differential Feed–Instruction Manual pg.____ Stitch Length Needle Tension–Instruction Manual pg.____ Gathering to a piece of fabric Use the Gathering Attachment with other Presser Feet. 1999 BERNINA Of America Section B - page2 4-THREAD OVERLOCK SEAM FABRIC: NEEDLES: THREAD: PRESSER FOOT: Medium weight woven cotton 5” X 6” 80/12 Universal 4 cones of serger thread Standard Instruction Manual pg.___ Bernette Advanced Guide Workbook pg.___ Serger Library – Simply Serging •Turn the Stitch Selection Dial to “A’ on the Stitch Selection Panel. •Thread the serger for a 4-thread Overlock stitch. •Attach the Right Hand Seam Guide. •Using a 6” ruler/gauge, adjust the Right Hand Seam Guide for a 5/8” seam. Measure the 5/8” seam from the Left Needle. •Fold the fabric in half to 2½” X 6”. •With the fold of the fabric against the Right Hand Seam Guide, serge the seam, cutting off exactly 3/8” as you serge. •Trim and mount the sample. 1999 BERNINA Of America Section B - page3 SEAMING KNIT FABRICS PRESSURE FOOT PRESSURE FABRIC: NEEDLES: THREAD: PRESSER FOOT: 2 pieces cotton single knit jersey 3” (cut the stretch (across) the fabric) X 6” (cut the length of the fabric) 11/75 Stretch or Ballpoint 2 cones of serger thread (Needles) 2 cones of Woolly Nylon (Loopers) Standard Instruction Manual pg.___ •Turn the Stitch Selection Dial to “B’ on the Stitch Selection Panel. •Thread the serger for a 4-thread Overlock stitch. •Using a Fabric Marker, divide the fabric in half along a 6” side. •With right sides together and a ¼” seam allowance, serge to the mark on the fabric. •Without removing the fabric from under the Presser Foot, notice the “ripple” effect where the fabric has stretched. •Locate the Presser Foot Pressure Adjusting Lever on the left end of the serger. •Reduce the Presser Foot Pressure to “L” (low pressure). •Seam the jersey to the end of the fabric. •Remove the fabric from under the Presser Foot and observe the decreased “rippling”. •Return the Presser Foot Pressure Adjusting Lever to “N” for normal. •Trim and mount the sample 1999 BERNINA Of America Section B - page4 SEAMING KNIT FABRICS DIFFERENTIAL FEED FABRIC: NEEDLES: THREAD: PRESSER FOOT: 2 pieces cotton single knit jersey 3” (cut the stretch (across) the fabric) X 6” (cut the length of the fabric) 11/75 Stretch or Ballpoint 2 cones of serger thread (Needles) 2 cones of Woolly Nylon (Loopers) Standard Instruction Manual pg.___ Bernette Advanced Guide Workbook pg.___ •Turn the Stitch Selection Dial to “B” on the Stitch Selection Panel. •Thread the serger for a 4-thread Overlock stitch. •Using a Fabric Marker, divide the fabric in half along a 6” side. •With right sides together and a ¼” seam allowance, serge to the mark on the fabric. •Without removing the fabric from under the Presser Foot, notice the “ripple” effect where the fabric has stretched. •Locate the Differential Feed Dial on the right end of the serger. •Adjust the Dial to 1.5. •Seam the jersey to the end of the fabric. •Remove the fabric from under the Presser Foot and observe the decreased “rippling”. •Return the Differential Feed Dial to “N” for normal. •Trim and mount the sample. 1999 BERNINA Of America Section B - page5 SEAMING KNIT FABRICS BUILT-IN TAPE GUIDE FABRIC: 2 pieces cotton single knit jersey 2” (cut the stretch (across) the fabric 6” (cut the length of the fabric) 8” of ¼” wide Twill Tape or Ribbon NEEDLES: 11/75 Stretch or Ballpoint THREAD: 2 cones of serger thread (Needles) 2 cones of Woolly Nylon (Loopers) PRESSER FOOT: Standard Instruction Manual pg.___ Bernette Advanced Guide Workbook pg.___ Serger Library – Simply Serging Feet-ures Unit____pg.___ •Turn the Stitch Selection Dial to “B” on the Stitch Selection Panel. •Thread the serger for a 4-thread Overlock stitch. •Locate the Built-In Tape Guide on the Presser Foot. •Using the small screwdriver from the accessories in the Looper Cover, loosen the Fixing Screw and slide the Tape Guide all the way to the left. Snug the screw. •Touch the Needle Stop Button on the front of the machine (left) to raise the Needles to their highest position. (The Looper Cover must be closed). •Raise the Presser Foot and using your right hand, push the Toe of the Swing-Out Presser Foot to the left. •Slip the Twill Tape (Ribbon) into the slot on the Presser Foot. •Return the Swing Out Presser Foot to the right (normal sewing position). •Lower the Presser Foot and press the Needle Stop Button to lower the Needles into the Twill Tape (Ribbon). •Loosen the Fixing Screw and adjust the Tape Guide to the width of the Twill Tape (Ribbon.). Retighten the screw. •Seam the jersey together along the 6” side, catching the Twill Tape (Ribbon) as you serge.•Remove the fabric from under the Presser Foot and examine the seam. It will not stretch. The Twill Tape (Ribbon) has stabilized the seam. •Trim and mount the sample. 1999 BERNINA Of America Section B - page6 ATTACHING RIBBING FABRIC: NEEDLES: THREAD: PRESSER FOOT: Sweatshirt fleece 4” X 6” Ribbing 2½” (length) X 6” (width) 11/75 Stretch or Ballpoint 2 cones of serger thread (Needles) 2 cones of Woolly Nylon (Loopers) Standard Instruction Manual pg.___ Bernette Advanced Guide Workbook pg.___ Serger Library – Simply Serging •Turn the Stitch Selection Dial to “B’ on the Stitch Selection Panel. •Thread the serger for a 4-thread Overlock stitch using Woolly Nylon in both Loopers. •Cut a mock neckline on the corner of the fleece. •Fold the ribbing in half (wrong sides together)to 1¾” X 6”. •Matching raw edges, place the ribbing to the neckline on the right side of the fleece. •Serge the ribbing to the fleece, stretching the ribbing to meet the fleece neckline. •You may find it easiest to serge for about 2’’ and stop. Touch the Needle Stop Button to lower the Needles into the fabric, reposition the fabric and ribbing, and then continue serging for another 2”. Repeat the Needle Stop, repositioning, and serging to the end of the fabric. •Trim and mount the sample. 1999 BERNINA Of America Section B - page7 SERGER PIECING SIMPLE 9 PATCH BLOCK FABRIC: NEEDLES: THREAD: PRESSER FOOT: 3 strips of medium weight cotton fabric cut 1¾” X 4” 3 strip of contrasting medium weight cotton cut 1¾” X 4” 80/12 Universal, Sharp, or Microtex 4 cones of serger thread Standard Bernette Advanced Guide Workbook Supplement #1 pg.___ Serger Library – Simply Serging Feet-ures Unit ____pg.________ •Turn the Stitch Selection Dial to “A’ on the Stitch Selection Panel. •Thread the serger for a 4-thread Overlock stitch. •Attach the Right Hand Seam Guide and adjust for a ¼” seam. •There will be two (2) strip sets sewn, each with three (3) strips of fabric. Strip set 1 is light, dark, and light and strip set 2 is dark, light, and dark. •With right sides together and the edge of the fabrics butted up against the Right Hand Seam Guide, serge the fabric strips together into strip sets. •Press the seam allowances toward the dark fabric strips. •Using a Rotary Cutter, Mat and Ruler, cut the strip sets into 1¾” block sets. Use 1 block set from the light/dark/light strip set and 2 block sets from the dark/light/dark strip set. Discard the excess fabric. •Serge 1 dark/light/dark strip to the light/dark/light strip. The seam allowances will be opposing (flipped to “nest” into each other). •Serge the remaining dark/light/dark strip to the light/dark/light strip. •Press the seam allowances to the dark/light/dark strips. •Trim thread tails and mount the sample on the next page. 1999 BERNINA Of America Section B - page8 1999 BERNINA Of America Section B - page9 QUILT-AS-YOU-GO FABRIC: NEEDLES: THREAD: PRESSER FOOT: 4 pieces of contrasting print cotton fabric cut 3 pieces 2” X 4” ; cut 1 piece 2” X 5 ½” 4 pieces of muslin 3 cut 2” X 4” ; 1 cut 2” X 5 ½” 4 pieces of cotton batting 3 cut 2” X 4”; 1 cut 2” X 5 ½” 80/12 Universal, Sharp, or Microtex 4 cones of serger thread Standard Bernette Advanced Guide Workbook Supplement pg.____ Serger Library – Simply Serging •Turn the Stitch Selection Dial to “A’ on the Stitch Selection Panel. •Thread the serger for a 4-thread Overlock stitch. •Attach the Right Hand Seam Guide and adjust for a ¼” seam. •Optional: Increase the Presser Foot Pressure to “H” for thick fabrics. •Create a quilt sandwich, layering the 4” fabrics as follows: 2 muslin (right sides together), one layer of batting, 2 layers of printed fabric (right sides together) and a layer of batting on top. •Raise the Presser Foot and position the fabrics under the Presser Foot with the right edges of the fabric and batting butted against the Right Hand Seam Guide. •Lower the Presser Foot and touch the Needle Stop Button on the front (left) of the serger to lower the Needles into the fabric. •Serge the 6 layers together, stopping as necessary to keep the right edges of the fabrics even. (Hint: Use the Needle Stop Button to lower the Needles and hold the fabrics in place while you align the right edges.) •Open the layers (1 muslin, 1 quilt top, 1 batting) to the right and left of the serged seam and press flat. •To serge the third section into place, layer the remaining 4” fabrics as follows: muslin to muslin, right sides together; print to print, right sides together; batting on top. •Serge through all 6 layers. •Open the last 3 layers to the right side and press. •Add the last section to the top edge of the 3 paneled quilt. Layer the 5½” fabrics as follows: muslin to muslin, right sides together; print to print, right sides together; batting on top. 1999 BERNINA Of America Section B - page10 •Serge, open the layers to the top of the square, and press. •Trim and mount the sample. 1999 BERNINA Of America Section B - page11 THE ELASTICATOR FABRIC: NEEDLES: THREAD: PRESSER FOOT: Medium weight woven cotton 3” X 12” 12” of ½” nylon or cotton braid elastic 80/12 Ballpoint or 11/75 Stretch 2 cones of serger thread (Needles) 2 cones of Woolly Nylon (Loopers) Elasticator Feet-ures Unit ____pg.___ Instruction Manual for Elasticator Bernette Advanced Guide Workbook pg.___ Serger Library – Tips and Tricks Additions •Turn the Stitch Selection Dial to “B” on the Stitch Selection Panel. •Thread the serger for a 4-thread Overlock stitch. •Adjust Stitch Length to 4. •Adjust the Presser Foot Pressure lever to “H” to increase the pressure. •Remove the Presser Foot – Instruction Manual page___. •Following the directions in the Instruction Manual for Elasticator, attach the Presser Foot. •Locate and raise the Roller Guide in the front of the Presser Foot. •Touch the Needle Stop Button to lower the Needles. (This lowers the Feed Dog.) •Raise the Presser Foot and insert the elastic through the slot and under the Presser Foot until it touches the Needles. •Lower the Presser Foot and serge a few stitches to catch and straighten the elastic along the right edge of the slot. Press the Needle Stop Button to lower the Needles. •Lower the Roller Guide. •Using the small screwdriver, adjust the Guide Plate on the Presser Foot to the width of the elastic. •Locate the Pressure Adjustment Set Screw (on the top of the Roller Guide) and turn the screw counterclockwise to completely loosen the pressure on the roller. •Place the fabric under the Presser Foot and begin serging. •Slowly tighten the Pressure Adjustment Set Screw to increase the pressure on the roller and stretch the elastic. Note – do not over tighten the screw. Excessive pressure on the elastic will bind the fabric feeding. •Serge the elastic onto the fabric letting the Presser Foot stretch the elastic for you. 1999 BERNINA Of America Section B - page12 •Trim and mount the sample. 1999 BERNINA Of America Section B - page13 THE GATHERING ATTACHMENT GATHERING FABRIC FABRIC: NEEDLES: THREAD: PRESSER FOOT: Medium weight woven cotton 3” X 15” 80/12 Universal, Sharp or Microtex 4 cones of serger thread Standard Feet-ures Unit ____pg.___ Instruction Sheet for the Gathering Attachment Bernette Advanced Guide Workbook Supplement 1 pg.___ Serger Library – Simply Serging Specialty Stitches Additions •Turn the Stitch Selection Dial to “A’ on the Stitch Selection Panel. •Thread the serger for a 4-thread Overlock stitch. •Raise the Upper Knife and adjust the Cutting Width to 3. •Raise the Presser Foot and, with the Needles in their highest position, swing the Presser Foot to the left. •Locate and loosen the silver Fixing Screw in front of the Rolled Hem Stitch Selection Lever. •Slip the Gathering Attachment on to the Fixing Screw and Metal Post directly behind the Fixing screw. (Hint: attach the horseshoe-shaped slot over the screw and then rotate the attachment to lock over the metal post.) Tighten the Fixing Screw. •Return Cutting Width to 2 (normal) and lower the Upper Knife into Cutting Position. •Locate and adjust the Differential Feed Dial (right end of the machine) to 2. •Return the Presser Foot to normal sewing position. •Using a Fabric Marker, divide the fabric into 3 equal sections along a 15” edge. •Touch the Needle Stop Button to lower the Needles and lower the Feed Dog. •Raise the Presser Foot and insert the fabric under the Gathering Attachment and up to the Needles. The fabric is lying against the stitch plate. •Lower the Presser Foot and serge to the first mark. •Adjust Stitch Length to 4 and serge to the second mark. •Increase tension on both Needles by moving the Tension Fine Tuning Levers up. •Serge to the end of the fabric. 1999 BERNINA Of America Section B - page14 •Mark the sample: with Differential Feed; with Differential Feed & SL4; with Differential Feed, SL4 & tighten Needle Tensions. •Trim and mount the sample. •Return all settings to normal. 1999 BERNINA Of America Section B - page15 THE GATHERING ATTACHMENT GATHERING FABRIC TO FABRIC FABRIC: NEEDLES: THREAD: PRESSER FOOT: Medium weight woven cotton 3” X 14” Medium weight woven cotton 3” X 8” 80/12 Universal, Sharp or Microtex 4 cones of serger thread Standard Feet-ures Unit ___pg.___ Instruction Sheet for the Gathering Attachment Bernette Advanced Guide Workbook Supplement 1 pg.___ Serger Library – Simply Serging Specialty Stitches Additions •Turn the Stitch Selection Dial to “A’ on the Stitch Selection Panel. •Thread the serger for a 4-thread Overlock stitch. •Raise the Upper Knife and adjust the Cutting Width to 3. •Raise the Presser Foot and, with the Needles in their highest position, swing the Presser Foot to the left. •Locate and loosen the silver Fixing Screw in front of the Rolled Hem Stitch Selection Lever. •Slip the Gathering Attachment on to the Fixing Screw and Metal Post directly next to the Fixing screw. (Hint: attach the horseshoe-shaped slot over the screw and then rotate the attachment to lock over the metal post.) Tighten the Fixing Screw. •Return Cutting Width to 2 (normal) and lower the Upper Knife into Cutting Position. •Locate and adjust the Differential Feed Dial (right end of the machine) to 2. •Return the Presser Foot to normal sewing position. •Raise the Presser Foot and insert the 14” strip of fabric (right side up) under the Gathering Attachment. The fabric is lying next to the stitch plate. Sew several stitches until the fabric is under the Needles. •Touch the Needle Stop Button to lower the Needles and lower the Feed Dog. •Place the 8” strip of fabric (right side down) on top of the Gathering Attachment and under the Presser Foot with the end of the 8” strip touching the Needles. 1999 BERNINA Of America Section B - page16 •Serge the two strips together, gathering the lower strip as you sew. •Trim and mount the sample. •Return all settings to normal. 1999 BERNINA Of America Section B - page17 THE GATHERING ATTACHMENT WITH THE ELASTICATOR PRESSER FOOT FABRIC: NEEDLES: THREAD: PRESSER FOOT: Medium weight woven cotton 3” X 18” 12” of ½” wide nylon or cotton braid elastic 80/12 Universal 4 cones of serger thread Elasticator Feet-ures Unit ____pg.___ Bernette Advanced Guide Workbook Supplement 1 pg.___ Serger Library – Additions •Turn the Stitch Selection Dial to “A’ on the Stitch Selection Panel. •Thread the serger for a 4-thread Overlock stitch. •Raise the Upper Knife and adjust the Cutting Width to 3. •Raise the Presser Foot and, with the Needles in their highest position, swing the Presser Foot to the left. •Locate and loosen the Silver Fixing Screw in front of the Rolled Hem Stitch Selection Lever. •Slip the Gathering Attachment on to the Fixing Screw and Metal Post directly behind the Fixing screw. (Hint: attach the horseshoe-shaped slot over the screw and then rotate the attachment to lock over the metal post.) Tighten the Fixing Screw. •Return Cutting Width to 2 (normal) and lower the Upper Knife into cutting position. •Locate and adjust the Differential Feed Dial (right end of the machine) to 2. •Return the Presser Foot to normal sewing position. •Raise the Presser Foot and insert the 18” strip of fabric under the Gathering Attachment. The fabric is lying against the stitch plate. Sew several stitches until the fabric is under the Needles. Touch the Needle Stop Button to lower the Needles and lower the Feed Dog. •Attach the Elasticator foot. •Turn the Pressure Adjustment Screw counterclockwise to release all pressure on the Roller Guide. •Raise the Roller Guide and insert the elastic into the slot at the front of the Presser Foot. •Lower the Presser Foot and take a few stitches into the elastic. 1999 BERNINA Of America Section B - page18 •Slowly turn the Pressure Adjustment Screw clockwise to increase the pressure on the Roller Guide and stretch the elastic. Note – do not over tighten the screw. Excessive pressure on the elastic will bind the fabric feeding. •Serge the elastic to the fabric gathering the fabric as you serge. •Trim and mount the sample. •Return all settings to normal. 1999 BERNINA Of America Section B - page19 WISH LIST 4-THREAD TECHNIQUES •Bernette Advanced Workbook •Bernette Advanced Guide Workbook Supplement I •Serger Library •Feet-ures •Woolly Nylon thread color________ color________ •Needles –Ballpoint Stretch size____ size____ size____ size____ •Elasticator •Gathering Attachment • ½” Nylon Elastic • ½” Cotton Braid Elastic •Twill Tape •Narrow Ribbon •BERNINA Ironing System •Pro Glide Plus Iron •6” Ruler/Gauge •Rotary Cutter •Rotary Cutter Guide Arm •BERNINA Cutting Mat •BERNINA 14” Ruler 1999 BERNINA Of America Section B - page20 SECTION C – 3-THREAD TECHNIQUES WIDE 3-THREAD OVERLOCK STITCH - Instruction Manual pg._____ • Left Needle only • Used for: Seaming stretchy knit fabrics Finishing woven edges Serging outside corners CENTER NEEDLE OVERLOCK STITCH- Instruction Manual pg._____ • Used for: Seaming fine fabrics Finishing woven edges on linen and wool Inside corners Turning tubes NARROW OVERLOCK STITCH- Instruction Manual pg._____ • Center Needle • Stitch Selection Lever/Rolled Hem Disengages the Stitch Finger. • Some minor tension adjustments may need to be made to the Loopers • Used for: Seaming batiste and other fine fabrics. Finishing the edge of fine fabrics. 3-THREAD FLATLOCKING- Instruction Manual pg._____ • Right Hand Seam Guide Adjust for fabric guiding. • Position “D” on the Stitch Display Panel Automatic Tension Adjustment for Flatlocking. ROLLED HEMMING- Instruction Manual pg._____ • The Upper Looper thread is visible. • Woolly Nylon in the Upper Looper “fills in” like a sewing machine satin stitch. • Stitch Selection Lever/Rolled Hem disengages the Stitch Finger. • Position “C” on the Stitch Display Panel Automatic Tension Adjustment for Rolled Edge 1999 BERNINA Of America Section C - page 1 OPTIONAL PRESSER FEET Blind Stitch Foot – Instruction Manual for Blind Stitch Attachment • Strong hem for children’s garments • Hand Picked or Drapery Hem Heirloom Home decor Hemming woven garments • Heirloom Serging Decorative Tucks Seaming Lace to Lace Seaming Lace to Fabric Cording Foot - Instruction Manual for Cording Foot • Swing-Out Presser Foot for easy “threading” of the Presser Foot • Nylon fishing line for a Bias Ruffle • Wire for Wired Edge Fabrics • Gimp Cord for gathering heavy fabrics 1999 BERNINA Of America Section C - page 2 3-THREAD OVERLOCK (5mm-7mm) FABRIC: NEEDLES: THREAD: PRESSER FOOT: Medium weight fabric 5” X 6” 80/12 Universal 3 cones of serger thread Standard Instruction Manual pg._____ Bernette Advanced Guide Workbook pg.____ Serger Library – Tips and Tricks •Using the Small Screwdriver and Brush/Needle Inserter, remove the Center Needle. •Snug the Needle Set Screw after removing the Needle. •Following the diagrams on page ____ in the Instruction Manual, thread the serger for a 3-thread wide Overlock stitch. •Turn the Stitch Selection Dial to “A” on the Stitch Display Panel. •Adjust Cutting Width to 2 (normal). •Adjust Stitch Length to 2.5 (normal). •Fold the fabric in half to 2 ½” X 6”. •Serge along the folded edge of the fabric. •Trim and mount the sample. 1999 BERNINA Of America Section C - page 3 Use a wide 3-thread Overlock as a seam finish on woven fabrics. Wrap the fabric edge with strips of bias cut tricot or water soluble stabilizer before serging for added support while stitching. 3-THREAD OVERLOCK(5mm-7mm) SEAM EDGE FINISH FABRIC: NEEDLES: THREAD: PRESSER FOOT: 2 pieces medium weight wool 2½” X 5” 80/12 Universal 3 cones of serger thread Standard Instruction Manual pg._____ Bernette Advanced Guide Workbook pg.____ Serger Library – Tips and Tricks •Thread the serger for a 3-thread Overlock stitch using the Left Needle. •Turn the Stitch Selection Dial to “A” on the Stitch Display Panel. •Serge finish one 5” raw edge on each piece of fabric. •Using your BERNINA sewing machine and a standard 5/8” seam allowance, seam the two pieces of fabric together along the serged edges. •Press the seam open. •Trim and mount the sample. 1999 BERNINA Of America Section C - page 4 OUTSIDE CORNER FABRIC: NEEDLES: THREAD: PRESSER FOOT: 2 pieces of firm woven fabric 4” X 5” 80/12 Universal 3 cones of serger thread Standard Instruction Manual pg._____ Bernette Advanced Guide Workbook pg.____ OPTION I •Thread the serger for a 3-thread Overlock stitch using the Left Needle. •Turn the Stitch Selection Dial to “A” on the Stitch Display Panel. •Serge one edge of the fabric, stitching off the end of the fabric. •Trim the thread tail. •Continue serging around the square crossing over the previous stitching. •Use a Seam Sealant on the untrimmed thread tails (or use a Tapestry Needle to weave the thread tail back through the stitching). When the Seam Sealant is dry, trim the thread tails. •Mount the sample on the next page. OPTION II •Thread the serger for a 3-thread Overlock stitch using the Left Needle. •Turn the Stitch Selection Dial to “A” on the Stitch Display Panel. •Before serging, trim away the seam allowance (¼”) for about 2” on each corner. •Beginning at one trimmed corner, serge (cutting ¼” as you sew) to the end of the fabric. Take 1 stitch off the end of the fabric. •Locate the Stitch Selection Lever/Roll Hem on the Stitch Plate and pull the white lever towards you. This will free the thread from the Stitch Finger. •Lift the Presser Foot and carefully pivot the fabric 90° clockwise. •Return the Stitch Selection Lever/Rolled Hem to normal (away from you). •Place the Needles one stitch into the fabric and lower the Presser Foot. •Continue serging until you are 1 stitch off the next corner. •Repeat the turning procedure and continue serging. •Mount the sample on the next page. 1999 BERNINA Of America Section C - page 5 Option I Option II 1999 BERNINA Of America Section C - page 6 3-THREAD SEAM (3mm-5mm) CENTER NEEDLE FABRIC: NEEDLES: THREAD: PRESSER FOOT: Light weight fabric 5” X 6” 80/12 Universal 3 cones of serger thread Standard Instruction Manual pg._____ Bernette Advanced Guide Workbook pg.____ Serger Library – Tips and Tricks •Using the Small Screwdriver and Brush/Needle Inserter, remove the Left Needle. •Snug the Needle Set Screw after removing the Needle. •Insert the Center Needle •Following the diagrams on page ____ in the Instruction Manual, thread the serger for a 3-thread Center Needle Overlock stitch. •Turn the Stitch Selection Dial to “A” on the Stitch Display Panel. •Adjust Cutting Width to 2 (normal). •Adjust Stitch Length to 2.5 (normal). •Fold the fabric in half to 2 ½” X 6”. •Serge along the folded edge of the fabric. •Trim and mount the sample. 1999 BERNINA Of America Section C - page 7 Use a Center Needle 3-thread Overlock as a seam finish on light weight woven fabrics. Wrap the fabric edge with strips of bias cut tricot or water soluble stabilizer before serging for added support while stitching. 3THREAD SEAM EDGE FINISH (3m-5mm) CENTER NEEDLE FABRIC: NEEDLES: THREAD: PRESSER FOOT: 2 pieces light weight linen 2½ X 5” 80/12 Universal 3 cones of serger thread Standard Instruction Manual pg._____ Bernette Advanced Guide Workbook pg.____ Serger Library – Tips and Tricks •Thread the serger for a 3-thread Overlock stitch using the Center Needle. •Turn the Stitch Selection Dial to “A” on the Stitch Display Panel. •Serge finish one 5” raw edge on each piece of fabric. •Using your BERNINA sewing machine and a standard 5/8” seam allowance, seam the two pieces of fabric together along the serged edges. •Press the seam open. •Trim and mount the sample. 1999 BERNINA Of America Section C - page 8 INSIDE CORNER FABRIC: NEEDLES: THREAD: PRESSER FOOT: 2 pieces of firm woven cotton 3” X 4” 80/12 Universal 3 cones of serger thread Standard Instruction Manual pg._____ Bernette Advanced Guide Workbook pg.____ •Thread the serger for a 3-thread Overlock stitch using the Center Needle. •Turn the Stitch Selection Dial to “A” on the Stitch Display Panel. OPTION I •Cut an inside corner into the fabric. •Snip into the corner ¼” (the width of the stitching). •Serge until the Knife reaches the end of the cut. •Touch the Needle Stop to lower the Needle into the fabric. •Lift the Presser Foot and straighten the corner towards you. •Lower the Presser Foot and continue serging. •Trim and mount the sample on the next page. OPTION II •Rotate the Upper Knife up. •Cut an inside corner into the fabric. •Line up the left edge of the cut with the Lower Knife blade. Keep the edge of the fabric even with the Lower Knife blade as you stitch. •Serge for a few stitches. Touch the Needle Stop Button to lower the Needle into the fabric. •Fold the right side of dthe corner towards you at about a 45°angle. • Serge 1 stitch into the cut corner. Touch the Needle Stop Button to lower the Needle into the fabric. •Lift the Presser Foot. •Fold the serged edge down and to the left, angling the serged edge about 45°. Pivot the fabric until the cut raw edge is even with the Lower Knife blade. •Lower the Presser Foot and continue stitching. •Use the Thread Cutter to cut the Thread Chain (the Upper Knife is disengaged). •Return the Upper Knife to Cutting Position. •Trim and mount the sample on the next page. 1999 BERNINA Of America Section C - page 9 . Option I Use this technique on continuous plackets for sleeves and back neck openings. Option II 1999 BERNINA Of America Section C - page 10 3-THREAD NARROW SEAM FABRIC: NEEDLES: THREAD: PRESSER FOOT: Batiste 5” X 6” 80/12 Universal 3 cones of serger thread Standard Instruction Manual pg._____ Bernette Advanced Guide Workbook pg.____ Serger Library – Tips and Tricks •Following the diagrams on page ____ in the Instruction Manual, thread the serger for a 3-thread Center Needle Overlock stitch. •Turn the Stitch Selection Dial to “A” on the Stitch Display Panel. •Adjust Cutting Width to 2 (normal). •Adjust Stitch Length to 2.5 (normal). •Pull the Stitch Selection Lever/Rolled Hem towards you to disengage the Stitch Finger. •Adjust the Differential Feed Dial between 0.7 and N. •Fold the fabric in half to 2½” X 6”. •Serge along the folded edge of the fabric. If necessary slightly tighten the Looper Tensions (up) and re-stitch the seam. •Return the Stitch Selection Lever/Rolled Hem to normal (push the lever away from you). •Return the Differential Feed Dial to “N” (normal). •Trim and mount the sample. 1999 BERNINA Of America Section C - page 11 TURNING TUBES FABRIC: NEEDLES: THREAD: PRESSER FOOT: Tricot 2” X 6” 75 Stretch or Ballpoint 3 cones of Metrolene serger thread Standard Feet-ures Unit ____pg.________ Bernette Advanced Guide Workbook pg.____ Serger Library – Tips and Tricks •Thread the serger for a 3-thread Overlock stitch using the Center Needle. •Turn the Stitch Selection Dial to “A” on the Stitch Display Panel. •Adjust Stitch Length to 2. •Serge a Thread Chain several inches longer than the fabric. •Fold the fabric, right sides together) to 1” X 6” encasing the Thread Chain against the fold. •With the folded edge aligned with the left edge of the Presser Foot, serge the tube being careful not to catch the Thread Chain in the stitching. •After stitching the tube, gently pull on the Thread Chain and turn the tube right side out. •Mount the sample. 1999 BERNINA Of America Section C - page 12 BLIND STITCH FOOT BLIND HEM FABRIC: NEEDLES: THREAD: PRESSER FOOT: Cotton jersey 5” X 6” 80/12 Universal 3 cones of serger thread Blind Stitch Foot Bernette Advanced Guide Workbook pg.____ Feet-ures Unit ___pg.___ Instruction Manual for Blind Stitch Attachment •Thread the serger for a 3-thread Overlock stitch using the Center Needle. •Turn the Stitch Selection Dial to “A” on the Stitch Display Panel. •Adjust the Stitch Length to 4 •Attach the Blind Stitch Foot. •Following the instructions in the Instruction Manual for Blind Stitch Attachment, fold the fabric for a 1½” blind hem and place the fabric under the Presser Foot. •Adjust the Fabric Guide so that the Needle just catches the fold in the stitching. •Serge the hem, keeping the fold of the fabric against the Fabric Guide. • Press the hem. • Trim and mount the sample. 1999 BERNINA Of America Section C - page 13 BLIND STITCH FOOT HAND PICKED OR DRAPERY BLIND HEM FABRIC: NEEDLES: THREAD: PRESSER FOOT: Medium weight cotton 5” X 6” 80/12 Universal 3 cones of serger thread Blind Stitch Foot Bernette Advanced Guide Workbook pg.___ Feet-ures Unit ___pg.___ •Thread the serger for a 3-thread Overlock stitch using the Center Needle. •Turn the Stitch Selection Dial to “A” on the Stitch Display Panel. •Adjust the Stitch Length to 3.5. •Attach the Blind Stitch Foot. •Turn up a double folded 1” hem. Fold the remaining fabric under so that no fabric extends beyond the upper edge of the hem. •Place the fabric under the Presser Foot. The fold of the fabric should rest against the Fabric Guide. •Adjust the Fabric Guide so that the Needle just catches the fold in the stitching. •Serge the hem, keeping the fold of the fabric against the Fabric Guide. •Press the hem. •Trim and mount the sample. 1999 BERNINA Of America Section C - page 14 BLIND STITCH FOOT Decorative Tucks FABRIC: NEEDLES: THREAD: PRESSER FOOT: Batiste 3½” X 6” 70/10 Sharp or Microtex 3 cones of Isacord thread Blind Stitch Foot Feet-ures Unit ___pg.___ Bernette Advanced Guide Workbook pg.___ Serger Library – Additions •Thread the serger for a 3-thread Overlock stitch using the Center Needle. •Turn the Stitch Selection Dial to “A” on the Stitch Display Panel. •Pull the Stitch Selection Lever/Rolled Hem towards you. •Adjust the Stitch Length to 1.5. •Attach the Blind Stitch Foot. •Move the Fabric Guide just to the left of the Knife Line on the Stitch Plate. •Stiffen the batiste with Spray Starch or a Fabric Stiffener. •Mark 3 lines 1” apart the length of the fabric. •Fold the fabric along a marked line and place the fabric under the Presser Foot so that the fold is against the Fabric Guide. Serge the tucks. •Return the Stitch Selection Lever/Rolled Hem to the normal sewing position (away from you). •Trim and mount the sample. 1999 BERNINA Of America Section C - page 15 BLIND STITCH FOOT LACE TO LACE FABRIC: NEEDLES: THREAD: PRESSER FOOT: 2 pieces of flat edging lace 6” long 70/10 Sharp or Microtex 3 cones of Isacord Blind Stitch Foot Feet-ures Unit ____pg._________ Instruction Manual for the Blind Stitch Attachment Bernette Advanced Guide Workbook pg.____ Serger Library – Simply Serging •Thread the serger for a 3-thread Overlock stitch using the Center Needle. •Turn the Stitch Selection Dial to “A” on the Stitch Display Panel. •Pull the Stitch Selection Lever/Rolled Hem towards you. •Adjust the Stitch Length to 1.5. •Loosen the Center Needle tension slightly. •Attach the Blind Stitch Foot. •Move the Fabric Guide just to the right of the Right Needle. •Stiffen the lace with Spray Starch or a Fabric Stiffener. •With right sides together place the header of the laces under the Presser Foot and butted up against the Fabric Guide. •Serge the laces together. •Gently pull the lace flat and press. •Trim and mount the sample. 1999 BERNINA Of America Section C - page 16 3-THREAD ROLLED HEM FABRIC: NEEDLES: THREAD: PRESSER FOOT: Medium weight woven cotton fabric 3” X 6” 80/12 Universal 2 cones of serger thread 1 cone of Woolly Nylon Standard Instruction Manual pg.___ Bernette Advanced Guide Workbook pg.___ Serger Library – Simply Serging Specialty Stitches Tips and Tricks •Thread the serger for a 3-thread Overlock stitch using the Center Needle. Use the Woolly Nylon in the Upper Looper. •Turn the Stitch Selection Dial to “C” on the Stitch Display Panel. •Adjust the Stitch Length to 1.75. •Locate the Stitch Selection Lever/Rolled Hem on the Stitch Plate and pull it towards you to disengage the Stitch Finger. •Cutting Width should be at 2 (normal). •Place the fabric under the Presser Foot and serge along one 6” edge. •Return Stitch Length to normal. •Return the Stitch Selection Lever/Rolled Hem to normal sewing position (away from you). •Trim and mount the sample. 1999 BERNINA Of America Section C - page 17 CORDING FOOT BIAS RUFFLE FABRIC: NEEDLES: THREAD: PRESSER FOOT: Medium weight woven cotton 3” X 8” cut on the bias 80/12 Universal 2 cones of serger thread (Needle and Lower Looper) 1 cone of Woolly Nylon (Upper Looper) Nylon fishing line 20 lb. test Cording Foot Feet-ures Unit ___pg___ Bernette Advanced Guide Workbook pg.___ Instruction Manual for Cording Foot •Thread the serger for a 3-thread Overlock stitch using the Center Needle. Use the Woolly Nylon in the Upper Looper. •Turn the Stitch Selection Dial to “C” on the Stitch Display Panel. •Adjust the Stitch Length to 1.75 •Pull the Stitch Selection Lever/Rolled Hem towards you. •Cutting Width should be at 2 (normal). •Attach the Cording Foot. •Raise the Presser Foot and swing it to the left. •Following the direction in the Instruction Manual for Cording Foot, insert the nylon fishing line through the Cord Guide. •Return the Presser Foot to normal sewing position. •Place the fabric under the Presser Foot and serge along one 8” edge stretching the fabric edge as you sew. •Return the Stitch Selection Lever/Rolled Hem to normal sewing position (away from you). Return Stitch Length to normal. •Trim and mount the sample. 1999 BERNINA Of America Section C - page 18 CORDING FOOT WIRED EDGE FABRIC FABRIC: NEEDLES: THREAD: PRESSER FOOT: Medium weight cotton 3” X 18” 80/12 Universal 2 cones of serger thread 1 cone of Woolly Nylon 28 gauge floral wire Cording Foot Instruction Manual for Cording Foot Feet-ures Unit ___pg.___ Bernette Advanced Guide Workbook pg.___ Serger Library – Simply Serging Additions •Thread the serger for a 3-thread Overlock stitch using the Center Needle. Use the Woolly Nylon in the Upper Looper. •Turn the Stitch Selection Dial to “C” on the Stitch Display Panel. •Adjust the Stitch Length to 1.75 •Pull the Stitch Selection Lever/Rolled Hem towards you. •Cutting Width should be at 2 (normal). •Attach the Cording Foot. •Raise the Presser Foot and swing it to the left. •Following the direction in the Instruction Manual for Cording Foot, insert the wire through the Cord Guide. •Return the Presser Foot to normal sewing position. •Place the fabric under the Presser Foot and serge along one 18” edge feeding the wire through the Presser Foot as you sew. •Use Wire Cutters to cut the wire. DO NOT USE THE SERGER KNIVES. •Repeat for the other 18” edge of the fabric. •Return the Stitch Selection Lever/Rolled Hem to normal sewing position (away from you). Return Stitch Length to normal. •Secure the thread tails with a Seam Sealant. When the sealant is dry, cut the thread tails. Use wire cutters to cut the wire. •Tie the wired fabric into a bow. •Mount the sample on the next page. 1999 BERNINA Of America Section C - page 19 1999 BERNINA Of America Section C - page 20 3-THREAD FLATLOCK FABRIC: NEEDLES: THREAD: PRESSER FOOT: Sweatshirt fleece 3” X 6” 80/12 Universal 2 cones of serger thread (Needle and Lower Looper) 1 cone of YLI Jeans Stitch (Upper Looper) Standard Instruction Manual pg.___ Bernette Advanced Guide Workbook pg.___ Feet-ures Unit ___pg.___ Serger Library – Tips and Tricks Specialty Stitches •Thread the serger for a 3-thread Overlock stitch using the Left Needle. Use the Jeans Stitch in the Upper Looper. •Turn the Stitch Selection Dial to “D” on the Stitch Display Panel. •Adjust the Stitch Length to 3. (You can shorten the Stitch Length slightly to fill in the stitch as you serge.) •Attach the Right Hand Seam Guide and adjust it so that the guide is halfway between the Left Needle and the right edge of the Stitch Finger. •Fold the fabric in half, wrong sides together, to 2” X 6”. •Place the fold under the Presser Foot and against the Right Hand Seam Guide. •Slowly serge the fabric. The Looper threads will extend beyond the fabric on the right side of the fold. •Pull the fabric flat. If it does not lay flat, move the Right Hand Seam Guide towards the Left Needle and try again. •Press, trim and mount the sample. 1999 BERNINA Of America Section C - page 21 WISH LIST 3-THREAD APPLICATIONS •Bernette Advanced Workbook •Serger Library •Feet-ures •Woolly Nylon thread •Isacord thread •YLI Jeans Stitch color________ color________ color________ color________ color________ color________ Needles –Sharp Microtex size____ size____ size____ size____ •Point Well Taken by Garber and O’Brien •Cording Foot •Blind Stitch Foot •Aqua Film, Solvy, or Aqua Solve Water Soluble Stabilizer •Seams Great (Bias Cut Tricot) •Seam Sealant •BERNINA Ironing System •Pro Glide Plus Iron •6” Ruler/Gauge •Rotary cutter •BERNINA Cutting Mat •BERNINA 14” ruler 1999 BERNINA Of America Section C - page 22 SECTION D – LET’S EXPERIMENT INSTALLING THE UPPER LOOPER CONVERTER – Instruction Manual pg.__ • Turn the Handwheel to bring the Upper Looper to its lowest position before attaching the Converter • Used for specialty stitches 3-thread Super Stretch Stitch 3-thread Wrapped Stitch 2-thread Flatlock 2-thread Rolled Edge SPECIALTY STITCHES Super Stretch Stitch • Ideal for active wear construction • Use with Elasticator when applying elastic • Position “B” on the Stitch Selection Panel Automatic Tension Adjustment for Woolly Nylon Two-Thread Flatlock • Wide decorative stitch for home decor projects and active wear • Position “E” on the Stitch Selection Panel Automatic Tension Adjustment for correct stitch formation • Deco Guide – Instruction Manual pg.___ Bypasses thread Tension Disks Use with heavier decorative threads Additional Deco Guides can be used for Needles and Upper Looper Two-Thread Rolled Hem • Delicate decorative edge on fine fabrics Wrapped Edges • Perfect decorative edge finish for blankets and polar fleece edges • Position “B” on the Stitch Selection Display Panel Automatic Tension Adjustment for lighter decorative threads • Use the Deco Guide to bypass tension disks for heavier threads 1999 BERNINA Of America Section D - page 1 OPTIONAL PRESSER FEET Multi-Purpose Foot with Guide – Instructional Manual for Multi-Purpose Foot • Used for: Making covered corded piping Attaching beads Attaching sequins • Use with a variety of stitches Covering cord 4-Thread Overlock stitch 3-Thread wide Overlock stitch with Left Needle 3-Thread Overlock stitch – Center Needle 3-Thread narrow Overlock stitch – Center Needle Attaching beads Two thread Rolled Edge 3-Thread Rolled Edge 3-Thread narrow Overlock stitch 3-Thread Flatlock – Center Needle Two thread Flatlock – Center Needle Attaching sequins 3-Thread wide Overlock stitch – Left Needle 3-Thread Flatlock – Left Needle Two thread Flatlock – Left Needle • Cording Guide – Instructional Manual for Multi-Purpose Foot with Guide Correctly feeds cording under the Presser Foot Use with the Gathering Attachment Gather and cord in one operation 1999 BERNINA Of America Section D - page 2 3-THREAD SUPER STRETCH STITCH FABRIC: NEEDLES: THREAD: PRESSER FOOT: Cotton or nylon Lycra 5” X 6” 80/12 stretch or 11/75 ballpoint 2 cones of serger thread (Needles) 1 cone of Woolly Nylon (Lower Looper) Standard Instruction Manual pg.___ Bernette Advanced Guide Workbook Supplement I pg.___ Serger Library – Tips and Tricks •Attach the Upper Looper Converter – Instruction Manual pg.___. •Turn the Stitch Selection Dial to “B” to automatically adjust thread tension. •Following the instructions on page ___ of your Instruction Manual, thread the serger for a Super Stretch Stitch using the Left and Center Needles. Use Woolly Nylon in the Lower Looper. •Adjust Stitch Length at 2.5 (normal). •Fold the Lycra in half to 2½” X 6”. •Place the fabric under the Presser Foot and serge, cutting off the fold. •Trim and mount the sample. 1999 BERNINA Of America Section D - page 3 ATTACHING ELASTIC WITH THE SUPER STRETCH STITCH FABRIC: NEEDLES: THREAD: PRESSER FOOT: Cotton or nylon Lycra 3” X 6” 12” of ½” nylon or cotton braid elastic 80/12 stretch or 11/75 ballpoint 2 cones of serger thread (Needles) 1 cone of Woolly Nylon (Lower Looper) Elasticator Foot Instruction Manual pg.___ Bernette Advanced Guide Workbook Supplement I pg.___ Serger Library – Tips and Tricks Instruction Manual for Elasticator Attachment •Attach the Upper Looper Converter. •Following the instructions on page ___ of your Instruction Manual thread the serger for a Super Stretch Stitch using the Left and Center Needles. Use Woolly Nylon in the Lower Looper. •Turn the Stitch Selection Dial to “B”. •Adjust Stitch Length to 4. •Adjust the Presser Foot Presser Lever to “H” (increase). •Attach the Elasticator Foot. •Following the instructions in the Instruction Manual for Elasticator Attachment, thread the elastic through the Presser Foot and adjust the Set Screw on the Roller Guide. •Place the fabric under the Presser Foot and serge attaching the elastic as you sew. •Trim and mount the sample. 1999 BERNINA Of America Section D - page 4 2-THREAD FLATLOCK FABRIC: NEEDLES: THREAD: PRESSER FOOT: Medium weight cotton 4” X 6” 80/12 Universal 1 cone of serger thread (Needle) 1 cone Jeans Stitch (Lower Looper) Standard Instruction Manual pg.___ Bernette Advanced Guide Workbook Supplement I pg.___ Feet-ures Unit ___pg.___ Serger Library – Tips and Tricks Specialty Stitches Simply Serging •Attach the Upper Looper Converter. •Turn the Stitch Selection Dial to “E”. •Following the instructions on page ___ of the Instruction Manual thread the serger for a 2-thread Flatlock Stitch using the Left Needle. Use Jeans Stitch in the Lower Looper. •Adjust Stitch Length for 2.5. •Attach the Right Hand Seam Guide and position the guide halfway between the Left Needle and the Stitch Finger. •Fold the fabric in half to 2” X 6”. •Place the fabric under the Presser Foot and against the Right Hand Seam Guide. •Serge along the fold. The Looper threads should loop off the edge of the fold. •Pull the fabric flat. If the fabric doesn’t lay flat, move the guide closer to the Left Needle and try again. •Press, trim and mount the sample. 1999 BERNINA Of America Section D - page 5 THE DECO GUIDE GUIDELINES FOR WORKING WITH HEAVIER THREADS FABRIC: NEEDLES: THREAD: PRESSER FOOT: 3 pieces of heavy weight cotton 4” X 6” 90/14 Universal 1 cone of serger thread (Needle) 1 cone of each of the following: YLI Pearl Crown Rayon Madeira Glamour or YLI Candlelight Madeira Décor or YLI Designer 6 Standard Instruction Manual pg.___ Bernette Advanced Guide Workbook Supplement I pg.___ Feet-ures Unit ___pg.___ Serger Library – Tips and Tricks Specialty Stitches Simply Serging •Attach the Upper Looper Converter. •Following the directions in the Instruction Manual, attach the Deco Guide over the Lower Looper Tension Slit. •Thread the Lower Looper with the decorative thread. Thread the first Thread Guide. The thread will pass through the Deco Guide skipping the tension disk. •Turn the Stitch Selection Dial to “E”. •Adjust Stitch Length to 4. You can slowly shorten the Stitch Length as you serge to fill in the Flatlock stitch. •Sew the sample. •If the tension on the decorative thread is too tight, remove the thread from Thread Guide #5 and try again. •If the tension on the decorative thread is still too tight, remove the thread from Thread Guide #7 and try again. •If the tension is still too tight, remove the thread from the first Thread Guide and try again. You may need to rethread guides #5 and/or #7 to slightly increase the tension. •Experiment with the suggested threads, by-passing Thread Guides as needed. •Press, trim, and mount the samples on the next page. 1999 BERNINA Of America Section D - page 6 Pearl Crown Rayon Glamour or Candlelight Décor or Designer 6 1999 BERNINA Of America Section D - page 7 2-THREAD ROLLED HEM FABRIC: NEEDLES: THREAD: PRESSER FOOT: Batiste 3” X 6” 70/10 Sharp or Microtex 2 cones of Metrolene serger thread Standard Instruction Manual pg.___ Bernette Advanced Guide Workbook Supplement I pg.___ Serger Library – Tips and Tricks •Attach the Upper Lopper Converter. •Following the directions found in the Instruction Manual on page___, thread for a 2-thread Rolled Edge. •Turn the Stitch Selection Dial to “A”. •Set Stitch Length to 1.75. •Pull the Stitch Selection Lever/Rolled Hem towards you. •Adjust Cutting Width to 2 (normal). •Place the fabric under the Presser Foot and serge one 6” edge cutting off about 1/8” as you serge. •Return the Stitch Selection Lever/Rolled Hem to normal sewing position (away from you). • Press, trim, and mount the sample. 1999 BERNINA Of America Section D - page 8 WRAPPED EDGE FABRIC: NEEDLES: THREAD: PRESSER FOOT: Heavy wool or polar fleece 4” X 5” 80/12 Universal 1 cone of serger thread (Needle) 1 cone of Jeans Stitch (Lower Looper) Standard Instruction Manual pg.___ Serger Library – Tips and Tricks Specialty Stitches Simply Serging •Attach the Upper Looper Converter. •Following the directions in the Instruction Manual on page___ thread for a Wrapped Edge using Jeans Stitch in the Lower Looper. •Turn the Stitch Selection Dial to “B”. •Serge one edge of the fabric. Engage Differential Feed if necessary. •If the Jeans Stitch does not wrap, thread tension may be too tight. Reduce the Looper Thread Tension. If the thread still does not wrap, remove the Jeans Stitch from the Thread Guide#5 and try again. Wrap Stitch the other three edges of the fabric. •Use Seam Sealant to seal the Wrapped Stitch at the corners. When the sealant is dry, trim the thread tails. •Press and mount the sample. . 1999 BERNINA Of America Section D - page 9 MULTI - PURPOSE FOOT COVERED CORDED PIPING FABRIC: NEEDLES: THREAD: PRESSER FOOT: Medium weight cotton bias strip 2” X 8” 12” of 3/8” cotton cording 80/12 Universal 4 cones of serger thread Multi-Purpose Foot with Guide Feet-ures Unit ___pg.___ Serger Library – Tips and Tricks Instruction Manual for Multi-Purpose Attachment with Guide • Following the directions in the Instruction Manual on page___, thread for a balanced 4-thread Overlock stitch using the Left and Center Needles. • Turn the Stitch Selection Dial to “A”. •Set Stitch Length to 3.5. •Attach the Multi-Purpose Foot and Guide following the directions in the Instruction Manual for Multi-Purpose Attachment with Guide. •Insert the cord into the guide. •Wrap the bias strip around the cord and place the wrapped cord in the groove under the Presser Foot. •Serge the covered cord. •Trim and mount the sample. 1999 BERNINA Of America Section D - page 10 MULTI - PURPOSE FOOT CREATING AND ATTACHING COVERED CORDED PIPING FABRIC: NEEDLES: THREAD: PRESSER FOOT: Medium weight woven cotton bias strip 2” X 8” Medium weight woven cotton 3” X 8” 12” of 3/8” cotton cording 80/12 Universal 4 cones of serger thread Multi-Purpose Foot with Guide Instruction Manual pg.___ Feet-ures Unit ___pg.___ Serger Library – Tips and Tricks Instruction Manual for Multi-Purpose Attachment with Guide • Following the directions in the Instruction Manual on page___, thread for a balanced 4-thread Overlock stitch using the Left and Center Needle. • Turn the Stitch Selection Dial to “A”. •Set Stitch Length to 3. •Attach the Multi-Purpose Foot and Guide following the directions in the Instruction Manual for Multi-purpose Attachment with Guide. • Place the 3” X 8” fabric under the Presser Foot. •Insert the cord into the Guide. •Wrap the bias strip around the cord and place the covered cord in the groove under the Presser Foot and on top of the other fabric. •Serge making the covered cord and attaching it to the fabric strip in one stitching. •Press the seam allowance to the wrong side of the fabric strip. •Trim and mount the sample. 1999 BERNINA Of America Section D - page 11 MULTIPURPOSE FOOT With the Gathering Attachment FABRIC: NEEDLES: THREAD: PRESSER FOOT: Medium weight woven cotton bias strip 2” X 8” Medium weight woven cotton 3” X 18” 12” of 3/8” cotton cording 80/12 Universal 4 cones of serger thread Multi-Purpose Foot with Guide Instruction Manual pg.___ Feet-ures Unit ___pg.___ Instruction Manual for Multi-purpose Attachment with Guide Instruction Manual for Gathering Attachment • Following the directions in the Instruction Manual on page___, thread for a balanced 4-thread Overlock stitch using the Left and Center Needle. • Turn the Stitch Selection Dial to “A”. •Set Stitch Length to 3. •Adjust Differential Feed to 2. •Attach the Multi-Purpose Foot (no Guide) following the directions in the Instruction Manual for Multi-Purpose Attachment with Guide. •Wrap the bias strip around the cord and place the cord in the groove under the Presser Foot. Take 2 or 3 stitches into the fabric. Lower the Needles into the fabric. •Attach the Gathering Attachment following the directions in the Instruction Manual for Gathering Attachment. • Place the 3” X 18” fabric under the Gathering Attachment and next to the Needles. •Serge covering the cord, gathering the fabric strip and seaming all layers together. •Trim and mount the sample on the next page. 1999 BERNINA Of America Section D - page 12 1999 BERNINA Of America Section D - page 13 MULTIPURPOSE FOOT PRE-STRUNG BEADS FABRIC: NEEDLES: THREAD: Instruction Manual pg.___ PRESSER FOOT: Medium weight fabric 4” X 6” 10” of plastic pre-strung beads (4mm) 80/12 Universal 3 cones of serger thread Multi-Purpose Foot Feet-ures Unit ___pg.___ Serger Library – Specialty Stitches Instruction Manual for Multi-purpose Attachment with Guide •Following the directions in the Instruction Manual on page___, thread for a 3-thread Flatlock using the Center Needle. •Turn the Stitch Selection Dial to “D”. •Set Stitch Length to 4. •Attach the Multi-Purpose Foot (no guide) following the directions in the Instruction Manual for Multi-Purpose Attachment with Guide. •Attach the Right Hand Seam Guide and move the Guide halfway between the Right Needle and the Stitch Finger. •Lay the pre-strung beads in the groove on the top of the Presser Foot, threading them under the back groove (See Instruction Manual for Multi-purpose Attachment with Guide). •Turn the Handwheel to encase the first beads into the Thread Chain. •Fold the fabric in half to 2” X 6” and place the fabric under the Presser Foot with the fold against the Right Hand Seam Guide. •Slowly Flatlock the beads to the folded fabric. •Pull the fabric flat. •Trim and mount the sample. 1999 BERNINA Of America Section D - page 14 WISH LIST LETS EXPERIMENT •Elasticator Foot •Multi-Purpose Foot with Guide • Deco Guide • Gathering Attachment •Woolly Nylon thread •Metrolene thread •Decorative threads color________ color________ color________ color________ YLI Jeans Stitch YLI Pearl Crown Rayon Madeira Décor YLI Decorator 6 Madeira Glamour YLI Candle Light color________ color________ color________ color________ color________ color________ color________ color________ color________ color________ color________ color________ •Bernette Advanced Workbook Supplement I •Serger Library •Feet-ures •BERNINA Ironing System •Pro Glide Plus Iron •6” ruler/gauge •Pearls-By-The-Yard (3mm-4mm) •Seam Sealant 1999 BERNINA Of America Section D - page 15 SECTION E – COVERS AND CHAINS CONVERSION TO COVER /CHAIN STITCH Conversion Chart - Instruction Manual pg.___ and Quick Reference Card The Converter Arm – Instruction Manual pg.___ • Disengages the Upper Looper shaft • Use the Needle Stop Button to lower the Needles • Removing the Knife Guard – Instruction Manual pg.___ Attaching the Cover/Chain Stitch Extension Plate – Instruction Manual pg.___ Swing Out Presser Foot – Instruction Manual pg.___ • Easier Needle threading • Locks the machine for safety Raising the Knife Arm – Instruction Manual pg.___ • Rotate the knife up • Remember to snug the White Locking Screw after moving the arm Which Needles To Use – Instruction Manual pg. __ • 4-Thread Cover Stitch – Left, Center, and Right Needles • 5-Thread Top and Bottom Cover Stitch – Left, Center, and Right Needles • Wide 3-Thread Cover Stitch – Left and Right Needles • Wide 4-Thread Top and Bottom Cover Stitch – Left and Right Needles • Narrow 3-Thread (2.5mm) Cover Stitch – Center and Right Needles or Left and Center Needles • Narrow 4-Thread Top and Bottom Cover Stitch – Left and Center Needles • Chain stitch – Right Needle only THE COVER/CHAIN STITCH FOOT – Instruction Manual pg.___ • Wider for better fabric feeding • Floating Toes to level the Presser Foot Easier fabric guiding • This Presser Foot does not swing to the left • Closed holes Completes the threading path THREADING FOR COVER/CHAIN STITCH – Instruction Manual pg.___ Threading Order First - Cover/Chain Stitch Looper Second - Right Needle Third - Center Needle Fourth - Left Needle • Raise the Presser Foot to open the Tension Disks. 1999 BERNINA Of America Section E - page 1 • The Threading Path – Instruction Manual pg.___ Use the Road Map inside the Looper Cover as a quick reference 4-Thread Cover Stitch And Wide 3-Thread Cover Stitch Threading Instruction Manual pg.___ Threading the Cover/Chain Stitch Looper • The Lower Looper when Overlocking • Auto Threader – Instruction Manual pg.___ Use the Handwheel to bring the Chain Stitch Looper to the right before engaging • Thread tail hangs down Cut it even with the base of the machine • Thread Guide #5 and #6. Study the Road Map inside the Looper Cover to see when to use these Thread Guides. • 3-Thread narrow (2.5mm) Cover Stitch – Instruction Manual page___ • Chain stitch – Instruction Manual pg.___ TEST SEWING Cover Stitch– Instruction Manual pg.___ • Cut all thread tails even with the Free Arm Cover– Instruction Manual pg.___ • Always start and end a Cover Stitch on the fabric Use a starting/ending block of fabric if you wish to Cover Stitch to the edge of the fabric. • Needles will always stop in the down position Rotate the Handwheel away from you to raise the Needles and free the threads from the Looper • Use the Built-In Thread Cutter to cut the Thread Chain Chain Stitch– Instruction Manual pg.___ • When first threading always start with the Needle in the fabric • Once the chain has been sewn you can stitch on to and off of the fabric • Chain off the fabric • Use the Built-In Thread Cutter to cut the Thread Chain 1999 BERNINA Of America Section E - page 2 4-THREAD COVER STITCH FABRIC: NEEDLES: THREAD: PRESSER FOOT: Medium weight cotton 3” X 6” 80/12 universal 4 cones of serger thread (yellow, green, brown, purple) Cover Stitch or Standard Instruction Manual pg.___ Feet-ures Unit ___pg.___ •Convert the serger from Overlock to Cover Stitch using the directions on page__ in the Instruction Manual or on the Quick Reference Card. and turn the Stitch Selection Dial to “F”. •Following the instructions on page ___ of your Instruction Manual thread the serger for a 4-Thread Cover Stitch. •Center the fabric under the Presser Foot. •Cover Stitch the length of the fabric. Stop stitching with the Needles in the fabric. •Turn the Handwheel away from you to raise the Needles to their highest position. •Lift the Presser Foot and remove the fabric from under the Presser Foot. •Following the directions on page___ in the Instruction manual, remove the stitch. •Place the fabric under the Presser Foot and Cover Stitch the length of the fabric again. •Following the directions on page___ in the Instruction manual, secure the thread tail. •Trim and mount the sample. 1999 BERNINA Of America Section E - page 3 4-THREAD COVER STITCH MOCK FLAT FELLED SEAM FABRIC: NEEDLES: THREAD: PRESSER FOOT: Medium weight cotton twill 4” X 6” 90/14 universal 4 cones of serger thread Cover Stitch or Standard Instruction Manual pg.___ Feet-ures Unit ___pg.___ •Convert the serger from Overlock to Cover Stitch using the directions on page__ in the Instruction Manual or on the Quick Reference Card. and turn the Stitch Selection Dial to “F”. •Following the instructions on page ___ of your Instruction Manual, thread the serger for a 4-Thread Cover Stitch. •Fold the fabric lengthwise to form a ½” tuck down the center. •Place the fabric under the Needles with the bulk of the fold on the left. Line the edge of the fold up with the inside of the Presser Foot’s Right Floating Toe. •Cover Stitch the tuck in place. Stop stitching with the Needles on the fabric. •Turn the Handwheel away from you to raise the Needles to their highest position. •Lift the Presser Foot and remove the fabric from under the Presser Foot. •Trim and mount the sample. 1999 BERNINA Of America Section E - page 4 TOP AND BOTTOM COVER STITCH FABRIC: NEEDLES: THREAD: PRESSER FOOT: Medium weight cotton 5” X 6” 80/12 universal 5 cones of serger thread Standard Instruction Manual pg.___ •Convert the serger from Overlock to Cover Stitch using the directions on page__ in the Instruction Manual or on the Quick Reference Card. •Insert the Left, Center, and Right Needles. •Stitch Selection Dial to “H”. •Attach the Fifth Spool Holder. •Following the instructions on page ___ of your Instruction Manual, thread the serger for a 4-thread Cover Stitch. •Push the Wiper Activating Lever towards the Needle Bar. •Lower the Wiper. •Thread the Wiper. •Fold the fabric in half to 2½” X 6” and center the fabric under the Presser Foot. •Cover Stitch the length of the fabric. Stop stitching with the Needles in the fabric. •Turn the Handwheel away from you to raise the Needles to their highest position. •Lift the Presser Foot and remove the fabric from under the Presser Foot. •Trim and mount the sample. •Remove the thread from the Wiper Spool Pin. •Disengage the Wiper and pull the Wiper Activating Lever away from the Needle Bar to return the serger to 4-thread Cover Stitch. 1999 BERNINA Of America Section E - page 5 5mm COVER STITCH FABRIC: NEEDLES: THREAD: PRESSER FOOT: Medium weight cotton denim 3” X 6” 90/14 universal 3 cones of serger thread Cover Stitch or Standard Instruction Manual pg._____ Feet-ures Unit ___pg.___ •Convert the serger from Overlock to Cover Stitch using the directions on page__ in the Instruction Manual or on the Quick Reference card. •Insert the Left and Right Needles. •Turn the Stitch Selection Dial to “F”. •Following the instructions on page ___ of your Instruction Manual, thread the serger for a 3-Thread wide (5mm) Cover Stitch. • Place the fabric under the Needles with the fabric centered under the Presser Foot. • Cover Stitch the length of the fabric stopping with the Needles in the fabric. •Turn the Handwheel away from you to raise the Needles to their highest position. •Lift the Presser Foot and remove the fabric from under the Presser Foot. •Trim and mount the sample. 1999 BERNINA Of America Section E - page 6 COVER STITCH HEM WOVEN FABRIC FABRIC: NEEDLES: THREAD: PRESSER FOOT: Medium weight woven cotton 5” X 6” 80/12 Universal 3 cones of serger thread Cover Stitch or Standard Instruction Manual pg.___ Feet-ures Unit ___pg.___ •Convert the serger from Overlock to Cover Stitch using the directions on page__ in the Instruction Manual or on the Quick Reference card. Insert the Left and Right Needles and turn the Stitch Selection Dial to “F”. •Following the instructions on page ___ of your Instruction Manual, thread the serger for a 3-Thread wide (5mm) Cover Stitch. • Fold up a 2” hem along the 6” edge of the fabric. Glue stick or pin in place. •Using the markings on the stitch plate as a guide, place the fabric under the Needles with the fold to the right of the Presser Foot. You are stitching on the right side of the fabric. • Cover Stitch the hem in place stopping with the Needles in the fabric. •Turn the Handwheel away from you to raise the Needles to their highest position. •Lift the Presser Foot and remove the fabric from under the Presser Foot. •Trim and mount the sample. 1999 BERNINA Of America Section E - page 7 5mm COVER STITCH TOP AND BOTTOM FABRIC: NEEDLES: THREAD: PRESSER FOOT: Medium weight woven cotton 5” X 6” 90/14 universal 2 cones of serger thread (Needles) 2 spool of Jeans Stitch (Looper and wiper) Standard Instruction Manual pg.___ •Convert the serger from Overlock to Cover Stitch using the directions on page__ in the Instruction Manual or on the Quick Reference Card. •Insert the Left and Right Needles. •Turn the Stitch Selection Dial to “H”. •Attach the Fifth Spool Holder. •Following the instructions on page ___ of your Instruction Manual, thread the serger for a 3-thread Cover Stitch with Jeans Stitch in the Looper. •Push the Wiper Activating Lever towards the Needle Bar. •Lower the Wiper. •Thread the Wiper using Jeans Stitch •Fold the fabric in half to 2½” X 6” and center the fabric under the Presser Foot. •Cover Stitch the length of the fabric. Stop stitching with the Needles in the fabric. •Turn the Handwheel away from you to raise the Needles to their highest position. •Lift the Presser Foot and remove the fabric from under the Presser Foot. •Trim and mount the sample. •Remove the thread from the Wiper Spool Pin. •Disengage the Wiper and pull the Wiper Activating Lever away from the Needle Bar to return the serger to 3-thread Cover Stitch. 1999 BERNINA Of America Section E - page 8 COVER STITCH HEM KNIT FABRIC FABRIC: NEEDLES: THREAD: PRESSER FOOT: Cotton jersey (T-shirt) 5” X 6” 80/12 Stretch or Ballpoint 2 cones of serger thread (Needles) 1 cone of Woolly Nylon (Looper) Cover Stitch or Standard Instruction Manual pg.___ Feet-ures Unit ___pg.___ •Convert the serger from Overlock to Cover Stitch using the directions on page__ in the Instruction Manual or on the Quick Reference card. Insert the Left and Right Needles and turn the Stitch Selection Dial to “F”. •Following the instructions on page ___ of your Instruction Manual, thread the serger for a 3-Thread wide (5mm) Cover Stitch. Use Woolly Nylon in the Looper. • Fold up a 2” hem along the 6” edge of the fabric. Glue stick or pin in place. •Using the markings on the stitch plate as a guide, place the fabric under the Needles with the fold to the right of the Presser Foot. You are stitching on the right side of the fabric. • Cover Stitch the hem in place stopping with the Needles in the fabric. There is no need to stretch the fabric while stitching. The Cover Stitch has a natural stretch. •Turn the Handwheel away from you to raise the Needles to their highest position. •Lift the Presser Foot and remove the fabric from under the Presser Foot. •Trim and mount the sample. 1999 BERNINA Of America Section E - page 9 NARROW 2.5mm COVER STITCH ATTACHING LACE FABRIC: NEEDLES: THREAD: PRESSER FOOT: Medium weight woven cotton 3” X 6” 8” of 1” wide edging lace 80/12 Universal 3 cones of serger thread Cover Stitch Instruction Manual pg.___ Feet-ures Unit ___pg.___ •Convert the serger from Overlock to Cover Stitch using the directions on page__ in the Instruction Manual or on the Quick Reference card. Insert the Center and Right Needles and turn the Stitch Selection Dial to “F”. •Following the instructions on page ___ of your Instruction Manual, thread the serger for a 3-Thread narrow (2.5mm) Cover Stitch. • Use a Fabric Stiffener or Spray Starch to stabilize the fabric and lace. •Position the lace on the right side of the fabric with the scalloped edge of the lace even with the right edge of the fabric. •Place fabric and lace under the Needles with the lace header positioned even with the inside edge of the Left Floating Toe. • Cover Stitch the lace to the fabric stopping with the Needles in the fabric. •Turn the Handwheel away form you to raise the Needles to their highest position. •Lift the Presser Foot and remove the fabric from under the Presser Foot. •Trim the fabric from beneath the lace and mount the sample. 1999 BERNINA Of America Section E - page 10 NARROW TOP AND BOTTOM COVER STITCH FABRIC: NEEDLES: THREAD: PRESSER FOOT: medium weight woven cotton 4” X 6” 80/12 Universal 4 cones of serger thread Standard Instruction Manual pg._____ •Convert the serger from Overlock to Cover Stitch using the directions on page__ in the Instruction Manual or on the Quick Reference Card. •Insert the Left and Center Needles. •Stitch Selection Dial to “H”. •Attach the Fifth Spool Holder. •Following the instructions on page ___ of your Instruction Manual thread the serger for a 3-thread Cover Stitch. •Push the Wiper Activating Lever towards the Needle Bar. •Lower the Wiper. •Thread the Wiper. •Fold the fabric in half to 2” X 6” and center the fabric under the Presser Foot. •Cover Stitch the length of the fabric. Stop stitching with the Needles in the fabric. •Turn the Handwheel away from you to raise the Needles to their highest position. •Lift the Presser Foot and remove the fabric from under the Presser Foot. •Trim and mount the sample. •Remove the thread from the Wiper Spool Pin. •Disengage the Wiper and pull the Wiper Activating Lever away from the Needle Bar to return the serger to a 2.5mm 3-thread Cover Stitch. 1999 BERNINA Of America Section E - page 11 CHAINSTICH SEAM FABRIC: NEEDLES: THREAD: PRESSER FOOT: 2 pieces of medium weight cotton 1½” X 6” 80/12 universal 2 cones of serger thread Cover Stitch or Standard Instruction Manual pg._____ Feet-ures Unit____pg.________ •Convert the serger from Overlock to Cover Stitch using the directions on page__ in the Instruction Manual or on the Quick Reference card. Insert the Right Needle and turn the Stitch Selection Dial to “G”. •Set Stitch Length at 3. •Following the instructions on page ___ of your Instruction Manual, thread the serger for a Chain Stitch. • With right sides together place the fabric under the Needles. Use the 5/8” mark on the Cover/Chain Stitch Extension Plate to position the fabric. • Chain Stitch the fabrics together. Continue stitching off the end of the fabric. •Following the directions on page ___ of the Instruction Manual, remove the chain stitch. • Lift the toe of the Presser Foot and Chain Stitch the seam a second time. •Following the directions on page___ in the Instruction manual, secure the thread tail. •Trim and mount the sample. 1999 BERNINA Of America Section E - page 12 ATTACHING BINDING FABRIC: NEEDLES: THREAD: PRESSER FOOT: Prequilted fabric 3” X 6” 20” of wide pre-folded bias binding 80/12 universal 2 or 3 cones of serger thread Cover Stitch Instruction Manual pg._____ Feet-ures Unit____pg.________ Cover Stitch Option •Convert the serger from Overlock to Cover Stitch. Insert the Left and Right Needles and turn the Stitch Selection Dial to “F”. Set Stitch Length at 3. •Thread the serger for a wide 3-Thread Cover Stitch. • Wrap the bias binding around one 6” side of the quilted fabric using 505 Adhesive Spray to hold the binding in place. •Place the fabric under the Needles with the unstitched edge of the binding even with the inside of the Left Floating Toe. The quilted fabric will lay to the left. • Cover Stitch the binding to the quilted fabric. Chain Stitch Option •Thread the serger for a Chain Stitch using the Right Needle. Set the Stitch Selection Dial to “G”. Set Stitch Length at 3. • Wrap the bias binding around the other 6” side of the quilted fabric using 505 Adhesive Spray to hold the binding in place. •Place the fabric under the Needle with the unstitched edge of the binding even with the inside of the Right Floating Toe. The quilted fabric will lay to the right. •Chain Stitch the binding to the quilted fabric. •Trim and mount the sample. 1999 BERNINA Of America Section E - page 13 CHAINSTITCH WITH DECORATIVE THREAD FABRIC: NEEDLES: THREAD: PRESSER FOOT: Medium weight cotton denim 6” X 6” Tear Away Stabilizer 6x6” 80/12 universal 1 cone of serger thread 3 cones of Isacord 1 spool of Sulky or Madeira Metallic thread Cover Stitch or Standard Instruction Manual pg._____ •Convert the serger from Overlock to Cover Stitch using the directions on page__ in the Instruction Manual or on the Quick Reference card. Insert the Right Needle and turn the Stitch Selection Dial to “G”. •Set Stitch Length at 3. •Following the instructions on page ___ of your Instruction Manual, thread the serger for a Chain Stitch threading the 3 Isacord thread colors through the thread guide for the chain stitch (Lower) Looper on the Thread Guide Support. Thread all three Isacord threads together through the Chain Stitch (Lower) Looper Tension Disks and the Chain Stitch (Lower) Looper Thread Guides. Use a floss threader to thread the 3-Threads through the Eye of the Looper. •Slightly loosen (down) the tension on the Chain Stitch Looper. •With stabilizer on top and the right side of the fabric against the Stitch Plate place the fabric under the Needle and lower the Presser Foot. (You will be stitching on the wrong side of the fabric with the stabilizer on top). •Stitch a curved line across the fabric. •Remove the fabric from under the Presser Foot and turn the fabric over to see the decorative stitching. •To see more of the decorative thread, increase Stitch Length. Changing Stitch Length as you sew varies the decorative chain stitch effect. Remember to always keep the Stitch Length at least 2.5mm long. •Stitch several more curving lines across the fabric. •Remove one spool of Isacord thread and rethread the serger using 2 spools of Isacord and 1 spool of metallic thread. •Slightly loosen (down) the tension on the Chain Stitch Looper. •Sew several additional rows of Decorative Chain Stitching. •Trim and mount the sample on the following page. 1999 BERNINA Of America Section E - page 14 1999 BERNINA Of America Section E - page 15 WISH LIST COVERS AND CHAINS •Feet-ures •Isacord thread •Metrolene thread color________ color________ color________ color________ color________ •Sulky Metallic threads color________ color________ •Madeira Metallic threads color________ color________ •Woolly Nylon thread color________ color________ •505 Temporary Spray Adhesive •Bias tape •Bias tape makers •BERNINA Ironing System •Pro Glide Plus Iron •6” ruler/gauge •Rotary cutter •BERNINA Cutting Mat •BERNINA 14” ruler 1999 BERNINA Of America Section E - page 16