1
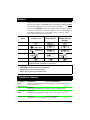
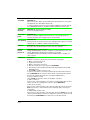
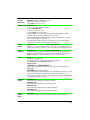
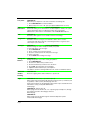
Business Communications Manager
Telephone Feature Card
© 2002 Nortel Networks
P0993297 02
Buttons
The Business Series Terminal (T-series) Feature button is a small globe icon. The
M-series Feature button reads Feature or Fx. The IP telephones display Feature
above the far left display key, when feature selection is available.
This book uses FEATURE to indicate pressing the Feature key before entering a
feature code. The table below shows which buttons to use on the different types of
Nortel Networks telephones to use the features. Refer to each user card for
specific details about each type of telephone.
Button
Name
T7000, T7100,
T7208, T7316
M7100, M7208,
M7310, M7324
M7000, M7100N,
M7208N, M7310N,
M7324N
Feature
Handsfree
(7208/7316)
Mute
(7208/7316)
Hold
Release
Answer call
Telephones with line buttons: Press line button and lift handset.
Telephones with no buttons: Lift handset.
This guide uses the following labels to indicate each type of configuration button:
– FEATURE indicates pressing the Feature key
– HOLD indicates pressing the Hold key.
– RLS indicates pressing the Release key.
Telephone features
Background
Music
FEATURE 86
Cancel: FEATURE #86
Listen to music (provided by your office) through your telephone speaker when
you are not on a call.
Button Inquiry FEATURE *0
Check what is programmed on any button. Use when labeling buttons.
Call Duration
Timer
FEATURE 77
Call Forward
FEATURE 4
Briefly display the approximate length of your current or most recent call.
Cancel: FEATURE #4
Send your calls to another telephone in your system.
Page 3
Call Park
FEATURE 74
Put a call on hold so that it can be picked up from any telephone in your system.
The display shows a three-digit retrieval code.
To retrieve a parked call: press an intercom button and dial the retrieval code. On
the T7100/M7100 telephone, just lift the handset and dial the retrieval code.
Call Pickup directed
FEATURE 76 and the telephone number
Call Pickup group
FEATURE 75
Call Queuing
FEATURE 801
Answer any ringing telephone.
Answer a call that is ringing at another telephone in your pickup group. The
external call that has been ringing longest is answered first.
Answer the next call. If more than one call is waiting, priority is given to incoming
external calls over callback, camped, or transferred calls.
Camp-on
FEATURE 82 and the extension number of the receiving telephone
Re-route a call to another telephone even if all its lines are busy.
Class of
service
password
FEATURE 68 plus COS password
Conference
FEATURE 3
Change the dialing filters on a line or telephone, or gain external access to your
system. Dialing filters determine which numbers you can dial.
The COS password is provided by your System Administrator to change your
class of service.
Establish a conference call between yourself and two other parties.
1. Make or answer the first call.
2. Put the first call on hold.
3. Make or answer the second call.
4. After the second call is connected, press FEATURE 3
5. Press the line or intercom button of the first held call (not required on the T7100/
M7100 telephone).
6. Press RLS to end the conference call.
To remove yourself from a conference permanently (unsupervised conference):
Press FEATURE 70. The other two callers remain connected. (Some external
lines may not support this feature. See your System Administrator.)
To put a conference on hold:
Press HOLD. The other two callers can still talk to each other.
To split a conference:
Press the line or intercom button of one caller to consult privately while the other
caller is on hold. To re-establish the conference, press FEATURE 3.
To disconnect one party:
Press the line or intercom button of the caller you want to disconnect, then press
RLS. Press the line or intercom button of the remaining caller to resume your
conversation.
To independently hold two calls:
Press the line or intercom button of the first caller, then press HOLD. The second
caller is automatically put on hold. To re-establish the conference, retrieve one call
from hold, press FEATURE 3, then retrieve the second call from hold.
Page 4
Contrast
adjustment
FEATURE *7 plus a number from 1 to 9
Adjust the contrast of your display.
Press HOLD to set your choice.
Dialing modes FEATURE *82
Choose one of three methods of dialing.
1. Press FEATURE *82.
2. Press # to select the mode.
3. Press HOLD to store the mode.
Standard Dial: Select a line, then dial the number. (Standard Dial is always
available, even when another dialing mode is selected.)
Automatic Dial: Dial the number without choosing a line button first. Your prime
line is automatically selected for the call.
Pre-Dial: Dial the number, then press a line button to place the call. Edit the
number by pressing the volume bar before placing the call.
Do Not
Disturb
FEATURE 85
Group
Listening
FEATURE 802
Hold
HOLD
Cancel: FEATURE #85
When you are not on a call prevent all incoming calls, except priority calls, from
ringing at your telephone. When you are on a call, block an incoming priority call.
Cancel: FEATURE #802
Use both the handset and speaker while you are on a call. To avoid electronic
feedback, keep the handset away from the speaker during the call, and press
RLS to hang up. Note: IP-based telephones cannot use this feature.
Temporarily suspend a call.
To retrieve a held call, press the line button for the held call.
(Press HOLD on the T7100/M7100 telephone.)
Exclusive Hold
FEATURE 79 or FEATURE/HOLD
Temporarily suspend a call and prevent other telephones from picking it up.
Auto Hold:
FEATURE 73 (to turn on or off)
Set your telephone to automatically put a call on Hold when you pick up a second
call, or stop your telephone from doing so. Default is Yes (feature is on).
Note: Telephones which have system-wide call appearance buttons (SWCA) must
have this feature active (set to Yes).
Language
Choice
FEATURE *501
Select Primary Language for the telephone display.
FEATURE *502
Select Alternate Language for the telephone display.
FEATURE *503
Select Alternate Language 2 for the telephone display.
FEATURE *504
Select Alternate Language 3 for the telephone display.
Last
Number
Redial
FEATURE 5
Automatically redial the last external telephone number that you dialed.
Page 5
Line pools
FEATURE 64
With a line pool, telephones can share several lines for making calls.
1. Press FEATURE 64 or an intercom button.
2. Enter a line pool access code. (See your System Administrator for a list.)
Line
Redirection
FEATURE 84
Link
FEATURE 71
Cancel: FEATURE #84
Send calls arriving on an external line to another telephone outside your system.
(Some external lines may not support this feature. See your System
Administrator.) This feature is not available on the T7100/M7100 telephone.
Generate a Link signal to access a PBX or other host exchange.
Long Tones
FEATURE 808
Generate a tone for as long as you hold down a button. This is used to
communicate with devices like fax or answering machines. Long tones are in
effect only for your current call.
Messages
FEATURE 1
Cancel: FEATURE #1
Send a message to another telephone within your system.
To view and reply to your messages:
1. Press FEATURE 65.
2. Press * and # to view your message list.
3. Press 0 to call the person who left you the message.
To erase a message:
1. Press HOLD while viewing a message.
Moving line
buttons
FEATURE *81
Change the position of your line or hunt group buttons.
1. Press FEATURE *81.
2. Press the line button that you want to move.
3. Press the button that you want to move the line to.
4. Press RLS. The two buttons are exchanged.
5. Update the button label strip on your telephone.
Line buttons cannot be exchanged with intercom, answer or Handsfree buttons.
Name and
number
blocking
FEATURE 819
Page
FEATURE 60 and code (1 to 3) and zone (0 to 6)
Make a page announcement through either the internal (code 1) or external (code
2) speakers, or both (code 3). Zone 0 pages all zones.
Page announcements are programmed to timeout after a pre-selected amount of
time which is set by your System Administrator.
Internal page
FEATURE 61 and zone (0 to 6)
Make a page announcement to all, or to a specific group of telephones, through
the telephone speakers. Zone 0 pages all zones.
External page
Block the outgoing name and/or number for a specific call.
FEATURE 62
Make a page announcement through an external loudspeaker system.
Internal and external page
Page 6
FEATURE 63 and zone (0 to 6)
Make a page announcement through both your telephone speakers and an
external loudspeaker system. Zone 0 pages all zones.
Pause
FEATURE 78
Program in an external autodial sequence to insert a 1.5 second delay ï .
For pulse dialing: * also inserts a 1.5 second delay.
Priority
FEATURE 69
Interrupt a person who is on a call.
A person on another call can press FEATURE 85 (Do Not Disturb) to block
priority calls.
Privacy
FEATURE 83
Change the privacy setting for an external line. If a line normally has privacy, this
permits another telephone that shares the line to join your call by selecting the
line while you are using it. If a line normally has privacy disabled, this prevents
another telephone that shares the line from joining your call by selecting the line
while you are using it. The privacy setting is re-established once you end your call
or when you enter the Privacy feature code again.
Ring Again
FEATURE 2
Cancel: FEATURE #2
Monitor a busy or unanswered telephone, or a busy line pool within your system.
Ring Again signals you to call back when the telephone or line pool becomes
available.
Ring type
FEATURE *6
Select a distinctive ring to help differentiate between your telephone and others
nearby.
1. Press FEATURE *6.
2. Enter the ring type number (1 to 4).
3. Press HOLD.
Ring
volume
FEATURE *80
Run/Stop
FEATURE *9
Saved
Number
Redial
FEATURE 67
Make your telephone ring so that you can adjust the volume. You can also adjust
the volume any time your telephone rings.
Store more than one autodial number or external carrier feature code on one
memory button by inserting a break point between numbers or codes. The first
press of the button dials the first number or code; the next press dials the next
number or code. You can program up to four numbers or codes separated by
break points.
Save a number to redial later. Enter the code while you are on a call that you have
dialed to save the number. Enter the code when you are not on a call to redial the
saved number.
Page 7
Service
Schedules
Show service schedules
FEATURE 870
Display the modes that have been turned on at a designated control set.
Ringing service
FEATURE 871
Cancel: FEATURE #871
Turn on one of six schedules for alternative ringing/call answering arrangements
from a designated control telephone.
Restriction services
FEATURE 872
Cancel: FEATURE #872
Turn on one of six services for restrictions on particular lines or telephones from a
designated control telephone. You will be required to enter a password.
Routing services
FEATURE 873
Cancel: FEATURE #873
Turn on one of six services for routing on particular lines or telephones from a
designated control telephone. You will be required to enter a password.
Speed Dial
FEATURE 0
Dial an external telephone number using a two-digit code. There are two types of
speed dial codes: system (01 to 70) and personal (71 to 94). System speed dial
codes can be used from any display telephone in the system. They are assigned
by your System Administrator. Personal speed dial codes are used exclusively at
your telephone. To make a call using a speed dial code:
1. Press FEATURE 0.
2. Enter the two-digit code for the number (01 to 70 for system speed dial, 71 to
94 for personal speed dial).
To program personal speed dial numbers:
1. Press FEATURE *4.
2. Enter a two-digit code from 71 to 94.
3. Specify the external line by pressing a line button, a line pool button, or the
intercom button. If you don’t specify the external line, the system automatically
chooses a line for the call.
4. Dial the telephone number you want to program (up to 24 digits).
5. Press HOLD.
6. Record the code and number you have just programmed.
You cannot program personal speed dial numbers while someone else is
programming your system.
Static time
and date
FEATURE 806
SWCA keys
FEATURE *521
Cancel: FEATURE #806
Change the first line of the display to the current time and date.
FEATURE *536 programmed to buttons with indicators
If you are part of a call group, you may have a number of line buttons that are
labelled as SWCA (system-wide call access). How you use these buttons,
depends on how the System Administrator set up the system. (Refer to the SWCA
user card for detailed instructions.)
FEATURE *520 Find first available SWCA key assigned to this tele-
phone.
FEATURE *537 Find the oldest parked SWCA call on this telephone.
FEATURE *538 Find the newest parked SWCA call on this telephone.
Page 8
Time
FEATURE 803
Briefly display the time and date while you are on a call.
Transfer
FEATURE 70
Send a call to another telephone within your system, or to an external telephone.
You may not be able to transfer a call on an external line to an external telephone,
depending on the capabilities of the lines.
1. Make or answer a call.
2. Press FEATURE 70.
3. Call the person you want to transfer the call to.
4. Stay on the line if you wish to speak to the person first.
5. Press RLS to complete the transfer.
If an external call is transferred to a busy internal or network extension, or is not
answered after a few rings, the call automatically rings you back.
Trunk
Answer
FEATURE 800
Voice call
FEATURE 66
Answer an external call that is ringing on a line that has been placed into a
Ringing Service schedule from any telephone in your system. This feature does
not work for a private line.
Make a voice announcement or begin a conversation through the speaker of
another telephone without first making the other telephone ring.
Voice call
deny
FEATURE 88
Wait for dial
tone
FEATURE 804
Cancel: FEATURE #88
Prevent your telephone from receiving voice calls.
Do Not Disturb (FEATURE 85) also prevents your telephone from receiving voice
calls.
Program in an external autodial number to cause the system to wait to receive dial
tone from another system before proceeding with the dialing sequence.
Call Display Services
The following features are available only if you subscribe to Call Display services
from your local telephone company.
Autobumping FEATURE 815
Cancel: FEATURE #815
Have the system automatically delete the oldest log item from a full Call Log, so
that a new log item can be stored.
Call
Information
FEATURE 811
Call Log
FEATURE 812
Display the name, number or line name of a ringing or held call. Press # to move
through the information displays.
Call Log displays use the following special characters:
underline identifies a new item
handset icon identifies answered calls
globe iconidentifies long distance calls
/
identifies that the information has been shortened
Page 9
To view your Call Log:
1. Press * to view old items.
Press # to view new items.
Press 0 to return to the last viewed item.
2. Press # and * to move through your items.
3. Press the volume bar to view more information on an item.
To erase a Call Log entry:
1. Press HOLD while viewing an item.
To return a call from your Call Log:
1. Display the desired number on your telephone.
2. Edit the number, if required. You can add numbers for long distance dialing or
line pool access or remove numbers using the volume bar.
3. Press a line button.
4. Lift the handset.
Call Log
options
FEATURE *84
Call Log
password
FEATURE *85
Logit
FEATURE 813
Select the type of calls that will automatically be stored in your Call Log. Press #
to see the next setting. Press HOLD to select the displayed setting.
Program a four-digit password for your Call Log. To remove a forgotten password,
see your System Administrator.
Store caller information for your current call in your Call Log.
ETSI feature
MCID
(ETSI feature)
FEATURE 897 within 30 seconds after the caller hangs up, and before you
hang up
Record caller information for last external call at the central office that assigned
the line. This feature only works if the incoming calls were received over ETSI
ISDN lines, and the feature is activated in programming. Check with your system
administrator.
IP telephone features
Feature
menus
Page 10
FEATURE *900 or
(services key access Feature menu)
Activate a display menu of feature options.
1. Press Page+ (move forward) and Page- (move back) to scroll through the list.
2. When you find the feature you want, press Select.
From this point, the feature works in the same manner as it does when invoked
from the keypad or through the memory buttons.
Note: The available features on this menu are configured by your system
administrator.
Hot
desking
FEATURE *999 or
(services key access Feature menu)
You can divert your IP telephone traffic to another IP telephone (i2004, i2002,
i2050) registered on the same system, using the Hot Desking feature. For
instance, this feature can be used if you are temporarily working at another site,
but you want to retain your telephone number and receive all your calls.
Setting up hot desking
1. On your telephone (xxx), enter Hot desking.
2. Press Admin.
The first time you do this, the display reads Creating password.
The next time you enter hot desking, the display reads Enter password.
3. Use the dial pad to enter a password. Note: Use the Back key to erase entries.
4. Press OK.
The first time you do this, the display reads Confirm password. Continue with
step 5. The next time you enter hot desking, the display reads either Disallow
hot desking or Allow hot desking, skip to step 7.
5. Use the dial pad to enter the same password you entered in step 3.
6. Press OK to save the password. The display reads Disallow hot desking.
7. If you want to allow/disallow hot desking, press CHANGE to select the function
you require.
8. Press Quit to exit.
Activating hot desking:
On the telephone to which you are diverting your calls (yyy).
1. Enter Hot desking:
2. Press Divert.
3. At the DN prompt, enter the DN of your telephone (xxx).
4. Press OK. The display reads Enter <
> PW.
5. Enter the password for your telephone (xxx).
6. Press OK.
De-activating hot desking
Hot desking can be cancelled from either IP telephone:
On the active telephone (yyy):
1. Enter the Hot desking feature. The display reads: Cancel hot desking?
2. Press Yes to cancel hot desking. The telephone displays of both sets return to
normal.
To cancel hot desking on the diverted telephone (xxx), press CANCEL.
Automatic cancellation occurs if the UTPS service from the system is terminated
or if either telephone re-boots, or is unplugged, or is hot-desked by a third
telephone.
NOTE: Ensure that the telephone is inactive when you activate or deactivate hot
desking.
Resetting the hot desking password
If you forget your hot desking password, ask your system administrator to reset
the password for your telephone. This will allow you to access hot desking on your
telephone and enter a new password.
Page 11