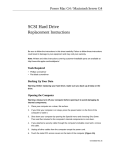
1
Power Mac G4 Lower Fan Replacement Instructions Follow the instructions in this sheet carefully. Failure to follow these instructions could damage your equipment and void its warranty. Note: Written and video instructions covering customer-installable parts are available at http://www.info.apple.com/installparts/. Warning: During this procedure, keep small parts away from children. Warning: Sharp edges exist inside the computer. Use caution when performing this procedure. Tools Required The following tools are required for this procedure: • #2 Phillips screwdriver with a magnetized tip • small flat-blade screwdriver (jeweler’s screwdriver) • needlenose pliers Opening the Computer Warning: Always shut down your computer before opening it to avoid damaging its internal components or causing injury. After you shut down the computer, the internal components can be very hot. Let the computer cool down before continuing. 1. Place your computer on a clean, flat surface. 2. If you think your computer is in sleep, press the power button on the front of the computer to wake it. 3. Shut down your computer and wait five minutes before continuing. 4. If you attached a security cable through the computer’s lockable cover latch, remove the cable. 5. Unplug all other cables from the computer except the power cord. 073-0800 Rev. A 6. Touch the metal PCI access covers on the back of the computer. (Figure 1) Important: To avoid electrostatic discharge, always ground yourself by touching the port access covers before you touch any parts or install any components inside the computer. To avoid static electricity building back up in your body, do not walk around the room until you have completed the installation and closed the computer. Figure 1 Power Mac G4 (Mirrored Drive Doors) Lower Fan - 2 7. Unplug the power cord. (Figure 2) Warning: Never plug in the power cord or turn on your computer unless all of its internal and external parts are in place and it is closed. Operating the computer when it is open or missing parts can damage your computer or cause injury. Make sure the power cord remains unplugged until the entire procedure is completed and the computer is closed. Warning: The power supply in your computer is a high-voltage component and should not be opened for any reason, even when the computer is off. If the power supply needs service, contact your Apple reseller or Apple Authorized Service Provider. Figure 2 8. Lift the latch on the right side access panel. 9. Gently lower the access panel until it lies flat. To avoid scratching the case, lower the panel onto a soft, clean cloth. Warning: If you see any lights glowing on the main logic board, the computer has not been shut down. Close the side access panel and shut down the computer before proceeding. Power Mac G4 (Mirrored Drive Doors) Lower Fan - 3 Removing the Installed Fan 1. Slide the back panel off the optical drive carrier. (Figure 3) Figure 3 2. Remove the two screws that secure the optical drive carrier to the chassis. (Figure 4) Figure 4 Power Mac G4 (Mirrored Drive Doors) Lower Fan - 4 3. Slide the carrier back and rotate it so that you can reach the drive cables. 4. Disconnect the drive data and power cables (P6 and P7) from the back of the optical drive(s) and remove the carrier from the computer. (Figure 5) Figure 5 Power Mac G4 (Mirrored Drive Doors) Lower Fan - 5 5. Disconnect the ATA ribbon cable from the logic board. (Figure 6) Figure 6 6. Disconnect the second ATA ribbon cable from the logic board and fold it back to expose the lower fan cable connector. (Figure 7) Figure 7 Power Mac G4 (Mirrored Drive Doors) Lower Fan - 6 7. Caution: The locking tab on the fan connector is delicate. If the locking tab breaks, the connector should still be usable. However, use a gentle touch when disconnecting the fan connector. Using a small flat-blade screwdriver, gently lift up the locking tab on the lower fan cable as you disconnect the cable from the logic board. (Figure 8) Figure 8 8. Slide the fan straight up to disconnect it from the optical drive shelf, and remove the fan from the computer. (Figure 9) Figure 9 Power Mac G4 (Mirrored Drive Doors) Lower Fan - 7 Installing the Replacement Fan 1. Using needlenose pliers or a flat-blade screwdriver, remove the four plastic pegs from the detachable finger guard and fan. (Figure 10) Figure 10 2. Use the four screws provided with the replacement fan to secure the finger guard to the replacement fan. Power Mac G4 (Mirrored Drive Doors) Lower Fan - 8 3. Install the replacement fan as follows: Replacement Caution: Position the replacement fan as shown so that the fan cable routes along the bottom of the fan, and the cable connector faces the logic board. (The replacement fan is rotated 90 degrees clockwise from the original fan.) Make sure cables are out of the way and cannot be pinched as you slide in the fan. Align the fan with the three latches in the drive shelf and slide the fan straight down until you feel the fan lock into place. (Figure 11) Figure 11 Replacement Note: Route the fan cable under the ribbon cable and over the narrower flex cable, as shown. (Figure 12) Figure 12 4. Connect the ATA ribbon cables to the logic board. Power Mac G4 (Mirrored Drive Doors) Lower Fan - 9 5. Reinstall the optical drive carrier as follows: Replacement Note: Before sliding the carrier back onto the optical drive shelf, make sure the power cable bundle at the side panel are routed in the recessed channel. (Figure 13) Figure 13 Replacement Note: When sliding the carrier back onto the optical drive shelf, make sure the latch on the underside of the carrier engages with the notch in the drive shelf. (Figure 14) Figure 14 Power Mac G4 (Mirrored Drive Doors) Lower Fan - 10 Connect the cables to the optical drive. (Figure 15) Figure 15 Power Mac G4 (Mirrored Drive Doors) Lower Fan - 11 Replacement Note: Before sliding the rear panel back onto the carrier, make sure the top lip of the panel engages with the top edge of the drive carrier. (Figure 16) Caution: Be careful not to pinch the power cable between the panel and the carrier. Figure 16 Install the two optical drive carrier screws. Power Mac G4 (Mirrored Drive Doors) Lower Fan - 12 Closing the Computer 1. Check that the screws removed from the computer have been reinstalled and that all internal cables are connected. 2. Raise the side access panel, lift the latch, and press the panel against the case until it snaps securely into place. 3. Reconnect all cables and restart your computer. Warning: Never turn on your computer unless all of its internal and external parts are in place and it is closed. Operating the computer when it is open or missing parts can damage your computer or cause injury. Apple Computer, Inc. © 2003 Apple Computer, Inc. All rights reserved. Under the copyright laws, this document may not be copied, in whole or in part, without the written consent of Apple. The Apple logo is a trademark of Apple Computer, Inc., registered in the U.S. and other countries. Use of the “keyboard” Apple logo (Option-Shift-K) for commercial purposes without the prior written consent of Apple may constitute trademark infringement and unfair competition in violation of federal and state laws. Every effort has been made to ensure that the information in this document is accurate. Apple is not responsible for printing or clerical errors. Apple Computer, Inc. 1 Infinite Loop Cupertino, CA 95014-2084 USA + 1 408 996 1010 http://www.apple.com Apple, the Apple logo, Mac, Macintosh, and the Mac logo are trademarks of Apple Computer, Inc., registered in the U.S. and other countries. Power Mac is a trademark of Apple Computer, Inc. Power Mac G4 (Mirrored Drive Doors) Lower Fan - 13