1
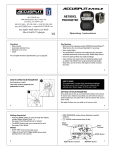
ACCUSPLIT®EAGLE
AE190XLM
ACCUSPLIT, Inc.
3090 Independence Drive, Suite 148
Livermore, CA 94551 USA
PEDOMETER
800-935-1996 • 925-290-1900 • FAX 925-290-1930
www.ACCUSPLIT.com • [email protected]
Eat Right! Walk More! Live Well!
e ACCUSPLIT Lifestyle
Operating Instructions
970-084
Sept 07
Functions
Key Features
•
•
•
•
•
• Built around the Japanese-made JW200 PedometerEngine™
Step Sensor, the current gold standard for accuracy.
• Extra Large Digits.
• The ACCUSPLIT exclusive case makes this the slimmest
available pedometer built around the JW200 Step Sensor.
• Chromed, Spring Steel clip resists breakage.
• Case includes two leash slots, for attaching safety leash
on either side. Made from tough polycarbonate plastic.
• Total Steps Memory counts to 10,000,000 steps!
• Step filter, can be set from 0-5 steps to further increase
accuracy.
Step counter.
Automatic Activity Timer.
Distance in mi or km.
Calories, based on high-accuracy proprietary formula.
Trip and Total memories for Steps, Distance, Calories, and
Activity Time.
• Clock.
For complete Function Specifications, go to page 31.
2
3
HOW TO OPEN YOUR PEDOMETER
See diagrams at right.
The cover must be closed for the
pedometer to work.
USE IT NOW!
Your pedometer is preset with standardized settings
that allow you to use it now! You can customize the
settings later. Skip to pages 17-23 to use it now!
DigiwalkerXL.c
om
STEP
ACCU
190XLM
TIME
4728
DIST
CAL
SET
SPLIT
EAGL
RESE
T
E
MODE
S3–
S1, S2,
S4
S3+
SETTING UP YOUR PEDOMETER
It’s a good idea to set up your pedometer before first using it.
To record your distance and calories accurately, you will need
to set your stride length and body weight. You may also wish
to set the clock to the correct time of day.
See page 9 when you are ready to set up your unit.
4
Getting Acquainted
• Press the MODE button to cycle through the display
modes (Steps, Activity Time, …).
See page 20 and Specifications for details.
• Press MEMORY M button to switch back and forth
between Trip and Total memory displays.
See pages 21–23 for a complete explanation.
• The RESET button sets your counts back to zero.
See page 24 for details.
MODES
• STEP: STEP mode shows step count.
• TIME: AUTO ACTIVITY TIMER MODE shows total
activity time in min and sec.
6
5
• DIST: DISTANCE mode shows distance traveled (mi/km).
• CAL: CALORIE mode shows calories burned.
•
: CLOCK mode shows time of day.
Mode
indicator
DIGI- WALKERXL.COM
STEP TIME
DIST
Steps
Counted
CAL
MY
MEMORY
MODE Button
190 XLM
JW200
S3-
RESET Button (yellow)
S1,S2,S4
S3+
MEMORY Button
7
SETTING PROCEDURE
ACCUSPLIT products use a common setting procedure known as “S1- S2-S3-S4.” Here’s how it works:
Press S1 for 2 seconds: Enter the SET mode
Press S2: Change the field to be set
Press S3: Change the field value
Press S4 for 2 seconds: Exit the SET mode
We recommend that you adjust the settings all at once, using
the procedure below.
Entering set mode
Press and hold the S1 (MEMORY) button for 2 seconds. The display will start to flash, showing that you’ve entered
SET mode. You can enter and exit Set mode from any of the regular
display screens. Once in Set mode, you can cycle through all
of these settings by pressing S2 repeatedly:
Set Stride Length g Set Weight g Set Clock Hours g Set Clock Minutes
8
9
Setting Stride Length
“in” indicator
for inches
Stride
Length
Flashes
DIGI- WALKERXL.COM
STEP TIME
DIST
SET
in
2. Press the S3 + (MODE) button to increase the Stride Length (in increments of ¼ inch), and press the S3- (RESET) button to decrease the Stride Length. Hold the buttons down to change values quickly.
140SXL
JW200
1. Press S2 (MEMORY), repeatedly until the mode indicator bar is underneath DIST and the “in” indicator comes on. The display will show a flashing number, which is your Stride Length set point (in inches).
S3-
S1,S2,S4
S3+
Setting Stride Length
3.Press the S2 (MEMORY) button to adjust your weight
setting.
10
11
Finding Your Stride Length: Your stride length is the
length of one of your steps, measured from “toe to toe.” To
measure, walk 10 steps with your normal stride and measure
the TOTAL DISTANCE from the toe of your starting step to
the toe of your 10th step (see diagram below). Divide the
TOTAL DISTANCE by 10, and multiply the decimal portion by
12 to find your stride length in feet and inches. Example: You
walk 23 feet and 6½ inches in 10 steps. Convert to feet only =
23.542 feet (6½ ÷ 12 = 0.542). Divide by ten to get the stride
length in feet = 2.354 feet. Now, convert back to feet and
inches to get your stride length = 2 feet 4.25 inches (0.354 ×
12 = 4.25).
DIGI- WALKERXL.COM
STEP TIME
DIST
CAL
lb
“lb” to
indicate
pounds
190 XLM
JW200
S3-
S1,S2,S4
S3+
Setting Your Weight
10 steps
12
13
Setting your Weight
Setting the Clock
1. (Continuing from above) - After pressing S2 (MEMORY), you will see the “in” indicator go out, and the “lb” indicator come on. The display will show a flashing number, which is your Weight setting (in pounds).
Note: Unit will show ”kg” for weight setting when in metric mode.
1. (Continuing from above) - After pressing S2 (MEMORY), you will see the “lb” indicator go out, and the “A” or “P” indicator come on. The display will show the current time of day setting, with the Hours value flashing.
2. As before, press the S3 + (MODE) button to increase Hours, and press the S3 - (RESET) button to decrease Hours. Hold the buttons down to change values quickly. Note: the “A” and “P” indicators indicate AM and PM.
3. Press the S2 (MEMORY) button to adjust the Minutes.
4. Press the S3 + (MODE) button to increase Minutes, and press the S3 - (RESET) button to decrease Minutes. Hold the buttons down to change values quickly. Note: the “A” and “P” indicators indicate AM and PM.
15
2. As before, press the S3 + (MODE) button to increase the Weight (in increments of ½ pound), and press the S3 - (RESET) button to decrease the Weight setting. Hold the buttons down to change values quickly.
3. Press the S2 (MEMORY) button to adjust the Clock.
14
Note: If you need to go back and change some of the values,
simply press S2 (MEMORY) to cycle through all of the set
points until you see the one you want to change.
Exiting Set Mode
Press and hold the S4 (MEMORY) button for 2 seconds.
The unit will exit setting mode – no values will be flashing
anymore.
Note: The unit will save any changes and exit set mode after
30 seconds unattended.
WEARING YOUR PEDOMETER
Gently slide the pedometer
onto your belt or the top
edge of your pants or skirt.
It should fit snugly and
level, above one knee. The
strong steel clip makes it
easy.
yes
no
Note: The pedometer should be as vertical as possible.
Walkers with larger stomachs may find it helpful to
wear the pedometer farther back on the body, toward
one hip.
The cover must be closed for the pedometer to work.
16
17
To avoid losing or dropping your pedometer, use the included
leash and clip to fasten the pedometer securely to your
clothing.
Attaching the Leash
First, loop leash
through slot on side
of pedometer
Next, clasp clothing
1. Attach the pedometer to the leash by looping the thin side of the leash through one of the leash slots on the sides of the pedometer case, near the bottom of the unit.
2. Put the pedometer onto your clothing as discussed above.
3. Attach the alligator clip to a belt loop or the top edge of the pants or skirt.
Note: You can also use a safety pin to fasten the leash to your clothing, loop the leash through your belt or belt loop, or use a badge holder.
18
Or, loop a belt
or belt loop
Or, loop a
badge holder, then
put into pocket
(Badge holder
not included)
19
VIEWING YOUR RESULTS
TOTAL vs. TRIP MEMORIES
Once you put on your pedometer with the cover closed, it
will automatically begin to record your steps, activity time,
distance, and calories burned. Repeatedly press the MODE
button to cycle through the pedometer modes:
This unit has two sets of memories – TRIP and TOTAL. The
TRIP memories are displayed in normal operating mode. We
call them TRIP memories because they can be reset whenever
you want, just like the extra Trip odometer on most cars.
STEPS g TIME g DISTANCE g CALORIE g CLOCK g STEPS
Time, Distance, and Calories are counted automatically
whenever steps are being counted.
• TIME is time spent in step activity.
• DISTANCE is simply stride length x steps.
• CALORIES is calorie burn from activity based on your weight and rate of stepping pace.
Note: For extra accuracy, the default Step Filter Setting is 1.
See page 34 to learn more.
DIGI- WALKERXL.COM
DIST
The unit stores both Trip and also Total memories for Steps,
Distance, Calories, and Activity Time. As steps are taken, the
unit increases the values for both Trip and Total memories 21
simultaneously.
To switch back and forth between viewing TRIP and TOTAL
memory, press the MEMORY button (“M”). You’ll see the “T”
icon (for Total) appear when displaying TOTAL memories. The
“T” icon disappears when displaying TRIP memory values.
“T” lights when viewing
Total Memories
STEP TIME
The TOTAL Memories are provided as a way to keep track of
your progress over a long period of time. You may wish to
reset your total memories once per week, per month, per
year, or never! It can be fun to see how many steps or how
much distance you walk in a long period of time.
CAL
The Memory
button switches
between
Trip and Total
Memories
T
In total step memory, the unit displays Steps ÷ 1,000. For
example, 500,000 steps displays as “500.0.” In this way, the
unit can display up to 10,000,000 steps.
190 XLM
JW200
S3-
S1,S2,S4
S3+
Viewing Trip vs. Total memories
22
23
RESETTING YOUR PEDOMETER
OTHER SETTINGS
Resetting TRIP Memories
Most people prefer to reset counts daily. To reset your regular
counts (Trip Memories): From STEP, TIME, DISTANCE, or
CALORIE mode, press and hold the yellow RESET button for
at least 2 seconds. You’ll see the values all go back to zero.
The TOTAL memories stay as they are when resetting the TRIP
memories.
The Step Filter and Unit of Measurement settings are
accessed through a special “deep set” mode.
To enter this mode, press and hold the S1 (MEMORY) button
for 4 seconds. The screen will display a single digit. From
within Deep Set mode, press the S2 (MEMORY) button to
cycle back and forth between the Step Filter set point and
Choice of Unit System.
Resetting TOTAL and TRIP Memories
To reset your TOTAL Memories (which always resets TRIP
Memories) , go into Total Memory Recall Mode. Press and
hold the yellow RESET button for at least 2 seconds to clear
BOTH TOTAL and TRIP memories.
24
25
CHANGING STEP FILTER SETTING
While the JW200 PedometerEngine™ Step Sensor is
extremely accurate, some people like to have the ability to
filter out false steps. Therefore, the unit has a variable setting
step filter, to allow fine-tuning to your specific preferences.
You can set the value to any value from 0 – 5 steps. For
example, if the filter is set to “3”, the unit will wait to start
counting steps until more than three steps have been taken in
less than five seconds.
Can be set
from 0-5
steps
DIGI- WALKERXL.COM
STEP TIME
DIST
CAL
“US” (English)
or “EU” (Metric)
DIGI- WALKERXL.COM
STEP TIME
DIST
190 XLM
CAL
JW200
S3-
S1,S2,S4
S3+
Set Step Filter set point
Press S3+ (MODE) or S3– (RESET) to change the Step Filter
Setting.
190 XLM
JW200
26
S3-
S1,S2,S4
S3+
Set measurement mode
CHANGING UNITS (English vs. Metric)
The Pedometer can display either in English units (in, mi, and lb - this
is the default), or in Metric units (cm, km, and kg). From within Deep
Set mode (see pg. 25), press the S2 (MEMORY) button to cycle back
and forth between setting the Step Filter set point and Choice of Unit
System. The unit will show either “US” or “EU” (for European Union)
depending on the unit system chosen. If you change units after using
the pedometer, the unit will convert all of your data into the new unit
system when you exit Deep Set model. You can check to see which
system of units you are using by seeing which measurement units
are displayed on the Stride and Weight setting screens.
Press S3+ (MODE) or S3– (RESET) to change the Measurement Mode.
Press and hold S4 (MEMORY) for 2 seconds to exit Deep Set Mode.
REPLACING THE BATTERY AND MASTER RESET
When the display starts to dim or goes blank, it is time to
replace the battery. If the display is not uniformly dim or blank, and appears to
display “erroneous data”, do a Master Reset by pressing all 3 buttons simultaneously for 3 seconds and then release.
The display should go blank, then turn all segments on, then
display 0 steps in Step Mode.
Note: All the settings will return to their default setting values. If you need to change the battery, the settings will also revert to default settings.
Note: The unit will save any changes and exit set mode after 30 28 seconds unattended.
Description of Functions
Battery
3. Snap faceplate back into place, hooking the bottom two tabs first, then closing by pressing together at the top two tabs. 30
29
SPECIFICATIONS, FEATURES, and FUNCTIONS
To replace the battery:
1. Insert a coin into the slot on the bottom of the case, and twist to loosen the faceplate. Remove faceplate and set aside.
2. Locate the battery holder as seen on sketch. Pull out the old battery, and push a new LR-44 battery into the holder, with positive terminal (+) facing up.
27
•
•
•
•
•
Counts Steps up to 99,999 then rollover.
Has a Total Memory for Steps that counts up to 99,999,999 steps, then rollover.
Counts Time spent in step activity, up to 999 Min 59 sec, then rollover. Automatically counts whenever step activity is occurring.
Has a Total Memory for Activity Time that counts up to 99,999 minutes, then rollover.
Counts distance traveled during step activity, up to 999.99 mi or km, then rollover. Automatically counts whenever step activity is occurring.
31
•
•
•
•
•
Has a Total Memory for Distance that counts up to 99,999 mi or km, then rollover.
Adjustable stride length for greater distance accuracy (default setting is 21 in/53 cm, but can be set from 12-72 in (30-180 cm), in 0.25 in / 1 cm increments.
Counts Calories consumed during step activity, up to 9,999.9 Kcal, then rollover. Automatically counts whenever step activity is occurring.
Uses a proprietary formula for high accuracy in Calorie computation.
Has a Total Memory for Calories that counts up to 9,999.9 Kcal, then rollover.
•
•
•
•
Adjustable Weight setting for greater Calorie accuracy (default setting is 100lbs/45 kg, but can be set from 66-400 lbs./30-180kg in 0.5 lb. / 0.5 kg increments.)
12 Hour Clock (default setting is 10.00am).
Adjustable Step Filter (default setting is 1 step, but can be set from 0-5 steps) to increase step count accuracy.
Switchable between English and Metric units, without losing data (default setting is English units).
32
33
REGISTER NOW Please return
Email (preferred)
your AE190XLM Registration to
the Repair Center address in the
warranty, and we will let you know
about future products.
User
NO-PROOF-OF-PURCHASE LIMITED WARRANTY
Free service for first year of ownership;
$12 fee for service thereafter. See label inside unit for date.
See www.ACCUSPLIT.com/support for details
34
INDEX
Battery, replacing . . . . 29-30
Clock, setting . . . . . . . . 15-16
Current day’s results, viewing . . . . . . . . . . . . . 20
Setting Mode, exiting . . . 16
Memory . . . . . . . . 6-7, 21-23
Memory, resetting . . . . . . 24
Open your pedometer . . . . 4
Safety Leash . . . . . . . . . 18-19
Setting up pedometer . . 5-16
Step Filter Setting, change . . . . . . . . . . . 26-27
Stride Length, setting . . . . . . . . . . . . 10-12
TOTAL vs TRIP Memories . . . . . . . . . 21-23
Unit of measure, changing . . . . . . . . . . . . 28
Wearing pedometer . . . . . 17
Weight, setting . . . . . . . 13-14
Warranty . . . . . . . . . . . . . . 34
35