1
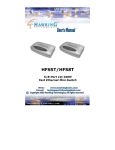
8-Port Fast Ethernet
10/100Mbps N-Way Switch
User’s Guide
FCC REGULATORY STATEMENTS
Part15, Class B
This device complies with Part 15 of FCC rules. Operation is
subject to the following two conditions:
1.
This device may not cause harmful interface, and
2.
This device must accept any interface received,
including interface that may cause undesired operation.
This equipment has been tested and found to comply
with the limits for a Class B digital device, pursuant to
Part 15 of the FCC Rules. These limits are designed to
provide
reasonable
protection
against
harmful
interference in a residential installation. This equipment
generates, uses and can radiate radio frequency energy,
and if not installed and used in accordance with the
instructions, may cause harmful interference to radio
communications. However, there is no guarantee that
interference will not occur in a particular installation. If
this equipment does cause harmful interference to radio
or television reception, which can be determined by
turning off and on, the user is encouraged to try to
correct the interference by one or more of the following
measures:
•
Reorient or relocate the receiving antenna.
•
Increase the distance between the equipment and
receiver.
•
Connect the equipment into an outlet on a circuit
different from that to which the receiver is connected.
Changes or modifications not expressly approved
by party responsible for compliance could void the
user authority to operate the equipment.
INTRODUCTION
The Fast Ethernet 10/100Mbps N-Way Switch
provides you a flexible, reliable, and affordable
solution of the Ethernet network. It comes with
eight independent 10BASE-T/100BASE-TX
ports. Each port delivers up to 200Mbps
throughput, and is able to operate in either half
or full-duplex modes.
The Fast Ethernet 10/100Mbps N-Way Switch
also processes a N-Way auto-negotiation
function, which automatically adjusts the device
for optimum operation; “Store-and-Forward”
architecture filters to eliminate error packets and
improve efficiency, and MDI/MDIX auto
crossover technology provides for detecting a
plugged straight through or crossover Ethernet
cable automatically. Plus, Built-in 2M bits
DRAM is smaller than the SRAM in dimension
and features very low power consumption, as
low as 1.8W.
Key Features & Specification
Compliant with IEEE 802.3 10Base-T and IEEE
802.3u 100Base-TX standards
Supports store-and-forward and cut-through
operation
10/100Mbps port auto-detect on Full or Half
Duplex mode
IEEE 802.3x or Back Pressure (HDX) Flow
-1-
Control
Each Ethernet port supports MDI/MDIX
auto crossover capacity
8 (Eight) 10/100Mbps Auto-Detection ports
Provides non-blocking and non-head-of-line
blocking forwarding capacity
Embedded 8K entries of look-up table and 128
entries of CAM
2M bits DRAM is built in as package storage
buffer. Page based buffer management to
efficiently utilize the internal packet buffer.
Broadcast storm control
Power Feeding (Please do not use any other
adapters
besides
the
one
provided):
+5VDC/1.5A
Dimension (WxDxH):
138.5mm x 76mm x 21.5mm
Automatic power saving
8 x RJ45 STP/UTP network ports on rear panel
Emission Certification: FCC/CE Class B
Operating Environment:
Temperature: 0 ~ 40oC; Humidity: 5 ~ 90 % RH
Package contents:
One 8-Port 10/100Mbps Fast Ethernet N-Way
Switch
One power adapter
This User’s Guide
Magnetic rubber feet
-2-
PARTS NAMES AND FUNCTIONS
Front Panel LED Indications
LED
POWER
LINK/ACT
Status Description
ON
Power On
ON
A valid connection
Blinks Receives packets
ON
SPD
OFF
Connects to a 100Mbps
Fast Ethernet connection
Connects to a 10Mbps
Ethernet connection
Ethernet Ports (1-8)
Ethernet Ports with MDI/MDIX auto crossover
capacity.
Power Port
Connect to the External power adapter.
-3-
HARDWARE INSTALLATION
Hub installation
The hub is considered as a “plug and play”
network device and requires no special setup
except for plugging the appropriate power
adapter and cables.
1. Put the hub on the appropriate location.
When you install the hub, there are two
things needed to be considered:
Location: Your hub should be located in a
place that is central to your home/office
space and allows all computers and
networked devices connected to your hub.
2.
3.
Power: Remember to locate your hub near
electrical outlet.
Power on the hub by connecting the power
adapter.
Verify if the power (POWER) LED is on.
If the POWER LED does not light up,
check the power cord and power outlet to
verify its connection. If it still remains
unlit, please contact your dealer for support.
Ethernet Port Connection
Connect user machines, servers, another switch,
hub, or any other devices to the Ethernet ports on
this hub with either straight through or crossover
Ethernet cables.
-4-