1
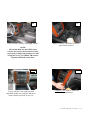
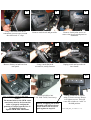
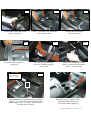
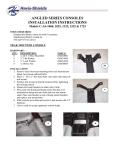
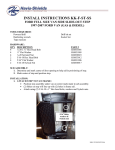
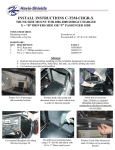
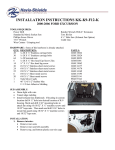
INSTALL INSTRUCTIONS C-VS-1000-TAH
VEHICLE SPECIFIC CONSOLE
2007-2014 CHEVY/GMC SUBURBAN/TAHOE/YUKON XL/
YUKON/AVALANCHE
TOOLS REQUIRED:
Ratcheting wrench
Metric/Standard Socket Set
Standard Wrench Set
HARDWARE:
QTY DESCRIPTION
1
OEM switch bracket
4
¼-20 Serrated nut
2
¼-20 x ¾” Hex bolt
2
#10 x ¾” Sheet metal screw
1
Torx screw hardware kit
Power drill w/ 1/8” drill bit (optional)
Screwdriver set
T-20 torx bit
PART #
CM001800-3
GSM30023
GSM33001
GSM33195
C-HK-1
C-VS-1000-TAH
Switch cutout filler plate
CM001800-4
OEM switch bracket
CM001800-3
Supplied lighter plugs
#1
View of OEM / Factory full-length console.
#2
Remove factory cup holder/accessory
pocket from console
NOTE:
The mount bolts for the OEM center
console may need to be loosened in order
to properly readjust the position so it will
accept the New C-VS-1000-TAH console.
Tighten OEM bolts when done.
Note:
If your console is not equipped with
adjustable pedal, tow package, and power
brake switches proceed to step #13
#3
CAREFULLY separate trim bezel
from dashboard
C-VS-1000-TAH_INST_12-10.docx rev 11-13
#4
#5
#6
Using a flat head screwdriver
concentrate pressure on or around
the trim bezels “J” clips
Remove entire bezel and put aside.
Remove factory trim screws to
remove the lower switch panel on
dashboard
#7
#8
#9
Remove factory switch box from
trim panel
#10
View of factory console at this time
NOTE:
The mount bolts for the OEM center
console may need to be loosened in
order to properly readjust the
position so it will accept the New CVS-1000-TAH console.
Tighten OEM bolts when done.
Using a small flat head
screwdriver, unclip fastener
Unplug switch and set aside for
later install
#11
Install switch box into
C-VS-1000-TAH (if necessary)
NOTE: Wrapping the switch
assembly with electrical tape
works well for the screws to
push against in step #12.
#12
Attach switch box to console
using T-20 torx screws. Do not
over tighten screws. This will
cause the switches to “stick” in
the ON position.
C-VS-1000-TAH_INST_12-10.docx rev 11-13
#13
#14
Install lighter plugs and extend
wires as necessary.
Slide C-VS-1000-TAH, front side
first, as shown above.
#16
#17
#15
Carefully drop backside of
console as shown
#18
#20
Re-attach factory plug into
switch box
For added
support install
#10 x ¾” screws
Be sure plug is secure and
wires are carefully routed so
not to chafe
Align rear-mounting studs into
factory console holes and attach
using ¼” Serrated nuts.
#19
Attach middle of VS console to factory console
using ¼” x ¾” Hex bolts and serrated nuts. For
added support #10 x ¾” screws can be installed
on front side of console
Route all wiring to console. Wire,
and install control heads and
accessories (Sold separately)
C-VS-1000-TAH_INST_12-10.docx rev 11-13