1
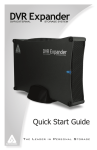
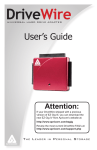
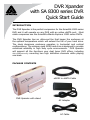
DVR Xpander
with SA 8300 series DVR
Quick Start Guide
INTRODUCTION
The DVR Xpander is the perfect companion for the Scientific 8300 series
DVR and it will operate on any DVR with an active eSATA port. Most
cable companies use the Scientific-Atlanta Explorer 8300 series DVR’s.
The DVR Xpander has an ultra-cool fan that keeps the enclosure at
the optimal temperature which will extend the life of your hard drive.
The sleek aluminum enclosure operates in horizontal and vertical
configurations. The whisper quiet SATA hard drive is designed to provide
enhanced reliability in high duty cycle environments. DVR Xpander
will support all the functions your dual tuner DVR offers, including
simultaneously recording two high definition channels while playing
one back.
PACKAGE CONTENTS
eSATA to eSATA Cable
DVR Xpander with stand
AC Adapter
AC Cable
CONNECTING THE DVR Xpander to the 8300 SERIES DVR
1. Turn the power off and disconnect the power cable to your Scientific
Atlanta 8300 series DVR.
2. Connect one end of the eSATA cable to the back of the DVR Xpander
3. Connect the AC adapter to the back of the DVR Xpander and then connect
it to the AC cable.
4. Connect the other end of the AC cable to suitable power supply that will
always stay on (like a wall outlet). Never connect the DVR Xpander to the AC
plug on the back of the 8300 series DVR.
5. Verify that the DVR Xpander is turned off by observing the front panel. At
this point there should not be any lights on the DVR Xpander.
If there is a light glowing on the front of the DVR Xpander, push the power
button to turn it off.
6. Now connect the other end of the eSATA cable to the eSATA port on the
back of the 8300 series DVR.
7. Push the power button on the front of the DVR Xpander to turn it on. The
LED light should start to glow.
8. Reconnect the power cable to the 8300 series DVR and allow to the system
to boot up. The boot up process may take a few minutes.
FORMATTING THE DVR Xpander
Once your 8300 series DVR boots up and recognizes the DVR Xpander the following
message should appear on the TV screen:
Attention
Format this external hard drive with this DVR?
Note: Any existing recordings on the external drive will be erased.
If you press C cancel, the external storage device will not be available
A yes, Format
C cancel
Press A to format the drive (Formatting will take several minutes)
Note: After it is complete you will get the message below
Attention
The external storage device connected works with this DVR.
NOTE: To safely unplug this device, first unplug power from the DVR, and
then wait 10 seconds before disconnecting
Exit Close
Press Exit to close the banner
Note: Your DVR and DVR Xpander are now operational.
www.apricorn.com
FAQ’S
How are recorded programs stored on the Scientific Atlanta 8300
series DVR once the DVR Xpander is installed?
Recordings are balanced between the internal hard drive on the 8300 series
DVR and the DVR Xpander as follows: A recording is not split between an
internal hard drive and the DVR Xpander. The 8300 series DVR automatically
stores complete program using space available logic: If the DVR Xpander
has more space available, the DVR Xpander stores the next recording. If
the internal hard drive on the 8300 series DVR has more space available, its
internal hard drive will store the next recording.
Why aren’t my recorded programs available for playback
The 8300 series DVR does not designate which hard drive your recorded
programs have been stored on. When the DVR Xpander is not connected to
the 8300 series DVR, all the programs that were recorded to the DVR Xpander
will be still be listed, but not available for viewing.
Why can’t I rewind or fast forward my live TV?
This is a known limitation on Time Warner systems and will happen when the
Scientific Atlanta DVR is recording to the DVR Xpander.
How can I check which version of software is loaded on my 8300
series DVR?
There are two methods for checking your software version and they both
require entering “Diagnostic Mode”.
Method 1 for entering “Diagnostic Mode”. Press and hold the “Select button”
on the front of the unit until the Mail light starts to flash, then press the INFO
button.
Method 2 for entering “Diagnostic Mode”. Press and hold the “Pause button”
on the remote until the Mail light starts to flash which may take as long as 10
to 15 seconds, then press the Page Up button.
Scroll through the pages until you see SARA or PASSPORT listed.
www.apricorn.com
CONTACTING TECHNICAL SUPPORT
Apricorn provides the following helpful resources for you:
1. Apricorn’s Website (http://www.apricorn.com)
This gives you the ability to check for up-to-date information.
2. E-mail us at [email protected].
3. Or call the Technical Support Department at 1-800-458-5448.
Apricorn’s Technical Support Specialists are available from 8:00 a.m. to
5:00 p.m., Pacific Standard Time Monday through Friday.
WARRANTY
One Year Warranty:
Apricorn offers a 1-year warranty on the DVR Xpander against defects in materials and workmanship
under normal use. The warranty period is effective from the date of purchase either directly from
Apricorn or an authorized reseller.
Disclaimer and terms of the warranties:
The warranty becomes effective on the date of purchase and must be verified with
your sales receipt or invoice displaying the date of product purchase.
Apricorn will, at no additional charge, repair or replace defective parts with
new parts or serviceable used parts that are equivalent to new in performance.
All exchanged parts and products replaced under this warranty will become the
property of Apricorn.
This warranty does not extend to any product not purchased directly from Apricorn
or an authorized reseller or to any product that has been damaged or rendered
defective: 1. As a result of accident, misuse, neglect, abuse or failure and/or inability
to follow the written instructions provided in this instruction guide: 2. By the use
of parts not manufactured or sold by Apricorn; 3. By modification of the product;
or 4. As a result of service, alternation or repair by anyone other than Apricorn and
shall be void. This warranty does not cover normal wear and tear.
No other warranty, either express or implied, including any warranty or
merchantability and fitness for a particular purpose, has been or will be made by
or on behalf of Apricorn or by operation of law with respect to the product or its
installation, use, operation, replacement or repair.
Apricorn shall not be liable by virtue of this warranty, or otherwise, for any
incidental, special or consequential damage including any loss of data resulting
from the use or operation of the product, whether or not Apricorn was apprised of
the possibility of such damages.
© Apricorn, Inc. 2007. All rights reserved.
12191 Kirkham Road
Poway, CA, U.S.A. 92064
1-858-513-2000
www.apricorn.com
www.apricorn.com