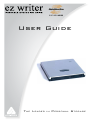
1
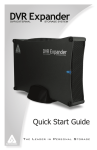
User Guide T he L eader in P ersonal S torage Copyright © Apricorn, Inc. 2008. All rights reserved. Windows is a registered trademark of Microsoft Corporation. All other trademarks and copyrights referred to are the property of their respective owners. Distribution of substantively modified versions of this document is prohibited without the explicit permission of the copyright holder. Distribution of the work or derivative work in any standard (paper) book form for commercial purposes is prohibited unless prior permission is obtained from the copyright holder. DOCUMENTATION IS PROVIDED AS IS AND ALL EXPRESS OR IMPLIED CONDITIONS, REPRESENTATIONS AND WARRANTIES, INCLUDING ANY IMPLIED WARRANTY OF MERCHANTABILITY, FITNESS FOR A PARTICULAR PURPOSE OR NON-INFRINGEMENT, ARE DISCLAIMED, EXCEPT TO THE EXTENT THAT SUCH DISCLAIMERS ARE HELD TO BE LEGALLY INVALID. FCC Compliance Statements This equipment has been tested and found to comply with the limits for a Class B digital device, pursuant to Part 15 of the FCC Rules. These limits are designed to provide reasonable protection against harmful interference in a residential installation. This equipment generates, uses and can radiate radio frequency energy and, if not installed and used in accordance with the instructions, may cause harmful interference to radio communications. However, there is no guarantee that interference will not occur in a particular installation. If this equipment does cause harmful interference to radio or television reception, which can be determined by turning the equipment off and on, the user is encouraged to try to correct the interference by one or more of the following measures: Reorient or relocate the receiving antenna. Increase the distance between the equipment and receiver. Connect the equipment into an outlet on a circuit different from that to which the receiver is connected. Consult the dealer or an experienced radio/TV technician for help. CAUTION CHANGE OR MODIFICATIONS NOT EXPRESSLY APPROVED BY PARTY RESPONSIBLE FOR COMPLIANCE COULD VOID THE USER AUTHORITY TO OPERATE THE EQUIPMENT. TABLE OF CONTENTS Introduction ................................................................. 4 System Requirements ................................................... 5 EZ Writer Kit ................................................................ 6 Part Names and Functions ............................................. 7 Front Panel of the Drive ........................................... 7 Rear Panel of the Drive ............................................ 7 Hardware Installation .................................................... 8 Device Drivers and Drive Letters for Windows 2000/XP .... 9 Copy files and folders to a CD (Windows) ....................... 12 “Drive is not Accessible” error ........................................ 13 Disconnecting ............................................................... 14 Contacting Technical Support ........................................ 15 RMA Policy ................................................................... 15 Warranty Conditions ..................................................... 16 What is LightScribe? ..................................................... 17 Introduction EZ Writer has the following features: Attaches through the USB (Universal Serial Bus) interface, the specification of the interface must meet: USB 1.1 (Data Transfer Rate = up to 12MBits/sec) or USB 2.0 (Data Transfer Rate = up to 480Mbits/sec) standard This drive can read all types of CD and DVD media including CD, CD-R, CD-RW and DVD disk, DVD-DL, DVD-R/DVD-RW, DVD+R/DVD+RW. As well as write to CD-R, CD-RW and DVD recordable media.* EZ Writer can be easily connected to computer via USB port, and can even be disconnected and re-connected while the computer is running (Plug-n-Play). Bus Powered, No AC power adapter required. LightScribe direct disc labeling (EZ-WTR-DVD-DL4-LS Only). LightScribe is an innovative technology that uses a special disc drive, special media, and label-making software to burn labels directly onto CDs and DVDs. Because the labels are laser-etched—not printed—there’s no ink, no smudging, and no peeling. Burn your data (music, photos, video, etc.) in the EZ Writer drive. When your data burning is complete, open the drive and flip the disc over. Then burn your LightScribe label. For more information about LightScribe go to the What is LightScribe section of this manual. This user’s manual is intended to describe how to install EZ Writer on the computer. To use the recording & playing software, please refer to the “OnLine Help” provided by the software publishers. * Only with DVD burner optical drive, NOTE: Depending on the DVD burner included with you EZ Writer it may support either DVD-DL, DVD-R/DVD-RW, or DVD+R/DVD+RW, or both formats. The optical drive capabilities included with your EZ Writer will be clearly marked on the product packaging. 4 The Leader in Personal Storage System Requirements USB 2.0 function USB 1.1 function Notebook or desktop computer with USB 2.0 port. Notebook or desktop computer with USB 1.1 port. Windows 2000/XP. Windows 2000/XP. LightScribe Compatibility (EZ-WTR-DVD-DL4-LS Only) Windows 2000 (Win 2K) Windows XP LightScribe System Software NOTE: Although EZ Writer supports USB 2.0, the actual transfer speed is dependant on the speed of the USB port it is connected to. If the USB port supports USB 2.0, EZ Writer works at USB 2.0 speeds (up to 480Mbits/sec); if the USB port only supports USB 1.1, EZ Writer can only work at USB 1.1 speeds (up to 12Mbits/sec). When connecting the external drive to a USB 1.1 port, the Data Transfer Rate is too slow to guarantee smooth playback of the DVD video title. Apricorn only recommends connecting to a USB 2.0 port to ensure smooth playback of DVD video titles. www.apricorn.com 5 EZ Writer Kit EZ Writer Kit includes the following items: EZ Writer Unit USB cable AC Adapter User Guide Software for model #EZ-WTR-DVD-DL4-LS Nero 8 Essentials Software for model #EZ-WTR-DVD-C24 Nero 7 Essentials CyberLink Power DVD 6 The Leader in Personal Storage Parts Names & Functions Your EZ Writer may differ slightly from the figure shown, however the controls will operate as described below. Front Panel of the Drive: 1. Disc Ready/Read LED: This LED is used to indicate the disc access status. 2. Eject Button: Press this button to open the disc tray. To close the disc tray, gently push the front of the try. 3. Emergency Eject: In case you cannot supply power to the drive but want to remove a disk from the tray, push a small rod (paperclip) about 5cm long, through the Emergency Eject hole to disengage the gears inside. Then pull the tray out manually. After removing the disk, gently push the tray back to its original position. This procedure is only to be used in the case of an emergency and is not meant for normal operation. NOTE: Front panel may look slightly different depending upon which optical drive is included with you EZ Writer. Rear Panel of the Drive 1. Interface Connector: Connect the USB interface cable here. 2. Power Jack (DC IN): Connect the AC Adapter lead here. www.apricorn.com 7 Hardware Installation Note: Depending on the host computer EZ Writer’s low power design will receive sufficient power to operate through the USB cable alone. Should you need additional power an AC Adapter has been included. Only use the AC Adapter provided by Apricorn, using an incorrect AC Adapter can result in permanent damage to the drive. 1. Insert the plug of the USB cable into the Interface Connector of the drive. Press firmly until the cable is seated correctly. 2. Place the external drive in the horizontal position. The drive is designed to operate only in the horizontal position. Operating the external drive in any abnormal position is not recommended. 3. If additional power is needed, connect the AC Adapter lead to the Power Jack (DC IN) at the rear panel of the drive. And then attach the AC Adapter to the AC power outlet. 4. Insert the port connector of the USB cable into the USB port of your computer and your EZ Writer drive is now ready for use. Port connector of the USB Cable 8 USB Port of computer The Leader in Personal Storage Device Drivers and Drive Letters for Windows 2000/XP 1. Boot up your computer into Windows 2000/XP. 2. Connect the USB interface cable and the AC adapter (if needed) as described in Hardware Installation. 3. Windows 2000/XP will automatically install its resident device driver (USB Mass Storage Device). After the installation, EZ Writer will appear under a new drive letter in ‘My Computer’. 4. If EZ Writer does not appear in ‘My Computer’ or does not work properly, right click on ‘My Computer’ and click on ‘Manage’ then under ‘System Tools’ you will click on ‘Device Manager’ and check whether the devices are installed as indicated below. Installed Device Drivers Location USB Mass Storage Device Installed under ’Universal Serial Bus Controllers’. Slimtype DVDRW Installed under ’DVD/CD-ROM drives’ (the drive listed in the figure may differ from your EZ Writer drive). www.apricorn.com 9 Device Drivers and Drive Letters for Windows 2000/XP 5. If the ‘Device Manager’ entries are correct and EZ Writer still does not appear in ‘My Computer’, you may need to reassign the ‘Drive Letter’. This is typically because you have mapped network drives and the EZ Writer has assigned the same ‘Drive Letter’ as one of the mapped drives. 6. To reassign the drive letter right click on ‘My Computer’ and click on ‘Manage’ then under ‘Storage’ you will click on ‘Disk Management’. 7. On the lower half of the window scroll down to see the CD-ROM Drives listed in numerical order. You are looking for a CD-ROM with DVD and a duplicate drive letter or no drive letter at all. 10 The Leader in Personal Storage Device Drivers and Drive Letters for Windows 2000/XP 8. Right click and open ‘Change Drive Letters and Paths’ dialog box. 9. Now click the down arrow next to the ‘Drive Letter’ to open the drop down menu and choose a new ‘Drive Letter’. Make sure to choose a ‘Drive Letter’ that does not conflict with any of the mapped network drives. Click on the OK button to assign the new ‘Drive Letter’ and close all the windows. 10.Go to ‘My Computer’ to verify that EZ Writer appears. 11. You are now ready to start copying files and folders to the EZ Writer DVD. www.apricorn.com 11 Copy files and folders to a CD (Windows) Note: If your are copying files to a DVD, you must use the DVD buring software provided. 1. Insert a blank, writable CD into the CD recorder. 2. Open My Computer. 3. Click the files or folders you want to copy to the CD. To select more than one file, hold down the CTRL key while you click the files you want. Then, under File and Folder Tasks, click Copy this file, Copy this folder, or Copy the selected items. If the files are located in My Pictures, under Picture Tasks, click Copy to CD or Copy all items to CD, and then skip to step 5. 4. In the Copy Items dialog box, click the CD recording drive, and then click Copy. 5. In My Computer, double-click the CD recording drive. Windows displays a temporary area where the files are held before they are copied to the CD. Verify that the files and folders that you intend to copy to the CD appear under Files Ready to be Written to the CD. 6. Under CD Writing Tasks, click Write these files to CD. Windows displays the CD Writing Wizard. Follow the instructions in the wizard. 12 The Leader in Personal Storage “Drive Not Accessible” error If you receive a “Drive Not Accessible” error when you try to access the EZ Writer in ‘My Computer’ or after trying to drag and drop files to you EZ Writer drive, you may need to enable CD Recording on this drive. 1. Go to Start, My Computer and right click on the appropriate CD drive. (Both DVD’s and CD’s may show up as a CD drive in Windows) 2. Scroll down and click on Properties to open the CD properties dialog box. 3. Click on the Recording tab and check the enable recording on this drive check box. 4. Click apply and OK to close the dialog box. Now you should be able to drag and drop files to this drive. www.apricorn.com 13 Disconnecting Windows 2000 and XP 1) Locate the system tray on your Windows Desktop (the system tray is the part of the taskbar that displays the date and time). 2) Click on the “Safely Remove Hardware” icon tray. A dialog box will appear. in the system 3) Click ‘Safely Remove Mass Storage Device – Drive (D:) in the dialog box. (Your drive letter may differ). 4) Wait for few seconds until the system prompts ‘The hard disk storage device can now be safely removed from the system.” Click OK, and then unplug the EZ Writer. NOTE: To protect against unexpected data loss, Windows checks that all files on the drive are closed before allowing the USB device to be removed. If you receive an error message that says “The device cannot be stopped right now. Try stopping the device again later.” Close all Windows and Programs that are using files from the drive, then repeat the procedure. 14 The Leader in Personal Storage Contacting Technical Support Apricorn provides the following helpful resources for you: 1. Hardware Installation Section of the User’s Guide. 2. Apricorn’s Website (http://www.apricorn.com) This gives you the ability to check for up-to-date information. 3. E-mail us at [email protected]. 4. Or call the Technical Support Department at 1-800-458-5448. Apricorn’s Technical Support Specialists are available from 8:00 a.m. to 5:00 p.m., Pacific Standard Time from Monday through Friday. RMA Policy An RMA (Return Merchandise Authorization) tracking number must be issued by Apricorn. If you need to return or replace your EZ Writer, Apricorn requires that you perform the following steps: 1. Find your original receipt. 2. Simply call Apricorn’s technical support department with your EZ Writer part number and a description of the problem(s) you are experiencing. 3. If the Apricorn representative finds cause for a return, they will issue an RMA number. Please write this number down. 4. Fill out an RMA authorization form with your package. The RMA form is available on-line at http://www.apricorn.com/support/rma.php. 5. Please send the prepaid package including RMA form and receipt to the following address, make sure the RMA# is written on the exterior of the package: Apricorn RMA#: __________ 12191 Kirkham Road Poway, CA 92064 The purchaser shall be responsible for any loss or damage to the returned product until it is received by Apricorn. Purchaser should consider obtaining insurance with respect to shipping the product. www.apricorn.com 15 Warranty Conditions One -Year Warranty: Apricorn offers a 1-year warranty on EZ Writer products against defects in materials and workmanship under normal use. The warranty period is effective from the date of purchase (validated by your original receipt) either directly from Apricorn or an authorized reseller. Disclaimer and terms of the warranties: The warranty becomes effective on the date of purchase and must be verified with your sales receipt or invoice displaying the date of product purchase. Apricorn will, at no additional charge, repair or replace defective parts with new parts or serviceable used parts that are equivalent to new in performance. All exchanged parts and products replaced under this warranty will become the property of Apricorn. This warranty does not extend to any product not purchased directly from Apricorn or an authorize reseller or to any product that has been damaged or rendered defective: 1. As a result of accident, misuse, Neglect, abuse or failure and/or inability to follow the written instructions provided in this instruction guide: 2. By the use of parts not manufactured or sold by Apricorn; 3. By modification of the product; or 4. As a result of service, alternation or repair by anyone other than Apricorn and shall be void. This warranty does not cover normal wear and tear. No other warranty, either express or implied, including any warranty or merchantability and fitness for a particular purpose, has been or will be made by or on behalf of Apricorn or by operation of law with respect to the product or its installation, use, operation, replacement or repair. Apricorn shall not be liable by virtue of this warranty, or otherwise, for any incidental, special or consequential damage including any loss of data resulting from the use or operation of the product, whether or not Apricorn was apprised of the possibility of such damages. 16 The Leader in Personal Storage What is LightScribe? LightScribe is a disc-labeling technology that lets you laser-etch a label directly on your disc. Creating professional-looking discs is easy: burn your disc, flip the disc over, and then burn your label onto the disc. The same drive that burns your data, burns your label. The LightScribe labeling system has no ink to smear, no paper to curl, and no sticky adhesive to cause problems. HARDWARE, SOFTWARE AND MEDIA There are three things you need to successfully use the Direct Disc Labeling feature on your EZ Writer CD/DVD burner: LightScribe hardware, LightScribe software and LightScribe media. 1. Hardware You will see the LightScribe logo on the outside of your EZ Writer CD/DVD burner (depending on the model you have purchased) and your box will be clearly marked with the LightScribe direct disc labeling logo. This confirms that it is equipped with the Direct Disc Labeling LightScribe technology. 2. Software Your EZ Writer CD/DVD burner comes with the necessary LightSribe Direct Disc Labeling System Software. This will allow you to create personalized CD and DVD labels and burn them directly onto the CD’s and DVD’s with your Light-Scribe enabled EZ Writer burner. 3. Special CDs or DVDs. LightScribe works when the hardware interacts with the special coating that can only be found on LightScribe discs. Specially coated LightScribe discs are available at major retail stores or online. LightScribe discs are identified by the LightScribe logo on the media package. www.apricorn.com 17 Notes: 18 The Leader in Personal Storage Notes: www.apricorn.com 19 12191 Kirkham Road Poway, CA, U.S.A. 92064 1-858-513-2000