1
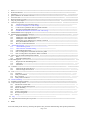
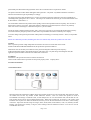
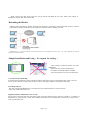
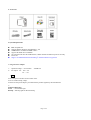
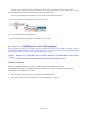
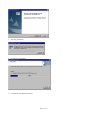
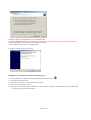
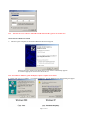
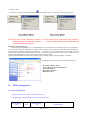
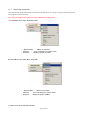
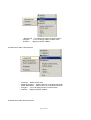
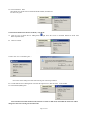
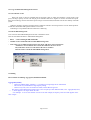
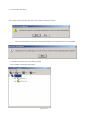
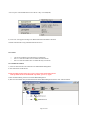
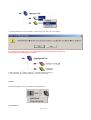
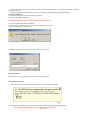
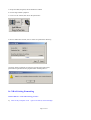
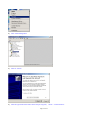
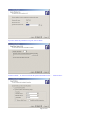
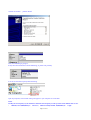
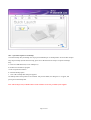
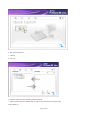
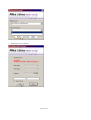
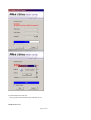
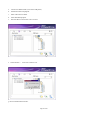
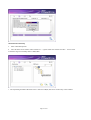
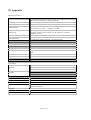
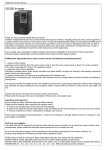
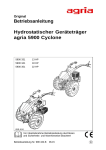
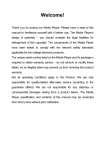
User Manual
LD-U35NU-2
Content
Page 1 of 1
1.
2.
3.
4.
5.
6.
7.
8.
Notice ---------------------------------------------------------------------------------------------------------------------------------Product Performance -----------------------------------------------------------------------------------------------------------Appearance ---------------------------------------------------------------------------------------------------- --------------------Quick installation of h ard disk enclosure ------------------------------------------------------------ --------------------------Accessories lists ------------------------------------------------------------------------------------------- ------------------------Required operation system--------------------------------------------------------------------------- -----------------------------Usage of power adapter ------------------------------------------------------------------------- ----------------------------------Connection of product ------------------------------------------------------------------------------ ------------------------------8.1
Connect to LAN as a data share storage -----------------------------------------------------------------------------8.2
Connect to computer as a USB storage -------------------------------------------------------------------8.3
Connect to PC by Ethernet cable as a portable hard disk ----------------------------------------------------------8.4
Disconnect USB portabl e hard disk-----------------------------------------------------------------------------------8.5
USB HUB Downstream connect to other USB storage ---------------------------------------------------------9. USB Installation of driver program ------------ ----------------------------------------------------------------------------------10. Network hard disk Installation and apply ----------------------------------------------------------------------------- ----------10.1
Software Installation ------------- ---------------------------------------------------------------------------------------10.2
Add/Register a New Network Hard Drive ---------------------------------------------------------------------------10.3
Add/Register a New NDAS Device -----------------------------------------------------------------------------------10.4
Add/Register a New NDAS Device without Connection ----------------------------------------------------------10.5
Newly Found Hardware Wizard ---------------------- -----------------------------------------------------------------10.6
How to Use Network Hard Drive --------------------------------------------------------------------------------------11. NDAS Management ---------------------------------------------- ----------------------------------------------------------------
11.1
NDAS Working Mode -----------------------------------11.2
Basic Function of NDAS Setting --------------------------------------11.3
NDAS Management Setup --------------------- -----------------------------------------------------------------------11.4
How to Change Read -write Mode to Read -only Mode -------------------------------------------------------------11.5
How to Change Read -only Mode to Read -write Mode -------------------------------------------------------------12•How to Use NDAS Bind Management Software ------------------------------------------------------------------------------12.1
Raid ------------------------------------------------------------------------------------------------------------------------12.2
NDAS Bind Management ----------------------------------------------------------------------------------------------13. Bind Management -------------------------------------------------------------------------------------------------------------- -----13.1
Requirement for Bind Management -----------------------------------------------------------------------------------13.2
Connection --------------------------------------------------------------------------------------------------------- -------13.3
Introduction ---------------------------------------------------------------------------------------------------------------14•Unmount ------------------------------------------------------------------------------------------------------ ----------------------14.1
Unmount all the NDAS Devices --------------------------------------------------------------------------------------14.2
Unmount Single NDAS Device ------------------------------------------------------------------------ ---------------15•Tool ---------------------------------------------------------------------------------------------------------------------------------15.1 Add Mirror ----------------------------------------------------------------------------------------------------- --------15.2 Utility of Add Mirror -------------------------------------------------------------------------------------------------15.3 Recover Mirror ----------------------------------------------------------------------------------------------- ------------15.4 Utility of Recover Mirror -----------------------------------------------------------------------------------------------16•NDAS Formatting -------------------------------------------------------------------------------------------------------17•Installation of backup software - -----------------------------------------------------------------------------------------------18•Usage of backup software -------------------------------------------------------------------------------------------------------18.1 Introduction of main menu ------------------------------------------------------------------------------------------- --18.2 Operation of quick backup record -------------------------------------------------------------------------------------18.3
FAT32 formatting ------------------------------------------------------------------------------------------------------ ---18.4
Renew record -------------------------------------------------------------------------------------------------------------18.5 Delete record backup --------------------------------------------------------------------------------------------- -------18.6
Record management ------------------------------------------------------------------------------------------------------18.7
Setup----------------------------------------------------------------------------------------------------------- -----------19•FAQ ---------------------------------------------------------------------------------20•Appendix function description of product --------------------------------------------------------------------------------1.
Notice
First of all, thank you for choosin g and using this product. For your better understanding of the product performance,
Page 2 of 2
please kindly read this manual and pay attention to the notices and instructions of operation in details.
The product described in this manual had applied and registered a s the patent. Any imitation should be considered
tortuous and assume the legal responsibility accordingly.
The product meets the safety standard of low -pressure of China and passed the American test for the compatibility of
electromagnetism, getting the P art 15 class B. The Europe CE certificate has also been got of criterion EN55022 Class
B, EN61000 -6-3, EN61000 -6-1.
The serial number attached to the product and the package is the most important warrant for repairing. The user has to
hold it when repair ing is necessary. If the serial number is damaged, torn and blurred, there will be no any warranty.
After-sales service of exchange in 3 months and repair in 1 year is available.
Not all the system complies with this product. After -sales service will only be provided for the product itself. And any
loss of data caused by using this product or other relative responsibilities will not be assumed by our company.
As for the change in design and Specification of this product in technology or caused by external factors, no any further
notice.
Please use USB cable provided, extending the cable over 3meters may cause this product not work well..
Caution!
Don’t expose this product in high temperature and moisture in order to avoid fire and electric shock.
Installed with hard disk HTS424020M9AT00, this product has passed the EMI test.
Data transfer rate will be likely to be influenced on by the electromagnetic field with special frequency.
If data transformation failed or discontinued because of the static elect ricity and strong electromagnetic field, the
application system should be restarted or the USB cable reconnected.
Trademark
NOONTEC is the special and exclusive brand of Noontec Ltd.
All the brands and the names of products are the special property of the company above.
2.Product Performance
·Network Data Share
Integrated with high performance USB2.0 chipset, this portable storage device has network data share function, which
can enable users to store any formats of data within the interne t. Users can connect this product to LAN or
10/100BASE-T Exchange via Ethernet cable, so that multiple PCs can visit the network disk, and edit data as well.
This product can provide two purview management modes : Read-write or Read only. If your PC is conn ected to LAN,
and other users acquire User Name and Password, then they can use the network disk as a local drive, and do editing
in the drive. It provides network storage for images, music, books, Flash, small software, video, etc, reliability for data
backup, and solutions for mobility of big file, data exchange between different locations. It can also be used as
external hard drive to PC.
Page 3 of 3
·Limitless Extending Capacity
The advanced features and appliance of the storage artwork can realise your ide al career.
limitlessly extend, safely backup.You only need to plug the other NDAS port into your Ethernetto extend
thestorage. Because of the insufficient place , most computers/notebooks will need to upgrade.
- Upgrade your computer, extend the storage place.
- Add any equipment of NDAS to extend the
storage capacity. -Don’t need to open your
computer/notebook.
Use the new big hard disk to replace the original
one.
- The NDAS equipment can provide the limitless
extending capacity.
·Safety Data Sharing
- Conserve control •Only one ID and KEY (serial NO. and code) in the hardware of NDAS. Keep
your ID and KEY well from all the others, no one can share the date in your NDAS, no exception to theose who
share the same net with you.
- You can share the data through the ID/KEY, it’s special networking protocol and different truss.
- Though connect to the Internet, NDAS can keep itself from the stealing, attaint and damage of hackers.
- When you forbid others to change the original file or add new f iles, you can also authorize some users to make
some change to your file.
- ID: Control reading the data
- There is no ID computer can not conserve or distinguish the exist of NDA.
KEY: Control the writing authority
-Without KEY, the users can not ch ange, delete, or damage the original data.
Page 4 of 4
- When conserve the data, those who have not got the ID and KRY can not write, make some change, or
damage the original data, but read the data.
·Defending the Hacker
NDAS is safe to the Internet hacker, Although your network is connected to the Internet DSL, NDAS is ,NDAS
unavailable externally, the hacker can not connect to NDAS to steal or damage your data.
NDAS has it’s protocol without using TCP/IP protocol, so though connect to the Int ernet, NDAS can protect
itself from attack hackers.
·Simply Installation and Using•No request for setting •
- Once connect to Ethernet Switch can store
immediately.
- There is no any request of setting and t
- No need to set TCP/IP address or DHPC.
-Several computers can visit at the same time.
·Convenient in System Backup
It can backup the important files in the network hard disk just through one press on the backup button. There is no need
to burn a pile of disks or setup any other trivial pro cedures. Just simple operation can guarantee data safety.
·Extending USB port
The there external USB HUB ports are convenient for any external USB devices connect to the PC.
( like U disk, USB mouse and so on)
·High Performance of Electronic Power Sw itch
Power switch is designed with soft push and electronic protection against data loss caused by operation by mistake of
POWER key by delayed power -down. When standby this product will be automatically on electricity saving mode in
order to protect hard disk.
Page 5 of 5
3. Product appearance
Page 6 of 6
4. Quick Installation of Hard Disk
Page 7 of 7
Page 8 of 8
5. Accessories
6 System Requirements
n
n
n
n
n
n
IBM compatible PC
Support platform W indows 98se/ME/2000 / XP
64MB RAM Žrecommend 128MB or more •
support CD -ROM driver installation
The computer must have the USB interface, USB2.0 interface and Ethernet port are necessary
Driver CD
n
Support 10/100EASE Ethernet Switching ŽEthernet HUB not su pported•
7. Usage of Power Adapter
1 •Operation Voltage •AC100 -240V
2• DC Output•DC 12V--- 2A
5V —--2A
50/60Hz 2A
Notice
l
Do not expose to moisture and avoid fall -down.
Do use it within rating voltage.
l
Please use the power adapte r provided with the product together by the manufacturer
l
3•
Indicator Illustration Ž
Power •on with stable light.
Backup •flickering light for data transferring.
Page 9 of 9
8. Product Connection
ReminderŽ1•Do NOT connect USB cable and Ethernet cable simultaneous ly.
2•T568B Ethernet cable is suggested.
3•Does NOT support Ethernet HUB.
8.1. Connect to LAN as a data share storage
Product can be connected to Ethernet network to be a network storage, and share data to other users who in this
Ethernet.
Connect the product to 10/ 100BASE-T Ethernet switch via Ethernet cable as shown above.
Ž1•
Ž2•
Ž1•2•plug in connectors of Ethernet switch via network cable.
Ž3•make sure proper power connection.
Ž3•
8.2. Connect to PC by USB cable as a portable hard disk
Product can disconnect from Ethernet network, and connect to PC with USB cable to be a independent USB
Page 10 of 10
portable hard disk.
Connect the USB following the above Illustration, Use the USB cable to connect the computer, one port connect
to the compute, the other port plug to the product. After connecting the USB, a signal os USB, double click on
“ my computer”, You can find the added of the hard disk, you can copy any important data and store into the
hard disk.
8.3. Connect to PC by Ethernet cable as a portable hard disk
Besides of USB cable, at the meanwhile product can be connected to PC independently by Ethernet LAN cable
Connect the product to PC via Ethernet cable as shown above.
Ž1•
Ž2•
Ž3•
Ž1•2•plug in connectors of Product and PC via Ethernet cable.
Ž3•Make sure proper power connection.
8.4. Disconnect USB portable hard disk
Page 11 of 11
Caution! Please follow the procedures of USB disconnection in order to avoid data loss and computer crash.
To plug out the product safely, please click the icon on below right corner of screen, and follow the steps
accordingly. Plug ou t the USB cable after appearing wizard of “Safely remove”.
Notice! Do close all the files and working procedures of the product before disconnection.
a•Icon of “Safely remove” is on the right lower corner of the screen.
b•Click the icon and the wizard after appearing.
c•Plug out USB cable after the computer shows “Safely remove” wizard.
Connect the USB HUB port to other USB equipment.
When this product connects to the computer through the USB, the three ports of USB HUB are available. Connect
the external hard disk to the PC th rough one of the three ports, it can read and write the data, the portable external
equipment can be used on computer conveniently through the port HUB. •
8.5.
Notice: 1•When used as an hard disk, need to install the USB driver for Windows98, no need for other
systems.
2•When used as the storage equipment of network, must install the relevant
9.USB Driver Installation
Notice: This installation operati ng procedure is suitable for the Microsoft Windows98 OS. for the
WindowsME/2000/XP OS driver installation, please skip to the next step. If there is any technical problem. please
contact retailer or local after sales service staff.
1• Put the CD into the optical disk driver, and the drive will run automatically •
2• Select“ Driver install”, and click “Product Driver” to install WIN98 driver program •
Page 12 of 12
3• Preparing installation •
4•Performing the installation •
5•Click “finish” and installation finished.
Page 13 of 13
6•All the functions of this product is available now and please connect it to the PC
10.network hard disk Installation and apply
10.1 Installation of software
Please put the CD into the optical disk driver, the CD will run automatically. After the Drive install menu appears
on the PC, please select softwa re, and then click Network share program to install requisite driver. After that click the
icon of setup and then click “ok” > “next” > “ nextŽselect I accept...... •” > “Install” > “finish” >”yes”, then installation
finishedž
10.2 ADD/Register Your Network HDD
Note: 10.4 Register guide can be used if 10.3 not be used. NDAS is a shortened form of “Network Direct Attached
Storage)
10.3 ADD/Register a new NDAS Device
1. Double click icon of NDAS Device
then click the right side icon
management on desktop which will be showed on the right side of the screen,
, it will be showed as below:
2. Choose add/register one new device
3. A wizard will be showed, then please click “ Next”
Page 14 of 14
4. Please enter a name of NDAS device (or Default),then click ”Next”
5. Please add a ID and write key into NDAS device based on the NDAS device ID and write key which is offere d by
LD-U35NU2 models, then please click “ Next”
Note: NDAS Device ID and Write Key cannot be “0”, neither number of “ 0”.
6. Check the status of the device of NDAS
7•Choose the needed NDAS device mode .
Page 15 of 15
--Read/Write Mode: Choose NDAS device in Read/Write Mode
Note: If the Read/Write Mode is not valid, it may because of no writing the register key in the Step 5 Write Key.
-- (Read-Only Mode): Choose NDAS device in Read -Only Mode
-- (Don’t Mount): NDAS device no mounting mode
8•Register complete, please click “Finish”
10.4Register a new NDAS device under no mounting status
1•Please click the icon of NDAS Device Management right down the screen.
2•Choose Register A New Device
3•NDAS device will release a new N DAS device window
4•Please input a NDAS Device Name.
5•Please input ID and Write Key to NDAS device on the window according to the NDAS device ID and Write Key
provided by the unit and then click Next.
Page 16 of 16
NoteŽThe letter O is not v alid as a NDAS Device ID and Write Key, please use number zero
10.5 Found New Hardware Wizard
1• After the register complete, the Found New Hardware Wizard will appear.
Please click Next to install a new NDAS device if a wi ndow as illustrated up appears .
It will detect appropriate driver for the NDAS device
Note: For Windows 2000, the guide will display replace to update device driver
2•Please click “Yes” or “Continue” to complete installation w hen the Windows Logo Testing dialog box appear
Page 17 of 17
3•Register finish
-- Click the icon of NDAS Device Management
down right the screen • NDAS device has been registered
Note: Please click “refresh” and check if all users a re able to read and write content when open the files by
Read/Write Mode, if no NDAS device appears.
All users can only read the content of hard disk when
open the files in Read -Only mode.
10.6 How to use NDAS device?
After installing the NDAS device, u sers should know well of NDAS device. The NDAS device can be regarded as
a local hard disk in the PC. (Illustrated as local hard disk I as follow, there would be 2 hard disk icons if hard disk is
formatted into two partitions.) The tag of hard disk icon
and NDAS can be amended in the PC. It provides users two
basic functions: Read/ write and Read -Only. If the PC is connect to a LAN and all the users know the right user name
and write key of NDAS device, the products can be used as a local hard disk.
The files on this hard disk are able to access and also copying, deleting, setting and backup folders is available.
The NDAS device can be used as a local hard disk in the PC.
- Draw files to NDAS device - Copy and plaster data to NDAS device - Set and delete files - Share files and folders - Backup the data -
11. NDAS management
11.1 NDAS working mode
— NDAS Setting Provide 5 kinds of basic modes for Users
— The following is a form about the modes and their relevant color
NDAS Setting
Color
Icon
NDAS Setting
Icon
Page 18 of 18
mode/Meaning
Green
•Only read Ž
Blue
•read & writeŽ
white
•connectionŽ
Black
•cut-offŽ
Red
•ActivateŽ
Read only Mode
-Use NDAS equipment, the users can only
read now
write and read mode
-Use NDAS equipment •Users can write and
read now
Connection Mode
-Now the PC can not use NDAS equipmen t,
will install•use after Installation Ž.
Cut-off mode
-can connect and use NDAS equipment •but
the system can not find the NDAS
equipment•
-Power cable•Ethernet cable or USB cable
may mis-connected•
-Please
make
sure
no
anti -virus
procedure/security Microsoft or spy
Microsoft to effect the connection.
Activate Mode
-Can be used for NDAS equipment •which
can not meet the system. • Stop using
NDAS equipment•
The setting can be activated to connect,
after the whi te frame appear the NDAS
setting can be used.
11.2 Basic Function of NDAS
Click the icon of NDAS Device Management
down right the screen, the menu as up will appear.
Function Ž- Register a New Device – Add/register a new device;
- Refresh Status – Refresh hard disk status;
- About… - To display software version;
- Options… - To display network hard disk tools
- Exit – To exit
Page 19 of 19
11•3 NDAS setup management
Click NDAS setup management and move the mouse to the NDASS to see its prope rty. Please find the setup mode
And properties of NDAS as follow
Note: The option displayed in yellow box is not available in the NDAS device.
A) Setup NDAS device under Read/Write mode
- Mounted (RW) – NDAS current status
- Unmount
- Users can change it to connect status
- Properties - Display properties of NDAS
B) Setup NDAS device under Read -Only mode
- Mounted (RO) - NDAS current status
- Unmount
- Users can change it to connect status
- Properties - Display properties of NDAS
C) NDAS device under disconnected status
Page 20 of 20
- Disconnected - Use NDAS device under unregistered status
- Unregister
- Users can change NDAS to connect status
- Properties - Display properties of NDAS
D) NDAS device under connected status
-
Connected - NDAS current status
Mount (Read -Only) - NDAS is able to be set in Read -Only mode
Mount (Read/Write) – NDAS is able to be set im Read/Write mode
Unregister – Users can change NDAS to connected status
Properties - Display properties of NDAS
E) NDAS device under deactivated status
Page 21 of 21
-
Deactivated - Current state of NDAS device
Activate - NDAS device will be activated to connecting state and it will be displayed by a white box.
Unregister - Change NDAS device setup to connecting state
Properties - Display Properties of NDAS device
11•4 Transform Read -Only Mode from Read/Write Mode Ž
1Ž Click the icon of NDAS Device Management
Read/Write mode
down right screen to transform Read -Only mode from
2Ž Choose Unmount
3•NDAS Device Management windo w will appear, please click “Yes”
Green box will turn to be white and enter to connecting state
4•Click the icon of NDAS Device Management
right down the screen •please choose the needed mode
Page 22 of 22
5ŽChoose Mounted •ROŽ
Select Read -Only mode menu to transform Mounted Mode, the white box
will turn to be green.
11.5Transform Read/Write Mode from Ready -only ModeŽ
1Ž Click the icon of NDAS Device Management
Read-only Mode (RO) .
right down the screen to transform Read/write mode from
2Ž Choose Unmount
3 Please click “Yes” on the dialog box. •
Green form will be changed to white form entering into connecting condition.
4ŽClick the NDAS Device Management icon under the right of screen, then select the mode needed.
5ŽSelect Mounted(RW)option
Select the RW menu under the RW mode, then the it transfer to RW mode, meanwhile the white form will be
changed to blue form entering into the RW mode.
Page 23 of 23
12. Usage of NDAS Bind Management software
12.1 introduction of raid
Raid is the name in short of redundant arrayfo inexpensive disk of which the advantage is high security, high
speed, and huge capacity for data. The arrayfo put several Hard disk drives together to work to accelerate the speed.
Some raid technology could accelerate the speed of single one disk to 400%.meanwhile increase the stability of the HD
system.
When the computer connecting with the switch of which the interface connecting with two or more NDAS products.
At that time NDAS Bind Man agement software can be used.
Performing to set up the Raid function in details is as following.
12.2 NDAS Bind Management
Users could use NDAS Bind Management to bind or unbind the mirror.
There are four different buttons in NDAS Bind Management.
- Bind: Used to binding, RAID and RAID1
- Unbind: Used to unbind the limit of NDAS Bind Management
- Tools: There are two different buttons in the tools form: add mirror and resynchronize
Add Mirror: used to add the mirror in the first NDAS to the secon d one.
Resynchronize: used to cover the data in the mirror of NDAS.
Refresh: used to refresh the NDAS Bind Management.
13. Binding
Three solutions for binding: Aggregation, RAID0 and RAID1.
Aggregation(Union) Ž
- Allow any NDAS setting between 2—8 to make up a single huge driver of hard disk.
- This will be very useful when a huge capacity setting.
- Allow no any error, once one of them is broken, all the data will get loss.
The capacity of the hard disk will equals to the u nion of capacity of each IDE hard disk, if use Aggregation(Union)
••ž,which appears as an single disk on the CPU.
•For example•If we use this function to Unite 2 ide disk of 40gb, the capacity of the new disk appears on the
CPU is 80gb •.
Page 24 of 24
RAID0 ( Doesn’t check odevity) Ž
- Allow any NDAS setting between 2 —8 to unite a single huge disk driver.
- Which is very useful when a huge capacity setting is need
- Allow no error,, all the data will get lost once one of them is broken.
- When rite into NDAS settings, the method which similar to the Aggregati on can get more fast
features.
raid 0 uses block striping function, divide the data into many equal logical parts an continual ly separate to each
disk. , Ž•.For example, write the data 1 to disk 0, 2 to disk 1, etc. When finish writing the last signal, It will rewrite
the data continually, until all the data are all wrote
Because this method is to write or read out several disks, it’s of fast speed. In fact, data transferring is in order,
But several read (write) can operate at the same time., which means that when write the data one to disk 0. data two has
started, so consequently , several disk can write at the same time.
Although named raid 0, it does not has all the features of raid, that’s because it has no data security function,,
once there is something wrong with one disk , all the data will get lost. Therefore, raid 0 can not apply to critical task.
After block str iping, the capacity of whole disk equals to the union of each ide capacity will appear on the CPU. .
( For instance, if we use 2 ide of 20GB WILL make up a disk of 40GB, The united disk will appear on the CPU. )
RAID1
-
Allow 2,4,6,8 NDA Settings can mirror at the same time.
Mistake allowing, if one is broken, can re gain through any other one.
The mirrored NDAS settings can be make up. raid 1, the disk mirroring function •means that it copy the data
from disk one to disk two, or equivalent storage device to realize the data redundancy. It’s disadvantage it
cost much more than a single disk of no redundancy furthermore, the writing speed is not improved. For
example, when w rite data 1 to disk 0, it’s copy start to write into disk 1, that because the same data is wrote to
two disks. But it can improve read speed when read data from the disk, is because it separates the read request
to two disks.
Since the data of one disk has totally copied to another one, it can protect the data when the disk is damaged.
If the data of one disk gets wrong, or the disk run off circuit, now, the other disk will save the data loss and system
cut-off , which caused by the disk mirror.
After disk mirror•the whole capacity of the disk equals half of the union of each ide. (Foe example, if we use this
function to unite 4 ide of 1gb, and the capacity of the new united disk is 2gb. Which will appear on the computer
as one disk•
Page 25 of 25
NoteŽThe disadvantage of raid 1 is that it can not expand the capacity. Once a raid I need to expand the support
capacity it , before adding the new disk , you need to backup all the data, all the other raid class can be
expand.
13.1 Necessary condition of bind ing:
-- A security key is needed for every NDAS.
-- The NDAS which is managed can’t be bind again.
--The NDAS which is managed in computer need to be connecting including the computer itself.
--The managed NDAS must be formatted
--Once the binding is fini shed, the other user is not allowed to be install
Note: Aggregation, RAID0, RAID1 can be used only in Windows xp and Windows 2000.
13.2 Connecting condition
NDSA must be in the condition of connecting before NDAS is managed.
1, Select the NDAS needed among the NDAS bind management.
--If NDAS is in the condition of being installed, select releasing the installation.
--If NDAS is connecting, please maintain the origin.
--If NDAS is unconnecting, please try to connect again.
--If NDAS is in the condition of unmoving, please activate the installation.
2, a warm conversation form will be shown.
3, click “yes”
4 wait for the process of changing for seconds. If the NDAS haven’t been changed to white, please click refresh
button.
5, repeat above steps for any NDAS needed to install.
6 please make sure that another computer visit NDAS in connecting condition.
Page 26 of 26
13.3 Introduction of binding
1, There are more or equal to two NDAS need to be connecting; all of the NDAS have their security key.
2, Clicking start into program NDAS software.
3, clicking bind button.
4, select the type of binding and HARD DISK No,
Aggregation support any of 2 -8 No binding
- Stripe (RAID0) only 2, 4, 8, are allowed to be bound.
- Mirror (RAID1) suppo rt 2, 4, 6,8binding.
Note: RAID4 is not being supported usually.
5, delect the NDAS in the left, then click the right button to mount the NDAS in the left to the right windows.
6, rpeat above steps and mount the NDAS needed, then click finish.
Page 27 of 27
7•two warn forms will shown
--Once NDAS is bound, all of the data will be lost, and then click YES to continue.
-
The newly bound NDAS needs to be mounted and formatted before using them, then select “CONFIRM”
8, -The NDAS will show that it succeeding in binding.
Turn to NDAS to install the bound NDAS
Page 28 of 28
--select any one of bound NDAS then select “Read -only” or mount(R/W)
9, Click “next” after appears finding a new Hard Disk till the installation is finished.
10.Please format before using combinational NDAS device
14. Unbind
----
One or all of NDAS can be unbound in a combination.
Part 15.1 used to introduce how to unbind all of the NDAS.
Part 15.2 used to introduce how to unbind the only one NDAS.
14.1 Unbind all of NDAS
1, select one NDAS needs to be unbound in the NDAS Bind Management.
2 click unbound or mount NDAS.
NOTE: If NDAS team is being used, a warn conversation form will be shown.
If the problem doesn’t lie in this kind of problem, p lease try again.
3 After uninstall NDAS, please turn to NDAS Bind Management.
4, after select the NDAS team just uninstalled from NDAS Bind Management. Please click “Unbind” button.
Page 29 of 29
5, when a unbind conversation form is shown please s elect the team needs to be unbind then click “Yes”.
6. Two warning boxes showed.
-- All of the data will be lost once the disks are unbound. Click on “YES” for continuing.
-- New NDAS equipment group must be mounted and f ormatted before using.
7. Come back to NDAS equipment manager for installing every NDAS equipment which has not been coupled now.
8. Before NDAS equipment is used, every NDAS equipment which has not been coupled should be formatted.
9. Format NDAS de vice
14.2 unbinding single NDAS equipment.
1. Choose the NDAS group to be unbound from the NDAS equipment manager.
2. Click on dismiss (Unmount) and install NDAS equipment.
Note: If NDAS equipment group is being using, one warning box will appear,
to confirm if NDAS equipment is being using, then try again.
3. After Uninstalling, come to NDAS equipment group manager again.
4. In NDAS equipment,
choose Single after pressing right button,
Page 30 of 30
5. All of the data will be lost once the disk is reset to single disk, click “yes” for continuing.
Note: Once group is broken, never any NDAS equipment can be added to this broken group,
reaggregating and formatting have to be done.
6. Please consult to 10 th Chapter of Page 10 th: Formatting NDAS equipment.
7. After formatting, your NDAS equipment will be seen as a local disk.
15. Tools:
Two functions supplied in Tools: Add Mirror and Resynchronize.
15.1 Add Mirror
Page 31 of 31
-- Add Mirror function is used when adding one data -held NDAS equipment to one data -absence NDAS equipment,
and mirror each other.
-- Capacity of 2nd NDAS equipment must never be less than the NDAS equipment operating this function.
15.2 Using Add Mirror
1. Group from Start, Programs, NDAS Software to NDAS.
2. Choose single NDAS equipment.
Note: NDAS equipment must be connected and write in Security key.
3. Click Tool button, then choose Add Mirror
4. Choose NDAS equipment from the list to be mirrored, then click on “OK”.
5. Showed a warning box, click on “Yes”.
6. Add Mirror box showed, click on “Start” for synchronous delivering.
15.3 Resynchronize
Resynchronize is used for fault happens on Mirrored NDAS equipment
15.4 Using Resynchronize
1. When fault happens on mirrored NDAS equipm ent, one warning box will appear.
2. Choose the NDAS equipment group you uninstalled from NDAS equipment aggregating manager.
Note: NDAS equipment must be connected and put in Security Key.
Page 32 of 32
3. Group from Start, Programs, NDAS Software to NDAS.
4. Choose single NDAS equipment.
5. Click on “Tool” button, then choose “Resynchronize”.
6. Recover Mirror box showed, click on “Start” for synchronous delivering.
7.If mirror NDAS equipment not connected, box like below will appear,
please dismiss again the NDAS equipment which installing Mirror.
16. NDAS Setting Formatting
Windows2000.XP format NDAS Setting procedure Ž
1) Click on“My Computer” click
right on the mouse, choose“Manage”
Page 33 of 33
2) Click “Disk Management”
3) Click on “Cancel”
4) Click the right of the mouse when choose the part ting disk,
Page 34 of 34
choose “Create Partition”
5) Click on ‘Next’
6) Click on “Next”
7)Choose the partition size •FAT32 just can support up to 32gb, please set the size less than 32000MB, Click on
‘Next’
Page 35 of 35
8)you can choose the pointed driver sig nal, click on“Next”
9)choose “NTFS” or “FAT32” Form for the system which will be used • click on“Next”
Page 36 of 36
10) Click on“Finish” •partition finish ž
Then, the formatting is going on.
It may need several minutes to finish formatting, so please wait patiently.
You can see the whole capacity after formatting.
Open my computer, The Net disk setting will appear in your computer as a local disk.
Notice
Usually, the real capacity of your disk is less than the stated capacity, It’s the practice in the disk line that we use
•ž1000/K, 10G=10,000,000 byte • However,•windows usually 1024/K, 10,000,000 byte Ž9.5gb•
Page 37 of 37
17.Installation of backup software
1•Run driver and select “Software”•then click “PCCloneEX” to enter the installation menu •
2•Click “Install” to next step •
Please read the user authorization agreement, only after agree to all the content can you select “Agree”
and Click start to install :
3•Input 20 bit CD -Key•and click Next to install:
4•Choose the path of i nstallation and click “Install” to next step:
5•Installation finished and click “OK”:
6•The icon of PCClone EX will appear, and it is available to perform PCCloneEX Lite just double click the
icon or right click the mouse
7•Operation of product key: The record backup dialog box will pop -up once press the backup button. Select
the files and press again, the backup will be performed.
18•Usage of backup software
18.1 Introduction of main menu •
1•Quick startup
2•Record backup
3•Record man agement
4•Setup
5•Record backup Key•
6•Move to system list •
7•About FNet PCClone EX •
8. Usage description •
Page 38 of 38
18.2•Operation of quick record backup
Convenient backup files just through one step to press File Backup or use backup button. No need other complex
setup step for backup.(For the first time using, please access Record back and setup to set option of backup)
Step:
a. Connect to USB hard disk (Tu rn on USB power).
b. Perform PCCloneEX Lite program.
c. Enter to Quick Launch menu.
d. select File Backup option
e. Click ‘OK to backup after dialog box appears.
The backup button on the product is also available. Just press the button, the dialog box wi ll appear, and
press again to start backup files.
Note: The backup is only available when it works with the accessories provided by the supplier
Page 39 of 39
f•Record backup Menu Ž
1•Backup
2•Recover
g. Select the target files and press backup button to backup :
•If there are more than two USB hard disk, it is able to select which one to backup the data
in the USB driver.
Page 40 of 40
h. Click “OK” to confirm the backup Ž
System will show the process of backup Ž
Page 41 of 41
i. Backup success and click‘OK’ •
The system will show backup finished after complete the backup Ž
j.
The files have been backup Ž
(PCClone EX has been backup the data to USB HDD)
USB Drive: If the PC connects to more than two USB hard disks, it can select which hard disk to backup in the USB
drive. If only one hard disk, then can’t select hard disk.
Page 42 of 42
k. There is a hide data folder “Fnet” under the USB(H:)hard driver root directory. The data of record backup is stored
in the data folder. (Please don’t delete the folder)
18.3 FAT32 Formatti ng Tool
Format tools
of Windows 2000/XP just can support up to 32GB•So the FAT32 format tools in the program can
support up to maximum 4TB. You can choose this format tools to format the chosen USB Disk Drive to FAT32
quickly.
Note: 1•If the hard disk has not been parted in Win, It can not be formatted in
FNet FAT32 Format.••ž
Win • Can format hard disk after the partition, But if you choose format directly , may cause all the data in the
chosen hard disk will get lost.
Step
a. Open the format menu in “start/programs/PCCloneEX/FNet FAT32 Format” and FAT32 format tools app earsŽ
b•Select USB device and the disk driver which need to be formatted, please choose "Start" Ž
Page 43 of 43
c• Display the process of format Ž
Page 44 of 44
d. Format finished and click‘OK’.
(The program has fo rmatted the target USB disk driver.)
18.4.Record recover
Page 45 of 45
a.
Connect to USB hard disk. (Turn on the USB power)
b.
Perform PCClone EX program.
c.
Enter in PCClone EX menu.
d.
Select File Backup option.
e.
Select the data or record need to be recovered
f. Select "Restore"• click ‘OK’ to start recover.
g. Recover finished and click‘OK’.
Page 46 of 46
18.5 Delete Record backup
a.
Enter in File Backup menu.
b.
Move the mouse on the window of the USB Device •right click and select "Delete select file" •then it is able
to delete the target record backup data in USB(H:)disk.
c. Directly deleting the hidden data folder “FNet ” under the USB(H:) disk driver root directory is also available.
Page 47 of 47
18.6•Record management
The function of File Management are the same as that of Windows •data folder or record is able to be drawn between the
left and right window. It is convenient for user to inspect, manage, move and access the record data after recover the
record backup and no need to open my computer or record ma nagement.
18.7•Setup
Page 48 of 48
File Backup
Fast key setup Žselect "Edit"•move the cursor to the reverse place, and use "Ctrl •Shift•Alt•and random
key” to setup the fast key. It can perform record backup through fast key from next time.
Compression ratio Žfall into place from 1 to 9, the more compression ratio the smaller the data is and
the more time to take.
B a c k u p M o d e Ž •Add files to existing backup" •and "Discard and replace existing backup"
Second confirmation:
Windows default will require the second
confirm ation when use button to backup. Please cancel windows default
if wo u ld lik e to b ack u p d ir ectl y.
19•Solution to The frequent asked Question
1žQŽWhat the use of NetDisk•
A•NetDisk has many uses, it’s ideal for those who can noT afford the NAS. For example: ,mid-small store,
small office, school and the public Department. The convience and low cost of NDAS technology
provides the best solution for home and office to conserve data.It can be used as private computer, and
used to store data for local network ( conserve or share files, backup or store document and so ons)
Ž Profound the storage equipment
Ž Store mail or side network
Ž Used as the data store for public, research data, backup and conserve.
Ž Multi-media storage equipment9MP3, photos, record)
2•Q•What’s the difference between NetDisk and NAS,SAN?
Page 49 of 49
A•NDAS is the most advanced and popular storagein the worl, While the other competitors just like NAS still
use the old technology which is very popular 10 years ago. Therefor, NDAS has more advanced f eatures and high
capability standard than the other technology .
3•Q•Which kind of OS dose NetDisk support?
A•It supports Windows 98SE/ME/2000/XPand Apple computer OS X 10.0 -10.3•BETA drive apply to CE
interface of Windows and Linux.
If you use that thro ugh USB storage, it will support your internal drive for your OS. You
don’tneedtoinstall the drive•If use Windows 98SE•You must install the provided USB drive. If you are using
Windows 2003 server, please update the driver before use it.
4•Q•Which kind of file system does NetDisk will use or form in advanc e?
A•NetDisk is absolute file system, Your OS need special file system to format NTFS in advance , But also can
format to any file system that your OS support.
5•Q•How many users can share a NetDisk?
A•Theoretically, there is no limitation, But we advise the users must less than 16 at the same time..
6•Q•May I use Netdisk on VPN or make a server?
A•At present, NDAS can not be used on VPN directly or used as a PTF server, but you can use sharing file
For example, Windows need a CPU to store NetDisk through sharing VPN.
For FTP•you can connect NetDiskto a PTF server and download the files from NetDisk.
•
7•Q•Do I have to install NetDisk on all of my computers?
A•You need to install our Microsoft when ever visit any computer of Netdisk through NDAS(Ethernet) •While
don’t need to install drive for USB, Unless you use Windows98SE OS
8•Q•Dose NetDisk have IP address •
A•NetDisk dose not use IP address or function TCP/IP.
9•Q•Why the NetDisk in my computer can only read but but not write and read •
A•There are two instance will appear on computer that can only read but read/write. Firstly because you
only knocked in ID WITHOUT Writekey when you regisit NDAS setting.
You only need to add a new or register a ne w setting and knock into ID AND Write Key.
The other reason is you choose the read only mode during using, you just need to exit NDAS setting and
choose read/write mode.
10•Q•Why Backup Microsoft can not installed to my computer •
A•Please make sure the Installation serial No of your backup Microsoft on the package is clear or not,
you also need to pay attention to the capitalization of the serial No. If still can not install, you need to confirm the
serial No. with the supplier.
11•Q•Why I can not use b ackup Microsoft on my computer?
A•Firstly, you need to confirm whether your computer has this function or not, meanwhile please make sure
you have installed the latest backup edition without mistake.
also your OS must be installed under disk C and your OS must be used in OS condition in or above
WIN2000/NT.
Page 50 of 50
20. Appendix:
Function Description:
Function
Interface
Characteristic
Transfer Speed
Span Using
User Management
Special Function
LAN transfer Agreemen t
LAN File Agreement
Hard Disk Size
Capacity (Max.)
Power Adapter
Driver Program
Working Temperature
Storing Temperature
Comparative Humidity
Atmospheric Pressure
Net-share Portable storage, one -press button for backup. USB Portable
HDD, Deferring Switch Off , setting USB HUB
USB 2.0 High Speed Int erface•LAN RJ45
Applying innovative MAC address technology
USB2.0•480MB/S žMax.•
10/100 BASE -T Version• 10MB/sec or so RW
Installing Driver program and applying user passport for
operating. The disk driver will appea r in “My Computer”, “Network
Neighbor” no need.
User Management Function is simple, can limit users with ID/KEY.
Support Raid 0,1, function.
Not applying Traditional TCP/IP, can obstruct hackers.
TCP/IP, AppleTalk, IPX
CIFS, NFS, NCP, AFP, HTTP
3.5 Ž
400GB
100-240V AC
Supply windows 98 \PCCloneEXand NET DISK Driver Program, others not
need.
0 —40
-40 —55
40%—90%
86KPa-106KPa
Environment:
Hardware
Software
Physical Measurement:
Dimension
Weight
Material
Manufacturing Technique
Certificate•
CE
FCC
IBM Compatible PC
Notebook Computer
Mac OS
Windows 98se/ME
Windows2000
Windows XP
203.5*111*36.5MM
454G•Hard Disk not included •
Aluminum + PC
Full automatic machine processing, 100% performance testing before
products leave factory.
•
•
Page 51 of 51