1
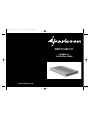
Manual_2.5_new 11.11.2005 9:04 Uhr Seite 1
SWIFT-CASE 2.5”
- Handbuch - Installation Guide -
www.sharkoon.com
Manual_2.5_new 11.11.2005 9:04 Uhr Seite 3
Manual_2.5_new 11.11.2005 9:04 Uhr Seite 5
DEUTSCH
ENGLISH
SWIFT-CASE 2.5”
SWIFT-CASE 2.5”
Manual_2.5_new 11.11.2005 9:04 Uhr Seite 7
ACHTUNG:
Für evtl. auftretenden Datenverlust, durch unsachgemäße Handhabung,
übernimmt SHARKOON keine Haftung.
WARNING:
For potential loss of data, due to inappropriate handling, SHARKOON
assumes no liability.
Alle genannten Produkte und Bezeichnungen sind
eingetragene Warenzeichen der jeweiligen Hersteller.
All named products and descriptions are registered
trademarks of the respective manufacturers.
www.sharkoon.com
SWIFT-CASE 2.5”
SWIFT-CASE 2.5”
Manual_2.5_new 11.11.2005 9:04 Uhr Seite 9
2. Insert the driver CD into your CDROM drive.
Inhalt
3. The installation wizard will start
automatically. If the auto-start
function is not being supported on
your system, or being deactivated,
choose your CD-ROM drive (e.g.
drive D).
1. Eigenschaften
2
2. Teile und Zubehör
3
3. Installation
3.1 Benötigte Teile
3.2 Installation des Laufwerks
3.3 Anschluß des Gehäuses
3.4 Installation der Treiber
4
4
5
6
7
4. Start the application >Setup.exe<
in the directory:
“CD_ROM \ External \ Driver \
Cypress” and follow the setup
instructions.
5. Finally you will need to reboot your
PC. After the operating system has
been loaded again, connect the
Swift-Case via USB cable to the PC.
Within a few seconds the SwiftCase becomes operational.
www.sharkoon.com
16
SWIFT-CASE 2.5”
SWIFT-CASE 2.5”
1
Manual_2.5_new 11.11.2005 9:04 Uhr Seite 11
1. Eigenschaften
•
•
•
•
•
•
•
•
•
Unterstützt USB 2.0 (kompatibel zu
USB 1.x)
Verwenden Sie Ihre Daten an jedem PC
oder Laptop
Datentransferrate: max. 480 Mbit/s
Plug & Play
Passend für 2,5“ Laufwerke (HDD)
LED-Anzeige bei Aktivität
Keine Treiber notwendig für Windows
ME/2000/XP, Mac OS 9.x und höher
Hochwertiges Aluminium
Elegantes Design
fig. 6
2. This completes the installation, therewith your Swift-Case is ready to use.
3.4 Installing the driver
If you are using Windows ME/2000/XP or
Mac OS 9.x/X, you do not need to install
additional drivers. All necessary files will
be installed automatically by the
operating system.
Solely under Windows 98SE you need to
install the driver manually. Please
proceed as follows:
1. Please make sure that the Swift-Case
is disconnected from the PC, before
you start the installation.
2
SWIFT-CASE 2.5”
SWIFT-CASE 2.5”
15
Manual_2.5_new 11.11.2005 9:04 Uhr Seite 13
3. Finally screw the device module to the
enclosure (fig. 4). Please use the
included mounting screws (C) for
fixation.
2. Teile und Zubehör
•
•
•
•
•
•
•
Swift-Case 2.5”
USB-Y-Kabel (2 x Stecker A / 1 x Stecker B)
Set mit Montageschrauben
Schraubendreher
Treiber-CD
Tragetasche
Handbuch
fig. 4
3.3 Connecting the enclosure
1. Now connect the included USB cable
to the enclosure (fig. 5) and your PC.
Please make sure to connect both USB
connectors to your computer (fig. 6).
Hinweis:
Sollte eines der oben aufgeführten Teile
fehlen, wenden Sie sich bitte per E-Mail an
den
Kundenservice
unter
support@
sharkoon.com, oder rufen Sie an unter:
+49 (0)6403 – 775 6100
fig. 5
14
SWIFT-CASE 2.5”
SWIFT-CASE 2.5”
3
Manual_2.5_new 11.11.2005 9:04 Uhr Seite 15
3. Installation
3.2 Installing the device
3.1 Benötigte Teile
A
B
1. First connect the HDD to the controller.
Please make sure that all contact pins
are completely seated in the connector
socket and the device label is pointing
upwards (fig. 2).
C
fig. 2
D
E
ABCDE-
Gehäuse samt IDE-Controller
Schraubendreher
Montageschrauben (2 x)
2,5“ Laufwerk (nicht enthalten)
USB-Kabel
2. Slide the device module into the
enclosure. The module can only be
inserted correctly as shown below
(fig. 3).
fig. 3
4
SWIFT-CASE 2.5”
SWIFT-CASE 2.5”
13
Manual_2.5_new 11.11.2005 9:04 Uhr Seite 17
3. Installation
3.2 Installation des Laufwerks
3.1 Needed parts
A
B
1. Verbinden Sie zunächst die Festplatte
mit dem Controller. Achten Sie
darauf, daß alle Kontaktstifte vollständig in der Anschlußbuchse sitzen
und das Laufwerkslabel (Aufkleber)
nach oben zeigt (Abb. 2).
C
Abb. 2
D
E
A - Enclosure including IDE controller
B - Screwdriver
C - Mounting screws (2 x)
D - 2.5“ device (not included)
E - USB cable
2. Schieben Sie das Laufwerksmodul
anschließend in das Gehäuse. Das
Modul läßt sich nur wie abgebildet
korrekt einschieben (Abb. 3).
Abb. 3
12
SWIFT-CASE 2.5”
SWIFT-CASE 2.5”
5
Manual_2.5_new 11.11.2005 9:04 Uhr Seite 19
3. Abschließend verschrauben Sie das
Laufwerksmodul mit dem Gehäuse
(Abb. 4). Verwenden Sie hierfür die
mitgelieferten Montageschrauben (C).
Abb. 4
3.3 Anschluß des Gehäuses
2. Parts and accessories
•
•
•
•
•
•
•
Swift-Case 2.5”
USB Y cable splitter (2 x plug A / 1 x plug B)
Set of mounting screws
Screwdriver
Driver CD
Carrying bag
Manual
Note:
If you are missing any of the items listed
above, please contact customer service via
e-mail at [email protected] or call:
+ 49 (0) 6403 – 775 6100
1. Verbinden Sie das mitgelieferte USBKabel mit dem Gehäuse (Abb. 5) und
Ihrem PC. Bitte denken Sie daran,
beide USB-Anschlüsse mit Ihrem
Computer zu verbinden (Abb. 6).
Abb. 5
6
SWIFT-CASE 2.5”
SWIFT-CASE 2.5”
11
Manual_2.5_new 11.11.2005 9:04 Uhr Seite 21
1. Features
•
•
•
•
•
•
•
•
•
Supports USB 2.0 (compatible to USB 1.x)
Access your data on any PC or Laptop
Data transfer rate: max. 480 Mbit/s
Plug & Play
Suitable for 2.5“ devices (HDD)
LED indicator for activity
No drivers needed for Windows
ME/2000/XP, Mac OS 9.x and higher
High quality aluminum
Stylish design
Abb. 6
2. Damit ist die Installation beendet,
Ihr Swift-Case ist nun betriebsbereit.
3.4 Installation der Treiber
Sollten Sie Windows ME/2000/XP oder
Mac OS 9.x/X verwenden, benötigen Sie
keine zusätzlichen Treiber. Alle benötigten
Dateien
werden
von
diesen
Betriebssystemen automatisch installiert.
Lediglich unter Windows 98SE ist eine
manuelle Treiberinstallation notwendig.
Gehen Sie hierfür folgendermaßen vor:
1. Stellen Sie sicher, daß das Swift-Case
nicht mit dem PC verbunden ist, bevor
Sie mit der Installation beginnen.
10
SWIFT-CASE 2.5”
SWIFT-CASE 2.5”
7
Manual_2.5_new 11.11.2005 9:04 Uhr Seite 23
2. Legen Sie die Treiber CD in Ihr CDLaufwerk ein.
Content
3. Die Installationsroutine wird daraufhin
automatisch gestartet. Falls die AutoStart-Funktion von Ihrem System nicht
unterstützt wird bzw. deaktiviert ist,
wechseln Sie bitte auf Ihr CD-Laufwerk
(z. B. Laufwerk D).
1. Features
10
2. Parts and accessories
11
3. Installation
3.1 Needed parts
3.2 Installing the device
3.3 Connecting the enclosure
3.4 Installing the driver
12
12
13
14
15
4. Starten
Sie
bitte
die
Datei
>Setup.exe< im Verzeichnis:
“CD_ROM \ External \ Driver \
Cypress” und folgen Sie den
Setup-Anweisungen.
5. Abschließend muß der PC neu
gestartet werden. Nachdem der
Computer wieder hochgefahren ist,
verbinden Sie bitte das Swift-Case per
USB-Kabel mit dem PC. Nach einigen
Sekunden steht das Swift-Case zum
Betrieb bereit.
www.sharkoon.com
8
SWIFT-CASE 2.5”
SWIFT-CASE 2.5”
9