1
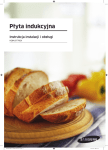
Piano cottura a induzione
Manuale dell'utente e di installazione
NZ84J9770EK
NZ84J9770EK_ET_DG68-00658A-00_IT.indd 1
2/25/2015 5:18:36 PM
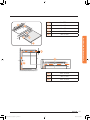
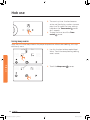
Indice
Indice
Uso di questo manuale
4
I simboli che seguono sono utilizzati in questo Manuale dell'utente.
4
Istruzioni di sicurezza
5
Smaltimento del materiale di imballaggio
Smaltimento corretto dell'apparecchio vecchio
Corretto smaltimento del prodotto (Rifiuti elettrici ed elettronici)
9
9
10
Installazione del piano cottura
11
Istruzioni di sicurezza per l'installatore
Collegamento alla rete elettrica
Installazione sul piano di lavoro
11
12
14
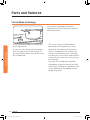
Parti e funzioni
19
Zone cottura
19
Pannello di controllo
20
Componenti21
Induzione di calore
21
Principali caratteristiche dell'apparecchio
22
Spegnimento di sicurezza
23
Tecnologia Virtual Flame™
24
Indicatore del calore residuo
25
Rilevamento della temperatura
25
Uso del piano cottura
26
Pulizia iniziale
26
Pentole per le zone cottura a induzione
26
Test appropriati
27
Dimensioni delle pentole
27
Rumori durante il funzionamento
28
Utilizzare recipienti di cottura adeguati
28
Uso dei sensori a sfioramento
29
Accensione dell'apparecchio
30
Selezionare la zona cottura e il calore desiderato
31
Spegnimento dell'apparecchio
32
Arresto rapido
32
Uso del blocco di sicurezza per bambini
33
Timer34
Uso della funzione Mantieni caldo
36
Regolazione del Power boost
37
Gestione della potenza
37
Pausa38
Controllo Flex
38
2 Italiano
NZ84J9770EK_ET_DG68-00658A-00_IT.indd 2
2/25/2015 5:18:36 PM
39
40
Pulizia e manutenzione
41
Piano cottura
Sporco leggero
Sporco ostinato
Sporco problematico
Telaio del piano cottura (opzionale)
Per evitare di danneggiare l'apparecchio
41
41
42
42
43
43
Garanzia e assistenza
44
FAQ (domande frequenti) e risoluzione dei problemi
44
Servizio47
Dati tecnici
48
Dati tecnici
Zone cottura
Informazioni sul prodotto
48
48
49
Italiano 3
NZ84J9770EK_ET_DG68-00658A-00_IT.indd 3
2/25/2015 5:18:36 PM
Indice
Attivazione/disattivazione audio
Impostazioni suggerite per la cottura di alcuni cibi
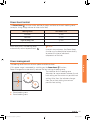
Uso di questo manuale
Uso di questo manuale
Prima di utilizzare l'apparecchio, leggere attentamente il manuale dell'utente, prestando
particolare attenzione alle informazioni sulla sicurezza contenute nella sezione che segue.
Conservare questo manuale come riferimento futuro.
Se l'apparecchio viene dato ad altre persone, ricordarsi di fornire al nuovo utente anche
questo manuale.
I simboli che seguono sono utilizzati in questo Manuale dell'utente.
AVVERTENZA
Pericoli o pratiche non sicure che possono causare lesioni personali gravi o mortali.
ATTENZIONE
Pericoli o pratiche non sicure che possono causare lesioni personali lievi o danni materiali.
ATTENZIONE
Per evitare rischi di incendio, esplosione, scariche elettriche o lesioni personali durante
l'uso del prodotto, seguire queste fondamentali precauzioni:
NOTA
Consigli, raccomandazioni e informazioni utili per un uso corretto del prodotto.
4 Italiano
NZ84J9770EK_ET_DG68-00658A-00_IT.indd 4
2/25/2015 5:18:36 PM
Istruzioni di sicurezza
Gli aspetti relativi alla sicurezza di questa apparecchiatura sono conformi a tutti gli
standard tecnici e sulla sicurezza riconosciuti nel settore. Come costruttori, riteniamo sia
nostra responsabilità mettervi a conoscenza delle seguenti istruzioni per la sicurezza.
AVVERTENZA
Istruzioni di sicurezza
L’apparecchio non è inteso per l'uso da parte di persone (bambini
inclusi) con ridotte capacità fisiche, sensoriali o mentali, inesperte
o prive di una adeguata conoscenza, a meno che una persona
responsabile per la loro sicurezza fornisca loro una corretta
supervisione e istruzione all'uso.
Sorvegliare i bambini affinché non giochino con l’apparecchio.
Se il cavo di alimentazione è danneggiato, richiederne la sostituzione
al produttore, a un tecnico dell'assistenza o un tecnico specializzato al
fine di evitare potenziali pericoli
Una volta terminata l'installazione, l'apparecchio deve poter essere
facilmente scollegabile dalla presa di corrente. La disconnessione
è ottenibile permettendo il libero accesso alla spina del cavo di
alimentazione o incorporando un interruttore nel cablaggio seguendo
le specifiche di cablaggio.
Se la superficie è crepata, spegnere l'apparecchio per evitare
eventuali scariche elettriche.
Durante l'uso questo prodotto diventa bollente. Prestare attenzione a
non toccare gli elementi riscaldanti all’interno del piano cottura.
Le parti accessibili diventano bollenti durante l'uso. Tenere i bambini
lontani dal prodotto.
Per la pulizia del prodotto non utilizzare un dispositivo a vapore.
Non appoggiare sul piano oggetti metallici quali coltelli, forchette,
cucchiai e coperchi in quanto diventano molto caldi.
Italiano 5
NZ84J9770EK_ET_DG68-00658A-00_IT.indd 5
2/25/2015 5:18:36 PM
Istruzioni di sicurezza
Dopo l'uso, spegnere l'elemento a induzione del piano cottura
mediante l'apposito comando, e non fare affidamento sul rilevatore di
pentole.
Istruzioni di sicurezza
Per pulire il vetro del piano cottura non utilizzare prodotti abrasivi o
raschietti metallici; potrebbero graffiare la superficie e ciò potrebbe
mandare in frantumi il vetro.
Questo apparecchio non è inteso per l'uso con timer o telecomando
esterni.
Il prodotto e le sue parti accessibili possono diventare bollenti
durante l'uso. Prestare attenzione a non toccare gli elementi
riscaldanti all’interno del piano cottura. Tenere i bambini di età
inferiore a 8 anni lontani dal prodotto a meno che non siano
costantemente sorvegliati.
Questo apparecchio può essere utilizzato da bambini di età
superiore agli 8 anni e da persone con handicap fisici, sensoriali o
mentali o senza esperienza o conoscenza del prodotto solo sotto la
supervisione di una persona responsabile o nel caso in cui abbiano
ricevuto informazioni specifiche sull'uso sicuro dell'apparecchio e
ne abbiano compreso i rischi ad esso associati. Non consentire ai
bambini di giocare con l'apparecchio. La pulizia e la manutenzione
dell'apparecchio non devono essere svolti da bambini senza la
supervisione di un adulto.
Lasciare senza sorveglianza una pentola contenente grasso o olio sul
piano cottura acceso può essere pericoloso e causare un incendio.
Non tentare MAI di spegnere un incendio con acqua, ma spegnere
l'apparecchio e coprire le fiamme, ad esempio con un coperchio o una
coperta antifiamma.
Pericolo di incendio: non riporre stoviglie o altri oggetti sulle
superfici di cottura.
6 Italiano
NZ84J9770EK_ET_DG68-00658A-00_IT.indd 6
2/25/2015 5:18:36 PM
La temperatura delle superfici accessibili potrebbe essere molto
elevata mentre l'apparecchio è in funzione.
ATTENZIONE
Verificare che l'apparecchio venga installato e collegato a massa in
modo appropriato da un tecnico qualificato.
La manutenzione dell'apparecchio deve essere effettuata
esclusivamente da personale qualificato. Le riparazioni eseguite
da persone non qualificate possono provocare lesioni personali o
gravi danni all'apparecchio. Se l'apparecchio deve essere riparato,
contattare il centro assistenza locale. La mancata osservanza di
queste istruzioni può causare danni e l'invalidamento della garanzia.
Le apparecchiature a incasso possono essere utilizzate solo dopo
essere state installate in telai e luoghi di lavoro conformi ai relativi
standard. Ciò garantisce una protezione sufficiente da un eventuale
contatto per le apparecchiature elettriche come previsto dagli
standard di sicurezza riconosciuti.
Se l'apparecchio si guasta o compaiono crepe o fratture:
•spegnere tutte le zone cottura;
•scollegare il piano cottura dall'alimentazione principale; e
•contattare il centro assistenza locale.
Se il piano cottura si crepa, spegnere l'apparecchio per evitare il
rischio di scosse elettriche. Non utilizzare il piano cottura finché la
superficie in vetro non è stata sostituita.
Non utilizzare il piano cottura per scaldare fogli di alluminio, prodotti
avvolti in fogli di alluminio o cibi surgelati confezionati in recipienti
di alluminio.
Italiano 7
NZ84J9770EK_ET_DG68-00658A-00_IT.indd 7
2/25/2015 5:18:36 PM
Istruzioni di sicurezza
Tenere il prodotto e il cavo di alimentazione lontano dalla portata di
bambini di età inferiore a 8 anni.
Istruzioni di sicurezza
Istruzioni di sicurezza
La presenza di liquido tra il fondo della pentola e il piano cottura può
produrre pressione di vapore. Ciò può provocare un sobbalzo della
pentola.
Assicurarsi sempre che il piano cottura e la base della pentola siano
asciutti.
Quando si cucina, le zone cottura diventano roventi.
Non lasciare mai che bambini piccoli si avvicinino all'apparecchio.
Poiché possono rappresentare un pericolo, tenere i materiali di
imballaggio fuori dalla portata dei bambini.
L'apparecchio deve essere utilizzato esclusivamente per la cottura o
la frittura di alimenti per uso domestico. Non è stato progettato per
un uso industriale o commerciale.
Non utilizzare mai il piano cottura per scaldare l'ambiente.
Fare attenzione quando si collegano apparecchiature elettriche a
prese di corrente poste nelle vicinanze del piano cottura. Le spine non
devono mai toccare il piano cottura.
In caso di surriscaldamento, grasso e olio possono prendere
rapidamente fuoco. Non lasciare mai i fornelli incustoditi durante
la preparazione di cibi cotti in olio o grasso, ad esempio quando si
cucinano patatine fritte.
Spegnere le zone cottura dopo l'uso.
Tenere sempre i pannelli di controllo asciutti e puliti.
Non mettere mai materiali combustibili sul piano cottura: potrebbero
provocare un incendio.
In caso di un uso non attento dell'apparecchiatura vi è il rischio di
ustioni.
8 Italiano
NZ84J9770EK_ET_DG68-00658A-00_IT.indd 8
2/25/2015 5:18:36 PM
I cavi che fuoriescono dalle apparecchiature elettriche non devono
toccare la superficie del piano cottura o i tegami caldi.
Non utilizzare il piano cottura per asciugare indumenti.
Non tentare di riparare, disassemblare o modificare l'apparecchiatura
autonomamente.
Spegnere sempre l'apparecchio prima della pulizia.
Pulire il piano cottura in base alle istruzioni per la pulizia e la
manutenzione contenute in questo manuale.
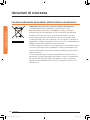
Smaltimento del materiale di imballaggio
AVVERTENZA
Tutti i materiali utilizzati per imballare l'apparecchio sono completamente riciclabili. Fogli
e parti in polistirolo sono contrassegnati in modo appropriato. Smaltire tutti i materiali
di imballaggio e le vecchie apparecchiature in base alle normative per l'ambiente e la
sicurezza.
Smaltimento corretto dell'apparecchio vecchio
AVVERTENZA
Prima di smaltire il vecchio apparecchio, renderlo inutilizzabile in modo che non possa
diventare fonte di pericolo. Per farlo, rivolgersi a un tecnico qualificato per scollegare
l'apparecchio dall'alimentazione principale e rimuovere la spina.
L'apparecchio non deve essere smaltito assieme ai rifiuti domestici.
Presso il locale centro di raccolta rifiuti sono disponibili informazioni sulle date di ritiro e
sulle piattaforme aperte al pubblico per lo smaltimento dei rifiuti.
Italiano 9
NZ84J9770EK_ET_DG68-00658A-00_IT.indd 9
2/25/2015 5:18:36 PM
Istruzioni di sicurezza
Gli utenti dotati di pacemaker e di protesi cardiache devono
mantenere una distanza minima di 30 cm tra la parte superiore
del corpo e le zone cottura a induzione, se accese. In caso di dubbi,
consultare il produttore del dispositivo o il proprio medico.
(Solo modello con piano cottura a induzione)
Istruzioni di sicurezza
Corretto smaltimento del prodotto (Rifiuti elettrici ed elettronici)
(Applicabile nei Paesi con sistemi di raccolta differenziata)
Istruzioni di sicurezza
Il simbolo riportato sul prodotto, sugli accessori o sulla
documentazione indica che il prodotto e i relativi accessori
elettronici (quali caricabatterie, cuffia e cavo USB) non devono
essere smaltiti con altri rifiuti al termine del ciclo di vita. Per
evitare eventuali danni all’ambiente o alla salute causati dallo
smaltimento dei rifiuti non corretto, si invita l’utente a separare il
prodotto e i suddetti accessori da altri tipi di rifiuti, conferendoli ai
soggetti autorizzati secondo le normative locali.
Gli utenti domestici sono invitati a contattare il rivenditore presso
il quale è stato acquistato il prodotto o l’autorità competente per
tutte le informazioni relative alla raccolta differenziata di questo
tipo di materiali.
Gli utenti professionali (imprese e professionisti) sono invitati a
contattare il proprio fornitore e verificare i termini e le condizioni
del contratto di acquisto. Questo prodotto e i relativi accessori
elettronici non devono essere smaltiti unitamente ad altri rifiuti
commerciali.
10 Italiano
NZ84J9770EK_ET_DG68-00658A-00_IT.indd 10
2/25/2015 5:18:37 PM
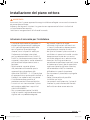
Installazione del piano cottura
AVVERTENZA
Assicurarsi che il nuovo apparecchio venga installato e collegato a massa esclusivamente
da personale qualificato.
Attenersi alle seguenti istruzioni. La garanzia non copre eventuali danni risultanti da
un'installazione non corretta.
I dati tecnici vengono forniti alla fine del manuale.
• L'impianto elettrico deve prevedere un
dispositivo che consenta di scollegare
tutti i poli dell'apparecchio dalla rete
con un'apertura di contatto larga
almeno 3 mm. I dispositivi adatti per
l'isolamento includono interruttori
per la protezione della linea, fusibili (i
fusibili a vite devono essere rimossi dal
supporto), interruttori a scatto automatici
per corrente di dispersione a terra e
contatori.
• Relativamente a quanto attiene
alla protezione antincendio, questa
apparecchiatura è conforme alle
normative EN 60335 - 2 - 6. Questo tipo
di apparecchiatura può essere installata a
fianco di una credenza o di una parete.
• L'installazione deve garantire la
protezione contro le scosse elettriche.
• La cucina in cui viene montato il piano
cottura deve soddisfare i requisiti di
stabilità DIN 68930.
• Per una protezione contro l'umidità,
tutte le superfici tagliate devono essere
sigillate con un prodotto adeguato.
• Nel caso di superfici di lavoro
affiancate, le giunzioni nell'area in cui
si trova il piano cottura devono essere
completamente riempite di malta.
• Nei piani di lavoro in pietra naturale o
artificiale o in ceramica, le molle a scatto
devono essere fissate con una resina
artificiale adeguata o un adesivo misto.
• Accertarsi che la guarnizione sia
correttamente posizionata contro il piano
di lavoro senza spazi. Non è necessario
applicare ulteriore sigillante siliconico;
ciò renderebbe infatti la rimozione
difficoltosa in caso di riparazione.
• Per rimuovere il piano cottura spingerlo
da sotto.
• Sotto il piano cottura è possibile
installare una lastra.
• Lo spazio di ventilazione tra il piano di
lavoro e la parte inferiore del frontale
dell'unità non deve essere ostruito.
Italiano 11
NZ84J9770EK_ET_DG68-00658A-00_IT.indd 11
2/25/2015 5:18:37 PM
Installazione del piano cottura
Istruzioni di sicurezza per l'installatore
Installazione del piano cottura
Collegamento alla rete elettrica
Prima di effettuare il collegamento, controllare che la tensione nominale dell'apparecchio,
ovvero la tensione indicata sulla piastra, corrisponda alla tensione disponibile. La piastra si
trova sulla parte inferiore del telaio del piano cottura.
AVVERTENZA
Installazione del piano cottura
Prima di collegare i cavi al circuito,
staccare la corrente.
La tensione dell'elemento riscaldante è
di 230 VCA ~. L'apparecchio funziona
perfettamente anche con tensioni di
~220 Vca o ~240 Vca. Il piano cottura
deve essere collegato alla rete mediante
un dispositivo che consenta di scollegare
tutti i poli dell'apparecchio dalla rete
con un'apertura di contatto larga almeno
3 mm, ad es., interruttori automatici per la
protezione della linea, interruttori a scatto
automatici per corrente di dispersione a
terra o fusibili .
AVVERTENZA
Prestare attenzione (conformità)
all'allocazione neutra e di fase
dell'apparecchio e dell'impianto della casa
(schemi di collegamento); in caso contrario,
i componenti potrebbero subire danni.
La garanzia non copre i danni derivanti da
un'installazione non corretta.
AVVERTENZA
Se il cavo di alimentazione è danneggiato,
richiederne la sostituzione al produttore,
a un tecnico dell'assistenza o un tecnico
specializzato al fine di evitare potenziali
pericoli
AVVERTENZA
I collegamenti dei cavi devono essere
effettuati in base alle normative e le viti
dei terminali devono essere serrate bene.
AVVERTENZA
Dopo aver collegato il piano cottura alla
rete elettrica, verificare che tutte le zone
cottura siano pronte all'uso accendendole
brevemente a turno alla massima potenza
con una pentola adatta.
12 Italiano
NZ84J9770EK_ET_DG68-00658A-00_IT.indd 12
2/25/2015 5:18:37 PM
1N~ (32A)
01
02
04
03
05
L
06
04
Blu
02
Marrone
05
Grigio
03
Nero
06
Verde/Giallo
03
05
04
06
L2
01
N
05
03
06
07
L2
N2
01
220-240 V ~
05
Blu
02
380-415 V ~
06
Grigio
03
Marrone
07
Verde/Giallo
04
Nero
2 x 1N~ (16A): Prima di effettuare il
collegamento separare i fili.
04
02
N1
07
01
220-240 V ~
05
Nero
02
Marrone
06
Grigio
03
Blu
07
Verde/Giallo
04
220-240 V ~
AVVERTENZA
Per un corretto collegamento elettrico
seguire lo schema di cablaggio fissato
vicino ai terminali.
Italiano 13
NZ84J9770EK_ET_DG68-00658A-00_IT.indd 13
2/25/2015 5:18:37 PM
Installazione del piano cottura
2N~ (16A): Separare i cavi a 2 fasi
(L1 e L2) prima di eseguire il
collegamento.
01
L1
220-240 V ~
N
02
L1
01
Installazione del piano cottura
Installazione sul piano di lavoro
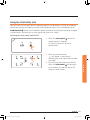
NOTA
A
Installazione del piano cottura
Prima dell'installazione, prendere
nota del numero di serie indicato
sulla piastra dell'apparecchio. Questo
numero, necessario in caso di richiesta
di assistenza, non è più accessibile
dopo l'installazione poiché è stampato
sulla piastra originale sul rovescio
dell'apparecchio.
A. N. di serie
NOTA
NOTA
Prestare particolare attenzione ai requisiti
minimi di spazio e tolleranza.
Sul fondo del piano cottura sono previste
due ventole. Qualora vi sia un armadietto
al di sotto del piano cottura, non
conservarvi piccoli oggetti o carta poiché
potrebbero rimanere impigliati nelle
ventole o interferire con la ventilazione
qualora aspirati.
01
Min. 2 mm
02
750 mm
01
02
14 Italiano
NZ84J9770EK_ET_DG68-00658A-00_IT.indd 14
2/25/2015 5:18:37 PM
01
02
03
06
04
08
07
11
05
Installazione del piano cottura
09
12
10
01
x4
07
Max. 50 mm, Min. 20 mm
02
ø6
08
Min. 60 mm
03
90 °
09
Min. 600 mm
04
750±1 mm
10
Min. 60 mm
05
490±1 mm
11
Min. 60 mm
06
R3
12
Min. 50 mm
Italiano 15
NZ84J9770EK_ET_DG68-00658A-00_IT.indd 15
2/25/2015 5:18:37 PM
Installazione del piano cottura
01
03
02
Installazione del piano cottura
04
05
06
08
07
01
Min. 40 mm
05
15 mm
02
520 mm
06
Min. 60 mm
03
Min. 40 mm
07
480 mm
04
25 mm
08
Min. 50 mm
16 Italiano
NZ84J9770EK_ET_DG68-00658A-00_IT.indd 16
2/25/2015 5:18:37 PM
01
02
Min. 550 mm
02
Min. 35 mm
03
Min. 65 mm
04
Min. 100 mm
05
Min. 5 mm
04
Installazione del piano cottura
03
01
05
02
03
01
01
Min. 20 mm
02
Min. 2 mm
03
Min. 20 mm
Italiano 17
NZ84J9770EK_ET_DG68-00658A-00_IT.indd 17
2/25/2015 5:18:38 PM
Installazione del piano cottura
Installazione del piano cottura
18 Italiano
NZ84J9770EK_ET_DG68-00658A-00_IT.indd 18
2/25/2015 5:18:38 PM
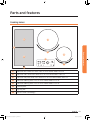
Parti e funzioni
Zone cottura
01
04
03
08
Parti e funzioni
05
02
06
08
07
01
Zona Flex a induzione estesa sul retro, a 1800 W con Power Boost a 2600 W
02
Zona Flex a induzione estesa sul davanti, a 1800 W con Power Boost a 2600 W
03
Zona Flex a induzione estesa completamente, a 3300 W con Power Boost a 3600 W
04
Zona cottura a induzione 2200 W con Power Boost 3200 W
05
Zona cottura a induzione 1200 W con Power Boost 2000 W
06
Pannello di controllo
07
Barra di illuminazione
08
Virtual Flame Technology™
Italiano 19
NZ84J9770EK_ET_DG68-00658A-00_IT.indd 19
2/25/2015 5:18:38 PM
Parti e funzioni
Pannello di controllo
06
01
06
01
09
05
01
06
Parti e funzioni
04
01
07
06
10
02
01
Selettori zone cottura
02
Selettore impostazione calore (manopola magnetica)
03
Sensore Controllo di sicurezza
04
Sensore Controllo On/Off
05
Sensore e spia controllo timer
06
Indicatori delle impostazioni del calore e del calore residuo
07
Mantieni caldo
08
Pausa
09
Selettore zona Flex estesa
10
Selettore Power Boost
08
03
20 Italiano
NZ84J9770EK_ET_DG68-00658A-00_IT.indd 20
2/25/2015 5:18:38 PM
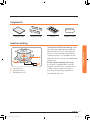
Componenti
Piano cottura a
induzione
Staffe di montaggio
Viti
Manopola
magnetica
Induzione di calore
A
C
A. Serpentina di induzione
B. Correnti indotte
C. Circuiti elettronici
Italiano 21
NZ84J9770EK_ET_DG68-00658A-00_IT.indd 21
2/25/2015 5:18:38 PM
Parti e funzioni
B
• Il principio di induzione di calore:
Posizionando una pentola su una
zona cottura e attivando tale zona, i
circuiti elettronici del piano cottura a
induzione producono "correnti indotte"
sul fondo della pentola che innalza
istantaneamente la temperatura della
pentola.
• Maggiore rapidità di cottura e di frittura:
Poiché viene riscaldata direttamente
la pentola e non il vetro, l'efficienza è
maggiore rispetto ad altri sistemi poiché
il calore non viene disperso. La maggior
parte dell'energia assorbita viene
trasformata in calore.
Parti e funzioni
Principali caratteristiche dell'apparecchio
Parti e funzioni
• Superficie di cottura in vetroceramica:
L'apparecchio ha una superficie di cottura
in vetroceramica e quattro zone cottura a
riscaldamento rapido.
• Sensori a sfioramento: L'apparecchio
funziona attraverso sensori a
sfioramento.
• Pulizia facile: Il vantaggio del piano
di cottura in vetroceramica e della
manopola di controllo smontabile è la
loro accessibilità. La superficie liscia e
piatta è facile da pulire.
• Sensore On/Off: Il sensore Controllo
"On/Off" fornisce all'apparecchio un
interruttore di alimentazione separato.
Toccando questo sensore, si attiva o
disattiva completamente l'alimentazione.
• Indicatori delle funzioni e dei controlli:
Display digitali e indicatori forniscono
informazioni su impostazioni e funzioni
attivate, oltre che sulla presenza di calore
residuo nelle varie zone cottura.
• Arresto di sicurezza: Se l'impostazione
non viene modificata, dopo un
determinato periodo di tempo un arresto
di sicurezza spegne automaticamente
tutte le zone cottura.
• Power Boost : Usare questa funzione
per riscaldare il contenuto di una pentola
più velocemente rispetto al livello
massimo ‘
’. (Il display visualizza ‘
’.)
• Rilevamento automatico pentole: In ogni
zona cottura è incorporato un sistema
di rilevamento automatico di pentole,
calibrato in modo da riconoscere pentole
dal diametro appena più piccolo della
zona cottura. Le pentole devono sempre
essere centrate in ogni zona cottura. E'
consigliabile utilizzare pentole adeguate
alla cottura desiderata.
• Display digitali:
• Da
a
,'
' impostazioni
selezionate per il calore
•
calore residuo (mantieni caldo)
•
calore residuo
•
il blocco di sicurezza per bambini
è attivo
•
il sensore è stato toccato per più
di 8 secondi.
•
il piano cottura si è surriscaldato
a causa di un funzionamento
anomalo. (esempio: funzionamento
con una pentola vuota)
•
nella zona cottura è stata
posizionata una pentola non adatta, la
pentola è troppo piccola oppure non è
stata posizionata alcuna pentola.
• Mantieni caldo
: Usare questa
funzione per mantenere in caldo gli
alimenti. Il display visualizza
.
• Pausa
: Usare questa funzione
per attivare tutte le zone di cottura
all'impostazione minore. (per esempio,
per rispondere a una telefonata) Il
display mostrerà
.
• Selettore zona Flex estesa : Usare
questa funzione per estendere la zona
cottura a tutta la parte sinistra.
22 Italiano
NZ84J9770EK_ET_DG68-00658A-00_IT.indd 22
2/25/2015 5:18:39 PM
• Virtual Flame™: Per comodità dell'utente,
il display visualizza il messaggio ‘Cucina
ora’.
• Manopola magnetica: Il controllo della
potenza è facile, semplice e intuitivo
mediante la Manopola magnetica.
• Zona Flex estesa: La zona Flex estesa è
un'area ampia di forma rettangolare per
la cottura di più piatti.
• Arresto rapido: Questa opzione riduce
il tempo di cottura e delle operazioni
necessarie mediante un semplice tocco.
Spegnimento di sicurezza
Se per un lungo periodo di tempo una delle zone cottura non viene spenta o l'impostazione
del calore non viene regolata, quella zona cottura si spegne automaticamente.
Il calore residuo viene indicato con
,
(“caldo") sul display digitale corrispondente a
quella specifica zona cottura.
Le zone cottura si spengono automaticamente dopo i seguenti periodi di tempo.
Spegnimento
1-3
Dopo 6 ore
4-6
Dopo 5 ore
7-9
Dopo 4 ore
10-15
Dopo 1,5 ore
NOTA
Se il piano cottura è surriscaldato a causa
di un funzionamento anomalo, viene
visualizzato il simbolo
.
Il piano cottura si spegne.
NOTA
Se sulla zona cottura è stata posizionata
una pentola non adatta, la pentola è troppo
piccola oppure non è stata posizionata
alcuna pentola, verrà visualizzato
.
Dopo 1 minuto, la zona cottura
corrispondente verrà spenta.
NOTA
Se una o più zone cottura si spengono
prima che sia trascorso il tempo indicato,
vedere la sezione "Risoluzione dei
problemi".
Altri motivi per cui una zona cottura si spegne automaticamente
Tutte le zone cottura si spengono immediatamente se un liquido trabocca e si rovescia sul
pannello di controllo.
Lo spegnimento automatico si attiva anche quando si appoggia un panno umido sul
pannello di controllo. In entrambi i casi, l'apparecchio deve essere riacceso utilizzando
il sensore dell'alimentazione principale Controllo On/Off
una volta che il liquido o il
panno è stato rimosso.
Italiano 23
NZ84J9770EK_ET_DG68-00658A-00_IT.indd 23
2/25/2015 5:18:39 PM
Parti e funzioni
Impostazione del calore
Parti e funzioni
Tecnologia Virtual Flame™
La tecnologia Virtual Flame crea fiamme
virtuali all'attivazione di un elemento a
induzione.
Parti e funzioni
• La tecnologia Virtual Flame è disponibile
solo sul fornello di destra.
• Ruotando la manopola per regolare il
livello di potenza, il colore della fiamma
cambia. (Selezionando Power Boost, le
fiamme fuoriescono dalla pentola.)
• La fiamma virtuale ha diversi aspetti in
base alla forma, dimensione e posizione
della pentola appoggiata sopra il
fornello. (Per risultati ottimali usare
tegami corrispondenti alla dimensione
dell'elemento.) Pentole troppo larghe
possono coprire completamente la
fiamma virtuale. Pentole troppo piccole
possono distorcere la forma della fiamma
virtuale.
• Eventuali impurità presenti sul fondo
delle pentole o sulla superficie del piano
cottura possono distorcere o spezzare
la forma della fiamma virtuale. Pulire le
pentole e la superficie del piano cottura
prima di utilizzarli.
24 Italiano
NZ84J9770EK_ET_DG68-00658A-00_IT.indd 24
2/25/2015 5:18:39 PM
Indicatore del calore residuo
Quando una singola zona cottura o il piano cottura vengono spenti, la presenza del calore
residuo viene visualizzata con la lettera
,
("caldo") sul display digitale della zona
cottura relativa. Una volta spenta la zona cottura, l'indicatore di calore residuo rimarrà
acceso fino al completo raffreddamento della zona cottura.
Il calore residuo può essere utilizzato per scongelare o tenere in caldo i cibi.
AVVERTENZA
Finché l'indicatore del calore residuo è
acceso vi è il rischio di scottarsi.
AVVERTENZA
Rilevamento della temperatura
Se per qualche motivo questo accadesse in una delle zone cottura nella quale vengono
superati i limiti di sicurezza, la zona cottura ridurrebbe automaticamente il livello di
potenza.
Una volta terminato l'uso del piano cottura, la ventola di raffreddamento continuerà a
funzionare fino al completo raffreddamento della parte elettronica del piano cottura.
La ventola di raffreddamento si spegnerà e accenderà in base alla temperatura
dell'elettronica.
Italiano 25
NZ84J9770EK_ET_DG68-00658A-00_IT.indd 25
2/25/2015 5:18:40 PM
Parti e funzioni
Se l'alimentazione viene interrotta,
il simbolo
,
scompare e le
informazioni sul calore residuo non sono
più disponibili.
Tuttavia, se il calore è ancora eccessivo vi
è il rischio di scottarsi. Per evitarlo, fare
sempre molta attenzione nei pressi del
piano cottura.
Uso del piano cottura
Pulizia iniziale
Passare sulla superficie in vetroceramica un panno umido e un detergente per piani cottura
in ceramica.
AVVERTENZA
Non usare detergenti corrosivi o abrasivi. Potrebbero danneggiare la superficie.
Pentole per le zone cottura a induzione
Il piano cottura a induzione può essere attivato solo se sopra una delle zone cottura viene
posizionata una pentola a base magnetica. E’ possibile usare i seguenti tipi di pentole.
Materiale delle pentole
Uso del piano cottura
Materiale delle pentole
Idoneo
Acciaio, acciaio smaltato
Sì
Ghisa
Sì
Acciaio inossidabile
Se adeguatamente etichettato dal costruttore
Alluminio, rame, ottone
N.
Vetro, ceramica, porcellana
N.
NOTA
I tegami idonei alla cottura a induzione
sono contrassegnati dal produttore.
NOTA
Alcune pentole possono emettere dei suoni
quando vengono usate per la cottura a
induzione. Tal rumori non indicano un
malfunzionamento nell'apparecchiatura
e non influenzano in alcun modo il
funzionamento.
NOTA
I contenitori non in acciaio inossidabile
hanno una minore conduttività termica
se paragonati ai contenitori in acciaio
inossidabile, il che comporta un maggiore
tempo di cottura.
26 Italiano
NZ84J9770EK_ET_DG68-00658A-00_IT.indd 26
2/25/2015 5:18:40 PM
Test appropriati
I recipienti di cottura sono adatti alla
cottura a induzione se presentano una
etichetta di idoneità apposta dal produttore
sul fondo e se una calamita si attacca al
fondo del recipiente.
NOTA
NOTA
Possono essere testati per l'idoneità
utilizzando la manopola magnetica.
La cottura a induzione può non funzionare
correttamente con pentole costruite
con materiali non ferrosi i cui bordi non
aderiscano ai magneti o pentole non
ferrose il cui fondo sia rivestito in ferro.
Uso del piano cottura
Dimensioni delle pentole
Le zone di cottura a induzione si adattano automaticamente alla dimensione del fondo
delle pentole entro certi limiti. Tuttavia, il fondo delle pentole deve avere un diametro
minimo in base alla dimensione della zona cottura.
Diametro delle zone cottura
Diametro minimo del fondo della pentola
220 mm
140 mm
160 mm
100 mm
Flex anteriore o posteriore
140 mm
Flex completo
240 mm, (dimensione lato lungo), ovale, pesciera
Italiano 27
NZ84J9770EK_ET_DG68-00658A-00_IT.indd 27
2/25/2015 5:18:40 PM
Uso del piano cottura
Rumori durante il funzionamento
Se si avverte.
• Rumori di crepe: il recipiente usato è
composto da materiali diversi.
• Fischio: sono in uso più di due zone
cottura e il recipiente usato è composto
da un materiale differente.
• Ronzio: sono stati impostati livelli di
potenza elevati.
• Ticchettio: disturbi elettrici causati da
una commutazione dei carichi.
• Sibilo, debole ronzio: la ventola è in
funzione.
Il rumore è normale e non rappresenta
alcun difetto.
Utilizzare recipienti di cottura adeguati
Uso del piano cottura
Pentole migliori offrono risultati migliori.
• Una buona pentola si riconosce dalla
base. La base deve essere più spessa e
piatta possibile.
• Quando si acquista una pentola, fare
attenzione al diametro della base. Spesso
i costruttori indicano solo il diametro del
bordo superiore.
• Non utilizzare pentole che hanno fondi
danneggiati o bordi taglienti o piegati.
Facendo scivolare queste pentole sul
piano cottura si possono provocare graffi
permanenti sul piano cottura stesso.
• Quando è fredda, in genere la base della
pentola è leggermente curva verso
l'interno (concava). Non deve mai essere
curva verso l'esterno (convessa).
• Se si desidera utilizzare una pentola
speciale, ad esempio una pentola a
pressione, un bollitore o un wok, leggere
le istruzioni del costruttore.
28 Italiano
NZ84J9770EK_ET_DG68-00658A-00_IT.indd 28
2/25/2015 5:18:40 PM
Consigli per risparmiare energia
NOTA
Attenendosi alle seguenti indicazioni, è
possibile risparmiare energia preziosa.
• Collocare sempre pentole e padelle sulla
zona cottura prima di accenderla.
• Se le zone cottura o le basi delle pentole
sono sporche, il consumo di energia
aumenta.
• Se possibile, mettere il coperchio in modo
che copra completamente la pentola o la
padella.
• Spegnere la zona cottura prima del
termine del tempo di cottura e usare il
calore residuo per tenere i cibi in caldo o
per scongelare.
Per utilizzare i sensori a sfioramento, toccare il sensore desiderato con la punta dell'indice
finché il relativo display si accende o si spegne, o finché la funzione desiderata viene
attivata.
Durante l'utilizzo dell'apparecchio, toccare un solo sensore. Se il dito viene appoggiato sul
pannello troppo di piatto, può venire attivato anche un sensore adiacente.
Italiano 29
NZ84J9770EK_ET_DG68-00658A-00_IT.indd 29
2/25/2015 5:18:40 PM
Uso del piano cottura
Uso dei sensori a sfioramento
Uso del piano cottura
Accensione dell'apparecchio
L'apparecchio viene acceso utilizzando il
sensore Controllo On/Off .
Toccare il sensore Controllo On/Off
per
circa 1 secondo.
Vengono visualizzati i display digitali
.
NOTA
Dopo aver toccato il sensore Controllo
On/Off
per accendere l'apparecchio,
selezionare entro 20 secondi
l'impostazione del calore. In caso contrario,
l'apparecchio si spegnerà automaticamente
per motivi di sicurezza.
Uso del piano cottura
30 Italiano
NZ84J9770EK_ET_DG68-00658A-00_IT.indd 30
2/25/2015 5:18:40 PM
Selezionare la zona cottura e il calore desiderato
1. Per selezionare la zona cottura, toccare
il tasto corrispondente alla zona
desiderata.
2. Per l'impostazione e la regolazione del
livello di potenza, ruotare la manopola
magnetica
NOTA
NOTA
Provando a ruotare la manopola magnetica
afferrando il lato o spingendola con forza,
essa non funzionerà.
Se si premono più sensori per oltre
8 secondi, sul display viene visualizzato
. Per azzerare, toccare il sensore
Controllo On/Off .
NOTA
Provando a ruotare la manopola con i
guanti, essa potrebbe non funzionare.
Se l'utente prova a ruotare la manopola
indossando dei guanti, non sarà possibile
impostare e regolare il livello di potenza.
Italiano 31
NZ84J9770EK_ET_DG68-00658A-00_IT.indd 31
2/25/2015 5:18:41 PM
Uso del piano cottura
Durante la selezione della zona cottura, il
livello predefinito è 15.
NOTA
Uso del piano cottura
Spegnimento dell'apparecchio
Per spegnere completamente l'apparecchio,
utilizzare il sensore Controllo On/Off .
Toccare il sensore Controllo On/Off
per
circa 1 secondo.
NOTA
Dopo aver spento una singola zona cottura
o l'intera superficie di cottura, la presenza
di calore residuo viene indicata sui display
digitali delle corrispondenti zone cottura
con i simboli
,
("caldo").
Uso del piano cottura
Arresto rapido
Per spegnere una zona cottura, premere il
relativo selettore per 2 secondi.
32 Italiano
NZ84J9770EK_ET_DG68-00658A-00_IT.indd 32
2/25/2015 5:18:41 PM
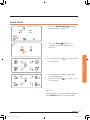
Uso del blocco di sicurezza per bambini
Si può utilizzare il blocco di sicurezza per bambini per evitare l'accensione involontaria
di una zona cottura o della superficie di cottura. Per evitare che le impostazioni vengano
modificate accidentalmente, ad esempio passando uno straccio sul pannello, è possibile
bloccare il pannello di controllo, ad eccezione del sensore Controllo On/Off .
Attivazione/Disattivazione del blocco di sicurezza per bambini
1. Toccare il sensore Blocco di sicurezza
per circa 3 secondi.
Verrà emesso un segnale acustico.
Italiano 33
NZ84J9770EK_ET_DG68-00658A-00_IT.indd 33
2/25/2015 5:18:41 PM
Uso del piano cottura
2. Toccare un sensore qualsiasi.
Sul display verrà visualizzato
,
a indicare l'attivazione del blocco di
sicurezza per bambini.
3. Per disattivare il blocco di sicurezza,
toccare nuovamente il sensore
Blocco di sicurezza
per 3 secondi.
Verrà emesso un segnale acustico.
Uso del piano cottura
Timer
Uso del timer come arresto di sicurezza:
Se si imposta un determinato periodo di tempo per il funzionamento della zona cottura,
trascorso tale periodo la zona cottura si spegne automaticamente. La funzione può essere
utilizzata per più zone cottura contemporaneamente.
Impostazione dell'arresto di sicurezza
Le zone cottura alle quali si desidera applicare l'arresto di sicurezza devono essere accese.
1. Una volta attivato, premere la
corrispondente zona cottura per
attivare un segnale flash per il display
corrispondente.
Uso del piano cottura
2. Toccare il sensore Controllo timer
Sopra il display del timer verrà
visualizzato il numero 10.
.
3. Utilizzare i Selettori di impostazione
del timer ( o ) per impostare il
periodo di tempo, ad esempio
15 minuti, dopo il quale la zona cottura
dovrà spegnersi automaticamente. Ora
l'arresto di sicurezza è attivato.
NOTA
E' possibile regolare l'impostazione del
timer mediante la manopola magnetica. Il
timer può essere regolato da 0 a 99.
34 Italiano
NZ84J9770EK_ET_DG68-00658A-00_IT.indd 34
2/25/2015 5:18:41 PM
4. Per annullare le impostazioni del timer,
selezionare il fornello desiderato e
tenere premuto il sensore Controllo
Timer
per 2 secondi. Ciò annullerà le
impostazioni del timer del fornello con
un beep. Tenendo premuto il sensore
Controllo Timer
per 2 secondi senza
selezionare alcun fornello, annullerà
le impostazioni del timer dell'ultimo
fornello modificato.
NOTA
Toccando il sensore Controllo timer
senza aver selezionato alcuna zona cottura,
il display si attiva ma non viene avviato
alcun timer.
NOTA
Per cambiare più facilmente le
impostazioni, tenere premuto uno
dei sensori di controllo
o
fino a
raggiungere il valore desiderato.
Timer di attivazione
Per utilizzare il timer per il conto alla rovescia, l'apparecchio deve essere acceso, ma tutte
le zone cottura non devono usare il timer come spegnimento di sicurezza.
1. Toccare il sensore Controllo timer .
verrà visualizzato sul display del
timer.
Italiano 35
NZ84J9770EK_ET_DG68-00658A-00_IT.indd 35
2/25/2015 5:18:42 PM
Uso del piano cottura
Per visualizzare il tempo restante di
qualsiasi zona cottura, utilizzare il sensore
Controllo timer .
Il corrispondente indicatore inizia a
lampeggiare lentamente.
Per azzerare le impostazioni, utilizzare i
Selettori di impostazione del timer
( o ). Una volta trascorso il periodo di
tempo impostato, la zona cottura si spegne
automaticamente, viene emesso un segnale
acustico come conferma e sul display del
timer appare un messaggio.
Uso del piano cottura
2. La funzione di timer di attivazione
diventa attiva e i numeri dei display
iniziano ad aumentare. Per annullare le
impostazioni del timer, tenere premuto
il sensore Controllo Timer
per
2 secondi.
3. Per interrompere il timer, toccare il
sensore Controllo timer .
Uso della funzione Mantieni caldo
La funzione Mantieni caldo mantiene i cibi alla giusta temperatura senza cuocerli
eccessivamente, in modo da poterli servire alla temperatura ottimale.
1. Usare questa funzione per mantenere
in caldo gli alimenti. Toccare il tasto
corrispondente alla zona cottura.
Uso del piano cottura
2. Premere il tasto Mantieni caldo
.
36 Italiano
NZ84J9770EK_ET_DG68-00658A-00_IT.indd 36
2/25/2015 5:18:42 PM
Regolazione del Power boost
La funzione Power boost fornisce una maggiore potenza a ognuna delle zone cottura.
(esempio: portare a ebollizione una grande quantità d'acqua)
Zone cottura
Tempo boost max
220 mm
10 min
160 mm
10 min
Flex anteriore o posteriore
10 min
Flex completo
5 min
Dopo tale periodo, la zona cottura torna al
livello di potenza
.
NOTA
In alcune circostanze, la funzione
Power Boost può essere disattivata
automaticamente al fine di proteggere i
componenti elettronici interni del piano
cottura.
Le zone cottura hanno una regolazione massima.
Se la gamma di potenza viene superata selezionando la funzione Power boost
Management ridurrà automaticamente il calore della zona cottura.
A
B
A
B
, Power
L'indicatore di questa zona cottura passa
alternativamente dalla regolazione
massima alla regolazione impostata. Dopo
ciò, l'indicatore passa dall'impostazione di
calore impostata all'impostazione massima
possibile.
A. Zona cottura doppia
B. Zona cottura doppia
Italiano 37
NZ84J9770EK_ET_DG68-00658A-00_IT.indd 37
2/25/2015 5:18:42 PM
Uso del piano cottura
Gestione della potenza
Uso del piano cottura
Pausa
La funzione Pausa
porta tutte le zone di cottura impostate sulla regolazione minima
per poi riportarle al loro valore impostato in precedenza. Questa funzione è utile per
interrompere brevemente la cottura per poi riprenderla, ad esempio per rispondere a una
telefonata.
Quando la funzione Pausa
è attiva, tutti i sensori tranne Pausa
, Blocco
e
Controllo On/Off
sono disattivati. Per riprendere la cottura, toccare nuovamente il
sensore PAUSA.
Pannello di controllo
Per attivare
Toccare Pausa
Per disattivare
Toccare Pausa
Display
Tornare al livello di potenza precedente
NOTA
Le funzioni del timer non vengono
interrotte da Pausa
.
Uso del piano cottura
Controllo Flex
La funzione Flex serve per attivare l'intera zona sinistra del piano cottura per utilizzare
pentole di maggiori dimensioni. (esempio; pentole ovali, pesciera)
1. Toccare il sensore Zone Flex estesa
.
2. Controllo del calore mediante la
manopola magnetica. Il display
del calore impostato sul lato
sinistro (davanti, dietro) cambierà
contemporaneamente.
38 Italiano
NZ84J9770EK_ET_DG68-00658A-00_IT.indd 38
2/25/2015 5:18:43 PM
Attivazione/disattivazione audio
1. Toccare il sensore Controllo On/Off
per circa 1 secondo.
2. Toccare il sensore Pausa
per 3 secondi entro 10 secondi
dall'attivazione.
4. Per cambiare le impostazioni dell'Audio,
ripetere le procedure 1 e 2.
L'audio sarà riattivato (ON) e il display
del timer visualizzerà
.
NOTA
Dopo 10 secondi dall'accensione non è più
possibile cambiare l'impostazione On/Off
dell'audio.
Italiano 39
NZ84J9770EK_ET_DG68-00658A-00_IT.indd 39
2/25/2015 5:18:43 PM
Uso del piano cottura
3. L'audio sarà escluso (OFF) e il display
del timer visualizzerà
.
Uso del piano cottura
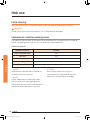
Impostazioni suggerite per la cottura di alcuni cibi
I valori della tabella sono solo indicativi. Le impostazioni del calore per i vari metodi di
cottura dipendono da diverse variabili, incluse la qualità del recipiente di cottura utilizzato
e la quantità di cibo che deve essere cucinata.
Uso del piano cottura
Impostazione
Metodo di cottura
Esempi d'uso
14-15
Riscaldamento
Rosolatura
Frittura
Riscaldamento di grandi quantità di liquido, cottura
della pasta, rosolatura della carne, doratura del
goulash, stufatura della carne
10-13
Intensivo
Frittura
Bistecca, lombata, pasticci rosolati, salsicce, pancake
/ frittelle
8-9
Frittura
Cotolette / costolette, fegato, pesce, polpette, uova
fritte
6-7
Bollitura
Cottura di 1,5 l max di liquido, patate, verdure
3-5
Cottura a vapore
Stufatura
Bollitura
1-2
Fondere
Cottura a vapore e stufatura di piccole quantità di
verdure, cottura del riso e piatti a base di latte
Per fondere il burro, sciogliere la gelatina, fondere il
cioccolato
NOTA
Le impostazioni del calore indicate nella
tabella sono solo indicative.
NOTA
Le impostazioni del calore devono essere
regolate in base al recipiente di cottura e
ai cibi.
40 Italiano
NZ84J9770EK_ET_DG68-00658A-00_IT.indd 40
2/25/2015 5:18:43 PM
Pulizia e manutenzione
Piano cottura
AVVERTENZA
I detergenti non devono entrare in
contatto con la superficie in vetroceramica
riscaldata: Dopo la pulizia, tutte le tracce
di detergente devono essere eliminate
con un'adeguata quantità di acqua pulita,
poiché potrebbero avere un effetto
corrosivo quando la superficie si scalda.
Non utilizzare detergenti aggressivi, come
spray per grill o forni, pagliette saponate o
pagliette abrasive.
NOTA
Pulire la superficie di vetroceramica dopo
ogni uso, quando toccandola risulta ancora
calda. In questo modo, eventuali tracce di
cibo non si carbonizzano sulla superficie.
Rimuovere incrostazioni, macchie di
calcare, tracce di grasso e macchie
metalliche utilizzando un detergente
per vetroceramica o acciaio inossidabile
disponibile sul mercato.
Sporco leggero
1. Pulire la superficie in vetroceramica
con un panno umido.
2. Asciugare con un panno pulito. Non
lasciare residui di detersivo sulla
superficie.
Italiano 41
NZ84J9770EK_ET_DG68-00658A-00_IT.indd 41
2/25/2015 5:18:44 PM
Pulizia e manutenzione
3. Pulire accuratamente l'intera superficie
di cottura in vetroceramica una volta
la settimana con un detergente per
vetroceramica o acciaio inossidabile
disponibile sul mercato.
4. Passare sulla superficie in
vetroceramica un panno bagnato e
asciugarla con un panno pulito che non
lascia pelucchi.
Pulizia e manutenzione
Sporco ostinato
1. Per rimuovere tracce di cibo e residui
ostinati, utilizzare un raschietto per
vetro.
2. Per utilizzare il raschietto, tenerlo
inclinato rispetto alla superfice in vetro.
3. Rimuovere lo sporco raschiando con la
lama.
NOTA
Raschietti e detergenti per vetroceramica
sono disponibili presso i rivenditori
specializzati.
Sporco problematico
1. Rimuovere zucchero caramellato,
plastica fusa, fogli di alluminio e
altri materiali utilizzando subito un
raschietto mentre sono ancora caldi.
Pulizia e manutenzione
AVVERTENZA
Quando si usa il raschietto su una
superficie calda si rischia di scottarsi:
2. Pulire normalmente il piano cottura una
volta raffreddato. Se la zona cottura
sulla quale vi sono tracce di sostanze
o materiale fuso si è raffreddata, per
pulirla scaldarla nuovamente.
NOTA
Dalla superficie in vetroceramica non è
possibile eliminare graffi o macchie scure
causati per esempio da una pentola con
i bordi taglienti. Tali imperfezioni non
influiscono sul funzionamento del piano
cottura.
42 Italiano
NZ84J9770EK_ET_DG68-00658A-00_IT.indd 42
2/25/2015 5:18:44 PM
Telaio del piano cottura (opzionale)
AVVERTENZA
Non utilizzare aceto, succo di limone o
anticalcare sul telaio del piano cottura; in
caso contrario possono comparire macchie
scure.
1. Pulire il telaio con un panno umido.
2. Inumidire i residui secchi con un panno
bagnato. Strofinare e asciugare.
Per evitare di danneggiare l'apparecchio
• Se zucchero o una preparazione
contenente zucchero si sciolgono
su una zona cottura calda, pulire
immediatamente con un raschietto
mentre sono ancora caldi. Se si lasciano
raffreddare, potrebbero danneggiare la
superficie quando si cerca di rimuoverli.
• Tenere lontano dalla superficie in
vetroceramica tutti i materiali che
potrebbero sciogliersi, come plastica,
fogli di alluminio e carta metallizzata da
forno. Se un materiale simile si scioglie
sul piano cottura, deve essere rimosso
immediatamente con un raschietto.
Italiano 43
NZ84J9770EK_ET_DG68-00658A-00_IT.indd 43
2/25/2015 5:18:44 PM
Pulizia e manutenzione
• Non utilizzare il piano cottura come
piano di lavoro o di appoggio.
• Non accendere una zona cottura se sul
piano non vi è alcuna pentola o se la
pentola è vuota.
• Il materiale in vetroceramica è molto
duro e resistente agli shock termici,
ma non è infrangibile Il piano cottura
può subire danni se su di esso cade un
oggetto particolarmente duro o tagliente.
• Non collocare le pentole sul telaio del
piano cottura. Possono graffiare o
danneggiare la finitura.
• Non versare sul telaio del piano cottura
liquidi acidi, come aceto, succo di
limone o agenti disincrostanti, poiché
potrebbero provocare macchie scure.
Garanzia e assistenza
FAQ (domande frequenti) e risoluzione dei problemi
Un guasto può essere causato da un piccolo errore che può correggere l'utente stesso
con l'aiuto delle indicazioni che seguono. Se tali indicazioni non sono di alcun aiuto, non
cercare di effettuare altre riparazioni.
AVVERTENZA
Le riparazioni dell'apparecchio devono essere effettuate esclusivamente da un tecnico
qualificato. Riparazioni eseguite in modo errato possono essere fonte di rischio per
l'utente. Se l'apparecchio deve essere riparato, contattare il centro assistenza clienti.
Problema
Causa possibile
Soluzione
Cosa faccio se le zone cottura
non funzionano?
• Il fusibile nell'impianto elettrico
• Se il fusibile scatta
domestico (scatola dei fusibili) è
intatto.
• Gli indicatori sul pannello di
controllo sono accesi.
diverse volte, chiamare
un elettricista.
• L'apparecchio è acceso
correttamente.
Cosa faccio se le zone cottura
non si accendono?
• E' stato attivato accidentalmente il
• L'apparecchio è acceso
Cosa faccio se sul display, a
parte l'indicatore
,
l'indicatore
del
calore residuo scompare
improvvisamente?
Garanzia e assistenza
Cosa faccio se dopo aver
disattivato le zone cottura, sul
display non è indicato il calore
residuo?
sensore On/Off.
• Il pannello di controllo è
parzialmente coperto da un panno
umido o da un liquido.
correttamente.
• Verifica del pannello di
controllo
• E' stato attivato accidentalmente il
• L'apparecchio è acceso
sensore On/Off.
• Il pannello di controllo è
parzialmente coperto da un panno
umido o da un liquido.
correttamente.
• Verifica del pannello di
controllo
• La zona cottura è stata utilizzata
• Se la zona cottura
solo per poco e quindi non è
diventata abbastanza calda.
è calda, contattare
il centro assistenza
clienti.
44 Italiano
NZ84J9770EK_ET_DG68-00658A-00_IT.indd 44
2/25/2015 5:18:44 PM
Codice informativo
Causa possibile
Soluzione
C0
Controllare il sensore Cottura
automatica.
Riavviare l'apparecchio utilizzando il
tasto Power. Se il problema persiste,
scollegare l'alimentazione per 30 secondi.
Quindi, riavviare l'apparecchiatura
e riprovare. Se il problema persiste,
rivolgersi al Centro assistenza Samsung
di zona.
C1
La temperatura rilevata è
maggiore di quanto previsto.
C2
Controllare il sensore Cottura
automatica.
A2
Il motore CC non funziona a
causa di un problema con la
PCB o il cablaggio, oppure si
verificano disturbi alle lamelle
del motore.
d0
Il sensore è stato premuto per
oltre 8 secondi.
Verificare se il pad del sensore è bagnato
o premuto. Se il problema persiste,
riavviare l'apparecchiatura premendo
il tasto Power. Se il problema persiste,
rivolgersi al Centro assistenza Samsung
di zona.
F0
La comunicazione tra la PCB
madre e quella secondaria è
fallita.
F2
La CI touch comunica in modo
anomalo.
Riavviare l'apparecchio utilizzando il
tasto Power. Se il problema persiste,
scollegare l'alimentazione per 30
secondi. Riavviare l'apparecchiatura. Se
il problema persiste, rivolgersi al Centro
assistenza Samsung di zona.
Garanzia e assistenza
Italiano 45
NZ84J9770EK_ET_DG68-00658A-00_IT.indd 45
2/25/2015 5:18:44 PM
Garanzia e assistenza
Cosa faccio se la zona cottura non si
accende o non si spegne?
La causa potrebbe essere una delle
seguenti possibilità:
• Il pannello di controllo è parzialmente
coperto da un panno umido o da un
liquido.
• Il blocco di sicurezza per bambini è
attivato.
Cosa faccio se il display
è acceso?
Verificare quanto segue:
• Il pannello di controllo è parzialmente
coperto da un panno umido o da un
liquido.
Per azzerarlo, toccare il sensore On/Off.
• Qualora si sia versato del liquido sul
pannello di controllo, asciugarlo.
Cosa faccio se il display
è acceso?
Verificare quanto segue:
• Il piano cottura è surriscaldato a causa di
un funzionamento anomalo.
• Una volta raffreddato il piano cottura,
premere il sensore On/Off per
reimpostarlo.
Cosa faccio se il display
è acceso?
Verificare quanto segue:
• Nella zona cottura è stata posizionata
una pentola non adatta o la pentola
è troppo piccola oppure non è stata
posizionata alcuna pentola.
• Se si usa una pentola adatta, il messaggio
sparirà automaticamente.
Cosa faccio se la ventola di raffreddamento
funziona ancora dopo lo spegnimento del
piano cottura?
Verificare quanto segue:
• Una volta terminato l'uso del piano
cottura, la ventola di raffreddamento
continua a funzionare per raffreddare il
piano.
• Dopo il raffreddamento della parte
elettronica del piano cottura, la ventola si
spegne.
Se viene effettuata una richiesta di
assistenza per un errore verificatosi
durante l'uso dell'apparecchio, l'uscita del
tecnico può essere a pagamento anche
durante il periodo di garanzia.
Garanzia e assistenza
46 Italiano
NZ84J9770EK_ET_DG68-00658A-00_IT.indd 46
2/25/2015 5:18:44 PM
Servizio
Prima di rivolgersi al cento assistenza, consultare la sezione “Risoluzione dei problemi".
Se è ancora necessaria l'assistenza, attenersi alle seguenti indicazioni.
Si tratta di un guasto tecnico?
In questo caso, contattare il centro
assistenza clienti.
Prepararsi sempre in anticipo alla
chiamata. In questo modo verrà
semplificata la diagnosi del problema e
sarà più facile decidere se è necessaria
l'uscita di un tecnico.
Prendere nota delle seguenti informazioni.
• Che forma assume il problema?
• In quali circostanze si verifica il
problema?
Prima di chiamare, annotare il modello e
il numero di serie dell'apparecchio. Questi
dati sono indicati sulla piastra nel modo
seguente:
• Descrizione del modello
• Numero di serie (15 cifre)
Quando l'uscita sarà a pagamento anche
durante il periodo di garanzia?
• Se il problema poteva essere risolto
dall'utente applicando una delle soluzioni
fornite nella sezione "Risoluzione dei
problemi".
• Se il tecnico dell'assistenza deve uscire
più volte, poiché prima della visita
non gli sono state fornite tutte le
informazioni del caso e, di conseguenza,
deve fare viaggi supplementari per
le parti di ricambio. Prepararsi alla
chiamata telefonica come indicato sopra
può evitare questi costi.
Garanzia e assistenza
Per una facile consultazione, consigliamo
di annotare qui tali informazioni.
• Modello:
• N. di serie:
Italiano 47
NZ84J9770EK_ET_DG68-00658A-00_IT.indd 47
2/25/2015 5:18:44 PM
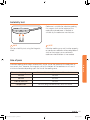
Dati tecnici
Dati tecnici
Dimensioni dell'apparecchio
Dimensioni dell'incasso del piano
di lavoro
Larghezza
800 mm
Profondità
520 mm
Altezza
56 mm
Larghezza
750 mm
Profondità
490 mm
Raggio d'angolo
3 mm
220 - 240 V ~ 50 / 60 Hz
7,0 kW
Tensione di collegamento
Potenza max del carico totale installato
Netto
16,5 kg
Lordo
19,5 kg
Posizione
Diametro
Potenza
Anteriore destro
160 mm
1200 W / Boost 2000 W
Centro
220 mm
2200 W / Boost 3200 W
Flex anteriore
-
1800 W / Boost 2600 W
Flex posteriore
-
1800 W / Boost 2600 W
Flex completo
-
3300 W / Boost 3600 W
Peso
Zone cottura
Risoluzione dei problemi
lmportato da:
SAMSUNG ELECTRONICS ITALIA S.P.A. Via C. Donat Cattin, 5
20063 Cernusco sul Naviglio - Milano-Italia
ll prodotto è costruito con materiali e componenti normalmente utilizzati da tutti i costruttori.
Alcuni materiali possono essere pericolosi se il prodotto o i materiali di imballaggio vengono
utilizzati in modo improprio o vengono smaltiti senza rispettare
le disposizioni delle autorità competenti.
L'uso incorretto del prodotto, degli accessori e dei materiali d'imballaggio
comporta dei rischi per l'utente.
Nel manuale d'istruzioni sono riportate le avvertenze per un corretto utilizzo.
48 Italiano
NZ84J9770EK_ET_DG68-00658A-00_IT.indd 48
2/25/2015 5:18:44 PM
Informazioni sul prodotto
Nome del fornitore
Samsung Electronics co. Ltd.
Identificativo del modello
NZ84J9770EK
Tipologia di piano cottura
Integrato
Tecnologia di riscaldamento
Zone e aree di cottura a induzione
Numero di zone e/o aree di cottura
3
Per le zone o le aree di cottura circolari:
diametro dell’area superficiale utile per
zona di cottura elettrica (Ø)
16,0 cm, 22,0 cm
Per le zone o le aree di cottura non
circolari: lunghezza e larghezza dell’area
superficiale utile per zona o area di cottura
elettrica (Lun x Lar)
43,5 x 22,5 cm
Ø 16,0 cm : 193,0 Wh/kg
Consumo energetico per zona o area di
cottura calcolato al kg (EC electric cooking)
Ø 22,0 cm : 176,5 Wh/kg
43,5 x 22,5 cm : 195,6 Wh/kg
Consumo energetico del piano cottura
calcolato per kg (EC electric hob)
188,4 Wh/kg
* Dati determinati secondo lo Standard EN 60350-2 e i Regolamenti della Commissione
(UE) N. 66/2014.
Consigli per risparmiare energia
• L'uso di una pentola a pressione riduce i
tempi di cottura.
Risoluzione dei problemi
• Collocare sempre pentole e padelle sulla
zona cottura prima di accenderla.
• Se le zone cottura o le basi delle pentole
sono sporche, il consumo di energia
aumenta.
Italiano 49
NZ84J9770EK_ET_DG68-00658A-00_IT.indd 49
2/25/2015 5:18:44 PM
Promemoria
NZ84J9770EK_ET_DG68-00658A-00_IT.indd 50
2/25/2015 5:18:44 PM
Promemoria
NZ84J9770EK_ET_DG68-00658A-00_IT.indd 51
2/25/2015 5:18:44 PM
DOMANDE O COMMENTI?
NAZIONE
CHIAMARE IL NUMERO
O VISITARE IL SITO WEB
AUSTRIA
0800-SAMSUNG (0800-7267864)
[Only for Premium HA] 0800-366661
[Only for Dealers] 0810-112233
www.samsung.com/at/support
BELGIUM
02-201-24-18
www.samsung.com/be/support (Dutch)
www.samsung.com/be_fr/support (French)
DENMARK
70 70 19 70
www.samsung.com/dk/support
FINLAND
030-6227 515
www.samsung.com/fi/support
FRANCE
01 48 63 00 00
www.samsung.com/fr/support
GERMANY
0180 6 SAMSUNG bzw.
0180 6 7267864*
(*0,20 €/Anruf aus dem dt. Festnetz,
aus dem Mobilfunk max. 0,60 €/Anruf)
www.samsung.com/de/support
ITALIA
800-SAMSUNG (800.7267864)
www.samsung.com/it/support
CYPRUS
8009 4000 only from landline, toll free
GREECE
80111-SAMSUNG (80111 726 7864) only from land line
(+30) 210 6897691 from mobile and land line
www.samsung.com/gr/support
LUXEMBURG
261 03 710
www.samsung.com/support
NETHERLANDS
0900-SAMSUNG (0900-7267864) (€ 0,10/Min)
www.samsung.com/nl/support
NORWAY
815 56480
www.samsung.com/no/support
PORTUGAL
808 20 7267
www.samsung.com/pt/support
SPAIN
0034902172678
www.samsung.com/es/support
SWEDEN
0771 726 7864 (0771-SAMSUNG)
www.samsung.com/se/support
SWITZERLAND
0800 726 78 64 (0800-SAMSUNG)
www.samsung.com/ch/support (German)
www.samsung.com/ch_fr/support (French)
UK
0330 SAMSUNG (7267864)
www.samsung.com/uk/support
EIRE
0818 717100
www.samsung.com/ie/support
DG68-00658A-00
NZ84J9770EK_ET_DG68-00658A-00_IT.indd 52
2/25/2015 5:18:45 PM
Induction Hob
User & installation manual
NZ84J9770EK
NZ84J9770EK_ET_DG68-00658A-00_EN.indd 1
2/16/2015 5:34:52 PM
Contents
Contents
Using this manual
4
The following symbols are used in this User Manual:
4
Safety instructions
5
Disposing of the packaging material
Proper disposal of your old appliance
Correct Disposal of This Product (Waste Electrical & Electronic Equipment)
9
9
10
Installing the hob
11
Safety instructions for the installer
Connecting to the mains power supply
Installing into the countertop
11
12
14
Parts and features
19
Cooking zones
19
Control panel
20
Components21
Induction heating
21
The key features of your appliance
22
Safety shutoff
23
Virtual flame technology
24
Residual heat indicator
25
Temperature detection
25
Hob use
26
Initial cleaning
26
Cookware for induction cooking zones
26
Suitability test
27
Size of pans
27
Operating noises
28
Using suitable cookware
28
Using the touch control sensors
29
Switching the appliance on
30
Select cooking zone and heat setting
31
Switching the appliance off
32
Quick stop
32
Using the child safety lock
33
Timer34
Using keep warm
36
Power boost control
37
Power management
37
Pause38
Flex control
38
2 English
NZ84J9770EK_ET_DG68-00658A-00_EN.indd 2
2/16/2015 5:34:52 PM
39
40
Cleaning and care
41
Hob41
Light soiling
41
Stubborn soiling
42
Problem dirt
42
Hob frame (option)
43
To avoid damaging your appliance
43
Warranty and service
44
FAQs and troubleshooting
44
Service47
Technical data
48
Technical data
Cooking zones
Product information
48
48
49
English 3
NZ84J9770EK_ET_DG68-00658A-00_EN.indd 3
2/16/2015 5:34:52 PM
Contents
Sound on/off
Suggested settings for cooking specific foods
Using this manual
Using this manual
Please take the time to read this owner’s manual, paying particular attention to the safety
information contained in the following section, before using your appliance. Keep this manual
for future reference.
If transferring ownership of the appliance, please remember to pass the manual on to the
new owner.
The following symbols are used in this User Manual:
WARNING
Hazards or unsafe practices that may result in severe personal injury or death.
CAUTION
Hazards or unsafe practices that may result in minor personal injury or property damage.
CAUTION
To reduce the risk of fire, explosion, electric shock, or personal injury when using your hob,
follow these basic safety precaution.
NOTE
Useful tips, recommendations, or information that helps users manipulate the product.
4 English
NZ84J9770EK_ET_DG68-00658A-00_EN.indd 4
2/16/2015 5:34:52 PM
Safety instructions
The safety aspects of this appliance comply with all accepted technical and safety standards.
However, as manufacturers we also believe it is our responsibility to familiarize you with the
following safety instructions.
WARNING
Children should be supervised to ensure that they do not play with the
appliance.
If the supply cord is damaged, it must be replaced by the manufacturer,
its service agent or similarly qualified persons in order to avoid a
hazard.
Appliance should allow the disconnection of the appliance from the
supply after installation. The disconnection may be achieved by having
the plug accessible or by incorporating a switch in the fixed wiring in
accordance with the wiring rules.
If the surface is cracked, switch off the appliance to avoid the
possibility of electric shock.
During use the appliance becomes hot. Care should be taken to avoid
touching heating elements inside the hob.
Accessible parts may become hot during use. Young children should be
kept away.
A steam cleaner is not to be used to clean the product.
Metallic objects such as knives, forks, spoons and lids should not be
placed on the hob surface since they can get hot.
English 5
NZ84J9770EK_ET_DG68-00658A-00_EN.indd 5
2/16/2015 5:34:53 PM
Safety instructions
This appliance is not intended for use by persons (including children)
with reduced physical, sensory or mental capabilities, or lack of
experience and knowledge, unless they have been given supervision or
instruction concerning use of the appliance by a person responsible for
their safety.
Safety instructions
After use, switch off the hob element by its control and do not rely on
the pan detector.
Safety instructions
Do not use harsh abrasive cleaners or sharp metal scrapers to clean
the hob glass since they can scratch the surface, which may result in
shattering of the glass.
Appliance is not intended to be operated by means of an external timer
or separate remote-control system.
The appliance and its accessible parts become hot during use. Care
should be taken to avoid touching heating elements inside the
hob. Children less than 8 years of age shall be kept away unless
continuously supervised.
This appliance can be used by children aged from 8 years and above
and persons with reduced physical, sensory or mental capabilities or
lack of experience and knowledge if they have been given supervision
or instruction concerning use of the appliance in a safe way and
understand the hazards involved. Children shall not play with the
appliance. Cleaning and user maintenance shall not be made by children
without supervision.
Unattended cooking on a hob with fat or oil can be dangerous and may
result in fire.
NEVER try to extinguish a fire with water, but switch off the appliance
and then cover flame e.g. with a lid or a fire blanket.
Danger of fire: do not store items on the cooking surfaces.
The temperature of accessible surfaces may be high when the appliance
is operating.
Keep the appliance and its cord out of reach of children less than
8 years.
6 English
NZ84J9770EK_ET_DG68-00658A-00_EN.indd 6
2/16/2015 5:34:53 PM
CAUTION
Be sure the appliance is properly installed and grounded by a qualified
technician.
Flush - mounted appliances may be operated only after they have
been installed in cabinets and workplaces that conform to the relevant
standards. This ensures sufficient protection against contact for
electrical units as required by the essential safety standards.
If your appliance malfunctions or if fractures, cracks or splits appear:
•switch off all cooking zones;
•disconnect the hob from the mains supply; and
•contact your local service centre.
If the cooktop cracks, turn the appliance off to avoid the possibility of
electric shock. Do not use your hob until the glass surface has been
replaced.
Do not use the hob to heat aluminium foil, products wrapped in
aluminium foil or frozen foods packaged in aluminium cookware.
Liquid between the bottom of the pan and the hob can produce steam
pressure. Which may cause the pan to jump.
Always ensure that the hotplate and the base of the pan are kept dry.
The cooking zones will become hot when you cook.
Always keep small children away from the appliance.
Keep all packaging materials well out of the reach of children, as
packaging materials can be dangerous to children.
English 7
NZ84J9770EK_ET_DG68-00658A-00_EN.indd 7
2/16/2015 5:34:53 PM
Safety instructions
The appliance should be serviced only by qualified service personnel.
Repairs carried out by unqualified individuals may cause injury or
serious malfunction. If your appliance is in need of repair, contact your
local service centre. Failure to follow these instructions may result in
damage and void the warranty.
Safety instructions
This appliance is to be used only for normal cooking and frying in the
home. It is not designed for commercial or industrial use.
Never use the hob for heating the room.
Safety instructions
Take care when plugging electrical appliances into mains sockets near
the hob. Mains leads must not come into contact with the cooktop.
Overheated fat and oil can catch fire quickly. Never leave surface units
unattended when preparing foods in fat or oil, for example, when
cooking chips.
Turn the cooking zones off after use.
Always keep the control panels clean and dry.
Never place combustible items on the hob, it may cause fire.
There is the risk of burns from the appliance if used carelessly.
Cables from electrical appliances must not touch the hot surface of the
hob or hot cookware.
Do not use the hob to dry clothes.
Users with Pacemakers and Active Heart Implants must keep their
upper body at a minimum distance of 30 cm from induction cooking
zones when turned on. If in doubt, you should consult the manufacturer
of your device or your doctor. (Induction hob model only)
Do not attempt to repair, disassemble, or modify the appliance yourself.
Always turn the appliance off before cleaning.
Clean the hob in accordance with the cleaning and care instructions
contained in this manual.
8 English
NZ84J9770EK_ET_DG68-00658A-00_EN.indd 8
2/16/2015 5:34:53 PM
Disposing of the packaging material
WARNING
Proper disposal of your old appliance
WARNING
Before disposing of your old appliance, make it inoperable so that it cannot be a source
of danger. To do this, have a qualified technician disconnect the appliance from the mains
supply and remove the mains lead.
The appliance may not be disposed of in the household rubbish.
Information about collection dates and public refuse disposal sites is available from your
local refuse department or council.
English 9
NZ84J9770EK_ET_DG68-00658A-00_EN.indd 9
2/16/2015 5:34:53 PM
Safety instructions
All materials used to package the appliance are fully recyclable. Sheet and hard foam parts
are appropriately marked. Please dispose of packaging materials and old appliances with due
regard to safety and the environment.
Safety instructions
Correct Disposal of This Product (Waste Electrical & Electronic
Equipment)
(Applicable in countries with separate collection systems)
Safety instructions
This marking on the product, accessories or literature indicates that
the product and its electronic accessories (e.g. charger, headset,
USB cable) should not be disposed of with other household waste
at the end of their working life. To prevent possible harm to the
environment or human health from uncontrolled waste disposal,
please separate these items from other types of waste and recycle
them responsibly to promote the sustainable reuse of material
resources.
Household users should contact either the retailer where they
purchased this product, or their local government office, for details
of where and how they can take these items for environmentally
safe recycling.
Business users should contact their supplier and check the terms and
conditions of the purchase contract. This product and its electronic
accessories should not be mixed with other commercial wastes for
disposal.
10 English
NZ84J9770EK_ET_DG68-00658A-00_EN.indd 10
2/16/2015 5:34:53 PM
Installing the hob
WARNING
Be sure the new appliance is installed and grounded only by qualified personnel.
Please observe this instruction. The warranty will not cover any damage that may occur as a
result of improper installation.
Technical data is provided at the end of this manual.
Safety instructions for the installer
• On tiled work surfaces, the joints in
the area where the hob sits must be
completely filled with grout.
• On natural, artificial stone, or ceramic tops,
the snap action springs must be bonded
in place with a suitable artificial resin or
mixed adhesive.
• Ensure that the seal is correctly seated
against the work surface without any
gaps. Additional silicon sealant must not
be applied; this would make removal more
difficult when servicing.
• The hob must be pressed out from below
when removed.
• A board can be installed underneath the
hob.
• The ventilation gap between the worktop
and front of the unit underneath it must
not be covered.
English 11
NZ84J9770EK_ET_DG68-00658A-00_EN.indd 11
2/16/2015 5:34:53 PM
Installing the hob
• A device must be provided in the electrical
installation that allows the appliance to be
disconnected from the mains at all poles
with a contact opening width of at least 3
mm. Suitable isolation devices include line
protecting cut - outs, fuses (screw type
fuses are to be removed from the holder),
earth leakage trips and contactors.
• With respect to fire protection, this
appliance corresponds to EN 60335 - 2 6. This type of appliance may be installed
with a high cupboard or wall on one side.
• The installation must guarantee shock
protection.
• The kitchen unit in which the appliance
is fitted must satisfy the stability
requirements of DIN 68930.
• For protection against moisture, all cut
surfaces are to be sealed with a suitable
sealant.
Installing the hob
Connecting to the mains power supply
Before connecting, check that the nominal voltage of the appliance, that is, the voltage stated
on the rating plate, corresponds to the available supply voltage. The rating plate is located on
the lower casing of the hob.
WARNING
Shut off power to circuit before connecting
wires to circuit.
Installing the hob
The heating element voltage is AC 230 V~.
The appliance also works perfectly on
networks with AC 220 V~ or AC 240 V~.
The hob is to be connected to the mains
using a device that allows the appliance to
be disconnected from the mains at all poles
with a contact opening width of at least
3 mm, eg. automatic line protecting cut out, earth leakage trips or fuse.
WARNING
Pay attention (conformity) to phase and
neutral allocation of house connection and
appliance (connection schemes); otherwise,
components can be damaged.
Warranty does not cover damage resulting
from improper installation.
WARNING
If the supply cord is damaged, it must be
replaced by the manufacturer, its service
agent or similarly qualified persons in order
to avoid a hazard.
WARNING
The cable connections must be made
in accordance with regulations and the
terminal screws tightened securely.
WARNING
Once the hob is connected to the mains
supply, check that all cooking zones are
ready for use by briefly switching each on
in turn at the maximum setting with suitable
cookware.
12 English
NZ84J9770EK_ET_DG68-00658A-00_EN.indd 12
2/16/2015 5:34:53 PM
1N~ (32A)
01
02
04
03
05
L
06
04
Blue
02
Brown
05
Gray
03
Black
06
Green/Yellow
03
05
04
06
L2
01
N
05
03
06
07
L2
N2
01
220-240 V ~
05
Blue
02
380-415 V ~
06
Gray
03
Brown
07
Green/Yellow
04
Black
2 x 1N~ (16A): S
eparate the wires before
connection.
04
02
N1
07
01
220-240 V ~
05
Black
02
Brown
06
Gray
03
Blue
07
Green/Yellow
04
220-240 V ~
WARNING
For correct supply connection, follow the
wiring diagram attached near the terminals.
English 13
NZ84J9770EK_ET_DG68-00658A-00_EN.indd 13
2/16/2015 5:34:54 PM
Installing the hob
2N~ (16A): S
eparate the 2-phase wires
(L1 and L2) before connection.
01
L1
220-240 V ~
N
02
L1
01
Installing the hob
Installing into the countertop
NOTE
A
Installing the hob
Make a note of the serial number on the
appliance rating label prior to installation.
This number will be required in the case
of requests for service and is no longer
accessible after installation, as it is on the
original rating plate on the underside of the
appliance.
A. Serial number
NOTE
NOTE
Pay special attention to the minimum space
and clearance requirements.
The bottom of the hob is equipped with two
fans. If there is a drawer under the hob it
should not be used to store small objects or
paper, since they could damage the fan or
interfere with the cooling if they are sucked
into it.
01
Min. 2 mm
02
750 mm
01
02
14 English
NZ84J9770EK_ET_DG68-00658A-00_EN.indd 14
2/16/2015 5:34:54 PM
01
02
03
06
04
08
07
11
05
Installing the hob
09
12
10
01
x4
07
Max. 50 mm, Min. 20 mm
02
ø6
08
Min. 60 mm
03
90 °
09
Min. 600 mm
04
750±1 mm
10
Min. 60 mm
05
490±1 mm
11
Min. 60 mm
06
R3
12
Min. 50 mm
English 15
NZ84J9770EK_ET_DG68-00658A-00_EN.indd 15
2/16/2015 5:34:54 PM
Installing the hob
01
03
02
Installing the hob
04
05
06
08
07
01
Min. 40 mm
05
15 mm
02
520 mm
06
Min. 60 mm
03
Min. 40 mm
07
480 mm
04
25 mm
08
Min. 50 mm
16 English
NZ84J9770EK_ET_DG68-00658A-00_EN.indd 16
2/16/2015 5:34:54 PM
01
02
03
01
Min. 550 mm
02
Min. 35 mm
03
Min. 65 mm
04
Min. 100 mm
05
Min. 5 mm
04
Installing the hob
05
02
03
01
01
Min. 20 mm
02
Min. 2 mm
03
Min. 20 mm
English 17
NZ84J9770EK_ET_DG68-00658A-00_EN.indd 17
2/16/2015 5:34:54 PM
Installing the hob
Installing the hob
18 English
NZ84J9770EK_ET_DG68-00658A-00_EN.indd 18
2/16/2015 5:34:54 PM
Parts and features
Cooking zones
01
04
03
Parts and features
08
05
02
06
08
07
01
Induction rear Wide Flex zone 1800 W with Power Boost 2600 W
02
Induction front Wide Flex zone 1800 W with Power Boost 2600 W
03
Induction complete Wide Flex zone 3300 W with Power Boost 3600 W
04
Induction cooking zone 2200 W with Power Boost 3200 W
05
Induction cooking zone 1200 W with Power Boost 2000 W
06
Control panel
07
Lighting Bar
08
Virtual Flame Technology™
English 19
NZ84J9770EK_ET_DG68-00658A-00_EN.indd 19
2/16/2015 5:34:55 PM
Parts and features
Control panel
06
01
06
01
09
05
01
06
Parts and features
04
01
07
06
10
01
Cooking zone selectors
02
Heat setting selector (Magnetic Knob)
03
Lock control sensor
04
On/Off control sensor
05
Timer control sensor and indicator
06
Indicators for heat settings and residual heat
07
Keep warm
08
Pause
09
Wide Flex zone selector
10
Power Boost selector
02
08
03
20 English
NZ84J9770EK_ET_DG68-00658A-00_EN.indd 20
2/16/2015 5:34:55 PM
Components
Induction hob
Bracket Spring
Screws
Magnetic Knob
Induction heating
A
C
A. Induction coil
B. Induced currents
C. Electronic circuits
English 21
NZ84J9770EK_ET_DG68-00658A-00_EN.indd 21
2/16/2015 5:34:55 PM
Parts and features
B
• The Principle of Induction Heating: When
you place your cookware on a cooking
zone and you turn it on, the electronic
circuits in your induction hob produce
“induced currents” in the bottom of the
cookware which instantly raise cookware’s
temperature.
• Greater speed in cooking and frying:
As the pan is heated directly and not
the glass, the efficiency is greater than
in other systems because no heat is
lost. Most of the energy absorbed is
transformed into heat.
Parts and features
The key features of your appliance
Parts and features
• Ceramic glass cooking surface: The
appliance has a ceramic glass cooking
surface and four rapid - response cooking
zones.
• Touch control sensors: Your appliance is
operated using touch control sensors.
• Easy cleaning: One advantage of the
ceramic glass cooking surface and
The detachable control knob is their
accessibility. The smooth, flat surface is
easy to clean.
• On/Off sensor: The “On/Off” control sensor
provides the appliance with a separate
mains switch. Touching this sensor
switches the power supply on or off
completely.
• Control and function indicators: Digital
displays and indicator lights provide
information about settings and activated
functions, as well as the presence of
residual heat in the various cooking zones.
• Safety shutoff: A safety shutoff
ensures that cooking zones switch off
automatically after a period of time if the
setting has not been changed.
• Power Boost : Use this function to heat
up the contents of the pan faster than
maximum power level
. (The display
will show
.)
• Auto Pan-Detection: Each cooking zone
incorporates an automatic pan-detection
system, the system is calibrated in order
to recognize pans of a diameter just
slightly smaller than the cooking zone.
Pans must always be placed centrally on
each cooking zone. And you should use
suitable cookware.
• Digital displays:
•
to
,‘
’ selected heat settings
•
residual heat (Stay Hot)
•
residual heat
•
the child lock is activated
•
message, the touch sensor button
has been touched for longer than
8 seconds.
•
message, when the hob is
overheated because of abnormal
operation. (example : operation with
empty cookware)
•
message, cookware is unsuitable
or too small or no cookware has been
placed on the cooking zone.
• Keep warm
: Use this function to keep
cooked food warm.
The display will show
.
• Pause
: Use this fuction to switch
all cooking zones on to the low power
setting. (example : to take a telephone call)
The display will show
.
• Wide Flex zone selector : Use this
function to expand cooking zone into
complete left side.
• Vritual Flame™: Get hassle free because
inform you ‘Creating food now on the
cooktop’ by visually telling.
22 English
NZ84J9770EK_ET_DG68-00658A-00_EN.indd 22
2/16/2015 5:34:56 PM
• Magnetic Knob: The power control is easy,
simple and intuitive by using Magnectic
Knob.
• Wide Flex zone: The Wide Flex zone is a
large, rectangle-shaped area designed for
cooking multiple dishes.
• Quick Stop: This option reduces the step
and time it takes to stop cooking by
simple one touch.
Safety shutoff
If one of the cooking zones is not switched off or the heat setting is not adjusted after an
extended period of time, that particular cooking zone will automatically switch itself off.
Any residual warmth will be indicated with
,
(for “hot”) in the digital displays
corresponding to the particular cooking zones.
The cooking zones switch themselves off at the following times.
Switch off
1-3
After 6 hours
4-6
After 5 hours
7-9
After 4 hours
10-15
After 1.5 hours
NOTE
If cookware is unsuitable or too small or no
cookware has been placed on the cooking
zone,
will be displayed.
And after 1 minute the corresponding
cooking zone will be switched off.
NOTE
NOTE
If the Hob is overheated because of
abnormal operation,
will be displayed.
And the Hob will be switched off.
Should one or more of the cooking zones
switch off before the indicated time has
elapsed, see the section “Troubleshooting”.
Other reasons why a cooking zone will switch itself off
All cooking zones will switch themselves off if liquid boils over and lands on the control
panel.
The automatic shutoff will also be activated if you place a damp cloth on the control panel. In
both of these instances, the appliance will need to be switched on again using the main On/
Off control
sensor after the liquid or the cloth has been removed.
English 23
NZ84J9770EK_ET_DG68-00658A-00_EN.indd 23
2/16/2015 5:34:56 PM
Parts and features
Heat setting
Parts and features
Virtual flame technology
Virtual flame technology creates the
appearance of flames when you turn on an
induction element.
Parts and features
• Virtual flame technology is available only
on the right burner.
• As you turn the knob to adjust the power
level, the color of the flames change. (If
you select Power Boost, the flames bounce
off the cookware.)
• The virtual flame may look different
depending on the appearance, size, or
position of the cookware. (For the best
results, use cookware that, matches the
element size. Cookware that is too large
can cover the virtual flame. Cookware that
is too small can cause the virtual flame to
be ill-formed.
• Impurities on the cookware bottom or
the cooktop surface can cause the virtual
flame to be ill-formed of incomplete. Clean
up the cookware or the cooktop surface
before using them.
24 English
NZ84J9770EK_ET_DG68-00658A-00_EN.indd 24
2/16/2015 5:34:56 PM
Residual heat indicator
When an individual cooking zone or the hob is turned off, the presence of residual heat is
shown with an
,
(for “hot”) in the digital display of the appropriate cooking zones.
Even after the cooking zone has been switched off, the residual heat indicator goes out only
after the cooking zone has cooled.
You can use the residual heat for thawing or keeping food warm.
WARNING
As long as the residual heat indicator is
illuminated, there is a risk of burns.
WARNING
Temperature detection
If for any reason the temperatures on any of the cooking zones were to exceed the safety
levels, should this happen then the cooking zone will automatically reduce to a lower power
level.
When you have finished using the hob, the cooling fan will continue to run until the hob’s
electronics has cooled down. And the cooling fan switched itself off depending upon the
temperature of the electronics.
English 25
NZ84J9770EK_ET_DG68-00658A-00_EN.indd 25
2/16/2015 5:34:56 PM
Parts and features
If the power supply is interrupted, the
,
symbol will go out and information
about residual heat will no longer be
available.
However, it may still be possible to burn
yourself. This can be avoided by always
taking care when near the hob.
Hob use
Initial cleaning
Wipe the ceramic glass surface with a damp cloth and ceramic cooktop glass cleaner.
WARNING
Do not use caustic or abrasive cleaners. The surface could be damaged.
Cookware for induction cooking zones
The induction hob can only be turned on when cookware with a magnetic base is placed on
one of the cooking zones. You can use the following suitable cookware.
Cookware material
Hob use
Cookware material
Suitable
Steel, Enamelled steel
Yes
Cast iron
Yes
Stainless steel
If appropriately labelled by the manufacturer
Aluminium, Copper, Brass
No
Glass, Ceramic, Porcelain
No
NOTE
Cookware for induction hob is labelled as
suitable by the manufacturer.
NOTE
NOTE
Non-stainless containers are less in
heat conductivity compared to stainless
containers, taking more time to cook.
Certain cookware can make noise when
being used on induction cooking zones.
These noise are not a fault in the appliance
and do not affect operation in any way.
26 English
NZ84J9770EK_ET_DG68-00658A-00_EN.indd 26
2/16/2015 5:34:56 PM
Suitability test
Cookware is suitable for induction cooking,
if a magnet sticks to the bottom of the
cookware and cookware is labelled as
suitable by the cookware manufacturer.
NOTE
NOTE
Can be suitability test using the Magnetic
Knob.
Induction cooking may not function properly
on nonferrous cookware whose edge doesn’t
stick to the magnet, or on nonferrous
cookware whose bottom is iron-coated.
Size of pans
Diameter of cooking zones
Minimum diameter of the bottom of the cookware
220 mm
140 mm
160 mm
100 mm
Front or Rear Flex
140 mm
Complete Flex
240 mm (long side dimension), oval, fish kettle
English 27
NZ84J9770EK_ET_DG68-00658A-00_EN.indd 27
2/16/2015 5:34:56 PM
Hob use
Induction cooking zones adapt automatically to the size of the bottom of the cookware up
to a certain limit. However the magnetic part of the bottom of the cookware must have a
minimum diameter depending upon the size of the cooking zone.
Hob use
Operating noises
If you can hear.
• Cracking noise: cookware is made of
different materials.
• Whistling: you use more than two cooking
zones and the cookware. is made of
different materials.
• Humming: you use high power levels.
• Clicking: electric switching occurs.
• Hissing, Buzzing: the fan operates.
The noise are normal and do not refer to
any defects.
Using suitable cookware
Better pans produce better results.
• You can recognise good pans by their
bases. The base should be as thick and flat
as possible.
• When buying new pans, pay particular
attention to the diameter of the base.
Manufacturers often give only the
diameter of the upper rim.
Hob use
• Do not use pans which have damaged
bases with rough edges or burrs.
Permanent scratching can occur if these
pans are slid across the surface.
• When cold, pan bases are normally bowed
slightly inwards (concave). They should
never be bowed outwards (convex).
• If you wish to use a special type of
pan, for example, a pressure cooker, a
simmering pan, or a wok, please observe
the manufacturer’s instructions.
28 English
NZ84J9770EK_ET_DG68-00658A-00_EN.indd 28
2/16/2015 5:34:56 PM
Energy saving tips
NOTE
You can save valuable energy by observing
the following points.
• Always position pots and pans before
switching on the cooking zone.
• Dirty cooking zones and pan bases
increase power consumption.
• When possible, position the lids firmly on
the pots and pans to cover completely.
• Switch the cooking zones off before the
end of the cooking time to use the residual
heat for keeping foods warm or for
thawing.
To operate the touch control sensors, touch the desired panel with the tip of your pointed
finger until the relevant displays illuminate or go out, or until the desired function is
activated.
Ensure that you are touching only one sensor panel when operating the appliance. If your
finger is too flat on the panel, an adjacent sensor may be actuated as well.
English 29
NZ84J9770EK_ET_DG68-00658A-00_EN.indd 29
2/16/2015 5:34:57 PM
Hob use
Using the touch control sensors
Hob use
Switching the appliance on
The appliance is switched on using the On/
Off control
sensor.
Touch the On/Off control
sensor for
approximately 1 second.
The digital displays will show
.
NOTE
After the On/Off control
sensor has
been actuated to switch on your appliance,
a heat setting must be selected within
approximately 20 seconds. Otherwise, the
appliance will switch itself off for safety
reasons.
Hob use
30 English
NZ84J9770EK_ET_DG68-00658A-00_EN.indd 30
2/16/2015 5:34:57 PM
Select cooking zone and heat setting
1. For selecting the cooking zone, touch the
corresponding cooking zone’s sensor.
2. For setting and adjusting the power
level, rotating the magnetic knob.
NOTE
The default level is set to 15 when selecting
the cooking zone.
If you try to rotate the magnetic knob by
grabbing the side or pushing it strongly, it
will not work.
If more than one sensor is pressed for
longer than 8 seconds,
will show in the
heat setting display. To reset, touch the On/
Off control
sensor.
NOTE
If you try to turn the knob with gloves on,
the knob may not work. If user rotate the
magnetic knob while wearing gloves, can
not set and adjust the power level.
English 31
NZ84J9770EK_ET_DG68-00658A-00_EN.indd 31
2/16/2015 5:34:57 PM
Hob use
NOTE
NOTE
Hob use
Switching the appliance off
To completely switch off the appliance, use
the On/Off control
sensor.
Touch the On/Off control
sensor for
1 seconds.
NOTE
After switching off a single cooking zone or
the entire cooking surface, the presence of
residual heat will be indicated in the digital
displays of the corresponding cooking zones
in the form of an
,
(for “hot”).
Quick stop
Hob use
To switch off a cooking zone, press the
cooking zone selector during 2 seconds.
32 English
NZ84J9770EK_ET_DG68-00658A-00_EN.indd 32
2/16/2015 5:34:57 PM
Using the child safety lock
You can use the child safety lock to safeguard against unintentionally turning on a cooking
zone and activating the cooking surface. Also the control panel, with the exception of the
On/Off control
sensor, can be locked in order to prevent the settings from being changed
unintentionally, for example, by wiping over the panel with a cloth.
Switching the child safety lock On/Off
1. Touch the Lock control
sensor for
approximately 3 seconds.
An acoustic signal will sound as
confirmation.
English 33
NZ84J9770EK_ET_DG68-00658A-00_EN.indd 33
2/16/2015 5:34:58 PM
Hob use
2. Touch any control sensor.
will appear in the displays,
indicating the child safety lock has been
activated.
3. For switching the child safety lock off,
touch the Lock control
sensor again
for 3 seconds. An acoustic signal will
sound as confirmation.
Hob use
Timer
Using the timer as a safety shutoff:
If a specific time is set for a cooking zone, the cooking zone will shut itself off once
this period of time has elapsed. This function can be used for multiple cooking zones
simultaneously.
Setting the safety shutoff
The cooking zone(s) for which you want to apply the safety shutoff must be switched on.
1. After switched on, press the
corresponding cooking zone to activate
the flash signal for the corresponding
cooking zone display.
2. Press the Timer control
sensor. The
number 10 will be displayed above the
timer display.
Hob use
3. Use the Timer setting selectors ( or
) to set the desired amount of time, for
example, 15 minutes, after which the
cooking zone will automatically switch
itself off. The safety shutoff is now
activated.
NOTE
It is possible to timer setting control using
magnetic knob. The timer can be adjusted
from 0 to 99.
34 English
NZ84J9770EK_ET_DG68-00658A-00_EN.indd 34
2/16/2015 5:34:58 PM
4. To cancel the timer settings, select the
target burner and hold down the Timer
control
sensor for 2 seconds. This
will cancel the burner’s timer settings
with a beep. If holding down the Timer
control
sensor for 2 seconds without
selecting a burner, this will cancel
the timer settings of the last changed
burner.
To display the time remaining for any of
the cooking zones, use the Timer control
sensor.
The corresponding control indicator will
begin to blink slowly.
The settings are reset using the Timer
setting selectors ( or ). After the set
period of time has elapsed, the cooking zone
automatically switches itself off, an acoustic
signal sounds as confirmation and the timer
display indicates.
NOTE
If you tap the Timer control
sensor
without selecting a cooking zone, the
display turns on but no timer settings is
applied.
NOTE
To change the settings quicker, touch and
hold any of the
or
control sensors
until the desired value is reached.
Hob use
Count up timer
For the count up timer to be used, the appliance must be switched on but all the cooking
zones must be not use timer as a safety shutoff.
1. Touch the Timer control
sensor.
will appear in the timer display.
English 35
NZ84J9770EK_ET_DG68-00658A-00_EN.indd 35
2/16/2015 5:34:59 PM
Hob use
2. The count up timer function becomes
active and the display numbers increase
over time. To cancel the timer settings,
hold down the Timer control
sensor
for 2 seconds.
3. To stop the timer, touch the Timer
control
sensor.
Using keep warm
Keep warm function keeps food at the proper temperature without over-cooking, so it stays
deliciously warm.
1. Use this function to Keep cooked food
Warm. Touch the corresponding cooking
zone’s sensor.
Hob use
2. Touch the Keep warm
sensor.
36 English
NZ84J9770EK_ET_DG68-00658A-00_EN.indd 36
2/16/2015 5:34:59 PM
Power boost control
The Power Boost
function makes additional power available to the each cooking zones.
(example : bring a large volume of water to the boil)
Cooking zones
Max Boost time
220 mm
10 min
160 mm
10 min
Front or Rear Flex
10 min
Complete Flex
5 min
After these times, the cooking zones
automatically return to power level
NOTE
.
In certain circumstances, the Power Boost
function may be deactivated automatically
to protect the internal electronic
components of the hob.
Power management
A
B
A
B
The indicator for this cooking zone
alternates for some seconds between the set
heat setting and the maximum possible heat
setting. After then, the indicator changes
from the set heat setting to maximum
possible heat setting.
A. Paired cooking zone
B. Paired cooking zone
English 37
NZ84J9770EK_ET_DG68-00658A-00_EN.indd 37
2/16/2015 5:34:59 PM
Hob use
The cooking zones have a maximum power available to them.
If this power range is exceeded by switching on the Power Boost
function,
Power Management automatically reduced the heat setting of cooking zone.
Hob use
Pause
The Pause
function simultaneously switches all cooking zones that are switched on
to the low power setting and then back to the heat setting that was previously set. This
function can be used to briefly interrupt and then continue the cooking process e.g. to take a
telephone call.
When the Pause
function is activated, all touch sensors except for the Pause
, Lock
and the On/Off
control sensors are disabled. To resume cooking, touch the PAUSE button
again.
Control Panel
To Switch On
Touch Pause
To Switch Off
Touch Pause
Display
Return to previous power level
NOTE
Timer functions are not stopped by Pause .
Flex control
Hob use
The flex function can operate complete left side cooking zone for using large size cookware.
(example : oval cookware, fish kettle)
1. Touch the Wide Flex zone
sensor.
2. Heat control using the magnetic Knob.
Heat setting display of left side (front,
rear) will be changed together.
38 English
NZ84J9770EK_ET_DG68-00658A-00_EN.indd 38
2/16/2015 5:34:59 PM
Sound on/off
1. Touch the On/Off control
approximately 1 second.
sensor for
2. Touch the Pause
sensor for
3 seconds within 10 seconds after
Power On.
3. Sound will OFF and
Timer display.
will show in the
Hob use
4. To change Sound setting, repeat No1
and No2 procedure.
Sound will ON and
will show in the
Timer display.
NOTE
After Power On, It is not possible to operate
sound On/Off control 10 senconds later.
English 39
NZ84J9770EK_ET_DG68-00658A-00_EN.indd 39
2/16/2015 5:35:00 PM
Hob use
Suggested settings for cooking specific foods
The figures in the table below are guidelines. The heat settings required for various cooking
methods depend on a number of variables, including the quality of the cookware being used
and the type and amount of food being cooked.
Switch setting
Cooking method
Examples for Use
14-15
Warming
Sautéing
Frying
Warming large amounts of liquid, boiling noodles,
searing meat, browning goulash, braising meat
10-13
Intensive
Frying
Steak, sirloin, hash browns, sausages, pancakes /
griddle cakes
8-9
Frying
Schnitzel / chops, liver, fish, rissoles, fried eggs
6-7
Boiling
Cooking up to 1.5 l liquid, potatoes, vegetables
3-5
Steaming
Stewing
Boiling
Steaming and stewing of small amounts of
vegetables, boiling rice and milk dishes
1-2
Melting
Melting butter, dissolving gelatine, melting
chocolate
Hob use
NOTE
The heat settings indicated in the table
above are provided only as guidelines for
your reference.
NOTE
You will need to adjust the heat settings
according to specific cookware and foods.
40 English
NZ84J9770EK_ET_DG68-00658A-00_EN.indd 40
2/16/2015 5:35:00 PM
Cleaning and care
Hob
WARNING
Cleaning agents must not come into contact
with a heated ceramic glass surface: All
cleaning agents must be removed with
adequate amounts of clean water after
cleaning because they can have a caustic
effect when the surface becomes hot. Do not
use any aggressive cleaners such as grill or
oven sprays, scouring pads or abrasive pan
cleaners.
NOTE
Clean the ceramic glass surface after
each use when it is still warm to the
touch. This will prevent spillage from
becoming burnt onto the surface. Remove
scales, watermarks, fat drippings and
metallic discolouration with the use of a
commercially available ceramic glass or
stainless steel cleaner.
Light soiling
1. Wipe the ceramic glass surface with a
damp cloth.
2. Rub dry with a clean cloth. Remnants of
cleaning agent must not be left on the
surface.
3. Thoroughly clean the entire ceramic
glass cooking surface once a week with
a commercially available ceramic glass
or stainless steel cleaner.
4. Wipe the ceramic glass surface using
adequate amounts of clean water and
rub dry with a clean lint - free cloth.
Cleaning and care
English 41
NZ84J9770EK_ET_DG68-00658A-00_EN.indd 41
2/16/2015 5:35:00 PM
Cleaning and care
Stubborn soiling
1. To remove food that has boiled over and
stubborn splashes, use a glass scraper.
2. Place the glass scraper at an angle to the
ceramic glass surface.
3. Remove soiling by scraping with the
blade.
NOTE
Glass scrapers and ceramic glass cleaners
are available from specialty retailers.
Problem dirt
1. Remove burnt-on sugar, melted plastic,
aluminium foil or other materials with a
glass scraper immediately and while still
hot.
Cleaning and care
WARNING
There is a risk of burning yourself when the
glass scraper is used on a hot cooking zone:
2. Clean the hob as normal when it has
cooled down. If the cooking zone on
which something has melted has been
allowed to cool, warm it up again for
cleaning.
NOTE
Scratches or dark blemishes on the ceramic
glass surface, caused, for example, by a
pan with sharp edges, cannot be removed.
However, they do not impair the function of
the hob.
42 English
NZ84J9770EK_ET_DG68-00658A-00_EN.indd 42
2/16/2015 5:35:00 PM
Hob frame (option)
WARNING
Do not use vinegar, lemon juice or scale
remover on the hob frame; otherwise dull
blemishes will appear.
1. Wipe the frame with a damp cloth.
2. Moisten dried debris with a wet cloth.
Wipe and rub dry.
To avoid damaging your appliance
• If sugar or a preparation containing sugar
comes into contact with a hot cooking
zone and melts, it should be cleaned off
immediately with a kitchen scraper while
it is still hot. If allowed to cool, it may
damage the surface when removed.
• Keep all items and materials that could
melt, for example, plastics, aluminium foil
and oven foils, away from the ceramic
glass surface. If something of this nature
melts onto the hob, it must be removed
immediately with a scraper.
Cleaning and care
• Do not use the hob as a work surface or
for storage.
• Do not operate a cooking zone if there is
no pan on the hob or if the pan is empty.
• Ceramic glass is very tough and resistant
to temperature shock, but it is not
unbreakable. It can be damaged by a
particularly sharp or hard object dropping
onto the hob.
• Do not place pans on the hob frame.
Scratching and damage to the finish may
occur.
• Avoid spilling acidic liquids, for example,
vinegar, lemon juice and descaling agents,
onto the hob frame, since such liquids can
cause dull spots.
English 43
NZ84J9770EK_ET_DG68-00658A-00_EN.indd 43
2/16/2015 5:35:00 PM
Warranty and service
FAQs and troubleshooting
A fault may result from a minor information that you can correct yourself with the help of
the following instructions. Do not attempt any further repairs if the following instructions do
not help in each specific case.
WARNING
Repairs to the appliance are to be performed only by a qualified service technician.
Improperly effected repairs may result in considerable risk to the user. If your appliance
needs repair, please contact your customer service centre.
Problem
Possible cause
Solution
Warranty and service
What should I do if the
cooking zones are not
functioning?
• The fuse in the house wiring is
• If the fuses trip a number
intact.
• The control indicators in the
control panel are illuminated.
of times, call an authorised
electrician.
• The appliance is properly
switched on.
What should I do if the
cooking zones will not
switch on?
• The On/Off sensor was
• The appliance is properly
What should I do if
the display except for
,
the residual
warmth indicator suddenly
disppears?
• The On/Off sensor was
• The appliance is properly
accidentally actuated.
• The control panel is partially
covered by a damp cloth or
liquid.
switched on.
• Clean the control panel.
What should I do if, after
the cooking zones have
been switched off, residual
warmth is not indicated in
the display.
• The cooking zone was only
• If the cooking zone is hot,
accidentally actuated.
• The control panel is partially
covered by a damp cloth or
liquid.
briefly used and therefore did
not become hot enough.
switched on.
• Clean the control panel.
please call the customer service
center.
44 English
NZ84J9770EK_ET_DG68-00658A-00_EN.indd 44
2/16/2015 5:35:01 PM
Information code
Possible cause
Solution
C0
Check the Auto Cook sensor.
Restart the appliance using the Power
button. If the problem continues,
disconnect power for more than 30
seconds. Then, restart the appliance and
try again. If the problem still continues,
contact a local service center.
C1
The temperature is sensed higher
than specified.
C2
Check the Auto Cook sensor.
A2
The DC Motor fails to operate
because of problems with the PCB
or wiring, or electrical disturbance
on the motor blade.
d0
The sensor is pressed for more
than 8 seconds.
Check if the sensor pad is wet or pressed.
If the problem continues, restart the
appliance using the Power button. If the
problem still continues, contact a local
service center.
F0
Communications between main
and sub PCBs fail.
F2
The touch-enabled IC
communicates abnormally.
Restart the appliance using the Power
button. If the problem continues,
disconnect power for more than 30
seconds. Then, restart the appliance. If
the problem still continues, contact a local
service center.
Warranty and service
English 45
NZ84J9770EK_ET_DG68-00658A-00_EN.indd 45
2/16/2015 5:35:01 PM
Warranty and service
What should I do if the cooking zone will
not switch on or off?
This could be due to one of the following
possibilities:
• The control panel is partially covered by a
damp cloth or liquid.
• The child safety lock is on.
What should I do if the
display is
illuminated?
Check for the following:
• The control panel is partially covered by a
damp cloth or liquid.
To reset, press the On/Off control sensor.
• If liquid has overflowd on control panel,
please wipe the liquid.
What should I do if the
display is
illuminated?
Check for the following:
• The hob is overheated because of
abnormal operation.
• After hob is cooled down, press the On/Off
control sensor for resetting.
What should I do if the
display is
illuminated?
Check for the following:
• Cookware is unsuitable or too small or no
cookware has been placed on the cooking
zone.
• If you use suitable cookware, displayed
message will automatically disapear.
What should I do if the cooling fan runs
after the hob is turned off?
Check for the following:
• When you have finished using the hob,
the cooling fan runs by itself for cooling
down.
• After the hob’s electronics has cooled
down, the cooling fan will be turned off.
If you request a service call because of
an information made in operating the
appliance, the visit from the customer
service technician may incur a charge even
during the warranty period.
Warranty and service
46 English
NZ84J9770EK_ET_DG68-00658A-00_EN.indd 46
2/16/2015 5:35:01 PM
Service
Before calling for assistance or service, please check the section “Troubleshooting”.
If you still need help, follow the instructions below.
Is it a technical fault?
If so, please contact your customer service
centre.
Always prepare in advance for the
discussion. This will ease the process of
diagnosing the problem and also make it
easier to decide if a customer service visit is
necessary.
Please take note of the following
information.
• What form does the problem take?
• Under what circumstances does the
problem occur?
When do you incur costs even during the
warranty period?
• If you could have remedied the problem
yourself by applying one of the solutions
provided in the section “Troubleshooting”.
• If the customer service technician has
to make several service calls because he
was not provided with all of the relevant
information before his visit and as a
result, for example, has to make additional
trips for parts. Preparing for your phone
call as described above will save you the
cost of these trips.
When calling, please know the model
and serial number of your appliance. This
information is provided on the rating plate
as follows:
• Model description
• S/N code (15 digits)
Warranty and service
We recommend that you record the
information here for easy reference.
• Model:
• Serial number:
English 47
NZ84J9770EK_ET_DG68-00658A-00_EN.indd 47
2/16/2015 5:35:01 PM
Technical data
Technical data
Width
800 mm
Depth
520 mm
Height
56 mm
Width
750 mm
Depth
490 mm
Corner radius
3 mm
Appliance dimensions
Worktop cut - out dimensions
220 - 240 V ~ 50 / 60 Hz
Connection voltage
7.0 kW
Maximum connected load power
Weight
Net
16.5 kg
Gross
19.5 kg
Cooking zones
Position
Diameter
Power
Front right
160 mm
1200 W / Boost 2000 W
Center
220 mm
2200 W / Boost 3200 W
Front Flex
-
1800 W / Boost 2600 W
Rear Flex
-
1800 W / Boost 2600 W
Complete Flex
-
3300 W / Boost 3600 W
Troubleshooting
48 English
NZ84J9770EK_ET_DG68-00658A-00_EN.indd 48
2/16/2015 5:35:01 PM
Product information
Supplier’s name
Samsung Electronics co. Ltd.
Model identification
NZ84J9770EK
Type of hob
Built-In
Heating technology
Induction cooking zones and cooking area
Number of cooking zones and/or area
3
For circular cooking zones or area:diameter
of useful surface area per electric heated
cooking zone (Ø)
16.0 cm, 22.0 cm
For non-circular cooking zones or area:
length and width of useful surface area per
electric heated cooking zone or area (L x W)
43.5 x 22.5 cm
Ø 16.0 cm : 193.0 Wh/kg
Energy consumption per cooking zone or
area calculated per kg (EC electric cooking)
Ø 22.0 cm : 176.5 Wh/kg
43.5 x 22.5 cm : 195.6 Wh/kg
Energy consumption for the hob calculated
per kg (EC electric hob)
188.4 Wh/kg
* Data determined according to standard EN 60350-2 and Commission Regulations (EU) No
66/2014.
Energy saving tips
• Always position pots and pans before
switching on the cooking zone.
• Dirty cooking zones and pan bases
increase power consumption.
• Using a pressure cooker reduces cooking
time.
Troubleshooting
English 49
NZ84J9770EK_ET_DG68-00658A-00_EN.indd 49
2/16/2015 5:35:01 PM
Memo
NZ84J9770EK_ET_DG68-00658A-00_EN.indd 50
2/16/2015 5:35:01 PM
Memo
NZ84J9770EK_ET_DG68-00658A-00_EN.indd 51
2/16/2015 5:35:01 PM
QUESTIONS OR COMMENTS?
COUNTRY
CALL
OR VISIT US ONLINE AT
AUSTRIA
0800-SAMSUNG (0800-7267864)
[Only for Premium HA] 0800-366661
[Only for Dealers] 0810-112233
www.samsung.com/at/support
BELGIUM
02-201-24-18
www.samsung.com/be/support (Dutch)
www.samsung.com/be_fr/support (French)
DENMARK
70 70 19 70
www.samsung.com/dk/support
FINLAND
030-6227 515
www.samsung.com/fi/support
FRANCE
01 48 63 00 00
www.samsung.com/fr/support
GERMANY
0180 6 SAMSUNG bzw.
0180 6 7267864*
(*0,20 €/Anruf aus dem dt. Festnetz,
aus dem Mobilfunk max. 0,60 €/Anruf)
www.samsung.com/de/support
ITALIA
800-SAMSUNG (800.7267864)
www.samsung.com/it/support
CYPRUS
8009 4000 only from landline, toll free
GREECE
80111-SAMSUNG (80111 726 7864) only from land line
(+30) 210 6897691 from mobile and land line
www.samsung.com/gr/support
LUXEMBURG
261 03 710
www.samsung.com/support
NETHERLANDS
0900-SAMSUNG (0900-7267864) (€ 0,10/Min)
www.samsung.com/nl/support
NORWAY
815 56480
www.samsung.com/no/support
PORTUGAL
808 20 7267
www.samsung.com/pt/support
SPAIN
0034902172678
www.samsung.com/es/support
SWEDEN
0771 726 7864 (0771-SAMSUNG)
www.samsung.com/se/support
SWITZERLAND
0800 726 78 64 (0800-SAMSUNG)
www.samsung.com/ch/support (German)
www.samsung.com/ch_fr/support (French)
UK
0330 SAMSUNG (7267864)
www.samsung.com/uk/support
EIRE
0818 717100
www.samsung.com/ie/support
DG68-00658A-00
NZ84J9770EK_ET_DG68-00658A-00_EN.indd 52
2/16/2015 5:35:01 PM