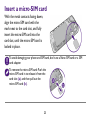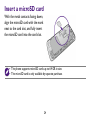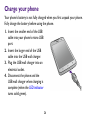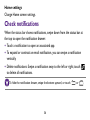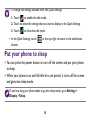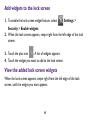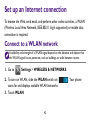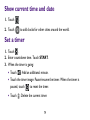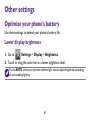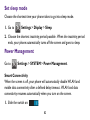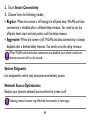
1
F5 Smartphone User Manual Copyright Copyright 2014 BenQ Corporation. All rights reserved. No part of this publication may be reproduced, transmitted, transcribed, stored in a retrieval system or translated into any language or computer language, in any form or by any means, electronic, mechanical, magnetic, optical, chemical, manual or otherwise, without the prior written permission of BenQ Corporation. Android is a trademark of Google Inc. The Bluetooth® word mark and logos are registered trademarks owned by Bluetooth SIG, Inc. and any use of such marks by BenQ Corporation is under license. Windows is a registered trademark of Microsoft Corporation. All other logos, products, or company names mentioned in this manual are the registered trademarks or copyrights of their respective owners, and are used for informational purposes only. 2 Disclaimer BenQ Corporation makes no representations or warranties, either expressed or implied, with respect to the contents hereof and specifically disclaims any warranties, merchantability or fitness for any particular purpose. Further, BenQ Corporation reserves the right to revise this publication and to make changes from time to time in the contents hereof without obligation of BenQ Corporation to notify any person of such revision or changes. About this user manual • Information contained in this user manual is correct at the time of release and subject to change without notice. Visit your local BenQ website from http://www.BenQ.com to download the latest version of this manual. • Screen images and icons in this manual are simulated for illustrative purposes only. Actual displays may vary. 3 • Operations described in this manual are written based on holding the phone in portrait mode. If the phone is held in landscape mode, part of the user interface may position differently. • For information on Google™ GMS (Google Mobile Services) applications, visit https://support.google.com. For information about other third-party applications, see the help that comes with the applications. Limit of Liability All contents and services accessible through this device belong to third parties and are protected by the laws on copyright, patents, trademarks and/or other intellectual property laws. These contents and services are provided solely for your personal use and not for commercial use. You cannot use them without the explicit permission from the content owner or service provider. Without limiting the foregoing, except with the express authorization of the content owner or of the supplier of the services concerned, you are forbidden to modify, copy, republish, transfer, distribute, transmit, translate, sell, exploit or 4 create derivatives, in any manner and on any medium, regardless of the content or services displayed by the intermediary of this device. BenQ is not responsible for the content of the websites or of similar resources, which are maintained and controlled by third parties, that may be linked from this product. Providing links to those websites or to similar resources does not mean that BenQ makes any warranty or representation to their content by expression or by implication. Any third party content or service preinstalled in this product is provided “as is”. BenQ does not, by expression or by implication, make any warrant to the content or to the services provided by third parties. BenQ does not warrant or guarantee that the content or services provided by third parties are accurate, effective, most up-to-date, legal, or complete. Under no circumstances shall BenQ be liable for the content or services provided by third parties including their negligence. 5 Services provided by third parties may be terminated temporarily or permanently. BenQ does not warrant or guarantee that any content or services provided by third parties are in good condition at any time, and is not liable for the termination of the said content and services. In addition, BenQ is not involved in any transactions you conduct in the websites or similar resources maintained by third parties. You should contact the content or service providers for any questions, concerns, or disputes. The availability and performance of 4G LTE services depend on some factors, such as the 4G LTE coverage of your mobile service provider, your 4G LTE subscription plan, and your distance to a 4G LTE base station. 6 BenQ ecoFACTS BenQ has been dedicated to the design and development of greener product as part of its aspiration to realize the ideal of the “Bringing Enjoyment ’N Quality to Life” corporate vision with the ultimate goal to achieve a low-carbon society. Besides meeting international regulatory requirement and standards pertaining to environmental management, BenQ has spared no efforts in pushing our initiatives further to incorporate life cycle design in the aspects of material selection, manufacturing, packaging, transportation, using and disposal of the products. BenQ ecoFACTS label lists key eco-friendly design highlights of each product, hoping to ensure that consumers make informed green choices at purchase. Check out BenQ’s CSR Website at http://csr.BenQ.com/ for more details on BenQ’s environmental commitments and achievements. 7 Contents Important safety information ............................................................................................................12 Operating temperature .................................................................................................................14 Battery ...............................................................................................................................................14 Electrical safety ................................................................................................................................15 About your phone...............................................................................................................................17 Check the package contents ........................................................................................................17 Front view.........................................................................................................................................18 Rear view ..........................................................................................................................................20 Set up your phone...............................................................................................................................22 Remove the back cover.................................................................................................................22 Insert a micro-SIM card.................................................................................................................23 Insert a microSD card....................................................................................................................24 Install the back cover .....................................................................................................................25 Charge your phone ........................................................................................................................26 Use the touch screen .........................................................................................................................29 Navigate your Home screens ...........................................................................................................32 Organize your Home screens......................................................................................................34 8 Check notifications.........................................................................................................................36 Use the Quick Settings ..................................................................................................................37 Put your phone to sleep................................................................................................................38 Navigate the lock screen...............................................................................................................39 Set up an Internet connection ..........................................................................................................42 Connect to a WLAN network ....................................................................................................42 Enable your phone’s mobile data connection ..........................................................................43 Add your accounts ..............................................................................................................................44 Sync your account...........................................................................................................................44 Remove your account....................................................................................................................45 Manage your location data ................................................................................................................46 Enter and edit text ..............................................................................................................................48 Use the Google Keyboard ............................................................................................................48 Move the cursor..............................................................................................................................49 Copy and paste text .......................................................................................................................49 Make calls ..............................................................................................................................................50 Use the dial pad...............................................................................................................................50 Use the Phone app’s main screen ...............................................................................................51 When an incoming call arrives.....................................................................................................52 9 Manage your contacts.........................................................................................................................52 Share your contacts........................................................................................................................53 Import/export your contacts .......................................................................................................54 Send text or multimedia messages ..................................................................................................55 Navigate the Web ...............................................................................................................................56 Send email .............................................................................................................................................58 Connect your phone to your computer........................................................................................60 Connect your phone to other devices...........................................................................................61 Bluetooth ..........................................................................................................................................61 WLAN Direct..................................................................................................................................63 Tethering & portable hotspot ......................................................................................................64 Wireless display...............................................................................................................................66 Connect to a network printer.....................................................................................................67 Use the Camera...................................................................................................................................68 Use the camera viewfinder (in Auto mode) .............................................................................68 Use other capture modes.............................................................................................................71 Camera settings...............................................................................................................................74 View captured photos/videos.......................................................................................................74 10 Manage your images and videos.......................................................................................................75 Manage your downloads ....................................................................................................................76 Set current time and date..................................................................................................................77 Use the Clock app...............................................................................................................................78 Set an alarm......................................................................................................................................78 Show current time and date.........................................................................................................79 Set a timer ........................................................................................................................................79 Use the stopwatch..........................................................................................................................80 Other settings ......................................................................................................................................81 Optimize your phone’s battery ...................................................................................................81 Adjust your phone’s display..........................................................................................................84 Manage your phone’s storage ......................................................................................................86 Protect your phone ........................................................................................................................87 Back up and reset your phone.....................................................................................................90 Check phone information .............................................................................................................92 Update your phone’s operating system .........................................................................................93 Troubleshooting...................................................................................................................................94 11 Important safety information Read the safety information carefully before using your phone. Failure to observe these instructions may result in damage to, or loss of, personal property, bodily injury, or even death. • Don’t make/receive handheld calls while driving. • Never text while driving. • Don’t use your phone at petrol stations. • Switch off when near explosive materials or liquids. • Switch off when asked to in planes and at airports. • Switch off when asked to in hospitals and medical facilities. • Don’t look directly into your phone’s LED flash. • Keep your phone and accessories away from small children. Small parts are a choking hazard. • Keep your phone away from pacemakers and electronic medical devices. • Use original approved accessories only. • Don’t dispose of your phone in fire. • Don’t take your phone apart. 12 • Avoid extreme temperatures. • Avoid contact with anything magnetic. • Don’t rely on your phone for emergency • Avoid contact with liquids. Keep your communications. phone dry. • Don’t hold your phone close to your ear while using the loudspeaker. Your phone can produce a loud sound and may damage your hearing. To prevent hearing damage, don’t listen at high volume levels (above 100 dB) for long periods (over 30 minutes). 13 Operating temperature Use this phone in environmental temperatures between -10 °C and 40 °C. Battery • Use only the supplied or approved battery. Using an unapproved battery may cause your phone to explode and result in serious damage to your health or property. • Use only the supplied or approved charger to charge the battery. • Don’t short-circuit the battery by connecting metal objects to the battery’s positive (+) and negative (-) terminals. Doing so may cause the battery to generate heat and result in burns or property damage. 14 • Don’t disassemble the battery or throw the battery in fire as it may explode. Your phone’s battery is non-removable. Don’t attempt to remove the battery. Electrical safety • Use only the charger supplied with your phone. Using an unapproved charger may cause malfunction and danger. • Connect the charger to a proper electrical outlet and power source. The voltage requirements are found on the product packaging. • Don’t place heavy objects on the charger or USB cable. • Keep good ventilation during charging. Don’t cover the charger with paper or objects that will reduce cooling. Don’t use the charger when it is inside a carrying case. 15 • • • • Don’t use the charger in a highly humid environment. Never touch the charger with wet hands. Don’t use the charger or USB cable if they are broken or damaged. Don’t attempt to repair the charger. Replace the charger if it is damaged or exposed to excessive moisture. Consult your BenQ dealer or service center for help and maintenance. 16 About your phone Check the package contents Open the package and confirm that the following items are included. If anything is missing or damaged, contact your place of purchase immediately. • F5 Smartphone x 1 (with a non-removable battery) • Charger x 1 • USB cable x 1 • Headset x 1 • Quick Start Guide x 1 • Online Warranty Information leaflet x 1 Available accessories may vary by country/region. 17 Front view 18 1 Earpiece Used to listen to voice calls. 2 Proximity and • Proximity sensor: Turns off the screen as you bring the phone ambient light close to your ear during a call. sensors • Ambient light sensor: Controls screen brightness according to surrounding lighting. 3 Front camera Captures photos and videos. 4 LED indicator Shows battery status and notifies events. 5 Volume buttons Adjust volume or turn on vibrate/silent mode. 6 Recent apps key • Touch to open the list of recent apps. • Touch and hold to open available menus. 7 Home key • Touch to go to the previous or central Home screen. • Touch and hold to open Google Now. 8 Back key Touch to return to the previous screen, or close the on-screen keyboard. 9 Cover notch Used to remove the back cover. 10 Touch screen Touch the screen to use the on-screen controls. 19 Rear view 20 1 Rear camera Captures photos and videos. 2 Headphone connector You can connect a headset to listen to music, FM radio, and conduct voice calls. To prevent hearing damage, don’t listen at high volume levels (above 100 dB) for long periods (over 30 minutes). 3 Secondary microphone The secondary microphone receives ambient noise in a noisy environment. Desired sound is retained in the primary microphone. 4 Power button • Press and hold to turn on the phone. • Press to turn the screen on/off. • Press and hold to Power off your phone, turn Airplane mode on/off, or switch to vibrate or silent mode. Turning on Airplane mode disables all WLAN, mobile, and Bluetooth connections. 5 LED flash Makes a flash while capturing photos and videos. 6 Speakerphone Used to listen to music or take hands-free calls. To avoid hearing damage, don’t put your phone close to your ear when using the speakerphone. 21 7 Micro USB port • Connects the USB cable to transfer data to and from a computer. • Connects the USB cable and charger to charge the phone. 8 Primary microphone Used to conduct voice calls. Set up your phone Remove the back cover Insert your fingernail into the notch and lift up the back cover. 22 Insert a micro-SIM card With the metal contacts facing down, align the micro-SIM card with the mark next to the card slot, and fully insert the micro-SIM card into the card slot, until the micro-SIM card is locked in place. To avoid damaging your phone and SIM card, don’t use a Nano SIM card or a SIM card adapter. To remove the micro-SIM card: Push the micro-SIM card in to release it from the card slot (a), and then pull out the micro-SIM card (b). 23 Insert a microSD card With the metal contacts facing down, align the microSD card with the mark next to the card slot, and fully insert the microSD card into the card slot. • The phone supports microSD cards up to 64 GB in size. • The microSD card is only available by separate purchase. 24 Install the back cover 1. Align the back cover onto the top of your phone (a). 2. In a clockwise direction (b), press the sides and the bottom of the back cover against your phone to lock the back cover into place. 25 Charge your phone Your phone’s battery is not fully charged when you first unpack your phone. Fully charge the battery before using the phone. 1. Insert the smaller end of the USB cable into your phone’s micro USB port. 2. Insert the larger end of the USB cable into the USB wall charger. 3. Plug the USB wall charger into an electrical outlet. 4. Disconnect the phone and the USB wall charger when charging is complete (when the LED indicator turns solid green). 26 • Fully charging the battery takes approximately 3 to 3.5 hours. • When the battery gets too low, your phone will shut down automatically. • Charger plug type may vary by country/region. • Your phone’s battery is non-removable. Don’t attempt to remove the battery. • Use original approved accessories only. Using unapproved chargers or cables may cause the battery to explode or damage your phone. LED indicator Your phone’s LED indicator displays the following battery status: • Flashing red: The battery is running low. • Solid red: The battery is charging. • Solid green: The battery is fully charged. 27 Turn your phone on/off • Turn on: Press and hold the power button. • Turn off: Press and hold the power button > touch Power off > OK. The first time you turn on your phone, select your language and touch . Follow on-screen instructions to complete the first-time setup process, which requires a WLAN or mobile data connection. See “Set up an Internet connection” on page 42. 28 Use the touch screen Touch Drag Touch the screen gently to select an item or perform an action. Touch and hold an item. Drag it to a new position. 29 Swipe Quickly slide your finger across the screen surface. 30 Zoom in or out (when browsing the Web or viewing images) Do one of the following: • Quickly double-tap the screen. • Spread or pinch images with two fingers. 31 Navigate your Home screens 1 2 3 8 7 6 4 5 1. Status bar: Shows notifications on the left, and system status icons and current time on the right. 2. Widget: A small app that provides convenient functions and information on your Home screen. 3. Home screens: To move between Home screens, swipe left or right. 4. Folder: Keeps and organizes your apps. • Create folders: Hold and drag an app icon. Stack the icon on top of another one. 5. New Comer: Your latest installed apps appear here. 6. Favorites tray: Keeps your favorite apps for quick access. Swipe left or right to show additional space and add more apps to the tray. 32 7. Home screen indicator: Indicates the number of Home screens and current Home screen. 8. App icon • Open an app: Touch an app icon. • Move an icon: Hold the icon. Slide and drop it in a new position. • Remove and uninstall an app: Hold the app icon. Slide the icon over and release it. Home screen layout and preloaded apps may vary by software version or country/region. • You can download new apps using the Play Store app. • To manage apps, select Settings > Apps. • To extend battery power, you can close the apps not in use: 1. Touch to show the images of recent apps. 2. Swipe away the apps you don’t need to use. 33 Organize your Home screens Touch and hold to open the menu: Edit mode • Add widgets: Swipe the widgets at the bottom. Hold and drag a widget to where you want it to be on the Home screen. • Add more Home screens: Swipe to the rightmost/leftmost screen and touch . You can also touch and hold an empty area of a Home screen to activate the Edit mode. Wallpaper Choose a Home screen wallpaper from available sources. 34 Search Open Google Now to search for information. To use Google Now you need to sign in to your Google account. Preview • Change the central Home screen: Touch on a Home screen thumbnail. The central Home screen’s thumbnail will show . • Touch a Home screen thumbnail to quickly jump to the Home screen you need. • Add more Home screens: Touch the thumbnail that shows . • Change the order of the Home screens: Hold a Home screen thumbnail, and drag it to a new position. Settings Open the Settings app to change phone settings. 35 Home settings Change Home screen settings. Check notifications When the status bar shows notifications, swipe down from the status bar at the top to open the notification drawer: • Touch a notification to open an associated app. • To expand or contract an email notification, you can swipe a notification vertically. • Delete notifications: Swipe a notification away to the left or right; touch to delete all notifications. To hide the notification drawer, swipe the bottom upward, or touch 36 or . Use the Quick Settings Use the Quick Settings to quickly enable/disable WLAN and mobile data connections, adjust brightness, and access the Settings app and other features. 1. Open the Quick Settings: • Swipe down the notification drawer and touch at the top right. Or • Swipe down with two fingers from the top of any screen. 2. Swipe the Quick Settings screen up and down, and touch a setting icon to turn on/off or change the setting. 37 • To change the settings available from the Quick Settings: 1. Touch to enable the edit mode. 2. Touch to select the settings that you want to display in the Quick Settings. 3. Touch to close the edit mode. • In the Quick Settings, touch drawer. at the top right to return to the notification Put your phone to sleep • You can press the power button to turn off the screen and put your phone to sleep. • When your phone is on and left idle for a set period, it turns off the screen and goes into sleep mode. To set how long your phone takes to go into sleep mode, go to Settings > Display > Sleep. 38 Wake up your phone and unlock the screen 1. Press the power button to turn on the screen. The lock screen appears. If you select Settings > Gesture > Double tap screen to wake up, you can quickly double-tap on the middle of the screen to wake up your phone. 2. Swipe away the lock icon . Navigate the lock screen You can use widgets and open the Camera app directly from the lock screen, without needing to unlock the screen. Start the camera from the lock screen Swipe left from the right edge of the lock screen. The camera viewfinder appears. 39 Add widgets to the lock screen 1. To enable the lock screen widget feature, select Settings > Security > Enable widgets. 2. When the lock screen appears, swipe right from the left edge of the lock screen. 3. Touch the plus icon . A list of widgets appears. 4. Touch the widget you want to add to the lock screen. View the added lock screen widgets When the lock screen appears, swipe right from the left edge of the lock screen, until the widget you want appears. 40 Reorder lock screen widgets 1. Touch and hold a widget. 2. Drag the widget and release it in a new location. Remove a lock screen widget 1. Touch and hold a widget. 2. Drag it onto X Remove and release. 41 Set up an Internet connection To browse the Web, send email, and perform other online activities, a WLAN (Wireless Local Area Network, IEEE 802.11 b/g/n supported) or mobile data connection is required. Connect to a WLAN network Availability and strength of a WLAN signal depend on the distance and objects that the WLAN signal has to penetrate, such as buildings or walls between rooms. 1. Go to Settings > WIRELESS & NETWORKS. 2. To turn on WLAN, slide the WLAN switch on: scans for and displays available WLAN networks. 3. Touch WLAN. 42 . Your phone 4. Touch a WLAN to connect to it. To connect to a secured network indicated by , type a password and touch Connect. 5. When the status bar at the top shows connection is successful. , your phone’s WLAN Enable your phone’s mobile data connection Go to Settings > More... > Mobile networks > select Data enabled. • Depending on your service provider, when you install your micro-SIM card in your phone, your phone may automatically enable your mobile data connection. • When both WLAN and mobile data connections are available, your phone will use the WLAN connection rather than the mobile data connection. Using mobile data connection may incur additional charges for data services. Contact your service provider to select an appropriate data tariff plan. 43 Add your accounts Using certain apps such as Email or Play Store requires you to set up and sign in to your personal account on your phone. 1. Go to Settings > ACCOUNTS > Add account. 2. Touch the type of account you wish to add. Select Corporate if you wish to set up an Exchange account. 3. Follow on-screen instructions to enter account information. Sync your account 1. Go to Settings > ACCOUNTS > your account type (for example, Google). 2. Touch your account. 44 3. Touch to select the data types that you wish to sync automatically (for example, Gmail or Contacts). Touch > Sync now to manually sync the selected data types. Remove your account 1. Go to Settings > ACCOUNTS > your account type (for example, Google). 2. Touch your account. 3. Touch > Remove account. 45 Manage your location data You can let your phone collect your location data from WLAN, mobile networks, GPS satellites, and Google’s location service. To estimate your location, apps that have your permission may use your location data to deliver location-based services, such as local weather forecast, traffic data, etc. • If you have privacy or security concerns over your location data, disable location data collection. • When you disable location data collection, features requiring access to your location data may not be available or fully functional. To enable location data collection: 1. Go to Settings > Location. 2. Slide the Location switch on: . 46 3. Touch Mode. 4. Select a location mode to decide what sources your phone uses to get your location data. • Select the Battery saving mode to let your phone estimate your location using low battery-intensive sources, such as WLAN and mobile networks. • Using GPS to find your location requires a clear view of the sky and may consume more battery power. 47 Enter and edit text Use the Google Keyboard When you touch a text box where you want to enter text, the Google Keyboard appears. When appears on the status bar, swipe down the notification drawer and touch “Choose input method” to use another input method keyboard, or change keyboard settings. Input words using gesture typing 1. On the keyboard, slide your finger across the letters of the word you want to input. 2. Release your finger when the word appears in the floating preview or in the middle of the suggestion strip. To select one of the words in the suggestion strip, touch it. 48 Move the cursor Touch where you want to edit in a text box, or drag the cursor tab . Copy and paste text 1. Select text: Touch and hold or double-tap to select text. 2. When the selected text highlights, drag the tabs / to change selection. 3. When the selected text highlights, the text-editing buttons appear: : Select all text : Paste : Cut : Send selected text using available apps : Copy 49 Search the Web for : information regarding the selected text. Make calls Touch Phone. Use the dial pad • Touch the keys on the dialpad to enter phone numbers. • To make international calls, touch and hold • To make calls, touch to enter “+”. . • When a phone number is entered on the dial pad, touch to add the number to your contact list. You can touch an existing contact and add the number to the contact, or touch CREATE NEW CONTACT to add the number as a new contact. 50 Use the Phone app’s main screen Touch to hide the dial pad and display the main screen. • To find a contact, type a name or phone number into the search bar at the top. To use voice search, touch and say a contact name or phone number. • To make a speed dial, touch the image of a favorite contact (marked with a star), the contact you call frequently, or a recent call. • To view all your contacts, touch • Touch : Show recent call history. • Touch : Open the dial pad. • Touch All contacts. > Settings: Adjust call settings. 51 When an incoming call arrives Touch and hold , and swipe it over: • : Answer the call. • If you cannot answer, touch a : message to send it to the caller. • : Reject the call. Manage your contacts Touch People. • To move among these views of contacts, swipe the screen horizontally or touch the tabs: : Groups of contacts in your accounts. : All contacts. 52 : People you talk to frequently or marked as favorites with a star. • Touch / to add new contacts/create caller groups. • If you have an Exchange (Corporate) or Google account on your phone, you can choose to save and sync a new contact to the account. • The contacts you choose to save in your phone or micro-SIM card will not be synced. • Touch to search for contacts. Share your contacts You can send your contacts to others using Email or available sharing apps installed on your phone. 1. Touch > Share. 2. Select the contacts to share with others > OK. 3. Select the app used to send the contacts. 53 Import/export your contacts 1. Touch > Import/export. 2. Choose from the following actions: Import from SIM card Contacts saved on the micro-SIM card will be copied to your account or phone. Export to SIM card Contacts saved on your phone or account will be copied to your micro-SIM card. Import from SD card Contacts saved as vCard files on your microSD card or internal phone storage will be copied to your account, phone, or micro-SIM card. 54 Export to SD card Contacts will be copied as vCard files and saved on your microSD card or internal phone storage. Send text or multimedia messages Touch Messaging. 1. Touch . 2. Type a mobile number or a contact’s name into the To text box. You can also touch to select a recipient from your contact list. 3. Touch the Type message text box and compose your message. 4. Touch : Insert media items. 5. Touch : Send the message. 55 Navigate the Web Navigating the Web requires a WLAN or mobile data connection. See “Set up an Internet connection” on page 42. Touch Browser. • To visit a web page, type a web address into the address bar at the top of the screen, or enter key words to look for information on the Web. • Scroll a web page: Swipe or drag the screen. • Zoom: Spread and pinch the screen with your fingers, or double-tap the screen. Zoom is only available when a web page is loaded in a desktop view. To change a web page from the mobile view to the desktop view, touch 56 > Request desktop site. • Touch : Open new windows or switch among windows. Touch : Open a new window. Touch : View bookmarks, browsing history, and saved web pages. • Touch : Refresh, forward, open bookmarks, save the current page to bookmarks, and access other options and settings. 57 Send email To send email, you need to: 1. Connect your phone to a WLAN or mobile data network. See “Set up an Internet connection” on page 42. 2. Set up an email account on your phone. See “Add your accounts” on page 44. 1. Touch Email. 2. Touch your email account tab at the top left to open the account/email folder list. 3. If you have multiple accounts on your phone, select an account. 4. Touch to open the email editing screen. 5. Type the recipient’s email address and subject. You can touch to select recipients from your contacts. 58 6. Compose your email content. 7. To perform further actions, such as attaching a picture, touch file. 8. Touch : Send the email. 59 > Attach Connect your phone to your computer 1. 2. 3. 4. Use the supplied USB cable to connect your phone to your computer. Swipe down the notification drawer from the top. Select Connected as a media device > Media device (MTP). On your computer, your phone is detected as a media device. Click on the device or select an action from the data transfer window that appears. • When a microSD card is inserted into your phone, the microSD card and your phone’s internal storage are mounted as two drives on your computer. You can click on the drive where you want to transfer files between your phone and the computer. • To connect your phone as a camera to your computer, select Connected as a media device > Camera (PTP). Your computer will detect your phone as a camera. Click on the camera to transfer photos from your phone to your computer. Don’t interrupt USB connection during data access process. Stored data may be lost or damaged. 60 Connect your phone to other devices Bluetooth You can connect your phone to another Bluetooth device to transfer files, or connect to a Bluetooth headset to make calls or listen to music. Using features requiring a Bluetooth connection may consume more battery power. To extend battery life between charges, turn off Bluetooth when not using it. Connect to a Bluetooth device Maximum distance between two connected Bluetooth devices is 8 meters. 1. Touch Settings. 2. Slide the Bluetooth switch on: . 61 3. Touch Bluetooth. Your phone scans for and displays the IDs of all available Bluetooth devices within range. To make your phone visible to nearby devices, touch your phone’s name so that it shows Visible to all nearby Bluetooth devices. 4. Touch the ID of the Bluetooth device to pair with it. 5. Confirm the passkey that appears and touch Pair. On the other Bluetooth device, accept the identical passkey for pairing. Once your phone pairs with the device, they stay paired until you unpair them. Unpair a Bluetooth device Touch beside the connected device you want to unpair > Unpair. 62 WLAN Direct WLAN Direct lets your phone connect to another device over a WLAN network, and then send data such as photos to the connected device using a sharing application available on both devices. 1. Touch Settings. 2. Slide the WLAN switch on: 3. Touch WLAN. 4. Touch . > WLAN Direct. Your phone scans for and displays available WLAN Direct devices. 5. Touch the device that you want to connect. 6. When the device accepts your invitation to connect, Connected appears below the device you choose to connect. 63 Tethering & portable hotspot You can share your phone’s mobile data connection via USB or as a portable WLAN hotspot. Go to Settings > More... > Tethering & portable hotspot. USB tethering Your computer can share your phone’s mobile data connection via USB. 1. Connect your phone to your computer with the supplied USB cable. 2. Select USB tethering. 64 Portable WLAN hotspot You can turn your phone into a portable WLAN hotspot, so that other devices can share your phone’s mobile data connection over a WLAN network. Set up a WLAN hotspot You can change your phone’s SSID (hotspot name), security type, and password. Other devices need to enter the same password to connect to your phone’s WLAN hotspot. Depending on the type of mobile data connection sharing, one of these icons appears in the status bar: : Both USB tethering and WLAN hotspot active. : USB tethering active. : Portable WLAN hotspot active. 65 Bluetooth tethering You can select Bluetooth tethering to share your phone’s Internet connection with other paired devices via Bluetooth. • To share your phone’s Internet connection via Bluetooth, you also need to go to Settings > Bluetooth to complete the following settings: 1. Pair with the device that you want to share the Internet connection with. 2. Touch beside the paired device, and enable the Internet connection sharing profile. • When Bluetooth tethering is enabled, appears in the status bar. Wireless display Your phone can connect wirelessly to a Miracast-certified television or monitor that is equipped with a certified Miracast adapter. You can then show your phone’s screen on the connected device. For more information, read the documentation that comes with the Miracast-certified device you wish to use with your phone. 66 1. Go to Settings > Display > Cast screen > . 2. Select Enable wireless display. Connect to a network printer Go to Settings > SYSTEM > Printing. You can connect your phone wirelessly to a network printer that supports wireless printing, and then print the content on your phone to the printer. Before you can print, you need a printing service installed on your phone. For information on setting up a printer, read the documentation that comes with the printer you wish to use with your phone. 67 Use the Camera Touch Camera. To open the Camera app from the lock screen, swipe left from the right edge of the lock screen. Use the camera viewfinder (in Auto mode) Capture a photo 1. Touch : Switch between the front camera and the rear camera. 2. When using the rear camera, spread or pinch the viewfinder screen with your fingers to zoom in or zoom out. 3. Aim the camera at the subject you wish to capture. 68 4. When the camera focuses on the subject in the selected focal point, touch to capture a photo. You can also press the volume up or volume down button to capture photos. In photo capture mode, select one of these auto-focus modes: • • : When you touch an object that you want to focus on, the camera focuses on the object and then captures a photo automatically. : The camera only focuses on the object that you touch on the screen. When auto-focus is done and locked, touch photo. 69 immediately to capture a Record a video 1. Touch : Start recording a video. During recording, touch to pause. 2. Touch : Stop recording. In video recording mode, select one of these auto-focus modes: • • : The camera will auto focus during recording. : Allows you to touch the subject that you want to focus on during recording. When recording a video, touch to capture a still shot. 70 Use other capture modes Touch to choose from the following capture modes: Photo Ultra Sensitivity Smile Burst Enhance camera sensitivity to lighting conditions, suitable for taking photos at night and in a dark place. The camera captures a photo immediately when the viewfinder detects a smile on a person’s face. You can quickly capture a number of consecutive shots. 1. Press and hold without releasing it to capture a number of quick shots in succession. Release to stop shooting. 2. Swipe to view captured photos. Touch and hold photo thumbnails to select/deselect photos. 3. Touch Save selected to save photos. 71 Panorama You can create a 360-degree panorama. 1. Frame one side or the other of the scene you want to include in a panorama. 2. Touch . Pan slowly and steadily across the scene you want to include in the panorama. 3. When you reach the end of your shot, touch . The camera processes and saves the image automatically. HDR The HDR (High Dynamic Range) mode helps capture a subject’s (available in photo and bright and dark details, suitable for shooting photos/videos with video modes) backlighting. Timer 1. Touch in the middle of the screen to set the countdown timer to 5, 10, or 15 seconds. 2. Touch or press the volume up or volume down button. The camera shows running countdown time, and then takes a photo when time is up. 72 Denoise EV Reduces a photo’s dark or bright spots. Lets you capture three photos of different exposure values. 1. Touch Sound to capture three photos with these values: EV 0, EV +1, EV -1. 2. Swipe to view the photos. Touch and hold the photo thumbnails to select/deselect the photos. 3. Touch Save selected to save the photos. Lets you control the camera shutter by saying the commands that your phone can recognize. Video Timelapse Slow Motion Antishake Playing videos shot in this mode will produce a time passage effect, used for shooting sunrise, sunset, traffic flow, plant growth, etc. Lets you shoot slow motion videos. Reduces camera shaking when recording videos. 73 Camera settings Touch these icons to perform the following operations: : Switch to another capture mode. : Set flash. Configure camera settings, including : Resolution, Scene Mode, Face Detection and Storage location. : Apply effects. View captured photos/videos 1. Swipe the viewfinder screen away to the left to view photos/videos. 2. To return to the viewfinder, swipe the photos away to the right until the viewfinder appears. You can also view photos and videos in Gallery. 74 Manage your images and videos 1. Touch Gallery. 2. Touch an album > image/video thumbnail to view the image/video. Touch and hold an image/video thumbnail to select the image/video. 3. To zoom in or zoom out on an image, spread or pinch the image with your fingers, or double-tap the image. 4. Touch these action icons to manage your images/videos: : Return to album/thumbnail views. Send or share images/videos by : available apps. Edit the image by applying effects or : using available tools. 75 : Delete images/videos. : Manage and edit the image. To save your phone’s screen as an image, press and hold the power and volume down buttons simultaneously. To view your screenshots, go to Gallery > Albums > Screenshot. Manage your downloads Touch Downloads to manage files and media items downloaded by your phone’s apps. Downloaded files are stored on your phone’s internal storage. 1. Touch a downloaded item to open it. 2. Touch to choose how your downloads are sorted. 3. Touch and hold a downloaded item to select it. 4. When items are selected, you can touch: 76 • • : Share selected items using available sharing apps. : Delete selected items. Set current time and date Go to Settings > SYSTEM > Date & time. You can set date and time manually or use your mobile network as the time source, select the time zone, and choose display format of date and time. 77 Use the Clock app Touch Clock. Set an alarm 1. Touch . 2. Touch the time shown on an existing alarm, or touch to add a new alarm. 3. Set the alarm time using the clock image that appears, and then touch Done. 4. Set the alarm ringtone, repeat days, etc. 5. To turn alarm on or off, slide the switch. 78 Show current time and date 1. Touch 2. Touch . to add clocks for other cities around the world. Set a timer 1. Touch . 2. Enter countdown time. Touch START. 3. When the timer is going: • Touch : Add an additional minute. • Touch the timer image: Pause/resume the timer. When the timer is paused, touch • Touch to reset the timer. : Delete the current timer. 79 Use the stopwatch 1. Touch . 2. Touch the stopwatch image to start/pause the stopwatch. 3. To add laps while the stopwatch is running, touch 80 . Other settings Optimize your phone’s battery Use these settings to extend your phone’s battery life. Lower display brightness 1. Go to Settings > Display > Brightness. 2. Touch or drag the color bar to a lower brightness level. Touch AUTO to let your phone’s ambient light sensor adjust brightness according to surrounding lighting. 81 Set sleep mode Choose the shortest time your phone takes to go into sleep mode. 1. Go to Settings > Display > Sleep. 2. Choose the shortest inactivity period possible. When the inactivity period ends, your phone automatically turns off the screen and goes to sleep. Power Management Go to Settings > SYSTEM > Power Management. Smart Connectivity When the screen is off, your phone will automatically disable WLAN and mobile data connectivity after a defined delay timeout. WLAN and data connectivity resumes automatically when you turn on the screen. 1. Slide the switch on: . 82 2. Touch Smart Connectivity. 3. Choose from the following modes: • Regular: When the screen is off during the off-peak time, WLAN and data connectivity is disabled after a defined delay timeout. You need to set the off-peak time’s start and end points, and the delay timeout. • Aggressive: When the screen is off, WLAN and data connectivity is always disabled after a defined delay timeout. You need to set the delay timeout. When WLAN and mobile data connections are disabled, your phone’s email and Internet accounts will not be synced. System Diagnostic List components which may consume more battery power. Network Access Optimization Reduce your phone’s network access when the screen is off. Reducing network access may affect the functionality of some apps. 83 Battery You can check remaining battery power percentage, individual power consumption percentages of the functions currently in use, and total time of battery usage. Adjust your phone’s display Low blue light mode Go to Settings > Display > Low blue light mode. The Low blue light mode reduces the blue light emitted by the screen and helps ease eye strain. You can choose from the following modes: • Multimedia: Suitable for viewing media items. • Web Surfing: Suitable for browsing the Web. • Reading: Suitable for reading e-books or documents. 84 Daydream You can let your phone display screensavers when it is charging or docked during sleep. 1. Go to Settings > Display > Daydream. 2. Slide the switch on: . 3. Choose what to display as screensavers. 4. Touch WHEN TO DAYDREAM to choose when to display screensavers. 5. Set sleep mode to choose how long your phone takes to go into sleep mode and start playing Daydream screensavers. 85 Manage your phone’s storage Go to Settings > Storage. View space usage status for your phone’s internal storage and microSD card. Safely remove your microSD card 1. Slide down toward the bottom of the Storage screen. 2. Touch Unmount SD card > OK. 3. Remove the microSD card from your phone. You can also safely remove the microSD card from your phone when the phone is off. Erase all data on the microSD card 1. Touch Erase SD card. 86 2. After being warned of losing all data on the card, touch the Erase SD card button to confirm. Deleted data cannot be restored. Consider backing up important data to your computer or a secondary storage device first. Protect your phone Here are the settings you can use to secure your phone and personal data stored on it. Go to Settings > Security. Screen lock Lock and unlock the screen using the following features. Select None to disable screen lock. Slide To unlock the screen, slide the lock icon over. 87 Face Unlock You can look at your phone to unlock the screen. Follow on-screen instructions to set up Face Unlock. When your phone tries to capture your face image, show your entire face within the suggested area on the viewfinder screen. Pattern Follow on-screen instructions to draw an unlock pattern with your finger. When the unlock pattern is set, you need to draw the pattern correctly to unlock the screen. PIN Enter at least 4 numbers as the PIN code to unlock the screen. Password Enter at least 4 characters as the password to unlock the screen. 88 Encrypt phone Encrypt all data on your phone. You must enter a numeric PIN or password to decrypt your phone each time you turn it on. Encryption is irreversible. The only way to revert to an unencrypted phone is to perform a factory data reset, which erases all your data. Set up SIM card lock Protect your micro-SIM card against unauthorized use with a personal identification number (PIN). When you turn on your phone, enter the PIN to unlock your micro-SIM card. 1. Select Lock SIM card. 2. Enter your micro-SIM card’s PIN to enable SIM card lock. 89 Verify apps Some apps can harm your phone. You can choose to verify apps in order to help prevent harmful software from being installed on your phone. We strongly recommend not selecting the Unknown sources option. Apps from sources other than Play Store may contain malicious content to harm your phone or steal your personal data. Back up and reset your phone Go to Settings > Backup & reset. Back up my data Select this option to back up your app data, WLAN passwords, and other settings to Google servers. Backup account Specify a Google account you added on your phone as your backup account. 90 Automatic restore Selecting this option lets your phone restore backed up settings and data when reinstalling apps. Factory data reset Performing this action will restore your phone to its factory state, and erase all your user data from your phone’s internal storage, including your accounts, system and app data, downloaded apps, and photos. Touch Reset phone > Erase everything. This operation is irreversible. Consider backing up important data to your computer or a secondary storage device first. 91 Check phone information Go to Settings > About phone. You can view your phone’s status including battery, IMEI, IP address, serial number, etc., and check the legal information, model number, and Android version. 92 Update your phone’s operating system • When your phone has a WLAN or mobile data connection, its Android system automatically checks for system updates and notifies you. Swipe down the notification drawer and touch the system update notification to start the update process. • You can also perform a manual update check by selecting Settings > About phone > System updates > Check now. Before updating your phone’s operating system, ensure that: • Your phone has a microSD card with sufficient space to download the upgrade package. • You have backed up your phone’s important data to your computer or a secondary storage device. • Your phone has minimum 30% battery power left. • Your phone has a WLAN or mobile data connection (WLAN is recommended). • Using mobile data connection may cause additional charges for data services. Contact your service provider to check details of your data tariff plan. 93 Troubleshooting This chapter explains frequently asked questions and common problems that may occur while using your phone. If a problem persists, contact your place of purchase or BenQ service center. Power/battery My phone does not turn on. • If your phone’s battery is completely discharged, your phone cannot be turned on immediately even when connecting to an electrical outlet. Allow your phone to charge for a period of time before turning it on. • Press and hold your phone’s power button for more than two seconds, until you feel your phone vibrate. 94 Touch screen Follow the instructions below when using the touch screen. • Use the pad on the end of your finger to touch the screen. • To avoid damaging the screen, don’t hit the screen with sharp or hard objects. • Don’t apply excessive pressure or force to the screen surface. • Clean the screen with soft dry cloth. Don’t use harsh chemicals or cleaning solvents such as benzenes, paint thinner, or alcohol. • Don’t use any type of adhesive on the screen. Why does the screen turn off when I hold my phone close to my ear during a call? To avoid touching the screen unintentionally, your phone’s proximity sensor turns off the screen automatically as you hold your phone close to your ear. 95 Internet connectivity I have trouble connecting to WLAN. Check the following to ensure that: • Your phone’s WLAN is turned on. • If the WLAN connection icon doesn’t appear on the status bar or shows poor signals, connect your phone to another WLAN access point that has strong signals. For more information, see “Connect to a WLAN network” on page 42 or contact your network service provider. 96 Why can’t I download apps from the Internet? Check the following to ensure that: • Your phone has a WLAN or mobile data connection. • Your phone has enough storage space to save your downloads. • The microSD card where you wish to save your downloads is correctly inserted in your phone. Phone system/apps How do I force my phone to reboot when it hangs or doesn’t respond? Press and hold the power and volume up buttons simultaneously until the phone displays the reboot screen. 97 How do I update my phone’s operating system? See “Update your phone’s operating system” on page 93. Others Why can’t my phone read the micro-SIM card/microSD card? • Ensure that you have fully inserted the micro-SIM card/microSD card into the correct card slot. See “Insert a micro-SIM card” on page 23 and “Insert a microSD card” on page 24. • Your phone only supports the micro-SIM card. Inserting other types of SIM cards may damage the phone and the card slot. v1.0_en 9/4/14 98 BenQ.com © 2014 BenQ Corporation. All rights reserved. Rights of modification reserved.