1
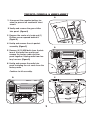
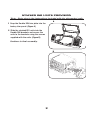
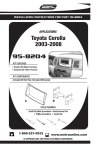
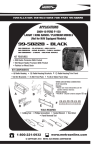
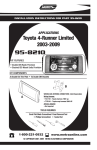
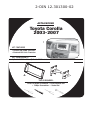
2-DIN 12.301300-02
INSTALLATION INSTRUCTIONS FOR PART 95-8204
APPLICATIONS
Toyota Corolla
2003-2007
95-8204
KIT FEATURES
• Double DIN Radio Provision
• Stacked ISO Units Provision
KIT COMPONENTS
A) Double DIN Trim Plate B) Double DIN Brackets
B
A
TOOLS REQUIRED:
Small Flat Blade Screwdriver • Panel Removal Tool
• Phillips Screwdriver • Socket Set
1-800-221-0932
www.metraonline.com
© COPYRIGHT 2004 METRA ELECTRONICS CORPORATION
95-8204
TABLE OF CONTENTS
Dash Disassembly
- Totota Corolla 2003-2007 . . . . . . . .. . . . . . . . . . . . . . . . . . . . . . . . . . . . . . . . . . 1
Kit Assembly
- Double DIN Radio Provision . . . . . . . . . . . . . . . . . . . . . . . . . . . . . . . . . . . . . . . 2
- Stacked ISO Units Provision. . . . . . . . . . . . . . . . . . . . . . . . . . . . . . . . . . . . . . . 3
Final Assembly . . . . . . . . . . . . . . . . . . . . . . . . . . . . . . . . . . . . . . . . . . 4
*Note:
Refer also to the instructions included with the aftermarket radio.
95-8204 DASH DISASSEMBLY
TOYOTA COROLLA 2003-2007
A
1 Disconnect the negative battery terminal to prevent an accidental short
circuit.
2 Unclip and remove the gear shifter
trim panel. (Figure A)
P
R
N
D
3 Remove the center a/c knob and (1)
Phillips screw exposed behind it.
(Figure B)
2
L
4 Unclip and remove the a/c-pocket
assembly. (Figure C)
B
5 Remove (4) 10 MM bolts from the bottom of the radio then unclip and
remove the factory radio and trim
panel together. Unplug radio from factory harness. (Figure D)
PASSENGER
6 Unclip and remove the radio trim
panel including the a/c vents from the
factory radio.
A/C
OF
HI
F
LO
Continue to kit assembly.
D
C
PASSENGER
A/C
A/C
1
HI
OF
F
LO
95-8204 KIT ASSEMBLY
DOUBLE DIN RADIO PROVISION
*Note: Refer also to the instructions included with the aftermarket radio.
A
1 Snap the Double DIN trim plate into the
factory trim panel. (Figure A)
2 Slide the Double DIN radio into the
Double DIN brackets and secure the
radio to the brackets using the screws
supplied with the radio. (Figure B)
Continue to final assembly.
B
2
95-8204 KIT ASSEMBLY
STACKED ISO UNITS PROVISION
*Note: Refer also to the instructions included with the aftermarket radio.
A
1 Snap the Double DIN trim plate into the
factory trim panel. (Figure A)
2 Slide the stacked ISO units into the
Double DIN brackets and secure the
units to the brackets using the screws
supplied with the units. (Figure B)
Continue to final assembly.
B
3