1
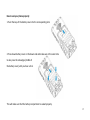
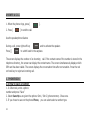
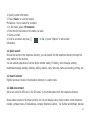
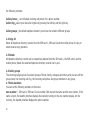
Languages: English Italian German French Spanish Dutch User manual OUT LIMITS DSS GSM, GPRS digital mobile Content SAFETY PRECAUTIONS ..............................................................................................................1 HEALTH & SAFETY INFORMATION ....................................................................................................................................3 GETTING STARTED: Front and rear view of OUT LIMITS…….………………………………………………………...............................................................................9 Technical specifications………………………………………………………………………………………….………………………10 Main keys and their function ……………………………………………………………………………………………………......10 Icons on the dislay …………………………………………………………………………………………………………………….….12 Addendum……………………………………………………………………………………………………………………………………15 Installing and removing of battery…………………………………………………………………………………………………..17 Installing and removing Sim card………………………………………………………………………………………………..….21 Switch the phone on and off…………………………………………………………………………………………………………..22 Make a call ……………………………………………………………………...…………………………………………………….…...22 Answer a call………………………………………………………………………………………………………………………….…….24 THE MENU 1. PHONEBOOK………………………………………………………………………………………………..…24 Quick Search…………………………………………………………………………………………………………………………………25 Search contact………………………………………………………………………………………………………………………………25 Add new contact……………………………………………………………………………………………………………………………25 i Copy all……………………………………………………………………………………………………………………………………..…26 Delete……………………………………………………………………………………………………………………………………….…26 Caller groups…………………………………………………………………………………………………………………………..……26 Extra numbers………………………………………………………………………………………………………………………………26 Phonebook settings……………………………………………………………………………………………………………………….27 Caller picture………………………………………………………………………………………………………………………………..27 Caller ringtone………………………………………………………………………………………………………………………………27 2. MESSAGES ……………………………………………………………………………………………………………………………28 Text message………………………………………………………………………………………………………………………….……28 MMS…………….……………………………………………………………………………………………………………………………..30 Chat………………………………………………………………………………………………………….………………………………...34 Voicemail server……………………………………………………………………………………………………………………........34 Broadcast message…………………………………………………………………………………………………………………...... 34 3.SOS……………………………………………………………………………………………………………………………………….. 35 setting………………………………………………………………………………………………………………………………….….….35 SMS Alert…………………………………………………………………………………………………………………………………….36 Auto Alert………………………………………………………………………………………………………………………………..…..36 4.SETTINGS………………………………………………………………………………………………………………………..…..36 User profiles…………………………………………………………………………………………………………………………………36 Dual SIM settings………………………………………………………………………………………………………………………….38 Phone setup…………………………………………………………………………………………………………………………….…..39 Bluetooth settings…………………………………………………………………………………………………………………….…..41 Network setup………………………………………………………………………………………………………………………………43 ii Security setup…………………………………………………………………………………………………………………..…….….44 Shortcuts………………………………………………………………………………………………………………………..……......45 Restore factory settings…………………………………………………………………………………………………………..…..48 5.CALL CENTER……………………………………………………………………………………………………………………..46 Call history …………………………………………………………………………………………………………………………..….46 Call settings …………………………………………………………………………………………………………………………..….48 6. Organizer ……………………………………………………………………………………………………….…………….51 File manager………………………………………………………………………………………………………………………………51 Services …………………………………………………………………………………………………………………………….……..52 Head lamp…………………………………………………………………………………………………………………………….…..54 Head lamp key mode…………………………………………………………………………………………………………………..54 Calendar…………………………………………………………………………………………………………………………………….54 Tasks……………………………………………………………………………………………………………………………….……....55 Alarm ………………………………………………………………………………………………………………………………….……55 Calculator…………………………………………………………………………………………………………………………….…….55 World clock………………………………………………………………………………………………………………………………..56 7. Input method…………………………………………………………………………………………………………………..….56 8. TROUBLE SHOOTING………………………………………………………………………………………………………....60 iii SAFETY PRECAUTIONS Please read these simple guidelines. Not following them may be dangerous or illegal. Read the complete user guide for further information. Switch off the phone in the vicinity of chemical plants, gas stations and other locations containing explosive objects. Keep the phone far away from children. When driving, please use the hand free calling device to ensure safety. Please park the car at roadside for communication unless in emergency. Switch off the phone when board an airplane and do not switch the phone on during the flight. Be careful when using the mobile phone in the vicinity of such devices as pacemakers, hearing aids and other electro-medical equipment, which may be interfered by the mobile phone. No guarantee for the accessories and parts not produced by the original factory. Never attempt to disassemble the phone by yourself. Contact the supplier in case of any trouble with your mobile phone. Do not recharge the phone without battery being installed. 1 Charge the phone in well-ventilated environment and keep away from inflammable and high explosive articles. To avoid demagnetization, keep the handset away from magnetic substances, such as magnetic discs or credit cards. Wireless phones may be susceptible to interference, which can affect performance。 Use only approved accessories and batteries. Use of any unauthorised accessories could damage you or your phone and may be dangerous. Use only in the normal position as explained in the produce documentation. Do not touch the antenna unnecessarily. Ensure the phone is switched on and in service. Enter the emergency number, then press the call key. Give your location. Do not end the call until given permission to do. The unit and the accessories can contain small parts. Keep them out of the reach of small children. Waterproof IP57, one meter deep for thirty minutes Phone can be used with rain and splash water. Please make sure battery cover, rubber, earphone and USB cover are completly closed. SOS: In case of emergency, please dial 112 to search the local network service or the default 2 SOS contact saved. HEALTH & SAFETY INFORMATION BATTERY CARE Your device is powered by a rechargeable battery. When the electric quantity is low, please re-charge the battery. In order to extend the lifetime of the battery allow the battery to run out of power before recharging. Take out the charger from AC. Do not leave the battery connected to a charger once the battery is full. Overcharging may shorten battery lifetime. Never use unauthorized charger or battery that is damaged. Do not short-circuit the battery. Accidental short-circuiting can occur when a metallic object such as a coin, clip, or pen causes direct connection of the polarity; (+) and (-) terminals of the battery (metal stripes on the battery). This might happen, for example, when you have a spare battery or magnetic objects in the vicinity. Short-circuiting the terminals can damage the battery or the connectors. Damaged batteries can damage or ruin components ( eg. Plastics ). 3 All of the above suggestions apply to the phone, battery, charger, or any accessory. If phone or accessories are not working properly, take only to authorised service facilities. Do not attempt to open the phone or accessories other than as instructed in this guide. Use only the supplied or authorised replacement parts. Unauthorized parts, modifications, or attachments can damage the phone and may violate regulations governing radio devices. Do not dispose of batteries in a fire! Dispose of batteries according to local regulations. Please recycle when possible. Do not dispose as household waste. Stop using the battery if it is leaking or has a crack or any other damage If the battery leaks on skin or clothes, you should use soap to clean; if it splashes into the eyes, rinse immediately with water and contact the hospital at once. IMPORTANT INFORMATION ON SOS FUNCTION Mobile phones such as this unit use radio signals, the mobile phone network, the terrestrial network and user-programmed functions. This means that connection in all circumstances cannot be guaranteed. Therefore you should never rely solely on a mobile phone for very important calls such as medical emergencies. 4 OPERATING ENVIRONMENT Remember to follow any particular rules that may apply wherever you happen to be,and always turn off the unit whenever its use is forbidden, or it can cause interference or danger. Only use the units in its normal user position. This unit complies with guidelines for radiation when it is used either in a normal position against your ear, or when it is at least 2.2 cm (7/8 inch) from your body. If the unit is carried close to your body in a case, belt holder or other holder, these should not contain any metal, and the product should be placed at the distance from yr body specified above. Make sure that the distance instructions above are followed until the transfer is complete. Parts of the unit are magnetic, The unit can attract metal object. Do not keep credit cards or other magnetic media near the unit, as information stored on them can be erase. ELECTRONIC DEVICES The use of equipment that transmits radio signals, e.g. mobile phones, can interfere with insufficiently protected medical apparatus. Consult a doctor or the manufacturer of the apparatus to determine if it has adequate protection against external radio signals, or if you have any question. If notices have been put up at health care facilities instructing you to turn off the unit while you are there, you should comply. Hospitals and other health care facilities sometimes use equipment that can be sensitive to external radio signals. PACEMAKER 5 Pacemaker manufacturers recommend a distance at least 15 cm. (6 inches) between a mobile phone and a pacemaker to avoid the risk of interference with the pacemaker. These recommendations are in accordance with independent research and recommendations from Wireless Technology Research. People with pacemakers should: always keep the unit at a distance of at least 15 cm from the pacemaker not carry the unit in a breast pocket hold the unit against the ear on the opposite side from the pacemaker to reduce the risk of interference If you suspect that there is a risk of interference, turn off the unit and move it further away. HEARING AIDS Some digital wireless units can cause interference to some hearing aids. Contact yr operator in case of interference. VEHICLES Radio signals can affect electronic systems in motor vehicles (e.g. electronic fuel injection, ABS brakes, automatic cruise control, air bag systems) that have been incorrectly installed or are inadequately protected. Contact the manufacturer or its representative for more information about yr vehicle or any additional equipment. Do not keep or transport flammable liquid gases or explosives together with the unit or its accessories. For vehicles equipped with air bags: remember that air bags fill with air with considerable force. 6 Do not place objects, including fixed or portable radio equipment in the area above the airbag or the area where it might expand. Serious injuries may be caused if the mobile phone equipment is incorrectly installed and the airbag fills with air. It is forbidden to use the unit whilst flying. Turn off the unit before you board a plane. Using wireless telecom units inside a plane can involve risk for air safety and interfere with telecommunications. It can also be illegal. POTENTIALLY EXPLOSIVE ENVIRONMENTS Always turn off the unit when you are in an area where there is a risk of explosion and follow all signs and instructions. An explosion risk exists in the places that include areas where your normally requested to turn off your car engine. Within such an area, sparks can cause explosion or fire which can lead to personal injuries, even death. Turn off the unit at filling stations i.e. near petrol pumps and garages. Follow the restrictions that are in force on the use of radio equipment near places where fuel is stored and sold, chemical factories and places where blasting is in progress. Areas with risk for explosion are often – but not always – clearly marked. This also applies to below decks on ships: the transport or storage of chemicals; vehicles that use liquid fuel (such as propane or butane); areas where the air contains chemicals or particles, such as grain, dust or metal powder. EMERGENCY CALLS IMPORTANT! Mobile phones such as this unit use radio signals, the mobile phone network, the terrestrial network and user-programmed functions. This means that connection in all circumstances cannot be guaranteed. 7 Therefore you should never rely solely on a mobile phone for very important calls such as medical emergencies. CERTIFICATION INFORMATION (SAR) This model meets international guidelines for exposure to radio waves. Your mobile device is a radio transmitter and receiver. It is designed not to exceed the limits for exposure to radio waves recommended by international guidelines. These guidelines were developed by the independent scientific organization ICNIRP and include safety margins designed to assure the protection of all persons regardless of age and health. The guidelines use a unit of measurement known as the Specific Absorption Rate, or SAR. The ICNIRP SAR limit for mobile devices used by the general public is 2.0 W/kg. As SAR is measured utilising the device’s highest transmitting power, the actual SAR of the device while operating is typically below the above indicated level. This is due to automatic changes to the power level of the device to ensure it only uses the minimum level requested to reach the network. While there may be differences between the SAR levels of various phones and at various positions, they all meet the governmental requirements for safe exposure. The World Health Organization has stated that present scientific information does not indicate the need for any special precaution for the use of mobile devices. They note that if you want to reduce your exposure then you can do so by limiting the length of calls or using a “hands-free” device to keep the mobile phone away from the head and body. 3. FRONT AND REAR VIEW OF OUT LIMITS 8 TECHNICAL SPECIFICATIONS System: GSM 900/1800 MHz 9 Network support: GPRS、WAP GPRS, WAP Size: 120*60*18mm Talk time:about 5 hours (determined by practical network condition) Standby time: about 300 hours (determined by practical network condition) Screen parameters:screen size 1.77 “ LCM; display material 262K, TFT Capacity of the mobile phone directory: 1000 Short message capacity of the mobile phone: 100 Battery: 900mAh Speaker: single speaker Working temperature: - 20-55° Mobile phone antenna: inside antenna MAIN KEYS AND THEIR FUNCTION Number 10 Name Function 1. Left soft key Perform the function indicated on the left bottom line of the display 2. Right soft key 3. Dialing key Perform the function indicated on the right bottom line of the display i.e back, delete etc. Make or answer a call. In Idle mode, press this key to browse the call history (recently dialed, missed and received calls) 4. End key Press and hold to switch the phone on or off End a call In the menu mode return to idle screen. 5. Navigation keys In standby, access the following menus: Up: shortcuts Down: profiles Right: Set-up of phone Left: Language choice In menu mode, scoll through menu options 6. OK key In standby, when pressing the OK key you access the menu The OK key almost has the same function as the left soft key in other interfaces 7. * key When pressing the * key in the dialing mode can enter: *, +, P, W When pressing the left soft key and THEN the * key in the in the idle mode you can unlock and lock the keypad. 8. # key In the idle mode pressing the # key for a long time can activate or deactivate the Silent mode. 11 9. Number keys Enter numbers, letters and special characters 10. Left side key Charger interface and an earphone interface 11 Torch key & volume key The torch can be turned on by pressing the upper side key; SOS (red botton on back of the phone) One-touch dialing emergency key 12. Volume key (below torch key) allow you to adjust the phone volume ICONS on the display The following icons may appear on the top line of the screen to indicate the phone’s status. Depending on country or service provider, the icons shown on the display may vary. SIM card 1 indicates signal strenght, the more strips, the stronger the signal is. SIM card 2 indicates signal strenght, the more strips, the stronger the signal is. Battery power level,the greener, the higher is the power level 12 Alarm clock: on/off Keypad is locked New short message of SIM card 1 or SIM card 2 New multimedia message of the SIM card 1 or SIM card 2 Missed calls of SIM card 1 or SIM card 2 Ring Vibration Vibration and/or ring Ringing after vibration Headset connected 13 Bluetooth mode GPRS network Power Level Full battery power level Half battery power level Quarter battery power level Empty battery power level A power level shortage will trigger an alarm tone. The mobile phone will turn itself off automatically after a few minutes Addendum 14 How to seal your phone properly: 1. Push the keys of the battery cover into the corresponding slots 2. Press down battery cover on the down side and make sure at the same time to also press the side edges [middle of the battery cover] until you hear a click. This will make sure that the battery compartment is sealed properly. 15 3. Turn the screws at the down side of the battery cover by 90 degrees 4. Make sure the charger slots cap is closed firmly (press it properly). GETTING STARTED 16 INSTALLING AND REMOVING BATTERY Gently push the battery into the battery slot, ensuring the metal contacts of the battery are faced upwards and in the position to be in contact with the metal contacts of the phone. Insert the battery cover by gently pushing it upward until in place. Press down the cover and turn the screws of the battery cover 90º clockwise (screw slots from a horizontal into a vertical position); best by using a screw driver or a coin; Please make sure that the battery is installed properly before switching on the mobile phone. Removing the battery 17 Turn off the mobile phone before taking out the battery. Turn the screws of the battery cover 90º counter clockwise (screw slots from a vertical into a horizontal position); best by using a screw driver or a coin. into a horizontal position); best by using a screw driver or a coin. Battery performance 18 The standby time of the mobile phone decreases with the use of Bluetooth, torch etc. The standby time of mobile phones decreases in areas with no network. Please also note that Dual Sim phones have a higher consumption than single Sim phones. Charging 1. Insert the USB charger in the multi-function jack (left upper side of the mobile phone) 2. Insert the charger plug in a power socket. 3. The battery power level icon flashes when charging; the battery power level icon stops flashing when fully charged. 4. Please make sure the protective rubber lid of multijack is closed properly to ensure waterproofness. Charging 19 1. Please fully charge the battery before first using the phone. 2. Please ensure you charge the mobile phone at room temperature. 3. Avoid charging over long periods as it reduces the lifetime of the battery. 4. When battery power is low the phone can not be turned on, keep under charge until the screen resumes indication of power in the battery. 5. Make sure that the standard voltage and power match the voltage and power indicated on the charger. 6. During the charging/recharging period, it is best to keep phone turned off. 7. If the battery is not used for long periods, fully charge the battery before use again. 8. The battery can be charged and discharged hundreds of times, but it will eventually wear out. When the talk and standby times are noticeably shorter than normal, replace the battery. 9. If the battery is completely discharged, it may take many minutes before the charging indicator appears on the display or before the phone can be used. 10. Your device is powered by a rechargeable battery. The full performance of a new battery is achieved only after two or three complete charge and discharge cycles. 11. If a replacement battery is being used for the first time or if the battery has not been used for a long period, it maybe necessary to connect, disconnect and then reconnect the charger before charging. INSTALLING AND REMOVING SIM CARD 20 How To Install Before installing the phone must be turned off and not connected to battery charger or any other accessory. Gently slide downwards the SIM card into the metal slot until the card is in place. Please ensure that the cut angle of the card corresponds to the slot. Notice: SIM card 2 message settings are the same as SIM card 1 message settings. SWITCH THE PHONE ON AND OFF 21 Switch on 1. Open the phone. 2. Press and hold 3. If necessary, enter the PIN and press <OK>. Switch off 1. Open the phone. 2. Press and hold: MAKE A CALL 1. In Idle mode, enter an area code and phone number 2. Press [ ]. Press to adjust the volume: 3. Press [ ] to end the call. Please note: If the other party has an automatic switch-over extension number, please input a switchboard number and then input ‘P’ and the extension number (or the extension number is saved in the telephone directory through ‘P’ to make a call by the saved number with ‘P’), put through the switchboard to automatic switch 22 over an extension set (number after P). In the course of conversation,press the left soft key to enter an options menu and execute the following operations: hold a call/ recover a call: pause/ recover current call. end a call end the current call. new call enter a new dialing interface. telephone directory: enter a telephone directory menu. Message: enter a short message menu. The multimedia message function is prohibited in the call course owing to the limitation of network occupation. Mute: mute mode settings. No MIC voice when the mute mode is started. dual-tone multifrequency: switch settings. In the call course, pressed keys of the keyboard are sent to the other party in the form of tone frequency signal for telephone banks, auto answering machines, etc. preset bluetooth earphone connection: search the bluetooth for connection and make a call Please note The maximum length of input phone number is 40, the front number is replaced when inputting over 40 digits. Telephone directory call Enter the telephone directory to find a contact; select a number to make a call; press the dial key to select a corresponding SIM card to make a call. 23 ANSWER A CALL 1. When the phone rings, press [ 2. Press [ ]. ] to end the call. Use the speakerphone feature During a call, press right soft key Press [ ] and to activate the speaker. to switch back to the earpiece. The screen displays the number of an incoming call. If the contact name of the number is stored in the telephone directory, the screen can display the contact name. The screen simultaneously displays which SIM card has been called. The screen displays the conversation time after conversation. Press the red on-hook key to reject an incoming call. 1. PHONEBOOK 1.0 How to save a number 1. In Idle mode, enter a phone number and press “Save” 2. Select Save you are given the options: Sim1 / Sim 2/ phone memory. Chose one. 3. If you chose to save on the phone Phone, you can select select a number type. 24 4. Specify contact information. 5. Press <Save> to save the contact. Phonebook – how to search for a contact 1. In Idle mode, press <Phonebook>. 2. Enter the first few letters of the name you want. 3. Select a contact. 4. Scroll to a number and press [ ] to dial, or press “Options” to edit contact information. 1.1 Quick search Browse the records of the telephone directory, you can quickly find the telephone directory through the input method in the interface. You can execute operations of current phone number calling, IP dialling, short message sending, multimedia message sending, checking, editing, deletion, copy, removing, name card sending, printing, etc. 1.2 Search contact Eligible records are found in the telephone directory in a name mode. 1.3 Add new contact Add a new record to SIM card 1, the SIM card 2 or the mobile phone from the telephone directory. Newly added records to the phone memory not only can display name, phone number, home telephone number, company name, E-mail address, company telephone number, fax number and birthday, but also 25 the following contents: Caller picture: set individual incoming call picture for a phone number. Caller ring:select your favourite ringtone by pressing the left key and the right key. Caller groups:the edited telephone directory record can be sorted in different groups 1.4 Copy all Select all telephone directory records from the SIM card 1, SIM card 2 and the mobile phone for copy or select reverse copy operation. 1.5 Delete All telephone directory records can be respectively deleted from the SIM card 1, the SIM card 2 and the mobile phone; delete the selected telephone directory records one by one. 1.6 Caller groups The incoming call group has five preset groups of friend, family, colleague and others, and you can edit the group name, the incoming call ring, the incoming call picture and group members in any group. 1.7 Extra numbers You can set the following numbers in the menu: own number: SIM card 1/ SIM card 2 own number. Edit and set the name and the own number, if the name is input, the standby interface displays the name by turning on the own number display. On the contrary, the standby interface displays the phone number. 26 service calling number: SIM card 1/SIM card 2 own number (need SIM card support). SIM card 1/SIM card 2 emergency number:setting SIM card emergency dialed number (need SIM card support). 1.8 Phonebook settings 1. Memory status: inquire the capacity of the SIM card 1, SIM card 2 and the mobile phone. 2. Preferred memory location: select the SIM card 1, SIM card 2 or the mobile phone 3. Column: select menu items of home telephone number, company name, E-mail address, company telephone number, fax number, incoming call picture, incoming call ring and incoming call group. 4. My name card: edit my name card and send my name card. 5. Name card edition: inquire the format of the name card to respectively set 2.1 edition and 3.0 edition. 1.9 Caller picture Select your favourite picture as your individual incoming call portrait post by the upper key and the lower key. Notice,the size of the incoming call picture is less than 10K-20K. 2.0 Caller ringtone Select your favourite music from the mobile phone as your incoming call ring. 2. MESSAGES 27 2.1 Text message Write message Enter submenu short message to write a short messages. Press ‘option’ for the following choices: Select the SIM card 1/and SIM card 2: you can execute operations of sending, saving and sending, saving, sending to contacts and group sending after ending the message. Use Template: a standard message that can be inserted in the place where in the current message insert Insert objects: you can insert picutres, my pictures, preset motion picture, my motion picture, rings, my rings and preset sound. Text format: set text font, size, alignment and new paragraph. Insert number: enter the telephone directory to select the number. Insert name: enter the telephone directory to select the name. Insert bookmark:insert a bookmark. Input method: many input methods for selection. Please note: short message centers in some areas don’t support SMS with more than 70 characters. Inbox Enter the inbox submenu to check SMS received for SIM card 1 or the SIM card 2. 28 Select message with upper or lower key; To read the SMS press ‘OK’; Press ‘option’ to chose the following functions: reply, delete, edit, forward, copy to SIM card/mobile phone, remove from SIM card/mobile phone, delete all, copy all, remove all, using number, using USSD and chatting. Outbox Enter the outbox to check the short messages saved on SIM card/mobile phone. Press ‘OK’ to read the SMS; Press ‘option’ to chose the following functions: sending from SIM card1 / SIM card 2, editing, deleting and copying to SIM card/ mobile phone, removing from SIM card/mobile phone, delete all, copy all, remove all, use number and use USSD. Templates 10 useful phrases which can be edited or deteted are saved on the mobile phone. SMS settings The short message settings include SIM card 1 information settings and SIM card 2 Information settings. You need to adopt corresponding setting before using the short message function. Enter an SIM card 1 information setting submenu to select the following settings: mode settings: please contact with local network operator to obtain a short message service center number. Enter the submenu, the screen displays the current message mode setting column lists, and the number of the lists are varied from different network operators and SIM cards. Select the mode setting 29 column and press ‘edit’ to set mode name, short message center number, short message expiry date and sending format. Notice:message expiry date, fax, messenger call and E-Mai functions needs to be supported by your network operator. state settings: turn on or cancel message sending report and reply path. memory status: display the current memory space for SMS left on SIM card and mobile phone. Preferred storage location: select to save on SIM card or mobile phone. Pls note: SIM card 2 message settings are the same as SIM card 1 messgae settings. 2.2 MMS MMS (Multi-Media Message) is multimedia short message service. The main feature of MMS supports multimedia function, which can transfer different kinds of multimedia information like text, images, sound, etc. The MMS service needs the support from your network operator. Please make sure that your SIM card supports the service or consult your network operator before using the MMS service. The mobile phone supports the MMS function and can reveive or send multimedia information by setting the necessary MMS parameters. Write message 30 Message>MMS>Write message you can find the following options: To(Recipient Number), CC(Carbon Copy), BCC(Blind Carbon Copy), Subject, Editing Content. You can directly input recipient’s phone numbers by “edit” option and add the numbers or emails, or you can press ‘Search’ to select a phone number from the Phonebook List. Press “OK” to return to the “Recipients”. If the same MMS will be send to more contacts, press “options” and chose between the options: Add number: add recipient’s number Add Email: add recipient’s Email Edit: edit the selected number. Delete: remove the selected number Delete All: remove all the numbers from the Recipients list if there are more than two contacts selected. The subject of the multimedia message can be blank; the subject name will be shown as “no subject” if there is no subject written for the MMS. MMS text contents can be edited by selecting “0 Slide” and press “Edit”. Here are you find the following options: Add text: add text content Add picture: add pictures from telephone memory Add audio: add size matched sound files from telephone memory Add attachment: add size matched files from telephone memory. 31 Add slide before: new page can be inserted before the last page. Add slide after: new page can be inserted after the last page. Preview: preview multimedia messages. Slide timing: set the preview interval time of the multimedia message contents. When editing the MMS, following options are shown: Done: MMS content is finished. Cancel: MMS content is cancelled. Input method: Choose input methods After pressing “Done”, it will show “1 Slide” and its size; Then press “Edit”, the “Options” will have: Edit text: re-edit the content of the written MMS Remove text: the MMS text can be deleted once. You can select the options of sending, saving and sending, saving to draft box, saving to template box, sending option, exit, etc. after finishing the edit, Inbox Display all received MMS. If there is an MMS, user can choose the options of checking, reply, short message reply, reply to all contacts, forwarding, delete, delete all, save as a template, message details and using details about the selected MMS. If there is no MMS or no MMS service is connected, the screen will show “Empty”; press “OK” to read the Inbox. 32 When there is an new MMS, phone will show “New MMS (SIM Card 1/2)”, press to read. If sending to email box, users have to go to webmail to check the MMS. Outbox Users can save the MMS here, and can edit the MMS by “Checking, Fowarding, Editing, Delete, Delete All, Save as a Template, Message Details, Using Details” Display fail delivered MMS. Drafts Display message draft list. Users can save the MMS here, and can edit the MMS by “Checking, Fowarding, Editing, Delete, Delete All, Save as a Template, Message Details, Using Details” Display fail delivered MMS. Template MMS Template includes user defined MMS and default MMS. User Defined MMS is the message saved as a template from “write message”, “Inbox”, “Outbox” or “Drafts”. Default MMS is the message installed in the phone. Show the list of user defined MMS and default MMS, the MMS can be edited. Choose “Options”, users can select to read, modify the template. MMS settings Users can modify all the settings of MMS by this option: Compose settings: select free mode, picture resolution size, Best page time on/off, automatic signature on/off and signature. 33 send settings: you can set validity period, delivery report, read report, priority, slide time and delivery time. Retrieve settings: you can set Home network, roaming network, read report and delivery report. Filter: you can set anonymous and advertisement message. Server profile: select multimedia message network settings on the SIM card 1 and the SIM card 2. (select and set as your operator’s MMS) Memory status:you can check the memory status of the MMS. 2.3 Chat Set two chatting rooms, set ‘my nickname’ and other party’s phone numbers, in this way, user can chat with the other party by short messages. 2.4 Voicemail Server The voicemaillbox of SIM card 1/2 needs to be supported and activated by your network, there are following options: Edit: You can edit 2 voice mail numbers. Call voicemail: if the user activates the voicemail box, please activate the service. 2.5 Broadcast Message This is a service provided by SIM card 1/2 information center, like weather report, travel service, etc. Users can read the messages directly. Currently, just few operators around the world provide this service, please consult with your operator for related details. Receive mode: switch on/off to receive broadcast message 34 Read message: read the received message Language: use to set the language for receving the message. Channel Settings: Choose, Increase, Edit or Delete channel numbers. 3. SOS 3.1 Setting Please note: This key remains active when keypad is locked BUT must be pressed for at least 2 seconds. For the set-up: Press the up/down key to choose the various options below. Press the right soft key to exit without modifications. Menu – SOS – Setting – status: This activates or deactivates the automatic SOS procedure … Light chose the option if you want the SOS light to flash during countdown … Time: how long for count down after pressing SOS key … Number: please insert the number that will be dialed in case of SOS. . ...SMS Status – further information: Select ON or OFF to activate or deactivate the SOS. When activated and the phone loses balance or SOS key is pressed, the stored SMS message is sent automatically to the SOS number. 3.2 SMS alert: 35 set the short message text content and the on/off state of the short message . This means the mobile phone automatically sends a message to your set number when the mobile phone experiences exceptional impact or drop, and the short message contents can be set in advance. 3.3 Auto alert:Set on/off for automatic alarm in case the mobile phone detects exceptional impact or drop. The mobile phone reacts according to the settings of the emergency call i.e by sending the short message automatically and calling the defined number. Please note: the emergency call function provided by the mobile phone is merely an optional function, which in some cases may cause false alarm. In any case the the company is not reliable. If you need emergency call equipment with full function, please purchase professional equipment in addition. 4.0 SETTINGS 4.1 User profiles The function is used for setting up the mobile phone to remind incoming calls and short messages in different ways under diffrent enviroments. Choose mode and go to customize by using the upper/lower key: 4.1.1 General mode The default mode is the normal mode without any customization, and the user can chose the general mode and customize the settings, which includes: (1) Activate:set the general mode as the default mode. 36 (2) Customize: includes setting up ringtones, volume etc. Ringtone settings: press the up or down key to select the ringtone, the mobile phone will play the selected ringtone, and the left soft key is to confirm the selection. Volume settings: set the ringtone volume; the default standard ringtone volume is level 3. Alert Type:select the incoming call alert mode, which includes ringtone only, vibration only, vibration and ringtone, ringtone after vibration. Ring style: the ring can be set as types of single, repeat and ascending. Extra tone: set relevant alert ringtone of warning, error, camp on and connect; Answer mode: set to press any key to answer the incoming calls; 4.1.2 Meeting mode Under this mode, the phone only vibrates, no ringtone or keytone, please refer to general mode settings for the specific setting. 4.1.3 Outdoor mode The default ringtone volume is level 7 under this mode, please refer to general mode settings for the specific setting. 4.1.4 Indoor mode The default ringtone volume is level 3 under this mode, please refer to general mode settings for the specific setting. Remarks:the screen will show different icons when selecting different modes or different ringtone 37 volumes. 4.1.5 Earphone mode The mobile phone automatically switches to the earphone mode when an earphone is inserted, please refer to general mode settings for the specific setting. 4.1.6 Bluetooth mode The mobile phone automatically switches to the bluetooth mode when the bluetooth earphone is conneted with the mobile phone, please refer to general mode settings for the specific setting. Press # key for a long time when standby to switch between the mute mode and the general mode. 4.2 Dual SIM settings Dual SIM open SIM card 1 and SIM card 2 both open. Only SIM card 1 open Close SIM card 2, only open SIM card 1, partial menu of SIM card 2 will be hidden. Only SIM card 2 open Close SIM card 1, only open SIM card 2, partial menu of SIM card 1 will be hidden. Flight Mode When on the plane, please activate the Flight mode, calls or messages will be restricted to some extent. 4.3 Phone setup 38 With this option you can set the time and date, schedule power on/off, language, preference input method, display characteristics, Greeting text, Dedicated Key, Auto update of date and time, and backlight settings 1. Time and date: including home city setting,time/date setting,format setting. 1) Set Home City Press up and down keybutton to choose the city. 2) Set time/date Set the hour and minutes in the first text, and set the date in the second text. 3) Time/date format 12 hours format or 24 hours format. Date format setting includes day-month-year, year-month-day, month-day-year. 4) Date separate mark The date is using following marks to separate them: “/”, “-”, “_”, “:”. 2. Schedule Power on/off: there are four teams of timers in total, you can edit the on/off time of the phone; and on/off option must be turned on if the users want to use this function. 3. Language: you can chose your language 4. Set the input method: set the input method as the preference input method for text editing. 5. Display Characteristics: you can set wallpaper, screen saver, starting up motion picture, shutdown motion picture, main menu style, date and time display, own number display and clock style. 1) Wallpapers Settings>Phone setup>DisplayCharacteristic>wallpaper, wallpaper>system, choose the default images, wallpaper> user defined, choose the images stored on your phone. 2) Screen Saver 39 Settings>Phone setup>DisplayCharacteristic>Screen saver, Screen saver>settings, use to define the status. If the status is “On”, you can use to set the waiting time of 5 sec / 15 sec / 30 sec / 1 min. If the status is “Display time”, your phone will show the time as the screen saver instead of showing the screen saver image. Screen saver>select>system, select the images from system as the screen saver image Screen saver>select>user defined, select the images from telephone memory as the screen saver image. 3) Power on display Settings>Phone setup>Display Characteristic> Power on display, set the animation when power on. Power on display>System, choose the animation from phone system. Power on display>User defined, choose the animation. 4) Power off display Settings>Phone setup>Display Characteristic> Power off display, set the animation when power off. Power off display>System, choose the animation from phone system. Power off display>User defined, choose the animation 5) Show date and time Settings>Phone setup>Display Characteristic> Show date and time Press left button to turn on or off this function, date and time will be shown on the screen if it is turned on. 6) Greeting Text You need to insert the SIM card first, otherwise this option will not be shown. Settings>Phone setup>Greeting text, use to choose the status, and edit the greeting text. If the status is on, your phone will display the greetings on the screen when the mobile phone is switched 40 on. 7) Dedicated key:Settings>Phone setup>Dedicated Key, define different shortcuts with different functions for up, down, left and right navigation keys when in standby mode. 8) Auto update of date and time: Settings>Phone setup>auto update of date and time, Press left button to set on or off. Auto update of date and time service needs network support. 9) Misc. settings: 1. Set the brightness and the lighting time of LCD backlight, 2. Auto adjust backlight. Press left button to set on or off. If this function is turned on, the LCD can adjust its brightness automatically according to the environment. 4.4 Bluetooth settings The mobile phone has a built-in bluetooth wireless communication function, the user can connect the phone to other bluetooth devices through the function, such as a bluetooth hands-free device, other phones or a PC which supports bluetooth wireless technology. The bluetooth connection can be applied to exchange information of images, video clip, text, digital name card, etc., you also can talk by the bluetooth handls-free device. Since devices with Bluetooth wireless technology communicate using radio waves, your device and the other device do not need to be in direct line-of-sight. The two devices only need to be within 10 meters (33 feet) of each other, but the connection may be subject to interference from obstructions such as walls or from other electronic devices Features using Bluetooth technology, or allowing such features to run in the background while using other features, increase the demand on battery power and reduce the battery life. 41 4.4.1 Power Settings>Bluetooth, Press left button to set on / off activatation of Bluetooth. 4.4.2 Inquiry audio device Settings>Bluetooth>Inquiry audio device Search all bluetooth devices. When the screen displays the searched device list, choose one device for connecting and pairing. The code needs to be inserted when matching. The device will be listed in the device list after pairing. Notice: if the user wants to establish a connection, the bluetooth devices must use the same code (default code is 0000). Devices that do not have a user interface can use the factory-set passcode. 4.4.3 My device Display connected bluetooth information. ‘Inquiry new device’ is displayed if the mobile phone is not connected with any bluetooth device. 4.4.4 Active devices The device showed in the list is active; you can select the device and cancel the pairing. 4.4.5 Settings Visibility: Press left button to set on to allow your device to be found by other devices with Bluetooth wireless technology, or set off to hide your device. In this way, you can better control who can find your device with Bluetooth wireless technology, and connect to it. Do not pair with or accept connection requests 42 from an unknown device. In this way, you can better protect your device from harmful content. Change device name:Edit the name shown to other devices using Bluetooth wireless technology. Authentication:Press left button to set on, Connection requests from this device must be accepted separately every time. Or set off, — Connections between your device and this device can be made without your knowledge. No separate acceptance or authorisation is needed. Voice path settings: Set the voice to be transmitted to the phone or the bluetooth hands-free device when using Bluetooth hands-free device. 4.5 Network setup Settings>Network Setup, select SIM card 1 network settings or SIM card 2 network settings. Network selection:the network selection includes new search, select network, selection modes. Choose Selection Mode, Press left button to change between Manual and Automatic. Preference: choose “options” to have following options: “Add from List”: List all the Newwork operators. “New”: Add the newly priority “Change Priority”: set up the priority “Delete”: Delete the priority of current using network. 4.6 Security setup 43 SIM Card 1 Security Setup Encrypt some functions of SIM card 1, which will be useful to pretect your mobile phone or SIM card from being embezzled. Password input is required, press “OK” after entering correct password which will be shown as “*”. Please press “Clear” to clear the codes and re-type the correct password, if input was wrong. In this setting, you can change the PIN code and PIN2 code. SIM card 1 lock Based on this option, you can lock or unlock the SIM card 1 with correct PIN code. Normally, SIM card 1 is locked. PIN code is provided by network operator, if the PIN code is inserted wrongly 3 times, you need to enter your PUK code to unlock the PIN code. Please enquiry with the network operator if the PUK is not provided or was lost. Fixed dial To restrict calls from your device to selected phone numbers, select Settings>Security setup>Fixed dial: You need your PIN2 code to activate and deactivate fixed dialling or edit your fixed dialling contacts. Contact your service provider if you do not have the code. To add new numbers to the fixed dialling list, select: Fixed dial > Fixed Dial List>Add. You need the PIN2 code for these functions. Barred Dial If your SIM card 1 has this function, you can forbid the calls from your device to selected phone numbers. If this function is activated, you can just call emergency numbers. For this function you need to enter PIN2 44 codes. SIM card 2 security settings Encrypt some functions of SIM card 1, which will be useful to protect your mobile phone or SIM card from being embezzled. You can set up for SIM card 2 as well: lock, fixed dial, change PIN codes. The procedure is the same as for SIM card 1 security settings. Phone lock This option can set a password to the phone to lock or unlock the phone. When you set the phone password, you need to input the code first when you switch on the phone. Phone password length is 4 to 8 digits, factory password is 1122. Auto Keyboard lock This function can lock/unlock the keyboard after it is idle for 5 sec / 15 sec / 30 sec / 1 min / 5 min. The keyboard will be locked automatically after the set time. Press left button and press “*” to unlock the keyboard. Change Password Enter the old password 1122 and enter the new code to finish mobile phone code change. 4.7 Shortcuts You can configure the normal functions by shortcuts, there are several shortcuts to select. 45 4.8 Restore Factory settings Some setting parameters in the mobile phone can be changed to default settings after the restore. The default code is 1122. 5)CALL CENTER 5.1 Call history SIM card 1 call records and SIM card 2 call records. You can check information of the call records, which includes: missed calls, dialed calls, received calls, delete call records, call timer, call charge, short message counter and GPRS flow. 5.1.1 SIM card 1 call history Call center>Call history>SIM card1 history SIM card 1 missed calls It will record automatically the missed calls, including un-answered calls or rejected calls, you can choose the number and check the information like date, time, name or number. SIM card 1 dialled calls It lists automatically the dailled calls, you can choose the number and check the detailed information. SIM card 1 received calls It lists automatically the received calls, you can choose the number and check the detailed information. 46 Delete SIM card 1 call logs This option is for deleting the missed calls logs, dialed calls logs, received calls logs Choose “delete call logs” > ”Delete all”, you can delete all the call logs. SIM card 1 call timers Last call: display the calling time of last call Dialled calls: display the quantity for all the dialled calls Received calls: display the time for all the received calls Reset all: clear the call logs on SIM card 1. SIM card 1 Call cost Last call cost: check the cost of last call of SIM card 1. Total cost: check the cost of all calls of SIM card 1 Reset cost: clear the cost records, you need to enter PIN2 code. Max cost: enter PIN2 code and restrict the call cost of SIM card 1. Price per unit: Input PIN2 code and set the unit price and rate. SIM card 1 text message counter Check the quantity of short messages received and sent SIM card 1 GRPS counter Check the total size of received or transferred by GPRS. 47 5.1.2 SIM card 2 Call history Same as SIM card 1. 5.2 Call settings A: SIM card 1 call settings Call ID You can choose “set by network”, “Hide ID” and “Send ID”, it needs the support from the network operator. If you choose “Send ID”, your phone number will be shown in other’s phone when they receive your call; If you choose “Hide ID”, it prevents your number from being displayed by the other party." Call waiting If a new incoming call reaches when calling, the network will inform your phone, and show the numbers on the phone, you can decide to answer or not. Contact your network operator and check if your SIM card supports this service. If this service is not activated, the network will not inform your phone, and the people will just hear busy line. Call transfer This needs network support, please contact your network supplier about whether your card supports this or not. 48 Call restriction For, “Call restriction”, has to be activated through your network operator. He’ll provide the network code, only then you can use the related function of the call restriction. Every item of the “call restriction” can be set switch on, switch off and search. You can restrict the calls as following: Restrict dial-up All the incoming call: restrict all of the incoming call International call: restrict dialing international call International call except domestic call: when you are in roaming, you can only dial the numbers of your home country. Switch on This is used to switch on (open) the call restriction of SIM1 Press the key to enter this function. It will show: “ please enter code” After entering the cose, press ok. Switch off This is used to switch off (close) the call restriction of SIM1. Press the key to enter this function. It will show: “ please enter code” After entering the cose, press ok. Search This is used for listing all the settings of call restriction Press ok key to enter the setting. Restrict incoming call 49 Restrict all incoming calls including the roaming call. When you switch on this function the user will not receive any call. The operation is the same as above “resctric dial-up” Start-up all Press ok key, enter code, switch on all the restrictions of SIM1. Cancel all Cancel all set call restrictions. Code change: Enter previous call retriction Enter a new restriction code. Remark: When you apply for this function, you will get a code from the operator. Line switching Switch line 1 and line 2, you can choose Close user group: the function needs to be supported by network operator B: SIM card 2 call settings The settings are the same as for SIM card 1 call settings. S elect the line 1 under call settings of SIM card 2 B: Advanced settings Automatic redial Turn on or turn off the function through on/off settings. With this function the mobile phone will redial automatically in case your previous call had no reply or the other party hung up. 50 Speed dialing Create your speed dialing list; you can set 8 speed dialing numbers. By pressing numbers 2 to 8 for a long time in the idle mode you dial your set numbers directly. Call time display Turn on and turn off the funtion to display the call time. Call time reminding turning off: turn off the function. one tone: the phone will remind you when entering any number between 1 and 3000. Cycle: input any number between 30 to 60 seconds, and the function prompts the call time in cycle (in seconds). Automatic time slicing Open or close the function, and the term is 1 to 9999 seconds 6) Organizer 6.1 File manager This phone has built-in storage. All files saved in this phone will be displayed. Under File Manager menu, the options are Open, New Folder, Format, and all files sent via Bluetooth will be saved under Received. When you open a file under “Received” Menu, there are four options, i.e. Open, New Folder, Rename, and Delete for your choice. When you open a file, you can choose from View, Print, Use as Wallpaper or ringtones, Send via MMS/ Bluetooth, Details, Rename, Copy, Move, Delete, Delete all files etc. Notice: The format of pictures and musics must be matched with the supported destination. 51 6.2 Services 6.2 .1STK service The service content is determined by user’s card and the local operator. 6.2.2 WAP You can connect your mobile phone with the mobile phone WAP Internet at any time. Please ask your network operator for his WAP parameters. 1. In the idle mode press the function key to access main menu. 2. Select ‘network service’→‘WAP’ option by the left key and the right key Press the function key to enter: A.homepage Enter the default homepage. Different SIM cards have different default homepages which can be changed. B.bookmarks You can use bookmark for your WAP websites by pressing the option key on the website : (1)Enter the bookmarked website. (2)Reedit the bookmark information. (3)The bookmark address is sent to the other party by the short message mode or multimedia message mode. (4)Delete the bookmark. (5)Delete all bookmarks (6)Add new bookmark (new website). C.Recent pages 52 The mobile phone automatically records some visited websites (webpage history) D.Offline pages Save webpage addresses. E.Input address Enter the target webpage address and press the function key to browse the webpage. F.service inbox The network inbox of the mobile phone receives public network information. G.Settings 1. Select SIM card: select the SIM card with internet service, also set as ‘always ask’. 2. Edit setting column: 3. Browse option: set waiting time for internet browse and whether pictures should be displayed or not. 4. Service information settings: suggest starting service information settings, you also can select service information settings, white list settings, SL settings and white list addition. 5. Clear cache: clear up mobile cache. Clear unnecessary information to accelerate the network speed of the mobile phone. 6. Clear personal data: clear set personal data information. 7. Trusted certificate: check the certificate name. 6.2.3 Data account Relevant settings are executed on the mobile phone before leaving the factory, if the user can not use the data account, please consult with the network operator. 1.GSM data: no setting required. 2.GPRS: select the GPRS like “….” GPRES service according to the card you’re currently using 53 6.3 Head lamp You can turn on the mobile phone torch through this function, or by pressing the button on the rightern side of your mobile phone. 6.4 Head lamp key mode 1. short press switch: controle the side key, you can turn on/off the torch light. 2. long press switch: long press the right side key and keep one second, you can turn/off the torch ligh. 6.5 Calendar The function is used for checking dates. You can browse the dates by using the upper, lower, left and right arrow and the calendar information at the upper part of the screen updates accordingly. Move and check the date by pressing the direction keys. Press the left function key (option) to execute the following operations: Checking: check all events Checking all:check all added events or press the OK key to select ‘addition’ for adding a new event. Additional event: add a new memo. Deleting event: delete a memo. Pointing to the appointed day:point to the right date by direct input. Check by week: weekly memo items are listed. Print: the mobile phone can be connected with a computer with bluetooth function or a printer for printing. 6.6 Tasks 54 The fucntion is used to save memos like appointments, telephone calls, memorial days etc. You can set the ring prompt time of the mobile phone as a reminder. Select appointment, telephone number etc for adding and editing by pressing the OK function key. 6.7 Alarm The function is used to set an alarm. Press the alarm clock function key to enter the function (you can set 5 alarms maximum) Press the upper or lower key to select alarm clock and press the edit key to enter settings. 1. Press the left and right keys to open or close the alarm clock at the first line. 2. Enter alarm time in the second line. 3. Ring mode: press the left/right key to select ring modes, once, everyday, custom (set the alarm clock for every week day is required when the custom ring mode is selected, the ring mode is set as on or off according to requirement. Finally, press finish to save the settings. 4. Snooze time: set snooze time for 1 to 10 minutes after the alarm ring rings. 5. Alarm type:set the prompt of the alarm ring as vibration and ring, ring only, vibration only when the alarm clock starts. 6.8 Calculator Your mobile phone provides a calculator with simple functions. With the direction keys you can execute operations of adding, subtracting, multiplying and division, ·press ”#” means “.” ·navigation key respectively stand for “+ - x ÷ M+ M- MR and MC” By pressing the ok key, the result will be displayed 55 Notice:the precision of the calculator is limited due to rounding errors. 6.9 World Clock You can view the current time of other major cities in the world, and you can select the “Daylight saving time for foreign city “ if you need. 7. INPUT METHOD Summarize The mobile phone supports input of intelligent English, numberS and symbolS. Keypad definition Please refer to the input method explanation about the keyboard definition in the input method state. The universal keyboard definition is stated as follows: Middle key: generally indicates confirmation, press the middle key to confirm the selected word in intelligent English; Input method mode; press the key to select ‘option’ for editing or 56 Left soft key : Generally executes function at the bottom left corner of the screen. Right soft key :Generally executes return or clear. Pressing the right soft key for a long time to clears all contents. Navigation keys (up key, down key, left and right keys): generally used for moving the cursor or selecting words to be selected. *key: used for symbol selection in text editing. Number keys (2-9) represent the letters on each key Number keys (1-6) represent stroke on each key in the state of stroke input method; # key: used for switching different input methods. Input method illustration English input method Keypads definition of English input (include capital and small) as below: Key name Number 0 key Number 1 key Number 2 key Number 3 key Number 4 key Number 5 key Number 6 key Number 7 key Number 8 key Number 9 key Corresponding English 0,space Symbol ABC; abc DEF; def GHI; ghi JKL; jkl MNO; mno PQRS; pqrs TUV; tuv WXYZ; wxyz letter or function Explanation 57 * key # key: Press * key to enter into symbol input box Switch input method Use the keypads to input General operation of English input: Each key is used for entering more letters. Press the keys quickly and repeatedly till your required character appears. Press * key to enter a special symbol like punctuation etc. Switch input method by # key. Press 0 key once in the state of capital or lowercase when you need a space. Clear input error by right soft key, and press the right soft key for a long time to clear all. Digital input method Use number keys 0-9 to input the corresponding numbers. Intelligent English input method General operating sequence: Input English letters: press 2-9 number keys to enter English words, the mobile phone selects all possible word combinations according to the entered letters, for example, if you press 2 key twice, multiple options of ‘ba’, ‘ca’, etc. are given, and press left and right keys to select the required word. Selection: select English words by using left and right keys, select the English words with OK key, then you can select word by left and right keys, press OK key to select English words, and press clear to undo English 58 selection. Select and input English letters: upper and lower navigation keys rolls the screen, left and right navigation keys find English words to be selected, and OK key selects the English words. Select English phrase association words: association input will give the phrase association of the last word, the upper and lower navigation keys are used for scrolling the screen, left and right navigation keys find English words to be selected, and OK key selects the English words. Edit input English words: left and right navigation keys move the cursor right and left, upper and lower navigation keys move the cursor up and down, press <clear> to delete the English words. Switching input method:press # key to switch input method in the text editing state among intelligent English input method, English upper case and lower case input method, English lower case input method, etc., and the top left corner of the screen has icon prompt. Symbol input:press the * key to enter symbol input . 8. TROUBLE SHOOTING 59 If you’re having problems with your mobile phone, please consult the following ‘trouble shooting list’. If the problems can’t be solved, please contact with professional technician Problem Possibly caused by Possible recovery method Incapable to power-on Power key pressing time is not enough Battery with low power Press power key for more than three seconds or longer Charge the battery Battery with poor contact SIM card fault Assemble the battery again or clean the contact points of the battery Check or replace SIM card Low Battery performance Replace battery Poor contact Check contact conditions, replace socket or plug Battery voltage is too low Battery fault Charge it half an hour first, and then unplug to charge the battery again Replace battery Charger Model Error Replace suitable charger Charger broken Replace or repair the charger SIM card failure Check or replace SIM card Insufficient standby time Charging Fault Conversation 60 failure Invalid key operation Part of calls are not reached Can’t find contacts No number in the phonebook PIN code error Auto-lock code error Mobile phone power-off automatically Dialling error Redial Fee limits Accidental interference Contact with the operator Take out the battery and assemble it after 1 minute Beyond the telephone number of digits Check with the phone number Setting problems Check whether ‘call restriction’ is set or not The SIM card is changed Use the original SIM card Setting error or too low long-time battery voltage or out of use for a long time Wrong PIN code has been entered three times wrong code entered Check whether a complete startup can reset or not, or the data loss is caused by too low battery voltage for a long time Contact your operator A serious shortage of battery power Please charge the battery Setting cause Check whether set auto power-off or not Please contact the appointed after-sales service spot 61 Accidental interference No warning tone with incoming call 62 Volume is set to mute Reset suitable volume again