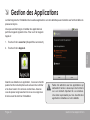
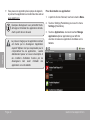
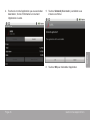
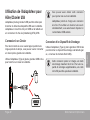
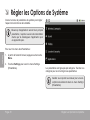
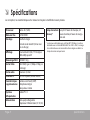
1
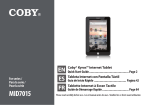
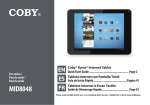
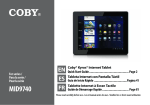
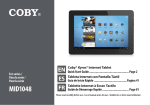
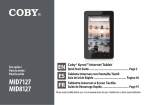
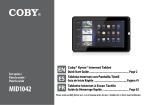
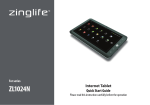
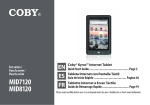
For series / Pour la série MP827 EN FR Internet Tablet Quick Start Guide................................................. Page 2 Tablette Internet à Ecran Tactile Guide de Démarrage Rapide................................. Page 36 Please read carefully before use • Veuillez lire ce livret avant utilisation ÂÂ Table of Contents English Thank You......................................................3 Package Contents.........................................................3 Features..........................................................................4 Getting to Know the INTERNET TABLET......5 About the Touchscreen................................................8 Protective Film.........................................................8 Touchscreen Actions..............................................8 About the Orientation Sensor....................................10 Charging the Tablet....................................................10 Inserting a Memory Card........................................... 11 Getting Started..........................................15 Turning the Tablet on and off . ..................................15 Turning the Screen On and Off (Standby) ........16 Unlocking the Screen...........................................16 Home Screen at a Glance.........................................17 About Applications.....................................................18 Preinstalled Applications......................................19 Installing Applications......................................... 20 About Menus............................................................... 20 About Notifications..................................................... 22 Requirements...............................................................23 Connect to a Wi-Fi network.......................................24 Browsing the Web......................................26 Managing Applications.........................27 Optional Connections.......................... 30 Connecting to a Computer...................................... 30 Connecting to a TV.....................................................31 Connecting Headphones..........................................32 Using the USB Full-Size Adapter................................. 33 Connecting a Keyboard..................................... 33 Connecting a Storage Device........................... 33 Setting the System Options.....................34 Specifications............................................35 Connecting to the Internet...................23 Page 2 Table Of Contents Congratulations on your purchase of the Internet Tablet. This guide is provided to help you get started quickly with your player; please read it carefully and save it for future reference. Package Contents Please make sure that the items shown below are included in the package. Should an item be missing, please contact the local retailer from which you purchased this product. Internet Tablet USB host/keyboard adapter Protective pouch Professional stereo Earphones USB cable Power adapter This package may contain plastic bags or other materials that pose a hazard to children. Be sure to safely dispose of all packing materials after opening. Page 3 Thank You English ÂÂ Thank You Features Browse the Web. Visit your favorite websites English Check your e-mail Keep in touch with friends and family Watch YouTube™ videos Browse the world’s most popular video-sharing community Read your favorite books Download thousands of books with the included Aldiko E-book reader * Discover thousands of apps for Android™ Download apps from AppsLib—the marketplace designed for tablets microSD memory card reader Increase your storage capacity (up to 32 GB supported) Built-in camera Convenient front-facing camera Automatic orientation detection Read any way you want; the display adjusts automatically! * Reading books in the ePub format requires the included Aldiko E-book reader application. ** Requires optional HDMI cable (Type A-to-Type C). 1080p HD video playback requires a video file encoded at 1080p. Streaming video quality will be affected by the source, and the quality and condition of your network connection. Connect to the Internet wirelessly High-speed Wi-Fi 802.11 b/g networking HDMI™ output to your TV ** Enjoy videos, photos and more in the comfort of your living room Enjoy your media library anywhere Portable powerhouse plays popular music, video, and photo formats Page 4 Thank You ÂÂ Getting to Know the Internet Tablet Name English Unit at a Glance Description 1 Volume – key Press to decrease the volume level. 2 Volume + key Press to increase the volume level. 3 Power key Press to turn the unit on, or to turn the screen on and off. Press and hold to access the Power Off menu. 4 Speakers Page 5 Stereo speakers. Getting To Know The Internet Tablet Name Description Camera Front-facing camera 6 Home soft key Tap to return to the home screen. Menu soft Key Tap to view the option menu. English 5 7 8 Back soft key Page 6 5 Tap and hold to view a list of recently used applications; touch an application in the list to launch it. Note: When you Tap the Menu key from within an application, you will see the options for that application. To view the Android system options, tap the Menu key from the home screen. 6 7 8 Tap to return to the previous screen. If the keyboard is on the screen, tap to close the keyboard. Getting To Know The Internet Tablet microSD card slot 10 Reset key Press to reset the tablet if it freezes or otherwise behaves abnormally. (Use a paperclip or other small object to gently press this key.) 10 11 Power jack (DC input) Charge and power the tablet with the included power adapter. 12 USB 2.0 Hispeed port Connect to a computer to transfer data (e.g., music, videos, photos, files). 13 Headphone jack Audio output connection for headphones. 11 12 13 14 HDMI Note: Speaker output is automatically disabled when headphones are connected to the player. DC IN 9V DC 9V 9 RESET Load external microSD memory cards here. microSD 9 Description 14 HDMI jack Connect to a TV or other display. (mini Type C) Page 7 Getting To Know The Internet Tablet English Name About the Touchscreen English Your tablet comes equipped with an easy-to-use touchscreen which allows access to the tablet’s functions. Use your finger tip to touch the area of the screen where a control icon is displayed. If you touch and hold the screen, it will register as a continuous button press. To avoid damaging the screen, do not touch it with excessive force or with any object other than your finger (or a stylus). For best response, make sure your hands are clean before using the touchscreen controls. buttons, menu items, the on-screen keyboard, and other items displayed on the screen. You can perform the following actions on the touchscreen using your fingertip. Touch: To activate an on-screen item (e.g., application icons, buttons, menu items, and the letter/symbols of the on-screen keyboard), simply touch them with your fingertip. Touch and Hold: Some on-screen items have an alternate action if you touch and hold it (e.g., opening an alternate menu, or to activate the drag function). To touch and hold an item, touch the item and do not lift your fingertip until the action occurs. Drag: Drag an on-screen item to change its position (e.g., an application icon on the home screen). To drag an item, touch and hold it for a moment, then without lifting your fingertip, move your fingertip on the screen until the item reaches its target destination. Protective Film A thin film has been applied to the touchscreen to protect it during shipping. The protective film should be removed before use. To remove it, simply take a corner of the film and peel it away from the screen. Touchscreen Actions You can control the functions of the tablet by using the touchscreen in combination with the three touch keys located on the bezel. To control the tablet with the touchscreen, use your fingertip to manipulate icons, Page 8 Getting To Know The Internet Tablet Swipe up/down on the screen to scroll through a list. On some screens, you may be able to swipe left/right to change the view. To swipe, touch the screen and then quickly move your fingertip across the screen without lifting your fingertip. Do not pause on the screen with your fingertip at the initial point of contact or you may accidentally drag an item instead. Double-tap: About the Orientation Sensor The tablet contains a sensor that will automatically change the orientation of most screens as you rotate the tablet. The sensor works best when the tablet is rotated perpendicular to the ground (i.e., when the tablet is held upright and not fat on its back). Quickly tap the screen twice on a webpage or other application screen to zoom (the application must support the double-tap/zoom function). Within the browser, double-tapping a webpage section will cause the browser to zoom and fit that section to the width of the screen. The orientation sensor can be turned on and off in the Display settings menu. Page 9 Getting To Know The Internet Tablet English Swipe: English Charging the Tablet Inserting a Memory Card The tablet comes with a built-in rechargeable lithiumpolymer battery. The tablet accepts microSD memory cards. Insert a memory card into the microSD card slot to: Before using the tablet, the battery should be charged fully. The Status Indicator will light blue when the battery is charged fully. Increase the memory capacity of your tablet To charge the battery: 1. Plug one end of the included power adapter into an AC 100-240V outlet. 2. Plug the other end of the included power adapter into the Power jack on the tablet. 3. Disconnect the power adapter when the tablet is fully charged. The battery used in this device may present a fire or chemical burn if mistreated. Do not disassemble, incinerate, or heat the device. Do not leave the de-vice in a place subject to direct sunlight, or in a car with its windows closed. Do not connect the device to a power source other than that which is indicated here or on the label as this may result in the risk of fire or electric shock. Page 10 Play media files stored on the memory card (e.g., music, video, or photo files). To insert a memory card: 1. Align the memory card with the card slot. The metal contacts of the memory card should face down away from the LCD screen. 2. Slide the card into the spring-loaded slot. Push the card in until it clicks into place. Do not attempt to insert objects other than a microSD memory card into the card slot. A compatible memory card should fit easily into the card slot; if you encounter resistance, check the alignment of the card. Do not attempt to force the card in. Avoid touching the gold contacts of the memory card. Getting To Know The Internet Tablet To release and remove a memory card: 1. UNMOUNT the memory card. English a. From the home screen, tap the Menu key, and then touch Settings to show the settings menu. b. Touch SD card & Device storage to show the SD card & device storage settings. c. Touch Unmount SD card to prepare the memory card for safe removal. 2. Push the card further into the slot until you hear a click. The card will spring out of the slot. 3. Grasp the card by its edge to remove it. To avoid damage and data corruption, do not remove a memory card while data is being written to or read from the card. For example, do not remove a card while playing a music file stored on the card. Page 11 Getting To Know The Internet Tablet ÂÂ Getting Started Turning the Tablet on and off English To turn the tablet on: 2. Touch Power off on the screen. A confrmation message will appear. Press and hold the Power key until the LCD screen turns on. Wait until the Home screen appears; the tablet is now ready for use. To turn the tablet off: 1. Press and hold the Power key until the Device Options menu appears. 3. Touch OK to turn off the tablet. Page 12 Getting Started Unlocking the Screen When the tablet is on, you can turn off the screen to conserve battery power. Simply press the Power key once to turn the screen off. Press the Power key again to turn the screen back on. When the screen turns off, you will have to unlock the screen when you turn it back on. To unlock the screen, drag the lock icon across the screen towards the speaker icon. To conserve battery power, the screen can be set to turn off automatically when the tablet is not in use (between 15 seconds and 30 minutes). This Screen timeout option can be found in the Display settings menu. Page 13 Getting Started English Turning the Screen On and Off (Standby) If a password has been set, enter the password to finish unlocking the screen. The Screen Unlock password can be set in the Location and security settings menu. Home Screen at a Glance The home screen is the starting point for all of the features of your tablet. English 1 2 3 4 Page 14 Getting Started 1 Notification bar Description Shows notification icons such as new messages and alarms; drag the bar down to the bottom of the screen to open the full Notifications panel. The right side of the bar also shows status information such as the time, battery level, and network signal strength. About Applications To open an application, touch the application icon on the home screen or in the Launcher. English Name Launcher screen: Note: You can press the Menu key and then touch Notifications to open the full Notifications panel from the Home screen. 2 Widgets Widgets are small applications that you can use directly from the home screen. To add widgets to the home screen, touch and hold an empty spot on the home screen; the Add to Home screen menu will appear. Touch Widgets; then choose a widget from the menu. 3 Launcher Tab Open the Launcher to view a list of all applications installed on the tablet. Touch the Launcher tab to open the Launcher. Note: You can swipe left and right to view additional screens. 4 Icons Page 15 The screen shown above is for illustrative purposes only. Mpman reserves the right to modify and improve the final list of applications available on the tablet. Touch an icon to open an application or folder Getting Started Preinstalled Applications Perform simple mathematical operations. Some applications have been installed on your tablet for your convenience. These applications include: English View the current time, or set an alarm. Take pictures or videos with the frontfacing camera. Download and read thousands of e-books. Supports the ePub standard. Check your e-mail. Find and display app installation files (APKs) on your tablet. View photos and play videos. Browse for, download, and install applications from the AppsLib store. Play music. Browse the web. Access the Settings menu to adjust the tablet’s options. Launch the mobile YouTube™ browser page to watch internet videos. Page 16 Getting Started You can also download an install additional applications from AppsLib, the web browser, or other sources. The tablet must be set to allow installation of applications from non-Market sources. The Unknown sources option can be set in the Application settings menu. Support for third-party applications is provided by their respective applications developers. Mpman is not responsible for the behavior of these applications; please review the description and terms of use provided by third-party developers carefully before installing applications on your tablet. About Menus There are two types of menus used by the tablet. 1. Option menus. Option menus contain items related to the current screen or application. To view an option menu, press the Menu key. Not all screens or applications have an option menu; if a menu does not exist, nothing will happen if you press the Menu key. Page 17 Getting Started English Installing Applications 2. Context menus. A context menu will appear. English Context menus contain items related to a specific item on the screen. To view a context menu, touch and hold an item on the screen. Touch & hold Video(3). Not all items have a context menu; if a menu does not exist, nothing will happen if you touch and hold the item. Page 18 Getting Started 1. To respond to a notification: The icons that appear in the Notification bar at the top of the screen alerts you when new messages arrive or alarms or other application events occur. Touch a notification in the list; the Notifcations panel will close and the application associated with the notification will launch. View and respond to the notifications by opening the full Notifications panel. 2. To clear all notifications: Drag the Notification bar down to the bottom of the screen to open the Notifications panel from any screen, or; On the Home screen, press the Menu key and then touch Notifications to open the Notifications panel. Touch the Clear button at the top right of the Notifications panel; the panel will close and all notifications will be cleared. 3. To close the Notifications panel: Drag the handle at the bottom of the Notifications panel to the top of the screen, or; Press the Back key. Page 19 Getting Started English About Notifications ÂÂ Connecting to the Internet English This tablet can utilize Wi-Fi data networks to connect to the Internet. Wireless Wi-Fi technology can provide Internet access at distances of over 300 feet; however, this distance can be affected by your surrounding environment and Wi-Fi router. Requirements In order to connect to the Internet, you will need the following: 1. A wireless router or access point with a broadband Internet connection The wireless router must support Wi-Fi 802.11b/g connections. If the router supports 802.11n, make sure that it has been configured to acc qept 802.11b/g connections as well. Please refer to your wireless router’s documentation for help, or ask your network administrator for details. You may encounter open Wi-Fi networks, or “hot spots.” These networks are usually configured so that you can simply connect to them without needing to know its settings; the tablet will obtain all the information it needs from the router automatically. A minimum connection speed of 64 Kbps is recommended. Faster speeds will enable a better Internet experience. 2. The wireless router network settings You will need to know the name of your network (SSID), as well as the password or other credentials if your network is secured. These settings can usually be found on the administration webpage of your wireless router. Page 20 Connecting To The Internet Connect to a Wi-Fi network f. Make sure that the Wi-Fi option box is checked: Touch Wi-Fi. The Notification bar displays icons that indicate your tablet’s Wi-Fi status. English Notification that an open Wi-Fi network is in range. Connected to a Wi-Fi network (waves indicate connection strength). [no icon] There are no Wi-Fi networks in range, or the Wi-Fi radio is off. 1. Turn on the Wi-Fi radio if it is not already on. To turn on Wi-Fi: b. Go to the Home screen: Press the Home key. When Wi-Fi is on, the tablet will look for and display a list of available Wi-Fi networks. c. Open the Settings menu: If a network that you have connected to previously is found, the tablet will connect to it. Tap the Menu key, then touch Settings. d. Open the Wireless & networks menu: Touch Wireless & networks. e. Open the Wi-Fi settings menu: If you don’t see your network in the list, you can force the tablet to re-scan. To scan for networks, tap the Menu key, and then touch Scan. Touch Wi-Fi settings. Page 21 Connecting To The Internet 2. Select an available Wi-Fi network to connect to: In the same Wi-Fi settings menu above, touch a network in the list. English If the network is open, the tablet will prompt you to confirm connection to the network. Touch Connect to confirm. If the network is secured (as indicated by a Lock icon), the tablet will prompt you to enter a password or other credentials. Touch the Wireless password box to show the on-screen keyboard and then use it to enter the password. Touch Connect to confirm. Page 22 When you have successfully connected to a Wi-Fi network, the Notifications bar at the top of the screen will show a Wi-Fi signal indicator. To learn about how to add a Wi-Fi network when it is not in range or when the router is set to obscure the network name (SSID); or to configure advanced Wi-Fi options, please refer to the manual. Connecting To The Internet The Browser application lets you visit webpages and find information on the web. Keep up with the news, your friends, or enjoy video from YouTube™, the world’s most popular video-sharing community. To use Browser, the tablet must be connected to the Internet. Read the section “Connecting to the Internet” to learn how to connect to the Internet. 2 www.mpmaneurope.com 1 To open Browser, touch the Browser icon on the Home screen or in the Launcher. Name Page 23 Description 1 Address bar Displays the address (URL) of the current page. Touch the bar to enter a new address or to search the web. 2 Bookmark icon Touch the Bookmark icon to add or view bookmarks, to view your most visited sites, or to view your browser history. Browsing The Web English ÂÂ Browsing the Web Some common Browser actions are described below. To go to a webpage. English 1. Touch the Address bar at the top of the Browser screen. The keyboard will open automatically. (If the Address bar is not visible, drag the page down to return to the top of the Browser screen.) 2. Use the keyboard to enter the ad-dress (URL) of the webpage (e.g., m.youtube.com. To bookmark a webpage. Bookmark your favorite webpages in order to visit them quickly without entering a URL. 1. Go to the webpage that you want to bookmark 2. Touch the Bookmark icon to the right of the Ad-dress bar. 3. Touch the Add tile. 3. Touch Go to open the webpage. Page 24 Browsing The Web To go to a bookmarked webpage. 1. Touch the Bookmark icon to the right of the Address bar. English 4. If desired, you can modify the name of the bookmark or its location (URL address). Otherwise, touch OK to finish adding the bookmark. 2. Touch a bookmark tile to open it. To open a new browser window. 1. Press the Menu key to show the Browser options. 2. Touch New Window to open a new browser window. Page 25 Browsing The Web To switch between browser windows. English 1. Press the Menu key to show the Browser options. 2. Touch Windows to show a list of open browser windows. 3. Touch the name of a window to switch to it, or touch the “x” to close the window. Page 26 Browsing The Web ÂÂ Managing Applications Downloading and installing new applications to your tablet can extend its functionality in many ways. English You can download and install applications from the included AppsLib store. To open the AppsLib store: 1. Touch the Launcher icon. 2. Touch the AppsLib icon. When installing an application, it will tell you what functions of the phone it needs to control and if it needs access to your data. Make sure you review these access requirements carefully before completing the installation. Page 27 Be especially cautious with applications that request access to many functions or to a significant amount of your data. You are responsible for the results of applications installed on your tablet. Managing Applications You can learn more about AppsLib, and browse applications by visiting their website at www.appslib.com. English Some developers allow you to download and install applications directly from their website. Support for third-party applications is provided by the respective application developer. Mpman is not responsible for the behavior of these applications; please review the description and terms of use provided by third-party developers carefully before installing applications on your tablet. Page 28 To uninstall an application: 1. From the Home screen, tap the Menu key. 2. Touch Settings to open the Settings menu. 3. Touch Applications, and then touch Manage applications to show a list of all applications installed on the tablet. Managing Applications 5. Touch Uninstall. The tablet will prompt you to confirm. English 4. Touch the name of the application you want to uninstall; the Application Info screen will open. 6. Touch OK to uninstall the application. Page 29 Managing Applications ÂÂ Optional Connections Connecting to a Computer English Connect the tablet to a computer to transfer files. 1. Connect your tablet to the computer. With the included USB cable: Plug the small end of the cable into the USB 2.0 Hispeed connector of the tablet. 2. When your tablet is connected, a USB icon will appear in the Notification bar. Drag the Notification bar down to open the notifications panel. Plug the large end of the cable into an available USB 2.0 Hi-speed port on the computer. Page 30 Optional Connections Connecting to a TV Touch USB connected (Internal) to mount the tablet’s built-in storage, then touch Mount when prompted to confirm. When mounted, you can copy files to/from your computer to it. Connect to a TV to enjoy your tablet from the comfort of your living room. An HDMI cable (Type A-to-Type C) is required to connect the tablet to a TV. If a memory card is installed, touch USB connected (External) to mount the card, then touch Mount when prompted to confirm. When mounted, you can copy files to/from the computer to it. Your tablet will be recognized by the computer as a Removable Storage drive. Drag and drop files between your tablet and the computer. To learn more about copying files, please refer to the documentation included with your computer or operating system. Before connecting the tablet to the TV, you will have to adjust a few display settings on the tablet. Make sure that the tablet is set to output over HDMI For optimal visual performance, make sure that the video output resolution of your tablet matches the capabilities of the TV. To adjust the display settings: 1. From the home screen, press the Menu key, and then touch Settings to show the settings menu. 2. Touch Display to show the Display settings. 3. Touch HDMI, and then touch a resolution option that matches the display capabilities of the TV: a. Choose 1080P if your TV is capable of displaying 1080p video. b. Choose 720P if your TV is capable of displaying 720p or 1080i video. Page 31 Optional Connections English 3. Mount the storage drive. English To connect the tablet to the TV: Connecting Headphones 1. Plug the small end of the HDMI cable into the mini HDMI connector of the tablet. Connect a pair of headphones (or earphones) to the tablet to enjoy media in private. 2. Plug the large end of the HDMI cable into the HDMI port on the TV. Lower the volume level of the tablet before connecting headphones, and then slowly raise the volume to a comfortable listening level. 3. Turn on the TV, and set its display mode to the HDMI port that the tablet is connected to. The tablet’s display will be output to the TV screen. If you need help setting the display mode of the TV, please refer to the documentation provided by the TV manufacturer. If there is no sound from the tablet on your TV, you may need to set the HDMI switch sound settings. Page 32 The headphones must have a 3.5 mm (1/8 in) plug. When headphones are connected, speaker output will be disabled automatically. Hearing experts advise against the constant use of personal stereos played at high volume. Constant exposure to high volumes can lead to hearing loss. If you should experience ringing in the ears or hearing loss, discontinue use and seek medical advice. Optional Connections Using the USB Full-Size Adapter Connecting a Keyboard For times when you want to type for an extended period of time, you may want to connect a full-size keyboard to the tablet. The adapter supports one connection at a time. To use a keyboard and mouse simultaneously, you will need to add an external USB hub. Connecting a Storage Device Use the included USB full-size (Type A) adapter to connect a storage device to the tablet (e.g., a USB flash memory drive). This connection supports a maximum storage size of 4 GB. For additional storage capacity, a microSD card can be added to the tablet. HDMI DC 9V RESET microSD Use the included USB full-size (Type A) adapter to connect a keyboard to the tablet. Page 33 Optional Connections English The USB full-size adapter can be used to connect and use USB devices with the tablet. The adapter converts the mini USB port on the tablet into a USB On-the-Go (OTG) connector. You may also use this connection to add a mouse to the tablet. ÂÂ Setting the System Options English Open the system settings menu to adjust how the tablet looks and functions. The settings are grouped by category. Touch a category to open and adjust its settings. Many applications will have their own settings; refer to the documentation provided by the application developer to learn more. Please refer to the manual for a description of the items in the Settings menu. To open the Settings menu: 1. From the Home screen, press the Menu key. 2. Touch Settings to open the Settings menu. Page 34 Setting The System Options ÂÂ Specifications Processor Cortex A8 (1 GHz) RAM 512 MB DDR2 Storage 4GB flash built-in microSD card slot (max. 32GB supported) Display 8.0” TFT LCD (800 x 600), Power Rechargeable Li-poly battery Power Adapter (DC 9V, 2A) Playback Time (hours) * Up to 15 hours music, 4.5 hours video, 6 hours web browsing * Music was tested with a 128 kbps MP3 file; video was tested with a 1920 x 1080 MPEG-4/AVC file; browsing was tested with the screen brightness set to default. Actual playback results may vary. capacitive touchscreen Wi-Fi Networking IEEE 802.11 b/g Video Output Mini HDMI, type C (1080p and 720p supported) Audio Output 3.5 mm headphone PC Interface USB 2.0 Hi-speed Additional Features Front-facing camera (0.3 MP) Built-in microphone Stereo speakers Operating System Page 35 Android™ 2.2 Specifications English Design, specifications, and manual are subject to change without notice. ÂÂ Table des Matières Merci............................................................37 Connexion à Internet.............................56 Contenu de l’emballage............................................37 Caractéristiques.......................................................... 38 Exigences......................................................................56 Connexion à un réseau Wi-Fi.....................................57 Apprendre à connaître le TABLETTE INTERNET.................................................................39 Naviguer sur le Web..................................59 Français L’appareil en un coup d’oeil......................................39 A propos de l’écran tactile........................................47 Film de Protection.................................................47 Actions d’écran tactile.........................................47 A propos du Capteur d’Orientation.........................49 Recharge de la Tablette............................................49 Insertion d’une Carte Mémoire................................ 50 Pour insérer une carte mémoire........................ 50 Pour relâcher et enlever une carte mémoire...51 Pour Démarrer...........................................47 Allumer et éteindre la Tablette .................................47 Allumer ou éteindre l’écran (Veille) . ................ 48 Déverrouillage de l’écran................................... 48 L’Ecran d’Accueil en un Coup d’Oeil...................... 50 A propos des applications.........................................51 Applications Pré-installées...................................52 Installation d’Applications.................................. 53 A propos des Menus................................................... 55 Page 36 Gestion des Applications........................63 Branchements Optionnels.....................66 Se connecter à un Ordinateur...................................66 Branchement sur un Téléviseur..................................67 Branchement des écouteurs.................................... 68 Utilisation de l’Adaptateur pour Hôte/ Clavier USB....................................................................69 Connexion à un Clavier.......................................69 Connexion d’un Dispositif de Stockage.............69 Régler les Options de Système................70 Spécifications............................................71 Table Des Matières ÂÂ Merci Félicitations pour votre achat d’une Tablette Internet. Ce guide est fourni pour vous aider à utiliser votre lecteur sans tarder ; veuillez le lire attentivement et le conserver pour pouvoir vous y référer ultérieurement. Contenu de l’emballage Vérifiez que les articles mentionnés ci-dessous sont présents dans l’emballage. Si l’un de ces articles est manquant, veuillez contacter votre revendeur. Etui de protection Câble USB Adaptateur pour hôte/clavier USB Ecouteurs stéréo professionnels Français Tablette Internet Adaptateur d’alimentation Cet emballage peut contenir des sacs en plastique ou autres matériaux qui présentent un danger pour les enfants. Veillez à éliminer en toute sécurité tous les matériaux d’emballage après l’ouverture. Page 37 Merci Caractéristiques Ecran tactile large de 7.0” Des commandes intuitives optimisées par Android™ OS Naviguez le Web Visitez vos sites web favoris Vérifiez vos e-mails Gardez contact avec vos amis et votre famille Français Regardez des vidéos YouTube™ Parcourez la communauté de partage de vidéos la plus populaire du monde Lisez vos livres favoris Téléchargez des milliers de livres avec Aldiko—le lecteur électronique inclus ** Découvrez de milliers d’applications pour Android™ Téléchargez des applications à partir d’AppsLib—le marché conçu pour tablettes Profitez de votre bibliothèque multimédia n’importe où Une centrale portable lit des formats musique, vidéo et photo populaires Lecteur de carte mémoire microSD Augmentez votre capacité de stockage (jusqu’à 32 Go pris en charge) Caméra intégrée Caméra pratique avant-face Détection de l’orientation automatique Lisez comme vous le souhaitez ; l’écran s’ajuste automatiquement ! * Nécessite un câble HDMI facultatif. La lecture vidéo HD 1080p nécessite un fichier vidéo codé à 1080p. La qualité de contenu vidéo sur Internet sera affecté par la qualité et la condition de la source et de votre connexion au réseau. ** Si vous voulez lire des livres dans le format ePub, cela nécessite l’application de lecteur électronique Aldiko incluse.. Branchez-vous à l’Internet sans fil Réseautage Haut Débit Wi-Fi 802.11 b/g Sortie HDMI™ à votre téléviseur * Profitez de vidéos, de photos et plus dans le confort de votre salon Page 38 Merci ÂÂ Apprendre à connaître le Tablette Internet Nom Description 1 Touche Volume – Appuyez sur pour augmenter le niveau de volume. 2 Touche Volume + Appuyez sur pour diminuer le volume. 3 Touche Marche/ Arrêt Appuyez sur pour allumer l’appareil, ou de tourner l’écran sur et en dehors. Appuyez sur la touche pour accéder au menu de mise hors tension. 4 Haut-parleurs Haut-parleurs stéréo. Page 39 Français L’appareil en un coup d’oeil Apprendre À Connaître Le Tablette Internet Nom Description 5 Caméra Caméra face à l'avant 6 Touche Programmable Accueil Appuyer pour revenir à l’écran d’accueil. Touche Programmable Menu Toucher pour visualiser le menu d’option. 7 Français 8 Touche Programmable Retour Page 40 Toucher et maintenir enfoncé pour visualiser une liste des applications récemment utilisées ; toucher une application dans la liste pour la lancer. Remarque : Quand vous Touchez la touche Menu à l’intérieur d’une application, vous verrez les options pour cette application. Pour visualiser les options de système Android, touchez la touche Menu à partir de l’écran d’accueil. 5 6 7 8 Appuyer pour revenir à l'écran précédent. Si le clavier est sur l'écran, toucher pour fermer le clavier. Apprendre À Connaître Le Tablette Internet Chargez les cartes mémoire microSD externes içi. 10 Touche Réinitialisation Appuyer pour réinitialiser la tablette si elle se gèle ou ne se comporte pas normalement. (Utilisez un trombone ou autre petit objet pour appuyer délicatement sur cette touche.) Branchez à un ordinateur pour transférer des données (par ex., musique, vidéos, photos, fichiers). 13 Connecteur jack pour casque Connexion de sortie audio pour écouteurs. 14 Prise HDMI (Type C min) Branchez à un téléviseur ou à un autre afficheur. Page 41 DC IN 9V 11 12 13 14 HDMI 12 Port USB 2.0 Hi-Speed (Grande vitesse) 10 DC 9V 11 Prise Chargez et alimentez la tablette avec d'Alimentation l'adaptateur d'alimentation inclus. (Entrée CC) 9 RESET Fente pour carte microSD microSD 9 Description Français Nom Remarque : La sortie du haut-parleur est automatiquement désactivée lorsque les écouteurs sont branchés au lecteur. Apprendre À Connaître Le Tablette Internet A propos de l’écran tactile Votre tablette est équipé d’un écran tactile facile à utiliser qui permet d’accéder aux fonctions de la tablette. Servez-vous du bout des doigts pour toucher une icône de commande affichée sur l’écran. Si vous touchez et maintenez l’écran, cet appui sera enregistré comme un appui continu. Français Pour éviter d’endommager l’écran, n’appuyez pas excessivement ou avec autre chose que votre doigt. Pour une meilleure réponse, assurez-vous que vos mains sont propres avant d’utiliser les commandes de l’écran tactile. Pellicule de protection Une pellicule fine est appliquée sur l’écran tactile pour le protéger durant l’expédition. Il convient d’ôter cette pellicule de plastique avant utilisation. Pour ce faire, saisissez simplement un angle de la pellicule et tirez doucement dessus pour la décoller de l’écran. Page 42 Actions relatives à l’écran tactile Il est possible de contrôler les fonctions de la tablette à l’aide de l’écran tactile. Pour cela, manipulez du doigt les icônes, les touches, les lignes des menus, le clavier à l’écran, et autres éléments apparaissant sur l’écran. Il vous est possible d’effectuer les actions suivantes par simple placement du bout du doigt sur l’écran. Toucher : Permet d’activer un élément figurant sur l’écran (tels que icônes d’applications, touches, options de menu, et lettres ou symboles du clavier apparaissant sur l’écran) ; il suffit de les toucher du doigt. Pression continue : Certains éléments figurant sur l’écran induisent une autre action lorsqu’on maintient la touche appuyée (par exemple : ouverture d’un sous-menu, ou activation de la fonction « Déplacer »). Pour provoquer le maintien sur un élément, touchez ce dernier et ne levez pas le doigt jusqu’au déclenchement de l’action. Apprendre À Connaître Le Tablette Internet Permet de faire déplacer un élément affiché sur l’écran pour lui faire changer de position. (Par exemple, déplacement sur l’écran d’accueil de l’icône de lancement d’une application.) Pour déplacer un élément, maintenez la pression sur ce dernier pendant un instant, puis sans le relâcher, faites bouger votre doigt le long de l’écran jusqu’à ce que l’article atteigne la destination que vous lui avez choisie. Balayer : Permet de parcourir l’écran verticalement pour faire défiler une liste. Il est possible sur certains écrans de procéder à cette manipulation horizontalement pour changer de vue. Pour effectuer la manœuvre, touchez l’écran puis, sans lever le doigt, déplacez rapidement ce dernier le long de l’écran. N’arrêtez pas votre doigt sur l’écran au point de contact initial, car un tel mouvement pourrait entraîner la saisie accidentelle d’un élément. Page 43 Doublefrappe : Pour agrandir une page web ou une autre application, frappez rapidement l’écran deux fois à l’emplacement de celle-ci (l’application concernée doit pouvoir supporter la fonction double frappe/zoom). Lorsque l’on se trouve au sein du navigateur, la double frappe sur une portion de page web déclenchera un agrandissement de cette portion par le navigateur puis son ajustement à la largeur de l’écran. Français Déplacer : Apprendre À Connaître Le Tablette Internet A propos du Capteur d’Orientation La tablette contient un capteur qui changera automatiquement l’orientation de la plupart des écrans quand vous faites pivoter la tablette. Le capteur fonctionne mieux quand la tablette est pivotée perpendiculairement au sol (par ex., quand la tablette est maintenue debout et non à plat sur son dos). Recharge de la Tablette La tablette a une batterie rechargeable intégrée lithiumpolymère. Avant d’utiliser la tablette, la batterie devrait être complètement rechargée. L’indicateur de Statut s’allumera bleu lorsque la batterie est complètement rechargée. Pour charger la batterie : 1. Branchez une extrémité de l’adaptateur d’alimentation inclus dans une prise CA 100-240V. Français 2. Branchez l’autre extrémité de l’adaptateur d’alimentation inclus dans la prise d’Alimentation sur la tablette. 3. Débranchez l’adaptateur d’alimentation quand la tablette est complètement chargée. e capteur d’orientation peut être allumé ou éteint dans le menu de paramètres de Display (Affichage). Page 44 Apprendre À Connaître Le Tablette Internet 2. Faites glisser la carte dans la fente à ressort. Poussez la carte jusqu’à ce qu’elle s’enclenche en place. N’essayez pas d’insérer des objets autres qu’une carte de mémoire microSD dans la fente de carte. Une carte mémoire compatible devrait rentrer facilement dans la fente de carte ; si vous rencontrez de la résistance, vérifiez l’alignement de la carte. N’essayez pas de forcer la carte pour qu’elle rentre. Insertion d’une Carte Mémoire La tablette accepte les cartes mémoire microSD. Insérez une carte mémoire dans la fente de carte microSD pour : Augmenter la capacité mémoire de votre tablette Lire les fichiers médias stockés sur la carte mémoire (par exemple fichiers musique, vidéo, photo). Pour insérer une carte mémoire : 1. Alignez la carte mémoire avec la fente de carte. Les contacts métalliques de la carte mémoire devraient être vers le haut vers l’écran LCD (ACL). Page 45 Evitez de toucher les contacts en or de la carte mémoire. Pour relâcher et enlever une carte mémoire : 1. DEMONTEZ la carte mémoire. a.A partir de l’écran d’accueil, touchez la touche Menu, et ensuite touchez Settings (Paramètres) pour afficher le menu de paramètres. b. Touchez Stockage de Carte SD & de Dispositif (SD card & Device storage) pour afficher les paramètres de stockage de carte SD & de dispositif. c. Touchez Unmount SD card (Démonter carte SD) pour préparer la carte mémoire pour enlèvement en toute sécurité. Apprendre À Connaître Le Tablette Internet Français La pile utilisée dans cet appareil peut présenter un risque d’incendie ou de brûlure chimique en cas de mauvaise manipulation. Ne pas démonter, incinérer ou chauffer le dispositif. Ne laissez pas l’appareil dans un endroit exposé à la lumière directe du soleil, ou dans une voiture aux fenêtres fermées. Ne branchez pas l’appareil à une source de courant autre que celle indiquée sur l’étiquette car cela pourrait entraîner un incendie ou une électrocution. 2. Poussez la carte plus loin dans la fente jusqu’à ce que vous entendiez un petit clic. La carte sortira de la fente. 3. Prenez la carte par ses bords pour l’enlever. Pour éviter des dommages et une corruption de données, ne retirez pas la carte mémoire lorsque des données sont en cours d’écriture ou de lecture à partir de la carte. Par exemple, ne retirez pas une carte pendant la lecture d’un fichier de musique stocké sur la carte. Français Page 46 Apprendre À Connaître Le Tablette Internet ÂÂ Pour Démarrer Allumer et éteindre la Tablette Pour allumer la tablette : 2. Touchez Power off (Arrêt) sur l’écran. Un message de confrmation apparaîtra. Appuyer et maintenir la touche Power (Marche/Arrêt) enfoncée jusqu’à ce que l’écran LCD (ACL) s’allume. Attendez jusqu’à ce que l’écran d’Accueil apparaîsse ; la tablette est maintenant prête à être utilisée. Pour éteindre la tablette : Français 1. Appuyer et maintenir la touche Power (Marche/ Arrêt) enfoncée jusqu’à ce que le menu d’Options de Dispositif apparaîsse. 3. Touchez OK pour éteindre la tablette. Page 47 Pour Démarrer Allumer ou éteindre l’écran (Veille) Déverrouillage de l’écran Quand la tablette est allumée, vous pouvez éteindre l’écran pour conserver la batterie. Appuyez simplement sur la touche Power (Marche/Arrêt) une fois pour éteindre l’écran. Appuyez de nouveau sur la touche Power (Marche/Arrêt) pour rallumer l’écran. Quand l’écran s’éteint, vous devrez déverrouiller l’écran quand vous le rallumer. Pour déverrouiller l’écran, faites glisser l’icône lock (verrouillage) à travers l’écran vers l’icône haut-parleur. Français Pour conserver la batterie, l’écran peut être réglé pour s’éteindre automatiquement quand la tablette n’est pas utilisée (entre 15 secondes et 30 minutes). Cette option Screen timeout (Temporisation d’Ecran) peut être trouvée dans le menu Display settings (Paramètres d’affichage). Page 48 Pour Démarrer Français Si un mot de passe a été paramétré, saisissez le mot de passe pour finir de déverrouiller l’écran. Le mot de passe de Déverrouillage d’Ecran peut être paramétré dans le menu de paramètres Location and security (Emplacement et sécurité). Page 49 Pour Démarrer L’Ecran d’Accueil en un Coup d’Oeil Nom 1 L’écran d’accueil est le point de départ pour toutes les fonctions de votre tablette. Barre de notification 1 2 Français Page 50 Montre les icônes de notifications, comme les messages et alarmes ; faites glisser la barre vers le bas de l’écran pour ouvrir le panneau complet de Notifications. Le côté droit de la barre montre aussi les informations d’état comme l’heure, le niveau de batterie, et la force de signal de réseau. Remarque : Vous pouvez appuyer sur la touche Menu et ensuite toucher Notifications pour ouvrir le panneau complet de Notifications à partir de l’écran d’Accueil. 3 4 Description 2 Gadgets Des gadgets sont de petites applications que vous pouvez utiliser directement à partir de l’écran d’accueil. Pour ajouter des gadgets à l’écran d’accueil, touchez et tenez un emplacement vide sur l’écran d’accueil ; le menu Add to Home screen (Ajouter à Ecran d’Accueil) apparaîtra. Touchez Widgets (Gadgets) ; ensuite choisissez un gadget à partir du menu. Pour Démarrer Nom 3 Onglet de Lancement Description Ouvrez le Dispositif de Lancement pour visualiser une liste de toutes les applications installées sur la tablette. Touchez l’onglet de Lancement pour ouvrir le Dispositif de Lancement. A propos des applications To open an application, touch the application icon on the Pour ouvrir une application, touchez l’icône d’application sur l’écran d’accueil ou dans le Dispositif de Lancement. Ecran de Dispositif de Lancement : Remarque : Vous pouvez faire glisser vers la gauche et la droite pour visualiser des écrans supplémentaires. Icônes Touchez une icône pour ouvrir une application ou un dossier Français 4 L’écran ci-dessus est seulement à titre indicatif. Mpman se réserve le droit de modifier et d’améliorer la liste finale d’applications disponibles sur la tablette. Page 51 Pour Démarrer Applications Pré-installées Quelques applications ont été installées sur votre tablette pour votre confort. Ces applications comprennent : Effectuer des opérations mathématiques simples. Français Visualiser l'heure actuelle, ou régler une alarme. Prendre des photos ou des vidéos avec la caméra face à l'avant. Télécharger et lire des milliers de livres électroniques. Prend en charge ePub standard. Vérifier votre courrier électronique. Trouver et afficher des fichiers d'installation d'app (APK) sur votre tablette. Visualiser des photos et lire des vidéos. Rechercher, télécharger, et installer des applications à partir du magasin AppsLib. Lire de la musique. Naviguer sur le Web. Accéder au menu des Paramètres pour régler les options de la tablette. Lancer la page mobile de navigation YouTube™ pour regarder des vidéos internet. Page 52 Pour Démarrer Installation d’Applications Vous pouvez aussi télécharger et installer des applications supplémentaires à partir de AppsLib, du navigateur web, ou d’autres sources. La tablette doit être réglée de façon à permettre l’installation d’applications à partir de sources non marchandes. L’option de sources Inconnues peut être réglée dans le menu Application settings (Paramètres d’Application). A propos des Menus Il y a deux types de menus utilisés par la tablette. 1. Menus d’Option. Les menus d’option contiennent des éléments relatifs à l’écran actuel ou à l’application actuelle. Pour visualiser un menu d’option, appuyez sur la touche Menu. Français La prise en charge pour les applications de tiers est fournie par leurs développeurs d’applications respectifs. Mpman n’est pas responsable pour le comportement de ces applications ; veuillez attentivement passer en revue la description et les conditions d’utilisation fournies par les développeurs tiers avant d’installer des applications sur votre tablette. Pas tous les écrans ou applications ont un menu d’option ; si un menu n’existe pas, rien ne se passera si vous appuyez sur la touche Menu. Page 53 Pour Démarrer 2. Menus de Contexte. Un menu de contexte apparaîtra. Les menus de contexte contiennent des éléments relatifs à un élément spécifique sur l’écran. Pour visualiser un menu de contexte, touchez et tenez un élément sur l’écran. Touchez & tenez Video(3). Français Pas tous les éléments ont un menu de contexte ; si un menu n’existe pas, rien ne se passera si vous touchez et tenez l’élément. Page 54 Pour Démarrer Les icônes qui apparaîssent dans la barre de Notification en haut de l’écran vous alertent quand de nouveaux messages ou alarmes arrivent ou quand d’autres évènements d’application se produisent. Visualisez et répondez aux notifications en ouvrant le panneau complet de Notifications. Faites glisser la barre de Notification vers le bas de l’écran pour ouvrir le panneau de Notifications à partir de n’importe quel écran, ou ; Sur l’écran d’Accueil, appuyez sur la touche Menu et ensuite touchez Notifications pour ouvrir le panneau de Notifications. Page 55 1. Pour répondre à une notification : Touchez une notification dans la liste ; le panneau de Notifications se fermera et l’application associée avec la notification se lancera. 2. Pour effacer toutes les notifications : Touchez le bouton Clear (Effacer) en haut à droite du panneau de Notifications ; le panneau se fermera et toutes les notifications seront effacées. 3. Pour fermer le panneau de Notific: Faites glisser le levier en bas du panneau de Notifications vers le haut de l’écran, ou ; Appuyez sur la touche Back (Retour). Pour Démarrer Français A propos des Notifications ÂÂ Connexion à Internet Cette tablette peut utiliser des réseaux de données Wi-Fi pour se connecter à l’Internet. La technologie Wi-Fi sans fil peut fournir un accès Internet à des distances de plus de 300 pieds ; par contre cette distance peut être affectée par votre environnement et le routeur Wi-Fi. Français Exigences 2. Les paramètres de réseau de routeur sans fil Pour se connecter à l’Internet, vous aurez besoin des choses suivantes : Vous aurez besoin de savoir le nom de votre réseau (SSID), ainsi que le mot de passe ou autres informations si votre réseau est sécurisé. Ces paramètres peuvent généralement être trouvé sur la page Web d’administration de votre routeur sans fil. 1. Un routeur sans fil ou un point d’accès avec une connexion à l’Internet à haut débit Le routeur sans fil doit prendre en charge les connexions Wi-Fi 802.11b/g. Si vous avez un routeur qui prend en charge 802.11n, assurez-vous qu’il a été configuré pour aussi accepter des connexions 802.11b/g. Une vitesse de connexion minimum de 64 Kbps est recommandée. Des vitesses plus rapides permettront une meilleure expérience Internet. Page 56 Veuillez vous référer à la documentation de votre routeur sans fil pour de l’aide, ou veuillez demander à votre administrateur de réseau pour des détails. Vous pouvez trouver des réseaux Wi-Fi ouverts, ou des “points d’accès sans fil.” Ces réseaux sont générallement configurés de sorte que vous pouvez simplement vous y connecter sans avoir besoin de connaître leurs paramètres ; la tablette obtiendra automatiquement toutes les informations dont elle a besoin du routeur. Connexion À Internet Connexion à un réseau Wi-Fi e. Assurez-vous que la case d’option Wi-Fi est cochée : Touchez Wi-Fi. La barre de Notification affiche des icônes qui indiquent le statut Wi-Fi de votre tablette. Notification qu'un réseau Wi-Fi ouvert est à portée. Branché à un réseau Wi-Fi (les ondes indiquent la puissance de connexion). [pas d’icône] Il n'y a pas de réseaux Wi-Fi à portée, ou la radio Wi-Fi est éteinte. a. Allez à l’écran d’Accueil : Appuyez sur la touche Home (Accueil). b. Ouvrez le menu des Paramètres : Touchez la touche Menu, et ensuite touchez Settings (Paramètres). c. Ouvrez le menu Wireless & networks (Sans fil & réseaux) : Touchez Wireless & networks (Sans fil & réseaux). d. Ouvrez le menu des paramètres Wi-Fi : Touchez Wi-Fi settings (Paramètres Wi-Fi). Page 57 Français 1. Allumer la radio Wi-Fi si elle n’est pas déjà allumée. Pour allumer Wi-Fi : Quand la Wi-Fi est activée, la tablette recherchera et affichera une liste de réseaux Wi-Fi disponibles. Si un réseau auquel vous vous êtes connectés précédemment est trouvé, la tablette s’y connectera. Si vous ne voyez pas votre réseau dans la liste, vous pouvez forcer la tablette à re-balayer. Pour rechercher des réseaux, touchez la touche Menu, et ensuite touchez Scan (Balayer). Connexion À Internet 2. Sélectionner un réseau Wi-Fi disponible auquel vous pouvez vous connecter : Dans le même menu de paramètres Wi-Fi ci-dessus, touchez un réseau dans la liste. Si le réseau est ouvert, la tablette vous invitera à confirmer la connextion au réseau. Touchez Connect (Connexion) pour confirmer. Français Si le réseau est sécurisé (comme indiqué par une icône de Verrouillage), la tablette vous invitera à entrer un mot de passe ou d’autres informations. Touchez la case de mot de passe Sans fil pour afficher le clavier sur l’écran et ensuite utilisez-le pour saisir le mot de passe. Touchez Connect (Connexion) pour confirmer. Page 58 Quand vous vous êtes connectés à un réseau Wi-Fi avec succès, la barre de Notifications en haut de l’écran affichera un indicateur de signal Wi-Fi. Pour apprendre comment ajouter un réseau Wi-Fi quand il n’est pas à portée ou quand le routeur est réglé pour cacher le nom de réseau (SSID) ; ou pour configurer des options Wi-Fi avancées, veuillez vous référer au manuel. Connexion À Internet ÂÂ Naviguer sur le Web L’application de Navigateur vous laisse visiter des pages Web et trouver des informations sur le Web. Tenez-vous au courant des nouvelles, gardez le contact avec vos amis, ou profitez des vidéos sur YouTube™, la communauté de partage de vidéos la plus populaire au monde. Pour utiliser le Navigateur, la tablette doit être connectée à l’Internet. Lisez la section “Connexion à l’Internet” pour apprendre comment vous connecter à l’Internet. 2 www.mpmaneurope.com 1 Français Pour ouvrir le Navigateur, touchez l’icône de Navigateur sur l’écran d’Accueil ou dans le Dispositif de Lancement. Nom Page 59 Description 1 Barre d'adresse Affiche l’adresse (URL) de la page actuelle. Touchez la barre pour saisir une nouvelle adresse ou pour rechercher le web. 2 Icône de Signet Touchez l’icône Bookmark (Signet) pour ajouter ou visualiser des signets, pour visualiser vos sites les plus visités, ou pour visualiser votre historique de navigation. Naviguer Sur Le Web Quelques actions de Navigateur communes sont décrites ci-dessous. Pour aller à une page web. Français 1. Touchez la Barre d’adresse en haut de l’écran de Navigateur. Le clavier s’ouvrira automatiquement. (Si la barre d’Adresse n’est pas visible, faites glisser la page vers le bas pour retourner vers le haut de l’écran de Navigateur.) 2. Utilisez le clavier pour saisir l’adresse (URL) de la page web (par ex., m.youtube.com. Pour mettre une page web en signet Mettez vos pages web favorites en signet pour les visiter rapidement sans saisir l’URL. 1. Allez à la page web que vous souhaitez mettre en signet. 2. Touchez l’icône Bookmark (Signet) à droite de la barre d’Adresse. 3. Touchez l’onglet Add (Ajouter). 3. Touchez Go (Aller) pour ouvrir la page web Page 60 Naviguer Sur Le Web Pour aller à une page web mise en signet. 1. Touchez l’icône Bookmark (Signet) à droite de la barre d’Adresse. 2. Touchez un onglet de signet pour l’ouvrir. Pour ouvrir une nouvelle fenêtre de navigation. 1. Appuyez sur la touche Menu pour afficher les options de Navigateur. 2. Touchez New Window (Nouvelle Fenêtre) pour ouvrir une nouvelle fenêtre de navigation. Page 61 Naviguer Sur Le Web Français 4. Si vous le désirez, vous pouvez modifier le nom du signet ou son emplacement (adresse URL). Sinon, touchez OK pour finir d’ajouter le signet. Pour basculer entre les fenêtres de navigation. 1. Appuyez sur la touche Menu pour afficher les options de Navigateur. 2. Touchez Windows (Fenêtres) pour afficher une liste des fenêtres de navigation ouvertes. Français 3. Touchez le nom d’une fenêtre pour y aller, ou touchez le “x” pour fermer la fenêtre. Page 62 Naviguer Sur Le Web ÂÂ Gestion des Applications Le téléchargement et l’installation de nouvelles applications sur votre tablette peuvent étendre ses fonctionnalités de plusieures façons. Vous pouvez télécharger et installer des applications à partir du magasin AppsLib inclus. Pour ouvrir le magasin AppsLib : 1. Touchez l’icône Launcher (Dispositif de Lancement). Français 2. Touchez l’icône AppsLib. Quand vous installez une application, il vous sera montré quelles fonctions du téléphone elle a besoin de contrôler et si elle a besoin d’un accès à vos données. Assurezvous de passer soigneusement en revue ces exigences d’accès avant de terminer l’installation. Page 63 Faites très attention avec les applications qui demandent l’accès à beaucoups de fonctions ou à un montant important de vos données. Vous êtes responsable pour les résultats des applications installées sur votre tablette. Gestion Des Applications Vous pouvez en apprendre plus à propos de AppsLib, et parcourir les applications en visitant leur site web sur www.appslib.com. Quelques développeurs vous permettent de télécharger et d’installer des applications directement à partir de leur site web. Français La prise en charge pour les applications de tiers est fournie par le développeur d’application respectif. Mpman n’est pas responsable pour le comportement de ces applications ; veuillez attentivement passer en revue la description et les conditions d’utilisation fournies par les développeurs tiers avant d’installer des applications sur votre tablette Page 64 Pour désinstaller une application : 1. A partir de l’écran d’Accueil, touchez la touche Menu. 2. Touchez Settings (Paramètres) pour ouvrir le menu Settings (Paramètres). 3. Touchez Applications, et ensuite touchez Manage applications (Gérer applications) pour afficher une liste de toutes les applications installées sur la tablette. Gestion Des Applications 5. Touchez Uninstall (Désinstaller). La tablette vous invitera à confirmer. Français 4. Touchez le nom de l’application que vous souhaitez désinstaller ; l’écran d’Informations concernant l’Application s’ouvrira. 6. Touchez OK pour désinstaller l’application. Page 65 Gestion Des Applications ÂÂ Branchements Optionnels Se connecter à un Ordinateur Branchez la tablette à un ordinateur pour transférer des fichiers. 1. Brancher votre tablette à l’ordinateur. 2. Quand votre tablette est branchée, une icône USB apparaîtra dans la barre de Notification. Faites glisser la barre de Notification vers le bas pour ouvrir le panneau de notifications. Avec le câble USB fourni : Français Branchez la petite extrémité du câble dans le connecteur USB 2.0 Hi-speed (Grande vitesse) de la tablette. Branchez la grande extrémité du câble dans un port USB 2.0 grande vitesse disponible sur votre ordinateur. Page 66 Branchements Optionnels 3. Monter le lecteur de stockage. Branchement sur un Téléviseur Touchez USB connected (Branché USB) (Interne) pour monter le stockage intégré de la tablette, ensuite touchez Mount (Monter) quand on vous invite à confirmer. Quand monté, vous pouvez copier les fichiers vers/de votre ordinateur vers celui-ci. Branchez à un téléviseur pour profiter de votre tablette dans le confort de votre salon. Un câble HDMI (Type A à Type C) est requis pour brancher la tablette à un téléviseur. Votre tablette sera reconnue par l’ordinateur en tant que lecteur de Stockage Amovible. Faites glisser et déposez des fichiers entre votre tablette et l’ordinateur. Pour en apprendre plus concernant la copie de fichiers, veuillez vous référer à la documentation incluse avec votre ordinateur ou système d’exploitation. Avant de connecter votre tablette au téléviseur, vous aurez à régler quelques-uns des paramètres d’affichage sur la tablette. Assurez-vous que la tablette est réglée à sortie sur HDMI. Pour une performance visuelle optimale, assurezvous que la résolution de sortie vidéo de votre tablette correspond à la capacité de la télévision. Pour ajuster les paramètres d’affichage : 1. A partir de l’écran d’accueil, appuyez sur la touche Menu, et ensuite touchez Paramètres (Settings) pour afficher le menu de paramètres. 2. Touchez Display (Affichage) pour afficher les paramètres d’Affichage. Page 67 Branchements Optionnels Français Si une carte mémoire est installée, touchez USB connected (Branché USB) (Externe) pour monter la carte, et ensuite touchez Mount (Monter) quand on vous invite à confirmer. Quand monté, vous pouvez copier les fichiers vers/de votre ordinateur vers celle-ci. 3. Touchez HDMI, et ensuite touchez une option de résolution qui correspond à la capacité d’affichage de la télévision : Choisissez 1080P si votre TV est capable d’afficher une vidéo 1080p. Choisissez 720P si votre TV est capable d’afficher une vidéo 720p ou 1080i. Pour brancher la tablette au téléviseur : 1. Branchez la petite extrémité du câble HDMI dans le mini connecteur HDMI de la tablette. Français 2. Branchez la grosse extrémité du câble HDMI dans le port HDMI sur le téléviseur. 3. Allumez le téléviseur, et réglez son mode d’affichage au port HDMI auquel la tablette est branchée. L’affichage de la tablette sera sur l’écran du téléviseur. Si vous avez besoin d’aide pour configurer le mode d’affichage du téléviseur, veuillez vous référer à la documentation fournie par le fabricant du téléviseur. Branchement des écouteurs Brachez une paire d’écouteurs (ou un casque) sur la tablette pour profiter des médias en privé. Diminuez le niveau de volume de la tablette avant de brancher les écouteurs, et ensuite augmentez lentement le volume à un niveau d’écoute confortable. Les écouteurs doivent avoir une prise 3,5 mm (1/8 po). Quand les écouteurs sont branchés, la sortie hautparleur sera automatiquement désactivée. Les spécialistes de l’audition déconseillent l’utilisation prolongée d’écouteurs stéréo à un niveau de volume élevé. L’écoute à un niveau de volume élevé constant peut provoquer des pertes auditives. Si vous souffrez de bourdonnements dans les oreilles ou de perte d’audition, arrêtez d’utiliser les écouteurs et consultez votre médecin. S’il n’y a pas de son de la tablette sur votre TV, vous pouvez avoir besoin de régler les paramètres de son de commutateur HDMI. Page 68 Branchements Optionnels L’adaptateur pleine grandeur USB peut être utilisé pour brancher et utiliser des dispositifs USB avec la tablette. L’adaptateur convertit le mini port USB sur la tablette en un connecteur On-the-Go (Instantané) (OTG) USB. Connexion à un Clavier Pour les moments où vous voulez tapper pendant une longue période de temps, vous pouvez vouloir connecter un clavier pleine grandeur à la tablette. L’adaptateur prend en charge une connexion à la fois. Pour utiliser un clavier et une souris simultanément, vous aurez besoin d’ajouter un concentrateur USB externe. Connexion d’un Dispositif de Stockage Utilisez l’adaptateur (Type A) pleine grandeur USB inclus pour brancher un dispositif de stockage à la tablette (par ex., un lecteur de mémoire flash USB).. Cette connexion prend en charge une taille de stockage maximum de 4 Go. Pour une capacité de stockage supplémentaire, une carte microSD peut être ajoutée à la tablette. HDMI DC 9V RESET microSD Utilisez l’adaptateur (Type A) pleine grandeur USB inclus pour brancher un clavier à la tablette. Vous pouvez aussi utiliser cette connexion pour ajouter une souris à la tablette. Page 69 Branchements Optionnels Français Utilisation de l’Adaptateur pour Hôte/Clavier USB ÂÂ Régler les Options de Système Ouvrez le menu de paramètres de système pour régler l’aspect et les fonctions de la tablette. Beaucoup d’applications auront leurs propres paramètres ; reportez-vous à la documentation fournie par le développeur d’application pour en apprendre plus. Pour ouvrir le menu des Paramètres : Français 1. A partir de l’écran d’Accueil, appuyez sur la touche Menu. 2. Touchez Settings pour ouvrir le menu Settings (Paramètres). Les paramètres sont groupés par catégorie. Touchez une catégorie pour ouvrir et régler ses paramètres Veuillez vous reporter au manuel pour une description des éléments dans le menu Settings (Paramètres). Page 70 Régler Les Options De Système ÂÂ Spécifications La conception, les caractéristiques et le manuel sont sujets à modifications sans préavis. Cortex A8 (1 GHz) Mémoire Vive 512 MB DDR2 Stockage 4Go flash intégré Fente de carte microSD (32 Go maxi pris en charge) Affichage Écran tactile LCD (ACL) TFT de 8,0 po. (800 x 600), capacitif Temps de Lecture Jusqu’à 15 heures de musique, 4.5 (heures) * heures de vidéo, 6 heures de navigation web * La musique a été testée avec un fichier MP3 128 kbps ; la vidéo a été testée avec un fichier MPEG-4/AVC de 1920 x 1080 ; la navigation a été testée avec la luminosité de l’écran réglée au défaut. Le temps de lecture réel peut varier. Français Processeur Réseautage Wi-Fi IEEE 802.11 b/g Sortie Vidéo Mini HDMI, type C (1080p et 720p pris en charge) Sortie audio Ecouteurs 3,5 mm Interface PC USB 2.0 Hi-Speed (Grande vitesse) Caractéristiques supplémentaires Caméra avant-face (0,3 MP) Microphone intégré Haut-parleurs stéréo Système d'Exploitation Android™ 2.2 Alimentation Pile Li-poly rechargeable Adaptateur d’Alimentation (CC 9V, 2A) Page 71 Spécifications For more information please check our website Pour de plus amples informations, veuillez consulter notre site Web www.mpmaneurope.com