1
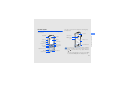
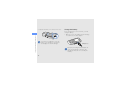
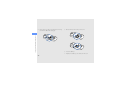
Samsung B2100
user manual
Instructional icons
using this
manual
Before you start, familiarise yourself with the icons
you will see in this manual:
Warning—situations that could cause
injury to yourself or others
This user manual has been specially designed to
guide you through the functions and features of your
mobile phone. To get started quickly,
refer to “introducing your mobile phone,”
“assembling and preparing your mobile phone,”
and “using basic functions.”
Caution—situations that could cause
damage to your phone or other equipment
Note—notes, usage tips, or additional
information
X
ii
Refer to—pages with related information;
for example: X p. 12 (represents “see
page 12”)
Copyright information
→
[
]
Square brackets—phone keys; for
example: [
] (represents the Power/
Menu exit key)
<
>
Angled brackets—softkeys that control
different functions at each screen; for
example: <OK> (represents the OK
softkey)
Rights to all technologies and products that
comprise this device are the property of their
respective owners:
• Bluetooth® is a registered trademark of the
Bluetooth SIG, Inc. worldwide—Bluetooth QD
ID: B014857.
• Java™ is a trademark of Sun Microsystems, Inc.
• Windows Media Player® is registered trademark
of Microsoft Corporation.
iii
using this manual
Followed by—the order of options or
menus you must select to perform a step;
for example: In Menu mode, select
Messages → Create new message
(represents Messages, followed by
Create new message)
safety and usage information .................. 2
contents
Safety warnings .......................................... 2
Safety precautions ...................................... 4
Important usage information ....................... 7
introducing your mobile phone ............. 10
Unpack ..................................................... 10
Phone layout ............................................. 11
Keys ......................................................... 12
Display ...................................................... 14
Icons ......................................................... 14
assembling and preparing your mobile
phone ...................................................... 16
Install the SIM card and battery ................. 16
Charge the battery .................................... 18
Insert a memory card (optional) ................. 19
using basic functions ............................. 21
Turn your phone on and off ....................... 21
iv
using advanced functions ..................... 32
Use advanced call functions ..................... 32
Use advanced Phonebook functions ......... 34
Use advanced messaging functions .......... 36
Use advanced music functions ................. 37
using tools and applications ................. 40
Use the Bluetooth wireless feature ............ 40
Activate and send an SOS message ......... 42
Activate the mobile tracker ........................ 43
Record and play voice memos .................. 43
Edit images ............................................... 44
Use Java-powered games and
applications .............................................. 47
View world clocks ..................................... 48
Set and use alarms ................................... 49
Use the calculator ..................................... 50
Convert currencies or measurements ....... 50
Set a countdown timer ............................. 50
Use the stopwatch .................................... 50
Create a new task ..................................... 51
Create a text memo .................................. 51
Manage your calendar .............................. 51
contents
Access menus .......................................... 22
Customise your phone .............................. 22
Use basic call functions ............................ 24
Send and view messages ......................... 25
Add and find contacts ............................... 27
Use basic camera functions ...................... 28
Listen to music ......................................... 29
Browse the web ........................................ 30
troubleshooting ........................................ a
index ......................................................... d
v
safety and
usage
information
Comply with the following precautions to avoid
dangerous or illegal situations and ensure peak
performance of your mobile phone.
2
Safety warnings
Keep your phone away from small
children and pets
Keep your phone and all accessories out of the
reach of small children or animals. Small parts may
cause choking or serious injury if swallowed.
Protect your hearing
Listening to a headset at high volumes
can damage your hearing. Use only the
minimum volume setting necessary to
hear your conversation or music.
Install mobile phones and equipment
with caution
Handle and dispose of batteries and
chargers with care
• Use only Samsung-approved batteries and
chargers specifically designed for your phone.
Incompatible batteries and chargers can cause
serious injuries or damage to your phone.
• Never dispose of batteries or phones in a fire.
Follow all local regulations when disposing used
batteries or phones.
Avoid interference with pacemakers
Maintain a minimum of 15 cm (6 inches) between
mobile phones and pacemakers to avoid potential
interference, as recommended by manufacturers
and the independent research group, Wireless
Technology Research. If you have any reason to
suspect that your phone is interfering with a
pacemaker or other medical device, turn off the
phone immediately and contact the manufacturer of
the pacemaker or medical device for guidance.
3
safety and usage information
Ensure that any mobile phones or related equipment
installed in your vehicle are securely mounted. Avoid
placing your phone and accessories near or in an air
bag deployment area. Improperly installed wireless
equipment can cause serious injury when air bags
inflate rapidly.
• Never place batteries or phones on or in heating
devices, such as microwave ovens, stoves, or
radiators. Batteries may explode when
overheated.
• Never crush or puncture the battery. Avoid
exposing the battery to high external pressure,
which can lead to an internal short circuit and
overheating.
Turn off the phone in potentially
explosive environments
safety and usage information
Do not use your phone at refuelling points (service
stations) or near fuels or chemicals. Turn off your
phone whenever directed by warning signs or
instructions. Your phone could cause explosions or
fire in and around fuel or chemical storage and
transfer areas or blasting areas. Do not store or carry
flammable liquids, gases, or explosive materials in
the same compartment as the phone, its parts, or
accessories.
Safety precautions
Drive safely at all times
Avoid using your phone while driving and obey all
regulations that restrict the use of mobile phones
while driving. Use hands-free accessories to
increase your safety when possible.
Follow all safety warnings and
regulations
Reduce the risk of repetitive motion
injuries
Comply with any regulations that restrict the use of a
mobile phone in a certain area.
When sending text messages or playing games on
your phone, hold the phone with a relaxed grip,
press the keys lightly, use special features that
reduce the number of keys you have to press (such
as templates and predictive text), and take frequent
breaks.
4
Use only Samsung-approved
accessories
Using incompatible accessories may damage your
phone or cause injury.
Turn off the phone near medical
equipment
Turn off the phone or disable the
wireless functions when in an aircraft
Your phone can cause interference with aircraft
equipment. Follow all airline regulations and turn off
your phone or switch to a mode that disables the
wireless functions when directed by airline
personnel.
Protect batteries and chargers from
damage
• Avoid exposing batteries to very cold or very hot
temperatures (below 0° C/32° F or above 45° C/
Handle your phone carefully and
sensibly
• Your phone has been tested in a controlled
environment and shown to be dust and
water resistant in certain circumstances
(meets requirements of classification IP57 as
described by the international standard IEC
60529 - Degrees of Protection provided by
Enclosures [IP Code]; test conditions:
15~35° C, 86~106kPa, 1meter, for
30minutes). Despite this classification, your
phone is not impervious to water damage in
any situation.
5
safety and usage information
Your phone can interfere with medical equipment in
hospitals or health care facilities. Follow all
regulations, posted warnings, and directions from
medical personnel.
113° F). Extreme temperatures can reduce the
charging capacity and life of your batteries.
• Prevent batteries from contacting metal objects,
as this can create a connection between the +
and - terminals of your batteries and lead to
temporary or permanent battery damage.
• Never use a damaged charger or battery.
safety and usage information
• Improperly sealed covers, extended immersion in
water, and/or excessive pressure may cause
leaks and allow water to enter the phone. Do not
intensionally immerse the phone in water, allow
the phone to come in contact with water, or
expose it to humidity.
• Improper sealing of covers, eccessive exposure
to dust and/or excessive pressure may cause
dust penetration. Do not expose to dust and/or
sand for extended periods of time.
• Your phone is a complex electronic device.
Protect it from impact and rough handling to avoid
serious damage. Damage to the phone’s exterior
may reduce its protection against water damage.
Do not insert sharp objects into the speaker
holes, microphone holes, or receiver holes, as
this may puncture the protective surface and
allow water and dust to enter.
• Do not paint your phone, as paint can clog
moving parts and prevent proper operation.
6
• Avoid using the phone’s camera flash or light
close to the eyes of children or animals.
• Your phone and memory cards may be damaged
by exposure to magnetic fields. Do not use
carrying cases or accessories with magnetic
closures or allow your phone to come in contact
with magnetic fields for extended periods of time.
Avoid interference with other electronic
devices
Your phone emits radio frequency (RF) signals that
may interfere with unshielded or improperly shielded
electronic equipment, such as pacemakers, hearing
aids, medical devices, and other electronic devices
in homes or vehicles. Consult the manufacturers of
your electronic devices to solve any interference
problems you experience.
Important usage information
Use your phone in the normal position
Avoid contact with your phone’s internal antenna.
Allowing unqualified personnel to service your phone
may result in damage to your phone and will void
your warranty.
Ensure maximum battery and charger
life
• Avoid charging batteries for more than a week, as
overcharging may shorten battery life.
• Over time, unused batteries will discharge and
must be recharged before use.
Handle SIM cards and memory cards
with care
• Do not remove a card while the phone is
transferring or accessing information, as this
could result in loss of data and/or damage to the
card or phone.
• Protect cards from strong shocks, static
electricity, and electrical noise from other devices.
• Frequent writing and erasing will shorten the life
span of memory cards.
• Do not touch gold-coloured contacts or terminals
with your fingers or metal objects. If dirty, wipe the
card with a soft cloth.
7
safety and usage information
Allow only qualified personnel to service
your phone
• Disconnect chargers from power sources when
not in use.
• Use batteries only for their intended purpose.
Ensure access to emergency services
safety and usage information
Emergency calls from your phone may not be
possible in some areas or circumstances. Before
travelling in remote or undeveloped areas, plan an
alternate method of contacting emergency services
personnel.
Specific Absorption Rate (SAR)
certification information
Your phone conforms to European Union (EU)
standards that limit human exposure to radio
frequency (RF) energy emitted by radio and
telecommunications equipment. These standards
prevent the sale of mobile phones that exceed a
maximum exposure level (known as the Specific
Absorption Rate, or SAR) of 2.0 watts per kilogram
of body tissue.
During testing, the maximum SAR recorded for this
model was 0.716 watts per kilogram. In normal use,
8
the actual SAR is likely to be much lower, as the
phone has been designed to emit only the RF
energy necessary to transmit a signal to the nearest
base station. By automatically emitting lower levels
when possible, your phone reduces your overall
exposure to RF energy.
The Declaration of Conformity at the back of this
manual demonstrates your phones compliance with
the European Radio & Terminal Telecommunications
Equipment (R&TTE) directive. For more information
about the SAR and related EU standards, visit the
Samsung mobile phone website.
Correct disposal of this product
(Waste Electrical & Electronic Equipment)
(Applicable in the European Union and
other European countries with separate
collection systems)
Household users should contact either the retailer
where they purchased this product, or their local
government office, for details of where and how they
can take this item for environmentally safe recycling.
Business users should contact their supplier and
check the terms and conditions of the purchase
contract. This product should not be mixed with
other commercial wastes for disposal.
Correct disposal of batteries in this
product
(Applicable in the European Union and other
European countries with separate battery
return systems)
This marking on the battery, manual or
packaging indicates that the batteries in this product
should not be disposed of with other household waste
at the end of their working life.
Where marked, the chemical symbols Hg, Cd or Pb
indicate that the battery contains mercury, cadmium or
lead above the reference levels in EC Directive 2006/66.
If batteries are not properly disposed of, these
substances can cause harm to human health or the
environment.
To protect natural resources and to promote material
reuse, please separate batteries from other types of
waste and recycle them through your local, free battery
return system.
9
safety and usage information
This marking shown on the product or its literature,
indicates that it should not be disposed with other
household wastes at the end of its working life. To
prevent possible harm to the environment or human
health from uncontrolled waste disposal, please
separate this from other types of wastes and recycle
it responsibly to promote the sustainable reuse of
material resources.
Unpack
introducing your
mobile phone
In this section, learn about your mobile phone’s
layout, keys, display, and icons.
10
Check your product box for the following items:
•
•
•
•
Mobile phone
Battery
Travel adapter (charger)
User manual
The items supplied with your phone may vary
depending on the software and accessories
available in your region or offered by your
service provider.
You can obtain additional accessories from
your local Samsung dealer.
Phone layout
The front of your phone includes the following keys
and features:
The rear of your phone includes the following keys
and features:
Speaker
Flash key
Volume key
4-way
navigation key
Left softkey
Dial key
Earpiece
Display
Multifunction
jack
Battery cover
Confirm key
Right softkey
Power/Menu
exit key
Alphanumeric keys
Special
function keys
Camera lens
Mouthpiece
Internal antenna
You can lock the keys to prevent any unwanted
phone operations. To lock the keys, press and
hold [ ]. To unlock these keys, press and hold
[ ].
When the auto keypad lock is on, the keys will be
locked automatically after the display turns off.
11
introducing your mobile phone
Flashbulb
Maintain your water and dust resistant
feature
introducing your mobile phone
Your phone offers limited protection against
accidental exposure to water in some conditions,
but you should never intensionally immerse the
phone in water.
• Do not expose your phone to high
water pressures or any other
liquids, such as salt water, ionized
water or dirty water.
• If the phone gets wet, dry it
thoroughly with a clean soft cloth.
• Ensure that all covers are properly
aligned and tightly closed.
• Always keep the multifunction jack
cover clean and be careful to
avoid damaging it.
• Any service performed on the phone may reduce
the water and dust protection. Avoid exposing the
phone to dust and water if any service has been
performed on it.
• Exposing the phone to extreme temperatures
may reduce the water and dust protection. Avoid
exposing the phone to temperatures below 0° C/
32° F or above 45° C/113° F.
Keys
Key
Softkeys
12
Function
Perform actions indicated at the
bottom of the display
Key
4-way
navigation
Confirm
In Idle mode, launch the web
browser or access Menu mode; In
Menu mode, select the highlighted
menu option or confirm an input
Dial
Make or answer a call; In Idle mode,
retrieve recently dialled, missed, or
received numbers
Power/
Menu exit
Turn the phone on and off (press
and hold); End a call; In Menu
mode, cancel input and return to
Idle mode
Key
Alphanumeric
Function
Enter numbers, letters and special
characters; In Idle mode, press and
hold [1] to access voice mails and
[0] to enter an international call prefix
Special
function
Enter special characters or perform
special functions; In Idle mode,
press and hold [ ] for Silent profile;
In Idle mode, press and hold [ ] to
lock the keys; Press and hold [ ] to
enter a pause between numbers
Flash
Turn the flash on or off (press and
hold)
Volume
Adjust the phone’s volume
13
introducing your mobile phone
Function
In Idle mode, access user-defined
menus (depending on your service
provider, pre-defined menus may
differ); In Menu mode, scroll through
menu options
Display
Icons
Your phone’s display consists of three areas:
Learn about the icons that appear on your display.
Icon line
Displays various icons
introducing your mobile phone
Text and graphic area
Displays messages,
instructions, and
information you enter
Select
Back
Softkey line
Displays the current actions
assigned to each softkey
Icon
Definition
Signal strength
GPRS network status
• Blue: GPRS network connected
• Red: Transferring data via GPRS network
EDGE network status
• Blue: EDGE network connected
• Red: Transferring data via EDGE network
Voice call in progress
Call diverting active
SOS message feature activated
Alarm activated
Connecting to secured web page
14
Icon
Definition
Roaming (outside of normal service area)
Icon
Definition
Normal profile activated
Silent profile activated
Bluetooth hands-free car kit or headset
connected
Battery power level
introducing your mobile phone
Bluetooth activated
Current time
Syncronised with PC
New text message (SMS)
New multimedia message (MMS)
New email message
New voice mail message
Music playback in progress
Music playback paused
FM radio on
Memory card inserted
15
Install the SIM card and battery
assembling and
preparing your
mobile phone
When you subscribe to a cellular service, you will
receive a Subscriber Identity Module, or SIM card,
with subscription details, such as your personal
identification number (PIN) and optional services.
To install the SIM card and battery,
1. Unscrew the lock and remove the battery cover.
Get started by assembling and setting up
your mobile phone for its first use.
Do not use your fingernails to unscrew. Use a
coin or screw driver, instead.
16
If the phone is on, press and hold [
it off.
] to turn
2. Insert the SIM card.
3. Insert the battery.
assembling and preparing your mobile phone
Place the SIM card in the phone with the goldcoloured contacts facing down.
17
4. Replace the battery cover and screw the lock.
Charge the battery
Before using the phone for the first time, you must
charge the battery.
assembling and preparing your mobile phone
1. Open the cover to the multifunction jack and plug
the small end of the travel adapter.
Screw the lock completely to secure the
battery cover. The battery cover must be
closed tightly to avoid water damage.
With the triangle
facing up
Improperly connecting the travel adapter can
cause serious damage to the phone. Any
damages by misuse are not covered by the
warranty.
18
2. Plug the large end of the travel adapter into a
power outlet.
3. When the battery is fully charged (the
icon is
no longer moving), unplug the travel adapter from
the power outlet.
5. Close the cover to the multifunction jack.
Push the cover completely to secure the
multifunction jack. The multifunction jack must
be closed tightly to avoid water damage.
To store additional multimedia files, you must insert a
memory card. Your phone accepts microSD™
memory cards up to 8 GB (depending on memory
card manufacturer and type).
1. Unscrew the lock and remove the battery cover.
2. Remove the battery.
3. Unlock the memory card cover.
About the low battery indicator
When your battery is low, the phone will emit a
warning tone and a low battery message. The
battery icon will also be empty and blinking. If
the battery level becomes too low, the phone
will automatically power off. Recharge your
battery to continue using your phone.
19
assembling and preparing your mobile phone
4. Unplug the travel adapter from the phone.
Insert a memory card (optional)
4. Lift the memory card cover and insert a memory
card with the label side facing up.
5. Close and lock the memory card cover.
assembling and preparing your mobile phone
6. Insert the battery.
7. Replace the battery cover and screw the lock.
20
Turn your phone on and off
using basic
functions
Learn how to perform basic operations and use the
main features of your mobile phone.
To turn your phone on,
1. Press and hold [
].
2. Enter your PIN and press <Confirm> (if
necessary).
3. When the setup wizard opens, customise your
phone as desired by following the screen.
To turn your phone off, repeat step 1 above.
Switch to the Offline profile
By switching to the Offline profile, you can use your
phone’s non-network services in areas where
wireless devices are prohibited, such as aeroplane
and hospitals.
21
Customise your phone
To switch to the Offline profile, in Menu mode,
select Settings → Phone profiles → Offline.
Follow all posted warnings and directions from
official personnel when in areas where wireless
devices are prohibited.
Get more from your phone by customising it to
match your preferences.
Adjust the volume of the key tones
using basic functions
In Idle mode, press [ / ] to adjust the key tone
volume.
Access menus
To access your phone’s menus,
Switch to or from the Silent profile
1. In Idle mode, press <Menu> to access Menu
mode.
In Idle mode, press and hold [ ] to silence or
unsilence your phone.
2. Use the navigation key to scroll to a menu or
option.
Change your ringtone
3. Press the Confirm key, <Select>, or <OK> to
confirm the highlighted option.
4. Press <Back> to move up one level; Press [
to return to Idle mode.
]
1. In Menu mode, select Settings → Phone
profiles.
2. Scroll to the profile you are using.
3. Press <Options> → Edit → Voice call ringtone.
22
4. Select a ringtone category → a ringtone.
3. Select Wallpaper → an image.
5. Press <Save>.
To switch to another profile, select it from the list.
4. Press <Save>.
Create a phone profile
2. Press <Options> → Create.
3. Enter a name for the profile and press the
Confirm key.
4. Customise the sound settings as desired.
5. When you have finished, press <Save>.
1. In Menu mode, select Settings → Display and
light → My theme.
2. Select a colour pattern.
using basic functions
1. In Menu mode, select Settings → Phone
profiles.
Select a skin colour (Menu mode)
Set menu shortcuts
1. In Menu mode, select Settings → Phone
settings → Shortcuts.
2. Select a key to use as a shortcut.
3. Select a menu to assign to the shortcut key.
Select a wallpaper (Idle mode)
1. In Menu mode, select Settings → Display and
light → Home screen.
2. Scroll left or right to Images.
23
Lock your phone
Answer a call
1. In Menu mode, select Settings → Security →
Phone lock → On.
1. When a call comes in, press [
2. To end the call, press [
].
].
using basic functions
2. Enter a new 4- to 8-digit password and press
<OK>.
Adjust the volume
3. Enter the new password again and press <OK>.
To adjust the volume during a call, press [ / ].
Use basic call functions
Use the speakerphone feature
Learn to make or answer calls and use basic call
functions.
1. During a call, press the Confirm key to activate
the speaker.
Make a call
2. To switch back to the earpiece, press the
Confirm key again.
1. In Idle mode, enter an area code and a phone
number.
2. Press [
] to dial the number.
3. To end the call, press [
24
].
Use the headset
By plugging the supplied headset into the
multifunction jack, you can make and answer calls:
Send and view messages
Learn to send or view text (SMS), multimedia (MMS),
or email messages.
4. Press <Options> → Add multimedia and add
an item.
5. Press <Options> → Advanced → Add subject.
6. Enter a subject.
7. Press <Options> → Send to send the
message.
Send an email
1. In Menu mode, select Messages → Create new
message → Email.
Send a text or multimedia message
2. Enter an email address and scroll down.
1. In Menu mode, select Messages → Create new
message → Message.
3. Enter a subject and scroll down.
4. Enter your email text.
2. Enter a destination number and scroll down.
25
using basic functions
• To redial the last call, press the headset button,
and then press again and hold.
• To answer a call, press and hold the headset
button.
• To end a call, press and hold the headset button.
3. Enter your message text. X Enter text
For sending as a text message, skip to step 7.
For attaching multimedia, continue with step 4.
5. Press <Options> → Attach multimedia and
attach a file (if necessary).
6. Press <Options> → Send to send the
message.
Enter text in one of the following modes:
Mode
ABC
Enter text
using basic functions
When entering text, you can change the text input
mode:
• Press and hold [ ] to switch between T9 and
ABC modes.
• Press [ ] to change case or switch to Number
mode.
• Press and hold [ ] to switch to Symbol mode.
26
Function
Press the appropriate alphanumeric key until
the character you want appears on the
display.
T9
1. Press the appropriate alphanumeric
keys to enter an entire word.
2. When the word displays correctly, press
[ ] to insert a space. If the correct word
does not display, select an alternate
word from the list that appears.
Number
Press the appropriate alphanumeric key to
enter a number.
Symbol
Press the appropriate alphanumeric key to
select a symbol.
Add and find contacts
1. In Menu mode, select Messages → My
messages → Inbox.
Learn the basics of using the Phonebook feature.
2. Select a text or multimedia message.
Add a new contact
View an email
1. In Idle mode, enter a phone number and press
<Options>.
1. In Menu mode, select Messages → My
messages → Email inbox.
2. Select Save → a memory location (phone or
SIM) → New.
2. Select an account.
3. Select a number type (if necessary).
3. Select Check new email.
4. Enter contact information.
4. Select an email or a header.
5. Press the Confirm key or press <Options> →
Save to add the contact to memory.
5. If you selected a header, press <Options> →
Retrieve to view the body of the email.
using basic functions
View text or multimedia messages
Find a contact
1. In Menu mode, select Phonebook.
2. Enter the first few letters of the name you want to
find.
27
3. Press the Confirm key to take a photo.
The photo is saved automatically.
using basic functions
3. Select the contact’s name from the search list.
Once you have found a contact, you can:
• call the contact by pressing [
]
• edit the contact information by pressing
<Options> → Edit
View photos
Use basic camera functions
In Menu mode, select My files → Images → My
photos → a photo file.
Learn the basics to capture and view photos and
videos.
Capture videos
Capture photos
1. In Menu mode, select Camera to turn on the
camera.
1. In Menu mode, select Camera to turn on the
camera.
2. Aim the lens at the subject and make any
adjustments.
4. Press <Back> to take another photo (step 2).
2. Press [1] to switch to Recording mode.
3. Aim the lens at the subject and make any
adjustments.
4. Press the Confirm key to start recording.
5. Press the Confirm key or < > to stop recording.
The video is saved automatically.
6. Press <
28
> to record another video (step 3).
View videos
5. Scroll up or down to a radio station.
In Menu mode, select My files → Videos → My
video clips → a video file.
6. To turn off the FM radio, press the Confirm key.
Listen to music
Listen to the FM radio
1. Plug the supplied headset into the phone’s
multifunction jack.
2. In Menu mode, select FM radio.
3. Press the Confirm key to turn on the FM radio.
4. Press <Yes> to start automatic tuning.
The radio scans and saves available stations
automatically.
The first time you access FM radio, you will be
prompted to start automatic tuning.
Start by transferring files to your phone or memory
card:
• Download from the wireless web. X p. 30
• Download from a PC with the optional Samsung
PC Studio. X p. 37
• Receive via Bluetooth. X p. 41
• Copy to your memory card. X p. 38
• Synchronise with Windows Media Player 11.
X p. 37
After transferring music files to your phone or
memory card,
1. In Menu mode, select Music.
2. Select a music category → a music file.
29
using basic functions
Learn how to listen to music via the music player or
FM radio.
Listen to music files
3. Control playback using the following keys:
Key
Confirm
/
using basic functions
Navigation
Function
Pause or resume playback
Browse the web
Learn to access and bookmark your favourite web
pages.
Adjust the volume up or down
• Left: Restart playback; Skip
backward (press within 3
seconds); Scan backward in a file
(press and hold)
• Right: Skip forward; Scan forward
in a file (press and hold)
• Up: Open the playlist
• Down: Stop playback
Browse web pages
1. In Menu mode, select Browser → Home.
Browser and Home may be labelled
differently depending on your service provider.
2. Navigate web pages using the following keys:
Navigation
Key
Function
Scroll up or down on a web page
Confirm
Select an item
<Back>
Return to the previous page
<Options> Access a list of browser options
30
Bookmark your favourite web pages
1. In Menu mode, select Browser → Bookmarks.
Browser may be labelled differently
depending on your service provider.
2. Press <Create> or <Options> → Add
bookmark .
using basic functions
3. Enter a page title and a web address (URL).
4. Press the Confirm key.
31
Use advanced call functions
using advanced
functions
Learn how to perform advanced operations and use
additional features of your mobile phone.
Learn about your phone’s additional calling
capabilities.
View and dial missed calls
Your phone will display calls you have missed on the
display. To dial the number of a missed call,
1. Press <View>.
2. Scroll to the missed call you want to dial.
3. Press [
] to dial.
Call a recently dialled number
1. In Idle mode, press [
recent numbers.
] to display a list of
2. Scroll to the number you want and press [
dial.
32
] to
Answer a second call
Press <Hold> to place a call on hold or press
<Retrieve> to retrieve a held call.
If your network supports this function, you can
answer a second incoming call:
Dial a second call
1. Press [
] to answer the second call.
The first call is automatically placed on hold.
If your network supports this function, you can dial
another number during a call:
2. Press <Swap> to switch between the calls.
1. Press <Hold> to place the first call on hold.
Make a multiparty call (conference call)
2. Enter the second number to dial and press
[
].
1. Call the first party you want to add to the
multiparty call.
3. Press <Swap> to switch between the two calls.
2. While connected to the first party, call the
second party.
The first party is automatically placed on hold.
4. To end the call on hold, press <Options> → End
→ Held call.
5. To end the current call, press [
].
3. When connected to the second party, press
<Options> → Conference call.
33
using advanced functions
Hold a call or retrieve a held call
4. Repeat steps 2 and 3 to add more parties (if
necessary).
5. To end the multiparty call, press [
].
Use advanced Phonebook functions
Learn to create namecards, set speed dial numbers,
and create groups of contacts.
using advanced functions
Call an international number
Create a namecard
1. In Idle mode, press and hold [0] to insert the +
character.
1. In Menu mode, select Phonebook.
2. Enter the complete number you want to dial
(country code, area code, and phone number),
and then press [
] to dial.
Call a contact from Phonebook
You can call numbers directly from Phonebook
using stored contacts. X p. 27
1. In Menu mode, select Phonebook.
2. Scroll to the number you want to dial and press
[
] to dial.
34
2. Press <Options> → My namecard.
3. Enter your personal details, and press the
Confirm key or press <Options> → Save.
You can send your namecard by attaching it to
a message or email or transferring it via the
Bluetooth wireless feature.
Create a group of contacts
1. In Menu mode, select Phonebook.
3. Press <Options> → Add to speed dial.
By creating groups of contacts, you can assign
ringtones and caller ID photos to each group or send
messages and emails to an entire group. Start by
creating a group:
4. Select a number (if necessary).
1. In Menu mode, select Phonebook.
5. Scroll to a number you want to set (2-9) and
press <Add>.
The contact is saved to the speed dial number.
You can now call this contact from Idle mode
by pressing and holding the assigned speed
dial number.
2. Scroll left or right to Groups.
2. Scroll to a contact to assign.
3. Press <Options> → Create group.
4. Enter a group name and press <Options> →
Save.
5. Select the new group.
6. Press <Options> → Group settings.
7. To set the caller ID image, press the Confirm key
→ an image category → an image.
35
using advanced functions
Set speed dial numbers
8. To set a group ringtone, scroll down and press
the Confirm key → a ringtone category → a
ringtone.
9. Press <Options> → Save.
Use advanced messaging functions
Create a multimedia template
1. In Menu mode, select Messages → Templates
→ Multimedia message templates.
2. Press <Options> → Add new to open a new
template window.
using advanced functions
Learn to create templates and use templates to
create new messages.
3. Create a multimedia message, with a subject
and desired attachments, to use as your
template. X p. 25
Create a text template
4. Press <Options> → Save to → Templates to
save the template.
1. In Menu mode, select Messages → Templates
→ Text templates.
Insert text templates in new messages
2. Select an empty location to open a new template
window.
1. In Menu mode, select Messages → Create new
message → a message type.
3. Enter your text and press the Confirm key to save
the template.
2. In the text field, press <Options> → Insert →
Template → a template.
36
Create a message from a multimedia
template
2. Using an optional PC data cable, connect the
multifunction jack on your phone to a PC.
1. In Menu mode, select Messages → Templates
→ Multimedia message templates.
3. Run Samsung PC Studio and copy files from the
PC to the phone.
Refer to the Samsung PC Studio help for more
information.
Use advanced music functions
Learn to prepare music files, create playlists, and
store radio stations.
Copy music files via Samsung PC Studio
1. In Menu mode, select Settings → PC
connections → Mass storage.
Synchronise your phone with Windows
Media Player
1. Insert a memory card.
2. In Menu mode, select Settings → PC
connections → Media player.
3. Using an optional PC data cable, connect the
multifunction jack on your phone to a PC with
Windows Media Player installed.
When connected, a pop-up window will appear
on the PC.
37
using advanced functions
2. Scroll to the template you want and press
<Options> → Edit.
Your template opens as a new multimedia
message.
4. Open Windows Media Player to synchronise
music files.
Create a playlist
5. Edit or enter your phone’s name in the pop-up
window (if necessary).
2. In Menu mode, select Music → Playlists.
6. Select and drag the music files you want to the
sync list.
using advanced functions
7. Click Start Sync.
1. Insert a memory card.
3. Press <Options> → Create playlist.
4. Enter a title for your new playlist and press the
Confirm key.
5. Select the new playlist.
Copy music files to a memory card
6. Press <Options> → Add → Tracks.
1. Insert a memory card.
7. Select the files you want to include and press
<Add>.
2. In Menu mode, select Settings → PC
connections → Mass storage.
3. Using an optional PC data cable, connect the
multifunction jack on your phone to a PC.
When connected, a pop-up window will appear
on the PC.
4. Open a folder to view files.
5. Copy files from the PC to the memory card.
38
Customise your music player settings
Learn to adjust the playback and sound settings for
your music player.
1. In Menu mode, select Music.
2. Press <Options> → Settings.
5. When you are finished recording, press the
Confirm key or <Stop>. The music file will be
saved in FM radio clips (My files → Music).
The recording feature is developed for voice
recording only. The quality of the recording will
be much lower than digital media.
Store radio stations automatically
4. Press <Save>.
1. Plug the supplied headset into the phone’s
multifunction jack.
Record songs from the FM radio
2. In Menu mode, select FM radio.
1. Plug the supplied headset into the phone’s
multifunction jack.
3. Press the Confirm key to start the FM radio.
2. In Menu mode, select FM radio.
3. Press the Confirm key to start the FM radio.
4. Press <Options> → Record to start recording.
using advanced functions
3. Adjust the settings to customise your music
player.
4. Press <Options> → Self-tuning.
5. Press <Yes> to confirm (if necessary).
The radio scans and saves available stations
automatically.
39
Use the Bluetooth wireless feature
using tools and
applications
Learn how to work with your mobile phone’s tools
and additional applications.
Learn about your phone’s ability to connect to other
wireless devices for exchanging data and using
hands-free features.
Turn on the Bluetooth wireless feature
1. In Menu mode, select Applications →
Bluetooth.
2. Press <Options> → Settings.
3. Scroll down to Activation.
4. Scroll left or right to On.
5. To allow other devices to locate your phone,
scroll down and scroll left or right to On.
If you select Custom, scroll down and set
duration that your phone is visible.
6. Press <Save>.
40
Find and pair with other Bluetoothenabled devices
1. In Menu mode, select Applications →
Bluetooth → Search new device.
2. Scroll to a device and press <Select>.
2. Press <Options> → Send namecard via or
Send via → Bluetooth (when sending contact
data, specify which data to send).
Receive data using the Bluetooth
wireless feature
1. Enter the PIN for the Bluetooth wireless feature
and press <OK> (if necessary).
Send data using the Bluetooth wireless
feature
In Remote SIM mode, you can make or answer calls
only with a connected Bluetooth hands-free car kit
via the SIM or USIM card on your phone.
1. Select the file or item from one of your phone’s
applications that you want to send.
2. Press <Yes> to confirm that you are willing to
receive data from the device (if necessary).
Use Remote SIM mode
To activate Remote SIM mode,
1. In Menu mode, select Applications →
Bluetooth.
41
using tools and applications
3. Enter a PIN for the Bluetooth wireless feature or
the other device’s Bluetooth PIN, if it has one,
and press <OK>.
When the owner of the other device enters the
same code or accepts the connection, pairing is
complete.
2. Press <Options> → Settings.
3. Scroll down to Remote SIM mode.
3. Scroll down and press the Confirm key to open
the recipient list.
4. Scroll left or right to On.
4. Press the Confirm key to open your contact list.
5. Press <Save>.
To use Remote SIM mode, start the Bluetooth
connection from a Bluetooth hands-free car kit.
5. Scroll to a contact and press the Confirm key.
using tools and applications
The Bluetooth hands-free car kit must be
authorised. To authorise, press <Options> →
Authorise device.
Activate and send an SOS message
When you have an emergency, you can send an
SOS message asking for help.
1. In Menu mode, select Messages → SOS
messages → Sending options.
2. Scroll left or right to On.
42
6. Select a number (if necessary).
7. When you are finished selecting contacts, press
<Options> → Add to return to the recipient list.
8. Press <Options> → Save to save the recipients.
9. Scroll down and set the number of times to
repeat the SOS message.
10. Press <Save> → <Yes>.
To send an SOS message, the keys must be
locked. Press [ / ] four times.
Once you send an SOS message, all phone
functions will be suspended until you press
[
].
Activate the mobile tracker
When someone inserts a new SIM card in your
phone, the mobile tracker feature will automatically
send the contact number to two recipients to help
you locate and recover your phone.
8. When you are finished selecting contacts, press
<Options> → Add to return to the recipient list.
9. Press <Options> → Save to save the recipients.
10. Scroll down and enter the sender’s name.
11. Press <Options> → Save → <Accept>.
To activate the mobile tracker,
Record and play voice memos
using tools and applications
1. In Menu mode, select Settings → Security →
Mobile tracker.
Learn to operate your phone’s voice recorder.
2. Enter your password and press <OK>.
3. Scroll left or right to On.
Record a voice memo
4. Scroll down and press the Confirm key to open
the recipient list.
1. In Menu mode, select Applications → Voice
recorder.
5. Press the Confirm key to open your contact list.
2. Press the Confirm key to start recording.
6. Scroll to a contact and press the Confirm key.
3. Speak your memo into the microphone.
7. Select a number (if necessary).
4. When you are finished speaking, press the
navigation key down.
43
Play a voice memo
Edit images
1. From the voice recorder screen, press
<Options> → Go to My voice clips.
Learn to edit images and apply fun effects.
2. Select a file.
Apply effects to images
3. Control the playback using the following keys:
Key
using tools and applications
Confirm
/
Navigation
Function
Pause or resume playback
Adjust the volume up or down
• Left: Scan backward in a file
• Right: Scan forward in a file
• Down: Stop playback
1. In Menu mode, select Applications → Image
editor.
2. Press <Options> → New image → Open or
Take photo.
3. Select an image or take a new photo.
4. Press <Load>.
5. Press <Options> → Effects → an effect option.
6. Select a variation of the effect to apply and press
<Done>. For some effects, adjust the level.
To apply a blur effect to a specific area of an
image, move or resize the rectangle and press
<Options> → Done.
44
7. When you are finished with adjustment, press
<Options> → Save as → <Yes>.
8. Enter a new file name for the image, and press
<Options> → Save.
8. Enter a new file name for the image, and press
<Options> → Save.
Adjust an image
Transform an image
1. In Menu mode, select Applications → Image
editor.
1. In Menu mode, select Applications → Image
editor.
2. Press <Options> → New image → Open or
Take photo.
2. Press <Options> → New image → Open or
Take photo.
3. Select an image or take a new photo.
3. Select an image or take a new photo.
4. Press <Load>.
4. Press <Load>.
5. Press <Options> → Adjust → an adjustment
option (brightness, contrast, or colour).
To adjust the image automatically, select Auto
level.
5. Press <Options> → Transform → Resize,
Rotate, or Flip.
using tools and applications
7. When you are finished with applying effects,
press <Options> → Save as → <Yes>.
6. Rotate or flip the image as desired and press
<Done>.
6. Adjust the image as desired and press <Done>.
45
To resize the image, select a size → <Yes> and
skip to step 7.
To resize or reshape the rectangle, press
<Options> → Resize or Shape.
7. When you are finished with transforming options,
press <Options> → Save as → <Yes>.
7. Press <Options> → Save as → <Yes>.
8. Enter a new file name for the image, and press
<Options> → Save.
using tools and applications
Crop an image
1. In Menu mode, select Applications → Image
editor.
2. Press <Options> → New image → Open or
Take photo.
8. Enter a new file name for the image, and press
<Options> → Save.
Insert a visual feature
1. In Menu mode, select Applications → Image
editor.
2. Press <Options> → New image → Open or
Take photo.
3. Select an image or take a new photo.
3. Select an image or take a new photo.
4. Press <Load>.
4. Press <Load>.
5. Press <Options> → Insert → a visual feature
(frame, image, clip art, emoticon, or text).
5. Press <Options> → Crop.
6. Move the rectangle over the area you want to
crop and press <Options> → Done.
46
6. Select a visual feature or enter text.
7. Move the added image (if necessary).
To resize or rotate the added image, press
<Options> → Resize or Rotate.
8. Press <Done> or <Options> → Done.
9. When you are finished with adding visual
features, press <Options> → Save as →
<Yes>.
Use Java-powered games and
applications
Launch applications
1. In Menu mode, select Applications → Games
and more → an application.
2. Press <Options> to access a list of various
options and settings for your application.
Learn to use games and applications powered by
award-winning Java technology.
Play games
1. In Menu mode, select Applications → Games
and more.
47
using tools and applications
10. Enter a new file name for the image, and press
<Options> → Save.
2. Select a game from the list and follow the onscreen instructions.
Available games may vary, depending on your
service provider or region. Game controls and
options may vary.
View world clocks
Add a world clock to your display
Learn to view the time in another country or city and
set world clocks to appear on your display.
In Dual Clock Display mode, you can view clocks
with two different time zones on your display.
View a world clock
using tools and applications
1. In Menu mode, select Organiser → World
clock.
2. Scroll down to the middle clock.
3. Scroll left or right to a time zone.
After you have saved world clocks,
1. In Menu mode, select Organiser → World
clock.
2. Scroll to the world clock you want to add and
press <Options> → Mark as second clock.
4. Scroll down to the bottom clock.
3. In Menu mode, select Settings → Display and
light → Home screen.
5. Scroll left or right to a time zone.
4. Scroll left or right to Images.
6. Press the Confirm key to save your world clock.
5. Scroll down to Clock and press the Confirm key.
To set daylight saving time, press <Options>
→ Apply daylight saving time → time zones.
48
6. Scroll left or right to Dual and press <Save>.
7. Press <Save>.
Set and use alarms
Stop an alarm
Learn to set and control alarms for important events.
When the alarm sounds,
Set a new alarm
1. In Menu mode, select Alarms.
3. Set alarm details.
You can set either the FM radio or a sound for
the alarm tone.
Deactivate an alarm
4. Press <Save>, or press <Options> → Save.
The auto power-up feature sets the phone to
automatically turn on and sound the alarm at
the designated time if the phone is turned off.
2. Scroll to the alarm you want to deactivate and
press the Confirm key.
1. In Menu mode, select Alarms.
3. Scroll down (if necessary).
4. Scroll left or right to Off.
5. Press <Save>.
49
using tools and applications
2. Scroll to an empty alarm location and press the
Confirm key.
• Press <OK> or any key to stop an alarm without
snooze.
• Press <OK> to stop an alarm with snooze, or
press <Snooze> or any key to silence the alarm
for the snooze period.
Use the calculator
Set a countdown timer
1. In Menu mode, select Organiser → Calculator.
1. In Menu mode, select Applications → Timer.
2. Use the keys that correspond to the calculator
display to perform basic mathematical
operations.
2. Press <Set>.
using tools and applications
Convert currencies or
measurements
1. In Menu mode, select Organiser → Convertor
→ a conversion type.
2. Enter the currencies or measurements and units
in the appropriate fields.
3. Enter hours or minutes to count down and press
<OK>.
4. Press the Confirm key to begin or pause the
countdown.
5. When the timer expires, press <OK> to stop the
alert.
Use the stopwatch
1. In Menu mode, select Applications →
Stopwatch.
2. Press the Confirm key to begin and record lap
times.
3. When you are finished, press <Stop>.
4. Press <Reset> to clear recorded times.
50
Create a new task
Manage your calendar
1. In Menu mode, select Organiser → Task.
Learn to change the calendar view and create
events.
2. Press <Create>.
3. Enter the details of the task.
Change the calendar view
4. Press <Save>, or press <Options> → Save.
1. In Menu mode, select Organiser → Calendar.
1. In Menu mode, select Organiser → Memo.
2. Press <Options> → View by → Day or Week.
Create an event
2. Press <Create>.
1. In Menu mode, select Organiser → Calendar.
3. Enter your memo text.
2. Press <Options> → Create → an event type.
4. Press <Options> → Save.
3. Enter the details of the event as required.
4. Press <Save>, or press <Options> → Save.
51
using tools and applications
Create a text memo
troubleshooting
If you are having trouble with your mobile phone, try these troubleshooting procedures before contacting a service
professional.
While using your phone, the following messages
may appear:
Message
Please
insert SIM
card
Phone lock
a
Message
Try this to solve the problem:
Ensure that the SIM card is installed
correctly.
When the phone lock feature is
enabled, you must enter the password
you set for the phone.
Enter PIN
Enter PUK
Try this to solve the problem:
When using the phone for the first time
or when the PIN requirement is
enabled, you must enter the PIN
supplied with the SIM card. You can
disable this feature by using the PIN
lock menu.
Your SIM card is blocked, usually as a
result of entering your PIN incorrectly
several times. You must enter the PUK
supplied by your service provider.
Your phone displays “Network error” or “No
network.”
• When you are in areas with weak signals or poor
reception, you may lose reception. Move to
another area and try again.
• You cannot access some options without a
subscription. Contact your service provider for
more details.
• Ensure that you have pressed the Dial key: [
].
• Ensure that you have accessed the right cellular
network.
• Ensure that you have not set call barring for the
phone number.
• Ensure that your phone is turned on.
• Ensure that you have accessed the right cellular
network.
• Ensure that you have not set call barring for the
phone number.
Another caller cannot hear you speaking.
• Ensure that you are not covering the built-in
microphone.
• Ensure that the microphone is close to your
mouth.
• If using a headset, ensure that it is properly
connected.
troubleshooting
You enter a number, but the call is not dialled.
Another caller cannot reach you.
The phone beeps and the battery icon flashes.
Your battery is low. Recharge or replace the battery to
continue using the phone.
b
The audio quality of the call is poor.
• Ensure that you are not blocking the phone’s
internal antenna.
• When you are in areas with weak signals or poor
reception, you may lose reception. Move to
another area and try again.
You select a contact to call, but the call is not
dialled.
troubleshooting
• Ensure that the correct number is stored in the
contact list.
• Re-enter and save the number, if necessary.
The battery does not charge properly or
sometimes the phone turns itself off.
• The battery terminals may be dirty. Wipe both
gold-coloured contacts with a clean, soft cloth
and try charging the battery again.
c
• If the battery will no longer charge completely,
dispose of the old battery properly and replace it
with a new battery.
Your phone is hot to the touch.
When you use several applications at once, your
phone requires more power and may heat up.
This is normal and should not affect your phone’s
lifespan or performance.
index
alarms
creating, 49
deactivating, 49
stopping, 49
calculator
see tools, calculator
battery
charging, 18
installing, 16
low battery indicator, 19
calls
advanced functions, 32
answering additional calls, 33
answering, 24
basic functions, 24
dialling additional calls, 33
dialling missed calls, 32
from Phonebook, 34
international numbers, 34
making, 24
Bluetooth
activating, 40
receiving data, 41
sending data, 41
browser
see web browser
calendar
see tools, calendar
multiparty, 33
placing on hold, 33
recently dialled, 32
retrieving held calls, 33
viewing missed, 32
conference calls
see calls, multiparty
contacts
adding, 27
creating groups, 35
finding, 27
convertor
see tools, convertor
d
countdown timer
see tools, countdown timer
FM radio
listening to, 29
storing stations, 39
key tones 22
lock
see phone lock
memo
see text or voice memos
index
headset 25
memory card 19
images 44
adjusting, 45
applying effects, 44
croppings, 46
inserting visual features, 46
transforming, 45
messages
sending email, 25
sending multimedia, 25
sending text, 25
viewing email, 27
viewing multimedia, 27
viewing text, 27
internet
see web browser
Java
accessing applications, 47
launching games, 47
e
music player
creating playlists, 38
customising, 39
listening to music, 29
synchronising, 37
namecards 34
offline profile 21
phone lock 24
photos
capturing, 28
viewing, 28
radio
see FM radio
mobile tracker 43
ringtone 22
multimedia
see messages
Samsung PC Studio 37
shortcut keys
see shortcuts
shortcuts 23
silent profile 22
SIM card 16
skin colour 23
SOS message 42
task
see tools, task
templates
inserting, 36
multimedia, 36
text, 36
timer
see tools, countdown timer
tools
alarm, 49
calculator, 50
calendar, 51
convertor, 50
countdown timer, 50
image editor, 44
stopwatch, 50
task, 51
viewing, 29
voice memos
playing, 44
recording, 43
volume
call volume, 24
key tone volume, 22
wallpaper 23
index
stopwatch
see tools, stopwatch
text
creating memos, 51
creating tasks, 51
entering, 26
messages, 25
web browser
adding bookmarks, 31
launching homepage, 30
Window Media Player 37
world clock
setting dual display, 48
viewing, 48
videos
capturing, 28
f
Declaration of Conformity (R&TTE)
We,
Samsung Electronics
declare under our sole responsibility that the product
GSM Mobile Phone : B2100
to which this declaration relates, is in conformity with the following
standards and/or other normative documents.
SAFETY
EN 60950- 1 : 2001 +A11:2004
EMC
EN 301 489- 01 V1.6.1 (09-2005)
EN 301 489- 07 V1.3.1 (11-2005)
EN 301 489- 17 V1.2.1 (08-2002)
SAR
EN 50360 : 2001
EN 62209-1 : 2006
RADIO
EN 301 511 V9.0.2 (03-2003)
EN 300 328 V1.7.1 (10-2006)
We hereby declare that [all essential radio test suites have been carried
out and that] the above named product is in conformity to all the
essential requirements of Directive 1999/5/EC.
The conformity assessment procedure referred to in Article 10 and
detailed in Annex[IV] of Directive 1999/5/EC has been followed with the
involvement of the following Notified Body(ies):
BABT, Balfour House, Churchfield Road,
Walton-on-Thames, Surrey, KT12 2TD, UK*
Identification mark: 0168
The technical documentation kept at :
Samsung Electronics QA Lab.
which will be made available upon request.
(Representative in the EU)
Samsung Electronics Euro QA Lab.
Blackbushe Business Park, Saxony Way,
Yateley, Hampshire, GU46 6GG, UK*
2009.02.27
Yong-Sang Park / S. Manager
(place and date of issue)
(name and signature of authorised person)
* It is not the address of Samsung Service Centre. For the address or the
phone number of Samsung Service Centre, see the warranty card or contact
the retailer where you purchased your phone.
Some of the contents in this manual may differ from your phone depending on the software of the phone or your
service provider.
World Wide Web
http://www.samsungmobile.com
Printed in Korea
Code No.:GH68-21473A
English. 03/2009. Rev. 1.1