1
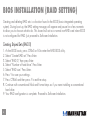
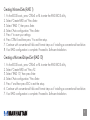
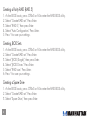
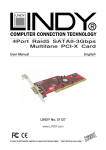
SATA 300 RAID
PCI Express Card
USER MANUAL
MODEL 160377
MAN-160377-UM-1006-04
Thank you for purchasing the MANHATTAN® SATA 300 RAID PCI Express Card, Model 160377.
Compliant with PCI Express 1.0a and SATA 1.0 specifications, this card adds dual internal
SATA 300 ports to connect data storage and other SATA peripheral devices, and supports
SATA 3 Gbps and RAID 5 data transfer rates.
IMPORTANT: Prior to PCI Express Card (controller card) installation, read the SATA RAID 5
manual on the enclosed CD, in the folder: \SATA PCIe_Raid5_2Port\SiI3132\Windows\Gui
(or \Raid5 SATA2_4Port \SiI3124\Windows\Gui). This RAID manual has more information
about RAID architecture, features, installation and settings, plus management software for RAID
5 GUI (graphical user interface).
After driver installation, if desired, install SATA RAID 5 GUI for RAID management. Before SATA
RAID 5 GUI installation, you must remove all the existing SATA RAID GUI (or Java SATA RAID
GUI) to ensure your new SATA RAID 5 GUI can work properly; i.e.: (\Start\Control Panel\Add
or Remove Programs\Select all SATARaid\Remove).
RAID sets can be created and managed by either the BIOS utility setting or the SATA RAID 5
GUI setting under Windows.
For RAID building, the BIOS utility allows random creation; GUI just supports the building by
sequential SATA Port1, Port2, etc.
introduction
This SATA 300 RAID PCI Express Card (also known as a low-profile PCI-Express host adapter)
is a controller board that supports both low-profile and regular-size PCI in one card.
The card can upgrade your desktop computer to a 2-port with a SATA 300 transfer rate of
3 Gbps, and supports RAID 5, RAID 0+1, RAID 0, RAID 1 and JBOD features. It accepts host
commands through the PCI Express bus, processes them and transfers data between the host
and SATA 300 devices. When connected to a SATA target device, the card will take the data,
serialize it and output it for transmission over the SATA interface. It can control four independent
SATA channels — each with its own SATA bus — and will support one SATA device.
The card supports SATA 100 and 300 transfer rates of 1.5 Gbps / 3 Gbps. It comes complete
with drivers for Windows 2000, XP and Server 2003.
RAID (redundant array of independent disks) greatly enhances two main areas of data storage:
performance and data integrity. By using RAID 0, also known as "Striping," performance of
sustained data transfer rates is greatly enhanced by simultaneously writing data to two, three or
four drives. The second benefit of RAID is data redundancy. RAID 1 (Mirroring) writes identical
data on two drives or sets of drives, thus protecting the data from a disk failure. If, for any
reason, one drive were to fail, your data is secure and available from the mirrored second
drive.
features
• External SATA 300 (eSATA) connector
• 48 bits LBA can break capacity: limit to support HDD larger than 137 GB
• Supports 1-lane 2.5 Gbps PCI Express
• Hot-plug capability
• Supports SATA 300 transfer rate of 3.0 Gbps
• Fully compliant with SATA 1.0 specifications
• Supports two independent SATA channels
• Independent Link, Transport and data FIFO
• Independent command fetch, scatter/gather and command execution
• Supports Legacy Command Queuing (LCQ)
• Supports Native Command Queuing (NCQ)
• Supports Non-zero offsets NCQ
• Supports Out of Order data delivery NCQ
• Supports FIS-based switching with port multipliers
• 31 commands and scatter/gather tables per port
• Two pin headers on board for LED connection
• Complete with drivers for Windows 2000/XP/Server 2003
• Provides RAID 0 (Striping), RAID 1 (Mirroring) and RAID 0+1 (Mirrored-Striping)
what is raid?
RAID (redundant array of independent disks) technology manages multiple disk drives to enhance
I/O performance and provide redundancy in order to withstand the failure of any individual
member without loss of data. The following RAID-related terms are used in this manual.
Disk Striping (RAID 0): Striping is a performance-oriented, non-redundant data mapping
technique. Striping arrays use multiple disks to form a larger virtual disk.
Disk Mirroring (RAID 1): Disk mirroring creates an identical twin for a selected disk by having
the data simultaneously written to two disks. If a read failure occurs on one drive, the system
reads the data from the other drive.
Mirrored-Striping (RAID 0+1, or RAID 10): A Mirrored-Striping Set provides the performance
enhancements of Striping and the data availability and integrity of Mirroring. When data is
written to a Mirrored-Striped Set, a second (Mirrored) virtual disk is created, as well.
Parity RAID (RAID 0): Parity, or RAID 5, adds fault tolerance to Disk Striping by including
parity information with the data. It uses less capacity for protection and is the preferred method
to reduce the cost per megabyte for larger installations.
Just a Bunch of Disks (JBOD): The JBOD is a virtual disk that can either be an entire disk drive
or a segment of a single disk drive. For this card, the JBOD function only supports one disk.
BIOS Installation (RAID Setting)
Creating and deleting RAID sets is a function found in the BIOS (basic integrated operating
system). During boot up, the RAID setting message will appear and pause for a few moments
to allow you to choose what to do. This board will act as a normal non-RAID card when BIOS
is not configured for RAID. Just proceed to Software Installation.
Creating Striped Sets (RAID 0)
1. As the BIOS boots, press CTRL+S or F4 to enter the raid bios utility.
2. Select "Create RAID set." Press Enter.
3. Select "RAID 0," then press Enter.
4. Select "Number of hard drive." Press Enter.
5. Select "RAID size." Press Enter.
6. Press Y to save your settings.
7. Press CTRL+E and then press Y to exit the setup.
8. Continue with conventional Fdisk and Format steps as if you were installing a conventional hard drive.
9. Your RAID configuration is complete. Proceed to Software Installation.
Creating Mirrored Sets (RAID 1)
1. As the BIOS boots, press CTRL+S or F4 to enter the Raid bios utility.
2. Select "Create RAID set." Press Enter.
3. Select "RAID 1," then press Enter.
4. Select "Auto configuration." Press Enter.
5. Press Y to save your settings.
6. Press CTRL+E and then press Y to exit the setup.
7. Continue with conventional Fdisk and Format steps as if installing a conventional hard drive.
8.Your RAID configuration is complete. Proceed to Software Installation.
Creating a Mirrored-Striped Set (RAID 10)
1. As the BIOS boots, press CTRL+S or F4 to enter the raid bios utility.
2. Select "Create RAID set." Press F2.
3. Select "RAID 10," then press Enter.
4. Select "Auto configuration." Press Enter.
5. Press Y and then press ESC to exit the setup.
6. Continue with conventional Fdisk and Format steps as if installing a conventional hard drive.
7. Your RAID configuration is complete. Proceed to Software Installation.
Creating a Parity RAID (RAID 5)
1. As the BIOS boots, press CTRL+S or F4 to enter the raid bios utility.
2. Select "Create RAID set." Press Enter.
3. Select "RAID 5," then press Enter.
4. Select "Auto Configuration." Press Enter.
5. Press Y to save your settings.
Creating JBOD Sets
1. As the BIOS boots, press CTRL+S or F4 to enter the raid bios utility.
2. Select "Create RAID set." Press Enter.
3. Select "JBOD (Single)," then press Enter.
4. Select "JBOD Drives." Press Enter.
5. Select "RAID size." Press Enter.
6.Press Y to save your settings.
Creating a Spare Drive
1. As the BIOS boots, press CTRL+S or F4 to enter the raid bios utility.
2. Select "Create RAID set." Press Enter.
3. Select "Spare Drive," then press Enter.
4. Select "Spare Drives." Press Enter.
5. Select "RAID size." Press Enter.
6.Press Y to save your settings.
Deleting RAID Sets
1. As the BIOS boots, press CTRL+S or F4 to enter the raid bios utility.
2. Select "Delete RAID set." Press Enter.
3. Answer "Y" to remove the RAID set. If the RAID set being deleted is a Striped set, then all of the data will be lost. If the set being deleted is a Mirrored set, then the data will remain intact and accessible on both drives.
Rebuilding Mirrored Sets (RAID 1)
1. After replacing the failed hard drives, boot the BIOS, then press CTRL+S or F4 to enter the
raid bios utility.
2. Select "Rebuild RAID 1 set." Press Enter.
3. Select "Rebuild Hard Drive." Press Enter.
4. Answer "Y" to rebuild the Mirrored set of the hard drive.
Resolving Conflict
When a RAID set is created, the metadata written to the disk includes drive connection information
(primary and secondary). If, after a disk failure, the replacement disk was previously part of a
RAID set (or used in another system), it may have conflicting metadata, specifically in reference
to the drive connection information. If so, this will prohibit the RAID set from being either created
or rebuilt. For the RAID set to function properly, this old metadata must be first overwritten with the
new metadata. To resolve this, select "Resolve Conflicts," and the correct metadata, including the
correct drive connection information, will be written to the replacement disk.
software installation
Windows 2000/XP/2003 Fresh Installation
1. Turn the system off. Connect the hard drives to the PCI Express Card and insert the card into a PCI Express slot. Turn the system back on.
2. Put your Windows 2000/XP CD into the CD-ROM/DVD drive (or put the 2000/XP boot diskette #1 in the floppy drive if your system cannot boot from the CD).
3. Press F6 for third-party SCSI or driver installation at the beginning of text mode installation. Press S when Setup asks if you want to specify an additional device, and insert the driver CD. Press Enter and select "E:\SATA PCIe_Raid5_2Port \SiI3132\Windows\Driver."
10
4. Press Enter to continue with text mode setup.
5. Follow the Setup instructions to select your choice for partition and file system.
6. After Setup examines your disks, it will copy files to Windows 2000 installation folders and restart the system. The Setup program will continue and finish the installation after restart.
7. Wait until Windows finishes installing devices, regional settings, networking settings,
components and the final set of tasks, then reboot the system if it is required.
8. See Verifying Controller Installation Under Windows to verify the PCI Express Card was installed correctly.
Adding the Express Card to an Existing Windows 2000/XP/2003 Installation
1. Turn the system off. Connect the hard drives to the PCI Express Card and insert the card into a PCI Express slot. Turn the system back on.
2. During OS bootup, Windows will display the "Found New Hardware Wizard." Click "Next."
3. Select "Search for a suitable driver for my device (Recommended)" and Click "Next."
4. Insert the driver CD in your CD-ROM/DVD drive; check "Specify a location"; uncheck the other boxes: click "Next"; type in "E:\ (if your CD-ROM/DVD is E:\)." Click "Browse."
5. Check a location; e.g., "E:\SATA PCIe_Raid5_2Port\SiI3132\Windows\Driver"; click "Open," then "OK."
6. When the wizard indicates that it found a driver for the device, click "Next."
7. If the "Digital Signature Not Found" dialog appears, click "Yes" to continue installing the driver.
11
8. The wizard will now copy the required files to the system and start the driver. When the wizard displays a completion dialog, click "Finish" to exit the wizard.
9. See Verifying Controller Installation Under Windows to verify the PCI Express Card was installed correctly.
Verifying Controller Installation under Windows 2000/XP/2003
1. Right click on "My Computer"; select "Properties"; left click on the "Hardware" tab; left click on the "Device Manager" button.
2. Double-click on "SCSI and RAID Controllers." If there is no yellow "!" or "?" in front of "Silicon Image SiI 3132 SoftRaid5 Controller," the driver has started correctly.
3. To view information about the devices attached to the card, use the SiICfg Utility and click on the device from the list.
Update a New Driver on Windows 2000/XP/2003 with an Existing Driver
1. Right click on "My Computer" and select "Properties." Under the "System Properties" section, click on the "Hardware" tab, then on "Device Manager." Click "SCSI and RAID Controller" and right click on "Silicon Image SiI 3132 SoftRaid5 Controller."
2. Click on "Driver" and "Update Driver"; select "Search for a suitable driver for my device (Recommended)." Insert the driver CD. Press Enter; select "E:\SATA PCIe_Raid5_2Port\SiI3132\Windows\Driver." Click "Next" to complete the driver installation.
12
3. The system will go through the enumeration process and install the driver. At the end of the
process, click "Yes" to reboot your system if necessary.
4. See Verifying Controller Installation Under Windows to verify the PCI Express Card was installed correctly.
13
specifications
Port Specifications
• Two internal SATA 300 ports
• Compliant with serial ATA 1.0 specifications
• 48-bit LBA supports HDD larger than 137 GB
• Supports two independent SATA channels
• Silicon serial controller
• Independent link, transport and data FIFO, and command fetch, scatter/gather and command execution
• Supports legacy command queuing (LCQ), native command queuing (NCQ), non-zero offsets NCQ, out-of-order data delivery NCQ and FIS-based switching with port multipliers
• 31 commands and scatter/gather tables per port
• Dual 2-pin headers for LED indicator connections
• 3.3 V
Bus Specifications
• PCI Express x1
• Bus speed: 2.5 Gbps
• Compliant with PCI Express specifications 1.0a
14
System Requirements
• Windows 2000/XP/Server 2003/Vista
• PCI Express-enabled system with an available Express Card slot
• CD-ROM drive
Package Contents
• SATA 300 RAID PCI Express Card, x1 lane
• Regular and low-profile brackets
• User manual and driver CD
15
www.manhattan-products.com
Are you completely satisfied with this product?
Please contact your MANHATTAN dealer with comments or questions.
®
Copyright © MANHATTAN
All products mentioned are trademarks or registered trademarks of their respective owners.