Download Blaupunkt San Diego CD32 CD Player
Transcript
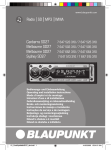
Radio / CD
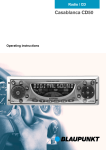
Las Vegas CD32
San Diego CD32
Santa Fe CD32
Operating and installation instructions
http://www.blaupunkt.com
Open here
Ouvrir s.v.p.
Por favor, abrir
Favor abrir
2
1
11
2
3
10
4
9
5
8
PORTUGUÊS
6
7
3
ESPAÑOL
FRANÇAIS
ENGLISH
CONTROLS
1
2
3
4
5
6
7
8
9
:
;
4
button to release the control
panel.
Button to switch the unit on/off.
Volume control.
CD compartment.
Arrow buttons.
MENU button to open the basic
settings menu.
Short press: SOURCE button, to
select the CD, radio and CD
changer sources.
Long press: CD eject.
AUDIO button to adjust the
bass, treble, balance and fader
settings.
Short press: EQ button to select
the sound presets.
Long press: X-BASS, X-Bass
function.
Keys 1 - 6.
Short press: BAND button to
select the FM memory bank
and the AM waveband, source
selection to radio mode.
Long press: TS, starts the
Travelstore function.
button to display the time.
Removable control panel ......... 7
Theft protection ............................... 7
Detaching the control panel ............. 7
Attaching the control panel .............. 7
Switching on/off ...................... 8
Adjusting the volume ............... 9
Setting the power-on volume ........... 9
Instantaneously reducing
the volume (mute) ............................ 9
Mute while telephoning .................... 9
Radio mode ............................ 10
Switching to radio mode ................ 10
Selecting the frequency band /
memory bank ................................. 10
Tuning into a station ....................... 10
Setting the sensitivity of station
seek tuning .................................... 10
Storing station presets ................... 10
Storing stations automatically
(Travelstore) .................................. 11
Listening to station presets ............ 11
CD mode ................................ 11
Switching to CD mode .................. 11
Selecting tracks ............................ 12
Fast track selection ....................... 12
Fast searching (audible) ................ 12
Random track play (MIX) ............... 12
Scanning tracks (SCAN) ............... 12
Repeating tracks (Repeat) ............. 12
Pausing playback (PAUSE) ............ 13
Removing the CD from the unit ...... 13
FRANÇAIS
Switching to CD changer mode ..... 13
Selecting CDs ............................... 13
Selecting tracks ............................ 13
Fast searching (audible) ................ 14
Repeating individual tracks or
whole CDs (REPEAT) .................... 14
Random track play (MIX) ............... 14
Scanning all tracks on all CDs
(SCAN) ......................................... 14
Pausing playback (PAUSE) ............ 15
Clock - Time ........................... 15
ESPAÑOL
CD changer mode .................. 13
Road safety ..................................... 6
Installation ....................................... 6
Accessories .................................... 6
Displaying the time ........................ 15
Setting the clock ........................... 15
Selecting 12/24-hour clock mode .. 15
Displaying the time when the unit
is off and the ignition is on ............. 16
PORTUGUÊS
Notes and accessories ............ 6
ENGLISH
CONTENTS
Sound and volume
distribution settings ............... 16
Adjusting the bass ......................... 16
Adjusting the treble ....................... 16
Adjusting the balance settings ....... 17
Adjusting the fader settings ........... 17
Equalizer and X-BASS ........... 18
X-BASS ........................................ 18
Selecting preset sound effect ........ 18
Specifications ........................ 18
Amplifier ........................................ 18
Tuner ............................................. 18
CD ................................................ 18
Pre-Amp Out ................................. 18
Installation instructions .......... 65
5
NOTES AND ACCESSORIES
Thank you for deciding to use a
Blaupunkt product. We hope you enjoy
using this new piece of equipment.
Please read these operating instructions
before using the equipment for the first
time. The Blaupunkt editors are constantly working on making the operating instructions clearer and easier to
understand. However, if you still have
any questions on how to operate the
equipment, please contact your dealer
or the telephone hotline for your country. You will find the hotline telephone
numbers printed at the back of this
booklet.
Road safety
Road safety has absolute priority. Only operate your radio unit if the
road and traffic conditions allow you
to do so. Familiarize yourself with the
unit before setting off on your journey.
You should always be able to hear
police, fire and ambulance sirens
from far. For this reason, set the volume of the program you are listening to at a reasonable level.
6
Installation
If you want to install your car radio by
yourself, please read the installation and
connection instructions that follow these
operating instructions.
Accessories
Only use accessories approved by
Blaupunkt.
Remote control
The supplied RC 04 remote control allows you to operate the main functions
of your car radio safely and conveniently
(only with the Las Vegas CD32).
The RC 04 remote control is optionally
available for the Santa Fe CD32 unit.
The San Diego CD32 unit cannot be
remotely controlled.
Amplifier
All Blaupunkt and Velocity amplifiers can
be used.
CD changer
The Blaupunkt CD changer CDC A 01
(7607 700 022) can be connected to the
Las Vegas CD32 unit. No CD changer
can be connected to either the San Diego CD32 or the Santa Fe CD32 units.
Theft protection
➮ First, pull the control panel straight
Note:
● Never drop the control panel.
● Never expose the control panel to
direct sunlight or other heat
sources.
● Avoid making direct skin contact
with the control panel’s contacts. If
necessary, clean the contacts with
a lint-free cloth and some alcohol.
●
●
●
off the unit and then out towards
the left.
The unit switches off after the
control panel is removed.
All current settings of the radio are
saved.
CD already inserted in the unit
remains there.
Attaching the control panel
➮ Slide the control panel from left to
PORTUGUÊS
As a way of protecting your equipment
against theft, the unit is equipped with
a detachable control panel (release
panel). Without this control panel, the
car radio is worthless to a thief.
Protect your equipment against theft by
taking the control panel with you every
time you leave your vehicle. Do not
leave the control panel in your vehicle not even in a hiding place.
The control panel has been designed
to be easily to use.
right into the unit’s guide.
➮ Press the left-hand edge of the
control panel into the unit until it
clicks into place.
Detaching the control panel
1
➮ Press the
button 1.
FRANÇAIS
The control panel locking mechanism
opens.
ESPAÑOL
Removable control panel
ENGLISH
REMOVABLE CONTROL PANEL
Note:
● When attaching the control panel,
make sure you do not press on the
display.
If the unit was still switched on when
you removed the control panel, the unit
will automatically switch back on with
the last settings activated i.e. radio, CD
or CD changer (CD changer only with
the Las Vegas CD32) when the panel
is reinserted.
7
SWITCHING ON/OFF
Switching on/off
There are various ways of switching the
unit on/off:
Switching on/off using the vehicle
ignition
If the unit is correctly connected to the
vehicle’s ignition and it was not switched
off using button 2, it will switch on/off
simultaneously with the ignition.
Switching on/off using the
removable control panel
➮ Remove the control panel.
The unit switches off.
➮ Attach the control panel again.
The unit switches on. The last settings
i.e. radio, CD or CD changer (CD
changer only with the Las Vegas CD32)
will be reactivated.
Switching on/off using button 2
➮ To switch the unit on, press button
2.
The unit can only be switched on when
the ignition is turned on.
➮ To switch the unit off, press button
2 for longer than two seconds.
The unit switches off.
8
Switching on by inserting a CD
If the unit is switched off and there is no
CD inserted in the drive,
➮ gently insert the CD with the
printed side uppermost into the
drive until you feel some resistance.
The CD is drawn into the drive automatically.
You must not obstruct or assist the drive
as it draws in the CD.
Once the CD has been drawn in, the
unit switches on again.
Setting the power-on volume
You can set the unit’s default power-on
volume.
➮ Press the MENU button 5.
➮ Keep pressing the or button
5 until “ON VOL” appears in the
display.
➮ Set the power-on volume using the
and buttons 5.
To help you adjusting the volume more
easily, the volume will be increased /
decreased as you make your changes.
When you have finished making your
changes,
5 until “MUTE LVL” appears in
the display.
➮ Set the mute level using the
and
buttons 5.
When you have finished making your
changes,
➮ press the MENU button 5 twice.
Mute while telephoning
If your unit is connected to a mobile telephone, the car radio’s volume will be
muted as soon as you “pick up” the telephone. “TEL CALL” flashes in the display.
This requires to the mobile telephone
be connected to the car radio as described in the installation instructions.
The volume will be reduced to the configured mute volume level.
➮ press the MENU button 5 twice.
Instantaneously reducing the
volume (mute)
You can instantaneously reduce the
volume (mute) to a level preset by you.
➮ Briefly press button 2.
“MUTE” appears in the display.
9
FRANÇAIS
➮ Press the MENU button 5.
➮ Keep pressing the or button
ESPAÑOL
The system volume can be adjusted in
steps from 0 (off) to 100 (maximum).
To increase the system volume,
➮ turn the volume control 3 clockwise.
To decrease the volume,
➮ turn the volume control 3 anticlockwise.
Setting the mute level
You can set the unit’s mute volume level.
PORTUGUÊS
Adjusting the volume
ENGLISH
ADJUSTING THE VOLUME
RADIO MODE
Radio mode
Switching to radio mode
If you are in CD or CD changer mode
(CD changer only with the Las Vegas
CD32),
➮ keep pressing the SOURCE 6
button until the radio mode
appears in the display together with
the memory bank and frequency.
Selecting the frequency band /
memory bank
This unit can receive programs broadcast over the FM and AM frequency
band. There are three preset memory
bank for the FM range and one for the
AM range. Six stations can be stored
on each memory bank.
Selecting the FM memory bank
To switch between the FM memory bank
FM1, FM2 and FMT,
➮ press the BAND/TS button :.
Selecting the AM waveband
To select the AM waveband,
➮ keep pressing the BAND/TS button
: until AM appears in the display.
Tuning into a station
There are various ways of tuning to a
station.
Automatic seek tuning
➮ Press the
or
button 5.
The unit tunes to the next receivable
station.
10
Setting the sensitivity of station
seek tuning
You can choose whether to tune only
to strong reception stations or to also
tune to those with a weak reception.
➮ Press the MENU button 5.
➮ Keep pressing the or button
5 until “SENS HI” or “SENS LO”
appears in the display
“SENS HI” means that the tuner is set
high to sensitivity. “SENS LO” means it
is set to the low sensitivity setting. If
“SENS LO” is selected, “LOC” lights up
in the display.
➮ Set the required sensitivity using
the and buttons 5.
When you have finished making your
changes,
➮ press the MENU button 5.
Tuning into stations manually
You can also tune into stations manually.
➮ Press the
or
button 5.
Storing station presets
Storing stations manually
➮ Select the required memory bank
(FM1, FM2 or FMT) or the AM
waveband.
➮ Tune into the station.
➮ Press one of the station buttons
1-6 9 for longer than one second
to store the station in that preset
memory.
RADIO MODE
➮ Press and hold the BAND/TS
button : until seek tuning begins.
The station storing procedure begins.
Once the procedure finishes, all the
stored stations are played briefly.
Listening to station presets
➮ Select the memory bank on which
the station was stored.
➮ Press the preset station button 1-6
9 of the station you want to listen
to.
Switching to CD mode
●
ENGLISH
FRANÇAIS
You can use this unit to play standard
CDs with a diameter of 5 inches.
Risk of severe damage to the
CD drive!
CD singles with a diameter of
3 inches and contoured CDs (shape
CDs) are not suitable for playback in
this unit.
We accept no liability for any damage to the CD drive that may occur
as a result of the use of unsuitable
CDs.
ESPAÑOL
You can automatically store the six stations with the strongest reception in the
region. The stations are stored in the
FMT or AM memory depending on the
selected frequency band.
Note:
● Any stations that were previously
stored on this memory bank are
deleted in the process.
CD mode
PORTUGUÊS
Storing stations automatically
(Travelstore)
CD MODE
If there is no CD inserted in the
drive.
➮ Gently insert the CD with the
printed side uppermost into the CD
compartment until you feel some
resistance.
The CD is drawn into the drive automatically.
Do not use force when inserting the CD.
You must not obstruct or assist the drive
as it draws in the CD.
CD playback begins.
● If a CD is already inserted in the
drive.
➮ Keep pressing the SOURCE 6
button until the CD mode display
appears.
Playback begins from the point at which
it was last interrupted.
11
CD MODE
Selecting tracks
➮ Press one of the /
or /
buttons 5 to select the next or
previous track.
If you press the / button 5 once,
the current track will be played again
from the beginning.
Fast track selection
To quickly select tracks backwards or
forwards,
➮ keep one of the / buttons 5
pressed until fast-reverse / fastforward track selection begins.
Fast searching (audible)
To fast search backwards or forwards,
➮ keep one of the
buttons 5
pressed until fast searching
backwards / forwards begins.
Random track play (MIX)
➮ Press button 4 (MIX) 9.
“S--MIX” and the track number appears
in the display. The next randomly selected track will then be played.
Canceling MIX
➮ Press button 4 (MIX) 9 again.
The standard CD display appears.
Scanning tracks (SCAN)
You can play briefly all the tracks on the
CD.
➮ Press button 2 (SCAN) 9.
Setting the scantime
You can set the scanning time to between 5 and 30 seconds in the menu.
➮ Press the MENU button 5.
➮ Keep pressing the
or button
5 until “SCANTIME” appears in
the display.
➮ Set the required scantime using
the and buttons 5.
When you have finished making your
changes,
➮ press the MENU button 5 twice.
Note:
● The set scantime also applies to
scanning in CD changer mode.
Stopping SCAN and continuing
playback
To stop scanning,
➮ press button 2 (SCAN) 9 again.
The current track will then continue to
be played.
Repeating tracks (REPEAT)
If you want to repeat a track,
➮ press button 3 (RPT) 9.
“S--RPT” and the track number appears
in the display. The track is repeated until
you deactivate RPT.
Deactivating REPEAT
If you want to deactivate the repeat function,
➮ press button 3 (RPT) 9 again.
The standard CD display appears. Normal playback is then resumed.
12
Canceling pause
9 while in
pause mode.
Playback is resumed.
➮ Press button 2
Removing the CD from the unit
To remove the CD from the unit,
➮ keep the SOURCE button 6
pressed until the CD is ejected.
Switching to CD changer mode
➮ Keep pressing the SOURCE 6
button until the display shows, for
instance, “CDC 1--1”.
The first digit in this display represents
the CD number (in this case 1), and the
second digit represents the track number (in this case 1).
Playback begins with the first CD that
the CD changer detects.
Selecting CDs
To move up or down to another CD,
➮ press the
or
several times.
button 5 once or
Selecting tracks
To move up or down to another track
on the current CD,
➮ press the
or
several times.
button 5 once or
13
ENGLISH
You can connect a CD changer to the
Las Vegas CD32 unit. You can obtain
further information on available CD
changers from your dealer.
Note:
● Information on handling CDs,
inserting CDs and operating the
CD changer can be found in the
operating instructions supplied with
your CD changer.
FRANÇAIS
“S--PAUSE” appears in the display.
CD changer mode
ESPAÑOL
Pausing playback (PAUSE)
➮ Press button 1 9.
CD CHANGER MODE
PORTUGUÊS
CD MODE
CD CHANGER MODE
Fast searching (audible)
Random track play (MIX)
To fast search backwards or forwards,
To play the tracks on the current CD in
random order,
➮ briefly press button 4 (MIX) 9.
buttons 5
pressed until fast searching
backwards / forwards begins.
➮ keep one of the
Repeating individual tracks or
whole CDs (REPEAT)
To repeat the current track,
➮ briefly press button 3 (RPT) 9.
“S--RPT” appears briefly in the display.
To repeat the current CD,
➮ keep the 3 (RPT) button 9
pressed for longer than two
seconds.
“D--RPT” appears briefly in the display.
Deactivating REPEAT
To stop the current track or current CD
from being repeated,
➮ press button 3 (RPT) 9 until
“S--RPT” or “D--RPT” disappears
and the standard CD changer
display reappears.
“S--MIX” appears briefly in the display.
To play the tracks on all inserted CDs in
random order,
➮ keep the 4 (MIX) button 9
pressed for longer than two
seconds.
“D--MIX” appears briefly in the display.
Canceling MIX
To stop the tracks from being played in
random order,
➮ press button 4 (MIX) 9 until
“S--MIX” or “D--MIX” disappears
and the standard CD changer
display reappears.
Scanning all tracks on all CDs
(SCAN)
Scanning tracks on the current CD
To briefly play all the tracks on the current CD in ascending order,
➮ press button 2 (SCAN) 9.
“S--SCN” appears in the display.
Scanning the first track on all CDs
You can briefly play the first track all CDs
in the CD changer.
➮ keep the 2 (SCAN) button 9
pressed for longer than two
seconds.
“D--SCAN” appears in the display.
14
CD CHANGER MODE
ENGLISH
CLOCK - Time
Displaying the time
FRANÇAIS
button ;.
Setting the clock
➮ Press the MENU button 5.
➮ Keep pressing the or button
5 until “CLOCKSET” appears in
the display.
➮ Press the
button 5.
Pausing playback (PAUSE)
➮ Press button 1 ( ) 9.
The time appears in the display. The
minutes flash on and off and can be
adjusted.
“S--PAUSE” appears in the display.
➮ Adjust the minutes using the
Canceling pause
➮ Press button 2 ( ) 9 while in
pause mode.
Playback is resumed.
/
buttons 5.
Once the minutes are set,
➮ press the
button 5.
The hours flash on and off.
➮ Adjust the hours using the /
buttons 5.
When you have finished making your
changes,
➮ press the MENU button 5 twice.
Selecting 12/24-hour clock
mode
➮ Press the MENU button 5.
➮ Keep pressing the or button
5 until “24 H MODE” or “12 H
MODE” appears in the display.
or button 5 to
switch between the modes.
➮ Press the
15
ESPAÑOL
To display the time,
➮ briefly press the
PORTUGUÊS
Stopping SCAN
To stop scanning,
➮ briefly press the 2 (SCAN) button
9 again.
The currently scanned track will then
continue to be played normally.
Note:
● You can set the scanning time
(scantime). For further details, read
the section entitled “Setting the
scantime” in the “CD mode”
chapter.
CLOCK - TIME
CLOCK - TIME
SOUND AND VOLUME
DISTRIBUTION SETTINGS
When you have finished making your
changes,
➮ press the MENU button 5.
Sound and volume
distribution settings
Displaying the time when the
unit is off and the ignition is on
To display the clock when the unit is off
and the ignition is on,
➮ press the MENU button 5.
➮ Keep pressing the or button
5 until “CLOCK OFF” or “CLOCK
ON” appears in the display.
or button 5 to
switch between the displays.
When you have finished making your
changes,
➮ press the MENU button 5.
➮ Press the
Adjusting the bass
To adjust the BASS,
➮ press the AUDIO button 7.
“BAS” appears in the display.
To increase the bass,
➮ turn the volume control 3 clockwise.
To decrease the bass,
➮ turn the volume control 3 anticlockwise.
When you have finished making your
changes,
➮ wait 8 seconds, the settings are
saved and the audio source display
appears.
Adjusting the treble
To adjust the TREBLE,
➮ keep pressing the AUDIO 7
button until “TRE” appears in the
display.
To increase the treble,
➮ turn the volume control 3 clockwise.
To decrease the treble,
➮ turn the volume control 3 anticlockwise.
When you have finished making your
changes,
➮ wait 8 seconds, the settings are
saved and the audio source display
appears.
16
➮ keep pressing the AUDIO 7
➮ keep pressing the AUDIO 7
button until “BAL” appears in the
display.
To move the volume distribution toward
the right,
➮ turn the volume control 3 clockwise.
To move the volume distribution toward
the left,
➮ turn the volume control 3 anticlockwise.
When you have finished making your
changes,
➮ wait 8 seconds, the settings are
saved and the audio source display
appears.
button until “FAD” appears in the
display.
To move the volume distribution toward
the back,
➮ turn the volume control 3 clockwise.
To move the volume distribution toward
the front,
➮ turn the volume control 3 tanticlockwise.
When you have finished making your
changes,
➮ wait 8 seconds, the settings are
saved and the audio source display
appears.
17
FRANÇAIS
To adjust the front/back volume distribution (fader),
ESPAÑOL
Adjusting the fader settings
To adjust the left/right volume distribution (balance),
PORTUGUÊS
Adjusting the balance settings
ENGLISH
SOUND AND VOLUME
DISTRIBUTION SETTINGS
SPECIFICATIONS
EQUALIZER AND X-BASS
Equalizer and X-BASS
Specifications
X-BASS
Amplifier
The X-BASS feature can be used to
boost the bass at low volume levels.
To activate X-BASS,
➮ keep the EQ/X-BASS button 8
pressed until “XBASS ON” appears
in the display.
“X-BASS” appears in the display.
To deactivate X-BASS,
➮ keep the EQ/X-BASS button 8
pressed until “XBASS OFF”
appears in the display.
“X-BASS” disappears.
Output power:
Las Vegas CD32:
San Diego CD32:
Santa Fe CD32:
Selecting preset sound effect
You can select preset sound effect for
the following styles of music:
● CLASSIC
● POP M
● ROCK M
The settings for these music styles have
already been programmed.
To select one of the sound presets,
➮ keep pressing the EQ/X-BASS
button 8 until the required setting
appears in the display.
If you want to deactivate the sound preset,
➮ keep pressing the EQ/X-BASS
button 8 until “DSP OFF” appears
in the display.
Tuner
Frequency ranges US:
FM:
87.5 - 107.9 MHz
AM:
530 - 1710 kHz
FM mono sensitivity:
15 dBf
FM frequency response:
35 - 16,000 Hz
CD
Frequency response:
20 - 20,000 Hz
Pre-Amp Out
(not applicable to San Diego CD32)
Output:
1.5 Vrms ± 2.5 dB
Subject to changes!
18
4 x 22 watts sine
in accordance
with DIN 45 324
at 14.4 V 4 x 50
watts max. power
4 x 15 watts sine
in accordance
with DIN 45 324
at 14.4 V 4 x 40
watts max. power
4 x 18 watts sine
in accordance
with DIN 45 324
at 14.4 V 4 x 45
watts max. power
Service numbers / Numéros du service après-vente /
Números de servicio / Número de serviço
Country:
Phone:
Fax:
WWW:
http://www.blaupunkt.com
Germany
(D)
0180-5000225
05121-49 4002
Austria
Belgium
Denmark
Finland
France
Great Britain
Greece
Ireland
Italy
Luxembourg
Netherland
Norway
Portugal
Spain
Sweden
Switzerland
(A)
(B)
(DK)
(FIN)
(F)
(GB)
(GR)
(IRL)
(I)
(L)
(NL)
(N)
(P)
(E)
(S)
(CH)
01-610 390
02-525 5454
44 898 360
09-435 991
01-4010 7007
01-89583 8880
0800-550 6550
01-4149400
02-369 6331
40 4078
023-565 6348
66-817 000
01-2185 00144
902-120234
08-7501500
01-8471644
01-610 393 91
02-525 5263
44-898 644
09-435 99236
01-4010 7320
01-89583 8394
01-576 9473
01-4598830
02-369 6464
40 2085
023-565 6331
66-817 157
01-2185 11111
916-467952
08-7501810
01-8471650
Czech. Rep.
Hungary
Poland
(CZ)
(H)
(PL)
02-6130 0441
01-333 9575
0800-118922
02-6130 0514
01-324 8756
022-8771260
Turkey
(TR)
0212-3350677
0212-3460040
USA
(USA) 800-2662528
Brasil
(Mercosur)
(BR)
708-6817188
+55-19 3745 2769 +55-19 3745 2773
Malaysia
(Asia Pacific) (MAL) +604-6382 474
+604-6413 640
Blaupunkt GmbH
12/01
CM/PSS 8 622 403 186
Radio / CD
Las Vegas CD32
San Diego CD32
Santa Fe CD32
Installation instructions
Notice de montage
Instrucciones de instalación
Instruções de montagem
http://www.blaupunkt.com
Indications de sécurité
Installation and connection
regulations
Consignes de montage et de
branchement
– In the event that this equipment is
installed or repaired incorrectly, this
could cause malfunctions in the
vehicle electronics.
– To avoid causing damage to your
radio, use the corresponding
Blaupunkt adapter cable to connect
the 8-pin +/- ISO plug in the
vehicle.
While installing and connecting
this equipment, please observe the
following safety notes:
– Disconnect the negative battery
termina.
– Observe the car manufacturer’s
safety instructions.
– If you drill any holes, make sure
that you do not damage any parts
of the vehicle.
– The diameter of the positive/
negative cable must not be less
than 1.5 mm2.
– En cas d’erreur d’installation ou
d’entretien, des perturbations
peuvent survenir au niveau des
systèmes électroniques du
véhicule.
– Pour ne pas détériorer votre
autoradio, branchez le connecteur
ISO +/- 8 pôles du véhicule
uniquement via un câble adaptateur Blaupunkt correspondant.
Pendant le montage et le branchement, observez les consignes de
sécurité suivantes :
– Débrancher le pôle (-) de la
batterie.
– Observer ce faisant les indications
de sécurité du constructeur
automobile.
– Veiller à ne pas endommager les
pièces du véhicule en perçant des
trous.
– La section transversale du câble
(+) et (-) ne doit pas être inférieure
à 1,5 mm2.
65
FRANÇAIS
F
ESPAÑOL
Safety precautions
PORTUGUÊS
GB
ENGLISH
Installation instructions • Notice de montage •
Instrucciones de instalación • Instruções de montagem
E
Normas de seguridad
Especificaciones sobre la
instalación y conexión
– En caso de realizarse una instalación o un mantenimiento inadecuado, éstos pueden ocasionar fallos
en las funciones de los sistemas
eléctricos del vehículo.
– Para que su radio no sufra daños,
debe conectar el enchufe del
vehículo de 8 polos +/- ISO sólo al
correspondiente cable adaptador
Blaupunkt.
Durante el montaje y la conexión
observe las siguientes normas de
seguridad.
– Desemborne el polo negativo de la
batería.
– Al hacerlo, observe las normas de
seguridad del fabricante del
vehículo.
– Al taladrar orificios asegúrese de
que el vehículo no sufra ningún
daño.
– El diámetro del cable positivo y
negativo no debe ser menor a
1,5 mm2.
66
Indicações de
segurança
P
Directivas de montagem e de
conexão
– Podem ocorrer erros de funcionamento em sistemas electrónicos de
automóveis devido à uma instalação ou manutenção errada.
– Para evitar a destruição do seu
rádio, deverá apenas ligar a ficha
ISO de 8 pólos do automóvel
através de um respectivo cabo de
adaptação Blaupunkt.
Observe por favor as seguintes
indicações de segurança durante a
montagem e a ligação
– Separar por pressão o pólo
negativo da bateria.
– Observar as indicações de
segurança do fabricante do
automóvel.
– Ao furar orifícios, deverá observar
que não sejam danificadas partes
do automóvel.
– O diâmetro do cabo positivo e
negativo não deve ser inferior a
1,5 mm2.
1.
ENGLISH
Supplied Mounting Hardware
Materiel de montage fourni
FRANÇAIS
Ferretería de montaje
suministrada
A
ESPAÑOL
Elementos de fixação
fornecidos
PORTUGUÊS
12V
B
2.
182
165
53
C
1-20
A
D
E
4x M5x6
x
x
x
RC 04
only
Las Vegas CD32
x
Bend as many taps as possible.
Plier si possible toutes les attaches.
Lo ideal es poder doblar todas las bridas
de sujeción.
Devem ser dobradas o máximo possível
de braçadeiras.
67
3.
4.
RR = right / rear
RR == right
recht // front
hinten
RF
RF == left
recht
/ vorn
LF
/ front
LF = links / vorn
LR
LR == left
links/ rear
/ hinten
10A
10A
7 607 621 . . .*
F LF
RR R
* Car-specific adapter cable which
is available at your dealer.
Câble adaptateur spécifique au
véhicule, disponible dans le
commerce.
Adaptador específico del
vehículo, el cual se puede adquirir
en el comercio especializado.
Cabo de adaptação específico do
automóvel que pode ser adquirido
no comércio especializado.
5.
8 601 910 002
1
2
B
1
2
6.
12V
68
+
+
+
+
-
LR
4 Ohm
4 Ohm
4 Ohm
4 Ohm
A
10
9
6
5
2
B
7
4
3
8
16
13
15
12
14
11
1
3
5
7
2
4
6
8
1
3
5
7
2
4
6
8
A
19
B
18
17
20
1
2
3
4
5
6
7
8
—
Telefon Mute
nc
Permanent +12V
Aut. antenna
nc
Kl.15/Ignition
Ground
1
2
3
4
5
6
7
8
FRANÇAIS
1
C-3
Speaker out RR+
Speaker out RRSpeaker out RF+
Speaker out RFSpeaker out LF+
Speaker out LFSpeaker out LR+
Speaker out LR-
ESPAÑOL
C
C-2
PORTUGUÊS
C-1
ENGLISH
7.
C
C1
1
2
3
4
5
6
Line Out LR 5V/10K
Line Out RR 5V/10K
Line Out Masse / Ground
nc
nc
nc
Equalizer
C2
7
8
9
10
11
12
nc
nc
nc
nc
nc
nc
C3
13
14
15
16
17
18
19
20
Changer Bus
nc
+12V
12V
Changer GND
AF - GND
Line In - L 1,2V/10K
Line In - R 1,2V/10K
Amplifier
CDC A01
only
Las Vegas CD32
only
Las Vegas CD32,
Santa Fe CD32
69
8.
Line-Out Kabel
Relais
LF
R RF
+
+
+
+
-
LR
R
4 Ohm
4 Ohm
4 Ohm
4 Ohm
A
Kl. 15 +12 V
1 35
6
2 4
7
8
12V
Telephone Mute (low)
This information is subject to change without notice!
Sous réserve de modifications!
Modificaciones reservadas!
Sob reserva de alterações!
70


