1
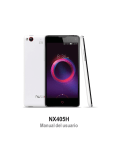
NX405H
User Manual
1 About the User Manual
1-1 Copyrights
Copyright © 2014 ZTE CORPORATION.
All rights reserved.
No part of this publication may be quoted, reproduced, translated or used in any form or by
any means, electronic or mechanical, including photocopying and microfilm, without the prior
written permission of ZTE Corporation.
ZTE Corporation reserves the right to make modifications on print errors or update
specifications in this manual without prior notice.
Don’t worry if the pictures we use to demonstrate your phone’s functions look a little
different from what you see on its screen. It’s the functions they represent that matter. If
the contents described in the user manual are inconsistent with the actual product due to
upgrade, please refer to the information subsequently released by the company.
1-2 Trademarks
Android, Google Settings, News & Weather, Google, Voice Search, Hangouts, YouTube, Google+,
Gmail and Chrome are trademarks owned by Google, Inc.
The Bluetooth word and logos are registered trademarks of the Bluetooth SIG, Inc., and any
use of such marks by ZTE Corporation is under license. All other trademarks remain the
property of their respective owners.
1-3 Third-party Applications Statement
During the installation process of some third-party applications, issues of repeated restart
or abnormal operation of software might be caused by incompatibility of the third-party
applications, rather than the phone.
Installation of a third-party ROM or non-official operating system might bring security risk
and security threats. ZTE Corporation will not be liable for the security threats brought by
upgrade of the operating system.
2
2 Basic Operations
2-1 Operation of the Keys
Power/Reboot/Lock key
Press and hold: turn on the phone; open the Phone options menu.
Press and hold more than 10 seconds: reboot the phone.
Press: turn off and lock the screen, or wake up the screen.
Home key
Press it to return to the home screen from any other interface.
Press and hold it to open the list of most recently used applications.
Menu key
Press it to open the tools menu of the current interface.
After Free Screenshot is enabled, press and hold it to enter the Free Screenshot mode.
Back key
Press it to return to the previous menu.
Volume key
Press and hold the upper key to raise the volume. Press and hold the lower key to lower the
volume, the lowest point being vibration only.
2-2 Icons on the Status Bar
GSM network signal
Connected to GSM 3G network
GSM network signal
Connected to GSM 4G network
Battery full
Connected to CDMA 3G network
Charging
Low battery
In a call
New Email
Missed calls
Unread messages
Sleep mode enabled
Silent mode enabled
Flight mode enabled
Vibrate in silent mode
Connected to Wi-Fi
Silence incoming calls and notifications
Wi-Fi hotspots enabled
Vibrate on incoming calls and notifications
Music player on
Bluetooth on
Call forwarding enabled
Alarm on
GPS enabled
SIM/UIM card unavailable
Headset inserted
3
2-3 Screen Control
You can control your phone through a series of operations on the screen.
- Touch: select an item or option on the screen, or open an application.
- Slide: swipe left/right or up/down on the screen to move what’s on the screen.
- Press and hold: press your finger down and leave it there for a few seconds to open a
menu specific to what you’re doing.
- Drag: drag some items on the screen to accomplish certain operations.
- Pinch or stretch: in some applications (e.g., Gallery, Browser), pinch two fingers
together on the screen or stretch them apart to zoom out or in.
- Rotate: in most screens, rotate your phone sideways to switch the screen from portrait
mode to landscape mode.
2-4 Home Screen
The home screen appears when the phone is in idle mode. On the home screen, you can
check the status of your phone and access applications.
Extend home screen
The home screen can be extended to exceed the width of the screen to provide more space
for newly added applications, shortcuts, widgets, etc.
Slide left/right on the home screen to move to another section of the home screen.
Touch one of the small dots at the lower part of the screen to directly move to the relevant
screen. Press and hold the small dot area and drag to quickly navigate.
Quick launch toolbar
There are four icons at the bottom of the screen. You can move the applications or shortcuts
that you need to access most frequently into the quick launch toolbar.
1. Press and hold an icon on the toolbar and drag it to the area outside the toolbar.
2. Press and hold another icon on the screen you want to move, and then drag it to an empty
area inside the toolbar.
Show/hide notification bar
When a new notification icon appears in the notification bar, you can pull down the
notification bar to view the list of notifications and you can touch a notification to perform an
operation. Swipe up from the bottom of the screen to hide the notification bar.
Move icons on home screen
To move an icon on the home screen, press and hold the icon you want to move, drag it to
your desired position on the screen and release it. Drag the icon to the navigation bar with
dots to quickly switch to another screen.
Press and hold the icon you want to move and release it to make it jump to the bottom of the
screen. Slide left or right to the target screen and touch the icon at the bottom of the screen
to make it jump to the target screen.
4
Delete icons on home screen
To uninstall an application or remove a widget, press and hold the “Application” or “Widget”
icon and drag it to the “Remove/Uninstall” icon at the top of the screen.
Note: The preinstalled system applications cannot be removed.
Change desktop wallpaper
On the home screen, press the “Menu” key (bottom left corner of the phone), then
“Wallpaper” to choose a wallpaper.
Change desktop theme
On the home screen, touch “ThemeManager” to choose a theme.
Access recently used applications
Press and hold the “Home Screen” key (bottom middle of the phone) to open a list of most
recently used applications. Touch a thumbnail to enter the relevant application, swipe up
on an application thumbnail to remove the application from the list, and swipe down on an
application thumbnail to lock/unlock the application. Touch the round icon at the lower part
of the screen to clear the list. The locked applications won’t be removed.
Use shortcuts panel
On the home screen or in the process of using an application, pull down the notification bar
to open the shortcuts panel. Touch the shortcut icons to perform the related actions.
Create a folder and put items into the folder
1. On the home screen, press and hold an icon and drag it to another icon on the screen to
create a folder containing these two icons.
2. Press and hold other icons and drag them to the folder to add items to the folder.
2-5 Lock & Unlock the Screen
Lock the screen
Press the “Power” key to lock the screen. The phone will automatically lock the screen after
it’s not used for a pre-chosen amount of time.
Lockscreen photo
When the screen is locked, press the “Power” key to light up the screen.
If the “Lockscreen Photo” function is enabled, slide two fingers to the left or right on any part
of the screen to display the lockscreen photos.
Touch the screen to stop them playing. Slide left or right to view photos, and touch the
screen again to resume auto-play.
To exit from the lockscreen photo, touch the “Home Screen” key or “Back” key, or slide two
fingers to the left or right.
Press the “Menu” key > “System Settings” > “Features” > “Lockscreen Photo” to enable/
disable lockscreen photo, set Play interval and select the folder.
5
Show Music widget
When the screen is locked, press the “Power” key to light up the screen, and double-touch
the “Home Screen” key to display the Music widget.
Unlock the screen
1. Press the “Power” key to light up the screen.
2. Drag the “Unlock” icon to “Unlock” to unlock the screen, and drag the “Unlock” icon to
“Unlock to Camera” to directly enter the camera interface.
Change Screen Lock method
1. On the home screen, press the “Menu” key > “System Settings” > “Security” > “Screen Lock.”
2. Choose the screen lock method.
3 Calls
3-1 Make a Call
Directly make a call
On the home screen, touch the “Phone” icon to display the dialing keypad. Touch the numeric
buttons to enter telephone numbers and touch the
button to make a call.
You can touch the first letter of a contact’s name on the dialing keypad to quickly search for
the contact. For example, if you want to call John, enter 5(JKL)-6(MNO)-4(GHI)-6(MNO).
Make a call from contacts
On the home screen, touch the “Contacts” icon, touch the contact you want to call and touch
the
button to make a call.
Make a call from the call logs
On the home screen, touch the “Phone” icon, select a call in the log and touch it to make a call.
Make an international call
On the home screen, touch the “Phone” icon to display the dialing keypad, press and hold
the “0” key until “+” appears on the screen, and then dial the country/region code, city code
and phone number.
Make a call from messaging
1. On the home screen, touch the “Messaging” icon to open the messaging interface.
2. Touch a message to open it.
3. Touch the
icon to view the details of the message sender and touch the
button to
call the sender.
6
Speed dial
On the dialing keypad, press and hold one of the number keys that you previously assigned
to a contact to quickly call the corresponding contact.
To assign a number to a contact, touch and hold one of the keys and follow the prompts.
3-2 Call Settings
1. On the home screen, touch the “Phone” icon to display the dialing keypad.
2. Press the “Menu” key > “Call Settings” to set up the options for calling. In the “Additional
Settings” menu, you can set up Fixed Dialing Numbers, Call Forwarding and Call Waiting.
3-3 Answer a Call
The phone will ring or vibrate (depending on the current mode and settings) for an incoming call.
- If the screen is unlocked, touch the “Answer” icon to answer the call on the incoming call interface.
- If the screen is locked, drag the
icon and swipe up to answer the call on the incoming call
interface.
- If you’ve activated “Motion Answer,” you can put the phone near your ear to directly
answer the call.
3-4 Reject a Call
Screen unlocked
On the incoming call interface, touch the “Decline” icon to reject the call.
If you want to politely reject the call, you can touch the “Send SMS” icon to send a text
message.
Screen locked
On the incoming call interface, drag the
icon to “Reject Call” to reject the call.
If you want to politely reject the call, you can drag the
icon down farther to “Send SMS.”
3-5 End a Call
During a call, touch the “End” icon to end the call.
3-6 Options During a Call
Adjust the volume
During a call, press the volume key to adjust the volume.
Dialpad
During a call, touch the “Dialpad” icon to display the dialing keypad for easy operations.
7
Speaker
During a call, touch the “Speaker” icon to enter the hands-free mode and touch the icon
again to resume.
Mute
Touch the “Mute” icon to turn off the microphone so the other party is unable to hear your
voice. Touch the icon again to turn mute off.
Add call
During a call, press the “Menu” key > “Add Call” to mute the phone and call another number.
You then can swap between the two calls by touching “Swap Calls” or combine them into a
conference call by touching “Merge Calls.” The function requires the support of the network
operator.
Record
During a call, press the “Menu” key > “Record.”
3-7 Call Log
1. On the home screen, touch the “Phone” icon.
2. The call log is displayed on the screen. If you want to clear the call log, press the “Menu”
key > “Clear Call Log.”
3-8 Voicemail
Note: Prior to accessing the voicemail server, you must save the voicemail server number.
Please contact your network operator to get the number.
Set up voicemail
1. On the home screen, touch the “Phone” icon to display the dialing keypad.
2. Press the “Menu” key > “Call Settings” > “Voicemail” > “Setup.”
3. Touch “Voicemail Number” to change the number.
Listen to voicemail
On the home screen, touch the “Phone” icon to display the dialing keypad, then press and
hold the “1” key to listen to voicemail.
8
4 Contacts
4-1 Create New Contact
1. On the home screen, touch the “Contacts” icon and select “New Contact.”
2. Enter the information for the new contact.
3. Select the storage location under “Save To.”
4. Touch “Done” to save.
4-2 Search Contacts
After you enter “Contacts,” all contacts will be arranged in alphabetical order.
1. Swipe up/down to scroll the list of contacts. You can also quickly scroll the list by dragging
your fingers along the right index.
2. Touch “Quick Search,” and touch the first letter of a contact’s name to quickly locate the
contact. Touch “Find Contacts” at the top of the screen and enter a contact’s name to
quickly find the contact.
3. Touch a contact’s name to view the details of the contact.
4. When a contact is open, you can touch
to call them and touch
to send a message
to them.
4-3 Add to Favorites
1. Enter “Contacts” and select the contact you want to add to favorites.
2. Touch “Star.”
3. On the contacts interface, all favorite contacts are displayed at the top of the screen.
Note: You can only add the contacts stored in the phone to favorites.
4-4 Contacts Group
1. Enter “Contacts” and touch the “Group” icon.
2. Touch the “Create Group” icon.
3. Enter a name for the group.
4. Touch “Default Ring” to set the ringtone for the group, and enter a contact’s name or
touch
to select from the list of contacts.
5. Touch “Done.”
6. Open a group and touch “Text” or “Email” at the bottom of the screen to send a text
message or Email to all of the group members.
Note: You can only add the contacts stored in the phone to a Group.
9
4-5 Delete a Contact
1. Enter “Contacts” and press the “Menu” key > “Delete Contact.”
2. Touch the contact(s) you want to delete and touch “OK.”
4-6 Edit a Contact
1. Enter “Contacts” and select the contact you want to edit.
2. Touch the “Edit” icon at the bottom of the screen.
4-7 Scan Business Card
1. Enter “Contacts” and touch the “Scan” icon.
2. Center the business card in the viewfinder, touch the shutter button and the
display the information from the business card on the screen.
3. Touch “Done.”
icon to
4-8 Share a Contact
You can share a contact with others.
1. Enter “Contacts” and select the contact you want to share with others.
2. Touch the “Share” icon.
4-9 Import & Export Contacts
You can move contacts from the SD card to the phone or from the phone to the SD card.
1. Enter “Contacts.”
2. Press the “Menu” key > “Advanced” and select from “Import/Export Contacts.”
5 Messaging
5-1 Send Messages
1. On the home screen, touch the “Messaging” icon to enter the messaging interface, and
touch the “Create” icon.
2. Type a phone number into the “To” field.
- For multiple numbers, please separate them with a comma.
- You can also touch the icon to select your desired phone number from Contacts.
3. Type the message text into the “Type message” field. Touch the
icon to insert an
Emoticon, Picture, Video, Audio, Phrase or Subject.
4. Touch to send the message.
10
5-2 Receive Messages
There is a notification in the notification bar upon the receipt of a new message. You can pull
down the notification bar and touch a message to view it.
5-3 Delete Messages
In the messaging interface, press and hold a message thread, then select the message
thread(s) you want to delete, and touch the “Delete” icon at the bottom of the screen.
5-4 Message Settings
On the messaging interface, press the “Menu” key > “Settings” to choose settings related to
messages.
6 Email
6-1 Set Up an Email Account
1. On the home screen, touch “Email.”
2. Enter your Email address and password and touch “Next.”
3. Follow the prompts on the screen.
6-2 Check Emails
1. If you have set up your Email account, touch “Email” to enter the inbox of this account.
2. If you want to check Emails of more accounts, select “Settings” > “Add Account.”
3. Touch the account’s name at the top of the screen to select the account you want to
check. Touch “Combined View” to check all of the Email accounts you’ve set up in one inbox.
4. Scroll the screen and check the Emails.
6-3 Send an Email
1. On the Email interface, touch the “Compose” icon.
2. Type the recipient’s address into the “To” field or touch the
icon to select a recipient
from the list of contacts.
3. If you need to send a CC or BCC, press the “Menu” key > “Add CC/BCC.”
4. Touch “Subject” to enter the Email subject.
5. Touch the body of the message to enter the text.
6. If you want to attach a file, touch the “Attach File” icon.
7. Touch “Send” to send the Email or press the “Menu” key > “Save Draft” to save the Email
as a draft.
11
7 Network Applications
7-1 Data Connection
Your phone can connect to the internet.
Pull down the notification bar to show the shortcuts panel, and touch “Data” to enable or
disable the data connection.
On the home screen, you can also press the “Menu” key > “System Settings” > “More” >
“Mobile Networks” to perform detailed settings for data connection.
Note: You may need to pay for some data service. For details, please consult your network
service provider.
If you don’t want to use the mobile network for data, please promptly disable data
connection to avoid unnecessary charges.
7-2 Wi-Fi
Your phone can connect to the internet through a wireless access point or Wi-Fi hotspot.
Turn on Wi-Fi
1. On the home screen, press the “Menu” key > “System Settings.”
2. Drag the button next to “Wi-Fi” to the right to turn it on, then touch “Wi-Fi.”
3. Your phone will automatically search for available wireless access points.
4. Select an access point from the list.
- If you’ve selected an open network, your phone will automatically connect to the network.
- If you’ve selected a secure network, your phone will connect to the network after you
enter the correct password.
Manually add Wi-Fi
1. On the home screen, press the “Menu” key > “System Settings” > “Wi-Fi.”
2. Touch the “Add Network” icon, enter the network SSID and select the security type.
3. Touch “Show Advanced Options” to perform further settings.
4. Touch “Save.”
7-3 Tethering & Portable Hotspot
Tethering Wi-Fi hotspot
1. On the home screen, press the “Menu” key > “System Settings” > “More.”
2. Touch “Portable Wi-Fi Hotspot.”
3. Touch “Set Up Wi-Fi Hotspot” to set “Network SSID,” “Security” and “Password.”
4. Find your phone’s network SSID on other devices and connect.
12
USB tethering
After connecting your phone to the PC with a USB cable, you can use your phone as a
modem to share the phone’s mobile network.
If your operating system is Windows 7 or Mac OS X, you can establish network connection
with the following method. If you use other operating systems, you may need to manually
establish a network connection.
1. Connect your phone to the PC with a USB cable.
2. On the home screen, press the “Menu” key > “System Settings” > “More.”
3. Drag the button beside “USB Tethering” to the right to turn it on.
4. When tethered, you can access the internet on your computer through the phone’s
network.
Bluetooth tethering
1. On the home screen, press the “Menu” key > “System Settings” > “More.”
2. Drag the button beside “Bluetooth Tethering” to the right to turn it on and share the mobile
network.
3. Make sure you have turned on Bluetooth and chosen “Visible to all nearby Bluetooth
devices.” Scan for other devices. Pair and connect to one with your phone.
7-4 Browser
Open browser
1. On the home screen, touch the “Browser” icon.
2. Touch the input field at the top of the screen and enter a website address.
3. Touch “Go.”
Browser options
When browsing a web page, you can slide to view other parts of the web page.
- Pinch your fingers together on the screen or stretch them apart to zoom in or out.
- Double-touch the screen to return to the original size. The function might not be available
on some pages.
- Press the “Menu” key > “Save to Bookmarks” to bookmark the current web page.
- Select “Bookmarks” to open the saved bookmarks.
- Press the “Menu” key > “Share” to send the website to others or share with others.
Browser settings
On the browser interface, press the “Menu” key > “Settings” for more options.
13
7-5 Bluetooth Connection
With the Bluetooth function, you can exchange data with other nearby Bluetooth devices.
Since Bluetooth devices communicate through radio waves, there may be interference due
to obstacles or other electronic devices.
Turn on Bluetooth
1. On the home screen, press the “Menu” key > “System Settings” > “Bluetooth.”
2. Drag the button beside “Bluetooth” to the right to turn on Bluetooth.
Search for devices and pair
1. On the home screen, press the “Menu” key > “System Settings” > “Bluetooth” > “Search
for Devices.”
2. Select a device.
3. Touch “Pair” or enter the Bluetooth password and then touch “OK.”
After the pairing request is accepted by the other device or the same password is entered,
pairing is completed.
4. After pairing, these two devices can communicate within a short distance.
Send data via Bluetooth
You can send music, sound recordings, videos, calendar events, contacts, etc., via Bluetooth.
The process depends on what you send. Below is an example of sending a photo via
Bluetooth.
1. On the home screen, touch “Gallery.”
2. Open the photo you want to send.
3. Select the “Share” icon > “Bluetooth.”
4. If there is a prompt “Turn on Bluetooth Now?” on the screen, touch “Turn On.”
5. Select a paired device or touch “Scan for Devices.” Select a device from the list to pair
and send the file.
Receive data via Bluetooth
1. Turn on Bluetooth and slide the button next to “Only Visible to Paired Devices” to make the
phone visible.
2. Open the notification bar, touch the Bluetooth share notification and touch “Accept” to
receive the file.
3. After the file is received, the phone will display a notification. If you want to view the file
immediately, open the notification bar and touch the relevant notification.
14
8 GPS
The phone has a GPS receiver so you can turn on GPS service and use GPS functions.
Please try to use GPS on sunny days. GPS performance can be affected by factors such as
a ceiling, roof or weather. If you want to get the best performance, please try to move to an
area where you can have a 360° panoramic view of the entire sky. Skyscrapers and walls
might affect the GPS performance.
Start GPS
You can receive the information of your location and search maps only after GPS service is
enabled.
1. On the home screen, press the “Menu” key > “System Settings” > “Security & Location” >
“Location Service.”
2. Drag the button beside “Access to My Location” to the right to turn it on.
3. Select “GPS Satellites” and/or “Wi-Fi & Mobile Network Location” as the location sources.
9 Connect to Your PC
USB mass storage
1. Connect your phone to your computer with a USB cable.
2. Select “USB Mass Storage” on the screen of your phone. If that doesn’t appear
automatically, bring down the notification menu and touch “USB Connected,” then “USB
Mass Storage” from the USB Connection menu.
MTP media device
You can access the media files saved in your phone from your PC.
1. Connect your phone to your computer through a USB cable.
2. Select “Show Files” from the USB Connection menu.
PTP camera device
You can access the photos saved in your phone from your PC.
1. Connect your phone to your computer through a USB cable.
2. Select “Show Pictures” from the USB Connection menu.
Modem
You can access the internet on your PC when your phone is connected as a modem.
If your computer’s operating system is Windows 7 or Mac OS X, you can establish a network
connection with the following method. For other operating systems, you need to manually
establish a network connection.
1. Connect your phone to your computer through a USB cable.
2. Select “Modem” from the USB Connection menu.
15
10 Settings
10-1 Wireless & Networks
Airplane mode
When Airplane mode is activated, your phone will turn off all wireless connections.
1. On the home screen, press the “Menu” key > “System Settings” > “More.”
2. Move the button next to “Airplane Mode” to turn it on.
Tip: You can pull down the notification bar to show the shortcuts panel, and touch “Airplane”
to turn on/off Airplane mode.
Data usage
On the home screen, press the “Menu” key > “System Settings” > “More” > “Data Usage”
to check data usage.
Mobile networks
1. On the home screen, press the “Menu” key > “System Settings” > “More.”
2. Select “Mobile Networks” and then you can change settings including “Data Enabled,”
“Data Roaming,” “Access Point Names” and “Network Operators.”
10-2 Personal
Display
On the home screen, press the “Menu” key > “System Settings” > “Display.” You can
change all kinds of display settings of your phone.
Wallpaper: Select one from Gallery, Live Wallpapers, Photos or Wallpapers.
Notification panel
If you turn on “Missed Event,” your phone will display missed calls and unread messages
when the screen is locked. Under “Lockscreen App,” you can select the applications that
can be displayed when the screen is locked. Under “Notification App,” you can select the
applications that can be displayed in the notification bar. Under “Arrange Toggles,” you can
select which toggles will appear on the notification bar and drag the items to adjust their
order.
16
Screen timeout: adjust the delay before the screen automatically turns off.
Auto-rotate screen: rotate the phone to change the display orientation after you turn it on.
Automatic brightness: after you turn on Automatic Brightness, your phone will adjust the
screen brightness automatically according to the environment. If Automatic Brightness is
disabled, you can drag the scrollbar to adjust the screen brightness manually.
Notification light: after you turn it on, the notification light will light up as your phone is
being charged; upon low battery; or if there is a missed call, unread message or application
message.
Font size: set the font size for Phone, Messaging, Contacts and Settings.
Screen projection: turn on/off screen projection.
Sound
On the home screen, press the “Menu” key > “System Settings” > “Sound.” You can change
all kinds of sound settings for your phone.
Volumes: set the volume for Ringtone and Notifications, Media, System and Alarms.
Silent mode: turn on/off Silent mode.
Phone ringtone: set the default incoming call ringtone.
Messaging sound: set the default message ringtone.
Default notification sound: set the default notification ringtone.
Vibrate when silent: set whether or not to turn on vibration in Silent mode.
DTS: enhance sound effects when playing video, music, audio and games to provide a
complete entertainment experience.
Dialpad touch tones: play sound when touching the dialpad.
Touch sounds: play sound when touching the screen.
Screen lock sound: play sound when locking the screen.
Vibrate on touch: vibrate when touching the buttons.
Power on sound: play sound when powering on/off your phone.
Security and location
Screen lock: select Slide, Face Unlock, Pattern, PIN or Password to lock the screen.
Set up SIM/RUIM card lock: after you select “Lock SIM Card,” you need to enter a PIN that
you will enter when you turn on the phone.
Make passwords visible: after you select “Make Passwords Visible,” you can see the
password you are entering.
Location service: turn on/off GPS.
Device administrators: view or deactivate device administrators.
App ops: view or change application permissions.
Installation manager: allow installation of apps from unknown sources.
17
Install from SD card: install an encrypted certificate from the SD card.
Clear credentials: remove all certificates.
Accounts
Touch “Add Account” to add accounts requiring synchronization.
10-3 System
Feature
Please see page 33.
Language and input
Choose the menu language, default input method, etc.
Date and time
Set the date and time displayed on the phone.
Battery
Check the battery status.
Apps
View the downloaded applications, ones on the SD card, running and all applications.
About phone
Check the phone’s battery usage, status and legal information.
More
Backup and reset: reset the phone to factory settings and erase all data.
Accessibility: accessibility is specially customized for people with disabilities. Changing
settings can make the phone more accessible to people with disabilities.
18
11 Multimedia
11-1 Camera
You can take photos with your phone. You can use a photo taken with your phone as
wallpaper, or send it to others via text messaging, Email, etc.
Tip: Please respect others’ rights and abide by local regulations and customs when taking
photos.
Turn on camera
On the home screen, touch “Camera” to open the camera.
There are three modes: Auto, Pro and Fun.
Auto: provides the basic camera functions. Simply press the shutter button to capture what
you want.
Pro: provides functions such as AE/AF Separation, AWB/AE/AF Lock, Gradient and Graphic
Lines, and Time-Lapse Shooting, which make your phone as good as a professional digital
camera.
Fun: provides Timer Shot, Multi-Exposure, Clear Object, Trajectory, Video Maker, Panorama
and Special Effect, which make your photos more entertaining.
On the camera interface, touch the bottom right icon to switch among the three different
modes.
Auto
1. In Auto mode, aim your lens at an object and adjust the following.
- : set Shutter Sound and Storage Location.
- / / : switch among Flashlight ON/Flashlight OFF/Auto Flashlight
- / : turn on/off HDR.
- / / / : set Time-Lapse Shooting and switch among 5S/10S/20S/OFF.
- : switch between Front Camera and Back Camera.
- Press the volume key or pinch/stretch your fingers on the screen to adjust the focus.
- Touch the position on the screen where you want to focus, and the focus frame will move
to this position.
2. Touch to take a photo and press and hold to take several. The photos will be
automatically saved.
3. Touch the photo thumbnail in the lower left corner of the screen to view the photo.
Pro
1. In Pro mode, aim your lens at an object and adjust the following.
- : set Picture Size, White Balance, ISO, etc.
- / / : switch among Flashlight ON/Flashlight OFF/Auto Flashlight.
- / : turn on/off HDR.
- / / / : set Time-Lapse Shooting and switch among 5S/10S/20S/OFF.
19
- : switch between Front Camera and Back Camera.
- You can separately drag the square frame and round frame on the screen.
- Press and hold the square frame to achieve AF lock.
- Press and hold the round frame to achieve AE lock.
- If you touch the icon and set White Balance as “Independent,” the screen will display a
diamond frame. Press and hold the diamond frame to achieve auto white balance lock.
2. Touch to take a photo and press and hold to take several. The photos will be
automatically saved.
3. Touch the photo thumbnail in the lower left corner of the screen to view the photo.
Fun
1. In Fun mode, aim your lens at an object and adjust the following.
- : Set Shutter Sound and Storage Location.
- / / : switch among Flashlight ON/Flashlight OFF/Auto Flashlight.
- / / / / / : Select Timer Shot, Multi-Exposure, Clear Object, Trajectory, Video
Maker, Panorama or Special Effect.
: switch between Front Camera and Back Camera.
2. Touch to take a photo. The photo will be automatically saved.
3. Touch the photo thumbnail in the lower left corner of the screen to view the photo.
Timer shot
1. Select “Timer Shot,” then slide the slider to the interval you wish.
2. Touch and it will take a snapshot continually at the set interval until you stop it.
Multi-exposure
1. Select “Exposure.” There are multiple multi-exposure modes on the screen from which to
select. Touch an icon at the lower part of the screen to select your desired mode.
2. Touch to take a photo. Take photos according to the prompt on the screen and combine
them into one photo.
Clear object
1. Select “Clear Object.”
2. Touch to take a photo. If something moved that you wish to remove from the final
picture, such as someone who unexpectedly walked by, touch the area that appears
outlined in blue to remove the object from the combined picture.
3. Touch to save the photo.
Trajectory
1. Select “Trajectory.”
2. Touch
to take a snapshot. Select more than three photos and touch
combined photo.
20
to save the
Video maker
1. Select “Video Maker.”
2. Press and hold to record a video. Release to pause. Press and hold again to
continue recording and touch to end.
3. Select the photos that will appear in the video clip. You can select Original Sound, Silence,
or some music for the video clip. You can select Rewind or Unrewind to set the playing
order and select Slow, Medium or Fast to set the playing speed.
4. After that, touch to save the video with the chosen settings.
Panorama
1. Select “Panorama.”
2. Touch , slowly move the phone horizontally or vertically to take photos, and touch
to finish.
Special effect
1. Select “Special Effect.” There are multiple special effects on the screen from which to
select. Touch an icon at the lower part of the screen to select your desired special effect.
2. Touch to take a photo.
11-2 Camcorder
You can record video clips with your phone.
Tip: Please respect others’ rights and abide by local regulations and customs when recording
video clips.
1. On the home screen, select “Camera” and touch the
button.
2. Aim your lens at an object and adjust the following.
- : set Video Quality, Video High Frame Rate, Focus Lock When Video Recording, Zoom
When Video Recording, Wavelet Denoise mode and Storage Location.
- / : switch between Flashlight ON and Flashlight OFF.
- : switch between Front Camera and Back Camera.
3. Touch to start recording and touch
to end recording. Touch to take a photo during
the process of video recording.
4. After recording, touch the thumbnail in the lower left corner of the screen to view the
video clip.
21
11-3 Music Player
With Music player, you can listen to the music saved in your phone.
Play local music
Before playing music, please first copy music files into your phone.
On the home screen, touch “Music Player” to open the Music player.
1. If you are entering the Music player for the first time, if it hasn’t already scanned
automatically, select “All Music” > “Menu” key > “Scan Music” to automatically search
for all music files saved in the phone and on an inserted SD card.
2. Touch a music file to start playing it and touch
to stop playing it.
3. During the process of playing music, you can press the volume keys to adjust the volume.
4. Touch the playing song’s thumbnail to enter the song’s Music player interface.
- Touch to add the current song to Favorites.
- Touch to return to the Music Playlist.
- Touch to switch among Random Play, Repeat Current Song, Repeat All Songs and
Ordinal Play.
- Touch to select Share, Download, Set as Ringtone, Delete, Tone Improver, Song Info
or Quit.
Add playlist
You can create some playlists to manage your music files.
1. On the local music interface, select “Playlists” > “Add Playlist.”
2. Enter a Playlist name and touch “Confirm.”
3. Touch “Add Music,” select a music file(s) and touch “Add.”
11-4 Video Player
With Video player, you can watch the videos saved in your phone.
1. On the home screen, touch “Video” to open the list of videos.
2. Select a video and touch it to play it.
During the process of playing videos, you can touch the screen and then the pause button to
stop playing the video and touch the icon again to continue to play it.
- Touch the “PIP” button to enable the Picture-in-Picture function. A small suspending
image appears after you touch the icon.
- Touch “Lock”/“Unlock” to lock/unlock the screen.
- Touch “More” > “Share” to share the video with your friends.
- Touch “More” > “Snapshot” to capture the current screenshot.
- Touch “More” > “Details” to view the video details.
22
You can perform the following operations with your fingers:
- Slide your fingers on the screen to the left/right to fast forward/rewind. The time progress
appears at the top of the screen.
- Pinch your fingers together on the screen or stretch them apart to adjust the display ratio
of the screen.
- Swipe up/down to adjust the volume.
11-5 Gallery
On the home screen, touch “Gallery” to view all photos and videos in your phone and on your
SD card. You can also use the Video Player to play the videos.
View photos
1. Touch the album you want to open, and select the photo you want to browse.
2. Double-touch the photo to enlarge and double-touch it again to return to regular size.
3. If you want to edit your selected photo, touch the photo and select “Edit.”
4. Pinch your fingers together on the screen to zoom out, then slide it up or down to delete.
Make GIF
1. Select an album from “Gallery” > “My Album.”
2. Open the album, select “More” > “Make GIF.”
3. Touch two or more photos > “OK” > “Make GIF.” Type a name > “Confirm.”
Slideshow
1. Select an album from “Gallery” > “My Album.”
2. Open the album and touch “Slideshow.”
12 Tools
12-1 Flashlight
On the home screen, touch “Tools” > “Flashlight” to use your phone as a flashlight.
Turn on flashlight
On the flashlight interface, drag the
button up to turn on the flashlight.
Turn off flashlight
On the flashlight interface, drag the
button down to turn off the flashlight, or pull down the
notification bar and touch the “Close” button next to “Flashlight” to turn it off.
Enter SOS mode
Whether you turn on the flashlight or not, touching the “SOS” button will enter SOS mode.
The flashlight will flash to send out a distress signal.
23
12-2 Sound Recorder
On the home screen, touch “Tools” > “Sound Recorder” to turn on the sound recorder.
Record audio files
1. Move the microphone on your phone close to your mouth and touch
to start recording.
2. Touch to pause, touch to continue and touch to stop recording.
3. Your phone will automatically save your recordings. Touch the name of your recording to
play it.
Set as ringtone
Press and hold a recording file, touch the “Menu” icon at the bottom right of the screen to
display a pop-up menu and touch “Set as Ringtone.”
Cut audio files
Press and hold a recording file, then touch “Cut.” Press OK and then drag the two ends of the
scrollbar. The contents between the two will be saved.
12-3 Calculator
On the home screen, touch “Tools” > “Calculator” to perform simple calculations.
If you rotate the phone to landscape mode, it automatically switches from Simple Calculator
to Advanced Calculator.
12-4 FM Radio
1. Insert the earphone into your phone. On the home screen, touch “Tools” > “FM Radio” to
open the FM radio.
2. Touch to turn on the radio.
- Slide your fingers on the channel scale in the center of the screen to adjust the frequency.
- Touch and “Scan Stations.” Your phone will search channels. Touch one channel to
listen to it.
- Touch to mark the channel as a favorite.
- Touch to turn off the radio.
- Touch and to seek channels up and down the dial.
- Press the volume key to adjust the volume.
- Select > “Enable Speaker” to listen to the radio through the speaker.
- Press the “Menu” key > “Settings,” touch “Alternate Frequency” to turn on or off
“Alternate Frequency.”
- Press the “Menu” key > “Settings”> “Radio Auto Off” to automatically turn off FM radio
after a certain period of time.
24
12-5 NotePad
1. On the home screen, touch “NotePad.”
2. Touch the “Add Note” button.
3. Enter what you want to write down and touch “Done.”
4. On the NotePad interface, touch a record to view its contents.
12-6 Calendar
On the home screen, touch “Calendar.” Touch the date at the top of the screen to select
TODAY, Day, Week or Month to view the calendar, and touch “Agenda” to view all events.
Tip: When viewing calendar by Day or Week, press and hold an event and drag it to another
time to quickly change the time of the event. You can slide your fingers on the screen to the
left/right on the Week view to change its date.
Create new event
1. On the calendar interface, touch the “New Event” button.
2. Enter the information for the new event and touch “Save.”
Edit event
1. On the calendar interface, touch the date at the top of the screen and touch “Agenda.”
2. Select the event you want to edit, and touch the “Edit” button.
Display and synchronize calendar
1. On the calendar interface, press the “Menu” key > “Calendars to Display.”
2. Select the calendars you want to display.
3. Touch “Calendars to Sync” to synchronize the calendars under other accounts.
12-7 Time Manager
On the home screen, touch “Time Manager” to set Alarms, check World Time and use
Stopwatch and Countdown functions.
Alarm
Add alarm
1. Select “Alarms” and touch “Add Alarm.”
2. Set up the alarm and touch “OK.”
Turn on/off alarm
On the “Alarms” interface, drag the button to the right to turn on the alarm, and to the left to
turn off the alarm.
25
Delete alarm
On the “Alarms” interface, press and hold the alarm you want to delete, then touch “Delete
Alarm” and then “Delete.”
World time
Add city
1. Select “World Time” and touch “Add City.”
2. Select cities based on your requirements. The time in different cities will be displayed on
the “World Time” interface.
Delete city
On the “World Time” interface, press and hold the city you want to delete, then touch
“Delete” and “OK.”
Stopwatch
1. Select “Stopwatch.”
2. Touch “Start” to start the stopwatch, touch “Record” to record the current time, and touch
“Stop” to stop counting the time.
3. Touch “Reset” to reset the stopwatch.
Timer
1. Select “Timer.”
2. Swipe up and down to set the period of time for your countdown.
3. Touch “Start” to start the countdown.
4. Touch “Cancel” to reset the clock.
13 Features
13-1 Profile
On the home screen, touch “Profile.”
Pocket
Avoid mistouching in pocket: when this function is enabled, the phone can prevent some
inadvertent operations when put inside of a pocket. In Pocket mode, the screen will light
up upon an incoming call or in other cases, but operations won’t be allowed on the lighted
screen. Take the phone out of the pocket to exit from Pocket mode.
Ringtone volume highest and vibration: when this function is enabled, your phone will
automatically adjust to the maximum vibration or ringtone when put inside of a pocket.
26
Powersave
When the Powersave mode is enabled, your phone will consume less power.
Below “Powersave” are the detailed settings.
Sleep
1. Drag the button to enable/disable the Sleep mode.
2. After Sleep mode is enabled, your phone will not ring or vibrate, and it will automatically
disable notifications, the notification light and dim the screen. You’ll be prompted only
upon an incoming call or message from the list of allowed contacts.
- Turn on and touch “Timer Switch” to set the time for enabling/disabling sleep mode.
- Touch “Allowable Contacts” to edit the list of contacts.
- If you turn on “Auxiliary Sleep,” your phone will play some Sleep Music within the set
period once upon entering Sleep mode. Touch “Auxiliary Sleep” to select the Sleep music
and set the time length for playing music.
- If you turn on “Disable Network Connection,” your phone will turn off WLAN, mobile
networks, GPS, Bluetooth and Wi-Fi hotspots upon entering Sleep mode.
- If you turn on “Repeated Incoming Calls Not Barred,” the phone will light or vibrate when
receiving the same incoming call for the third time or more in 5 minutes.
- After the phone enters Sleep mode and the screen turns off, the screen displays the
Sleep clock. Touch the screen to light up the screen.
13-3 Lockscreen Photo
On the home screen, press the “Menu” key > “System Settings” > “Feature” > “Lockscreen
Photo.”
If the “Lockscreen Photo” function is enabled, you can press the “Power” key to light up the
screen, and slide two fingers to the left or right on any place on the screen to display the
Lockscreen Photos.
When photos are auto-playing, you can touch the screen to stop playing them. Slide left or
right to view photos, and touch the screen again to resume auto-play. Press the “Home
Screen” key or “Back” key to exit from photo auto-playing. You can also slide your fingers to
the left/right to exit. You can set the Play Time and select the folder you want to play.
13-4 Custom Bottom Key
You can define the functions of the three keys at the bottom of the phone.
On the home screen, press the “Menu” key > “System Settings” > “Feature” > “Custom
Bottom Key,” and select what you prefer according to the prompts on the screen.
13-5 Touch Gestures
You can perform fast operations on the screen via gestures.
On the home screen, press the “Menu” key > “System Settings” > “Feature” > “Touch
Gestures” to set it up. Slide the button next to “Touch Gestures” to the right.
27
Free screenshot
When this function is enabled, you can press and hold the “Menu” key to enter the free
screenshot mode. Draw an enclosed pattern to take your desired screenshot.
Tri finger screenshot
When this function is enabled, you can swipe up with three fingers to take a screenshot.
Tri finger switch app
When this function is enabled, you can slide three fingers to the left or right to switch
between the opened applications.
View notifications
When this function is enabled, you can swipe down with one single finger from any place of
the desktop to view notifications.
13-6 Smart Sensing
With the smart sensing function, you can control your phone with a flip, shake, etc.
On the home screen, press the “Menu” key > “System Settings” > “Feature” > “Smart
Sensing” to set these up. Slide the button next to “Smart Sensing” to the right.
Motion sensing dial
When viewing the detailed information of logged calls, messages or contacts, put the phone
close to your ear to dial the contact.
Motion sensing answer
Upon an incoming call, put the phone close to your ear to answer the incoming call.
Flip to mute/pause
Flip the phone to mute the ringer, pause the media player or snooze the alarm.
Shake to change songs
When playing music, shake the phone to the left to play the previous song, and shake the
phone to the right to play the next song.
Shake to clear
On the notification bar, shake the phone to clear notifications. On the multitask interface,
shake the phone to clear memory and most recently used applications.
Shake to update
Shake the phone to update the list by scanning for Bluetooth or Wi-Fi.
28
14 Accessories
14-1 Media Share
With Media Share, devices that support DLNA can play the multimedia files (including music,
videos, pictures, etc.) in your phone; and your phone can play the multimedia files in other
devices. Before sharing, your phone and the other devices using Media Share should join the
same Wi-Fi network.
Set up connection
1. On the home screen, select “Accessories,” then “Media Share.”
2. Touch “Setting the WLAN” to connect to a Wi-Fi network.
3. Make the devices using Media Share join the same network.
Share local files
On the “Media Share” interface, touch “Images”/“Audios”/“Videos,” select a file you want to
share and select a device to play the file.
Share files on other devices in the LAN
Touch the “Scan” icon to search for nearby DLNA devices.
Touch a device’s icon to access its shared folders.
14-2 Screen Projection
With Screen Projection, you can project your phone’s screen onto your smart TV.
15 Other
15-1 My Files
With My Files, you can manage the files in your phone (including pictures, music, videos,
documents, zips, applications and folders).
15-2 Backup
On the home screen, touch “Backup.”
Touch “One-Key Backup” to back up the contacts, texts, etc., to internal phone storage or
external OTG storage.
Touch the icon to set up “Backup Content” and “Backup Device.”
- Restore: restore the previous backup.
- Scheduled Backup: backup your designated contents periodically after enabling
“Scheduled Automatic Backup.”
- History: check the history of backup operations.
- Space Info: check the space in local memory and SD card memory.
29
15-3 OTG Function
The phone supports OTG (On The Go) functions. The phone can directly transmit data with
external devices after connecting to them (USB drive, mouse, keyboard, etc.) through a USB
cable. Also, you can view and manage the data in external devices through “My Files.”
16 Input Method
The phone has the preinstalled Android input method and the TouchPal input method.
After entering a text input interface, pull down the notification bar and touch “Choose Input
Method” to switch between input methods.
17 Appendix
17-1 Safety Precautions
Using your phone safely
On the road
• Using a phone while driving is illegal in many countries. Please follow local laws and
drive safely at all times.
Near sensitive electronics
• Don’t use your phone near sensitive electronic equipment – particularly medical devices
such as pacemakers – as it could cause them to malfunction. It can also interfere with
the operation of fire detectors and other automatic-control equipment.
• For more information about how your phone affects pacemakers or other electronic
equipment, please contact the manufacturer or your local distributor.
• Your phone may cause interference when used near TVs, radios or automated office
equipment.
While flying
• Your phone can cause interference with aircraft equipment, so it’s essential that you
follow airline regulations. If airline personnel ask you to switch off your phone, or to
disable its wireless functions, please do as they say.
In a hospital
• Your phone may interfere with the normal operation of medical equipment. Follow all
hospital regulations and turn it off when you’re asked to by posted warnings or medical staff.
At a gas station
• Don’t use your phone at gas stations. In fact, it’s always best to turn it off whenever
you’re near fuels, chemicals or explosives.
30
Around water
• Keep your phone away from water (or any other liquid). It’s not a waterproof model.
Making repairs
• Never take your phone apart. Please leave that to the professionals. Unauthorized repairs
could break the terms of your warranty.
Broken antenna
• Don’t use your phone if the antenna is damaged, as it could cause injury.
• Please do not touch or cover the antenna area (the upper part on the back of your phone)
during a conversation to avoid affecting talk quality and consuming more battery power,
which might reduce the talk time and standby time.
Around children
• Keep your phone out of children’s reach. It should never be used as a toy.
Original accessories
• Only use the original accessories supplied with your phone or those approved by the
manufacturer. Using unapproved accessories may affect performance, void the warranty,
break national regulations on the use of phones, or even cause injury.
Near explosives
• Turn off your phone in or near areas where explosive materials are used. Always obey
local laws and turn off your phone when requested.
Emergency calls
• To make an emergency call, your phone must be turned on and in an area where there’s
network coverage. Dial the national emergency number and touch “send.” Explain
exactly where you are and don’t hang up until help has arrived.
Working temperature
• The working temperature for the phone is between 0° F and 104° F. Please don’t use
the phone outside the range. Using the phone under too high or too low a temperature
might cause problems.
Eyesight
• Please do not use your phone in dim light for a long time to avoid damage to your
eyesight.
• For some people, exposure to flashing lights (such as TV) might trigger seizures or
dizziness. If you have a history of seizures or epilepsy, consult a doctor before playing
video games or enabling a flashlight feature on your phone.
Safety information
• In order to protect your personal information and prevent disclosure of sensitive i
information, please set a phone password and change it from time to time, make sure
to back up important data, back up the data on your phone before disposal and reset
your phone.
• Please do not download unknown applications or browse suspected websites in order to
protect your phone from malicious applications and viruses.
At very high volume, prolonged listening to a phone can damage your hearing.
31
Charger care and safety
- Only plug into voltages between 110VAC and 220VAC. Using a voltage outside that range
can damage the phone/charger – and cause the battery to leak or catch fire.
- Never short-circuit the charger – this may cause electrocution, overheating or damage.
- Don’t charge the phone in direct sunlight or in an area where it’s damp, dusty or on
a vibrating surface. Charging your phone near – or on – a TV or radio could interfere with
transmission.
- Don’t use the charger if the power cable is damaged. It may cause a fire or give
someone an electric shock.
- Keep water well away from the charger. If the charger does get splashed by water, or any
other kind of liquid, immediately unplug it to avoid overheating, fire or electrocution.
- Don’t take the charger apart. It could cause injury, give you an electric shock or catch
fire.
- Never touch any charger, electric cable or socket with wet hands.
- Don’t place heavy objects on the electric cable.
- If the cable is damaged, don’t try to fi it yourself – it could cause a fi or electrocute you.
- Always unplug the charger before you clean it.
- When unplugging the charger, hold the plug itself, rather than pulling on the cable. A
damaged cable can cause electrocution or fire.
17-2 Care & Maintenance
The following advice will help you to keep your phone looking good and performing well:
• Use a soft dry cloth to clean your phone and charger. Don’t use liquids such as alcohol,
dilution agents or benzene.
• From time to time, clean the socket where the charger cable connects to the phone. Dust
tends to gather there. This will ensure a good connection.
• Don’t use needles, pen points or other sharp objects on the keypad or screen.
• Don’t use your phone with wet hands – it could injure you and damage the phone.
• Don’t use your phone in a dusty or dirty environment.
• Keep your phone away from extremes of heat – like radiators or ovens. It may explode if
it gets too hot.
• If your phone gets wet and the color of the label on it changes, the warranty will be void,
even if the warranty period hasn’t expired.
• If there’s anything wrong with the phone, battery, charger or any accessory, please send
them to your nearest service center for inspection.
32
17-3 SAR
Certification information (SAR)
This mobile device meets guidelines for exposure to radio waves.
Your mobile device is a radio transmitter and receiver. It is designed not to exceed the limits
for exposure to radio waves recommended by international guidelines. These guidelines
were developed by the independent scientific organization ICNIRP and include safety margins
designed to assure the protection of all persons, regardless of age and health.
The exposure guidelines for mobile devices employ a unit of measurement known as the
Specific Absorption Rate or SAR. The SAR limit stated in the ICNIRP guidelines is 1.6 watts/
kilogram (W/kg) averaged over 1 gram of tissue. Tests for SAR are conducted using standard
operating positions with the device transmitting at its highest certified power level in all
tested frequency bands. The actual SAR level of an operating device can be below the
maximum value because the device is designed to use only the power required to reach the
network. That amount changes depending on a number of factors such as how close you are
to a network base station.
Use of device accessories and enhancements may result in different SAR values. SAR values
may vary depending on national reporting and testing requirements and the network band.
Your mobile device is also designed to meet the requirements for exposure to radio waves
established by the Federal Communications Commission (USA) and Industry Canada. These
requirements set a SAR limit of 1.6 W/kg averaged over one gram of tissue. The highest SAR
value reported under this standard during product certification for use at the head is 0.65
W/Kg and when properly worn on the body is 1.19 W/Kg.
While there may be differences between the SAR levels of individual nubia 5 phones and at
various positions, they all meet the government requirement.
The FCC has granted an Equipment Authorization for this model phone with all reported SAR
levels evaluated as in compliance with the FCC RF exposure guidelines. SAR information on
this model phone is on file with the FCC and can be found under the Display Grant section of
www.fcc.gov/oet/ea/fccid after searching on FCC ID: SRQ-NX405H.
For body-worn operation, this phone has been tested and meets the FCC RF exposure
guidelines for use with an accessory that contains no metal and that positions the handset a
minimum of 1.0 cm from the body. Use of other accessories may not ensure compliance with
FCC RF exposure guidelines. If you do not use a body-worn accessory and are not holding the
phone at the ear, position the handset a minimum of 1.0 cm from your body when the
phone is switched on.
FCC compliance information
This device complies with Part 15 of the FCC Rules. Operation is subject to the following two
conditions:
(1) This device may not cause harmful interference, and (2) this device must accept any
interference received, including interference that may cause undesired operation.
33
U.S.A. U.S. FEDERAL COMMUNICATIONS COMMISSION RADIO FREQUENCY
INTERFERENCE STATEMENT
INFORMATION TO THE USER
Note: This equipment has been tested and found to comply with the limits for a Class B
digital device pursuant to Part 15 of the FCC Rules. These limits are designed to provide
reasonable protection against harmful interference in a residential installation. This
equipment generates, uses and can radiate radio frequency energy and, if not installed
and used in accordance with the instructions, may cause harmful interference to radio
communications. However, there is no guarantee that interference will not occur in a
particular installation. If this equipment does cause harmful interference to radio or television
reception, which can be determined by turning the equipment off and on, the user is
encouraged to try to correct the interference by one or more of the following measures:
- Reorient or relocate the receiving antenna. Increase the separation between the
equipment and receiver.
- Connect the equipment into an outlet of a circuit different from that to which the receiver
is connected.
- Consult the dealer or an experienced radio/TV technician for assistance.
Changes or modification not expressly approved by the party responsible for compliance
could void the user’s authority to operate the equipment. Connecting of peripherals requires
the use of grounded, shielded signal cables.
34