1
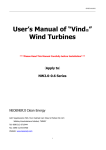
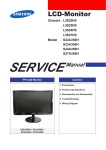
TOSHIBA AMERICA INFORMATION SYSTEMS
STORAGE DEVICE DIVISION
IRVINE, CALIFORNIA
SD-C2732
DVD-ROM MOBILE DRIVE
USER MANUAL
CONTENTS
Introduction..............................................................................1
Setup ........................................................................................3
Using the DVD-ROM ................................................................4
Troubleshooting.......................................................................6
Specifications ..........................................................................7
Drive Connectors...................................................................10
INTRODUCTION – SD-C2732
General Features
RoHS CompliantRPC2 Compliant
110ms Average Access Time (DVD)
DVD+R DL, DVD±R, DVD±RW, DVD-RAM, CD-R and CD-RW Compatible
Drive Speed
DVD
CD-ROM
DVD-RAM
DVD±R, DVD±RW, DVD+R DL
BUS Interface
8X
24X
2X
4X
ATAPI
Types of Disc Formats Supported –
DVD-ROM
DVD-5 (single-sided, single layered)
DVD-9 (singled-sided, double layered)
DVD-10 (double-sided, single layered)
DVD-18 (double-sided, double layered
DVD-R (read, 3.9GB/4.7GB)
DVD-RW (read, 4.7GB)
DVD+R
DVD+R DL
DVD+RW
DVD-RAM (read, 2.6GB, 4.7GB/1.46GB)
CD
CD-DA, CD+(E)G, CD-MIDI, CD-TEXT, CD-ROM, CD-ROM XA, MIXED MODE CD, CD-I,
CD-I Bridge (Photo-CD, Video-CD), Multi-session (Photo-CD Disc, CD-Extra, Portfolio, CD-R,
CD-RW), CD-R (read), CD-RW (read)
Front Panel
Figure 1.SD-C2732 DVD-ROM Front Panel
1
Eject Button
The EJECT button is used to open the disc tray so you can install or remove a disc
Busy Indicator
When you install a disc into the DVD-ROM drive, the BUSY light flashes slowly as it
attempts to locate the disc. One of the following will occur:
• BUSY light goes out. The DVD-ROM drive is ready to read data from the disc.
• BUSY light flashes slowly. The disc may be dirty.
• BUSY light remains ON. The DVD-ROM is accessing data.
• BUSY light remains ON indefinitely. The DVD-ROM is experiencing an error.
Emergency
Eject Hole
The emergency eject hole is to be used only when the DVD tray will not open when
EJECT button is pressed.
DVD Tray
Insert DVD Disc in tray
SETUP – SD-C2732
Toshiba recommends that only trained professionals install this DVD-ROM drive into your
laptop/notebook.
Installation Notes
•
•
•
•
•
The SD-C2732 DVD-ROM drive has no jumpers that need to be set
Mounting orientation: 15° (horizontally), 15° vertically (volume control in down position), 30°
(drive with volume control in up position).
When mounting drive use 4 M2-PO.4 tapping holes located on the left and right sides of drive.
When mounting drive, the tightening torque of the four screws must be even. Recommended
screw tightening torque is 2Nm
For clearance around the front bezel, it is recommended that a clearance of more than 0.8mm
should be left in all directions.
Software Driver
Toshiba's SD-C2732 drive does not require any unique device drivers for Windows '98/2000/XP/NT.
After installing your drive and re-booting, your system should recognize your drive. Win '98/2000/XP/NT
Operating Systems support all Toshiba's ATAPI drives natively. If you prefer using DOS, download the
ATAPI driver from our web site.
3
USING THE DVD-ROM Drive – SD-C2732
Drive Operation
Inserting Media – Horizontally or Vertically
To insert a DVD in a DVD-ROM drive that is mounted horizontally, perform the following steps:
Figure 1.Inserting Disc
1. Open the drive's loading tray by pressing the Eject Button and pulling out the tray.
2. Place media disc into drive's loading tray, and lightly press down on the inner portion of the disc.
3. Gently close the disc tray.
Removing Media
To remove media disc from the drive, perform the following steps:
1. Open the loading tray by pressing the Eject Button, and pulling tray out.
2. Grasp disc by it's outer edge, and lift out of loading tray.
3. Gently close the loading tray.
Usage Guidelines
•
•
•
•
•
Keep the disc tray closed when not using the DVD-ROM drive
Do not press down on the disc tray when opening or closing it.
Do not place objects on the disc tray
Never use a damaged, broken, or deformed disc
Do not press the Eject button while the drive is playing a DVD movie or accessing a disc. To
stop a DVD movie, click Stop button in the DVD player application program
NOTE: High-speed drives spin the disc at a high rotational speed. If a disc has printing on only half of
the disc, or if there is a slight imbalance in the disc, the imbalance is greatly magnified by the high
speed, causing the drive to vibrate or produce a fan-like noise. These effects are inherent in the highspeed technology and do not indicate a problem with the drive.
4
Regional Coding
Region Protection Coding (RPC) of DVD Discs: this feature is supported on DVD Players and is used
with DVD-Video Discs (i.e. movies). Currently, the motion picture industry has divided the world into
different regional "zones." These regions or "zones" correlate to the regional markets into which the
motion picture industry releases movies. Simply put, RPC Codes are placed on Movie Discs marketed
throughout the world based on the region of the world where they are being sold. These RPC codes
help to control and prevent the pirating of new release movies into other motion picture market regions
prior to their true release dates within those markets.
The SD-C2732 DVD-ROM/CD-RW drive supports the current RPC phase 2 industry specifications. This
means that when the DVD-ROM drive ships from the factory it is set to the region for which the
Operating System was intended. In other words the drive is set to support the Region 1 (North America)
Operating System and will only play Region 1 (North America) DVD-Video movie discs.
Emergency Ejection
CAUTION: The following procedure is intended only as a last resort when
pressing the eject button fails to open the Loading Tray.
1. Turn computer power OFF by properly shutting down system.
2. Insert a solid bar (i.e. large paper clip) into Emergency Eject hole and push in as shown in the
picture below.
3. Loading tray will open/eject.
Figure 2.Using Emergency Eject
Handling Media
DVD media is sensitive to dust and fingerprints. Carefully handle media by its edges only. If a DVD
movie skips or hangs during playback, clean the media. Most DVD video playback issues are mediarelated and can be remedied by proper handling and care of media.
Cleaning Media
Try to avoid touching the read area (underside) of the disc as dirt and smears will degrade the disc
accessing speed.
If the disc becomes dirty wipe it with a damp soft cloth. Avoid cleaning in a circular motion, but rather
from the inner side outward.
5
TROUBLESHOOTING – SD-C2732
Solution
Problem
Disc tray cannot be opened
•
•
Check that there is power to drive.
Use Emergency Eject instructions to open tray.
Drive is not recognized by
system
•
Is the drive connected properly? Are all cables plugged in
properly (e.g. Power Cable, Interface Cable and Audio Cables).
Is the software driver loaded? On a step-by-step (F8) Boot of the
system is the DVD-ROM drive recognized?
(BIOS / DOS reports "device driver not found" or "no valid
drivers selected."). If not, Contact Technical Support.
Has the DVD-ROM drive software driver been corrupted by a
virus. Run a Virus Scan program and repair if possible. Contact
Technical Support if the Virus renders the DVD-ROM drive
software drivers not useable.
•
•
Drive is not recognized by
system during Boot process,
but is recognized by the
Operating System (i.e. XP,
Win2000, Win98, Win NT, etc.)
BUSY Indicator LED flashes
slowly
•
•
•
•
Is the DVD-ROM drive software driver loaded? On a step-bystep (F8) Boot of the system is the DVD-ROM drive recognized?
(BIOS / DOS reports "device driver not found" or "no valid DVD
drivers selected."). If not, Contact Technical Support.
Has the Windows DVD-ROM drive software driver program been
corrupted by a virus. Run a Virus Scan program and repair if
possible. Contact Technical Support if the Virus renders the
software drivers not useable.
The disc may be dirty Clean it with a soft damp cloth. Avoid
cleaning the disc using a circular motion. The disc should be
wiped in a radial direction. That is, from the inner side outward.
The laser lens may have become cloudy or blocked by
particulate matter. Please contact Technical Support.
BUSY Indicator LED is
constantly ON
•
Possible Hardware Problem. Please contact Technical Support.
DVD-ROM can not play a DVD
in the drive or certain types of
CD media (i.e. CD-plus, etc.)
•
•
Is the DVD-ROM drive driver loaded
Is the DVD disc the correct format for the type of system that you
are using? (i.e. on a PC an ISO9660 IBM compatible PC format
as opposed to Apple/Mac HFS disc or UNIX disc formats which
will not function).
Do you have the correct software applications program/drivers
installed to run a DVD disc?
Has the Windows DVD-ROM drive software driver program been
corrupted by a virus. Run a Virus Scan program and repair if
possible. Contact Technical Support if the Virus renders the
software drivers not useable.
•
•
6
SPECIFICATIONS –SD-C2732
General
Interface:
ATAPI
Compatible DVD-ROM Standard - Read:
DVD:
DVD-ROM (DVD-5, DVD-9, DVD-10, DVD-18)
DVD-R (ver 1.0 & 2.1, read)
DVD-RW (ver 1.0, 1.1 read)
DVD+R, DVD_R DL, DVD+RW
DVD-RAM (ver 2.1, read)
CD-ROM:
CD-DA, CD+(E)G, CD-MIDI, CD-TEXT, CD-ROM, CD-ROM XA, MIXED MODE CD,
CD-I, CD-I Bridge (Photo-CD, Video-CD), Multi-session (Photo CD Disc, CD-Extra,
CD-R, CD-RW), CD-RW (read), CD-R (read)
Note: All DVD/CD formats, except CD-Red Book (audio), require additional application specific software
and/or hardware. The drive is capable of reading these data formats. However, in order to run applications
that use these formats, you must first have the required software and/or hardware.
Data Disc Capacities
DVD-ROM
DVD-R (Ver 1)
DVD-R (Ver 2.1)
DVD-RW
DVD+R
DVD+R DL
DVD+RW
DVD-RAM (Ver 2.1)
CD
4.377GB (DVD-5)
7.959GB (DVD-9)
8.754GB (DVD-10)
15.917GB (DVD-18)
3.679GB
4.377GB
4.377GB
4.377GB
7.960GB
4.377GB
4.377GB
656.5MB (mode 1)
748.8MB (mode 2)
Performance
User Data Blocks
DVD-ROM, DVD-RAM:
CD (mode 1)
CD (mode 2)
7
2,048 Byte/block
2,048 Byte/block
2,336 Byte/block
Transfer Rate
DVD (Single)
DVD (Dual)
DVD±R/±RW
DVD+R Double Layer
DVD-RAM (Ver 2.1)
CD (mode 1)
CD (mode 2)
4,460 – 10,816 Kbytes/s
3,380 – 8,112 Kbytes/s
2,298 – 5,408 Kbytes/s
2,298 – 5,408 Kbytes/s
2,704 Kbytes/s
1,546 – 3,600 Kbytes/s
1,761– 4,104 Kbytes/s
Rotational Speed
DVD single layer:
DVD dual layer:
DVD-R (ver 1.0)
DVD-R (ver 2.1)
DVD±RW, DVD+R, DVD+R DL
DVD-RAM (ver 2.1):
CD-ROM, CD-R, CD-RW:
CD-DA, Video-CD
CD-DA Transfer:
4,670rpm (3.3X – 8X)
3,792rpm (2.5X – 6X)
2,560rpm (1.7 – 4X)
2,224rpm (1.7 – 4X)
2,224rpm (1.7 – 4X)
1,380 – 3,300rpm (2X)
1,200 – 2,000rpm (4X – 5.7X)
1,700rpm (3.3 – 8X)
2,200 – 5,100rpm (10X)
Burst Data
Transfer Rates
16.7 Mbytes/s
16.7 Multi-word DMA
33.3 Ultra DMA
Random Access Time
DVD-ROM
CD-ROM
DVD-RAM
110ms (3.3X – 8X)
110ms (10.3X – 24X)
140ms (2X)
Data Buffer
256Kbytes
Reliability
MTBF
60,000 hours
User Error Rates (with up to 5 retries and layered ECC on)
DVD Hard Error Rate:
10-15 max
CD Hard Error Rate: mode 1
10-15 max
CD Hard Error Rate: mode 2
10-12 max
Seek Error Rate (allowing 10 retries)
10-6 max
Environmental
Ambient Temperature
Operating
Storage
Shipping
5° to 50° C (41° to 122° F)
-20° to 65° C (-4° to 149° F)
-40° to 65° C (-40° to 149° F)
Relative Humidity
Operating
Storage/Shipping
8% to 80%
5% to 95% (wet bulb 40° C max)
Acoustical Noise
40dB
8
Power
DC Voltage and Current Requirements
+5V ±5% (Operating), 8% (start-up)
Physical
Height
Width
Depth
Weight
0.5" (12.7mm)
5.04" (128mm)
4.96" (126.1mm)
6.0oz (.17kg)
Connectors
IDE Interface Connector
50 Pin I/F ATAPI Standard
Regulatory
The SD-C2732 DVD Writeable drive has been certified by the following regulatory agencies
•
•
•
•
•
•
9
UL 1950
CSA C22.2 No. 950
TUV (EN60950I)
CE standard
DHHS 21 CFR Sub-Chapter J
FDA CFR21, EN60825
Drive Connectors –SD-C2732
Figure 1.SD-C2732 DVD Writeable Drive Rear Panel – Connector
A 50-pin ATAPI interface connector is found at the rear of the SD-C2732 DVD-ROM drive.
ATAPI
Connector Connecting cable should use Japan Aviation Electronics Industry Limited KX14-50Series L
or equivalent connector.
Table 1.Interface Pin Assignments
PIN
NO.
1
3
5
7
9
11
13
15
17
19
21
23
25
27
I/O
SIGNAL NAME
O
Audio L-CH
Audio Ground
/RESET
DD7
DD6
DD5
DD4
DD3
DD2
DD1
DD0
Ground
I
I/O
I/O
I/O
I/O
I/O
I/O
I/O
I/O
/DIOW:STOP
IORDY: /
DDMARDY:
DSTROBE
29
O
INTRQ
31
I
DA1
33
I
DA0
35
I
/CS1FX
37
I/O /DASP
39
I
+5V (Motor)
41
I
+5V (Logic)
43
Ground
45
Ground
47
I
CSEL
49
I
Vendor Unique*
*Vender Unique, don't connect pins
10
I
O
PIN
NO.
2
4
6
8
10
12
14
16
18
20
22
24
26
28
30
32
34
36
38
40
42
44
46
48
50
I/O
SIGNAL NAME
O
Audio R-CH
Digital Ground
DD8
DD9
DD10
DD11
DD12
DD13
DD14
DD15
DMARQ
/DIOR: /
HDMARDT:
HSTROBE
Ground
/DMACK
I/O
I/O
I/O
I/O
I/O
I/O
I/O
I/O
O
I
I
O
I/O
I
I
I
I
I
I
/IOCS16
/PDIAG
DA2
/CS3FX
+5V (Motor)
+5V (Motor)
+5V (Logic)
Ground
Ground
Ground
Vendor Unique*