1
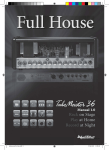
--
--
-
-
212
Single Unit Guitar Amp
A
A
Intended to alert the user to the presence of uninsulated “dangerous voltage” within the product’s enclosure
that may be of sufficient magnitude to constitute a risk of electric shock to persons.
Intended to alert the user to the presence of important operating and maintenance (servicing) instructions in the literature accompanying the product.
CAUTION Risks of electrical shock - DO NOT OPEN
CAUTION To reduce the risk of electric shock, do not remove cover. No user serviceable parts inside. Refer
Servicing to qualified service personnel.
WARNING To prevent electrical shock or fire hazard, do not expose this appliance to rain or moisture. Before
using this appliance, read the operating guide for further warnings.
A
A
Este simbolo tiene el proposito de alertar al usuario de la presencia de instrucciones importantes
sobre la operation y mantenimiento en la literatura que viene con el producto.
Este simbolo tiene el proposito de alertar al usuario de la presencia de “(voltaje) peligroso” que no
tiene aislamiento dentro de la caja de1 product0 que puede tener una magnitud suficiente coma
para constituir riesgo de corrientazo.
PRECAUCION Riesgo de corrientazo - No abra.
PRECAUCION Para disminuir el riesgo de corrientazo, no abra la cubierta. No hay piezas adentro que el usuario
pueda reparar. Deje todo mantenimiento a 10s tecnicos calificados.
ADVERTENCIA Para evitar corrientazos o peligro de incendio, no deje expuesto a la lluvia o humedad este aparato.
Antes de usar este aparato, lea mas advertencias en la guia de operation.
A
A
Ce symbole est utilise pour indiquer a l’utilisateur qu’il ou qu’elle trouvera d’importantes instructions
sur l’utilisation et l’entretien (service) de l’appareil dans la litterature accompagnant le produit.
Ce symbole est utilize’ pour indiquer a l’utilisateur la presence a l’interieur de ce produit de tension nonisolee dangereuse pouvant etre d’intensite suffisante pour constituer un risque de choc electrique.
ATTENTION Risques de choc electrique - NE PAS OUVRIR!
ATTENTION Afin de reduire le risque de choc electrique, ne pas enlever le couvercle. 11 ne se trouve a l’interieur
aucune piece pouvant etre reparee par l’utilisateur. Confier l’entretien a un personnel qualifie.
AVERTISSEMENT Afin de prevenir les risques de decharge electrique ou de feu, n’exposez pas cet appareil
a la pluie ou a l’humidite. Avant d’utiliser cet appareil, iisez les avertissements supplementaires situ& dans le
guide d’utilisation.
A
A
Dieses Symbol sol1 den Benutzer auf wichtige Instruktionen in der Bedienungsanleitung aufmerksam
machen, die Handhabung und Wartung des Produkts betreffen.
Dieses Symbol sol1 den Anwender vor unisolierten gefahrlichen Spannungen innerhalb des Gehauses
warnen, die von Ausreichender Starke sind, urn einen elektrischen Schlag verursachen zu konnen.
VORSICHT Risiko - Elektrischer Schlag! Nicht iiffnen!
VORSICHT Urn das Risiko eines elektrischen Schlages zu vermeiden, nicht die Abdeckung enfernen. Es befinden
sich keine Teile darin, die vom Anwender repariert werden konnten. Reparaturen nur von qualifiziertem Fachpersonal durchfiihren lassen.
ACHTUNG Urn einen elektrischen Schlag oder Feuergefahr zu vermeiden, sollte dieses Gerat nicht dem Regen
oder Feuchtigkeit ausgesetzt werden. Vor Inbetriebnahme unbedingt die Bedienungsanleitung lesen.
2
FRONT PANEL
3
NORMAL
12 13
-
@ s~~~LE~~~~~~~:~~~:~~~~~~~~~~~~~:~~a~~~~~*~~~~~
ON
ON
1
2
PILOT
PRESENCE
4
5
VOLUME
TREBLE
MIDDLE
6
BASS
REVERB
8
7
1 12 1 12 1 12 1 12 1 12 1 12 1 12 1 12 1 12
POST
PRE
NORMAL
9
10
11
B&O&
INPUTS
POWER SWITCH (1)
Switch to “on” position to turn on.
STANDBY SWITCH (2)
Allows amp to be placed in standby or active mode. In standby mode the tubes remain hot, but the amplifier
is not operational.
CHANNEL SELECT SWITCH (3)
Allows selection of the Lead or Normal Channel.
NOTE: Channel selection may also be accomplished by the remote footswitch. If remote selection is desired
the channel switch must be in the “in” (Lead) position.
PILOT LIGHT LED (4)
Illuminates when AC power is being supplied to the amp.
PRESENCE (5)
An active tone control that boosts the extreme high frequencies by 6 dB.
MASTER VOLUME (6)
Controls the overall volume level of the system.
TREBLE, MIDDLE, AND BASS EQ (7)
Passive tone controls that regulate high, mid, and low frequencies respectively.
REVERB (8)
Reverberation is an echo effect. Rotate clockwise to increase the effect. Remote footswitch can control On/Off.
POST GAIN (9)
Controls the overall volume level of the Lead channel. The final level adjustment should be made after the
desired sound has been achieved.
PRE GAIN (10)
Controls the input volume level of the Lead channel.
NORMAL GAIN (11)
Controls the volume level of the Normal channel.
BRIGHT INPUT (12)
Input for instrument-level signals. This input produces enhanced high frequency response (treble), similar
to a bright switch when compared to the normal input.
NORMAL INPUT (13)
Input for instrument-level signals. For brighter frequency response (highs) see Bright Input No. 12.
3
REAR PANEL
16
FUSE (14)
The fuse is located within the cap of the fuseholder. If the fuse should fail, IT MUST BE REPLACED WITH
THE SAME TYPE AND VALUE IN ORDER TO AVOID DAMAGE TO THE EQUIPMENT AND TO PREVENT VOIDING THE WARRANTY. If the amp repeatedly blows fuses, it should be taken to a qualified
service center for repair.
WARNING: THE FUSE SHOULD ONLY BE REPLACED WHEN THE POWER CORD HAS BEEN
DISCONNECTED FROM ITS POWER SOURCE.
GROUND SWITCH (15)
Three position rocker-type switch which, in most applications, should be operated in its center or zero position. There may be some situations when audible hum and/or noise will come from the loudspeaker. If this
situation arises, position the ground switch to either positive or negative ( + or -) or until the noise is minimized.
NOTE: Should the noise problem continue, consult your Authorized Peavey Dealer, the Peavey Factory, or
a qualified service technician. THE GROUND SWITCH IS NOT FUNCTIONAL ON 220/240 VOLT
MODELS.
SPEAKER OUTPUTS (16)
Speaker output (% “) jacks are provided for 16 and 8 ohms. When both jacks are engaged, amplifier impedance
is 8 ohms.
REMOTE SWITCH JACK (17)
Provided for the connection of the optional remote footswitch. Footswitch is used to select the Lead or Normal channels and defeat reverb. When using remote footswitch, always insert the plug fully (second click)
to ensure proper operation.
BLOCK DIAGRAM
I
F. S.
INPUTS
so
f
NOFWAL
BASS ,“I0 T R E B L E
El J7
Ex2
PRESENCE
lhii blockd~r4m 3Kms signd nw
wtlhinthrunit Inofdutottwoughly
undowand the unlh fwdorm, pIme
study TV bbck dbgmm cafofuhrlly.
A
SPECIFICATIONS
PREAMP SECTION
POWER AMPLIFIER SECTION
4 - 6BQYEL84’s with
12AX7 driver
Rated Power & Load:
50 W RMS into 16 or 8 ohms
Power @ Clipping: (Typically)
(5% THD, 1 kHz,
120 V AC line)
50 W RMS into 16 or 8 ohms
(Bias must be reduced
to measure)
Frequency Response:
+0, -2 dB, 50 Hz to 15 kHz,
@ 40 W RMS into 16 ohms
Hum & Noise:
Greater than 80 dB below
rated power
Power Consumption:
200 watts, 50/60 Hz,
120 V AC (Domestic)
2 - 12AX7’s
The following specs are measured @
1 kHz with the controls preset as follows:
Pre & Post (lead) @ 0
Reverb Level @ 0
Bass & Treble EQ @ 12
Middle EQ @ 0
Master Volume @ 12
Presence @ 6
Nominal level is with Input
Gain @ 6
Minimum levels is with Input
G a i n @ 12
Preamp Normal Input:
Impedance: Very high Z,
470 K ohms
Lead Channel
(Post gain @ 10)
Normal Channel:
Nominal Input Level : -17 dBV,
140 mV RMS
Minimum Input Level: -28 dBV,
40 mV RMS
Maximum Input Level : 0 dBV,
1.0 V RMS
Preamp Bright Input:
Impedance: Very high Z, 470 K
o h m s +12 dB boost @ 2 kHz
Equalization:
(Lead & Normal Channels)
Custom bass, middle & treble
passive type EQ
External Footswitch Function:
Reverb Defeat
(when reverb control is raised)
Normal/Lead Channel Select
(when Lead activated)
Nominal Input Level: -40 dBV,
10 mV RMS
Minimum Input Level: -70 dBV,
0.3 mV RMS
TONE SETTING
ADJUST TO TASTE
ADJUST TO TASTE
USED FOR BRIGHTER
SOUND WITH
ENHANCED HIGHS
ROCK
ADJUST TO TASTE
ADJUST TO TASTE
SELECT DESIRED iNPUT
METAL
Tone settings given are general and will vary according to type of guitar, type and guages of
strings, type of pickup and even type of pick. Personal taste, playing style, and type of music
greatly contribute to desired tonahty.
Consulte 10s diagramas de1 panel
delantero en la seccih de inglb de este manual.
POWER SWITCH (Interruptor de corriente) (1)
Coloque a la position “on” para encender.
STANDBY SWITCH (Interruptor de condicih de espera) (2)
Este interruptor le permite a su aparato estar en condition de“espera” o la condition de active. En la condicion “standby” 10s tubos permanecen calientes, pero el amplificador no esta en operation.
CHANNEL SELECT SWITCH (Interruptor de seleccih de canal) (3)
Per-mite la selection de1 canal “Lead” (solista) o Normal.
NOTA: Tambien se puede lograr la selection de1 canal por medio de1 pedal interruptor remoto. Si desea la
selection a control remoto, el interruptor de canal debe estar en la position “in” (hacia adentro) (canal de solista).
PILOT LIGHT LED (LED indicadora de lampara piloto) (4)
Se ilumina cuando el amplificador recibe corriente alterna.
PRESENCE (Presencia) (5)
Control de tono active que aumenta en 6 dB las frecuencias de 10s extremos agudos.
MASTER VOLUME (Volumen de maestra) (6)
Controla el nivel global de volumen de1 sistema.
TREBLE, MIDDLE, AND BASS EQ (Ecualizador de tiples, medias y agudas) (7)
Controles de tono pasivo que regulan las frecuencias altas, medias y agudas, respectivamente.
REVERB (Reverberacih) (8)
La reverberation es un efecto de eco. Haga girar a la derecha para aumentar el efecto. El encendido/apagado
(“on/off ‘) se puede controlar con el pedal interruptor de control remoto.
POST GAIN (Control de ganancia posterior de1 preamplificador) (9)
Controla el volumen general de1 canal solista. El ajuste final de nivel debe hacerse despues de que se haya
obtenido el sonido deseado.
PRE GAIN (Control de1 preamplificador) (10)
Controla la entrada de volumen de1 canal solista.
NORMAL GAIN (Ganancia normal) (11)
Controla el nivel de volumen de1 canal Normal.
BRIGHT INPUT (Entrada de brillo) (12)
Esta entrada es para las seiiales a nivel de instrumentos. Esta entrada produce una respuesta de frccucncias
agudas (tiple), semejante al interruptor de brillo cuando se compara con la entrada normal.
NORMAL INPUT (Entrada normal) (13)
Entrada para seiiales de nivel de instrumento. Para obtener respuestas de frecuencia mas brillantes (altas)
ver Entrada de Brillo Numero 12.
FUSE (Fusible) (14)
El fusible se encuentra localizado dentro de la capsula de1 portafusible. Si el fusible se quema o falla, SE
DEBERA REEMPLAZAR CON UN0 DEL MISMO TIP0 Y VALOR, PARA EVITAR DAfiO AL APARATO
Y EL ANULAMIENTO DE LA GARANTIA. Si el aparato quema 10s fusible repetidamente, cerciorese de
que esta conectado a un tomacorriente con el voltaje adecuado, si esto es correcto, entonces desconectelo
y llevelo a revision por un tecnico autorizado.
ATENCION: Antes de reemplazar el fusible quemado, cerciorese de que el aparato esta completamente
desconectado de1 tomacorriente.
GROUND SWITCH (Interruptor de tierra) (15)
Un interruptor tipo balancin de tres posiciones que, en la mayoria de las aplicaciones, debe ser operado en
su position de1 centro o cero (0). Puede haber situaciones cuando un zumbido audible salga de1 altavoz. Si
esta situation occure, ajuste la position de1 interruptor de tierra a positivo o negativo ( + o -) o hasta que
el ruido disminuya.
NOTA: Si el problema de ruido continua, consulte su representante autorizado de Peavey, la fabrica de Peavey,
o un tecnico de servicio calificado. EL INTERRUPTOR DE TIERRA NO FUNCIONA EN LOS MODELOS
DE 220/240 VOLTIOS.
SPEAKER OUTPUTS (Salidas de parlante) (16)
Se proporcionan enchufes hembras de salida de parlante de % de pulgada para 16 y 8 ohmios. Cuando se
utilizan ambos conectores, la impedancia de amplificador es de 8 ohmios.
REMOTE SWITCH JACK (Enchufe hembra de interruptor remoto) (17)
Se suministra para la conexion de1 pedal interruptor de control remoto optional . El pedal interruptor se utiliza
para seleccionar 10s canales solista o normal y desactivar la reverberation. Cuando utilice el pedal de control
remoto, inserte siempre la clavija completamente (Segundo reten) para asegurar el correct0 funcionamiento.
7
Veuillez vous r6f6rer au “front panel line art”’
situ6 dans la section en langue anglaise de ce manuel.
POWER SWITCH (Interrupteur d’alimentation) (1)
Mettre en position “On” pour mettre sous tension.
STANDBY SWITCH (S,electeur attente) (2)
Permet de selectionner l’etat de l’ampli: mode “Active” (actif) ou mode “Standby” (attente). En position “Standby”, l’amplificateur ne fonctionne pas mais les lampes (“tubes”) restent chaudes pour permettre de le remettre
en service sans delai.
CHANNEL SELECT SWITCH (S,electeur de canal) (3)
Permet de selectionner les canaux “Lead” ou “Normal”.
NOTE: La selection de canal peut aussi s’accomplir a distance a l’aide de la pedale-interrupteur. Pour que
la selection a distance soit possible, le canal doit etre en position “In” (“Lead”).
PILOT LIGHT LED (DEL t,emoin) (4)
S’allume lorsque l’ampli recoit l’alimentation CA.
PRESENCE (Pr,esence) (5)
Reglage de tonalite actif qui renforce les frequences extremes aigues (+6 dB).
MASTER VOLUME (Principal volume) (6)
Controle le niveau de volume general du systeme.
TREBLE, MIDDLE, AND BASS EQ (*Egalisation aigu,es, moyennes, graves) (7)
Reglages de tonalite passif ajustant respectivement les frequences aigues, moyennes et graves.
REVERB (R,everb,eration) (8)
La reverberation est un effet d’echo. Tournez dans le sens du mouvement des aiguilles d’une montre pour
augmenter l’intensite de l’effet. Linterrupteur au pied peut controler la mise en circuit ou hors circuit (“On/Off’).
POST GAIN (9)
Commande le volume general du canal “Lead”. Le reglage final de niveau doit etre effectue apres avoir obtenu
la sonorite desiree a l’aide des autres reglages.
PRE GAIN (10)
Controle le niveau de volume a l’entree sur du canal “Lead”.
NORMAL GAIN (Gain canal normal) (11)
Controle le niveau de volume du canal “Normal”.
BRIGHT INPUT (Entr,ee “Bright”) (12)
Entree pour signaux de niveau instrument. Cette entree produit une reponse accentuee des frequences aigues,
similaire a un selecteur de brillance compare a une entree normale.
NORMAL INPUT (Entqee normale) (13)
Entree pour les signaux de niveau instrument. Pour une reponsc en frequence plus brillante (hautcs) voir
Bright Input No. 12.
FUSE (Fusible) (14)
Le fusible se trouve a l’interieur de son support. Si le fusible grille, IL DOIT ETRE REMPLACE PAR UN
FUSIBLE DE MEME TYPE ET MEME VALEUR POUR EVITER TOUT DOMMAGE A LAPPAREIL
ET EVITER D’ANNULER LA GARANTIE. Si le fusible grille de fqon rep&e, apportez l’appareil a un
centre de service qualifie pour reparation. AVERTISSEMENT: LE FUSIBLE NE DOIT ETRE REMPLACE
QUE LORSQUE LE CORDON D’ALIMENTATION EST DE BRANCHE DE LA SOURCE D’ALIMENTATION.
GROUND SWITCH (S~lecteur de mise B terre) (15)
Commutateur rotatif a trois positions devant, la plupart du temps, etre en position centrale (zero). Dans certaines situations un bruit de ronflement ou un bourdonnement audible peut provenir des haut-parleurs de
puissance. Dans ce cas, bougez le selecteur de mise a terre jusqu’en position positive ou negative ( + ou -)
ou jusqu’a ce que le bruit diminue.
NOTE: Si le probleme de bruit persis,te, consultez votre detajllant autorise Peavey, la fabrique Peavey, ou
un technicien de service qualifie. LE SELECTEUR DE MISE A TERRE NE FONCTIONNE PAS SUR LES
APPAREILS 220/240 VOLT.
SPEAKER OUTPUTS (Sortie pour haut-parleur) (16)
Les jacks ‘/4 N (635 mm) de sortie pour haut-parleur sont p&us pour 16 et 8 ohms. Lorsque les deux jacks
sont utilises, l’impedance de l’amplificateur est de 8 ohms.
REMOTE SWITCH JACK (Prise pour interrupteur B distance) (17)
Sert a brancher la pedale-interrupteur (en option). L’interrupteur au pied est utilise pour selectionner les canaux
“Lead” ou “Normal” et mettre la reverberation hors w-vice. Afin d’assurer un bon fonctionnement lors de
l’utilisation de l’interrupteur au pied, inserez la fiche Zt fond jusquau second cran (au second clic).
Q
Siehe diagramm der frontplatte im englischen teil des handbuchs.
POWER SWITCH (1)
Zum Einschalten diesen Schalter auf “on” stellen.
STANDBY SWITCH (2)
Ermiiglicht es, den Verstarker mit abgeschaltetem Tonsignal betriebsbereit zu halten. In der “Standby”Betricbsart
werden die Riihren weiter beheizt, das Signal ist jedoch abgeschaltet.
CHANNEL SELECT SWITCH (3)
Zur Umschaltung von Lead auf Normal Kanal.
MERKE: Kanalwahl kann such mittels dem Fernbedienungsfuflschalter ausgefuhrt werden. Dazu muh der
“Channel”-Schalter sich in der “in” (lead) Position befinden.
PILOT LIGHT (4)
Leuchtet auf, wenn das Get-at eingeschaltet ist.
PRESENCE (5)
Eine aktive Tonkontrolle, welche die extrem hohen Frequenzen urn 6 dB boostet (anhebt).
MASTER VOLUME (6)
Regler fur die Gesamtlautstarke des Systems.
TREBLE, MIDDLE, AND BASS EQ (7)
Passive Klangregler die jeweils die Hohen, Mitten und Basse bearbeiten.
REVERB (8)
Eingebautes Echo-Hall-System. In Uhrzeigerrichtung drehen, urn den Effekt zu vcrsttirken. Fernbcdienungs
FuBschalter zum Ein- und Ausschalten des Effekts.
POST GAIN (9)
Kontrolliert den gesamten Lautstarke-pegel des Hauptkanals (Mastervolumen). Die endgiiltige Lautstarkeregclung
sollte vorgenommen werden, nachdem der gewiinschtc Sound eingcstellt ist.
PRE GAIN (10)
Kontrolliert den Vorstufenpegel des Lead-Kanals.
NORMAL GAIN (11)
Regelt den Pegel des Normal Kanals.
BRIGHT INPUT (12)
Dieser Instrumenten-Eingang erhoht die Wiedergabe der hohcn Frequenzen, ahnlich wie tin Bright-Schalter
im Vergleich zum Normal-Eingang.
NORMAL INPUT (13)
Eingang fur Signale mit Instrumentenpegel. Fur brillantere Frequenzwiedergabe in den Hiihen sichc Bright
Input No. 12.
10
FUSE (14)
Die Sicherung befindet sich innerhalb der Kappe des Sicherungshalters. Wenn die Sicherung durchbrennt,
MUSS SIE DURCH EINE DES GLEICHEN TYPS UND MIT DEM GLEICHEN WERT ERSETZT
WERDEN, UM DAS GERAT ZU SCHUTZEN UND DIE GARANTIELEISTUNGEN ZU ERHALTEN.
Wenn am Verstarker wiederholt die Sicherung durchbrennt, muB das Getit in eine qualifizierte Fachwerkstatt.
WARNUNG: SICHERUNGSWECHSEL NUR BE1 ABGEZOGENEM NETZKABEL VORNEHMEN!
GROUND SWITCH (15)
Der Ground-Schalter funktioniert nicht bei den 220/240 Volt-Modellen.
LAUTSPRECHERAUSGANGE (16)
Fur die Lautsprecherausgange stehen klinkenbuchsen fur und 8 ohm zur Verfiigung. Wenn beide Buchsen
belegt sind, betrayt die Impedanz des Varstarkers 8 ohm.
REMOTE SWITCH JACK (Remote Switch Jack) (17)
Vorgesehen fiir den AnschluB des als Option erhaltlichen FuBschalters. Der FuBschalter kann zum Anwahlen
des Normal- und Leadkanals sowie zum Schalten des Halls verwendet werden. Urn eine einwandfreie Funktion zu gewahrleisten, ist beim AnschluB des FuBschalters darauf zu achten, dal3 der Stecker vollstandig (bis
zum 2. Klick) eingesteckt ist.ion erhaltlichen FuBschalters. Der FuBschalter kann zum Anwahlen des Normalund Leadkanals sowie zum Schalten des Halls verwendet werden. Urn eine einwandfreie Funktion zu gewahrleisten, ist beim AnschluR des FuRschalters darauf zu achten, daB der Stecker vollstandig (bis zum 2. Klick)
eingesteckt ist.
THIS LIMITED WARRANTY VALID ONLY WHEN PURCHASED AND REGISTERED IN THE UNITED STATES OR CANADA. ALL EXPORTED PRODUCTS ARE SUBJECT
TO WARRANTY AND SERVICES TO BE SPECIFIED AND PROVIDED BY THE AUTHORIZED DISTRIBUTOR FOR EACH COUNTRY.
Ces clauses de garantie ne sont vaiables qu’aux Etats-Unis et au Canada. Dans tour les autres pays, les clauses de garantie et de maintenance sont fixees par
le distributeur national et assuree par lul seion la legislation envigueur.
Diese Garantie ist nur in den USA and Kanada gultig. Alle Export-Produkte sind der Garantie und dem Service des lmporteurs des jewelligen Landes unterworfen.
Esta garantia es valida solamente cuando el product0 es comprado en E.U. continentales o en Canada. Todos 10s productos que Sean comprados en el extranjero,
estan sujetos a las garantias y servicio que cada distribuidor autorizado determine y ofrezca en 10s diferentes paises.
Peavey’s Ilability to the purchaser for damages from any cause whatsoever and regardless of the form of action, including negligence, is limlted to the actual
damages up to the greater of $500.00 or an amount equal to the purchase price of the product that caused the damage or that IS the subject of or IS directly
related to the cause of action. Such purchase price will be that in effect for the specific product when the cause of action arose. This limitation of llabillty will
not apply to clarms for personal injury or damage to real property or tangible personal property allegedly caused by Peavey’s negligence. Peavey does not assume
liability for personal injury or property damage arising out of or caused by a non-Peavey alteration or attachment, nor does Peavey assume any responsbility
for damage to interconnected non-Peavey equipment that may result from the normal functioning and maintenance of the Peavey equipment.
UNDER NO CIRCUMSTANCES WILL PEAVEY BE LIABLE FOR ANY LOST PROFITS, LOST SAVINGS, ANY INCIDENTAL DAMAGES, OR ANY CONSEQUENTIAL DAMAGES ARISING OUT OF THE USE OR INABILITY TO USE THE PRODUCT, EVEN IF PEAVEY HAS BEEN ADVISED OF THE POSSIBILITY
OF SUCH DAMAGES.
THESE LIMITED WARRANTIES ARE IN LIEU OF ANY AND ALL WARRANTIES, EXPRESSED OR IMPLIED, INCLUDING, BUT NOT LIMITED TO, THE IMPLIED WARRANTIES OF MERCHANTABILITY AND FITNESS FOR A PARTICULAR USE; PROVIDED, HOWEVER, THAT IF THE OTHER TERMS AND CONDITIONS NECESSARY TO THE EXISTENCE OF THE EXPRESSED, LIMITED WARRA < i IES, AS HEREINABOVE STATED, HAVE BEEN COMPLIED WITH, IMPLIED
WARRANTIES ARE NOT DISCLAIMED DURING THE APPLICABLE ONE-YEAR OR NINETY-DAY PERIOD FROM DATE OF PURCHASE OF THIS PRODUCT.
SOME STATES DO NOT ALLOW LIMITATION ON HOW LONG AN IMPLIED WARRANTY LASTS, OR THE EXCLUSION OR LIMITATION OF INCIDENTAL
OR CONSEQUENTIAL DAMAGES, SO THE ABOVE LIMITATIONS OR EXCLUSIONS MAY NOT APPLY TO YOU. THESE LIMITED WARRANTIES GIVE YOU
SPECIFIC LEGAL RIGHTS, AND YOU MAY ALSO HAVE OTHER RIGHTS WHICH MAY VARY FROM STATE TO STATE.
THESE LIMITED WARRANTIES ARE THE ONLY EXPRESSED WARRANTIES ON THIS PRODUCT, AND NO OTHER STATEMENT, REPRESENTATION, WARRANTY, OR AGREEMENT BY ANY PERSON SHALL BE VALID OR BINDING UPON PEAVEY.
In the event of any modification or disclaimer of expressed or implied warranties, or any limitation of remedies, contained herein conflicts with applicable
law, then such modification, disclaimer or limitation, as the case may be, shall be deemed to be modified to the extent necessary to comply with such law.
Your remedies for breach of these warranties are limited to those remedies provided herein and Peavey Electronics Corporation gives this limited warranty
only with respect to equipment purchased in the United States of America.
INSTRUCTIONS - WARRANTY REGISTRATION CARD
1. Mail the completed WARRANTY REGISTRATION CARD to:
PEAVEY ELECTRONICS CORPORATION
POST OFFICE BOX 2898
MERIDIAN, MISSISSIPPI 39302-2898
a. Keep the PROOF OF PURCHASE. In the event warranty service IS required during the warranty period, you will need this document. There will
be no identification card issued by Peavey Electronics Corporation.
2 IMPORTANCE OF WARRANTY REGISTRATION CARDS AND NOTIFICATION OF CHANGES OF ADDRESSES
a Completion and mailing of WARRANTY REGISTRATION CARDS - Should notification become necessary for any condition that may
require correction, the REGISTRATION CARD will help ensure that you are contacted and properly notlfred
b Notice of address changes ~ If you move from the address shown on the WARRANTY REGISTRATION CARD, you should notify Peavey of
the change of address so as to facilitate your receipt of any bulletins or other forms of notification wl-11ch may bccorne necessary in
connection with any condition that may require dissemination of information or correctlon.
3 You may contact Peavey directly by telephoning (601) 483-5365
12
IMPORTANT SAFETY INSTRUCTIONS
WARNING When using electric products, basic cautions should always be followed, including the following.
1.
Read all safety and operating instructions before using this product.
2.
All safety and operating instructions should be retained for future reference.
3.
Obey all cautions in the operating instructions and on the back of the unit.
4.
All operating instructions should be followed.
5.
This product should not be used near water, i.e., a bathtub, sink, swimming pool, wet basement, etc.
6.
This product should be located so that its position does not interfere with its proper ventilation. It should not be placed flat
against a wall or placed in a built-in enclosure that will impede the flow of cooling air.
7.
This product should not be placed near a source of heat such as a stove, radiator, or another heat producing amplifier.
8.
Connect only to a power supply of the type marked on the unit adjacent to the power supply cord.
9.
Never break off the ground pin on the power supply cord. For more information on grounding, write for our free booklet
“Shock Hazard and Grounding.”
10.
Power supply cords should always be handled carefully. Never walk or place equipment on power supply cords. Periodically
check cords for cuts or signs of stress, especially at the plug and the point where the cord exits the unit.
11.
The power supply cord should be unplugged when the unit is to be unused for long periods of time.
12. If this product is to be mounted in an equipment rack, rear support should be provided.
13.
Metal parts can be cleaned with a damp rag. The vinyl covering used on some units can be cleaned with a damp rag, or an
ammonia-based household cleaner if necessary. Disconnect unit from power supply before cleaning.
14. Care should be taken so that objects do not fall and liquids are not spilled into the unit through the ventilation holes or any
other openings.
15.
This unit should be checked by a qualified service technician if
a. The power supply cord or plug has been damaged.
b. Anything has fallen or been spilled into the unit.
c. The unit does not operate correctly.
d. The unit has been dropped or the enclosure damaged.
16.
The user should not attempt to service this equipment. All service work should be done by a qualified service technician.
17.
This product should be used only with a cart or stand that is recommended by Peavey Electronics.
18. Exposure to extremely high noise levels may cause a permanent hearing loss. Individuals vary considerably in susceptibility to
noise induced hearing loss, but nearly everyone will lose some hearing if exposed to sufficiently intense noise for a sufficient
time.
The U.S. Government’s Occupational Safety and Health Administration (OSHA) has specified the following permissible noise
level exposures
Duration Per Day In Hours
8
6
4
3
2
1%
1
‘I2
‘Vi or less
Sound Level dBA, Slow Response
90
92
95
97
100
102
105
110
115
According to OSHA, any exposure in excess of the above permissible limits could result in some hearing loss.
Ear plugs or protectors in the ear canals or over the ears must be worn when operating this amplification system in order to
prevent a permanent hearing loss if exposure is in excess of the limits as set forth above. To ensure against potentially
dangerous exposure to high sound pressure levels, it is recommended that all persons exposed to equipment capable of producing high sound pressure levels such as this amplification system be protected by hearing protectors while this unit is in
operation.
SAVE THESE INSTRUCTIONS
Features and specifications subject to change without notice.
01992
A(H)
Peavey Electronics Corporation 711 A Street / Meridian, MS 39301 / U.S.A. / (601) 483-5365 / Fax 486-1278
#80301444
Printed in U.S.A. 9/95