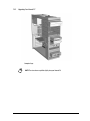
1
3/8” spine allowed - adjust according to binding xxl The information in this guide is subject to change without notice. COMPAQ COMPUTER CORPORATION SHALL NOT BE LIABLE FOR TECHNICAL OR EDITORIAL ERRORS OR OMISSIONS CONTAINED HEREIN; NOR FOR INCIDENTAL OR CONSEQUENTIAL DAMAGES RESULTING FROM THE FURNISHING, PERFORMANCE, OR USE OF THIS MATERIAL. This guide contains information protected by copyright. No part of this guide may be photocopied or reproduced in any form without prior written consent from Compaq Computer Corporation. © 1999 Compaq Computer Corporation. All rights reserved. Printed in the U.S.A., Brazil, Canada, Japan, Korea, Singapore, Taiwan, and the U.K. Compaq and Presario are registered in the U.S. Patent and Trademark Office. Microsoft, MS-DOS, and Windows are registered trademarks of Microsoft Corporation. The software described in this guide is furnished under a license agreement or nondisclosure agreement. The software may be used or copied only in accordance with the terms of the agreement. Product names mentioned herein may be trademarks and/or registered trademarks of their respective companies. Internet PC Features Guide 7800 Series Table of Contents i Table of Contents CHAPTER 1 Using this Guide Special Text .......................................................................................................................... 1-1 Special Messages ................................................................................................................. 1-2 Locating Help ........................................................................................................................ 1-2 Glossary ........................................................................................................................ 1-2 Index ............................................................................................................................. 1-2 Service and Support Guide ............................................................................................ 1-3 Troubleshooting............................................................................................................. 1-3 For More Information ..................................................................................................... 1-3 Comments about this Guide .................................................................................................. 1-4 CHAPTER 2 Checking Your Connections Identifying the Front Components on Your Internet PC........................................................... 2-2 Identifying the Rear Components on Your Internet PC............................................................ 2-4 CHAPTER 3 Using the Compaq Internet Keyboard Using the Internet Button Suite.............................................................................................. 3-1 Using the Multimedia Easy Access Buttons ........................................................................... 3-4 Using Additional Button Features of Your Keyboard ............................................................... 3-5 Working with the Standard Keyboard Keys ............................................................................ 3-6 Keyboard Status Lights ......................................................................................................... 3-8 ii Table of Contents CHAPTER 4 Introducing the Digital Creativity Imaging Center (available on select models only) Understanding Digital Interfaces.....................................................................................4-2 Creating Videos ..............................................................................................................4-3 CHAPTER 5 Learning About Your CD-ReWritable (CD-RW) Drive (available on select models only) Understanding Your CD-R and CD-RW Media.........................................................................5-1 Accessing the just!burn User’s Manual ..................................................................................5-2 The just!burn CD Assistant.....................................................................................................5-2 PacketCD ....................................................................................................................... 5-2 just!audio .......................................................................................................................5-3 CD!backup .....................................................................................................................5-3 just!data.........................................................................................................................5-3 CHAPTER 6 Learning About Your TV Out Connection (available on select models only) CHAPTER 7 Upgrading Your Internet PC Identifying the Major Components of Your Internet PC ...........................................................7-3 Removing the Cover...............................................................................................................7-5 Replacing the Cover .......................................................................................................7-6 Identifying Power Supply and Data Cables .............................................................................7-7 Power Supply Cables......................................................................................................7-7 Data Cables.................................................................................................................... 7-8 Installing an Expansion Card ..................................................................................................7-9 Determining Expansion Card Compatibility .....................................................................7-9 Inserting an Expansion Card...........................................................................................7-9 Adding or Replacing an Accelerated Graphics Port (AGP) Card .............................................7-13 Table of Contents iii Installing an Additional Hard Drive....................................................................................... 7-15 Adding a Secondary Hard Drive in an Internet PC Equipped with a Hard Drive in the Top Drive Compartment............................................................................................... 7-15 Installing a Secondary Hard Drive in an Internet PC with an Open Top Drive Compartment .............................................................................................................. 7-17 ® Replacing a Diskette or Zip Drive (Zip Drive available on select models only)..................... 7-19 Adding or Replacing Memory Modules ................................................................................ 7-21 Installing Additional Memory........................................................................................ 7-21 Replacing the Real-Time Clock Battery ............................................................................... 7-24 Removing and Inserting a Battery ................................................................................ 7-25 CHAPTER 8 Understanding Your Service and Support Options Compaq Support ................................................................................................................... 8-1 Compaq Remote Support (available in select regions) ........................................................... 8-2 Using Compaq Diagnostics.................................................................................................... 8-3 Testing Equipment......................................................................................................... 8-4 System Record...................................................................................................................... 8-5 Compaq Service Connection.................................................................................................. 8-5 Overview ....................................................................................................................... 8-5 Turning Compaq Service Connection On and Off............................................................ 8-6 How it Works ................................................................................................................. 8-6 Compaq Service Connection Privacy and Data Security Statement ................................ 8-7 Internet Support .................................................................................................................... 8-7 iv Table of Contents QuickRestore .........................................................................................................................8-8 Full Restore....................................................................................................................8-8 Custom Restore..............................................................................................................8-9 Typical Restore ............................................................................................................8-10 Drivers.................................................................................................................................8-10 Installing Drivers for New Hardware .............................................................................8-10 Reinstalling Deleted Drivers .........................................................................................8-11 CHAPTER 9 Troubleshooting Guide Helpful Hints ..........................................................................................................................9-1 Understanding This Guide......................................................................................................9-1 Troubleshooting Audio Problems............................................................................................9-2 Troubleshooting CD or DVD Problems ....................................................................................9-4 Troubleshooting Disk and Disk Drive Problems ......................................................................9-5 Troubleshooting Display (Monitor) Problems ..........................................................................9-8 Troubleshooting Fax Modem Problems ................................................................................9-10 Troubleshooting Game Problems .........................................................................................9-12 Troubleshooting Hard Drive Problems ..................................................................................9-12 Troubleshooting Internet Access Problems ..........................................................................9-13 Troubleshooting Keyboard and Mouse Problems..................................................................9-14 Troubleshooting Memory Problems......................................................................................9-16 Troubleshooting Power Problems.........................................................................................9-16 Troubleshooting Printer Problems (see your printer manual for additional information) ........9-19 Contacting a Compaq Authorized Service Provider...............................................................9-22 Index Using this Guide 1-1 Chapter 1 Using this Guide Thank you for buying a Compaq Internet PC. This Feature Guide will help you to familiarize yourself with the features of your Internet PC, as well as information on how to upgrade your computer. Please take a moment to familiarize yourself with the special text and messages used throughout this guide. Special Text The examples below explain the specially formatted text used in this guide. x Keyboard key names appear in bold type: Home, End, Backspace, Tab x Keyboard keys that must be pressed at the same time to perform a task appear in bold type with a plus (+) between the key names: Ctrl+Home x Drives appear as capital letters: drive C x Folder names appear with initial capital letters: Favorites x File names appear in italics with an initial capital letter: Setup.exe x Command line statements appear in lower case bold type: a:\install x Names of icons appear in bold type followed by a picture of the icon: My Computer G icon x Menu items appear in bold type: Programs, Accessories 1-2 Using this Guide Special Messages The following words and symbols have special meaning in this guide. * HINT: Helpful hints that will make using your computer easier and faster. + NOTE: Important information concerning the operation of your Internet PC. ` CAUTION: Failure to follow directions may result in equipment damage or loss of data. a WARNING: Failure to follow directions may result in bodily harm or loss of life. Locating Help Compaq provides you with several resources to help you learn about your Internet PC. Glossary Computer terms that may be unfamiliar to you are identified in the glossary in the Reference Manual. Index The index in each guide or manual is a comprehensive list of the topics covered in this guide. Using this Guide 1-3 Service and Support Guide Your Internet PC is equipped with several helpful programs that will aid you in identifying and solving common computer problems. You can learn about these programs in the Service and Support Guide. If you need further technical support, visit the Compaq Web site at: www.compaq.com/mypresario Compaq technical support telephone numbers are listed in the Limited Warranty Statement included with your Internet PC. + NOTE: Locate the model and serial numbers for your computer before you call technical support. Write your computer’s model and serial numbers below for future use. Computer Information Purchase Date Store Name Computer Model Number Computer Serial Number Monitor Model Number Monitor Serial Number Troubleshooting The Troubleshooting section shows how to fix many common computer-related issues. The Troubleshooting section is located in this Feature Guide. For More Information For the latest information about the topics discussed in this Feature Guide, please visit the Compaq Web Site at www.compaq.com. 1-4 Using this Guide Comments about this Guide Compaq Computer Corporation welcomes comments and suggestions you may have concerning this guide. Send correspondence to the following address: COMPAQ COMPUTER CORPORATION ATTN: DOCUMENTATION PROGRAM MANAGER MAIL CODE 060504 20555 SH 249 HOUSTON, TX 77070 + NOTE: This address is for comments and suggestions only. It is not for the purpose of obtaining technical assistance. Checking Your Connections Chapter 2 Checking Your Connections The following graphics show how to connect devices to your Internet PC and to identify all connectors. Compaq 7800 Series Internet PC Rear Connectors Select model will have ONE Phone Jack connector only + NOTE: The view shown may differ slightly from your Internet PC. 2-1 2-2 Checking Your Connections Identifying the Front Components on Your Internet PC Internet PC Front Components + NOTE: The view shown may differ slightly from your Internet PC. Checking Your Connections No. Components 1 CD, DVD, or CD-RW Drive (DVD and CD-RW Drive available on select models only; location of the CD-RW Drive may vary) 2 CD, DVD, or CD-RW Drive Eject/Load Button 3 Pressure point used to open the door 4 Diskette Drive 5 Diskette Drive Eject Button 6 Zip Drive (available on select models only) 7 Zip Drive Activity Light/Eject Button 8 Power Button 9 Digital Creativity Imaging Center (available on select models only) 2-3 2-4 Checking Your Connections Identifying the Rear Components on Your Internet PC Icon Z Component Scroll Mouse AC Power Connector T Internet Keyboard W USB Ports (2) V SVGA Monitor Port ² Parallel Printer Port [ Digital Flat Panel Monitor Port (available on select models only) X Serial Port IEEE-1394 Connector : z ®or PHONE ^ or LINE S Microphone TV Out Modem Line Out *(The appearance of your modem may vary.) Modem Line In *(The appearance of your modem may vary.) Game Port ¾ or Ë Audio In ½ or Ì Audio Out * For more information on the 56K V.90 PCI modem, refer to the Learning About Your Modem section in the Reference Manual supplied with your computer; for information on the digital modem, refer to the Introducing the Compaq Digital DSL/56K Modem section in the Reference Manual. Using the Compaq Internet Keyboard 3-1 Chapter 3 Using the Compaq Internet Keyboard Your Compaq Internet Keyboard offers an assortment of Easy Access buttons that make accessing the Internet and using your favorite software programs easier and faster. Along with the standard computer keyboard, the Internet Keyboard provides the following: x Internet Button Suite x Multimedia Easy Access buttons Using the Internet Button Suite The Internet buttons allow easy access to the following: x e-mail x Internet searches x your favorite Web sites x electronic shopping 3-2 Using the Compaq Internet Keyboard Internet Button Suite No. Icon United States All Other Countries Outside the United States Instant E-Mail provides one-touch access for sending and reading your E-mail. Instant E-Mail provides one-touch access for sending and reading your E-mail using Microsoft Outlook Express. Community takes you to a predefined Web site that provides unique services for communication over the Internet. Community takes you to a predefined Web site that provides unique services for communication over the Internet. $ My Presario is your instant connection to Compaq for product information, helpful hints, performance updates, service, and more. My Presario is your instant connection to Compaq for product information, helpful hints, performance updates, service, and more. 4 3 Instant Internet provides your daily start point to the Internet. It connects you to a personalized Web page filled with local weather, news, sports, and financial information, or a Web page with useful information from Compaq. Instant Internet provides your daily start point to the Internet. It connects you to a personalized Web page filled with local weather, news, sports, and financial information. 5 © Instant Search accesses a default Web site that helps you locate information on the Internet. Instant Search accesses a default Web site that helps you locate information on the Internet. 1 2 3 2 Using the Compaq Internet Keyboard No. 6 7 + Icon * ° United States 3-3 All Other Countries Outside the United States Online MarketPlace takes you to an electronic shopping experience. Compaq has partnered with several companies to provide you with the convenience of catalog shopping at the touch of a button. Instant Answer provides you with a central location to obtain specific information about your Internet PC. Retail Central provides an instant connection to your computer store and a variety of leading consumer companies. Secure E-Commerce/Featured Web Site takes you to an electronic shopping experience. Compaq has partnered with several companies to provide you with the convenience of catalog shopping at the touch of a button. NOTE: For the Internet Button Suite to operate, you must be connected to the Internet. Until you set up your Internet service provider (ISP), each Internet button will launch the Compaq Internet Setup process. 3-4 Using the Compaq Internet Keyboard Using the Multimedia Easy Access Buttons The Multimedia Easy Access buttons allow you to easily do the following: x control your CDs and DVDs x change the volume x skip tracks x mute the sound x eject or load CDs and DVDs + NOTE: These buttons are not programmable. Multimedia Easy Access Buttons No. 1 2 3 4 5 Icon Component Play/Pause starts or stops CD or DVD temporarily. Rewind/Previous Track skips to the previous track. Fast Forward/Next Track skips to the next track. Stop ends the CD or DVD playback. Eject/Load ejects or loads the CD or DVD. Using the Compaq Internet Keyboard 3-5 Using Additional Button Features of Your Keyboard Your Internet Keyboard is equipped with several special purpose buttons. Additional Keyboard Buttons No. 1 2 3 4 5 6 Icon United States All Other Countries Outside the United States ² Quick Print enables you to quickly print from your Microsoft compatible programs. This button is programmable. Quick Print enables you to quickly print from your Microsoft compatible programs. This button is programmable. k Built In Technician allows you to open the Built In Technician software. Launch enables you to launch Microsoft Works/Microsoft Word (depending on your computer). This button is programmable. @ Minus allows you to decrease the volume of your PC audio. Minus allows you to decrease the volume of your PC audio. Mute button allows you to temporarily mute your PC audio. Mute button allows you to temporarily mute your PC audio. Plus allows you to increase the volume of your PC audio. Plus allows you to increase the volume of your PC audio. Sleep puts your computer into a low power state, as well as wakes your computer. The light on the Sleep button glows green when the system is awake, and amber when the system is asleep. Sleep puts your computer into a low power state, as well as wakes your computer. The light on the Sleep button glows green when the system is awake, and amber when the system is asleep. n 3-6 Using the Compaq Internet Keyboard Working with the Standard Keyboard Keys The standard keyboard has four major types of keys: x main keys (typewriter-style) x function keys (F1 through F12) x arrow keys Å Æ Ç È x numeric keys (calculator-style) Some keys have special functions, either alone or when combined with other keys. The functions may vary depending on the programs you are using. Refer to Help to learn how these keys can be used in combination with other keys to develop shortcuts in your programs. Key/Button Description ÅÆÇÈ Arrow moves the cursor left, right, up, and down. ± Windows opens the Start menu. ) Windows Application usually has the same effect as a right mouse click. Alt Alt is frequently used in combination with other keys. By pressing Alt, the focus moves from the cursor to the menu bar. The effect depends on the program you are using. Backspace Backspace moves the cursor left one space and deletes the character in that space. Caps Lock Caps Lock capitalizes all letters when typed. The Caps Lock light on the keyboard glows when the key is active. Ctrl Control is normally used in combination with other keys. The effect depends on the program you are using. Delete Delete deletes the character to the right of the cursor and moves the following text left one space. End End moves the cursor to the end of the text line, table cell, or document. It can also be used in combination with other keys. Esc Esc exits a program, moves back one window, or cancels a command, depending on the program you are using. Using the Compaq Internet Keyboard Key/Button 3-7 Description F1-F12 Function keys are assigned specific tasks, depending on the program you are using. Some tasks include shortcuts, spelling and grammar, and activating the menu bar. Refer to Help for details on specific key combinations. Home Home moves the cursor to the beginning of the text line, table cell, or document. Home can also be used in combination with other keys. Insert Insert switches typing between insert and overtype modes. For example, after pressing this key, new text is either inserted into the current text or replaces it. Page Up/ Page Down Page Up/Page Down moves the cursor or the page up or down. Pause Pause temporarily stops screen scrolling. The effect depends on the program you are using. Print Scrn Print Screen prints the displayed screen in most programs. Scroll Lock Scroll Lock prevents automatic scrolling in some programs and allows scrolling to be controlled by the arrow keys. The Scroll Lock light on the keyboard glows when this key is activated. The effect depends on the program you are using. Shift Shift is frequently used in combination with other keys. The effect depends on the program you are using. 3-8 Using the Compaq Internet Keyboard Keyboard Status Lights Status lights provide information about your computer’s operation. Your Internet Keyboard is equipped with the status lights shown below. Keyboard Status Lights No. 1 Icon Component Num Lock indicates that use of the 10-key number pad will produce only numbers. Pressing the Num Lock key on the keyboard will activate and deactivate this function. 2 Caps Lock capitalizes letters when typed. When this function is active, the keyboard status light will glow. Select this function by pressing the Caps Lock key on the left of your Internet Keyboard. 3 5 Scroll Lock indicates that automatic scrolling has been disabled. Introducing the Digital Creativity Imaging Center Chapter 4 Introducing the Digital Creativity Imaging Center (available on select models only) The Digital Creativity Imaging Center (DCIC) is the latest in digital interfaces coupled with imaging software. You can use it to perform the following tasks: x Connect digital video camcorders and videophone cameras. x Input, capture, edit, and enhance full-motion video, audio, and photos. x Apply special effects to videos and 3-D titling for introductions. x Attach your saved files to e-mail or word processing documents. x Create a custom background for your computer desktop. 4-1 4-2 Introducing the Digital Creativity Imaging Center Understanding Digital Interfaces The DCIC is the connection point for digital equipment such as USB cameras, camcorders, and other devices. The DCIC is made up of two Universal Serial Bus (USB) connectors and one IEEE-1394 connector (designed to support rapid transfer of audio and video signals). The connectors are located on the front of the computer, as shown below. Digital Creativity Imaging Center No. Icon Component 1 S 2 W USB ports (2) 3 IEEE-1394 connector (available on select models) Game port (available on select models) Check the guidelines for your particular digital equipment to determine which connector is required. Check the Compaq Web site for special adapter cables. Introducing the Digital Creativity Imaging Center 4-3 Creating Videos Your Compaq Internet PC is equipped with, VideoWave III (available on select models), a powerful tool that allows you to create videos quickly and easily. With VideoWave III you can do the following: x Capture media. x Animate text. x Add special effects and transitions. x Use video animation. x Mix audio. x Edit video using the cutting room and dark room. For detailed information and instructions for using VideoWave III refer to the program Help. 4-4 Introducing the Digital Creativity Imaging Center Learning About Your CD-ReWritable (CD-RW) Drive 5-1 Chapter 5 Learning About Your CD-ReWritable (CD-RW) Drive (available on select models only) Your CD-RW drive has the following attributes: x Supports standard CD-ROM, write-once CD-R, and rewritable CD-RW discs. x Can be used to create your own audio CDs, share information, and save data for backups and other data storage needs. Understanding Your CD-R and CD-RW Media CD-R and CD-RW media have the following features: x CD-R discs can be used on nearly any computer system with a CD-ROM Drive. x CD-R is recommended for creating audio discs or sharing information between computers. x CD-R discs can be written to only once. However, you can write to CD-R discs over multiple recording sessions until you choose to finalize the disc. (Finalization is explained under just!audio in The just!burn CD Assistant in this section or in the online manual.) x CD-RW can be used to create CD backups of your personal CDs. x CD-RW discs are reusable and can be over-written. x CD-RW discs are recommended for creating personal system backups. * HINT: For best compatibility, CD-RW discs should be played on your CD-RW drive. 5-2 Learning About Your CD-ReWritable (CD-RW) Drive Accessing the just!burn User’s Manual The just!burn software included with your Presario Internet PC comes with a complete online user’s manual to answer any questions you might have about the functionality of the software with your CD-RW Drive. To access the just!burn User’s Manual, complete the following steps: 1. At your Windows desktop, click Start. 2. Click Programs. 3. Click CeQuadrat and select just!burn Manual. The online manual opens for your use. The just!burn CD Assistant The just!burn CD Assistant will appear whenever a blank disc is inserted into the CD-RW Drive. From the just!burn CD Assistant screen, you are given options allowing access to the following tools in the package. PacketCD PacketCD stores files to your CD-R or CD-RW disc. Selecting this option creates a drive letter in your Windows Explorer screen. You can copy individual files and treat your CD-RW drive just like any other removable media drive (e.g. diskette, Zip). With PacketCD you can format CD-RW media. Formatting options include Random CD-RW and Sequential CD-RW. * HINT: When prompted to format your media, choose the format option that best fits your specific needs. To share data stored on CD-R or CD-RW that has been formatted sequentially, you must first finalize your disc. Right-click your mouse on the CD-RW drive letter and select Finalize Disc. When your disc is inserted into another PC’s CD-ROM or DVD drive for the first time, you will be prompted to install the Universal Disc Format (UDF) program. You will not need to install UDF on the drive again. Learning About Your CD-ReWritable (CD-RW) Drive 5-3 just!audio just!audio lets you create your own audio CDs. You may record over multiple recording sessions to fill your CD-R disc. When the CD-R disc is complete, you must use the Finalize option in order to play your disc in an audio CD player or CD-ROM drive. * HINT: Once you have finalized your CD-R disc in just!audio, you will not be able to write to it again. just!audio automatically finalizes after recording. If you don’t want just!audio to finalize your newly created audio CD after the first recording session, you must change the default setting. On the Options screen, uncheck the Finalize Disc Option box to change the default setting. * HINT: To test the system performance, Compaq recommends using the Emulate Only option, located on the Options screen, when recording a new CD-R or using a computer system for the first time. This allows you to perform a test run before actually recording. CD!backup CD!backup will create personal backups of almost any CD quickly and easily. If you only have a CD-RW drive, your hard drive will act as temporary storage until you insert a destination CD-R or CD-RW disc and write to it. If your Internet PC is equipped with an additional CD- or DVD-ROM drive, you can write directly between the drives to create a personal CD backup. just!data just!data easily creates data CDs which can be read on almost any computer and operating system.Your Internet PC can use your hard drive for temporary storage of files, enabling you to copy from one disc to another if you have only a CD-RW drive. If your PC is equipped with both a CD- or DVD-ROM drive and a CD-RW drive, you can choose to write data directly between the two drives. Use these CDs instead of diskettes to transfer files from one computer to another. Additionally, you can use just!data to back up and share MP3 files and other compressed digital audio files with other PCs. However, you cannot play these CDs on an audio CD player. For more information about using these tools, refer to the online user’s manual. 5-4 Learning About Your CD-ReWritable (CD-RW) Drive Learning About Your TV Out Connection 6-1 Chapter 6 Learning About Your TV Out Connection (available on select models only) Your computer is equipped with a graphics card consisting of an S-Video connector referred to as TV Out. With a TV Out connection, you can do the following: x Play games on a big screen television or monitor. x Watch DVD movies on television rather than a computer monitor. x Play a video segment for recording on a VCR. 6-2 Learning About Your TV Out Connection TV Out Connections + NOTE: The view shown may differ slightly from your Internet PC. No. Components 1 SVGA Monitor Connector 2 TV Out Connector (available on select models) 3 Digital Flat Panel Monitor Port (available on select models) Upgrading Your Internet PC 7-1 Chapter 7 Upgrading Your Internet PC Your Internet PC is fully upgradable. Items that you can add or replace include the following: x PCI expansion card x ISA expansion card (available on select models only) x Accelerated Graphics Port (AGP) card (available of select models only) x hard drive x removable media storage drive x memory modules x system battery If you would like to replace the system board or microprocessor, consult a Compaq Authorized Service Provider. To find the nearest service provider in your area, visit the Compaq Web site at: www.compaq.com Your safety is important. Before proceeding with any procedures involving the internal components of your Internet PC, please take a few moments to read the following Warning and Caution statements. Following the guidelines in these statements will help to reduce the risk of personal injury or equipment damage. 7-2 Upgrading Your Internet PC a WARNING: To reduce the risk of electric shock and damage to the equipment: Do not disable any 3-prong grounding plug. The grounding pin on a 3-prong plug is an important safety feature. Removal of the grounding pin increases the risk of computer damage. If you cannot fit the plug into your electrical outlet, contact an electrician for information on having grounded outlets installed. Use only grounded electrical outlets when plugging in your computer. These outlets should be easily accessible at all times. When connecting a power cord to a grounded electrical outlet, ensure that nothing rests on the power cord. To reduce the risk of electrical shock and damage to the computer, BEFORE REMOVING THE COVER always ensure the following: x x x x x ` The computer is turned off. The computer power cord is unplugged. The modem line is disconnected from the telephone jack. All network cables are disconnected. All cables and power cords are disconnected from the computer. CAUTION: To prevent damage to the computer by electrostatic discharge, you must become static-free before removing the cover. To become static-free, touch an unpainted metal surface or one of the screws on the computer cover. As you work, avoid touching exposed metal on any of the computer circuit boards. Upgrading Your Internet PC 7-3 Identifying the Major Components of Your Internet PC Your Compaq Internet PC has been constructed using a cover and drawer design concept. This design makes it simple to access the internal components. Please familiarize yourself with the major components. Computer Cover + NOTE: The view shown may differ slightly from your Internet PC. 7-4 Upgrading Your Internet PC Computer Cage + NOTE: The view shown may differ slightly from your Internet PC. Upgrading Your Internet PC Removing the Cover Before removing the cover, move the computer to a suitable work area. Choose a clean, spacious, and well-lit area. 8VLQJDVFUHZGULYHUUHPRYHWKHILYHFRYHUUHWDLQLQJVFUHZV Removing the Cover Retaining Screws + NOTE: The view shown may differ slightly from your Internet PC. 7-5 7-6 Upgrading Your Internet PC 8VLQJWKHFKDVVLVFDJHKDQGOH1VORZO\SXOORXWWKHFKDVVLVFDJH Removing the Chassis Cage + NOTE: The view shown may differ slightly from your Internet PC. Replacing the Cover To replace the cover, perform the removal steps in reverse order. Upgrading Your Internet PC Identifying Power Supply and Data Cables When performing upgrade procedures, you may find it necessary to disconnect power supply and data cables. Refer to the following graphics for assistance in identifying power supply and data cables. * HINT: If you must disconnect a cable, mark the cable with a piece of masking tape labeled with the name of the device for future reference. Power Supply Cables Power supply cables usually have a white connector that consolidates several colored wires. Typical Power Supply Cable + NOTE: The view shown may differ slightly from your Internet PC. 7-7 7-8 Upgrading Your Internet PC Data Cables Data cables are thin wide cables that usually have black connectors. Typical Data Cable + NOTE: The view shown may differ slightly from your Internet PC. Upgrading Your Internet PC 7-9 Installing an Expansion Card Expansion cards, such as a scanner card or a modem, increase the capabilities of your computer. There are many different types of expansion cards available on the market. Before purchasing an expansion card or equipment that requires the installation of an expansion card, ensure that the new card and equipment is compatible with your Internet PC. Determining Expansion Card Compatibility The types of cards compatible with your Compaq 7800 Series Internet PC include the following: x Plug and Play Peripheral Component Interconnect (PCI) cards x Industry Standard Architecture (ISA) cards (available on select models only) x Accelerated Graphics Port (AGP) cards (available on select models only) * HINT: Plug and Play PCI cards are automatically recognized and resourced upon installation by the Microsoft Windows operating system and Basic Input Output System (BIOS). The operating system and the BIOS do not automatically recognize ISA cards. The card jumper settings may require manual adjustment based on your currently available system resources, such as the IRQ (Interrupt ReQuest) and DMA (Direct Memory Access). Then you must adjust the operating system settings to reflect these resource settings according to the card manufacturer’s instructions. Inserting an Expansion Card To install a card, complete the following steps: 5HDGDOOWKHPDQXIDFWXUHUGRFXPHQWDWLRQIRUWKHQHZFDUG &ORVHDOOSURJUDPV 5HPRYHDOOGLVNHWWHVDQG&'V )URPWKH:LQGRZV7DVNEDUFOLFNWKH6WDUWEXWWRQFOLFN6KXW'RZQVHOHFW 6KXW'RZQDQGWKHQFOLFN2. 8QSOXJWKHFRPSXWHUSRZHUFRUGIURPWKHHOHFWULFDORXWOHW 'LVFRQQHFWDOOFDEOHVDQGSRZHUFRUGVIURPWKHEDFNRIWKHFRPSXWHU 5HPRYHWKHFRPSXWHUFRYHU 7-10 Upgrading Your Internet PC 8VLQJDVFUHZGULYHUUHPRYHWKHH[SDQVLRQFDUGUHWHQWLRQEUDFNHW1DQGWKH UHWDLQLQJVFUHZV $WRQHHQGRIWKHVORWFRYHUSRVLWLRQDUHJXODUVFUHZGULYHU2DWWKHEHQGLQWKH VORWFRYHUDQGVWULNHWKHKDQGOHRIWKHVFUHZGULYHUWRSXVKWKHHQGRIWKHVORW FRYHUVOLJKWO\LQZDUG Removing the Expansion Card Retention Bracket + NOTE: The view shown may differ slightly from your Internet PC. Upgrading Your Internet PC 7-11 5HSHDWVWHSDWWKHRWKHUHQGRIWKHFRYHU )URPWKHLQVLGHRI\RXU3&JHQWO\ZRUNWKHPHWDOEUDFNHWORRVHIURPWKHVORW DQGUHPRYH 8VLQJWKHIROORZLQJJUDSKLFDVDJXLGHORFDWHDQRSHQH[SDQVLRQFDUGVORW Expansion Card Slots + No. NOTE: The view shown may differ slightly from your Internet PC. Component 1 ISA (available on select models) 2 PCI Expansion Slots 3 Accelerated Graphics Port (AGP) Slot (available on select models) 7-12 Upgrading Your Internet PC )LUPO\SUHVVWKHQHZFDUGLQWRWKHVORWRQWKHV\VWHPERDUGXVLQJDVOLJKWO\ URFNLQJPRWLRQ Inserting an Expansion Card + NOTE: The view shown may differ slightly from your Internet PC. 5HSODFHWKHH[SDQVLRQFDUGUHWHQWLRQEUDFNHWWRVHFXUHWKHQHZFDUGLQSODFH 5HSODFHWKHFRPSXWHUFRYHU If you installed a PCI card, the next time you turn on the computer, Microsoft Windows will automatically detect the new card. If you installed an ISA card, follow the manufacturer’s instructions to complete the installation. Upgrading Your Internet PC 7-13 Adding or Replacing an Accelerated Graphics Port (AGP) Card The AGP interface is the video graphics port that enables high performance 3D graphic capabilities on your Internet PC. To add or replace an AGP card, complete the following steps: 5HDGDOOWKHPDQXIDFWXUHUGRFXPHQWDWLRQIRUWKHQHZFDUG &ORVHDOOSURJUDPV 5HPRYHDOOGLVNHWWHVDQG&'V )URPWKH:LQGRZV7DVNEDUFOLFNWKH6WDUWEXWWRQFOLFN6KXW'RZQVHOHFW 6KXW'RZQDQGWKHQFOLFN2. 8QSOXJWKHFRPSXWHUSRZHUFRUGIURPWKHHOHFWULFDORXWOHW 'LVFRQQHFWDOOFDEOHVDQGSRZHUFRUGVIURPWKHEDFNRIWKHFRPSXWHU 5HPRYHWKHFRPSXWHUFRYHU /RFDWHWKH$*3FDUGVORWRQWKHV\VWHPERDUG5HIHUWRWKHSUHFHGLQJVHFWLRQ ,QVWDOOLQJDQ([SDQVLRQ&DUGIRUDQLOOXVWUDWLRQRIWKH$*3FDUGVORW 7-14 Upgrading Your Internet PC ,I\RXDUHUHSODFLQJDQ$*3FDUGUHPRYHWKHH[LVWLQJFDUG)LUPO\SUHVVWKH QHZFDUGLQWRWKHVORWRQWKHV\VWHPERDUGXVLQJDVOLJKWURFNLQJPRWLRQ Inserting an AGP Card + NOTE: The view shown may differ slightly from your Internet PC. 5HSODFHWKHFRPSXWHUFRYHU The next time you turn on your computer, the new card will be detected. Follow the manufacturer’s instructions to complete the installation. Upgrading Your Internet PC 7-15 Installing an Additional Hard Drive To ensure proper installation, please read all the manufacturer’s documentation for the new hard drive. Adding a Secondary Hard Drive in an Internet PC Equipped with a Hard Drive in the Top Drive Compartment If your Internet PC has the primary hard drive installed in the top drive compartment of the chassis cage, complete the following steps: &ORVHDOOSURJUDPV 5HPRYHDOOGLVNHWWHVDQG&'V )URPWKH:LQGRZV7DVNEDUFOLFNWKH6WDUWEXWWRQFOLFN6KXW'RZQVHOHFW 6KXW'RZQDQGWKHQFOLFN2. 8QSOXJWKHFRPSXWHUSRZHUFRUGIURPWKHHOHFWULFDORXWOHW 'LVFRQQHFWDOOFDEOHVDQGSRZHUFRUGVIURPWKHEDFNRIWKHFRPSXWHU 5HPRYHWKHFRPSXWHUFRYHU 5HIHUWRWKHGULYHPDQXIDFWXUHU¶VLQVWUXFWLRQVZKHQLQVHUWLQJWKHVHFRQGDU\ KDUGGULYHLQWRWKHERWWRPVORWRIWKHGULYHFDJH 7-16 Upgrading Your Internet PC 8. Secure the drive in the drive cage by inserting the drive retaining screws supplied with the new hard drive. Drive Retaining Screws View 1 + NOTE: The view shown may differ slightly from your Internet PC. 9. Locate and connect the spare power supply cable. Spare power supply cables are provided with the system. 10. Locate the data cable that is connected to the primary hard drive. This data cable is equipped with a spare connector approximately midway down the cable. Carefully insert the connector into the receptacle on the back of the secondary hard drive. 11. Replace the computer cover. 12. Refer to the manufacturer’s instructions supplied with the new device to complete the necessary software installation. Upgrading Your Internet PC 7-17 Installing a Secondary Hard Drive in an Internet PC with an Open Top Drive Compartment If your Internet PC has the primary hard drive installed in the lower slot of the drive cage, under the diskette drive, and the top drive compartment is open, complete the following steps: &ORVHDOOSURJUDPV 5HPRYHDOOGLVNHWWHVDQG&'V )URPWKH:LQGRZV7DVNEDUFOLFNWKH6WDUWEXWWRQFOLFN6KXW'RZQVHOHFW 6KXW'RZQDQGWKHQFOLFN2. 8QSOXJWKHFRPSXWHUSRZHUFRUGIURPWKHHOHFWULFDORXWOHW 'LVFRQQHFWDOOFDEOHVDQGSRZHUFRUGVIURPWKHEDFNRIWKHFRPSXWHU 5HPRYHWKHFRPSXWHUFRYHU 7RDGGD´KDUGGULYHSODFHWKHQHZKDUGGULYHLQWKHWRSGULYH FRPSDUWPHQWDQGVHFXUHWKHGULYHZLWKWKHVLGHUHWDLQLQJVFUHZVDVVKRZQ Top Compartment Drive Retaining Screws + NOTE: The view shown may differ slightly from your Internet PC. 7-18 Upgrading Your Internet PC 7RDGGD´KDUGGULYHSODFHWKHQHZKDUGGULYHLQWKHWRSGULYH FRPSDUWPHQWDQGVHFXUHWKHGULYHZLWKWKHERWWRPUHWDLQLQJVFUHZV Drive Retaining Screws View 2 + NOTE: The view shown may differ slightly from your Internet PC. /RFDWHDQGFRQQHFWWKHVSDUHSRZHUVXSSO\FDEOH6SDUHSRZHUVXSSO\FDEOHV DUHSURYLGHGZLWKWKHV\VWHP /RFDWHWKHGDWDFDEOHWKDWLVFRQQHFWHGWRWKHSULPDU\KDUGGULYHLQVWDOOHGLQWKH ORZHUVORWRIWKHGULYHFDJHXQGHUWKHGLVNHWWHGULYH7KLVGDWDFDEOHLV HTXLSSHGZLWKDVSDUHFRQQHFWRUDSSUR[LPDWHO\PLGZD\GRZQWKHFDEOH &DUHIXOO\LQVHUWWKHFRQQHFWRULQWRWKHUHFHSWDFOHRQWKHEDFNRIWKHVHFRQGDU\ KDUGGULYH 5HSODFHWKHFRPSXWHUFRYHU 5HIHUWRWKHPDQXIDFWXUHU¶VLQVWUXFWLRQVVXSSOLHGZLWKWKHQHZGHYLFHWR FRPSOHWHWKHQHFHVVDU\VRIWZDUHLQVWDOODWLRQ Upgrading Your Internet PC 7-19 ® Replacing a Diskette or Zip Drive (Zip Drive available on select models only) 5HDGDOOWKHPDQXIDFWXUHU¶VGRFXPHQWDWLRQIRUWKHQHZGULYH &ORVHDOOSURJUDPV 5HPRYHDOOGLVNHWWHVDQG&'V )URPWKH:LQGRZV7DVNEDUFOLFNWKH6WDUWEXWWRQFOLFN6KXW'RZQVHOHFW 6KXW'RZQDQGWKHQFOLFN2. 8QSOXJWKHFRPSXWHUSRZHUFRUGIURPWKHHOHFWULFDORXWOHW 'LVFRQQHFWDOOFDEOHVDQGSRZHUFRUGVIURPWKHEDFNRIWKHFRPSXWHU 5HPRYHWKHFRPSXWHUFRYHU 'LVFRQQHFWWKHSRZHUVXSSO\FDEOHIURPWKHGULYH\RXDUHUHSODFLQJ 'LVFRQQHFWWKHGDWDFDEOH%HVXUHWRPDUNWKHGDWDFDEOHFRQQHFWRURQWKH V\VWHPERDUGVRWKDW\RXFDQSURSHUO\FRQQHFWWKHGDWDFDEOHIRUWKHQHZ GHYLFH 7-20 Upgrading Your Internet PC 8VLQJDVFUHZGULYHUUHPRYHWKHGULYHUHWDLQLQJVFUHZVDVVKRZQ Removing the Retaining Screws + NOTE: The view shown may differ slightly from your Internet PC. &DUHIXOO\EDFNWKHGULYHRXWRIWKHGULYHFDJH 5HIHUWRWKHGULYHPDQXIDFWXUHU¶VLQVWUXFWLRQVZKHQLQVHUWLQJWKHQHZGULYH LQWRWKHGULYHFDJH 6HFXUHWKHGULYHLQWKHGULYHFDJHE\UHSODFLQJWKHGULYHUHWDLQLQJVFUHZV &RQQHFWWKHSRZHUVXSSO\FDEOH &RQQHFWWKHGDWDFDEOH 5HSODFHWKHFRPSXWHUFRYHU 5HIHUWRWKHPDQXIDFWXUHU¶VLQVWUXFWLRQVVXSSOLHGZLWKWKHQHZGHYLFHWR FRPSOHWHWKHQHFHVVDU\VRIWZDUHFRQILJXUDWLRQ Upgrading Your Internet PC 7-21 Adding or Replacing Memory Modules Installing Additional Memory Adding memory can improve computer and software performance. Contact a Compaq Authorized Service Provider for information on compatible memory module types as well as memory module installation. To determine the amount of memory currently installed on your computer, complete the following steps: )URPWKH:LQGRZV7DVNEDUFOLFNWKH6WDUWEXWWRQVHOHFW6HWWLQJVDQGWKHQ VHOHFW&RQWURO3DQHO 'RXEOHFOLFNWKH6\VWHPMLFRQ 6HOHFWWKH*HQHUDOWDE Please be advised that the amount of memory displayed may not include the amount of memory automatically allocated for video display functions. + NOTE: If you use non-Compaq memory modules, you must ensure that they are installed by a Compaq Authorized Service Provider to preserve your Warranty rights. To add memory, complete the following steps: 5HDGDOOWKHPDQXIDFWXUHUGRFXPHQWDWLRQIRUWKHQHZPHPRU\ &ORVHDOOSURJUDPV 5HPRYHDOOGLVNHWWHVDQG&'V )URPWKH:LQGRZV7DVNEDUFOLFNWKH6WDUWEXWWRQFOLFN6KXW'RZQVHOHFW 6KXW'RZQDQGWKHQFOLFN2. 8QSOXJWKHFRPSXWHUSRZHUFRUGIURPWKHHOHFWULFDORXWOHW 'LVFRQQHFWDOOFDEOHVDQGSRZHUFRUGVIURPWKHEDFNRIWKHFRPSXWHU 5HPRYHWKHFRPSXWHUFRYHU 7-22 Upgrading Your Internet PC /RFDWHWKHPHPRU\PRGXOHVORWV17KHVHVORWVDUHVKRZQLQWKHJUDSKLF EHORZ Memory Module Slots Upgrading Your Internet PC 7-23 $OLJQWKHPHPRU\PRGXOHZLWKWKHVORWDQGILUPO\SUHVVLWGRZQXQWLOLWFOLFNV LQWRSRVLWLRQWKHQSXVKWKHODWFKHVLQWRVHFXUHWKHPHPRU\PRGXOH Inserting a Memory Module + No. NOTE: The view shown may differ slightly from your Internet PC. Component 1 DIMM Memory Module (available on select models) 2 RIMM Memory Module (available on select models) 5HSODFHWKHFRPSXWHUFRYHU 7-24 Upgrading Your Internet PC Replacing the Real-Time Clock Battery Your Compaq Internet PC is equipped with a lithium or nickel cadmium battery that provides power to the real time clock when your system is shut down. If you must replace the battery, observe the following safety guidelines. For information about real-time clock battery replacement, contact a Compaq Authorized Service Provider. a WARNING: Your computer is provided with a battery-powered, real-time clock circuit. Danger of explosion and risk of personal injury exists if the battery is incorrectly replaced or mistreated. Do not attempt to recharge the battery, disassemble it, remove it, immerse it in water, or dispose of it in fire. a WARNING: This computer may contain a lithium-ion or nickel-metal-hydride battery pack. There is a risk of fire and chemical burn if the battery pack is handled improperly. Do not disassemble, crunch, puncture, or short external contacts, dispose of in water or fire, or expose to temperatures higher than 140F (60C). ` CAUTION: Do not dispose of batteries with general household waste. To dispose of them or recycle them, use the public collection system in accordance with local regulations or return them to Compaq, an authorized Compaq Partner, or the pointof-sale. In North America, dispose of nickel-metal-hydride or lithium-ion batteries by taking advantage of the Compaq battery recycling program. You will be provided with a postage-paid battery pack mailer pre-addressed to a reclamation facility where the metals are recycled Upgrading Your Internet PC 7-25 Removing and Inserting a Battery To remove and insert a battery, complete the following steps: 5HDGDOOWKHPDQXIDFWXUHU¶VGRFXPHQWDWLRQIRUWKHQHZGULYH &ORVHDOOSURJUDPV 5HPRYHDOOGLVNHWWHVDQG&'V )URPWKH:LQGRZV7DVNEDUFOLFNWKH6WDUWEXWWRQFOLFN6KXW'RZQVHOHFW 6KXW'RZQDQGWKHQFOLFN2. 8QSOXJWKHFRPSXWHUSRZHUFRUGIURPWKHHOHFWULFDORXWOHW 'LVFRQQHFWDOOFDEOHVDQGSRZHUFRUGVIURPWKHEDFNRIWKHFRPSXWHU 5HPRYHWKHFRPSXWHUFRYHU 7RUHPRYHWKHEDWWHU\SXVKLQWKHGLUHFWLRQRIDUURZ1WKHQOLIWWKHEDWWHU\RXW DVVKRZQE\DUURZ2 Removing the Battery 7-26 Upgrading Your Internet PC 7RLQVHUWDEDWWHU\VOLGHWKHHGJHRIWKHEDWWHU\XQGHUWKHFOLSVDQGWKHQSUHVVLW ILUPO\LQWRWKHEDWWHU\FRPSDUWPHQW Inserting a Battery 5HSODFHWKHFRPSXWHUFRYHU Understanding Your Service and Support Options 8-1 Chapter 8 Understanding Your Service and Support Options Your Internet PC has many tools to make computing easier. If you have a computer problem or question, check the following resources for answers: • Review the Troubleshooting section in this guide for suggestions on how to fix the problem. • Review the tools in this section to find answers. • Look in the Compaq Warranty Statement (included with your computer) or Service and Support Card to find your regional Compaq Service telephone number. Compaq Support Double-clicking the Compaq Support $ icon located on the Windows desktop provides access to the following tools: Compaq Support Tools Tool Description Compaq Remote Support (not available in all locations) Allows most of your computer problems to be remotely diagnosed and cured by a Compaq technician. With this tool, technicians can talk to you at the same time they are resolving your computer issue. Compaq Diagnostics Diagnoses problems with your Internet PC. This software provides an easy way to check attributes of your Internet PC. System Record Reports all of the devices that came with your Internet PC and all of the devices you have added or changed since you purchased your Internet PC. Compaq Service Connection Provides automated software updates and general information on using your Internet PC. 8-2 Understanding Your Service and Support Options Compaq Support Tools Tool Description Internet Support (available in selected countries only) Allows you to access the Compaq Service and Support Web page for your country. Compaq's Service and Support Web page provides you with software updates, maintenance tips, and tools to help make using your Internet PC easier. QuickRestore Allows you to perform a Full, Custom, or Typical Restore. These options allow you to either restore your Internet PC to its original factory condition or selectively restore certain drivers and applications. McAfee Anti-Virus Provides anti-virus scanning and free software updates for one year through the Internet. For more information on computer viruses and how to run McAfee Anti-Virus software, refer to the Identifying and Removing Computer Viruses section of this guide. Compaq Remote Support (available in select regions) If you ever need answers to your computing problems, Compaq Remote Support allows you to connect directly to a support technician using your computer modem. These technicians can remotely diagnose and cure most of your computer problems. You can watch your monitor and talk directly to the service technician on the telephone while they are resolving your issue. To use Compaq Remote Support, complete the following steps: 1. When you experience a problem not addressed in this guide, call the Compaq Customer Support number for your region. The number is listed in the Compaq Warranty Statement or the Service and Support Card that came with your computer. 2. The service representative will ask you to double-click the Compaq Support $ icon from the Windows desktop. icon. A Compaq/Carbon Copy banner will display explaining the Compaq Remote Support application. 3. Click the Compaq Remote Support 4. Click the OK button. The message, “Compaq Remote Support is waiting for a call,” displays and explains that the Compaq Support technician is dialing into your computer. Understanding Your Service and Support Options 8-3 5. Do not answer the telephone when it rings. Compaq Remote Support will connect with your computer on the second ring. If for any reason you need to exit the application, click Cancel. 6. Once a connection has been established, the Compaq Legal Disclaimer window will display. After reading the terms and conditions, click Agree to allow the support technician to remotely diagnose your computer. + NOTE: If for any reason the support technician cannot connect to your computer, you will receive an error message notifying you of the failed connection. If this happens, the technician will call you back. Make sure you answer your telephone. Using Compaq Diagnostics Compaq Diagnostics provides an easy way to perform system checks and diagnose problems. When you double-click the Compaq Diagnostics icon located in the Compaq Support $ folder on the Windows desktop, a progress bar is displayed while the application analyzes your Internet PC for information about its components. After approximately one minute, a Summary window with the component information is displayed. A row of icons is located at the top of the window. Clicking these icons displays information about the components being tested. Refer to the following table for descriptions of the tabs. Compaq Diagnostics Tab Description Overview Contains information about your computer Test Selects the devices you want tested Status Shows progress of tests and faults detected Log Shows a record of all device tests and detailed results Error Reports details of errors detected 8-4 Understanding Your Service and Support Options Testing Equipment You may conduct a Quick, Complete, or Custom test. If you choose the Quick test, it can be run in either the Interactive or Unattended mode. Complete or Custom tests are completed only in the interactive mode, since they test the audio and video components of your Internet PC. You must be present to confirm the test results. Complete testing takes about 10 minutes. The Test tab has the following main regions: Type of Test, Test Mode, an Information Window, and a Component List (under the Type of Test box). The Component List resembles Windows Explorer: Click the + to open a component folder, then the component to get information about it. The information window may show further tests that can be performed on certain components. You can request any or all of these subtests. To run a test, complete the following steps: 1. Click the Test tab. 2. Choose the type of test: Quick, Complete, or Custom. In Custom, you will need to check the boxes in the Component List for each test you want. 3. Select Interactive Mode or Unattended Mode. * HINT: You can select Quick or Complete as a starting point for a Custom test. If you select Interactive Mode, stay with your computer for the interactive test portions. 4. Click the Begin Test button at the bottom of the window. The Status tab will automatically replace the Test tab on your window. You can follow the progress of individual tests on this window. When the tests are complete, the progress bar in the Status window will be green if the test was successful and red if the test failed. The lower part of this tab gives details of the tests that have been completed. The Log tab lists all the tests and also gives information about the number of times each test was run, the time taken for the test, and the number of errors detected. You can save this information by clicking the Save button at the bottom of the window. The Error tab provides details about the errors detected, including error codes. This code is useful information for a Compaq technician, who can advise you on how to fix your computer. Understanding Your Service and Support Options 8-5 System Record System Record reports all of the devices that came with your computer and all of the devices you have added or changed since you purchased your computer. System Record highlights these changes in red. This allows you to isolate and diagnose possible problems with your computer. To access System Record, complete the following steps: 1. From the Windows desktop, double-click the Compaq Support $ icon. 2. Double-click the System Record ¢ icon. The System Record tab displays the Base.log, all of the devices that came with your computer, and the Now.log, which displays all of the devices you have added or changed. The changes you have made to your computer are highlighted in red. For example, if your computer came with 64 megabytes (MB) of memory and you upgrade it to 96 MB of memory, your Base.log displays 64 MB of memory and the Now.log displays 96 MB. The memory line in the Base.log and the memory line in the Now.log are noted in red lettering, which indicates a change has been made to your computer's original amount of memory. Compaq Service Connection Overview The Compaq Service Connection software installed on your computer is an innovative way of correcting problems before they begin. The service automatically sends you free software updates that will keep your computer in peak operating condition. You decide when to install the updates. A small notice, displayed as a rotating $, will appear on the bottom-right corner of the Windows desktop when an update is available. Turning Compaq Service Connection On and Off If you wish to manually turn on Compaq Service Connection, complete the following steps: 1. Double-click the Compaq Support $ icon on the Windows desktop. 2. Double-click the Service Connection $ icon. 8-6 Understanding Your Service and Support Options + NOTE: If the Service Connection $ icon is visible in the Windows Taskbar, the service is already active. The Compaq Service Connection will remain active and will be ready to perform updates when you log on the Internet. To turn off Compaq Service Connection, complete the following steps: 1. Right-click the Service Connection $ icon on the Windows Taskbar. 2. Select Shutdown Compaq Service Connection. How it Works The Compaq Service Connection software operates in the background while you are performing other tasks on your computer. You will only be aware that it is working when a Notice is displayed. If you are actively using your modem when the Compaq Service Connection software initiates an update, it waits until the modem is idle before downloading any information. You will not be interrupted while using your Web browser or email programs. When a Notice is displayed, complete the following steps to obtain the update: 1. Double-click the Notice, usually displayed as a rotating $, to reveal the update identification. 2. Install, postpone, or delete the download by clicking the appropriate button. • If you ignore the Notice, it will disappear after a minute or two. However, the update will still be available for you to download at any time during the next 10 days. • If you have not downloaded the update within 10 days, it will automatically be cancelled. To view the updates you have downloaded and the updates that are still available, double-click the Compaq Support $ icon on the Windows desktop, then doubleclick the Service Connection $ icon. The window displays a list of updates and highlights in bold the updates that have not yet been accepted. Understanding Your Service and Support Options 8-7 Compaq Service Connection Privacy and Data Security Statement Compaq Service Connection is committed to providing you with beneficial software updates and information. To provide you with these updates and information, non-personal information limited to your computer model number, serial number, and software ID files is communicated to the Compaq server. Files sent to your PC are protected by a personalized security number, similar to a Personal Identification Number (PIN), to ensure that you receive the correct information. Compaq Service Connection does not access, share, or send any personal information, files, or data on your system over the Internet. If you no longer wish to receive updates from Compaq Service Connection, you can turn it off at any time. Internet Support The Internet Support § icon allows you to access the Compaq Service and Support Web page for your country. The Compaq Service and Support Web page provides you with tools and information to help make using your Internet PC easier than ever. – (available in selected countries only) To access the Service and Support Web page, complete the following steps: 1. Make sure your computer is connected to the Internet. 2. From the Windows desktop, double-click the Compaq Support $ icon. 3. Double-click the Internet Support § icon. A window will display icons representing flags of various countries. 4. Click on the icon that represents your country’s flag. You will be connected to your country’s specific Service and Support web page. * HINT: You can also access Internet Support through the Instant Answer button (available on select models) on your keyboard. 8-8 Understanding Your Service and Support Options QuickRestore Compaq provides you with the ability to restore your system at any time with QuickRestore. QuickRestore has three types of restore options: Full Restore, Custom Restore, or Typical Restore. The following table describes each type of QuickRestore. QuickRestore Restore Description Full Restore Reformats your hard drive and returns your computer to its original factory-installed software state. Custom Restore Allows you to select certain Compaq drivers or applications you want to re-install without reformatting your hard drive. Typical Restore Re-installs your basic Compaq drivers and applications without reformatting your hard drive. + NOTE: Do not leave your computer unattended while QuickRestore is running. You are periodically required to enter information. If you do not enter the required information, your computer may not complete the QuickRestore process. Full Restore Full Restore returns your computer to its original factory-installed software state. It reformats your hard drive and removes all data from your computer. ` CAUTION: Full Restore deletes all data on your computers hard drive. If you have added personal files, software, or data since you purchased your computer, copy this data to diskettes or save the data to an external storage device before proceeding. To perform a Full Restore on your computer, complete the following steps: 1. Insert the QuickRestore CD into your CD or DVD drive. The CD will automatically start and the QuickRestore main menu is displayed. 2. Click the Full Restore button. The Full Restore menu is displayed. ` CAUTION: If you have not copied or backed up your personal files, software, or other data onto diskettes, they will be permanently deleted! Understanding Your Service and Support Options 8-9 3. Click the Start button to begin the Full Restore. During the Full Restore process, a progress bar shows the percentage of the software restored to the hard drive. 4. Once the Full Restore is finished, your computer automatically restarts. Once your computer restarts in DOS mode, a Progress window is displayed Once the Full Restore is complete, you will need to provide the startup information again to reinstall Windows. This information includes the Product Key number from the cover of the Microsoft Windows 98 Getting Started guide, your time zone, the time, and the date. Custom Restore Custom Restore allows you to select the Compaq drivers or applications you want to re-install without reformatting your hard drive. To perform a Custom Restore on your computer, complete the following steps: 1. Insert the QuickRestore CD into your CD or DVD drive. The CD will automatically start and the QuickRestore main menu is displayed. 2. Click the Custom Restore button. The Custom Restore is displayed. 3. Click the icon representing the application or driver you want to re-install. A progress bar indicates that the software is installing. 4. Once the Custom Restore is finished, a Restart window is displayed and it will prompt you to restart your computer. 5. Click the OK button. 6. Repeat this procedure to re-install as many drivers and applications as you need. 7. Once you have re-installed all the drivers or applications you need, remove the QuickRestore CD from your CD or DVD drive. 8-10 Understanding Your Service and Support Options Typical Restore Typical Restore re-installs your basic drivers and applications that were originally installed on your computer. It will not reformat your hard drive or destroy data. ` CAUTION: If you have not copied or backed up your personal files, software, or other data onto diskettes, they will be permanently deleted! To perform a Typical Restore, complete the following steps: 1. Insert the QuickRestore CD into your CD or DVD drive. The CD will automatically start. 2. Click the Typical Restore button. The Typical Restore menu is displayed. 3. Click the Start button to begin the Typical Restore. Once the Typical Restore is finished, it will prompt you to restart the computer. Creating a QuickRestore Recovery diskette QuickRestore is installed on your hard drive. However, you will need to create a QuickRestore Recovery diskette in case you are ever unable to start your computer properly. To create a QuickRestore Recovery diskette, complete the following steps: 1. From the Windows desktop, double-click the Compaq Support A icon. 2. Select Compaq Support, then double-click the Compaq Recovery Disk Creator. The “Welcome to Compaq Direct QuickRestore Recovery Diskette Creator” screen is displayed. 3. Click the OK button. The “Create Compaq Recovery Diskette” screen is displayed. (User will be prompted to insert a diskette into the drive.) 4. Insert a 3.5-inch, high-density formatted diskette into the drive and click OK. Compaq Recovery Disk Creator will begin creating the recovery diskette for you. 5. When Compaq Recovery Disk Creator has finished creating the recovery diskette, store the QuickRestore Recovery diskette in a safe place for emergency use. Understanding Your Service and Support Options 8-11 Using the QuickRestore Recovery diskette Use the QuickRestore Recovery diskette if you are unable to start your computer. The diskette will help you to get your computer up and running again. To run the QuickRestore Recovery diskette, complete the following steps: 1. Place your QuickRestore CD in the CD Drive, and your QuickRestore 2. 3. 4. 5. 6. Recovery diskette in the diskette drive. Turn off your PC using the power button. Turn your PC on using the power button. Follow the instructions on your screen. Eject your QuickRestore Recovery diskette and QuickRestore CD. Restart your system. Drivers Installing Drivers for New Hardware If you add new hardware such as a printer or a gamepad to your computer, you may be prompted to insert the Windows Installation CD or diskettes. If this occurs, complete the following steps: 1. At the Add New Hardware Wizard, click Next to being installing the drivers and files necessary to make the new hardware work. 2. Select the Search for the best driver for your device (Recommended) option and click Next. 3. Select the Specify a location option. If C:\WINDOWS\OPTIONS\CABS is not displayed in the drop-down box, either select it from the drop-down menu or type it in the box and click Next. The Add New Hardware Wizard will begin installing the necessary files and drivers for the new hardware. 4. When the Add New Hardware Wizard completes installing the files and drivers, click the Finish button. You may need to restart your computer for the new hardware to be recognized by your computer. 8-12 Understanding Your Service and Support Options Reinstalling Deleted Drivers If a driver is accidentally deleted or the operating system is reinstalled, the driver subdirectory allows you to restore individual drivers rather than restoring all the original software. The drivers you can restore are Audio, Video, TouchPad, Display, Modem, and CD-ROM. To re-install a driver, complete the following steps: 1. From the Windows Taskbar, click Start, point to Programs, and click Windows Explorer. 2. Navigate to the CPQDRV folder on the hard drive and double-click it. 3. Find the folder of the device you wish to reinstall and double-click it. 4. Double-click the setup program for the driver you wish to reinstall. 5. Follow the on-screen instructions. Drivers may also be reinstalled by selecting the Custom Restore option from QuickRestore. Refer to QuickRestore for more information on how to reinstall drivers using the Custom Restore option. Troubleshooting Guide 9-1 Chapter 9 Troubleshooting Guide This guide provides useful information on how to identify and correct common problems that may occur with your Internet PC. Helpful Hints If you encounter minor problems with your Internet PC, monitor, or software, refer to the following list of general suggestions before taking further action: x Check that the computer and monitor are plugged into a working electrical outlet. x Check to see that the computer is turned on and the amber power light is on. x Check to see that the monitor is turned on and the power light is on. x Turn up the brightness and contrast controls of the monitor if the monitor is dim. x Check all cable connections for loose or incorrect connections. x Remove the diskette from the diskette drive before turning on your computer. x Run Windows Diagnostics to determine and repair minor problems. Understanding This Guide This guide has been divided into three columns: Symptom, Problem, and Solution. The Symptom column describes the symptom or warning that made you realize you had a problem. The Problem column identifies one or more reasons why the symptom has occurred, and the Solution column describes what you should do to try to fix the problem listed. If a solution does not fix your problem, try all solutions for the symptom or try the solution a second time. If a problem persists and you are unable to resolve it yourself, please review Understanding Your Service and Support Options or contact a Compaq Authorized Service Provider. Refer to your Warranty Statement for details. 9-2 Troubleshooting Guide Troubleshooting Audio Problems Audio Symptom No sound. Problem Solution Speaker cables are not properly connected. Shut down your Internet PC using the normal Windows shutdown procedure. Reconnect the speakers. Refer to the Compaq Hardware and Software Setup poster for detailed instructions. Volume has been muted. On the Taskbar, click the Volume ¶ icon and clear the Mute check box. Internet PC is in Sleep mode. This is identified when the power status light on the front of your Internet PC turns amber. Press the Power button to wake your Internet PC. Windows does not detect audio driver. 1. On the Taskbar, click the Start button and point to Settings. 2. Click Control Panel. 3. Double-click the System M icon. 4. Click the Device Manager tab. 5. Click the µ plus sign next to Sound, video and game controllers, and select the installed audio driver. 6. Click the Remove button, and click OK. 7. Restart your Internet PC and let Windows redetect the audio driver. Sound is too low. Volume is too low. Click the Volume ¶ icon on the Taskbar, and click the Volume slider bar and then drag it up, or press the Volume Up button on your Compaq Internet Keyboard. Sound is distorted. Volume is too high. Click the Volume ¶ icon on the Taskbar, and click the Volume slider bar and drag it down, or press the Volume Down button on your Compaq Internet keyboard. Speakers may be damaged. Call a Compaq Authorized Service Provider. See your Warranty Statement for details. Troubleshooting Guide Audio Symptom Audio recordings from digital video camera sound is distorted. Problem DVD is not set up properly. Solution Change settings in the DVDeck program. 1. From the Taskbar, click the Start button. 2. Point to Programs, and DVDeck, and then DVDeck. 3. Click the Options tab. 4. Click AVI Interleave Options button. 5. In the Interleave Factor area, change the default setting to 4:1. 6. Click OK and close the window. Audio CD or DVD does not play. See troubleshooting topic CD or DVD in this section. Volume ¶ icon is missing from Windows Taskbar. Multimedia settings have been changed. 1. On the Taskbar, click the Start button. 2. Click Control Panel. 3. Double-click Multimedia. 4. Select the Show volume control on taskbar option, and click OK. 9-3 9-4 Troubleshooting Guide Troubleshooting CD or DVD Problems CD or DVD Symptom CD or DVD drive cannot read a disc or takes too long to start. Problem Solution CD has been inserted upside down. Reinsert the CD with the label facing up. The DVD drive will take longer to start because it has to determine the type of media, such as audio or video being played, before it can begin playing. Wait at least 30 seconds to let the DVD drive determine the type of media being played. If disc still does not start, see the solutions for related problems. CD or DVD disc is dirty. Clean CD or DVD with a CD cleaning kit available in most computer stores. Windows does not detect CD or DVD driver. 1. On the Taskbar, click the Start button and point to Settings. 2. Click Control Panel and double-click System M icon. 3. Click the Device Manager tab. 4. Click the µ next to the CD or DVD disc, and select the installed driver. 5. Click the Remove button, and click OK twice. 6. Restart your Internet PC and let Windows redetect the CD or DVD driver. Troubleshooting Guide Troubleshooting Disk and Disk Drive Problems Diskette Drive or Zip Drive Symptom Not reading drive: “Abort, Retry, Fail?” message appears. Problem A non-formatted diskette has been inserted. Solution Format the diskette by following these steps: 1. Double-click the My Computer G icon on the desktop. 2. Select the 3 1/2 Floppy (A:) drive. 3. Click File, and point to Format. 4. Select desired options, and click Start to begin formatting the diskette. “Non-system disk or disk error” message is displayed. Diskette is damaged. Replace the diskette with a new one. A diskette that does not contain system files needed to start your Internet PC has been inserted in drive. When drive activity stops, remove the diskette and press the spacebar. System should start up. System files have been damaged. 1. Insert a startup disk in the diskette drive. 2. Restart your Internet PC. 3. At the A:\ prompt, type SYS C: and press the Enter key. The following message is displayed: ‘SYSTEM TRANSFERRED’. This task will restore the system files to your hard drive. 4. Restart your Internet PC. Hard drive has failed. Call a Compaq Authorized Service Provider. Refer to your Warranty Statement for details. 9-5 9-6 Troubleshooting Guide Diskette Drive or Zip Drive Symptom Diskette drive light stays on. Diskette drive cannot save information to diskette. Problem Solution Diskette has been improperly inserted. Remove the diskette and reinsert the diskette as follows: Insert the edge with the sliding cover into drive first face up, and push all the way in until the diskette stops. Diskette is damaged. Remove the diskette and reinsert a new diskette. If a problem persists, run the Windows Maintenance Wizard to repair the drive. Refer to Maintaining Your Internet PC in the User’s Guide. Diskette is not formatted. Format the diskette by following these steps: 1. Double-click the My Computer G icon on the desktop. 2. Select the 3 1/2 Floppy (A:) drive. 3. Click File, and point to Format. 4. Select desired options, and click Start to begin formatting the diskette. Diskette is write-protected. Slide the write-protection tab to the unlocked position on the diskette. Diskette is full or file is too big. Use another diskette or compress the file to reduce the size. File save command not properly executed. When saving information to the diskette drive, verify you are using the correct drive letter. Diskette is damaged. Replace the damaged diskette. Diskette drive has failed. Call a Compaq Authorized Service Provider. Refer to your Warranty Statement for details. Troubleshooting Guide Diskette Drive or Zip Drive Symptom Diskette drive cannot read a diskette. Problem Diskette is not formatted. Solution Format the diskette by following these steps: 1. Double-click the My Computer G icon on the desktop. 2. Select the 3 1/2 Floppy (A:) drive. 3. Click File, and point to Format. 4. Select desired options, and click Start to begin formatting the diskette. Zip drive (available on select models) cannot read a disk. Zip drive (available on select models) indicator light continuously blinks. The wrong diskette type is being used. Check the type of drive you have and use the correct diskette type. Diskette drive has failed. Call a Compaq Authorized Service Provider. Refer to your Warranty Statement for details. Windows does not detect Zip driver. Reinstall your Zip drive driver. Wrong disk is being used. Verify the disk you have inserted is a Zip disk and is compatible with your Zip drive. Windows is not enabled. Zip drive cannot be used in DOS mode. Zip disk is not inserted properly. Push the Disk Eject button to remove disk, and then reinsert it. 9-7 9-8 Troubleshooting Guide Troubleshooting Display (Monitor) Problems Display Symptom Problem Solution Screen is blank and monitor power light is not lit. Monitor power cable is not connected to monitor or wall outlet. Reconnect the monitor’s power plug on rear of monitor and wall outlet. Screen is blank. Monitor is not turned on. Press the monitor’s Power button. Monitor connector cable is not properly connected to rear of Internet PC. Inspect the monitor’s video connector for bent pins. If bent pins do not exist, reconnect the monitor connector cable on rear of Internet PC. Screen saver is enabled. Press any key or move mouse to make screen display. Internet PC is in Sleep mode. This mode is identified when the power status light on the front of your Internet PC turns amber. Press the Power button to wake your Internet PC. If you are using a Flat-Panel Monitor (available on select models), you may need a Digital Video Interface and connector. Call a Compaq Authorized Service Provider. Refer to your Warranty Statement for details. Troubleshooting Guide Display Symptom Display only fills part of the screen. Problem If you are using a Flat-Panel Monitor (available on select models), your resolution settings are not set properly. Solution 1. On the Taskbar, click the Start button and point to Settings. 2. Click Control Panel. 3. Double-click Display. 4. Click the Settings tab. 5. In the Display area, click the resolution slider for the Screen and drag it to the right. Repeat this step for the Desktop resolution slider. Increase the resolutions to the maximum allowable. 6. Click OK to accept the new settings then close the Control Panel window. Display is too faint. Brightness and contrast controls are not set properly. Adjust the brightness and contrast controls on your monitor. Resolution cannot be adjusted to desired setting. Windows does not detect display driver. 1. On the Taskbar, click the Start button and point to Settings. 2. Click Control Panel. 3. Double-click the System G icon. 4. Click the Device Manager tab. 5. Click the µ next to Display Adapters and select the installed display adapter. 6. Click the Remove button, and click OK. 7. Restart your Internet PC and let Windows redetect the display driver. 9-9 9-10 Troubleshooting Guide Troubleshooting Fax Modem Problems Fax Modem Symptom Problem Solution Cannot send or receive faxes. Fax modem is not connected properly. Reconnect the fax modem, verifying the following connections: Telephone Line to Telephone (for external phone sets) and Telephone Line to Wall Jack (from Internet PC to wall). Connection has failed. Ten-digit phone number is not properly entered or number being dialed is not a fax number. Verify whether mandatory area code is included in number being dialed or correct fax number is being dialed. Internet PC is turned off or third-party program is closed. Some third-party fax software can only be used to receive faxes when the program is open. Fax modem has failed. Call a Compaq Authorized Service Provider. Refer to your Warranty Statement for details. Troubleshooting Guide 9-11 Fax Modem Symptom Fax starts to send but quits before the transmission is complete. Problem Solution Line connection failure. Redial the fax number to send fax again. Call waiting enabled on line. Refer to third-party software for instructions on how to disable call waiting, or contact your local telephone company. Third-party fax software does not detect the fax modem driver. Verify correct fax modem speed and COM port are selected. 1. Click the Start button and point to Settings. 2. Click Control Panel and double-click Modems. 3. Windows will detect the modem you have installed. Click the Properties button. 4. Verify that the correct modem port is set and the maximum speed of your modem is selected. Reset these settings if necessary, and click OK. 5. Close the Control Panel window. Third party fax software is conflicting with another program. Close all programs, except the fax software, and redial the fax number. The receiver for another telephone on the same line was picked up. Verify all telephone handsets on the same line are on the receiver. Fax machine where call is being placed has run out of paper. Call location where the fax is being sent, and ask if the fax machine has paper. Internet PC needs repair. Call a Compaq Authorized Service Provider. Refer to your Warranty Statement for details. 9-12 Troubleshooting Guide Troubleshooting Game Problems Games Symptom Game crashes frequently. Graphic distortion or blank screen exists during game’s introduction. Problem Solution Minimum hardware or software requirements set by Game manufacturer have not been met. Review the game documentation or packaging for minimum requirements. Game was not set up properly when installed. Reinstall the program, noting any settings and default selections that pertain to your Internet PC, and restart the game. Incorrect version of game. Contact game manufacturer for updated version of game. Troubleshooting Hard Drive Problems Hard Drive Symptom Problem Solution Internet PC seems to have locked up. Program in use has stopped responding to commands. Attempt a normal Windows shutdown. If this fails, restart your Internet PC by pressing the Power button for 4 or more seconds to power it off. To restart your Internet PC, press the Power button again. Hard drive error message is displayed. Part of hard drive has failed. Run the Windows Maintenance Wizard to repair the drive. Refer to Maintaining Your Internet PC in the User’s Guide. Hard drive fault protection error message is displayed. Part of hard drive has potential to fail or could already have failed. Call a Compaq Authorized Service Provider. Refer to your Warranty Statement for details. Insufficient memory message is displayed. All memory in Internet PC is being used by open programs and memory is needed for desired task. Close one or more programs and retry. It may also be necessary to restart Windows to recover memory should this fail. Troubleshooting Guide 9-13 Troubleshooting Internet Access Problems Internet Symptom Cannot connect to the Internet. Problem Solution Internet Service Provider (ISP) account is not set up properly. Verify Internet settings, or contact your ISP for assistance. Modem is not set up properly. Reconnect the modem, verifying the following connections: Telephone Line to Telephone (for external phone sets) and Telephone Line to Wall Jack (from Internet PC to wall). Web browser is not set up properly. Verify your Web browser is installed and set up to work with your ISP. Internet keyboard failed. Call a Compaq Authorized Service Provider. Refer to your Warranty Statement for details. Cannot automatically launch Internet programs. If using America Online (AOL) as your ISP, you must log in to AOL before some programs will start. Log in to AOL and launch your desired program. Cannot use the Internet because the fax modem is busy or no dial tone found. Telephone or modem line connections are not connected properly. Reconnect the modem, verifying the following connections: Telephone Line to Telephone (for external phone sets) and Telephone Line to Wall Jack (from Internet PC to wall). If no dial tone is found, another telephone handset on the same line is not on the receiver. Verify all telephone handsets on the same line are on the receiver. Messages have not been cleared from answering service. If you use an answering service that modifies your telephone’s dial tone to inform you of messages, clear all messages and try your call again. 9-14 Troubleshooting Guide Internet Symptom Internet takes too long to download Web sites. Problem Modem is not set up properly. Solution Verify correct modem speed and COM port are selected. 1. Click the Start button and point to Settings. 2. Click Control Panel and double-click Modems. 3. Windows will detect the modem you have installed. Click the Properties button. 4. Verify that the correct modem port is set and the maximum speed of your modem is selected. Reset these settings if necessary, and click OK. 5. Close the Control Panel window. Troubleshooting Keyboard and Mouse Problems Keyboard and Mouse Symptom Keyboard commands and typing are not recognized by Internet PC. Problem Keyboard connector is not properly connected. Solution 1. Shut down your Internet PC using your mouse. 2. On the Taskbar, click the Start button. 3. Click Shut Down... 4. Select the Shut down option and click OK. 5. After the shutdown is complete, reconnect the keyboard connector on the rear of your Internet PC and restart the computer. Program in use has stopped responding to commands. Shut down your Internet PC using your mouse. Refer to the problem “Keyboard connector is not properly connected.” Troubleshooting Guide 9-15 Keyboard and Mouse Symptom Mouse does not respond to movement or is too slow. Problem Solution Keyboard needs repair. Call a Compaq Authorized Service Provider. Refer to your Warranty Statement for details. Mouse connector is not properly connected. Shut down your Internet PC using your keyboard. 1. Press the Ctrl and Esc keys simultaneously. 2. From the Windows Start menu, use the arrow keys to select Shut Down..., and press the Enter key. 3. Select the Shut down option (you may need to use the arrow keys to select it). 4. Click OK. After the shutdown is complete, reconnect the mouse connector on the rear of your Internet PC and restart the computer. Mouse will only move vertically or horizontally. Mouse roller ball is dirty. Remove roller ball cover from bottom of mouse and clean with mouse cleaning kit available in most computer stores. Program in use has stopped responding to commands. Shut down your Internet PC using your keyboard. Refer to the problem “Mouse connector is not properly connected” for details on how to shut down using your keyboard. Mouse roller ball is dirty. Remove roller ball cover from bottom of mouse and clean with mouse cleaning kit available in most computer stores. Mouse needs repair. Replace mouse. Call a Compaq Authorized Service Provider. See your Warranty Statement for details. 9-16 Troubleshooting Guide Troubleshooting Memory Problems Memory Symptom Memory parity error. Problem Solution Wrong memory modules were used in upgrade. Review Upgrading Your Internet PC that came with your Internet PC to verify the correct type of memory modules to use. Memory modules failed. Call a Compaq Authorized Service Provider. Refer to your Warranty Statement for details. Troubleshooting Power Problems Power Symptom Internet PC will not turn on. Problem Solution Power button on the front of your Internet PC has not been pressed. Press the Power button on the front of your Internet PC. Power plug is not properly connected to back of Internet PC or wall outlet. Reconnect the power plug to rear of Internet PC and wall outlet. Line voltage selection switch is not in the proper position for your region (115V/230V). Refer to Checking Your Connections in the User’s Guide, or call a Compaq Authorized Service Provider for assistance. Refer to your Warranty Statement for details. Wall outlet is bad. Test the outlet by connecting a different electrical device to outlet. Troubleshooting Guide 9-17 Power Symptom Internet PC will not start. Problem System files may have been damaged. You will need to insert a startup disk or Windows Startup disk to restart your Internet PC. Solution 1. Insert a startup disk in the diskette drive. 2. Restart your Internet PC. 3. At the A:\ prompt, type SYS C: and press the Enter key. The following message will be displayed: ‘SYSTEM TRANSFERRED’. This task will restore the system files to your hard drive. 4. Restart your Internet PC. If this task does not restart your Internet PC, call a Compaq Authorized Service Provider. Refer to your Warranty Statement for details. Wrong memory modules were used in upgrade, or memory modules were installed in the wrong location. Verify the installation of memory modules by calling a Compaq Authorized Service Provider. Refer to your Warranty Statement for details. Hard drive has been damaged. Call a Compaq Authorized Service Provider. Refer to your Warranty Statement for details. 9-18 Troubleshooting Guide Power Symptom “Illegal Operation has Occurred” error message is displayed. “Non-system disk or disk error” message is displayed. Problem Solution Program being used is not certified for Windows by Microsoft. Verify program is certified by Microsoft (see program packaging for this information). Configuration files are corrupt If possible, save all data, close all programs, and restart your Internet PC. If the error message returns you may need to back up your personal data and use the Quick Restore utility. See Understanding Your Service and Support Options for details. a WARNING: Quick Restore reformats your hard drive, all files will be lost. A diskette that does not contain system files needed to start your Internet PC has been inserted in drive. When drive activity stops, remove the diskette and press the spacebar. Your Internet PC will start up. Disk error has occurred. Restart your Internet PC. If the error returns, see the next problem “System files have been damaged.” System files have been damaged. 1. Insert a startup disk in the diskette drive. 2. Restart your Internet PC. 3. At the A:\ prompt, type SYS C: and press the Enter key. The following message will be displayed:‘SYSTEM TRANSFERRED’. This task will restore the system files to your hard drive. 4. Restart your Internet PC. Hard drive has failed. Call a Compaq Authorized Service Provider. Refer to your Warranty Statement for details. Troubleshooting Guide 9-19 Troubleshooting Printer Problems (see your printer manual for additional information) Printer Symptom Printer prints only in red or colors other than black. Problem Printer cartridge is out of black ink. Solution Replace the printer cartridge. ` Do not attempt to install your printer cartridge by moving the printer carriage manually. 1. On the Window taskbar, click Start. 2. Click Programs. 3. Select the printer model you have installed on your PC. 4. Select the Cartridges tab. 5. In the Cartridge pull-down box, choose the cartridge you want to install. 6. In the Action pull-down box, select the action you want. 7. Click Install/Reinstall Cartridge. The cartridge carriage moves to the loading position in the middle of the printer. 8. Lift the printer access door. 9. Remove the old cartridge if necessary and install the new cartridge. 10. Close the printer access door. 11. Click Continue. Printer seems to be printing, but no characters appear on the paper. The print cartridge may be out of ink. Replace the cartridge by following the directions in the preceding box. Print cartridge nozzle may be blocked. Be sure the tape covering the nozzle of the print cartridge has been removed. 9-20 Troubleshooting Guide Printer Symptom Poor print quality. Problem Solution Cartridge may be running out of ink. Replace cartridge by following the preceding directions. Cartridge nozzles may need cleaning. 1. Click Start. 2. Click Programs. 3. Select the printer model you have installed on your PC. 4. Select Printer Control. 5. Click the Cartridges tab. 6. Select Clean Print Nozzles. The cleaning pattern prints. 7. Follow the test instructions on the screen to obtain satisfactory print quality. You may need to run the test as many as three times. 8. If the print quality is not satisfactory, reinstall the print cartridge and rerun the test. 9. If the quality is still unsatisfactory, wipe the print cartridge nozzles. Cartridge needs to be aligned. 1. Click Start. 2. Click Programs. 3. Select the printer model you have installed on your PC. 4. Select Printer Control. 5. Select the Cartridges tab. 6. Click the Align Cartridges button. The cartridge alignment page prints. Follow the instructions on the screen to test and correct the alignment of your print cartridge. 7. Click OK. Troubleshooting Guide 9-21 Printer Symptom Poor print quality. Problem Drivers are improperly installed. Solution Uninstall and reinstall the printer drivers. To uninstall the printer drivers, complete the following steps: 1. On the Window taskbar, click Start. 2. Click Programs. 3. Select your printer model. 4. Click Uninstall Drivers. 5. Follow the instructions on the screen. The program will uninstall your printer drivers. To reinstall the printer drivers, insert the Inkjet Printer Driver CD that came with your printer into the CD-ROM drive. On some systems the installation program will run automatically if you follow the instructions on the screen. To run the setup program manually, complete the following steps: 1. From the Windows taskbar, click Start. 2. Select Programs. 3. Select Windows Explorer. 4. Select the CD-ROM drive that contains the printer driver CD. 5. Double click the file Setup.exe to run the setup program. 6. Follow the instructions on the screen. 9-22 Troubleshooting Guide Contacting a Compaq Authorized Service Provider If you were unable to fix your Internet PC using this troubleshooting guide, refer to the Warranty Statement that came with your computer for the technical support telephone numbers. Index-1 Index A Animate text 4-3 B buttons Instant Answer 8-7 D diagnostics 8-1 Digital Creativity Imaging Center overview 4-1 digital interface 4-1 diskette troubleshooting 9-18 drivers 8-10, 8-11 installing new 8-10 reinstalling deleted drivers 8-11 DVD troubleshooting 9-4 E C Capture media 4-3 CD troubleshooting 9-4 CD Read/Write Drive Features 5-1 Just!burn Software 5-1 CD-R 5-1 CD-RW 5-1 just!burn CD Assistant 5-2 CD!backup 5-3 just!audio 5-3 just!data 5-3 PacketCD 5-2 Compaq Remote Support 8-2 Compaq Service Connection overview 8-5 Compaq Support 8-1 Compaq Remote Support 8-2 diagnostic testing equipment 8-4 Diagnostics 8-1, 8-3 Internet Support 8-2 McAfee Anti-Virus 8-2 QuickRestore 8-2 Remote Support 8-1 Service Connection 8-1 System Record 8-1 Edit video 4-3 F fax troubleshooting 9-10 fixing problems 9-1 flat-panel monitor troubleshooting 9-8 G game troubleshooting 9-12 I IEEE-1394 connector 4-2 installing hardware 8-10 Instant Answer button 8-7 Internet service provider troubleshooting 9-13 Internet Support 8-2, 8-7 ISP troubleshooting 9-13 J just!burn software 5-2 Index-2 K S keyboard Community 3-2 function keys (F1 through F12) 3-6 Instant Answer 3-3 Instant E-Mail 3-2 Instant Internet 3-2 Instant Search 3-2 Launch button 3-5 Multimedia Easy Access buttons 3-4 My Presario 3-2 Online MarketPlace 3-3 Quick Print button 3-5 Retail Central 3-3 Secure E-Commerce/Featured Web Site 3-3 Sleep button 3-5 standard keyboard keys 3-6 status lights 3-8 screen troubleshooting 9-8 Selective QuickRestore Full Restore 8-8 serial numbers 1-3 Service Connection 8-1 sound troubleshooting 9-2 speaker cable troubleshooting 9-2 special effects and transitions 4-3 S-Video connector 6-1 System Record 8-1, 8-5 Base.log 8-5 Now.log 8-5 M McAfee Anti-Virus free software updates 8-2 McAfee Anti-Virus 8-2 Mix audio 4-3 modem troubleshooting 9-10 monitor troubleshooting 9-8 P problems solving common 9-1 Q QuickRestore 8-2 R remote support 8-1 T testing equipment complete 8-4 custom 8-4 quick 8-4 text conventions 1-1 troubleshooting 9-1 CD 9-4 diskette 9-18 DVD 9-4 fax 9-10 flat-panel monitor 9-8 games 9-12 helpful hints 9-1 modem 9-10 monitor 9-8 screen 9-8 sound 9-2 speaker cable 9-2 volume 9-2 Zip disk 9-7 Zip drive 9-7 TV Out connection 6-1 Index-3 U upgrading additional memory 7-21 AGP card 7-13 chassis cage 7-4 diskette or zip drive 7-19 expansion cards 7-9 hard drive 7-15 memory modules 7-21 real-time clock battery 7-24 removing a battery 7-25 removing the cover 7-5 replacing the cover 7-6 V video animation 4-3 VideoWave III 4-3 virus McAfee Anti-Virus 8-2 volume troubleshooting 9-2 Z Zip disk troubleshooting 9-7 Zip drive 9-7 troubleshooting 9-7 Index-4