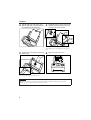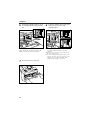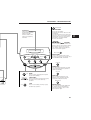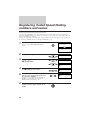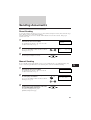
1
FAX-B150
User’s Guide
How to use this User’s Guide
Before you use this user’s guide, read this list of symbols, terms and abbreviations to become familiar
with them. A complete glossary of terms is included at the end of this guide.
+ Document
The original sheet(s) of paper you send, receive or copy with your fax.
+ Menu
A list of options or features from which you select an item to set up or change.
+ Numeric buttons
The round buttons on the operation panel with digits 0 through 9,
and # on them.
+ Arrow buttons
The buttons
used to display choices and change settings. These buttons also change the
volume setting of the speaker.
+ STOP button
Press
to cancel any operation or to cancel the selection of a menu item.
+ START/COPY button
Press
) to start an operation or register a setting.
+ Transaction number
A number automatically assigned everytime you send or receive a fax. Transaction numbers are
4-digit numbers that can help you keep track of the documents you send and receive.
+ TX/RX NO. XXXX
Represents the transaction number when displayed on the LCD, where XXXX is the 4-digit
transaction number.
+ TX
Stands for transmit or send.
+ RX
Stands for receive.
+ NOTE
A note describes important points and helpful hints, or how to avoid minor difficulties.
As an ENERGY STAR Partner, Canon has determined that the FAX-B150
meets the ENERGY STAR guidelines for energy efficiency.
Trademarks
Canon and BJ are registered trademarks, and Bubble Jet is a trademark of
Canon Inc.
Copyright
Copyright r 1997 by Canon Inc. All rights reserved. No part of this publication may be reproduced,
transmitted, transcribed, stored in a retrieval system, or translated into any language or computer
language in any form or by any means, electronic, mechanical, magnetic, optical, chemical, manual or
otherwise, without the prior written permission of Canon Inc.
This CE Marking shows compliance of this equipment with Directive 73/23/EEC and Directive
89/336/EEC (as amended by Directive 92/31/EEC), both as amended by Directive 93/68/EEC.
Canon Inc./Canon Europa N.V.
ii
Welcome
Thank you for choosing the Canon FAX-B150 Bubble JetTM facsimile. The compact, upright design of
the fax means it takes up less space in your work area. The bubble jet print mechanism uses cut-sheet
plain paper, so you get crisp reproductions of your fax documents and copies.
The FAX has a number of features that make it ideal for small to medium-sized offices with a single
telephone line.
Features
Plain paper
The fax accepts A4, letter, and legal size cut-sheet plain paper for crisp reproduction and faxes that are
flat and easy to write on.
Automatic switching between fax and voice calls
The fax recognises incoming fax calls, and automatically switches to receive mode.
Automatic dialling
A variety of dialling methods allows you to register frequently used fax numbers and phone numbers
and access them by pressing one or a few buttons.
Error Correction Mode (ECM) Tx / Rx
Automatically helps correct transmission errors due to system and telephone line noise.
Delayed transmission
Sends a fax automatically at a later time, for example, at night when telephone rates are lower.
360 dpi copy mode
Lets you make copies at 360 × 360 dpi.
iii
Notice for connection to telecommunication systems in
the United Kingdom and the Republic of lreland
Approval Number 607721 (UK)
Your Canon FAX-B150 has been approved against the requirements of NTR3 for use in the UK and
complies with the requirements of 91/263 EEC. The CE mark is applied in respect of the requirements
of 72/23 EEC and 89/336 EEC. (UK)
It is intended for connection to analogue two wire public telecommunication networks.
Connect the supplied cable to this socket first, then to the telephone line.
There are two auxiliary sockets to which equipment approved for direct connection to the network may
be connected.
If required, a suitable adaptor, approved under Approval Number NS/G/23/L/100005 for direct and
indirect connections between the fax machine and any piece of approved telecommunications apparatus,
is available from your Canon supplier. (UK)
This socket is intended for connection of an answering machine or similar device.
This socket is intended for connection of a telephone.
Voltage and current available at these sockets is determined by the network to which the line cable is
connected. They will not normally exceed the limits for TNV as described in EN60950.
Canon recommend that any additional equipment connected in the installation is connected to one of
these sockets. Do not connect additional equipment through parallel sockets elsewhere on the telephone
line.
This equipment is not intended or recommended for making calls to emergency services.
iv
For your safety (Australia only)
To ensure safe operation the three-pin plug supplied must be inserted only into a standard three-pin
power point which is effectively earthed through the normal household wiring.
Extension cords used with the equipment must be three-core and be correctly wired to provide
connection to earth.
Wrongly wired extension cords are a major cause of fatalities. The power point shall be located near the
equipment and shall be easily accessible.
The fact that the equipment operates satisfactorily does not imply that the power point is earthed and
the installation is completely safe. For your safety, if in any doubt about the effective earthing of the
power point, consult a qualified electrician.
Caution (New Zealand only)
1. This equipment may not necessarily provide for the effective hand-over of a call to or from a
telephone connected to the same line.
2. The Operation of this equipment on the same line as telephone or other equipment with audible
warning devices or automatic ring detectors will give rise to bell rinkle or noise and may cause false
tripping of the ring detector. Should such problems occur, the user is not to contact telecom faults
service.
3. Should this equipment become physically damaged, disconnect immediately from the Telecom
connection and power source and contact your nearest service agent.
4. To
1)
2)
3)
4)
relocate this equipment please.
Disconnect the equipment from the Telecom connection.
Disconnect the equipment from the power source.
Reconnect the equipment to the power source.
Reconnect the equipment to the Telecom connection.
5. If the supply cord of this equipment is damaged, it must be replaced by the special cord (Parts
No.:HH2-1910).
6. Not all standard telephones will respond to incoming ringing when connected to the extension
socket.
v
Precautions
General
Make sure the place where you set up the fax satisfies the following conditions:
Over 32.5°C
Under 10°C
• Use the fax only within the following range of temperature
and humidity ranges.
Ambient temperature:
10º to 32.5 Cº
Ambient humidity:
10% to 80% RH (no condensation)
• Keep your fax out of direct sunlight, as this can damage the
unit.
• Do not lift the fax by the operation panel.
• If you have installed the optional handset, do not lift the fax
by the handset cradle.
• Hold the fax as shown when transporting it.
vi
PRECAUTIONS
• Place the fax on a level surface.
• Do not remove the BJ cartridge from the unit unless it needs
to be replaced, or when transporting the fax. Removing the
cartridge and leaving the print head unprotected will cause it
to dry out and become unusable.
• Do not place the fax on the edge of a desk so as to prevent received documents falling onto the floor.
• Certain table surfaces may prevent received documents from sliding out smoothly, resulting in paper
jams. Do not place the fax on these types of tables.
• Do not install the fax near devices which contain magnets or generate magnetic fields.
• Do not subject the fax to strong physical shock or vibration.
• Keep the fax clean. Dust accumulation can prevent the fax from operating properly.
• Before you transport your fax, make sure to remove the BJ cartridge and recover the print head with
the orange tape. After moving the fax, remove the orange tape and reload the BJ cartridge.
Others
Here are some other general precautions when you are using or working around it.
CAUTION
• Avoid installing your fax in places exposed to direct sunlight, dust, vibration, high temperature or
humidity, or on unstable surfaces.
• To assure proper electrical contact, make sure the fax is firmly plugged in.
• Never pull on the cord to unplug the fax. Pull on the plug itself.
WARNING
•
•
•
•
Do not overload the electrical outlet where the fax is plugged in.
Never plug or unplug the fax when your hands are wet.
For your safety, unplug the fax during electrical storms.
If you have problems with the fax (smoke, odd smells or noises), immediately unplug the fax
from the outlet. Keep the area around the outlet free from clutter so you can unplug the fax
quickly in case of an emergency.
• Never use liquids or drink beverages around the fax. Liquids spilled on the fax can cause a
fire or electrical shock. If you accidentally spill a liquid on the fax, unplug it immediately and
call your Canon service representative.
• To avoid electrical shock from exposed power points, never disassemble the fax. There are
no parts or switches in the fax that require adjustment.
vii
Table of Contents
INTRODUCTION
How to use this User’s Guide ................................
Welcome ...................................................................
Features ....................................................................
Notice for connection to telecommunication
systems in the United Kingdom and Republic
of lreland ..............................................................
For your safety (Australia only) ..............................
Caution (New Zealand only) ...................................
Precautions ..............................................................
iv
v
v
vi
Unpacking ................................................................
2
Assembling the fax ..................................................
5
ii
iii
iii
General ............................................................................. vi
Others ............................................................................... vii
1. SETTING UP
Removing the shipping materials ....................................
Attaching components ....................................................
Attaching the handset .....................................................
Connecting the AC power cord .......................................
Loading the paper ...................................................
Selecting the right kind of paper .....................................
Loading the paper ...........................................................
Installing the BJ cartridge ......................................
4
5
6
6
7
7
7
9
BJ cartridge guidelines .................................................... 9
Handling the BJ cartridge ................................................ 10
Installing the BJ cartridge ................................................ 11
Connecting the phone line ..................................... 14
Connecting to the wall jack .............................................
Connecting the telephone ...............................................
Connecting the optional handset ....................................
Connecting an extension phone or answering machine
(optional) .....................................................................
Setting the TEL LINE TYPE .............................................
14
14
15
Selecting the receiving mode ..........................................
Fax Only Mode .................................................................
Fax/Tel Mode ...................................................................
Manual Mode ...................................................................
Ans. Machine Mode .........................................................
17
18
19
20
21
15
16
Setting up to receive faxes .................................... 17
2. PREPARING TO
USE YOUR FAX
Main components of the fax .................................. 24
Front view ......................................................................... 24
Rear view ......................................................................... 25
Fax controls – the Operation Panel ....................... 26
Registering your name and number ..................... 28
Moving through the main menus ....................................
Entering a number ...........................................................
Entering a name ...............................................................
Personalising your fax .....................................................
Registering the date and time .........................................
Registering your telephone/fax number and name ........
viii
28
30
30
32
33
34
Table of Contents
Registering One-touch Speed Dialling numbers
and names ........................................................... 36
Registering Coded Speed Dialling numbers and
names .................................................................. 38
Special dialling ......................................................... 39
Registering the access type and the outside line
number ....................................................................... 40
Using alternative telephone networks (UK only) . 42
Attaching the M label .......................................................
Registering an alternative telephone network ................
Sending with a registered long-distance service ...........
Registering speed dialling with the M button .................
3. HANDLING
DOCUMENTS
4. MAKING
COPIES
5. SENDING
FAXES
42
42
44
45
Preparing documents ............................................. 48
Types of documents you can scan ................................. 48
Loading the document .................................................... 49
Setting the resolution and density .................................. 51
Copying documents ................................................ 54
Preparing to send a document .............................. 56
Sending methods ............................................................. 56
Dialling methods .............................................................. 56
Sending documents ................................................ 57
Direct Sending .................................................................
Manual Sending ...............................................................
Automatic Dialling ............................................................
Memory Sending .............................................................
Cancelling Sending ..........................................................
Redialling ..........................................................................
Messages displayed during sending ..............................
Clearing document jams (ejecting a document from the
ADF) ............................................................................
57
57
58
59
60
60
61
62
Delayed Sending ...................................................... 63
Sending other documents while the fax is set for
Delayed Sending ........................................................ 64
Cancelling Delayed Sending ........................................... 65
Sequential broadcasting ........................................ 66
Sending a document to more than one location ............ 66
6. RECEIVING
FAXES
Receiving documents ............................................. 68
Receiving documents in Manual Mode ..........................
Receiving documents in Fax Only Mode ........................
Receiving documents in Fax/Tel Mode ...........................
Receiving documents in Ans. Machine Mode ................
Receiving documents in memory ....................................
Printing documents in memory .......................................
Receiving while registering, copying or printing .............
68
69
69
70
71
72
72
ix
Table of Contents
Network FAX/TEL Switching (Australia only) ...... 73
Setting the fax for Network Switch ................................. 73
Operation for Network Switch System ........................... 74
Network FAX/TEL Switching (New Zealand
only) ...................................................................... 75
Setting the fax Network ................................................... 75
Operation for Network Switch System ........................... 76
7. SETTINGS AND
ACTIVITY
REPORTS
User menu settings ................................................. 78
Settings ..................................................................... 81
How to change a setting ................................................. 81
Activity reports ........................................................ 87
How to print a report .......................................................
Activity management report ............................................
One-touch Speed Dialling list ..........................................
Coded Speed Dialling list ................................................
User’s data list .................................................................
Activity report (Sending) ..................................................
Activity report (Receiving) ................................................
Multi-activity report ..........................................................
Memory clear list .............................................................
87
88
88
89
90
90
91
91
92
Restricting use of the fax ....................................... 93
Locking the fax ................................................................ 93
Changing the access password ...................................... 94
Cancelling the restriction setting ..................................... 95
8. SOLUTIONS TO
COMMON
PROBLEMS
Paper jams ............................................................... 98
Automatic Document Feeder (ADF) jams ....................... 98
Recording paper jams ..................................................... 99
Periodic care ............................................................100
Cleaning the fax exterior ................................................. 100
Cleaning the glass scanning window .............................. 100
Cleaning the printer area ................................................. 101
Cleaning the BJ cartridge print head .............................. 102
Replacing the BJ cartridge .............................................. 103
Frequently Asked Questions ..................................104
TRANSMITTING ............................................................... 104
RECEIVING ...................................................................... 105
TELEPHONE .................................................................... 106
COPYING ......................................................................... 107
PAPER LOADING PROBLEMS ....................................... 107
GENERAL ......................................................................... 107
Print quality problems .............................................109
Error codes, messages and solutions ..................110
In case of a power failure .......................................113
During a power failure ..................................................... 113
x
Table of Contents
Specifications ...................................................................................................................115
Appendix ...........................................................................................................................117
Document sizes ................................................................................................................................ 117
What happens when Fax/Tel Mode is selected .............................................................................. 118
Glossary ............................................................................................................................119
Index ..................................................................................................................................123
xi
This page is intentionally blank.
1
SETTING UP
Unpacking ................................................................
2
Assembling the fax ..................................................
5
Removing the shipping materials ....................................
Attaching components ....................................................
Attaching the handset .....................................................
Connecting the AC power cord .......................................
Loading the paper ...................................................
Selecting the right kind of paper .....................................
Loading the paper ...........................................................
Installing the BJ cartridge ......................................
4
5
6
6
7
7
7
9
BJ cartridge guidelines .................................................... 9
Handling the BJ cartridge ................................................ 10
Installing the BJ cartridge ................................................ 11
Connecting the phone line ..................................... 14
Connecting to the wall jack .............................................
Connecting a telephone ..................................................
Connecting the optional handset ....................................
Connecting an extension phone or answering machine
(optional) .....................................................................
Setting the TEL LINE TYPE .............................................
14
14
15
Selecting the receiving mode ..........................................
Fax Only Mode .................................................................
Fax/Tel Mode ...................................................................
Manual Mode ...................................................................
Ans. Machine Mode .........................................................
17
18
19
20
21
15
16
Setting up to receive faxes .................................... 17
Unpacking
As you unpack the fax, save the carton and packing material in case you want to move or ship the unit
in the future.
Carefully remove all items from the box.
¶ It is best to have someone hold the box while you lift the fax and its protective packaging out of the
carton.
User’s guide
BX-3 BJ FAX
cartridge
Paper tray cover
Main unit
Paper tray
2
Power cord and Telephone
line
UNPACKING
If any of these items are damaged or missing, notify your Canon dealer immediately.
Main unit
Paper tray
Power cord*
Telephone line**
1
Paper tray cover
Miscellaneous
¶ User’s Guide (This
manual)
¶ M Label (UK only)
Overlay
BX-3 BJ FAX cartridge
* The shape of the power cord varies depending on the country of purchase.
** The shape of the telephone line varies depending on the country of purchase.
3
SETTING UP
Removing the shipping materials
Remove the shipping materials as shown below.
2
2
1
3
1
3
Remove these tapes
Remove these tapes
Open the front cover
Remove this tape
Pull
Open
2
1
Be sure to also remove any shipping materials from the paper tray cover and the paper tray.
4
Assembling the fax
1
To see how the fax looks fully assembled, see Main components of the fax, p. 24.
Attaching components
j Paper Tray
Make sure the paper lever is in the position . Then place the paper tray into the
fax, making sure the two knobs fit in the appropriate slots on the fax.
This symbol indicates
the use of a function
(envelope printing)
not available with this
model.
Paper lever
j Paper Tray Cover
Place the paper tray cover over the paper tray, making sure the two tabs fit in the
appropriate slots on the fax.
5
SETTING UP
Attaching the optional handset*
* The handset is available as an optional in some countries.
1
Attach the handset cradle.
2
Place the handset on its cradle.
Please release
the screw.
Connecting the AC power cord
Plug the fax into a 200 240 volt AC 50/60 Hz outlet.
1
Plug the power cord connector into the
rear of the unit.
2
Plug the other end of the power cord
into a properly grounded AC outlet.
There is no power switch on the fax. The power is
on as long as the fax is plugged in.
6
Loading the paper
1
Selecting the right kind of paper
The quality of the paper you use affects the print quality of the fax. Using paper that meets the
following specifications will ensure the best possible printing results.
Quality
Use plain bond, typewriter quality without curls, folds, or rough edges.
Weight
64-90 g/m2
Thickness
0.08 mm-0.12 mm
Storage
18° to 24° C, 40% to 60% relative humidity.
Size
A4, Letter, Legal
Note
¶
¶
¶
¶
¶
Test the plain bond paper you intend to use first to make sure printing results are satisfactory.
Do not use punched or coloured paper.
Do not use glossy paper.
Ink drying time will vary depending on the type of paper.
Using paper other than the above may cause jamming and/or blurred printing.
j Setting the paper size
The paper size setting determines the size of the recording paper in the paper tray.
The factory setting is A4 size. If you want to use a paper size other than A4, you must change the
PAPER SIZE setting. See FAX PRINTER, p. 86.
Loading the paper
1
Remove the paper tray cover.
2
Fan a small stack of up to 100 sheets (up
to 10 mm thick). Tap the edge of the
stack on a flat surface to even the stack.
7
SETTING UP
3
Align the right edge of the paper stack
with the right edge of the paper tray and
insert halfway into the paper tray.
4
Holding the paper of stack, squeeze and
slide the paper guide until it touches the
left edge of the stack of paper.
Make sure the stack of paper does not exceed the
paper limit mark on the right side of the paper
tray.
5
Insert the paper stack into the paper tray
until it stops.
6
Replace the paper tray cover.
A4
LT
R
A4
LT
R
Do not force the paper down into the fax.
Note
¶ Make sure the stack of the paper is flat, held upright and aligned with the left paper guide.
¶ The top edge of the stack does not need to be even.
8
Installing the BJ cartridge
1
The first time you set up your fax, you have to install the BX-3 BJ FAX cartridge before you can begin
receiving and copying documents.
BJ cartridge guidelines
Use only the Canon BX-3 BJ FAX cartridge with the FAX-B150.
The actual amount of ink that you use will vary depending on the print density of a page. If the
majority of your printed output is graphics, you may need to change the ink cartridge more often than
when you are receiving or copying text only.
You may need to replace the BJ cartridge when either of the following conditions exist:
¶ Your printed output is not crisp and clear, and there are gaps in the characters (missing dots) even
after you have cleaned the print head once or twice and you have removed and reinstalled the BJ
cartridge.
¶ You have been using the BJ cartridge for over one year.
Note
¶ To ensure optimum print quality, Canon recommends the use of the cartridges designated by
Canon. Canon accepts no liability or responsibility for damages caused by the use of any
cartridge other than those designated by Canon.
¶ Canon makes numerous ink cartridges; the BX-3 BJ FAX cartridge is the only one designed to be
used with the FAX-B150.
9
SETTING UP
Handling the BJ cartridge
¶ Leave the BJ cartridge in its packaging until you are ready to use it to prevent it from drying out.
¶ Store BJ cartridges out of the reach of children. The ink contains isopropyl alcohol 67-63-0.
¶ Replace the BJ cartridge after one year of use or if the print is not clear or is missing, even after
trying five successive head cleanings.
¶ Never remove the BJ cartridge unless you are going to replace it. When left exposed, the cartridge
print head dries out, making it unusable.
¶ Do not touch the print head area on the BJ cartridge. Ink
may leak out and cause stains.
¶ Never shake the BJ cartridge, especially after removing the
protective tape from the print head.
If spilled, the ink is very difficult to clean. Therefore, always follow the above precautions and carefully
handle the BJ cartridge.
10
INSTALLING THE BJ CARTRIDGE
Installing the BJ cartridge
1
Open the front cover of the fax.
2
1
Raise the green cartridge release lever.
Thickness lever
Make sure the paper thickness lever is set to the
paper position (left position).
3
Remove the print head cap from the BJ
cartridge.
4
Pull off the protective orange tape.
11
SETTING UP
5
Insert the BJ cartridge. Align the slot in
the cartridge with the yellow post in the
fax.
The yellow post (BJ cartridge guide) should be
visible through the slot. The BJ cartridge tilts
slightly to the left in the loaded position.
7
12
Close the front cover of the fax.
6
Lower the cartridge release lever down
until you hear a click to lock the
cartridge in place.
¶ Make sure the arm on the cartridge release
lever aligns with the marking on the BJ
cartridge.
¶ If the lever movement is not smooth, release
the lever and reload it.
¶ To avoid cartridge misalignment and an error
message appearing, do not press down on the
cartridge or try to align it manually while
raising and lowering the green lever.
INSTALLING THE BJ CARTRIDGE
8
The fax automatically prints a test page.
The fax prints a test page every time you insert a BJ cartridge.
1
TEST PRINT
This is a test sheet designed to test the print quality of this unit.
Please refer to the test patterns below. If they are not printed clearly,
you may want to clean the print head of the ink cartridge. To clean the
ink cartridge, please press [FUNCTION] then [CLEANING] button.
When the BJ cartridge is properly installed, the test printout should
look as shown above.
White streak
If the printout has white streaks as shown above, try cleaning the print
head. See Cleaning the BJ cartridge print head, p. 100. If the problem
persists after cleaning, try reinstalling the BJ cartridge.
¶ You can turn off automatic test printing by changing the AUTO TEST PRINT setting. See SYSTEM
SETTINGS, p. 86.
13
Connecting the phone line
Connecting to the wall jack
1
Connect one end of the supplied telephone line to the jack marked
fax.
2
Connect the other end of the line to your wall telephone jack.
on the rear of the
Note
¶ To avoid electrical shock, connect the telephone line to the fax first. Then connect the line to the
wall telephone jack.
Connecting the telephone
1
Connect the end of the telephone cord to the jack.
B.T. adaptor
UK only
¶ Users in the UK only:
When you connect a telephone, be sure to connect the B.T. adaptor. Contact your Canon supplier for
more information.
14
CONNECTING THE PHONE LINE
Connecting the optional handset
1
1
Connect the handset’s modular jack to the handset jack on the fax.
Connecting an extension phone or answering machine
(optional)
1
Connect an extension phone or answering machine to the jack marked
the fax.
on the rear of
B.T. adaptor
UK only
¶ Be sure to connect an extension phone if you want to use the INCOMING RING feature and you
want it to ring when the fax receives a call, See pp. 69, 85.
¶ If you connect an answering machine, refer to Ans. Machine Mode, p. 21.
¶ Users in the UK only:
When you connect an extension phone or answering machine, be sure to connect the B.T. adaptor.
Contact your Canon supplier for more information.
15
SETTING UP
Setting the TEL LINE TYPE*
Your fax is factory set to work with rotary pulse telephone lines**. If you have a tone line, you will
need to change the telephone line setting as follows.
* TEL LINE TYPE cannot be set in Hong Kong, Norway and Denmark.
** The factory default setting for the UK and Singapore is touch tone.
1
Press [FUNCTION].
Wait a second for TEL REGISTRATION to
appear.
FUNCTION
SELECT MENU
1 sec.
TEL REGISTRATION
2
Use [
] or [
] to select USER SETTINGS.
USER SETTINGS
Press [START/COPY].
START/COPY
SET DATE
3
Use [
] or [
] to select TEL LINE TYPE.
TEL LINE TYPE
Press [START/COPY].
START/COPY
ROTARY PULSE
4
Use [
5
Press [START/COPY].
6
Press [STOP] to finish.
] or [
] to select TOUCH TONE.
TOUCH TONE
START/COPY
DATA ENTRY OK
STOP
Note:
Users in the UK only:
Although this equipment can use either rotary pulse or touch tone, only the performance of the
touch tone is subject to regulatory requirements for correct operation. It is therefore strongly
recommended that the equipment is set to use touch tone for access to public or private emergency
services. Touch tone also provides faster call set up.
16
Setting up to receive faxes
1
Selecting the receiving mode
Before you set up the receiving mode on your fax, you should determine how you plan to use your fax:
¶ Are you able to dedicate the use of one telephone line to the fax only to receive document
transmissions from other fax machines? If yes, choose Fax Only Mode (see below).
¶ Do you want to use your fax as both a telephone and fax, receiving documents automatically and
ringing only for telephone calls? If yes, choose Fax/Tel Mode (see below).
¶ Do you want to use your fax mainly as a telephone, and answer every call yourself, whether from a
person or a fax unit? If yes, choose Manual Mode (see below).
¶ Do you want to connect an answering machine to your fax and receive the other party’s document
and also record the other party’s message? If yes, choose Ans. Machine mode (see below).
How you answer these questions will determine which receiving method you choose. If you are not
satisfied with the mode you select, you can always change it at any time.
j Fax Only Mode (See p. 18)
You may want to use this mode if you have two phone lines in your office, and plan to use one line for
the fax and the other line for your telephone.
Set Fax Only Mode if you want to use your fax only to receive faxes automatically and do not intend to
use it as a telephone.
j Fax/Tel Mode (See p. 19)
If you only have one phone line in your office, you may be planning to use it for both fax and
telephone communication. By setting this mode, you will be able to use your fax for both fax and
telephone communication using only one phone line. You will need to have the optional handset or an
extension phone connected to the fax so that when it rings to alert you of a call, you can answer the
call. The fax will automatically receive faxes without ringing.
j Manual Mode (See p. 20)
Use Manual Mode if you receive more telephone calls than faxes. By having a telephone or the optional
handset connected to your fax, you can answer every call, whether from a person or from another fax
unit. If you hear a slow beep, simply press [START/COPY] on your fax and hang up the handset to
receive the fax.
j Ans. Machine Mode (See p. 21)
Use Ans. Machine Mode if you have an answering machine connected to the fax. This mode allows you
to receive not only documents sent from other fax machines, but also messages from people calling
when you are out.
17
SETTING UP
Fax Only Mode
The fax is set up at the factory to Fax/Tel Mode. If you have a dedicated fax line, you need to set the
mode to Fax Only.
j Setting Fax Only Mode
When you set the fax to Fax Only Mode, the unit picks up every call and automatically treats it as a fax
transmission.
The fax cannot receive automatically if you are making copies, printing reports, or registering
information. See p. 72.
1
2
Press [RECEIVE MODE] until ″Fax Only Mode″
appears on the LCD.
Press [START/COPY].
When this mode is set, the LCD will display the
time and ″FaxOnly″.
RECEIVE MODE
Fax Only Mode
START/COPY
12:00
FaxOnly
j Receiving documents in Fax Only Mode
When the fax is set to Fax Only Mode, it automatically receives documents whenever a call comes over
the fax line.
1
Make sure the fax is set to ″Fax Only Mode″
(see above).
The fax assumes all incoming calls are from another fax machine sending a document. It receives the
documents automatically.
18
SETTING UP TO RECEIVE FAXES
Fax/Tel Mode
If you only have one phone line in your office, you can set the fax to receive both documents and
telephone calls. You need to have the optional handset or an extension phone connected to your fax for
this mode. See pp. 14, 15.
j Setting Fax/Tel Mode
The fax is set up at the factory to this mode. You only need to follow this procedure if you have
changed the factory setting.
1
2
Press [RECEIVE MODE] until ″Fax/Tel Mode″
appears on the LCD.
Press [START/COPY].
When this mode is set, the LCD will display the
time and ″Fax/Tel″.
RECEIVE MODE
Fax/Tel Mode
START/COPY
12:00
Fax/Tel
j Receiving documents and calls in Fax/Tel Mode
You can set the fax to monitor all incoming calls over the fax/telephone line. When the fax receives an
incoming call, it checks to see if the call is from another fax machine trying to send a document, or
from someone wanting to talk to you.
The fax cannot receive a document automatically if you are making copies, printing reports, or
registering information. See p. 72.
1
2
Make sure you have connected the optional
handset or an extension phone to your fax.
See pp. 14, 15.
Make sure the fax is set to ″Fax/Tel Mode″
(see above).
When the fax receives a call, it checks to see whether the call is from another fax machine or from a
telephone.
¶ If it is a fax call, your fax automatically switches to receive mode to accept the fax.
¶ If the call is from a person, your fax rings to alert you to pick up the handset.
19
1
SETTING UP
Manual Mode
You may want to set your fax to Manual Mode if you want to personally monitor every call, whether
from a fax machine or a person.
You need to have the optional handset or an extension phone connected to your fax for this mode. See
pp. 14, 15.
j Setting Manual Mode
Set to Manual Mode if you want to personally monitor every incoming call.
1
2
Press [RECEIVE MODE] until ″Manual Mode″
appears on the LCD.
Press [START/COPY].
When this mode is set, the LCD will display the
time and ″Manual″.
RECEIVE MODE
Manual Mode
START/COPY
12:00
j Receiving documents and calls in Manual Mode
Manual
You can set the fax to ring every time it receives a call so that you can personally check if it is from a
fax machine or from a person.
Keep in mind that you cannot use Manual Mode if a document is in the Automatic Document Feeder
(ADF) waiting to be sent.
1
2
3
4
Make sure you have connected the optional
handset or an extension phone to your fax.
See pp. 14, 15.
Make sure the fax is set to ″Manual Mode″
(see above).
When the fax rings, pick up the handset.
If you hear a person’s voice, start your
conversation. If the caller wants to send a
document after talking to you, press
[START/COPY] on the fax to receive the
document.
or
If you hear a slow beep or silence, another fax
is trying to send you a document. Press
[START/COPY] on the fax.
You can also start receiving the document by
pressing ″25″ on the extension phone, and then
hanging up.
Your fax begins receiving the document.
20
START/COPY
SETTING UP TO RECEIVE FAXES
Ans. Machine Mode
Use Ans. Machine Mode if you have an answering machine connected to the fax. By setting this mode,
you can receive documents automatically, and messages from people calling when you are out.
See p. 15 for details on connecting an answering machine to your fax.
j Recording the outgoing message
When recording a message...
Try to keep your message to less than 15 seconds long.
In the message tell your callers how to send a fax.
Here’s a sample message:
″Hello. I’m not in the office right now, but please leave a message after the beep. I’ll return your call
as soon as possible. If you would like to send a fax, press the start button on your fax after recording
your message. Thank you.″
¶ Leave a 4-second pause at the beginning of the message (this pause plus the outgoing message should
not exceed 15 seconds).
¶ Set the answering machine to answer on the first or second ring.
¶
¶
¶
¶
j Setting Ans. Machine Mode
Set Ans. Machine Mode when you have an answering machine connected to your fax, and you are
going out.
1
2
Press [RECEIVE MODE] until ″Ans. Machine
Mode″appears on the LCD display.
Press [START/COPY].
When this mode is set, the LCD will display the
time and ″AnsMode″.
RECEIVE MODE
Ans. Machine Mode
START/COPY
12:00
AnsMode
j Receiving documents and messages in Ans. Machine Mode
When the fax is set to Ans. Machine Mode, it automatically receives documents, or leaves messages on
your answering machine when you are out.
1
2
Make sure you have connected an answering
machine to your fax. See p. 15.
Make sure the fax is set to ″AnsMode″ (see
above).
21
1
SETTING UP
3
Set your answering machine to answer.
¶ The fax allows the answering machine to
answer, then listens for a fax tone, and switches
to receive mode automatically if it detects the
tone.
¶ If the fax runs out of paper or ink, it receives
the document and stores it in memory. To print
out documents in memory, see pp. 71, 72.
4
22
When not in use, turn the answering machine
off and switch to Fax/Tel Mode, Manual Mode,
or Fax Only Mode using [RECEIVE MODE] .
2
PREPARING TO
USE YOUR FAX
Main components of the fax .................................. 24
Front view ......................................................................... 24
Rear view ......................................................................... 25
Fax controls – the Operation Panel ....................... 26
Registering your name and number ..................... 28
Moving through the main menus ....................................
Entering a number ...........................................................
Entering a name ...............................................................
Personalising your fax .....................................................
Registering the date and time .........................................
Registering your telephone/fax number and name ........
28
29
30
32
33
34
Registering One-touch Speed Dialling numbers
and names ........................................................... 36
Registering Coded Speed Dialling numbers and
names .................................................................. 38
Special dialling ......................................................... 39
Registering the access type and outside line access
number ....................................................................... 40
Using alternative telephone networks (UK only) . 42
Attaching the M label .......................................................
Registering an alternative telephone network ................
Sending with a registered long-distance service ...........
Registering speed dialling with the M button .................
42
42
44
45
Main components of the fax
Front view
Extension
For use with legal-size
documents
Automatic document
feeder (ADF)
Paper tray
cover/document tray
Document guide
Operation panel
Use the operation panel
buttons to operate the fax.
Paper tray
Front cover
Speaker
24
MAIN COMPONENTS OF THE FAX
Rear view
2
Power cord connector
Handset jack
Telephone line jack
Extension phone jack
25
Fax controls – the Operation Panel
VOLUME
RECEIVE MODE
CODED DIAL
HOOK
RESOLUTION
FUNCTION
REDIAL/PAUSE
START/COPY
SEND OPTIONS
REPORT
CLEANING
SPACE
CLEAR
TONE
R
D.T.
STOP
Numeric buttons
Use the numeric buttons to enter when dialling. These buttons can also
be used to enter text, numbers, and symbols when registering names.
+ (#)
When registering your fax number, press to enter a plus (+).
FUNCTION
Press
R
Press to access an outside line.
and
CLEANING
Press to clean the BJ cartridge print head.
REPORT
Press to print a transaction report, a list of registered
numbers, or a list of settings.
SEND OPTIONS REPORT
CLEANING
R
SEND OPTIONS
Press to select a transmission mode.
SPACE
Press to enter a space between numbers or letters when you register
fax numbers and names.
CLEAR
Press to clear a number or name quickly so you can re-enter it.
TONE
Press to temporarily switch to tone signal when using pulse dialling.
D.T.
Press to confirm the dial tone when registering numbers.
26
SPACE
CLEAR
TONE
D.T.
FAX CONTROLS – THE OPERATION PANEL
RECEIVE MODE
RECEIVE MODE
LCD Display
Four modes are available:
Fax Only Mode: Answers calls as fax calls
automatically.
Ans. Machine Mode: Receives documents
and passes calls to an answering machine.
Fax/Tel Mode: Receives both documents
and telephone calls. Manual Mode:
Receives calls manually.
Displays messages and
prompts during operation.
Displays selectable
functions, numbers, and
names when registering
information.
Arrow buttons (
,
)/VOLUME
Use to scroll through menus and lists that
appear on the LCD, and to change settings.
These buttons also move the cursor in
some naming operations and adjust the
volume of the monitor speaker.
RESOLUTION
RESOLUTION
VOLUME
RECEIVE MODE
CODED DIAL
RESOLUTION
FUNCTION
Use to set the resolution for the type of
document you want to send. You can select
from STANDARD, FINE, and PHOTO.
REDIAL/PAUSE
CODED DIAL
HOOK
START/COPY
STOP
CODED DIAL
Press this button (followed by a two-digit
code) to dial a fax number registered for
Coded Speed Dialling.
FUNCTION
HOOK
START/COPY
HOOK
Press to engage or disengage the telephone
line (hands-free dialling).
FUNCTION
START/COPY
Press to start data registration of fax
numbers, names, and other important
settings for sending and receiving.
Press to start sending, receiving and copying.
This button is also used for data entry
operations.
STOP
STOP
Press to cancel sending, receiving, copying
and data entry operations.
REDIAL/PAUSE
REDIAL/PAUSE
Press to dial the last number dialled with
the numeric buttons. When dialling or
registering fax numbers, press to enter
pauses between digits.
27
2
Registering your name and number
You should now register the time, date, and your name and fax number, which will appear at the top of
every page you send.
Moving through the main menus
The fax includes a menu system that you use to register information and select fax and telephone
operations. The main menu includes these items:
TEL REGISTRATION
USER SETTINGS
REPORT SETTINGS
TX SETTINGS
RX SETTINGS
FAX PRINTER
SYSTEM SETTINGS
For a complete description of the menu system, see User menu settings, p. 78.
In general, follow these steps to access the menus and make selections:
1
Press [FUNCTION].
Wait a second for TEL REGISTRATION to
appear.
FUNCTION
SELECT MENU
1 sec.
TEL REGISTRATION
2
3
4
28
Press [ ] or [ ] to scroll through the menus
until you see the menu you wish to access.
The LCD displays the menu title.
Press [START/COPY]. The LCD displays the
first selection for the selected menu.
You can now make a selection:
Press the arrow buttons to view the possible
selections.
USER SETTINGS
START/COPY
SET DATE
REGISTERING YOUR NAME AND NUMBER
5
After selecting or entering a value, press
[START/COPY].
6
START/COPY
DATA ENTRY OK
Repeat steps 4 and 5 as needed.
7
When the operation is complete, press [STOP].
Registration ends and the fax returns to standby
mode.
2
STOP
Note
After 60 seconds of no operation panel input, the fax returns to standby mode and any unregistered
changes are lost.
Entering a number
Whenever you are prompted to enter a fax number or a telephone number, follow these procedures.
Use the numeric buttons to enter the number.
TEL=
¶ You can enter up to 20 digits for your fax number or 50 digits for a speed dialling number.
¶ Be sure to enter 1 and the area code, if necessary, to dial a different area code.
¶ Do not enter dashes, slashes, commas, or other punctuation.
Use the One-touch Speed Dialling buttons as follows:
¶ To enter a space between numbers, press [SPACE].
¶ If you make a mistake, press [CLEAR] and enter the number
again.
¶ To erase a previously registered number, press [CLEAR].
You can also enter a new number over the old one.
SEND OPTIONS
01
SPACE
06
REPORT
CLEAR
07
R
CLEANING
03
02
04
TONE
08
05
D.T.
09
10
If you need to enter a pause for any reason,
¶ Press [REDIAL/PAUSE] at the desired point in the sequence when entering a series of digits.
¶ A pause within a number is 2 seconds long*. The length of this pause can be adjusted. See MID
PAUSE SET in TX SETTINGS, p. 85. A pause at the end of a number is fixed at 10 seconds.
*
4 seconds long in the UK.
29
PREPARING TO USE YOUR FAX
Entering a name
Whenever you register a fax number or a telephone number, you can assign a name to that number. To
enter a name from the operation panel, use the numeric buttons to create alphanumeric characters.
Each numeric button has a certain letter group (uppercase and lowercase) plus a digit assigned to it.
Each press of the button steps to the next character in the group. To change between uppercase entry
mode and lowercase entry mode, press [ ].
Use the chart below to determine which number to press for each character:
Button
Uppercase
´
Lowercase
´
¶ First press the numeric button corresponding to the character you want.
¶ Then press [ ] to switch to lowercase or uppercase entry mode.
¶ Press the numeric button repeatedly until the character you want appears in the display.
For example, to enter Canon 1:
1
Press the appropriate numeric button repeatedly until the desired character appears.
C
2
The next character is a lowercase, so press [ ] to change the uppercase letter entry mode to the
lowercase letter entry mode. Then press the numeric button to display the desired character.
Ca
3
Press [
]. Then, press [2] once.
The next character is in a different group, so simply press the new group’s numeric button--the
cursor moves automatically. Press the numeric button repeatedly to display the desired character.
Can
30
Press [2] three times.
Press [6] twice.
REGISTERING YOUR NAME AND NUMBER
4
The next character is in the same group, so press [
press the numeric button repeatedly.
Cano
5
Press [
] to move the cursor to the right first. Then
] once. Then, press [6] three times.
Repeat the step 4 to enter ″n″.
Canon
6
Canon
7
Press [SPACE] once.
The next character is a digit. Press the numeric button corresponding to the digit. (For digits other
than 0 and 1, press repeatedly until the digit appears.)
Canon 1
8
2
The next character is a space. Simply press [SPACE].
Press [1] once.
After entering a name, press [START/COPY].
¶ You can enter up to 16 characters in a name.
¶ To enter a space between characters, press [SPACE] or move
the cursor to the right using [ ].
¶ To correct a mistake, use the arrow buttons to move the
cursor under the mistake; then enter the correct character.
You can also press [CLEAR] to begin again; then simply
enter the name again.
¶ To erase a previously registered name, press [CLEAR] or
simply enter the new name over the old one.
SEND OPTIONS
01
SPACE
06
REPORT
02
CLEAR
07
CLEANING
03
R
04
TONE
08
05
D.T.
09
10
31
PREPARING TO USE YOUR FAX
Personalising your fax
j Identifying your documents
When sending a document, you can have your fax number and your name (known as your ID), and the
current date and time printed out by the receiving fax. This information is called your TTI (Transmit
Terminal Identification) and appears at the top of the faxed document in small type.
By identifying the documents you send, the receiving party will recognise your fax messages at a glance.
The illustration below shows a sample document with the identifying information.
01/12/97
10:12
FAX 3 2 1 4 5 6 7 7 7 7
CANON U K
→→→
CANON U S A FAX
.
01/01
The page number/
the total number of
pages sent
THE SLEREXE COMPANY LIMITED
SAPORS LANE - BOOLE - DORSET - BH 25 8 ER
TELEPHONE DOOLE ( 945 13 ) 51617
TELEX 123456
Our Ref. 350/PJC/EAC
The name of the party who is
receiving the document
Your name or company name
Your fax/telephone number
The date and time you sent the document
The top line includes the name of the receiving party if you send the document using One-touch Speed
Dialling or Coded Speed Dialling and you registered the party’s name. It also includes the total number
of pages sent if you send the document from memory.
32
REGISTERING YOUR NAME AND NUMBER
Registering the date and time
Follow the steps below to set the date and time for your fax. The date and time appear in the LCD
display as well as on the documents you send.
1
Press [FUNCTION].
Wait a second for TEL REGISTRATION to
appear.
FUNCTION
SELECT MENU
2
1 sec.
TEL REGISTRATION
2
Use [
] or [
] to select USER SETTINGS.
USER SETTINGS
Press [START/COPY].
START/COPY
SET DATE
3
4
Press [START/COPY].
START/COPY
00/00/00
_
Enter today’s date using the numeric buttons,
using the day-month-year format (DD/MM/YY).
15/09/97
_
¶ Precede single digits with a zero.
¶ To make a correction, press [CLEAR] to return
to the previous setting and re-enter the date.
¶ You can also use [ ] or [ ] to move the
cursor.
¶ To change the date format, see SYSTEM SETTINGS p. 86.
5
Press [START/COPY] when you finish entering
the new date.
Wait a second for SET TIME to appear.
START/COPY
DATA ENTRY OK
1 sec.
SET TIME
6
Press [START/COPY].
START/COPY
00:00
_
33
PREPARING TO USE YOUR FAX
7
8
9
Enter the time using the numeric buttons.
Set the time using the 24-hour clock system.
Precede single digits with a zero. Example:
07:30 = 7:30 a.m.
17:05 = 5:05 p.m.
08:15
_
Press [START/COPY] when you finish entering
the new time.
Press [STOP].
Registration ends and the fax returns to standby.
START/COPY
DATA ENTRY OK
STOP
Registering your telephone/fax number and name
Follow the steps below so that your fax number and name appear on the top of each document you
send.
1
Press [FUNCTION].
Wait a second for TEL REGISTRATION to
appear.
FUNCTION
SELECT MENU
1 sec.
TEL REGISTRATION
2
Use [
] or [
] to select USER SETTINGS.
USER SETTINGS
Press [START/COPY].
START/COPY
SET DATE
34
REGISTERING YOUR NAME AND NUMBER
3
Use [
] or [
] to select ENTER YOUR TEL.
ENTER YOUR TEL
Press [START/COPY].
START/COPY
TEL=
4
Enter your fax number (up to 20 digits) using
the numeric buttons.
You can enter a plus sign (+) or space to make
your number easier to read. To enter a plus sign
(+), press [#]. To make a correction, press
[CLEAR] and re-enter the number.
TEL=
12345678
SPACE
CLEAR
5
Press [START/COPY] when you finish entering
your fax number.
Wait a second for USER NAME to appear.
START/COPY
DATA ENTRY OK
1 sec.
USER NAME
6
7
8
9
Press [START/COPY].
START/COPY
_
Enter your name (up to 16 characters) using
the numeric buttons.
See Entering a name, p. 30. Correct errors by
moving the cursor to the error using [ ] or [ ]
and entering the correct character.
CANON US_
A
Press [START/COPY] when you finish entering
your name.
Press [STOP].
Registration ends and the fax returns to standby.
START/COPY
DATA ENTRY OK
STOP
35
2
Registering One-touch Speed
Dialling numbers and names
The quickest way to dial a fax number is to use One-touch Speed Dialling. This allows you to dial a
number by pressing a single button. Before you can use One-touch Speed Dialling, you must register the
receiving number with your fax.
One-touch Speed Dialling assigns a fax number (up to 50 digits) to a One-touch Speed Dialling button
(01 to 10).
You can also register the name of the party (up to 16 characters); the name appears on the printout of
the One-touch Speed Dialling list. See One-touch Speed Dialling list, p. 88.
1
Press [FUNCTION].
Wait a second for TEL REGISTRATION to
appear.
FUNCTION
SELECT MENU
1 sec.
TEL REGISTRATION
2
Press [START/COPY].
3
Press [START/COPY].
4
5
36
START/COPY
1-TOUCH DIAL
START/COPY
01=
Use [ ] or [ ] to select the number of the
One-touch button you want to use for the
number.
If a number is already registered for this
One-touch Speed Dialling button, the LCD
displays the number.
Enter the number (up to 50 digits) using the
numeric buttons.
See Entering a number, p. 29.
Correct errors by pressing [CLEAR] and re-entering the number.
03=
03=
1234 5678
REGISTERING ONE-TOUCH SPEED DIALLING NUMBERS AND NAMES
6
Press [START/COPY] to register the number.
Wait a second for 1-TOUCH SPD NAME to
appear, followed by 03=_.
START/COPY
DATA ENTRY OK
1 sec.
1-TOUCH SPD NAME
2
03=_
7
8
Enter the party’s name (up to 16 characters)
using the numeric buttons.
See Entering a name, p. 30.Correct errors by
pressing [CLEAR] and re-entering the name.
03=CANO_
N
Press [START/COPY] to register the name.
START/COPY
DATA ENTRY OK
1 sec.
04=
9
To assign additional One-touch Speed Dialling
numbers, start from step 4 . To finish, press
[STOP].
STOP
Note
Applying the overlay
For quick reference, write the names for the One-touch Speed
Dialling numbers you register on the overlay.
37
Registering Coded Speed Dialling
numbers and names
Use Coded Speed Dialling to dial a fax number at the press of three buttons. Each two-digit (01-20)
Coded Speed Dialling number can contain a fax number. You can register up to 20 locations with each
number containing up to 50 digits.
You can also register the name of the party (up to 16 characters); the name appears on the printout of
the Coded Speed Dialling list. See Coded Speed Dialling list, p. 89.
1
Press [FUNCTION].
Wait a second for TEL REGISTRATION to
appear.
FUNCTION
SELECT MENU
1 sec.
TEL REGISTRATION
2
Press [START/COPY].
3
Use [
START/COPY
1-TOUCH DIAL
] or [
] to select CODED DIAL.
CODED DIAL
Press [START/COPY].
START/COPY
01=
4
5
6
38
Use [ ] or [ ] to select the two-digit code
you want to assign to the number.
15=
Enter the party’s number (up to 50 digits) and
name the same way you registered them for
One-touch Speed Dialling.
See steps 5 to 8 of registering One-touch Speed
Dialling. (See Registering One-touch Speed
Dialling numbers and names, p. 36.)
To assign additional Coded Speed Dialling
numbers, start from step 4. To finish, press
[STOP].
15=
STOP
1234 5678
Special dialling
This section explains how to dial through a switchboard, dial long distance numbers, register your
number to an outside line and confirm a dial tone.
j Dialling through a switchboard (PBX)
2
A PBX (private branch exchange) is an on-site telephone switchboard.
¶ If your fax is connected through a switchboard, dial an outside line access number first. Then dial the
rest of the number.
¶ If you want to dial with automatic dialling, you may have to insert a pause between the outside line
number and the telephone number when you register the number for One-touch or Coded Speed
Dialling. To enter a pause, press [REDIAL/PAUSE].
¶ When you have to make calls to an outside line or an extension, you may have to press the [R]
button. Before you can use the [R] button, you have to register it.See p. 40.
j Long distance dialling
When you register a long distance number, you may have to insert a pause within or after the number.
For long distance dialling, the location and length of the pause may differ depending on the telephone
system. To enter a pause, press [REDIAL/PAUSE]. A pause within a number is 2 seconds long*. The
length of this pause can be adjusted, see MID PAUSE SET in TX SETTINGS., p. 85. A pause at the
end of a number is fixed at 10 seconds.
*
4 seconds long in the UK.
j Confirming a dial tone**
When you register a number, you may have to confirm the dial tone in the middle of a facsimile number
before entering the rest of the number. This is called dial tone detection. When dial tone detection is
required, press [D.T.]; a small dot (*) appears on the LCD.
** This feature is ineffective in the UK.
39
PREPARING TO USE YOUR FAX
Registering the access type and outside line access
number
When the fax is connected to a PBX or other telephone switching system, you can register the access
type and outside access line number under the [R] button. Once you have registered them, you simply
need to press [R] before dialling a fax or telephone number. If you register the access type and outside
line access number under the [R] button, you cannot use the [05] button for One-touch Speed Dialling.
1
Press [FUNCTION].
Wait a second for TEL REGISTRATION to
appear.
FUNCTION
SELECT MENU
1 sec.
TEL REGISTRATION
2
Use [
] or [
] to select USER SETTINGS.
USER SETTINGS
Press [START/COPY].
START/COPY
SET DATE
3
Use [
] or [
] to select PSTN/PBX SET.
PSTN/PBX SET
Press [START/COPY].
START/COPY
PSTN
4
Use [
] or [
] to select PBX.
PBX
Press [START/COPY].
The [05] button is now assigned to the [R] button.
5
START/COPY
Use [ ] or [ ] to select the access line type
for the switching system.
EARTH CONNECTION
START/COPY
Press [START/COPY].
You can select EARTH CONNECTION,
HOOKING or PREFIX.
40
SPECIAL DIALLING
6
If you chose PREFIX in step 5, enter the
outside line access number (up to 19 digits)
using the numeric buttons and then press
[REDIAL/PAUSE].
TEL=
123456P
REDIAL/PAUSE
Press [START/COPY].
2
START/COPY
7
Press [STOP].
STOP
Note
If you want to use the [05] button for One-touch Speed Dialling instead of using it for registering
the access type and outside line access number, follow steps 1 to 3. Then use the search buttons to
display PSTN, and press [START/COPY]. The [05] button can now be used for One-touch Speed
Dialling.
41
Using alternative telephone
networks (UK only)
The fax has a built-in feature that allows you to send documents and make telephone calls with an
alternative long-distance service, such as the 2300 Service of Mercury Communications Limited. If you
subscribe to such a service, you can save money on most long-distance and international
communications.
The procedures described in this chapter show you how to use your fax with the 2300 Service of
Mercury Communications Limited. For details on using your fax with alternative telephone services,
contact your Canon authorised representative.
Attaching the M label
Before operating the fax, attach the M label as shown below.
SEND OPTIONS
01
REPORT
SPACE
06
CLEANING
03
02
CLEAR
07
R
04
TONE
08
05
D.T.
09
M
10
Registering an alternative telephone network
When you register an alternative telephone network under the [M] button you cannot use the [10]
button for One-touch Speed Dialling.
1
Press [FUNCTION].
Wait a second for TEL REGISTRATION.
FUNCTION
SELECT MENU
1 sec.
TEL REGISTRATION
2
Use [
] or [
] to select USER SETTINGS.
USER SETTINGS
Press [START/COPY].
START/COPY
SET DATE
3
Use [
] or [
] to select M-KEY SETTING.
M-KEY SETTING
Press [START/COPY].
START/COPY
OFF
42
USING ALTERNATIVE TELEPHONE NETWORKS (UK ONLY)
4
Use [
] or [
] to select ON.
ON
Press [START/COPY] twice.
START/COPY
ACCESS CODE
START/COPY
2
TEL=
5
Enter the access code (up to 19 digits) using
the numeric buttons.
Press [REDIAL/PAUSE].
6
TEL =
131
TEL =
131P
REDAIL/PAUSE
Press [START/COPY] twice.
START/COPY
ID CODE
START/COPY
TEL=
7
Enter the ID code (up to 19 digits) using the
numeric buttons.
TEL = 1234567890
¶ This code is given to you by Mercury
Telecommunications Limited.
¶ If your access code is 132, you do not have to
enter the ID code. Press [STOP] to return to
standby.
¶ If an ID code is already registered, you will see
on the
a string of asterisks
display.
REDAIL/PAUSE
TEL = 1234567890P
Press [REDIAL/PAUSE].
8
Press [START/COPY].
9
Press [STOP] to finish registration.
START/COPY
STOP
Note
If you want to use the [10] button for One-touch Speed Dialling instead of using it for registering an
alternative telephone network, follow steps 1 to 3. Then use the search buttons to display OFF, and
press [START/COPY]. The [10] button can now be used for One-touch Speed Dialling.
43
PREPARING TO USE YOUR FAX
Sending with a registered long-distance service
1
Feed the document face-down into the
Automatic Document Feeder (ADF).
See Loading the document, p. 49.
2
Press [M].
3
Dial the other party’s fax number.
4
44
Press [START/COPY].
The fax automatically dials the access code and ID
code registered under the [M] button. Next, the fax
dials the number of the other party andconnects
the call.
In order to protect your codes, the access code and
ID code are not printed on activity reports.
DOCUMENT READY
M
START/COPY
TEL=
M
TEL=
M12345
USING ALTERNATIVE TELEPHONE NETWORKS (UK ONLY)
Registering speed dialling with the M button
Follow this procedure to enter your access code and ID code when you register a number for One-touch
or Coded Speed dialling. This allows you to send documents over the 2300 Service of Mercury
Communications Limited at the press of one or a few buttons.
1
2
3
4
Before you can do this procedure, you must
register the access code and ID code.
2
While you are registering a number for
One-touch or Coded Speed dialling, when you
come to a step that asks you to enter the
facsimile number of the other party, press [M].
Enter the number (up to 99 digits) using the
numeric buttons.
M
05=
M
TEL= M4167951111
Continue with the procedure for registering
One-touch or Coded Speed Dialling.
¶ After you have registered the number for speed
dialling, you can dial and use the 2300 Service
without pressing the [M] button.
45
This page is intentionally blank.
3
HANDLING
DOCUMENTS
Preparing documents ............................................. 48
Types of documents you can scan ................................. 48
Loading the document .................................................... 49
Setting the resolution and density .................................. 51
Preparing documents
Types of documents you can scan
j Size
The fax can scan standard A4, letter, or legal size documents.
j Thickness
Each sheet of the document should be of the same thickness and between 0.08 mm and 0.13 mm thick
with a paper weight between 75 and 90 g/m2.
j Effective image size
The actual scanned image size for the fax is shown below.
2.0 mm
A4
293 mm
2.0 mm
208 mm
1.0 mm
1.0 mm
The 1.0 mm margin on either side of the sheet and the 2.0 mm margin on the top and bottom are not
picked up by the scanner.
Note
Problem Documents
¶ Do not attempt to feed the following types of documents into the fax:
Wrinkled or creased
paper
Curled or rolled paper
Torn paper
Carbon paper or
carbon-backed paper
Coated paper or
glossy paper
Onion skin or thin
paper
Envelopes
¶ Remove all staples, paper clips, etc. before feeding the document.
¶ Make sure any glue, ink or correction fluid on the paper is completely dry before feeding the
document.
¶ Make a photocopy of any document that will not feed into the fax so that you can then feed the
copy.
48
PREPARING DOCUMENTS
Loading the document
1
For a multipage document, tap the
document on a flat surface to even the
stack.
2
Insert the document face-down and
head first into the Automatic Document
Feeder (ADF) until you hear a beep.
3
You can load up to 20 A4 or letter size sheets, or
10 legal size sheets at a time into the Automatic
Document Feeder (ADF).
3
The fax automatically feeds the pages one by one
from the bottom.
If a page jams or stops while feeding, see Clearing
document jams p. 62.
Adjust the right paper guide to the width
of the document.
For legal-size documents, flip the extension tray
open to accomadate the document.
Extension tray
If you are experiencing difficulty feeding
multipage documents, slant the edges of the stack
and insert the document into the Automatic
Document Feeder (ADF).
49
HANDLING DOCUMENTS
j Adding pages to the document
You can load up to 20 A4 at a time into the Automatic Document Feeder (ADF).
For longer documents, wait until the twentieth sheet has started feeding, then load up to 20 more sheets.
If you want to add pages while the fax is sending a document, insert the first new page so that it
overlaps the last page by about 2 cm.
Wait until the last page is being fed into the fax before you add new pages.
50
PREPARING DOCUMENTS
Setting the resolution and density
You can control the resolution and density of the fax reproduction when sending or copying documents.
j What is resolution
Resolution defines the quality of the document reproduction. STANDARD is enough for most text
documents. Documents with very fine print should be set to FINE. Documents with photographs should
be set to PHOTO.
j Setting the resolution
To set the resolution, you need to load the
document first (see p. 49).
STANDARD
¶ STANDARD
Press [RESOLUTION] until STANDARD
appears.
RESOLUTION
FINE
Standard resolution is 3.85 lines/mm.
When copying, even if you set STANDARD,
the document will automatically be scanned in
FINE mode.
¶ FINE
PHOTO
Press [RESOLUTION] until FINE appears.
Fine resolution is 7.7 lines/mm.
¶ PHOTO
To scan documents that contain photos, use the PHOTO setting. With this setting, areas of the
document that contain photos are automatically scanned with 64 levels of grey, rather than just 2
levels, black and white. Photo resolution is 3.85 lines/mm. This results in a much better reproduction
of the photograph.
j Density control
You can adjust the scanning density by changing the DENSITY CONTROL setting in the USER
SETTINGS (see p. 83). For light originals choose the DARKER setting. For dark originals choose the
LIGHTER setting.
51
3
This page is intentionally blank.
4
MAKING COPIES
Copying documents ................................................ 54
Copying documents
One of the convenient features of the fax is its ability to make high quality copies. You can make up to
99 copies of one document at a time.
1
2
3
4
Feed the document face-down into the
Automatic Document Feeder (ADF).
See Loading the document, p. 49.You can select
the density. See p. 51.
You can select FINE or PHOTO for the
resolution. (If you set the resolution to
STANDARD, your document will automatically
be copied in FINE mode.) See p. 51.
Press [START/COPY].
To make a single copy, go to step 4.
STANDARD
START/COPY
Enter the number of copies (up to 99) using the
numeric buttons.
To make a correction to the number of copies,
press [CLEAR] and re-enter the number.
Press [START/COPY].
To stop copying anytime, press [STOP]. You
may then need to lift the operation panel to
remove the document. See Clearing document jams, p. 62.
COPY PAGE
01
COPY PAGE
3
START/COPY
COPY
Note
If MEMORY FULL displays on the LCD
If MEMORY FULL displays on the LCD while making multiple copies of a document, do not use
the multiple copy feature for copying the document. Make single copies of the document instead (as
many times as required)
54
5
SENDING FAXES
Preparing to send a document .............................. 56
Sending methods ............................................................. 56
Dialling methods .............................................................. 56
Sending documents ................................................ 57
Direct Sending .................................................................
Manual Sending ...............................................................
Automatic Dialling ............................................................
Memory Sending .............................................................
Cancelling Sending ..........................................................
Redialling ..........................................................................
Messages displayed during sending ..............................
Clearing document jams (ejecting a document from the
ADF) ............................................................................
57
57
58
59
60
60
61
62
Delayed Sending ...................................................... 63
Sending other documents while the fax is set for
Delayed Sending ........................................................ 64
Cancelling Delayed Sending ........................................... 65
Sequential broadcasting ........................................ 66
Sending a document to more than one location ............ 66
Preparing to send a document
Before you send a document please refer to:
¶
¶
¶
¶
Types of documents you can scan, p. 48.
Loading the document, p. 49.
Adding pages to the document, p. 50.
Setting the resolution and density, p. 51.
Sending methods
j Direct Sending (See p. 57)
If your document has a large number of pages, you may sometimes get a MEMORY FULL error if you
are using Memory Sending. To avoid this, use Direct Sending.
To send directly, load the document, dial the fax number and press [START/COPY].
j Manual Sending (See p. 57)
If you would like to speak with the other party before sending a fax to them, use Manual Sending.
When sending manually, you dial, converse normally and then press [START/COPY] to begin sending.
For manual sending, you need to have the optional handset or an extension phone connected.
j Memory Sending (See p. 59)
If you do not want to wait for your document to be scanned page by page during sending (Direct
Sending), use Memory Sending. Memory Sending scans the document into memory, then dials and
sends the stored image, letting you take away the original immediately after scanning.
Dialling methods
There are several methods of dialling the receiving party’s number, depending on how your fax is set up.
Manual Dialling:
Dial the recipient’s fax number using the numeric buttons.
One-touch Speed Dialling:
Dial a recipient’s fax number that has been assigned to a One-touch Speed Dialling button by simply
pressing the corresponding One-touch Speed Dialling button (see p. 58).
Coded Speed Dialling:
Dial a recipient’s fax number that has been assigned to a Coded Speed Dialling code by pressing
[CODED DIAL] and the 2-digit code assigned to the number (see p. 58).
56
Sending documents
Direct Sending
To scan and transmit a document one page at a time without storing it in memory first, follow the steps
below. This procedure is called ″Direct sending″.
Use Direct Sending if you want to visually confirm that the fax scans the document. Each page is
scanned as it is sent.
1
2
3
Feed the document face-down into the
Automatic Document Feeder (ADF).
See Loading the document, p. 49. You can set the
resolution and density. See p. 51.
STANDARD
Dial the other party’s fax number.
Use one of the dialling methods described earlier in
this chapter. See p. 56.
TEL=
Press [START/COPY].
The fax begins sending the document.
3456 7890
START/COPY
Manual Sending
If you would like to first speak with the person you are sending the fax to, use Manual Sending. You
need to connect the optional handset or an extension phone to the fax for Manual Sending.
1
2
3
Feed the document face-down into the
Automatic Document Feeder (ADF).
See Loading the document, p. 49.You can set the
resolution and density. See p. 51.
Pick up the handset or press [HOOK] and dial
the other party’s fax number.
Use one of the dialling methods described earlier in
this chapter. See p. 56.
If a person answers, converse normally, then
ask them to press the start button on their fax.
Press [START/COPY] and hang up.
If you hear a high pitch tone, press
[START/COPY] and hang up.
5
STANDARD
HOOK
TEL= 3456 7890
START/COPY
57
SENDING FAXES
¶ The fax beeps once to indicate that the document has been sent successfully.
TRANSMITTING OK
¶ If an error occurs during sending, the fax beeps intermittently for a few seconds. If this happens, try
sending the fax again.
¶ The fax automatically redials if the receiving fax does not answer or if the line is busy. (You can
specify the number of times it redials; see AUTO REDIAL in TX SETTINGS, p. 85.)
¶ To stop sending before the fax is finished, press [STOP]. You may then need to lift the operation
panel to remove the document, see Clearing document jams, p. 62.
¶ If an error message appears on the LCD, correct the error and then press [STOP]. Refer to Error
codes, messages and solutions, p. 110.
Automatic Dialling
j Sending a document using One-touch Speed Dialling or Coded
Speed Dialling
After registering the One-touch numbers or Coded Speed Dialling numbers you can send documents as
follows:
1
2
Feed the document face-down into the
Automatic Document Feeder (ADF).
See Loading the document, p. 49. You can set the
resolution and the density, p. 51.
FINE
Press the One-touch Speed dialling button
assigned to the number to which you wish to
fax.
or
CANON USA
1 sec.
12345678999
Press [CODED DIAL] and enter the appropriate
two-digit Coded Speed Dialling code.
Wait a second for the number to appear after the
name of the number.
¶ If no number is registered for the button or
code you pressed, the LCD display shows the
NO TEL# message. Make sure you pressed the
correct button or entered the correct code and
that the number you want to dial is registered
correctly.
¶ If you make a mistake, press [STOP]. Then
press the correct One-Touch Speed Dialling
button or press [CODED DIAL] and re-enter
the code
¶ If an error message appears on the LCD, correct
the error and press [STOP]. If necessary, refer to
Frequently Asked Questions, p. 104.
58
CODED DIAL
CANON CANADA
1 sec.
2345678999
SENDING DOCUMENTS
Memory Sending
You can use Memory Sending to send your document. With Memory Sending, the fax quickly scans the
document into memory. Then, after it dials the receiving party, it sends the document from memory.
This means you do not have to wait for the fax to finish sending before you can retrieve your original
document.
You can send up to 21 A4-size pages at a time with Memory Sending (based on the Canon FAX
Standard Chart No.1- standard resolution).
¶ If the memory becomes full while scanning your document, MEMORY FULL is displayed on the
LCD. If this should happen, you may need to open the operation panel to remove the document. See
Clearing document jams, p. 62. Then try dividing the document into several sections and sending each
section individually, or send using Direct Sending or Manual Sending. See p. 57.
The definition of an A4-size page for memory storage purposes is based on the Canon FAX Standard
Chart No.1.
1
2
Feed the document face-down into the
Automatic Document Feeder (ADF).
See Loading the document, p. 49.You can set the
resolution and density. See p. 51.
Press [FUNCTION].
Wait a second for TEL REGISTRATION to
appear.
STANDARD
FUNCTION
SELECT MENU
1 sec.
TEL REGISTRATION
3
Press [SEND OPTIONS].
5
SEND OPTIONS
MEMORY TX
Press [START/COPY].
START/COPY
TEL=
4
5
Dial the other party’s fax number.
Use one of the dialling methods described earlier in
this chapter (see p. 56).
Press [START/COPY].
The fax scans the document into memory and
begins sending.
TEL=
987654333
START/COPY
TX/RX NO.
XXXX
1 sec.
MEMORY INPUT P01
59
SENDING FAXES
Cancelling Sending
To stop sending before the fax is finished, press [STOP]. Then you may need to open the operation
panel to remove the document, see Clearing document jams, p. 62.
Redialling
j Manual
To start dialling again, just press [REDIAL/PAUSE]. (When you press [REDIAL/PAUSE], the previous
number dialled with the numeric buttons is redialled.)
j Automatic
The fax automatically redials twice after the first attempt at sending fails (eg. the line was busy).
The time between redials is two minutes.
You can change the number of redials and the time between redials by changing the AUTO REDIAL
setting in the TX SETTINGS (see p. 85).
If the fax fails to get through after the second redial, the fax beeps.
The LCD displays REDIALING while the fax is in the redialling process.
REDIALING
j To cancel automatic redialling
You can cancel automatic redialling anytime by pressing the [STOP] button.
However, when memory is used during sending (including Delayed Sending and Sequential
Broadcasting), you cannot cancel redialling while REDIALING is displayed on the LCD. In this case,
wait until dialling begins, then press [STOP] to cancel redialling.
60
SENDING DOCUMENTS
Messages displayed during sending
When your fax sends a document, the following messages are displayed as the call progresses.
The fax is dialling the recipient’s phone number.
DIALING
The recipient’s phone is ringing.
CALLING
The display tells you when transmission begins.
TRANSMIT
After a few moments the display begins changing every 2 seconds.
TX/RX No.
XXXX
ECM TX
PXX
or
TRANSMIT
PXX
If ECM is off, “TRANSMIT PXX” is displayed.
Other party’s number
789 3456
CANON INC.
5
Other party’s name (For some models, the other party’s name may not
be displayed.)
After the document is sent, the fax beeps once and the display tells you when the transmission has
ended.
TRANSMITTING OK
61
SENDING FAXES
Clearing document jams (ejecting a document from the
ADF)
j Removing a jammed sheet
1
Hold down the fax with your left hand,
and gently pull the operation panel with
your right hand.
¶ Do not press on the LCD display.
3
62
Gently push the operation panel shut
until it clicks.
2
While holding the operation panel open,
pull the sheet out from the top or
bottom.
Delayed Sending
Your fax can send documents automatically at a preset time. This allows you to take advantage of
lower late night long-distance rates offered by some telephone companies.
You can use any dialling method to dial fax numbers to send a document to up to 31 destinations at a
preset time. See Sending a document to more than one location for details, p. 66.
1
2
Feed the document face-down into the
Automatic Document Feeder (ADF).
See Loading the document, p. 49.You can set the
resolution and density. See p. 51.
Press [FUNCTION].
Wait a second for TEL REGISTRATION to
appear.
DOCUMENT READY
FUNCTION
SELECT MENU
1 sec.
TEL REGISTRATION
3
Press [SEND OPTIONS].
4
Use [
SEND OPTIONS
MEMORY TX
] or [
5
] to select DELAYED TX.
Press [START/COPY].
Wait a second for SET TIME to appear.
DELAYED TX
STARTCOPY
TX/RX NO.
XXXX
1 sec.
5
Enter the desired sending time (24-hour clock)
using the numeric buttons.
¶ Set the time using the 24-hour clock
system.Precede single digits with a zero.
Example:
07:30 = 7:30 a.m.
17:05 = 5:05 p.m.
¶ Press [CLEAR] if you need to re-enter the time.
¶ You can also use [ ] or [ ] to move the
cursor.
SET TIME
_
XX:XX
SET TIME
_
23:00
63
SENDING FAXES
6
7
8
Press [START/COPY].
START/COPY
TEL=
Dial the other party’s fax number.
¶ You can enter the other party’s fax number
using the numeric buttons, One-touch Speed
Dialling (see p. 58), or Coded Speed Dialling
(see p. 58).
¶ If you use the numeric buttons, press
[START/COPY] after entering the number to
register it before going on to the next number.
Press [START/COPY].
The fax reads the document into memory.
TEL=
3456 7890
START/COPY
MEMORY INPUT P01
After scanning in the document, the fax displays TIMER on the LCD. When the set time comes, the fax
dials and sends the document.
TIMER
Sending other documents while the fax is set for
Delayed Sending
You can send, receive, and copy other documents even when the fax is set for sending at a preset time.
The fax can only register one preset sending operation at a time.
To send or copy other documents after setting the fax for Delayed Sending, simply send or copy using
any other sending procedure in this manual.
Note
Delayed sequential broadcasting
Delayed sequential broadcasting is applicable for sending one document to more than one location
at a later time when multiple fax numbers are dialled. See p. 66.
64
DELAYED SENDING
Cancelling Delayed Sending
1
Press [FUNCTION].
Wait a second for TEL REGISTRATION to
appear.
FUNCTION
SELECT MENU
1 sec.
TEL REGISTRATION
2
Press [SEND OPTIONS].
3
Use [
SEND OPTIONS
MEMORY TX
] or [
] to select DELAYED TX.
DELAYED TX
Press [START/COPY].
Wait a second for SET TIME to appear.
START/COPY
SET TIME
4
5
Press [CLEAR].
23:00
CLEAR
SET TIME
Press [START/COPY].
Delayed Sending is cancelled.
START/COPY
ERASING END
5
65
Sequential broadcasting
Sending a document to more than one location
Sequential broadcasting sends one document to more than one location.
You can send to a total of 31 destinations as follows:
One-touch Speed Dialling
Coded Speed Dialling
Regular dialling (Numeric buttons dialling)
=
=
=
10 destinations
20 destinations
1 destination
You can enter the One-touch Speed Dialling and Coded Speed Dialling destinations in any order. You
simply press the One-touch Speed Dialling button, or press [CODED DIAL] followed by the two-digit
code (with the numeric buttons).
You can also include one destination using Regular dialling. Remember that when using regular
dialling, you must press [START/COPY] after entering the number.
You can send up to 21 A4-size pages (based on the Canon FAX Standard Chart No.1-standard
resolution).
1
2
3
66
Feed the document face-down into the
Automatic Document Feeder (ADF).
See Loading the document, p. 49.You can set the
resolution and density. See p. 51.
STANDARD
Dial the other party’s fax number.
¶ You can send to up to 31 destinations.
¶ Simply enter the numbers one after the other:
press the desired One-touch Speed Dialling
button or press [CODED DIAL] followed by
the two-digit code (with the numeric buttons).
¶ You can enter only one number directly with
the numeric buttons using regular dialling.
Remember to press [START/COPY] after
entering the number.
¶ You can also press [REDIAL/PAUSE] to redial
the last number dialled with the numeric
buttons.
¶ You must press each button within 10 seconds
of the preceding one. The fax begins the
operation approximately 10 seconds after you
press the last button.
Press [START/COPY].
¶ The fax reads the document into memory and
begins sending. Between transmissions, MULTI
TRANS ON displays on the LCD.
¶ To cancel a transmission, press [STOP] during
dialling or transmission. All transmissions in the
sequence are cancelled.
TEL=
3456 7890
START/COPY
TX/RX NO.
XXXX
1 sec.
MEMORY INPUT P01
6
RECEIVING
FAXES
Receiving documents ............................................. 68
Receiving documents in Manual Mode ..........................
Receiving documents in Fax Only Mode ........................
Receiving documents in Fax/Tel Mode ...........................
Receiving documents in Ans. Machine Mode ................
Receiving documents in memory ....................................
Printing documents in memory .......................................
Receiving while registering, copying or printing .............
68
69
69
70
71
72
72
Network FAX/TEL Switching (Australia only) ...... 73
Setting the fax for Network Switch ................................. 73
Operation for Network Switch System ........................... 74
Network FAX/TEL Switching (New Zealand
only) ...................................................................... 75
Setting the fax Network ................................................... 75
Operation for Network Switch System ........................... 76
Receiving documents
Receiving documents in Manual Mode
You may want to set your fax to Manual Mode if you want to personally monitor every call, whether
from a fax machine or a person.
For Manual Mode, you need to have the optional handset or an extension phone connected to your fax.
See p. 15.
Keep in mind that you cannot use Manual Receiving if a document is in the Automatic Document
Feeder (ADF) waiting to be sent.
1
2
Make sure you have connected the optional
handset or an extension phone to your fax.
See p. 15.
Press [RECEIVE MODE] until ″Manual Mode″
appears on the LCD.
3
Press [START/COPY].
4
When the fax rings, pick up the handset.
5
RECEIVE MODE
Manual Mode
START/COPY
12:00
If you hear a person’s voice, start your
conversation. If the caller wants to send a
document after talking to you, press
[START/COPY] to receive the document.
or
If you hear a slow beep or silence, another fax
is trying to send you a document. Press
[START/COPY].
You can also start receiving the document by
pressing ″25″ on the extension phone, and then
hanging up.
Manual
START/COPY
Your fax begins receiving the document.
¶ Hang up the handset after the fax displays RECEIVE. If you do not hang up, the fax beeps
intermittently for a few seconds after you receive the document. To turn off the beeping, see OFF
HOOK ALARM in the USER SETTINGS, p. 83.
68
RECEIVING DOCUMENTS
Receiving documents in Fax Only Mode
When the fax is set up for a dedicated line, it automatically receives documents whenever a call comes
over the fax line.
The fax cannot receive automatically if you are making copies, printing reports, or registering
information. See p. 72.
1
2
Press [RECEIVE MODE] until ″Fax Only Mode″
appears on the LCD.
Press [START/COPY]
RECEIVE MODE
Fax Only Mode
START/COPY
12:00
FaxOnly
The fax assumes all incoming calls are from another fax machine sending a document. It receives the
documents automatically.
Receiving documents in Fax/Tel Mode
You can set the fax to monitor all incoming calls over the fax/telephone line. When the fax receives an
incoming call, it checks to see if the call is from another fax machine trying to send a document or from
someone wanting to talk to you. You need to have the optional handset or an extension phone
connected to your fax for this mode. See p. 15.
The fax cannot receive automatically if you are making copies, printing reports, or registering
information. See p. 72.
1
2
3
Make sure you have connected the optional
handset or an extension phone to your fax.
See p. 15.
Press [RECEIVE MODE] until ″Fax/Tel Mode″
appears on the LCD.
Press [START/COPY]
RECEIVE MODE
Fax/Tel Mode
START/COPY
12:00
Fax/Tel
6
When the fax receives a call, it checks to see whether the call is from another fax machine or from a
telephone.
¶ If the INCOMING RING function is set to OFF, the fax does not ring (even if the optional handset
or an extension phone is connected) when it receives a call from another fax machine that is trying to
send a document. This is so that you are not disturbed when your fax is communicating with another
fax machine. The fax automatically receives the document.
¶ In Fax Only Mode or Fax/Tel Mode, if you want the optional handset or extension phone to ring to
make sure that someone is sending you a document, you need to set INCOMING RING to ON and
connect the optional handset or an extension phone.
¶ If the call is from a person, the fax rings to alert you to pick up the optional handset or extension
phone.
¶ If you do not pick up the handset within 22 seconds, the fax stops ringing. It checks again to make
sure the call is not from a fax machine and then hangs up.
69
RECEIVING FAXES
Note:
¶ If the paper runs out or if the BJ cartridge runs out of ink, the fax receives the rest of the
document in memory.
¶ To stop receiving before the document is complete, press [STOP].
¶ If an error message appears on the LCD, make sure the error is corrected and then press [STOP].
If necessary, see Frequently Asked Questions, p. 104.
¶ The fax beeps once to show that the document was received. If an error occurs, the fax beeps
intermittently for a few seconds. If this happens, contact the other party and have them resend
the document.
Receiving documents in Ans. Machine Mode
Connecting an answering machine to the fax allows you to receive not only documents sent from other
fax machines, but also messages from people calling when you are out of the office. When the fax is
connected to an answering machine, all incoming calls are first directed to the answering machine. If the
call is from a person, the caller can leave a message. If the call is from a fax machine, your fax receives
the document automatically. See p. 15 for instructions on how to connect the answering machine to the
fax.
1
2
3
4
5
70
Make sure you have connected an answering
machine to your fax. See p. 15.
Press [RECEIVE MODE] until ″Ans. Machine
Mode″ appears on the LCD display.
Press [START/COPY]
RECEIVE MODE
Ans. Machine Mode
START/COPY
12:00
Set your answering machine to answer.
¶ The fax allows the answering machine to
answer, then listens for a fax tone, and switches
to receive mode automatically if it detects the
tone.
¶ If the fax runs out of paper or ink, it receives
the document and stores it in memory. To print
out documents in memory, see pp. 71, 72.
When not in use, turn the answering machine
off and switch to Fax/Tel Mode, Manual Mode,
or Fax Only Mode using [RECEIVE MODE] .
AnsMode
RECEIVING DOCUMENTS
Receiving documents in memory
When the fax receives documents in memory, you see one of the following messages and you must
perform one of the following actions:
CHANGE CARTRIDGE
PUT IN CARTRIDGE
CHECK REC PAPER
REC. PAPER JAM
CHK. FRONT COVER
Cause:
You ran out of ink or the BJ cartridge is not set
properly.
Action:
Install a new BJ cartridge or install the BJ cartridge
properly. (See Replacing the BJ cartridge, p. 103.)
Cause:
There is no BJ cartridge.
Action:
Install a BJ cartridge. (See Installing the BJ cartridge,
p. 11.)
Cause:
You ran out of recording paper.
Action:
Load paper into the paper tray, then press [STOP].
(See Loading the paper, p. 7.)
Cause:
A paper jam has occurred.
Action:
Clear the jam, then press [STOP]. (See Recording
paper jams, p. 99.)
Cause:
The front cover is open.
Action:
Close the front cover.
¶ The fax can store up to 15 A4-size pages (based on the Canon FAX Standard Chart No.1).
¶ When the memory contains documents, the LCD displays REC’D IN MEMORY alternating with the
error message.
71
6
RECEIVING FAXES
Printing documents in memory
Except when you run out of paper, the fax will automatically print out the contents stored in memory
when you remedy the cause of the problem.
If running out of recording paper caused memory reception, add recording paper and press [STOP] to
begin printing the stored page(s).
After printing the page(s) stored in memory, the fax erases the documents from memory.
Receiving while registering, copying or printing
If the fax rings while you are
entering registration information,
report manually, lift the handset.
making a copy or
printing a
¶ If you hear a slow beep or nothing at all, someone is trying to send a fax; press [STOP] to cancel ,
or . Then, press [START/COPY].To cancel making a copy to receive a fax, make sure that the
document is removed from the Automatic Document Feeder (ADF). Then, press [START/COPY].
¶ If it is a phone call, you can converse normally.
If you cancelled operations
,
or
, start the procedure again from the beginning after the call.
Note:
If you are performing operations , or
above, the fax will not automatically answer an
incoming call, even if the fax is in Ans. Machine Mode or Fax/Tel Mode. Follow the above
procedure to answer the call.
72
Network FAX/TEL Switching
(Australia only)
Telstra offers the FaxStream DUET capability. If you subscribe to this service, your line is assigned two
numbers: one for fax and one for phone. When the fax number is called, the network sends a specific
ringing tone which your unit recognises and automatically handles as a fax call. If the phone number is
called, a different ringing tone is sent out from the network so that the call is handled as a voice call.
This means that there is no switching delay at the caller’s end.
Setting the fax for Network Switch
¶ Triple ring (short-short-short) for fax receivingThree short rings, at regular intervals.
¶ Any ring except triple ring (depending on your switchboard) for telephone conversation.
1
Press [FUNCTION]
Wait a second for TEL REGISTRATION appear.
FUNCTION
SELECT MENU
1 sec.
TEL REGISTRATION
2
Use [
] or [
] to select RX SETTINGS.
RX SETTINGS
Press [START/COPY].
START/COPY
ECM RX
3
Use [
] or [
] to select NET SWITCH.
NET.SWITCH
Press [START/COPY].
START/COPY
6
OFF
4
Use [
] or [
] to select ON.
ON
Press [START/COPY]
START/COPY
73
RECEIVING FAXES
5
Press STOP.
STOP
Operation for Network Switch System
The procedures for using the Network Switch system are almost the same as when using the fax over a
normal telephone line. When you receive calls, however, the fax will respond slightly differently as
described below.
When you hear the telephone call ring pattern:
Pick up the handset and talk normally. If you hear a slow beep, it means the call is from a fax machine
trying to send a document. Press [START/COPY] to receive the document. If you do not pick up the
handset, the fax continues to ring until the other party hangs up. If an answering machine is connected,
it takes over the call.
When you hear the fax call ring pattern (triple ring):
After the fax rings, it receives the document automatically.
If you want to receive a document without ring:
First, make sure the fax is in Fax/Tel mode („Fax/Tel” displayed on the LCD). Then set INCOMING
RING in the RX SETTINGS to OFF. See p. 85. When someone sends a document, the fax receives it
automatically without ringing.
74
Network FAX/TEL Switching (New
Zealand only)
Telecom N.Z. offers the FaxAbility capability. If you subscribe to this service, your line is assigned two
numbers: one for fax and one for phone. When the fax number is called, the network sends a specific
ringing tone which your unit recognises and automatically handles as a fax call. If the phone number is
called, a different ringing tone is sent out from the network so that the call is handled as a voice call.
This means that there is no switching delay at the caller’s end.
Setting the fax Network
1
Press [FUNCTION].
Wait a second for TEL REGISTRATION appear.
FUNCTION
SELECT MENU
1 sec.
TEL REGISTRATION
2
Use [
] or [
] to select RX SETTINGS.
RX SETTINGS
Press [START/COPY].
START/COPY
ECM RX
3
Use [
] or [
] to select NET SWITCH.
NET.SWITCH
Press [START/COPY].
START/COPY
OFF
4
Use [
] or [
6
] to select ON.
ON
Press [START/COPY].
START/COPY
75
RECEIVING FAXES
5
Press STOP.
STOP
Operation for Network Switch System
The procedures for using the Network switch system are almost the same aa when using the unit over a
normal telephone line. When you receive calls, however, the unit will respond slightly differently as
described below.
When you hear the telephone call ring pattern:
Pick up the handset and talk normally. If you hear a slow beep, it means the call is from a fax machine
trying to send a document. Press [START/COPY] to receive the document. If you do not pick up the
handset, the fax continues to ring until the other party hangs up. If an answering machine is connected,
it takes over the call.
When you hear the fax call ring pattern:
After the fax rings, it receives the document automatically.
If you want to receive a document without ring:
First, make sure the fax is in Fax/Tel model („Fax/Tel” displayed on the LCD). Then set INCOMING
RING in the RX SETTINGS to OFF. See p. 85. When someone sends a document, the fax receives it
automatically without ringing.
76
7
SETTINGS AND
ACTIVITY
REPORTS
User menu settings ................................................. 78
Settings ..................................................................... 81
How to change a setting ................................................. 81
Activity reports ........................................................ 87
How to print a report .......................................................
Activity management report ............................................
One-touch Speed Dialling list ..........................................
Coded Speed Dialling list ................................................
User’s data list .................................................................
Activity report (Sending) ..................................................
Activity report (Receiving) ................................................
Multi-activity report ..........................................................
Memory clear list .............................................................
87
88
88
89
90
90
91
91
92
Restricting use of the fax ....................................... 93
Locking the fax ................................................................ 93
Changing the access password ...................................... 94
Cancelling the restriction setting ..................................... 95
User menu settings
The following illustrates the user menu settings in hierarchical order. The TEL REGISTRATION,
USER SETTINGS, REPORT SETTINGS, TX SETTINGS, RX SETTINGS, FAX PRINTER, and
SYSTEM SETTINGS menus comprise the items shown on the following pages.
Take a few minutes to familiarise yourself with the user menu settings.
FUNCTION
SELECT MENU
1 second
TEL REGISTRATION
To select the desired menu, complete the
procedure as shown in the shaded area.
Press [FUNCTION], SELECT MENU is
displayed for approximately 1 second
followed by the TEL REGISTRATION
menu. Use the arrow buttons to scroll
through the menus.
Press
USER SETTINGS
to display the SELECT MENU.
Press
to go to the next menu.
Press
to go to the previous menu.
when you wish to make a
Press
change to a setting.
REPORT SETTINGS
Press
settings.
to exit from the user menu
TX SETTINGS
RX SETTINGS
FAX PRINTER
SYSTEM SETTINGS
Whenever you make a change to a setting, press [START/COPY] and confirm that DATA ENTRY OK
displays on the LCD. Unless this message displays, the setting has not been changed.
When you return to the previous level, press [FUNCTION].
Refer to the following section as a comprehensive guide of the user menu settings.
78
USER MENU SETTINGS
¶ The TEL REGISTRATION menu contains the following settings.
START/COPY
TEL REGISTRATION
1-TOUCH DIAL
CODED DIAL
¶ The USER SETTINGS menu contains the following settings.
START/COPY
USER SETTINGS
SET DATE
SET TIME
ENTER YOUR TEL
USER NAME
TTI OPTION SET
DENSITY CONTROL
OFFHOOK ALARM
VOLUME CONTROL
RX CALL LEVEL
DIALING TONE
TEL LINE TYPE*
PSTN/PBX SET
M-KEY SETTING
(UK only)
*TEL LINE TYPE cannot be set in Norway and Denmark.
¶ The REPORT SETTINGS menu contains the following settings.
START/COPY
REPORT SETTINGS
TX REPORT
RX REPORT
ACTIVITY REPORT
7
¶ The TX SETTINGS menu contains the following settings.
START/COPY
TX SETTINGS
ECM TX
MID PAUSE SET
AUTO REDIAL
79
SETTINGS AND ACTIVITY REPORTS
¶ The RX SETTINGS menu contains the following settings.
START/COPY
RX SETTINGS
ECM RX
FAX/TEL SWITCH
INCOMING RING
MAN/AUTO SWITCH
REMOTE RX
MEMORY RX
¶ The FAX PRINTER menu contains the following settings.
START/COPY
FAX PRINTER
PAPER SIZE
RX REDUCTION
PRT DIRECTION
¶ The SYSTEM SETTINGS menu contains the following settings.
START/COPY
SYSTEM SETTINGS
UN/LOCK PHONE
AUTO TEST PRINT
DATE FORMAT
DISPLAY LANGUAGE
TX START SPEED
RX START SPEED
80
Settings
The fax has seven sets of settings that control its various modes of operation.
The settings and how to change them are described below.
How to change a setting
There are two basic types of settings, selectable settings and numeric entry settings. The following
example shows how to make both types of changes.
Whenever you make a change to a setting, press [START/COPY] and confirm that DATA ENTRY OK
displays on the LCD. Unless this message displays, the setting has not been changed.
Example:
Changing INCOMING RING, the number of rings before the fax
answers.
1
Press [FUNCTION].
Wait a second for TEL REGISTRATION to
appear.
FUNCTION
SELECT MENU
1 sec.
TEL REGISTRATION
2
Use [
3
Press [START/COPY].
4
Use [
5
Press [START/COPY].
] or [
] to select RX SETTINGS.
RX SETTINGS
START/COPY
ECM RX
] or [
] to select INCOMING RING.
INCOMING RING
START/COPY
OFF
7
81
SETTINGS AND ACTIVITY REPORTS
6
Use [
7
Press [START/COPY].
] or [
] to select ON.
ON
START/COPY
DATA ENTRY OK
RING COUNT
1 sec.
2
8
9
Use the numeric buttons to enter a new ring
count, for example 3.
Press [START/COPY].
10
82
3
START/COPY
DATA ENTRY OK
Press [STOP] to finish registration and
return to standby mode.
STOP
SETTINGS
TEL REGISTRATION
Factory settings are in bold. For instructions on how to change a setting, refer to How to change a
setting, pp. 81, 82.
Name
1-TOUCH DIAL
CODED DIAL
Description
See Registering One-touch Speed Dialling numbers
andnames, p. 36.
See Registering Coded Speed Dialling numbers and
names, p. 38.
Settings
-
USER SETTINGS
Factory settings are in bold. For instructions on how to change a setting, refer to How to change a
setting, pp. 81, 82.
Name
SET DATE
SET TIME
ENTER YOUR TEL
USER NAME
TTI OPTION SET
Description
Set the date using the numeric buttons.
Set the time (24-hour clock) using the numeric buttons.
Enter your fax number using the numeric buttons.
This is the name that appears at the top of each fax page
you send. See Entering a name, p. 30.
This option sets the parametres for the identification
header that appears on every page you send.
Settings
-
TX TERMINAL ID
Enable/disable the TTI.
TTI POSITION
Select the position of the TTI.
OUTSIDE IMAGE: Position the TTI outside the image area.
INSIDE IMAGE: Position the TTI inside the image area.
TTI MARKER
Select the icon for the fax number.
FAX/TEL
FAX: Sets the fax icon.
TEL: Sets the telephone icon.
Set the density of the reproduction. Set to DARKER for
STANDARD/LIGHTER/DARKER
light originals and LIGHTER for dark originals.
Enable/disable the off hook alarm. The alarm alerts you that
ON/OFF
the telephone is off hook.
Set the audio level of the line monitor, calling signal and
alarm.
DENSITY CONTROL
OFFHOOK ALARM
VOLUME CONTROL
ON/OFF
OUTSIDE IMAGE/INSIDE IMAGE
PHONE VOL LEVEL
Set the volume of the line monitor (sound during off hook
and dialling conditions)
VOL MIN/VOL MID/VOL MAX
CALLING VOLUME
Set the volume of the ring produced when the fax detects a
voice call during FAX/TEL switchover.
VOL MIN/VOL MID/VOL MAX
ALARM VOLUME
Set the volume of the error alarm sound.
KEYPAD VOLUME
RX CALL LEVEL
DIALING TONE
Set the volume of the keypad.
Set the ring tone.
Turn the dial tone on/off for dialling.
VOL MIN/VOL MID/VOL MAX
OFF/VOL MIN/VOL MID/ VOL MAX
LOW/HIGH
ON/OFF
83
7
SETTINGS AND ACTIVITY REPORTS
Name
TEL LINE TYPE*
PSTN/PBX SET
Description
Set the dialling method the fax uses to match the type of
phone line you have.
Sets the type of the PBX through which your fax is
connected.
PSTN
Your fax is connected to the outside line.
PBX
Your fax is connected through a PBX.
You can set the type of the PBX among PREFIX, HOOKING
and EARTH CONNECTION. If you select PREFIX, you can
set the number up to 19-digits that will access the outside
line.
If set to PBX, the [05] button cannot be used for One-touch
Speed Dialling.
Enable/disable the M-key setting. When set to ON, the [10]
button cannot be used for One-touch Speed Dialling.
Set an access code and ID code for the 2300 service of
Mercury Communications Limited, p. 42.
M-KEY SETTING (UK
only)
ACCESS CODE
Set an access code up to 19 digits.
ID CODE
Set an ID code up to 19 digits.
*TEL LINE TYPE cannot be set in HongKong, Norway and Denmark.
**TOUCH TONE is the default setting in the UK and Singapore.
Settings
TOUCH TONE/ROTARY PULSE**
PSTN/PBX
ON/OFF
-
REPORT SETTINGS
Factory settings are in bold. For instructions on how to change a setting, refer to How to change a
setting, pp. 81, 82.
Name
TX REPORT
TX CONFIRM REP.
RX REPORT
ACTIVITY REPORT
TX/RX SEPARATE
84
Description
Settings
Enable/disable automatic printing of the transmission
report.
PRINT ERROR ONLY prints only when a transmission error
occurs.
OUTPUT YES sets the fax to print an activity report every
time you send a document.
OUTPUT NO turns off the activity report feature.
OUTPUT YES/OUTPUT NO/
PRINT ERROR ONLY
When you set TX REPORT to OUTPUT YES or PRINT
ERROR ONLY, you can add to the TX report half of the first
page of the document that was being sent. This can help
remind you which document was being sent. Valid only for
memory transmissions.
Enable/disable automatic printing of the reception report.
PRINT ERROR ONLY prints only when an error occurs
during receiving.
OUTPUT YES sets the fax to print an activity report every
time you receive a document.
OUTPUT NO turns off the activity report feature.
Enable/disable automatic printing of the activity report.
Unless you change the setting, your fax is set to print
anactivity management report for every 20 transactions
(sending and receiving).
OUTPUT YES/OUTPUT NO
Divide the activity management report into sending and
receiving transactions.
OUTPUT YES/OUTPUT NO/
PRINT ERROR ONLY
OUTPUT YES/OUTPUT NO
ON/OFF
SETTINGS
TX SETTINGS
Factory settings are in bold. For instructions on how to change a setting, refer to How to change a
setting, pp. 81, 82.
Name
ECM TX
MID PAUSE SET
AUTO REDIAL
REDIAL TIMES
Description
Enable/disable error correction during transmission.
Set the length of the pause you insert into a dialling
sequence.
Detemine whether the fax will redial a number if it fails to
get a response on the first attempt.
Set the number of retries.
REDIAL INTERVAL
Set the period of time between rediallings.
*4 seconds (4-11) in the UK and Hong Kong.
**Up to 4 times in the UK and Ireland, and 5 times in New Zealand.
Settings
ON/OFF
2 seconds (1 to 15)*
ON/OFF
2 times (1 to 10)**
2 minutes (2 to 60)
RX SETTINGS
Factory settings are in bold. For instructions on how to change a setting, refer to How to change a
setting, pp. 81, 82.
Name
ECM RX
FAX/TEL SWITCH
Description
Enable/disable error correction during reception.
Enable/disable FAX/TEL switchover. When ON, this feature
answers calls, and if no fax tone is detected, the fax rings
to alert you of an incoming call.
Settings
ON/OFF
RING START TIME
Set the duration that the fax listens for a fax tone before
starting to ring.
8 seconds (0 to 30)
F/T RING TIME
Set the length of time the fax will ring to alert you of an
incoming call.
22 seconds (10 to 300)
F/T SW ACTION
INCOMING RING
Select the action taken after the F/T RING TIME expires.
When the fax is set to Fax Only Mode or Fax/Tel Mode and
an extension phone is connected, set the fax to ring when
it receives a call.
DISCONNECT/RECEIVE
ON/OFF
RING COUNT
MAN/AUTO SWITCH
Set the number of incoming rings before the fax answers.
Determine if the fax switches to document receive mode
after the fax rings for a specified time when the fax is in the
manual receive mode.
2 times (1 to 99)
ON/OFF
Set the amount of time the fax will ring before switching to
document receive mode.
Allows you to dial the REMOTE RX ID on an extension
phone to start receiving a document.
10 seconds (1 to 99)
RING TIME
REMOTE RX
REMOTE RX ID
MEMORY RX
If you set REMOTE RX ON, you can change the remote
receiving ID.
Turn on/off memory receiving of a document.
ON/OFF
25 (00 to 99, including
and #)
ON/OFF
85
7
SETTINGS AND ACTIVITY REPORTS
FAX PRINTER
Factory settings are in bold. For instructions on how to change a setting, refer to How to change a
setting, pp. 81, 82.
Name
Description
Settings
PAPER SIZE
RX REDUCTION
Select the size of the loaded fax paper.
Enable/disable reduction for received faxes.
A4/LEGAL/LTR
ON/OFF
REDUCTION RATE
Set the reduction factor in percent.
STANDARD/A4→LTR/LGL→LTR
SEL. REDUCE DIR
Select reduction in width only or both width and height.
PRT DIRECTION
Select between unidirectional and bi-directional printing.
VERTICAL ONLY/HORIZ &
VERTICAL
BI-DIRECTION PRT/PRT ONE
DIRECT.
SYSTEM SETTINGS
Factory settings are in bold. For instructions on how to change a setting, refer to How to change a
setting, pp. 81, 82.
Name
UN/LOCK PHONE
Description
PASSWORD
Allows you to set a four digit password to restrict access to
the LOCK PHONE setting below.
LOCK PHONE
AUTO TEST PRINT
Allows you to restrict sending.
Enable/disable auto test printing whenever the BJ cartridge
is replaced.
Set the date format.
DATE FORMAT
DISPLAY LANGUAGE
TX START SPEED
RX START SPEED
86
Settings
Restricts sending with a password.
ON/OFF
ON/OFF
MM/DD/YY
DD/MM/YY
YY/MM/DD
Set the language of the LCD messages.
ENGLISH/FRENCH/SPANISH/
GERMAN/ITALIAN/DUTCH/FINNISH/
PORTUGUESE/NORWEGIAN/
SWEDISHDANISH/SLOVENE/
CZECH/HUNGARIAN
Set the speed at which the fax starts transmitting. Set this
14400bps/9600bps/7200bps/
to a lower speed if you have difficulties connecting over
4800bps
long distance or noisy lines.
Set the speed at which the fax starts receiving. Set this to a
9600bps/7200bps/4800bps
lower speed if you have difficulties connecting over long
distance or noisy lines.
Activity reports
Your fax keeps track of most of its sending and receiving operations. These operations can be printed
out in the form of activity reports that can help you confirm the dates and times of facsimile
transmissions and whether or not each transaction was successful.
How to print a report
Depending on the type of report, you can have the fax print the report automatically, or you can print
it directly. See REPORT SETTINGS (p. 84) on how and when reports are printed automatically. The
fax prints the Send report, Receive report, and Multi activity report automatically only.
You’ll find a sample of each report below.
1
Press [FUNCTION].
2
Press [REPORT].
3
FUNCTION
REPORT
Use [ ] or [ ] to display the type of report
you want to print.
ACTIVITY REPORT
START/COPY
Press [START/COPY].
1-TOUCH SPD LIST
CODED SPD LIST
USER’S DATA LIST
7
87
SETTINGS AND ACTIVITY REPORTS
Activity management report
Summarises the information for the sending and receiving activities of your fax after 20 transactions.
For automatic printing see ACTIVITY REPORT in REPORT SETTINGS, p. 84.
01/12/97
10:12
FAX 321 456 7777
CANON U.S.A.
P01
***********************************************************
ACTIVITY REPORT
*******
*******
***********************************************************
START TIME
01/12 11:55
11:57
12:45
12:53
CONNECTION TEL
CONNECTION ID
NO.
MODE
PAGES
RESULT
0017
0016
0018
0019
TRANSMISSION
TRANSMISSION
RECEPTION
RECEPTION
1
1
1
1
DERIC MA
0021
TRANSMISSION
1
OK 00’31
OK 00’47
OK 00’35
NG 00’01
0 #011
NG 00’31
0 #018
CANON TOKYO
CANON ITALIA
0022
0023
TRANSMISSION
1
1
*
*
*
*
3 7390602
312 228 5700
0337582111
321 228 5700
CANON
CANON
CANON
CANON
12:57 *
356 895 1111
12:56 *
13:55
37582111
2 5059
HONGKONG
INC.
TOKYO
INC.
OK 00’31
OK 00’21
STOP
Error Code: See Error
Codes messages and
solutions, p. 110.
[STOP] was pressed during
transaction.
If marked with an asterisk,
Transaction
The number of the page with an
has already been printed
number
error.
out.
¶ The fax prints sending and receiving transactions together in the same report. You can also set the
fax to print sending and treceiving transactions separately. See TX/RX SEPARATE, p. 84.
One-touch Speed Dialling list
Lists the information for each of the registered One-touch Speed Dialling numbers.
01/12/97
10:12
FAX 321 456 7777
CANON U.S.A.
***********************************************************
1-TOUCH SPD LIST
*******
*******
***********************************************************
SD #
[01]
[02]
[03]
[04]
[05]
88
CONNECTION TEL
1 773 3173
312 228 5700
2 5059
3 7390802
R-KEY
CONNECTION
CANON
CANON
CANON
CANON
UK
INC.
ITALIA
HONGKONG
P01
ACTIVITY REPORTS
Coded Speed Dialling list
Lists information for each of the registered Coded Speed Dialling numbers.
01/12/97
10:12
FAX 321 456 7777
CANON U.S.A.
P01
***********************************************************
CODED SPD LIST
*******
*******
***********************************************************
SD #
[*01]
[*02]
[*03]
[*04]
CONNECTION TEL
356 895 1111
001 813 5236 7456
516 484 1005
3290 2644
CONNECTION ID
DERIC MAY
CHARLIE PARISEK
ABDUL HISHAM
TECHNO GRAPHICS
7
89
SETTINGS AND ACTIVITY REPORTS
User’s data list
Lists the name and number you registered during setup and a list of all current settings.
01/12/97
10:12
FAX 321 456 7777
CANON U.S.A.
P01
***********************************************************
USER’S DATA LIST
*******
*******
***********************************************************
USER SETTINGS
USER TEL #
USER ID
TTI OPTION SET
TTI POSITION
TTI MARKER
DENSITY CONTROL
OFFHOOK ALARM
VOLUME CONTROL
PHONE VOL LEVEL
CALLING VOLUME
ALARM VOLUME
KEYPAD VOLUME
RX CALL LEVEL
-------
321 456 7777
CANON USA
-------------
OUTSIDE IMAGE
FAX
STANDARD
ON
----------
VOL M
Activity report (Sending)
Normally the fax does not print an activity report for sending, but you can set the fax to print an
activity report every time you send a document. See TX REPORT in REPORT SETTINGS, p. 84.
01/12/97
10:12
FAX 321 456 7777
CANON U.K.
P01
***********************************************************
TX REPORT
*******
*******
***********************************************************
TRANSMISSION OK
TX/RX NO.
CONNECTION TEL
CONNECTION ID
START TIME
USAGE TIME
PAGES
RESULT
0002
1516334455
CANON USA FAX
01/12 10:11
00’36
1
OK
¶ You can set the fax to print an activity report only when an error occurs during sending. See TX
REPORT in REPORT SETTINGS, p.84.
¶ You can set the fax to print the first page of the documents. Valid only for memory transmissions.
See TX CONFIRM REP. in REPORT SETTINGS, p. 84.
90
ACTIVITY REPORTS
Activity report (Receiving)
Normally the fax does not print an activity report for receiving, but you can set the fax to print an
activity report every time you receive a document. See RX REPORT in REPORT SETTINGS, p. 84.
01/12/97
10:12
FAX 321 456 7777
CANON U.K.
P01
***********************************************************
RX REPORT
*******
*******
***********************************************************
RECEPTION
TX/RX NO.
CONNECTION TEL
CONNECTION ID
START TIME
USAGE TIME
PAGES
RESULT
0026
0337582111
CANON TOKYO
01/12 13:49
00’27
1
OK
¶ You can set the fax to print an activity report only when an error occurs during receiving. See RX
REPORT in REPORT SETTINGS, p. 84.
Multi-activity report
Lists the result of a Sequential broadcast.
01/12/97
10:12
FAX 321 456 7777
CANON U.K.
P01
***********************************************************
MULTI TX/RX REP.
*******
*******
***********************************************************
TX/BX NO.
0026
INCOMPLETE TX/RX
TRANSACTION OK
[04]
[02]
[03]
3 7390602
312 228 5700
2 5059
CANON HONGKONG
CANON INC.
CANON ITALIA
ERROR
¶ If you set the fax to print activity reports (TX REPORT or RX REPORT) and then use Sequential
broadcasting, a Multi-activity report will be printed instead of the activity report (Sending). See TX
REPORT in REPORT SETTINGS, p. 84.
7
91
SETTINGS AND ACTIVITY REPORTS
Memory clear list
The memory clear list summarises the documents in memory.
01/12/97
10:12
FAX 321 456 7777
CANON U.S.A.
P01
***********************************************************
MEMORY CLEAN REPORT
*******
*******
***********************************************************
TX/RX NO.
MODE
CONNECTION TEL
PAGES
SET TIME
0012
0013
TRANSMISSION
RECEPTION
312 228 5700
0337582111
2
2
01/12 23:00
01/12 12:37
START TIME
¶ If you experience a power failure, the documents in the fax memory will be lost. As soon as power is
restored and the fax is turned on again, the fax will automatically print out a list of documents that
were stored in the memory at the time of the power failure.
92
Restricting use of the fax
Use the lock feature of the FAX-B150 to prevent unauthorised use of the fax. When the lock feature is
on, your fax cannot be used to send faxes without the passwords.
To restrict access to the LOCK PHONE setting, you need to register a password. Set the password and
LOCK PHONE setting as explained below.
Locking the fax
1
Press [FUNCTION].
Wait a second for TEL REGISTRATION to
appear.
FUNCTION
SELECT MENU
1 sec.
TEL REGISTRATION
2
Use [
] or [
] to select SYSTEM SETTINGS.
SYSTEM SETTINGS
Press [START/COPY].
START/COPY
UN/LOCK PHONE
3
4
Press [START/COPY] twice.
NEW appears in the display. If OLD appears in
the display, a password has already been
registered.
To change the password, enter the current 4-digit
password and press [START/COPY].
START/COPY
PASSWORD
START/COPY
Enter a four-digit access password using the
numeric buttons.
NEW
_
NEW
7777
_
Press [START/COPY] twice.
START/COPY
LOCK PHONE
START/COPY
PASSWORD
_
7
93
SETTINGS AND ACTIVITY REPORTS
5
Enter the current four-digit access password
using the numeric buttons.
The password is not displayed as you enter it.
PASSWORD
START/COPY
Press [START/COPY].
6
Use [
] or [
OFF
] to select ON.
ON
Press [START/COPY].
7
START/COPY
Press [STOP].
STOP
Changing the access password
1
2
Follow steps 1 to 3 on p. 93.
OLD appears in the display.
OLD
Enter the current four-digit access password
using the numeric buttons.
The password is not displayed as you enter it.
OLD
START/COPY
Press [START/COPY].
NEW appears on the display.
3
NEW
Enter a new four-digit access password using
the numeric buttons.
NEW
Press [START/COPY].
4
94
_
START/COPY
Press [STOP].
STOP
_
8888
_
RESTRICTING USE OF THE FAX
Cancelling the restriction setting
1
Follow steps 1 and 2 on p. 93.
2
Press [START/COPY].
3
Use [
UN/LOCK PHONE
START/COPY
PASSWORD
] or [
] to select LOCK PHONE.
LOCK PHONE
Press [START/COPY].
START/COPY
PASSWORD
4
Enter the current four-digit access password
using the numeric buttons.
The password is not displayed as you enter it.
PASSWORD
START/COPY
Press [START/COPY].
5
Use [
] or [
] to select OFF.
OFF
Press [START/COPY].
6
_
START/COPY
Press [STOP].
STOP
7
95
This page is intentionally blank.
8
SOLUTIONS TO
COMMON
PROBLEMS
Paper Jams .............................................................. 98
Automatic Document Feeder (ADF) jams ....................... 98
Recording paper jams ..................................................... 99
Periodic care ............................................................100
Cleaning the fax exterior ................................................. 100
Cleaning the glass scanning window .............................. 100
Cleaning the printer area ................................................. 101
Cleaning the BJ cartridge print head .............................. 102
Replacing the BJ cartridge .............................................. 103
Frequently Asked Questions ..................................104
TRANSMITTING ............................................................... 104
RECEIVING ...................................................................... 105
TELEPHONE .................................................................... 106
COPYING ......................................................................... 107
PAPER LOADING PROBLEMS ....................................... 107
GENERAL ......................................................................... 107
Print quality problems .............................................109
Error codes, messages and solutions ..................110
In case of a power failure .......................................113
During a power failure ..................................................... 113
Specifications ..........................................................115
Appendix ...................................................................117
Document sizes ............................................................... 117
What happens when Fax/Tel Mode is selected .............. 118
Glossary ....................................................................119
Index ..........................................................................123
Paper jams
Automatic Document Feeder (ADF) jams
j To remove a jammed document
1
Hold down the fax with your left hand,
and gently pull the operation panel with
your right hand.
¶ Do not push the LCD display.
3
98
Gently push the operation panel shut
until it clicks.
2
While holding the operation panel open,
pull the sheet out from the top or
bottom.
PAPER JAMS
Recording paper jams
j To remove jammed paper
1
Remove the paper tray cover.
2
Remove the recording paper.
3
Open the front cover.
4
Pull the sheet out slowly from the top or
bottom.
5
Close the front cover.
6
Load the paper (see Loading the paper,
p. 7), then replace the paper tray cover,
and press [STOP].
8
99
Periodic care
Cleaning the fax exterior
To keep the exterior of the fax clean, gently wipe the fax with a soft cloth lightly moistened with water.
Never use thinner, benzene, alcohol or any other organic solvent, as it may damage the surface of the
fax.
Cleaning the glass scanning window
The glass scanning window can accumulate dirt with continued use, resulting in spots on faxes and
copies.
j To clean the glass scanning window
1
Disconnect the power cord.
2
Open the front cover.
3
Press down on the scanning window
assembly and clean the glass window
with a dry cotton swab.
4
Close the front cover.
100
PERIODIC CARE
Cleaning the printer area
Clean the printer area regularly to prevent accumulation of paper dust and ink spots.
j To clean the printer area
1
Disconnect the power cord.
2
Open the front cover.
3
Clean the printer area with a soft, dry
cloth.
4
Close the front cover.
Platen
Roller
¶ Remove any ink mist or paper debris from the interior of the printer using a soft cloth. Clean
especially well around the platen area. If the rollers become dirty, you can clean them using a small,
soft brush.
¶ Never use a solvent, such as thinner or benzene, to clean the printer area.
¶ Do not remove the BJ cartridge or attempt to wipe the cartridge print head.
8
101
SOLUTIONS TO COMMON PROBLEMS
Cleaning the BJ cartridge print head
To maintain the best possible print quality, the BJ cartridge print head needs to be cleaned from time to
time. If you notice some degradation in the print quality, try cleaning the print head.
Cleaning the print head consumes a small amount of ink. Cleaning too often significantly reduces the
amount ink in the cartridge.
1
Press [FUNCTION].
Wait a second for TEL REGISTRATION to
appear.
FUNCTION
SELECT MENU
1 sec.
TEL REGISTRATION
2
102
Press [CLEANING].
CLEANING
HEAD CLEANING
PERIODIC CARE
Replacing the BJ cartridge
Replace the BJ cartridge when you see the message CHANGE CARTRIDGE displayed.
1
Open the front cover of the fax.
2
Raise the green cartridge release lever.
3
Remove the cartridge.
4
Insert a new cartridge.
See Installing the BJ cartridge, steps 3
to 8, pp. 11 13.
Dispose of the BJ cartridge properly.
You may want to place it in a plastic bag to keep
from spilling any residual ink.
8
103
Frequently Asked Questions
Refer to this section if you experience trouble operating your fax.
TRANSMITTING
❏ Cannot send a document?
• Is the fax set for the type of telephone line in use (pulse/tone)?
If you have a pulse line, be sure the fax is set for pulse dialling. If you are
not sure about what type of line you have, contact your local telephone
company. See p. 16
• Has the document been fed correctly into the fax?
Remove the document, stack it and feed it into the fax correctly. See p. 49.
• Is the One-touch or Coded Speed Dialling number you used registered for the
feature you want to use?
Check the content of the One-touch or Coded Speed Dialling button and be
sure it was registered correctly. See pp. 36, 38.
• Is the other party’s fax out of paper?
Call the other party and be sure paper is installed in the other party’s fax
unit.
• Are there any other documents being sent from memory?
Allow time for the current document to finish sending.
• Can you hear a dial tone when you press [HOOK] or when you lift the
handset?
If you cannot hear a dial tone, make sure the telephone line is connected
properly. See p. 14.
• Print an activity report and check for an error code. See pp. 87, 110.
❏ Are the images you send or copy spotted or dirty?
• Is the document scanning glass clean?
If the scanning glass is dirty, clean it. See p. 100.
• Is the other party’s fax working properly?
To confirm correct operation of your own fax, make a copy. If the copy is
clear, the other party’s fax may have a problem.
• Is the document fed correctly into the Automatic Document Feeder (ADF)?
Remove the document and feed it correctly into the feeder. See p. 49.
❏ Cannot send using Error Correction Mode (ECM)?
• Does the other party’s fax support ECM?
Some fax units do not support ECM transaction. If the other party’s fax
does not support ECM transaction, then the document is sent in the normal
mode without error checking.
• Is your fax set for ECM sending?
ECM sending for your fax can be turned off and on. Check the current
setting. See p. 85.
104
FREQUENTLY ASKED QUESTIONS
RECEIVING
❏ Cannot receive a document automatically?
• Is the fax set to receive automatically?
For the fax to receive automatically, the LCD must display ″Fax/Tel″, ″Fax
Only″ or ″AnsMode″. Press [RECEIVE MODE] to display ″Fax/Tel
Mode″″Fax Only Mode″or ″Ans. Machine Mode″ on the operation panel.
See pp. 69, 70.
• Make sure you have printed out any document received in memory. See p.
72.
• Check the LCD for an error message. See p. 110.
• Print an activity report and look for an error code. See pp. 87, 110.
❏ The fax won’t switch automatically between telephone and fax
transmissions?
• Is ″Fax/Tel″ displayed on the LCD?
For the fax to switch automatically between telephone and fax reception,
″Fax/Tel″ must be displayed on the LCD. Press [RECEIVE MODE] on the
operation panel to select ″Fax/Tel Mode″. See p. 69.
• Make sure you have printed out any documents in memory. See p. 72.
• Check the LCD for an error message. See p. 110.
• Some fax units cannot send the CNG signal that tells your fax the incoming
signal is from a fax. In such cases, you will have to receive the document
manually.
❏ Cannot receive a document manually?
• Is an extension phone connected to your fax?
You cannot receive manually unless an extension phone is connected.
• Is a document fed into the fax?
Remove the document. You cannot receive when there is a document fed
into your fax.
• Did you press [START/COPY] after hanging up the handset?
Always press [START/COPY] before hanging up the handset. Don’t press
[START/COPY] after you hang up the handset.
❏ Print quality poor?
• Are you using the correct type of paper?
Be sure you are using paper that meets the paper requirements for this fax.
See p. 7.
• Is the fax unit’s BJ cartridge out of ink?
Replace the BJ cartridge. See p. 103.
• Make a copy on your fax. If the image is OK, then your fax is operating
properly.Contact the other party and have them check their machine.
8
105
SOLUTIONS TO COMMON PROBLEMS
❏ Cannot receive using Error Correction Mode (ECM)?
• Does the other party’s fax support ECM?
Some fax units do not support ECM transmission. If the other party’s fax
does not support ECM, the document is sent in the normal mode without
error checking.
• Is your fax set for ECM receiving?
ECM receiving can be turned off and on. Check the current setting. See
p. 85.
❏ Nothing prints?
• Did you remove the orange tape from the BJ cartridge before you installed it
in the fax?
Be sure to remove the orange tape from the BJ cartridge before you install
it in the fax. See p. 11.
• Make sure the BJ cartridge is installed correctly. See pp. 11 13.
• Clean the print head several times. See p. 102.
• Try another BJ cartridge.
❏ Are the images you print blotched or uneven?
• Are you using ECM sending/receiving?
ECM sending/receiving should eliminate such problems. However, if the
telephone lines are in poor condition, you may have to try again.
• How is the quality of the other party’s fax?
Remember, the sending fax usually determines document quality. Be sure
the other party’s back of top cover and scanning glass are clean.
TELEPHONE
❏ Cannot dial?
• Is the telephone line connected to the fax?
Be sure the telephone line is correctly connected to the fax. See p. 14.
• Is the fax set for the type of telephone line in use (pulse/tone)?
If you have a tone line, be sure the fax is set for tone dialling. If you are
not sure what type of line you have, contact your local telephone company.
See p. 16.
❏ Does the phone disconnect while you are talking on the line?
• Is ″AnsMode″ displayed on the LCD?
If ″AnsMode″ is displayed on the LCD, press [RECEIVE MODE] to select
a different mode. The ″Ans. Machine Mode″ should only be on when an
answering machine is connected, turned on, and ready to take messages
from telephone callers.
106
FREQUENTLY ASKED QUESTIONS
COPYING
❏ Cannot make a copy?
• Was the [HOOK] button pressed?
You cannot make copies if [HOOK] was pressed. Press [HOOK] to release
it.
• Make sure the handset is on the hook.
• Make sure a document is set in the Automatic Document Feeder (ADF)
and the LCD displays the current resolution.
• Print an activity report to ensure the fax is working properly.
PAPER LOADING PROBLEMS
❏ Multiple sheets feed into the fax?
• Make sure the paper is not sticking together. Fan the paper before loading
it into the paper tray. Always fan a stack of paper along the edge that will
feed into the fax first.
• Make sure the paper tray does not contain too much paper. Remove a few
sheets of paper from the paper tray.
• If different paper types are loaded in the paper tray, load just one paper
type. See Loading the paper, p. 7.
❏ Paper is loaded skewed (Printing is skewed)?
• Make sure the paper is loaded properly in the paper tray: the right side of
the paper is aligned against the right side of the paper tray and the paper
guide rests against the left side of the paper stack, see Loading the paper,
p. 7.
GENERAL
❏ Sending and receiving documents too slow?
• When sending, is the document mode set to FINE or PHOTO?
Before sending documents, press [RESOLUTION MODE] until
STANDARD appears on the display. Sending will be faster, but the image
will not be as clear, and photos will be reproduced in black and white only.
• Is your fax set for ECM sending or receiving?
Because the fax is constantly checking for errors during transmission, ECM
sending and receiving require more time. If the transmission speed appears
to be extremely slow, you may be able to speed it up by turning ECM off.
See p. 85.
8
107
SOLUTIONS TO COMMON PROBLEMS
❏ Cannot get faxes from information services?
• Is your fax connected to a rotary dial telephone line?
Press [TONE] to receive faxes from information services that require
touch-tone telephone lines for transmission.
❏ Nothing shows on the display?
• Is the power plug firmly plugged in?
Check the plug and be sure it is firmly plugged into the socket.
• Cannot solve the problem?
Disconnect the power. Wait five seconds and reconnect the power again.
Check the other party’s fax and be sure that it is compatible with your fax.
There are some compatibility problems between certain types of faxes.
Still cannot solve the problem?
Call for service.
108
Print quality problems
If the printout is unsatisfactory, consider the following suggestions:
¶ Most paper has a right side and a wrong side. If the print quality is poor, try turning the paper over
and printing on the other side.
¶ If characters and images are blurred, check that you are using the correct kind of paper, see p. 7.
¶ If ink gets on the printer’s platen, the reverse side of the printed page will have smudges. In this case,
clean the platen area with a soft dry cloth. See p. 101.
¶ If white streaks or missing dots appear on printed pages, perform the print head cleaning operation.
See p. 102.
¶ If the quality is not crisp and clear after cleaning the print head, repeat the head cleaning procedure
again. If output is still not satisfactory after cleaning the print head five consecutive times, replace the
BJ cartridge. See p. 103.
¶ If the following print quality problems occur in the entire printing area, check for the most probable
cause and remedy as listed below.
Print Results
Most Probable Cause
Remedy
Smudged
Paper type
Try a different type. See p. 7.
Blurred
Paper type
Try a different type. See p. 7.
Faded
Print head is clogged or out of ink.
Perform head cleaning or replace the
BJ cartridge. See pp. 102, 103.
White Streaks
Print head is clogged.
Perform head cleaning or reinstall the
BJ cartridge. See pp. 11, 102.
Dots Missing
Print head is clogged.
Perform head cleaning. See p. 102.
Irregular Dots
Print head is clogged.
Perform head cleaning. See p. 102.
8
109
Error codes, messages and solutions
The following table summarises the error codes that appear on Activity reports (see
p. 87), the displayed messages and what to do for each error.
Message
Error Code
Cause
Action
BUSY/NO SIGNAL
#005/018
The telephone number you
dialled is busy.
Try sending the document at
a later time.
The other party’s fax is not
working.
Contact the other party and
have them check their fax.
The other party is not using
a G3 machine.
Contact the other party and
have them send or and have
them send or receive the
document using a G3
machine.
The touch tone/rotary pulse
setting on your fax is
incorrect.
Set your fax to the setting
that matches your telephone
line. (See p. 16)
The receiving fax did not
answer within 35 seconds.
Contact the other party and
have them check their fax.
You can try to send the
document send the
document manually. For an
overseas manually. For an
overseas manually. For an
overseas call, add pauses to
the registered number. (See
p. 29)
CHANGE CARTRIDGE
-
The BJ cartridge is empty or
the ink has dried out.
Replace the BJ cartridge.
(See p. 103)
CHECK REC PAPER
#009
No paper in the fax or there
is a paper jam.
Add paper or clear the jam,
then press [STOP]. (See p. 7)
CHK. FRONT COVER
-
The front cover is open.
Close the front cover.
CHECK DOCUMENT
#001
Document is jammed.
Remove the document and
start again. (See p. 98)
110
ERROR CODES, MESSAGES AND SOLUTIONS
Message
Error Code
Cause
Action
CHECK PRINTER
-
An error occurred in the
printer.
Press [STOP]. Try your
operation again.
DOC. TOO LONG
#003
It took more than 32
minutes to send or copy a
document.
Divide the document and
send or copy each part
separately.
It took more than 32
minutes to receive a
document.
Contact the other party. Have
them divide the document
and send each part
separately.
The document is longer than
1 m.
Use a copy machine to make
a reduced copy of the
document and send the copy.
HANG UP PHONE
-
The handset is off hook.
Place the handset properly
into its cradle.
MEMORY FULL
#037
The memory of the fax is full
because it has received too
many documents.
Print out any documents that
are stored in memory. Then
start the operation again (See
p. 72)
The memory is full because
you tried to send too many
pages at once.
Divide the documents and
send each part separately.
MULTI TRANS. ON
-
Sequential broadcasting is
in progress, with a pause
between calls.
If you want the fax to
continue, do nothing. If you
want to stop sending, wait
until the fax starts to dial the
number, then press [STOP].
NO RX PAPER
#012
The other party’s fax is out
of paper.
Contact the other party and
have them install paper in
their fax.
NO TEL #
#022
The One-touch Dialling or
Coded Speed Dialling
number has not been
registered.
Register the number. (See pp.
36, 38)
8
111
SOLUTIONS TO COMMON PROBLEMS
Message
Error Code
Cause
Action
OUT OF RANGE
-
The number you entered is
out of range.
Enter only numbers that are
allowed.
PUT IN CARTRIDGE
-
The BJ cartridge is not
installed.
Install the BJ cartridge (See
p. 11).
REC’D IN MEMORY
-
The paper or ink ran out, or
a paper jam occurred, so
the fax received the
document in memory.
Add paper to the paper tray,
change the BJ cartridge, or
clear the paper jam. Print out
the document from memory.
(See p. 72)
REC.PAPER JAM
#009
There is a paper jam.
Clear the jam, then press
[STOP]. (See p. 99)
REDIALING
-
The fax is waiting to redial
the other party’s number.
Either the line was busy or
the other party did not
answer when you tried to
send the document.
Wait for the fax to redial. If
that doesn’t work, wait until
the fax starts to dial the
number, then press [STOP] to
cancel redialling. Try to send
the document again at a later
time.
START AGAIN
-
An error has occurred.
Start the procedure again
from the beginning.
STOP KEY PRESSED
-
[STOP] is pressed.
Start the procedure again
from the beginning.
TALK
-
Fax/Tel Mode is set for the
fax to ring.
Answer the call.
TIMER
-
Delayed Sending is set and
will send at the preset time.
Wait for the fax to send the
document.
112
In case of a power failure
The user data settings and registered data for One-touch Speed Dialling and Coded Speed Dialling are
saved during a power failure using a built-in battery. However, documents stored in the fax memory will
be deleted. If a power failure occurs or the power is turned off, the fax will automatically print a
Memory Clear List as soon as the power is turned on or the power is restored. This list informs you of
the deleted memory files.
During a power failure
The following restrictions apply to the function of the fax during a power failure or while the power is
turned off:
¶ A call can be received with the fax during a power failure. However, a call cannot be made since the
numeric buttons, One-touch Speed Dialling and Coded Speed Dialling features are not operational.
¶ A document can neither be sent nor received during a power failure.
8
113
This page is intentionally blank
Specifications
Scanning sheet size: Maximum width: 216 mm
Minimum width: 210 mm
Maximum length: 1 m
Minimum length: 148 mm
Maximum thickness: 0.13 mm
Minimum thickness: 0.08 mm
Effective image size: (when Width (A4): 208 mm
scanning)
Printing paper size: A4: 210 × 297 mm
Transmission time: G3 ECM MMR: Approx. 6 seconds*
Scanning line density: Horizontal:8.00 dots/mm
VerticalStandard: 3.85 lines/mm
Fine: 7.7 lines/mm
Scanning method: Solid state electronic scanning by contact image sensor
Recording method: Bubble Jet printing
Paper tray capacity: Maximum: 100 sheets (75 g/m2)
Maximum thickness of stacked paper: 10 mm
Paper type: Plain cut sheet paper (A4/Letter/Legal)
Paper weight: 64 to 90 g/m2
Paper thickness: 0.08 to 0.12 mm
Image memory: 21 A4-size pages* when sending (standard resolution)
15 A4-size pages* when receiving (standard resolution)
Applicable lines: Subscriber’s telephone circuit (PSTN)
Auto dial functions: One-touch Speed Dialling (Registration for 10 numbers)
Coded Speed Dialling (Registration for 20 numbers)
*
Based on the Canon FAX Standard Chart No.1, Standard mode.
115
Specifications
Ink cartridge: Type: Canon BX-3 (single cartridge ink supply)
Ink colour: Black
Print head: 64 bubble jet nozzles
Ink amount: Approx. 29 ml
Power source: 200-240 V/50-60 Hz
Power consumption: Standby: Approx. 8 W
20°C room temp.
Operation: Approx. 17 W, maximum 30 W
(based on all black copy)
Operating environment: Temperature: 10° to 32.5°C
Humidity: 20% to 80 % RH
Dimensions: 369 mm (W) × 297 mm (D) × 337 mm (H)
(including trays)
Weight: Approx. 5.5 kg
Specifications subject to change without notice.
116
Appendix
Document sizes
The following illustrations show the maximum and minimum document sizes that can be fed into the
fax.
216 mm
210 mm
148 mm
Up to a maximum of 32 minutes
for sending each page or 1 m in
length
The actual scanned image size for the fax is shown below.
2.0 mm
A4
293 mm
2.0 mm
208 mm
1.0 mm
1.0 mm
The 1.0 mm margin on either side of the sheet and the 2.0 mm margin on the top and bottom are not
picked up by the scanner.
Note
Document thickness
Maximum 0.13 mm
Minimum 0.08 mm
117
Appendix
What happens when Fax/Tel Mode is selected
Type of call
Tel. charges begin
for caller.
Telephone
Fax
Fax
Sending document
manually
Sending document
automatically
Fax answers without ringing
Fax listens for FAX TONE (For 8 sec.)
RING START
TIME
FAX TONE
detected
(Factory setting = 8 sec.)
FAX TONE is not detected
Fax starts ringing
F/T RING TIME
(Factory setting = 22 sec.)
Document received
automatically.
(FAX TONE is
detected and fax
switches to receive
mode.)
Pick up the
telephone to talk.
If you do not pick up the telephone within 22
seconds
F/T SW ACTION
Choose between: Receive (Factory setting) and
Disconnect
DISCONNECT
(Factory setting)
Fax disconnects the
call.
RECEIVE
Not all fax machines are capable of sending a
FAX TONE. For those cases if you set the F/T
SW ACTION to RECEIVE, the fax switches to
receive mode automatically and starts receiving
the document. If no document comes in it
disconnects.
To select Fax/Tel Mode
1 Press [RECEIVE MODE] until ″Fax/Tel Mode″ appears in the LCD.
To change the Fax/Tel Mode settings:
1 Press [FUNCTION].
2 Press [ ] until RX SETTINGS is displayed in the LCD. Press [START/COPY].
3 Press [ ] until FAX/TEL SWITCH is displayed in the LCD. Press [START/COPY].
4 The LCD displays RING START TIME. Press [START/COPY]. Choose between 0 and 30
5
6
7
SECONDS using the numeric buttons, then press [START/COPY] again.
The LCD displays F/T RING TIME. Press [START/COPY]. Choose between 10 and 300
SECONDS using the numeric buttons, then press [START/COPY] again.
The LCD displays F/T SW ACTION. Press [START/COPY]. Press [ ] or [ ] to choose
RECEIVE or DISCONNECT. Press [START/COPY].
Press [STOP] to finish registration and return to the standby mode.
118
Glossary
A
`
AC
Alternating current. The type of electrical
current available from a wall outlet.
Activity report
Journal of transactions, both sent and received.
ADF
Automatic Document Feeder. The document
tray on the fax holds 20 sheets of paper.
Ans. Machine Mode
If you connect an answering machine to your
fax, this option allows you to receive
documents sent from other fax machines, as
well as messages from people calling when you
are out.
Automatic dialling
Dialling fax or telephone numbers by pressing
one or three buttons. To use automatic
dialling, you must register the numbers in the
fax’s memory. See also One-touch Speed
Dialling and Coded Speed Dialling.
`
B
Bi-directional printing
The ability of the fax to print both left to right
and right to left. This printing method provides
a fast speed. See also Unidirectional printing.
bps
Bits per second. Refers to the speed with which
a fax machine sends and receives data.
Broadcasting
Transmitting documents to more than one
location (through the fax’s memory).
Bubble Jet printing
An ink-jet type printing method that heats the
ink to the boiling point to form a bubble.
When the bubble expands, there is no room
left in the nozzle for the ink and the ink is
projected onto the paper.
C
`
CCITT/ITU-TS
Formerly known as CCITT, Consultative
Committee for International Telegraph and
Telephone. CCITT has been replaced by the
International Telecommunications
Union-Telecommunications Sector (ITU-TS), a
committee created to set international
standards for telecommunications.
CNG
Calling Tone. This is a signal sent by fax
machines to identify the call as an incoming
document. When the receiving fax detects this
signal, it automatically starts to receive the fax
transmission. The majority of fax machines in
use today can send and detect CNG signals.
Coded Speed Dialling
An automatic dialling method that allows you
to dial a fax or telephone number by pressing
three buttons-[CODED DIAL] and a two-digit
code using the numeric buttons. You can
register up to 20 Coded Speed Dialling
numbers in the fax.
Cursor
The underline symbol you see on the LCD
when you register numbers and names in the
fax. Press the arrow buttons to move the
cursor.
D
`
Delayed Sending
The ability to send a document at a preset time
in the future. You do not have to be in your
office to use Delayed Sending to one or more
destinations. (You can set up only one delayed
transmission at a time on the fax)
Density control
A setting that darkens or lightens the scanning
of documents.
Dialling methods
Ways of pressing one or more buttons to
access a number to connect to an outside party
or fax machine. Dialling methods include
One-touch, Coded Speed Dialling, and Manual
(Regular).
Direct Sending
Transmitting a fax document one page at a
time without having the document scanned
into memory.
Document
The sheet of paper containing the data that
you send to or receive from a fax.
dpi
Dots per inch. A unit of measurement for
indicating a printer’s resolution.
119
E
`
Glossary
ECM
Error Correction Mode. The ability of your fax
to reduce system and line errors when sending
or receiving from another fax with ECM
capability. ECM is most effective in areas
where the telephone lines are in poor condition
or there is frequent interference on the line. Do
not use ECM if you need to send a document
quickly and you are sure the other party can
read your transmission without it (turning off
ECM also turns off MMR).
Extension
A telephone connected to the fax.
F
`
Fax Only Mode
This option allows you to use your fax only to
receive faxes automatically. If you have a
dedicated fax line, you may want to set this
mode.
Fax/Tel Mode
This option allows you to set the fax to
automatically detect whether a call is from a
fax or telephone. If the call is from another
fax, the transmission is automatically received.
If the call is from a telephone, the fax rings to
let you know, so you can pick up the handset.
With this feature, one telephone line can be
shared by both the telephone and the fax.
FINE
The setting for documents with very small
characters and lines.
G
`
G3, Group 3 fax machine
Defined by CCITT. Uses encoding schemes to
transmit image data while reducing the amount
of data that needs to be transmitted, thus
reducing transmission time. G3 fax machines
can transmit one page in less than one minute.
Encoding schemes for G3 fax machines are
Modified Huffman (MH), Modified Read
(MR), and Modified Modified Read (MMR).
`
H
HOOK
The button that engages and disengages the
telephone line.
120
I
`
Ink cartridge
The special type of ink cartridge used with
Canon Bubble Jet fax machines. The ink
cartridge for the fax includes the print head
and ink. Use the BX-3 cartridge only.
J
`
Jack
The telephone receptacles on your wall or in
your fax used to connect the fax to the
telephone line, answering machine and
extension phone.
M
`
Manual Dialling
Pressing the individual numeric buttons to dial
a fax number. Also called regular dialling.
Manual Mode
A setting that allows you to answer all
incoming telephone and fax calls. If you hear a
slow beep it indicates an incoming fax
transmission from another machine. Just press
[START/COPY] to receive the incoming fax.
Manual redialling
When you use Regular dialling, you can redial
a number manually simply by pressing
[REDIAL] on the operation panel. The last
number called is the number redialled.
Memory Sending
Scans a document into memory before the fax
dials the numbers and sends it. This method is
faster than direct sending and it allows you to
retrieve your original document immediately
after scanning.
N
`
Noise
A term applied to a variety of problems that
impair the operation of telephone lines used for
faxing.
Numeric buttons
The round numbered buttons on the operation
panel marked the same as a standard telephone
keypad. Press them to perform Manual
Dialling. You also use the numeric buttons to
enter numbers and letters when you register
numbers and names, and for entering Coded
Speed Dialling codes with two or more digits.
O
`
Glossary
One-touch Speed Dialling buttons
The rectangular buttons numbered 01 to 10 on
the operation panel, each of which may be
registered as a fax or telephone number. Once
a number is registered, you press one button to
dial the entire number.
P
`
Pause
A timing entry required for registering certain
long distance numbers and for dialling out
through some telephone systems or
switchboards.
PBX
Private branch exchange. See Switchboard.
PHOTO
The document setting you use for sending
documents with intermediate tones, such as
photographs.
Pulse
See Rotary pulse.
R
`
Redialling-automatic
When the fax you dial does not answer or a
sending error occurs, the fax waits for a
specified interval and then redials the same fax
number. You can adjust the number of redials
and the length of time between redialling.
Redialling-manual
When you use the regular dialling method, you
can quickly call the last number dialled by
pressing [REDIAL].
Reduction mode
The fax’s automatic feature that slightly
reduces the received image to allow room at
the top of the page for the sender’s ID
information. You can also reduce the size of
large incoming documents using the RX
REDUCTION option.
Resolution
The density of dots for any given output
device. Expressed in terms of dots per inch
(dpi). Low resolution causes font characters
and graphics to have a jagged appearance.
Higher resolution means smoother curves and
angles as well as a better match to traditional
typeface designs. Resolution values are
represented by horizontal data and vertical
data.
Rotary pulse
A telephone dialling system where a dial is
rotated to send pulses to the telephone
switching system. When you pulse dial, you
hear clicks. When you touch-tone dial, the
most common dialling system, you hear tones.
Rotary pulse dialling requires certain setting
adjustments.
S
`
Sender ID
The identifying information from the sender at
the top of a document including: date and
time, the sender’s fax/telephone number,
sender’s name, receiver’s name or company
name, and page number. Also called TTI or
Transmit Terminal ID.
Sending speed
The bits per second rate at which documents
are sent. See also bps.
STANDARD
A document setting for sending normal
typewritten or printed documents containing
only text and no drawings, photographs, or
illustrations.
Standby
The mode in which the fax is on and ready to
use. All operations start from standby mode
when the LCD displays the date and time.
Switchboard
Also called a PBX (Private Branch Exchange)
internal switching system. A telephone system,
usually for a large company office with many
extensions, whereby you must dial an outside
line number along with the regular telephone
or fax number. Dialling out through a
switchboard sometimes requires use of the
[REDIAL/PAUSE] button.
T
`
Timed sending
Setting the fax to transmit documents at a
preset time in the future. See also Delayed
sending.
Tone/pulse setting
The ability to set the fax to match the
telephone dialling system your telephone line
uses: touch-tone or rotary pulse.
121
Glossary
TONE
A button that allows you to temporarily switch
to touch-tone from pulse dialling. In some
countries, on-line data services may require
that you use tone dialling.
TTI
Transmit Terminal ID. See Sender ID.
U
`
Unidirectional printing
Printing in one direction only, left to right.
This printing method on the fax provides a
higher image quality but slower print speed.
See also Bi-directional printing.
122
Index
A
Activity Management Report
automatic print out of, 84
explanation, 88
Activity Report
automatic print out of, 84
errors and, 110
explanation, 87, 90, 91
turning on/off, 84
Adding
pages when sending, 50
Adjusting
pause time, 39, 85
Alarm
volume of, 83
Answering machine
connecting, 15
receiving documents and, 70
sample message, 21
using with fax, 21
Automatic
dialling methods, 36, 38
fax/tel mode, 19
receiving, 18
receiving of documents and
phone calls, 19
redialling, 60
report printout. See listing
under individual reports,
switching to automatic
receiving, 17, 18
B
Bi-directional printing, 86
Bubble-Jet cartridge
cleaning head of, 102
installing, 11
replacing, 103
Buttons,
description, 26, 27
C
Cartridge. See Bubble-Jet
cartridge
Changing
date format, 86
language of display, 86
pause time, 85
ringing time, 85
time before switching to
receiving, 85
clearing jams with, 62, 98
containing fine lines and
small type, 51
containing photographs or
illustrations, 51
containing text and
photographs, 51
darkening, 51, 83
feeding into the fax, 49
glass scanning window, 100
in memory, 71, 72
jam clearing, 62
lightening, 51, 83
maximum size of, 115
minimum size of, 115
preparing for sending, 56
received in memory, 71
storing in memory, 71
Cleaning
fax, 100
glass scanning window, 100
print head, 102
printer area, 101
Clearing document jams, 62
Coded Speed Dialling
explanation, 38
printing list of numbers
registered for, 87, 89
registering, 38
Connecting
answering machine, 15
extension phone, 15
fax to telephone line, 14
Copying 54
D
Darkening documents, 51, 83
Date
format, 86
on documents you send, 32
registering, 33
Dedicated fax line
explanation, 17
receiving documents over, 18
setting fax for use over, 18
Delayed sending, 63
Deleting. See Erasing
Density
changing, 51, 83
customising default, 83
of copies, 51
of documents you send, 51
Dialling
automatic, 56, 58
buttons. See Numeric
buttons, 56, 58
Coded Speed, 56, 58
Manual, 57
numbers that are busy. See
Redialling,
One-touch Speed, 56, 58
pauses when, 29
pulse, 16
tone, 16
Direct Sending, 56, 57
Display, 27
Message(s), 61, 71, 110
Document(s)
adding when sending, 50
automatically receiving
telephone calls and, 19,
21, 69, 70
E
ECM (Error Correction Mode)
turning on/off, 85
Erasing
names when registering, 31
Error,
Activity reports and, 88
messages and codes, 110
Extension phone,
connecting, 15
jack, 15
F
Facsimile numbers
dialling, 56
printing list of registered, 87,
88, 89
registering your, 34
Fax Only Mode, 18
Fax/Tel Mode,
explanation, 17
setting fax for use, 19
using, 19, 69
Feeding documents into fax, 49
Frequently Asked Questions,
104
H
Handset,
attaching, 6
connecting, 15
123
Index
I
Ink
cartridge. See Bubble-Jet
cartridge
Installing
answering machine, 15
Bubble-Jet cartridge, 11
extension phone, 15
paper, 7
J
Jack
answering machine, 15
extension phone, 15
telephone line, 14
Jams
document, 62, 98
paper, 98, 99
L
Lightening documents, 51, 83
Loading paper, 7
M
Manual Mode
receiving, 20, 68
redialling, 60
Maximum
document size, 115
number of documents in
memory, 71
Memory,
capacity when receiving, 71
capacity when sending, 59
printing documents received
in, 72
Memory Sending,
explanation, 56
using, 59
Minimum,
document size, 115
Multiple locations,
sending, 66
N
Name
entering when registering, 30
on documents you send, 32
124
registering, 34
Numeric buttons,
dialling with, 57
entering names with, 30
O
One-touch Speed Dialling
explanation, 56
printing list of numbers
registered for, 87, 88
registering, 36
using, 58
P
Packing list, 3
Paper
loading, 7
non-usable types for sending,
48
recommended type for
receiving, 7
size settings, 7, 86
Pause time
changing length of, 85
explanation, 29
Photo
setting, 51
Power
cord, 6
requirements, 6
Precautions vi
Preparing Documents, 50
Printer
Bubble-Jet cartridge and, 9
cleaning, 101
testing, 13
Printing
documents received in
memory, 72
list of customs settings, 87,
90
numbers registered for
automatic dialling, 87, 88,
89
reports, 87
Pulse dialling,
setting, 16
switching to tone dialling
from, 16
R
Receiving
answering machine and, 70
automatically, 17
dedicated, 17, 18
documents and telephone
calls automatically, 17, 69
ECM, 85
manually, 17, 20, 68
memory, 71
switching from manual to
automatic, 17, 69
Redialling
automatic, 60
manual, 60
setting, 85
Registering
Coded Speed Dialling, 38
date, 33
entering a name when, 30
One-touch Speed Dialling, 36
time, 33
your facsimile number, 34
your name, 34
Reports
Activity, 87
Activity Management, 88
printing out, 87
Ring Time, 85
S
Sending
Activity Report when, 90
adding pages while, 50
at a preset time, 63
clearing document jams
when, 62
darkening documents when,
51, 83
Delayed, 63
Direct, 57
documents with fine lines, 51
documents with
photos/illustrations, 51
ECM, 85
feeding documents for, 49
lightening documents when,
51, 83
Manual, 57
Memory, 59
non-usable types of
documents when, 48
Index
preparing documents before,
48
redialling and, 60
to more than one location,
66
Setting up,
packing list for, 3
power requirements for, 6
telephone line setting, 16
Specifications, 115
Switching (fax/tel)
settings for, 19
time, 85
using, 19, 69
Symbols, 30
T
Telephone
extension, 15
extension jack, 15
line jack, 14
line setting for, 16
Testing printer, 13
Timer. See Delayed sending,
Tone dialling,
setting, 16
switching to temporarily, 26
TTI, 32, 83
V
Volume
alarm, 83
calling, 83
control, 83
keypad, 83
phone, 83
125
his page is intentionally blank