1
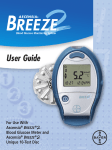
Diabetes Care System
USER GUIDE
Ascensia BREEZE ™ and
Ascensia AUTODISC ™
Unique 10-Test Disc
®
®
Introduction:
Thank you for choosing the Ascensia® BREEZE ™
Diabetes Care System! We are proud to be your
partner in helping you to manage your diabetes. We
understand that people who regularly check their
blood glucose levels want a meter that is simple,
straightforward and easy to use. As you use your
Ascensia® BREEZE ™ System, you will appreciate the:
• Ease of running a test, and discarding a used test strip.
• Use of a 10-Test Disc—which means no individual test
strips to fumble with.
• User-friendly design—buttons make recalling your
results or setting the time as easy as making a
telephone call.
• Ease of recalling a 14-Day Average.
This ease of use comes with the added bonus of the
reliability that you count on from Bayer.
This user guide shows you how to use your Ascensia®
BREEZE ™ Diabetes Care System. It will answer any
questions you might have and guide you through the
testing process. It is here to help you!
This User Guide is divided into two sections. Part 1 —
Everyday Use will guide you through the basic use of
the meter. Part 2 — Beyond Everyday Use will guide
you through special features—such as how to change
the time and the date, or where to find more help
with this product.
i
A look at your
Ascensia BREEZE Meter…
Release Button:
Press to release
and discard
used test strip.
Battery Holder:
(side of meter)
Holds one CR2025
lithium battery.
On/Off Button:
Use this button to
manually turn the
meter On or Off.
Meter Handle:
Use this handle to
push out a test
strip and
automatically turn
on the meter.
Screen: This is
where your test
results will be
displayed.
Data Port:
(side of meter)
Insert cable
here to allow
communication
between meter
and a personal
computer.
Button Door:
Open to expose
meter buttons.
Fold this page out for easy reference when using
your user guide.
ii
Up/Down
Buttons:
On/Off Button:
Use this button to
manually turn the
meter On or Off.
Use these buttons
with the Memory
button to see your
results or use with
the Set-Up button
to change the
time, date, etc.
Memory Button:
Use this button to
view your blood
glucose results
stored in memory
and to view your
14-day average.
Accept
(OK) Button:
Use this button to accept
changes made
in the Set-Up
mode.
Set-Up Button:
Use this button to
enter the Set-Up
mode and easily
change the time,
date or other
features.
(Button door open)
Simply place the easy reference sticker on the
Button Door as shown. See sheet of stickers
provided in your meter package and select the
language of your choice.
iii
Release Button
Test Strip Slot
Open Latch
(back of meter)
Press in and
pull up to
open meter.
Meter Handle
iv
Testing Materials:
10-Test AUTODISC ™
(Contains ten test strips.)
Normal Control Solution
MICROLET ® Adjustable
Lancing Device and Lancet
Important Information:
Caution: Before using any product to test your blood
glucose, read all instructions carefully and practice the test.
A full display, as shown here, indicates
that all characters in the display are
working properly. To view the full
display, pull the meter handle all the way
out. Compare your meter to the display
shown here. If there is a difference,
please see Troubleshooting page 44.
v
Table of Contents:
Everyday Use
Inserting a 10-Test AUTODISC . . . . . . . . . . . . . . . . . . . . . . . . . . . . . . . . 2
Running a Blood Glucose Test . . . . . . . . . . . . . . . . . . . . . . . . . . . . . . 5
Running a Control Test . . . . . . . . . . . . . . . . . . . . . . . . . . . . . . . . . . . . 12
Beyond Everyday Use
Recalling Test Results . . . . . . . . . . . . . . . . . . . . . . . . . . . . . . . . . . . . . .
Setting Time, Date and Other Features . . . . . . . . . . . . . . . . . . . . . . .
Transferring Test Results to a Computer . . . . . . . . . . . . . . . . . . . . . .
Cleaning Your Meter . . . . . . . . . . . . . . . . . . . . . . . . . . . . . . . . . . . . . .
Replacing the Battery . . . . . . . . . . . . . . . . . . . . . . . . . . . . . . . . . . . . .
17
19
26
27
28
Technical Information
Specifications . . . . . . . . . . . . . . . . . . . . . . . . . . . . . . . . . . . . . . . . . . . . 31
Performance Evaluations . . . . . . . . . . . . . . . . . . . . . . . . . . . . . . . . . . 32
Multiple Site Testing Evaluation . . . . . . . . . . . . . . . . . . . . . . . . . . . . . 37
Solving Problems
Solving Problems . . . . . . . . . . . . . . . . . . . . . . . . . . . . . . . . . . . . . . . . . .
Troubleshooting and Error Codes . . . . . . . . . . . . . . . . . . . . . . . . . . . .
Customer Service . . . . . . . . . . . . . . . . . . . . . . . . . . . . . . . . . . . . . . . . . .
Replacement Items . . . . . . . . . . . . . . . . . . . . . . . . . . . . . . . . . . . . . . . .
5-Year Limited Warranty . . . . . . . . . . . . . . . . . . . . . . . . . . . . . . . . . . .
39
40
45
46
47
The Ascensia® BREEZE ™ Diabetes Care System (meter, test strips and
controls) is intended for self-testing by persons with diabetes, and by
healthcare professionals, to monitor the level of glucose in whole
blood. The Ascensia® BREEZE ™ System is specific for glucose and has
been referenced to plasma/serum glucose.
1
Everyday Use
INSERTING A 10-TEST AUTODISC ™:
WARNING: Never open
the meter with the
meter handle pulled out.
Open Meter
1. Hold the meter with
the display screen
down. Open the meter
by pressing down on
the back edge of the
open latch and then
pulling the front cover
up.
2. Open the new 10-test disc
package. Check the expiration
date on the disc.
2
Insert Disc
3. Insert a new 10-test
disc—yellow arrow
(bumpy side) up. The
arrow may point in any
direction.
Close Meter
4. Close the meter and
snap it shut. Keep the
meter flat.
J Helpful Hint: The meter must be kept flat when closing.
If the meter is not kept flat, the disc may move and become
damaged and you may waste test strips.
3
Counting Number of Strips Left
Your Ascensia® BREEZE ™
Meter will automatically count
down the number of test strips
you have left.
To see this count when the
meter is off, press the
button.
Note: This count is reset to
10 every time you open the
meter. To keep an accurate
count, open the meter only
when all 10 of the test
strips have been used in the
10-test disc.
Your meter will also tell you
when you need to insert a
new 10-test disc. It will do this
by showing you a picture of a
disc being inserted into the
meter.
4
RUNNING A BLOOD GLUCOSE TEST:
1. Wash your hands well with soap and
warm water. Rinse and dry
thoroughly.
2. Remove the endcap from the
MICROLET ® Adjustable Lancing
Device. (See MICROLET ® Device
package insert for complete
instructions.)
3. Insert lancet firmly until it
comes to a full stop. This will
“cock” the device.
5
4. Twist off lancet cap and
replace the endcap.
Push out Test Strip
Caution: Your meter is designed
to push out one test strip at a
time. Do not attempt to push
out a new test strip with one
already showing.
5. Your Ascensia® BREEZE ™ Meter
was designed with a special,
easy-to-use “Pull and Push” design. Here’s how it works:
Hold the meter comfortably in one hand. Firmly grasp the
Meter Handle with the other hand (shown here). Now, just
“Pull and Push”—“Pull” the handle out until it stops and
“Push” it back in until it stops again.
6
Note: This will
automatically turn your
meter on if it is not already on. For regular,
everyday use you don’t
have to worry about
turning it on— just “Pull
and Push.”
Note: The release
button is UP, a test strip
is pushed out and a
flashing blood drop
appears on the screen.
The meter is now ready
to run a blood glucose
test.
6. Stick your finger with
the MICROLET ® Device
and form a small round
drop of blood.
7
Test
7. Your test strip is like a
straw; it sips in a sample
of blood. Move the
entire front edge of the
test strip to touch the
edge of the blood drop.
The blood is
automatically pulled
into the test strip and
fills the test strip.
Hold the test strip in
place until the meter
beeps, and three dashes
appear on the screen,
then move it away. By
doing this, you will
make sure the test strip
is completely filled.
8
8. While the meter calculates
your blood glucose level,
you will see a sequence of
dashes on the screen.
After 30 seconds, your test
result will appear on the
screen.
9
9.To release the used test strip,
hold the meter with the test
strip pointing down over a
waste container. Press the
release button. Make sure
the heel of your hand is not
against the meter handle.
Note: If you block the meter
handle with your hand, the
test strip may not release
properly.
10.Press the
button to turn the meter off.
If you forget to turn your meter off, the meter will turn
off automatically after three minutes. This will save
battery power.
Caution: If your glucose result is below 2.8 mmol/L
(50 mg/dL), above 13.9 mmol/L (250 mg/dL) or
if the meter shows “HI” or “LO,” test again. If your
glucose level is still below 2.8 mmol/L (50 mg/dL),
above 13.9 mmol/L (250 mg/dL), or if the meter again
shows “HI” or “LO,” it may indicate a potentially serious
medical condition.
If this is the case: We recommend you consult your
physician or healthcare professional immediately.
Caution: Any changes in medication based on Ascensia®
BREEZE ™ blood glucose results without the advice of a
physician or healthcare professional is not recommended.
10
For best results:
• Blood is pulled IN the test
strip not dropped ON.
• Do not allow blood to
run down into the meter.
• Do not add more blood after
the meter beeps.
11
RUNNING A CONTROL TEST:
There are times when you will want to do a quality control
test so you know that your system is working properly. You
may also want to do a control test to check the way you do
your test. Simply follow these steps:
Note: Look on the bottom flap of
the box of test strips to find the
control range.
Push out Test Strip
1. Hold the meter comfortably in one hand. Firmly grasp the
Meter Handle with the
other hand (shown
here). Now, just “Pull
and Push”—“Pull” the
handle out until it stops
and “Push” it back in
until it stops again.
12
Note: The release button is UP, a test strip is pushed out
and a flashing blood drop appears on the screen. The
meter is now ready to run a control test.
2. Squeeze a small drop of control solution onto a
nonabsorbent surface (such as a clean piece of wax paper).
Do not apply control solution to the test strip directly from
the bottle.
Note: The control solution contains a red dye and
may stain.
Test
3. Move the entire front
edge of the test strip to
touch the edge of the
drop of control solution.
The control solution is
automatically pulled
into the test strip.
Important: Hold the test
strip in place until the
meter beeps, and three
dashes appear on the
screen, then move it
away. By doing so, you
will make sure the test
strip is completely filled.
13
4. While the meter calculates
your control test result, you
will see a sequence of
dashes on the screen.
After 30 seconds, your
control test result will
appear on the screen.
Compare this control test
result with the range
printed on the bottom flap
of the test strip carton.
Note: You will want to
“mark” your control test
now so that it will not be
included in your 14-day
average. (See next page.)
14
Marking a Control Test
Marking a test result as a control test excludes it from the
14-day average.
You must mark the result immediately after the test is
performed—while the result is still displayed on the screen.
To do this, follow these steps:
5. Open the Button Door.
Press the
a control.
button to mark as
The “Control” marker looks
like this:
Press
to accept.
6. To release the used test
strip, hold the meter with
the test strip pointing down
over a waste container. Press
the release button. Make sure
the heel of your hand is not
against the meter handle.
Note: If you block the meter
handle with your hand, the
test strip may not release
properly.
7. Press the
off.
to turn your meter
15
Marking a Deleted Blood Test
Marking a test result as a deleted blood test excludes it from
the 14-day average.
You must mark the result immediately after the test is
performed—while the result is still displayed on the screen.
To do this, follow these steps:
1. Open the Button Door.
2. Press the
as deleted.
button to mark
3. The “Delete” marker looks
like this:
4. Press
to accept.
5. Press the
meter off.
16
to turn your
Beyond Everyday Use
RECALLING TEST RESULTS:
Your Ascensia® BREEZE ™
Meter can store up to 100 test
results in its memory. This
makes it easy to see your
earlier blood glucose test
results. To view those results:
1. Open the Button Door.
2. Press the
button.
The meter will now show
you the most recent test
result.
3. Press the
button to see
all of your stored results.
J Helpful Hint: Your meter can store up to 100 test results.
If there are no stored test results in memory, the meter will
tell you this by showing three dashes. When the memory is
full, the meter will remember the newest result and discard
the oldest.
17
Viewing Your 14-Day Average
Your Ascensia® BREEZE ™ Meter
also keeps a 14-day average of
your blood glucose results for
you (
). To see this average, simply follow these steps.
1. Open the Button Door and
press the button. The
meter will show you your
last result.
2. Press the button again to
see your blood glucose
average for the last 14 days.
You may press the button
again to review your stored
test results. Note: If there are
no results in memory, the meter will show you three dashes.
Clearing Stored Test Results
To clear the results from the
meter, follow these few steps:
1. Open the Button Door.
2. Press the button.
3. Press again and hold the
button.
4. While holding the button, press and hold the
button.
5. Hold both buttons together until all three dashes are
continuously lit (for about 3 seconds).
If you change your mind and do not want to clear results, simply
let go of the buttons before all three dashes have been lit.
18
SETTING TIME, DATE AND OTHER FEATURES:
J Helpful Hint: You may
press the
button at any
time during set-up to turn
the meter off. Just remember
to press the
button first
to store your changes!
Setting the Time
1. Open the Button Door.
2. Press
.
3. Press
or
the hour.
to change
Press
to accept and
move on.
4. Press
or
the minutes.
to change
Press
to accept and
move on.
19
5. Press
or
or PM.
to select AM
Press
to accept and
move on.
Setting the Date
Note: If you have just set the
time, skip ahead to step 4.
1. Open the Button Door.
2. Press
.
3. Press
until you see the
“day” icon flashing.
4. Press
or
the day.
to change
Press
to accept and
move on.
20
5. Press
or
the month.
to change
Press
to accept and
move on.
6. Press
or
the year.
to change
Press
to accept and
move on.
21
Setting Buzzer Level
Your Ascensia® BREEZE ™ Meter has an easy-to-use volume
control for the buzzer. Here are the three different buzzer
levels:
high
low
off
Note: If you have just set the date, skip ahead to step 4.
1. Open the Button Door.
2. Press
.
3. Press
until you see the
“buzzer” icon.
4. Press
or
to change
the buzzer level.
Press
to accept and
move on.
22
Setting Units-of-Measure
Important: Test results are shown in either mmol/L or mg/dL.
The mmol/L results will always include a decimal point. The
mg/dL results do not include a decimal point.
5.3
Example:
or
95
Your Ascensia® BREEZE ™ Meter comes with the units-ofmeasure preset. However, you may change the units-ofmeasure if you wish.
Note: If you have just set the buzzer level, skip ahead to
step 4.
1. Open the Button Door.
2. Press
.
3. Press
until you see a
“unit-of-measure” icon.
4. Press
or
to choose
units-of-measure.
Press
to accept and
move on.
23
Setting Time Format (12- or 24-hour Clock)
Your Ascensia® BREEZE ™ Meter will let you choose either a
12-hour (
) or a 24-hour time setup (
).
Note: If you have just set the units-of-measure, skip ahead to
step 4.
1. Open the Button Door.
2. Press
.
3. Press
until you see the
“time format” icon.
4. Press
or
to set 12- or
24-hour clock.
Press
to accept and
move on.
24
Setting Date Format
Your Ascensia® BREEZE ™ Meter will let you set the day and
month option on your meter. You can choose to set it as
“month/day” (
) or as “day/month” (
).
Note: If you just set the time format, skip ahead to step 4.
1. Open the Button Door.
2. Press
.
3. Press
until you see the
“date format” icon.
4. Press
or
date format.
Press
to set the
to accept.
25
TRANSFERRING TEST RESULTS TO A COMPUTER:
You can transfer test results from
the Ascensia® BREEZE ™ Meter to
a computer, where they can be
summarized in a report with
graphs and tables.
To make use of this feature, you
will need the Ascensia™
WinGlucofacts ® or
Ascensia™ WinGlucofacts ® Professional software, and
Ascensia™ Data Cable.
For more information relating to these softwares, contact our
Diabetes Helpline: 1-800-268-7200 or visit our website at
www.ascensia.ca.
26
CLEANING YOUR METER:
Your Ascensia® BREEZE ™ Meter can be
cleaned using a moist (not wet) lint-free
tissue with a mild detergent or disinfecting solution (1 part bleach mixed with 9
parts water). Wipe both the outside and
inside of the meter, taking care to keep
detergent or disinfecting solution from
running down into the test strip slot. Wipe
dry with a lint-free tissue after cleaning.
If you do get moisture in the test strip
slot, wick it away with a corner of a tissue
as shown.
WARNING: Potential Biohazard!
Healthcare professionals or persons using this system on multiple
patients should be aware of the following and should follow the
infection control procedure approved by their facility.
All products or objects which come into contact with human
blood, even after cleaning, should be handled as if capable of
transmitting viral diseases.
The user should follow the recommendations for prevention of
blood-borne transmissible diseases in healthcare settings, as
recommended for potentially infectious human blood specimens
in National Committee for Clinical Laboratory Standards,
Protection of Laboratory Workers from Instrument Biohazards
and Infectious Disease Transmitted by Blood, Body Fluids and
Tissues: Approved Guideline. NCCLS Document M29-A [ISBN
1-56238-339-6] NCCLS, 940 West Valley Road, Suite 1400, Wayne,
Pennsylvania 19087-1898, USA, 1997. This document has
complete information on the topic of user protection and can
be used as background material for instruction.
27
REPLACING THE BATTERY:
Your Ascensia® BREEZE ™ Meter uses one 3-volt lithium battery
(CR2025). A battery will already be installed in the meter when
you buy it.
When it is time to put a new
battery in the meter, the meter
will tell you by displaying a
flashing battery on the screen.
You will not erase test results in
the meter’s memory when you
change the battery. You will,
however, need to reset the
clock (see pg. 19).
Caution: If you have a low
battery in your meter, you
should replace the battery
within approximately 20
readings or within one week.
Note: When battery life is very low, the display will show only a
battery icon. When this occurs, the meter will not allow you to
run a test until the battery is changed. This is so you always
receive the most accurate results possible. When battery life has
completely ended, nothing will show on the display and the
meter will not respond.
Things To Remember
WARNING: Keep battery away from children! Lithium batteries
are poisonous!
If swallowed, immediately contact your physician or poison
control center. Dispose of old batteries properly.
28
To replace the battery, follow these steps:
Note: A replacement battery (CR2025) can be found at most
pharmacies.
1. Hold the meter with the display screen down. Open the
meter by pressing on the open latch and pulling up.
2. Slide out the battery holder.
Note: You must
open the meter
first in order to
remove the
battery holder.
DO NOT PRY the
battery holder
out!
3. Remove the old
battery. The
battery should be
removed from
the holder with
your finger.
29
4. Snap 1 new
battery (CR2025)
firmly in the
holder with the +
side up.
5. Gently slide the battery
holder back into the
battery compartment.
Make sure battery
holder is pushed all the
way in.
6. Close the meter.
7. Reset the meter’s time
(see pg. 19).
You are now ready to resume testing!
30
Technical Information
SPECIFICATIONS:
Test:
Capillary blood glucose referenced to
plasma/serum glucose values
Calibration:
Meter is automatically calibrated each
time a new test strip disc is used.
Sample Size:
Approximately 2.5–3.5 µL
Test Range:
0.6–33.3 mmol/L (10–600 mg/dL)
Test Time:
30 seconds
Memory Feature:
Meter stores 100 test results.
Normal Operating
Temperature:
10° to 40°C (50° to 104°F)
Humidity:
10 to 80% RH
Power Source:
One 3-volt lithium battery (CR2025)
31
PERFORMANCE EVALUATIONS:
Precision
1. Laboratory Precision: To assess the repeatability (within-run
precision) of Ascensia® BREEZE ™, 100 blood glucose
readings (10 readings on each of 10 instruments) were
obtained with venous blood specimens at five glucose
concentrations. The following table summarizes the mean
and pooled within-meter %CV at each level.
Mean
%CV
2.9 mmol/L 7.4 mmol/L 9.1 mmol/L 14.7 mmol/L 23.7 mmol/L
8.9%
4.1%
4.4%
3.8%
2.9%
2. Control Testing Precision: An imprecision study of the
Ascensia® BREEZE ™ System was conducted at two diabetes
clinics. In each location, 50 lay persons with diabetes tested
the low, normal and high control solutions in duplicate
using the meter system. A different lot of test strips was
used in each of the two locations. The table below shows
the total standard deviations (SD) and coefficients of
variation (CV), which include the within run and between
run / day variations.
Low Control Solution
Total
Mean
SD
(mmol/L) (mmol/L)
Total
CV
(%)
Strip
Lot
Operator
No. of
Assays
A
Lay User (n=50)
100
4.272
0.267
6.2
B
Lay User (n=50)
100
4.100
0.244
6.0
32
Normal Control Solution
Total
Mean
SD
(mmol/L) (mmol/L)
Total
CV
(%)
Strip
Lot
Operator
No. of
Assays
A
Lay User (n=50)
100
8.394
0.400
4.8
B
Lay User (n=50)
100
8.317
0.356
4.3
High Control Solution
Total
Mean
SD
(mmol/L) (mmol/L)
Total
CV
(%)
Strip
Lot
Operator
No. of
Assays
A
Lay User (n=50)
100
18.706
0.961
5.1
B
Lay User (n=50)
100
18.867
0.800
4.2
Accuracy
1. Bayer Accuracy Evaluation:
To assess the accuracy of the Ascensia® BREEZE ™ System,
102 fresh fingerstick specimens from people with diabetes
were tested with the Ascensia® BREEZE ™ (2 readings per
fingerstick) and the YSI 2300 STAT Plus Glucose Analyzer.
The glucose concentration of the samples ranged from 2.3
to 30.1 mmol/L with an average of 9.9 mmol/L. The range
of hematocrits was 29% to 55% with an average of 40%.
33
Ascensia® BREEZE ™ Plasma Glucose (mmol/L)
35
30
y=x
25
20
15
10
5
0
0
5
10
15
20
25
30
35
YSI Plasma Glucose (mmol/L)
Weighted Deming Agreement Statistics / Pearson correlation
95% Confidence Interval
N
Y=
Slope
204
1.07x – 0.21
1.03 to 1.10
/
Intercept
R
–0.48 to 0.06
0.983
2. Professional / Lay User Evaluation: A patient use
evaluation was conducted at two diabetes clinics. Lay users
with diabetes learned to use the meter system by reviewing
the meter user guide. After reviewing the instructions, the
users performed fingersticks and glucose assays using the
Ascensia® BREEZE ™ System. Two test strip lots were
evaluated, one at each of the two clinics. After the user’s
self test, the attending healthcare professional performed
an Ascensia® BREEZE ™ System assay from the lay user’s
fingerstick. A capillary blood sample was then collected for
34
comparative laboratory glucose and hematocrit
determinations. The glucose concentrations of the 196
samples ranged from 2.9 to 28.2 mmol/L with an average of
8.9 mmol/L. The range of hematocrits was 32 to 55%, with
an average of 45%.
A. Lay User Results
Ascensia® BREEZE ™ Result (mmol/L)
35.0
30.0
y=x
25.0
20.0
15.0
10.0
5.0
0.0
0.0
5.0 10.0 15.0 20.0 25.0 30.0 35.0
Laboratory Plasma Glucose Result (mmol/L)
o = Lot A
+ = Lot B
35
B. Healthcare Professional Results
Ascensia® BREEZE ™ Result (mmol/L)
35.0
y=x
30.0
25.0
20.0
15.0
10.0
5.0
0.0
0.0
5.0
10.0 15.0 20.0 25.0 30.0 35.0
Laboratory Plasma Glucose Result (mmol/L)
o = Lot A
+ = Lot B
Comparison of Meter to Laboratory Results †
95% Confidence Intervals
Slope
/
Intercept
Lot
Opr.
N
Y=
A
Lay
HCP
Lay
HCP
100
100
96
96
0.85x + 0.72
0.84x + 0.65
1.02x – 0.58
1.03x – 0.61
0.81 to 0.89
0.80 to 0.88
0.96 to 1.08
0.99 to 1.08
0.38 to 1.06
0.33 to 0.96
–1.04 to –0.13
–0.94 to –0.29
0.98
0.98
0.97
0.98
All
392
0.91x + 0.21
0.89 to 0.94
0.01 to 0.40
0.97
B
A&B
R
† Weighted Deming regression, weighted linear correlation coefficient
Opr. = Operator; Lay = Lay User; HCP = Healthcare Professional
36
MULTIPLE SITE TESTING EVALUATION:
Forty-one persons with diabetes, in steady state for glucose,
performed self-capillary blood glucose assays using the
Ascensia® BREEZE ™ System and one test strip lot (Lot A). A
fingerstick was performed with the MICROLET ® Adjustable
Lancing Device. Samples from the palm, forearm, thigh and
abdomen were obtained using the MICROLET ® VACULANCE
Lancing Device. Ascensia® BREEZE ™ results from the multiple
sites were compared to those obtained from the finger. The
blood glucose range for the fingerstick measurements was
3.3 to 13.6 mmol/L, with an average of 7.5 mmol/L. The
hematocrit range was 38 to 53%, with an average of 45%.
20
B. Results from Forearm (n = 30)
y=x
15
10
5
0
0
5
10
15
Ascensia® BREEZE ™
Finger Stick Result (mmol/L)
20
Ascensia® BREEZE ™ Forearm Result (mmol/L)
Ascensia® BREEZE ™ Palm Result (mmol/L)
A. Results from Palm (n = 36)
20
y=x
15
10
5
0
0
5
10
15
20
Ascensia® BREEZE ™
Finger Stick Result (mmol/L)
37
20
y=x
15
10
5
0
0
5
10
15
D. Results from Thigh (n = 32)
Ascensia® BREEZE ™ Thigh Result (mmol/L)
Ascensia® BREEZE ™ Abdomen Result (mmol/L)
C. Results from Abdomen (n = 32)
y=x
20
15
10
5
0
0
20
Ascensia® BREEZE ™
Finger Stick Result (mmol/L)
5
10
15
20
Ascensia® BREEZE ™
Finger Stick Result (mmol/L)
Comparison of Multiple Site to Fingertip Results†
Site
Opr.
N
Y=
Palm
Forearm
Abdomen
Thigh
Lay
Lay
Lay
Lay
36
30
31‡
32
0.95x + 0.51
1.01x + 0.57
0.92x + 0.98
1.14x – 0.21
95% Confidence Intervals
Slope
/
Intercept
0.77 to 1.13
0.82 to 1.19
0.79 to 1.05
0.92 to 1.37
–0.70 to 1.71
–0.59 to 1.73
0.05 to 1.91
–1.81 to 1.40
R
0.92
0.93
0.97
0.91
† Weighted Deming regression, weighted linear correlation coefficeint
‡One outlier excluded from statistics, but included in data plot
Opr. = Operator; Lay = Lay User;
38
Solving Problems
PROBLEM SOLVING:
You can solve many of the problems you might have by
working through this section.
1. Do you have a 10-test disc in the meter? Yes____ No_____
No? (see pg. 2)
2. Does it contain new test strips? Yes____ No_____
No? (see pg. 2)
3. Is the 10-test disc within its expiration date?
Yes_____ No______
No? (see pg. 2)
4. When you “Pull and Push” the meter handle, are you
making sure you “Pull” all the way out and “Push” all the
way in?
Yes____ No_____
No? (see pg. 6)
5. Do you need to replace the battery? Yes____ No_____
Yes? (see pg. 28)
6. Is the battery holder pushed all the way into the battery
compartment? Yes____ No_____
No? (see pg. 30)
39
TROUBLESHOOTING AND ERROR CODES:
When you have a problem or a question concerning what
you see on your screen, the following may be helpful.
What You See
40
What It Means
What You Do
Test result is below
0.6 mmol/L (10 mg/dL).
Repeat test and make sure
test strip is completely filled.
If LO appears again, contact
your physician or healthcare
professional (HCP).
Test result is above
33.3 mmol/L (600 mg/dL).
Wash your hands and test
site. Repeat the test. If HI
appears again, contact
your physician or HCP.
You have not pushed
the meter handle all the
way in.
Push the meter handle in
until it clicks. You must push
the handle all the way in
and see the flashing blood
drop before you touch the
strip to the blood drop.
The 10-test disc is out of
test strips.
Insert a new 10-test disc.
The meter will mark a test
result with a thermometer
and an X if the meter is
too cold or too hot when
the test is performed. The
result will not be included
in any averages calculated.
Test only when the meter
temperature is between
10°C and 40°C (50°F and
104°F).
What You See
What It Means
What You Do
Low Battery icon flashes if
battery power is low.
Replace battery within 20
readings or within one
week.
Battery life has ended.
Replace the battery.
Meter cannot perform
automatic calibration,
and you must enter
the Program Number
manually.
Check test strip disc
or carton for Program
Number (P#). Use the
or
to select the
correct number and press
to accept.
Temperature is either too
hot or too cold.
Allow the meter to reach
room temperature.
Test strip removed during
the test, or release button
pressed during the test.
Take care to not press
release button or remove
test strip during test.
Release used test strip and
repeat test (see pg. 8).
The meter is open when
the meter handle is pulled.
Close meter and push
handle in.
41
What You See
42
What It Means
What You Do
Meter has detected an
error; accurate test result
not possible.
• You may have applied
blood too early to the test
strip. Repeat test and wait
until you see the flashing
blood drop to apply blood.
• There might also be
moisture on the test strip
guide. Clean meter if
needed and dry
thoroughly (see pg. 27).
Repeat test.
Meter has detected an
error; accurate test result
not possible.
• Test strip is not
completely filled. Release
used test strip and repeat
test. (see pg. 8) or
• 10-test disc may have been
damaged due to intense
heat or moisture exposure.
Replace 10-test disc, using
a new box if necessary.
There was a problem filling
the test strip completely
full.
Review pg. 8, and repeat
test.
Your Blood Glucose Level is
very high or meter error.
Turn meter off, then on
using
. Retest. If error
appears again, call your
physician or healthcare
professional (HCP). Your
blood glucose may be
above 55.5 mmol/L (1500
mg/dL). If the problem is
with the meter and cannot
be corrected, contact the
Bayer Diabetes Helpline
(see pg. 45).
What You See
What It Means
What You Do
E11 or higher
Meter Malfunction
Turn meter off, then on
using
. Retest. If error
remains, contact the
Bayer Diabetes Helpline
(see pg. 45).
The display goes 1. You may have
blank when the
accidentally pressed
meter is turned
the
button.
on.
2. Meter will turn off after
3 minutes without use or
15 minutes of no use
while waiting for you to
apply blood or control
solution. This is a normal
expected action that
saves battery life.
Meter will not
turn on.
1. Battery life has ended.
2. Battery holder is loose or
battery is installed + side
down.
1. Not enough blood.
Meter fails to
start countdown
after blood is
2. The inside of your meter
applied.
may be dirty, or foil
from the 10-test disc
may be lodged in the
front of the meter.
1. Press the
button.
2. Press the
button.
1. Replace Battery
(see pg. 28).
2. Check the battery and
the battery holder to be
sure they are tightly in
place and correctly
installed (see pg. 28). If
display is still blank,
replace battery (CR2025).
1. Discard used test strip.
Retest using a round
drop of blood.
2. Clean inside of meter
(see pg. 27). Retest.
43
What You See
What It Means
What You Do
Control Test
result is out
of range (too
high or too
low).
• Control solution is past
expiration date or is past
the 6-month open uselife date.
• 10-test disc is past
expiration date.
• Deteriorated test strip
due to heat or exposure
to moisture.
• Control solution not at
room temperature.
• Not enough control
solution drawn into test
strip.
Run another control test.
If still out of range, retest
with a new 10-test disc and
control solution with an
acceptable expiration date
and open use-life date. If
still out of range, contact
the Bayer Diabetes
Helpline (see pg. 45).
Meter shows
Your meter may be dirty.
dashes before
blood is applied.
Clean meter (see pg. 27). If
you continue to experience
difficulty, contact the Bayer
Diabetes Helpline (see
pg. 45).
Some display
This may affect the way
segments do not you see your results.
appear to be
working when
the meter
handle is all the
way out.
If there is a difference in
your meter’s display and
the one shown on page v,
contact the Bayer Diabetes
Helpline (see pg. 45).
Invalid test result.
44
Discard strip and retest.
CUSTOMER SERVICE:
If a problem arises, work through the Solving Problems
section (see pg. 39). You may easily find your solution there.
If you are still having trouble, please call our Bayer Diabetes
Helpline. We have friendly, knowledgeable people who are
there to help 12 hours a day, 7 days a week (9 – 9 EST).
In Canada, call toll free: 1-800-268-7200
Important:
• Always speak with a customer service representative
before returning your meter for any reason. They will be
able to provide information that can help solve your
problem quickly.
• Have your Ascensia® BREEZE ™ Meter ready for testing
when you phone. It would also be helpful to have a
bottle of Ascensia® AUTODISC ™ Normal Control Solution
with you.
• Fill out the following check list before you call:
Check List:
1. The meter serial number
2. Date and time the problem occurred
3. I have tested with Normal Control
Yes
No
The Normal Control result was:
Lot Number
Expiration Date
4. Please also give the Lot Number and Expiration Date of the
test strip disc currently being used. This information is
printed on the test strip disc and the test strip disc box.
Lot Number
Expiration Date
45
REPLACEMENT ITEMS:
If you call or write for supplies, please include the number
with the name of the replacement part or product.
Replacement Parts
Part Number*
40030035
99A61189
50184270
Item
1 lithium battery (CR2025)
(available at most stores)
Duracell Inc. DL2025
Panasonic Industrial Company CR2025
Renata CR2025
Ascensia® BREEZE ™ User Guide
Ascensia® BREEZE™ Quick Reference Guide
You can obtain these parts in Canada from:
Bayer Inc.
Healthcare Division
77 Belfield Road
Toronto, Ontario M9W 1G6
Replacement Products
Number
3611A
3628A
3642A
3643A
6540B
6546A
6550A
Product Name
Ascensia® AUTODISC ™ Test Strip Discs (box of 50)
Ascensia® AUTODISC ™ Test Strip Discs
(box of 100)
Ascensia® AUTODISC ™ Normal Control Solution
Ascensia® AUTODISC ™ Low and High
Control Solutions
MICROLET ® Adjustable Lancing Device
MICROLET ® Lancets (box of 100)
MICROLET ® Lancets (box of 200)
Replacement products may be obtained from Diabetes Care
Centers, retail drug stores or other home healthcare
distributors.
*Part numbers are subject to change without notice.
46
5-YEAR LIMITED WARRANTY:
Manufacturer’s Warranty: Bayer Inc. Healthcare Division
(“Bayer”) warrants to the original purchaser that this
instrument will be free from defects in materials and
workmanship for 5 years from the date of original purchase
(except as noted below). During the stated 5-year period,
Bayer shall, at no charge, replace a unit found to be
defective with an equivalent or current version of the
owner’s model.
Limitations of the Warranty: This warranty is subject to the
following exceptions and limitations:
1. A 90-day warranty only will be extended for consumable
parts and/or accessories.
2. This warranty is limited to replacement due to defects in
parts or workmanship. Bayer shall not be required to
replace any units which malfunction or are damaged
due to abuse, accidents, alteration, misuse, neglect,
maintenance by other than Bayer, or failure to operate
the instrument in accordance with instructions. Further,
Bayer assumes no liability for malfunction or damage to
Bayer instruments caused by the use of reagents other
than reagents (i.e., Ascensia® AUTODISC ™ Test Strip Discs)
manufactured or recommended by Bayer.
3. Bayer reserves the right to make changes in design of
this instrument without obligation to incorporate such
changes into previously manufactured instruments.
47
4. Bayer has no knowledge of the performance of the
Ascensia® BREEZE ™ Meter when used with any Test Strip
Discs other than Ascensia® AUTODISC ™ Test Strip Discs,
and therefore makes no warranty of the performance of
the Ascensia® BREEZE ™ Meter when used with any Test
Strips or Test Strip Discs other than Ascensia® AUTODISC ™
Test Strips or when the Ascensia® AUTODISC ™ Test Strip is
altered or modified in any manner.
BAYER MAKES NO OTHER EXPRESS WARRANTY FOR THIS
PRODUCT. THE OPTION OF REPLACEMENT, DESCRIBED
ABOVE, IS BAYER’S ONLY OBLIGATION UNDER THIS
WARRANTY.
IN NO EVENT SHALL BAYER BE LIABLE FOR INDIRECT,
SPECIAL, OR CONSEQUENTIAL DAMAGES, EVEN IF BAYER HAS
BEEN ADVISED OF THE POSSIBILITY OF SUCH DAMAGES.
For Warranty service: Purchaser must contact the Bayer
Diabetes Helpline of Bayer Inc., by calling toll free
1-800-268-7200, for assistance and/or instructions for
obtaining service of this instrument.
/™ Bayer HealthCare LLC, used under license by Bayer Inc.
®
48
Manufactured by:
Bayer HealthCare LLC
Subsidiary of Bayer Corporation
Mishawaka, IN 46544 U.S.A.
Distributed by:
Bayer Inc.
Toronto, Ontario M9W 1G6 Canada
Bayer and Bayer Cross are registered trademarks
of Bayer AG, used under license by Bayer Inc.
99A61189
© 2003 Bayer HealthCare LLC
Made and Printed in U.S.A.
Rev. 4/04