1
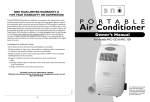
One Year Limited Warranty
Amcor, Inc. (“Amcor”) warrants the original retail purchaser (“Purchaser”) purchasing in the
United States that the Amcor product with which this warranty is enclosed is free from defects
in materials and workmanship.
P O RTA B L E
Amcor’s sole obligation under this warranty is to replace, or at Amcor’s discretion, to repair,
free of charge, all defective parts, for a period of one (1) year from date of original purchase.
ANY IMPLIED WARRANTY OF MERCHANTABILITY IS SIMILARLY LIMITED TO ONE (1)
YEAR FROM DATE OF ORIGINAL PURCHASE AND NO ACTION BASED UPON ANY
IMPLIED WARRANTY OF MERCHANTABILITY OR OTHERWISE MAY BE COMMENCED
AFTER EXPIRATION OF ONE (1) YEAR FROM DATE OF ORIGINAL RETAIL PURCHASE.
Some states do not allow limitations on how long an implied warranty lasts, so the above limitation
may not apply to you.
Air Conditioner
Owner’s Manual
The provisions of this warranty shall not apply to any product which in Amcor’s judgment has
been (1) subject to misuse or neglect. (2) damaged in an accident. (3) used for a purpose for
which it was not designed, or (4) repaired or altered in any way that adversely affected its
performance or reliability.
For models ALD-12,000E and ALD-12,000EH
To obtain warranty service, the defective product or part must be shipped or delivered to:
Amcor’s authorized service center. All postage, insurance and shipping charges are the responsibility
of the Purchaser and are not included in this warranty.
AMCOR NEITHER ASSUMES NOR AUTHORIZES ANY PERSON TO ASSUME FOR IT ANY
OTHER ( LIABILITY IN CONNECTION WITH ITS PRODUCTS,THERE ARE NO WARRANTIES
WHICH EXTEND BEYOND THE DESCRIPTION ON THE FACE HEREOF. NO RESPONSIBILITY
IS ASSUMED FOR INCIDENTAL OR CONSEQUENTIAL DAMAGES THAT MAY RESULT FROM
THE USE OF AN AMCOR PRODUCT, NOR FOR THE DAMAGES DUE TO ACCIDENT, ABUSE,
LACK OF RESPONSIBLE CARE, THE AFFIXING OF ANY UNAUTHORIZED ATTACHMENT,
LOSS OF PARTS, OR USE AT A VOLTAGE OTHER THAN SPECIFIED. Some states do not allow
the exclusion of limitation of incidental or consequential damages, so these limitations may not
apply to you.
Amcor disclaims all liabilities for defects or damages caused by use of replacement parts obtained
from or by service at any service center other than Amcor’s authorized service center.
Product: AMCOR Portable Air Conditioner
Model: ALD-12,000E/EH
Date Purchased:_____________________________________
Production Code:________
1/2006
QUESTIONS? Call 866-361-2233 · www.amcorgroupusa.com
Dear Customer: Please keep this warranty for your record. DO NOT return it.
14
913124000
This warranty gives you specific legal rights, and you may also have other rights which vary from
state to state.
It is important that you read
these instructions before
using your new purchase and
we strongly recommend that
you keep them in a safe place
for future reference.
Troubleshooting
Problem
Cause
Table of Contents
Solution
Never try to repair or dismantle the air conditioner yourself. Tampering with the unit
may result in the loss of warranty and can endanger the user and property.
THANK YOU...............................................................................................................................2
The Air Conditioner
Does Not Function
Properly
SPECIFICATIONS .......................................................................................................................3
The Unit
Does Nothing
Energy Saving Tips .......................................................................................................................................................2
Windows or doors
are open.
Close doors and windows.
The filter is dirty
Clean or replace filter.
BEFORE USE.................................................................................................................................4
Air inlet or air
outlet is blocked.
Remove blockage.
PARTS ............................................................................................................................................5
Room temperature lower
than the selected value.
Lower temperature selected.
The overheat protection
is activated.
Wait 3 minutes until temperature
has decreased, then turn on again.
No power supply
Make sure outlet works.
Be sure Green Light is on (L.C.D.I. Plug)
Press Re-start button.
Water container is full.
Drain the Unit.
Front, Back .....................................................................................................................................................................5
Accessories.....................................................................................................................................................................5
INSTALLATION ..........................................................................................................................6
Window Kit Installation..............................................................................................................................................6
Wall Connection ...........................................................................................................................................................6
Mounting the Exhaust Pipe.......................................................................................................................................7
Cleaning the Filter........................................................................................................................................................7
OPERATION ................................................................................................................................8
Control Panel .................................................................................................................................................................8
Setting Mode / Function.............................................................................................................................................8
Auto Mode.....................................................................................................................................................................8
Setting the Temperature.............................................................................................................................................8
Setting Fan Speed ........................................................................................................................................................9
Setting the Timer ..........................................................................................................................................................9
Regulating Airflow Direction ......................................................................................................................................9
Timer Function Set
Deactivate the Timer Function.
The Unit is Noisy
Unit is not standing
on a level surface.
Place on an even surface.
The Remote
Control Does
Not Function
Distance too great.
Make sure the remote is aimed
at the control panel.
DRAINAGE..................................................................................................................................10
Remote control signal not
detected by control panel.
Control is aimed at the
control panel.
MAINTENANCE ........................................................................................................................11
Batteries are dead.
Replace the batteries.
If you have any questions regarding the operation of the ALD-12,000
please contact AMCOR at 1-866-361-2233
REPLACEMENT FILTERS:
To purchase Replacement Filters for this unit, contact AMCOR at
1-866-361-2233 and request model number ALD-12,000F
How to Drain the Unit ..............................................................................................................................................10
Cleaning the Housing ................................................................................................................................................11
Cleaning the Filter ......................................................................................................................................................11
End of Season Storage ..............................................................................................................................................11
Storing the Power Cord............................................................................................................................................11
TROUBLESHOOTING..............................................................................................................12
WARRANTY ...............................................................................................................................14
If this product is defective or not working properly,
please DO NOT return to your retail store.
Please contact us directly for any Service or Technical Assistance at:
1-866-361-2233
Amcor Inc.
www.amcorgroupusa.com
12
1
Drainage
Specifications
During the process of cooling, some water will be extracted from the air into the unit. Most of this water
is used to cool the unit and make it run more efficiently. This is a feature not found in most Portable Air
Conditioners. If the unit is operated in VERY HUMID air, water will collect in the container inside the unit.
If the Internal Water Container is full, the backlight on the LCD display will flash, the unit will shut off, and
it must be drained before it will re-start.
Model Number
ALD-12,000E
ALD-12,000EH
Cooling Capacity
12,000 BTU/hr
12,000 BTU/hr
How to Drain the Unit
Heating Capacity
N/A
12,000 BTU/hr
Use a Shallow Container or Dish
Power Consumption
950W / 8.4A
950W / 8.4A
1. Turn off the unit.
Humidity Removal Capacity
65 Pts. / Day
65 Pts. / Day
2. Position a flat container or dish under the drain hole.
Do not allow the water to drip continuously into
the container, as it might easily overflow.
Recommended room size*
Up to 400 sq. ft.
Up to 400 sq. ft.
Power Supply
115V / 60Hz / 1 Phase
115V / 60Hz / 1 Phase
3. Remove the drain knob & rubber plug from
the drain hole.
The condensed water will drain out automatically.
Compressor
Rotary
Rotary
4. When the container is almost full, replace the
rubber plug into the drain hole to stop the water.
Empty the container.
Refrigerant
R-22
R-22
Fan Speed
2
2
Timer
1-12 hours
1-12 hours
Temperature Set Range
62°F - 90°F
62°F - 90°F
Unit Weight
65 lbs.
68 lbs.
Dimensions
16"W x 17"D x 30"H
16"W x 17"D x 30"H
Working Temperature
Cooling: 62°F to 110°F
Cooling: 62°F to 110°F
Heating: 41°F to 81°F
5. Repeat steps 2, 3 & 4 until all the condensed water
is emptied.
6. Once all the condensed water has been removed,
replace the rubber plug into the drain hole firmly.
The Full Water indicator should be off now.
7. Replace the drain knob.
8. Turn unit on, the unit will resume working.
REMARKS:
The cooling capacity of the unit may be affected by the height of the ceiling,
quality of insulation, number of windows, etc.
10
3
Operation
Control Panel
Cool
Set Temp. Low Fan
Fan Only
Auto
Room
Temp.
High
Fan
Parts
Front
Timer
Not available
on all units Power
Back
1
2
Mode:
AC or Fan
3
Temp. Up
Timer
On / Off
Temp. Down
Fan Speed:
High / Low
Not available on all units
Setting Mode/Function
Press the MODE button to select the required working mode: Automatic, Cooling, Fan or Heating (Heating is only
available for ALD-12,000EH). The green indicator illustrating your selected mode lights up. It is recommended to
select Cooling or Heating mode and set your desired temperature, as the Auto mode has a preset temperature (please
see below) that cannot be changed.
The indicators of the functions in progress come on at the same time, e.g. Cool and Lo = Cooling mode with Low fan speed.
4
1.
2.
3.
4.
5.
6.
7.
8.
9.
Control Panel
Cooling Air Outlet
Handle
Castors
Auto Mode
Air Filter
Air Inlet
Exhaust Air Outlet
Cord Hanger
Water Stopper (Rubber Plug Inside)
When this mode is selected, the unit is preset to the following temperature settings and unit will only start to:
• Cool when room temperature is higher than 75ºF
• Heat when room temperature is lower than 68ºF (ALD-12,000EH only)
If room temperature is between 68ºF and 75ºF, unit will stay in Fan mode. Again, when in Auto Mode, the temperature
settings cannot be changed.
Setting the Temperature in Cooling or Heating Mode
The display window’s default is to display the ambient room temperature. The green indicator light under RT is on.
(RT = Room Temperature)
To set your desired temperature, press the Temperature up or down buttons (ranging from 62ºF to 90ºF). Each press
will increase or decrease your set temperature by 1ºF. When pressing the temperature up or down buttons, the
window will change to display your set temperature. At this time, the green indicator will light under ST (Set
Temperature). Once the temperature up or down buttons is released, the window will return to displaying the
ambient temperature after a second.
Note: When unit is in the following modes: Auto, Cool, or Heat - the compressor will cool/heat the room to reach
the set temperature. Once the ambient temperature has reached the set temperature, the compressor will stop and
unit will run in Fan mode. To conserve energy, the compressor will not start immediately after a couple degrees
increase or decrease, but will wait for a 5ºF allowance. For example:
In Cooling Mode with a set temperature of 70ºF
When compressor first stops after reaching 70ºF, unit will auto-switch to Fan.
Compressor will start cooling again when ambient temperature increases to 75ºF or above.
In Heating Mode with a set temperature of 72ºF
When compressor first stops after reaching 72ºF, unit will auto-switch to Fan.
Compressor will start heating again when ambient temperature drops to 67ºF or below.
In Auto Mode (with preset temperature of 68ºF for heat and 75ºF for cool)
Compressor will start cooling again when ambient temperature reaches above 80ºF or will start heating when
ambient temperature drops below 63ºF.
8
Accessories
10
10. Adaptor - for insertion over the
hose and into the back of the
air conditioner
12
11. Exhaust Hose
11
12. Adjustable Slide Bar
13. Round Connector
13
14. Cap for Round Connector
15. Remote Control
(Electronic control models only)
14
15
5
Installation
Installation
Mounting the Exhaust Pipe
Slide Bar
Connector
• The supplied Exhaust Hose can be
extended from 1 foot to 5 feet
for mounting. It is recommended that
you use the shortest possible length of Hose.
• Take care to prevent any kink or
bend in the middle of the Exhaust
Hose, as this will trap hot exhaust air,
which will radiate back into the room.
Window Kit Installation
In order for this unit to function
properly, it must be vented to the
outside.
Fitting the Exhaust Hose through
the window is easy. Please see
below.
1. Extend Hose at least 6" and
insert it into back of the unit,
tightening into place by turning
it clockwise.
2. Attach Slide Bar Connector,
(Round Connector) to the
other end of the Hose by
extending hose at least 6".
Then tighten Hose by turning
the (Round Connector)
clockwise.
3. Place Adjustable Slide Bar in
the window and expand so it
fits tightly.
4. Lower the window.
5. Make sure the Hose has
no kinks.
Slide Bar has 3 sections which
allows installation in windows up
to 48" in width.
WARNING!
Round
Connector
The length of the Exhaust Pipe is specially
designed according to the specification of
this product.
Do not replace or extend it with your own hose
as this could cause the unit to malfunction.
Cleaning the Filter
Wall Connection
1. Make a hole (5.1" in diameter)
in the wall.
2. Insert the Round Connector
(part #13) into the hole and
hold in place by using 4 small
screws (not supplied).
3. Extend one end of the Exhaust
Pipe (part #11) and screw into
the Round Connector by
turning clockwise.
4. Extend other end of exhaust
pipe and screw in Adaptor (part
#10) by turning clockwise.
6
5. Push Adaptor to fit firmly
over the opening on the back
of the unit.
Use a vacuum cleaner or tap the filter lightly to remove loose dust and dirt from the filters
and then rinse them thoroughly under running water (no hotter than 104ºF)
Dry thoroughly before replacing.
Notice! Never operate the unit without the filters.
** When not in use, cover the
Round Connector and hole
with Cap (part #14).
7
Before Use
Operation
Setting The Fan Speed
Important!
• Leave the unit in an upright position for at least 2 hours before use.
• Always place the unit on an even surface.
• The power cord has a built-in L.C.D.I. (Leakage, Current, Detection, Interruption) circuit
breaker for added safety. If the power supply is interrupted, please press the reset
button to reconnect the unit to the power source. The green light should be on.
• Make sure the unit is connected to a correctly grounded power supply.
• For proper operation, the unit must be vented to the outside.
• Do not cover or obstruct the appliance inlet or outlet grilles.
• To avoid the risk of shock, the product should never be used in bathrooms, shower rooms
or in any other steamy or wet areas.
• Always transport the unit in an upright position.
• Do not sit or stand on the unit.
Press the SPEED button to choose the fan speed you require, high or low.
The indicator of high or low fan will light up at the same time.
If the unit is in AUTO mode, it will select the fan speed automatically according to the
ambient temperature (the related indicators, cool, fan or heat will light up), at this time the
fan speed switch is invalid.
Setting the Timer
Press the TIMER button to set the operating hours you desire (1 to 12 hours, the timer
indicator will light up). When the set time has elapsed, the machine will turn off
automatically. The display window will show the hour(s) you set as you press the TIMER button.
If the timer button is not pressed, the unit will work continuously.
By pressing the timer button but without turning on the unit, you can PRE-SET the time for
the machine to work. For example, if you press the timer to ‘2’,
the unit will come on automatically after 2 hours.
All the above functions can also be performed with the supplied remote
control. This remote control requires 2 AAA batteries to operate.
Regulating the Airflow Direction
• Do not place objects on the unit.
• Do not touch the unit with wet/damp hands or when standing barefoot.
• Drainage of the water container is required before moving the unit or
putting it into storage.
• If the electric socket is different from the plug provided, have a professionally qualified
electrician replace the outlet with a suitable one. Avoid the use of adaptor plugs, multiple
sockets and/or extension cords; if their use is necessary, ensure that they conform to the
current safety regulations.
• Do not pull the power cord or place it near a source of heat; always unroll it completely
to avoid the possibility of dangerous overheating.
• If the power cord is damaged, it must be replaced by a qualified person.
THE MANUFACTURER DISCLAIMS ANY RESPONSIBILITY IF THE ABOVE
INSTRUCTIONS ARE NOT FOLLOWED.
4
Turn the roller on the air vent to control
the airflow direction from the vertical louvres.
Move the air vent directly to adjust the
airflow direction from the horizontal louvres.
IMPORTANT!
• The compressor will start approximately 3 minutes after the unit is turned on (this will
help prolong the life of the compressor). After switching the unit off, please wait at least
3 minutes before turning the unit back on.
• The cooling system will switch off if the room temperature is lower than set. The fan, however, keeps
working at the set level. If the ambient temperature rises above the chosen temperature +/-5°F,
the cooling will resume.
• In heating mode, the compressor will switch off if the room temperature is HIGHER than the one set
(the fan keeps working at the set level). When the room temperature drops 5°F below the chosen
temperature, heating will resume.
• This machine is equipped with an ANTI-FROST function. Sometimes, while using the heating function
during low temperatures, the heating will stop for a while to melt the internal frost. When this occurs,
wait for heating to resume.
• As you switch on the heating, the fan will stop for 15-20 seconds prior to the unit starting.
9
Maintenance
Thank You!
Always unplug the unit from the wall outlet before beginning
the cleaning.
Thank you for choosing the portable air conditioner from AMCOR, a leading brand in
indoor air treatment. We would like you to enjoy the many benefits this unit offers, so
please read this manual carefully and take full advantage of the many advanced features
that your AMCOR Air Conditioner offers you.
AMCOR has specialized in complete indoor environment control, manufacturing
world-class air conditioners, dehumidifiers and air purifiers with innovative technology.
In designing these advanced products, we have listened carefully to our customers and have
passed their views on to our research and development laboratories.
We wish you many years of enjoyable use.
After reading this manual, please keep it in a safe place for future reference.
Energy Saving Tips
• Do not locate the air conditioner where furniture or other objects can obstruct
the airflow.
• Keep doors closed so cool air does not escape.
• Keep the filters clean.
Set the unit to maximum cooling and high speed fan initially, then adjust the unit
to a comfortable setting.
NOTE: Use the Temperature Control (UP/DOWN) to adjust
Air Conditioner cooling to a desired level.
Cleaning the Housing
Use a soft, damp cloth to wipe the body clean.
Never use strong chemicals, oil-based products, detergents, chemically treated cloths or other
cleaning solutions. These could possibly damage the cabinet.
Cleaning the Filter
Use a vacuum cleaner or tap the filter lightly to remove loose dust and dirt from the filters and then
rinse them thoroughly under running water (no hotter than 104°F).
Dry thoroughly before replacing.
Do not wet the activated carbon filter, remove from frame before rinsing.
IMPORTANT! Never operate the unit without the filters.
End of Season Storage
Unplug the unit.
Drain the condensed water COMPLETELY (please refer to page 10).
Clean or change the filter.
On a warm day, turn the unit to fan mode for a couple of hours so that the
inside can dry out completely.
It is recommended that the unit be put back into its original carton for storage.
Do not stack heavy objects on top of the unit.
Storing The Power Cord
When the unit is not in use, please store the power cord away as shown in Figure 3.
Fig. 3
2
11