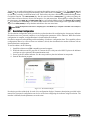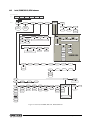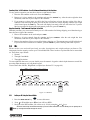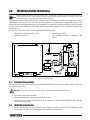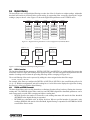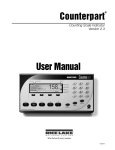
1
Counterpart ® Counting Scale Indicator Version 1.0 User Manual To be the best by every measure 118677 Contents 1.0 Introduction.................................................................................................................................. 2 1.1 Standard Features . . . . . . . . . . . . . . . . . . . . . . . . . . . . . . . . . . . . . . . . . . . . . . . . . . . . . . . . . . . . . . . 2 1.2 Capacities and Resolutions . . . . . . . . . . . . . . . . . . . . . . . . . . . . . . . . . . . . . . . . . . . . . . . . . . . . . . . . 2 1.3 Modes of Operation . . . . . . . . . . . . . . . . . . . . . . . . . . . . . . . . . . . . . . . . . . . . . . . . . . . . . . . . . . . . . . 2 1.3.1 1.4 1.5 1.6 1.7 1.8 1.9 2.0 Description of Modes of Operation . . . . . . . . . . . . . . . . . . . . . . . . . . . . . . . . . . . . . . . . . . . . . . . . . . . . 2 Keypad Functions . . . . . . . . . . . . . . . . . . . . . . . . . . . . . . . . . . . . . . . . . . . . . . . . . . . . . . . . . . . . . . . Tare Recall . . . . . . . . . . . . . . . . . . . . . . . . . . . . . . . . . . . . . . . . . . . . . . . . . . . . . . . . . . . . . . . . . . . . . Annunciator Symbols . . . . . . . . . . . . . . . . . . . . . . . . . . . . . . . . . . . . . . . . . . . . . . . . . . . . . . . . . . . . . Softkey Setup. . . . . . . . . . . . . . . . . . . . . . . . . . . . . . . . . . . . . . . . . . . . . . . . . . . . . . . . . . . . . . . . . . . How to use Alpha/Numeric Keypad . . . . . . . . . . . . . . . . . . . . . . . . . . . . . . . . . . . . . . . . . . . . . . . . . . Indicator Operations . . . . . . . . . . . . . . . . . . . . . . . . . . . . . . . . . . . . . . . . . . . . . . . . . . . . . . . . . . . . . . 3 4 4 4 4 5 Installation ................................................................................................................................... 6 2.1 2.2 2.3 2.4 2.5 2.6 2.7 Unpacking . . . . . . . . . . . . . . . . . . . . . . . . . . . . . . . . . . . . . . . . . . . . . . . . . . . . . . . . . . . . . . . . . . . . . Leveling . . . . . . . . . . . . . . . . . . . . . . . . . . . . . . . . . . . . . . . . . . . . . . . . . . . . . . . . . . . . . . . . . . . . . . . Enclosure Disassembly. . . . . . . . . . . . . . . . . . . . . . . . . . . . . . . . . . . . . . . . . . . . . . . . . . . . . . . . . . . . Making Power Connections . . . . . . . . . . . . . . . . . . . . . . . . . . . . . . . . . . . . . . . . . . . . . . . . . . . . . . . . Load Cell Wiring . . . . . . . . . . . . . . . . . . . . . . . . . . . . . . . . . . . . . . . . . . . . . . . . . . . . . . . . . . . . . . . . . Wire Specifics. . . . . . . . . . . . . . . . . . . . . . . . . . . . . . . . . . . . . . . . . . . . . . . . . . . . . . . . . . . . . . . . . . . Cable Grounding . . . . . . . . . . . . . . . . . . . . . . . . . . . . . . . . . . . . . . . . . . . . . . . . . . . . . . . . . . . . . . . . 2.7.1 2.7.2 2.7.3 6 7 7 7 7 7 8 Serial Communications . . . . . . . . . . . . . . . . . . . . . . . . . . . . . . . . . . . . . . . . . . . . . . . . . . . . . . . . . . . . . 8 Digital I/O - COMING SOON . . . . . . . . . . . . . . . . . . . . . . . . . . . . . . . . . . . . . . . . . . . . . . . . . . . . . . . . . 8 Network Connection to Counterpart . . . . . . . . . . . . . . . . . . . . . . . . . . . . . . . . . . . . . . . . . . . . . . . . . . . 9 2.8 Enclosure Reassembly . . . . . . . . . . . . . . . . . . . . . . . . . . . . . . . . . . . . . . . . . . . . . . . . . . . . . . . . . . . . 9 2.9 CPU Board Removal . . . . . . . . . . . . . . . . . . . . . . . . . . . . . . . . . . . . . . . . . . . . . . . . . . . . . . . . . . . . . 9 2.10 Battery Replacement . . . . . . . . . . . . . . . . . . . . . . . . . . . . . . . . . . . . . . . . . . . . . . . . . . . . . . . . . . . . 9 2.11 Installing Option Cards . . . . . . . . . . . . . . . . . . . . . . . . . . . . . . . . . . . . . . . . . . . . . . . . . . . . . . . . . . . 9 2.12 Indicator Replacement Parts and Assembly Drawings. . . . . . . . . . . . . . . . . . . . . . . . . . . . . . . . . . . 11 3.0 Configuration ............................................................................................................................. 15 3.1 3.2 3.3 3.4 3.5 3.6 4.0 Front Panel Configuration . . . . . . . . . . . . . . . . . . . . . . . . . . . . . . . . . . . . . . . . . . . . . . . . . . . . . . . . . Menu Navigation . . . . . . . . . . . . . . . . . . . . . . . . . . . . . . . . . . . . . . . . . . . . . . . . . . . . . . . . . . . . . . . Revolution Configuration. . . . . . . . . . . . . . . . . . . . . . . . . . . . . . . . . . . . . . . . . . . . . . . . . . . . . . . . . . Audit Menu. . . . . . . . . . . . . . . . . . . . . . . . . . . . . . . . . . . . . . . . . . . . . . . . . . . . . . . . . . . . . . . . . . . . Menu Structures and Parameter Descriptions. . . . . . . . . . . . . . . . . . . . . . . . . . . . . . . . . . . . . . . . . . Setup Menu . . . . . . . . . . . . . . . . . . . . . . . . . . . . . . . . . . . . . . . . . . . . . . . . . . . . . . . . . . . . . . . . . . . 15 15 16 17 18 18 3.6.1 3.6.2 3.6.3 3.6.4 3.6.5 SCALE Submenu . . . . . . . . . . . . . . . . . . . . . . . . . . . . . . . . . . . . . . . . . . . . . . . . . . . . . . . . . . . . . . . . SCALE 3 Submenu . . . . . . . . . . . . . . . . . . . . . . . . . . . . . . . . . . . . . . . . . . . . . . . . . . . . . . . . . . . . . . FEATUR Submenu . . . . . . . . . . . . . . . . . . . . . . . . . . . . . . . . . . . . . . . . . . . . . . . . . . . . . . . . . . . . . . . FEATUR Menu, REGULA / INDUST Submenu. . . . . . . . . . . . . . . . . . . . . . . . . . . . . . . . . . . . . . . . . . . Serial, PFORMT, DIG I/O, VERS Submenus . . . . . . . . . . . . . . . . . . . . . . . . . . . . . . . . . . . . . . . . . . . . 18 23 24 29 31 3.7 Calibration Menu . . . . . . . . . . . . . . . . . . . . . . . . . . . . . . . . . . . . . . . . . . . . . . . . . . . . . . . . . . . . . . . 3.8 Test Menu . . . . . . . . . . . . . . . . . . . . . . . . . . . . . . . . . . . . . . . . . . . . . . . . . . . . . . . . . . . . . . . . . . . . 3.9 Display Menu . . . . . . . . . . . . . . . . . . . . . . . . . . . . . . . . . . . . . . . . . . . . . . . . . . . . . . . . . . . . . . . . . . 3.10 ID Menu . . . . . . . . . . . . . . . . . . . . . . . . . . . . . . . . . . . . . . . . . . . . . . . . . . . . . . . . . . . . . . . . . . . . . 35 36 37 38 Calibration ................................................................................................................................. 39 Technical training seminars are available through Rice Lake Weighing Systems. Course descriptions and dates can be viewed at www.ricelake.com/training or obtained by calling 715-234-9171 and asking for the training department. @ August 2011 Rice Lake Weighing Systems. all rights reserved. Printed in the United States of America. Specifications subject to change without notice. Rice Lake Weighing Systems is an ISO 9001 registered company. Version 1.00 4.1 4.2 4.3 4.4 Front Panel Calibration. . . . . . . . . . . . . . . . . . . . . . . . . . . . . . . . . . . . . . . . . . . . . . . . . . . . . . . . . . . EDP Command Calibration . . . . . . . . . . . . . . . . . . . . . . . . . . . . . . . . . . . . . . . . . . . . . . . . . . . . . . . Revolution® Calibration . . . . . . . . . . . . . . . . . . . . . . . . . . . . . . . . . . . . . . . . . . . . . . . . . . . . . . . . . . More About Calibration . . . . . . . . . . . . . . . . . . . . . . . . . . . . . . . . . . . . . . . . . . . . . . . . . . . . . . . . . . 4.4.1 5.0 39 40 40 41 Adjusting Final Calibration . . . . . . . . . . . . . . . . . . . . . . . . . . . . . . . . . . . . . . . . . . . . . . . . . . . . . . . . . . 41 Scale Operations........................................................................................................................ 42 5.1 Weight Unit Switching . . . . . . . . . . . . . . . . . . . . . . . . . . . . . . . . . . . . . . . . . . . . . . . . . . . . . . . . . . . 42 5.2 Entering Tare Weights . . . . . . . . . . . . . . . . . . . . . . . . . . . . . . . . . . . . . . . . . . . . . . . . . . . . . . . . . . . 42 5.2.1 5.2.2 One-Touch Tare, Tare Unknown . . . . . . . . . . . . . . . . . . . . . . . . . . . . . . . . . . . . . . . . . . . . . . . . . . . . . 42 Digital Tare, Tare Weight Known . . . . . . . . . . . . . . . . . . . . . . . . . . . . . . . . . . . . . . . . . . . . . . . . . . . . . 42 5.3 Toggling Between Gross and Net . . . . . . . . . . . . . . . . . . . . . . . . . . . . . . . . . . . . . . . . . . . . . . . . . . 43 5.4 Entering Unit Weights . . . . . . . . . . . . . . . . . . . . . . . . . . . . . . . . . . . . . . . . . . . . . . . . . . . . . . . . . . . 43 5.4.1 5.4.2 Unit Weight Operation by Sampling. . . . . . . . . . . . . . . . . . . . . . . . . . . . . . . . . . . . . . . . . . . . . . . . . . . 44 Unit Weight Operation by Key Entry . . . . . . . . . . . . . . . . . . . . . . . . . . . . . . . . . . . . . . . . . . . . . . . . . . 44 5.5 IDs. . . . . . . . . . . . . . . . . . . . . . . . . . . . . . . . . . . . . . . . . . . . . . . . . . . . . . . . . . . . . . . . . . . . . . . . . . 45 5.5.1 5.5.2 5.5.3 5.5.4 5.5.5 Setting an ID Using the Normal Mode . . . . . . . . . . . . . . . . . . . . . . . . . . . . . . . . . . . . . . . . . . . . . . . . . Using a Stored ID . . . . . . . . . . . . . . . . . . . . . . . . . . . . . . . . . . . . . . . . . . . . . . . . . . . . . . . . . . . . . . . . Adding an ID From Count Mode . . . . . . . . . . . . . . . . . . . . . . . . . . . . . . . . . . . . . . . . . . . . . . . . . . . . . Adding an ID Through Revolution . . . . . . . . . . . . . . . . . . . . . . . . . . . . . . . . . . . . . . . . . . . . . . . . . . . . WeighVault . . . . . . . . . . . . . . . . . . . . . . . . . . . . . . . . . . . . . . . . . . . . . . . . . . . . . . . . . . . . . . . . . . . . . 45 46 47 47 48 5.6 Totalization Counts . . . . . . . . . . . . . . . . . . . . . . . . . . . . . . . . . . . . . . . . . . . . . . . . . . . . . . . . . . . . . 49 5.7 Connecting a Barcode Scanner . . . . . . . . . . . . . . . . . . . . . . . . . . . . . . . . . . . . . . . . . . . . . . . . . . . . 49 5.7.1 6.0 Setting up a Softkey . . . . . . . . . . . . . . . . . . . . . . . . . . . . . . . . . . . . . . . . . . . . . . . . . . . . . . . . . . . . . . 49 Serial Commands ...................................................................................................................... 51 6.1 The Serial Command Set. . . . . . . . . . . . . . . . . . . . . . . . . . . . . . . . . . . . . . . . . . . . . . . . . . . . . . . . . 51 6.1.1 6.1.2 6.1.3 6.1.4 6.1.5 6.1.6 6.1.7 6.1.8 6.1.9 7.0 Key Press Commands . . . . . . . . . . . . . . . . . . . . . . . . . . . . . . . . . . . . . . . . . . . . . . . . . . . . . . . . . . . . Keypad Lock . . . . . . . . . . . . . . . . . . . . . . . . . . . . . . . . . . . . . . . . . . . . . . . . . . . . . . . . . . . . . . . . . . . ID Commands . . . . . . . . . . . . . . . . . . . . . . . . . . . . . . . . . . . . . . . . . . . . . . . . . . . . . . . . . . . . . . . . . . ETH Commands . . . . . . . . . . . . . . . . . . . . . . . . . . . . . . . . . . . . . . . . . . . . . . . . . . . . . . . . . . . . . . . . . Reporting Commands. . . . . . . . . . . . . . . . . . . . . . . . . . . . . . . . . . . . . . . . . . . . . . . . . . . . . . . . . . . . . Clear and Reset Commands . . . . . . . . . . . . . . . . . . . . . . . . . . . . . . . . . . . . . . . . . . . . . . . . . . . . . . . . Parameter Setting Commands . . . . . . . . . . . . . . . . . . . . . . . . . . . . . . . . . . . . . . . . . . . . . . . . . . . . . . Normal Mode Commands. . . . . . . . . . . . . . . . . . . . . . . . . . . . . . . . . . . . . . . . . . . . . . . . . . . . . . . . . . Unique Commands. . . . . . . . . . . . . . . . . . . . . . . . . . . . . . . . . . . . . . . . . . . . . . . . . . . . . . . . . . . . . . . 51 52 52 52 53 53 53 57 57 Print Formatting ......................................................................................................................... 58 7.1 Print Formatting Commands . . . . . . . . . . . . . . . . . . . . . . . . . . . . . . . . . . . . . . . . . . . . . . . . . . . . . . 58 7.2 Customizing Print Formats. . . . . . . . . . . . . . . . . . . . . . . . . . . . . . . . . . . . . . . . . . . . . . . . . . . . . . . . 61 7.2.1 7.2.2 7.2.3 7.2.4 8.0 Using the EDP Port . . . . . . . . . . . . . . . . . . . . . . . . . . . . . . . . . . . . . . . . . . . . . . . . . . . . . . . . . . . . . . . Using the Front Panel . . . . . . . . . . . . . . . . . . . . . . . . . . . . . . . . . . . . . . . . . . . . . . . . . . . . . . . . . . . . . Using Revolution® . . . . . . . . . . . . . . . . . . . . . . . . . . . . . . . . . . . . . . . . . . . . . . . . . . . . . . . . . . . . . Print Label Examples . . . . . . . . . . . . . . . . . . . . . . . . . . . . . . . . . . . . . . . . . . . . . . . . . . . . . . . . . . . . . 61 61 62 63 WLAN Installation Instructions .................................................................................................. 65 8.1 Enclosure Disassembly . . . . . . . . . . . . . . . . . . . . . . . . . . . . . . . . . . . . . . . . . . . . . . . . . . . . . . . . . . 65 8.2 WLAN Card Installation . . . . . . . . . . . . . . . . . . . . . . . . . . . . . . . . . . . . . . . . . . . . . . . . . . . . . . . . . . 65 9.0 Appendix .................................................................................................................................... 66 9.1 Error Messages . . . . . . . . . . . . . . . . . . . . . . . . . . . . . . . . . . . . . . . . . . . . . . . . . . . . . . . . . . . . . . . . 66 9.2 Using the XE EDP Command. . . . . . . . . . . . . . . . . . . . . . . . . . . . . . . . . . . . . . . . . . . . . . . . . . . . . . 66 9.2.1 Using the P EDP Command . . . . . . . . . . . . . . . . . . . . . . . . . . . . . . . . . . . . . . . . . . . . . . . . . . . . . . . . 67 9.3 Continuous Output (Stream) Format . . . . . . . . . . . . . . . . . . . . . . . . . . . . . . . . . . . . . . . . . . . . . . . . 68 9.4 Demand Output Serial Data Format . . . . . . . . . . . . . . . . . . . . . . . . . . . . . . . . . . . . . . . . . . . . . . . . . 68 Rice Lake continually offers web-based video training on a growing selection of product-related topics at no cost. Visit www.ricelake.com/webinars. ii Counterpart User Manual 9.5 Custom Stream Formatting . . . . . . . . . . . . . . . . . . . . . . . . . . . . . . . . . . . . . . . . . . . . . . . . . . . . . . . 68 9.6 Digital Filtering . . . . . . . . . . . . . . . . . . . . . . . . . . . . . . . . . . . . . . . . . . . . . . . . . . . . . . . . . . . . . . . . . 71 9.6.1 9.6.2 9.6.3 9.6.4 DIGFLx Parameters . . . . . . . . . . . . . . . . . . . . . . . . . . . . . . . . . . . . . . . . . . . . . . . . . . . . . . . . . . . . . . . DFSENS and DFTHRH Parameters . . . . . . . . . . . . . . . . . . . . . . . . . . . . . . . . . . . . . . . . . . . . . . . . . . . Setting the Digital Filter Parameters . . . . . . . . . . . . . . . . . . . . . . . . . . . . . . . . . . . . . . . . . . . . . . . . . . . Audit Trail Support . . . . . . . . . . . . . . . . . . . . . . . . . . . . . . . . . . . . . . . . . . . . . . . . . . . . . . . . . . . . . . . 71 71 72 72 9.7 Serial Scale Interface . . . . . . . . . . . . . . . . . . . . . . . . . . . . . . . . . . . . . . . . . . . . . . . . . . . . . . . . . . . . 9.8 Regulatory Mode Functions . . . . . . . . . . . . . . . . . . . . . . . . . . . . . . . . . . . . . . . . . . . . . . . . . . . . . . . 9.9 Updating Firmware . . . . . . . . . . . . . . . . . . . . . . . . . . . . . . . . . . . . . . . . . . . . . . . . . . . . . . . . . . . . . . 9.10 Specifications . . . . . . . . . . . . . . . . . . . . . . . . . . . . . . . . . . . . . . . . . . . . . . . . . . . . . . . . . . . . . . . . . 9.11 Specifications . . . . . . . . . . . . . . . . . . . . . . . . . . . . . . . . . . . . . . . . . . . . . . . . . . . . . . . . . . . . . . . . . 73 74 75 76 77 iv Counterpart User Manual About This Manual This manual is provided for the use of trained and qualified installers of counting scales, and represents the correct, safe and recommended methods for setting up and using the Counterpart®. This manual can be viewed and downloaded from the Rice Lake Weighing Systems web site at www.ricelake.com. Rice Lake Weighing Systems is an ISO 9001 registered company. Note Some features of Counterpart included in this manual will be available soon. Those sections and features are noted. Once available, those features will be available via download from the Rice Lake Weighing Systems web site. To stay up-to-date with the latest downloads available, sign up for Email Updates on the Rice Lake Weighing Systems web site at http://www.ricelake.com/software.aspx. 1. For registered users, simply click on the Support tab on the RLWS homepage and select software/ firmware. 2. Select SIGN UP FOR EMAIL UPDATES as shown on the left side graphic above. 3. Select the number of boxes you wish to receive email alerts on and press SAVE CHANGES. Counterpart User Manual - 1 1.0 Introduction The Counterpart offers practical solutions for a full range of precision counting applications. A bright LCD display enables operators to easily view quantities and alphanumeric text messaging displays part numbers to verify descriptions and correct part called from memory. One hundred and fifty (150) item memory and two RS-232 ports and Ethernet enable the Counterpart to provide real-time data collection and position it for the future growth of your business. Multiple scales can be connected to the Counterpart, as well as an RS-232 bar code scanner and external printer. When portability is required, choose the battery operation option of the Counterpart up to 24 hours of continuous use for mobile workstations, outdoor applications, and rental fleets. It’s built to withstand transport from one area of the plant to another or from one business to the next. Simply connect a printer via RS-232 for labeling, ticketing, or receipt tasks. 1.1 Standard Features Counterpart offers a variety of standard features and are listed below. • AC operated (battery operation is optional) • Lb/kg, g/oz weight display conversion • Single or dual channel models w/ serial scale • Two RS-232 ports for peripheral connections (with one port also supporting 20 mA transmit) • On board Ethernet capability • Scanner input (using RS-232 port) • Revolution software utility for setup • 150 item memory 1.2 Capacities and Resolutions Table 1-1 list the scale capacities and resolutions for all part numbered models of the Counterpart. Counting scales specify two types of resolution: • Weight (or external) resolution • Counting (or internal) resolution Weight resolution is displayed in divisions of the full scale capacity, which is divided into weight increments. For example, a 5-lb scale divided into 10,000 display divisions would display weight with 0.0005 lb divisions (10,000 divisions x 0.0005 lb = 5.0 lb). Counting resolution is based on the internal resolution of the scale. The default weight and counting resolutions for the Counterpart capacities are shown below. Platform Capacity Weighing Resolution Counting Resolution Platform Dimensions 5.0 lb 0.005 lb 0.000005 9 in x 12 in 10 lb 0.001 lb 0.00001 11 in x 16 in 25 lb 0.002 lb 0.00002 50 lb 0.005 lb 0.00005 100 lb 0.01 lb 0.0001 Table 1-1. Counterpart Capacities 1.3 Modes of Operation 1.3.1 • • 2 Description of Modes of Operation Count Mode – where all the basic weighing and counting operations are performed. Setup Mode – where item data can be programmed into the memory of the scale. Counterpart User Manual 1.4 Keypad Functions Key Function Turns the Counterpart unit on/off. NOTE: If the PC1 jumper is set to SW, the POWER button must be used to turn the unit on and off. If the PC jumper is set to ON, the unit will automatically power on when it’s plugged in and the only way to turn it off is to unplug power. POWER Enters Menu mode, allowing configuration if the Audit jumper is in the “ON” position. Also used as an “escape” key in Menu mode. MENU SETUP ZERO Sets the current gross weight to zero, provided the amount of weight to be removed or added is within the specified zero range and the scale is not in motion. The zero band is defaulted to 1.9% of full scale, but can be configured for up to 100% of full scale. NOTE: 1.9% is required for legal for trade applications. Used to enter a known unit weight of a part. UNIT WEIGHT Sends “on-demand” serial information out the serial port, provided the conditions for standstill are met. PRINT TARE Performs one of several predetermined Tare functions dependent on the mode of operation selected in the TAREFN parameter. To view a stored tare, see Section 1.5. Also acts as the ENTER key Allows the display to change between gross mode and net mode. GROSS NET B/N SAMPLE Pieces This is used for computing the unit weight by sampling. Press the SAMPLE key after placing a sample on the platform, or after using the numeric keypad to enter the sample size. The default sample size is 10. This switches the weight display to an alternate unit. the alternate unit is defined in the Setup Menu and could be kg, g, lb, oz. UNITS TOGGLE Clear key. Used to backspace on entries Alpha-Numeric keypad (see Figure 1-1) Used to enter values directly. Press keys for small and upper case alpha characters. Table 1-2. Keypad Functions Counterpart User Manual - Introduction 3 1.7 Softkey Setup Softkeys offer additional ways to access features associated with the Counterpart . To access the softkey setup parameter, go to Menu -> Setup -> Config -> Feature -> Softkeys. Select information for each softkey and press TARE (Enter) key after each entry and then press SaveExit softkey. To exit back out of the unit, press the MENU SETUP key twice without saving changes. Note Figure 1-1. Numeric Keypad 1.5 Tare Recall When a stored tare is displayed, Net annunciators will be turned on. To display a stored tare, 1. Set up a soft key (see Softkey Setup below). 2. Press the DISPLAY TARE softkey. The tare value will be displayed. If there is no tare in the system, pressing the TARE key will have no effect. The Gross/Net annunciators are not lit and a value is displayed in weight display area. 1.6 Annunciator Symbols Annunciator Description Zero (Center of Zero) While in gross weight display mode, this LED indicates that the current displayed weight reading is within +/-0.25 display divisions of the acquired zero, or is within the center of zero band. When in the net weight display mode, it indicates that the current net weight reading is within +/-0.25 display divisions of the center of net zero. A display division is the resolution of the displayed weight value, or the smallest incremental increase or decrease that can be displayed or printed. G/B Gross weight mode (or Brutto in OIML mode) N Net weight display mode. Table 1-3. Annunciator Symbols 4 Counterpart User Manual Softkeys set for either Display Tare or Display Accum will automatically time out and revert to the normal active display after 10 seconds. 1.8 How to use Alpha/Numeric Keypad Counterpart has the ability to use alpha characters along with numeric characters. Use the following steps to change to alpha characters: 1. Select a key labeled with the value desired. 2. Push until the desired value appears, ie: 2 abcABC). 3. Move to the next letter and push until that value appears. 4. If the next letter is the same key, push the right arrow (PRINT) to move over to the next selection. 5. When complete, push TARE(Enter) to save. 1.9 Indicator Operations Basic Counterpart operations are summarized below. Toggle Gross/Net Press the GROSS/NET key to switch the display mode from gross to net or from net to gross. If a tare value has been entered or acquired, the net value is the gross weight minus the tare. If no tare has been entered or acquired, the display remains in gross mode. Gross mode and Net mode is indicated by the annunicator on the display. Set Date and Time 1. If the softkey is enabled, push the softkey. The current value is displayed. 2. To change, use the Up/Down arrows to highlight the value to change. 3. Press the TARE key to save and exit. Set Serial Scale (Scale 3) 1. Select Port 1 - Indust Scale 2. Match the baud rates. Upon doing this it automatically becomes Scale 3. Toggle Units Press the UNITS TOGGLE key to switch between primary, secondary, and tertiary units. Zero Scale 1. While in gross mode, remove all weight from the scale and wait for the standstill ). annunicator ( 2. Press the ZERO key. The zero annunicator is displayed to indicate the scale is zeroed. Acquire Tare 1. Place a container on the scale and wait for the standstill annunicator ( ). 2. Press the TARE key to acquire the tare weight of the container. 3. The Net annunicator will be enabled. Remove Stored Tare Value 1. Remove all weight from the scale and wait for the standstill annunicator ( ). 2. Press the TARE key. The display shifts to gross weight and the Gross annuciator is displayed. Keyed Tare 1. Key in the value of the container. 2. Press the TARE key. 3. The Net annunciator is displayed. Print Press the PRINT key to print either the Gross, Net, Total or Count format. The default format is a 2.25 x 4.5 inch label. 1. Wait for standstill annunciator ( ). 2. Press the PRINT key to send data to the serial port. If the standstill annunciator is not present, the PRINT key command is executed if the scale comes out of motion within three seconds. Counterpart User Manual - Introduction 5 2.0 Installation Counterpart is available in different configurations from just the indicator display to the display and counting scale combined together as a unit. This section contains instructions on unpacking and assembly, leveling, making power connections, load cell wiring, wiring standard serial port, optional network communications, wiring optional digital outputs, optional backup battery operation, and power-up sequence. Assembly drawings and replacement parts lists are also included. Caution 2.1 Do not pick up the counting scale by the “spider” assembly, which supports the platter. Lifting by the spider may damage the load cell. Lift the scale from under the base to move it. Unpacking The Counterpart comes with the following components (if purchasing scale and indicator): • AC adapter • Weighing platform • This manual • Indicator head • Bracket kit Note Store the packing material and box in a safe, easily accessible place. Should you ever need to transport the scale across any substantial distance, using the original packing material is the first step in protecting your investment. 1. Immediately after unpacking the scale, visually inspect the Counterpart to ensure all components are included and undamaged. If any parts were damaged in shipment, notify Rice Lake Weighing Systems and the shipper immediately. Caution Do not turn the scale upside down. Always work with the scale on its side. Damage to the load cell can occur if the scale is turned upside down. 2. Set up the scale on a stable, level surface. 6 Counterpart User Manual 2.2 Leveling Select a location for the Counterpart that is reasonably level and free of vibrations and air currents. Adjust the four corner feet on the scale base and refer to the bubble level on the inside frame. The base should not rock and the feet should have solid contact with the surface. Note 2.3 Ensure the nut on each foot’s bolt is secured flush against the scale base. Enclosure Disassembly The Counterpart indicator enclosure must be opened to connect cables for load cells, communications, and digital inputs/outputs. Before opening the unit, ensure the unit is turned off and the power cord is disconnected from the power outlet. The power outlet must be located near the indicator to allow the operator to easily disconnect power to the unit. 2.5 Load Cell Wiring On all complete units, the load cell has been wired to the CPU load cell terminal at the factory. Wire the cable to the CPU board’s J1and J2 connector as shown in Table 2-1. Warning Note Ensure power to the indicator is disconnected, then place the indicator on an antistatic mat. Remove the four screws holding the top plate to the enclosure body and set them aside. Gently lift the top plate away from the enclosure and disconnect any cables and set it aside. 2.4 Making Power Connections The power source used for the Counterpart must be properly grounded to an acceptable earth ground and the outlet must be a grounded outlet. If the scale is remotely mounted, the platform must be separately grounded from the chassis ground screw located on the bottom of the platform. Connect this screw with 18 gauge wire to the same earth ground system as the AC power source. Failure to ground the base may cause static buildup that could cause damage to the electronics and/or give incorrect weight readings. If using a 4-wire connection, set JP1 and JP2 to ON. If using a 6-wire connection, set JP1 and JP2 to OFF. J1 & J2 Function 1 + Signal 2 - Signal 3 + Sense 4 - Sense 5 + Excitation 6 - Excitation Table 2-1. J1 and J2 Pin Assignments 2.6 Wire Specifics Wires connecting to J1, J2, J3, or J4 should adhere to the following specifications: Wire Range Wire Strip Length 28~12 AWG stranded or solid wire 5~6 mm (3/16” ~ 1/4”) Table 2-2. Wire Specifications for Connectors Counterpart User Manual - Installation 7 2.7 Cable Grounding Except for the power cord, all cables should be grounded against the scale enclosure. Do the following to ground shielded cables. • Use the lockwashers, clamps, and kep nuts provided in the parts kit to install grounding clamps on the enclosure studs. Install grounding clamps that will be used; do not tighten nuts. • Route cables and grounding clamps to determine cable lengths required to reach cable connectors. Mark cables to remove insulation and shield as described below: • For cables with foil shielding, strip insulation and foil from the cable half an inch (15 mm) past the grounding clamp (see Figure 2-1). Fold the foil shield back on the cable where the cable passes through the clamp. Ensure silver (conductive) side of foil is turned outward for contact with the grounding clamp. • For cables with braided shielding, strip cable insulation and braided shield from a point just past the grounding clamp. Strip another half inch (15 mm) of insulation only to expose the braid where the cable passes through the clamp (see Figure 2-1 8). • Finish installation using cable mounts and ties to secure cables inside of indicator enclosure. NOTE: Install lockwashers first, against backplate, under grounding clamp Insulated cable Foil (silver side out) Shield wire (cut) Braid Cut insulation here for braided cables Grounding clamp Cut insulation here for foil-shielded cables Length of foil before folding back on cable insulation Port 1 supports full duplex RS-232 communications only; Port 2 provides either active 20 mA output or d u pl e x R S - 2 3 2 t r a n s m i s s i o n . B o t h p o r t s a r e configured using the SERIAL menu. See Section 3.6.5 on page 31. Connector Pin J4 1 20 mA 2 Ground or -20 mA 3 Tx J5 Signal 4 Rx 5 CTS 6 RTS 1 Ground 2 Ground 3 Tx 4 Rx 5 DTR 6 RTS Port 2 1 Table 2-3. J4 and J5 Pin Assignments 2.7.2 Digital I/O - COMING SOON The Digital I/O can be configured as either digital inputs or digital outputs as determined by the DIO menu (see Section 3.6.5 on page 31). The inputs are active (on) with low voltage (0 VDC) and can be driven by TTL or 5V logic without additional hardware. Use the DIG I/O menu (see Section 3.6.5 on page 31) to configure the digital inputs. LEDs on the CPU board light when digital inputs are active (see Figure 2-2). Digital outputs are typically used to control relays that drive other equipment. Outputs are designed to sink not source, switching current. Each output is a CMOS circuit, capable of sinking 24 mA when active. Digital outputs are wired to switch relays when the digital output is active (low, 0 VDC) with reference to 5 VDC supply. LEDs on the CPU board light up when the digital outputs are active (see Figure 2-2). Figure 2-1. Grounding Clamp Attachment for Foil-Shielded and Braided Cabling 2.7.1 Serial Communications Wire the serial communications cables to J4, which is Port 2 (5-wire RS-232 port). J5 is Port 1 (RS-232 and 20 mA). Connect communications cables to J5 and J4 as shown in Table 2-3. Use cable ties to secure serial cables to the inside of the enclosure. Connector Pin Signal J3 1 +5V 2 Ground 3 DIG I/O 1 4 DIG I/0 2 5 DIG I/O 3 6 DIG I/O 4 Table 2-4. J3 Pin Assignments (Digital I/O) 8 Counterpart User Manual 2.7.3 2.10 Battery Replacement Network Connection to Counterpart Counterpart has an onboard Ethernet connection. It’s wireless connectivity is made possible with the optional Lantronix WiPort wireless networking device (PN 108671). Refer to the WLAN installation instructions (PN 108680) included with the option card for installing and configuration instructions. PC1 Jumper LED JP1 JP2 LED JP3 JP4 JP5 JP6 Port 1 & 2 LED lights Ethernet LED Light Caution Risk of explosion if battery is replaced with incorrect type. Dispose of batteries per manufacturer instructions. The lithium battery on the CPU board maintains the real-time clock and protects data stored in the system RAM when the indicator is not connected to AC power. Data protected by this battery includes time and date, IDs, and configuration information. If any data is lost, the indicator configuration can be restored from the PC. Watch for the low battery warning on the LCD display and periodically check the battery voltage on the CPU board. Batteries should be replaced when the indicator low battery warning comes on, or when battery voltage falls to 2.2 VDC. Life expectancy of the battery is 7 years. Use Revolution to store a copy of the configuration before attempting to replace the battery. For best results, replace the battery while in weigh mode and with AC power applied. Use care not to bend the battery retaining spring. 2.11 Installing Option Cards Figure 2-2. LED Light Locations 2.8 Enclosure Reassembly Once the cabling is complete, position the top plate over the enclosure and reinstall the four screws. 2.9 CPU Board Removal If you must remove the Counterpart CPU board, use the following procedure: 1. Disconnect power to the scale. 2. Disconnect power supply cable from connector J12 on the Counterpart CPU board. 3. Disconnect the wires at the following connectors: J1, J2, J3, J4 and J5 and J13 if equipped. 4. Remove the six screws connecting the CPU board, then lift the board out of the enclosure. To replace the CPU board, reverse the above procedure. Be sure to reinstall cable ties to secure all cables inside the indicator enclosure. Disconnect power cord entirely before installing option cards. Note Ethernet port is not suitable for connection to circuits used outside the building and is subject to lightning or power faults. Each option card is shipped with installation instructions specific to that card. For specific instructions on the WLAN card, refer to Section 8.0 on page 65. The general procedure for all option cards is: 1. Disconnect power cord from the scale. 2. Install the plastic standoffs in the standoff holes. 3. Carefully align the option card connector with the J14 connector on the CPU board. 4. Press down firmly to seat the option card in the CPU board connector. 5. Make connections to the option card as required. Use cable ties to secure loose cables inside the enclosure. When installation is complete, reassemble the enclosure as described in Section 2.8. Counterpart User Manual - Installation 9 PC1 Jumper Power Supply Display connector Display Backlight LED JP1 JP2 LED JP3 JP4 JP5 JP6 RS-232 Connectors Ethernet Connector Figure 2-3. Counterpart CPU Board Jumper Description JP1/JP2 JP3/JP4 Jump excitation to sense. If using a 4-wire load cell cable, leave JP1 and JP2 on. If using a 6-wire load cell cable, take JP1 and JP2 off. Default is ON. JP5/JP6 Used when upgrading firmware. The jumpers should be on when upgrading firmware and off when the update is complete. PC 1 JMP2 Power control. If the jumper is set to SW, the POWER key can be used to turn the unit on/off. If set to ON, the unit will power on when plugged in and can only be powered off by unplugging. AUDIT JMP1 If set to Audit ON, calibration and configuration can be accessed through the front keypad. If set to Audit OFF, calibration and configuration can only be accessed by removing the screws from the unit and pressing the Setup switch with a screwdriver. Default is Audit ON. Table 2-5. Jumper Descriptions Note 10 If the RESET button on the CPU board is pressed, the scale will perform a reboot. Counterpart User Manual 2.12 Indicator Replacement Parts and Assembly Drawings Ref Number Part Number Description (Quantity) 1 118434 Overlay, Membrane Switch Panel (1) 2 118435 Counterpart Cover Enclosure (1) 3 120756 Seal Strip, Nylon Brush w/ Holes (1) 119275 LCD Display Module (1) 7 120484 CPU Mounting Bracket (1) 8 14621 Kep Nut, 6-32NC Hex (6) 9 120741 CPU Board (1) single AD 4 5 6 117507 CPU Board (1) dual AD 10 14822 Machine Screw, 4-4 ONC x 1/4 (6) 11 118437 Enclosure Base (1) 12 19433 Rubber Foot (4) 13 60130 Ribbon Cable (1) 14 75146 Coverplate (1) 15 120266 Machine Screw, 6-32NC x 3/8 (7) 16 69291 Lithium Battery, 3V (1) 17 59274 #6 Flat Washer (1) 18 56972 Flat Cable Clamp (2) Figure 2-4. Counterpart Indicator Replacement Parts Counterpart User Manual - Installation 11 Figure 2-5. Counterpart Front View 12 Counterpart User Manual Figure 2-6. Counterpart Assembly and Components Counterpart User Manual - Installation 13 Figure 2-7. Counterpart Dimensions Figure 2-8. Counterpart Rear and Side Dimensions 14 Counterpart User Manual 3.0 Configuration 3.1 Front Panel Configuration To set up and configure the Counterpart counting Scale, you will use the MENU key on the front panel. The indicator is defaulted at the factory with the audit trail jumper (JMP1) in the ON position, allowing configuration access by pressing the Menu key. Pressing the MENU key will take you to the Audit menu selection. Use the SAMPLE ( ) and PRINT ( ) navigation keys to move to other menu selections. Use the NET/GROSS ( ) and ZERO ( ) navigation keys to enter and exit menu selections, respectively. ID AUDIT CALIBR SETUP TEST DISPLAY Figure 3-1. Menu Mode Navigation Structure Menu Function ID ID Allows you to setup or edit IDs. AUDIT Audit Trail Displays the legally relevant (LR) firmware version, configuration count, and calibration count. CALIBR Calibrate Calibrates the scale. SETUP Setup Accesses setup options for the scale, features, serial output, print format, digital inputs and outputs, and displays the version number. TEST Test Performs a basic test on the A/D, digital inputs and outputs, communication ports, RAM, and keypad. DISPLAY Display Accesses the setup option for contrast, image, brightness Table 3-1. Menu Summary 3.2 Menu Navigation Once you have entered the menus, you can use the front panel buttons to navigate. Note the looped menu structure shown in Figure 3-1. This provides a shortcut for accessing the right most menu items by navigating to the left, and vice-versa for the opposite side of the menu. This shortcut also holds true for sub-menu navigation. ZERO GROSS NET B/N TARE SAMPLE Pieces PRINT UNIT WEIGHT Move UP/ Increment value Move DOWN/ Increment Value Enter Key Move LEFT/ previous MENU SETUP UNITS TOGGLE Enter MORE/ Move forward/ Figure 3-2. Front Panel Key Functions in Menu Mode Counterpart User Manual - Configuration 15 Various keys are used as directional keys to navigate through the menus (see Figure 3-2). The SAMPLE ( ) and PRINT ( ) keys scroll left and right (horizontally) on the same menu level; ZERO ( ) and GROSS/NET ( ) move up and down (vertically) to different menu levels. Each of these keys has a directional symbol indicating its menu navigation function. The TARE (ENTER) key has the same function as GROSS/NET ( ) when navigating the menu-either will move down to access sub-categories of a main menu item. When adding or editing data using the Counterpart, the ZERO ( ) and GROSS/NET ( ) keys will edit the blinking digit. The SAMPLE ( ) and PRINT ( ) keys navigate to another digit. The numeric keys can also be used to insert a digit to the right of the blinking digit. Press TARE (ENTER) to accept the data and return to the next menu item. Note 3.3 To exit Configuration and return to weighing, press the MENU key or navigate to the EXIT menu and press ENTER. Revolution Configuration The Revolution configuration utility provides the preferred method for configuring the Counterpart indicator. Revolution runs on a personal computer to set configuration parameters for the indicator. When Revolution configuration is complete, configuration data is downloaded to the indicator. Revolution supports both uploading and downloading of indicator configuration data. This capability allows configuration data to be retrieved from one indicator, edited, then downloaded to another indicator with an identical hardware configuration. To use Revolution, do the following: 1. Install Revolution on an IBM-compatible personal computer. 2. With both indicator and PC powered off, connect the PC serial port to the RS-232 pins on the indicator serial port or to the optional USB communications card. 3. Power up the PC and the indicator. Use the setup switch to place the indicator in setup mode. 4. Start the Revolution program. Figure 3-3. Revolution Display Revolution provides online help for each of its configuration displays. Parameter descriptions provided in this manual for front panel configuration can also be used when configuring the indicator using Revolution: The interface is different, but the parameters set are the same. 16 Counterpart User Manual 3.4 Audit Menu The audit menu accesses audit trail support. It provides tracking information for configuration and calibration events. To prevent potential misuse, all configuration and calibration changes are counted as change events. Audit information can be printed by pressing the PRINT key while displaying the audit trail items beneath the AUDIT menu. ID AUDIT XXXXXXX CALIBR CALIB LRV SETUP TEST DISPLAY CFG Figure 3-4. Audit Menu AUDIT Menu Parameter Description LRV Legally relevant firmware version. CALIB Displays total calibration events. CFG Displays total configuration events. Table 3-2. Audit Menu Parameters Counterpart User Manual - Configuration 17 3.5 Menu Structures and Parameter Descriptions The Counterpart scale can be configured using a series of menus accessed through the scale front panel when the scale is in setup mode. Figure 3-5 and Table 3-3 summarizes the functions of each of the top level menus. ID AUDIT CALIBR SETUP TEST DISPLAY CONFIG SCALES FEATURE SERIAL ETHERNET PFORMT DIGIO VERS Figure 3-5. Top Level Configuration Menu The Counterpart counting scale can be configured using a series of menus accessed through the display front panel when the scale is in setup mode. The top level menu structure includes the following:. Menu Menu Function ID ID Sets up IDs of various parts AUDIT Audit Trail View audit trail data CALIBR Calibration Calibrate Counterpart through this menu SETUP Setup Set up the configuration parameters TEST Test Menu Test functionality DISPLAY Display Sets up the display parameters of Counterpart Table 3-3. Top Level Menu Structure To access the second level parameters use the down arrow on the indicator to access the submenus which are noted in Table 3-4. Menu Menu Function SCALES Configuration Configure and calibrate scales. FEATURE Feature Set date and time formats passwords, keyboard locks, regulatory mode, and initial consecutive number value, count function, and define softkeys. SERIAL Serial Configures the communications ports ETHERNET Ethernet Configures the Ethernet port PFORMT Print Format Set print format used for header, gross, net, count, pallet and total ticket formats. See Section 6.0 on page 51 for more information. DIG IO Digital IO Assign digital input/output functions VERS Version Display installed software version number. The Reset Config softkey on the Version menu can be used to restore all configuration parameters to their default values. Table 3-4. Setup Menu Summary 3.6 Setup Menu The setup menu allows you to configure settings for the scale, features, serial port settings, Ethernet, print format, and digital inputs and outputs. You can also view the software and regulatory versions, and revert to default settings. 3.6.1 SCALE Submenu Calibration can be performed in two places within the menu: the CALIBR menu shown in Figure 3-11 is an in-depth scale setup and calibration. A “quick access” calibration is shown in Figure 4-1 on page 39. 18 Counterpart User Manual Scale Parameter Levels ID Level 1 AUDIT XXXXXXX CALIBR SETUP TEST DISPLAY CONFIG Level 2 SCALES Level 3 Level 4 FEATUR SCALE 1 SERIAL SCALE 2 ETHERNET SCALE 3 GRADS CALIBR PFORMT DIGIO VERS Go to Scale 3 Submenu FORMAT MOTBAND OVRLOAD 1.900000 1 FS+2% 10 number number FS+1D number ZTRKBND ZRANGE 10000 0.000000 number number SSTIME FS+9D FS WZERO Previous A/D raw counts are shown Press Calibrate softkey to calibrate zero. Press menu to cancel WVAL WSPAN Display and edit test weight value Previous A/D raw counts are shown Press calibrate softkey to calibrate zero. Press menu to cancel WLI N REZERO PRIMRY TER KG OFF G LB KG Calibrating, please wait Press Enter to remove offset from zero and span calibrations G OZ * LB/OZ Calibrating, Calibrating, SEC LB OFF POINT 1 POINT 2 POINT 3 POINT 4 OZ POINT 5 UNITS DECPNT DSPDIV LB 8888800 1D OZ OFF 8888880 2D 8888888 5D LB/OZ KG * 8.888888 Same as POINT 1 WGT 1 CAL1 G 88.88888 888.8888 8888.888 88888.88 888888.8 DFLTR1 DFLTR2 DFLTR3 DFSENS DFTHRH 4 4 4 2OUT NONE 15HZ 8 8 8 4OUT 2D 30HZ 16 16 16 8OUT 5D 60HZ PBTARE 32 32 32 16OUT 10D 7.5HZ KEYED 64 64 64 32OUT 20D 128 128 128 64OUT 50D 256 256 256 128OUT 100D 1 1 1 200D 2 2 2 250D SMPRAT TAREFN ACCUM GO BOTH OFF DELAY NOTARE ON PWRUPMD THRESH 0 * Not legal for trade Figure 3-6. Setup Menu: Scale Submenu Counterpart User Manual - Configuration 19 SETUP Menu Parameter Choices Description Level 3 submenu SCALES 1 AND 2 Allows configuration and calibration of each scale Level 4 submenus GRADS 10000 1–100000 Specifies the number of full scale graduations. The value entered must be in the range 1–100000 and should be consistent with legal requirements and environmental limits on system resolution. To calculate GRADS, use the formula: GRADS = Capacity / Display Divisions. Display divisions are specified under the FORMAT submenu. FORMAT PRIMRY SEC TER Select your primary, secondary, and tertiary units of measure. Sub-choices include lb, kg, oz, and g. ZTRKBND 0.000000 number Automatically zeroes the scale when within the range specified, as long as the input is within the ZRANGE and scale is at standstill. Specify the zero tracking band in ± display divisions. Maximum legal value varies depending on local regulations. Note For scales using linear calibration, do not set the zero tracking band to a value greater than that specified for the first linearization point. ZRANGE 1.900000 number Selects the range within which the scale can be zeroed. The 1.900000 default value is ± 1.9% around the calibrated zero point, for a total range of 3.8%. Indicator must be at standstill to zero the scale. Use the default value for legal-for-trade applications. MOTBAND 1 number Sets the level, in display divisions, at which scale motion is detected. If motion is not detected for 1 second or more, the standstill symbol lights. Some operations, including print, tare, and zero, require the scale to be at standstill. Maximum legal value varies depending on local regulations. If this parameter is set to 0 the standstill annunciator does not light; operations normally requiring standstill (zero, tare, print) are performed regardless of scale motion. If 0 is selected, ZTRKBND must also be set to 0. OVRLOAD FS+2% FS+1D FS+9D FS Overload. Determines the point at which the display blanks and an out-of-range error message is displayed. Maximum legal value varies depending on local regulations. SSTIME 10 number Specifies the length of time the scale must be out of motion, in 0.1-second intervals, before the scale is considered to be at standstill. Values greater than 10 are not recommended. DFLTR 1-3 4 8 16 32 64 128 256 1 2 Selects the digital filtering rate used to reduce the effects of mechanical vibration from the immediate area of the scale. The overall filtering effect can be expressed by adding the values assigned to the three filter stages: DFLTR1 + DFLTR2 + DFLTR3 See Section 9.6 on page 71 for information on digital filtering. Choices indicate the number of A/D conversions per update that are averaged to obtain the displayed reading. A higher number gives a more accurate display by minimizing the effect of a few noisy readings, but slows down the settling rate of the indicator. Table 3-5. Setup Menu Parameters 20 Counterpart User Manual SETUP Menu Parameter Choices Description DFSENS 4OUT 2OUT 8OUT 16OUT 32OUT 64OUT 128OUT Digital filter cutout sensitivity. Specifies the number of consecutive readings that must fall outside the filter threshold (DFTHRH parameter) before digital filtering is suspended. DFTHRH NONE 2D 5D 10D 20D 50D 100D 200D 250D Digital filter cutout threshold. Specifies the filter threshold, in display divisions. When a specified number of consecutive scale readings (DFSENS parameter) fall outside of this threshold, digital filtering is suspended. If NONE is selected, the filter is always enabled. SMPRAT 15 HZ 30 Hz 60 Hz 7.5 Hz Sample rate. Selects measurement rate, in samples per second, of the analog-to-digital converter. Lower sample rate values provide greater signal noise immunity. PWRUPM GO DELAY Power up mode. In GO mode, the indicator goes into operation immediately after a brief power up display test. In DELAY mode, the indicator performs a power up display test, then enters a 30-second warm up period. If no motion is detected during the warm up period, the indicator becomes operational when the warm up period ends; if motion is detected, the delay timer is reset and the warm up period repeated. TAREFN BOTH NOTARE PBTARE KEYED Enables or disables push-button and keyed tares. Possible values are: BOTH: Both push-button and keyed tares are enabled NOTARE: No tare allowed (gross mode only) PBTARE: Push-button tares enabled KEYED: Keyed tare enabled ACCUM OFF ON Accumulator. Specifies whether the scale accumulator is enabled. If enabled, accumulation occurs whenever a print operation is performed. Scale must return to zero to re-arm a new print. THRESH 0 Enter a value to be used as divisions. Zero threshold allows you to select a threshold or reset point where automatic printing functions reset themselves to be retriggered. When a value is entered, anything that would normally require the scale to reach zero before it happens/rearms (except for LFT parameters) now only needs to go below this value and then above it again. CALIBR WZERO WVAL WSPAN WLIN REZERO See Level 4 submenu descriptions in Table 3-9 on page 32. Table 3-5. Setup Menu Parameters (Continued) Counterpart User Manual - Configuration 21 SETUP Menu Parameter Choices Description Level 5 submenus - Format PRIMRY UNITS DECPNT DSPDIV Allows you to set the primary units, decimal point format, and display divisions. SEC KG G LB OZ OFF Allows you to set the secondary units. Decimal point format and display divisions are selected automatically. Values are kg=kilogram (default); g=gram; lb=pound; oz=ounce; and off. OFF KG G LB OZ Allows you to set the tertiary units. Decimal point format and display divisions are selected automatically. Values are off (default); kg=kilogram; g=gram; lb=pound; oz=ounce. TER Note Note If using the <cu> token and secondary or tertiary values are changed, the stream tokens must be changed to match in order to stream secondary or tertiary. If using the <cu> token and secondary or tertiary values are changed, the stream tokens must be changed to match in order to stream secondary or tertiary. Level 5 submenus - Calibration WZERO Allows you to view or change the zero calibration a/d count value. WVAL Allows you to view and edit the test weight value. WSPAN Allows you to view or change the span calibration a/d count value. WLIN COMING SOON POINT 1 POINT 2 POINT 3 POINT 4 POINT 5 REZERO COMING SOON Press ENTER to display and edit test weight and calibration values for up to five linearization points. Perform linear calibration only after WZERO and WSPAN have been set. Parameters include CAL1 - View or change linear point calibration value. WGT1 - Sets test value. Removes offset from zero and span calibrations. Can be used during a span calibration process using hooks and chains. Level 6 submenus - Primary, Secondary, Tertiary UNITS LB OZ KG G OFF Specifies primary units for displayed and printed weight. Values are lb=pound; oz=ounce; kg=kilogram; g=gram. DECPNT 8888800 8888880 8888888 8.888888 88.88888 888.8888 8888.888 88888.88 888888.8 Allows you to place the decimal point position. Use the ID ( ) and TARGET ( ) keys to place the decimal point where desired. DSPDIV 1D 2D 5D Display divisions. Selects the minimum division size for the primary unit’s displayed weight. Table 3-5. Setup Menu Parameters (Continued) 22 Counterpart User Manual 3.6.2 SCALE 3 Submenu Scale Parameter Levels ID Level 1 AUDIT XXXXXXX CALIBR SETUP TEST DISPLAY CONFIG Level 2 SCALES FEATUR ETHERNET Level 3 SCALE 1 SCALE 2 SCALE 3 SERIAL PFORMT VERS ACCUM FORMAT PRIMRY DIGI/O SEC TER OFF ON **Scale 3 sub-menu appears only when serial port 1 is set to SCALE or IND. KG OFF G KG LB OZ * LB/OZ OFF G LB OZ UNITS DECPNT DSPDIV LB 8888800 1D OZ 8888880 2D KG G LB/OZ * 8888888 5D OFF 88.88888 8.888888 888.8888 8888.888 88888.88 888888.8 Figure 3-7. Scale 3 Serial Menu SCALE 3 Submenu Parameter Choices Description PRIMRY UNITS DECPNT DSPDIV Allows you to set the primary units, decimal point format, and display divisions. SEC KG G LB OZ OFF Allows you to set the secondary units. Decimal point format and display divisions are selected automatically. Values are kg=kilogram (default); g=gram; lb=pound; oz=ounce; and off. OFF KG G LB OZ Allows you to set the tertiary units. Decimal point format and display divisions are selected automatically. Values are off (default); kg=kilogram; g=gram; lb=pound; oz=ounce. Format Submenu TER Note Note If using the <cu> token and secondary or tertiary values are changed, the stream tokens must be changed to match in order to stream secondary or tertiary. If using the <cu> token and secondary or tertiary values are changed, the stream tokens must be changed to match in order to stream secondary or tertiary. Accum Submenu Table 3-6. Scale Three Submenu Parameters Counterpart User Manual - Configuration 23 3.6.3 FEATUR Submenu Scale Parameter Levels Level 1 ID AUDIT XXXXXXX CALIBR SETUP TEST DISPLAY CONFIG Level 2 SCALES Level 3 SAMPLQTY NEGCOUNT SERIAL FEATURE ETHERNET COUNT INSFSMPL LOTUPDT REGION UID CONSC# 1 CURVAL VERS RESVAL 0 NEWITEM ON 10 0.1% OFF ON 25 0.2% ON OFF 50 0.0% REZERO DIGI/O 0 SCLCHG OFF 100 PFORMT XFRUTWT XFRTARE CHKSTBLE OFF ON OFF ON ON OFF ON OFF DSPMODE DISPACC UTWTUPDT UTWTBASE OFF OFF 1000 COUNT ON ON 1 WEIGHT REGWORD REGULAT UNIT WT TIME DECFMT NTEP GROSS DOT CANADA BRUTTO COMMA DATE INDUST See INDUST Submenu* NONE OIML DFORMT D SEP MMDDY4 SLASH DDMMY4 DASH Y4MMDD SEMI Y4DDMM TFORMT T SEP 12 HOUR COLON DDMMY2 24 HOUR COMMA Y2MMDD MMDDY2 Y2DDMM RECALL STNDBY KEYLCK SOFTKEYS PASSWD 0N 0 CALIBR SETUP TEST T&D ID 0 0 0 0 0 OFF DISPLAY SK1-12 KEYBEEP CONTRAST BRIGHT IMAGE OFF value value negative ON BLANK positive TIME/DATE CLRTAR DSPTAR DSP ACC SCL SEL MENU ZERO GRS NET UNITS PRINT TARE NUMBER SAMPLE UNIT WT UNLOCK UNLOCK UNLOCK UNLOCK UNLOCK UNLOCK UNLOCK UNLOCK UNLOCK LOCK LOCK LOCK LOCK LOCK LOCK LOCK LOCK LOCK CODE LOT PRINT PLT SWAP DSP IN OUT CLR CN TOTAL + TOTAL CLR TTL Figure 3-8. FEATUR Submenu 24 Counterpart User Manual FEATUR Menu Parameter Choices Description Level 3 submenus - Feature COUNT NEGCOUNT SAMPLEQTY INSFSMPL LOTUPDT SCLCHG NEWITEM DISPACC Selects the counting mode (enables/disables negative checkweighing; turns data parameters on/off. See Level 3 submenus. UNITWTUPDATE UTWTBASE REGION REGULA REGWRD DECFMT TIME DATE Selects regional settings. See Level 3 submenus. UID 1 Sets the unit ID, a string of up to 6 ASCII characters, which can be set via serial port or keypad. This will be used in place of the <UID> token in a print format. The default value is “1.” CONSC# CURVAL RESVAL Allows sequential numbering for print operations (CURVAL is the current value and RESVAL is the reset value). The consecutive number value is incremented following each print operation that includes <CN> in the ticket format. When the consecutive number is reset, it is reset to the RESVAL specified on the parameter. PASSWD CALIBR SETUP TEST T&D ID Creates a password to access the CALIBR, SETUP, TEST, T&D, and ID menus. Specify a non-zero value to restrict access to all configuration menus. Passwords can be overridden by loading new firmware or entering 999999. Note Overriding passwords will clear configuration and calibration settings. To preserve settings (i.e., ID information), use Revolution software to upload your data to a PC, then download it back to the indicator after the password override is performed. SOFTKEYS SK1-12 KEYLCK MENU ZERO GRSNET UNITS PRINT TARE NUMBER SAMPLE UNIT WT Disables the MENU, ZERO, GRSNET, UNITS, PRINT, TARE number sample and unit weights. Select LOCK to disable the key, and UNLOCK to enable the key. STNDBY 0 Standby mode delay. Specifies the number of minutes the indicator must be inactive before entering standby mode. Valid values are 0 (off) through 255 minutes. When in standby mode, power is still supplied to the CPU and draws 1/2 of the current as when the display is powered. The annunciators are still lit, but no weight is displayed. Press any key to exit standby mode and reactivate the display. The indicator enters standby mode if no key presses, serial communications, or scale motion occur for the length of time specified in this parameter. Set to 0 to disable standby mode. Note Standby mode will not be implemented if there is weight on the scale. Table 3-7. FEATUR Submenu Parameters Counterpart User Manual - Configuration 25 FEATUR Menu Parameter Choices Description RECALL ON OFF ON allows the Tare, Zero, and Units values to be maintained across a power cycle. Over/ Under/Target/ID values are also maintained. OFF clears the values on a power cycle. Zero is reset to calibrated zero and Units are reset to Primary. Over/Under/Target/ID values are reset as well. DISPLAY CONTRAST BRIGHT IMAGE Adjusts Counterpart display viewing. Key in a value BRIGHT - Key in a value IMAGE - enter negative or positive KEYBEEP OFF ON Select ON to alert the user every time a key is pressed. Level 4 submenus - under the Level 3 Count Feature NEGCOUNT ON OFF Sets whether negative weighing mode is off or on. SAMPLQTY 10 25 50 100 Is the default value for sample quantity. INSFSMPLE 0.1 0.2 0.0 A minimum sample size is required based on the platform capacity and product weight. LOTUPDT OFF ON Updates the lot number from the front panel softkey.1 It does not override the stored value. SCLCHG REZERO CHKSTABLE XFRTARE XFRUTWT Scale change. These are actions taken when changing from one scale to another. NEWITEM OFF ON New item. This prompts to add an ID to memory from the front panel. DISPACC OFF ON Display accuracy UTWTUPDT OFF ON Enables or disables the updating of the loaded ID with a new unit weight value. OFF - Parts can be sampled (generating a new unit weight) or a unit weight can be keyed or scanned but the new unit weight is not saved into the stored copy of the currently loaded ID record. ON - If on, the unit weight will update the stored value whether at zero or actual value. UTWTBASE 1000 1 Unit weight base. 1=APW (Average Piece Weight), 1000=Piece weight per thousand. Table 3-7. FEATUR Submenu Parameters (Continued) 26 Counterpart User Manual FEATUR Menu Parameter Choices Description DISPMODE Count Weigh Unit Weight Display mode. This chooses the value to be displayed as large in viewing window. Level 4 submenus - under the Level 3 Region Feature REGULA NTEP CANADA INDUST NONE OIML Regulatory mode. Specifies the regulatory agency having jurisdiction over the scale site. Note • • • • • The value specified for REGULA affects the function of the front panel TARE and ZERO keys. OIML, NTEP, and CANADA modes allow a tare to be acquired at any weight greater than zero. NONE allows tares to be acquired at any weight value. OIML, NTEP, and CANADA modes allow a tare to be cleared only if the gross weight is at no load. NONE allows tares to be cleared at any weight value. NTEP and OIML modes allow a new tare to be acquired even if a tare is already present. In CANADA mode, the previous tare must be cleared before a new tare can be acquired. NONE, NTEP and CANADA modes allow the scale to be zeroed in either gross or net mode as long as the current weight is within the specified ZRANGE. In OIML mode, the scale must be in gross mode before it can be zeroed; pressing the ZERO key in net mode clears the tare. INDUST provides a set of subparameters to allow customization of tare, clear, and print functions in non-legal-for-trade scale installations. REGWOR GROSS BRUTTO Sets the term printed when weighing in gross mode. Selecting BRUTTO replaces Gross with Brutto. DECFMT DOT COMMA Specifies whether decimal numbers are displayed using a period (DOT) or a comma. TIME TFORMT T SEP Allows you to set the current time, and the time format and separator character. DATE DFORMT D SEP Allows you to set the current date, and date format and date separator character. Level 4 submenus - under the Level 3 Consec # Feature CURVAL 0 This is the starting number. RESVAL 0 This is the ending/reset value. Level 4 submenus - under the Level 3 Password Feature CALIBR 0 Can enter a numeric password for each of the parameters listed. SETUP TEST T&D ID Level 4 submenus - under the Level 3 Softkeys Feature Table 3-7. FEATUR Submenu Parameters (Continued) Counterpart User Manual - Configuration 27 FEATUR Menu Parameter Choices Description SK1-12 BLANK TIMEDATE CLR TAR DSPTAR DSP ACC SCL SEL CODE LOT PRINT PLT SWAP DSP IN OUT CLR CN TOTAL + TOTAL CLR TTL Labels softkeys for access to function stated. Level 4 submenus - under the Level 3 Keylock Feature MENU UNLOCK LOCK ZERO UNLOCK LOCK GRS NET UNLOCK LOCK UNITS UNLOCK LOCK PRINT UNLOCK LOCK TARE UNLOCK LOCK NUMBER UNLOCK LOCK SAMPLE UNLOCK LOCK UNIT WT UNLOCK LOCK Allows the user to lock or unlock keys of the Counterpart. Level 5 submenus - Under the Level 4 SCLCHG Feature REZERO OFF ON Performs a zero function on change. CHKSTBLE ON OFF When changing scales, a stability check can be either enabled or disabled. If enabled, and the stability check is successful, no indication is shown and the unit switches to the next scale. If enabled and the stability check fails, then NON-STABLE is shown on the display and the switch to the next scale is not made. XFRTARE OFF ON When changing scales, the tare weight is transferred from scale 1 to scale 2. Units must be set to the same unit of measurement. XFRUTWT ON OFF When changing scales, the unit weight is transferred from scale 1 to scale 2. Level 5 submenus - Under the Level 4 DATE Feature Table 3-7. FEATUR Submenu Parameters (Continued) 28 Counterpart User Manual FEATUR Menu Parameter Choices Description DFORMT MMDDY4 DDMMY4 Y4MMDD Y4DDMM MMDDY2 DDMMY2 Y2MMDD Y2DDMM Sets the date format. Y4 will use a four-digit year value, such as 2011, while Y2 will use a two-digit value, such as 11. D SEP SLASH DASH SEMI Sets the date separator as a slash, dash, or semicolon. Level 5 submenus - Under the Level 4 TIME Feature TFORMT 12 HOUR 24 HOUR Sets the time format. T SEP COLON COMMA Sets the time separator as a colon or a comma. Table 3-7. FEATUR Submenu Parameters (Continued) 3.6.4 FEATUR Menu, REGULA / INDUST Submenu Scale Parameter Levels ID Level 1 AUDIT XXXXXXX CALIBR SETUP TEST DISPLAY CONFIG Level 2 SCALES Level 3 COUNT SERIAL FEATUR REGION INDUST SNPSHT ZTARE CONSC# UID REGULAT ETHERNET REGWOR DECFMT PFORMT SOFTKEYS PASSWD TIME DIGIO KEYLCK VERS STNDBY RECALL DATE Only displayed if INDUST is selected from the REGULAT parameter KTARE MTARE NTARE CTARE DISPLY NO YES REPLAC NO YES SCALE YES NO REMOVE YES NO NOTHN PRTMOT PRTPT OVRBAS NO NO CALIB AGENCY NTEP YES YES SCALE CANADA INDUST NONE OIML Figure 3-9. FEATUR Menu, REGULA/INDUST Submenu FEATUR Menu, REGULA / INDUST Submenu Parameter Choices Description LEVEL 6, REGULA / INDUST submenu SNPSHT DISPLY SCALE Display or Scale weight source. ZTARE NO YES Remove tare on ZERO. Table 3-8. REGULA / INDUST Submenu Parameters Counterpart User Manual - Configuration 29 FEATUR Menu, REGULA / INDUST Submenu Parameter Choices Description LEVEL 6, REGULA / INDUST submenu KTARE YES NO Always allow keyed tare. MTARE REPLAC REMOVE NOTHIN Multiple tare action. NTARE NO YES Allow negative or zero tare. CTARE YES NO Allow CLEAR key to clear tare/accumulator. PRTMOT NO YES Allow print while in motion. PRTPT NO YES Add PT to keyed tare print. OVRBAS CALIB SCALE Zero base for overload calculation. CALIB = Calibrate Zero SCALE = Scale Zero AGENCY NTEP CANADA INDUST NONE OIML Selects the agency having jurisdiction over the scale site. • OIML, NTEP, and CANADA modes allow a tare to be acquired at any weight greater than zero. NONE allows tares to be acquired at any weight value. A tare can be cleared only if the gross weight is at no load. NONE allows tares to be cleared at any weight value. • NTEP and OIML modes allow a new tare to be acquired even if a tare is already present. In OIML mode, printing is not allowed if the scale is more than -20dd. In CANADA mode, the previous tare must be cleared before a new tare can be acquired. • NONE, NTEP and CANADA modes allow the scale to be zeroed in either gross or net mode as long as the current weight is within the specified ZRANGE. In OIML mode, the scale must be in gross mode before it can be zeroed; pressing ZERO in net mode clears the tare. • INDUST provides a set of subparameters to allow customization of tare, clear, and print functions in non-legal-for-trade applications. The value specified for this parameter affects the function of the front panel TARE and ZERO keys. See Section 9.8 on page 74 for more information. Table 3-8. REGULA / INDUST Submenu Parameters (Continued) 30 Counterpart User Manual 3.6.5 Serial, PFORMT, DIG I/O, VERS Submenus Scale Parameter Levels Level 1 ID AUDIT XXXXXXX CALIBR SETUP TEST DISPLAY CONFIG Level 2 SCALES FEATUR See SCALE Submenu See FEATUR Submenu SERIAL ETHERNET PFORMT DIGI/O VERS SOFTWR REG V 1.03 LR, V.1.00 DEFALT NO YES GFMT CFMT NFMT FMT FMT PORT <x><x> PORT 2 PALFMT Level 3 DIO 1 SAME AS GFMT TOTALFMT HDRFMT1 DIO 4 Same as DIO 1 OFF ACCFMT DIO 3 DIO 2 HDRFMT2 INPUT OUTPUT UNITS FUNCTN CLEAR <x><x> <x><x> DSPACC SAME AS GFMT GRSNET STABLE SETPOINT PRINT COMING SOON ZERO TARE ACC DHCP IPADDRESS NETMASK DNSPRI DFLGTWY DNSSEC COUNTERPART PORT ON OFF VAULT MAC REMOTEPT REMOTEIP OFF ONBOARD EXTERNAL CMD PORT 3 PORT 2 PORT1 SCALE SCANNER Same as PORT 2 IND SCALE BAUD BITS STOP BITS TERMIN ECHO RESPONSE 9600 8NONE 1 CR/LF ON ON 19200 7EVEN 2 CR OFF OFF 28800 7ODD EOLDY 0 STREAM SOURCE LFT SCALE 1 INDUST SCALE 2 OFF SFMT CMD SCANNER Same parameters as Port 1 SCALE 3 38400 57600 115200 <2><P><W7><U><M><S><CR><LF> 1200 2400 4800 Figure 3-10. Serial, PFORMT, DIG I/O, VERS Submenus Counterpart User Manual - Configuration 31 SETUP Menu Parameter Choices Description Level 2 submenus SCALE See Section 3.6.1 on page 18 Configure scale settings. See the level 3 submenus of Table 3-5 on page 20 for parameter descriptions. FEATURE See Section 3.6.3 on page 24 Set counting options, region settings, view Unit ID, and set consecutive numbering. See level 3 submenus of Table 3-7 on page 25 for parameter descriptions. SERIAL PORT 1 PORT 2 PORT 3 (Option Card) Configure communications ports. See level 3 submenus below for parameter descriptions. ETHERNET CURRENTLY WORKS WITH WEIGHVAULT. EXPANDED DHCP IPADDRES NETMASK DFLTGTWY DNSPRI DNSSEC COUNTERPART PORT REMOTEIP REMOTEPT MAC VAULT DHCP = on/off for static IP ADDRES = Address leased or statically set NET MASK = sub net address DFLTGTWY = default gateway DNSPRI = primary domain server IP number DNSSEC = secondary domain server IP number LCLHSTNM = local host name PORT = port number used REMOTE IP = remote IP number using Weighvault REMOTE PT = remote port number using Weighvault MAC = views the MAC address and is non-changeable VAULT = on or off PFORMT GFMT NFMT CFMT PALFMT ACCFMT TOTALFMT HDRFMT1 HDRFMT 2 Sets the print format for gross weight, net weight, count, pallet, accumulate, total, header 1 and header 2. DIG IO COMING SOON DIO 1 DIO 2 DIO 3 DIO 4 Assign digital input/output functions. VERS SOFTWR REG Displays the software version. Displays the regulatory version. CAPABILITIES COMING SOON. Level 3 submenus - Under the Level 2 Serial Feature PORT 1 PORT 2 PORT 3 CMD SCANNER BAUD BITS STOPS BITS TERMIN HEADERS EOLDLY SFMT Specifies Port 1 through 3’s mechanism for triggering a transmission of data, print message, baud rate, bits, stop bits, termination character, end-of-line delay, and echo. see level 4 submenu for parameter descriptions. Level 3 submenus - Under the Level 2 Ethernet Feature VAULT OFF ON BOARD EXTERNAL Selets on or off Using on board RJ45 Ethernet connections Using wireless port connections Table 3-9. Serial, PFORMT, DIG I/O, VERS submenu parameters 32 Counterpart User Manual SETUP Menu Parameter Choices Description Level 3 submenus - Under the Level 2 Version Feature SOFTWR V1.XX Displays the software version REG LR, V 1.XX Displays the legally relevant version Level 3 submenus - Under the Level 2 DIGIO Feature DIGIO DIO 1-4 Level 3 submenus - Under the Level 2 PFORMT Feature GFMT Gross format NFMT Net format CFMT Count format PALFMT Pallet format ACCFMT Accumulator format TOTALFMT Total format HDRFMT1 Header 1 format HDRFMT2 Header 2 format Level 4 Submenus - Under the Level 3 DIO Feature OFF Turns the digital input/output off. INPUT UNITS CLEAR DISPACC GRSNET CLRCN PRINT ZERO TARE Digital input functions OUTPUT FUNCTN Digital output functions. Level 3 submenus - Under the Level 3 PORT Feature CMD BAUD BITS STOP BITS TERMIN ECHO RESPONSE EOLDLY STREAM **SOURCE **SFMT Sets up the transmission information for the command. SCANNER BAUD BITS STOP BITS TERMIN HEADERS Sets up the transmission information for the scanner. SCALE BAUD BITS STOP BITS TERMIN EOLDLY SFMT Sets up the transmission information for scale 3. ** For SOURCE and SFMT to appear on menu display, you must first enable Legal for Trade parameter under STREAM Table 3-9. Serial, PFORMT, DIG I/O, VERS submenu parameters (Continued) Counterpart User Manual - Configuration 33 SETUP Menu Parameter Choices Description IND SCALE BAUD BITS STOP BITS TERMIN EOLDY SFMT Sets up the transmission information for the industrial scale parameter. Table 3-9. Serial, PFORMT, DIG I/O, VERS submenu parameters (Continued) 34 Counterpart User Manual 3.7 Calibration Menu See Section 4.0 on page 39 for calibration procedures. The Calibration menu can be protected by assigning a password in the Feature menu. Note The Counterpart requires the WZERO and WSPAN points to be calibrated. The linearity points are optional, but must NOT duplicate zero or span. During calibration, the TARE key acts as a data entry confirmation key. It also acts as an EXECUTE key, and accepts the value if calibration was successful. ID AUDIT XXXXXXX CALIBR SETUP SCALE 1 SCALE 2 SCALE 3 WZERO WVAL WSPAN Previous A/D raw counts are shown Press the calibrate softkey to calibrate zero. Press Menu to cancel Display and edit test weight value DISPLAY WLI N Previous A/D raw counts are shown Press the calibrate softkey to calibrate span. Press Menu to cancel REZERO Calibrating Press calibrate softkey to remove offset from zero from zero and span calibrations Calibrating Calibrating POINT 1 TEST POINT 2 POINT 3 POINT 4 POINT 5 Same as POINT 1 WGT 1 COMING SOON CAL1 Figure 3-11. Calibration Menu CALIBR Menu Parameter Choices Description Level 2 submenus WZERO — Press the calibrate softkey and the A/D raw counts will be displayed. Press calibrate softkey again to calibrate zero, or press MENU to cancel. “CALIBRATING” will be appear prior to automatically moving to WVAL. WVAL — Press calibrate softkey to display and edit the test weight value. Press calibrate softkey again to move to WSPAN. WSPAN — Press calibrate softkey and the A/D raw counts will be displayed. Press calibrate softkey to calibrate the span or press MENU to cancel. “CALIBRATING” will be appear prior to automatically moving to WLIN. WLIN COMING SOON POINT 1 — POINT 5 WGT 1 allows you to display and edit the test weight value. Press calibrate softkey to edit the value. CAL1 allows you to calibrate and display the raw A/D value. Press TARE to perform calibration. Press calibrate softkey to will move to the next calibration point. The linearity points are optional, but must NOT duplicate zero or span. Note They must be between zero and span. REZERO COMING SOON — Press calibrate softkey to remove an offset value from the zero and span calibrations (e.g. if hooks or chains are being used during calibration). Use this parameter only after WZERO and WSPAN have been set. See Note Section 4.1 on page 39 for more information about using this parameter. Table 3-10. Calibration Menu Parameters Counterpart User Manual - Configuration 35 3.8 Test Menu ID AUDIT XXXXXXX A/D CALIBR SETUP DIG I/O TEST DISPLAY COMM WARNING... DISCONNECT DIGITAL I/O BEFORE RUNNING TEST PORT1 PORT2 PASS or FAIL PASS or FAIL RAM KEYPAD PASS or FAIL TEST LOOP DIO 1 DIO 2 DIO 3 DIO 4 PASS or FAIL STATUS STATUS STATUS STATUS COMING SOON AD1 AD2 RAW ZERO SPAN mV EXCVDC VAL VAL VAL VAL VAL VAL VAL Figure 3-12. Test Menu TEST Menu Parameter Choices Description Level 2 submenus A/D DIG I/O COMING SOON AD1 AD2 EXCVAC Gives details of current or live A/D counts as well as stored zero and span A/D values. LOOP DIO 1 DIO 2 DIO 3 DIO 4 Tests your digital I/O ports. If they are functioning, “PASS” is displayed. If they are not functioning, “FAIL” is displayed. Shows voltage levels for signal and excitation voltages. Note Both inputs and outputs are active low. They go to a ground state when active. Warning The I/O ports become activated when the test is performed. Make sure any equipment is disconnected prior to performing this test to avoid it being inadvertently activated. COMM PORT1 PORT2 Performs a loopback test on the serial ports. If they are functioning, “PASS” is displayed. If they are not functioning, “FAIL” is displayed. RAM TEST Tests the unit’s memory. if it is functioning, “PASS” is displayed. If it is not functioning, “FAIL” is displayed. KEYPAD TEST Tests the unit’s individual keypad buttons by displaying the name of the key pressed. If nothing is displayed, the key is not functioning. Press the Menu key to exit the test. Level 3 submenus - Under Level 2 A/D Feature RAW VAL Displays the live current raw A/D count. ZERO VAL Displays the captured A/D Zero calibration value. SPAN VAL Displays the captured A/D Span calibration value. mV VAL Displays the live current millivolt signal voltage. EXCVDC VAL Displays the current excitation voltage. Table 3-11. TEST Menu Parameters 36 Counterpart User Manual TEST Menu Parameter Choices Description LOOP TEST Performs a loop test on dig I/O cards. DIO 1 DIO 2 DIO 3 DIO 4 STATUS Displays the status of each individual digital I/O port. If set as input, the display shows input stats IN HI or IN LO. If set as output, pressing Enter toggles the output between HI and LO. OUT HI or OUT LO. OUT LO is active. PORT1 PORT2 TEST Performs a loopback test on serial port 1 or 2. Connect jumper TX and RX together on port 1 or port 2 before testing. Table 3-11. TEST Menu Parameters 3.9 Display Menu There are three display settings on the Counterpart. ID AUDIT XXXXXXX CALIBR SETUP TEST DISPLAY CONTRAST BRIGHT IMAGE 100 50 Negative 0-100% 0-100% Positive Figure 3-13. DISPLAY Menu Setting the display parameters from this top level menu is temporary - after a power cycle, the values will revert to their previous values. Changes made to these parameters through the CONFIG menu are kept through a power cycle. Counterpart User Manual - Configuration 37 3.10 ID Menu The ID menu displays parameters for registers from 1 to 150. Sub-parameters are shown below. ID AUDIT XXXXXXX CALIBR SETUP TEST REG 2 REG 150 SAME AS REG 1 SAME AS REG 1 REG 1 QUANTITY CODE DESC VALUE VALUE VALUE DISPLAY PART NUM LOT VALUE VALUE UNIT WT VALUE TARE VALUE UNITS LOCATION LB VALUE OZ KG G OFF Figure 3-14. ID Menu ID Menu Parameter Choices Description Level 2 submenus REG 1, 2 150 QUANTITY CODE DESCRIPTION PART NUMBER LOT UNIT WEIGHT TARE UNITS LOCATION Table 3-12. ID Menu Parameters 38 Counterpart User Manual 4.0 Calibration The Counterpart can be calibrated using the front panel, EDP commands, or Revolution®. Note Calibration can be performed in two places within the menu: the CALIBR menu shown in Figure 4-1 and the SCALE submenu shown in Figure 3-6 on Page 18. The CALIBR menu shown in Figure 4-1 is a “quick access” calibration; for more in-depth scale setup and calibration, use the menus found under SETUP»CONFIG»SCALE (see Figure 3-6 on Page 18). Calibration consists of the following steps: • Zero calibration • Entering the test weight value Note • • • Span calibration Optional five-point linearization Optional rezero calibration for test weights using hooks or chains. The Counterpart requires the WZERO and WSPAN points to be calibrated. The linearity points are optional, but must NOT duplicate zero or span. During calibration, the TARE(Enter) key acts as a data entry confirmation key. The soft calibrate key accepts that value. ID AUDIT XXXXXXX CALIBR SETUP SCALE 1 SCALE 2 SCALE 3 WZERO WVAL WSPAN Previous A/D raw counts are shown Press the calibrate softkey to calibrate zero. Press Menu to cancel Display and edit test weight value TEST WLI N Previous A/D raw counts are shown Press the calibrate softkey to calibrate span. Press Menu to cancel DISPLAY REZERO Calibrating Press calibrate softkey to remove offset from zero from zero and span calibrations Calibrating Calibrating POINT 1 POINT 2 POINT 3 POINT 4 POINT 5 Same as POINT 1 WGT 1 COMING SOON CAL1 Figure 4-1. Calibration (CALIBR) Menu 4.1 Front Panel Calibration 1. Press the MENU SETUP button, then press until the display reads CALIBR (see Figure 4-1). 2. Press TARE(Enter) or to go to the scale to be calibrated. Press TARE(Enter) or to go to WZERO . Press TARE(Enter) once again to display a value and press the Calibrate softkey to Calibrate WZERO. Note If you do not want to calibrate zero, press Menu to exit. 3. The indicator displays CALIBRATING while calibration is in progress. When complete, press TARE(Enter) or to advanced to the next prompt (WVAL). Note exit. To view the new A/D count, repeat Step 3, but instead of pressing TARE(Enter) while viewing the value, press MENU SETUP to 4. With WVAL displayed, press TARE(Enter) or to display or edit the stored calibration weight value. Press TARE(Enter) to store the WVAL value and advance to WSPAN. 5. With WSPAN displayed, press TARE(Enter) or to view the A/D count. Place test weights on the scale equal to WVAL. Press the Calibrate softkey to calibrate WSPAN. Note If you do not want to calibrate span, press Menu to exit. 6. After Calibrate softkey is pressed, the indicator displays CALIBRATING when complete. Press TARE(Enter) or and the SaveExit softkey or proceed to WLIN. To view the new A/D count, navigate back to the WSPAN, repeat Step 6; however, instead of pressing Calibrate softkey while viewing the value, press Save/Exit to exit. Note Counterpart User Manual - Calibration 39 Five-point linearization - COMING SOON Rezero - COMING SOON 4.2 EDP Command Calibration To calibrate the indicator using EDP commands, the indicator EDP port must be connected to a terminal or personal computer. See Section 2.7.1 on page 8 for EDP port pin assignments. Once the indicator is connected to the sending device, do the following: 1. Place the indicator in config mode (display must read SCALE - see Figure 3-6 on page 19) and remove all weight from the scale platform. If your test weights require hooks or chains, place the hooks or chains on the scale for zero calibration. 2. Send the SC.WZERO#n command to calibrate zero. The indicator displays CALIBRATING while calibration is in progress. 3. Place test weights on the scale and use the SC.WVAL#n command to enter the test weight value in the following format: 4.3 Revolution® Calibration To calibrate the indicator using Revolution, the indicator EDP port must be connected to a PC running the Revolution configuration utility. 1. Place the indicator in config mode (display reads SCALE, see Figure 3-6 on page 19) and remove all weight from the scale platform. 2. From Revolution, select File » New. The Select Indicator dialog box appears. 3. Select Counterpart and click OK. 4. From the Communications menu, select Connect. 5. From the left pane, expand the Scale selection and click the Scale button. SC.WVAL=nnnnnn<CR> 4. Send the SC.WSPAN#n command to calibrate span. The indicator displays CALIBRATING while calibration is in progress. 5. Up to five linearization points can be calibrated between the zero and span calibration val ues. Use the followi ng commands to set and calibrate a single linearization point: SC.WLIN.V1=nnnnn<CR> SC.WLIN.C1<CR> The SC.WLIN.V1#n command sets the test weight value (nnnnn) for linearization point 1. The SC.WLIN.C1#n command calibrates the point. Repeat using the SC.WLIN.Vx and SC.WLIN.Cx commands as required for additional linearization points. 6. To remove an offset value, clear all weight from the scale, including hooks or chains used to hang test weights, then send the SC.REZERO#n command. The indicator displays CALIBRATING while the zero and span calibrations are adjusted. 7. Send the SC.KUPARROW#n or SC.KEXIT#n EDP command to return to normal mode. 40 Counterpart User Manual Figure 4-2. Scale Button 6. From the Tools menu, select Calibration Wizard. 7. Click NEXT to begin the Calibration Wizard. 8. Select whether you want to perform a standard calibration or a standard with multi-point linearization and click NEXT. 9. In the text box, enter the test weight value be used for span calibration. 10. Select the checkbox if you are using chains or hooks during the calibration, then click NEXT. 11. Remove all weight from the scale and click Click to Calibrate Zero to begin zero calibration. If your test weights require hooks or chains, place them on the scale for zero calibration. 12. When zero calibration is complete, the Calibration Wizard prompts you to place test weights on the scale. Place the test weights on the scale, then click Click to Calibrate Span. 13. If you chose to perform linear calibration, the Calibration Wizard now displays prompts (1–5). Enter the weight value for Linear Point #1, place test weights on scale and click GO. Repeat for additional linearization points, then click NEXT. 14. The new and old calibration settings are displayed. To accept the new values, click Finish. To exit and restore the old values, click Cancel. 4.4 More About Calibration The following topics provide additional information about compensating for environmental factors (Section 4.4.1) and diagnostic information for determining expected zero and span coefficients. 4.4.1 Adjusting Final Calibration Calibration may be affected by environmental factors including wind, vibration, and angular loading. For example, if the scale is calibrated with 1000 lb, a strain test may determine that at 2000 lb the calibration is 3 lb high. In this case, final calibration can be adjusted by tweaking WVAL to 998.5 lb. This adjustment provides a linear correction of 1.5 lb per 1000 lb. To adjust the final calibration, return to the WVAL prompt and press TARE(Enter) to show the test weight value. Press or to adjust calibration up or down. Press Calibrate softkey to save the value, then press to return to the CALIBR menu. Counterpart User Manual - Calibration 41 5.0 Scale Operations The following paragraphs contain detailed operator instructions for Counterpart. Included are instructions to enter tare weights, toggle between net and gross weight, enter unit weights, perform inventory accumulation and reduction, and toggle between scales. All operator instructions are conducted with the scale in the operation mode that is the weighing or normal mode. Counting scale accuracy is primarily determined by the following factors: • Sample size (number of pieces) • Total sample size as a percentage of full scale capacity • Piece-to-piece weight variation As a general rule when determining sample size of fairly uniform pieces, the larger the sample size the greater the total sample weight, therefore, the better the counting accuracy. Selecting the smallest capacity scale that can obtain the highest counting resolution should be considered, but should not sacrifice the capacity required for the heaviest container of parts. For this kind of application, a dual-platform scale may be the best selection. There is a direct relationship between piece-to-piece weight variation (non-uniformity) and counting accuracy. Therefore, elimination of the piece-to-piece weight variations can be accomplished by: 1. Isolating the sample used to calculate the unit weight and use the same sample to re-check the scale. 2. Recalculating the unit weight from lot-to-lot of parts. Parts manufactured on one machine may vary slightly from another machine relative to weight. 3. Tightening the manufacturing tolerances on the parts reduces piece weight variations and increases count accuracy. The Stand-By Screen At the stand-by screen the WEIGHT, UNIT WEIGHT, and QUANTITY displays show zeroes and the annuciator for the platform you are using is illuminated (Scale 1 or 2). 5.1 Weight Unit Switching The weight units displayed can be changed between Primary, Secondary and Tertiary units during weighing operations by pressing the UNITS TOGGLE key. 5.2 Entering Tare Weights Tare weights can be entered in the scale by one of two methods: one-touch tare or digital tare. Digital tare is used when the tare weight is already known while one-touch tare is used when the tare weight is unknown. If you call up an Item Code already programmed into the Counterpart memory and you have a Tare Weight stored for that Item Code, the Tare Weight stored with the Item Code will override one entered digitally or by using the TARE key. 5.2.1 One-Touch Tare, Tare Unknown 1. If the tare weight value is not known, place the container, box, or item to be tared on the scale and press TARE. The weight display should now show 0 and the Net annunciator should illuminate. 2. Remove the container, box, or item from the scale. The weight display should show a negative weight value (weight of the tared container, box, or item). 3. To clear the tare weight, press TARE with no weight on the scale, scale should be at gross zero. The Net annunciator will no longer be illuminated. 5.2.2 Digital Tare, Tare Weight Known 1. If the tare weight value is known, use the numeric keypad to key in the value and then press TARE. The Net annunciator will illuminate. 2. To reset the tare to zero, press TARE again with no weight on the scale while the scale is at Gross Zero and the Zero annunicator is lit. 42 Counterpart User Manual 5.3 Toggling Between Gross and Net To toggle between net and gross weight, a tare value must be entered into the scale. Follow Section 5.2 to enter a tare value. After a tare value is entered into the scale, items placed on the scale will cause the net annunciator to illuminate and allow toggling between net weight and gross weight. An example of toggling between net weight and gross weight is shown below: 1. Place 0.5 lb weight on the scale and then press TARE once. The weight display should show 0.000 lb. 2. Place another 0.5 lb weight on the scale. The scale weight display should now show 0.500 and the net annunciator should be illuminated. 3. Press the GROSS/NET key. The weight display should show 1.000 GROSS WEIGHT, the net annunciator will no longer be illuminated. The unit weight and the quantity displays goes to zero. 4. Press the GROSS/NET key. The weight display should now show 0.500 and the net weight annunciator is illuminated again. 5.4 Entering Unit Weights Entering unit weights can be done either by sampling, as presented in Section 5.4.1, or by key entry as described in Section 5.4.2. Note EXTENT OF INSUFFICIENT SAMPLES controls unit weight sampling. The default setting for the SPEC is 0.1 percent. SAMPLE QUANTITY determines the number of pieces the scale assumes are on the platter when you press the SAMPLE key to calculate the unit weight. The default setting for the 10 pieces. XFRUNITWT sets whether the unit weight determined by sampling is automatically transferred from Scale 1 to Scale 2. The default setting AUTOMATIC. Note UNIT WEIGHT BASE controls whether the unit weight is displayed per 1000 pieces or per 1 piece. The default settings for this 1000 pieces. Unit Weight per 1000 Pieces vs. Unit Weight per 1 Piece The scale’s internal microprocessor calculates unit weights to several decimal places. However, the scale display generally can only show Unit Weight to a maximum of 8 characters (or 7 places and a decimal point). If this Unit Weight is recorded from the scale display and entered by key entry, this can introduce errors in the Unit Weight and consequently in the counts. This error increases as the Unit Weight of the parts being counted decreases. Example: A sample of 10 zener diodes is placed on the scale. The Unit Weight is computed to be 0.000653642 lbs. However, the scale has a 7 character display for Unit Weight (or 6 places after the decimal point - 0.000000) so the scale can only display 0.000653 as the Unit Weight. If this Unit Weight were recorded and keyboard entered in future counting operations, the resulting error would be: 0.000653642 - 0.000653 x 100 = .098% 0.000653642 On the other hand, with entry of the Unit Weight as “weight per 1000 pieces” the decimal place is, in effect, moved three places to the right, allowing 3 more decimal places of accuracy. In this example, the entry would be made as 0.653642 per 1000 pieces, eliminating the error. As a practical note, entering unit weights per 1000 pieces also lessens the chances of entering the wrong number of zeros when keying in weights with many leading zeros. Incorrect entry of unit weights is a common cause of inaccurate counting. When might you want to use unit weight per 1 piece? Generally in one of two cases: 1. If you are working with other existing systems or procedures that are already set up to record unit weight per piece (inventory systems, labeling requirements, etc). 2. If the unit weight or your pieces is more than 100 lbs, the number of digits in the scale’s Quantity display will not be able to fully display counts of more than 100 pieces. Counterpart User Manual - Scale Operations 43 5.4.1 Unit Weight Operation by Sampling Unit weight operation by sampling is accomplished by placing a 10 piece sample on the scale and then pressing the SAMPLE key. The scale calculates a unit weight based on the weight of the sample. The following paragraphs detail the procedure with UNIT WEIGHT either set at on or off. Default settings are placed at 10 pieces but if you want to key in a larger sample, key in the quantity and press TARE(Enter). Unit Weight Update Set to “Update: Off” (Default) Parts can be sampled (generating a new unit weight) or a unit weight can be scanned but the new unit weight is not saved into the stored copy of the loaded ID record. Unit Weight Auto-Recomputing Set to “1: On” Parts can be sampled (generating a new unit weight) or a unit weight can be scanned but the new unit weight is not saved into the stored copy of the loaded ID record unless the existing unit weight is zero. 5.4.2 Unit Weight Operation by Key Entry Unit weight operation by key entry is accomplished by using the numeric keypad to enter the known value of the unit weight and then pressing the UNIT WEIGHT key. An example of unit weight operation by key entry is shown below: 1. With the display in the weighing mode, enter the known unit weight using the keyboard, for example, 200.00. 2. Press UNIT WEIGHT key to enter the unit weight. 3. Place a 2 lb. weight on the scale. The scale displays the quantity for the weight placed on the scale, for example, the weight display reads 2.000, the unit weight display reads 200.00, and the quantity display reads 10). You can also enter a weight as APW (Average Piece Weight) or Unit Weight per thousand. Note To clear the unit value, enter 0 and push the unit weight key. Piece Weight Enhancement After performing a sample process, the unit determines the maximum number of pieces that could be accurately used for a recompute. If the number of pieces on the scale is less than the recompute value, the RECOMP annunicator will be shown. 1. Place items to be counted on the scale platter, make sure the RECOMP annunciator is still on. 2. Press the SAMPLE key while the RECOMP annunciator is shown. This will start a sample process using the current piece count (instead of the SAMPLEQTY value) as the sample quantity. Negative Counting (Full Box Counting) Just as you can count by adding parts to the scale, you can also count by removing parts from the scale. This is called “negative counting” because a negative weight is displayed while counting. Contrary to what may seem intuitively logical, you do not use the (-) key to do negative counting. The (-) key is only used to delete an entry in accumulation mode that you want to erase. This procedure does not affect the inventory quantity for this item stored in the scale. Note To utilize the negative counting feature, you need to set NEGCOUNT to “On” under the Count Menu. There are two ways to do this depending on whether at the end you want to see the total amount remaining in the container or the total amount removed from the container. 44 Counterpart User Manual Counting Out of a Full Container - See Total Amount Remaining in the Container To carry out this operation you must know the tare weight ahead of time. 1. Place the full container on the scale. Press the TARE key. 2. Remove a 10 piece sample to the container and press the SAMPLE key. After the unit weight has been calculated, return the 10 piece sample to the container. 3. If you want to see how many are still in the bin you first have to know the tare weight of the bin or container. After removing the parts you want to take out of the bin, simply digitally enter the tare weight of the bin and press the TARE key. The scale will display how many parts were left in the bin. To print a label to put on the bin showing the total quantity in the bin, press the PRINT key. Negative Counting - Total Removed Displayed at the End With this procedure you can count accurately out of a full container for kitting, shipping, etc.without having to know the tare weight of the container. 1. Place a full container on the scale and press TARE. 2. Remove a 10 piece sample from the container and press SAMPLE. After the unit weight has been calculated, return the 10 piece sample to the container. 3. Remove the number of pieces you need for kitting, shipping, etc. The amount removed will be displayed. If you need a label for each kit or container, press the PRINT key after removing each batch of pieces. 5.5 IDs IDs are used to save and recall previously set codes, descriptions, unit weight, and tare preferences. The Counterpart has the capacity to store up to 150 individual IDs. There are three ways that IDs can be entered and set. Those three ways include: 1. Normal 2. Through Count Mode 3. Through Revolution To enter alpha ID characters you can double press the numeric keypad to obtain alpha characters much like accessing alpha characters on a cell phone keypad. To store more than 150 IDs, WeighVault is required (see Section 5.5.5 on page 48). ID AUDIT XXXXXXX CALIBR SETUP TEST REG 2 REG 150 SAME AS REG 1 SAME AS REG 1 REG 1 QUANTITY CODE DESC VALUE VALUE VALUE DISPLAY PART NUM LOT VALUE VALUE UNIT WT TARE VALUE VALUE UNITS LOCATION LB VALUE OZ KG G OFF Figure 5-1. ID Menu 5.5.1 Setting an ID Using the Normal Mode 1. Press the MENU SETUP key MENU SETUP to access this menu. 2. Press to ID and then press and you will be at REG1. 3. Navigate to the REG number you want to set (1-150) by using the and keys. All menus have wrap-around functionality. If you are at ID1 and want to access ID150, you can quickly do so Note by moving backwards through the menu. Counterpart User Manual - Scale Operations 45 4. When you have reached the REG number you want to set, press to select that register number. 5. Press and enter the CODE value - either the numeric or alpha-numeric is acceptable. Thirty two characters can be entered and 25 characters maximum for bar code entries. This is the code that will be used to recall the ID. 6. When the desired value is entered, press TARE(Enter). 7. Enter in the information for description, part number, lot number, unit weight, tare, etc. with all entries being optional. 8. Press TARE(Enter) again to accept the value(s). 9. Press to advance back up to REG. Press 10. When complete, push the DONE softkey. one more time, the DONE softkey is displayed. Enter Lot Number - Optional 1. “LOT” will be displayed. Press key to enter the alpha numeric value using the Counterpart keypad. 2. Press the TARE(Enter) key to accept. Enter Unit Weight - Optional 1. “UNIT WT” will be displayed. Press 2. Press the TARE(Enter) key to accept. and enter the unit weight value using the Counterpart keypad. Enter Tare - Optional 1. “TARE” will be displayed. Press and enter the tare value using the Counterpart keypad. 2. Press the TARE(Enter) key to accept. Enter Units - Optional 1. “UNITS” will be displayed. If you need to adjust the units, use the press to view the current setting. 2. Use the key or the TARE(Enter) key to store the setting. and keys to adjust the selection or Enter Location - Optional 1. “LOCATION” is displayed. Use the 5.5.2 key and enter a value. Push the TARE(Enter) key to store. Using a Stored ID 1. Press the CODE (softkey needs to be set up) key. 2. Counterpart responds with a code #=> with a prompt. Enter the ID code. 3. Press TARE(Enter). Note 46 Press code and then enter a zero to unload an ID code. Counterpart User Manual 5.5.3 Adding an ID From Count Mode 1. 2. 3. 4. 5.5.4 Press the CODE softkey. Add in the ID number. If the ID number is not already in the database, Counterpart prompts, Not Found, Save as New ID? Select Yes or No. By selecting Yes, Counterpart will store that ID code into the first open register. By selecting No, you will go back to the Counting mode screen. Adding an ID Through Revolution To add an ID using Revolution, you must have Revolution installed on your computer. Visit www.ricelake.com to download this free configuration software. 1. Unplug power to Counterpart. 2. Wire cable between computer and Counterpart. 3. Plug in power to Counterpart and press Counterpart’s POWER key. 4. Open Revolution on computer and go to Base Configuration, >> IDs 5. To upload IDs from Counterpart, select Connect from the Toolbar or under Communications - Connect. 6. Select Communications then Upload Configuration or Upload Section. 7. Select REG # and add information into the screens as shown in Figure 5-2. Figure 5-2. Adding IDs Through Revolution 8. To download the ID to Counterpart, connect if Revolution is disconnected, and select Communications and either Download Configuration or Download Section. 9. All register IDs are now entered and available through Revolution. Note By Uploading ID’s using Revolution and saving them to a file the ID’s can be backed up for future use. Counterpart User Manual - Scale Operations 47 5.5.5 WeighVault WeighVault is a PC program which allows Counterpart users to add, edit, and access IDs over a network connection. WeighVault surpasses the Counterpart's 150 ID limitation and eliminates front-panel entry of ID parameters. It also collects data as transactions occur, and provides detailed transaction and productivity reports which can be exported to Excel, Word, or PDF. For WeighVault to function, the following criteria must be met: • Use on-board Ethernet or wireless option (PN72117 Ethernet TCP/IP Interface Installation and Configuration Manual) • IP address assigned to the Counterpart (Refer to PN72117 Ethernet TCP/IP Interface Installation and Configuration Manual) (If using option) • WeighVault enabled in the Counterpart menu (ETHERNET menu; see Section 3.6.5 on page30). Table 5-1 lists parameters that must be entered in order for WeighVault to work. Parameter Default DHCP Consult with network administrator IP ADDRESS Static IP Address - Consult with network administrator NET MASK 255.255.255.0 - Consult with network administrator PORT Port 10001 REMOTE IP IP address of computer running WeighVault REMOTE PT 5466 VAULT Onboard or external if using a wireless option Table 5-1. WeighVault Default Settings Note The above mentioned default settings only apply if the VAULT parameter is set to ONBOARD. See Figure 3-10 on page 30. Once the above criteria have been met, IDs can then be entered into WeighVault and saved on the PC’s hard drive. The Edit Product dialog box in Figure 5-3 shows ID parameters which can be saved in WeighVault. Figure 5-3. WeighVault Edit Product Dialog Box To access a saved ID from WeighVault over the network connection, 1. Using the Counterpart front panel, press the CODE key. 2. Enter an ID CODE value. 3. Press the TARE(Enter) key. The ID CODE is loaded and ready to use. 48 Counterpart User Manual 5.6 Totalization Counts Counterpart has a totalization function that allows you to totalize the quantity of several weighings together. This is especially helpful if putting together parts kits Use the following steps to totalize parts. 1. Conduct a sampling process to determine the unit weight of the pieces. Or key in a known unit weight or recall an ID. 2. Enter a known tare weight or place an empty container on the scale to perform tare function. If an ID was recalled in step 1 its tare value is already loaded. 3. Place container 1 (full of parts) on the scale. The number of pieces in the container is shown in the ”PCS” area of the display. 4. Press the Total + softkey to store the number of pieces in container 1. The memory (M) icon is shown. The total value is shown in place of the piece weight value and will be labeled ”ttl”. 5. Remove container 1 and place container 2 (full of parts) on the scale. 6. Press the Total + softkey, the accumulated total is now equal to container 1 plus container 2. The displayed total is also updated. 7. Continue to add containers in the same totalization method. The total number of parts stored in all containers will be stored in the totalization register and shown on the display. 5.7 Parts Reduction Counts Parts reduction can also be done by using the - key while the scale is in the weighing mode and the memory annunciator is on. 1. Conduct a sampling process to determine the unit weight of the pieces. Or key in a known weight or recall an ID. 2. Enter known tare weight, or place an empty container on the scale to perform tare function. If ID was recalled in step one its tare value is already loaded. 3. Place container (full of parts) on the scale. The number of pieces in the container is shown in the ”PCS” area of the display. 4. Press the Total + softkey to store the number of pieces in the container. The memory (M) icon is shown. The total value is shown in place of the piece weight value and will be labeled ”ttl”. 5. Remove the number of parts required from the container and press the Total - softkey. The accumulated total will now be equal to previous total minus the number of pieces removed. The displayed total is also updated. The number of pieces remaining in the container is shown in the ”PCS” area of the display. 6. Repeat step 5 as needed. Note Once part reduction has been started, a press of Total + will give you an error message. Counterpart User Manual - Scale Operations 49 5.8 Connecting a Barcode Scanner The Counterpart will accept a barcode scanner connected to the unit. In order to use a scanner, you must set the specifications of the Counterpart scale to recognize the scanner to the appropriate port and in some cases, do the setup on the scanner required by the scanner manufacturer. The scanner allows non-contact, instantaneous, and accurate input of unit weight, tare weight, and ID code. QD2100 Barcode Scanner If you are using the Quickscan QD2100 barcode scanner sold by Rice Lake Weighing Systems, you can set up the scanner by connecting the scanner (PN121495) to the RS-232 port on the Counterpart CPU board.You will also need a cable (PN101555) and an AC power option for the scanner. Connections between the barcode scanner and Counterpart should be wired up as follows: Pin out Wire Color RX Green TX Red Ground Black DIGIO 5+ Table 5-2. Barcode Wiring Connections The default baud rate is set for 9600 for both Counterpart and the scanner. To set up barcode scanner parameters, use the following steps: 1. Navigate through the menu Setup >> Config >> Serial. 2. Set up the selected Port, J5 (Port 1) or J4 (Port 2) for the scanner. . 3. Follow through and set up the various parameters such as 9600 baud, 8 bits, 1 stop bit, none parity. 4. Headers are set to ON under the scanner submenu when needing to have headers for IDs, tare and unit weights. 5. If the header is set to OFF, the Counterpart assumes that all items are ID codes and automatically adds the ID code header. Header Codes for Bar Codes ID Code 3 Tare 4 Unit Weight 1 Table 5-3. Header Codes for Bar Codes 5.8.1 Setting up a Softkey To set up a softkey, use the following steps: 1. 2. 3. 4. 5. 6. 7. 8. 9. 10. 11. 12. 50 Press the MENU SETUP key. Navigate through the menu setup to Setup using the key. Press the to navigate to CONFIG. Press the to navigate to SCALES. Press the to navigate to FEATURE. Press the to navigate to COUNT. Using the scroll through until you get to SOFTKEYS. Scroll down, then using scroll through menu selections SK1 through SK12. Press to assign a softkey to that position Select a choice that you wish to be displayed. Press the arrow once the function is selected. Press Save/Exit softkey. MENU SETUP Counterpart User Manual 6.0 Serial Commands The Counterpart can be controlled by a PC or remote keyboard connected to an indicator serial port. Control is provided by a set of serial commands that can simulate front panel key press functions, display and change setup parameters, and perform reporting f u n c t i o n s . T h i s p r o v i d e s t he a b i l i t y t o p r i n t configuration data or to save to your hard drive. 6.1 The Serial Command Set The serial command set can be divided into five groups: key press commands, reporting commands, the RESETCONFIGURATION special function command, parameter setting commands, and transmit weight data commands. When a serial command is processed, the Counterpart responds with the message OK . The OK response verifies that the command was received and has been executed. If the command is unrecognized or cannot be executed, the Counterpart responds with ??. The following sections list the commands and command syntax used for each of these groups. 6.1.1 Key Press Commands Key press serial commands (see Table 6-1) simulate pressing the keys on the front panel of the indicator. These commands can be used in both setup and normal (weighing) mode. Several of the commands serve as “pseudo” keys, providing functions that are not represented by a key on the front panel. For example, to enter a 15-pound tare weight: 1. Type K1 and press ENTER (or RETURN). 2. Type K5 and press ENTER. 3. Type KTARE and press ENTER. Command Command KDISPTARE Display tare (pseudo key) KCLR Press the CLEAR key KCLRCN Reset consecutive number (pseudo key) KCLRTAR Clear tare from system (pseudo key) KLEFT In menu mode, move left in the menu KRIGHT In menu mode, move right in the menu KUP In weighing mode, press the UNDER key. In menu mode, move down in the menu. In data entry mode, decrement the current digit. KDOWN In weighing mode, press the UNDER key. In menu mode, move down in the menu. In data entry mode, decrement the current digit. KSAVE In menu mode, saves the current configuration KEXIT In menu mode, saves the current configuration then exits to normal mode K0–K9 Press number 0 (zero) through 9 KDOT Press the decimal point (.) KENTER Press the ENTER key KLOCK Lock specified front panel key. For example, to lock the ZERO key, enter KLOCK=KZERO. KUNLOCK Unlock specified front panel key. For example, to unlock the PRINT key, enter KUNLOCK=KPRINT. KDATE Display date (pseudo key) KTIME Display time (pseudo key) KESCAPE Exits the selected parameter. Returns to weigh mode if a parameter is not selected (functions identical to the MENU key in menu mode) KSOFTx Press softkey number x Function KMENU Press the MENU key KZERO In weighing mode, press the ZERO key KUNITS In weighing mode, press the UNITS key KPRINT In weighing mode, press the PRINT key KTARE Press the TARE key KID In weighing mode, press the ID key. In menu mode, move left in the menu. In data entry mode, move to previous digit. KGROSSNET In weighing mode, press the GROSS/NET key (pseudo key) KGROSS Go to gross mode (pseudo key) KNET Go to net mode (pseudo key) KDISPACCUM Display ACCUM (pseudo key) Function Table 6-1. Serial Key Press Commands (Continued) Table 6-1. Serial Key Press Commands Counterpart User Manual - Serial Commands 51 6.1.2 Keypad Lock The user has the ability to lock or unlock the keypad. The commands are listed in Table 6-2. Command Parameter KEYLCK.NUMBER Keys can be locked or unlocked. Default for all: Unlock KEYLCK.PRINT KEYLCK.TARE KEYLCK.ZERO KEYLCK.SAMPLE KEYLCK.GROSSNET KEYLCK.UNITWT Table 6-2. Keypad Lock Commands 6.1.3 ID Commands Up to 150 codes can be entered under ID commands. Command Function ID.CODE#n (#n = ID Code number referenced) ID.DESC#n (#n = item description) ID.LOCATION#n (n = Item location)) ID.LOT#n (#n = lot number) ID.PARTNUMBER#n (#n = part number) - Can enter up to ID.QUANTITY#n (#n = quantity) ID.TARE#1 (weight value) ID.UNITS#1 (weight value in pounds) ID.UNITWEIGHT#1 (weight value) Table 6-3. ID Commands 6.1.4 ETH Commands ETH commands are parameter setting commands. The commands listed in Table 6-4 can be used. Command Parameter ETH.DEFAULTGATEWAY Sets IP address 0.0.0.0 ETH.DHCP ON ETH.DNSPRIMARY 0.0.0.0 ETH.DNSSECONDARY 0.0.0.0 ETH.IPADDRESS 192.168.0.1 ETH.LOCALHOSTNAME COUNTERPART ETH.MACADDRESS 00-00-00-00-00-00 ETH.NETMASK 0.0.0.0 ETH.PORT 10001 ETH.REMOTESERVERIP 0.0.0.0 ETH.REMOTESERVERPORT 5466 Table 6-4. Ethernet Parameters 52 Counterpart User Manual Command ETH.WEIGHVAULT Parameter OFF Table 6-4. Ethernet Parameters 6.1.5 Reporting Commands 6.1.6 Reporting commands send specific information to the serial port. The commands listed in Table 6-5 can be used in all modes. Command Function Clear and Reset Commands The following commands can be used to clear and reset the Counterpart: RS : Reset system. Resets the indicator without resetting the configuration. RESETCONFIGURATION: Restores all configuration parameters to their default values (menu mode only). The RESETCONFIGURATION function can also be initiated by pressing navigating to the DEFALT parameter under the VERS menu and selecting YES. Then press ENTER to reset the indicator. DUMPALL List all parameter values and ID information DUMPCONFIG List all parameter values excluding ID information DUMPAUDIT List audit trail information DUMPIDS List all ID information DUMPIDINDEX List a specific ID by index. See table 6-13 for more information. DUMPIDCODE List a specific ID by code. See table 6-13 for more information. VERSION Write Counterpart software version 6.1.7 P Write current displayed weight with units identifier. See Section 9.2.1 on page 67. XE Returns a 10-digit code representing any error conditions currently shown on the front panel. Parameter setting commands allow you to display or change the current value for a particular configuration parameter (Tables 6-6 through 6-12). Current configuration parameter settings can be displayed in all modes using the following syntax: Table 6-5. Reporting Commands Note Transmitting all configuration settings can be achieved by the DUMPALL command or by pressing PRINT while in menu mode. Note All load cell calibration settings are lost w h e n t h e R E S E T C O N F I G U R AT I O N command is run. CLEARBUFFER: Clears the buffer information. Parameter Setting Commands command<ENTER> Most parameter values can be changed in menu mode only. Use the following command syntax when changing parameter values: command=value<ENTER>, where value is either a number or a parameter value. Use no spaces before or after the equal (=) sign. If you type an incorrect command, the display reads ??. For example, to set the motion band parameter to 5 divisions, type the following: SC.MOTBAND=5<ENTER> For parameters with selectable values, enter the command and equal sign followed by a question mark: command=?<ENTER> to see a list of those values. The indicator must be in menu mode to use this function. Some parameters are valid only if other parameters or parameter values are specified. Restrictions for front-panel configuration also apply to serial command configuration. Note Counterpart User Manual - Serial Commands 53 Command Description Values SC.GRADS#n Graduations 1–100000 SC.ZTRKBND#n Zero track band 0, 0–100 SC.ZRANGE#n Zero range 1.900000, 0–100 SC.MOTBAND#n Motion band 1, 0–100 SC.SSTIME#n Standstill time 1–65535 SC.OVRLOAD#n Overload FS+2%, FS+1D, FS+9D, FS SC.DIGFLTR1#n SC.DIGFLTR2#n SC.DIGFLTR3#n Digital filtering 1, 2, 4, 8, 16, 32, 64, 128, 256 SC.DFSENS#n Digital filter cutout sensitivity 2OUT, 4OUT, 8OUT, 16OUT, 32OUT, 64OUT, 128OUT SC.DFTHRH#n Digital filter cutout threshold NONE, 2D, 5D, 10D, 20D, 50D, 100D, 200D, 250D SC.THRESH#n Zero threshold 0–9999999 SC.SMPRAT#n Sample rate 30HZ, 60HZ, 120HZ, 240HZ, 480HZ, 960HZ SC.PWRUPMD#n Power up mode GO, DELAY SC.TAREFN#n Tare function BOTH, NOTARE, PBTARE, KEYED SC.PRI.DECPNT#n Primary units decimal position 8.888888, 88.88888, 888.8888, 8888.888, 88888.88, 888888.8, 8888888, 8888880, 8888800 SC.PRI.DSPDIV#n Primary units display divisions 1D, 2D, 5D SC.PRI.UNITS#n Primary units lb, kg, g, oz, OFF SC.ACCUM#n Accumulator enable ON, OFF SC.WZERO#n Zero calibration — SC.WVAL#n Test weight value test_weight_value SC.WSPAN#n Span calibration — SC.WLIN.F1– SC.WLIN.F5#n Actual raw count value for linearization points 1–5 0–16777215 SC.WLIN.V1 SC.WLIN.V5#n Test weight value for linearization points 1–5 0.000001–9999999 SC.WLIN.C1– SC.WLIN.C5#n Calibrate linearization points 1–5 — SC.LC.CD#n Deadload coefficient — SC.LC.CW#n Span coefficient — SC.LC.CZ#n Temporary zero — SC.REZERO#n Rezero — SC.SEC#n Secondary units lb, kg, g, oz, OFF SC.TER#n Tertiary units lb, kg, g, oz, OFF Table 6-6. SCALES Serial Commands Command Description Values EDP.BAUD#p Port baud rate 1200, 2400, 4800, 9600, 19200, 28800, 38400, 57600, 115200 EDP.BITS#p Port data bits/parity 8NONE, 7EVEN, 7ODD EDP.STOPBITS#p Port stop bits 1, 2 EDP.PRNMSG#p Print message ON, OFF Table 6-7. SERIAL Port Serial Commands 54 Counterpart User Manual Command Description Values EDP.ECHO#p Port echo ON, OFF EDP.EOLDLY#p Port end-of-line delay 0–255 (0.1-second intervals) EDP.HEADERS#p Port header ON, OFF EDP.INPUT#p Port input CMD, SCANNER, SCALE, IND SC EDP.PORT Port reporting command. It responds to the port you are connected to. EDP.RESPONSE#p Port response ON, OFF EDP.SFMT#p Port custom stream format 0-200 characters EDP.SOURCE#p Port source 1, 2, 3 EDP.STREAM#p Port stream OFF, LFT, INDUST EDP.TERMIN#p Port termination CR/LF, CR STR.POS Custom stream identifiers STR.NEG None, Space, + None, Space, - STR.PRI 8 alphanumeric characters STR.SEC STR.TER STR.GROSS STR.NET STR.TARE STR.MOTION 2 alphanumeric characters STR.RANGE STR.OK STR.INVALID STR.ZERO Table 6-7. SERIAL Port Serial Commands (Continued) Command Description Values CFGPWD Configuration password 0, 1–9999999 CONSNUM Consecutive numbering 0–9999999 CONSTUP Consecutive number start-up value 0–9999999 DATEFMT Date format MMDDYYYY, DDMMYYYY, YYYYMMDD, YYYYDDMM DATESEP Date separator SLASH, DASH, SEMI DECFMT Decimal format DOT, COMMA DSPBRIGHT Sets display intensity 0 (dimmest), through 100 (brightest as a percentage) KYBDLK Keyboard lock (disable keypad) OFF, ON REG.AGENCY Regulatory compliance NONE, OIML, NTEP, CANADA, INDUST REGULAT=NTEP Regulatory compliance NONE, OIML, NTEP, CANADA, INDUST REG.CTARE Allow clear keyed tare NO, YES REG.WORD Weighing mode Gross, Brutto REG.KTARE Always allow keyed tare NO, YES REG.MTARE Multiple tare action REPLACE, REMOVE, NOTHING REG.NTARE Allow negative tare NO, YES REG.ZTARE Remove tare on ZERO NO, YES Table 6-8. FEATURE Serial Commands Counterpart User Manual - Serial Commands 55 Command Description Values REG.BASE Zero base for overload calculation CALIB, SCALE REG.PRTMOT Allow print while in motion NO, YES REG.PRINTPT Add PT to keyed tare print NO, YES REG.SNPSHOT Display or Scale weight source DISPLAY, SCALE SD Set date MMDDYY, DDMMYY, YYMMDD, or YYDDMM. Enter six-digit date using the year-month-day order specified for the DATEFMT parameter, using only the last two digits of the year. ST Set time hhmm (enter using 24-hour format) TIMEFMT Time format 12HOUR, 24HOUR TIMESEP Time separator COLON, COMMA Table 6-8. FEATURE Serial Commands (Continued) Command Description Values GFMT.FMT Gross demand print format string NFMT.FMT Net demand print format string ACC.FMT Accumulator print format string CFMT.FMT Count format TOTAL.FMT Total Format HDRFMT1 Header 1 Format PALFMT.FMT Pallet Format HDRFMT2 Header 2 Format See Section 7.0 on page 58 for information about demand print format strings. Table 6-9. PFORMT Serial Commands Command Description Values DIO#b Digital input function OFF, ZERO, NT/GRS, TARE, UNITS, PRINT, ACCUM, TIMDATE, ESC, CLEAR, DSPTAR, IDKEY, KEY0–KEY9, KEYDP, ENTER, NAVUP, NAVDN, NAVLFT, NAVRGT, KBDLOC, HOLD, CLRCN, GROSS, NET, PRIM, SEC, CLRTAR, CLRACC, TRIGGER DIO#b Digital output function OVER, UNDER, ACCEPT, ZEROBD Digital inputs and outputs are specified by bit number Table 6-10. DIG I/O Serial Commands Command GFMT.PORT Description Set the port for each of these commands Value 2 NFMT.PORT ACC.PORT CFMT.PORT TOTAL.PORT PALFMT.PORT Table 6-11. Select Port Serial Commands 56 Counterpart User Manual 6.1.8 Normal Mode Commands The normal mode print commands (see Table 6-12) transmit data to the serial port on demand in either setup or normal mode. Command Description Values CONSNUM#n Set consecutive number 0–9 999 999 UID#n Set unit ID nnnnnnn SD#n Set date MMDDYY, DDMMYY, YYMMDD, or YYDDMM. Enter six-digit date using the year-month-day order specified for the DATEFMT parameter, using only the last two digits of the year. ST#n Set time hhmm (enter using 24-hour format) SX#n Start serial port streaming EX#n Stop serial port streaming OK or ?? An EX command sent while in menu mode does not take effect until the indicator is returned to normal mode. The EDP.Stream must be set to LFT or INDUST for this command to work. XG#n Transmit gross weight in displayed units XN#n Transmit net weight in displayed units XT#n Transmit tare weight in displayed units XA#n Transmit accumulator value RS Reset system nnnnnn UU where nnnnnn is the weight value, UU is the units. NOTE: You can also send XGP, XGS, XGT, XTP, etc. to specify primary, secondary or tertiary (P.S.T.). Soft reset. Used to reset the indicator without resetting the configuration to the factory defaults. Table 6-12. Normal Mode Serial Commands 6.1.9 Unique Commands Command Description DUMPID.INDEX=n To dump an ID by register DUMPID.CODE=n To dump an ID by code Table 6-13. Unique Commands Counterpart User Manual - Serial Commands 57 7.0 Print Formatting The Counterpart provides eight print formats, GFMT, NFMT, TOTALFMT, PALFMT, CFMT, ACCFMT, HDRFMT1 and HDRFMT2. These determine the format of the printed output when the PRINT key is pressed or when a KPRINT EDP command is received. The HDRFMTs must be called from another format. Each print format can be customized to include up to 500 characters of information, such as company name and address, on printed tickets. You can use the indicator front panel (PFORMT menu), EDP commands, or the Revolution® configuration utility to customize the print formats. Note 7.1 Print formats are limited to 500 characters. Print Formatting Commands Table 7-1 lists commands you can use to format the gross, net and count print formats. Commands included in the format strings must be enclosed between < and > delimiters. Any characters outside of the delimiters are printed as text on the ticket. 58 Counterpart User Manual Command Supported Ticket Formats Description <G> Gross weight in displayed units <N> Net weight in displayed units <T> Tare weight in displayed units. Add four before bracket to print header <A> Accumulated weight in displayed units <AC> Number of accumulator events (5-digit counter) <AD> Date of last accumulator event <AT> Time of last accumulator event <UID> Unit ID number <CN> Consecutive number <C> Piece count, current scale <C#n> Piece count, scale n <NLnn> New line (nn = number of termination (<CR/LF> or <CR>) characters)* <SPnn> Space (nn = number of spaces)* <SU> Suppress Units. Toggle weight data format (formatted/unformatted)** <TI> Time <DA> Date <TD> Time & Date <H1> Header 1 <H2> Header 2 <IDC> Loaded ID Code - 32 characters maximum <IDD> Loaded ID Description - 32 characters maximum <IDLC> Loaded ID Location - 12 characters maximum <IDP> Loaded ID Part Number - 32 characters maximum <IDLT> Loaded ID Lot - 32 characters maximum <IDU> Loaded ID Units - 1 character maximum <IDT> Loaded ID Tare - 9 characters maximum (range 0.0 to 9999999.0) <IDW> Loaded ID Unit Weight - 9 characters maximum (range 0.0 to 9999999.0) <IDQ> Loaded ID Quantity - 11 characters maximum (range -2000000000 to 2000000000) <C> Piece Count, current scale - 7 characters maximum (no explicit maximum value) <C#n> Piece Count, Scale n <TTLV> Totalization Value - 11 character maximum (range -2000000000 to 2000000000) <TTLC> Totalization Count - 4 characters maximum <TT> Transaction Type - gives a “1” for receiving (in) or “0” for (sending out) GFMT, NFMT, TOTALFMT, PALFMT, CFMT, ACCFMT HDRFMT1, HDRFMT2 Note: This command cannot be used in any other format except Weighvault Table 7-1. Print Format Commands Counterpart User Manual - Print Formatting 59 Command Description Supported Ticket Formats Gross, net, and tare weights are 8 digits in length, including sign and decimal point, followed by a space and a one- to five-digit units identifier. Total field length with units identifier is 10-14 characters. Depending on what units are configured, the units identifier will be lb, oz, g, or kg. Gross, net, tare, and accumulator weights can be printed in any configured weight units by adding the following modifiers to the gross, net, tare, and accumulator weight commands: /P (primary units), /D (displayed units), /S (secondary units), /T (tertiary units). If not specified, the current displayed units (/ D) is assumed. Example: To format a ticket to show net weight in secondary units, use the following command: <N/S>. UNIT ID and consecutive number (CN) fields are 1–6 characters in length, as required. * If nn is not specified, 1 is assumed. Value must be in the range 1–99. ** After receiving an SU command, the indicator sends unformatted data until the next SU command is received. Unformatted data omits decimal points, leading and trailing characters. Table 7-1. Print Format Commands Format Default Format String Used When NFMT Normal mode, tare in N<NL>A30,75,0,4,1,1,N,"Gross: system <G>"<NL>B30,115,0,3,2,4,101,B,"<G>"<NL>A30,300,0,4,1,1,N, "Tare: <T>"<NL>B30,340,0,3,2,4,101,B,"<T>"<NL>A30,525,0,4,1,1,N, "Net: <N>"<NL>B30,565,0,3,2,4,101,B,"<N>"<NL>A30,806,0,3,1,1,N,"<TD>"<NL> P1<NL> PALFMT N<NL>A416,25,1,4,1,1,N,"ID CODE: <IDC>"<NL>B378,25,1,3,2,4,51,N,"3<IDC>"<NL>A296,28,1,4,1,1,N,"Total QTY: <C>"<NL>B264,22,1,3,2,4,51,N,"<C>"<NL> A179,25,1,4,1,1,N,"Part Name: <IDD>"<NL>A126,25,1,4,1,1,N,"Part Number: <IDP>"<NL>A73,25,1,4,1,1,N,"Lot Number: <IDLT>"<NL>P1<NL> Print mode CFMT N<NL>B371,20,1,3,2,4,51,N,"3<IDC>"<NL>A410,20,1,4,1,1,N,"ID. CODE: <IDC>"<NL>A302,22,1,4,1,1,N,"QTY: <C>"<NL>B264,20,1,3,2,4,51,N,"<C>"<NL>A280,400,1,4,1,1,N,"GROSS <G>"<NL> A225,400,1,4,1,1,N,"TARE <T>"<NL>B189,355,1,3,2,4,51,N,"4<T>"<NL>A120,400,1,4,1,1,N,"NET <N>"<NL>A195,24,1,4,1,1,N,"WT/K OR U W"<NL>B124,20,1,3,2,4,51,N,"1<IDW>"<NL> A47,16,1,4,1,1,N,"<TD>"<NL>A160,24,1,4,1,1,N,"<IDW>"<NL>P1<NL> Count mode GFMT Normal mode, no tare in N<NL>A410,32,1,5,2,1,N,"<TOTAL QUANTITY>"<NL>A57,532,1,3,1,1,N,"<TD>"<NL>A309,39,1,5,2,1,N,"<TV>"<NL>B system 195,32,1,3,2,4,101,N,"<TV>"<NL> A61,32,1,5,1,1,N,"BOX COUNT: <TC>"<NL>P1<NL> TOTAL Totalization mode N<NL>A410,32,1,5,2,1,N,"<TOTAL QUANTITY>"<NL>A57,532,1,3,1,1,N,"<TD>"<NL>A309,39,1,5,2,1,N,"<TV>"<NL>B 195,32,1,3,2,4,101,N,"<TV>"<NL> A61,32,1,5,1,1,N,"BOX COUNT: <TC>"<NL>P1<NL> ACCFMT ACCUM<A><NL><DA> <TI><NL> Accumulator enabled and displayed Table 7-2. Default Print Formats The 500-character limit of each print format string includes the output field length of the print formatting commands, Note not the command length. For example, if the indicator is configured to show a decimal point, the <G> command generates an output field of 13 characters: the 10-character weight value (including decimal point), one space, and a two-digit units identifier. 60 Counterpart User Manual The default Counterpart print formats are shown in Table 7-2 and Table 7-3: Format Default Format String Sample Output H1 Company Name <NL> Street Address <NL> City, ST ZIP <NL2> Company Name, Street Address, City, ST ZIP H2 Company Name <NL> Street Address <NL> City, ST ZIP <NL2> Company Name, Street Address, City, ST ZIP Table 7-3. H1, H2 Formats 7.2 Customizing Print Formats The following sections describe procedures for customizing the GFMT, NFMT and CFMT formats using the EDP port, the front panel (PFORMT menu), and the Revolution® configuration utility. 7.2.1 Using the EDP Port With a personal computer, terminal, you can use the EDP command set to customize the print format strings. To view the current setting of a format string, type the name of the string (GFMT.FMT or NFMT) and press TARE (Enter). For example, to check the current configuration of the GFMT format, type GFMT and press ENTER. The indicator responds by sending the current configuration for the gross format: GFMT=<G> GROSS<NL> To change the format, use the GFMT.FMT or NFMT EDP command followed by an equals sign (=) and the modified print format string. For example, to add the name and address of a company to the gross format, you could send the following EDP command: Note Indicator must be placed in the config mode with CONFIG shown on the display. GFMT.FMT=FINE TRANSFER CO<NL>32400 WEST HIGHWAY ROAD<NL>SMALLTOWN<NL2><G> GROSS<NL> A ticket printed using this format might look like the following: FINE TRANSFER CO 32400 WEST HIGHWAY ROAD SMALLTOWN 1345 lb GROSS 7.2.2 Using the Front Panel If you have no access to equipment for communication through the EDP port or are working at a site where such equipment cannot be used, you can use the PFORMT menu (see Figure 7-1) to customize the print formats. Using the PFORMT menu, you can edit the print format strings by changing the decimal values of the ASCII characters in the format string. Note Lower-case letters and some special characters cannot be displayed on the Counterpart front panel and are shown as blanks. The Counterpart can send or receive any ASCII character; the character printed depends on the particular ASCII character set implemented for the receiving device. Counterpart User Manual - Print Formatting 61 ID AUDIT XXXXXXX CALIBR SETUP TEST ACCUM DISPLAY CONFIG SCALES FEATURE GFMT NFMT SERIAL CFMT ETHERNET PALFMT PFORMT ACCFMT TOTALFMT DIGIO H1 VERS VERS H2 Same as GFMT Scroll left in formatting string Display first 6 characters of format Press INSERT to enter a space before the active character Scroll right in formatting string Press to cycle the active character to the previous character Press to cycle the active character to the next character Press CLR to delete the character to the left NOTE: To change the active character, use the alpha keypad to enter the new value. Figure 7-1. PFORMT Menu, Showing Alphanumeric Character Entry Procedure Using Revolution® The Revolution configuration utility provides a print formatting grid with a tool bar. The grid allows you to 7.2.3 construct the print format without the formatting commands (<NL> and <SP>) required by the front panel or EDP command methods. Using Revolution, you can type text directly into the grid, then select weight value fields from the tool bar and place them where you want them to appear on the printed ticket. Figure 7-2 shows an example of the Revolution print formatting grid. Figure 7-2. Revolution Print Format Grid 62 Counterpart User Manual 7.2.4 Print Label Examples Listed below are print formatting examples that appear with the various formats. Count Format Figure 7-3. Count Format Label Example Pallet Label Format Figure 7-4. Pallet Format Label Example Gross Label Format Figure 7-5. Gross Label Format Counterpart User Manual - Print Formatting 63 Total Label Format Figure 7-6. Total Format Label Example Gross/Tare/Net Label Format Figure 7-7. Gross/Tare/Net Label Format 64 Counterpart User Manual 8.0 WLAN Installation Instructions Note Before installing this option, you must contact your IT administrator to obtain network communication protocol codes and have a RS-232 communications cable or regular comm port cable available to run between your PC and the indicator while installing and setting up the wireless network. The optional Lantronix® WiPort™ (WLAN - Wireless Local Area Network) wireless networking device can be installed inside the Counterpart for real-time data transmission to warehouse management systems. The Windows®-based configuration software, DeviceInstaller™ is required for installation and setup and is available on the CD that comes with the kit. The WLAN option can be factory installed or can be purchased separately and installed on site. The wireless LAN option comes in a kit containing the following items: • Pluggable wireless board (PN 125787) • Standoffs (PN 95356) • Antenna (PN 98357) • CD containing Lantronix information (PN 72763) Figure 8-1. WLAN Board 8.1 Enclosure Disassembly The indicator enclosure must be opened to install the WLAN option card and antenna and to connect cables for the installed option card. Warning Before opening the unit, ensure the power cord is disconnected from the power outlet. 1. Disconnect power to the indicator. 2. Place the indicator face-down on an antistatic work mat. 3. Remove the screws that hold the backplate to the enclosure body, then lift the backplate away from the enclosure and set it aside. 8.2 WLAN Card Installation 1. Refer to CW-90/90X, 720i, 820i, iQUBE2, LaserLT WLAN Installation Instructions PN 108680 included with the WLAN option card for installation and configuration instructions. Counterpart User Manual - WLAN Installation Instructions 65 9.0 9.1 Appendix Error Messages If an error code appears on the display, use the information in Table 9-1 as a troubleshooting guide. If you cannot clear the error, call RLWS Service for assistance. Error Display - - - - - - Description Over range Under range - - - - - - - - - - - - - - - - A/D out of range Solution • Check load cell wiring, including sense jumpers. • Check configuration, including number of grads, channel selection, display divisions. • Check calibration, including W ZERO and W SPAN values. • Under range can be caused by OIML setting and weight less than -20 display divisions • Check for scale binding or damage. • Check for proper excitation voltage. • Call RLWS Service for assistance. CHKERR - BATTERY BACK LOST Battery Error Press ENTER after replacing the battery to restore defaults to battery backed storage. ERROR Internal program error Check configuration. Run XE command (see Section 9.2 on page 66) to determine error type. Call RLWS Service if unable to clear error by cycling power or if error reoccurs. HWFERR Hardware error Reboot the unit. Call RLWS Service if unable to clear error by cycling power or if error reoccurs. INVALID UNITS ID uses unassigned units Modify the ID to use a configured unit. NOTARE Tare is prevented Change regulatory mode settings or the TAREFN parameter. OVERFL Overflow error Weight value too large to be displayed. RANGE GRADS > 100,000 WVAL > 100,000 Only shows up in Config mode. EEPERR EEPROM error Call Rice Lake Weighing Systems (RLWS) for service VERSION UPDATED Core has been updated or memory has been corrupted. Press the ENTER key. If the message persists, call RLWS for service. Table 9-1. Counterpart Error Messages 9.2 Using the XE EDP Command The XE EDP command can be used to remotely query the Counterpart for the error conditions shown on the front panel. The XE command returns a 5-digit number in the format: xxxxx yyyyy where xxxxx contains a decimal representation of any existing error conditions as described in Table 9-2. If more than one error condition exists, the number returned is the sum of the values representing the error conditions. For example, if the XE command returns the number 1040, this value represents the sum of an A/D reference error (1024) and an A/D calibration checksum error (16). 66 Counterpart User Manual XE Error Code Description XEH Hex Value 1 VIRGERR 0x00000001 2 PARMCHKERR 0x00000002 4 LOADCHKERR 0x00000004 8 PRINTCHKERR 0x00000008 16 ENVRAMERR 0x00000010 32 ENVCRCERR 0x00000020 64 BATTERYERR 0x00000040 32768 GRAVERR 0x00008000 65536 ADPHYSICALERR 0x00010000 131072 TAREERR 0x00020000 262144 EACCOVER 0x00040000 524288 STRINGERR 0x00080000 1048576 RESERVED_PF 0x00100000 2097152 RTCERR 0x00200000 4194304 MISSINGHWERR 0x00400000 8388608 CFGCONFLICTERR 0x00800000 16777216 UNRECOVERABLEERR 0x01000000 0x10000 - 0x80000000 Reserved Table 9-2. Error Codes Returned on XE Command 9.2.1 Using the P EDP Command The P EDP command returns the current displayed weight value to the EDP port. Counterpart User Manual - For More Information 67 9.3 Continuous Output (Stream) Format Figure 9-1 shows the continuous output format sent to a Counterpart port when that port’s TRIGGE parameter (SERIAL menu) is set to STREAM. <STX> <POL> <wwwwwww> <UNIT> <G/N> <S> <TERM> G = Gross N = Net ASCII 02 (decimal) Polarity: <space> = Positive <–> = Negative <^> = Overload <]> = Underrange L = pounds K = kilogram G = grams O = ounces <space> = lb/oz <CR> <LF> or <CR> ASCII 13, 10 (decimal) Status: <space> = valid I = Invalid M = Motion O = Over/under range Weight data: 7 digits, right-justified, with decimal point, l eading zero supression. Overload = &&&&&&& Underrange = = = = = = = = Display overflow = OVERFL Figure 9-1. Continuous Output Data Format 9.4 Demand Output Serial Data Format When demand mode is configured for the serial port (STREAM parameter set to OFF), the Counterpart uses a data string formatted for a basic ticket printout. The particular ticket format printed depends on the indicator configuration. You can customize the ticket to work with a wide variety of printers, scoreboard displays, and other remote equipment. See Section 6.0 on page 52 for more information on custom print formats. 9.5 Custom Stream Formatting Each port can be independently configured to stream a default frame format or can be customized to stream a user-defined format. Custom formatting is very similar to the standard print formatting described in Section 7.0 on page 52. Custom stream formatting can be set up through the Regula/Indust submenu. Table 9-3 lists the format identifiers used to configure a custom stream format. Format Identifier Defined By Description <P[G | N | T]> STR.POS STR.NEG Polarity. Specifies positive or negative polarity for the current or specified (Gross/Net/Tare) weight on the source scale. Possible values are SPACE, NONE, + (for STR.POS), or – (for STR.NEG) <CU> STR.PRI STR.SEC STR.TER Units. Specifies primary, secondary, or tertiary units for the current or specified weight on the source scale. <U[P | S | T]> Dynamic =L if Units=LB =K if Units=KG =G if Units=G =O if Units=OZ =space if Units=LB/OZ Table 9-3. Custom Stream Formatting 68 Counterpart User Manual Format Identifier Defined By Description <M[G | N | T]> STR.GROSS STR.NET STR.TARE Mode. Specifies gross, net, or tare weight for the current or specified weight on the source scale. <S> STR.MOTION STR.RANGE STR.OK STR.INVALID Status for the source scale. Default values and meanings for each status: STR.MOTIONMIn motion STR.RANGEOOut of range STR.OK<space>OK STR.INVALIDIInvalid <CW> — Status of over/under/accept. O=Over, U=Under, A=Accept. <B [–]n,…> See descriptions below Bit fields. Comma-separated sequence of bit field specifiers. Must be exactly 8 bits. Minus sign ([–]) inverts the bit. B0 — Always 0 B1 — Always 1 B2 Configuration =1 if even parity B3 Dynamic =1 if MODE=NET B4 Dynamic =1 if COZ B5 Dynamic =1 if standstill B6 Dynamic =1 if gross negative B7 Dynamic =1 if out of range B8 Dynamic =1 if secondary/tertiary B9 Dynamic =1 if tare in system B10 Dynamic =1 if tare is keyed B11 Dynamic =00 if MODE=GROSS =01 if MODE=NET =10 if MODE=TARE =11 (not used) B12 Dynamic =00 if UNITS=PRIMARY =01 if UNITS=SECONDARY =10 if UNITS=TERTIARY =11 (not used) B13 Configuration =00 (not used) =01 if current DSPDIV=1 =10 if current DSPDIV=2 =11 if current DSPDIV=5 B14 Configuration =00 (not used) =01 if primary DSPDIV=1 =10 if primary DSPDIV=2 =11 if primary DSPDIV=5 B15 Configuration =00 (not used) =01 if secondary DSPDIV=1 =10 if secondary DSPDIV=2 =11 if secondary DSPDIV=5 B16 Configuration =00 (not used) =01 if tertiary DSPDIV=1 =10 if tertiary DSPDIV=2 =11 if tertiary DSPDIV=5 Table 9-3. Custom Stream Formatting Counterpart User Manual - For More Information 69 Format Identifier Defined By Description B17 Configuration =000 if current DECPNT=8888800 =001 if current DECPNT=8888880 =010 if current DECPNT=8888888 =011 if current DECPNT=888888.8 =100 if current DECPNT=88888.88 =101 if current DECPNT=8888.888 =110 if current DECPNT=888.8888 =111 if current DECPNT=88.88888 B18 Configuration =000 if primary DECPNT=8888800 =001 if primary DECPNT=8888880 =010 if primary DECPNT=8888888 =011 if primary DECPNT=888888.8 =100 if primary DECPNT=88888.88 =101 if primary DECPNT=8888.888 =110 if primary DECPNT=888.8888 =111 if primary DECPNT=88.88888 B19 Configuration =000 if secondary DECPNT=8888800 =001 if secondary DECPNT=8888880 =010 if secondary DECPNT=8888888 =011 if secondary DECPNT=888888.8 =100 if secondary DECPNT=88888.88 =101 if secondary DECPNT=8888.888 =110 if secondary DECPNT=888.8888 =111 if secondary DECPNT=88.88888 B20 Configuration =000 if tertiary DECPNT=8888800 =001 if tertiary DECPNT=8888880 =010 if tertiary DECPNT=8888888 =011 if tertiary DECPNT=888888.8 =100 if tertiary DECPNT=88888.88 =101 if tertiary DECPNT=8888.888 =110 if tertiary DECPNT=888.8888 =111 if tertiary DECPNT=88.88888 <wspec [–] [0] digit[[.]digit]> Scale weight Weight for the source scale. wspec is defined as follows: wspec Indicates whether the weight is the current displayed weight (W, w), gross (G, g), net (N, n), or tare (T, t) weight. Upper-case letters specify right-justified weights; lower-case are left-justified. Optional /P, /S, or /T suffixes can be added before the ending delimiter (>) to specify weight display in primary (/P), secondary (/ S), or tertiary (/T) units. [–] Enter a minus sign (–) to include sign for negative values. [0] Enter a zero (0) to display leading zeroes. digit[[.][.]digit] The first digit indicates the field width in characters. Decimal point only indicates floating decimal; decimal point with following digit indicates fixed decimal with n digits to the right of the decimal. Two consecutive decimals send the decimal point even if it falls at the end of the transmitted weight field. <CR> — Carriage return <LF> — Line feed Table 9-3. Custom Stream Formatting 70 Counterpart User Manual 9.6 Digital Filtering The Counterpart uses averaged digital filtering to reduce the effect of vibration on weight readings. Adjustable threshold and sensitivity functions allow quick settling by suspending filter averaging, allowing the weight reading to jump to the new value. Figure 9-2 shows the digital filter parameters on the CONFIG menu. DFLTR1 DFLTR2 DFLTR3 DFSENS DFTHRH 4 4 4 2OUT NONE 8 8 8 4OUT 2D 16 16 16 8OUT 5D 32 32 32 16OUT 10D 20D 64 64 64 32OUT 128 128 128 64OUT 50D 256 256 256 128OUT 100D 1 1 1 200D 2 2 2 250D Figure 9-2. Digital Filtering Parameters on the Configuration (CONFIG) Menu DIGFL1= n1 DIGFL2= n2 DIGFL3= n3 n2 n3 A/D Readings 1st Stage Filter Averages 2nd Stage Filter Averages 1st Stage Filter Average 2nd Stage Filter Average 3rd Stage Filter Average n1 Displayed Value Figure 9-3. Flow Diagram for Counterpart Digital Filters 9.6.1 DIGFLx Parameters The first three digital filtering parameters, DFLTR1, DFLTRL2, and DFLTR3, are configurable filter stages that control the effect of a single A/D reading on the displayed weight. The value assigned to each parameter sets the number of readings received from the preceding filter stage before averaging (see Figure 9-3). The overall filtering effect can be expressed by adding the values assigned to the three filter stages: DFLTR1 + DFLTR2 + DFLTR3 For example, if the filters are configured as DFLTR1=4, DFLTR2=8, DFLTR3=8, the overall filtering effect is 20 (4 + 8 + 8). With this configuration, each A/D reading has a 1-in-20 effect on the displayed weight value. Setting the filters to 1 effectively disables digital filtering. 9.6.2 DFSENS and DFTHRH Parameters The three digital filters can be used by themselves to eliminate vibration effects, but heavy filtering also increases settling time. The DFSENS (digital filter sensitivity) and DFTHRH (digital filter threshold) parameters can be used to temporarily override filter averaging and improve settling time: • DFSENS specifies the number of consecutive scale readings that must fall outside the filter threshold (DFTHRH) before digital filtering is suspended. • DFTHRH sets a threshold value, in display divisions. When a specified number of consecutive scale readings (DFSENS) fall outside of this threshold, digital filtering is suspended. Set DFTHRH to NONE to turn off the filter override. Counterpart User Manual - For More Information 71 9.6.3 Setting the Digital Filter Parameters Fine-tuning the digital filter parameters greatly improves indicator performance in heavy-vibration environments. Use the following procedure to determine vibration effects on the scale and optimize the digital filtering configuration. 1. In menu mode, set all three digital filters (DFLTR1, DFLTRL2, DFLTR3) to 1. Set DFTHRH to NONE. Return indicator to normal mode. 2. Remove all weight from the scale, then watch the indicator display to determine the magnitude of vibration effects on the scale. Record the weight below which all but a few readings fall. This value is used to calculate the DFTHRH parameter value in Step 4. For example, if a heavy-capacity scale produces vibration-related readings of up to 50 lb, with occasional spikes to 75 lb, record 50 lb as the threshold weight value. 3. Place the indicator in menu mode and set the digital filters (DFLTRx) to eliminate the vibration effects on the scale. (Leave DFTHRH set to NONE.) Reconfigure as necessary to find the lowest effective values for the DFLTRx parameters. 4. With optimum values assigned to the DFLTRx parameters, calculate the DFTHRH parameter value by converting the weight value recorded in Step 2 to display divisions: threshold_weight_value / DSPDIV In the example in Step 2, with a threshold weight value of 50 lb and a display division value of 5lb: 50 / 5lb = 10DD. DFTHRH should be set to 10DD for this example. 5. Finally, set the DFSENS parameter high enough to ignore transient peaks. Longer transients (typically caused by lower vibration frequencies) will cause more consecutive out-of-band readings, so DFSENS should be set higher to counter low frequency transients. Reconfigure as necessary to find the lowest effective value for the DFSENS parameter. 9.6.4 Audit Trail Support Audit trail support provides tracking information for configuration and calibration events. To prevent potential misuse, all configuration and calibration changes are counted as change events. Use the Audit menu or Revolution to display audit trail information. This includes the legally relevant (LR) version number (software version for the code that provides audit trail information), a calibration count and a configuration count. Audit trail information can be printed from Revolution or by sending the DUMPAUDIT serial command. 72 Counterpart User Manual 9.7 Serial Scale Interface Serial port 1 can be configured for serial scale input. The serial scale function allows other scale indicators to send gross, or net weight data to Counterpart. Once the serial port has been configured to accept scale data, the data format can be customized to match the data stream sent by that indicator. See Figure 3-9 on page 28 for information setting up To set up and configure a serial scale, do the following: 1. Under the SERIAL menu, select Port 1 and scroll over to INDUST Scale (industrial serial scale) or LFT (Legal-for-Trade), depending on what is required. 2. Match up the baud rates (9600) and this becomes SCALE 3. 3. Under the SERIAL menu, return to the selected port and set the format under the SFMT parameter to match the format sent by the serial scale. The default serial scale format is: <STX><P><W7><U><M><S><CR> Where: <STX> <P> <W7> <U> <M> <S> <CR> STX character Polarity Seven characters of net data with decimal pt Units Mode Status Carriage return Note that industrial serial scales (INDUST) do not require the <M>, <U> and <S> identifiers. However, the units and number of decimal places must be specified. Units can be selected from the FORMAT menu; decimal places should be indicated with a w-spec identifier. For example, a seven-digit weight reading requiring two decimal places should be specified as <W7.2> rather than <W7>. To change or match formats, use the same path to change formats. Counterpart User Manual - For More Information 73 9.8 Regulatory Mode Functions The function of the front panel TARE and ZERO keys depends on the value specified for the REGULAT parameter on the FEATURE menu. Table 9-4 describes the function of these keys for the NTEP, CANADA, OIML, and NONE regulatory modes. TARE and ZERO key functions are configurable when the REGULAT mode is set to INDUST (see Table 9-5 on page 74). Front Panel Key Function REGULAT Parameter Value Weight on Scale Tare in System TARE ZERO NTEP zero or negative no no action ZERO yes CLEAR TARE no TARE positive CANADA zero or negative positive OIML NONE yes TARE no no action yes CLEAR TARE no TARE yes no action ZERO zero or negative (not to exceed -20dd) no no action ZERO yes CLEAR TARE ZERO and CLEAR TARE positive no TARE ZERO yes TARE ZERO and CLEAR TARE if weight is within ZRANGE. No action if weight is outside of ZRANGE no TARE ZERO yes CLEAR TARE zero or negative positive no TARE yes CLEAR TARE Table 9-4. TARE and ZERO Key Functions for REGULAT Parameter Settings Table 9-5 lists the subparameters available when configuring a scale using INDUST mode. The table includes the default values of the INDUST subparameters and the effective (not configurable) values used by the NTEP, CANADA, OIML, and NONE regulatory modes. REGULAT / INDUST Parameter Parameter Name Text Prompt REGULAT Mode INDUST NTEP CANADA OIML NONE DISPLAY DISPLAY DISPLAY DISPLAY SCALE SNPSHOT Display or Scale weight source ZTARE Remove tare on ZERO NO NO NO YES NO KTARE Always allow keyed tare YES YES NO YES YES MTARE Multiple tare action REPLACE REPLACE NOTHING REPLACE REMOVE NTARE Allow negative tare NO NO NO NO YES CTARE Allow CLEAR key to clear tare/ accumulator YES YES NO NO YES PRTMOT Allow print while in motion NO NO NO NO YES PRTPT Add PT to keyed tare print NO NO YES YES NO OVRBASE Zero base for overload calculation CALIB ZERO CALIB ZERO CALIB ZERO SCALE ZERO CALIB ZERO Table 9-5. REGULAT / INDUST Mode Parameters, Comparison with Effective Values of Other Modes 74 Counterpart User Manual 9.9 Updating Firmware To update firmware of the Counterpart, you must have Revolution installed and a .hex file on your computer. Visit www.ricelake.com to download this free configuration software and the latest .hex file. Note If the hex file is the same version as is currently in the indicator, the firmware update will not reset the configuration. This is helpful if the firmware becomes corrupt and you want to reload the same firmware. However, it is always recommended that configuration be backed up in Revolution to avoid any data loss. 1. Unplug power to the Counterpart and remove top from the base of the unit. 2. Wire the serial cable to the Counterpart’s Port 1. Refer to Table 9-6 for cable connection settings. DB9 Cable Connector (J2) Pin/Color Signal In/Out Description Pin Description In/Out 1/Brown DCD In Data Carrier Detect NC NA NA 2/Red RxD In Receive Data 3 Tx Out 3/Orange TxD Out Transmit Data 4 Rx In 4/Yellow DTR Out Data Terminal Ready 5 DTR In 5/Green GND -------- Ground 1 or 2 Gnd -------- 6/Blue DSR In Data Set Ready NC NA NA 7/Purple RTS Out Request to Send 6 RTS In 8/Gray CTS In Clear to Send NC NA NA 9/Black RI In Ring Indicator NC NA NA Table 9-6. Cable connection settings 3. 4. 5. 6. Install jumpers on JP5 and JP6. See Figure 2-3 on page 8. Plug in power to the Counterpart and press the indicator’s Power button. With Revolution open, begin a new configuration file for the Counterpart. Click Update Counterpart Firmware. Figure 9-4. Revolution Screen. 7. The Rice Lake Updater screen appears. Specify the COM port the Counterpart is connected to, and click the ellipses (...) to browse to and select the desired .hex file. Counterpart User Manual - For More Information 75 Figure 9-5. Rice Lake Updater Screen 8. Click the Program button. The update will take several moments. 9. When complete, remove the jumpers shown in Figure 4 on page 75 and press the Power button to power up the indicator. 9.10 Specifications Part # Description Weighing Resolution Platter Dimensions Single Channel 118788 CP Indicator Console only 120736 CP-5 5 lb x 0.0005 lb (2 kg x 0.0002 kg) 9 in x 12 in 120737 CP-10 10 lb x 0.001 lb (5 kg x 0.0005 kg) 11 in x 16 in 120738 CP-25 25 lb x 0.002 lb (10 kg x 0.001 kg) 11 in x 16 in 120739 CP-50 50 lb x 0.005 lb (20 kg x 0.002 kg) 11 in x 16 in 120740 CP-100 100 lb x 0.01 lb (50 kg x 0.005 kg) 11 in x 16 in Dual Channel (single platform XL base systems) 120770 CP dual indicator 119796 CP-5 Console only 5 lb x 0.0005 lb (2 kg x 0.0002 kg) 9 in x 12 in 118797 CP-10 10 lb x 0.001 lb (5 kg x 0.0005 kg) 11 in x 16 in 118798 CP-25 25 lb x 0.002 lb (10 kg x 0.001 kg) 11 in x 16 in 118799 CP-50 50 lb x 0.005 lb (20 kg x 0.002 kg) 11 in x 16 in 118800 CP-100 100 lb x 0.01 lb (50 kg x 0.005 kg) 11 in x 16 in Dual Channel with Benchmark 125113 CP-50BM 50 lb x 0.01 lb (20 kg x 0.002 kg) 12 in x 18 in 125116 CP-100BM 100 lb x 0.02 lb (50 kg x 0.005 kg) 12 in x 18 in Table 9-7. Specifications 76 Counterpart User Manual 9.11 Specifications CERTIFICATIONS AND APPROVALS Counterpart Indicator NTEP (Pending) - $0/'& t /" 5 * /" 0 3 ) 5 4 63 ( &4 t .3 Two-year limited warranty $& &/ 0-4.5 mV/V ANALOG SPECIFICATIONS: APPROVALS: Pending WARRANTY: * & 0/ 8 POWER: Power source: Input: 100-240VAC, 47-63 Hz, 5 watts, US power cord Output: 9VDC or 12VDC 1.25 max EXCITATION VOLTAGE: 5VDC ANALOG SIGNAL INPUT RANGE: " 4 "/% .& V/V grad minimum ANALOG SPECIFICATIONS: Input sensitivity: 1.5 V/V grad recommended Zero adjustment range: 0-100% or per region settings A/D conversion rate: 7.5, 15, 30 samples per second Load cells per scale: 8 x 350Ω; 16 x 700Ω Scale channels: 1 or 2 Linearity +/- 0.017 full scale CIRCUIT PROTECTION: RFI, EMI, ESD protection DIGITAL I/O: 4 I/O DISPLAY: Viewing Area: 240 x 64 pixels, transmissive VGA Liquid Crystal Display (LCD) with adjustable contrast KEYBOARD: 24 buttons, full keypad - alpha numeric RESOLUTION: Weight display resolution: up to 100,000 graduations Counting resolution: 1/1,000,000 SERIAL COMMUNICATIONS AND SETPOINT: Two RS-232 ports supports up to 115,200 bps One optional port 3 connector for USB, Ethernet Fiber Optics, etc. Ethernet port Setpoint output (pending) - serial scale on Port 1 only. STATUS ENUNCIATORS: PCS, motion, low battery, insuff, recomp, scale number, gross, net, zero BATTERY: Type: Lithium Ion Charge Time: 6-8 hours Charge Cycles 400-1200 Estimated Run Time: up to 24 hours OPERATING TEMPERATURE: (Pending) Measurement Canada Approved (Pending) 10o F to 104o F (0o C - 40o C) OPERATING HUMIDITY: 85% PHYSICAL DIMENSIONS: Indicator Only: 12.25 in x 6.25 in x 4.0 in Counterpart User Manual - For More Information 77 Counterpart Limited Warranty Rice Lake Weighing Systems (RLWS) warrants that all RLWS equipment and systems properly installed by a Distributor or Original Equipment Manufacturer (OEM) will operate per written specifications as confirmed by the Distributor/OEM and accepted by RLWS. All systems and components are warranted against defects in materials and workmanship for two years. RLWS warrants that the equipment sold hereunder will conform to the current written specifications authorized by RLWS. RLWS warrants the equipment against faulty workmanship and defective materials. If any equipment fails to conform to these warranties, RLWS will, at its option, repair or replace such goods returned within the warranty period subject to the following conditions: • • • • • • Upon discovery by Buyer of such nonconformity, RLWS will be given prompt written notice with a detailed explanation of the alleged deficiencies. Individual electronic components returned to RLWS for warranty purposes must be packaged to prevent electrostatic discharge (ESD) damage in shipment. Packaging requirements are listed in a publication, Protecting Your Components From Static Damage in Shipment, available from RLWS Equipment Return Department. Examination of such equipment by RLWS confirms that the nonconformity actually exists, and was not caused by accident, misuse, neglect, alteration, improper installation, improper repair or improper testing; RLWS shall be the sole judge of all alleged non-conformities. Such equipment has not been modified, altered, or changed by any person other than RLWS or its duly authorized repair agents. RLWS will have a reasonable time to repair or replace the defective equipment. Buyer is responsible for shipping charges both ways. In no event will RLWS be responsible for travel time or on-location repairs, including assembly or disassembly of equipment, nor will RLWS be liable for the cost of any repairs made by others. THESE WARRANTIES EXCLUDE ALL OTHER WARRANTIES, EXPRESSED OR IMPLIED, INCLUDING WITHOUT LIMITATION WARRANTIES OF MERCHANTABILITY OR FITNESS FOR A PARTICULAR PURPOSE . N EITHER RLWS NOR DISTRIBUTOR WILL, IN ANY EVENT, BE LIABLE FOR INCIDENTAL OR CONSEQUENTIAL DAMAGES. RLWS AND BUYER AGREE THAT RLWS’ SOLE AND EXCLUSIVE LIABILITY HEREUNDER IS LIMITED TO REPAIR OR REPLACEMENT OF SUCH GOODS. IN ACCEPTING THIS WARRANTY, THE BUYER WAIVES ANY AND ALL OTHER CLAIMS TO WARRANTY. SHOULD THE SELLER BE OTHER THAN WARRANTY CLAIMS. RLWS, THE BUYER AGREES TO LOOK ONLY TO THE SELLER FOR NO TERMS, CONDITIONS, UNDERSTANDING, OR AGREEMENTS PURPORTING TO MODIFY THE TERMS OF THIS WARRANTY SHALL HAVE ANY LEGAL EFFECT UNLESS MADE IN WRITING AND SIGNED BY A CORPORATE OFFICER OF RLWS AND THE BUYER. © 2011 Rice Lake Weighing Systems, Inc. Rice Lake, WI USA. All Rights Reserved. RICE LAKE WEIGHING SYSTEMS • 230 WEST COLEMAN STREET • RICE LAKE, WISCONSIN 54868 • USA 78 Counterpart User Manual For More Information Literature • • • Counterpart Sales Literature, PN 125545 Counterpart CD with WeighVault, PN 125546 Weighvault manual for Counterpart, PN 125561 Web Site • Frequently Asked Questions (FAQs) at http://www.ricelake.com/faqs.aspx Contact Information Hours of Operation Fax Knowledgeable customer service representatives are available 6:30 a.m. - 6:30 p.m. Monday through Friday and 8 a.m. to 12 noon on Saturday. (CST) Fax Number 715-234-6967 Email • Telephone • • • Sales/Technical Support 800-472-6703 Canadian and Mexican Customers 800-321-6703 International 715-234-9171 Immediate/Emergency Service For immediate assistance call toll-free 1-800-472-6703 (Canadian and Mexican customers please call 1-800-321-6703). If you are calling after standard business hours and have an urgent scale outage or emergency, press 1 to reach on-call personnel. • US sales and product information at [email protected] International (non-US) sales and product information at [email protected] Mailing Address Rice Lake Weighing Systems 230 West Coleman Street Rice Lake, WI 54868 USA Counterpart User Manual - For More Information 79 PN 118677 06/11