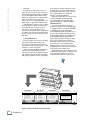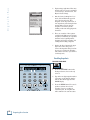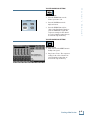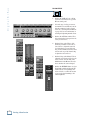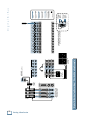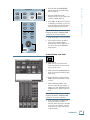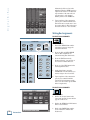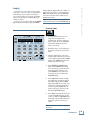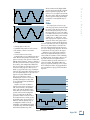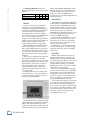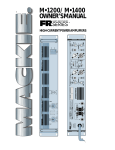
1
D I G I TA L
8 • B U S
OWNER’S MANUAL
™
MACKIE’S 56-INPUT, 72-CHANNEL, FULLY AUTOMATED DIGITAL AUDIO MIXING CONSOLE
8. Power Sources — This Mackie product should be connected to a power
supply only of the type described in these operation instructions or as marked
on this Mackie product.
9. Power Cord Protection — Power supply cords should be routed so that
they are not likely to be walked upon or pinched by items placed upon or
against them, paying particular attention to cords at plugs, convenience
receptacles, and the point where they exit this Mackie product.
10. Object and Liquid Entry — Care should be taken so that objects do not
fall into and liquids are not spilled into this Mackie product.
11. Damage Requiring Service — This Mackie product should be serviced
only by qualified service personnel when:
A. The power-supply cord or the plug has been damaged; or
B. Objects have fallen, or liquid has spilled into this Mackie
product; or
C. This Mackie product has been exposed to rain; or
D. This Mackie product does not appear to operate normally or
exhibits a marked change in performance; or
E. This Mackie product has been dropped, or its chassis
damaged.
SAFETY INSTRUCTIONS
1. Read Instructions — All the safety and operation instructions should be
read before this Mackie product is operated.
2. Retain Instructions — The safety and operating instructions should be
kept for future reference.
3. Heed Warnings — All warnings on this Mackie product and in these
operating instructions should be followed.
4. Follow Instructions — All operating and other instructions should be
followed.
5. Water and Moisture — This Mackie product should not be used near
water – for example, near a bathtub, washbowl, kitchen sink, laundry tub, in
a wet basement, near a swimming pool, swamp or salivating St. Bernard
dog, etc.
6. Ventilation — This Mackie product should be situated so that its
location or position does not interfere with its proper ventilation. For
example, the Component should not be situated on a bed, sofa, rug, or
similar surface that may block any ventilation openings, or placed in a
built-in installation such as a bookcase or cabinet that may impede the
flow of air through ventilation openings.
7. Heat — This Mackie product should be situated away from heat sources
such as radiators, or other devices which produce heat.
PORTABLE CART WARNING
Carts and stands - The
Component should be used
only with a cart or stand
that is recommended by
the manufacturer.
A Component and cart
combination should be
moved with care. Quick
stops, excessive force, and
uneven surfaces may cause
the Component and cart
combination to overturn.
12. Servicing — The user should not attempt to service this Mackie product
beyond those means described in this operating manual. All other servicing
should be referred to the Mackie Service Department.
13. Do not remove the cover on the console. It is permissible to remove the
outer cover on the Remote CPU to install accessory cards. Do not remove the
inner power supply cover.
14. To prevent electric shock, do not use this polarized plug with an
extension cord, receptacle or other outlet unless the blades can be fully
inserted to prevent blade exposure.
Pour préevenir les chocs électriques ne pas utiliser cette fiche polariseé avec
un prolongateur, un prise de courant ou une autre sortie de courant, sauf si
les lames peuvent être insérées à fond sans laisser aucune pariie à découvert.
15. Grounding or Polarization — Precautions should be taken so that the
grounding or polarization means of this Mackie product is not defeated.
16. This apparatus does not exceed the Class A/Class B (whichever is
applicable) limits for radio noise emissions from digital apparatus as set out
in the radio interference regulations of the Canadian Department of
Communications.
ATTENTION —Le présent appareil numérique n’émet pas de bruits
radioélectriques dépassant las limites applicables aux appareils numériques de
class A/de class B (selon le cas) prescrites dans le règlement sur le brouillage
radioélectrique édicté par les ministere des communications du Canada.
FCC Information
NOTE: This equipment has been tested and found to comply
with the limits for a Class A digital device, pursuant to Part 15
of the FCC Rules. These limits are designed to provide
reasonable protection against harmful interference when the
equipment is operated in a commercial installation. This
equipment generates, uses, and can radiate radio frequency
energy and, if not installed and used in accordance with the
instruction manual, may cause harmful interference to radio
communications. Operation of this equipment in a residential
area is likely to cause harmful interference in which case the
user will be required to correct the interference at his own
expense.
WARNING — To reduce the risk of fire or electric shock, do
not expose this appliance to rain or moisture.
™
Mackie Designs Inc.
16220 Wood-Red Rd. NE • Woodinville, WA 98072 • USA
800/898-3211 • Outside the US: 425/487-4333
Fax: 425/487-4337 • www.mackie.com
email: [email protected]
©1998 Mackie Designs Inc. All rights reserved. #820-076-00
Owner’s Manual
Digital 8•Bus Owner’s Manual
Table of Contents
1. Introduction
About the Digital 8•Bus .............................................................. 1-1
The Digital Advantage .......................................................... 1-1
Digital 8•Bus Unique Features .................................................... 1-3
D8B Console ......................................................................... 1-3
V-Pots™ ......................................................................... 1-3
Fat Channel .................................................................... 1-3
DSP Plug-ins .................................................................. 1-3
Motorized 100mm Faders ............................................... 1-3
Automation ..................................................................... 1-3
The Remote CPU .................................................................. 1-3
Built-In Hard Drive and Floppy Drive ............................. 1-3
SVGA Monitor, Keyboard and Mouse ............................. 1-3
How to Use This Manual ...................................................... 1-4
How to Use Help................................................................... 1-5
The Split-Console Approach ........................................................ 1-5
2. Digital 8•Bus Description
Channel Strip Description ............................................................ 2-1
Master Section Description ......................................................... 2-3
Master Fader/Bank Select Section ....................................... 2-3
Master V-Pot Section ............................................................ 2-3
V-Pot Select Section ............................................................. 2-4
Fat Channel Section ............................................................. 2-5
Studio/Solo Section .............................................................. 2-6
Phones/Cue Mix Section ...................................................... 2-7
Control Room Section ........................................................... 2-7
Clipboard Section ................................................................. 2-8
Master L-R Section .............................................................. 2-8
Shortcuts Section ................................................................. 2-8
Bus Assignment Section ...................................................... 2-8
Automation Section .............................................................. 2-9
Session Setup Section .......................................................... 2-9
Transport Section ............................................................... 2-10
Rear Panel Description .............................................................. 2-12
Remote CPU/Power Supply Description .................................... 2-15
Top Panel Drawing with Callouts .............................................. 2-17
Rear Panel Drawing with Callouts ............................................ 2-18
3. Start-Up
Initial Power Up ........................................................................... 3-1
Returning to Factory Default Settings ......................................... 3-1
Power Down ................................................................................ 3-2
Re-booting after Power Failure:................................................... 3-2
General Setup .............................................................................. 3-2
Selecting a Language ........................................................... 3-2
Setting the Surround Mode .................................................. 3-3
Configuring MIDI Parameters .............................................. 3-4
Configuring Auto Save .......................................................... 3-7
Setting Aux Sends Pre or Post Fader ................................... 3-8
Setting the Display Intensity ................................................ 3-9
Determining the Operating System Version ....................... 3-10
Digital I/O Setup ........................................................................ 3-11
Configuring Digital I/O ....................................................... 3-11
Setting the Console’s Sample Rate ..................................... 3-13
Downloading Plug-ins to the FX Cards ............................... 3-14
Setting the Date and Time .................................................. 3-15
Setting Channel Phase ....................................................... 3-15
Table of Contents
T-1
Digital 8•Bus
4. Making the Connections
Analog Metering vs. Digital Metering.......................................... 4-1
Analog Audio Connections
Connecting Microphones and Line-Level Signals ................. 4-1
Phantom Power .............................................................. 4-1
Connecting Recording Devices ............................................. 4-2
TO TAPE Connections (Channels 1-24 Tape Outs) ......... 4-2
FROM TAPE Connections (Channels 25-48 Tape Returns) ... 4-2
BUS OUT 1-8 Connections (Surround Outputs) .............. 4-2
Connecting External Effects Devices ................................... 4-2
Channel Inserts .............................................................. 4-3
Aux Buses ...................................................................... 4-4
Connecting Control Room Monitors ..................................... 4-4
Connecting Studio Monitors ................................................. 4-5
Connecting Headphones ....................................................... 4-5
Connecting Your Final Mix Deck .......................................... 4-5
Digital Audio Connections ........................................................... 4-6
AES/EBU .............................................................................. 4-6
S/PDIF ................................................................................. 4-6
MIDI Connections ........................................................................ 4-6
Connecting a MIDI Time Code Source for Synchronization .. 4-6
Using MMC (MIDI Machine Control): .................................. 4-6
Connections for External MIDI Effects Processors .............. 4-6
Other Connections ....................................................................... 4-7
Using an SVGA Monitor ....................................................... 4-7
Using a Mouse ...................................................................... 4-7
Using a QWERTY Keyboard ................................................. 4-7
The Ethernet Connection ...................................................... 4-7
5. Preparing for a Session
Saving and Retrieving Files from the Internal Hard Drive ............... 5-1
File Structure Hierarchy .............................................................. 5-1
Sessions ............................................................................... 5-1
Patches ................................................................................ 5-1
Bin ........................................................................................ 5-1
Creating a New Folder ................................................................. 5-2
Using the Disk Manager .............................................................. 5-4
Copying Files to a Floppy Disk ............................................. 5-4
Copying Files from One Folder to Another ........................... 5-4
Creating a Session ................................................................ 5-5
Saving a Session .......................................................................... 5-6
Saving a Session Under a New Name........................................... 5-7
Recalling a Session ...................................................................... 5-8
Saving Sessions to Floppy Disk ................................................... 5-9
Creating and Storing Snapshots ..................................................... 5-11
Creating Snapshots .................................................................... 5-11
Recalling Snapshots .................................................................. 5-12
Creating Locate Points ................................................................... 5-13
Recalling Locate Points .................................................................. 5-15
Looping Between Two Locate Points .............................................. 5-16
Clipboard ........................................................................................ 5-17
Cutting ....................................................................................... 5-17
Copying ...................................................................................... 5-18
Pasting ...................................................................................... 5-18
Undoing ..................................................................................... 5-19
T-2
Table of Contents
Recording/Tracking .......................................................................... 6-1
Setup ........................................................................................... 6-1
Input Sensitivity Adjustment Procedure for Channels 1–24 .... 6-1
Using the Channel V-Pots ..................................................... 6-3
Adjusting the Channel PAN Control ................................ 6-3
Adjusting the Aux Send Levels ...................................... 6-4
Adjusting the Digital Trim .............................................. 6-6
Adjusting the Level to Tape ............................................ 6-7
Routing Mixer Channels to Tape Outputs and Buses .................. 6-8
Assigning Channels to a Tape Output .................................. 6-8
Assigning Channels to a Bus Output .................................... 6-9
Arming External Recorders from the Console ........................... 6-10
Adding EQ, Dynamics and Effects to Input Signals ................... 6-12
Monitoring in the Control Room ................................................ 6-12
Solo .................................................................................... 6-13
AFL/PFL ....................................................................... 6-14
Soloing a Channel ......................................................... 6-14
Soloing an Aux Send .................................................... 6-15
Mixdown Solo ............................................................... 6-16
Setup of Cue/Headphone Mixes for Performers ......................... 6-16
Talkback ............................................................................. 6-19
Overdubs .................................................................................... 6-19
Bouncing Down Tracks .............................................................. 6-19
Mixdown ......................................................................................... 6-22
Routing Tape Returns to the Main Outputs ............................... 6-22
Input Sensitivity Adjustment Procedure, Channels 25–48 ......... 6-23
Monitoring the Final Mix ........................................................... 6-26
Using Apogee UV22® ................................................................. 6-26
Selecting UV22 ................................................................... 6-27
Muting Channels ........................................................................ 6-28
Adding EQ, Dynamics, and Effects to Tape Returns .................. 6-28
Consider Compression ........................................................ 6-28
The Fat Channel Display .................................................... 6-28
Using EQ ............................................................................ 6-28
Selecting the EQ ........................................................... 6-28
Changing the Gain Setting ............................................ 6-29
Changing the Center-Frequency Setting ....................... 6-30
Changing the Q Setting ................................................. 6-31
Changing the Parametric EQ Frequency Bandwidth .... 6-32
Changing the Display Matrix of the Parametric EQ ..... 6-33
Saving, Loading, and Resetting EQ Settings ................ 6-33
Editing EQ Settings ...................................................... 6-36
Morphing ...................................................................... 6-38
Using the Compressor ........................................................ 6-38
Selecting the Compressor ............................................. 6-39
Adjusting the Compressor Settings .............................. 6-39
Saving, Loading, and Resetting the Compressor Settings ... 6-41
Editing Compressor Settings ........................................ 6-43
Using the Gate .................................................................... 6-46
Selecting the Gate ........................................................ 6-46
Adjusting the Gate Settings ......................................... 6-47
Saving, Loading, and Resetting the Gate Settings ....... 6-49
Editing the Gate Settings ............................................. 6-51
Using Internal Effects ........................................................ 6-53
Selecting Internal Effects ............................................. 6-55
Adjusting the Effects Settings ...................................... 6-56
Turning the Effects On and Off ..................................... 6-57
Saving, Loading, and Resetting the Effects Settings ... 6-58
Editing Effects Settings ................................................ 6-60
Table of Contents
Owner’s Manual
6. Starting a New Session
T-3
Digital 8•Bus
Chapter 6 continued
Using External Processing ................................................. 6-62
Configuring an Aux Send .............................................. 6-63
Adjusting for Nominal Input and Output Levels ........... 6-64
Adding Final Mix Effects to the Main Outputs ................... 6-64
Live Mixing ..................................................................................... 6-64
Setup ......................................................................................... 6-64
Adjusting Input Signals ............................................................. 6-65
Routing Channels to Mains and Subs ........................................ 6-66
Assigning Channels to the L-R bus .................................... 6-66
Assigning Channels to BUS 1–8 ......................................... 6-67
Setup of Monitor Mixes for Performers ..................................... 6-68
Setting the Aux Send Levels .............................................. 6-68
Headphones ............................................................................... 6-69
Adding EQ, Dynamics and Effects to Input Signals ................... 6-69
Adding EQ .......................................................................... 6-69
Adding Compression........................................................... 6-70
Adding Gate ....................................................................... 6-71
Adding Effects .................................................................... 6-71
Adding Effects to the Main Outputs .......................................... 6-73
Making a Recording While Doing a Live Mix ............................ 6-73
Using the Stereo AUXes ..................................................... 6-73
Recalling Console Snapshots During a Performance ................. 6-74
Hookup Diagrams
Analog Recording/Tracking ....................................................... 6-75
Digital Recording/Tracking ........................................................ 6-76
Analog Recording/Mixdown ...................................................... 6-77
Analog Recording/Overdub ........................................................ 6-78
Live Sound Reinforcement ......................................................... 6-79
Post Production ......................................................................... 6-80
7. Automation
Dynamic Automation ........................................................................ 7-1
Bypass ......................................................................................... 7-1
Absolute Mode ............................................................................. 7-1
Auto Touch Mode ......................................................................... 7-1
Trim Levels Mode ........................................................................ 7-2
Faders in Trim Mode ............................................................ 7-2
Auto Touch / Trim Levels Mode ................................................... 7-2
Snapshot Automation ....................................................................... 7-2
Automation Filters ............................................................................ 7-3
Faders .......................................................................................... 7-3
Mutes ........................................................................................... 7-3
Pan .............................................................................................. 7-3
All ................................................................................................ 7-3
Write Standby and Master Record ............................................... 7-4
Fader Motors Off .............................................................................. 7-4
Writing Fader Moves ........................................................................ 7-5
Writing Fader Moves in Trim Levels Mode ....................................... 7-6
Writing Mutes ................................................................................... 7-7
Writing Channel V-Pot Moves ........................................................... 7-8
Writing Bus Assignments ............................................................... 7-10
Writing Snapshots into Automation ................................................ 7-11
Undo Edit ........................................................................................ 7-12
Looping ........................................................................................... 7-13
T-4
Table of Contents
8. Advanced Functions
Advanced Automation....................................................................... 8-1
Recording EQ, Compressor, Gate and Effects Changes ............... 8-1
Virtual Grouping/Ungrouping ........................................................... 8-4
Auto Fading ...................................................................................... 8-6
Stereo Paired Faders ........................................................................ 8-8
Controlling External Effects Processors via MIDI ........................... 8-9
Surround Sound ................................................................................ 8-9
Surround Modes ........................................................................ 8-10
Stereo ................................................................................. 8-10
Quad ................................................................................... 8-10
LCRS .................................................................................. 8-11
5:1 ...................................................................................... 8-11
7:1 ...................................................................................... 8-12
Surround Sound Control Panel .................................................. 8-12
Ball Icon ............................................................................. 8-13
A/B (red ball/green ball) ..................................................... 8-13
Morph ................................................................................. 8-13
Flyback ............................................................................... 8-13
Menu .................................................................................. 8-13
Monitoring in Surround Sound .................................................. 8-13
Owner’s Manual
The Mix Editor ................................................................................ 7-14
Using The Mix Editor ................................................................. 7-15
The Event List .................................................................... 7-15
Including And Removing Channels .................................... 7-15
Selecting Events By Type ................................................... 7-16
Deleting a Mute .................................................................. 7-16
Changing a Time................................................................. 7-16
Creating a Fade-In and Fade-Out Event ............................. 7-16
Editing Fade-In And Fade-Out Events ................................ 7-17
Mackie Real Time OS Automation Edit Example… ........... 7-17
Inserting Blank Time/Delete Time ..................................... 7-18
Modify Events .................................................................... 7-19
Automation Info ................................................................. 7-19
9. Service
Warranty Service .............................................................................. 9-1
Repair ............................................................................................... 9-1
Troubleshooting Guide ...................................................................... 9-1
No Power ..................................................................................... 9-1
No Sound ..................................................................................... 9-1
Bad Sound ................................................................................... 9-2
Noise/Hum ................................................................................... 9-2
Table of Contents
T-5
Digital 8•Bus
Appendices
Appendix A : Glossary ..................................................................... A-1
Appendix B : Digital Basics ............................................................. B-1
Appendix C : Synchronization ........................................................... C-1
Appendix D : Apogee UV22 ............................................................. D-1
Appendix E : IVL Vocal Studio ..........................................................E-1
Appendix F : Optional I/O Cards ....................................................... F-1
Appendix G : Technical Information ................................................ G-1
Appendix H : Upgrading ................................................................... H-1
Appendix I : Shortcuts ...................................................................... I-1
Appendix J: Screen Shots .................................................................. J-1
Appendix K: Recommended Books .................................................. K-1
Colophon
Track Sheet
Index
Warranty & Registration Card
®
Please write the serial numbers of your Digital 8•Bus console and Remote CPU here for
future reference (i.e., insurance claims, tech support, return authorization, etc.):
Console:
Remote CPU:
Purchased at:
Date of purchase:
Part No. 820-076-00 Rev. A 8/98
©1998 Mackie Designs Inc., All Rights Reserved. Printed in the U.S.A.
T-6
Table of Contents
12
2
4
7
10
15
20
25
30
40
50
60
About the Digital 8•Bus
Thank you for choosing Mackie Designs’
Digital 8•Bus Mixing Console. If you are
unfamiliar with digital mixing consoles, rest
assured you made the right choice. With the
Digital 8•Bus’s easy learning curve, you’ll
quickly realize the benefits it has to offer over
other similarly priced digital consoles. Mackie
didn’t do affordable digital mixers first—we
just did them right!
When Greg Mackie and his handpicked
team of digital design engineers sat down to
design Mackie’s first digital console, they
immediately realized that our digital mixer had
to be extremely user-friendly. With Greg’s track
record in analog mixing design, he knew the
Digital 8•Bus would have to work—and feel—
just like an analog mixer. Experienced audio
pros can sit down in front of any analog mixer
and understand its capabilities very quickly. We
think you’ll find that the Digital 8•Bus reveals
its abilities and assets almost as fast.
Take a look at the D8B. Along the top is the
meter bridge, the channel strips have Input
Trim controls and Mic/Line select switches,
and at the bottom of the strip is a fader. Just
like on an analog console. Between these
beacons of familiarity are a few buttons and a
unique knob that performs multiple functions.
The knob with the LEDs around it is a V-Pot™.
A single V-Pot controls the D8B’s aux sends
and pan, replacing a slew of controls that you
would normally find on an analog mixer.
What about EQ parameters? Equalization
for every channel — all 48 of them — is
controlled by the four V-Pots in the upper-right
section of the Digital 8•Bus’s control panel.
Again, very few V-Pots replace what would
have been a whole lotta knobs.
Back on the channel strip you’ll find mute
and solo buttons, and of course, the inevitable
fader. The D8B’s faders are just like analog
faders. However, because the audio signal is in
digital form, they act as digital controllers that
set the output level from the channel to the
digital mix bus. They’re also motorized for
automation. But aside from their advanced
digital abilities, they’re basically faders.
There’s a whole lot more to the Digital
8•Bus. But the point is, it’s laid out in a way
that makes it as easy to understand and use as
an analog console. You’ll spend much more
time being creative than you will trying to learn
how to operate this digital mixer. Which is
exactly how it should be. You won’t have to
tear through a fat owner’s manual, dig through
a serious nest of computer menus, or perform
13
OL
tedious command rituals in order to use the
D8B. All you’ll have to do is that creative thing
you do.
36
37
TRIM
TRIM
The Digital Advantage
So why change? Why go to the trouble of
learning how to use a digital mixing console
when analog has served you well for all these
years? It’s all about choices. Digital technology
provides more flexibility and allows you to be
more creative in less time than with analog
alone. The number of channels and the sheer
magnitude of operations that can be performed
with a digital console would require more than
twice the space in the analog world. In other
words, digital gives you more power in a
smaller package with fewer parts.
Imagine the number of components it takes
to build a 4-band parametric EQ in an analog
mixer. (If you can’t, we’re talking upwards of
100 resistors, capacitors, and integrated
circuits.) Then multiply that by 48 channels. In
the digital domain, this can be accomplished
with a few digital signal processors (DSPs),
more accurately, and at a lower cost. You can
dial in precise frequencies, Qs, and boost/cuts
rather than guessing according to the numbers
on the knob. Or you can click and drag in the
EQ control panel and shape the EQ curve
graphically in real time to achieve the sound
you want.
LINE
MIC
0
-20dB
-20
+20
13
MIC
REC/RDY
REC/RDY
ASSIGN
ASSIGN
WRITE
WRITE
12
36
13
37
SELECT
SELECT
SOLO
SOLO
MUTE
MUTE
MIDI 4
MIDI 5
FX 12
FX 13
12
36
13
37
Affordable Technology
Digital technology is now affordable for
nearly everyone. The Digital 8•Bus has a builtin 166MHz Pentium®-compatible computer that
is dedicated to the powerful on-board Mackie
Real Time OS™ automation system. It has 25
DSPs dedicated to Fat Channel processing
(parametric EQ, compressor, gate), which
together are capable of executing 1 billion
instructions per second (1 gigaflop).
The D8B’s computer supervises all
automation operations. You can automate a
mix, save it, then go back and make changes to
it as many times as it takes to get it right. Save
it to the hard drive or a floppy disk, and you
can recall and repeat it weeks or months later.
All the fader levels, fades, mutes, EQ, dynamics,
and effects settings are stored for future use.
Very handy and efficient.
This much power in a digital console cost
upwards of $200,000 only a few years ago.
Today, it’s available from Mackie Designs for a
whole lot less. A whole lotta less!
60
+40dB
12
dB
Owner’s Manual
1. Introduction
dB
10
10
5
5
U
U
5
5
10
10
20
20
30
30
40
40
50
50
60
60
Introduction
1-1
Digital 8•Bus
Accuracy
to the signal (for example equalization, reverb,
or compression) are all done mathematically.
Remember, the signal is just a series of ones and
zeroes at this point. Noise, crosstalk, and
distortion are virtually eliminated.
Finally, the digital signal is converted back
to analog using high-quality 24-bit 64X
oversampling D/A converters. The analog
signal is output at the L-R XLR and TRS
MASTER OUTPUTs.
You can keep the signal in the digital
domain by going direct from the Digital 8•Bus
to a digital 2-track recorder via the AES/EBU
or S/PDIF digital outputs. And with the
optional Digital Tape I/O cards installed, you
can do all your tracking and mixdown in the
digital domain as well, direct to ADAT optical
or Tascam TDIF. With the D8B’s built-in
Apogee UV22 Super CD encoding, the digital
signal can be brought down to 16 bits for
mastering to digital media. This process has
proven superior to noise-shaping and bitmapping systems, and creates a lower, more
transparent noise floor that actually allows the
audio signal greater dynamic range.
Going digital offers a wealth of benefits to the
sound and recording engineer – making your life
easier, and giving you the tools to be more
creative and more productive at what you do.
Perhaps the most important reason to go
digital is to preserve the absolute accuracy of
the signal throughout the tracking and mixing
process. The Digital 8•Bus’s internal 32-bit
digital processing provides an extremely high
degree of precision for processing audio
signals. (For a more in-depth discussion of the
digital world, see Appendix B, Digital Basics.)
Basically, when you make a copy of a digital
recording (digital-to-digital), it is identical to
the original. No hiss, no signal loss. It is a
perfect clone, and that means there is no
degradation of the signal when bouncing tracks
and mixing down. Your final master mix will be
as clear and noise-free as the first take on the
first track.
Purely Mathematical
The analog signal is converted to the digital
domain just after the mic preamps (postinsert). The resulting signal stays digital for
the remainder of the recording session — from
tracking to overdubs to mixdown.
Audio passes through Mackie’s high-quality,
low-noise mic preamps, which prepare the
signal for conversion into the digital domain by
way of high-precision 24-bit 64X oversampling
A/D (analog-to-digital) converters. Any changes
®
Channels
1-24
Channels
25-48
FX Retur
n 1-16; AL
T Return
Groups 1-8
1-8
; MIDI 1-8
Fader Bank 1
Fader Bank 2
Bank 1
Mic/Line Inputs
Channels 1-24
Bank 2
Tape Inputs
Channels 25-48
; Bus 1-8
Fader Bank 3
Bank 3
FX Return 1-16; ALT Return 1-8
Channels 49-72
Figure 1-1. How to fit 96 Channels into 38 inches.
1-2
Introduction
Fader Bank 4
Bank 4
Groups 1-8; MIDI 1-8; Bus 1-8
Channels 73-96
The Digital 8•Bus has a number of unique
features that distinguish it from other
affordable digital consoles. Here’s a short
rundown.
D8B Console
V-Pots™
V-Pot is short for “Virtual Potentiometer.” It
is similar to, but uniquely different from, the
rotary pots found on analog mixers. A V-Pot
rotates continuously, without physical stops.
Because it is actually an infinitely variable
digital controller, it can emulate any analog
“knob” function, and you can change its
function at the push of a button. The relative
position of the V-Pot is represented by a ring of
LEDs around the V-Pot. Depending on the
function of the V-Pot, the actual values may be
displayed in the vacuum fluorescent display
(VFD) located in the upper-right corner of the
console, in the meter bridge, or on an optional
SVGA monitor. The V-Pots in each channel
strip represent Aux Send 1–12 levels, Send To
Tape levels, Digital Trim levels, and Pan
settings. The Fat Channel’s V-Pots represent
the EQ, compression, gate, and internal effects
settings for each selected channel.
Fat Channel
Yes, Fat Channel. Instead of 24 vertical
channel strips, each with an assortment of
analog rotary pots, the D8B’s Fat Channel is
made up of four V-Pots, laid out horizontally
underneath the VFD. All digital signal
processing is controlled from there. Select the
channel you want to work with, then use the
Fat Channel V-Pots to set EQ, compression,
gate, and internal stereo effects for that
channel. This knob-saving marvel is one reason
the Digital 8•Bus has such a small footprint.
Because we’re in the digital domain, and
because Mackie’s job is to make you more
creative, we’ve set up the Fat Channel with
two memories per channel. You can store and
easily recall one of two different groups of EQ/
compression/gate settings, either manually or
via real-time dynamic automation. You can also
use this feature to compare two different
settings and determine which sounds best.
The Fat Channel also contains a Library for
storing frequently used EQ and internal effects
settings, which can be recalled and used by any
channel.
DSP Plug-ins
Owner’s Manual
Digital 8•Bus Unique Features
The Digital 8•Bus has a built-in board with
two digital effects processors, and card-cage
slots for adding up to three more DSP effects
boards. Each board contains two digital effect
processors, for a total of eight internal digital
effects (which can run simultaneously). The
D8B comes with the Mackie Standard Effects
package and the IVL™ Vocal Studio. Optional
software packages from Mackie and third-party
plug-ins from your favorite digital effects
manufacturers designed specifically for the
Digital 8•Bus are on the way.
Motorized 100mm Faders
All 25 faders are motorized, allowing you to
see what’s happening when you’re in automation
mode. When you recall a scene, the faders
automatically move to their stored positions. In
Touch mode, you can grab a moving fader on the
fly and update a move automatically. If you
choose, the fader motors can be globally shut off
with the push of a button.
Automation
The Digital 8•Bus has Mackie Real Time OS
Automation software built-in. This powerful
automation engine provides a method of
storing fader moves, pans, EQ changes, and
mutes, all synced to time code for dynamic
automation. In addition, it can store and recall
up to 100 snapshots of fader, EQ, effects, pan,
and mute parameters (and an unlimited
number of snapshots when using the optional
screen/keyboard/mouse combination).
The Remote CPU
Built-in Hard Drive and Floppy Drive
All automation information is stored on the
internal hard drive, and you can back up the
information on 3.5" floppy disks with the builtin floppy drive.
SVGA Monitor, Keyboard and Mouse
These items are optional, but can greatly
enhance the operation of the Digital 8•Bus.
Since a monitor, keyboard, and mouse are
natural extensions of a computer, you might
feel more comfortable using them to perform
the more computer-like functions built into the
console, like saving files, cutting/pasting/
copying, etc.
Introduction
1-3
Digital 8•Bus
How To Use This Manual
This manual is designed to cover the basics
first, and then get into the more detailed
information later on. That way, you can do a
minimal amount of reading to get started, and
read the in-depth sections as it becomes
necessary. Notice that the page numbers
include the chapter number. For example, page
6-23 is the 23rd page of chapter 6.
The contents section in the front of this
manual—as well as the index section in back—
will help you answer questions about specific
buttons and/or operations of the Digital 8•Bus.
The Digital 8•Bus is designed to be used as
a stand-alone console. However, it does provide
connections for a keyboard, mouse, and SVGA
monitor. Whenever an operation is described
that can be performed either from the console
surface or with the mouse/keyboard/monitor
combination, both methods of operation are
described. If you have a mouse, keyboard, and
monitor connected, you can compare the two
methods and decide which works best for you.
Chapter 1: Introduction
This is the section you are now reading, a
gentle guide to the features and manual of your
new console.
Chapter 2: Digital 8•Bus Description
You’ll find a large foldout diagram of the
D8B’s top panel and rear panel here, along
with a diagram of the Remote CPU’s rear
panel. Its numbered callouts are referenced to
the text in this section, which describes every
knob, button, control, and jack on the Digital
8•Bus. In addition, there’s a picture of the
graphical user interface screen with a
description of each control.
Chapter 3: Start-Up
This section discusses how to start up the
D8B, its system defaults, and how to change
system options.
Chapter 4: Making the Connections
Here we discuss the kinds of connections you
make between the Digital 8•Bus and the various
external equipment that you may use with it.
From microphones to external effects to analog
or digital recorders, it’s all covered here.
Chapter 5: Preparing for a Session
This is a “getting started” guide for
automation. Creating new sessions, saving files
to the hard drive or floppy drive, and creating
snapshots and locate points are some of the
topics discussed.
Chapter 6: Starting a New Session/Live Mix
This section discusses what you need to do
when starting a recording session or a live mix.
You’ll also find a few examples of typical hookups
you might use in a studio or live sound situation.
Automation is discussed in more detail.
1-4
Introduction
Chapter 7: Automation
This section discusses the various lovely
automation features and techniques, including
dynamic automation, snapshots, recording, and
the Mix Editor.
Chapter 8: Advanced Techniques
Once you become familiar with the Digital
8•Bus’s basic functions, you might want to turn
here to learn some advanced techniques. Virtual
grouping, auto fading, mixing for surround
sound, and more are discussed in this section.
Chapter 9: Service
This section includes a troubleshooting
guide, and information on obtaining service for
your Digital 8•Bus.
Chapter 10: Appendices
These include a number of sections that go
into further detail about things covered
elsewhere in the manual. The glossary has a
generous helping of both analog and digital
terms used in this book and throughout the
audio world. Next comes a discussion of the
basic principles of digital audio, a “Digital 101”
course for those who find themselves in
unfamiliar territory and want to learn more.
Along the same line, other sections cover the
basics of synchronization, the Apogee UV22
encoding process, the IVL Vocal Studio,
various optional digital I/O cards that can be
installed in the Digital 8•Bus, and much more.
Index
Just as you’d expect, this section will help
you find information relating to specific
functions or features of the D8B.
Track Sheet
Since you can save all the settings on the
Digital 8•Bus to disk, in most cases there’s no
reason to have a track sheet. But the Trim
controls are analog, non-automated knobs, so
we’ve provided a track sheet showing the Trim
knobs and the Mic/Line switches in case you
want to preserve their settings for future
reference.
Warranty/Registration Card
This section describes the limited warranty
that comes with your Digital 8•Bus. Please
take the time to fill out the registration card
attached to the back cover of this manual and
send it in. We’ll pay the postage, and you’ll
have Mackie’s renowned tech support at your
fingertips.
Quick Start Guide and Quick Start Video
There are two companions to the Digital
8•Bus Owner's Manual: the Digital 8•Bus Quick
Start Guide and the Digital 8•Bus Quick Start
Video. Most of your fundamental questions
about hookup and operation can be answered
by referring to the Quick Start Guide or by
watching the video.
The special Help button, located in the Fat
Channel Section of the console’s control panel,
can help you quickly determine how to use a
button or configure a particular aspect of the
Digital 8•Bus.
When the HELP button is on, the green LED
lights and the console switches to interrogate
mode. After pressing the HELP button, press
the button associated with the feature you’re
interested in, and some descriptive text will
appear in the Fat Channel Display.
Note: The Help function may not be
implemented in the first release of the Mackie
Real Time OS software. Stay tuned to Mackie’s
website for software updates.
Owner’s Manual
The Split-Console Approach
How To Use Help
This concept is presented in the Digital
8•Bus Quick Start Guide, but it is so important
we decided to include it here also.
One of the primary applications the Digital
8•Bus was designed for is multitrack recording
(up to 24 tracks). This involves tracking and
monitoring, bouncing and overdubbing, and
mixdown.
Tracking
The first 24 channels, on Fader Bank 1, are
used for tracking. Microphones and instruments
are connected directly to the input jacks on
channels 1–24, and their signals are directassigned to the Tape Outputs 1–24 (and not to
the L-R bus). The Tape Outs are then
connected to your multitrack recorder(s).
Monitoring
In order to monitor these signals from your
multitrack as you’re recording, switch to Fader
Bank 2. Channels 25–48 are located here and
they let you hear the signal the way it will go
to tape. (They are assigned to the L-R bus).
On an analog mixer you’d need 24 channels for
tracking and 24 more for monitoring. But here
— using the split-console concept — you can
switch between Fader Banks 1 and 2 with the
touch of a button. The D8B’s 24 channel strips
do the work of 48 analog strips. (Actually, they
do more than that. But we’ll get to that later.)
To Tape
Channels 1-24
MIC/LINE IN
Tape Outs
or Bus Outs
From Tape
Digital
Multitrack
Recorders
Tracks 1-24
TAPE IN
L/R MASTER
OUT
DAT Recorder
2-Track
Master
CUE MIX
OUT
Channels 1-24
TRACKING HALF
Fader Bank 1
Channels 25-48
MONITORING HALF
Fader Bank 2
Figure 1-2. Tracking and Monitoring with the D8B.
Introduction
1-5
Digital 8•Bus
Overdubbing and Bouncing Tracks
A corollary of Murphy’s Law states that no
matter how many tracks you have available for
recording, you’ll always need at least one more.
So you may have to bounce some tracks down to
make room for the background vocal parts.
Assign the tracks you want to bounce down
to one (for a mono mix) or two (for a stereo
mix) of the Bus 1–8 Masters, on Fader Bank 4,
and direct-assign the Bus Master(s) to the
Tape Outputs.
After you’ve bounced the tracks down,
you’ll have freed up more tracks for recording.
When you do, you’ll monitor the previously
recorded tracks and the new vocal tracks
together through the monitoring half of the
console (see Figure 1-3).
Mixdown
Mixing down is an art unto itself, and the
Digital 8•Bus gives you the tools to make the
job easier. Since the D8B is fully automated,
you can go through a step-by-step process of
adjusting levels, pans, EQ, and effects in a very
efficient manner. The console remembers each
move and plays them back each time you make
a pass, adding your creative touch to each and
every track. When you’re finished, hit PLAY
and sit back and watch the console perform the
complex tasks you’ve programmed it to do.
Now you can concentrate more on the art —
and less on the mechanics — of mixing.
START
Bounce down to
one or two tracks
Digital
Multitrack
Recorders
Bus Outs
Tracks being
bounced
CUE MIX
OUT
Channels 1-24
TRACKING HALF
Fader Bank 1
Tape Tracks In
to
Bus Outs
(This routing
is internal)
Figure 1-3. Bouncing Tracks with the D8B.
1-6
Introduction
Channels 25-48
MONITORING HALF
Fader Bank 2
Refer to the foldout page at the end of this
chapter for a complete view of all of the Digital
8•Bus’s features and components.
Channel Strip Description
There are 24 channel strips on the Digital
8•Bus, configurable as one of four tiers, or
banks. We refer to them as Fader Banks 1, 2,
3, and 4.
• Fader Bank 1 includes channels 1–12,
which have both mic and line input capability, and channels 13–24, which have
line-level inputs only.
• Fader Bank 2 includes 24 channels of Tape
Inputs which are accessed through the three
optional TAPE IN/OUT cards in the rear
panel.
• Fader Bank 3 includes sixteen internal effects returns (FX 1–16), and eight alternate
returns which are accessed through the optional ALT I/O card in the rear panel.
• Fader Bank 4 includes eight Virtual Groups,
eight MIDI controllers, and eight Bus Masters (Bus 1–8).
Channel
s 1-24
s 25-48
1-16; ALT
Groups 1-
8; MIDI 1-
8
8; Bus 1-
8
Each channel
strip has the following:
• Meter ladder (dB FS)
• Analog TRIM control
• Latching MIC/Line button (Ch 1–12 only)
• MMC REC/RDY button
• ASSIGN button
• Automation WRITE enable button
• V-Pot controller
• 2 Fader Bank indicator LEDs per channel
• SELECT button
• SOLO button
• MUTE button
• 100mm motorized Fader
OL
2
4
7
10
15
20
25
30
35
40
50
bn
36
TRIM
LINE
MIC
0
-20dB
MIC
The MIC button appears on channels 1–12,
since these are the only channels with mic inputs. This button engages only one connector
to the preamp, so if MIC is engaged, any signal
connected to that channel’s line input jack is
disconnected.
REC/RDY
ASSIGN
WRITE
Note: TRIM controls and MIC switches cannot
be controlled with the mouse/keyboard combination, nor can they be automated or saved
with snapshots. In most cases, though, these
controls are set at the beginning
of a session and then left alone.
We have included a Track Sheet
Fader Bank
at the back of this manual for
1
Channels 1-2
4
documenting the settings of
Mic/Line
Tracking
these controls if necessary.
Fader Bank
Virtual Groups 4
MIDI Controlle 1-8
rs 1-8
Bus 1-8 Maste
rs
60
+40dB
12
36
SELECT
SOLO
3 REC/RDY enable button
Press this button to arm the
corresponding HDR/MDM track
(via MIDI) for recording audio.
The REC/RDY LED flashes
when the recorder is in record
standby mode, and lights continuously when the master
RECORD button in the transport
section is engaged.
4 ASSIGN button
The ASSIGN button serves two functions: it’s
used to assign a channel to a bus or tape output,
and to indicate if the channel is assigned to a selected bus or tape output (with its LED).
5 WRITE button
1
12
2 MIC button
Fader Bank
3
FX Return 1-1
6
ALT Return 1-8
Return 1-
12
This is an analog preamp trim control for
channels 1–24 only; its circuit is similar to the
one we use in our large-format analog mixing
consoles. Channels 1–12 share the same preamp for both the Mic and Line inputs (channels
13–24 are line input only). The Mic level preamp’s gain range is from 0 dB to +60 dB. The
line input gain range on channels 1–12 is from
–20 dB (pad) to +40 dB, while channels 13–24
range from –20 dB (pad) to +20 dB.
The trim control is active at all times, regardless of whether Fader Bank 1, 2, 3, or 4 is
selected.
Fader Bank
2
Channels 25-48
Monitor/Tape
In
Mixdown
Channel
FX Return
1 TRIM control
MUTE
2
Owner’s Manual
2. Digital 8•Bus Description
3
4
5
6
7
8
9
bl
MIDI 4
FX 12
12
36
dB
10
5
U
bm
5
10
20
30
Press this button to enable (arm) a channel
for an automation pass. Used with the buttons
in the Automation Section (il–is).
40
50
60
Digital 8•Bus Description
2-1
Digital 8•Bus
6 V-Pot
12
OL
2
4
7
10
15
20
25
30
35
40
50
bn
36
TRIM
LINE
MIC
0
-20dB
60
+40dB
1
12
MIC
REC/RDY
ASSIGN
WRITE
12
36
SELECT
SOLO
MUTE
2
3
4
5
6
7
8
9
bl
MIDI 4
12
36
dB
10
5
5
7 Fader Bank Select LEDs
These LEDs indicate which bank is currently selected.
• If Bank 1 is selected (Channels 1–24), the
green LEDs light.
• If Bank 2 is selected (Channels 25–48), the
red LEDs light.
• If Bank 3 is selected (Channels 49–72), both
of the LEDs light.
• If Bank 4 is selected (Masters), neither of
the LEDs light.
8 SELECT button
The SELECT button LED lights solid green
when it is engaged. Select highlights only the
specific channel’s DSP parameters in the Fat
Channel’s Vacuum Fluorescent Display for editing. (See also Fat Channel in the Master Section
description on page 2-5.) It’s also used for cut,
copy, and paste operations and grouping assignments.
9 SOLO button
FX 12
U
This is a non-detented pot with no stop
(range >360 degrees), and a 12-segment LED
indicator collar. Each V-Pot controls a single
function at a time on its given channel. The
function is chosen in the V-Pot Select or Master V-Pot section, and applies to all channels.
The default assignment is Pan (selected with
the PAN button in the Master V-Pot Section).
Other assignment options include eight mono
and two stereo Aux Send level controls, Digital
Trim controls, and Tape Send (LEVEL TO
TAPE) controls, all accessed in the V-Pot Select section.
bm
The channel Solo button places the
channel’s signal on the stereo solo bus. This
signal is post-fader level (AFL) and post-pan by
default, but can be changed globally to prefader by pressing the PFL SOLO button in the
Studio/Solo section.
If the MIXDOWN TO SOLO button is engaged
in the Studio/Solo Section, the soloed channel’s
signal is isolated on the main L-R bus.
10
20
30
40
50
60
2-2
Digital 8•Bus Description
bl MUTE button
Press this button to mute the signal postfader and prior to the output buses, including the
aux sends. MUTE doesn’t affect the signal going
to the Tape Outputs, the Solo bus, or the Aux
Sends if they are PFL-assigned. The MUTE button LED lights when the button is engaged.
bm Fader
The channel fader track is 100mm in length,
with a dB level range from ∞ dB (bottom of
travel, fully off) to +10 dB (fully on). It does
not pass audio, but rather remotely controls
the channel level via DSP.
The faders are motorized and act as automation controllers when a channel is armed for
automated level recording using the channel
WRITE button or Auto Touch mode.
Each fader controls the level on one of the
24 mic/line channels (Fader Bank 1), one of
the 24 tape returns (Fader Bank 2), one of the
internal effects returns and alternate (ALT I/O)
returns (Fader Bank 3), and one of the Groups,
MIDI controllers, and Bus Masters (Fader
Bank 4). When switching from one Fader Bank
to another, the console remembers the individual fader setting for each fader in each
Fader Bank.
bn Meter LED Ladder
The meters indicate pre-fader audio signal
level for each channel (1–48), and for the internal
effects returns and ALT returns. They indicate
post-fader levels for the BUS 1–8 Masters.
The audio level display is scaled in digital
dB FS (decibels full scale), where OL is +22 dBu,
–10 dB FS is +10 dBu, –15 dB FS is +5 dBu,
and minimum indication is –50 dB FS. Markings
screened next to the LED ladders are denoted
as –50 dB FS to OL. Markings are similar in
function to those of digital recorders.
Note: Typically, in digital recording devices
such as MDMs, HDRs or DATs, there is a builtin overhead of 3 to 4 dB above the 0 dB FS mark,
to match the typical maximum unbalanced analog console bus output level of +22 dBu.
The Master Section is divided into 12 subsections. They are as follows:
• Master Fader/Bank Select Section
• Master V-Pot Section
• V-Pot Select Section
• Fat Channel Section
• Studio/Solo Section
• Phones/Cue Mix Section
• Control Room Section
• Clipboard Section
• Master L-R Section
• Shortcuts Section
• Bus Assignment Section
• Automation Section
• Session Setup Section
• Transport Section
br bs
MASTERS
SHIFT
1-24
25-48
bo bp
MIC/LINE
TAPE IN
(TRACK)
(MONITOR)
49-72
bq
EFFECTS
BANK SELECT
MASTER
L/R
dB
10
bt
Master Fader/Bank
Select Section
All 96 channels are always active, all of the time.
However, only 24 of them
are accessible from the control surface (and screen) at
any given time. Which 24
channels are accessible is
determined by the following
four buttons:
5
U
5
10
bo MIC/LINE (TRACK)
Selects channels 1–24
(Fader Bank 1) to be the
currently accessible channels.
20
30
40
50
60
bp TAPE IN (MONITOR)
Selects channels 25–48
(Fader Bank 2) to be the
currently accessible channels. You must have one,
two, or three TAPE I/O
cards installed in the card
cage to use channels 25–48.
bq EFFECTS
Selects channels 49–72 (Fader Bank 3) to
be the currently accessible channels. Fader
Bank 3 controls the sixteen internal effects returns and the eight ALT I/O returns.
The basic console has one internal FX card
installed, consisting of two stereo effects processors. Each FX card is equivalent to two
rack-mounted stereo processors (i.e., two
mono-in/stereo-out processors). The two stereo
effects returns are returned to the L-R bus via
FX 1–4. You can install up to three more FX
cards in the card cage for a total of eight internal effects sends (Aux 1–8) and sixteen
internal FX returns (FX 1–16).
You must have the optional ALT I/O card installed to use the eight alternate return inputs
(RET 1–8).
br MASTERS
Selects channels 73–96 (Fader Bank 4) as
currently accessible channels. The first eight
faders control the eight Virtual Groups. A Virtual Group fader changes the overall level of all
the channels assigned to that particular group.
This is useful, for example, to raise or lower
the level of all the background vocal parts assigned to a group, without affecting the
balance between the individual parts (group
members).
The second set of eight channel strips are
MIDI controllers. The faders, V-Pots, and Mute
buttons send control change messages via the
MIDI OUT port on the rear panel of the Remote
CPU. See Appendix G for specific MIDI implementation.
The last set of eight faders controls the levels to the eight Bus outputs (BUS 1–8), which
are output via the 25-pin D-Sub connector on
the rear panel of the console.
Owner’s Manual
Master Section Description
bs SHIFT button
Pressing this button allows more than one
channel SELECT button to be engaged simultaneously. This is useful for functions such as
cut/copy/paste commands for multiple channels. When SHIFT is pressed, the RUDE SOLO
LIGHT blinks to let you know the Shift function is on.
bt MASTER L-R Fader
There is one 100mm fader that controls the
Master L-R stereo bus output. Similar in function to the channel faders, this fader does not
pass audio; it remotely controls level via DSP.
The dB level range is from ∞ dB (fully off) to
+10 dB (fully on).
Master V-Pot Section
bu MASTER V-Pot
Acts as a master-level pot
for the currently selected
Aux bus.
bu
cl
PAN
MASTER
cm
SOLO
cl Master PAN button
This button assigns all channel V-Pots to act
as Pan controls (channels 1–72 and 81–88).
This button stays lit continuously until an Aux
Select button is engaged.
Digital 8•Bus Description
2-3
Digital 8•Bus
cm Master SOLO button
bu
cl
Pressing this button solos the currently selected aux bus. Only one aux
bus may be soloed at a time, along
with any number of channels. The aux
bus remains soloed until it is manually
disengaged, or until the CLEAR SOLO
button (in the Studio/Solo Section) is pressed.
Aux bus soloing is post-Master V-Pot only.
Pressing the PFL SOLO button in the Studio
Solo Section does not affect the aux bus solo.
cm
MASTER
SOLO
PAN
cn V-Pot Select Section
cq
co
cp
1-24
1-48
LEVEL TO TAPE
DIGITAL TRIM
AUX 1
AUX 2
AUX 3
cn
AUX 4
AUX 5
AUX 6
AUX 7
AUX 8
AUX 9-10
AUX 11-12
PAN
PAN
These buttons assign the V-Pots
on each channel to control individual aux send levels. Unity gain
is at the 2 o’clock position.
AUX 1 button
Assigns channel V-Pots to control individual send levels to Aux 1
output. Additionally, an identical
signal is sent simultaneously to internal effects processor 1.
Tip: Internal effects 1 is returned
via FX 1 and FX 2 in Fader Bank 3.
AUX 2 button
Assigns channel V-Pots to control individual
send levels to Aux 2 output. Additionally, an
identical signal is sent simultaneously to internal effects processor 2.
Tip: Internal effects 2 is returned via FX 3 and
FX 4 in Fader Bank 3.
AUX 3–8 buttons
Assigns channel V-Pots to control individual
send levels to Aux 3–8 outputs, respectively.
If additional FX cards are installed in the card
cage, the Aux 3–8 sends are sent simultaneously
to internal effects processors 3–8.
Tip: Internal effects 3–8 are returned via FX 5
through FX 16 in Fader Bank 3.
AUX 9–10 LEVEL button
Assigns channel V-Pots to control the individual output level being sent to Aux 9 and 10
outputs as a left/right stereo pair. Aux 9 and 10
can be used as a cue mix for PHONES 1 and 2
by selecting AUX 9–10 in the Phones/Cue Mix
1 and 2 section.
AUX 11–12 LEVEL button
Assigns channel V-Pots to control the individual output level being sent to Aux 11 and 12
outputs as a left/right stereo pair. Aux 11 and
12 can be used as a cue mix for PHONES 1 and
2-4
Digital 8•Bus Description
2 by selecting AUX 11–12 in the Phones/Cue
Mix 1 and 2 Section.
AUX 9–10 PAN button
Assigns channel V-Pots to control the stereo
balance of the signal being sent to Aux 9 and
10 outputs as a left/right stereo pair.
AUX 11–12 PAN button
Assigns channel V-Pots to control the stereo
balance of the signal being sent to Aux 11 and
12 outputs as a left/right stereo pair.
co LEVEL TO TAPE
This button is designed to give you more
control over your tape sends while tracking.
The direct Tape Outs are positioned after the
channel DSPs and before the fader in the signal flow, so the channel fader has no effect on
the Tape Out signal.
Pressing the LEVEL TO TAPE button
causes the channel V-Pots to become Tape
Send level controls, after the channel DSPs.
This lets you adjust the V-Pot to get the recommended meter readings on your tape deck for
the best signal-to-noise ratio, without having to
readjust the analog input TRIM control, or the
DIGITAL TRIM control.
cp DIGITAL TRIM
Pressing this button causes the channel
V-Pots to become digital trim controls. Digital
Trim is positioned just after the A/D converter
stage in the signal path for channels 1–48, so
it’s the first digital process in the channel.
If the Digital I/O cards are installed
(DIO•8), there is no A/D converter in the signal path for channels 25–48, so the digital trim
is the first digital control in the signal path after the Tape I/O card.
Digital Trim is a recallable function (unlike
the analog TRIM control), and can be automated in a mixdown session. It is also the only
trim control for channels 25–48.
cq Talkback Mic
Sounds arriving at this mic are routed to the
Phones/Cue Mix Outputs. Talkback can also be
routed to the Studio Outputs.
• The talkback mic is activated by pressing
the TALKBACK button in the Control Room
section.
• Talkback is routed to the Studio Outputs by
pressing TALKBACK TO STUDIO in the Studio/Solo section.
• The talkback level is controlled by pressing
TALKBACK LEVEL in the Studio/Solo section. Turn the V-Pot to adjust the talkback
level.
cs
OL
CHANNEL
LEFT
ct
D8B
2
4
7
10
15
20
25
30
35
40
50
56 INPUT / 72 CHANNEL DIGITAL MIXER
RIGHT
SELECT
SELECT
SELECT
SELECT
dm
HELP
dm
dl
PREVIOUS
LOW
do
ds
ON
dr
dn
cu
SUPER CD ENCODING
EQ
LOW MID
GATE
Fat Channel Section
When a channel is selected, the Fat Channel
Vacuum Fluorescent Display (VFD) ct shows
the editable DSP parameters for that channel.
Parameters may be edited within the parametric
EQ, Compressor, Gate, and internal plug-in effects. Additionally, the Fat Channel can display
and allow you to modify global console parameters including Aux Pre/Post selection, Help
functions, and loading stored effects settings
from the onboard library. It also shows fileloading and disk management functions,
synchronization settings, naming functions, error messages, and warning indicators.
The Fat Channel has an open architecture
and will accommodate additional functions and
parameters in the event of system additions,
upgrades, and installation of third party software plug-ins.
cr LEFT/RIGHT LED Ladders
These meters indicate the signal level of
whatever source is selected in the Control
Room section. These include the L-R bus,
DIGITAL IN 1 and 2, and 2 TRACK A, B, or C.
In addition, if the solo function is activated by
pressing a solo button, the meters indicate the
stereo solo bus level. If the MONO button in
the Control Room Section is activated, both
meters indicate the mono level.
cs CHANNEL Select Display
Indicates the last channel selected by any
channel select button. The channel that is indicated in the CHANNEL SELECT display is also
the currently active channel selected for editing in the Fat Channel.
Note: Only channels 1–48 have Fat Channel
DSP capability.
HI
HI MID
dp
dt
SETUP
MEMORY A
du
COMPRESSOR
PLUG-INS
dq
el
NEXT
MEMORY B
em
LOAD PATCH
SAVE PATCH
Owner’s Manual
cr
ct Fat Channel Display
This vacuum fluorescent display provides an
interface for selecting and adjusting channel
EQ and dynamics, global plug-in effects, and
for selecting operating system options, preferences, and managing files.
cu V-Pot SELECT buttons
These buttons are used to select an option
appearing in the Fat Channel Display, or to
toggle through a series of parameters related
to a function. For example, when viewing the
parametric EQ settings for a channel, pressing
the SELECT button for LOW EQ cycles the display through the Gain, Frequency, and Q
parameter settings for the Low EQ.
dl V-Pot controllers
These knobs provide control of the
currently selected parameter chosen by
the V-Pot SELECT buttons. A ring of
eleven discrete LEDs surround the VPots to indicate the relative position of
the current setting, with an arc from 7
o’clock to 5 o’clock. An additional LED,
located at the 6 o’clock position, lights
when the V-Pot control is exactly centered (or normalled) (for example, when
an audio track is panned precisely in the
center of the stereo picture).
dm PREVIOUS and NEXT Arrow buttons
When more than four parameters are associated with a particular effect or menu, the
PREVIOUS button scrolls the items in the display to the left and the NEXT button scrolls the
items to the right, allowing you to control the
extra parameters.
Digital 8•Bus Description
2-5
Digital 8•Bus
dn HELP button
This button is available to use at any time to
get information about a particular control, configuration, or operation. By pressing this
button and then pressing any other button, the
Fat Channel Display will provide on-line, context-sensitive help messages.
Note: The Help function may not be implemented in the first release of the Mackie Real
Time OS software. Stay tuned to Mackie’s web
site for software updates.
do ON button
Turns the EQ, compressor, or gate on and
off for the selected channel. Select EQ, COMPRESSOR, or GATE, then press the ON button
to toggle the selected processor on and off.
dp SETUP button
This button allows you to make per-channel
preference changes to the selected EQ, compressor, or gate. Select one of these options,
then press the SETUP button to see what preferences are available for the selected
processor.
dq MEMORY A and B buttons
Each channel has two memory locations to
store individual EQ, Compressor, and Gate parameters, determined by which function is
selected in the Fat Channel Section.
Simply make the adjustments you want to
the EQ, Compressor, or Gate, and the settings
are automatically stored in the selected
memory bank.
You can use the MEMORY A and B buttons
to make a quick change to the EQ, Compressor,
or Gate settings on a channel, or to compare
different settings to decide which works best
for a particular instrument or voice.
If PLUG-INS is selected in the Fat Channel,
MEMORY A and B store the settings for the
plug-in effect chosen for the selected aux send.
dr EQ button
Press this button to display the EQ parameters for the selected channel in the Fat
Channel Display.
ds GATE button
Press this button to display the gate parameters for the selected channel in the Fat Channel
Display.
dt COMPRESSOR button
Press this button to display the compressor
parameters for the selected channel in the Fat
Channel Display.
2-6
Digital 8•Bus Description
du PLUG-INS button
Press this button (along with an Aux 1–8
button) to select and edit the internal effects
plug-ins for each internal FX card. The basic
console comes with one FX card installed, to
provide up to two effects. Three additional FX
cards can be installed for a total of up to eight
simultaneous internal effects processors. See
Appendix F for information on installing additional FX cards.
el LOAD PATCH button
Press this button to load an individual EQ,
compressor, gate, or internal effects setting
previously stored in the onboard Library.
em SAVE PATCH button
Press this button to store an individual EQ,
compressor, gate, or internal effects setting to
the onboard Library.
Studio/Solo Section
en
eo
ep
eq
STUDIO/SOLO
fl
MIXDOWN SOLO
PFL SOLO
fm
AFL SOLO
TALKBACK TO
STUDIO
er
es
et
eu
CLEAR SOLO
RUDE SOLO
LIGHT
SOLO LEVEL
STUDIO LEVEL
TALKBACK LEVEL
LEVEL
en MIXDOWN SOLO button
Normally, when a solo button is pressed, the
soloed signal appears in the Control Room outputs without affecting the L-R Main Outputs.
When MIXDOWN SOLO is activated, soloed
channels are isolated in the Main Outputs. Soloed channels can still be monitored in the
Control Room outputs when L-R is selected as
the source in the Control Room Section.
eo PFL SOLO button
Press this button to activate pre-fader listening on the solo bus. The channel fader has
no effect on the soloed channel when PFL
SOLO is on.
ep AFL SOLO button
Press this button to activate after-fader listening on the solo bus. The signal on a soloed
channel is post-fader, so the fader does affect
the soloed signal.
Note: PFL/AFL affects channel soloing only,
and has no effect on aux send soloing.
eq TALKBACK TO STUDIO button
Routes sounds arriving at the in-panel Talkback Mic to the Studio Outputs.
Note: Make sure the studio speakers are located in another room to avoid feedback when
the TALKBACK TO STUDIO button is active.
er CLEAR SOLO button
Disengages all solos throughout the console
with the push of a single button.
es SOLO LEVEL button
Press this button to assign the V-Pot in the
STUDIO/SOLO section to control the solo level
being fed to the Control Room outputs.
et STUDIO LEVEL button
Press this button to assign the V-Pot in the
STUDIO/SOLO section to control the output
level to the Studio outputs.
eu TALKBACK LEVEL button
Press this button to assign the V-Pot in the
STUDIO/SOLO section to control the preamp
level for the in-panel Talkback Mic.
fl RUDE SOLO LIGHT
Whenever a SOLO button is engaged, the
RUDE SOLO LIGHT blinks to let you know. In
addition, when the SELECT/SHIFT, CONTROL,
or ALT buttons are pressed, the RUDE SOLO
LIGHT lights continuously to indicate that a
modifier key is active.
Phones/Cue Mix Section
PHONES/CUE MIX 1
PHONES/CUE MIX 2
fp fn
fq fo
fp
fq
AUX 9-10
COPY MIX TO CUE
AUX 9-10
COPY MIX TO CUE
AUX 11-12
CONTROL ROOM
AUX 11-12
CONTROL ROOM
fr
LEVEL
Pressing this button causes all the channel
fader settings to be copied to the channel
V-Pots for the selected Aux 9–10 or Aux 11–12
Send, including the effects returns on Fader
Bank 3. This allows you to quickly create a cue
mix based on your overall L-R mix, which you
can then fine-tune to suit your performers.
Note: The COPY MIX TO CUE function may
not be implemented in the first release of the
Mackie Real Time OS software. Stay tuned to
Mackie’s web site for software updates.
fq CONTROL ROOM button
Assigns the same source as the Control
Room to the PHONES output. Solo signals are
also routed to the PHONES output when Control Room is selected.
fr LEVEL V-Pot
Adjusts the PHONES output level.
Control Room Section
These buttons select the source
for the Control Room outputs, turn
the outputs on and off, and adjust the
listening level.
fs 2 TRACK A button
Selects the signal at the 2 TRACK
A inputs as the Control Room source.
CONTROL ROOM
fs
ft
fu
gl
gm
gn
2 TRACK A
DIGITAL IN 1
2 TRACK B
DIGITAL IN 2
2 TRACK C
MASTER
L-R
go
MONO
gp
NEAR FIELD
ft 2 TRACK B button
SPEAKERS
Selects the signal at the 2 TRACK
B inputs as the Control Room source.
gq
gr
MAIN
SPEAKER LEVEL
These two matrices select the source(s) for
the Phones outputs, set Phones levels, and add
effects to the cue mix.
fn
fo
Owner’s Manual
fp COPY MIX TO CUE button
fr
LEVEL
fn AUX 9–10 button
Assigns the stereo Aux Send 9–10 to the
PHONES output.
fo AUX 11–12 button
Assigns the stereo Aux Send 11–12 to the
PHONES output.
gs
fu 2 TRACK C button
Selects the signal at the 2 TRACK
C inputs as the Control Room source.
gt
DIM
TALKBACK
gl DIGITAL IN 1 button
Selects the AES/EBU digital input as the
Control Room source.
gm DIGITAL IN 2 button
Selects the S/PDIF digital input as the Control Room source.
gn MASTER L-R button
Selects the main L-R output bus as the Control Room source.
go MONO button
Combines the left and right signals into a
monaural signal and sends it to the left and
right Control Room outputs (NEAR FIELD and
MAIN). This lets you quickly monitor how your
mix sounds in mono.
Digital 8•Bus Description
2-7
Digital 8•Bus
gp NEAR FIELD button
Turns on the Control Room NEAR FIELD
output.
Master L-R Section
The buttons in this section apply to the Master Fader.
gq MAIN button
ho SELECT button
Turns on the Control Room MAIN output.
Selects the Master Fader for edit operations.
Note: The NEAR FIELD and MAIN buttons
cannot both be on at the same time.
gr SPEAKER LEVEL V-Pot
Adjusts the individual output level of the selected Control Room output (NEAR FIELD or
MAIN). This control does not affect the signal
level that is sent to the Phones/Cue Mix Section.
hp WRITE button
Engages the Master Fader to record automation events dependent on the current
automation mode.
MASTER L/R
SHORTCUTS
ho
hp
hq
hr
SELECT
CONTROL
WRITE
ALT
gs DIM button
Quickly attenuates the Control Room output
by 20 dB, in case you’re interrupted by a visitor
or the phone ringing.
gt TALKBACK button
Routes the signal arriving at the in-panel
Talkback Mic to Phones/Cue Mixes 1 and 2.
Clipboard Section
CLIPBOARD
gu
hm
hl
hn
CUT/ZERO SET
COPY
PASTE
UNDO
Provides cut, copy,
paste, and undo functions
for specific fader operations, channel
parameters, and automation events.
gu CUT/ZERO SET button
Deletes parameters from the currently selected channel(s), and returns the channel
settings to the default. Options are selected in
the Fat Channel Display.
hl COPY button
Copies parameters from the currently selected channel(s). Options are selected in the
Fat Channel Display.
hm PASTE button
Pastes copied parameters to the currently
selected channel(s).
hn UNDO button
Reverts the currently selected channel(s) to
their previous status, before a cut, copy, or paste
operation was initiated. There is only one level
of undo. Pressing the UNDO button a second
time will undo the undo, or “redo” the operation.
2-8
Digital 8•Bus Description
Shortcuts Section
hq CONTROL button
Used in combination with other buttons as a
modifier key. See Appendix I for a listing of
shortcut keys.
hr ALT button
Used in combination with other buttons as a
modifier key. See Appendix I for a listing of
shortcut keys.
Bus Assignment Section
This is where you assign
channels to up to ten different buses, as well as to any
direct TAPE OUT.
ASSIGNMENT
ASSIGN
BUS 2
ASSIGN
ASSIGN
BUS 3
hs BUS 1–8 buttons
ASSIGN
BUS 1
hs
BUS 4
ASSIGN
ASSIGN
BUS 5
BUS 6
ASSIGN
ASSIGN
Selects a bus for channel
assignments. Only one bus
may be assigned at a time.
Press a channel’s ASSIGN
button to route the channel’s post-fader signal
to the selected bus. Since the ASSIGN button
lights when its channel is assigned to a selected bus, you can quickly see what channels
have been assigned. Press the ASSIGN button
again to unassign the channel from the selected bus.
BUS 7
BUS 8
ASSIGN
ASSIGN
L-R
ROUTE TO
TAPE
ht hu
ht MASTER L-R button
Pressing this button allows you to assign
channels to the L-R bus by pressing the channel ASSIGN buttons. The internal FX returns
(FX 1–16) and alternate returns (RET 1–8) can
also be assigned to the L-R bus. Since the ASSIGN button lights when its channel is
assigned to the selected L-R bus, you can
hu ROUTE TO TAPE button
This is the Digital 8•Bus’s built-in patchbay.
Use it to assign a selected channel to one of the
24 tape outputs. Any of the 48 channels, as well
as any internal FX return, ALT I/O RETurn, or
BUS 1–8, can be assigned to a Tape Out (with
the exception that a Tape In channel can’t be assigned to its own Tape Out).
When ROUTE TO TAPE is selected, press
the SELECT button on the source channel you
want to route to a tape output, then press the
ASSIGN button on the channel corresponding
to the Tape Output you want to use.
Note: The 24 tape outputs are always assignable across any selected fader bank.
Automation Section
Use this section to create automated mixes.
ip PAN button
Allows writing automation only of pans. When
PAN is activated, all pan changes on writeenabled channels are written into automation.
iq ALL button
Activates all automatable functions. When
ALL is activated, all write-enabled channel and
Fat Channel moves are written into automation. This includes faders, pans, mutes, digital
trims, phase reverse, aux levels, bus assignments, direct tape out assignments, parametric
EQ, compressor, gate, effects, stereo and surround panning, cue mix level and pan, and
snapshot events.
ir AUTO TOUCH button
Owner’s Manual
quickly see what channels have been assigned
to it. Press the ASSIGN button again to
unassign the channel from the L-R bus.
Activates Auto Touch write mode. In this
mode of automation, all console control points
become write-enabled once they are touched
(modified from their current state). It is not
necessary to engage individual channel WRITE
buttons, as they become automatically engaged
when a channel’s parameter is changed.
AUTOMATION
il
im
BYPASS
FADER MOTORS
OFF
in
io
FADERS
PAN
ip
iq
MUTES
ALL
ir
is
AUTO TOUCH
TRIM LEVELS
il BYPASS button
Turns on and off all automation when the
tape rolls. You must turn this button off before
any automation can be recorded or played back.
im FADER MOTORS OFF button
Disengages fader motors and prevents any
automated fader motion during automation playback. This does not affect audio changes that
have been recorded during automation record
passes. All automated fader levels will play
back, but the faders won’t actually move. If
you have an SVGA monitor connected to the
Remote CPU, the faders still move on the screen.
Note: When this button is engaged, all the
faders snap to OFF.
in FADERS button
Allows writing automation only of fader
moves. When FADERS is activated, all the
fader moves of write-enabled channels are written into automation.
io MUTES button
Allows writing automation of only channel
mutes. When MUTES is activated, all mute
changes on write-enabled channels are written
into automation.
Note: One of the automation buttons must be
simultaneously active (FADERS, MUTES, PAN,
or EVERYTHING) or nothing will be written to
automation.
is TRIM LEVELS button
Activates Trim Level automation on all
write-enabled channels. In Trim mode, fader or
V-Pot moves are not replaced, but rather new
ones are added or subtracted from the previously recorded ones. The fader motors are
turned off on all write-enable channels.
Session Setup Section
Buttons in this section are used for file management and setting up system functions such
as Virtual Groups, Digital I/O, meter assignment, and MIDI parameters.
it
jn
SAVE
GROUP
iu
jo
SAVE AS...
GENERAL
SETUP
jl
jp
NEW
PLUG INS
jm
jq
LOAD
DIGITAL I/O
it SAVE button
Saves the currently active session to the internal hard drive. Press SAVE, then press the
SELECT button beneath “SAVE” in the Fat
Channel Display. Alternatively, to do a quicksave, press the SAVE button twice.
Digital 8•Bus Description
2-9
Digital 8•Bus
it
jn
SAVE
GROUP
iu
jo
SETUP
SAVE AS...
jl
jp
GENERAL
NEW
PLUG INS
Transport Section
jm
jq
This section provides control for external recorder transports, time display, and snapshot
automation.
LOAD
DIGITAL I/O
jr POSITION LED Display
iu SAVE AS... button
Saves the currently active session under a
new name. Press SAVE AS..., then use the
V-Pots and SELECT buttons in the Fat Channel
Display to enter the new name. Alternatively, to
do a quick Save As (and accept the default session name), press the SAVE AS... button twice.
jl NEW button
Press this button to start a new session.
The New Session menu appears in the Fat
Channel Display.
This display shows numeric representation
of SMPTE or MIDI Time Code (HOURS:
MINUTES:SECONDS:FRAMES) or the more
musical display of BARS:BEATS:TICKS. If the
console is set to receive external time code,
and MIDI Time Code (MTC) or SMPTE is being
input to the console, the position display will
continually update according to the time code
position.
js RANGE LED Display
This display shows the snapshot number
(when in Snapshot mode) or the locate point
(when in Locator mode) that is currently entered. When looping, it shows the beginning
(FROM) and ending (TO) points of the loop.
jm LOAD button
Brings up the Load Session menu in the Fat
Channel Display for loading previously saved
files from the hard disk and the floppy disk.
jt SET TIME button
jn GROUP button
Press this button to enter a new time in the
POSITION DISPLAY. Use the number buttons to
enter the time, then press the ENTER button.
Brings up the Group menu in the Fat Channel Display for creating Virtual Groups.
ju SMPTE VIEW button
jo GENERAL button
This button toggles between SMPTE/MTC
time and BBT in the POSITION display.
Brings up the General menu in the Fat
Channel Display for changing languages, setting up the Surround matrix, setting up MIDI
or Auto Save, selecting Effects Return metering and pre/post settings for auxes and buses,
and determining the serial number and operating system version.
Number Buttons 0–9
Use these buttons to numerically enter
Snapshots, Locate and Loop points in the
RANGE display, and time values in the POSITION display. Generally, when numeric buttons
are pressed in Locator, Snapshot, or Set Time
modes, it is necessary to press the ENTER button to initiate any changes.
jp PLUG INS button
Brings up the Plug-In menu in the Fat Channel Display for selecting the effects package to
download to the internal FX cards.
RANGE
POSITION
jq DIGITAL I/O button
jt
ju
jr
HOURS
MINUTES
SECONDS
FRAMES
BEATS
TICKS
js
FROM
TO
SET TIME
Brings up the Digital I/O menu in the
Fat Channel Display for selecting Tape I/O,
ALT I/O, and Stereo I/O (AES/EBU and
S/PDIF) settings, and selecting the internal sample rate.
BARS
SMPTE VIEW
LOOP
1
2
3
4
5
6
7
8
9
0
ENTER
LOOP
STORE
LOCATOR
SNAPSHOT
MODE
REWIND
FAST FWD
STOP
PLAY
RECORD
SHUTTLE
JOG & SHUTTLE
JOG
2-10
Digital 8•Bus Description
This button initiates numeric changes that
have been typed into the POSITION or RANGE
display with the console number buttons or
with a standard IBM-style keyboard connected
to the console.
LOOP button
This button is used to set the ending locate
point in a loop. First enter the starting locate
point using the number buttons, then press ENTER (you must be in Locator mode). Next, press
LOOP, enter the ending locate point number using the numeric buttons, then press ENTER.
STORE button
This momentary button is used to save locate points and console automation snapshots.
LOCATOR button
This button allows the number buttons to be
used for entering specific location numbers.
When in this mode, the left two digits in the
RANGE display indicate the locate point number.
SNAPSHOT button
This button allows the number buttons to be
used for entering snapshot numbers. When in
this mode, the left two digits in the RANGE
display indicate snapshot numbers.
Transport Controls
These buttons control external devices that
respond to MIDI Machine Control (MMC) and
ESAM II (with optional Video Sync I/O card).
MMC is transmitted at the MIDI output port on
the rear panel of the Remote CPU, which can
be connected to MMC-compatible devices.
If you are using the optional Video Sync I/O
card, ESAM II machine control is transmitted at
the RS232/422 9-Pin D-Sub connector on the
card (see Appendix C for an explanation of Video
Sync I/O card installation and connections).
REWIND button
Engages external machines to fast-rewind
with no given locate point.
Owner’s Manual
ENTER button
FAST FWD button
Engages external machines to fast-forward
with no given locate point.
STOP button
Stops external machines at the current
position.
Note: The STOP button lights when time code
is no longer received.
PLAY button
Engages external machines to play at normal speed from the current position. It lights
when time code is being received.
RECORD button
Engages the Master Record function on external machines, regardless of transport activity.
JOG & SHUTTLE button
Engages the rotary dial to advance external
machines forward or backward with singleframe accuracy.
Rotary Dial Encoder
This multifunction dial enables the scrub
function with external machines and allows for
data input and screen paging.
Digital 8•Bus Description
2-11
Digital 8•Bus
Rear Panel Description
This section describes the rear panel connector types, their functions, and associated
signal buses.
Channels 1–12
Note: Optional digital I/O cards may be
installed, changing the physical connector and
specifications for the channel direct outs (see
Appendix C for digital I/O options).
Channels 13–24
LINE INPUTS
(BAL /UNBAL)
3
2
+48V
PH
+48V
PH
MIC
MIC
1
18
17
16
15
14
13
24
23
22
21
20
19
+48V
PH
MIC
LINE IN
LINE IN
LINE IN
INSERT
INSERT
INSERT
Channels 13 through 24 have the following
connectors:
TRS (Tip/Ring/Sleeve) line input
connectors, accept balanced and unbalanced
signals.
Tape Outputs for channels 13–24 are
3-conductor balanced line-level direct outputs,
fed post-DSP and pre-fader.
Channels 1 through 12 have the following
connections:
3-pin XLR microphone connector. Each
microphone connector has an individual 48 volt
phantom power switch , which should be
activated when using condenser microphones.
When switched on (pushed in), this switch
feeds +48VDC to pins 2 and 3 of the XLR
microphone connector relative to pin 1
(ground).
1⁄4" TRS (Tip/Ring/Sleeve) line input
connector accepts balanced and unbalanced
signals. When connecting a line-level input to
the LINE IN connector, make sure the MIC
button located just below the TRIM control is
in the OUT position.
1⁄4" TRS insert connector serves as a
combination signal output and input. This is a
normalling jack, so with nothing plugged into
it, the send signal is connected to the return
pin inside the jack.
tip
SEND to processor
ring
sleeve
(TRS plug)
This plug connects to one of the
mixer’s Channel Insert jacks.
“tip”
“ring”
RETURN from processor
Insert cables must be wired like this:
• Tip = Send (output to effects device)
• Ring = Return (input from effects device)
• Sleeve = Common ground (connect shield
to all three sleeves)
Tape Outputs for channels 1–12 are
3-conductor balanced line-level direct outputs,
fed post-DSP and pre-fader.
2-12
Digital 8•Bus Description
Note: Optional digital I/O cards may be added,
changing the physical connector and
specifications for the channel direct outs (see
Appendix F for digital I/O options).
Card Cage Section
TAPE IN/OUTS
There are 24 TAPE OUTS, which are direct
line-level balanced analog outputs and can be
fed from any of channels 1–48. The TAPE INS
are line-level balanced analog inputs that feed
into channels 25–48.
Connections for the tape inputs and outputs
depend on which Tape I/O cards you have
installed.
Analog I/O
Each analog I/O card has two 25-pin D-Sub
connectors, one for connecting eight balanced
line-level inputs from a multitrack recorder to
the Digital 8•Bus, and the other for connecting
eight balanced line-level outputs from the
Digital 8•Bus to a multitrack recorder. You can
install up to three cards in the card cage on the
rear panel to accommodate up to 24 tracks.
These connectors are compatible with the
analog 25-pin connector used on Tascam
digital multitrack recorders. Several audiograde cable manufacturers make high-quality
cables for this application. Some also make
breakout cables with a 25-pin D-Sub connector
on one end and connectors used by other
popular MDMs and HDRs on the other end.
TAPE 1- 8
Digital I/O
Digital XLR AES/EBU STEREO
MASTER Input
TAPE 17- 24
TO TAPE
TO TAPE
FROM TAPE
FROM TAPE
ANALOG I/O ANALOG I/O ANALOG I/O
OUT
2
FROM TAPE
DIGITAL I/O
S/PDIF
IN
OUT
DIGITAL EFFECTS
DIGITAL I/O
SYNC
ALT I/O
TAPE IN/OUTS
8•Bus ships with one card already installed.)
These cards have no external connections, but
are connected internally to the Aux Sends (FX
in) and to the Left and Right Bus via the FX
RETurns (Fader Bank 3).
Sync
This slot is provided for an optional card
that can be installed to provide word clock or
blackburst in, SMPTE in, and ESAM II
machine control. (See Appendix F for Digital
I/O options.)
1
IN
ALT I/O
This slot is provided for an optional
card (AIO•8 or DIO•8) that can be
installed to provide eight additional
analog or digital inputs and outputs.
Any channel (1–48), Aux Send, or Bus
1–8 output can be assigned to the ALT I/O
outputs. Any digital ALT I/O input can be assigned to Bus 1–8 or the L-R bus. See Appendix F
for more information on using I/O cards.
DIGITAL I/O
AES/EBU
TO TAPE
DIGITAL EFFECTS
TAPE 9- 16
Owner’s Manual
See Appendix C for the pin-out diagram
for the 25-pin D-Sub connectors.
Apogee Digital I/O
These cards have an optical digital
input connector for connecting eight
tracks to an ADAT or ADAT-optical
compatible MDM. They also have a 25pin D-Sub connector for connecting to a
Tascam MDM. Along with the 25-pin
connector is a Sync BNC connector for
providing sample rate clock information
to a Tascam MDM. See Appendix C for
the pin-out diagram for the Digital I/0
25-pin D-Sub connector.
Master Input/Output Section
Master outputs are provided with both
analog and digital connections. In all
instances, Master outputs are fed from the
Master L-R fader on the console surface.
Other output connections, including PHONES,
STUDIO OUT, and CR MAIN and ALT are fed
from their respective dedicated buses as
indicated on the console surface.
Single plug, balanced stereo digital input
directly feeds the L-R bus.
BUS OUT 1-8
&
SURROUND OUT
Digital XLR AES/EBU STEREO
MASTER OUTput
Single plug, balanced stereo digital output
fed post DSP and fader, but pre-DAC. This
output is driven by the main L-R bus.
Digital RCA S/PDIF MASTER Input
L
Single plug, unbalanced stereo digital input
directly feeds the L-R bus.
Digital RCA S/PDIF STEREO
MASTER OUTput
Single plug, unbalanced stereo digital
output fed post-DSP and fader, but pre-DAC.
This output is driven by the main L-R bus.
DIGITAL EFFECTS
There are four slots available to install up to
four digital effects (FX) cards. (The Digital
MASTER OUT
L R
2 TRACK IN A
L R
CR
MAIN
L R
2 TRACK IN B
L R
CR
NEAR FIELD
L R
2 TRACK IN C
L R
PHONES 1
PHONES 2
STUDIO OUT
L R
PUNCH I/O
TALKBACK
R
MASTER OUT
BUS OUT 1–8 (SURROUND OUT)
Eight balanced analog line-level outputs are
provided with a single 25-pin D-Sub connector.
Any channel (1–48) can be assigned to one or
more Bus outputs, as well as any FX Return or
ALT Return, and the output level controlled by
Digital 8•Bus Description
2-13
Digital 8•Bus
the BUS 1–8 Masters (Fader Bank 4). The Bus
Outputs are also used for surround-sound
mixing. See Appendix F for the pin-out diagram
for the Bus 1–8 25-pin D-Sub connector.
Analog XLR L-R MASTER OUTputs
These are the main left and right outputs.
They are balanced analog XLR output
connectors, fed post-DSP, fader, and DAC.
These outputs are driven by the main L-R bus.
Analog TRS L-R MASTER OUTputs
These connectors are two 1⁄4" TRS stereo
line-level outputs for sending signals to control
room speakers. They are balanced analog
stereo-paired outputs fed post-DSP, fader, and
DAC. The signal at this output is the same as
the CR ALT output, but with independent level
control, and is determined by the Control Room
Source selection. These outputs can drive a
balanced or unbalanced input.
CR MAIN L-R Outputs
These connectors are two 1⁄4" TRS stereo
line-level outputs for sending signals to control
room speakers. They are balanced analog
stereo-paired outputs fed post-DSP, fader, and
DAC. The signal at this output is the same as
the CR NEAR FIELD output, but with independent level control, and is determined by the
Control Room source selection. These outputs
can drive a balanced or unbalanced input.
CR NEAR FIELD L-R Outputs
These connectors are two 1⁄4" TRS stereo
line-level outputs for sending signals to control
room speakers. They are balanced analog
stereo-paired outputs fed post DSP, fader and
DAC. The signal at this output is the same as
the CR MAIN output, but with independent
level control, and is determined by the Control
Room source selection. These outputs can
drive a balanced or unbalanced input.
PHONES 1 and 2 Outputs
These are unbalanced 1⁄4" TRS jacks
for connecting stereo headphones. The
TRS jacks are wired as follows:
Tip
= Left output
AUX
9
Ring = Right output
Sleeve = Shield (audio ground)
These outputs are designed to drive virtually
all stereo headphones. The signal at these
outputs is determined by the PHONES/CUE MIX
1 and 2 source selection. Adjust the Cue Mix
LEVEL control to compensate for headphones
with exceptionally high or low impedances.
2-14
Digital 8•Bus Description
STUDIO L-R OUTputs
These connectors are two 1⁄4" TRS stereo
line-level outputs for sending signals to the
studio. They are balanced analog stereo-paired
outputs fed post-DSP, fader, and DAC. The
signal at these outputs is determined by the
Control Room source selection. These outputs
can drive a balanced or unbalanced input.
PUNCH I/O
This connector is for a remote punch-in/
punch-out switch. Use a normally-open switch.
TALKBACK
This connector is for a remote talkback
switch. It duplicates the Talkback switch in the
Control Room Section. Use a normally-open
switch.
2 TRACK A, B, and C L-R Inputs
These are balanced 1⁄4" TRS jacks for
connecting line-level input signals from a
2-track recorder. The separate left/right pairs
feed the 2 TRACK A, B, and C buses in the
control room monitoring section. These inputs
can accept balanced and unbalanced signals.
AUX Outputs
There are eight mono and two stereo-pair
TRS, line-level, balanced auxiliary outputs.
Aux Outputs 1 and 2 are analog outputs
paralleled with the internal effects send buses
1 and 2 respectively. AUX outputs 3 through 8
are independent analog mono outputs, fed from
the corresponding internal aux buses. AUX
outputs 9 through 12 are analog stereo pair
outputs. Auxes 9–10 constitute a single left/
right pair and Auxes 11–12 constitute a single
left/right pair. These outputs can drive a
balanced or an unbalanced input.
When Aux 9–10 is selected as a Cue Mix
source, aux outputs 9 and 10 are paralleled with
the Cue Mix source from the internal aux buses
9 and 10. The same principle applies when Aux
11–12 is selected as a Cue Mix source.
AUX
8
AUX
7
AUX
6
AUX OUT
(BAL/UNBAL)
AUX
5
AUX
4
CONSOLE DATA
56 INPUT 72 CHANNEL
DIGITAL MIXER
Connect the supplied 25-pin D-Sub
computer cable between the CONSOLE
DATA connector on the rear panel of the
on the
console and this connector
Remote CPU. This cable must be
installed in order for the computer to
communicate with the console.
WARNING:
SHUT OFF REMOTE POWER SUPPLY BEFORE CONNECTING
OR DISCONNECTING POWER SUPPLY CABLE FROM CONSOLE
POWER
SUPPLY
CONSOLE
DATA
POWER SUPPLY
WARNING:
CAUTION
RISK OF ELECTRIC SHOCK
DO NOT OPEN
TO REDUCE THE RISK OF FIRE OR ELECTRIC SHOCK, DO NOT
EXPOSE THIS EQUIPMENT TO RAIN OR MOISTURE. DO NOT REMOVE COVER.
NO USER SERVICEABLE PARTS INSIDE. REFER SERVICING TO QUALIFIED PERSONNEL.
SERIAL NUMBER
MANUFACTURING DATE
Connect the POWER cable
from
the Remote CPU to the POWER SUPPLY
on the console.
AVIS: RISQUE DE CHOC ÉLECTRIQUE — NE PAS OUVRIR
REPLACE WITH THE SAME TYPE FUSE AND RATING.
DISCONNECT SUPPLY CORD BEFORE CHANGING FUSE
UTILISE UN FUSIBLE DE RECHANGE DE MÊME TYPE.
DEBRANCHER AVANT DE REMPLACER LE FUSIBLE
Owner’s Manual
Power/Data Section
WARNING: SHUT OFF POWER TO UNIT BEFORE INSTALLING OR REMOVING CARDS!
Remote CPU/Power Supply Description
MACKIE DESIGNS
SERIAL NUMBER
MANUFACTURING DATE
120V
60Hz, 2.8A
VIDEO
PARALLEL
CONSOLE DATA
THIS DEVICE COMPLIES WITH PART 15 OF THE FCC RULES. OPERATION IS SUBJECT TO
THE FOLLOWING TWO CONDITIONS: 1) THIS DEVICE MAY NOT CAUSE HARMFUL
INTERFERENCE AND 2) THIS DEVICE MUST ACCEPT ANY INTERFERENCE RECEIVED THAT
MAY CAUSE UNDESIRED OPERATION
SERIAL
120/230V
1.0/0.5A
KEYBOARD
MOUSE
CONCEIVED, DESIGNED, AND MANUFACTURED BY MACKIE DESIGNS INC • WOODINVILLE • WA • USA • MADE IN USA • FABRIQUE AU USA • COPYRIGHT ©1997 •
THE FOLLOWING ARE TRADEMARKS OR REGISTERED TRADEMARKS OF MACKIE DESIGN INC.: "MACKIE", "DIGITAL SYSTEMS", D8B AND THE "RUNNING MAN" FIGURE •
Data and Synchronization I/O
These connections are for non-audio functions.
Note: The MIDI card installed in the Remote
CPU has a 15-pin D-Sub connector. Use the
supplied 15-pin to Dual-DIN adapter with the
MIDI card to make connections using standard
MIDI cables.
MIDI IN
This standard 5-pin DIN/MIDI connector
can be used to bring in MIDI Time Code (MTC)
from a Modular Digital Multitrack (MDM)
recorder or other external device. The MIDI IN
can also be used to receive Program Changes
and Sysex dumps from outboard gear.
Note: The initial version of the software may
not accept all MIDI commands. Please contact
our Tech Support department for upgrades as
they become available.
MIDI OUT
This standard 5-pin DIN/MIDI connector
can be used to send out MIDI Machine Control
(MMC) commands to an MMC-compatible
recorder. The MIDI OUT can also be used to
transmit Program Changes and Sysex dumps
to outboard gear.
Note: The initial version of the software may
not transmit all MIDI commands. Please
contact our Tech Support department for
upgrades as they become available.
Ethernet connector
This RJ-45 connector accepts standard
network plugs. It is used to connect to an
Ethernet hub for communication with the outside
world via the Internet. This provides a method
for upgrading the Mackie Real Time OS, as well
as accessing new plug-in effects. Additionally,
peer-to-peer connections are possible through
this connection. See Appendix H (“Upgrading”)
for more information.
Digital 8•Bus Description
2-15
Digital 8•Bus
COLOR MONITOR Port
Connecting an optional SVGA monitor
allows for graphic display of many console
functions including secondary console layout,
equalization, compression, gating, software
library and hierarchy menus. See GUI Description
on page xx for software screen listings. (Video
pixel resolution at this port is 1024x768.)
CONSOLE DATA
Connect the supplied 25-pin D-Sub
computer cable between the CONSOLE DATA
connector on the rear panel of the console
and this connector on the Remote CPU. This
cable must be installed for the console to
communicate with the CPU.
PARALLEL Port
You can use this 25-pin D-Sub connector to
connect peripheral devices such as backup
drives and printers.
Note: This port is not currently active, but will be
implemented in future software revisions.
SERIAL CONTROLLERS Port
This 9-pin D-Sub connector is provided for
external control of surround-sound functions
and data I/O using a joystick or trackball.
Note: The initial version of the software may
not support the serial port. Please contact our
Tech Support department for upgrades as they
become available.
56 INPUT / 72 CHANNEL
MACKIE "REALTIME" OS CPU &
CONSOLE POWER SUPPLY
2-16
Digital 8•Bus Description
KEYBOARD Port
Connecting an optional IBM-compatible
QWERTY keyboard provides an alternative
method of accessing console functions. See
Appendix I (Shortcut Keys) for keyboard/
mouse/console equivalencies and functions.
MOUSE Port
Connecting an optional IBM-compatible
(PS/2) mouse to this port provides an
alternative method of accessing console
functions. See Appendix I for keyboard/mouse/
console equivalencies and functions.
IEC Connectors
This connector is for attaching the supplied
linecord to the Remote CPU. Make sure the
linecord is pushed all the way in to the IEC
connector. A second connector is provided for
connecting an optional color monitor to the AC
power. This second AC connector is
unswitched, and will provide power as long as
the Digital 8•Bus is plugged into an AC outlet.
POWER SUPPLY Cable
Connect this cable to the POWER SUPPLY
connector on the rear panel of the console.
Power Switch (on the front panel)
Flip this switch to the UP position to turn on
the Digital 8•Bus. The Fat Channel Display
lights up and the console boots the Mackie
Real Time OS operating system, initializes the
internal DSPs, and lets you know when it’s
ready to start mixing.
cs
OL
OL
OL
OL
OL
OL
OL
OL
OL
OL
OL
OL
OL
OL
OL
OL
OL
OL
OL
OL
OL
OL
OL
CHANNEL
2
4
7
10
15
20
25
30
35
40
50
2
4
7
10
15
20
25
30
35
40
50
2
4
7
10
15
20
25
30
35
40
50
2
4
7
10
15
20
25
30
35
40
50
2
4
7
10
15
20
25
30
35
40
50
2
4
7
10
15
20
25
30
35
40
50
2
4
7
10
15
20
25
30
35
40
50
2
4
7
10
15
20
25
30
35
40
50
2
4
7
10
15
20
25
30
35
40
50
2
4
7
10
15
20
25
30
35
40
50
2
4
7
10
15
20
25
30
35
40
50
2
4
7
10
15
20
25
30
35
40
50
2
4
7
10
15
20
25
30
35
40
50
2
4
7
10
15
20
25
30
35
40
50
2
4
7
10
15
20
25
30
35
40
50
2
4
7
10
15
20
25
30
35
40
50
2
4
7
10
15
20
25
30
35
40
50
2
4
7
10
15
20
25
30
35
40
50
2
4
7
10
15
20
25
30
35
40
50
2
4
7
10
15
20
25
30
35
40
50
2
4
7
10
15
20
25
30
35
40
50
2
4
7
10
15
20
25
30
35
40
50
2
4
7
10
15
20
25
30
35
40
50
2
4
7
10
15
20
25
30
35
40
50
2
25
3
26
4
27
5
28
6
29
7
30
8
31
9
32
10
33
11
34
12
35
13
36
14
37
15
38
16
39
17
40
18
41
19
42
20
43
21
44
22
45
23
46
24
47
48
LEFT
D8B
56 INPUT / 72 CHANNEL DIGITAL MIXER
RIGHT
cq
dn
cu
Owner’s Manual
bn
ct
cr
OL
1
SUPER CD ENCODING
1
TRIM
TRIM
TRIM
TRIM
TRIM
TRIM
TRIM
TRIM
TRIM
TRIM
TRIM
TRIM
LINE
MIC
LINE
MIC
LINE
MIC
LINE
MIC
LINE
MIC
LINE
MIC
LINE
MIC
LINE
MIC
LINE
MIC
LINE
MIC
LINE
MIC
LINE
MIC
0
60
-20dB +40dB
0
60
-20dB +40dB
0
60
-20dB +40dB
0
60
-20dB +40dB
0
60
-20dB +40dB
0
60
-20dB +40dB
0
60
-20dB +40dB
0
60
-20dB +40dB
0
60
-20dB +40dB
0
60
-20dB +40dB
0
60
-20dB +40dB
0
60
-20dB +40dB
1
2
3
4
5
6
7
8
9
10
11
12
MIC
MIC
MIC
MIC
MIC
MIC
MIC
MIC
MIC
MIC
MIC
MIC
2
TRIM
-20
TRIM
-20
+20
13
TRIM
-20
+20
14
TRIM
-20
+20
15
TRIM
-20
+20
16
TRIM
-20
+20
17
TRIM
-20
+20
18
TRIM
-20
+20
19
TRIM
-20
+20
20
TRIM
-20
+20
21
TRIM
-20
+20
22
TRIM
-20
+20
23
co
cp
1-24
1-48
LEVEL TO TAPE
DIGITAL TRIM
AUX 1
AUX 2
REC/RDY
REC/RDY
REC/RDY
REC/RDY
REC/RDY
REC/RDY
REC/RDY
REC/RDY
REC/RDY
REC/RDY
REC/RDY
REC/RDY
REC/RDY
REC/RDY
REC/RDY
REC/RDY
REC/RDY
REC/RDY
REC/RDY
REC/RDY
REC/RDY
REC/RDY
REC/RDY
AUX 5
AUX 6
AUX 7
AUX 8
ASSIGN
ASSIGN
ASSIGN
ASSIGN
ASSIGN
ASSIGN
ASSIGN
ASSIGN
ASSIGN
ASSIGN
ASSIGN
ASSIGN
ASSIGN
ASSIGN
ASSIGN
ASSIGN
ASSIGN
ASSIGN
ASSIGN
ASSIGN
ASSIGN
ASSIGN
ASSIGN
ASSIGN
WRITE
WRITE
WRITE
WRITE
WRITE
WRITE
WRITE
WRITE
WRITE
WRITE
WRITE
WRITE
WRITE
WRITE
WRITE
WRITE
WRITE
WRITE
WRITE
WRITE
WRITE
WRITE
WRITE
WRITE
1
25
2
26
3
27
4
28
5
29
6
30
7
31
8
32
9
33
10
34
11
35
12
36
13
37
14
38
15
39
16
40
17
41
18
42
19
43
20
44
21
45
22
46
23
47
24
48
SELECT
SELECT
SELECT
SELECT
SELECT
SELECT
SELECT
SELECT
SELECT
SELECT
SELECT
SELECT
SELECT
SELECT
SELECT
SELECT
SELECT
SELECT
SELECT
SELECT
SELECT
SELECT
SELECT
SELECT
SOLO
SOLO
SOLO
SOLO
SOLO
SOLO
SOLO
SOLO
SOLO
SOLO
SOLO
SOLO
SOLO
SOLO
SOLO
SOLO
SOLO
SOLO
SOLO
SOLO
SOLO
SOLO
SOLO
SOLO
bu
cl
br
MUTE
MUTE
MUTE
MUTE
MUTE
MUTE
MUTE
MUTE
MUTE
MUTE
MUTE
MUTE
MUTE
MUTE
MUTE
MUTE
MUTE
MUTE
MUTE
MUTE
MUTE
MUTE
fm
AFL SOLO
SOLO
1-24
(TRACK)
GROUP 2
GROUP 3
GROUP 4
GROUP 5
GROUP 6
GROUP 7
GROUP 8
MIDI 1
MIDI 2
MIDI 3
MIDI 4
MIDI 5
MIDI 6
MIDI 7
MIDI 8
BUS 1
BUS 2
BUS 3
BUS 4
BUS 5
BUS 6
BUS 7
BUS 8
FX 1
FX 2
FX 3
FX 4
FX 5
FX 6
FX 7
FX 8
FX 9
FX 10
FX 11
FX 12
FX 13
FX 14
FX 15
FX 16
RET 1
RET 2
RET 3
RET 4
RET 5
RET 6
RET 7
RET 8
2
26
1
25
3
27
4
28
5
29
6
30
7
31
8
32
9
33
10
34
11
35
12
36
13
37
14
38
15
39
16
40
17
41
18
42
19
43
20
44
21
45
22
46
23
47
24
48
fp fn
fp
er fn
fq fo
fq
es fo
fr
fr
et
eu
AUX 9-10
COPY MIX TO CUE
AUX 9-10
COPY MIX TO CUE
SOLO LEVEL
AUX 11-12
CONTROL ROOM
AUX 11-12
CONTROL ROOM
LEVEL
gl
gm
gn
SHIFT
ASSIGN
ASSIGN
BUS 1
BUS 2
ASSIGN
ASSIGN
DIGITAL IN 1
2 TRACK B
DIGITAL IN 2
BUS 3
ASSIGN
ASSIGN
2 TRACK C
MASTER
L-R
BUS 5
BUS 6
ASSIGN
ASSIGN
TAPE IN
hs
il
im
BYPASS
BUS 4
in
io
FADERS
go ht hu it iu
jn jo
gq
gr jt
jr
ju
gt
BUS 7
BUS 8
ASSIGN
ASSIGN
L-R
ROUTE TO
TAPE
NEAR FIELD
MAIN
ip
iq
SAVE
SAVE AS...
GROUP
GENERAL
bm
dB
10
dB
10
dB
10
dB
10
dB
10
dB
10
dB
10
dB
10
dB
10
dB
10
dB
10
dB
10
dB
10
dB
10
dB
10
dB
10
dB
10
dB
10
dB
10
dB
10
dB
10
dB
10
dB
10
5
5
5
5
5
5
5
5
5
5
5
5
5
5
5
5
5
5
5
5
5
5
5
5
5
U
U
U
U
U
U
U
U
U
U
U
U
U
U
U
U
U
U
U
U
U
U
U
U
U
jl
jp
5
5
5
5
5
5
5
5
5
5
5
5
5
5
5
5
5
5
5
5
5
5
5
5
5
10
10
10
10
10
10
10
10
10
10
10
10
10
10
10
10
10
10
10
10
10
10
10
10
20
20
20
20
20
20
20
20
20
20
20
20
20
20
20
20
20
20
20
20
20
20
20
20
20
jm
jq
NEW
PLUG INS
LOAD
DIGITAL I/0
HOURS
bt
MINUTES
SECONDS
FRAMES
RANGE
BEATS
TICKS
js
FROM
TO
SET TIME
SPEAKER LEVEL
gs
CLIP BOARD
gu
hm
BARS
SMPTE VIEW
LOOP
TALKBACK
DIM
10
TRIM LEVELS
SETUP
SPEAKERS
dB
10
AUTO TOUCH
ALL
POSITION
dB
10
ir
is
MUTES
PAN
FADER MOTORS
OFF
MONO
BANK SELECT
MASTER
L/R
AUTOMATION
2 TRACK A
(MONITOR)
LEVEL
LEVEL
ASSIGNMENT
CONTROL ROOM
EFFECTS
SAVE PATCH
PHONES/CUE MIX 2
TALKBACK LEVEL
TALKBACK TO
STUDIO
49-72
GROUP 1
em
LOAD PATCH
STUDIO LEVEL
25-48
bo
PLUG-INS
MEMORY B
CLEAR SOLO
MASTER
PAN
dq
el
MEMORY A
NEXT
PHONES/CUE MIX 1
fl
RUDE SOLO
LIGHT
HI
du
COMPRESSOR
STUDIO/SOLO
MIXDOWN SOLO
HI MID
SETUP
GATE
PFL SOLO
MIC/LINE
MUTE
en
eo
ep
cm eq
bs
fs
bp ft
fu
bq
gp
PAN
LOW MID
dp
dt
ON
dr
AUX 11-12
MASTERS
MUTE
LOW
do
ds
EQ
AUX 9-10
HELP
dm
dl
AUX 4
REC/RDY
PAN
6
7
8
9
bl
dm
PREVIOUS
cn
SELECT
SELECT
+20
24
AUX 3
3
4
5
SELECT
SELECT
hl
hn
CUT/ZERO SET
COPY
PASTE
UNDO
MASTER L/R
SHORTCUTS
1
2
3
4
5
6
7
8
9
0
ENTER
LOOP
STORE
LOCATOR
SNAPSHOT
MODE
30
30
30
30
30
30
30
30
30
30
30
30
30
30
30
30
30
30
30
30
30
30
30
30
30
40
40
40
40
40
40
40
40
40
40
40
40
40
40
40
40
40
40
40
40
40
40
40
40
40
50
50
50
50
50
50
50
50
50
50
50
50
50
50
50
50
50
50
50
50
50
50
50
50
50
60
60
60
60
60
60
60
60
60
60
60
60
60
60
60
60
60
60
60
60
60
60
60
60
60
ho
hp
hq
hr
SELECT
CONTROL
WRITE
ALT
REWIND
FAST FWD
STOP
PLAY
RECORD
SHUTTLE
JOG & SHUTTLE
JOG
Digital 8•Bus Description
2-17
Digital 8•Bus
LINE INPUTS
BUS OUT 1-8
12
(BAL/UNBAL)
&
SURROUND OUT
18
17
23
24
L
16
14
15
22
21
MASTER OUT
L R
2 TRACK IN A
L R
CR
MAIN
L R
2 TRACK IN B
L R
CR
NEAR FIELD
L R
2 TRACK IN C
L R
13
20
19
PHONES 1
PHONES 2
+48V
PH
STUDIO OUT
L R
PUNCH I/O
11
10
+48V
PH
9
+48V
PH
+48V
PH
8
+48V
PH
7
6
+48V
PH
+48V
PH
5
+48V
PH
4
+48V
PH
3
+48V
PH
2
+48V
PH
1
+48V
PH
MIC
MIC
MIC
MIC
MIC
MIC
MIC
MIC
MIC
MIC
MIC
MIC
LINE IN
LINE IN
LINE IN
LINE IN
LINE IN
LINE IN
LINE IN
LINE IN
LINE IN
LINE IN
LINE IN
LINE IN
INSERT
INSERT
INSERT
INSERT
INSERT
INSERT
INSERT
INSERT
INSERT
INSERT
INSERT
INSERT
AUX
12
AUX
11
AUX
10
AUX
9
AUX
8
AUX
7
AUX
6
AUX
5
AUX
4
AUX
3
AUX
2
AUX
1
TALKBACK
R
AUX OUT
(BAL/UNBAL)
MASTER OUT
MACKIE DESIGNS
THIS DEVICE COMPLIES WITH PART 15 OF THE FCC RULES. OPERATION IS SUBJECT TO THE FOLLOWING TWO CONDITIONS:
1) THIS DEVICE MAY NOT CAUSE HARMFUL INTERFERENCE AND
2) THIS DEVICE MUST ACCEPT ANY INTERFERENCE RECEIVED THAT MAY CAUSE UNDESIRED OPERATION
TAPE 1- 8
D
1
ANALOG I/O ANALOG I/O ANALOG I/O
WARNING:
SHUT OFF REMOTE POWER SUPPLY BEFORE CONNECTING
OR DISCONNECTING POWER SUPPLY CABLE FROM CONSOLE
POWER
SUPPLY
IN
TO TAPE
DIGITAL MIXER
TAPE 17- 24
FROM TAPE
DIGITAL I/O
AES/EBU
56 INPUT 72 CHANNEL
TAPE 9- 16
TO TAPE
C
FROM TAPE
B
TO TAPE
A
CONCEIVED, DESIGNED, AND MANUFACTURED BY MACKIE DESIGNS INC • WOODINVILLE • WA • USA • MADE IN USA • FABRIQUE AU USA • COPYRIGHT ©1997 •
THE FOLLOWING ARE TRADEMARKS OR REGISTERED TRADEMARKS OF MACKIE DESIGN INC.: "MACKIE", "DIGITAL SYSTEMS", D8B AND THE "RUNNING MAN" FIGURE •
CONSOLE
DATA
OUT
2
FROM TAPE
DIGITAL I/O
S/PDIF
IN
CAUTION
RISK OF ELECTRIC SHOCK
DO NOT OPEN
REPLACE WITH THE SAME TYPE FUSE AND RATING.
DISCONNECT SUPPLY CORD BEFORE CHANGING FUSE
WARNING: TO REDUCE THE RISK OF FIRE OR ELECTRIC SHOCK, DO NOT
SERIAL NUMBER
OUT
MANUFACTURING DATE
EXPOSE THIS EQUIPMENT TO RAIN OR MOISTURE. DO NOT REMOVE COVER.
NO USER SERVICEABLE PARTS INSIDE. REFER SERVICING TO QUALIFIED PERSONNEL.
AVIS: RISQUE DE CHOC ÉLECTRIQUE — NE PAS OUVRIR
UTILISE UN FUSIBLE DE RECHANGE DE MÊME TYPE.
DEBRANCHER AVANT DE REMPLACER LE FUSIBLE
WARNING: SHUT OFF POWER TO UNIT BEFORE INSTALLING OR REMOVING CARDS!
DIGITAL EFFECTS CARDS
2-18
Digital 8•Bus Description
DIGITAL I/O
SYNC
ALT I/O
TAPE IN/OUTS
PATENTS PENDING
Owner’s Manual
3. Start-Up
Most of the procedures described in this manual
can be performed from the console’s surface or
with the optional Video Monitor/Keyboard/Mouse
combination. Therefore, all operations and procedures are presented in this sequence: “From the
console,” followed by “From the screen.”
Initial Power-Up
See the Quick Start Guide for instructions on
how to connect the Remote CPU to the console.
Once you have the Remote CPU properly connected to the console, turn on the power switch
located on the front panel of the Remote CPU,
then turn on any peripheral equipment, such as
multitrack recorders. Upon power-up, the internal
computer initializes the DSPs and console surface. There is a short delay (about 60 seconds)
while the Remote CPU loads the Mackie Real
Time OS into the console’s memory and engages
the DSPs.
When the Digital 8•Bus is first turned on, it
recalls the Startup Session, which contains the
default settings for the console. You can modify
the Startup Session according to your own preference and save it. If you download a plug-in to
the FX card and save the Startup Session, the
CPU downloads the effects algorithms that were
assigned to the FX card(s) every time you reboot
the console. This may take several minutes, depending on how many FX cards you have installed.
In order to start working, you should create a
new session or load a previously saved session
(see Chapter 5 for information on creating and recalling sessions). If you’ve made some initial
settings and want to move on, save the session
before creating a new session using either the
“Save” or “Save As...” command.
Returning to Factory Default Settings
Occasionally, you may find it necessary to return
the console to the original factory default settings.
There is an easy way to quickly “zero” the
console.
TO RECALL FACTORY DEFAULT SETTINGS
RANGE
POSITION
HOURS
MINUTES
SECONDS
FRAMES
BEATS
TICKS
FROM
TO
From the console:
1. Press the SNAPSHOT button in the
Transport Section.
SET TIME
BARS
SMPTE VIEW
LOOP
1
2
3
4
5
6
7
8
9
0
ENTER
LOOP
STORE
LOCATOR
SNAPSHOT
MODE
REWIND
FAST FWD
STOP
PLAY
RECORD
SHUTTLE
2. Enter the number “00” with the
numeric keypad.
3. Press the ENTER button. The console
recalls Snapshot 00, which contains
the Factory Default settings (all level
controls at unity gain, EQ and pan
controls centered).
JOG & SHUTTLE
JOG
Start-Up
3-1
Digital 8•Bus
TO RECALL FACTORY DEFAULT SETTINGS
From the screen:
1. Click on the Snapshots button in the
lower menu bar. The Snapshots dialog
box opens.
2. Double-click on 00 in the list of
snapshots (click in the gray area, on
the number).
3. The console recalls Snapshot 00,
which contains the Factory Default
settings (all faders off, EQ and pan
controls centered).
Power Down
General Setup
Since power down is the complement of power
up, it’s worth mentioning here. Before you power
down the console, save your work to the hard
drive. Then back it up to floppy disk. The procedures for saving files and backing them up to
floppy disk are described in Chapter 5, “Preparing
for a Session” later on in this manual.
After you’ve saved your files, return the console to a zero state by the methods described in
the previous section, so it’s ready for the next
session.
Now simply turn off the power switch on the
front panel of the Remote CPU.
Nearly all parameters on the console can be
stored and automated on a per-channel basis.
However, certain options are global, while others
are Session-based. Global options remain in effect, and do not change from session to session.
Session-based options are saved and recalled
with each session.
Global options include: Language, Auto Save,
Display Intensity, and Date/Time. Session-based
options include: Surround mode, MIDI settings,
Aux Pre/Post, Plug-ins, Sample Rate, and Digital
I/O settings.
Re-booting After Power Failure
If the console had been powered off by an AC
line failure or other power loss, all console settings
at the time of power loss will be stored in a special
snapshot within the active session labelled
“TotalRecall” (Snapshot 151). After restoring
power to the console, load the session you were
working on, and recall Snapshot 151 to restore
the settings just prior to the power loss.
Snapshot 151 is a fail-safe mechanism to
guard against losing your settings in the event of
a power failure.
Selecting a Language
The Digital 8•Bus ships with English as the
default language. If you prefer to view all console software messages and screens in a
language other than English, you may do so after
initial power up. (French, German and Spanish
will become available as software upgrades.)
TO SELECT A DIFFERENT LANGUAGE:
SETUP
3-2
Start-Up
SAVE
SAVE AS...
NEW
LOAD
GROUP
GENERAL
PLUG INS
DIGITAL I/O
From the console:
1. Press the GENERAL button in the
Setup Section. The General Setup
menu appears in the Fat Channel
Display.
Language
56 INPUT / 72 CHANNEL DIGITAL MIXER
(GENERAL SETUP Pg1 ->)
Surround
MIDI
AutoSave
D8B
56 INPUT / 72 CHANNEL DIGITAL MIXER
English
<<
(LANGUAGE MENU)
Cancel
OK
>>
Owner’s Manual
D8B
2. Press the SELECT button below
LANGUAGE in the Fat Channel
Display to view the Language menu.
3. Press the SELECT buttons below the
arrows in the Fat Channel Display to
scroll through the available languages.
4. When the language you want to select
appears in the display, press the
SELECT button below OK. The
selected language will now be used by
the Digital 8•Bus.
TO SELECT A DIFFERENT LANGUAGE:
From the screen:
1. Click on the Setup button in the lower
menu bar. The Setup dialog box opens.
2. Click on the General icon on the left
side of the box. The General dialog box
opens.
3. Click and hold on the Language box.
Drag down to the desired language and
then release to finalize your selection.
4. Click on the Close button in the upperright corner of the dialog box to close
the Setup dialog box (or click on the
Setup button in the menu bar).
Setting the Surround Mode
There are a variety of surround modes
you can work with, which you can save as
an option with your session. When mixing
for surround sound, the eight bus outputs
(BUS 1–8) are used for the surround outputs. You can select from Stereo,
Quadraphonic, LCRS, 5.1 surround, and 7.1
surround.
Note: See Chapter 8 “Advanced Functions”
for more information on mixing for surround sound applications.
TO SET THE SURROUND MODE
SETUP
SAVE
SAVE AS...
NEW
LOAD
GROUP
GENERAL
PLUG INS
DIGITAL I/O
From the console:
1. Press the GENERAL button in the
Setup Section. The General Setup
menu appears in the Fat Channel
Display.
Start-Up
3-3
Digital 8•Bus
D8B
Language
56 INPUT / 72 CHANNEL DIGITAL MIXER
(GENERAL SETUP Pg1 ->)
Surround
MIDI
AutoSave
D8B
56 INPUT / 72 CHANNEL DIGITAL MIXER
Stereo
<<
>>
(GLOBAL
Cancel
PAN
MENU)
OK
2. Press the SELECT button below
SURROUND in the Fat Channel
Display to view the Surround menu.
3. Press the SELECT buttons below the
arrows in the Fat Channel Display to
scroll through the available surround
modes.
4. When the mode you want to select
appears in the display, press the
SELECT button below OK. The
selected surround mode will now be
used by the Digital 8•Bus.
TO SET THE SURROUND MODE
From the screen:
1. Click on the Setup button in the lower
menu bar. The Setup dialog box opens.
2. Click on the General icon on the left
side of the box. The General dialog
box opens.
3. Click and hold on the Surround Mode
box. Drag down to the desired
surround mode and then release to
finalize your selection.
4. Click on the Close button in the upper
right corner of the dialog box to close
the Setup dialog box (or click on the
Setup button in the menu bar).
Configuring MIDI Parameters
The Digital 8•Bus Remote CPU has a MIDI
card installed in the rear panel. The MIDI I/O
ports on it can be configured to send and receive
MIDI channel messages and Sysex messages, or
to send MIDI Machine Control (MMC) and receive MIDI Time Code (MTC). The following
parameters can be configured.
MMC DEVICE ID: Some 8-track digital recorders
require that you define the device ID numbers
used for each recorder in the MIDI Machine
Controller. Typically, tracks 1–8 are device 0,
tracks 9–16 are device 1, and tracks 17–24 are
device 2.
SINGLE BUTTON RECORD: You can also select
whether to press the PLAY and RECORD buttons to enter record mode, or just press the
RECORD button (Single Button Record). We
3-4
Start-Up
recommend leaving Single Button Record off
to provide an extra measure of safety in case
you inadvertently press the RECORD button
in the Transport Section.
MTC OFFSET: MIDI File Offset can be used to indicate the starting time of a Standard MIDI File
(SMF), referenced to absolute timecode. This
option allows you to enter a MIDI File Offset
using the number buttons in the Transport Section. This is used to re-reference the Digital
8•Bus to a starting point other than zero.
TEMPO MAP: If you use sequencers in your recording process, you can create a standard MIDI
file from the song(s) you’ve recorded. You can
copy the tempo map from the SMF to the Digital
8•Bus and “synchronize” the D8B to the
Bars:Beats:Ticks of the sequenced program.
SMFs are loaded from the floppy disk drive.
Owner’s Manual
TO CONFIGURE MIDI PARAMETERS
SETUP
SAVE
SAVE AS...
NEW
LOAD
GROUP
GENERAL
PLUG INS
DIGITAL I/O
D8B
Language
(GENERAL SETUP Pg1 ->)
Surround
MIDI
AutoSave
D8B
<-
Rec1-8
DevID0
56 INPUT / 72 CHANNEL DIGITAL MIXER
Rec9-16
DevID1
D8B
<-
56 INPUT / 72 CHANNEL DIGITAL MIXER
<On
(MMC)->
2. Press the SELECT button below MIDI
in the Fat Channel Display. The MIDI
menu appears.
3. The default Device ID assignments
appear in the display. To reassign a
device, turn the V-Port below the
Device ID.
56 INPUT / 72 CHANNEL DIGITAL MIXER
00:00:00:00
<<
>>
D8B
Rec17-24
DevID2
From the console:
1. Press the GENERAL button in the
Setup Section. The General Setup
menu appears in the Fat Channel
Display.
(MTC
Zero-Set
OFFSET)->
Set
4. Press the NEXT button to scroll to
page 2 of the MIDI menu, to set MTC
offset. Press the SELECT button below
the arrows in the display to set the
amount of offset. Then press SELECT
below “Set.” Press SELECT below “ZeroSet” to reset the offset back to zero.
56 INPUT / 72 CHANNEL DIGITAL MIXER
(SINGLE
Off
BUTTON
RECORD)->
5. Press the NEXT button to scroll to page 3
of the MIDI menu. Press the SELECT
button below “On” or “Off” to turn on
or off the single button record option.
Tip: We recommend you leave the
single button record OFF. This provides
an extra measure of safety to prevent
you from accidentally putting your
recorder(s) into record mode.
D8B
<-
MIDIMAP1
<<
Scan
>>
56 INPUT / 72 CHANNEL DIGITAL MIXER
(LOAD TEMPO
Reset
MAP)
Open
->
6. Press the NEXT button to scroll to
page 4 of the MIDI menu. Press the
SELECT buttons below the arrows to
see the available SMFs in the display.
Press the NEXT button to get to the
“ChangeDir” menu, for stepping through
the various directories, or for changing
drives. Press the PREVIOUS button to
get back to the “Load Tempo Map”
menu. Press the SELECT button below
“Open” to load the selected SMF Tempo
Map. Press the SELECT button below
“Reset” to return to the default settings.
7. Press the PREVIOUS button to get
back to the General menu, or press the
GENERAL button to return to normal
Fat Channel operation.
Start-Up
3-5
Digital 8•Bus
TO CONFIGURE MIDI PARAMETERS
From the screen:
1. Click on the Setup button in the lower
menu bar. The Setup dialog box opens.
2. Click on the MIDI-Sync icon on the
left side of the box. The MIDI-Sync
dialog box opens.
3. To set the device ID for MIDI Machine
Control (MMC) of each 8-track
recorder, click in the Device ID box
and drag down to the desired
selection. Release to finalize your
selection.
4. Click on the Load button to load a
tempo map file from a floppy disk. The
“MIDI Files” dialog box opens.
Click on the FLOPPY icon to display
the files on the floppy.
Click on the file you want to load, then
click on the “Open” button (or doubleclick on the filename).
5. To set the MIDI File Offset time, click
on the Set button in the bottom of the
dialog box. The Ask Time... window
opens.
Enter the MIDI start time for the
session; that is, the point in SMPTE
timecode when the MIDI file should
start.
Click on the Enter button (or press the
Return key) to set the offset time and
close the window.
3-6
Start-Up
Owner’s Manual
6. Click on the “Single Button Record”
box under “Machine Control:” in the
MIDI-Sync dialog box to turn on and
off the single button record function.
Tip: We recommend you leave the
single button record button OFF. This
provides an extra measure of safety to
prevent you from accidentally putting
your recorder(s) into record mode.
7. Click on the Close button in the upper
right corner of the dialog box to close
the Setup dialog box (or click on the
Setup button in the menu bar).
Configuring Auto Save
You can set up the Digital 8•Bus to automatically save your session periodically as
you work.
TO CONFIGURE AUTO SAVE
SETUP
SAVE
SAVE AS...
NEW
LOAD
GROUP
GENERAL
PLUG INS
DIGITAL I/O
D8B
Language
(GENERAL SETUP Pg1 ->)
Surround
MIDI
AutoSave
D8B
Never
56 INPUT / 72 CHANNEL DIGITAL MIXER
Each
56 INPUT / 72 CHANNEL DIGITAL MIXER
Pass
(AUTO-SAVE
Set Timer
OPTIONS)
Exit
From the console:
1. Press the GENERAL button in the
Setup Section. The General Setup
menu appears in the Fat Channel
Display.
2. Press the SELECT button below Auto
Save in the Fat Channel Display. The
Auto-Save menu appears.
3. Press the SELECT button below “Each
Pass” to auto-save the session after
every automation pass, or…
Press the SELECT button below “Set
Timer” to set the amount of time
between saves (i.e., 10 minutes), or…
Press the SELECT button below
“Never” to turn off the auto save
function.
4. When finished, press SELECT below
Exit.
5. Press the PREVIOUS button to get
back to the General menu, or press the
GENERAL button to return to normal
Fat Channel operation.
Start-Up
3-7
Digital 8•Bus
TO CONFIGURE AUTO SAVE
From the screen:
1. Click on the Setup button in the lower
menu bar. The Setup dialog box opens.
2. Click on the General icon on the left
side of the box. The General dialog
box opens.
3. The Auto Save options appear at the
bottom of the box. Click on “Never” to
turn Auto Save off, or…
Click on “After Each Pass” to save
your session after each automation
pass, or…
Click on “After 10 minutes” to save
your session periodically. You can
change the amount of time between
saves by clicking in the minutes box
and entering a new number using the
number keys on the keyboard. Or…
Click on “Create New Files” to save
the session under a new name each
time the session is saved.
4. Click on the Close button in the upper
right corner of the dialog box to close
the Setup dialog box (or click on the
Setup button in the menu bar).
Setting Aux Sends Pre/Post Fader
You can individually configure the aux sends to be
pre- or post-fader. If you’re using an aux send as a monitor feed, you probably want to set it pre-fader, so FOH
(Front of House) level changes won’t affect
the monitor mix. If you’re using an aux
send as an external effects send, you may
want to set it post-fader.
TO SET AUX SENDS PRE/POST FADER
SETUP
SAVE
SAVE AS...
NEW
LOAD
GROUP
GENERAL
PLUG INS
DIGITAL I/O
D8B
Language
3-8
Start-Up
56 INPUT / 72 CHANNEL DIGITAL MIXER
(GENERAL SETUP Pg1 ->)
Surround
MIDI
AutoSave
From the console:
1. Press the GENERAL button in the
Setup Section. The General Setup
Menu appears in the Fat Channel
Display.
2. Press the NEXT button in the Fat
Channel Section to go to page 2 of the
General Setup menu.
56 INPUT / 72 CHANNEL DIGITAL MIXER
<Pre-Post
Display
D8B
AUX1
Pre
(GENERAL
About
SETUP
PG2)
56 INPUT / 72 CHANNEL DIGITAL MIXER
AUX2
Pre
AUX3
Post
AUX4
Post
Owner’s Manual
D8B
3. Press the SELECT button below “PrePost” in the Fat Channel Display. The
Pre-Post menu appears.
4. Press the NEXT button in the Fat
Channel Section to advance to AUX
5–8, and AUX 9-10–AUX 11/12. Press
the PREVIOUS button to move back
through the menu.
5. Press the SELECT button below each
Aux to toggle between Pre and Post.
6. When finished, press the GENERAL
button to return to normal Fat Channel
operation.
TO SET AUX SENDS PRE/POST FADER
From the screen:
1. Click on the Setup button in the lower
menu bar. The Setup dialog box opens.
2. Click on the Aux Sends icon on the left
side of the box. The Aux Sends dialog
box opens.
3. Click in the boxes corresponding to the
aux send you want to configure prefader. A checkmark indicates pre-fader
is selected.
4. Click on the Close button in the upper
right corner of the dialog box to close
the Setup dialog box (or click on the
Setup button in the menu bar).
Setting the Display Intensity
This option allows you to adjust the
brightness of the Fat Channel Display.
TO SET THE DISPLAY INTENSITY
SETUP
SAVE
SAVE AS...
NEW
LOAD
GROUP
GENERAL
PLUG INS
DIGITAL I/O
D8B
Language
56 INPUT / 72 CHANNEL DIGITAL MIXER
(GENERAL SETUP Pg1 ->)
Surround
MIDI
AutoSave
From the console:
1. Press the GENERAL button in the
Setup Section. The General Setup
Menu appears in the Fat Channel
Display.
2. Press the NEXT button in the Fat
Channel Section to scroll to the next
page of options.
Start-Up
3-9
Digital 8•Bus
D8B
56 INPUT / 72 CHANNEL DIGITAL MIXER
<Pre-Post
Display
D8B
Low
(GENERAL
About
SETUP
PG2)
4. Press the SELECT button below the
desired intensity (Low, Medium, or
High).
56 INPUT / 72 CHANNEL DIGITAL MIXER
Medium
(DISPLAY
High
3. Press the SELECT button below
“Display” in the Fat Channel Display.
The Display Intensity menu appears.
INTENSITY)
Exit
5. Press the SELECT button below
“Exit” to return to the General menu.
TO SET THE DISPLAY INTENSITY
From the screen:
1. Click on the Setup button in the lower
menu bar. The Setup dialog box opens.
2. Click on the General icon on the left
side of the box if it’s not already
selected.
3. Click and hold on the Display Intensity
box. Drag down to the desired
intensity setting and then release to
finalize your selection.
4. Click on the Close button in the upper
right corner of the dialog box to close
the Setup dialog box (or click on the
Setup button in the menu bar).
Determining the Operating System Version
One of the most beneficial and persuasive reasons for
using the Digital 8•Bus is the fact that the internal operating system is entirely upgradeable. As new features
and updates are provided, you’ll be able to keep your
console up-to-date through the use of online and floppy disk upgrades. Mackie
maintains a web site which has the latest
software updates.
TO DETERMINE THE OPERATING SYSTEM
VERSION
SETUP
SAVE
SAVE AS...
NEW
LOAD
GROUP
GENERAL
PLUG INS
DIGITAL I/O
From the console:
1. Press the GENERAL button in the
Setup Section. The General Setup
menu appears in the Fat Channel
Display.
2. Press the NEXT button to scroll to the
next page of options.
D8B
56 INPUT / 72 CHANNEL DIGITAL MIXER
<Pre-Post
3-10
Start-Up
Display
(GENERAL
About
SETUP
PG2)
3. Press the SELECT button below
“About” in the Fat Channel Display.
The version number of the current
Mackie OS is displayed.
56 INPUT / 72 CHANNEL DIGITAL MIXER
Software by Bob Tudor and Peter Watts.
Mackie Realtime OS for D8B 1.0.
Owner’s Manual
D8B
4. Press the PREVIOUS button to get
back to the main menu, or press the
GENERAL button to resume normal
Fat Channel operation.
TO DETERMINE THE OPERATING SYSTEM
VERSION
From the screen:
1. Click on “Windows” in the upper menu
bar. Select “About” in the drop-down
menu. The About Box appears on the
screen.
Note: From time to time, you should check
our web site at www.mackie.com, or call our
Tech Support department to determine if you
have the current version of the software. If
you discover that you need to upgrade the
operating system (OS), refer to Appendix H
(Upgrading) to see how to proceed.
Digital I/O Setup
Settings that fall under Digital I/O setup include
input and output select (when one or more DIO•8
digital tape I/O cards are installed), Apogee
UV22®, AES/EBU or S/PDIF input select, and
Sample Rate.
Configuring Digital I/O
If you’re using digital inputs and outputs, particularly if you’ve installed the optional Digital
Tape I/O cards in the Digital 8•Bus, there are a
number of parameters that you must define for
your particular application.
• INPUT: If you have Digital Tape I/O cards installed, you can select the TDIF-1 or the ADAT
optical input.
• OUTPUT: You can independently select the
TDIF-1 or the ADAT optical output. In addition,
you can choose to dub from TDIF-1 input to
ADAT output, or from ADAT input to TDIF-1
output.
• UV22: The Digital 8•Bus is equipped with
Apogee’s acclaimed UV22 encoding. This is becoming an industry-standard process for final
mastering to 2-track for CD recordings.
The UV22 process can be switched on or off
at the digital tape outputs, the ALT I/O outputs, or
the Stereo AES/EBU output, depending on your
application. You can also select whether to use
the UV22 at full power or low power at each output. Use Full Power for final mastering when you
haven’t used it elsewhere during the recording
process. Otherwise, use Low Power if you use it
for both tracking and mixdown.
The AES/EBU and S/PDIF Stereo Master
Outputs are normally 24-bit digital outputs. You
can enable UV22 encoding on the AES/EBU output or the S/PDIF output and “dither” it down to
16-bits, while still retaining the accuracy and
linearity of the 24-bit signal. (See Appendix D
for an in-depth discussion of the UV22 process.)
If you have installed the DIO•8 cards in the
Tape I/O slots or the ALT I/O slot (see Appendix
F), their outputs are normally 16-bit, but truncated down from 24-bits. You can enable the
UV22 process for the digital tape outputs, providing a much lower noise floor and improved
linearity.
Start-Up
3-11
Digital 8•Bus
TO CONFIGURE DIGITAL I/O
SETUP
SAVE
SAVE AS...
NEW
LOAD
GROUP
GENERAL
PLUG INS
DIGITAL I/O
D8B
Tape
1-8
Tape
56 INPUT / 72 CHANNEL DIGITAL MIXER
(DIGITAL I/O SETUP Pg.1)>
9-16 Tape 17-24
ALT 1-8
From the console:
1. Press the DIGITAL I/O button in the
Setup Section. The Digital I/O Setup
Menu appears in the Fat Channel
Display.
2. Press the SELECT button below the
Tape I/O card, ALT I/O card, or Stereo
I/O you want to reconfigure (Stereo I/O
is selected on page 2 of the Digital I/O
Setup Menu).
3. Press the SELECT buttons below the
arrows in the display to scroll through
the available options.
D8B
Input
ADAT
56 INPUT / 72 CHANNEL DIGITAL MIXER
Output
ADAT
Low
UV22
(DIGITALIO)
Power
Exit
4. When the option you want appears in
the display, press the SELECT button
below OK.
5. Press the DIGITAL I/O button to return
to normal Fat Channel operation.
TO CONFIGURE DIGITAL I/O
From the screen:
1. Click on the Setup button in the lower
menu bar. The Setup dialog box opens.
2. Click on the Digital icon on the left
side of the box. The Digital dialog box
opens.
3. Click and hold on the box for the
parameter you want to reconfigure.
Drag down to the desired selection
and then release to finalize your
selection.
4. Click on the Close button in the upper
right corner of the dialog box to close
the Setup dialog box (or click on the
Setup button in the menu bar).
3-12
Start-Up
The Digital 8•Bus console can operate at either of two user-selected sample rates, 44.1kHz
and 48kHz. When beginning a new session, think
about which sample rate is best for the job. If you
intend to stay in the digital domain from start to
finish on a project, you must consider what
sample rate the final product requires. (If you
aren’t using digital inputs and outputs, then this
Owner’s Manual
Setting the Console’s Sample Rate
setting doesn’t matter.) Commercial compact
discs are standardized at 44.1kHz. If you intend
to complete your project by mastering for CD,
you may want to choose this sample rate. If a
project is recorded at 48kHz but will eventually
end up on a 44.1kHz CD, it will be necessary to
go through one stage of analog at the main outputs, or to use a sample rate converter.
TO SET THE CONSOLE’S SAMPLE RATE
SETUP
SAVE
SAVE AS...
NEW
LOAD
GROUP
GENERAL
PLUG INS
DIGITAL I/O
From the console:
1. Press the DIGITAL I/O button in the
Setup Section. The Digital I/O Setup
menu appears in the Fat Channel
Display.
2. Press the NEXT button in the Fat
Channel Section to scroll to page 2 of
the Digital I/O Setup menu.
D8B
StereoI/O
56 INPUT / 72 CHANNEL DIGITAL MIXER
(DIGITAL
Samplerate
D8B
I/O
SETUP
Pg.2)
56 INPUT / 72 CHANNEL DIGITAL MIXER
Pick a sample rate:
44.1k
48k
(SAMPLERATE)
Exit
3. Press the SELECT button below
Samplerate in the Fat Channel Display.
The Sample Rate Setup menu appears.
4. Press the SELECT button below the
desired sample rate.
5. The console is now set to operate at
the selected sample rate.
TO SET THE CONSOLE’S SAMPLE RATE
From the screen:
1. Click on the Setup button in the lower
menu bar. The Setup dialog box opens.
2. Click on the Digital icon on the left side
of the box. The Digital Setup dialog box
opens.
3. In the Internal Sample Rate section,
click the desired sample rate.
4. Click on the Close button in the upper
right corner of the Setup dialog box to
close it (or click on the Setup button in
the menu bar).
Start-Up
3-13
Digital 8•Bus
Downloading Plug-Ins to the FX Cards
The Digital 8•Bus comes with one internal effects card installed, with the option of installing
up to three more. Each effects card can process
two different effects, which you can individually
select for each installed card.
When you start a new session, you may want
to change the plug-in effects that are loaded in
the FX Cards.
TO DOWNLOAD PLUG-INS TO THE FX CARDS
SETUP
SAVE
SAVE AS...
NEW
LOAD
GROUP
GENERAL
PLUG INS
DIGITAL I/O
D8B
Pick a Card
Card A
56 INPUT / 72 CHANNEL DIGITAL MIXER
to setup:
Card B
D8B
2. Press the SELECT button below the
Card you want to reconfigure.
3. Press the SELECT buttons below the
arrows in the display to scroll through
the available plug-ins.
56 INPUT / 72 CHANNEL DIGITAL MIXER
MackieFX
<<
(PLUGIN SETUP)
Card C
Card D
From the console:
1. Press the PLUG INS button in the
Setup Section. The Plug In menu
appears in the Fat Channel Display.
>>
(PLUGIN-CARD1)
Cancel
Transmit
4. When the plug-in you want to use
appears in the display, press the
SELECT button below TRANSMIT.
The selected plug-in will now be
downloaded to the FX Card.
TO DOWNLOAD PLUG-INS TO THE FX CARDS
From the screen:
1. Click on the Setup button in the lower
menu bar. The Setup dialog box opens.
2. Click on the Plug-ins icon on the left
side of the box. The Plug-ins dialog
box opens.
3. Click and hold on the Plug-in box for
the card you want to reconfigure. Drag
down to the desired plug-in and then
release to finalize your selection.
Note: The plug-ins available on your model
may be different than those shown.
4. Click on the Close button in the upper
right corner of the dialog box to close
the Setup dialog box (or click on the
Setup button in the menu bar).
Note: Refer to “Using Internal EFFECTS”
in Chapter 6 for information on how to
select and adjust individual effects from
the Mackie Standard Effects package.
3-14
Start-Up
Owner’s Manual
Setting the Date and Time
You can reset the clock in the CPU so it
corresponds to your specific time zone.
Note: There is no console equivalent for
this function.
TO SET THE DATE AND TIME
From the screen:
1. Click on the Setup button in the lower
menu bar. The Setup dialog box opens.
2. Click on the General icon on the left
side of the box if it’s not already
selected.
3. The Date and Time settings appear in
the middle of the General window.
Click on the arrows next to each
setting to change it.
4. Click on the Close button in the upper
right corner of the dialog box to close
the Setup dialog box (or click on the
Setup button in the menu bar).
Setting Channel Phase
You can switch the phase of the input signal on any
of the first 48 channels. This is equivalent to swapping
pins 2 and 3 on the XLR connector, or tip and ring on
the 1/4" TRS jack. However, the actual
phase reversal occurs in the digital domain,
after the mic pre and (for channels 1–12)
after the Insert jack.
Note: There is no console equivalent for
this function.
TO SET CHANNEL PHASE
From the screen:
1. Click on the PHASE button at the top of
the channel strip. When the PHASE button is lit, the signal is inverted (180º).
When the PHASE button is unlit (off),
the signal is non-inverted (0º).
Start-Up
3-15
3-16
Start-Up
Digital 8•Bus
Analog Metering vs. Digital
Metering
Unlike analog console meters which typically
use 0 dB as a nominal range, the Digital 8•Bus
meters use 0 dB to represent full bit resolution.
When a signal reaches 0 dB full scale on the
console, the analog-to-digital converters are
using all 20 bits to represent a single sample. 0
dB full scale (0 dB FS) is equivalent to an
analog output of +19 dBu, and –15 dB full scale
is equivalent to +4 dBu, the average nominal
level of most professional analog consoles.
dBu
equivalent
12
OL
+20 dBu
+18
+16
+13
+10
+5 dBu
0
–5
–10
–15
–20
–30 dBu
2
4
7
10
15
20
25
30
35
40
50
Unbalanced TS (tip-sleeve) lines can be
accommodated via the TRS jack. Make sure
the cord terminates with a TS plug (like a
guitar plug), or if it’s a TRS plug (like a
headphone plug), make sure the ring is tied to
the shield, preferably at the source.
RING SLEEVE
SLEEVE RING TIP
TIP
RING (COLD)
TIP (HOT)
SLEEVE (SHIELD)
Figure 4-3. 1/4" TRS Plug
When connecting microphones to the XLR
inputs on channels 1–12, be sure to turn the
MIC switch on (LED lit). Otherwise, leave the
switch off for line-level signals.
RING SHORTED
TO SLEEVE
SLEEVE
Owner’s Manual
4. Making the Connections
SLEEVE RING TIP
TIP
TIP (HOT)
SLEEVE (SHIELD)
Figure 4-4. TS Plug
36
Figure 4-1. Digital 8•Bus meter dBu equivalents
Analog Audio Connections
Connecting Microphones and
Line-Level Signals
Channels 1–12 have both XLR Mic inputs
and 1/4" TRS Line inputs, while channels 13–24
have 1/4" TRS Line inputs only. Mackie
consoles use 3-pin female XLR connectors on
all microphone inputs, so use a male XLR
connector to connect to the console’s mic
preamps.
The XLR and 1/4" TRS inputs are balanced
analog inputs. When connecting a balanced
signal using the XLR or 1/4" jacks, be sure
they’re wired — per AES (Audio Engineering
Society) standards — like this:
XLR
TRS
Hot (+)
Pin 2
Tip
Cold (–)
Pin 3
Ring
Shield (Ground)
Pin 1
Shield
2
SHIELD
HOT
COLD
SHIELD
Phantom Power
Each of the XLR mic inputs on channels
1–12 has its own individual +48V phantom
power switch. Phantom power is required to
operate most condenser microphones (some
condenser microphones are battery-powered).
If you have a condenser microphone plugged
in, or any mic that requires +48VDC phantom
power, engage this switch. If you have a
dynamic, ribbon, or tube mic that does not
require phantom power, leave the Phantom
Power switch out.
Caution: Turn all output levels
down before operating this
switch to avoid the possibility of
a “pop” in your speakers.
Connecting a line-level input
to an XLR input connector with
the phantom power switched on
could damage the output of the
source device. We recommend
using the 1/4" jacks for linelevel inputs.
1
+48V
PH
MIC
LINE IN
INSERT
1
3
1
AUX
1
COLD 3
HOT
1
3
SHIELD
COLD
2
Figure 4-2. XLR Connectors
2
HOT
Connections
4-1
Digital 8•Bus
Connecting Recording Devices
This section discusses how to connect your
recording device to the Digital 8•Bus, whether
it be DAT, MDM, HDR, or something else. The
type of connections you make are determined
by which Tape I/O cards you have installed.
Our discussion here centers on analog Tape
I/O to and from the recording devices, with the
Analog I/O cards installed. Direct digital
connections for tracking and mixdown are
possible using one of the optional Digital I/O
cards (Apogee Digital I/O or ALT I/O). See
Appendix F for information on installing and
connecting the optional Digital I/O cards.
TO TAPE Connections
(Channels 1–24 Tape Outs)
With three Analog I/O cards installed in the
TAPE IN/OUTS slots, there are three 25-pin
D-Sub connectors (TO TAPE) for connecting up
to 24 tracks directly to your recorder(s). Tape
Outs 1–8 appear on the first card (TAPE 1–8),
Tape Outs 9–16 on the second (TAPE 9–16),
and Tape Outs 17–24 on the third (TAPE 17–
24). Any of the 48 channels, effects returns
(internal FX and ALT returns, channels 49–
72), and BUS 1–8 can be assigned to the Direct
Tape Outputs. These are balanced analog
connections, and the signal at this point is
post-EQ and pre-fader (for channels 1–48). See
Figure 4-5 for the wiring configuration of these
connectors.
TAPE 1- 8
FROM TAPE
TO TAPE
ANALOG I/O
4-2
Connections
FROM TAPE Connections
(Channels 25–48 Tape Returns)
With three Analog I/O cards installed in the
TAPE IN/OUTS slots, there are three 25-pin
D-Sub connectors (FROM TAPE) for connecting
up to 24 tracks directly from your recorder to
the Digital 8•Bus. The inputs to channels 25–
32 appear on the first card (Tape 1–8),
channels 33–40 appear on the second (Tape 9–
16), and 41–48 appear on the third (Tape
17–24). Fader Bank 2 (TAPE IN) is dedicated
entirely to the Tape Inputs. These are balanced
analog connections and the signal for each
track goes directly to its own dedicated A/D
converter, followed by a DIGITAL TRIM
control, DSP for all the same processing
functions as channels 1–24, fader, mute, and
pan. See Figure 4-5 for the wiring configuration
of these connectors.
The TO TAPE and FROM TAPE connectors
are compatible with the analog 25-pin
connectors used on Tascam digital multitrack
recorders. Several audio-grade cable
manufacturers make high-quality cables for
this application. Some also make breakout
cables with a 25-pin D-Sub connector on one
end and connectors used by other popular
MDMs and HDRs on the other end.
BUS OUT 1–8 Connections
(Surround Outputs)
This is a single 25-pin
D-Sub connector on the
rear panel for connecting
eight submaster outputs
directly to an 8-track
recorder, to separate
monitor feeds, or to any
device that requires a
custom audio feed.
These are balanced
analog line-level
connections that can
feed directly into an
analog balanced linelevel input. See Figure 4-5
for the wiring
configuration of this
connector.
As with the Tape IN/
OUT connectors, this
connector is compatible
with the analog 25-pin
connectors used on
Tascam digital
multitrack recorders.
BUS OUT 1-8
&
SURROUND OUT
L
R
MASTER OUT
Connecting External Effects Devices
The Digital 8•Bus comes equipped with two
internal stereo effects processors that can be
programmed via the Fat Channel. These
internal effects are driven by Aux 1 and Aux 2,
and returned to the signal path using the FX 1–
4 faders in Fader Bank 3.
GROUP 1
GROUP 2
GROUP 3
GROUP 4
FX 1
FX 2
FX 3
FX 4
1
25
2
26
3
27
4
28
dB
dB
dB
dB
10
10
10
10
5
5
5
5
U
U
U
U
Up to three more effects cards can be installed
in the card cage for a total of up to eight internal
effects operating at one time. Refer to “Using
Internal Effects” in Chapter 6 for more information.
Pin 14
Pin 15
Pin 16
Pin 17
Pin 18
Pin 19
Pin 20
Pin 21
Pin 22
Pin 23
Pin 24
Pin 25
Tape 17-24
Tape 17-24
Ch24
Ch24
Ch23
Ch22
Ch22
Ch21
Ch20
Ch20
Ch19
Ch18
Ch18
Ch17
Tape 9-16
Tape 9-16
Ch16
Ch16
Ch15
Ch14
Ch14
Ch13
Ch12
Ch12
Ch11
Ch10
Ch10
Ch 9
Tape 1-8
Bus 1-8,
and ALT I/O
Tape 1-8,
Bus 1-8,
and ALT I/O
Ch 8
Ch 8
Ch 7
Ch 6
Ch 6
Ch 5
Ch 4
Ch 4
Ch 3
Ch 2
Ch 2
Ch 1
Signal
Description
Signal
Description
+
shield
–
+
shield
–
+
shield
–
+
shield
–
N/C
–
+
shield
–
+
shield
–
+
shield
–
+
shield
Ch 8
Ch 7
Ch 7
Ch 6
Ch 5
Ch 5
Ch 4
Ch 3
Ch 3
Ch 2
Ch 1
Ch 1
Ch16
Ch15
Ch15
Ch14
Ch13
Ch13
Ch12
Ch11
Ch11
Ch10
Ch 9
Ch 9
Ch24
Ch23
Ch23
Ch22
Ch21
Ch21
Ch20
Ch19
Ch19
Ch18
Ch17
Ch17
Owner’s Manual
Pin 1
Pin 2
Pin 3
Pin 4
Pin 5
Pin 6
Pin 7
Pin 8
Pin 9
Pin 10
Pin 11
Pin 12
Pin 13
Figure 4-5. DB-25 Pin-out Identification
DIGITAL EFFECTS
FX Cards located
behind this cover plate.
DIGITAL EFFECTS
In addition to the internal effects, the Digital
8•Bus provides several ways to connect
external effects devices.
many cable manufacturers make cables
especially for this purpose. With nothing
plugged into the INSERT jack, the send signal
is directly connected to the return pin via the
normalling jack.
The INSERT jack can also be used as a direct
out from the mic preamps to tape. If you insert a
TS (mono) 1/4" plug only partially into the
INSERT jack (to the first click), the plug will not
activate the jack switch and will not open the
insert loop in the circuit (thereby allowing the
channel signal to continue on its merry way
through the mixer). This allows you to tap the
channel signal at that point in the circuit
without interrupting normal operation.
If you push the 1/4" TS plug in to the
second click, you will open the jack switch and
create a direct out, which does interrupt the
signal in that channel.
Do not overload or shortcircuit the signal you are
tapping from the mixer.
Doing so will affect the
internal signal.
1
+48V
PH
MIC
LINE IN
INSERT
AUX
1
Channel Inserts
Channels 1–12 are equipped with INSERT
jacks for connecting external processors into
each channel’s signal path. The insert point
comes after the Mic/Line preamp and just
before the analog-to-digital converter.
This is a TRS jack specially configured as a
combination Send/Return connection point. It
is configured with the Tip = Send, Ring =
Return, and Sleeve = Ground. This has become
somewhat of a standard in the industry, and
tip
SEND to processor
ring
sleeve
(TRS plug)
This plug connects to one of the
mixer’s Channel Insert jacks.
“tip”
“ring”
RETURN from processor
Connections
4-3
Digital 8•Bus
MONO PLUG
MUTE
MUTE
MUTE
GROUP 1
GROUP 2
GROUP 3
GROUP 4
FX 1
FX 2
FX 3
FX 4
1
25
2
26
3
27
4
28
Channel Insert jack
Direct out with no signal interruption.
Insert only to first “click.”
dB
MONO PLUG
dB
dB
dB
10
10
10
10
5
5
5
5
U
U
U
U
5
5
5
5
Channel Insert jack
Direct out with signal interruption.
Insert all the way in to the second “click.”
STEREO
PLUG
Channel Insert jack
For use as an effects loop.
(TIP = SEND to effect, RING = RETURN from effect.)
Aux Buses
1
+48V
PH
MIC
LINE IN
INSERT
The Digital 8•Bus has 12 analog aux send
outputs that can be used for monitor sends or
for connecting external effects devices. These
are eight mono and two stereo-pair TRS, linelevel output jacks. They are wired like this:
Tip = signal positive
Ring = signal negative
Sleeve = shield (ground).
RING SLEEVE
SLEEVE RING TIP
TIP
RING (COLD)
TIP (HOT)
SLEEVE (SHIELD)
AUX
1
4-4
MUTE
Connections
Use the buttons in the V-Pot Select section to
choose the aux sends for each channel. When an
AUX button is selected, the channel V-Pots
become aux send level controls. You can have up
to 8 mono aux sends (AUX 1–8) and two stereo
aux sends (AUX 9–10 and AUX 11–12) per
channel.
The versatile architecture of the aux sends
allows you to be creative and
flexible in your use of effects.
You can independently assign
each aux send to be pre- or
post-fader (see “Setting Aux
Sends Pre/Post Fader” in
Chapter 3). Aux Sends 1 and
2 are sent to the two internal
effects buses as well as to the
AUX 1 and 2 send outputs.
You can defeat the internal
effects signal by muting the
FX 1–4 faders in the
EFFECTS fader deck.
1-24
1-48
LEVEL TO TAPE
DIGITAL TRIM
AUX 1
AUX 2
AUX 3
AUX 4
AUX 5
AUX 6
AUX 7
AUX 8
AUX 9-10
AUX 11-12
PAN
PAN
Aux Sends 3–8 are independent analog
mono outputs, fed from the corresponding
internal aux buses. If additional D8•FX cards
are installed, these aux sends are directed to
their corresponding internal effects buses as
well. See Appendix F for more info on
installing D8•FX cards.
Aux Sends 9-10 and 11-12 are analog stereo
pairs (referred to as CUE 1 and CUE 2 on the
screen). There are two buttons in the V-Pot
Select Section associated with these stereo aux
sends, LEVEL and PAN. Select LEVEL to
adjust the stereo aux send level using the
channel V-Pot, and select PAN to adjust the left
and right aux send balance using the channel
V-Pot.
When AUX 9-10 or AUX 11-12 is selected as
a Cue Mix source, the signals from those aux
buses are sent to the Headphones and Control
Room outputs.
So where are the effects return jacks? You
can use any of the unused channels 1–24 as
external effects returns. Follow the Input
Sensitivity Adjustment Procedure for Channels
1-24 in Chapter 6 to set the TRIM control for
the channels used as effects returns, and set
the channel fader to adjust the amount of the
effect you want to mix into the main buses. You
can monitor the mix using headphones or
control room speakers, and soloing the effects
return channel(s).
Connecting
Control Room
Monitors
MASTER OUT
L R
CR
MAIN
There are two pairs
L R
of 1/4" TRS stereo linelevel outputs provided
CR
on the rear panel of the
NEAR FIELD
Digital 8•Bus for
L R
sending signals to
control room speakers.
These can be connected
to the inputs of an amplifier driving the control
room monitors, or directly to the monitors if
they are active (i.e., with built-in amplifiers).
NEAR FIELD
MAIN
SPEAKERS
SPEAKER LEVEL
Connecting Studio Monitors
One pair of 1/4" TRS stereo line-level outputs
is provided on the rear panel for sending signals
to the studio (or wherever you want it to go).
Connect these outputs to a power amplifier and
speakers, or powered monitor speakers, or a
headphone distribution amplifier (DA) for the
musicians. This is the same signal that is
assigned to the Control Room outputs. However,
it is not affected by the DIM button in the
Control Room Section, nor is it interrupted when
a channel is soloed.
PHONES 1
PHONES/CUE MIX 1
PHONES/CUE MIX 2
AUX 9-10
COPY MIX TO CUE
AUX 9-10
COPY MIX TO CUE
AUX 11-12
CONTROL ROOM
AUX 11-12
CONTROL ROOM
LEVEL
Owner’s Manual
Many engineers and producers like to listen
to their mix on standard reference monitors as
well as on smaller monitors. Typically, you use
the MAIN output for your standard reference
monitors, and the NEAR FIELD output for
smaller or alternative monitor listening.
You can select the signal source sent to the
control room outputs in the Control Room
Section. Though both outputs carry the same
signal, only one output can be switched on at a
time. Use the MAIN and NEAR FIELD buttons
in the Control Room Section to quickly switch
back and forth between them. Use the
SPEAKER LEVEL V-Pot to adjust their
individual output levels.
LEVEL
These outputs are designed for stereo
headphones, where the tip and ring carry the
left and right channel signals respectively, and
the sleeve is the ground return for both signals.
Connecting Your Final Mix Deck
After you’ve finished all your tracking and
you’re ready to make your final mixdown to
2-track, use the 1/4" TRS MASTER OUT or
XLR MASTER OUT jacks on the rear panel to
connect to your 2-track recorder. The same
signal appears at the 1/4" and XLR outputs,
with the exception that the 1/4" jacks have a
maximum output level of +22 dBu, and the
XLR jacks have a maximum output level of
+28 dBu. These can both be connected to
balanced or unbalanced inputs, so choose the
one that matches your 2-track deck.
MASTER OUT
L R
CR
MAIN
L R
L
CR
NEAR FIELD
L R
PHONES 2
R
STUDIO OUT
L R
MASTER OUT
PUNCH I/O
TALKBACK
Connecting Headphones
There are two 1/4" TRS headphone output
jacks labeled PHONES 1 and PHONES 2. They
are located just above the STUDIO OUTS on
the rear panel of the Digital 8•Bus. You can
independently assign the signal going to these
two outputs and adjust their output levels in
the Phones/Cue Mix Section.
If you’re mixing down to DAT, use one of the
digital OUT connectors on the DIGITAL I/O
card, which is equipped with an AES/EBU
XLR-type OUT connector, and a S/PDIF RCAtype OUT connector. Select the output you
want to use in the Digital I/O Setup menu (I/O
CARDS button in the Setup Section, or Setup/
Digital I/O on the screen).
You’ll probably want to monitor the final mix
from the 2-track tape you’re recording with. To
do this, connect the outputs from your 2-track
deck to one of the 2 TRACK inputs (A, B, or C)
on the rear panel of the Digital 8•Bus. Then
select the corresponding 2 TRACK source in
the Control Room Section.
Connections
4-5
Digital 8•Bus
Digital Audio Connections
DIGITAL I/O
AES/EBU
1
IN
OUT
DIGITAL I/O
S/PDIF
2
IN
OUT
DIGITAL I/O
CONTROL ROOM
2 TRACK A
DIGITAL IN 1
2 TRACK B
DIGITAL IN 2
2 TRACK C
MASTER
L-R
MONO
NEAR FIELD
MAIN
SPEAKERS
SPEAKER LEVEL
DIM
TALKBACK
AES/EBU
AES/EBU, also known as AES3, is a standard
interconnection established by the Audio
Engineering Society (AES) for transmitting two
channels of digital audio information between
two devices (see the glossary for more
information).
This is a balanced XLR-type connector.
Resist the temptation to use a standard
microphone cable. The digital signals
transmitted by the AES/EBU jack are much
higher in frequency than microphone cables
are designed to handle. Many audio cable
manufacturers have cables specifically
designed for AES/EBU digital audio transmission.
The AES/EBU output connector is fed from
the Master L/R output fader. The AES/EBU
input connector is routed to the Control Room
output. Select DIGITAL IN 1 in the Control
Room section to monitor the AES/EBU input.
The monitoring level of the AES/EBU input is
controlled by the SPEAKER LEVEL control in
the Control Room Section.
S/PDIF
S/PDIF (Sony/Philips Digital Interface
Format) is similar to AES/EBU, but is more often
used in consumer-grade digital devices. The
obvious difference is in the connector type used.
The less obvious difference is in the formatting of
the non-audio digital data (channel status bits)
that is transmitted along with the digital audio.
S/PDIF uses an unbalanced RCA-type
connector. Resist the temptation to use a
standard audio-grade cable. The digital signals
transmitted by the S/PDIF jack are much
higher in frequency than standard cables are
designed to handle. Many audio cable
manufacturers have cables specifically
designed for S/PDIF digital audio transmission.
The S/PDIF output connector is fed from the
Master L/R output fader. The S/PDIF input
connector is routed to the Control Room
Output. Select DIGITAL IN 2 in the Control
Room section to monitor the S/PDIF input. The
monitoring level of the S/PDIF input is dictated
by the SPEAKER LEVEL control in the Control
Room Section.
MIDI Connections
Connecting a MIDI Time Code
Source for Synchronization
To synchronize the Remote CPU to MIDI
Time Code, connect one end of a standard 5-pin
MIDI cable to the MIDI IN connector on the
back of the Remote CPU. Connect the other
4-6
Connections
end to a MIDI Time Code
generating device (i.e.,
MIDI interface, SMPTE-toMTC converter, etc.). Upon
the arrival of MTC at the
MIDI input, the Remote
CPU will chase and lock to
the incoming timecode.
MIDI
OUT
Using MMC (MIDI
Machine Control)
If you are using any
MIDI
device that responds to
IN
MIDI Machine Control, you
can control the transport
mechanisms with the
transport buttons on the
console surface. To do this,
connect one end of a
standard 5-pin MIDI cable
to the MIDI OUT connector on the back of the
Remote CPU. Connect the other end to the
input of the timecode master (i.e., MIDI
interface, ADAT Computer Interface (ACI),
BRC, SY88 card, etc.). See “Configuring MIDI
Parameters” in Chapter 3 for information on
setting up MIDI Machine Control.
Connections for External MIDI
Effects Processors
External effects processor settings may be
edited and stored in the console. To do so,
connect one end of a standard 5-pin MIDI cable
to the MIDI OUT connector on the back of the
Remote CPU. Connect the other end of the
cable to the MIDI input on the back of your
effects processor. Using a separate MIDI cable,
connect one end to the MIDI Out on the back of
your effects processor and connect the other
end to the MIDI IN connector on the back of
the Remote CPU.
You can sequence fader levels using MIDI
Channel Voice Messages. The L/R Master
Fader is MIDI Channel 0, and MIDI Channels 1
through 48 follow the channel numbers on the
console. See Chapter 8, “Advanced Techniques,”
for more information.
Note: These features may not be available at
the time your Digital 8•Bus was manufactured.
Contact Mackie Technical Support or check our
web site for software upgrades as they become
available.
VIDEO
PARALLEL
CONSOLE DATA
You can operate virtually every function of
the Digital 8•Bus from its control surface.
However, through the use of optional input/
output devices, you may enjoy increased
productivity and ease of use.
SERIAL
KEYBOARD
MOUSE
CONCEIVED, DESIGNED, AND MANUFACTURED BY MACKIE DESIGNS INC • WOODINVILLE • WA • USA •
THE FOLLOWING ARE TRADEMARKS OR REGISTERED TRADEMARKS OF MACKIE DESIGN INC.: "MACKIE", "D
Using an SVGA Monitor
Through the use of an optional, user-supplied
SVGA monitor, it is possible to view almost all
console parameters from the built-in proprietary
Mackie Graphical User Interface (GUI).
Notice that we specify using an SVGA
monitor. That’s because SVGA provides higher
resolution than a VGA monitor. The video card
in the Digital 8•Bus produces an output
resolution of 1024 by 768 pixels with 256
colors. The highest resolution a VGA monitor
can produce is 640 by 480 pixels with 16
colors. Because of this, only part of the picture
would be reproduced on a VGA monitor,
rendering it useless.
The SVGA output uses a High Density, 15pin D-Sub connector. Nearly all IBMcompatible SVGA graphic displays use the
same connector. A 17" monitor is the
recommended minimum and 21" is preferable
for reproducing the GUI with easy-to-read
clarity. When switching monitor sizes, no user
adjustments are necessary from the console.
Any SVGA monitor will show full-screen
graphic resolution.
Note: Most SVGA monitors are multisync
(a.k.a. multiscanning) monitors, which
automatically adjust to the signal frequency of
the video display driver. If you have a fixedfrequency monitor, be sure the monitor is
capable of reproducing 1024 by 768 pixels with
256 color resolution, at a minimum of 72Hz
refresh rate.
Using a Mouse
Owner’s Manual
Other Connections (not necessary
for operation)
In conjunction with the SVGA display, an
optional PS/2 style mouse can provide greatly
increased ease of use. Use the mouse to select
all graphic symbols on the screen, including
the SMPTE display, Snapshots, Locate points,
graphic editing windows, etc. The mouse input
is an IBM-compatible, 6-pin mini-DIN, PS/2
style connector.
There are two other
standards for mouses (on a
PC): the serial mouse and
the bus mouse. A serial
mouse connects to the
computer’s serial port, which
is usually a 9-pin D-Sub connector using RS232 or RS-422 data transmission protocol. A
bus mouse connects to an expansion board
plugged into a computer slot, and the
connection can vary depending on the board. A
PS/2 mouse connects to a PS/2 port, which is a
6-pin mini-DIN connector on the computer, and
is often referred to as (can you guess?) the
mouse port.
Using a QWERTY Keyboard
The final input/output option is an IBMcompatible keyboard, which can be used to
input alphanumeric names and parameters. An
extended 101-key keyboard, with a 10-key
entry pad, can be used for entering Snapshot/
Cue numbers, SMPTE times, etc. The keyboard
connector on the Remote CPU is an IBMcompatible, 5-pin DIN-style connector.
The Ethernet Connection
Included inside the Digital 8•Bus Remote
CPU is a high-speed Ethernet card. The
Ethernet connection can be used to download
Mackie Real Time OS upgrades and effects
plug-ins, make on-line diagnoses, and make
peer-to-peer connections for transferring
sessions from one user to another. The
Ethernet connector is a standard U.S.-style,
RJ45 telco connector.
If you have a computer that has an Ethernet
connection, we recommend that you purchase
an Ethernet hub so you can have multiple
devices sharing that connection.
Connect one end of the supplied RJ45 telco
cable to the Ethernet connector on the back of
the Remote CPU, then connect the other end of
the telephone cable to an existing Ethernet
connector or Ethernet hub. Refer to Appendix
H for more information on upgrading the
operating software in your Digital 8•Bus.
Connections
4-7
Digital 8•Bus
4-8
Connections
Patches, and Bin. You can create new folders
and store any file in any folder (see Figure 5-1).
Before beginning a new session, we
recommend that you first create a new session
file. By creating a new session file right away,
any automated snapshots, locate points, and
rough mixes for a given client or project are
stored with the session file, eliminating the
need to “recreate the mix” when resuming that
project. Stored elements may also include aux
sends, channel/bus assignments, EQ, dynamics,
and effects settings. Additionally, doing so will
give the added benefit of letting you recover
your work in the event of a power failure.
Sessions
Saving and Retrieving Files from
the Internal Hard Drive
All automation information for a project is
stored on the internal hard drive in the Remote
CPU, in a single file called a session. You can
store numerous session files in the Sessions
folder, limited only by the amount of hard drive
space available.
In addition, you can store individual static
settings for the EQ, compressor, gate, and
internal effects in the Patches folder, also on
the internal hard drive.
The main areas on the console to access
these functions are in the Setup Section and
the Fat Channel Section on the front of the
console. On the screen, these commands are
accessed under “File” in the upper menu bar.
File Structure Hierarchy
The D8B’s file structure is similar to most
computer file structures. The hard drive in the
Digital 8•Bus is labeled the B: drive. There are
three primary folders on the B: drive: Sessions,
The Sessions folder is the default location to
store session files. You can store sessions
under different names—perhaps the title of a
song, or name of a piece that has several
segments, or “verse,” “chorus,” etc. All
automation, snapshot, and locate points are
stored in the session file. Session files have a
“.d8b” extension, which is automatically
appended to the filename (you don’t need to
add it yourself). The extension isn’t visible
during normal file loading and saving
operations, but is visible in the File Manager
window (on-screen only).
Owner’s Manual
5. Preparing for a Session
Patches
The Patches folder is the default location to
store channel (.chn), EQ (.equ), gate (.gat),
compressor (.cmp), internal effects (.efx), and
surround-sound (.sur) settings. As with sessions,
the extensions are automatically appended to
the filename, and are not visible during normal
file loading and saving operations.
EQ, compressor and gate settings are selectable per channel, but internal effects settings
are selected and assigned globally to the aux
sends. A number of factory presets for the
internal effects are stored in the “MackieFx” and
“Vocal Studio” folders in the “Patches” folder.
It’s a good idea to store a modified effects
preset under a different name so that the
original presets are always available. You
should also back up the factory presets to a
floppy disk so they are always available.
Bin
BackDir
Internal Hard Drive
B:
Floppy Drive
A:
Ethernet
Fat Channel
Display
Fat Channel Display
ChangeDir
Scan
Figure 5-1. Digital 8•Bus File Structure Heirarchy
Surround
Vocal
Studio
patch#2.efx
Voice Doubler.efx
Mackie FX
surround.sur
FourCorners.sur
Gates
patch#1.efx
Small Room.efx
EQs
Bertha's
Backups
gate#1.gat
GuitarBuzz.gat
Compressors
Horatio's
Folder
EQ#1.equ
KickEQ.equ
Channels
Bin
comp#1.cmp
Jon's Vocal.cmp
Startup
strip#1.chn
Trumpet.chn
Trombone.chn
Sax.chn
Beebop#1.d8b
Beebop#2.d8b
Skittle.d8b
Skattle.d8b
Beebop
Bob's Mix
Patches
Startup.d8b
Mix#1.d8b
Dog&Pony.d8b
Jimmy's Jam.d8b
Sessions
Backup.d8b
Mix#1.d8b
Joe's Garage.d8b
Bonnie.d8b
Sessions
The Bin folder
is where files go
that have been
dragged into the
trash bin (in the
Disk Manager
window). You can
retrieve files from
the Bin by copying
them and pasting
them into another
folder. Otherwise,
click on “Edit” in
the upper-left
corner of the Disk
Manager window,
and select “Empty
Trash Bin” to
delete the files
from the Bin folder.
Preparing for a Session
5-1
Digital 8•Bus
Creating a New Folder
You can create a new folder at any level
of the file heirarchy.
TO CREATE A NEW FOLDER
SETUP
From the console:
1. Press the SAVE button in the Setup
Section.
SAVE
SAVE AS...
NEW
LOAD
GROUP
GENERAL
PLUG INS
DIGITAL I/O
Note: You can create a new folder from the
Save, Save As..., New, or Load menus.
D8B
Save
Session
"Startup"?
Cancel
D8B
<-[BACK
<<
DIR]
Scan
56 INPUT / 72 CHANNEL DIGITAL MIXER
->
Yes
56 INPUT / 72 CHANNEL DIGITAL MIXER
>>
Cur:Startup
New
ChangeDir
2. The Fat Channel Display now shows
the “Save Session” menu. An arrow
appears in the right side of the display,
indicating that you can access another
page by pressing the NEXT button.
3. Press the NEXT button, and the
directory navigator appears in the
display. The current folder (folder and
directory are used interchangeably
here) is indicated in the upper-right
side of the display.
4. You can navigate to a different folder
by using the SELECT buttons under
“ChangeDir” and the Scan arrows.
• To move toward the root directory,
scan left until “[BACK DIR]” appears
in the upper-left side of the display,
then press the SELECT button under
“ChangeDir.”
• To move away from the root
directory, scan right until the folder
name you want to open appears in the
display, then press the SELECT button
under “ChangeDir.”
5. When you have the folder you want
displayed as the current directory,
press the SELECT button under “New”
to create a new folder within the
current folder.
D8B
<<
5-2
Preparing for a Session
56 INPUT / 72 CHANNEL DIGITAL MIXER
>>
(Create
Cancel
Folder)
Create
6. The “Create Folder” menu appears. To
name the folder:
• Turn the first V-Pot to change the
letters.
• Press the SELECT buttons below
the arrows to move the cursor left and
right. You must use at least 3, and up
to 20, characters to name a file.
7. Press the PREVIOUS button to return
to the “Save Session” menu. You can
save the session in the new folder, or
you can press SELECT under “Cancel”
to return to normal operation (this
won’t cancel your new folder — it’s
already been created).
TO CREATE A NEW FOLDER
Owner’s Manual
When the name appears as you want it,
press the SELECT button below
“Create” to complete the operation.
The new folder becomes the current
directory.
From the screen:
1. Using the mouse, choose “Disk
Manager” from the File menu in the
upper menu bar.
Note: You can create a new folder from the
Save Session As, New Session, Open
Session, or Disk Manager windows.
2. The Disk Manager window appears in
the display. Select the folder you want
to put your new folder in.
• To move toward the root directory,
click on the “Up Arrow” next to the
“Current Directory” box at the top of
the window.
• To move away from the root
directory, double-click on a folder in the
list of folders and files.
3. When you have the target folder
displayed as the current directory, click
on the “New” button. A window
appears to enter the new folder name.
Type the name with the keyboard. You
must use at least 3, and up to 20,
characters to name a folder.
4. When the name appears as you want it,
click on the “Enter” button to complete
the operation. You can click on “Cancel”
to return to normal operation, or click
on the the Close button in the upper
right corner of the window to remove
the Disk Manager box from the screen.
Preparing for a Session
5-3
Digital 8•Bus
Using the Disk Manager
Although a method of file management
is available from the console surface via
the directory navigator, it is somewhat
limited due to the size of the Fat Channel
Display. In fact, there are certain operations
that can’t be performed from the console
surface, such as deleting files, emptying
the Bin, and copying multiple files or folders.
File management is much easier to
accomplish using the Disk Manager on the
screen. You can quickly copy files from the
internal hard drive to a floppy disk and
vice versa.
Copying Files To a Floppy Disk
TO COPY FILES TO A FLOPPY DISK USING
THE DISK MANAGER
1. Select “Disk Manager” from “File” in
the upper menu bar.
2. Click on the file you want to copy in
the list of files found in the Disk
Manager window.
3. Drag it to the FLOPPY icon on the
right side of the window, and release
the mouse when the icon is
highlighted. A dialog box indicates the
file is being copied.
Note: Make sure a 3.5” floppy disk is
installed in the floppy drive on the Remote
CPU.
You can reverse the process and copy a
file from the floppy disk to the internal
hard drive. Just click on the FLOPPY icon
to view the files available on the floppy
disk. Click and drag a file to the
INTERNAL icon to copy it to the internal
hard drive.
Note: The file is copied to whatever
directory is current on the hard drive. This
is indicated near the top of the Disk
Manager window, just under the “Edit”
menu.
Copying Files from One Folder to
Another
TO COPY FILES FROM ONE FOLDER TO
ANOTHER
1. With the Disk Manager window open,
click on the file (or files) you want to
copy. To select multiple files, hold down
the shift key while clicking on files.
5-4
Preparing for a Session
3. Double-click on the folder you want to
copy the file(s) to. When the target
folder’s name appears as the current
directory, select “Paste” from the edit
menu. The file(s) now appear in the
target folder.
You can copy an entire folder of files in
the same manner. Just click on a folder to
highlight it, and select “Copy” from the Edit
menu. Then “Paste” it into another
location.
In addition to the Cut, Copy, and Paste
functions, the Edit menu allows you to
delete selected files, duplicate a file (by
appending “copy” into the name), rename a
file, empty the Bin (you can drag files into
the Bin to temporarily hold them before
deleting them), refresh the file list, and
select all the files displayed.
You can create a new folder by clicking
on the “New” button, and open a session by
clicking on the “Open” button.
You can save and open files quite easily
from the console or the “File” menu on the
screen, but the Disk Manager is the place
to go to organize your files and back them
up to floppy.
Owner’s Manual
2. Select “Copy” from the Edit menu.
Creating a Session
TO CREATE A SESSION
SETUP
SAVE
SAVE AS...
NEW
LOAD
GROUP
GENERAL
PLUG INS
DIGITAL I/O
D8B
mix#1
<<
>>
56 INPUT / 72 CHANNEL DIGITAL MIXER
(NEW SESSION)
Cancel
New
->
From the console:
1. Press the NEW button in the Setup
Section. The Fat Channel Display asks
if you want to save changes to the
current session. Make your selection to
continue.
2. The Fat Channel Display now shows
the New Session menu. A default name
appears in the Fat Channel Display,
such as “mix#1.” You can accept the
default name, or you can change it to
one of your own choice.
To change the name:
• Turn the first V-Pot to change the
letters.
• Press the SELECT buttons below the
arrows to move the cursor left and
right. You must use at least 3, and up
to 20, characters to name a file.
Preparing for a Session
5-5
Digital 8•Bus
D8B
mix#1
<<
56 INPUT / 72 CHANNEL DIGITAL MIXER
(NEW SESSION)
Cancel
New
>>
->
3. When the name appears as you want
it, press the SELECT button below
NEW to complete the operation. The
console reverts to its default nominal
settings to start a new session.
TO CREATE A SESSION
From the screen:
1. Using the mouse, choose “New
Session” from the File menu in the
upper menu bar (or press CTRL-N on
the keyboard). A dialog box appears
asking if you want to save any
changes to the current session. Make
your selection to continue.
2. The “Save File As...” dialog box
appears with the name “mix#1.” If you
want to rename the session, you can
type the new name in now.
3. When you’re satisfied with the name
of the new session, click on the “Save”
button to complete the operation. The
console reverts to its default nominal
settings to start a new session.
Saving a Session
TO SAVE A SESSION
SETUP
SAVE
SAVE AS...
NEW
LOAD
GROUP
GENERAL
PLUG INS
DIGITAL I/O
D8B
Save
Session
2. Press the SELECT button below “Yes.”
56 INPUT / 72 CHANNEL DIGITAL MIXER
"Startup"?
Cancel
Yes
From the console:
1. Press the SAVE button in the Setup
Section. The Fat Channel Display now
shows the Save Session menu, which
asks if you want to save the session.
->
Tip: A faster way to save a session is to
press the SAVE button twice.
TO SAVE A SESSION
From the screen:
1. Using the mouse, choose Save Session
from the File menu in the upper menu
bar (or press CTRL-S on the keyboard).
2. The session has now been saved.
5-6
Preparing for a Session
You can save a session in progress under
a new name. This is useful if you want to
retain the session in its current state while
you continue working on it. If you don’t like
what you’ve done, you can always go back
to the previously saved session and start over.
Note: You can configure the Auto Save
feature to save your session under a new
name periodically. See “Configuring Auto
Save” in Chapter 3.
TO SAVE A SESSION UNDER A NEW NAME
Owner’s Manual
Saving a Session under a New
Name
SETUP
SAVE
SAVE AS...
NEW
LOAD
GROUP
GENERAL
PLUG INS
DIGITAL I/O
D8B
mix#1
<<
>>
56 INPUT / 72 CHANNEL DIGITAL MIXER
(SAVE SESSION AS)->
Cancel
Save
From the console:
1. Press the SAVE AS... button in the
Setup Section.
2. The Fat Channel Display now shows
the “Save Session As” menu. A default
name appears in the Fat Channel
Display, such as mix#1. You can accept
the default name, or you can change it
to one of your own choice.
To change the name:
• Turn the first V-Pot to change the
letters.
• Press the SELECT buttons below the
arrows to move the cursor left and
right. You must use at least 3, and up
to 20, characters to name a file.
3. When the name appears as you want it,
press the SELECT button below SAVE
to complete the operation.
Tip: A faster way to save a session under
the default name is to press the SAVE AS...
button twice.
TO SAVE A SESSION UNDER A NEW NAME
From the screen:
1. Using the mouse, choose “Save Session
As” from the File menu in the upper
menu bar.
Preparing for a Session
5-7
Digital 8•Bus
2. The “Save File As...” dialog box
appears with the default name
“mix#1.” If you want to rename the
session, you can type it in now.
3. When you’re satisfied with the name
of the new session, click on the “Save”
button to complete the operation.
Recalling a Session
TO RECALL A SESSION
SETUP
SAVE
SAVE AS...
NEW
LOAD
GROUP
GENERAL
PLUG INS
DIGITAL I/O
D8B
mix#1
<<
SCAN
>>
56 INPUT / 72 CHANNEL DIGITAL MIXER
(LOAD SESSION)
Cancel
Open
->
From the console:
1. Press the LOAD button in the Setup
Section on the front of the console.
The Load Session menu appears in the
Fat Channel Display.
2. The Fat Channel Display shows the
first session file (in alphabetical order)
in the current folder. Press the
SELECT buttons below the arrows to
scan through the stored session files.
3. When the one you want appears in the
display, press the SELECT button
below “Open” to complete the
operation.
TO RECALL A SESSION
From the screen:
1. Using the mouse, choose “Open
Session” from the File menu in the
upper menu bar. The “Session Files...”
dialog box appears.
2. Double-click on the Session name you
want to load, or click on it once and
then click on the “Open” button.
3. The “Load Session Confirmation”
dialog box opens, asking if you want
to save changes to the currently active
session. Make your selection to
complete the operation.
5-8
Preparing for a Session
In order to preserve hard drive space
and to supply clients with copies of their
session files, you may want to copy files
onto floppy disks. Additionally, floppies can
be used to store your EQ, Compressor,
Gate, and Effects patches. Copying a
session to floppy disk copies all of the
automation information for that session.
TO SAVE A SESSION TO FLOPPY DISK
SETUP
SAVE
SAVE AS...
NEW
LOAD
GROUP
GENERAL
PLUG INS
DIGITAL I/O
D8B
Save
Session
D8B
<-[BACK
<<
DIR]
Scan
2. Press the SAVE button in the Setup
Section. The Save Session menu
appears in the Fat Channel Display.
56 INPUT / 72 CHANNEL DIGITAL MIXER
"Startup"?
Cancel
->
Yes
56 INPUT / 72 CHANNEL DIGITAL MIXER
Cur:Startup
New
ChangeDir
>>
From the console:
1. If you haven’t already done so, save the
session to the hard drive. Also make
sure you have a 3.5” floppy disk
inserted in the floppy drive.
Owner’s Manual
Saving Sessions to Floppy Disk
3. An arrow appears in the right side of
the display to indicate that there is
another page available. Press the
NEXT button and the directory
navigator appears in the display. The
current folder (folder and directory are
used interchangeably here) is indicated
in the upper-right side of the display.
4. Move toward the root directory (B:) by
scanning left until [BACK DIR]
appears in the upper-left corner of the
display, then selecting “ChangeDir”
until FLOPPY appears. Press
“ChangeDir” one more time and the
current directory becomes the floppy
drive (Cur:A:). If there are any folders
contained on the floppy disk, the name
of one will be displayed in the upperleft corner.
5. Press the PREVIOUS button to return
to the Save Session menu. Select “Yes”
to save the session to the floppy disk.
SETUP
SAVE
SAVE AS...
NEW
LOAD
GROUP
GENERAL
PLUG INS
DIGITAL I/O
D8B
mix#1
<<
SCAN
>>
56 INPUT / 72 CHANNEL DIGITAL MIXER
(LOAD SESSION)
Cancel
Open
->
Note: Your working directory is now the
floppy drive. You must load the session
from the internal hard drive in order to
return to it as your working directory.
• Press LOAD in the Setup Section.
• Press NEXT to get to the directory
navigator.
• Scan left and select “ChangeDir” until
“INTERNAL” appears in the upper-left
corner of the display.
• Select “ChangeDir” and work your way
Preparing for a Session
5-9
Digital 8•Bus
D8B
<-[BACK
<<
DIR]
Scan
56 INPUT / 72 CHANNEL DIGITAL MIXER
>>
Cur:Startup
New
ChangeDir
back to the folder containing the session
file you’re using.
• When the folder’s name appears in the
display, press the PREVIOUS button to
return to the Load Session menu.
• Scan until the session’s name appears in
the display, then select “Open” to load the
session from the hard drive.
TO SAVE A SESSION TO FLOPPY DISK
From the screen:
1. Using the mouse, choose “Save
Session As” from the File menu in the
upper menu bar. A dialog box appears
asking if you want to save any
changes to the current session. Make
your selection to continue.
2. The “Save File As...” dialog box
appears with the name “mix#1” (or the
next numerically available number).
Click on the Floppy Drive Icon to
select it. Make sure you have a 3.5”
floppy disk inserted in the floppy drive.
3. If you want to create a new name for
the session, you can type it in now.
4. Click on the “Save” button to save the
session to the floppy disk.
Note: Your working directory is now the
floppy drive. You must load the session
from the internal hard drive in order to
return to it as your working directory.
• Choose “Open Session” from the File
menu in the upper menu bar (or press
Ctrl-O on the keyboard). The Session
Files dialog box appears.
• Click on the “INTERNAL” icon.
• Double-click on the session name in
the list of session files to load the
session from the hard drive.
5-10
Preparing for a Session
Once you’ve loaded a session, you’ll
have access to as many as 100 (0–99)
snapshots (150 from the screen) within
that session. This makes it possible to
recall all settings for a session except
analog trim levels and the Mic switch
position setting.
Creating Snapshots
TO CREATE A SNAPSHOT
RANGE
POSITION
HOURS
MINUTES
SECONDS
FRAMES
FROM
TO
SET TIME
BARS
SMPTE VIEW
BEATS
TICKS
LOOP
1
2
3
4
5
6
7
8
9
0
ENTER
LOOP
STORE
LOCATOR
SNAPSHOT
MODE
REWIND
FAST FWD
STOP
PLAY
RECORD
SHUTTLE
JOG & SHUTTLE
From the console:
1. After creating a session, press the
SNAPSHOT button in the Transport
Section, located just above the
RECORD button.
Owner’s Manual
Creating and Storing Snapshots
2. Begin setting rough mixes. These may
include send levels to tape, monitoring
levels from tape, aux send levels, and
EQ and effects settings.
3. Once the desired settings have been
made, press the STORE button in the
Transport Section. The STORE button
lights and the ENTER button begins
blinking.
4. Use the number buttons to type in a
known blank snapshot number (two
digits). The number appears in the
RANGE display.
Note: If you enter a number that is already
used, you will overwrite the previous
snapshot settings with the new ones.
5. Once you’ve entered the snapshot
number, press the ENTER button in the
Transport Section.
6. The display indicates that the new
snapshot has been stored.
TO CREATE A SNAPSHOT
From the screen:
1. After creating a Session, click on the
Snapshot menu button in the lower
menu bar. The Snapshots dialog box
appears.
Preparing for a Session
5-11
Digital 8•Bus
2. Begin setting rough mixes. These may
include send levels to tape, monitoring
levels from tape, aux send levels, and
EQ and effects settings.
3. Once the desired settings have been
made, click on Edit in the upper-left
side of the box and select “New
Snapshot” in the drop-down menu. A
new snapshot is created using the first
unused number. You can give the
snapshot a new name by doubleclicking on the name and typing in the
characters.
4. There are a number of other options
available in the Edit menu for deleting
snapshots, renumbering (in sequential
numerical order, beginning with 1),
changing and storing a snapshot, and
locking and unlocking a snapshot.
5. Click on the Close button in the upper
right corner of the dialog box to
remove the Snapshots dialog box from
the screen (or click on the Snapshot
button in the menu bar, or press Ctrl-3
on the keyboard).
Recalling Snapshots
TO RECALL SNAPSHOTS
RANGE
POSITION
HOURS
MINUTES
SECONDS
FRAMES
BEATS
TICKS
FROM
TO
From the console:
1. Press the SNAPSHOT button in the
Transport Section, if it’s not already
selected.
SET TIME
BARS
SMPTE VIEW
LOOP
1
2
3
4
5
6
7
8
9
0
ENTER
LOOP
STORE
LOCATOR
SNAPSHOT
MODE
REWIND
FAST FWD
STOP
PLAY
RECORD
SHUTTLE
JOG & SHUTTLE
5-12
Preparing for a Session
2. Type in the two-digit snapshot number
you want to recall using the number
buttons. The number appears in the
RANGE display.
3. Press the ENTER button. The console
updates to indicate the selected
snapshot. If you’re recording an
automation pass, the snapshot data
will be written to the current session.
From the screen:
1. Click on the Snapshot menu button in
the lower menu bar. The Snapshots
dialog box appears.
2. Double-click on the snapshot number
(in the gray area) you want to recall
from the list of available snapshots.
The console updates to indicate the
selected snapshot. If you’re recording
an automation pass, the snapshot data
will be written to the current session.
Owner’s Manual
TO RECALL SNAPSHOTS
3. Click on the Close button in the upperright corner of the dialog box to remove
the Snapshots dialog box from the
screen (or click on the Snapshot button
in the menu bar, or press Ctrl-3 on the
keyboard).
Creating Locate Points
TO CREATE LOCATE POINTS
RANGE
POSITION
HOURS
MINUTES
SECONDS
FRAMES
FROM
TO
From the console:
1. Press the LOCATOR button in the
Transport Section.
SET TIME
BARS
SMPTE VIEW
BEATS
TICKS
LOOP
1
2
3
4
5
6
7
8
9
0
ENTER
LOOP
STORE
LOCATOR
SNAPSHOT
REWIND
FAST FWD
STOP
PLAY
MODE
RECORD
SHUTTLE
JOG & SHUTTLE
2. Set the desired SMPTE/BBT time
where the locate point should be.
• Press the SMPTE VIEW button next
to the POSITION display if you are
working in SMPTE time, otherwise the
display will be in Bars:Beats:Ticks.
• Press the SET TIME button. The
SET TIME and ENTER LEDs start
blinking.
• Enter the desired time using the
number buttons.
• Press ENTER. The SET TIME LED
turns off and an MMC command is sent
to advance the tape to the new time.
3. Press the STORE button. The STORE
LED lights, and the ENTER button
begins blinking.
4. Enter a two-digit number using the
number buttons to identify the locate
point. The number appears in the
RANGE display.
Preparing for a Session
5-13
Digital 8•Bus
MINUTES
Note: If you enter a number that is already
used, you will overwrite the previous
locate time with the new one.
RANGE
POSITION
HOURS
SECONDS
FRAMES
BEATS
TICKS
FROM
TO
SET TIME
BARS
SMPTE VIEW
LOOP
1
2
3
4
5
6
7
8
9
0
ENTER
LOOP
STORE
LOCATOR
SNAPSHOT
MODE
REWIND
FAST FWD
STOP
PLAY
RECORD
SHUTTLE
JOG & SHUTTLE
5. Press the ENTER button. The Fat
Channel Display indicates that the
locate point has been stored.
You can store a locate point on the fly:
• Roll the tape.
• With LOCATOR selected in the
Transport Section, press the STORE
button.
• Enter a two-digit number to identify
the locate point.
• Press the ENTER button at the point
in time you want to store the locate.
TO CREATE LOCATE POINTS
From the screen:
1. Click on the Locator button in the
lower menu bar. The Transport
window appears in the screen.
2. Click on the time display to enter a
new time using the keyboard. Tab-left
or Shift-Tab-right to navigate in the
display.
3. Click on the “New” button at the
bottom of the Transport window. A
new locate point appears in the cue
list using the first unused number.
Note: You must Tab out of the display in
order for the New button to work.
4. You can change the name of the locate
point to something more useful, like
“First Verse.” Double-click on the
Untitled name to highlight it, and type
in the new name using the keyboard.
At the bottom of the Transport window
are three more buttons for managing
locate points.
• To delete a locate point, click on the
name of the locate point to highlight it,
and then click on the “Delete” button.
• To renumber the locate points, click on
the “Renum” button. The stored locate
points are re-ordered chronologically
according to SMPTE times. Note that
some of the locate numbers may
change.
5-14
Preparing for a Session
You can store a locate point on the fly:
• Roll the tape.
• With the Transport window open, click
on the “New” button at the point in time
you want to store the locate. A new
locate point appears in the cue list using
the first unused number.
Note: The name of the most recent locate
point appears as the Title in the Transport
window.
Owner’s Manual
• To change a locate point to a new time,
highlight the locate point, enter the new
time in the time display and click on the
“Store” button.
Recalling Locate Points
TO RECALL LOCATE POINTS
RANGE
POSITION
HOURS
MINUTES
SECONDS
FRAMES
BEATS
TICKS
FROM
TO
From the console:
1. Press the LOCATOR button in the
Transport Section.
SET TIME
BARS
SMPTE VIEW
LOOP
1
2
3
4
5
6
7
8
9
0
ENTER
LOOP
STORE
LOCATOR
SNAPSHOT
MODE
REWIND
FAST FWD
STOP
PLAY
RECORD
SHUTTLE
JOG & SHUTTLE
2. Use the number buttons to enter the
desired two-digit locate number. The
number appears in the RANGE display.
3. Press the ENTER button. The
POSITION display updates according
to the new locate point, and a
corresponding MMC locate message is
sent out the MIDI port to the
recorder(s).
TO RECALL LOCATE POINTS
From the screen:
1. Click on the Locator menu button in
the lower menu bar. The Transport
window appears in the screen.
2. Double-click on the desired locate
point’s number, in the gray area.
3. The console updates according to the
new locate point, and a corresponding
MMC locate message is sent out the
MIDI port to the recorder(s).
Preparing for a Session
5-15
Digital 8•Bus
Looping Between Two Locate
Points
TO LOOP BETWEEN TWO LOCATE POINTS
RANGE
POSITION
HOURS
MINUTES
SECONDS
FRAMES
FROM
TO
From the console:
1. Create locate points at the starting
point and ending point of the desired
loop, as described previously.
SET TIME
BARS
SMPTE VIEW
BEATS
TICKS
LOOP
1
2
3
4
5
6
7
8
9
0
ENTER
LOOP
STORE
LOCATOR
SNAPSHOT
MODE
REWIND
FAST FWD
STOP
PLAY
2. Use the number buttons to type in the
two-digit locate number for the
starting point, and then press ENTER.
The number appears under FROM in
the RANGE display.
RECORD
SHUTTLE
JOG & SHUTTLE
JOG
3. Press the LOOP button in the
Transport Section. Use the number
buttons to type in the two-digit locate
number for the ending point, and then
press ENTER. The number appears
under TO in the RANGE display.
4. Press the PLAY button in the
Transport Section. The recorder(s) will
play the section from the starting
point to the ending point, and will
continually repeat between these two
points until the STOP button is
pressed.
Note: Pressing PLAY when the POSITION
display indicates a time before the first
Loop point causes the transport to play
through to the second Loop point and then
begin repeating from then on. Pressing
play when the POSITION display indicates
a time after the second Loop point simply
causes the transport to play through to the
end of the tape/hard disk, etc. No looping
will occur.
TO LOOP BETWEEN TWO LOCATE POINTS
From the screen:
This function is only available from the
console.
5-16
Preparing for a Session
The Clipboard lets you perform the
common editing functions you’ll find in
most computer programs. You can use
these editing functions to copy the settings
from one channel to another or to copy and
paste automation information.
Cutting
TO MAKE A CUT
CLIPBOARD
CUT/ZERO SET
COPY
PASTE
UNDO
From the console:
1. Press the SELECT button on the
channel you want to edit.
Owner’s Manual
Clipboard
2. Press the CUT/ZERO SET button in
the Clipboard Section and the Cut
menu appears in the display.
D8B
Cut
(zero)
56 INPUT / 72 CHANNEL DIGITAL MIXER
selected
Cancel
"Channel"
Cut Mix
Cut
3. Press the SELECT button below “Cut
Mix” to move all automation events for
the selected channel to the clipboard
memory.
4. Select “Cut” to move the static settings
for the selected channel to the
clipboard memory. The channel then
reverts to the default (zero) state.
TO MAKE A CUT
From the screen:
1. Click on the SELECT button on the
channel you want to edit.
2. Click on “Edit” in the upper menu bar
and select “Cut Moves” from the dropdown menu to move all automation
events for the selected channel to the
clipboard memory (or press Ctrl-X on
the keyboard).
3. Select “Cut Channels” to move the
static settings for the selected channel
to the clipboard memory. The channel
then reverts to the default (zero) state.
Preparing for a Session
5-17
Digital 8•Bus
Copying
TO MAKE A COPY
CLIPBOARD
CUT/ZERO SET
COPY
PASTE
UNDO
D8B
Copy
From the console:
1. Press the SELECT button on the
channel you want to edit.
2. Press the COPY button in the
Clipboard Section and the Copy menu
appears in the display.
56 INPUT / 72 CHANNEL DIGITAL MIXER
selected "Channel"
Cancel
Copy
Mix
Copy
3. Press the SELECT button below “Copy
Mix” to copy all automation events for
the selected channel to the clipboard
memory. The automation events for
the channel remain in place.
4. Select “Copy” to copy the static
settings for the selected channel to the
clipboard memory. The channel retains
its settings.
TO MAKE A COPY
From the screen:
1. Click on the SELECT button on the
channel you want to edit.
2. Click on “Edit” in the upper menu bar
and select “Copy Moves” from the
drop-down menu to copy all
automation events for the selected
channel to the clipboard memory (or
press Ctrl-C on the keyboard). The
automation events for the channel
remain in place.
3. Select “Copy Channels” to copy the
static settings for the selected channel
to the clipboard memory. The channel
retains its settings.
Pasting
TO PASTE
CLIPBOARD
5-18
Preparing for a Session
CUT/ZERO SET
COPY
PASTE
UNDO
From the console:
1. Press the SELECT button on the
channel you want to edit.
2. Press the PASTE button in the
Clipboard Section and the Paste menu
appears in the display.
56 INPUT / 72 CHANNEL DIGITAL MIXER
PASTE:Channel
TO:Channel
over selections.
Cancel
Paste
3. Press the SELECT button below Paste
in the display. The automation events
or the static settings for the selected
channel are replaced by those stored in
the clipboard memory.
TO PASTE
From the screen:
1. Click on the SELECT button on the
channel you want to edit.
2. Click on “Edit” in the upper menu bar
and select “Paste All” (or “Paste
Channels,” depending on the last
clipboard operation) from the dropdown menu (or press Ctrl-V on the
keyboard). The automation events or
the static settings for the selected
channel are replaced by those stored in
the clipboard memory.
Owner’s Manual
D8B
Undoing
TO UNDO
CLIPBOARD
CUT/ZERO SET
COPY
PASTE
UNDO
D8B
Undo-ing
last
56 INPUT / 72 CHANNEL DIGITAL MIXER
clipboard
operation...
From the console:
1. Press the UNDO button to delete the
last edit command that was performed
and return the settings to their
previous state.
2. Press the UNDO button again to redo
the last edit command that was
performed and return the settings to
the edited state (undo the undo).
TO UNDO
From the screen:
1. Click on “Edit” in the upper menu bar
and select “Undo Cut Channels” (this
may display differently depending on
the last clipboard operation) from the
drop-down menu (or press Ctrl-Z on the
keyboard) to undo the last edit command
that was performed and return the
settings to their previous state.
2. Select “Undo” again to redo the last
edit command that was performed and
return the settings to the edited state
(undo the undo).
Preparing for a Session
5-19
Digital 8•Bus
5-20
Preparing for a Session
In this section we’ll see what it’s like to actually use the Digital 8•Bus in three of the
most common applications. First we’ll look at
recording from the standpoint of tracking —
how to create individual tracks on your multitrack recorder, bouncing down tracks to free up
more room for tracking, and setting up cue
mixes for the performers. Next we’ll look at
mixing down those tracks with effects to create
a two-track master. Then we’ll take a look at
the unique requirements of live mixing. To finish
up, we’ll take a look at automation and what
you can do with it.
Recording/Tracking
The recording process can be as simple as
one microphone recorded to one track, or as
complex as 24 tracks (or more with cascaded
consoles) recorded simultaneously, composed
of a number of microphones, instruments, and
submixes fed direct-out to tracks, and each
submix composed of a number of microphones
and instruments. Whew. Most sessions fall
somewhere in between. Refer to the “Recording—Tracking Hookup Diagram” at the end of
Chapter 6 while reading this section.
Setup
We’ll assume that you’ve already connected
your multitrack recorder(s) to the Digital
8•Bus. If you haven’t, refer to Chapter 4,
“Making the Connections.”
Okay, now we’ll get ready for your session.
Make a diagram of your studio setup showing
mic positioning, keyboards, and other line-level
input sources. Then assign an input source to
each mic and line-level input.
Clarifying your mic/line-to-input layout now
will avoid confusion later. Group similar instruments together. If there is a left-to-right
pattern to the mics (like drum mics or a vocal
group), keep the same left-to-right sequence on
the console. Plan your basic track assignments
the same way. It’s very confusing to have inputs randomly strewn across a mixing console.
Now, normal your console (also called “zeroing”). This means checking the position of
every switch and knob to be sure they’re in the
normal position. Your normal may be different
from someone else’s (isn’t that always the
case!), but generally it means all switches off
or up, and all knobs either all the way down or
at their unity setting. This can be accomplished
quite easily with the Digital 8•Bus by recalling
Snapshot 00, or any other snapshot you may
have reserved for your own normal settings.
There are two strips provided for labeling
channels. Lay a piece of 1/2" or 3/4" white paper tape between the meters and the analog
TRIM controls and label your inputs for tracking. Do the same across the bottom of the
faders and label all your tape returns for
mixdown. (By the way, avoid using masking
tape. It will muck up your console. Take the
time to go to an art supply store or a recording
supply store and get some better-quality “low
tack” tape.)
If you’re using a video monitor connected to
the VIDEO port on the Remote CPU, locate the
monitor just behind the console. This way you
can easily refer to either the console or the
screen to see the current settings on the Digital
8•Bus.
Also, there is a scribble strip located just
above the faders in the monitor screen. You can
use this to label your channels with up to five
alpha-numeric characters, so you don’t have to
stick tape on your monitor screen!
After you’ve connected all the inputs, follow
this input sensitivity adjustment procedure for
each and every input.
TRIM
LINE
MIC
0
-20dB
MIC
REC/RDY
ASSIGN
WRITE
12
36
SELECT
Input Sensitivity Adjustment Procedure for
Channels 1–24
SOLO
(–15 dB FS on the meter is equivalent to
+5 dBu analog)
The input sensitivity adjustment procedure is
similar to that of an analog mixing console because the input section for channels 1–24 is the
same as on most analog large-format consoles.
FOLLOW THIS SENSITIVITY ADJUSTMENT
PROCEDURE FOR EACH CHANNEL IN USE
(Channels 1–24):
1. If you’re starting from scratch, it’s a good
idea to normal the console (also called
“zeroing”) to some starting point, such as
all level controls down, and EQ and pan
controls centered. Snapshot 00 is preprogrammed with our default factory
settings — our version of a “normalled”
console. You can reprogram Snapshot 00
so that it resets the console to your
preferred “normal state,” or keep the
factory default settings and save your own
settings to another snapshot (Snapshot 01,
for example). See “Creating and Storing
Snapshots” in Chapter 5.
60
+40dB
12
Owner’s Manual
6. Starting a New Session
MUTE
MIDI 4
FX 12
12
36
dB
10
5
U
5
10
20
30
40
50
60
Starting a New Session
6-1
Digital 8•Bus
2. Connect a signal to a channel.
• If the channel is used with a microphone,
the MIC switch should be down.
• If the channel is used with a line input, the
MIC switch should be up.
6. Press the PFL SOLO switch in the Studio/
Solo Section. In this mode, the faders do not
affect the solo level at the Control Room
output.
3. Connect the Control Room output to your
control room amplifier/speaker combination,
so you can monitor the signal.
STUDIO/SOLO
MIXDOWN SOLO
CLEAR SOLO
RUDE SOLO
LIGHT
MASTER OUT
L R
CR
MAIN
L R
TRIM
PFL SOLO
SOLO LEVEL
AFL SOLO
STUDIO LEVEL
TALKBACK LEVEL
TALKBACK TO
STUDIO
LEVEL
LINE
MIC
0
-20dB
CR
NEAR FIELD
L R
60
+40dB
12
7. Press the channel SOLO button. The LED in
the button lights.
MIC
REC/RDY
ASSIGN
WRITE
12
36
4. Select Fader Bank 1 by pressing the
MIC/LINE (1–24) button.
MASTERS
SHIFT
1-24
25-48
SELECT
SOLO
MIC/LINE
TAPE IN
(TRACK)
(MONITOR)
MUTE
49-72
MIDI 4
8. Make appropriate “noise” into the channel input. For example, have a performer play/sing/
strike something or someone, etc. at the level
they’re going to record or perform. Don’t just
play a single sustained note, but rather, jam
away as you would during a recording or performance. If the channel is being used for a
tape input during mixdown, roll an alreadyrecorded track from your recorder.
9. Adjust the TRIM control. The goal is to get
the channel meter reading at or around –15.
The peaks should regularly hit, and occasionally exceed, the –15 designation on the
meter. This is equivalent to a +4 dBu analog
level, and provides plenty of headroom for
transient peaks before reaching 0 dB FS.
EFFECTS
FX 12
BANK SELECT
12
36
12
2
4
7
10
15
20
25
30
35
40
50
dB
10
5
U
5
10
20
30
40
50
60
6-2
13
OL
5. Set the channel strip controls as follows:
• TRIM controls all the way counterclockwise (–20 dB).
• All the faders to their “U” (unity) markings,
including the MASTER L-R.
• There is a Digital Trim control located just
after the A/D converter in the channel signal
path. This defaults to unity gain, which is
where you would normally leave it. See “Adjusting the Digital Trim” on page 6-6 to see
how to adjust it.
Starting a New Session
36
37
To monitor the signal, press SOLO LEVEL in
the Studio/Solo Section and adjust the
LEVEL V-Pot. Make sure the SPEAKER
LEVEL V-Pot in the Control Room Section is
turned up.
11. Repeat steps 4–9 on the next channel that is
being used.
12. Once you’ve achieved a rough mix using this
method, clear all soloed channels and monitor
the mix in the Control Room outputs (with all
channels assigned to the L-R bus, and L-R selected as the Control Room source) or the
Main L-R Output, and use the channel faders
to adjust individual levels. Leave the TRIM
controls alone. This will give you the best signal-to-noise ratio in your mix.
Note: If you use the built-in compressor on any
channels, you can get away with turning the
TRIM control up a little higher, since the compressor will reduce the chance of transient peaks
reaching digital clipping (see “Using The Compressor” on page 6-38).
Using the Channel V-Pots
These are non-detented pots with no stop
(range >360 degrees), and a 12-segment LED
indicator collar. Each V-Pot controls a single
function at a time on its given channel, globally
chosen and applying to all channels. The default
assignment is Pan, which can be selected with
the PAN button in the Master V-Pot Section.
Other assignment options include eight mono
and two stereo aux sends (located in the V-Pot
Select Section), Digital Trim for each of the 48
channels, and tape send level for the Tape Outputs.
When Pan is selected in the Master V-Pot
Section, the LED pattern around the V-Pot
indicates the relative panoramic position of the
channel between the left and right buses. When
the Pan control is set to exact center, an LED
located at the 6 o’clock position lights.
Owner’s Manual
10. If desired, press the channel’s SELECT button and adjust the EQ in the Fat Channel (see
page 6-28). You may need to readjust the
channel’s TRIM control after changing the
EQ setting.
Note: The Pan function does not apply to Fader
Bank 4. The MIDI Controllers’ Pan control
works as a continuous controller.
When an aux send is selected, the channel
V-Pot controls the aux send level for its respective channel, and the Master V-Pot, located at
the right end of the V-Strip, controls the summed
aux send level of all the channels assigned to it.
The aux send level LED pattern wraps clockwise from 7 o’clock (full off = –∞ dB) to 5 o’clock
(full on = +10 dB). Unity gain is at 2 o’clock.
Adjusting the Channel PAN Control
TO ADJUST THE CHANNEL PAN CONTROL
AUX 9-10
AUX 11-12
PAN
PAN
MASTER
SOLO
PAN
From the console:
1. Press the PAN button below the
MASTER V-Pot. The Master V-Pot
becomes disabled, and the channel
V-Pots become pan controls.
2. Rotate the channel V-Pot to the right to
position the signal right of center, and
rotate it to the left to position the signal to the left of center. The ring of
LEDs around the V-Pot indicates the
relative position setting of the control.
When the V-Pot is centered, the small
LED at the bottom of the V-Pot lights.
12
36
SELECT
Starting a New Session
6-3
Digital 8•Bus
TO ADJUST THE CHANNEL PAN CONTROL
From the screen:
1. Click on the PAN button below the
MASTER V-Pot. The Master V-Pot becomes disabled, and the channel
V-Pots become pan controls.
2. Click and hold on the channel V-Pot,
and move the mouse left and right (or
up and down) to pan the signal to the
left and right. The box below the V-Pot
indicates the pan position numerically,
from zero at center to 127L and 126R.
When an AUX button is pressed in the
V-Pot Select Section, the channel V-Pots
adjust the selected Aux Send level.
Note: The Aux Send function does not apply to Fader Deck 4. When Fader Deck 3 is
selected, the Aux Sends associated with
each FX Return are locked out to prevent
feedback loops. For example, if Aux 2 is
selected in the V-Pot Select Section, the
Aux Send control on FX 3 and 4 are disabled.
Adjusting the Aux Send Levels
TO ADJUST THE AUX SEND LEVELS
1-24
1-48
LEVEL TO TAPE
DIGITAL TRIM
AUX 1
AUX 2
AUX 3
AUX 4
AUX 5
AUX 6
AUX 7
AUX 8
12
36
SELECT
6-4
Starting a New Session
From the console:
1. Press one of the AUX buttons in the
V-Pot Select Section. The Master
V-Pot becomes the Master Aux Send
Level control for the selected aux bus,
and the channel V-Pots become the
channel aux send Level controls.
2. Rotate the channel V-Pot to the right
to increase the signal in the selected
aux bus, and to the left to reduce the
amount of signal in the selected Aux
bus. The ring of LEDs around the
V-Pot indicates the relative position
setting of the control.
MASTER
PAN
SOLO
TO ADJUST THE AUX SEND LEVELS
From the screen:
1. Click on one of the AUX buttons above
the MASTER V-Pot. The Master V-Pot
becomes the Master Aux Send Level
control for the selected aux bus, and
the channel V-Pots become the channel
Aux Send Level controls.
Owner’s Manual
3. Rotate the Master V-Pot to the right to
adjust the overall Aux Out level for the
selected aux bus.
2. Click and hold on the channel V-Pot,
and move the mouse up or to the right
to increase the signal in the selected
aux bus, and down or left to reduce the
amount of signal in the selected Aux
bus. The box below the V-Pot indicates
the Aux level numerically, from OFF to
+10, with “0” representing unity gain.
The Aux levels are also indicated as
bar graphs just above the EQ section
on each channel.
3. Click and hold the Master V-Pot and
move the mouse up and down to adjust
the overall Aux Out level for the selected aux bus.
The Master L-R meters can indicate the
overall aux send level if you press the
SOLO button in the Master V-Pot Section.
Mono master aux sends (1–8) are indicated
equally on the Master L-R meters, and
stereo Aux Master aux sends 9–10 and
11–12 are indicated in stereo on the Master
L-R meters.
Note: You can also click and hold on any
auxiliary bar (level or pan) and drag to set
levels. Clicking and holding the right mouse
button while dragging across the screen
will set adjacent channels (auxes) to the
same levels as the original clicked (aux) level.
Starting a New Session
6-5
Digital 8•Bus
Adjusting the Digital Trim
When DIGITAL TRIM is pressed, the channel
V-Pots for channels 1–48 adjust the signal level
post-A/D converter and pre-DSP. For channels
25–48 (Tape Inputs), this may serve as an input
trim control.
The Digital Trim LED pattern wraps
clockwise from 7 o’clock (minimum = off)
to 5 o’clock (maximum = +10 dB). Unity
gain is at 2 o’clock.
TO ADJUST THE DIGITAL TRIM
1-24
1-48
LEVEL TO TAPE
DIGITAL TRIM
AUX 1
AUX 2
AUX 3
AUX 4
AUX 5
AUX 6
AUX 7
AUX 8
12
36
SELECT
From the console:
1. Press the DIGITAL TRIM button at
the top of the V-Pot Select Section.
The Master V-Pot becomes disabled,
and the channel V-Pots become digital
trim controls (active in Fader Banks 1
and 2 only).
2. Rotate the channel V-Pot to the right
to increase the input level. The ring of
LEDs around the V-Pot indicates the
relative position setting of the control.
TO ADJUST THE DIGITAL TRIM
From the screen:
1. Click on the DIGITAL TRIM button
near the top of the Master Section (on
the upper right side of the screen).
The Master V-Pot becomes disabled,
and the channel V-Pots become digital
trim controls (active in Fader Banks 1
and 2 only).
2. Click and hold on the channel V-Pot,
and move the mouse up to increase
the input level, and down to decrease
the level. The box below the V-Pot
indicates the trim level numerically,
from OFF to +10, with “0.00”
representing unity gain.
3. Alternatively, click and drag on the
“D” bar in the OUT box near the top of
the channel strip to increase and decrease the digital trim level.
6-6
Starting a New Session
The Tape Outputs are post-DSP, pre-fader
signals from each channel assigned to a Tape
Output. When LEVEL TO TAPE is pressed, the
channel V-Pots become send levels (To Tape) for
channels 1–48. This is useful for matching the
tape send levels to the optimum input level for
your recording devices. The Tape Send level LED
pattern wraps clockwise from 7 o’clock (full off =
–∞ dB) to 5 o’clock (full on = +10 dB). Unity gain
is at 2 o’clock.
Note: The LEVEL TO TAPE control corresponds to the Tape Out assignment. For
example, if channel 1 is assigned to Tape
Out 9, turn the V-Pot on channel 9 to adjust
the Level to Tape Out 9. The V-Pot “Level
to Tape” assignment is independent of the
D8B fader bank assignment.
TO ADJUST THE LEVEL TO TAPE
1-24
1-48
LEVEL TO TAPE
DIGITAL TRIM
AUX 1
AUX 2
AUX 3
AUX 4
AUX 5
AUX 6
AUX 7
AUX 8
Owner’s Manual
Adjusting the Level to Tape
From the console:
1. Press the LEVEL TO TAPE button at
the top of the V-Pot Select Section. The
Master V-Pot becomes disabled, and
the channel V-Pots become level to
tape controls.
2. Rotate the channel V-Pot to the right to
increase the input level. The ring of
LEDs around the V-Pot indicates the
relative setting of the control.
TO ADJUST THE LEVEL TO TAPE
From the screen:
1. Click on the TRACKING LEVEL button
near the top of the Master Section (on
the upper right side of the screen). The
Master V-Pot becomes disabled, and
the channel V-Pots become level to
tape controls.
2. Click and hold on the channel V-Pot,
and move the mouse up to increase the
input level, and down to decrease the
level. The box below the V-Pot indicates the trim level numerically, from
OFF to +10, with “0” = unity gain.
3. Alternatively, click and drag on the “T”
bar in the OUT box near the top of the
channel strip to increase and decrease
the level to tape.
Starting a New Session
6-7
Digital 8•Bus
Routing Mixer Channels to Tape Outputs and Buses
If you have only one source going to one tape
track, you’ll simply assign the source to a Tape
Output. If you have to combine two or more inputs onto one or two tracks (two trumpets on one
track, five drum mics panned across a pair of
tracks), you must assign the inputs to a common
bus or pair of buses, because you can’t assign
more than one channel to a Tape Out.
Why you’d use a direct tape out:
• You want to have a single voice or instrument
on one track for later mixdown.
• You’ve already assigned all eight of your buses
to other duties.
Why you’d use a bus:
• You want to economize tracks by combining
several microphones onto a single track.
• It’s there, it’s easy, it sounds great.
• You want to help reduce single-occupancyvehicles (SOVs) on the road by using the bus.
Assigning Channels to a Tape Output
The tape out assignment defaults to off; that
is, no channels are assigned to the tape outputs.
You can assign a channel to any tape output by
using the ASSIGN button along with the ROUTE
TO TAPE button in the Assignment Section.
There are 24 direct Tape Outputs. Any of the 48
channels can be assigned to a tape out. In addition, the
16 internal Effects Returns, the 8 ALT Returns, and
the BUS OUT 1–8 can be assigned to a tape out.
Note: You can assign only one channel to a direct
tape output. Similarly, you can’t assign a channel
to more than one tape out.
Adjusting for Nominal Input and Output Levels
Refer to the “Input Sensitivity Adjustment
Procedure” on page 6–1 to properly set the
TRIM controls on channels 1–24.
Now we’ll concentrate on getting the optimum
signal level from the Digital 8•Bus to the recorder.
This is actually a simple procedure from the
Digital 8•Bus’ point of view. The signal going to
tape is pre-fader, so the fader levels won’t affect
the signal going to tape.
The channel V-Pots can be configured as Tape
Send level controls. Just press the LEVEL TO
TAPE button and use the channel V-Pots to
adjust the signal level as it appears in your
recorder’s meter. You should refer to your
recorder’s instruction manual at this point and
review their recommendations on setting input
levels for recording. Generally, you will want to
keep the channel fader close to the “U” designation, which provides a +4 dBu output from the
Digital 8•Bus to the recorder (if you’ve followed
the Input Sensitivity Adjustment Procedure).
TO ASSIGN CHANNELS TO TAPE OUTPUTS
ASSIGNMENT
6-8
ASSIGN
ASSIGN
BUS 1
BUS 2
ASSIGN
ASSIGN
BUS 3
BUS 4
ASSIGN
ASSIGN
BUS 5
BUS 6
ASSIGN
ASSIGN
BUS 7
BUS 8
ASSIGN
ASSIGN
L-R
ROUTE TO
TAPE
Starting a New Session
REC/RDY
REC/RDY
ASSIGN
ASSIGN
WRITE
WRITE
From the console:
1. Press the ROUTE TO TAPE button in
the Bus Assignment Section.
2. Press the SELECT button on the channel you want to route to tape. This
could be any of the channels 1–24 on
Bank 1, channels 25–48 on Bank 2,
FX Returns on Bank 3, or BUS 1–8 on
Bank 4.
12
36
13
37
SELECT
SELECT
SOLO
SOLO
3. Press the ASSIGN button on the channel whose TAPE OUT you want to
route to the selected channel. It is not
necessary to change banks when
pressing the ASSIGN button. Since
there are only 24 Tape Outputs (and
24 ASSIGN buttons), the console
knows which Tape Output you are assigning the selected channel to.
From the screen:
Tape out assignment is made with the
OUT box at the top of each channel
strip.
1. In the OUT box at the top of the channel strip, a hyphen indicates that the
channel is not assigned to a direct out.
Click and hold in the OUT box and a
drop-down menu appears. Select the direct out you want by dragging down
the menu until the channel you want is
highlighted, then release the mouse to
select it. The number will appear in the
OUT box. Select OFF to disconnect the
channel from a direct out, and select
RESET ALL to clear all the channels
to OFF.
Owner’s Manual
TO ASSIGN CHANNELS TO TAPE OUTPUTS
Assigning Channels to a Bus Output
If you assign a channel to an odd/even
pair of buses (i.e., Buses 1 and 2, Buses 3
and 4, etc.), the channel pan control pans
the signal between the two buses.
Note: The Bus Assignment Section is disabled on Group Master & MIDI faders
(1–16) when Fader Bank 4 is selected.
TO ASSIGN CHANNELS TO BUS OUTPUTS
ASSIGNMENT
ASSIGN
ASSIGN
BUS 1
BUS 2
ASSIGN
ASSIGN
BUS 3
BUS 4
ASSIGN
ASSIGN
BUS 5
BUS 6
ASSIGN
ASSIGN
BUS 7
BUS 8
ASSIGN
ASSIGN
L-R
ROUTE TO
TAPE
REC/RDY
ASSIGN
WRITE
13
37
From the console:
1. Press a BUS button in the Bus Assignment Section. The ASSIGN button
lights on all channels that are already
assigned to the selected bus.
2. Press the ASSIGN button on any channel to assign it to the selected bus. You
can change Fader Banks to assign
channels from different banks to the
selected bus. Press the ASSIGN button
again to remove it from the selected
bus (the ASSIGN LED turns off).
Starting a New Session
6-9
Digital 8•Bus
TO ASSIGN CHANNELS TO BUS OUTPUTS
From the screen:
1. Click on the appropriate button above
the Master Fader to select the fader
deck containing the channel you want
to assign.
2. Click on the bus assignment numbers
at the top of the channel strip to assign the channel to one of the eight
buses. You can select the L-R buses
here, too. The selected bus numbers
light when selected.
3. You can click and hold on a bus assignment button, and sweep across
adjacent channels to assign the selected bus to multiple channels. You
can repeat this step to remove channels from a bus.
See Chapter 8, “Advanced Functions,” to learn how to create groups using the ASSIGN button.
Arming External Recorders from the Console
If your MDM/DAW has MIDI Machine Control
(MMC) capabilities, connect a MIDI cable between the MIDI Out on the Remote CPU and the
MIDI timecode interface as described in the MIDI
Connections section in Chapter 4. You can control
the transport mechanisms with the transport buttons on the console surface. Transport MMC
control messages (like Stop, Play, etc.) from the
Digital 8•Bus are sent as “ALL CALL” to any device in your studio setup.
The channel strip REC/RDY buttons are active
regardless of the selected fader bank on the D8B.
These switches are specifically mapped to the
MIDI’s according to the setup “MIDI Device
ID”assignment. They send out an MMC command when pressed that arms the corresponding
track for recording.
The following is a summary of REC/RDY LED
activity:
1. The LED will not light if REC/RDY is not engaged.
2. The LED flashes whether tape is rolling or not
when channel REC/RDY is enabled and the
Master RECORD is not enabled.
3. The LED lights continuously when tape is rolling, the channel REC/RDY is enabled, and the
Master RECORD is enabled. Audio is being recorded.
TO ARM CHANNELS FOR RECORDING
TRIM
LINE
MIC
0
-20dB
60
+40dB
9
MIC
REC/RDY
6-10
Starting a New Session
From the console:
1. Press the REC/RDY button for each Tape
Output you want to arm for recording. The
red LED in the button flashes.
REWIND
FAST FWD
STOP
PLAY
RECORD
SHUTTLE
JOG & SHUTTLE
The REC/RDY button
corresponds to the Tape
Out assignment. For example, if you’ve routed
Channel 1 to Tape Out
9, press the REC/RDY
button on Channel 9 to record the signal
on Channel 1 to Track 9.
2. Press the Master RECORD button in
the Transport Section. The red LED in
the button lights steadily, and all the
REC/RDY button LEDs also light
steadily. The MDM/DAW goes into
Record Pause mode.
3. Press the PLAY button. The green LED
in the PLAY button lights and the tape
deck/DAW begins to record. The timecode display should begin counting.
Owner’s Manual
Note: The Master Record button in the transport section performs double duty as a dynamic automation
Master Write button. The function of the button is determined by whether the Write buttons in the channel
strips are engaged (Write standby), or if the Rec/Rdy
buttons are engaged (Record standby). Make a note of
which mode you are in, Write or Record.
TO ARM CHANNELS FOR RECORDING
From the screen:
1. Click on the REC/RDY button for each
Tape Out you want to record. The red
LED in the button flashes.
The REC/RDY button
corresponds to the
Tape Out assignment. If
you’ve routed Channel
1 to Tape Out 9, click
on the REC/RDY button on Channel 9 to record the signal
on Channel 1 to Track 9.
2. Click on the Locator button in the
lower menu to open the Locator window.
3. Click on the Master REC button in the
Locator window. The red LED in the
Master RECORD button on the console
lights steadily, and all the REC/RDY
button LEDs also light steadily. The
tape deck/DAW goes into Record
Pause mode.
Note: Depending on the MDM model,
pressing the Record switch may start the
deck in record mode. Usually, Play and
Record are both pressed together.
4. Click on the PLAY button. The green
LED in the PLAY button lights and the
tape deck/DAW begins to record. The
timecode display in the Locator window
and on the console should begin counting.
Starting a New Session
6-11
Digital 8•Bus
Adding EQ, Dynamics and Effects to Input
Signals
As a general rule, you want to minimize your
use of EQ and effects when recording on your
multitrack master. That said, there are occasions
when you will want to use them, particularly the
dynamics processors (compressor and gate).
Due to the tremendous power of the Digital
8•Bus, you can assign compression and gating to
any channel, with two individual settings for each
channel. This can save you the cost of a rack-full
of external compressors and gate processors.
Refer to “Adding EQ, Dynamics, and Effects to
Tape Returns” on page 6-28 for details on how to
use these functions.
Monitoring in the Control Room
The most straightforward way to monitor during a recording or overdubbing session is by
listening to the output of the recorder, played
through channels 25–48 and assigned to the L-R
bus. Properly configured, your recorder will automatically switch between source and playback as
you put the deck into stop, play, fast wind, record
and so on. That way, you’re always hearing the
instruments after they travel through the multitrack deck, regardless of whether or not the tape
is rolling.
This method allows you to set up a custom
mix of the tape tracks, independent of your recording levels. You can independently adjust the
level, pan, reverb and even EQ in your monitor
mix while you record. You can even patch the
L-R outputs into a 2-track recorder for a rough
mix of the session.
TO MONITOR IN THE CONTROL ROOM
ASSIGNMENT
SHIFT
MASTERS
1-24
25-48
MIC/LINE
TAPE IN
(TRACK)
(MONITOR)
49-72
EFFECTS
ASSIGN
ASSIGN
BUS 1
BUS 2
ASSIGN
ASSIGN
BUS 3
BUS 4
ASSIGN
ASSIGN
BUS 5
BUS 6
ASSIGN
ASSIGN
BUS 7
BUS 8
ASSIGN
ASSIGN
L-R
ROUTE TO
TAPE
BANK SELECT
From the console:
1. Select Fader Bank 2 by pressing the
TAPE IN (25–48) button.
2. Press the L-R button in the Assignment Section.
3. If the channels aren’t already assigned
to the L-R bus, sweep your finger
across all the channel ASSIGN buttons to assign all the channels to the
L-R bus.
CONTROL ROOM
4. Press the MASTER L-R button in the
Control Room Source Section.
2 TRACK A
DIGITAL IN 1
2 TRACK B
DIGITAL IN 2
2 TRACK C
MASTER
L-R
MONO
NEAR FIELD
MAIN
SPEAKERS
SPEAKER LEVEL
DIM
6-12
Starting a New Session
TALKBACK
5. Turn the SPEAKER LEVEL V-Pot all
the way down.
6. Select the speakers you want to use
for monitoring by pressing their corresponding button (MAIN or NEAR
FIELD).
7. Adjust the SPEAKER LEVEL V-Pot to
a comfortable listening level.
From the screen:
1. Select Fader Bank 2 by clicking on the
TAPE button located above the Master
L-R fader.
2. If the channels aren’t already assigned
to the L-R bus, click and hold in the
L-R assignment button at the top of the
first channel strip (number 25), and
drag the mouse across all the channel
L-R buttons to assign all the channels
to the L-R bus.
Owner’s Manual
TO MONITOR IN THE CONTROL ROOM
3. Press the MASTER L-R button in the
Control Room Source Section (there is
no equivalent on the screen).
4. Turn the SPEAKER LEVEL V-Pot all
the way down.
5. Select the speakers you want to use for
monitoring by pressing the corresponding button (MAIN or NEAR FIELD).
6. Adjust the SPEAKER LEVEL V-Pot to
a comfortable listening level.
Solo
The channel Solo function places the channel’s
signal on the stereo solo bus. This signal is postfader level (AFL) and post-pan by default, but it
can be changed globally to pre-fader by pressing
the SOLO PFL button in the Studio/Solo Section
(see AFL/PFL next). Whenever a SOLO button is
engaged, the stereo solo bus is routed to the Control Room Outputs, overriding whatever signal
source is selected in the Control Room Section.
The SOLO button LED lights red when it is engaged and turns off when manually disabled. The
CLEAR SOLO button in the Studio/Solo Section
turns off all Solo buttons that are currently engaged. A global RUDE SOLO LIGHT flashes
continually whenever any solo button is engaged
on the console.
You can solo any channel or channels at any
time without affecting the Main L-R output or any
of the Direct Outs. However, if you are using the
Main Outputs for monitoring purposes, you can
select the MIXDOWN SOLO button in the Studio/
Solo Section, and the stereo solo bus is routed to
the Main Outputs as well as to the Control Room
Outputs.
In addition, you can solo any aux send by
pressing the SOLO button in the Master V-Pot
Section whenever an aux bus is selected in the
V-Pot Select Section. Solo is useful for isolating
an individual channel to troubleshoot a problem
like distortion or buzz, to adjust EQ or dynamics
parameters, or just to listen to see if a particular
mic is open or not. When soloing more than one
source, you can listen to the blend of just part of
your mix: for example, only the sopranos, or just
the tom mics on the drums.
The solo circuits are designed not to interrupt
the recording process. The solo bus signal is
sent directly to the control room monitors without affecting any of the inputs, outputs or
recording buses. The L-R Main LED ladders represent the summed signal level for the soloed
channels. When an aux send is soloed, the L-R
Main LED ladders represent the summed signal
level for the selected aux send. If a stereo aux is
soloed, the L-R Main LED ladders represent the
stereo signal of the soloed aux.
When you are mixing or monitoring with reverb, remember to not only solo the channel
you’d like to hear, but also the aux return carrying your reverb. Otherwise, you will hear the
channel soloed dry, without its echo.
Starting a New Session
6-13
Digital 8•Bus
AFL/PFL
AFL stands for After-Fader Listen, and PFL
stands for Pre-Fader Listen. The AFL SOLO
and PFL SOLO buttons in the Studio/Solo Section allow you to globally change the solo bus
from AFL (the default setting) to PFL.
Note: These buttons only affect channel soloing. They have no effect on aux soloing, which
is always post-Master V-Pot.
There are times when each are useful. For
troubleshooting purposes, PFL is usually the
preferred setting because you can have the
fader turned down and still hear the signal at
the input of the channel. For listening to the mix
of individual voices or instruments, AFL is usually the preferred setting so you can hear and
adjust the blend with the faders.
Note: If you switch from AFL to PFL, be wary! If
the fader is set below unity (the “U” symbol), and
you press the SOLO PFL button in the Studio/
Solo Section to turn it on (i.e., change to prefader), the solo signal will become louder; much
louder if the fader is below about –5 dB. This
might surprise you so much that you could spill
your cup of coffee all over yourself.
Soloing a Channel
TO SOLO A CHANNEL
From the console:
1. Press the SOLO button on the channel
you want to direct to the solo bus. The
SELECT button automatically engages
on the soloed channel.
12
36
2. The red LED in the SOLO button lights,
and the RUDE SOLO LIGHT in the Studio/Solo Section begins flashing.
SELECT
SOLO
MUTE
STUDIO/SOLO
MIXDOWN SOLO
CLEAR SOLO
RUDE SOLO
LIGHT
PFL SOLO
SOLO LEVEL
AFL SOLO
STUDIO LEVEL
TALKBACK TO
STUDIO
3. Whatever source is selected for the
control room is overridden by the solo
signal. Press SOLO LEVEL in the Studio/Solo Section to adjust the master
solo level with the LEVEL V-Pot. The
solo signal is routed to the Control
Room outputs and the Master L-R
meters indicate the signal level of all
soloed channels when one or more
SOLO buttons are engaged. Solo is active in all four fader banks.
TALKBACK LEVEL
LEVEL
TO SOLO A CHANNEL
From the screen:
1. Click on the SOLO button in the channel
you want to direct to the solo bus. The
SELECT button automatically engages
on the soloed channel.
6-14
Starting a New Session
STUDIO/SOLO
MIXDOWN SOLO
CLEAR SOLO
RUDE SOLO
LIGHT
PFL SOLO
SOLO LEVEL
AFL SOLO
STUDIO LEVEL
TALKBACK LEVEL
TALKBACK TO
STUDIO
LEVEL
3. Whatever source is selected for the
control room is overridden by the solo
signal. Press SOLO LEVEL in the
Studio/Solo Section to adjust the
master solo level with the LEVEL
V-Pot. The solo signal is routed to the
Control Room outputs and the Master
L-R meters indicate the signal level of
all soloed channels when one or more
SOLO buttons are engaged. Solo is
active in all four Fader Banks
Owner’s Manual
2. The red LED in the SOLO button on
the console lights, and the RUDE
SOLO LIGHT in the Studio/Solo
Section begins flashing.
Soloing an Aux Send
Note: Aux Send soloing is always postMaster V-Pot, regardless of the AFL/PFL
selection in the Solo/Studio Section.
TO SOLO AN AUX SEND
AUX 9-10
AUX 11-12
PAN
PAN
From the console:
1. Select an aux bus by pressing one of
the Aux buttons in the V-Pot Select
Section.
2. Press the SOLO button in the Master
V-Pot Section.
3. The red LED in the SOLO button
lights, and the RUDE SOLO LIGHT in
the Studio/Solo Section begins flashing.
MASTER
SOLO
PAN
STUDIO/SOLO
MIXDOWN SOLO
CLEAR SOLO
RUDE SOLO
LIGHT
PFL SOLO
SOLO LEVEL
AFL SOLO
STUDIO LEVEL
TALKBACK TO
STUDIO
TALKBACK LEVEL
LEVEL
4. Whatever source is selected for the
control room is overridden by the solo
signal. Press SOLO LEVEL in the Studio/Solo Section to adjust the master
solo level with the LEVEL V-Pot. The
solo signal is routed to the Control
Room outputs and the Master L-R
meters indicate the signal level of all
soloed channels and aux sends when
one or more SOLO buttons are engaged.
5. You can select a different aux bus and
solo it in the same way. Only one aux
send can be soloed at a time. You can
still solo multiple channels along with
the soloed aux send. The aux send remains soloed until you either turn the
SOLO button off, or press the CLEAR
SOLO button in the Studio/Solo Section.
Starting a New Session
6-15
Digital 8•Bus
TO SOLO AN AUX SEND
From the screen:
1. Click on an aux button above the Master V-Pot on the right side of the
screen.
2. Click on the SOLO button next to the
Master V-Pot.
3. The red LED in the SOLO button on
the console lights, and the RUDE
SOLO LIGHT in the Studio/Solo Section begins flashing.
STUDIO/SOLO
MIXDOWN SOLO
CLEAR SOLO
RUDE SOLO
LIGHT
PFL SOLO
SOLO LEVEL
AFL SOLO
STUDIO LEVEL
TALKBACK TO
STUDIO
TALKBACK LEVEL
LEVEL
Mixdown Solo
In some situations, you may want to isolate individual channels in the Main Outputs. MIXDOWN
SOLO allows you to quickly mute every channel
except for the ones that are soloed.
MIXDOWN SOLO operates a little differently
than normal soloing, because the signal at the
Main Outputs doesn’t come off the Solo bus. Instead, when you press the SOLO button on a
channel, all the other channels are immediately
muted. The SOLO LEVEL control has no effect on
the signal at the Main Outputs. MIXDOWN SOLO
is AFL only, and the channel faders and Master
L-R fader control the signal level.
Pressing additional channel SOLO buttons
simply unmutes those channels, allowing their
signals to pass on to the Main Outputs. The same
signal is heard in the Control Room outputs
(when L-R is selected as the source in the Control
Room Section).
6-16
Starting a New Session
4. Whatever source is selected for the control room is overridden by the solo
signal. Press SOLO LEVEL in the Studio/Solo Section to adjust the master
solo level with the LEVEL V-Pot. The
solo signal is routed to the Control
Room outputs and the Master L-R
meters indicate the signal level of all soloed channels and aux sends when one
or more SOLO buttons are engaged.
5. You can select a different aux bus and
solo it in the same way. Only one aux
send can be soloed at a time. You can
still solo multiple channels along with
the soloed aux send. The aux send remains soloed until you either turn the
SOLO button off, or press the CLEAR
SOLO button in the Studio/Solo Section. (The CLEAR SOLO button is not
available on the screen.)
Setup of Cue/Headphone Mixes for
Performers
The Digital 8•Bus has two separate phones
outputs, each of which can be independently assigned a different source.
Initially, you can assign the L-R outputs as
the source for Phones/Cue Mix 1 and 2 by pressing the CONTROL ROOM buttons in the Phones/
Cue Mix Section. This sends the signal you have
selected as a source for the Control Room to the
Phones output (in this case, the L-R bus). This
way the musicians will at least have something
to listen to right away so they can tune up and
rehearse, providing all your chosen tracks are in
record mode and auto-switching to input when
tape is not rolling.
Aux Sends 9–10 and 11–12 are designed to
set up two different cue mixes for the performers. Assign each of the tracks from the recorder
to AUX 9–10 and AUX 11–12. In the Phones/
Cue Mix Section assign one cue mix to Aux 9–10
and the other to Aux 11–12. Now you can create
a different mix for each of the Phones outputs by
adjusting the aux send level and pan for each
track. Press the SOLO button in the Master VPot Section to monitor the individual cue mixes.
TO SET UP A CUE MIX
AUX 3
AUX 4
25-48
AUX 5
AUX 6
MIC/LINE
TAPE IN
AUX 7
AUX 8
(TRACK)
(MONITOR)
AUX 9-10
AUX 11-12
PAN
PAN
MASTERS
SHIFT
1-24
49-72
EFFECTS
BANK SELECT
PHONES/CUE MIX 1
AUX 9-10
COPY MIX TO CUE
AUX 11-12
CONTROL ROOM
Owner’s Manual
Keeping the Phones assigned to CONTROL
ROOM may work for the entire session, but usually the musicians want one or even two custom
mixes. The bass player and drummer may want
bass and drums featured very loud in their cans
(headphones for the uninitiated), which may be
killing the vocalist. Likely, as soon as you are
close, you will be required to come up with some
new cue feeds for the players.
From the console:
1. Select Fader Bank 2 by pressing the
TAPE IN (25–48) button.
2. Press the AUX 9–10 button in the
V-Pot Select Section.
3. Press AUX 9–10 in the Phones/Cue
Mix Section. Use the Phones/Cue Mix
LEVEL V-Pot to adjust the Phones output level.
4. At this point, you can copy the L-R mix
to the cue mix by pressing the COPY
MIX TO CUE button in the Phones/Cue
Mix Section. This copies the fader levels from each channel to the channel
V-Pot aux sends. The Effects Returns
on Fader Bank 3 are also copied to the
cue mix.
5. Adjust the V-Pot (Aux 9–10 Send
Level) on each channel you want to
modify in the cue mix.
LEVEL
AUX 3
AUX 4
AUX 5
AUX 6
AUX 7
AUX 8
AUX 9-10
AUX 11-12
PAN
PAN
6. Press the AUX 9–10 PAN button in the
V-Pot Select Section.
7. Adjust the V-Pot (Aux 9–10 Send Pan)
on each channel you want to pan in the
Cue Mix 1.
8. Adjust the Master V-Pot to control the
overall aux send level.
Starting a New Session
6-17
Digital 8•Bus
AUX 9-10
AUX 11-12
PAN
PAN
9. Press SOLO in the Master V-Pot Section to monitor the cue mix in the
control room.
10. Repeat steps 2–8 for Aux 11–12 to
create a second cue mix.
MASTER
SOLO
PAN
TO SET UP A CUE MIX
From the screen:
1. Select Fader Bank 2 by clicking the
TAPE button.
2. Click on the CUE 1 LEVEL button in
the V-Pot Select Section.
PHONES/CUE MIX 1
AUX 9-10
COPY MIX TO CUE
AUX 11-12
CONTROL ROOM
LEVEL
3. Press AUX 9–10 in the Phones/Cue
Mix Section (no equivalent on-screen).
Use the Phones/Cue Mix LEVEL V-Pot
to adjust the Phones output level.
4. At this point, you can copy the L-R
mix to the cue mix by pressing the
COPY MIX TO CUE button in the
Phones/Cue Mix Section (no equivalent on-screen). This copies the fader
levels from each channel to the channel V-Pot Aux Sends. The Effects
Returns on Fader Bank 3 are also copied to the cue mix.
5. Click and hold on the V-Pot (Aux Send
Level) on each channel you want to
modify in the Cue Mix, and adjust by
dragging the mouse up and down.
6. Click and hold on the Master V-Pot
and drag the mouse up and down to
control the overall aux send level.
6-18
Starting a New Session
8. Click and hold on the V-Pot (Aux 9–10
Send Pan) on each channel you want to
pan in the Cue Mix 1, and adjust by
dragging the mouse left and right.
9. Press SOLO in the Master V-Pot Section to monitor Cue Mix 1 in the
control room (no equivalent on-screen).
10. Repeat steps 2–8 for Aux 11–12 to create a second cue mix.
Owner’s Manual
7. Click on the CUE 1 PAN button in the
V-Pot Select Section.
Talkback
The Digital 8•Bus has a built-in talkback mic,
for remote communication with talent or whoever
the engineer needs to talk to.
The signal from the talkback mic is routed to
the PHONES outputs when the TALKBACK button is pressed in the Control Room Section. Use
the LEVEL V-Pot in the Studio/Solo Section (with
TALKBACK LEVEL selected) to adjust the gain of
the talkback signal.
You can route the signal from the talkback mic
to the Studio output by pressing the TALK TO
STUDIO button in the Studio/Solo Section. The
LEVEL control in the Studio/Solo Section controls
the gain of the talkback signal to both the Phones
and Studio outputs.
Overdubs
After you’ve recorded all your tracks, you may
want to record another pass on one of the instruments (the trumpet player missed that high C), or
you might want to take several passes of the lead
vocalist for comping.
Overdubbing is easy on the Digital 8•Bus.
Simply take all the channels out of REC/RDY
mode except the one you want to record. You can
reassign the instrument or vocal to another
track by pressing the ROUTE TO TAPE button,
and you can change the cue mix specifically for
the musician doing the overdub. It’s that simple.
Bouncing Down Tracks
You may find that you need to free up some
more tracks to get everything to fit. You can do a
submix and combine several tracks down into
one (or two) using the BUS 1–8 Submasters.
Maybe you have six separate tracks for the
kick drum, snare drum, cymbals left, cymbals
right, tom 1, and tom 2. You can free up five extra tracks by bouncing these down to one track,
or free up four extra tracks if you want to
bounce them down to a stereo pair of tracks.
The following pages show an example of how
to bounce tracks 1–6 down to tracks 7 and 8 by
using Bus 1 and 2.
Starting a New Session
6-19
Digital 8•Bus
TO BOUNCE RECORDED TRACKS DOWN
TO ONE OR TWO TRACKS
ASSIGNMENT
SHIFT
MASTERS
1-24
ASSIGN
ASSIGN
BUS 1
BUS 2
ASSIGN
ASSIGN
BUS 3
BUS 4
25-48
MIC/LINE
TAPE IN
(TRACK)
(MONITOR)
ASSIGN
ASSIGN
BUS 5
BUS 6
ASSIGN
ASSIGN
49-72
BUS 7
BUS 8
ASSIGN
ASSIGN
L-R
ROUTE TO
TAPE
From the console:
1. Select Fader Bank 2 by pressing the
TAPE IN (25–48) button.
2. Press L-R in the Bus Assignment Section. Turn off the ASSIGN buttons for
channels 25–30 (tracks 1–6 returns).
Turn off the ASSIGN buttons for any
other channels you don’t want to
monitor while bouncing down.
EFFECTS
BANK SELECT
ASSIGNMENT
ASSIGN
ASSIGN
BUS 1
BUS 2
ASSIGN
ASSIGN
BUS 3
BUS 4
ASSIGN
ASSIGN
BUS 5
BUS 6
ASSIGN
ASSIGN
BUS 7
BUS 8
ASSIGN
ASSIGN
L-R
ROUTE TO
TAPE
REC/RDY
REC/RDY
ASSIGN
ASSIGN
WRITE
WRITE
3. Press BUS 1 in the Bus Assignment
Section.
4. Press the ASSIGN button on channels
25 through 30.
5. Press BUS 2 in the Bus Assignment
Section.
6. Press the ASSIGN button on channels
25 through 30.
1
25
2
26
7. Press the ROUTE TO TAPE button in
the Bus Assignment Section.
8. Press the MASTERS button in the
Master Fader/Bank Select Section to
switch to Fader Bank 4.
9. Press the SELECT button on BUS 1.
MASTERS
SHIFT
1-24
25-48
MIC/LINE
TAPE IN
(TRACK)
(MONITOR)
10. Press the ASSIGN button on channel 7.
11. Press the SELECT button on BUS 2.
49-72
EFFECTS
BANK SELECT
6-20
Starting a New Session
12. Press the ASSIGN button on channel 8.
Channels 25–30 (tracks 1–6) are now
assigned to Bus 1 and 2, and Bus 1 and 2
are assigned to tape outs 7 and 8 respectively. Adjust the V-Pot Pan controls on each
channel to achieve the proper left/right
balance (if you assign a channel to an odd/
even pair of buses, the channel pan control
pans the signal between the two buses).
You can run through a test mixdown to
adjust the levels, EQ, and effects for the
submix. You can even automate it.
Don’t forget to press the REC/RDY
buttons on channels 7 and 8 when you’re
ready to record.
From the screen:
1. Select Fader Bank 2 by clicking on the
TAPE button next to the Master Fader.
2. Turn off the L-R assignments for channels 25–30 (tracks 1–6 returns). Turn
off the L-R assignments for any other
channels you don’t want to monitor
while bouncing down.
3. Click and hold on the “1” button at the
top of channel 1. Sweep across to
channel 6 to assign channels 1–6 to
Bus 1.
Owner’s Manual
TO BOUNCE RECORDED TRACKS DOWN
TO ONE OR TWO TRACKS
4. Click and hold on the “2” button at the
top of channel 6. Sweep across to
channel 1 to assign channels 1–6 to
Bus 2.
5. Click on the MASTERS button next
to the Master Fader to select Fader
Bank 4.
6. Click and hold on the OUT box at the
top of BUS 1 (channel 89). Drag down
to channel 7 to assign Bus 1 to channel
7 tape out.
7. Click and hold on the OUT box at the
top of BUS 2 (channel 90). Drag down
to channel 8 to assign Bus 2 to channel
8 tape out.
Channels 25–30 are now assigned to
Bus 1 and 2, and Bus 1 and 2 are assigned
to tape outs 7 and 8 respectively. Adjust the
V-Pot Pan controls on each channel to
achieve the proper left/right balance (If you
assign a channel to an odd/even pair of
buses, the channel pan control pans the
signal between the two buses). You can run
through a test mixdown to adjust the levels,
EQ, and effects for the submix. You can
even automate it.
Don’t forget to click the REC/RDY buttons on channels 7 and 8 when you’re
ready to record.
Starting a New Session
6-21
Digital 8•Bus
Mixdown
Now you have all your tracks recorded and
you’re ready to mixdown to two tracks. Tracking
and overdubbing require care from the recording
engineer, but the focus there is on the performances. In tracking it’s important to get a good
sound, but it’s more important to keep the musicians really in it, keep the pace up, and be ready
to snag that killer track when it happens.
Good mixing, however, focuses solely on the
engineer and requires an emphasis on precision
and meticulous setup. Creatively, you must blend
the tracks so they’re brilliant together; technically, you must take into account the sound of
home and car speakers, mono compatibility, and
human perception changes under different listening conditions, not to mention tonal and level
balance between songs, and meeting the technical criteria for tape and disc mastering.
Before proceeding, it’s a good idea to “zero”
the console by recalling Snapshot 00, or any
other snapshot you may have reserved for nominal settings. This way you’re starting afresh,
which can eliminate problems later on down the
road. Refer to the “Recording — Mixdown
Hookup Diagram” on page 6-77 while reading
this section.
Routing Tape Returns to the Main
Outputs
TO ROUTE TAPE RETURNS TO THE MAIN
OUTPUTS
ASSIGNMENT
SHIFT
MASTERS
1-24
ASSIGN
ASSIGN
BUS 1
BUS 2
ASSIGN
ASSIGN
BUS 3
BUS 4
25-48
MIC/LINE
TAPE IN
(TRACK)
(MONITOR)
49-72
EFFECTS
BANK SELECT
ASSIGN
ASSIGN
BUS 5
BUS 6
ASSIGN
ASSIGN
BUS 7
BUS 8
ASSIGN
ASSIGN
L-R
ROUTE TO
TAPE
REC/RDY
REC/RDY
ASSIGN
ASSIGN
WRITE
WRITE
From the console:
1. Select Fader Bank 2 by pressing the
TAPE IN (25–48) button.
2. Press the L-R button in the Bus
Assignment Section.
3. Press the ASSIGN button on all the
channels that are going to be mixed
down to two tracks.
MASTER OUT
L R
CR
MAIN
L R
L
CR
NEAR FIELD
L R
R
MASTER OUT
6-22
Starting a New Session
4. Connect the MASTER L-R outputs on
the Digital 8•Bus’ rear panel to the inputs of your two-track master tape
recorder.
From the screen:
1. Select Fader Bank 2 by clicking on the
TAPE button.
2. Click and drag across the channel L-R
assign buttons on the channels that are
going to be mixed down to two tracks.
MASTER OUT
L R
Owner’s Manual
TO ROUTE TAPE RETURNS TO THE MAIN
OUTPUTS
3. Connect the MASTER L-R outputs on
the Digital 8•Bus’ rear panel to the inputs of your two-track master tape
recorder.
CR
MAIN
L R
L
CR
NEAR FIELD
L R
R
MASTER OUT
TAPE 1-8
TAPE 9-16
TAPE 17-24
TO TAPE
TO TAPE
TO TAPE
FROM TAPE
FROM TAPE
FROM TAPE
ANALOG I/O ANALOG I/O ANALOG I/O
TAPE IN/OUTS
Input Sensitivity Adjustment Procedure
for Channels 25–48
(–15 dB FS on the meter is equivalent to
+5 dBu analog)
FOLLOW THIS SENSITIVITY ADJUSTMENT PROCEDURE FOR EACH
CHANNEL IN USE:
1. If you’re starting from scratch, it’s a
good idea to normal the console (also
called “zeroing”) to some starting
point, such as all level controls down,
and EQ and pan controls centered.
2. Connect the tape outs from your recorder to the TAPE IN connections on
the rear panel of the Digital 8•Bus.
3. We’re assuming you already have the
Control Room outputs connected to an
amplifier/speaker combination.
Starting a New Session
6-23
Digital 8•Bus
4. Select Fader Bank 2 by pressing the
TAPE IN (25–48) button.
MASTERS
SHIFT
1-24
25-48
MIC/LINE
5. Set all the faders to their “U” (unity)
markings, including the MASTER L-R.
TAPE IN
(TRACK)
(MONITOR)
49-72
EFFECTS
BANK SELECT
1-24
1-48
LEVEL TO TAPE
DIGITAL TRIM
AUX 1
AUX 2
AUX 3
AUX 4
AUX 5
AUX 6
AUX 7
AUX 8
STUDIO/SOLO
MIXDOWN SOLO
RUDE SOLO
LIGHT
CLEAR SOLO
PFL SOLO
SOLO LEVEL
AFL SOLO
STUDIO LEVEL
TALKBACK TO
STUDIO
6. Press the DIGITAL TRIM button near
the TALKBACK MIC. This causes the
channel V-Pots to become digital
preamp trim controls. Use this instead
of the TRIM control at the top of the
channel strip.
7. Set the PFL SOLO switch in the Studio/Solo Section to PFL (the LED
lights). In this mode the faders do not
affect the solo level at the Control
Room output.
TALKBACK LEVEL
LEVEL
8. Press the channel SOLO button. The
LED in the button lights.
12
36
SELECT
SOLO
MUTE
6-24
Starting a New Session
9. Roll the tape and adjust the V-Pot Digital Trim control. The goal is to get the
channel meter reading at or around
–15. The peaks should regularly hit,
and occasionally exceed, the –15 designation on the meter. This is equivalent
to a +4 dBu analog level.
13
OL
2
4
7
10
15
20
25
30
35
40
50
36
37
STUDIO/SOLO
MIXDOWN SOLO
RUDE SOLO
LIGHT
CLEAR SOLO
PFL SOLO
SOLO LEVEL
AFL SOLO
STUDIO LEVEL
TALKBACK TO
STUDIO
10. To monitor the signal, adjust the Solo
Level in the Studio/Solo Section by
pressing SOLO LEVEL and adjusting
the LEVEL V-Pot.
Owner’s Manual
12
11. If desired, press the channel’s SELECT
button and adjust the EQ in the Fat
Channel (see page 6-28). You may need
to readjust the channel’s TRIM control
after changing the EQ setting.
TALKBACK LEVEL
LEVEL
12. Repeat steps 8–11 on the next channel
being used.
13. Once you’ve achieved a rough mix using this method, clear all soloed
channels and monitor the mix in the
Control Room outputs (with all channels assigned to the L-R bus, and L-R
selected as the Control Room source)
or the Main L-R Output, and use the
channel faders to adjust individual levels. Leave the Digital Trim controls
alone. This will give you the best signalto-noise ratio in your mix.
Note: If you use the built-in compressor on
any channels, you can get away with turning the TRIM control up a little higher,
since the compressor will reduce the
chance of transient peaks reaching digital
clipping (see “Using The Compressor” on
page 6-38).
Starting a New Session
6-25
Digital 8•Bus
6-26
Monitoring the Final Mix
The best way to monitor the final mix is by listening to the output of the 2-track recorder.
Properly configured, your recorder will automatically switch between source and playback as you
put the deck into stop, play, fast wind, record, and
so on. That way, you’re always hearing your mix
after it goes through the 2-track deck, regardless
of whether or not the tape is rolling.
This is easily accomplished by connecting the
left and right outputs of the 2-track recorder to either the 2 TRACK A, 2 TRACK B, or 2 TRACK C
inputs on the rear panel of the Digital 8•Bus. You
can select any of these sources in the Control
Room Section.
If your multitrack tape machine will do it, go
into LOOP mode so it will just play the song over
and over. Start mixing a group of tracks that run
throughout the song, maybe drums or the rhythm
section.
There is a tendency for levels to creep upwards as you add more and more tracks to your
mix. One way to keep a handle on this is to set
the L-R Master Fader a few dB below unity, and
to set your initial monitor levels pretty high. As
you get closer and closer to your final, you can
ease the monitor levels down and ease up the
master fader to unity, which is where it should be.
Check your speakers and amplifiers to be sure
that they’re balanced left-to-right and mounted
symmetrically to your mixing position. A 2 dB
shift in monitor balance will produce a 2 dB shift
in the opposite direction in your mix.
Also, check your speaker polarity. This is a
seemingly basic thing, but it’s amazing how many
times we’ve found studio speakers (especially
near-field monitors, which are often plugged and
unplugged regularly) connected with opposing polarity. You should train your ears to notice
out-of-polarity conditions instantly. It’s easy to
hear (to us it sounds like a combination of not
hearing enough bass and feeling like our eyes are
slightly crossed), and getting polarity right will
save you much grief in mixing.
Remember that you need to mix so that your
music or program sounds good on anybody’s system. Be sure you have some real-world monitor
speakers in addition to the monitors you like so
well, and check back and forth frequently. This is
easy to do with the Digital 8•Bus. Simply use the
SPEAKERS switches in the Control Room Section (MAIN and NEAR FIELD). Check at different
monitoring levels, too. A mix that sounds great
Starting a New Session
when it’s loud will not necessarily sound good at
low volume. Listen at a barely audible level from
time to time. You should still be able to hear the
essential pieces of your mix.
Also, check your stereo mixes in mono regularly during your mix. That’s what the MONO
button in the Control Room Section is for. Television and radio are still sometimes broadcast in
mono, and your mix has to sound its best both
ways. When MONO is selected, the L-R Main
LED ladder indicates the summed mono signal in
both sides.
Take a hint from film soundtrack mixers and
set your dialog or lead vocals to about 85 dB/c at
the mixing position. This is a moderate, normal
volume; not quiet but definitely not thundering. If
you have a sound pressure meter available you
can take a measurement to get a feel for how
loud 85 dB is. If you don’t, run down to Radio
Shack and say, “I want #33-2050 or #33-2055.
Here’s $34.99 or $59.99 plus applicable taxes.”
Every set of self-respecting ears should own one.
This monitoring volume will keep you honest
(in the ’90s sense of the word), and keep your
mixes balanced for playback. You should listen at
very low levels, too, and crank it from time to
time to remember why you’re in this line of work,
but stay at the moderate 85 dB/c setting most of
the time. You will save your hearing and also
make better mixes.
Using Apogee UV22®
The Digital 8•Bus is equipped with Apogee’s
UV22 encoding, which we believe provides the
best method available for “dithering” down 24-bit
words to 16-bit words for digital mastering.
You can select one of two “strengths” when
applying the UV22 encoding. For 2-track mastering, use the “Normal” setting on the AES/EBU or
S/PDIF outputs (called “Full Power” in the Fat
Channel Display). However, you also have the option of using UV22 while tracking. In this case,
the best procedure would be to use the “Low
Power” UV22 setting on the Tape Outputs, and
then use the “Low Power” UV22 setting on the
AES/EBU or S/PDIF outputs. For a more indepth look at UV22, refer to Appendix D.
TO SELECT UV22 ON TAPE OUTPUTS,
ALT OUTPUTS, AND STEREO OUTPUTS
(AES/EBU OR S/PDIF):
SETUP
From the console:
1. Press the DIGITAL I/O button in the
Setup Section.
SAVE
SAVE AS...
NEW
LOAD
GROUP
GENERAL
PLUG INS
DIGITAL I/O
D8B
Tape
1-8
Tape
2. The Digital I/O Setup Menu appears in
the Fat Channel Display.
56 INPUT / 72 CHANNEL DIGITAL MIXER
(DIGITAL I/O SETUP Pg.1)>
9-16 Tape 17-24
ALT 1-8
SUPER CD ENCODING
PREVIOUS
EQ
SELECT
SELECT
SELECT
SELECT
HELP
LOW
LOW MID
HI MID
HI
NEXT
ON
SETUP
MEMORY A
MEMORY B
GATE
COMPRESSOR
D8B
Mix
Output
PLUG-INS
LOAD PATCH
SAVE PATCH
56 INPUT / 72 CHANNEL DIGITAL MIXER
UV22
Full Power
(Stereo IO)
Exit
Owner’s Manual
Selecting UV22
3. Press the PREVIOUS and NEXT buttons in the Fat Channel Section to view
all the menu choices.
4. Press the SELECT button below the
Tape, ALT, or Stereo I/O that you want
to configure. The Digital I/O options
appear in the display.
5. Press the SELECT button below UV22
to toggle through the various settings.
TO SELECT UV22 ON TAPE OUTPUTS,
ALT OUTPUTS, AND STEREO OUTPUTS
(AES/EBU OR S/PDIF):
From the screen:
1. Click on the Setup button in the lower
menu bar. The Setup dialog box opens.
2. Click on the Digital icon on the left side
of the box. The Digital I/O dialog box
opens.
3. Click and hold on the UV22 box below
the Tape, ALT, or Stereo I/O you want
to configure. Drag down to the desired
setting and then release to finalize your
selection.
4. Click on the Close button in the upper
right corner of the dialog box to close it
(or click on the Setup button in the
menu bar).
Starting a New Session
6-27
Digital 8•Bus
Muting Channels
Consider Compression
The MUTE button mutes the corresponding
channel, and affects the output at the L-R bus,
Bus 1–8, and aux sends (when the aux send is set
for AFL). Press this button to mute the signal after the fader and prior to the output buses,
including the aux sends. The MUTE button LED
lights when the MUTE button is manually engaged or while playing back previous automation
tracks with mute data. Press the button again to
turn it off.
For channels 1–48, mute is post-DSP, postfader, and pre-bus assign. Mute does not affect
the tape outputs, the Solo bus, or the aux sends
(if the aux send is set for PFL).
Mute is active in all four fader banks. In Fader
Bank 4, if MUTE is engaged on a Virtual Group, all
channels assigned to the group are muted. If MUTE
is engaged on a MIDI Controller, a control change
message is transmitted at the MIDI OUT port.
Adding EQ, Dynamics, and Effects to Tape
Returns
If you’re like most people, you record your
tracks with minimal EQ and effects. You just
want to get the track down on tape in a pure and
unadulterated form, with the intention of sweetening it in the mix later.
The best way to add EQ, dynamics, and effects is
to solo each channel individually, add EQ or an effect, then switch it out of solo and hear how the
adjustment sounds in the mix. You may need to dynamically adjust the EQ or an effect during the mix.
This, too, can be automated. And that’s just another
way the Digital 8•Bus can make your life easier.
You can mix an entire project without a lick of
compression; many engineers do. The dynamic
range of a CD can certainly handle it. But consider: most people listen to what you mix under
less than ideal conditions. Typically their listening
environment features background or road noise,
and most of the time they don’t listen as loud as
you mix. A little gentle compression, whether on
individual tracks or on the entire mix, can reduce
the dynamic range a bit and pull your mix together. Also, if you want to simulate what your
mix will sound like over the airwaves, you can
compress the heck out of it. This is good for
checking things out, but not for your final mix.
Okay, roll the tape!
The Fat Channel Display
When a channel is selected, the channel number appears in the CHANNEL SELECT window
and the DSP parameters for that channel appear
in the Fat Channel Display. Up to four parameters can appear in the display at one time, and
each parameter corresponds to a V-Pot and Select button located just below it. If there are
more than four parameters associated with a particular menu, use the NEXT arrow button to see
the rest of the parameters.
The Select button is used to choose an individual parameter, and the V-Pot is used to adjust
the value of its corresponding parameter.
Using EQ
Each of the first 48 channels has a fourband parametric equalizer, with the
capability of storing two separate EQ
curves per channel.
Selecting the EQ
TO SELECT THE EQ
12
36
SELECT
SOLO
MUTE
6-28
Starting a New Session
From the console:
1. Select the channel you want to EQ by
pressing its SELECT button.
PREVIOUS
SELECT
SELECT
SELECT
SELECT
HELP
LOW
LOW MID
HI MID
HI
NEXT
ON
SETUP
MEMORY A
MEMORY B
EQ
GATE
COMPRESSOR
PLUG-INS
LOAD PATCH
3. Press the SOLO button on the selected
channel if desired. Now you hear just
that channel in the Control Room output.
SAVE PATCH
TO SELECT THE EQ
From the screen:
1. Select the channel you want to EQ by
clicking on its SELECT button.
Owner’s Manual
2. Press the EQ button and the ON button
in the Fat Channel Section.
SUPER CD ENCODING
2. Click on the EQ button near the top of
the channel strip.
3. To use the graphic view, click on the
EQ button in the lower menu bar (or
double-click in the small graphic view
below the EQ button). The EQ control
panel opens. This also has an ON/OFF
button.
4. Click on the SOLO button on the selected channel if desired. Now you hear
just that channel in the Control Room
output.
Changing the Gain Setting
TO CHANGE THE GAIN SETTING
D8B
GAIN
12.0 DB
56 INPUT / 72 CHANNEL DIGITAL MIXER
GAIN
0.0 DB
GAIN
0.0 DB
GAIN
0.0 DB
SUPER CD ENCODING
PREVIOUS
EQ
SELECT
SELECT
SELECT
SELECT
HELP
LOW
LOW MID
HI MID
HI
NEXT
ON
SETUP
MEMORY A
MEMORY B
GATE
COMPRESSOR
PLUG-INS
LOAD PATCH
SAVE PATCH
From the console:
1. Rotate the V-Pot beneath the desired
band clockwise to boost the gain by up
to 15 dB, and rotate it counterclockwise to cut the gain by up to 15 dB.
The gain is adjustable in approximately
0.25 dB increments.
Note: You can also use “Next” to have the
VFD display each EQ band’s gain, Frequency,
and Q.
Starting a New Session
6-29
Digital 8•Bus
TO CHANGE THE GAIN SETTING
From the screen:
This can be done in one of two ways.
1. Click and drag in the small EQ display
for the channel you want to adjust.
Move the mouse up and down to adjust the gain setting. The settings are
immediately updated in the Fat Channel Display.
2. Click on the EQ button in the lower
menu bar to view a larger amplitude
vs. frequency graph of the EQ settings
for the selected channel. The graph
shows the EQ settings for the selected
Memory A or Memory B. You can click
and drag the line in the EQ window up
and down to adjust the gain settings.
Or you can click in the box showing
the gain value and drag the mouse up
and down to change the gain. The settings are immediately updated in the
Fat Channel Display.
Changing the Center-Frequency Setting
The center frequency can be adjusted
for each band of the EQ. We recommend
using the default frequencies to start and
then adjusting them as required for each
particular application.
TO CHANGE THE CENTER-FREQUENCY
SETTING
D8B
56 INPUT / 72 CHANNEL DIGITAL MIXER
FREQ
150 hz
GAIN
0.0 DB
GAIN
0.0 DB
GAIN
0.0 DB
SELECT
SELECT
SELECT
SELECT
HELP
LOW
LOW MID
HI MID
HI
NEXT
ON
SETUP
MEMORY A
MEMORY B
From the console:
1. Press the SELECT switch above the VPot for the band you want to adjust so
that FREQ is displayed.
SUPER CD ENCODING
PREVIOUS
EQ
6-30
GATE
Starting a New Session
COMPRESSOR
PLUG-INS
LOAD PATCH
SAVE PATCH
Tip: You can also use “Next” to have the
VFD display each EQ band’s gain,
Frequency, and Q.
2. Rotate the V-Pot clockwise to increase
the frequency and rotate it counterclockwise to decrease the frequency
setting. Frequency is adjustable in
increments of 1/20th of an octave.
From the screen:
This can be done in one of two ways.
1. Click and drag in the EQ display for the
channel you want to adjust. Move the
mouse left and right to adjust the
frequency setting. The settings are
immediately updated in the Fat
Channel Display.
2. Click on the EQ button in the lower
menu bar to view a larger amplitude
vs. frequency graph of the EQ settings
for the selected channel. The graph
shows the EQ settings for the selected
Memory A or Memory B. You can click
and drag the line in the EQ window left
and right to adjust the center frequency
settings. Or you can click in the box
showing the frequency value and drag
the mouse up and down to change the
frequency. The settings are immediately
updated in the Fat Channel Display.
Owner’s Manual
TO CHANGE THE CENTER-FREQUENCY
SETTING
Changing the Q Setting
The last adjustable parameter in the
parametric EQ is the Q. This adjusts the
bandwidth of the affected frequencies around
the center frequency. The default value is
1.9 (Q has no unit of measure). A higher Q
value creates a tighter bandwidth so fewer
frequencies around the center frequency
are affected. A smaller Q value creates a
wider bandwidth so more frequencies
around the center frequency are affected.
TO CHANGE THE Q SETTING
D8B
Q
1.1
Q
56 INPUT / 72 CHANNEL DIGITAL MIXER
GAIN
0.0 DB
GAIN
0.0 DB
GAIN
0.0 DB
From the console:
1. Press the SELECT switch above the
V-Pot for the band you want to adjust
so that Q is displayed.
SUPER CD ENCODING
PREVIOUS
EQ
SELECT
SELECT
SELECT
SELECT
HELP
LOW
LOW MID
HI MID
HI
NEXT
ON
SETUP
MEMORY A
MEMORY B
GATE
COMPRESSOR
PLUG-INS
LOAD PATCH
SAVE PATCH
Tip: You can also use “Next” to have the
VFD display each EQ band’s gain, Frequency,
and Q.
2. Rotate the V-Pot clockwise to increase
the Q and counterclockwise to decrease
the Q.
Starting a New Session
6-31
Digital 8•Bus
TO CHANGE THE Q SETTING
From the screen:
This can be done in one of two ways.
1. Click and drag in the EQ display for
the channel you want to adjust. Click
and drag the mouse left and right while
holding down the ALT key on the keyboard to adjust the Q setting (or rightclick with the mouse). The settings
are immediately updated in the Fat
Channel Display.
2. Click on the EQ button in the lower
menu bar to view a larger amplitude
vs. frequency graph of the EQ settings
for the selected channel. The graph
shows the EQ settings for the selected
Memory A or Memory B. You can click
and drag the line in the EQ window
left and right while holding down the
ALT key on the keyboard to adjust the
Q setting (or right-click with the
mouse). Or you can click in the box
showing the Q value and drag the
mouse up and down to change the Q.
The settings are immediately updated
in the Fat Channel Display.
Changing the Parametric EQ Frequency
Bandwidth
The parametric EQ is programmed using an analog model, with four discrete,
non-overlapping bands. This can be globally changed so that each band’s center
frequency can be set anywhere within the
entire 20Hz-20kHz frequency range.
TO CHANGE THE FREQUENCY BANDWIDTH
D8B
Analog
<<
56 INPUT / 72 CHANNEL DIGITAL MIXER
Modelling
>>
(SET
EQ
From the console:
1. Press the SETUP button in the Fat
Channel. The EQ Setup Menu appears
in the Fat Channel Display.
FREQ MODE)
Exit
SUPER CD ENCODING
PREVIOUS
EQ
6-32
SELECT
SELECT
SELECT
SELECT
HELP
LOW
LOW MID
HI MID
HI
NEXT
ON
SETUP
MEMORY A
MEMORY B
GATE
Starting a New Session
COMPRESSOR
PLUG-INS
LOAD PATCH
SAVE PATCH
2. Press the SELECT button below the
arrows in the display to scroll through
the available options.
3. When the frequency mode you want to
use appears in the display, press the
SELECT button below “Exit”. The selected bandwidth will now be used.
From the screen:
There is no screen equivalent for this feature.
Changing the Display Matrix of the
Parametric EQ
D8B
EQ
LOW
BAND
You can change the way in which the
parametric EQ is displayed in the Fat Channel by pressing the PREVIOUS or NEXT
button located just to the left or right of the
V-Pots. Think of it as rotating the default
matrix 90 degrees.
Now the first SELECT button is used to
change the band (the first V-Pot also
changes bands). The second V-Pot controls
the gain of the selected band, the third VPot controls the frequency, and the fourth
V-Pot controls the Q.
Press the PREVIOUS or NEXT button
again to return to the original display mode.
56 INPUT / 72 CHANNEL DIGITAL MIXER
GAIN
0.0 DB
FREQ
76 hz
Q
1.9
Owner’s Manual
TO CHANGE THE FREQUENCY BANDWIDTH
Saving, Loading, and Resetting EQ Settings
EQ settings can be saved and recalled
from the hard drive. You can save and load
files from either Memory A or Memory B.
TO SAVE AN EQ PATCH
D8B
From the console:
1. With EQ selected for channel processing, press SAVE PATCH in the Fat
Channel Section.
56 INPUT / 72 CHANNEL DIGITAL MIXER
EQ#1
(SAVE
Cancel
Equalizer)
OK
<<
>>
SELECT
SELECT
SELECT
SELECT
HELP
LOW
LOW MID
HI MID
HI
NEXT
ON
SETUP
MEMORY A
MEMORY B
SUPER CD ENCODING
PREVIOUS
EQ
GATE
COMPRESSOR
PLUG-INS
LOAD PATCH
SAVE PATCH
2. A default name appears in the Fat
Channel Display, such as EQ#1. You
can accept the default name, or you
can change it to one of your own
choice.
To change the name:
• Turn the first V-Pot to change the
letters.
• Press the SELECT buttons below the
arrows to move the cursor left and
right. You can use up to 23 characters
to name a file.
3. When the name appears as you want it,
press the SELECT button below OK to
complete the operation.
Starting a New Session
6-33
Digital 8•Bus
TO SAVE AN EQ PATCH
From the screen:
1. Click and hold on the MENU button in
the EQ control panel.
2. Drag down to “Save EQ As...” The
“Save File As...” dialog box appears.
3. A default name for the EQ is automatically displayed, such as EQ#1. If
you want to rename it, simply type in
the name you want, using up to 23
characters.
4. Click on “Save” to complete the
operation.
TO LOAD AN EQ PATCH
D8B
<<
EQ#1
Scan
56 INPUT / 72 CHANNEL DIGITAL MIXER
>>
(LOAD
Cancel
Equalizer)
OK
SUPER CD ENCODING
PREVIOUS
EQ
SELECT
SELECT
SELECT
SELECT
HELP
LOW
LOW MID
HI MID
HI
NEXT
ON
SETUP
MEMORY A
MEMORY B
GATE
COMPRESSOR
PLUG-INS
LOAD PATCH
SAVE PATCH
From the console:
1. With EQ selected for channel processing, press the SELECT button on the
channel you want to load with the EQ
file. Press and hold the SHIFT button
in the Master V-Pot Section to select
more than one channel.
2. Press MEMORY A or MEMORY B to
choose the memory location to which
you want to load the file.
3. Press LOAD PATCH in the Fat
Channel Section.
4. The Fat Channel Display shows the
first EQ file (in alphabetical order) in
the EQs folder. Press the SELECT buttons below the arrows to scroll
through the stored EQ files.
5. When the one you want appears in the
display, press the SELECT button below OK to complete the operation.
6-34
Starting a New Session
From the screen:
1. Click on the SELECT button of the
channel you want to load with the EQ
file. Press and hold the SHIFT key to
select more than one channel.
2. Click on MEM A or MEM B to choose
the memory location to which you want
to load the file.
3. Click and hold on the MENU button in
the EQ control panel.
Owner’s Manual
TO LOAD AN EQ PATCH
4. Drag down to “Open EQ...” The “EQ
Files...” dialog box appears.
5. Click on INTERNAL if the file is on the
internal hard drive, or click on
FLOPPY if the file is on a floppy disk.
6. Click on the name of the file to highlight the one you want to load.
7. Click on “Open” to load the EQ file to
the selected channel(s). You can also
double-click on the name of the file to
load it.
TO RESET THE EQ
From the console:
To reset or zero the EQ use the Cutting
operation described on the next page.
TO RESET THE EQ
From the screen:
1. Click and hold on the MENU button in
the EQ control panel.
2. Drag down to Reset and release.
Starting a New Session
6-35
Digital 8•Bus
Editing EQ Settings
You can cut, copy, and paste EQ settings
from one channel to another.
TO CUT EQ SETTINGS
CLIPBOARD
CUT/ZERO SET
COPY
PASTE
UNDO
From the console:
1. Press the SELECT button on the channel you want to edit.
2. Press the CUT/ZERO SET button in
the Clipboard Section.
3. Press the EQ button in the Fat
Channel section.
SUPER CD ENCODING
SELECT
PREVIOUS
EQ
SELECT
SELECT
SELECT
LOW
LOW MID
HI MID
HI
ON
SETUP
MEMORY A
MEMORY B
GATE
COMPRESSOR
PLUG-INS
LOAD PATCH
HELP
NEXT
SAVE PATCH
4. Press the SELECT button below “Cut”
in the Fat Channel Display, or press
the CUT/ZERO SET button again. The
EQ settings for that channel are
temporarily stored in the clipboard
memory in case you want to paste
them to another channel. The EQ
reverts to its default state (it is reset).
TO CUT EQ SETTINGS
From the screen:
1. Click and hold on the MENU button in
the EQ control panel.
2. Drag down to “Cut.” The EQ settings
for that channel are temporarily stored
in the clipboard memory in case you
want to paste them to another channel. The EQ also reverts to its default
state (it is reset).
TO COPY EQ SETTINGS
From the console:
1. Press the SELECT button on the
channel you want to edit.
CLIPBOARD
2. Press the COPY button in the
Clipboard Section.
CUT/ZERO SET
COPY
PASTE
UNDO
3. Press the EQ button in the Fat
Channel section.
4. Press the SELECT button under
“Copy” in the Fat Channel Display, or
press the COPY button again. The EQ
6-36
Starting a New Session
TO COPY EQ SETTINGS
From the screen:
1. Click and hold on the MENU button in
the EQ control panel.
2. Drag down to “Copy.” The EQ settings
for that channel are temporarily stored
in the clipboard memory in case you
want to paste them to another channel.
The EQ settings for the selected channel are retained.
Owner’s Manual
settings for that channel are retained,
and are temporarily stored in the
clipboard memory in case you want to
paste them to another channel.
TO PASTE EQ SETTINGS
CLIPBOARD
CUT/ZERO SET
COPY
PASTE
UNDO
From the console:
1. Press the SELECT button on the
channel you want to paste an EQ
setting to.
2. Press the PASTE button in the
Clipboard Section.
3. Press the SELECT button below
“Paste” in the Fat Channel Display.
The EQ settings for that channel are
replaced with the settings that are
stored in the clipboard memory.
TO PASTE EQ SETTINGS
From the screen:
1. Click and hold on the MENU button in
the EQ control panel.
2. Drag down to “Paste.” The EQ settings
for the selected channel are replaced
with the settings that are stored in the
clipboard memory.
Starting a New Session
6-37
Digital 8•Bus
Morphing
The morphing feature allows you to
smoothly change from one EQ setting to another. You can start with the settings stored
in Memory A and morph to Memory B, or
start with Memory B and morph to Memory
A. This feature is only accessible from the
EQ control panel in the video monitor.
TO MORPH THE EQ
From the screen:
1. Select the starting EQ curve by clicking on either MEM A or MEM B in the
EQ control panel.
2. Click in the Time box just below the
EQ window in the control panel. Enter
the amount of time in seconds you
want the morph to take, by clicking on
the time and dragging the mouse up or
down.
3. Click on the MORPH button to initiate
the operation.
Using the Compressor
A compressor is used to reduce or limit transient peaks in a signal. As the input level to the
compressor increases, the output level increases
linearly until the threshold point is reached. After
that point, the output level no longer increases
linearly, but increases at a reduced rate that is determined by the ratio setting. There are several
other settings for the compressor that we should
examine.
• Threshold: This control determines the level at
which the compressor begins to act on the incoming signal. It is calibrated in decibels, with
a range from –60.00 dB to –1.00 dB.
• Attack: This determines how fast the compressor
reacts once the threshold has been exceeded.
It is calibrated in milliseconds, with a range
from 0.31 ms to 2560.00 ms (2.6 seconds).
• Release: This determines how fast the compressor turns off once the signal falls below the
threshold. It is calibrated in milliseconds, with a
range from 10.00 ms to 2500.00 ms (2.5 seconds).
6-38
Starting a New Session
• Ratio: This determines the change in output
level as a function of the change in input level,
once the threshold has been exceeded. It is
calibrated in decibels, with a range from
1.00:1 to 19.99:1. Thus, if it is set to 10:1, an
increase in input level of 10 dB (assuming the
input is above the threshold level), results in a
1 dB increase in output level.
As a general rule, use ratio settings from
1:1.5 to 1:5 for compressor use. Settings from
1:10 to 1:20 are more useful for limiting purposes, because in that range the output level
changes very little as the input increases.
• Gain: This determines the overall gain of the
compressor from input to output (as measured
with the signal below the threshold level). You
can use this control to compensate for the loss
of gain caused by the action of the compressor.
It is calibrated in decibels, with a range from
unity (00.00 dB) to +20.00 dB.
TO SELECT THE COMPRESSOR
SUPER CD ENCODING
PREVIOUS
SELECT
SELECT
SELECT
SELECT
HELP
LOW
LOW MID
HI MID
HI
NEXT
ON
SETUP
MEMORY A
MEMORY B
EQ
GATE
COMPRESSOR
PLUG-INS
LOAD PATCH
SAVE PATCH
From the console:
1. Select the channel you want to compress by pressing its SELECT button.
2. Press the COMPRESSOR button and
the ON button in the Fat Channel
Section.
TO SELECT THE COMPRESSOR
Owner’s Manual
Selecting the Compressor
From the screen:
1. Select the channel you want to compress
by clicking on its SELECT button.
2. Click on the COMP button near the top
of the channel strip.
3. To use the graphic view, click on the
Compressor button in the lower menu
bar. The Compressor control panel
opens. This also has an ON/OFF button.
Adjusting the Compressor Settings
TO ADJUST THE COMPRESSOR SETTINGS
D8B
56 INPUT / 72 CHANNEL DIGITAL MIXER
C.Thresh
-60.0dB
C.Attack
0.3 mS
C.Release
80.0 mS
C.Ratio
1.0:1
SELECT
SELECT
SELECT
SELECT
HELP
LOW
LOW MID
HI MID
HI
NEXT
ON
SETUP
MEMORY A
MEMORY B
SUPER CD ENCODING
PREVIOUS
EQ
GATE
COMPRESSOR
PLUG-INS
LOAD PATCH
SAVE PATCH
From the console:
1. With COMPRESSOR selected in the
Fat Channel, the first V-Pot adjusts the
compressor threshold, with a range
from –60.00 dB to –1.00 dB. Turn the
V-Pot clockwise to increase the threshold and counterclockwise to decrease
the threshold.
2. The second V-Pot adjusts the compressor attack time, with a range from 0.31
ms (milliseconds) to 2560.00 ms (2.6
seconds). Turn the V-Pot clockwise to
increase the attack time and counterclockwise to decrease the attack time.
3. The third V-Pot adjusts the compressor
release time, with a range from 10.00
ms to 2500.00 ms (2.5 seconds). Turn
the V-Pot clockwise to increase the release time and counterclockwise to
decrease the release time.
Starting a New Session
6-39
Digital 8•Bus
D8B
C.Attack
0.3 mS
4. The fourth V-Pot adjusts the compression ratio, with a range from 1.00:1 to
19.99:1. Turn the V-Pot clockwise to
increase the ratio and counterclockwise to decrease the ratio.
56 INPUT / 72 CHANNEL DIGITAL MIXER
C.Release
80.0 mS
C.Ratio
1.0:1
C.Gain
0.0dB
SUPER CD ENCODING
PREVIOUS
EQ
SELECT
SELECT
SELECT
SELECT
HELP
LOW
LOW MID
HI MID
HI
NEXT
ON
SETUP
MEMORY A
MEMORY B
GATE
COMPRESSOR
PLUG-INS
LOAD PATCH
SAVE PATCH
5. Press the NEXT button to scroll to the
next set of parameters for the Compressor. The last adjustable parameter
is the compressor gain, with a range
from unity gain to +20.00 dB. Typically,
you would leave this set to unity gain
(00.00 dB), but it depends upon how
much makeup gain you need. Turn the
V-Pot clockwise to increase the output
gain and counterclockwise to decrease
the output gain.
TO ADJUST THE COMPRESSOR SETTINGS
From the screen:
1. Click on the Compressor button in the
lower menu bar. The COMPRESSOR
control panel appears on the screen.
2. The first control in the COMPRESSOR
window adjusts the compressor threshold, with a range from –60.00 dB to
–1.00 dB. Click and drag up on the
control to increase the threshold and
drag down to decrease the threshold.
3. The second control adjusts the compressor attack time, with a range from
0.31 ms (milliseconds) to 2560.00 ms
(2.6 seconds). Click and drag up on the
control to increase the attack time and
drag down to decrease the attack time.
4. The third control adjusts the compressor release time, with a range from
10.00 ms to 2500.00 ms (2.5 seconds).
Click and drag up on the control to increase the release time and drag down
to decrease the release time.
5. The fourth control adjusts the compression ratio, with a range from
1.00:1 to 19.99:1. Click and drag up
on the control to increase the ratio and
drag down to decrease the ratio.
6. The fifth control adjusts the gain of
the compressor, with a range from
unity to +20.00 dB. Typically, you
would leave this set to unity gain.
Click and drag up on the control to increase the output gain and drag down
to decrease the output gain.
6-40
Starting a New Session
Compressor settings can be saved and
recalled from the hard drive. You can save
and load files from either Memory A or
Memory B.
TO SAVE A COMPRESSOR PATCH
D8B
comp#1
<<
From the console:
1. With COMPRESSOR selected for channel processing, press SAVE PATCH in
the Fat Channel Section.
56 INPUT / 72 CHANNEL DIGITAL MIXER
>>
(SAVE
Cancel
Compressor)
OK
SUPER CD ENCODING
PREVIOUS
EQ
SELECT
SELECT
SELECT
SELECT
HELP
LOW
LOW MID
HI MID
HI
NEXT
ON
SETUP
MEMORY A
MEMORY B
GATE
COMPRESSOR
PLUG-INS
LOAD PATCH
SAVE PATCH
2. A default name appears in the Fat
Channel Display, such as “comp#1.”
You can accept the default name, or
you can change it to one of your own
choice.
Owner’s Manual
Saving, Loading, and Resetting the
Compressor Settings
To change the name:
• Turn the first V-Pot to change the letters.
• Press the SELECT buttons below the
arrows to move the cursor left and
right. You can use up to 23 characters
to name a file.
3. When the name appears as you want it,
press the SELECT button below OK to
complete the operation.
TO SAVE A COMPRESSOR PATCH
From the screen:
1. Click and hold on the MENU button in
the Compressor control panel.
2. Drag down to “Save Compressor As...”
The “Save File As” dialog box appears.
3. A default name for the Compressor is
automatically displayed, such as
“comp#1.” If you want to rename it,
simply type the name you want.
4. Click on Save to complete the operation.
Starting a New Session
6-41
Digital 8•Bus
TO LOAD A COMPRESSOR PATCH
D8B
<<
56 INPUT / 72 CHANNEL DIGITAL MIXER
comp#1
Scan
>>
(LOAD Compressor)
Cancel
OK
SUPER CD ENCODING
PREVIOUS
EQ
SELECT
SELECT
SELECT
SELECT
HELP
LOW
LOW MID
HI MID
HI
NEXT
ON
SETUP
MEMORY A
MEMORY B
GATE
COMPRESSOR
PLUG-INS
LOAD PATCH
SAVE PATCH
From the console:
1. With COMPRESSOR selected for channel processing, press the SELECT
button on the channel you want to load
with the compressor file. Press and
hold the SHIFT button in the Master
V-Pot Section to select more than one
channel.
2. Press MEMORY A or MEMORY B to
choose the memory location to which
you want to load the file.
3. Press LOAD PATCH in the Fat Channel Section.
4. The Fat Channel Display shows the
first compressor file (in alphabetical order) in the Compressors folder. Press
the SELECT buttons below the arrows
to scroll through the stored Compressor files.
5. When the one you want appears in the
display, press the SELECT button below OK to complete the operation.
TO LOAD A COMPRESSOR PATCH
From the screen:
1. Click on the SELECT button of the
channel you want to load with the
compressor file. Press and hold the
SHIFT key to select more than one
channel.
2. Click on MEM A or MEM B to choose
the memory location to which you
want to load the file.
3. Click and hold on the MENU button in
the COMPRESSOR control panel.
4. Drag down to “Open Compressor...”
The “Compressor Files...” dialog box
appears.
6-42
Starting a New Session
6. Click on the name of the file to highlight the one you want to load.
7. Click on “Open” (or double-click on the
file name) to load the Compressor file
to the selected channel(s).
TO RESET THE COMPRESSOR
Owner’s Manual
5. Click on INTERNAL if the file is on the
internal hard drive, or click on
FLOPPY if the file is on a floppy disk.
From the console:
1. Refer to the instructions below for
Cutting Compressor settings.
TO RESET THE COMPRESSOR
From the screen:
1. Click and hold on the MENU button in
the COMPRESSOR control panel.
2. Drag down to Reset and release.
Editing Compressor Settings
You can cut, copy, and paste compressor
settings from one channel to another.
TO CUT COMPRESSOR SETTINGS
CLIPBOARD
CUT/ZERO SET
COPY
PASTE
UNDO
From the console:
1. Press the SELECT button on the
channel you want to edit.
2. Press the CUT/ZERO SET button in
the Clipboard Section.
SUPER CD ENCODING
PREVIOUS
EQ
SELECT
SELECT
SELECT
SELECT
HELP
LOW
LOW MID
HI MID
HI
NEXT
ON
SETUP
MEMORY A
MEMORY B
GATE
COMPRESSOR
PLUG-INS
LOAD PATCH
SAVE PATCH
3. Press the COMPRESSOR button in the
Fat Channel section.
4. Press the SELECT button below “Cut”
in the Fat Channel Display, or press the
CUT button again. The compressor
settings for that channel are temporarily
stored in the clipboard memory in case
you want to paste them to another
channel. The compressor then reverts
to the default state.
Starting a New Session
6-43
Digital 8•Bus
TO CUT COMPRESSOR SETTINGS
From the screen:
1. Click and hold on the MENU button in
the Compressor control panel.
2. Drag down to “Cut.” The compressor
settings for that channel are temporarily stored in the clipboard memory
in case you want to paste them to another channel. The compressor then
reverts to the default state.
TO COPY COMPRESSOR SETTINGS
CLIPBOARD
CUT/ZERO SET
COPY
PASTE
UNDO
From the console:
1. Press the SELECT button on the
channel you want to edit.
2. Press the COPY button in the
Clipboard Section.
3. Press the COMPRESSOR button in
the Fat Channel section.
SUPER CD ENCODING
SELECT
PREVIOUS
EQ
SELECT
SELECT
SELECT
LOW
LOW MID
HI MID
HI
ON
SETUP
MEMORY A
MEMORY B
GATE
COMPRESSOR
PLUG-INS
LOAD PATCH
HELP
NEXT
SAVE PATCH
4. Press the Select button below “Copy”
in the Fat Channel Display, or press
the COPY button again. The compressor
settings for that channel are retained,
and are temporarily stored in the
clipboard memory in case you want to
paste them to another channel.
TO COPY COMPRESSOR SETTINGS
From the screen:
1. Click and hold on the MENU button in
the Compressor control panel.
2. Drag down to “Copy.” The compressor
settings for that channel are temporarily stored in the clipboard memory in
case you want to paste them to another
channel. The compressor settings for
the selected channel are retained.
6-44
Starting a New Session
From the console:
1. Press the SELECT button on the
channel you want to edit.
CLIPBOARD
CUT/ZERO SET
COPY
PASTE
UNDO
2. Press the PASTE button in the
Clipboard Section.
3. Press the SELECT button below
“Paste” in the Fat Channel Display, or
press the PASTE button again. The
compressor settings for that channel
are replaced with the settings that are
stored in the clipboard memory.
Owner’s Manual
TO PASTE COMPRESSOR SETTINGS
TO PASTE COMPRESSOR SETTINGS
From the screen:
1. Click and hold on the MENU button in
the EQ control panel.
2. Drag down to “Paste.” The compressor
settings for the selected channel are
replaced with the settings that are
stored in the clipboard memory.
Starting a New Session
6-45
Digital 8•Bus
Using the Gate
• Attack: This determines how fast the gate
opens once the threshold has been exceeded.
It is calibrated in milliseconds (ms), with a
range from 0.10 ms to 599.99 ms (0.6 seconds).
Using a short attack time with a relatively
high threshold can sound like the signal is
suddenly turned on when the gate opens.
Stretching out the attack time can soften the
attack so the signal gradually fades in.
• Release: This determines how fast the gate
closes after the hold time has expired. It is
calibrated in milliseconds (ms), with a range
from 10.00 ms to 2500.00 ms (2.5 seconds).
Using a short release time with a relatively
high threshold can sound like the signal is
suddenly turned off when the gate closes.
Stretching out the release time can soften the
release so the signal gradually fades out.
• Range: This determines the change in output
level as a function of the change in input level,
once the signal level drops below the threshold. This is sometimes called downward
expansion. It is calibrated in decibels, with a
range from 0.00 dB to 100.00 dB. Typically,
you would leave this set to maximum expansion.
A gate is used to turn off a microphone or signal source when the signal drops below the
threshold setting. This can reduce the overall
noise level in your mix by muting unused or noisy
channels. You might use the gate if you’re miking
a noisy guitar amp so you don’t hear the noise
when the guitar isn’t playing. Or, you might gate
the bass drum signal, to prevent the rest of the
drum kit from leaking into the bass drum mic. Or
you might use the gate to reduce reverb “tails” on
a vocal track with a little too much reverb on it.
Note: When we say the gate opens, it means the
gate is not acting on the signal and the signal is
allowed to pass. When the gate closes, the gate
acts on the signal by turning it off. Remember to
close the gate or the cows will get out.
There are a number of settings for the gate
that we should explain.
• Threshold: This control determines the level
at which the gate acts on the incoming signal.
It is calibrated in decibels, with a range from
–60.00 dB to –1.00 dB.
Selecting the Gate
TO SELECT THE GATE
12
36
13
37
SELECT
SELECT
From the console:
1. Select the channel you want to gate by
pressing its SELECT button.
2. Press the GATE button and the ON
button in the Fat Channel Section.
SUPER CD ENCODING
PREVIOUS
EQ
6-46
SELECT
SELECT
SELECT
SELECT
HELP
LOW
LOW MID
HI MID
HI
NEXT
ON
SETUP
MEMORY A
MEMORY B
GATE
Starting a New Session
COMPRESSOR
PLUG-INS
LOAD PATCH
SAVE PATCH
From the screen:
1. Click on the GATE button near the top
of the channel strip you want to gate.
2. To use the graphic view, click on the
GATE button in the lower menu bar
(or press Ctrl-7 on the keyboard).
Owner’s Manual
TO SELECT THE GATE
Adjusting the Gate Settings
TO ADJUST THE GATE SETTINGS
D8B
56 INPUT / 72 CHANNEL DIGITAL MIXER
G.Thresh
-60.0dB
G.Attack
0.1 mS
G.Hold
80.0 mS
G.Release
80 mS
SELECT
SELECT
SELECT
SELECT
HELP
LOW
LOW MID
HI MID
HI
NEXT
ON
SETUP
MEMORY A
MEMORY B
SUPER CD ENCODING
PREVIOUS
EQ
GATE
COMPRESSOR
PLUG-INS
LOAD PATCH
SAVE PATCH
From the console:
1. With GATE selected in the Fat Channel,
the first V-Pot adjusts the gate threshold, with a range from –60.00 dB to
–1.00 dB. Turn the V-Pot clockwise to
increase the threshold and counterclockwise to decrease the threshold.
2. The second V-Pot adjusts the gate attack time, with a range from 0.10 ms
(milliseconds) to 599.99 ms (0.6 seconds). Turn the V-Pot clockwise to
increase the attack time and counterclockwise to decrease the attack time.
3. The third V-Pot adjusts the gate release time, with a range from 10.00
ms to 2500.00 ms (2.5 seconds). Turn
the V-Pot clockwise to increase the release time and counterclockwise to
decrease the release time.
4. The last adjustable parameter is the
range, with a range from 0.00 dB to
100.00 dB. Typically, you would leave
this set to maximum expansion. Turn
the V-Pot clockwise to increase the
range and counterclockwise to decrease
the range.
Starting a New Session
6-47
Digital 8•Bus
TO ADJUST THE GATE SETTINGS
From the screen:
1. Click on the Gate button in the lower
menu bar. The GATE control panel appears on the screen.
2. The first control in the GATE window
adjusts the gate threshold, with a
range from –60.00 dB to –1.00 dB.
Click and drag up on the control to increase the threshold and drag down to
decrease the threshold.
3. The second control adjusts the gate attack time, with a range from 0.10 ms
(milliseconds) to 599.99 ms (0.6 seconds). Click and drag up on the control
to increase the attack time and drag
down to decrease the attack time.
4. The third control adjusts the gate release time, with a range from 10.00 ms
to 2500.00 ms (2.5 seconds). Click
and drag up on the control to increase
the release time and drag down to decrease the release time.
5. The fourth control adjusts the range of
the compressor, with a range from
0.00 dB to 100.00 dB. Typically, you
would leave this set to maximum expansion. Click and drag up on the
control to increase the range and drag
down to decrease the range.
6-48
Starting a New Session
Gate settings can be saved and recalled
from the hard drive. You can save and load
files from either Memory A or Memory B.
TO SAVE A GATE PATCH
D8B
gate#1
<<
From the console:
1. With GATE selected for channel processing, press SAVE PATCH in the Fat
Channel Section.
56 INPUT / 72 CHANNEL DIGITAL MIXER
>>
(SAVE
Cancel
Gate)
OK
SUPER CD ENCODING
PREVIOUS
EQ
SELECT
SELECT
SELECT
SELECT
HELP
LOW
LOW MID
HI MID
HI
NEXT
ON
SETUP
MEMORY A
MEMORY B
GATE
COMPRESSOR
PLUG-INS
LOAD PATCH
SAVE PATCH
2. A default name appears in the Fat Channel display, such as “gate#1.” You can
accept the default name, or you can
change it to one of your own choice.
Owner’s Manual
Saving, Loading, and Resetting the
Gate Settings
3. To change the name:
• Turn the first V-Pot to change the letters.
• Press the SELECT buttons below the
arrows to move the cursor left and
right. You can use up to 23 characters
to name a file.
When the name appears as you want it,
press the SELECT button below SAVE
to complete the operation.
TO SAVE A GATE PATCH
From the screen:
1. Click and hold on the MENU button in
the Gate control panel.
2. Drag down to “Save Gate As...” The
“Save File As...” dialog box appears.
3. A default name for the Gate is automatically chosen, such as “gate#1.” If
you want to rename it, simply type in
the name you want.
4. Click on “Save” to complete the
operation.
Starting a New Session
6-49
Digital 8•Bus
TO LOAD A GATE PATCH
D8B
<<
From the console:
1. With GATE selected for channel processing, press the SELECT button on
the channel you want to load with the
Gate file. Press and hold the SHIFT
button in the Master V-Pot Section to
select more than one channel.
56 INPUT / 72 CHANNEL DIGITAL MIXER
gate#1
Scan
>>
(LOAD Gate)
Cancel
OK
SUPER CD ENCODING
PREVIOUS
EQ
SELECT
SELECT
SELECT
SELECT
HELP
LOW
LOW MID
HI MID
HI
NEXT
ON
SETUP
MEMORY A
MEMORY B
GATE
COMPRESSOR
PLUG-INS
LOAD PATCH
2. Press MEMORY A or MEMORY B to
choose the memory location to which
you want to load the file.
3. Press LOAD PATCH in the Fat Channel Section.
SAVE PATCH
4. The Fat Channel display shows the
first Gate file (in alphabetical order) in
the Gate folder. Press the SELECT
buttons below the arrows to scroll
through the stored Gate files.
5. When the one you want appears in the
display, press the SELECT button below “Load” to complete the operation.
TO LOAD A GATE PATCH
From the screen:
1. Click on the SELECT button of the
channel you want to load with the
Gate file. Press and hold the SHIFT
key to select more than one channel.
2. Click on MEM A or MEM B to choose
the memory location to which you
want to load the file.
3. Click and hold on the MENU button in
the GATE control panel.
4. Drag down to “Open Gate.” The “Gate
Files...” dialog box appears.
5. Click on INTERNAL if the file is on
the internal hard drive, or FLOPPY if
the file is on a floppy disk.
6. Click on the name of the file to highlight the one you want to load.
7. Click on “Open” to load the Gate file to
the selected channel(s).
6-50
Starting a New Session
From the console:
Refer to the instructions below for cutting
Gate settings.
TO RESET THE GATE
From the screen:
1. Click and hold on the MENU button in
the Gate window.
Owner’s Manual
TO RESET THE GATE
2. Drag down to “Reset” and release.
Editing the Gate Settings
You can cut, copy, and paste gate settings from one channel to another.
TO CUT GATE SETTINGS
CLIPBOARD
CUT/ZERO SET
COPY
PASTE
UNDO
From the console:
1. Press the SELECT button on the
channel you want to edit.
2. Press the CUT/ZERO SET button in
the Clipboard Section.
3. Press the GATE button in the Fat
Channel Section.
SUPER CD ENCODING
SELECT
PREVIOUS
EQ
SELECT
SELECT
SELECT
LOW
LOW MID
HI MID
HI
ON
SETUP
MEMORY A
MEMORY B
GATE
COMPRESSOR
PLUG-INS
LOAD PATCH
HELP
NEXT
SAVE PATCH
4. Press the SELECT button below “Cut”
in the Fat Channel Display, or press the
CUT/ZERO SET button again. The gate
settings for that channel are temporarily
stored in the clipboard memory in case
you want to paste them to another
channel. The gate then reverts to the
default state.
Starting a New Session
6-51
Digital 8•Bus
TO CUT GATE SETTINGS
From the screen:
1. Click and hold on the MENU button in
the Gate control panel.
2. Drag down to “Cut.” The gate settings
for that channel are temporarily stored
in the clipboard memory in case you
want to paste them to another channel.
The gate then reverts to the default
state.
TO COPY GATE SETTINGS
CLIPBOARD
CUT/ZERO SET
COPY
PASTE
UNDO
From the console:
1. Press the SELECT button on the channel you want to edit.
2. Press the COPY button in the Clipboard Section.
3. Press “GATE” in the Fat Channel section.
SUPER CD ENCODING
SELECT
PREVIOUS
EQ
SELECT
SELECT
SELECT
LOW
LOW MID
HI MID
HI
ON
SETUP
MEMORY A
MEMORY B
GATE
COMPRESSOR
PLUG-INS
LOAD PATCH
HELP
NEXT
SAVE PATCH
4. Press the SELECT button below
“Copy” in the Fat Channel display, or
press the COPY button again. The gate
settings for that channel are retained,
and are temporarily stored in the clipboard memory in case you want to
paste them to another channel.
TO COPY GATE SETTINGS
From the screen:
1. Click and hold on the MENU button in
the Gate control panel.
2. Drag down to “Copy.” The gate settings for that channel are temporarily
stored in the clipboard memory in case
you want to paste them to another
channel. The gate settings for the selected channel are retained.
6-52
Starting a New Session
CLIPBOARD
CUT/ZERO SET
COPY
PASTE
UNDO
From the console:
1. Press the SELECT button on the
channel you want to edit.
2. Press the PASTE button in the
Clipboard Section. Or press the Select
button under “PASTE” in the Fat
channel display.
TO PASTE GATE SETTINGS
Owner’s Manual
TO PASTE GATE SETTINGS
From the screen:
1. Click and hold on the MENU button in
the Gate control panel.
2. Drag down to “Paste.” The gate settings for the selected channel are
replaced with the settings that are
stored in the clipboard memory.
Using Internal Effects
The Digital 8•Bus comes with one DSP card
installed to provide two stereo effects. Three
additional cards can be installed for a total of up
to eight mono-in, stereo-out internal effects
available simultaneously.
The console ships with the Mackie FX
(MFX•8™) plug-in installed. This plug-in provides
five useful effects that can be globally selected
and used with the aux sends and FX returns.
Each effect has a 3-Band Parametric EQ which
filters the signal prior to the actual effect.
3-Band Parametric EQ
This provides a low-shelving filter with a corner
frequency at 100Hz, a mid-band fully parametric
EQ, and a high-shelving filter with a corner frequency at 10kHz.
Low Shelf Gain: This adjusts the boost and cut
below 100Hz. This is calibrated in decibels (dB),
with a range from –12 dB to +12 dB.
High Shelf Gain: This adjusts the boost and
cut above 10kHz. This is calibrated in decibels
(dB), with a range from –12 dB to +12 dB.
Mid Gain: This adjusts the boost and cut at
the mid-frequency setting. This is calibrated in
decibels (dB), with a range from –12 dB to +12 dB.
Mid Frequency: This adjusts the center frequency of the parametric EQ. This is calibrated
in Hertz (Hz), with a range from 100Hz to
10kHz.
Mid Q: This adjusts the bandwidth of the frequencies affected by the parametric EQ. It is a
unit-less measure, with a range from 0.1 to 10.
A low Q setting provides a very tight bandwidth
(less than an octave), and a high Q setting provides a very wide bandwidth (covering several
octaves).
Reverb
This uses a room reverberation algorithm that
provides the following controls:
Room Size: This adjusts the time between reflections to simulate different room sizes. It is
calibrated in meters (m), with a range from 3.0m
(small) to 40.0m (large).
Starting a New Session
6-53
Digital 8•Bus
Decay: This adjusts the amount of time that
reflections continue to propagate. A “live” room
will have a longer decay time than a “dead” room.
It is calibrated in seconds (S), with a range from
1.1 seconds to 2.2 seconds.
PreDelay: This adjusts the amount of delay between the dry audio signal and the start of the
wet reverberant signal. Adjusting this control can
provide better separation and definition to the dry
signal. It is calibrated in milliseconds (mS), with
a range from 0mS to 299mS (0.3 seconds).
Damping: This control causes the higher
frequencies to roll off faster than the low
frequencies. The higher the damping setting, the
faster the high frequencies roll off. This is a unitless measure, with a range from 0 to 10.
Diffusion: This controls the increase in echo
density over time in the reverberant signal. The
higher the diffusion setting, the higher the echo
density. This is a unit-less measure, with a range
from 0 to 10.
Rolloff: This adjusts the cutoff frequency for
rolling off the entire reverberant signal. This is
different from the damping control which rolls off
only the higher frequencies over time. It is calibrated in Hertz (Hz), with a range from 500Hz to
20kHz. It also has a Flat position, which bypasses the control.
Mono Delay
The mono delay effect provides an adjustable
delay, which is returned to the left and right stereo effect return. It also provides an adjustable
feedback path for a multiple echo effect. The
mono delay has the following controls:
Delay: This adjusts the amount of time between the original signal and the delayed signal.
It is calibrated in milliseconds (mS), with a range
from 0mS to 1599ms (1.6 seconds).
Feedback: This adjusts the amount of signal
that is fed back to the input of the delay. It is calibrated in percent, with a range from 0% to 99%.
Rolloff: This adjusts the cutoff frequency for rolling off the feedback signal. It is calibrated in Hertz
(Hz), with a range from 500Hz to 20kHz. It also
has a Flat position, which bypasses the control.
Stereo Delay
The stereo delay effect provides independently
adjustable delays which are returned to the left
and right stereo effect return. It also provides an
adjustable feedback path for a multiple echo effect. The stereo delay has the following controls:
Left and Right Delay: This adjusts the amount
of time between the original signal and the delayed signal. It is calibrated in milliseconds (mS),
with a range from 0mS to 799ms (0.8 seconds).
Notice that the stereo delay effect has precisely
one-half the amount of delay available per channel as the mono delay.
6-54
Starting a New Session
Left and Right Feedback: This adjusts the
amount of signal that is fed back to the input of
the delay. It is calibrated in percent, with a range
from 0% to 99%.
Rolloff: This adjusts the cutoff frequency for rolling off the feedback signal. It is calibrated in Hertz
(Hz), with a range from 500Hz to 20kHz. It also has
a Flat position, which bypasses the control.
Ping Pong
This effect is the same as stereo delay, with
the exception that the left feedback is directed to
the right delay input, and the right feedback is
directed to the left delay input. In this way, the
delayed signal (echo) bounces back and forth between the left and right channels.
Chorus
The chorus effect generates a mono or stereo
simulated chorus of voices. It has the following
controls:
Depth: This adjusts the depth of the chorus
modulation for all the voices. It is calibrated in
milliseconds (mS), with a range from 0mS to
10.0mS.
Delay: This adjusts the amount of time between the original signal and all the generated
chorus voices. It is calibrated in milliseconds
(mS), with a range from 0mS to 100mS.
Thicken: This defines the number of delay
taps used to generate the chorus effect, and how
they are distributed across the left and right
channels. There are four settings:
0 = one mono voice
1 = one stereo voice
2 = two stereo voices
3 = three stereo voices
Speed: This controls the rate of the chorus
modulation, and applies to all voices. It is calibrated in Hertz (Hz), with a range from 0.1Hz to
10.0Hz.
Waveform: This defines the waveform that is
used for modulating the voices. There are three
settings, including sine, triangle, and random.
The random setting applies random sine/triangle
waveforms to each voice independently.
The Digital 8•Bus also comes with a library of
effects settings (patches) stored on the hard
drive that can be readily selected. Additional
plug-in effects will become available.
Only one effect can be assigned to each internal
effects bus. Aux 1 is routed to the Internal Effects 1
bus, and is returned to the L-R bus via the FX 1 and
FX 2 faders in Fader Bank 3. Aux 2 is routed to the
Internal Effects 2 bus, and is returned to the L-R
bus via the FX 3 and FX 4 faders in Fader Bank 3.
If additional DSP cards are installed, this pattern is
repeated for up to eight internal effects buses and
sixteen effects returns.
TO SELECT INTERNAL EFFECTS
1-24
1-48
LEVEL TO TAPE
DIGITAL TRIM
AUX 1
AUX 2
AUX 3
AUX 4
AUX 5
AUX 6
AUX 7
AUX 8
From the console:
1. Select the Aux Send in the V-Pot Select
Section corresponding to the effect processor you want to use.
SUPER CD ENCODING
SELECT
SELECT
SELECT
SELECT
HELP
Owner’s Manual
Selecting Internal Effects
2. Press the PLUG-INS button and the ON
button in the Fat Channel Section.
PREVIOUS
LOW
LOW MID
HI MID
HI
ON
SETUP
MEMORY A
MEMORY B
EQ
GATE
PLUG-INS
COMPRESSOR
MASTERS
SHIFT
1-24
25-48
MIC/LINE
TAPE IN
(TRACK)
(MONITOR)
NEXT
SAVE PATCH
LOAD PATCH
3. Press the EFFECTS button to select
Fader Bank 3. Adjust the corresponding FX Return fader to add the effect to
the L-R buses. Start at unity gain; you
will be returning to this bank often to
adjust the “wet” return.
49-72
EFFECTS
BANK SELECT
D8B
56 INPUT / 72 CHANNEL DIGITAL MIXER
Aux 1
Reverb
(STANDARD EFFECTS)>
Version 1.0
SUPER CD ENCODING
PREVIOUS
EQ
SELECT
SELECT
SELECT
SELECT
HELP
LOW
LOW MID
HI MID
HI
NEXT
ON
SETUP
MEMORY A
MEMORY B
GATE
COMPRESSOR
PLUG-INS
SAVE PATCH
LOAD PATCH
AUX 9-10
AUX 11-12
PAN
PAN
12
36
5. Adjust the Aux level V-Pots on the
channels you want to send to the
selected effect.
6. Turn the Master Aux level V-Pot to adjust the overall aux send level to the
selected effect. You can press the SOLO
button in the Master V-Pot Section to
monitor the aux send signal, Pre-FX.
SELECT
MASTER
PAN
4. Select the effect you want to use with
the first V-Pot in the Fat Channel Section, and adjust the effect’s parameters
as desired.
SOLO
Starting a New Session
6-55
Digital 8•Bus
TO SELECT INTERNAL EFFECTS
From the screen:
1. Click on the CARD A, B, C, or D button
in the lower menu bar to open the
Effects Control Panel. Alternately,
Ctrl-9, Ctrl-0, Ctrl-(–), and Ctrl-(=) on
the keyboard will open and close the
respective control panels. Click on the
ON switch if the Effect isn’t already on
(defaults to ON). If the card isn’t
loaded with an effects algorithm, go to
the SETUP section in the lower-left
corner of the screen, and click on the
Plug-Ins icon.
2. Click on the Aux Send button corresponding to the effect you want to
assign channels to. Click and hold on
the V-Pots of the channels you want to
send to the selected effect and adjust
the send levels by dragging the mouse
up and down. Alternately, you can
click and hold in the Aux Send
bargraph near the middle of the channel strip to adjust the aux send level.
3. Select the effect you want to use in
the control panel, and adjust the
effect’s parameters .
4. Click on the EFFECTS button just
above the Master Fader to select
Fader Bank 3. Adjust the corresponding FX Return fader to add the effect
to the Left and Right buses.
Adjusting the Effects Settings
TO ADJUST THE EFFECTS SETTINGS
D8B
56 INPUT / 72 CHANNEL DIGITAL MIXER
Aux 1
Reverb
From the console:
1. Press the PLUG-INS button in the Fat
Channel Section.
(STANDARD EFFECTS)>
Version 1.0
SUPER CD ENCODING
PREVIOUS
EQ
6-56
SELECT
SELECT
SELECT
SELECT
HELP
LOW
LOW MID
HI MID
HI
NEXT
ON
SETUP
MEMORY A
MEMORY B
GATE
Starting a New Session
COMPRESSOR
PLUG-INS
LOAD PATCH
SAVE PATCH
The Fat Channel display instructs you
to select an aux send that has an FX
plug-in card installed. If you have only
one card installed, press AUX 1 or
AUX 2 in the V-Pot Select Section.
2. Rotate the first V-Pot to scroll through
the available effects for the selected
FX card. Stop when the one you want
appears in the display.
TO ADJUST THE EFFECTS SETTINGS
From the screen:
1. Click on the CARD A, B, C, or D button
in the lower menu bar to open the control panel for the FX card you want to
program.
2. Click on the “TYPE” control to view
the available effects for the selected FX
card. Stop on the one you want to use.
Owner’s Manual
3. The parameters associated with the selected effect appear in the display.
Rotate their corresponding V-Pots to
adjust their parameters to taste.
3. Depending on which effect you choose,
a number of parameters appear in the
control panel. Click and drag on each
control and adjust to taste.
Turning the Effects On and Off
TO TURN THE EFFECTS ON AND OFF
SUPER CD ENCODING
PREVIOUS
EQ
SELECT
SELECT
SELECT
SELECT
HELP
LOW
LOW MID
HI MID
HI
NEXT
ON
SETUP
MEMORY A
MEMORY B
GATE
COMPRESSOR
PLUG-INS
LOAD PATCH
SAVE PATCH
From the console:
1. With PLUG-INS selected in the Fat
Channel Section, press the ON button to
toggle the effects on and off. The LED
in the ON button lights to indicate that
the effects are enabled. When the effects are turned off, the current settings
remain in memory so that when the ON
button is pressed again, the effects are
restored. This lets you quickly compare
the channel with and without effects.
TO TURN THE EFFECTS ON AND OFF
From the screen:
1. Click on the appropriate Card (A,B,C,D)
button in the lower menu bar.
2. Click on the ON switch in the FX control panel. The LED above the switch
lights to indicate that the Effect is on.
Starting a New Session
6-57
Digital 8•Bus
Saving, Loading, and Resetting the
Effects Settings
Effects settings can be saved and recalled from the hard drive. You can save
and load files from either Memory A or B.
TO SAVE AN EFFECTS PATCH
SUPER CD ENCODING
PREVIOUS
EQ
SELECT
SELECT
SELECT
SELECT
HELP
LOW
LOW MID
HI MID
HI
NEXT
ON
SETUP
MEMORY A
MEMORY B
GATE
COMPRESSOR
PLUG-INS
LOAD PATCH
SAVE PATCH
From the console:
1. With PLUG-INS selected for channel
processing, press SAVE PATCH in the
Fat Channel Section.
2. A default name appears in the Fat
Channel display, such as “Patch #1”.
You can accept the default name, or
you can change it to one of your own
choice.
3. To change the name:
• Turn the first V-Pot to change the
letters.
• Press the SELECT buttons below
the << >> arrows to move the cursor left and right. You can use up to 23
characters to name a file.
When the name appears as you want
it, press the SELECT button below
SAVE to complete the operation.
TO SAVE AN EFFECTS PATCH
From the screen:
1. Click and hold on the MENU button in
the AUX control panel.
2. Drag down to “Save Effect As...” The
“Save File As...” dialog box appears.
3. A default name for the effect is automatically chosen, such as “patch #1.”
If you want to rename it, simply type
in the name you want.
4. Click on “Save” to complete the
operation.
6-58
Starting a New Session
SUPER CD ENCODING
PREVIOUS
EQ
SELECT
SELECT
SELECT
SELECT
HELP
LOW
LOW MID
HI MID
HI
NEXT
ON
SETUP
MEMORY A
MEMORY B
GATE
COMPRESSOR
PLUG-INS
LOAD PATCH
SAVE PATCH
From the console:
1. With PLUG-INS selected for channel processing, press MEMORY A or MEMORY
B to choose the memory location to
which you want to load the file.
2. Press LOAD PATCH in the Fat Channel
Section.
3. The Fat Channel display shows the
first effects file (in alphabetical order)
in the FX folder. Press the SELECT
buttons below the arrows to scroll
through the stored effects files.
Owner’s Manual
TO LOAD AN EFFECTS PATCH
4. When the one you want appears in the
display, press the SELECT button below Load to complete the operation.
TO LOAD AN EFFECTS PATCH
From the screen:
1. Click on MEM A or MEM B in the AUX
control panel to choose the memory location to which you want to load the
file.
2. Click and hold on the MENU button in
the AUX control panel.
3. Drag down to “Effect Files...” The
“Patches...” dialog box appears.
4. Click on INTERNAL if the file is on the
internal hard drive, or FLOPPY if the
file is on a floppy disk.
5. Click on the name of the file to highlight the one you want to load.
6. Click on “Open” to load the EQ file to
the selected channel(s).
TO RESET THE EFFECTS
From the console:
This feature is not available from the
console.
Starting a New Session
6-59
Digital 8•Bus
TO RESET THE EFFECTS
From the screen:
1. Click and hold on the MENU button in
the Effects Control Panel.
2. Drag down to “Reset” and release.
Editing Effects Settings
You can cut, copy, and paste effects settings from one patch to another.
TO CUT EFFECTS SETTINGS
From the console:
This feature is not available from the
console.
TO CUT EFFECTS SETTINGS
From the screen:
1. Click and hold on the MENU button in
the Effects Control Panel.
2. Drag down to “Cut.” The effects settings for that effect are temporarily
stored in the clipboard memory in case
you want to paste them to another
patch. The effect then reverts to the
default state.
6-60
Starting a New Session
From the console:
This feature is not available from the
console.
TO COPY EFFECTS SETTINGS
From the screen:
1. Click and hold on the MENU button in
the Effects Control Panel.
Owner’s Manual
TO COPY EFFECTS SETTINGS
2. Drag down to “Copy.” The effects settings for that patch are temporarily
stored in the clipboard memory in case
you want to paste them to another
patch. The effects settings for the selected channel are retained.
TO PASTE EFFECTS SETTINGS
From the console:
This feature is not available from the
console.
TO PASTE EFFECTS SETTINGS
From the screen:
1. Click and hold on the MENU button in
the Effects Control Panel.
2. Drag down to “Paste.” The effects settings for the selected patch are
replaced with the settings that are
stored in the clipboard memory.
Starting a New Session
6-61
Digital 8•Bus
Using External Processing
Compressors, gates, and equalizers are
generally inserted into the signal path. They are
referred to as “serial devices,” used in series with
the signal path. All the signal goes into the
device, then out and back to the mixing console’s
signal path. The compressor, gate, and EQ in the
Digital 8•Bus follow this model.
Reverb, echo, delay, aural excitement, and
spatial enhancement are usually set up as send/
return devices. These are referred to as “parallel
devices.” Some amount of the signal is “borrowed”
from a channel via an aux send, sent to the device,
processed and returned to the console as a new,
wet signal to be mixed with the original, dry
signal. The plug-in effects in the Digital 8•Bus
follow this model.
tip
SEND to processor
ring
sleeve
(TRS plug)
This plug connects to one of the
mixer’s Channel Insert jacks.
“tip”
“ring”
RETURN from processor
MONO PLUG
Channel Insert jack
Direct out with no signal interruption.
Insert only to first “click.”
MONO PLUG
Channel Insert jack
Direct out with signal interruption.
Insert all the way in to the second “click.”
STEREO
PLUG
Channel Insert jack
For use as an effects loop.
(TIP = SEND to effect, RING = RETURN from effect.)
6-62
Starting a New Session
You can add external processing devices in
addition to the internal processors of the Digital
8•Bus. If you want to use an external serial
device on a channel, such as a compressor,
equalizer, de-esser, or specialized filter, use the
channel INSERT jack (available on channels 1–12).
The channel INSERT point is after the TRIM
control but before the A/D converter and DSP
effects. The send (tip) is low-impedance (120
ohms), capable of driving any line-level device.
The return (ring) is high-impedance (over 2.5k
ohms) and can be driven by almost any device.
Insert cables must be wired thusly:
Tip = Send (output to effects device)
Ring = Return (input from effects device)
Sleeve = Common ground (connect shield to
all three sleeves)
Besides being used for inserting external devices, these jacks can also be used as channel
analog direct outputs (post-TRIM and pre-EQ).
In fact, Mackie mic preamps have become so famous that people buy our compact mixers just to
have four or six of these preamps in their arsenal. Here’s three ways you can use the channel
INSERT jacks:
If you want to use an external parallel device
on a channel such as a reverb or digital delay,
use the AUX sends and Effects Returns (channels 13–24). The AUX Sends 1–8 are post-fader,
-mute, and -pan by default. You can configure an
aux send to be pre-fader, post-EQ if desired in the
Fat Channel Setup. Post-fader is almost always
the preferred mode for reverb sends. Keep the
sends assigned post-fader unless you don’t want
the reverb to follow the fader moves.
Remember, when you have an aux send
configured post-fader with the level below unity
and you switch the aux send to pre-fader, the
signal will be louder at the aux send. This could
be a startling experience, for your ears and your
tweeters!
TO CONFIGURE AN AUX SEND TO BE
PRE- OR POST-FADER
SETUP
SAVE
SAVE AS...
NEW
LOAD
GROUP
GENERAL
PLUG INS
DIGITAL I/O
D8B
Language
56 INPUT / 72 CHANNEL DIGITAL MIXER
(GENERAL
Surround
MIDI
D8B
SETUP Pg1)
Autosave
>
56 INPUT / 72 CHANNEL DIGITAL MIXER
<
Pre-Post
From the console:
1. Press the GENERAL button in the
Setup Section. The General Setup Menu
appears in the Fat Channel display.
Display
(GENERAL
About
SETUP
Pg2)
2. Press the NEXT button on the Fat
channel section to go to page 2 of the
General Setup menu. Press PREVIOUS
if you want to go back to page 1.
3. Press the SELECT button below PrePost in the Fat Channel display. The
Pre-Post menu appears.
Owner’s Manual
Configuring an Aux Send
4. Press the NEXT button to advance to
AUX 5–8, and AUX 9–12 if desired.
Press the PREVIOUS button to move
back through the menu.
D8B
AUX1
Post
AUX2
Post
5. Press the SELECT button below each
Aux to toggle between Pre and Post.
56 INPUT / 72 CHANNEL DIGITAL MIXER
AUX3
Post
AUX4
Post
>
6. When finished, press PREVIOUS to get
back to the General Setup Menu and
then press the GENERAL button to return to normal Fat Channel operation.
TO CONFIGURE AN AUX SEND TO BE
PRE- OR POST-FADER
From the screen:
1. Click on the Setup button in the lower
menu bar. The Setup dialog box opens.
2. Click on the Aux/Surround icon on the
left side of the box. The Aux Surround
dialog box opens.
3. Click in the boxes corresponding to the
auxes you want to configure pre-fader.
A checkmark indicates pre-fader is
selected.
4. Click on the Close button in the upper
right corner of the dialog box to remove
the Setup dialog box from the screen
(or click on the Setup button in the
menu bar).
Starting a New Session
6-63
Digital 8•Bus
Adjusting for Nominal Input and Output
Levels
The channel V-Pot indicates the relative send
level for the selected aux bus by the LED indicators surrounding the pot. When the LED located
at 2 o’clock is lit, the signal going to the aux send
is unity gain.
Start with the channel aux send levels at unity
gain. If you find that you want the channel’s signal to have more or less of the effect, you can
turn the aux send level up or down accordingly.
Adjust the overall aux send level using the
MASTER V-Pot. The overall aux send level is indicated in the L-R meters when the SOLO button
next to the MASTER V-Pot is pressed. You’ll
want the overall aux send level to be compatible
with the effects device to which it’s being sent.
Most professional effects devices will accept a
+4 dBu level which corresponds to –15 dB FS. If
it has RCA-type connectors on it, it will probably
need a –10 dBV level, which corresponds to
–30 dB FS. Use the MASTER V-Pot to adjust the
aux send output level accordingly.
Patch the output of the reverb or delay unit to
an Effects Return input, which offers level and
pan controls as well as all the EQ and DSP effects, and assign switches to put your effect
where you want it. There are up to twelve channels available for Effects Returns (channels
12–24). This allows you to send and return to six
stereo effects units and bring all the reverbs and
echoes back in.
If you want more “wet” sound, turn the Effects
Return fader up a little more. If you want less
“dry” sound, turn the fader down a bit, and turn
up the appropriate AUX send to compensate and
keep the “wet” level the same.
You can use channels 13–24 as additional inputs to the console if you want. You can also use
channels 1–12 as reverb returns. Simply patch
the return into any LINE input.
Note: Be sure the aux send feeding that reverb is
turned fully down on the channels being used as
reverb returns. If you don’t, every dog in the neighborhood will come begging for treats (or mercy!).
Adding Final Mix Effects to the Main
Outputs
In addition to the various EQ and effects on individual tracks, you may want to add an effect to
the overall mix going to two-track.
If you want to add an external effect to the
overall mix, you have two options.
For a serial processing device:
Feed the Master Outputs from the console directly to the inputs of the external device. Then
run the outputs from the device to your two-track
recorder.
6-64
Starting a New Session
For a parallel processing device:
Assign all the channels to an unused
Submaster as well as to the L-R outputs. Connect the Submaster output to the input of the
external device. Then connect the output from
the external device to an unused Effects Return
channel (13–24). Assign that Effects Return
channel to the L-R output. This is the “wet” signal, and you control the amount of “wet” signal
in the mix by adjusting the Effects Return fader
level (in Fader Bank 3).
Alternately, you can install the optional digital
or analog ALT I/O board in the rear panel card
cage of the Digital 8•Bus. You can assign the
Bus Out 1–8 to the ALT Output, and return the
processed signal to the left and right buses via
the ALT Input and RET 1–8 in Fader Bank 4.
Live Mixing
One of Mackie Designs’ primary product
philosophies is to make our mixing consoles as
multipurpose as possible. This has always applied
to our analog consoles, and it also applies to our
digital mixing consoles. The Digital 8•Bus was
designed to operate like our analog mixing
consoles — the way you’re used to mixing in the
studio and for live sound. See the hookup diagram
on page 6-79.
Although the mechanical design of the Digital
8•Bus is no less durable than our roadworthy
analog mixing consoles, the Remote CPU has a
built-in hard drive, so it is necessary to exercise
some caution in transporting it. Treat it as you
would any computer. A hard drive is a precision
instrument that could be damaged under extreme conditions of vibration or shock. If the
Digital 8•Bus is going to spend some time on the
road, we recommend that you invest in a shockmount case for the Remote CPU. Better to be
safe than sorry.
Setup
From a features standpoint, the Digital 8•Bus
is easy to configure for public address and sound
reinforcement applications, whether you are mixing the house, stage monitors or both at once.
Use the L-R main mix buses and the main L-R
outputs as your main signal path. If you want
separate headphone cue mixes, the PHONES/
CUE MIX 1 and 2 can be assigned to separate
mixes via the AUX 9–10 and AUX 11–12 buses,
or you can patch the Control Room outputs to a
suitable headphone amplifier. Refer to the “Live
Mixing Hookup Diagram” on page 6-79 while
reading this section.
First, let’s take a moment and set everything
up sensibly. Just like in a recording session, it’s
good to group your inputs by instruments, stage
position or whatever else suits you. Try to keep
Adjusting Input Signals
FOLLOW THIS SENSITIVITY ADJUSTMENT
PROCEDURE FOR EACH CHANNEL IN USE:
1. If you’re starting from scratch, it’s a good
idea to zero the console to some starting
point, such as all level controls down, and EQ
and pan controls centered. Snapshot 00 is
pre-programmed with our default factory settings — our version of a “zeroed” console.
You can reprogram Snapshot 00 so that it resets the console to your preferred “zero
state,” or keep the factory default settings
and save your own settings to another snapshot (Snapshot 01, for example).
2. Connect a signal to a channel.
• If the channel will be used with a microphone, the MIC switch should be up.
they’re going to play/sing/strike. Don’t just
play a single sustained note, but rather, jam
away as you would be during a recording or
performance.
8. Adjust the TRIM control. The goal is to get
the channel meter reading at or around –15.
The peaks should regularly hit, and occasionally exceed, the –15 designation on the
meter. This is equivalent to a +5 dBu analog
level, and provides plenty of headroom for
transient peaks before reaching 0 dB FS.
TRIM
LINE
MIC
0
-20dB
60
+40dB
12
To monitor the signal, adjust the Solo Level
in the Studio/Solo Section by pressing SOLO
and adjusting the LEVEL V-Pot.
MIC
REC/RDY
9. If desired, press the channel’s SELECT
switch and adjust the EQ in the Fat Channel. You may need to readjust the channel’s
TRIM control after changing the EQ setting.
Owner’s Manual
the drum mics next to each other, the vocals together and so on. Label your cables, color-code
your windscreens, lay tape across the arm rest,
make a cheat sheet, iron your shorts, give yourself
a break. It can be confusing enough mixing a big
show without wondering which channel is which.
Using aux send-return loops to insert outboard
gear is the same as when recording, unless you want
to use the aux sends as independent cue mixes, by
engaging the PFL function for those aux sends.
ASSIGN
WRITE
10. Repeat steps 4–10 on the next channel that
is being used.
11. Once you’ve achieved a rough mix using this
method, clear all soloed channels to monitor
the Main L-R Output and use the channel
faders to adjust individual levels. Leave the
TRIM control alone. This will give you the
best signal-to-noise ratio in your mix.
12
36
SELECT
• If the channel will be used with a line input,
the MIC switch should be down.
SOLO
MUTE
3. Select Fader Bank 1 by pressing the
MIC/LINE (1–24) button.
MIDI 4
4. Set channel strip controls as follows:
FX 12
12
36
TRIM pots all the way counterclockwise
(–20 dB).
dB
10
Set all the faders to their “U” (unity) markings, including the MASTER L-R.
5
U
There is a Digital Trim control located just after the A/D converter in the channel signal
path. This defaults to unity gain, which is
where you would normally leave it.
5. Press the PFL SOLO switch in the STUDIO/
SOLO section. In this mode the faders will not
affect the solo level at the PHONES output.
6. Press the channel SOLO switch. The LED in
the switch lights.
5
10
30
MIXDOWN SOLO
RUDE SOLO
LIGHT
PFL SOLO
CLEAR SOLO
40
SOLO LEVEL
50
60
AFL SOLO
7. Make appropriate “noise” into the channel input. For example, have a performer play/sing/
strike something or someone, etc. at the level
20
STUDIO/SOLO
TALKBACK TO
STUDIO
STUDIO LEVEL
TALKBACK LEVEL
LEVEL
Starting a New Session
6-65
Digital 8•Bus
Routing Channels to Mains and Subs
You should normally use the L-R Mix buses as
your main or house feed. Patch out from the L-R
outputs (preferably the balanced XLR outputs)
into the input to your amp stack (usually your
house graphic equalizer).
If you’re used to assigning groups of instruments
or voices to a submaster so you can control the
level of an entire group with a single fader, you’ve
probably realized by now that the submasters on
the Digital 8•Bus don’t patch directly to the L-R
outputs. We did anticipate your need for this,
however. That’s why there are eight Virtual Group
Faders in Fader Bank 4. See “Virtual Grouping/
Ungrouping” in Chapter 8 to see how they work.
You can use the submaster outputs as independent outputs for a variety of purposes. In our Live
Mixing hookup example on page 6-79, we are us-
ing all eight submaster outputs to connect to an
8-track recorder. But you can use them to create
a separate submix for special monitoring purposes, or even as additional aux sends.
If you assign a channel to an odd/even pair of
buses (i.e., Buses 1 and 2, Buses 3 and 4, etc.),
the channel pan control pans the signal between
the two buses.
If you really need to assign audio buses 1-8 to
the L-R mix, you can route the bus outs to the
ALT I/O returns 1-8 and then assign the returns
(Fader bank 3) to the L-R mix. This will also allow you to add effects to the buses, by sending
auxes from the returns to the effects, and returning the effects to the mains.
You can also bring the buses into the channels in
the same manner, for even more DSP processing.
Assigning Channels to the L-R Bus
TO ASSIGN CHANNELS TO THE L-R BUS
ASSIGNMENT
ASSIGN
ASSIGN
BUS 1
BUS 2
ASSIGN
ASSIGN
BUS 3
BUS 4
ASSIGN
ASSIGN
BUS 5
BUS 6
ASSIGN
ASSIGN
BUS 7
BUS 8
ASSIGN
ASSIGN
L-R
ROUTE TO
TAPE
From the console:
1. Select the Fader Bank containing the
channels you want to assign to the
L-R bus.
2. Press the L-R button in the Bus
Assignment Section.
3. Press the ASSIGN button on all the
channels that you want to assign to
the L-R bus.
TO ASSIGN CHANNELS TO THE L-R BUS
From the screen:
1. Click on the Fader Bank button containing the channels you want to
assign to the L-R bus.
2. Click on the channel L-R assign buttons on the channels that you want to
assign to the L-R bus.
3. If you want to assign multiple consecutive channels, click and hold the
mouse button on the first channel’s
L-R assign button, and swipe the cursor across the row of L-R buttons.
6-66
Starting a New Session
TO ASSIGN CHANNELS TO BUS 1–8
ASSIGNMENT
ASSIGN
ASSIGN
BUS 1
BUS 2
ASSIGN
ASSIGN
BUS 3
BUS 4
ASSIGN
ASSIGN
BUS 5
BUS 6
ASSIGN
ASSIGN
BUS 7
BUS 8
ASSIGN
ASSIGN
L-R
ROUTE TO
TAPE
From the console:
1. Select the Fader Bank containing the
channels you want to assign to the bus.
2. Press one of the BUS 1–8 buttons in
the Bus Assignment Section.
3. Press the ASSIGN button on all the
channels that you want to assign to the
selected bus.
Owner’s Manual
Assigning Channels to BUS 1-8
TO ASSIGN CHANNELS TO BUS 1–8
From the screen:
1. Click on the Fader Bank button containing the channels you want to
assign to the bus.
2. Click on the bus assign buttons on the
channels that you want to assign to the
buses.
3. If you want to assign multiple consecutive channels, click and hold the mouse
button on the first channel’s bus assign
button, and swipe the cursor across the
row of bus buttons.
Starting a New Session
6-67
Digital 8•Bus
Setup of Monitor Mixes for Performers
Any of the aux buses can be used to feed a stage
monitor mix. Set the aux sends in each channel to prefader (see page 6-63) and patch the aux send outputs to
the appropriate amplifiers. See the “Live Mixing hookup
diagram” on page 6-79.
If you need to provide a simultaneous
independent mix for a stereo recording,
use the stereo Aux 9–10 or Aux 11–12
Sends.
Setting the Aux Send Levels
TO SET THE AUX SEND LEVELS
1-24
1-48
LEVEL TO TAPE
DIGITAL TRIM
AUX 1
AUX 2
AUX 3
AUX 4
AUX 5
AUX 6
AUX 7
AUX 8
AUX 9-10
AUX 11-12
PAN
PAN
MASTER
PAN
SOLO
From the console:
1. Press the AUX button in the V-Pot
Select Section you want to use.
2. Adjust the channel V-Pots to set the aux
send level on each channel you want
send to the AUX output. The LEDs
around the V-Pot indicate the relative
level, with 2 o’clock being unity.
3. Adjust the Master V-Pot to set the
overall aux send level for the selected
aux bus. The LEDs around the Master
V-Pot indicate the relative level, with 2
o’clock being unity.
4. To monitor the aux send mix, with the
aux bus selected in the V-Pot Select
Section, press the SOLO button in the
Master V-Pot Section. The aux send is
routed to the Control Room Output.
Use the V-Pot in the Studio/Solo Section to adjust the Solo level (make
sure the SOLO button is on). If you’re
monitoring on headphones, select
CONTROL ROOM in the Phones/Cue
Mix Section (see next section).
TO SET THE AUX SEND LEVELS
From the screen:
1. Click on the AUX button you want to
use in the V-Pot Select Section.
2. Click and drag on the channel V-Pots
to set the aux send level on each channel you want to send to the AUX
output. The box just below the V-Pot
indicates the level.
3. Alternately, click and drag on the horizontal bar in the AUXES section of the
channel to adjust the aux send dB level.
4. Click and drag on the Master V-Pot to
set the overall aux send level for the selected aux bus. The box just below the
Master V-Pot indicates the dB level.
6-68
Starting a New Session
CONTROL ROOM
PHONES/CUE MIX 1
AUX 9-10
COPY MIX TO CUE
AUX 11-12
CONTROL ROOM
Headphones
2 TRACK A
DIGITAL IN 1
2 TRACK B
DIGITAL IN 2
2 TRACK C
MASTER
L-R
LEVEL
MONO
NEAR FIELD
MAIN
SPEAKERS
SPEAKER LEVEL
TALKBACK
DIM
D8B
Adding EQ, Dynamics and
Effects to Input Signals
56 INPUT / 72 CHANNEL DIGITAL MIXER
GAIN
0.0 DB
GAIN
0.0 DB
GAIN
0.0 DB
GAIN
0.0 DB
SELECT
SELECT
SELECT
SELECT
HELP
LOW
LOW MID
HI MID
HI
NEXT
ON
SETUP
MEMORY A
MEMORY B
SUPER CD ENCODING
PREVIOUS
EQ
GATE
COMPRESSOR
PLUG-INS
If you like to check things out in your
phones, and especially if you want to use
the Digital 8•Bus solo or PFL functions as
a cue circuit, set your phones up like this:
• Plug your headphones into one of the
two PHONES output jacks; let’s say
PHONES 1. Now select CONTROL
ROOM as the PHONES/CUE MIX 1
source.
• In the Control Room Section, select
MASTER L-R as the source. Since the
solo bus only feeds the Control Room, you
need to monitor the L-R mix via the
Control Room circuit to get to the solo bus.
Owner’s Manual
5. To monitor the aux send mix, click on
the SOLO button in the Master V-Pot
Section. The aux send is routed to the
Control Room Output. Use the V-Pot in
the Studio/Solo Section to adjust the
Solo level (make sure the SOLO button
is on). If you’re monitoring on headphones, select CONTROL ROOM in the
Phones/Cue Mix Section (console only,
see next section).
LOAD PATCH
SAVE PATCH
The only difference between using EQ
and effects on our digital mixing console instead of an analog console is that there’s
only one set of knobs to adjust, rather than
a gazillion. Just push the SELECT button
on the channel you want to adjust, and the
Fat Channel becomes an extension of that
channel, showing you the settings for the
selected processor (EQ, compressor, gate,
internal effects) and allowing you to easily
and accurately adjust the parameters for
each one.
Adding EQ
TO ADD EQ
SUPER CD ENCODING
PREVIOUS
EQ
SELECT
SELECT
SELECT
SELECT
HELP
LOW
LOW MID
HI MID
HI
NEXT
ON
SETUP
MEMORY A
MEMORY B
GATE
COMPRESSOR
PLUG-INS
LOAD PATCH
From the console:
1. Select the channel you want to EQ by
pressing its SELECT button.
2. Press the EQ button in the Fat Channel
Section.
SAVE PATCH
3. Adjust the EQ as desired.
Starting a New Session
6-69
Digital 8•Bus
TO ADD EQ
From the screen:
1. Click on the EQ button in the lower
menu bar and the EQ control panel
appears.
2. Select the channel you want to EQ by
clicking on its SELECT button.
3. Adjust the EQ as desired.
Adding Compression
TO ADD COMPRESSION
SUPER CD ENCODING
PREVIOUS
EQ
SELECT
SELECT
SELECT
SELECT
HELP
LOW
LOW MID
HI MID
HI
NEXT
ON
SETUP
MEMORY A
MEMORY B
GATE
COMPRESSOR
PLUG-INS
LOAD PATCH
From the console:
1. Select the channel you want to compress by pressing its SELECT button.
2. Press the COMPRESSOR button in
the Fat Channel Section.
SAVE PATCH
3. Adjust the parameters as desired.
TO ADD COMPRESSION
From the screen:
1. Click on the Compressor button in the
lower menu bar and the Compressor
control panel appears.
2. Select the channel you want to compress by clicking on its SELECT button.
3. Adjust the compressor parameters as
desired.
6-70
Starting a New Session
TO ADD GATE
SUPER CD ENCODING
PREVIOUS
SELECT
SELECT
SELECT
SELECT
HELP
LOW
LOW MID
HI MID
HI
NEXT
ON
SETUP
MEMORY A
MEMORY B
EQ
GATE
PLUG-INS
COMPRESSOR
From the console:
1. Select the channel you want to gate by
pressing its SELECT button.
2. Press the GATE button in the Fat
Channel Section.
SAVE PATCH
LOAD PATCH
3. Adjust the gate parameters as desired.
TO ADD GATE
Owner’s Manual
Adding Gate
From the screen:
1. Click on the Gate button in the lower menu
bar and the Gate control panel appears.
2. Select the channel you want to gate by
clicking on its SELECT button.
3. Adjust the gate parameters as desired.
Adding Effects
TO ADD EFFECTS
SUPER CD ENCODING
SELECT
PREVIOUS
EQ
SELECT
SELECT
SELECT
LOW
LOW MID
HI MID
HI
ON
SETUP
MEMORY A
MEMORY B
GATE
1-24
1-48
LEVEL TO TAPE
DIGITAL TRIM
AUX 1
AUX 2
AUX 3
AUX 4
AUX 5
AUX 6
AUX 7
AUX 8
AUX 9-10
AUX 11-12
PAN
PAN
PLUG-INS
COMPRESSOR
HELP
NEXT
SAVE PATCH
LOAD PATCH
From the console:
1. Press the PLUG-INS button in the Fat
Channel Section.
2. Select the aux send in the V-Pot Select
Section corresponding to the effects
processor you want to use.
3. Adjust the V-Pots on the channels you
want to send to the selected effect.
AUX 9-10
AUX 11-12
PAN
PAN
MASTER
PAN
4. Turn the Master V-Pot to adjust the
overall aux send level to the selected
effect. You can press the SOLO button
in the Master V-Pot Section to monitor
the aux send signal.
MASTERS
SHIFT
1-24
25-48
SOLO
MIC/LINE
TAPE IN
(TRACK)
(MONITOR)
49-72
EFFECTS
BANK SELECT
5. Select the effect you want to use with
the first V-Pot (in the Fat Channel), and
adjust the effect’s parameters as desired. See “Selecting Internal Effects”
on page 6-53 for more information on
selecting and adjusting internal effects.
6. Press the EFFECTS button to select
Fader Bank 3. Adjust the corresponding FX Return fader to add the effect to
the Left and Right buses.
Starting a New Session
6-71
Digital 8•Bus
TO ADD EFFECTS
From the screen:
1. Click on the CARD A, B, C, or D button in the lower menu bar to open the
Effects control panel.
2. Select the type of effect you want to
use with the selected FX card, and adjust the parameters for the selected
effect. See “Selecting Internal Effects”
on page 6-53 for more information on
selecting and adjusting internal effects.
3. Click on the AUX button in the V-Pot
Select Section that corresponds to the
effect you want to use.
4. Click and drag on the V-Pots of the
channels you want to send to the selected effect, to adjust the aux send
level. Alternately, you can click and
drag on the horizontal bar in the auxes
section at the top of the channel strip
to adjust the aux send level.
5. Click and drag on the Master V-Pot to
adjust the overall aux send level to the
selected effect. You can click on the
SOLO button in the Master V-Pot Section to monitor the aux send signal.
6. Click on the EFFECTS button to select
Fader Bank 3. Click and drag the FX
return fader(s) corresponding to the
selected effect, to control the amount
of processed signal returning to the
left and right bus.
6-72
Starting a New Session
If you want to add an external effect to the
main outputs, you have two options.
For a serial processing device:
Feed the Master Outputs from the console directly to the inputs of the external device. Then
run the outputs from the device to your two-track
recorder.
For a parallel processing device:
Assign all the channels to an unused
submaster as well as to the L-R outputs. Connect
the submaster output to the input of the external
device. Then connect the output from the external device to an unused effects return channel.
Assign that effects return channel to the L-R output. This is the “wet” signal, and you control the
amount of “wet” signal in the mix by adjusting
the Effects Return fader level (in Fader Bank 3).
Making a Recording While
Doing a Live Mix
You’re all set up, ready to go, when the
band’s manager comes up to you with a DAT
machine and goes “The producer wants us to
send him a recording of tonight’s gig,” and
you go, “I’ll patch it into the house mix,” and
he goes, “No, I’d rather get a special mix just
for the tape,” and you roll your eyes and go,
“You should really get a remote truck,” and he
rolls his eyes and goes, “Here’s the tape.
Make it so and we might hire you next time.”
Piece of cake with the Digital 8•Bus.
Aux 9–10 and Aux 11–12 are stereo aux
sends that can be used to make a stereo recording. Simply assign the channels to the
stereo aux send, individually adjust their
levels and pans, and send it off to the 2-track
recorder. See “Live Sound Reinforcement
Hookup Example” on page 6-79.
Owner’s Manual
Adding Effects to the Main Outputs
Using the Stereo AUXes
TO USE THE STEREO AUXES
AUX 9-10
AUX 11-12
PAN
PAN
From the console:
1. Connect the AUX 9–10 (or 11–12) outputs to the line level inputs on your
tape recorder.
2. Press AUX 9–10 (or AUX 11–12) button
in the V-Pot Select Section.
3. Adjust the V-Pot on all the channels
you want to send to the auxiliary mix.
MASTER
PAN
SOLO
4. Press the AUX 9–10 (or AUX 11–12)
PAN button in the V-Pot Select Section.
5. Adjust the V-Pot on all the channels
you are sending to the auxiliary mix to
control the amount of left or right panning for each channel.
TO USE THE STEREO AUXES
From the screen:
1. Connect the AUX 9–10 (or 11–12) outputs to the line-level inputs on your
tape recorder.
2. Click on CUE 1 (or CUE 2) LEVEL in
the V-Pot Select Section.
Starting a New Session
6-73
Digital 8•Bus
3. Click and drag on the V-Pot for all the
channels you want to send to the auxiliary mix.
4. Click on the CUE 1 (or CUE 2) PAN
button in the V-Pot Select Section.
5. Click and drag on the V-Pot for all the
channels you are sending to the auxiliary mix to control the amount of left
or right panning for each channel.
Recalling Console Snapshots
During a Performance
The power of automation can make
your life a whole lot easier. If you’ve saved
some snapshots of the console’s audio path
settings, you can instantly recall them at
any time during a show (see Chapter 7,
“Automation”). You might have set up different mixes in advance for each individual
song, which you can recall in succession
during the show. During a live theater performance, this can be invaluable to make
quick changes from scene to scene.
TO RECALL A SNAPSHOT
RANGE
POSITION
HOURS
MINUTES
SECONDS
FRAMES
BEATS
TICKS
FROM
TO
SET TIME
BARS
SMPTE VIEW
From the console:
1. Press the SNAPSHOT button in the
Transport Section.
LOOP
1
2
3
4
5
6
7
8
9
0
ENTER
LOOP
STORE
LOCATOR
SNAPSHOT
MODE
REWIND
FAST FWD
STOP
PLAY
2. Enter the two-digit snapshot number
you want to recall using the number
buttons. The number appears in the
RANGE display.
RECORD
3. Press the ENTER button to recall the
snapshot.
SHUTTLE
JOG & SHUTTLE
TO RECALL A SNAPSHOT
From the screen:
1. Click on the SNAPSHOT button in the
lower menu bar.
2. The Snapshot window opens, containing a list of snapshots currently stored
with the session.
3. Double-click on the snapshot title (in
the gray area) you want to recall from
the list.
6-74
Starting a New Session
ANALOG
I/O
ANALOG
I/O
R
L
MASTER OUT
BUS OUT 1-8
&
SURROUND OUT
2 TRACK C
CR
NEAR FIELD
Powered near-field
monitor speakers
2 TRACK B
21
CR
MAIN
22
2 TRACK A
23
24
15
LINE IN
16
MASTER
OUT
17
18
Direct Box
19
13
PNCH I/0 TLKBK
STUDIO OUT
PHNS 1 PHNS 2
20
14
LINE IN
INSERT
LINE IN
INSERT
LINE IN
INSERT
AUX 12
AUX 11
AUX 10
10
11
12
Stereo Effects
Procesor
Digital 8•Bus Analog Recording/Tracking Hookup Example
TO TAPE
FROM TAPE
ANALOG
I/O
TO TAPE
FROM TAPE
Optional
AIO•8
Cards
TO TAPE
FROM TAPE
2-inch
24 track
Sync Interface
AUX 9
INSERT
LINE IN
9
INSERT
LINE IN
8
AUX 8
Reverb
Starting a New Session
INSERT
INSERT
AUX 5
INSERT
LINE IN
5
Internal
Digital Audio
Signal Path
AUX 6
LINE IN
LINE IN
AUX 7
6
7
AUX 4
INSERT
LINE IN
4
LINE IN
INSERT
LINE IN
INSERT
AUX 3
AUX 1
INSERT
LINE IN
1
FX Card 1
AUX 2
2
3
To FX Return
3 and 4
(Fader
Bank 3)
To FX Return
1 and 2
(Fader
Bank 3)
digital control signal
internal digital send
internal digital return
audio out
audio in
Owner’s Manual
MIDI IN/OUT
(Rear of Remote CPU)
Vocal Enhancer
6-75
Computer
w/ Sequencing
Software
OUT
ADAT OPTICAL
ADAT OPTICAL
R
L
MASTER OUT
BUS OUT 1-8
&
SURROUND OUT
CR
NEAR FIELD
CR
MAIN
MASTER
OUT
23
17
2 TRACK C
2 TRACK B
2 TRACK A
24
18
21
15
PNCH I/0 TLKBK
STUDIO OUT
PHNS 1 PHNS 2
22
16
LINE IN
Direct Box
Digital 8•Bus Digital Recording/Tracking Hookup Example
Optional DIO•8 Cards
(ADAT optical connections shown)
ADAT OPTICAL
APOGEE
APOGEE
APOGEE
DIGITAL I/O DIGITAL I/O DIGITAL I/O
Sync Interface
MIDI IN/OUT
(Rear of Remote CPU)
OUT
IN
20
14
19
13
AUX 12
LINE IN
INSERT
LINE IN
INSERT
AUX 11
AUX 10
AUX 9
11
12
MIDI Controlled
Stereo Effects
Processor
IN
OUT
Starting a New Session
INSERT
LINE IN
10
AUX 8
Reverb
IN
6-76
ADATS
INSERT
INSERT
AUX 6
LINE IN
LINE IN
AUX 7
8
9
AUX 5
INSERT
LINE IN
7
AUX 4
INSERT
LINE IN
6
MIDI Controlled
Keyboard
AUX 3
INSERT
LINE IN
5
LINE IN
INSERT
LINE IN
INSERT
AUX 1
INSERT
LINE IN
1
Internal Digital Audio
Signal Path
To FX Return
3 and 4
(Fader
Bank 3)
To FX Return
1 and 2
(Fader
Bank 3)
2
3
FX Card 1
AUX 2
INSERT
LINE IN
4
digital control signal
internal digital send
internal digital return
digital audio out
digital audio in
audio out
audio in
audio insert
Digital 8•Bus
Vocal Enhancer
Starting a New Session
Digital I/O
AES/EBU
OUT
IN
2-inch
24 track
ANALOG
I/O
TO TAPE
FROM TAPE
ANALOG
I/O
TO TAPE
FROM TAPE
ANALOG
I/O
TO TAPE
FROM TAPE
2-Track DAT
(rear of D8B
Remote CPU)
MIDI I/O
Sync Interface
Out
In
R
L
MASTER OUT
BUS OUT 1-8
&
SURROUND OUT
23
24
21
2 TRACK C
CR
NEAR FIELD
Control Room Monitors
Near-field Powered
Monitors
2 TRACK B
2 TRACK A
22
15
LINE IN
16
CR
MAIN
MASTER
OUT
2-Track Recorder
17
18
19
13
Stereo
Reverb
AUX 11
INSERT
INSERT
AUX 12
LINE IN
11
LINE IN
12
INSERT
LINE IN
9
AUX 10
AUX 9
8
AUX 8
INSERT
LINE IN
Digital Delay
INSERT
LINE IN
10
AUX 7
INSERT
LINE IN
7
AUX 6
INSERT
LINE IN
6
AUX 5
INSERT
LINE IN
5
INSERT
LINE IN
3
INSERT
LINE IN
2
AUX 4
AUX 3
AUX 2
1
INSERT
LINE IN
AUX 1
digital control signal
audio out
audio in
INSERT
LINE IN
4
Digital 8•Bus Analog Recording/Mixdown Hookup Example
PNCH I/0 TLKBK
STUDIO OUT
PHNS 1 PHNS 2
20
14
Owner’s Manual
Optional AIO•8 Cards
6-77
ADAT OPTICAL
R
L
MASTER OUT
BUS OUT 1-8
&
SURROUND OUT
Sync
Interface
(SY88)
23
17
Near-field
Powered
Monitors
CR
NEAR FIELD
CR
MAIN
MASTER
OUT
24
18
15
21
2 TRACK C
2 TRACK B
2 TRACK A
22
LINE IN
16
MIDI IN/OUT
(Rear of Remote CPU)
19
13
Control Room
Monitors
PNCH I/0 TLKBK
STUDIO OUT
PHNS 1 PHNS 2
20
14
Digital 8•Bus Analog Recording/Overdub Hookup Example
Optional DIO•8 Cards
(DA-88 TDIF with Sync
connections shown)
ADAT OPTICAL
APOGEE
APOGEE
APOGEE
DIGITAL I/O DIGITAL I/O DIGITAL I/O
OUT
IN
OUT
IN
OUT
Starting a New Session
IN
6-78
ADAT OPTICAL
DA-88
AUX 11
INSERT
INSERT
AUX 12
LINE IN
11
LINE IN
12
AUX 9
INSERT
LINE IN
9
AUX 8
INSERT
LINE IN
8
AUX 7
INSERT
LINE IN
7
AUX 6
INSERT
LINE IN
6
AUX 5
INSERT
LINE IN
5
4
AUX 4
INSERT
LINE IN
Internal Digital Audio Signal Path
(MFX Digital Effects Processing card
with IVL Vocal Studio Software)
AUX 10
INSERT
LINE IN
10
AUX 3
INSERT
LINE IN
3
AUX 1
INSERT
LINE IN
1
FX Card 1
AUX 2
INSERT
LINE IN
2
To FX Return
3 and 4
(Fader
Bank 3)
To FX Return
1 and 2
(Fader
Bank 3)
digital control signal
internal digital send
internal digital return
digital audio out
digital audio in
audio out
audio in
Digital 8•Bus
Optional AIO•8 Cards
R
L
FOH Speakers
MASTER OUT
BUS OUT 1-8
&
SURROUND OUT
2 TRACK B
2 TRACK C
CR
NEAR FIELD
2 TRACK A
CR
MAIN
MASTER
OUT
23
24
21
20
14
19
13
AUX 12
Separate Mix for
Live Broadcast Feed
PNCH I/0 TLKBK
STUDIO OUT
PHNS 1 PHNS 2
Cassette Deck
22
15
LINE IN
16
Processor
Starting a New Session
Digital 8•Bus Live Sound Reinforcement Hookup Example
Digital I/O
AES/EBU
ANALOG
I/O
8 Track Analog
Recorder
17
18
CR1604-VLZ
AUX 10
AUX 9
INSERT
LINE IN
11
AUX 8
AUX 7
INSERT
LINE IN
9
INSERT
LINE IN
10
Stereo Monitors for
Finicky Keyboard Player
AUX 11
INSERT
LINE IN
12
Stereo Reverb
OUT
IN
ANALOG
I/O
TO TAPE
FROM TAPE
ANALOG
I/O
TO TAPE
FROM TAPE
2-Track DAT
Drum Mics
Horn Section Mics
TO TAPE
Percussion Mics
Mic Preamps
Digital Delay
INSERT
INSERT
AUX 5
LINE IN
LINE IN
AUX 6
7
8
AUX 4
INSERT
LINE IN
6
Backup Vocals
INSERT
LINE IN
4
INSERT
LINE IN
3
AUX 3
AUX 1
Power Amp
mono mode
AUX 2
FX Card 1
2
INSERT
LINE IN
INSERT
LINE IN
1
internal digital send
internal digital return
audio out
audio in
audio insert
Stage Monitors
To FX Return
1 and 2
(Fader
Bank 3)
To FX Return
3 and 4
(Fader
Bank 3)
internal digital audio
signal path
INSERT
LINE IN
5
Lead Vocals
Owner’s Manual
Stereo Processor
FROM TAPE
Vocal Enhancer
6-79
APOGEE
APOGEE
APOGEE
DIGITAL I/O DIGITAL I/O DIGITAL I/O
Optional DIO•8 Cards
(DA-88 TDIF with Sync
connections shown)
(rear of D8B
Remote CPU)
MIDI I/O
R
L
Out
In
MASTER OUT
Near-field
Powered
Monitors
2 TRACK C
2 TRACK B
21
CR
MAIN
22
15
2 TRACK A
23
24
16
LINE IN
19
13
Control Room
Monitors
PNCH I/0 TLKBK
STUDIO OUT
PHNS 1 PHNS 2
20
14
Sound FX
MASTER
OUT
17
18
MMC to
RS422
Converter
CR
NEAR FIELD
MIDI
Machine
Control
SMPTE VTR
Time Code
BUS OUT 1-8
&
SURROUND OUT
MIDI Time Code
MIDI Time Code
Sync Interface
(SY88)
Video Sync
Video Sync Gerator
(house sync)
Digital 8•Bus Post Production Hookup Example
Optional
Word Clock
Card
WORD
CLOCK
OUT
WORD
CLOCK
IN
SYNC
CARD
ADAT OPTICAL
Word Clock
ADAT OPTICAL
Video Sync
to Word Clock
Converter
Video Sync
OUT
IN
OUT
IN
OUT
IN
Starting a New Session
ADAT OPTICAL
6-80
DA-88
AUX 12
INSERT
LINE IN
12
AUX 11
INSERT
LINE IN
11
AUX 9
INSERT
LINE IN
9
AUX 8
INSERT
LINE IN
8
AUX 7
INSERT
LINE IN
7
AUX 6
INSERT
LINE IN
6
AUX 5
INSERT
LINE IN
5
AUX 4
INSERT
LINE IN
4
AUX 3
INSERT
LINE IN
3
Foley Mics
Internal Digital Audio Signal Path
(MFX Digital Effects Processing card
with IVL Vocal Studio Software)
AUX 10
INSERT
LINE IN
10
Samplers
AUX 2
INSERT
LINE IN
2
FX Card 1
AUX 1
INSERT
LINE IN
1
Voiceover/
Dialogue
To FX Return
3 and 4
(Fader
Bank 3)
To FX Return
1 and 2
(Fader
Bank 3)
digital control signal
internal digital send
internal digital return
digital audio out
digital audio in
audio out
audio in
Digital 8•Bus
Automation moves are divided into two basic
types: snapshot and dynamic. Snapshot automation makes it possible to instantly reset all
automated console settings to a predetermined
fixed (or static) position with a single command
(snapshot recall). Dynamic automation allows
you to record and play back any parameter
changes, like fader positions or mute toggles,
in real time while locked into time code.
The Digital 8•Bus is powered by Mackie’s
Real Time OS™ automation software. Upon
initial power-up, the console Automation
Section is bypassed. Prior to beginning an
automated mixing session, then, it is necessary
to disengage the BYPASS button in the
Automation Section and select the desired
automation mode(s). Note that snapshot
automation (described in Chapter 5, “Creating
and Storing Snapshots”) is active at all times.
Bypass is only relevant to snapshot automation
when recording or playing back snapshots as
events in a dynamic automation pass. (See
“A word of warning about snapshot automation
relative to dynamic automation,” page 7-2.)
The screen equivalents to the buttons in the
Automation Section are found in the Locator
window (click on the Locator button in the bottom menu bar on the screen).
We suggest that you read this entire chapter
before digging into automation, because there’s
many ways to “skin a cat” in automation land.
It’s best to know how to perform these functions
before you go too far. This chapter covers the
five automation modes, filters, and a number of
different ways to initiate and exit automation.
Dynamic Automation
Dynamic automation writing overwrites
ALL subsequent events for a changed parameter while time code is running. For example,
if you put a channel into write mode with the
FADERS button selected, any fader moves that
were previously written on that channel are
erased while you edit the fader moves for the
channel, but only if timecode is received. If the
Write switch LEDs are solidly lit, but no
timecode is received, there will be no data
written into the automation buffer.
Dynamic automation has four modes of
operation: Bypass, Absolute (or Replace), Auto
Touch, and Trim Levels.
Bypass
Bypass is engaged as the default write-safe
mode on startup. It is used to stop all automation playback and recording. You must turn off
the BYPASS button in order to begin automating a session. Re-enabling Bypass will
Owner’s Manual
7. Automation
extinguish all currently armed Write tracks (so
it’s a quick way to completely disable all currently enabled channels). Bypass cannot be
toggled on and off while timecode is running.
Note: When performing functions other than
automation, such as tracking, live mixing, etc.,
the BYPASS button should remain engaged,
preventing any inadvertent automation writing
(or playback, if any exists).
Upon completion of an automated mix,
BYPASS should be engaged to prevent inadvertently modifying the saved session.
Absolute Mode
Absolute mode is sometimes called Replace
or Update mode. There is no button to engage
Absolute mode; it is the default mode whenever
Bypass is turned off (and Auto Touch and Trim
Levels are off).
The channel WRITE button must be manually engaged to replace current values with
new values. You must also have one of the automation filters active in the Automation
Section: FADERS, MUTES, PAN, or ALL. You
can engage the WRITE button prior to rolling
tape (punch-in), but the automation will not
record moves until approximately 22 frames after stable timecode is received. It is best to
write-enable after timecode is being received,
or pre-roll tape prior to when you intend to
write the automation.
The fader motor is disabled while WRITE is
engaged, and a channel remains in Write mode
until it is manually turned off (punch-out), or
STOP is pressed in the Transport Section, or
timecode stops. The fader motor is enabled
once WRITE is disengaged.
See also “Write Standby and Master
Record” on page 7-4.
Auto Touch Mode
Auto Touch mode is a variation of Absolute
mode: all channels are automatically placed in
Write mode as soon as a control is altered.
Only the control being altered is written to automation; all other automated events from
previous passes for the channel remain intact
unless you alter a control. Auto Touch is great
for minor tweaks as you get closer to the final
mix: small fader rides, a mute you may have
missed earlier on, etc.
As in Absolute mode, you must also have
one of the automation filters active in the Automation Section: FADERS, MUTES, PAN, or
ALL. The channel remains in Write mode until
it is manually turned off (pressing the WRITE
button for a punch-out), or if STOP is pressed
in the Transport Section, or if timecode stops.
Automation
7-1
Digital 8•Bus
You can punch-out a channel while in Auto Touch
Mode by turning off its WRITE button, and reengage Write mode by altering a control on the
channel at another time.
Trim Levels Mode
Trim Levels mode applies to all types of moves,
except on/off data. Trim Levels is a mathematical
recalculation process that modifies levels by some
positive or negative offset value. This mode does
not replace existing fader data, but rather merges
data from any new moves with those that have already been written. In other words, Trim Levels
mode adds or subtracts your new moves from
those you already did. It’s very handy when you’ve
just finished a complex series of moves—a tricky
vocal ride, for example—but you then discover
that the overall level needs adjusting.
Faders in Trim Mode
When you activate TRIM LEVELS, the faders
default to unity position and the fader motors disengage. When TRIM mode is entered, the
on-screen faders and hardware faders take on a
new role. On the screen, a green vertical level bar
appears on each channel strip next to the fader
track to show what the current level position is.
In a default session setting, all fader levels are off
to start with (completely down), so if you don’t
see a green bar when you enter Trim mode, the
fader level is currently off. In Trim, the hardware
or screen faders control the Trim offset and are
no longer displaying the absolute level unless the
fader just happened to match the level when you
first entered Trim mode on that channel.
Note: The Master fader default position is Unity
gain, so it may be confusing when you first enter
Trim mode and the only green level indicator displayed is the Master fader’s level. Also, Fader
Bank 4 has default levels that will display levels
other than the off position.
You must engage a channel’s WRITE button in
order to modify a control in automation. See also
“Write Standby and Master Record” on page 7-4.
Auto Touch / Trim Levels Mode
You can activate Auto Touch along with Trim
Levels mode, and the channel automatically goes
into Write mode as soon as you alter the fader
level. You can then punch-out of Trim Levels by
turning off the WRITE button, by pressing STOP
in the Transport Section, or by stopping timecode.
7-2
Automation
Snapshot Automation
Snapshot automation operates independently
of dynamic automation. A snapshot is a singular,
global event, not specifically related to individual
channels. If a snapshot has been recorded into a
dynamic automation pass, it can be cut, copied,
and pasted as an event in the Mix Editor, and/or
its timestamp can be changed. Snapshot automation may be written into dynamic automation
only in Auto Touch mode with the ALL filter button engaged.
Snapshots are recalled either by:
• Entering the snapshot number and pressing
ENTER (while in Snapshot mode), or
• Clicking on the snapshot in the on-screen
Snapshot window.
As a reminder, snapshots capture and store
the “set it and forget it” settings for the channel
strips, including pans, aux send levels, bus assignments, and DSP settings (EQ, gate,
compressor, internal effects), and the master
fader. Snapshots do not include solo, Control
Room, or Cue Mix settings.
You can modify a snapshot, save it, and the
changes are copied over to the automation the
next time you make a pass.
A word of warning about snapshot automation
relative to dynamic automation:
Snapshots can operate independently of the
dynamic automation (they can be manually stored
and recalled at any time) or snapshots can be
stored and recalled as a global event (independent
of specific channel automation events) in the
dynamic automation memory. This means that a
snapshot can be timestamped and recalled at a
specific time or at any number of times.
Snapshots are elastic within the dynamic
automation track. That is, if a snapshot is altered
and stored in the same snapshot location, then that
specific updated snapshot is recalled by the
dynamic automation every time it plays back in the
dynamic automation. Snapshots in memory are
isolated (stored and recalled) from dynamic events,
so if snapshot 05 is recorded into a dynamic
automation pass three times, and you later store a
new snapshot at 05, it will play back as the new
edited and stored snapshot those three times.
Now here’s the warning: Since a snapshot is an
entity unto itself, operating independently of
other dynamic events, it would be wise to separate snapshot events from dynamic events as
much as possible. Recording a snapshot inside of
a series of contiguous dynamic events may result
in an audible “blip.”
Consider that a snapshot is a single event at
some timestamp, and the automation playback
will not change any event levels (fader levels, EQ
parameters, mute status, etc.) until another
event occurs — maybe even another snapshot.
Automation Filters
The majority of your dynamic automation will
involve fader moves, pans and mutes. These can
be accomplished quickly and easily by pressing
their corresponding buttons in the Automation
Section.
These buttons provide selective Write Automation filtering for specific moves you want to write
into automation. They also serve as a safety to
prevent you from accidentally overwriting previous
moves, such as accidentally writing over a fader
move when you were only intending to change the
channel’s pan setting.
Perhaps less often used in automation are
changes in bus assignments and aux send levels.
You can dynamically automate these changes by
pressing the ALL button, or consider changing
these parameters with single timestamped snapshots. The ALL button opens the door to a wide
range of parameter control, and should be used
with caution until you have a good handle on what
you’re going to be automating.
For more advanced users, EQ, compression,
gating, and internal effects can be dynamically
automated, too. However, this kind of automation
requires more attention and care. This will be discussed further in Chapter 8, “Advanced Techniques.”
Note: Just because you can automate something
doesn’t mean you should. Most of the time EQ, pan,
compression, and gating are “one-time only”
events. You set them once and then forget them.
Chances are you’ll settle on EQ, pan, and compression settings and leave them that way for the whole
mix. This is where taking a snapshot at the beginning of a mix would act as an initial “set-up,” and
then dynamic automation would include fader and
mute changes.
Faders
Engaging the FADERS button makes it possible to write automated fader moves when
channel WRITE buttons or AUTO TOUCH are engaged. When writing fader automation in this
mode, any previous fader moves will be replaced.
When the AUTO TOUCH button is engaged, Faders mode is similar to a null function: moves are
only written when the fader is moved by the user.
This is known as “Touch Updating.”
When FADERS is off (and ALL is off), fader
moves are not recorded to automation. FADERS
may be toggled on and off regardless of whether
tape is rolling (i.e., time code is being received),
which allows this filter to act as a real-time
write safety operation.
Owner’s Manual
As an example, an automation pass is made
that consists of a smooth dynamic fader level fadein from –30 dB to Unity gain (0 dB), over a five
second period. Subsequently, a snapshot is recorded in the center of that fade-in, with a fader
level of +10 dB. When you play this section back,
you’ll notice an audible jump in fader level at the
timestamp where the snapshot was taken. A frame
or so after the +10 dB event played, the volume
would jump back to continuing its smooth fade-in.
Therefore, as a general rule, we don’t recommend following dynamic automation with
snapshot automation. If you want to mix and
match, we suggest that you use snapshots to set
up a rough mix, then superimpose dynamic events
in between the snapshots to fine-tune the mix.
Note: Auto Touch will only engage faders that
are in a static (non-moving) state or position. If
the fader is under motor control (i.e., moving),
the only way to enable Write automation on the
fader is to manually engage the Write (pressing
the WRITE button with the Master RECORD
button engaged) to allow takeover of the fader
from the OS.
Mutes
When MUTES is selected in the Automation
Section, engaging/disengaging any write-enabled
channel’s MUTE button writes the mute information as part of the current session. All other
moves are ignored, unless their corresponding
buttons are turned on (i.e., FADERS, PAN, ALL).
When MUTES is off (and ALL is off), mute
on/off events are not recorded to automation.
The channel MUTE buttons may be toggled on
and off regardless of whether tape is rolling,
though. They just won’t be written into automation.
Pan
When PAN is selected, all write-enabled
channel pans are written as part of the current
session. All other moves are ignored, unless their
corresponding buttons are turned on (i.e.,
FADERS, MUTES, ALL). When PAN is off (and
ALL is off), pan moves are not recorded. The
channel pan controls may be used regardless of
whether tape is rolling, though. They just won’t
be written into automation.
All
When ALL is selected, all write-enabled
channel moves are written as part of the current
session. Automatable parameters include:
faders, mutes, pans, aux sends, bus assigns,
phase reverse, and all parameters associated
with EQ, gate, compressor, and internal effects.
When ALL is off, fader, mute, and pan moves
may still be recorded (when their respective
filters are selected). ALL may be toggled on and
Automation
7-3
Digital 8•Bus
off regardless of whether tape is rolling, which
allows this filter to act as a real-time write safety
operation for automation writing other than
faders, mutes and pans.
Note: The ALL filter is a very powerful filter,
which obviously encompasses everything that is
automatable and may in some instances be used
to accidently overwrite parameters that weren’t
meant to be overwritten. Before engaging any automation Write activity, SAVE your sessions, be it
to disk or floppy. And then proceed with caution.
Even after you learn how to use the ALL filter, remember to save your work often. That is all.
Write Standby and Master Record:
Automation Write/Record Enable
The basic channel strip WRITE button operation and the transport Master RECORD enable
button are both explained in Chapter 2. The purpose of discussing these two operations in this
section is to clarify when these buttons are used,
according to which Automation mode is enabled.
The following points about parameters and
Write-engage status are very important for you to
understand:
1) Write Standby occurs when Auto Touch is
not used, i.e., using Absolute or Trim without
AUTO TOUCH engaged.
2) The Master RECORD button does not need
to be engaged for Auto Touch to record automation
moves. The Master RECORD button will not automatically engage when Touch mode is engaged.
There is one more automation filter, which is
available on a “per track” basis rather than as a
parameter change (such as faders or mutes). This
filter is the Write engage on each channel — and
operates in conjunction with the Master RECORD
button and the other filters in the Automation
section. We could have labeled the button WriteReady, but the WRITE button works in more
ways than one.
In Absolute or Trim mode, without AUTO
TOUCH engaged, and without the Master
RECORD button enabled, pressing the WRITE
buttons will cause their LEDs to flash. Now they
are in Write standby and are ready to have automation written to their specific tracks.
But… Touch mode is similar to the analog
mixer concept of grabbing a knob and moving it
without having to think about whether a track,
DSP module, or automation is engaged. In Touch
mode the D8B’s parameters are always in standby.
So, if the console senses that a parameter has been
changed, the WRITE button LEDs will not flash
first, they will simply go solid and the updated parameter will be written as soon as tape rolls. Or it
will be written if tape is already rolling.
However, when AUTO TOUCH is not engaged,
it’s possible to specifically change a parameter at
7-4
Automation
a certain point by punching-in (write-engaging by
pressing the PLAY and Master RECORD buttons)
at a specific point in time (with tape rolling),
with the knob in a different position. Whether
the track is in Touch mode or not, you can always punch-out at a specific time by toggling
either the individual track WRITE buttons off, or
by pressing and disabling the Master RECORD
button, or stopping timecode.
In Touch mode, Write-enabled tracks turn off
if time code is stopped. When the console is not
in Touch mode, Write-enabled tracks go back to
their flashing state when time code is no longer
received, or the STOP button is pressed, or the
Master RECORD button is toggled off.
Note: The Master RECORD
button also acts as the audio
Master Record button—i.e.,
the MMC Master Record engage button. If you are
remotely arming tracks on an MMC-compatible
multitrack, for whatever reason, and you press
the Master RECORD button and send a message
to engage the Master on the multitracks, you
may accidentally erase audio on the multitrack.
We recommend that you always arm and disarm individual tracks of the multitrack from the
D8B Rec/Rdy buttons to avoid any mix-ups or
heartbreaks that may occur. Remember: Write is
for automation, and Rec/Rdy is for audio—as
simple as it may seem—but the Master Record
serves both purposes.
Why did we design it this way? Because some
people prefer to automate and record audio simultaneously. If you can keep all that information
straight in your head, then go for it.
Automation Mistakes
What if I get all of this confused and mess up
my automation tracks? There are three things to
remember:
1) The UNDO button will undo the last automation pass.
2) The Mix Editor can be opened and used to
cut, copy, and paste data, in case of overwrites or
unintended tweaks.
3) Save often. Use the Auto Save feature—set to
“Save after every pass” if you feel more comfortable
working with a safety net. Automation doesn’t take
up much space on your hard disk and floppies, so
save as often as you think is necessary.
Fader Motors Off
At times, you may find fader movement distracting during automated playback. The FADER
MOTORS OFF button in the Automation Section allows you to turn off the fader motors and prevent
any fader motion during automated playback.
All previously written automated fader
moves still play back when the fader motors are off, but the faders are disabled and
will not accept new dynamic automation
changes until the fader motors are turned
back on.
Writing Fader Moves
TO WRITE FADER MOVES
AUTOMATION
BYPASS
FADERS
MUTES
AUTO TOUCH
FADER MOTORS
OFF
PAN
ALL
TRIM LEVELS
From the console:
1. Press the BYPASS button in the
Automation Section to engage the
automation functions.
Owner’s Manual
When this switch is engaged, the faders drop to the off position (all the way down), regardless of which fader bank
is selected.
2. Press the FADERS button to engage
Faders mode, if it’s not already lit. If
this is an initial automation pass, make
sure TRIM is off.
D
FAST FWD
STOP
PLAY
RECORD
3. Press the PLAY transport control, or
press Play on the recorder, to initiate
timecode.
SHUTTLE
JOG & SHUTTLE
JOG
SETUP
SAVE
SAVE AS...
NEW
LOAD
GROUP
GENERAL
PLUG INS
DIGITAL I/O
4. If you’re using Absolute Write mode
instead of AUTO TOUCH, make sure to
engage the WRITE button on the
channels that are to be automated.
5. At the desired times, move the
fader(s).
6. Upon completion of the automation
pass, if you’re satisfied with the
automated fader moves, make sure to
save the session (press SAVE in the
Setup Section).
TO WRITE FADER MOVES
From the screen:
1. Click on the Locator button in the
lower menu bar. The Locator window
appears on the screen.
2. Click on the BYPASS button to turn it
off and engage the automation
functions.
3. Click on the FADER button to engage
Faders mode, if it’s not already lit. If
this is an initial automation pass, make
sure TRIM is off.
Automation
7-5
Digital 8•Bus
4. Click on the PLAY transport control,
or press Play on the recorder, to
initiate timecode.
5. If you’re using Absolute Write mode
instead of AUTO TOUCH, make sure
to click on the WRITE button on the
channels that are to be automated.
6. At the desired times, click/hold and
drag on the channel faders you want
to automate.
7. Upon completion of the automation
pass, if you’re satisfied with the
automated fader moves, make sure to
save the session (click on “File” in the
upper menu bar and choose “Save
Session”).
Writing Fader Moves in Trim
Levels Mode
TO WRITE FADER MOVES IN TRIM LEVELS
MODE
AUTOMATION
BYPASS
FADERS
MUTES
AUTO TOUCH
FADER MOTORS
OFF
PAN
ALL
TRIM LEVELS
D
FAST FWD
STOP
PLAY
RECORD
From the console:
1. Press the TRIM LEVELS button in the
Automation Section. All the faders
jump to their unity positions. You can
readjust the fader positions at this
point, if required. If you are going to
add more than 10 dB to the existing
fader value, you need to lower the fader
so that you have enough fader
movement available to add to the
existing fader position (see note below).
SHUTTLE
2. Roll your tape by pressing the PLAY
button in the Transport Section.
JOG & SHUTTLE
3. Place all the tracks you want to
automate into WRITE mode, or
engage AUTO TOUCH mode.
TRIM MODE (maxing out)
+10 dB
(max)
4. Make your level changes by moving
the fader(s) up or down at the desired
points. Note that any previous moves
are retained, but at a modified overall
level determined by your trim move.
ing level
ult
res
fader position
original pass
l pass
iona
dit
ad
∞
(min)
A
punch in
7-6
Automation
time
B
punch out
Note: Be careful that you don’t run out of
headroom: you cannot have your fader near
the top of its travel already and then add a
lot more to it in Trim mode. The ceiling
stays at +10 dB, no matter how you do it.
From the screen:
1. Click on the Locator button in the
lower menu bar. The Locator window
appears.
2. Click on the TRIM button in the Locator
window. All the faders jump to their
unity positions. You can readjust the
fader positions at this point, if required.
If you are going to add more than 10 dB
to the existing fader value, lower the
fader so that you have enough fader
movement available to add to the
existing fader position (see note below).
Owner’s Manual
TO WRITE FADER MOVES IN TRIM MODE
3. Roll your tape by clicking on the PLAY
button in the Locator window.
4. Place all the tracks you want to write
to automate into WRITE mode, or
engage AUTO TOUCH mode.
5. Make your level changes by clicking on
the fader(s) and moving them up or
down at the desired points. Note that
any previous moves are retained, but at
a modified overall level determined by
your trim move.
TRIM MODE (maxing out)
+10 dB
(max)
ing level
ult
res
fader position
original pass
Note: Be careful that you don’t run out of
headroom: you cannot have your fader near
the top of its travel already and then add a
lot more to it in Trim mode. The ceiling
stays at +10 dB, no matter how you do it.
l pass
iona
dit
ad
∞
(min)
time
A
punch in
B
punch out
Writing Mutes
TO WRITE MUTES
AUTOMATION
BYPASS
FADERS
MUTES
AUTO TOUCH
FADER MOTORS
OFF
PAN
ALL
TRIM LEVELS
From the console:
1. Turn off the BYPASS button in the
Automation Section to engage the
automation functions.
2. Press the MUTES button to engage
Mutes mode, if it’s not already lit.
3. Press the PLAY transport control, or
press Play on the recorder, to initiate
timecode.
Automation
7-7
Digital 8•Bus
WRITE
WRITE
4. If you’re using Absolute Write mode
instead of AUTO TOUCH, make sure
to engage the WRITE button on the
channels that are to be automated.
5. At the desired times, mute the
channels you want to automate.
12
36
13
37
SELECT
SELECT
SOLO
SOLO
MUTE
MUTE
6. Upon completion of the automation
pass, if you’re satisfied with the
automated mutes, make sure to save
the session (press SAVE in the Setup
Section).
TO WRITE MUTES
From the screen:
1. Click on the Locator button in the
lower menu bar. The Locator window
appears on the screen.
2. Click on the MUTE button in the
Locator window to initiate Mute mode.
3. Begin rolling tape by either pressing
PLAY in the Locator window or on the
recorder.
4. If you’re not using TOUCH mode,
make sure to click on the WRITE
buttons on the channels that are to be
automated.
5. At the desired times, click the MUTE
buttons on the channel(s) you want to
automate.
6. Upon completion of the automation
pass, if you’re satisfied with the automated mutes, make sure to save the
session (click on “File” in the upper
menu bar and choose “Save Session”).
Writing Channel V-Pot Moves
TO WRITE CHANNEL V-POT MOVES
From the console:
1. Turn off the BYPASS button in the
Automation Section to engage the
automation functions.
7-8
Automation
BYPASS
FADERS
MUTES
AUTO TOUCH
FADER MOTORS
OFF
PAN
ALL
TRIM LEVELS
AUX 5
AUX 6
AUX 7
AUX 8
AUX 9-10
AUX 11-12
PAN
PAN
3. Press the PLAY button in the
Transport Section, or press Play on the
recorder to initiate timecode.
4. Press PAN in the Master V-Pot Section
to adjust the pan settings, or press one
of the AUX buttons in the V-Pot Select
Section to adjust an aux send level.
Note: DIGITAL TRIM moves are not dynamically automatable. DIGITAL TRIM
settings can be stored in snapshots.
Owner’s Manual
2. Press the ALL and AUTO TOUCH
buttons. V-Pots are automated using
Auto Touch mode.
AUTOMATION
5. At the desired times, rotate the V-Pots.
6. Upon completion of the automation
pass, if you’re satisfied with the
automated V-Pot moves, make sure to
save the session (press SAVE in the
Setup Section).
MASTER
PAN
SOLO
TO WRITE CHANNEL V-POT MOVES
From the screen:
1. Click on the Locator button in the
lower menu bar. The Locator window
appears on the screen.
2. Click on the ALL and TOUCH buttons
in the Locator window to initiate Auto
Touch mode.
3. Begin rolling tape by either pressing
PLAY in the Locator window or on the
recorder.
4. Click on PAN in the Master V-Pot
Section to adjust the pan settings, or
click on one of the AUX buttons in the
AUXES Section to adjust an aux send
level.
Note: DIGITAL TRIM moves are not dynamically automatable. DIGITAL TRIM
settings can be stored in snapshots.
5. At the desired times, click/hold and
drag on the V-Pots you want to
automate. Move the mouse to the right
to rotate the pot clockwise, and move
the mouse to the left to rotate the pot
counterclockwise.
Automation
7-9
Digital 8•Bus
Alternatively, click on a bar in the
individual channel’s AUXES section to
adjust an aux send level. A numerical
representation of the aux send level
appears in place of the channel
number just above the AUXES box.
6. Upon completion of the automation
pass, if you’re satisfied with the automated fader moves, make sure to save
the session (click on “File” in the upper
menu bar and choose “Save Session”).
Writing Bus Assignments
TO WRITE BUS ASSIGNMENTS
AUTOMATION
BYPASS
FADERS
MUTES
AUTO TOUCH
FADER MOTORS
OFF
PAN
ALL
TRIM LEVELS
TRIM
TRIM
ASSIGNMENT
LINE
MIC
0
-20dB
60
+40dB
12
-20
ASSIGN
BUS 1
BUS 2
ASSIGN
ASSIGN
BUS 3
BUS 4
ASSIGN
ASSIGN
BUS 5
BUS 6
ASSIGN
ASSIGN
BUS 7
BUS 8
+20
13
MIC
REC/RDY
ASSIGN
REC/RDY
ASSIGN
ASSIGN
WRITE
WRITE
ASSIGN
ASSIGN
L-R
ROUTE TO
TAPE
From the console:
1. Turn off the BYPASS button in the
automation section to engage the
automation functions.
2. Press the ALL and AUTO TOUCH
buttons. Bus assignments are
automated using Auto Touch mode.
3. Press the PLAY button in the
Transport Section, or press Play on
the recorder to initiate timecode.
4. Press one of the BUS buttons in the
bus Assignment Section.
5. At the desired times, press the
ASSIGN button on the channels you
want to assign to the selected bus.
6. Upon completion of the automation
pass, if you’re satisfied with the
automated bus assignments, make
sure to save the session (press SAVE
in the Setup Section).
TO WRITE BUS ASSIGNMENTS
From the screen:
1. Click on the Locator button in the
lower menu bar. The Locator window
appears on the screen.
2. Click on the BYPASS and ALL buttons
in the Locator window.
7-10
Automation
3. Click on the TOUCH button in the
Locator window to initiate Auto
Touch mode.
5. At the desired times, click on a bus
button at the top of the channel strip.
6. Upon completion of the automation
pass, if you’re satisfied with the
automated bus assignments, make
sure to save the session (click on “File”
in the upper menu bar and choose
“Save Session”).
Writing Snapshots into Automation
Snapshots can be stored or recalled in real
time, making it possible to instantly change the
status of any or all console parameters to a predetermined fixed position. Furthermore, snapshots
can be recalled during an automated pass to instantly change the settings of the console to those
Owner’s Manual
4. Begin rolling tape by either clicking on
PLAY in the Locator window or on the
recorder.
stored in the snapshot. These new settings are
then written to the automated session.
Refer to “Creating and Storing Snapshots” in
Chapter 5 for a refresher on how to perform
these functions. We’re assuming, at this point,
that the snapshots you want to use for your automated session have already been created.
TO WRITE SNAPSHOTS INTO AUTOMATION
RANGE
POSITION
HOURS
MINUTES
SECONDS
FRAMES
FROM
00 00 00 00
SET TIME
BARS
SMPTE VIEW
12
TICKS
BEATS
TO
LOOP
1
2
3
4
5
6
7
8
9
0
ENTER
LOOP
STORE
LOCATOR
SNAPSHOT
MODE
From the console:
1. Press the SNAPSHOT button in the
Transport Section.
2. Turn off the BYPASS button in the
Automation section, and press the ALL
and AUTO TOUCH buttons.
3. Press PLAY in the Transport Section, if
you’re using an MMC-compatible
recorder. Otherwise, make sure that
the console is receiving timecode,
indicated by the POSITION display.
4. Prior to the desired point at which the
snapshot is to be recalled, enter the twodigit snapshot number using the number
keys in the Transport Section. The
number appears in the RANGE display.
5. At the desired time, press the ENTER
button to recall the snapshot. The
console updates according to the
snapshot settings.
SETUP
SAVE
SAVE AS...
NEW
LOAD
GROUP
GENERAL
PLUG INS
DIGITAL I/O
6. Upon completion of the automation pass,
if you’re satisfied with the automation
pass, make sure to save the session
(press SAVE in the Setup Section).
Automation
7-11
Digital 8•Bus
TO WRITE SNAPSHOTS INTO AUTOMATION
From the screen:
1. Click on the Locator button in the
lower menu bar. The Locator window
appears in the screen.
2. Click on the ALL and TOUCH buttons
(make sure the BYPASS button is off).
3. Click on the Snapshots button in the
lower menu bar. The Snapshots
window appears.
4. Begin rolling tape by either clicking on
Play in the Locator window or on the
recorder.
5. At the point where the snapshot is to
be written, double-click on the
snapshot number (in the gray area).
The screen and console settings update
according to the snapshot settings.
6. Upon completion of the automation
pass, if you’re satisfied with the
automation pass, make sure to save
the session (click on “File” in the
upper menu bar and choose “Save
Session”).
Undo Edit
Anytime you complete an automation
pass, you can undo what you did by pressing the UNDO button in the Clipboard
Section, or selecting “Undo Last Pass”
(Ctrl-Z) in the Mix Editor’s Edit menu.
CLIPBOARD
7-12
Automation
CUT/ZERO SET
COPY
PASTE
UNDO
You can create a loop between two cue points
on the tape to repeat over and over again. This is
useful when you need to make several passes
over a section of the tape in order to get multiple
fader moves just right, or for difficult EQ or processing on a track.
In Loop mode, the left two digits in the RANGE
display indicate the starting loop point (FROM),
and the right two digits indicate the ending loop
point (TO). Loop points are cues that send an
MMC command message out of the MIDI OUT
connector on the back of the computer to the
multitrack recorders.
Note: Locate points specifically refer to a timestamped point, relative to the POSITION display.
TO CREATE A LOOP
RANGE
POSITION
HOURS
SET TIME
MINUTES
SECONDS
FRAMES
FROM
TO
00 00 00 00 34 35
BARS
SMPTE VIEW
BEATS
TICKS
LOOP
1
2
3
4
5
6
7
8
9
0
ENTER
LOOP
STORE
LOCATOR
FAST FWD
SHUTTLE
STOP
PLAY
2. Rewind the tape to some point prior to
the section you want to repeat. Press
PLAY.
SNAPSHOT
MODE
REWIND
From the console:
1. If you haven’t already done so, you
must create cue points for the
beginning and end of the section you
want to repeat. Press the LOCATOR
button in the Transport Section to
enter Locator mode.
Owner’s Manual
Looping
RECORD
3. Using the number keys, enter a twodigit cue number that you haven’t used
yet. The number appears in the RANGE
display under FROM. This will be the
starting cue point of the loop.
4. Press STORE. The STORE button
lights and the ENTER button blinks.
As soon as the tape reaches the point
where you want to begin the loop,
press ENTER. The cue point is now
saved, referenced to the time in the
POSITION display.
5. Press LOOP. Enter another two-digit
cue number that you haven’t used yet.
The number appears in the RANGE
display under TO. As soon as the tape
reaches the point where you want to
end the loop, press STORE. The cue
point is now saved, referenced to the
time in the POSITION display.
6. Press STOP and rewind the tape back
to some point within the loop or prior
to the loop. With the LOCATOR button
still engaged, press PLAY and the tape
will now loop between the two cue
points.
Note: This function is available only from
the console.
Automation
7-13
Digital 8•Bus
The Mix Editor
Slip in your plastic pocket protector and put
on your propeller beanie, because now we’re
taking off for a journey deep into the heart of
Tweakland.
The Mix Editor presents a comprehensive
visual record of everything you do in your automated mix. When you stop to think about it,
this can be a huge amount of information: Just
to give you an idea, Mackie Real Time OS automation writes just one single fader move by
listing every MIDI level change, second by second, frame by frame.
The Mix Editor can only be accessed from
the screen. It is used for concise editing of specific event types, within certain time ranges,
and on single or multiple faders. It uses the
cut, copy, and paste commands for more restricted fader and time slices that need cleanup
and manipulation.
Edit Menu
This is located near the top of the Mix Editor window. These menu items allow you to
edit events in the events list. Use the mouse to
select an event or events, then select Cut or
Copy in the Edit menu to put the event on the
clipboard (cut removes the event, copy leaves
the event in place). Select a new spot in the
event list where you want to paste the copied
event, then click on Paste.
Select Undo (Ctrl-Z) to undo the last written
automation events or clipboard operations in
the Mix Editor. The UNDO button in the Clipboard Section performs the same function.
From/To Boxes
These boxes define the beginning time
(From) and ending time (To) of the selected automation events, referenced to SMPTE timecode
(or Bars:Beats:Ticks if SMPTE is disabled). You
can manually enter the From and To times into
the boxes using the number keys, or you can select multiple events in the Event List below, and
the beginning and ending times of the selected
events appear in the boxes.
To enter time values in the From/To boxes:
1. Click in the two-digit box you want to change.
2. Enter the new number using the number
keys on the keyboard or console.
3. Press the Enter key on the keyboard or console. As soon as you press Enter, you’ll notice
that all events framed by the new time are
highlighted and available for editing.
4. Use the Tab key to highlight the next box to
the right. Use Shift+Tab to highlight the
next box to the left.
7-14
Automation
To select multiple events in the Event List:
1. Click on the first event you want to select. It
becomes highlighted in the Event List.
2. Hold down the Shift key and click on the last
event you want to select. All events between
the first and last selected events become
highlighted and are available for editing.
Event List
The rectangular area below the From and To
boxes contains a list of all the automation
events in the current session. This is a
scrollable, temporal display of all the events as
determined by the selected channel(s) and the
event filter checkboxes at the bottom of the
Mix Editor window.
Included Event Types
This section contains all of the event types
found in Mackie Real Time OS automation. Select or clear these checkboxes to display the
event types for the currently selected channels
in the scrolling event list above. Channel event
types include fader, mute, pan, auxes, EQs, compressor, gate, buses, and All Channel Types
(which displays all of the categories with one
click o’ the mouse).
Plug-in and snapshot events are not channelrelated, and can be viewed separately as Other
Event Types. While performing edits on all
other events, it’s important to make sure that
the plug-ins and snapshots checkboxes are not
checked. If they are, you will erase events that
aren’t listed in the Event List. For instance, if
you “Select All” and then cut all of the events
in view and had the plug-ins box checked, you
would erase all plug-in events that exist for the
entire session.
Mackie Real Time OS Automation Event Insight
Each automated event is discrete and timestamped. A Fade-In is a series of fader events
with ascending values within a certain time
resolution (less than 15 frames), that ends in a
maximum value. Conversely, a Fade-Out is a
series of fader events with descending values,
ending with a minimum value. Fader, EQ, compressor, gate, pans, aux and cues, and plug-in
effects changes are all “continuous” events broken down into high resolution discrete events
in the Event List. Mutes, bus assignments,
phase reverse, snapshots, and EQ, gate, and
compressor on/off are all singular events.
To familiarize you with the Mix Editor, let’s
first take a look at what the various functions
do for the edit process. The Mix Editor can
only be viewed in the monitor screen, not from
the console Fat Channel display. To open the
Mix Editor, use the keyboard shortcut (Ctrl-2)
from either the keyboard or the console.
Okay, let’s get started. If no automation has
been written on the selected channel before
you open the Mix Editor, the window will appear blank, as shown here.
On the other hand, if you have already written some automation on the selected channel
before opening the Mix Editor, the events for
that channel appear in the window, as shown in
the following picture.
The Event List
Owner’s Manual
Using The Mix Editor
The Event List portion of the Mix Editor (main
area of the box) is a scrollable, temporal display
of all events, as determined by both the event filter checkboxes and the channels selected. You
can select either individual or multiple events by
using the mouse and the Shift key. All events can
be cut, copied, or pasted.
There are four columns in the Event List to
convey information about each automated event.
Name: This column tells you the channel that
is associated with the automated event displayed in the corresponding row. It might say
Channel 1 for a mic/line input channel, Channel
25 for a tape input channel, Aux 1 for an auxiliary send, VG 1 for a Virtual Group, FX 1 for an
internal effects return, Bus 1 for Submaster 1,
or L/R for the MASTER L/R output. This column
may not be edited.
Type: This column describes what automatable function is indicated in the row. This is
one of the included types categories listed at
the bottom of the Mix Editor window (Fader,
Mute, Pan, etc.). This column may not be edited.
Value: The Value column is used by all of the
different event types and it represents an event
value for a given time, either as a decibel value
or as an on/off (mute type) display.
Time: This is the event timestamp. The time
can be adjusted by using the Tab, number, and
Enter key(s), or clicking on a value with the
mouse and changing it with the number pad.
Pressing Enter will update the new time value
and the dynamic parameter event will be repositioned in its proper temporal position in the
Event List.
Including And Removing Channels in
The Event List
You can select multiple channels using the
SHIFT button, and all the selected channels
will appear in the window.
From the console:
To add more channels to the Event List, press
and hold the SHIFT button and push the SELECT
button on the channel(s) you want to add.
To remove channels from the Event List,
press and hold the SHIFT button and push the
SELECT button on the channel(s) you want to
remove (to deselect those channels).
From the screen:
To add more channels to the Event List,
hold the SHIFT key on the keyboard and click
on the SELECT button on the channel(s) you
want to add.
To remove channels from the Event List,
hold the SHIFT key and click on the SELECT
button on the channel(s) you want to remove
(to deselect those channels).
Note: You can right-click, hold, and drag across
the SELECT buttons on multiple adjacent channels to quickly select or deselect them.
Automation
7-15
Digital 8•Bus
Selecting Events By Type
To select events of a specific type, click the
appropriate “Included Types:” checkboxes.
“All” is the default setting, but you can select
individual types by clicking in their checkboxes
at the bottom of the Mix Editor window. If you
do NOT want an event of a particular type included, click on its box to deselect it.
Deleting a Mute
This is a snap. Find the “Mute On” event in
the Name column for the mute you don’t want,
and click on it to select it. Then choose “Cut
Event” in the Edit menu to delete the mute.
The event automatically vanishes from the
Event List.
Changing a Time
Equally easy. Just click in the time column
to select it, then type in the new time. This
technique is very handy if you have a tricky
mute and the timing is just a hair off.
graphical display of the fade curve, where
the x-axis represents time and the y-axis
represents amplitude.
3. Select Fade In or Fade Out by clicking on
the corresponding button in the lower-left
corner of the window. The default fade is
linear.
4. Select the “rubber-band” box to edit the
curve. This allows you to click on the line representing the curve to create anchor points
that you can move and place wherever you
like. The more anchor points you create, the
smoother you can make the curve.
5. Select the “eraser” box to remove anchor
points from the curve.
6. You can change the Seconds box to speed up
or slow down the fade. You can enter any
number from 0 to 9999 seconds.
7. When the fade curve is finished, you can
save it by clicking in the Custom Curves box
and selecting “Add Curve...”
Creating a Fade-In and Fade-Out Event
Mackie Real Time OS automation includes a
special feature that lets you trigger fade-ins
and fade-outs of any length, on any faders, and
at any point during your mix. You can create a
custom fade and save it for future use.
1. Click on Channels in the upper menu bar.
Select Edit Fade from the drop-down menu.
8. The “Save Curve As...” box appears. Enter
the name under which you want to save the
curve, then click on “Enter.”
2. The Fade Curves window appears.
The main portion of this window contains a
7-16
Automation
9. To retrieve the fade curve, click on the Custom Curves box, and select one of the saved
curves from the drop-down menu.
You can edit a Fade-In or Fade-Out curve by
recalling it in the Edit Fade Curve box, making
your changes, then saving it under the same
name. This permanently changes the fade
curve stored in memory.
You can also edit a channel fade curve once
it’s been written to automation by going into the
Mix Editor and modifying either the values or
the time for each discrete event. This is more
time consuming to accomplish, but allows you
much more control to fine-tune the fade curve.
Deleting a Fade-In or Fade-Out Event
You can delete a Fade-In or Fade-Out curve
from memory by selecting “Delete Curve...”
from the Custom Curves box.
Recording a Fade-In or Fade-Out Event
into Dynamic Automation
Owner’s Manual
Editing Fade-In And Fade-Out Events
Select any number of channels to be writeenabled. At the point where you want to write
an auto-fade into the automation, type “W” on
the computer keyboard to write-enable. (Make
sure Master Record is engaged.) Then type either an “F” or “G” to fade-in or fade-out. You
can punch-out of automation at any point, using the rules you learned earlier, or you can
stop the fade-in/out by re-typing “F” or “G” midway through an active fade.
Roll back, listen to the fade, and watch it on
the screen. Check out the fader events in the
Mix Editor. Hit Undo or erase the events, if
necessary. Change the fade curve or time in the
fade curve editor and redo the automation
pass, if necessary. (It’s easier than tweaking
the events in the Mix Editor.)
Copying An Entire Segment Of Your Mix
Now we’re getting into some heavy duty
stuff. You would use the following technique if,
for example, you’ve worked out some extremely tricky moves on multiple faders during
the first chorus, and now you want all those
same moves on the second chorus. This works
only if the two segments are identical in
length—which, if you work in the MIDI world,
is likely the case.
The Delete Fade Curves box appears. Select
the curve you want to delete from the list, then
click Delete. This permanently removes the
Fade Curve from memory.
You can also delete a channel fade curve once
it’s been written to automation. Select Fader in
the Included Types section. Select the fader
events, and then choose Cut from the Edit menu.
A milder caution applies here: you may unwittingly create unwanted volume jumps until you
become a master of the technique.
A Little Mackie Real Time OS Automation
Edit Example…
One of the most powerful things about the
Mix Editor is that you can now select a range
of events on a range of faders in a given range
of time and put it elsewhere or make it disappear. Here’s an example:
Channels 1 to 14 have been mixed and put
to bed. But now the songwriter/producer wants
to add the intro music (8 bars of quasi-automated fade-in) to the end of the 108-bar song,
as a style effect that leaves the listener “wanting for more.”
OK. Since this music was generated using a
MIDI sequencer, the engineer first needs to
reimport the longer sequence to work with.
The engineer then selects Channels 1 to 14 and
opens the Mix Editor. She changes the view to
bars:beats:tics and then selects the Fader
events between the Start and End times of
1:1:0 and 8:4:479 (all of the 8 measures right
up to the final tic).
To copy moves from one time to another:
The engineer then chooses Copy from the
Edit menu in the Mix Editor. This copies all of
the selected events onto the computer clipboard.
Automation
7-17
Digital 8•Bus
The engineer then chooses the Paste command from the Edit menu and she is prompted
with a dialog box asking her where, in time,
she wants the data placed.
She types in 109:1:0 and hits the Enter key
(or clicks on Paste).
The first 8 bars of Channel 1 are now cloned
to be the last 8 bars of Channel 1. The same
thing happens with Channels 2 through 14.
Inserting Blank Time/Delete Time
These two commands can be found under
Automation in the upper menu bar. You can use
them to insert blank time or delete time from
your entire mix. In other words, these commands affect all channels.
Insert Blank Time has the effect of bumping
backward all events in your mix. If you insert
time at the beginning of your mix, it will move
all events back by that amount of time. (This is
similar to programming an offset into a synchronizer). If you insert time into the middle of
a mix, it will move all events after the insert
point to a later point by the specified amount. If
you have fader events with start times before
the time insertion and end times after the insertion, these events will be extended. However,
Mackie OS Real Time automation does not interpolate if you insert time in the middle of an
event. For example, if you have a fade that begins at 10 seconds and ends at 20, and you
insert 20 seconds of blank time at 15 seconds,
you will not get a smooth 30-second fade. You
will get a fade that stops at 15 seconds, holds
there for 20 seconds, and then resumes.
Delete Time has a similar but opposite effect. Delete time removes the specified time,
starting at the time designated in the “Delete
Time” window.
Note: If you have imported a Standard MIDI
File (SMF), you may press the SMPTE VIEW
button next to the Position Display, or click on
the SMPTE button in the Transport window to
choose either SMPTE code or bars/beats/tics
as the time reference.
3. In the “Length” box, enter the amount of
time you want to insert. For example, if you
want to add a minute at the beginning of
your mix, enter 00:00:00:00 in the “Start At”
box and 00:01:00:00 in the “Length” box. If
you want to add a minute and fifteen seconds of blank time at two minutes into your
mix, enter 00:02:00:00 in the “Start At” box
and 00:01:15:00 in the “Length” box.
4. Click on the Insert button.
Insert Blank Time is handy for putting an
offset at the beginning of a mix to lock it up to
an audio source that has a different start point.
It’s also handy if, for example, you added some
time in a sequenced music piece and now you
need to add the time to your mix. (This could
require some tweaking if the inserted time falls
in the middle of events, as noted previously.)
Deleting Time:
1. Choose Delete Time from the Automation
menu at the top of the screen.
2. In the “Start At” box, enter the time at
which you want your deletion to start.
Inserting Blank Time:
1. Choose “Insert Blank Time” from the Automation menu at the top of the screen.
2. In the “Start At” box, enter the time at
which you want to insert the blank time.
7-18
Automation
3. In the “End At” box, enter the time at which
you want the deletion to end.
4. Click on the Delete button.
Delete Time is handy if you have too much
offset time at the beginning of a mix. Or, in the
reverse of the above situation, you can use it to
take sections or time slices out of a mix. However, this can be somewhat risky.
Automation Info
Owner’s Manual
It is important that you are extremely careful when you use the Delete Time command. If
you delete a time segment that contains a
change event, that change suddenly disappears
from the Event List. This not only affects whatever events are contained in the time window
that is deleted, but, because Mackie Real Time
OS automation is a “preceding-event” application — meaning each event is based on the
prior event — it can also affect later events.
For example, if you delete a prior event such as
a fade-in, a later event such as a fade-out has
nothing to reference to and will result in a sudden jump from off to on before fading out.
For most of what you’re likely to do in automation, all of this really doesn’t matter. But for
that one time where you have to do delicate
time surgery, understanding this concept could
save you some head-shaking and hair-pulling!
Another option is “Automation Info.” Select
this option to see how many automation events
are available.
Modify Events
Select “Modify Events” from “Automation”
in the upper menu bar to open the Modify Automation dialog box (or press Ctrl-M).
There is room for 125,000 automation
events. You can monitor the memory and
events usage from the gas gauges in the Locator Control Panel.
Take A Breather
Okay, take your propeller beanies off and
stuff your pocket protectors back in the
drawer. That’s about all you’ll ever want to do
in the Event Editor, at least if you do what
most of the rest of us do (for a living or for fun)
in the world of audio mixing. If you are obsessed with very precise, radical slam-banging
of sounds hither and yon, feel free to explore
the intricacies of the Event Editor until your
heart’s content. Or to the limits of your sanity.
And, if you stumble across some astonishingly
useful techniques that aren’t too terribly difficult to accomplish, drop us a line so we can
include them in the next edition.
This allows you to select an automation parameter such as Fader, Pan, or Aux Send level
and modify all the values for that parameter on
the selected channel. You can change their values to a minimum or maximum, increase or
decrease their values by a specified percentage, or set them to a value of your choice.
Note: If you need to fine-tune a single event,
you can click on its value in the Mix Editor
with the mouse and drag up or down to increase
or decrease its value. You can also use the
automation Trim Mode to perform modifications
to existing events.
Automation
7-19
Digital 8•Bus
7-20
Automation
Advanced Automation
Recording EQ, Compressor, Gate, and
Effects Changes
In an automated mix, faders are frequently
moved and mutes are constantly changing. That’s
why they each have their own mode of automation. This makes it easy to erase over a previous
move without affecting the rest of the mix.
EQ, compressor, gate, and effects settings can
be automated in Touch Write mode. However, it’s
good practice to wait until you have your fader
moves and mutes written to automation before attempting to automate EQ, compressor, gate, and
effects. Once you begin to automate these parameters, Mackie Real Time OS automation thinks
you prefer the recorded settings over the static
Memory A and Memory B settings. Since it’s quite
likely you’ll be adjusting EQ settings on various
tracks until the last minute—that is, up until
your final mix—you’ll find it’s wiser to wait until
then to automate EQ. You may even decide to
leave EQ out of your automated mix altogether.
After all, EQ is a “set it and forget it” event 99%
of the time.
So keep in mind: Every time you hit PLAY,
the parameters will go to the last automationrecorded settings. After you’ve racked up some
automation experience you’ll live by this saying:
Just because it can be automated doesn’t mean it
has to be.
Owner’s Manual
8. Advanced Techniques
TO RECORD EQ, COMPRESSOR, AND GATE
CHANGES
AUTOMATION
BYPASS
FADERS
MUTES
AUTO TOUCH
FADER MOTORS
OFF
PAN
ALL
TRIM LEVELS
From the console:
1. Turn off the Bypass button (button
light off) in the Automation Section to
engage the automation functions.
2. Press the ALL and AUTO TOUCH
buttons.
1
2
3
4
5
6
7
8
9
0
ENTER
LOOP
STORE
LOCATOR
3. Press the PLAY button in the
Transport Section, or Play on the
recorder to initiate timecode.
SNAPSHOT
4. Press the SELECT button on the
channel you want to adjust.
MODE
REWIND
STOP
FAST FWD
RECORD
PLAY
SHUTTLE
D8B
GAIN
12.0 DB
5. Press either EQ, COMPRESSOR, or
GATE in the Fat Channel Section to
select the processor you want to
adjust.
56 INPUT / 72 CHANNEL DIGITAL MIXER
GAIN
0.0 DB
GAIN
0.0 DB
GAIN
0.0 DB
6. At the desired times, adjust the V-Pots
in the Fat Channel to make your
changes.
SUPER CD ENCODING
SELECT
PREVIOUS
EQ
SELECT
SELECT
SELECT
LOW
LOW MID
HI MID
HI
ON
SETUP
MEMORY A
MEMORY B
GATE
COMPRESSOR
PLUG-INS
LOAD PATCH
HELP
NEXT
7. Upon completion of the automation
recording pass, if you’re satisfied with
the recorded processor adjustments,
make sure to save the session (press
SAVE in the Session Setup Section).
SAVE PATCH
Advanced Techniques
8-1
Digital 8•Bus
TO RECORD EQ, COMPRESSOR, AND GATE
CHANGES
From the screen:
1. Click on the Locator button in the
lower menu bar. The Locator dialog
box appears on the screen.
2. Click on the ALL and TOUCH buttons
in the Locator window to initiate
AUTO TOUCH mode (make sure
Bypass is turned off).
3. Begin rolling tape by either clicking
Play in the Locator window, or from
the recorder.
4. Click on the SELECT button for the
channel you want to adjust.
5. Click on the EQ, Compressor, or Gate
button in the lower menu bar. The
control panel for the selected
processor appears in the screen.
6. At the desired times, click/hold and
drag on the controls you want to
automate.
7. Upon completion of the automation
recording pass, if you’re satisfied with
the recorded processor adjustments,
make sure to save the session (click
on “File” in the upper menu bar and
choose “Save Session”).
Note: You can view a graphical representation of the EQ parameters for each channel
in the box located midway in the channel
strip. You can even click and drag in the
box to change the EQ parameters, just as
you would in the EQ control panel. Or you
can double-click in the box to open the EQ
control panel.
Before we leave this subject, there’s one other
option you should know about. Mackie Real Time
OS automation allows you to automate switching
between MEMORY A and MEMORY B settings
and allows you to load patches from the hard
drive (in real time) into the dynamic automation
pass. Say you want to make a radical change in
EQ during a mix. Set up MEMORY A with the
initial settings and MEMORY B with the final
settings. Then during a Touch Write automation
pass, start with MEMORY A engaged for the
selected channel, then press MEMORY B at the
8-2
Advanced Techniques
required time. The change is recorded in the
session. You can switch back and forth between
MEMORY A and B as many times as you want.
You can also load EQ settings from the hard
drive (as well as gates, compression, and channel
patches). From the EQ window, under the Menu
option, select the desired EQ patch, and when
you’re ready to load it on your Write-enabled
channel, press Open. This may be more timeconsuming than simply clicking the A & B
settings, but it allows you to take “mini-snapshots”
of dynamic events on a local DSP basis.
Remember, any changes made to the internal effects affect all channels assigned
to the aux send feeding the effect.
AUTOMATION
BYPASS
FADERS
MUTES
AUTO TOUCH
FADER MOTORS
OFF
PAN
ALL
TRIM LEVELS
1
2
3
4
5
6
7
8
9
0
ENTER
LOOP
STORE
LOCATOR
From the console:
1. Turn off the Bypass button (button
light off) in the Automation Section to
engage the automation functions.
2. Press the AUTO TOUCH button.
3. Press the PLAY button in the
Transport Section, or Play on the
recorder to initiate timecode.
Owner’s Manual
TO RECORD EFFECTS CHANGES
SNAPSHOT
MODE
REWIND
STOP
FAST FWD
RECORD
PLAY
SHUTTLE
4. Select the Aux Send for the Effect you
want to automate.
1-24
1-48
LEVEL TO TAPE
DIGITAL TRIM
AUX 1
AUX 2
AUX 3
AUX 4
AUX 5
AUX 6
AUX 7
AUX 8
D8B
<-RoomSize
9.7
5. Press the PLUG-INS button in the Fat
Channel Section. The PLUG-INS menu
appears in the Fat Channel Display.
56 INPUT / 72 CHANNEL DIGITAL MIXER
Decay
1.6s
PreDelay
25ms
Damping
5
SUPER CD ENCODING
PREVIOUS
EQ
SELECT
SELECT
SELECT
SELECT
HELP
LOW
LOW MID
HI MID
HI
NEXT
ON
SETUP
MEMORY A
MEMORY B
GATE
COMPRESSOR
PLUG-INS
LOAD PATCH
SAVE PATCH
6. At the desired times, adjust the V-Pots
in the Fat Channel to make your
changes.
7. Upon completion of the automation
recording pass, if you’re satisfied with
the recorded effects adjustments, make
sure to save the session (press SAVE
in the Session Setup Section).
Advanced Techniques
8-3
Digital 8•Bus
TO RECORD EFFECTS CHANGES
From the screen:
1. Click on the Locator button in the
lower menu bar. The Locator dialog
box appears on the screen.
2. Click on the TOUCH button in the
Locator window to initiate AUTO
TOUCH mode (make sure the Bypass
button is turned off).
3. Begin rolling tape by either clicking
Play in the Locator window, or from
the recorder.
4. Click on the CARD button in the lower
menu bar to open the control panel for
the effect you want to change.
5. At the desired times, click/hold and
drag on the controls you want to
automate.
6. Upon completion of the automation
recording pass, if you’re satisfied with
the recorded effects adjustments,
make sure to save the session (click
on “File” in the upper menu bar and
choose “Save Session”).
Virtual Grouping/Ungrouping
The Digital 8•Bus has eight software-based
“Virtual Groups.” These are similar to the analog
subgroups you’re used to, but with virtual groups
there are no separate buses, no separate gain
stages, and no separate outputs.
Instead, you are merely instructing the DSP engine to apply the same commands, be they fader
moves or mutes, to all faders assigned to that
group. In other words, when you move a group
fader up 3 dB, the DSP engine adds 3 dB to each
fader assigned to that group. As with hardware
groups, you don’t actually see the individual faders
move, but you do hear the results in real time.
For instance, let’s say you have five channels
of backing vocals on channels 8–12 assigned to a
Virtual Group, and you need to drop their levels
about 5 dB relative to the rest of the mix. When
you pull down the group master fader, each of the
channels in that group is affected equally. As your
group master is being pulled down, the process of
calculating channel output is happening smoothly
and invisibly throughout the fader throw.
8-4
Advanced Techniques
It is important to remember that, because you
do not have a separate gain stage, you cannot
add gain with a group fader beyond the gain
available in each individual fader assigned to
that group. Say you have Fader 1 at about +4 dB
(above Unity, roughly MIDI number 110), you assign it to a group, and then try to add 10 dB of
gain with the group fader. It can’t go past +10 dB
(MIDI 126), so you will run out of headroom.
You can make most of your grouping decisions
before you even sit down to mix. For example,
you might put all the drum tracks in one group,
the horn section in a second group, and the background vocals in a third.
Note: Any number of faders in Fader Banks 1, 2,
3, and 4 can be assigned to a Virtual Group; however, a single channel cannot be assigned to
more than one group at a time. Additionally, a
channel that is assigned to a Virtual Group can
still be controlled by its own channel fader and
any moves will be in proportion/relation to the
group it is assigned to.
SETUP
SAVE
SAVE AS...
NEW
LOAD
GROUP
GENERAL
PLUG INS
DIGITAL I/O
D8B
Grp
1
<<
56 INPUT / 72 CHANNEL DIGITAL MIXER
Press
GROUPS
>>
Ch.
Select
Exit
From the console:
1. Press the GROUP button in the
Session Setup Section of the console.
The Group menu appears in the Fat
Channel Display. Also, the Fader Bank
select buttons automatically revert to
Fader Bank 4.
Owner’s Manual
TO ASSIGN CHANNELS TO VIRTUAL
GROUPS
2. Press the SELECT buttons below the
arrows to choose the Group number
you want to modify. It’s also possible to
pick the group master by using the
SELECT button on one of the first 8
channels of Fader Bank 4.
3. Using the Fader Bank select switches,
(MIC/LINE, TAPE, EFFECTS,
MASTERS) choose the fader deck with
the channels that will be included in
the group.
4. Press the SELECT buttons on the
channels you want to assign to the
Virtual Group. Their inclusion in the
group will be indicated by the channel
SELECT LEDs being lit.
Note: You can assign channels from
different fader banks to the same Virtual
Group, but you can’t assign a channel to
more than one group.
5. Repeat steps 2 through 4 until all
desired channels are assigned to all
desired Virtual Groups.
6. When assignments are complete, press
the SELECT button below “Exit” in the
Fat Channel Display to leave group
assignment mode.
Advanced Techniques
8-5
Digital 8•Bus
TO ASSIGN CHANNELS TO VIRTUAL
GROUPS
12
36
13
37
SELECT
SELECT
SOLO
SOLO
MUTE
MUTE
From the screen:
1. Click on the SELECT buttons on the
channel(s) you want to add to a group.
Use the SHIFT key to select more than
one channel. You can select channels
from more than one fader deck.
2. Click on “Channel” in the upper menu
bar and drag down to select “Group”
(or press Ctrl-G).
The Group Selections window opens.
3. Click in the Group Select box and
choose the group number you want to
add the selected channels to.
4. Click on the Group button to complete
the group assignment. The selected
faders now have the group number
and color for easy identification.
Auto Fading
This feature can be used to set a
custom-length fade with various preset
and/or user-modified fade curve shapes.
TO SET AN AUTO FADE
From the console:
This feature is not available from the
console.
8-6
Advanced Techniques
From the screen:
1. Click on the SELECT button on the
channel you want to fade. You can
auto-fade any channel’s fader, including
the master fader.
2. Click on “Channel” in the upper menu
bar, and drag down to select “Edit Fade.”
The Fade Curves window appears.
Owner’s Manual
TO SET AN AUTO FADE
3. Click on the “Fade In” or “Fade Out”
button in the lower left corner of the
window to choose the fade you want to
edit.
4. You can choose a preset fade by
clicking in the “Custom Curves” box in
the lower-right corner of the window
and choosing one of the selections.
5. You can set the fade time by clicking in
the “Seconds” box and highlighting the
number. Then enter the new number
using the number keys on the
keyboard.
6. You can modify the curve by clicking in
the “Rubber Band” box, then clicking
on the line in the graph. This adds an
anchor point to the line which you can
move to shape the curve. Click on the
eraser to remove anchor points.
7. Click on the “Close Box” icon in the
upper-right corner of the window to
close the Fade Curves window.
8. Click on “Channel” and drag down to
“Fade In” (or press Ctrl-D). The
selected channel will fade in according
to the selected fade-in curve.
9. Click on “Channel” and drag down to
“Fade Out” (or press Ctrl-F). The
selected channel will fade out according to the selected fade-out curve.
Advanced Techniques
8-7
Digital 8•Bus
Stereo Paired Faders
Under some circumstances, it may be desirable to move two faders together as a
stereo pair. Any two adjacent odd/even faders can be linked so they move in tandem.
TO CREATE A STEREO FADER PAIR
12
36
13
37
SELECT
SELECT
SOLO
SOLO
MUTE
D8B
Channel 1-2
Cancel
From the console:
1. Select two adjacent odd/even channels
by pressing and holding the two
channels’ SELECT buttons.
2. The “Create Stereo Pair” menu
appears in the Fat Channels Display.
MUTE
56 INPUT / 72 CHANNEL DIGITAL MIXER
Move->
(CREATE
Move<-
STEREO PAIR)
Zero-Set
3. You can make one of three choices:
• “Move –>” copies the left channel
fader level to the right channel, and an
equal, but opposite, pan setting.
• “Move <–” copies the right channel
fader level to the left channel, and an
equal, but opposite, pan setting.
• “Zero-Set” sets both channels to a
nominal zero state (faders down, pans
fully left/right).
4. Press the SELECT button below your
choice to complete the operation.
5. Now whenever you select one of the
paired channels, both channels’
SELECT LEDs light. Move one fader
up or down, and the adjacent fader
moves with it. Move one pan control,
and the adjacent channel’s pan moves
in the opposite direction.
TO CREATE A STEREO FADER PAIR
From the screen:
1. Hold down the Shift key and click on
the Select buttons on any two adjacent
odd/even faders.
2. Click on “Channel” in the upper menu
bar, and drag down to select “Stereo
Link” (or press Ctrl-L).
8-8
Advanced Techniques
4. You can select one of three options in
this dialog box:
• “Start with Both Channels
Normalled” means that both faders will
return to a nominal setting (faders
down, pans fully left/right).
• “Match Right Channel” means the
left channel fader will snap to the same
level as the right channel fader, with an
equal but opposite pan.
• “Match Left Channel” means the
right channel fader will snap to the
same level as the left channel fader,
with an equal but opposite pan.
Owner’s Manual
3. The “Make Stereo Pair” window appears.
5. Click on “Pair” in the “Make Stereo
Pair” window to link the two channels.
6. The two channels’ fader knobs are now
labeled “L” and “R” to indicate they are
stereo-paired. Move one fader up or
down, and the adjacent fader moves
with it. Move one pan control, and the
adjacent channel’s pan moves in the
opposite direction.
Surround-Sound
Controlling External Effects
The Mackie Real Time OS automation system
Processors from the Console via MIDI
Fader Bank 4 includes 8 MIDI controllers
(channels 81-88), which can be used to transmit
MIDI continuous controller messages and note
on/off messages through the MIDI OUT connector
on the back of the Remote CPU. The channel faders and V-Pots transmit continuous controller
messages, and the channel mute buttons transmit
the note on/off messages.
The control messages and note on/off messages are as follows:
MIDI Faders:
$B0 $00 $XX to $B0 $07 $XX
(XX is a value ranging from $00 to $7F).
MIDI V-Pots:
$B0 $08 $XX to $B0 $0F $XX
(XX is a value ranging from $00 to $7F).
MIDI Mute:
$90 $00 $XX to $90 $07 $XX
(Mute on = Note on = $40;
Mute off = Note off = $00).
provides a powerful method for automating
surround-sound mixes by using the Surround
Control Panel (on-screen only).
You can select one of five different surround
sound modes in the General menu (from the console) or the Aux/Surround window in the Setup
dialog box (from the screen). The surround
modes are global; whatever surround mode you
select applies to all channels.
The surround outputs are routed to the D8B’s
outputs. The buses used depends on the surround mode you have selected. You can
individually pan and locate the signal from each
channel within the sound-field by dragging the
point-source dot in the Surround Control Panel.
You can save the static location as a surround
patch, or you can automate a dynamic move (for
example, a sweep from left-rear to right-front),
and save it as part of your session. What’s more,
you can copy the move in the Mix Editor, and
paste it to another channel. For example, you
could copy a sweep to an effects return channel,
but place it at a point in time slightly behind the
dry signal, to get a cool, trailing sweep effect.
Advanced Techniques
8-9
Digital 8•Bus
Stereo Panning
Surround Modes
0 dB
The surround modes available include
the following:
–3 dB
Level
–100 dB
Left
Right
Left
Right
0 dB
A. Stereo
Left Front = Bus 1 Out
Right Front = Bus 2 Out
This is separate from the main stereo
L-R output. The channel’s V-Pot pan control indicates the position between Bus 1
and Bus 2 Out. Constant-power panning is
between the Left and Right Front (Bus 1
and Bus 2).
0 dB
–3 dB
–100 dB
Bus 1
Bus 2
Left
Front
Right
Front
Figure 8-1. Stereo Panning
Quad Panning
Left
Right
0 dB
0 dB
–3 dB
–100 dB
Bus 2
Bus 1
Left
Front
Right
Front
Left
Rear
Right
Rear
Bus 5
Bus 6
–100 dB
–3 dB
Left
0 dB
Figure 8-2. Quad Panning
8-10
Advanced Techniques
Right
0 dB
B. Quad
Left Front = Bus 1 Out
Right Front = Bus 2 Out
Left Rear = Bus 5 Out
Right Rear = Bus 6 Out
Constant-power panning is between
Left Front and Right Front buses (Bus 1
and Bus 2), and between the Left Rear and
Right Rear buses (Bus 5 and Bus 6). There
is no panning between the front and rear
speaker buses.
–3 dB
Level
–100 dB
L (bus 1)
C (bus 3)
R (bus 2)
C. LCRS
Left Front = Bus 1 Out
Right Front = Bus 2 Out
Center = Bus 3 Out
Surround = Bus 4 Out
Constant-power panning is between the
Left Front and Center buses (Bus 1 and
Bus 3) and between the Center and Right
Front buses (Bus 3 and Bus 2).
Center
Left
Right
0 dB
0 dB
0 dB
–3 dB
Owner’s Manual
LCRS Panning
0 dB
–100 dB
Bus 1
Bus 3
Left
Front
Bus 2
Right
Front
Center
Surround
Bus 4
(Same signal goes to
both Surround speakers)
Figure 8-3. LCRS Panning
5.1 Panning
Center
Left
Right
0 dB
0 dB
0 dB
–3 dB
–100 dB
Bus 1
Bus 3
Left
Front
Left
Rear
Sub
Bus 4
Bus 5
Center
Bus 2
Right
Front
Right
Rear
D. 5:1
Left Front = Bus 1 Out
Right Front = Bus 2 Out
Center = Bus 3 Out
Sub = Bus 4 Out
Left Rear = Bus 5 Out
Right Rear = Bus 6 Out
This is a combination of the LCRS and
rear Quad panning. Constant-power panning
is between the Left Front and Center buses
(Bus 1 and Bus 3) the Center and Right
Front buses (Bus 3 and Bus 2), and between
the Left Rear and Right Rear buses (Bus 5
and Bus 6). There is no panning between the
front and rear speaker buses.
Bus 6
–100 dB
–3 dB
Left
0 dB
Right
0 dB
Figure 8-4. 5.1 Panning
Advanced Techniques
8-11
Digital 8•Bus
E. 7:1
Left Front = Bus 1 Out
Right Front = Bus 2 Out
Center = Bus 3 Out
Sub = Bus 4 Out
Left Rear = Bus 5 Out
Right Rear = Bus 6 Out
Left Side = Bus 7 Out
Right Side = Bus 8 Out
7.1 Panning
Center
Left
Right
0 dB
0 dB
0 dB
–3 dB
Bus 1
Bus 3
Left
Front
0 dB
Bus 2
0 dB
Right
Front
Center
Bus 7
Left
Side
Left
Right
Side
Side
Left
Rear
0 dB
Bus 5
Sub
Bus 4
Bus 8
Side
Right
Rear
Bus 6
–3 dB
Left
0 dB
Figure 8-5. 7.1 Panning
Right
Right
0 dB
0 dB
This is a combination of the LCRS and
rear Quad panning, with side speakers to
create two front-to-rear constant-power
pans. Constant-power panning is between
the Left Front and Center buses (Bus 1
and Bus 3) and the Center and Right Front
buses (Bus 3 and Bus 2), and between the
Left Rear and Right Rear buses (Bus 5 and
Bus 6). The side speakers provide constantpower panning between the Left Rear and
Left Side buses (Bus 5 and Bus 7) and the
Left Side and Left Front buses (Bus 7 and
Bus 1), and panning between the Right
Rear and Right Side buses (Bus 6 and Bus
8) and the Right Side and Right Front
buses (Bus 8 and Bus 2), creating full
front-to-rear panning. The one bus unaccounted for in the side and rear panning
schemes is the Center bus, which is not
included in this panning curve algorithm.
Surround-Sound Control Panel
Click on the Surround button in the
lower menu bar to open the SurroundSound Control Panel. It is comprised of a
rectangle with varying numbers of speaker
icons surrounding it, depending on the surround mode selected. The Surround-Sound
Control Panel opens with the speaker
icons turned off by default.
The number of speakers range from 2
(stereo) to 8 (7.1). A red or green dot sits
in this rectangle to show current positioning. Each dot represents one of two
surround positions (or dynamic sweeps)
you can store with each channel.
The dot may be moved in an X/Y manner within the grid and the speakers
representing the pan buses may be toggled
on and off by clicking on the speaker icons
to mute specific pan buses. For example, if
a voice is meant to stay front and center
only, then you would turn off all but the
Left, Center, and Right speakers to isolate
the dialog audio from reaching the rear or
side speakers.
The speaker icons are placed in a logical
and symmetrical distribution around the
surround box rectangle. These speaker
8-12
Advanced Techniques
Ball icon
Displays the relative signal position in
the pan grid. This is stored and recalled
with the session.
A/B (red ball/green ball)
Use for panning positioning comparison
and automation.
Morph
This button is a trigger to move the ball
in a timed fashion on a straight-line track
between the A and B positions, according
to the time amount box below the morph
button (0.1 to 10.1 seconds).
Owner’s Manual
icons represent the bus outputs and may be
toggled on and off by clicking on them to restrict the pan access (hard on/off bus
output) of the signal, on a per-channel basis.
This is stored and recalled with the session.
Flyback
This causes the position ball to jump immediately back to its original start point
(mouse driven only, where releasing the
mouse button causes the ball to fly back).
Menu
This button is identical to the menu
buttons in the EQ, gate, compressor, and
effects control panels. It provides clipboard
functions, and storing and recalling
surround patches.
A two-digit current-channel designator
in the upper right hand corner has the same
function as the Channel Select Display on
the console.
Monitoring in Surround-Sound
You should reserve eight of the first 48
channels (Fader Banks 1 and 2) for monitoring your surround-sound mix. The
signal-flow should be as follows (refer to
Figure 8-6 on the following page):
1. Use up to 40 of the first 48 channels
for signal input (reserve eight of them
for monitoring). If you have an I/O card
installed in the ALT I/O slot, you could
use the 8 ALT inputs as well (but not
for monitoring).
2. Use the Surround-Sound Control Panel
to locate each signal source within the
sound field. The signals are routed to
the BUS 1-8 outputs. Remember, you
can mix any of the internal FX returns
in surround-sound, too.
Advanced Techniques
8-13
Digital 8•Bus
3. If you’re using the analog inputs on your
multitrack recorder, you can go directly from
the SURROUND OUT 25-pin D-Sub connector
on the rear panel of the console to your
multitrack recorder’s analog inputs.
If you have a digital Tape I/O card installed,
you can assign the Bus 1-8 channels to the
eight digital Tape Outputs provided by your
DIO•8 card. Connect them to the multitrack
recorder’s digital inputs.
4. Return the eight tracks from your multitrack
recorder to the eight channels you’ve
reserved for monitoring. For example, you
might return the eight tracks to channels 41–
48 via the third Tape I/O card.
5. Assign the eight monitor channels to eight
unused Tape Outputs, which you can route to
your surround amplifiers and speakers.
Remember, you can’t assign the monitor
channels to the same Tape I/O card as you’re
using to input the channels (this is a safeguard to prevent feedback during recording).
For example, if you’re using channels 41–48
for tape returns, use could use Tape Outputs
9–16 to go to your monitor speakers.
You can assign the eight tape returns to a
virtual group, and use the group fader as a
“Virtual Control Room” master volume control
for monitoring all eight surround stems, because
the Control Room Level control works only for
the stereo Control Room outputs.
You can also assign the eight tape returns to
the L-R bus for a stereo dub, and to check for
coherence. Make sure the source channels are
not assigned to the L-R bus to avoid doublemonitoring.
Direct Box
17
16
15
14
13
24
23
22
21
20
19
11
10
9
8
7
6
5
4
3
2
1
LINE IN
LINE IN
LINE IN
LINE IN
LINE IN
LINE IN
LINE IN
LINE IN
LINE IN
LINE IN
LINE IN
LINE IN
INSERT
INSERT
INSERT
INSERT
INSERT
INSERT
INSERT
INSERT
INSERT
INSERT
INSERT
INSERT
BUS OUT 1-8
&
SURROUND OUT
TO TAPE
FROM TAPE
TO TAPE
FROM TAPE
TO TAPE
FROM TAPE
ANALOG
I/O
L
MASTER
OUT
2 TRACK A
PHNS 1 PHNS 2
CR
MAIN
2 TRACK B
STUDIO OUT
CR
NEAR FIELD
2 TRACK C
PNCH I/0 TLKBK
audio insert
audio in
audio out
MASTER OUT
Figure 8-6. Surround-Sound Monitoring
Advanced Techniques
Vocal Enhancer
ANALOG
I/O
Reverb
ANALOG
I/O
R
8-14
12
Stereo Effects
Procesor
Optional
AIO•8
Cards
LINE IN
18
AUX 12
AUX 11
AUX 10
AUX 9
AUX 8
AUX 7
AUX 6
AUX 5
AUX 4
AUX 3
AUX 2
AUX 1
Owner’s Manual
9. Service
Warranty Service
Details concerning Warranty Service are
spelled out on the Warranty Card included with
your console (if the card is missing, let us
know and we’ll rush one to you).
If you think your console has a problem,
please do everything you can to confirm it
before calling for service, including reading
through the Troubleshooting section of this
owner’s manual. Doing so might save you from
deprivation of your console and the associated
suffering.
Of all Mackie products returned for service
(which is hardly any at all), roughly 50% are
coded “CND” — Could Not Duplicate, which
usually means the problem lay somewhere else
in the system.
Repair
Service for the U.S. versions of our digital
consoles is available only from our factory,
located in sunny Woodinville, Washington.
(Service for products living outside the United
States can be obtained through local dealers or
distributors.) If your console needs service,
follow these instructions:
1. Review the troubleshooting suggestions in
your owner’s manual (see next section).
Please.
2. Call Tech Support at 1-800-258-6883, 8am
to 5pm PST, to explain the problem and
request an RA (Return Authorization)
number. Have your Digital 8•Bus (or
Remote CPU) serial number(s) ready. You
must have an RA number before you can
obtain service at the factory.
3. Set aside the power cord, owner’s manual,
or anything else that you’ll ever want to see
again. We are responsible only for the return
of the product being repaired.
4. Pack the product in its original package,
including the foam end caps and the upper
tray. This is VERY IMPORTANT. When you
call for the RA number, please let Tech
Support know if you need new packaging.
Mackie is not responsible for any damage
that occurs due to non-factory packaging.
5. Include a legible note stating your name,
shipping address (no P.O. boxes), daytime
phone number, RA number, and a detailed
description of the problem, including how we
can duplicate it.
6. Write the RA number in BIG PRINT on
top of the box. It must appear on the outside
of the box.
7. Ship the product to us. We recommend
United Parcel Service (UPS). We suggest
insurance for all forms of cartage. Ship to
this address (unless told differently by your
friendly Tech Support person):
Mackie Designs
SERVICE DEPT.
16220 Wood-Red Rd. NE
Woodinville, WA 98072
8. We’ll try to fix the product within three
business days. We normally send everything
back prepaid using UPS BLUE (Second Day
Air). However, if you rush your product to us
by Air Shipment, we’ll treat it in kind by
letting it jump to the head of the line, and
we’ll also ship it back to you UPS RED
(Next Day Air). This paragraph does not
necessarily apply to non-warranty service.
Troubleshooting Guide
Three Things to Keep in Mind
As you become familiar with the Digital
8•Bus, you’ll find it helpful to keep these three
questions in mind at all times:
1. What Fader Bank is selected?
2. What channel is selected?
3. What is the V-Pot assignment?
In 90% of the cases, if something isn’t working
as you expect it should, it’s because one of these
three settings isn’t where you intend it to be.
No power!
• Our favorite question: Is it plugged in? Make
sure the power cord is securely seated in the
IEC socket and plugged all the way into the
AC outlet.
• Our next favorite question: Is the POWER
switch on? If not, try turning it on.
• Is the Fat Channel Display working? If not,
make sure the AC outlet is live (check with
a tester or lamp). If so, refer to “No Sound”
below.
• Make sure the DC power cable is securely
connected at the rear panel of the console.
No Sound!
• Is the signal source working correctly, and
properly connected to an input on the
console?
• Is the TRIM control (channels 1–12) or the
Digital Trim control (channels 1–48) turned
Service
9-1
Digital 8•Bus
•
•
•
•
•
all the way down? See “Input Sensitivity
Adjustment Procedure” in Chapter 6.
Is the MIC/LINE switch set to the correct
position?
Is the channel fader control turned up?
Has the channel been assigned to an output
bus in the Bus Assignment Section?
Is the master level control for the selected
output bus turned all the way down?
Try soloing a channel and listen to the
Control Room Outputs, or use headphones
connected to the Phones Out (with Control
Room selected in the Phones/Cue Mix
Section). Make sure the Solo Level is turned
up in the Studio/Solo Section, and the
Control Room Level is turned up in the
Control Room Section.
Bad Sound
• Is the input connector plugged completely
into the jack?
• Is it loud and distorted? Turn down the
output level on the console.
• Are any of the meters hitting the “OL”
mark? Try turning down the TRIM control
(channels 1–12) or the Digital Trim control
(channels 1–48). Or try turning down the
signal source volume control.
• Solo the signal source and listen to it in the
Control Room Output, or with headphones in
the Phones output. Select PFL SOLO in the
Studio/Solo Section. Make sure the SOLO
LEVEL control is turned up in the Studio/
Solo Section, and the Control Room LEVEL
control is turned up in the Control Room
Section. If the signal sounds bad with PFL
SOLO selected, the problem lies somewhere
before the channel fader, with the source
itself or the input settings on the console. If
the signal sounds okay, the problem lies
somewhere after the channel fader, with the
output settings or the amplifier/speaker
combination after the console.
Noise/Hum
• Check the signal cable between the console
and the power amplifier. Make sure all
connections are secure.
• Make sure signal cables are not routed near
AC cables, power transformers (wall warts),
or other EMI sources.
• Is there a light dimmer or other triac-based
(SCR) device on the same AC circuit as the
console? Use an AC line filter or plug the
console (along with all other audio
equipment) into a different AC circuit.
• If you’re connecting an unbalanced source to
the balanced input using an XLR or TRS
connector, try disconnecting the unbalanced
ground from pin 1 (XLR) or sleeve (TRS).
9-2
Service
This Glossary contains brief definitions of
many of the audio and electronic terms used in
discussions of sound mixing and recording.
Many of the terms have other meanings or
nuances or very rigorous technical definitions
that we have sidestepped here because we
figure you already have a lot on your mind. If
you’d like to get more information, see Appendix K for a list of recommended books on
related subjects.
ance. Additionally, each leg may carry the signal at exactly the same level but with opposite
polarity with respect to ground. In some balanced circuits, only one leg actually carries the
signal but both legs exhibit the same impedance characteristics with respect to ground.
Balanced input circuits can offer excellent rejection of common-mode noise induced into the
line and also make proper (no ground loops)
system grounding easier. Usually terminated
with 1⁄4" TRS or XLR connectors.
AFL
bandwidth
An acronym for After Fade Listen, which is
another way of saying post-fader solo function.
The band of frequencies that pass through a
device with a loss of less than 3 dB, expressed
in Hertz or in musical octaves. Also see Q.
A/D converter (ADC)
bit
Analog-to-digital converter, a device which
transforms incoming analog signals into digital
form.
The smallest component of a digital word,
represented by either a one or a zero.
aliasing
bus
This is a type of distortion that can be
caused during the analog-to-digital conversion
process. The frequency of the analog signal
must be one-half or less than the sampling rate
in order to be accurately represented in the
digital domain (see Nyquist Sampling Theorem).
Careful design and filtering before the sampling
stage can reduce aliasing to a minimum.
An electrical connection common to three or
more circuits. In mixer design, a bus usually carries signals from a number of inputs to a mixing
amplifier, just like a city bus carries people from
a number of neighborhoods to their jobs.
assign
In sound mixers, assign means to switch or
route a signal to a particular signal path or
combination of signal paths.
attenuate
To reduce or make quieter.
channel strip
The physical representation of an audio
channel on the front panel of a mixer; usually a
long, vertical strip of controls.
chorusing
An effect available in some digital delay
effects units and reverbs. Chorusing involves a
number of moving delays and pitch shifting, usually panned across a stereo field.
automation system
clipping
A system that memorizes fader positions,
switch settings, and all send, EQ, dynamics,
and effects settings on a console. Mackie’s
Real Time OS™ automation is a powerful
system that not only memorizes static settings
(snapshot automation), but also all level
changes and switch on/off changes referenced
to time code (dynamic automation).
A cause of severe audio distortion that is the
result of excessive gain requiring the peaks of
the audio signal to rise above the capabilities of
the amplifier circuit. Seen on an oscilloscope,
the audio peaks appear flattened or clipped off.
To avoid distortion, reduce the system gain in
or before the gain stage in which the clipping
occurs. See also headroom.
auxiliary
compressor
In sound mixers, supplemental equipment or
features that provide additional capabilities to
the basic system. Examples of auxiliary equipment include: serial processors (equalizers,
compressors, limiters, gates) and parallel devices (reverberation and delay). Most mixers
have aux send buses and aux return inputs to
accommodate auxiliary equipment.
This is used to smooth out any large transient peaks in an audio signal that might
otherwise overload your system or cause distortion. The amplitude threshold and other
parameters such as attack time, release time
and tire pressure are adjustable.
balanced
In a classic balanced audio circuit, the two
legs of the circuit (+ and –) are isolated from
the circuit ground by exactly the same imped-
Owner’s Manual
Appendix A
Glossary
cue mix
A separate output, usually having an individual mix and level control specifically for the
talent to monitor. The Digital 8•Bus has two
cue mix/phone outputs.
Glossary
A-1
Digital 8•Bus
D/A converter
Digital-to-analog converter, a device that
transforms incoming digital signals into analog
form.
DAT
Digital Audio Tape is a recording/playback
system in which analog signals are converted
to digital form and stored on magnetic tape. It
offers all the benefits of digital audio, including
low noise and wide dynamic range.
DAW (digital audio workstation)
A dedicated recording/editing software (application) and hardware system, used for hard
disk (non-linear) random access playback and
recording. Many DAWs are used with personal
computers using Windows® 95 or Macintosh®
operating systems, though some use their own
proprietary computers.
dB
Dog Biscuit, see also decibel.
dBu
A unit of measurement of audio signal level
in an electrical circuit, expressed in decibels
referenced to 0.775 VRMS into any impedance.
Commonly used to describe signal levels within
a modern audio system.
dBv
A unit of measurement equal to the dBu but
no longer in use. It was too easy to confuse a
dBv with a dBV, to which it is not equivalent.
dBV
A unit of measurement of audio signal level
in an electrical circuit, expressed in decibels
referenced to 1 VRMS across any impedance.
Commonly used to describe signal levels in
consumer equipment. To convert dBV to dBu,
add 2.2 dB.
decibel (dB)
The dB is a ratio of quantities measured in
similar terms using a logarithmic scale. Many
audio system parameters measure over such a
large range of values that the dB is used to
simplify the numbers. A ratio of 1000V:1V is
equal to 60 dB. When one of the terms in the
ratio is an agreed-upon standard value such as
0.775V, 1V or 1mw, the ratio becomes an absolute value, i.e., +4 dBu, –10 dBV or 0 dBm.
delay
In sound work, delay usually refers to an
electronic circuit or effects unit whose purpose
it is to delay the audio signal for some short period of time. Delay can refer to one short
repeat, a series of repeats, or the complex interactions of delay used in chorusing or reverb.
When delayed signals are mixed back with the
original sound, a great number of audio effects
can be generated, including phasing and flanging, doubling, Haas-effect positioning, slap or
A-2
Glossary
slapback, echo, regenerative echo, chorusing,
and hall-like reverberation. Signal time delay is
central to many audio effects units.
dither
This is an interesting technique used to reduce low-level distortion by adding random
noise to the analog signal before the sampling
stage. Adding dither decorrelates the quantization error from the signal level, allowing the
digital system to encode amplitudes smaller
than the least significant bit.
DSP
Abbreviation for digital signal processing.
DSP can accomplish the same functions found
in analog signal processors, but performs them
mathematically in the digital domain, with more
precision and accuracy than its analog counterpart. Since DSP is a software-based process,
parameters and processing functions are easily
changed and updated by revising the software,
rather than redesigning the hardware. DSP can
be found in an outboard effects device, such as a
reverb or delay unit, or it can be integrated into
a DAW or digital mixing console.
dry
Usually means without reverberation, or
without some other applied effect like delay or
chorusing. Dry is not wet, i.e., totally
unaffected.
dynamic range
The range between the maximum and minimum sound levels that a sound system can
handle. It is usually expressed in decibels as
the difference between the level at peak
clipping and the level of the noise floor.
dynamics processor
Dynamics processors are used to correct or
control signal levels. The Digital 8•Bus provides gate and compressor dynamic processing
for each of the first 48 channels.
echo.......echo........echo
The reflection of sound from a surface such
as a wall or a floor. Reverberation and echo are
terms that can be used interchangeably, but in
audio parlance a distinction is usually made:
echo is considered to be a distinct, recognizable
repetition (or series of repetitions) of a word,
note, phrase, or sound, whereas reverberation
is a diffuse, continuously smooth decay of
sound. Echo and reverberation can be added in
sound mixing by sending the original sound to
an electronic (or electronic/acoustic) system
that mimics natural echoes and then some. The
added echo is returned to the blend through
additional mixer inputs. Highly echoic rooms
are called live; rooms with very little echo are
called dead. A sound source without added
echo or reverb is dry; one with reverb or echo
added is wet.
External signal processors used to add reverb, delay, spatial, or psychoacoustic effects
to an audio signal. An effects processor may be
used as an insert processor (serial) on a particular input or subgroup, or it may be used via
the aux send/return system (parallel). See also
echo, reverberation.
EIN
Equivalent Input Noise. Specification that
helps measure the “quietness” of a gain stage by
deriving the equivalent input noise voltage necessary to obtain a given preamp’s output noise.
Typically ranges from –125 to –129.5 dBm.
equalization (EQ)
This refers to deliberately changing the frequency response of a circuit, sometimes to
correct for previous unequal response (hence
the term, equalization), and more often to add or
subtract level at certain frequencies for sound
enhancement, to remove extraneous sounds, or
to create completely new and different sounds.
Bass and treble controls on your stereo are
EQ; so are the units called parametrics, graphics, and notch filters.
A lot of how we refer to equalization has to
do with what a graph of the frequency response
would look like. A flat response (no EQ) is a
straight line; a peak looks like a hill, a dip is a
valley; a notch is a really skinny valley; and a
shelf looks like a plateau (or shelf—duh!). The
slope is the grade of the hill on the graph.
Graphic equalizers have enough frequency
slider controls to form a graph of the EQ right
on the front panel. Parametric EQs, like those
used in the Digital 8•Bus, let you vary several
EQ parameters at once. A filter is simply a
form of equalizer that allows certain frequencies through untouched while reducing or
eliminating other frequencies.
Aside from the level controls, EQs are probably the second most powerful controls on any
mixer (no, the power switch doesn’t count!).
of pitch, harmonics, tone, and overtones. Frequency is measured in units called Hertz (Hz).
One Hertz is one repetition or cycle per second.
gain
The measure of how much a circuit amplifies a signal. Gain may be stated as a ratio of
input to output values, such as a voltage gain
of 4, or a power gain of 1.5, or it can be expressed in decibels, such as a line amplifier
with a gain of 10 dB.
gain stage
An amplification point in a signal path,
either within a system or a single device. Overall system gain is distributed between the
various gain stages.
gate
This is a circuit that will automatically turn
off an input signal when the signal drops below
a certain level. This can reduce the overall noise
level of your mix by turning off noisy inputs,
such as old tube gear, effects pedals, or ambient
noise picked up by microphones. Threshold,
attack time, and release are some of the gate
adjustments available.
headroom
The difference between nominal operating
level and peak clipping in an audio system. For
example, a mixer operating with a nominal line
level of +4 dBu and a maximum output level of
+22 dBu has 18 dB of headroom. Plenty of
room for surprise peaks.
Hertz
The unit of measure for frequency of oscillation, equal to 1 cycle per second. Abbreviated
Hz, kHz is pronounced “kay-Hertz” and is an
abbreviation for kilohertz, or 1000 Hertz.
internal effects
The Digital 8•Bus comes with one internal
effects card, with the option of adding more. A
plate of chicken vindaloo will also yield plenty
of remarkable internal effects, many in the
audio frequency range.
EQ curve
level
A graph of the response of an equalizer, with
frequency on the x (horizontal) axis and amplitude (level) on the y (vertical) axis. Equalizer
types and effects are often named after the
shape of the graphed response curve, such as
peak, dip, shelf, notch, knee, and so on.
Another word for signal voltage, power,
strength or volume. Audio signals are sometimes classified according to their level.
Commonly used levels are: microphone level
(–40 dBu or lower), instrument level (–20 to
–10 dBu), line level (–10 to +30 dBu), and
speaker level (+30 dBu and above).
frequency
The number of times an event repeats itself
in a given period. Sound waves and the electrical signals that represent sound waves in an
audio circuit have repetitive patterns that
range from a frequency of about 20 repetitions
per second to about 20,000 repetitions per second. Sound is the vibration or combination of
vibrations in this range of 20 to 20,000 repetitions per second, which gives us the sensation
Owner’s Manual
effects devices
line level
A signal whose level falls between –10 dBu
and +30 dBu.
mic level
The typical level of a signal from a microphone. A mic-level signal (usually but not
always coming from a microphone) is generally
below –30 dBu. With a very quiet source (a pin
Glossary
A-3
Digital 8•Bus
dropping?) the signal can be –70 dBu or lower.
It is also possible for some microphones to deliver more signal than this, in which case it
may be referred to as a “hot” mic level. Alternatively, you can just say, “Boy, is that loud!”
mic preamp
Short for microphone preamplifier. An amplifier that functions to bring the very low signal
level of a microphone (approximately –50 dBu)
up to line level (approximately 0 dBu). Mic
preamps often have their own volume control,
called a trim control, to properly set the gain
for a particular source. Setting the mic preamp
gain correctly with the trim control is an essential step in establishing good noise and
headroom for your mix.
MIDI
Acronym for musical instrument digital interface. MIDI is the music industry’s standard
serial communication protocol.
Nyquist Sampling Theorem
An incoming analog signal must be converted to a digital signal before the Digital
8•Bus can do its thing. The amplitude of the
analog signal is sampled at a fast rate and converted into digital words.
The theorem states that a continuous analog signal must be sampled at a frequency
higher than twice the highest analog frequency
present in order to be accurately reproduced,
or aliasing will occur. Filtering of the signal before sampling will reduce aliasing errors (see
aliasing).
parametric EQ
A “fully” parametric EQ is an extremely powerful equalizer that allows smooth, continuous
control of each of the three primary EQ parameters (frequency, gain, and bandwidth) in each
section independently. “Semi” parametric EQs
allow control of fewer parameters, usually frequency and gain (i.e., they have a fixed bandwidth, but variable center frequency and gain).
PFL
An acronym for Pre Fade Listen. Broadcasters would call it cueing. Sound folks call it being
able to solo a channel with the fader down.
phantom power
A system of providing electrical power for
condenser microphones (and some electronic
pickup devices) from the sound mixer. The system is called phantom because the power is
carried on standard microphone audio wiring in
a way that is “invisible” to ordinary dynamic
microphones. Mackie mixers use standard +48
volt DC power, switchable on or off. Most quality condenser microphones are designed to use
+48 VDC phantom power. Check the
manufacturer’s recommendations.
A-4
Glossary
Generally, phantom power is safe to use with
non-condenser microphones as well, especially
dynamic microphones. However, unbalanced
microphones and some electronic equipment
(such as some wireless microphone receivers)
can short out the phantom power and be
severely damaged. Check the manufacturer’s
recommendations and be careful!
phasing
A delay effect, where the original signal is
mixed with a short (0 to 10 msec) delay. The
time of the delay is slowly varied, and the
combination of the two signals results in a dramatic moving comb-filter effect. Phasing is
sometimes imitated by sweeping a comb-filter
EQ across a signal. A comb filter can be found
in your back pocket.
phone jack
Ever see those old telephone switchboards
with hundreds of jacks and patch cords and
plugs? Those are phone jacks and plugs, now
used widely with musical instruments and audio
equipment. A phone jack is the female connector, and we use them in 1⁄4" two-conductor (TS)
and three-conductor (TRS) versions.
phone plug
The male counterpart to the phone jack, described above.
post-fader
A term typically used to describe an aux
send that is connected so that it is affected by
the setting of the associated channel fader.
Sends connected this way are typically (but not
always) used for effects. See pre-fader.
pre-fader
A term typically used to describe an aux send
that is connected so that it is not affected by the
setting of the associated channel fader. Sends
connected this way are typically (but not always)
used for monitors (foldback). See post-fader.
Q (bandwidth)
A way of stating the bandwidth of a filter or
equalizer section. An EQ with a Q of .75 is
broad and smooth, while a Q of 10 gives a narrow, pointed response curve. To calculate the
value of Q, you must know the center frequency of the EQ section and the frequencies
at which the upper and lower skirts fall 3 dB
below the level of the center frequency. Q
equals the center frequency divided by the difference between the upper and lower –3 dB
frequencies. For example, a peaking EQ centered at 10kHz whose –3 dB points are 7.5kHz
and 12.5kHz has a Q of 2.
quantization
The digital representation of an analog signal involves sampling the amplitude at a fast
rate. Quantization is the measurement of the
amplitude at the time of each sample, expressed
RAM (Random Access Memory)
In computers and computer-controlled
equipment, this is an area of processor memory
that can be read from and written to.
return
A return is a mixer line input dedicated to
the task of returning processed or added sound
from reverb, echo, and other effects devices.
Depending on the internal routing of your
mixer and your own inclination, you could use
returns as additional line inputs, or you could
route your reverb outputs to ordinary line inputs rather than the returns.
reverberation, reverb
The sound remaining in a room after the
source of sound is stopped. It’s what you hear in
a large tiled room immediately after you’ve
clapped your hands. Reverberation and echo are
terms that can be used interchangeably, but in
audio parlance a distinction is usually made:
reverberation is considered to be a diffuse, continuously smooth decay of sound, whereas echo
is a distinct, recognizable repetition of a word,
note, phrase, or sound. Reverberation and echo
can be added in sound mixing by sending the
original sound to an electronic (or electronic/
acoustic) system that mimics natural reverberation, or worse. The added reverb is returned to
the blend through additional mixer inputs.
Highly reverberant rooms are called live; rooms
with very little reverberation are called dead. A
sound source without added reverb is dry; one
with reverb or echo added is wet.
ROM (Read Only Memory)
In computers and computer-controlled
equipment, this is an area of processor memory
that can only be read from.
sampling frequency
This is the rate at which an analog signal is
sampled during the analog-to-digital conversion process. It is selectable between 44.1kHz
and 48 kHz, rates which are fast enough to accurately capture the analog signal information
into digital form.
send
A term used to describe a secondary mix and
output of the input signals, typically used for
foldback monitors, headphone monitors, or effects devices. Mackie mixers call it an aux send.
shelving
A term used to describe the shape of an
equalizer’s frequency response. A shelving
equalizer’s response begins to rise (or fall) at
some frequency and continues to fall (or rise)
until it reaches the shelf frequency, at which
point the response curve flattens out and re-
Owner’s Manual
in a digital form or word. Where an analog signal
will be continuous as if it were going up a smooth
path, quantization will have discrete steps.
mains flat to the limits of audibility. If you were
to graph the response, it would look like a
shelf (or at least more like a shelf than, say, a
hiking boot). The EQ controls on your stereo
are usually shelving equalizers.
Signal-to-Noise ratio (S/N)
This is a major specification that describes
how much noise an audio component has compared to the signal. Usually it is expressed in
dB below a given output level.
snapshot
In reference to the Digital 8•Bus, snapshots
are used to capture and save the settings for
the channel strips at any instant. Snapshots
can be recalled at a later time.
solo
Italian for all alone on Saturday night. In
audio mixers, a solo circuit allows the engineer
to listen to individual channels, buses, or other
circuits singly or in combination with other
soloed signals.
surround-sound
Multi-channel audio playback systems in 4,
5, 6, or 7 channel formats. Surround-sound is
typically found in movie theaters and home
theater systems.
talkback system
A system that allows the engineer in the
control room to talk to the talent in the studio.
The Digital 8•Bus has a talkback mic built into
the console surface. The talkback button is
located in the Control Room Section and routes
the signal from the talkback mic to the Phones/
Cue Mix outputs 1 and 2. The TALKBACK TO
STUDIO button in the Studio/Solo Section
routes the talkback signal to the Studio outputs.
trim
In audio mixers, the gain adjustment for the
first amplification stage of the mixer. The trim
control helps the mixer cope with the widely
varying range of input signals that come from
real-world sources. It is important to set the
trim control correctly; its setting determines
the overall noise performance in that channel
of the mixer. See mic preamp.
TRS
Acronym for Tip-Ring-Sleeve, a scheme for
connecting three conductors through a single
plug or jack. 1⁄4" phone plugs and jacks and 1⁄8"
mini phone plugs and jacks are commonly
wired TRS. Since the plug or jack can carry
two signals and a common ground, TRS connectors are often referred to as stereo or
balanced plugs or jacks. Another common TRS
application is for insert jacks, used for inserting an external processor into the signal path.
In Mackie mixers, the tip is send, ring is return, and sleeve is ground.
Glossary
A-5
Digital 8•Bus
TS
Acronym for Tip-Sleeve, a scheme for connecting two conductors through a single plug
or jack. 1⁄4" phone plugs and jacks and 1⁄8" mini
phone plugs and jacks are commonly wired TS,
and are sometimes called mono or unbalanced
plugs or jacks. A 1⁄4" TS phone plug or jack is
also called a standard phone plug or jack.
unbalanced
An electrical circuit in which the two legs of
the circuit are not balanced with respect to
ground. Usually, one leg will be held at ground
potential. Unbalanced circuit connections
require only two conductors (signal “hot” and
ground). Unbalanced audio circuitry is less
expensive to build, but under certain circumstances is more susceptible to noise pickup.
unity gain
A circuit or system that has its voltage
gain adjusted to be one, or unity. A signal will
leave a unity gain circuit at the same level at
which it entered. In Mackie mixers, unity gain
is achieved by setting all variable controls to
the marked “U” setting. Mackie mixers are
optimized for best headroom and noise figures
at unity gain.
V-Pot™
Abbreviation for virtual potentiometer, the
V-Pot is considered a “soft knob” because it
performs various functions determined by the
software. It acts as a continuous or variable
controller and also reflects current value or position via its surrounding 12-segment LED
collar.
wet
With added reverberation or other effect like
echo, delay, or chorusing.
A-6
Glossary
If you’ve been involved in the audio biz for a
while, chances are you have at least some
fundamental knowledge of the physics of sound
and of what digital audio is all about. Numerous
articles, papers, and books have been written on
the subject and doubtless you’ve read some of
them. If not, check out the list of recommended
books in Appendix K.
Nevertheless, this section is devoted to the
fundamentals of digital audio which, for some,
may be new information and serve its intended
purpose, and for others may serve as a refresher
course, to exercise those brain cells and refresh
your internal RAM memory.
Sound and Signal
The Binary Number System
You probably know that in the digital world,
the language spoken consists of ones and zeros.
This is the binary number system. We’re used
to using the decimal system, which is base 10.
With the decimal system we have ten different
symbols to represent numbers (one for each
finger). When we reach the tenth symbol, we
start a new column which represents how many
10s we’ve counted. Each column increases by a
factor of 10 over the previous column.
In the binary system, we have only two symbols to represent numbers, so it’s base 2. When
we reach the second symbol, we start a new
column which represents how many 2s we’ve
counted. Because of this, binary numbers look
a lot bigger than decimal numbers. For example,
the number 20 is written 10100 in binary.
So how can a rapidly changing analog electrical signal be represented by a bunch of ones
and zeros?
The Analog-to-Digital Converter
The analog signal must be converted into a
series of binary numbers by an analog-to-digital
converter (ADC). The ADC takes periodic measurements of the analog signal and assigns a
numeric value to represent the level of the signal at the time it is measured. In this fashion,
the ADC takes “snapshots” of the analog audio
signal, much like a motion picture camera
takes snapshots (frames) of a live scene. When
the still pictures are shown in rapid succession, it fools the eye into thinking you’re seeing
movement, or motion pictures. In the same
way, when the binary numbers are played back
through a digital-to-analog converter (DAC), it
fools the ear into thinking you’re hearing continuous analog sound. This method of sampling
is referred to as pulse code modulation (PCM).
See Figure B-2.
Positive Voltage
Sound waves have two important attributes
used to describe them. One is frequency , which
describes the number of vibrations that occur
per second. The higher the frequency, the
faster the vibration, and the higher the pitch.
The other attribute is amplitude , which describes the intensity of the vibration. The
higher the amplitude, the louder the sound.
These attributes are conveyed through the
atmosphere in the form of varying air pressure.
A sound wave is composed of a region of high
pressure (compression), followed by a region of
low pressure (rarefaction). A microphone has a
sensitive diaphragm that moves in response to
these sound waves, and converts the mechanical energy of the sound into electrical energy.
The electrical signal that is used to represent the sound wave is composed of alternating
positive voltages (corresponding to compressions) and negative voltages (corresponding to
rarefactions). The electrical signal is what
we’re concerned with here, because that’s what
the Digital 8•Bus uses. We’ll use a sine wave
in our examples, which represents a perfect
tone at a single frequency (see Figure B-1).
Owner’s Manual
Appendix B
Digital 101
Time
Negative Voltage
0V
Figure B-1. Sine Wave
Digital 101
B-1
Amplitude
Digital 8•Bus
One Sampling
Period
Time
Figure B-2. Sampling
Amplitude
Experiments have shown that if still pictures are shown at a rate of less than 20 per
second, the eye can distinguish between individual frames. But above 20 pictures per
second they tend to blend into a continuous
stream. In the U.S., films are made at a rate of
24 frames per second. Due to the nature of
sound and the sensitivity of the ear, audio signals must be sampled at a much higher rate.
Signal below the Nyquist Frequency
Amplitude
Time
Signal at the Nyquist Frequency
Amplitude
Time
Signal above the Nyquist Frequency results in aliasing
Time
Figure B-3. Aliasing
B-2
Digital 101
Sampling
The sampling rate is defined as the number
of samples, or snapshots, the ADC takes of the
analog audio signal per second. The most common sampling rate used in digital audio is
44.1kHz (44,100 samples per second), because
that is what is used in making CDs. This may
seem like a lot, and it is, but remember that we
have to be able to sample frequencies up to
20kHz. With a 20kHz signal, this allows for
slightly over two samples per cycle.
A 20Hz signal, on the other hand, receives over 2000 samples per cycle!
In fact, there is a rule called the
Nyquist Theorem, which states that
in order to accurately represent a signal there must be at least two
samples per cycle. So when using a
44.1kHz sampling rate, the highest
frequency that can be accurately represented is 22.05kHz. Attempting to
convert anything higher than half the
sampling frequency results in a phenomenon called aliasing. Aliasing
occurs when the digital-to-analog converter is fooled into thinking that the
frequency of the signal is lower than it
actually is. Figure B-3 might help you
better understand this concept.
Quantization
Another important aspect of digital audio is quantization , or sampling
resolution. Sampling represents the
time of the measurement, and quantization represents the amplitude value
of the measurement. This goes back
to our discussion about the binary
number system, so let’s define a few
more terms:
Owner’s Manual
Amplitude
24-bit converters in the Digital 8•Bus
provide a theoretical 144 dB of dynamic
range! To put this in perspective, the
noise level of a jet engine is around 140
dB at close range, while the background
noise in a quiet recording studio might
be 20 dB, for a total dynamic range of
120 dB.
Dither
Time
Amplitude
As a signal gets softer, it is represented by progressively fewer bits until
it reaches a point where it runs out of
bits and the signal just stops. In a 16bit system, this can occur at an audible
level. Dither was invented as a solution
to this problem. Adding a small amount
of white noise, or dither noise, to the
audio signal prior to digital conversion
causes the waveform to jump around
randomly, crossing the threshold from
one bit to another bit more often (see Figure B-5).
At low levels, this results in a smoother fadeout so the signal actually drops into the noise
floor before disappearing altogether. The tradeoff is that noise is being added to the signal.
Dithering is also applied in the digital domain, when a digital wordlength needs to be
reduced. This is sometimes called redithering,
or dithering down. For example, when recording a CD, often times the digital master is
recorded in 20-bits or 24-bits, and it has to be
reduced to 16-bits. The Digital 8•Bus uses
Apogee’s proprietary UV22® process to reduce
the wordlength to 16-bits. See Appendix D for
more information on Apogee UV22 and dithering down.
Time
Figure B-4. Quantization
Amplitude
Amplitude
• A binary digit is called a bit.
• A multibit binary number is called a word .
• The number of bits in a word is the
wordlength .
• A word of 8 bits is called a byte .
Computers like to store numbers in groups of
8 bits. An 8-bit binary number allows the computer to count up to 256. (You can calculate this
with the simple formula 2n, where n = number of
bits.) The greater the number of bits, the greater
the accuracy of the sampled data. With 8 bits,
there are 256 discrete values that can be represented. For audio purposes, this leaves too
much of a gap between the steps, resulting in
round-off errors and audible distortion of the signal, called quantization noise, represented as a
signal-to-error ratio. With 16-bits,
there are 65,536 discrete values,
minimizing the round-off errors and
providing much higher accuracy. CDs
are recorded using 16-bit quantization
(see Figure B-4).
Signal-to-error ratio is similar to
signal-to-noise ratio in an analog system, and both relate to the dynamic
range of the system. Dynamic range
Signal below one significant bit drops out
is the difference between the loudest
Time
possible sound and the background
noise, given in decibels (dB). The
greater the number of bits, the lower
the background noise and the greater
the dynamic range. A general rule-ofthumb to estimate dynamic range is
to multiply the number of bits by
6 dB. Thus, 8-bit sampling has 48 dB
of dynamic range and 16-bit sampling
Signal below one significant bit with dither is still reproduced
has 96 dB of dynamic range. The
Time
Figure B-5. Dither
Digital 101
B-3
Digital 8•Bus
Clipping
Now that we have a general understanding
of how an audio signal is represented in the
digital domain, it’s time to talk about clipping.
This is important because clipping takes on a
different characteristic in the digital domain,
and is not at all as subtle or excusable as it can
be (in small doses) in the analog domain. When
recording with analog tape recorders, if the signal level gets too hot it can start to saturate the
tape and cause distortion. In most cases, occasional excesses of this nature will go unnoticed.
But if you exceed the maximum recording level
with a digital tape recorder, there’s no ignoring
it. Clipping in the digital domain sounds very
different than in the analog domain, with a very
harsh and unpleasant character to the sound. If
you’re tracking, you’ll have to record the track
over again with the level turned down a bit. If
you’re mixing down, you should first make a
dry run of the transfer (in Record-Pause) to
make sure the levels are set correctly and you
don’t exceed 0 dB FS.
Digital Interface Standards
A number of interface standards have been
developed over the years for transmitting digital
audio from one piece of equipment to another.
We’ll introduce a few of the most common ones,
and explain the differences between them.
AES/EBU
This is probably the most accepted digital
audio interface in the professional audio
industry. It was developed jointly by the Audio
Engineering Society and the European Broadcasting Union, and is officially named AES3. It
uses balanced cables with XLR connectors for
transmitting data. Two channels of digital audio
are multiplexed on a single pair of wires. This
means that a digital word from the first channel
is transmitted, followed by a digital word from
the second channel, followed by the next digital
word from the first channel, and so on. It can
handle digital words up to 24 bits, and transmits
data at 64 times the sampling frequency.
S/PDIF
Sony and Philips both wanted to develop a
standard for transmitting digital audio between
consumer devices, so the Sony/Philips Digital
Interface Format, or S/PDIF, was developed.
Many of the engineers who worked on the
AES3 standard were from Sony and Philips, so
S/PDIF is very similar to AES3. The main difference is that it uses unbalanced cables with
RCA connectors for transmitting data. Like
AES3, two channels are multiplexed together
on a single conductor, and it can handle up to
24-bit words.
B-4
Digital 101
ADAT Optical
Alesis introduced the ADAT modular digital
multitrack recorder (MDM) in 1992, capable of
recording eight tracks of digital audio on an
S-VHS videocassette. They developed a
proprietary optical digital audio interface called
the ADAT Multichannel Optical Interface for
transmitting all eight channels of digital audio
(sometimes referred to as the ADI interface, or
Lightpipe). It uses a single fiber-optic cable to
transmit eight multiplexed channels, and can
handle up to 24-bit words, even though the
original ADAT records in 16 bits. The datatransmission rate is 256 times the sample rate,
which is four times faster than AES/EBU and
S/PDIF. This makes sense, however, because it
is transmitting four times the number of
channels as AES/EBU and S/PDIF.
TDIF
Soon after the ADAT was introduced,
TASCAM came out with the DA-88, its version
of an eight-track MDM. Their proprietary interface is called TEAC Digital Interface Format,
or TDIF, which uses 25-pin D-sub connectors
with 25-conductor cables to transmit and receive eight channels of digital audio. Unlike
any of the previously described interface standards, which require separate cables to
transmit and receive, TDIF transmits and receives on a single cable. Each wire in the cable
carries two multiplexed channels in a format
similar to AES/EBU, with a maximum resolution of 24 bits.
Jitter
Jitter is the result of instability in the timing
of the digital data. This can be caused by the
clock in the A/D or D/A converter circuits,
called sampled jitter, or by errors introduced by
the transmitting or receiving circuits, or even by
the transmitting cable, called data jitter. Jitter
can result in data errors in the transmission of
digital audio, causing increased noise and distortion in the analog audio signal after conversion.
We could go on about other aspects of
digital audio, like oversampling, the different
types of analog-to-digital and digital-to-analog
convertors, error correction, sample rate
conversion, and digital signal processing, but
there’s just not enough room for it in this
owner’s manual. If you still want more, refer to
Appendix K, “Recommended Books.”
Synchronization is a topic that is often confusing to the first-time user of multitrack
recording equipment, MIDI sequencers, and
automated mixing. The source of the confusion
is not so much in understanding synchronization itself, but in understanding the various
types of synchronization that exist and how
they are used. This section details the various
types of synchronization and time code that
have developed over the years, where they
came from, and how they are used. We hope
that this short guide will help you better understand how to use the Digital 8•Bus
automation.
What Synchronization Is For
“Synchronize,” as defined by Webster’s New
World College Dictionary, comes from the Greek
“syn,” meaning “together,” and “chronos,”
meaning “time for a nice cup of tea.” Basically,
synchronize means “to move or occur at the
same time or rate.”
Nothing magical here. In fact, synchronization has been around as long as drums have
kept time to music. Keeping the beat so that
multiple devices can run at the same speed is
one of the primary purposes of synchronization.
Types of Time Code
There are two forms of time code that are
used primarily in the audio/video industry today: SMPTE and MIDI. They both serve the
same purpose, to allow two or more machines
to lock to a common time frame. One source
serves as the master, and all the others are
slaves. This means that the master generates
a time code while the slaves (other devices)
read it and follow along.
Types of Synchronization
You’ve probably heard of a “click track.” It’s a
prerecorded track with a series of evenly-timed
clicks that allow the musicians to play at a consistent tempo. (Think of a metronome,
persistently—consistently—clicking away.)
When dubbing or overdubbing, the talent listens
to the click track in their headphones. This type
of syncing is called pulse synchronization; the
pulse signals convey the rate of speed (tempo),
but that’s all. In order for machines to be in
sync, they must start at the same time, and at
the same point in the program.
A more complex synchronization method,
sometimes called timepiece synchronization, uses
place markers to identify the location of each individual pulse within the program. This allows
the machines in the system to sync to each
other even if they don’t start at the same time or
the same place in the program. In this case, the
slaves in the system chase to the location indicated by the master, and then lock to it. SMPTE
is an example of timepiece synchronization.
SMPTE
SMPTE time code (pronounced “Simp-tee”)
was chosen by the Society of Motion Picture and
Television Engineers as the industry standard
for synchronization in 1971. The purpose of
SMPTE was to allow for editing of video tape. It
not only indicates tape speed, but also tape position. A SMPTE time code generator produces a
continuous string of digital words that convey
timing information in the form of hours, minutes, seconds, and frames. This information can
be read back by a time code reader so that you
can find the exact spot in a film or video where
an event occurs, and edit the audio so it is perfectly in time with the picture.
The hours, minutes, and seconds used by
SMPTE are universal, but the frame rate and
number of subdivisions of each second differs
according to the application. There are four
frame rates primarily in use today:
Owner’s Manual
Appendix C
Synchronization
30-Frame — 30 frames per second was the
original frame rate used by SMPTE. In the
United States, black-and-white video runs at 30
frames per second, which was derived from the
60-cycle AC line frequency.
30 Drop-Frame — When color television
came along, the frame rate had to be reduced
slightly in order to accurately reproduce the
color (29.97 frames per second, to be precise).
But by solving one problem, it created another.
The time code ran slightly slower, so that one
hour by 30 Drop-Frame standards actually
lasts one hour and 3.6 seconds. So a scheme
for periodically dropping frames was developed
to compensate for the time differential. 108
frames are dropped every hour, the equivalent
of 3.6 seconds worth. This is currently the
standard for U.S. network broadcast of color
television.
25-Frame — In Europe, the AC line frequency
is 50 cycles per second. The European standard
time code for both black-and-white and color
television is 25 frames per second. This applies
to any country that uses the 50Hz line reference.
24-Frame — The film industry uses 24
frames per second, so 24-Frame time code was
introduced to correspond to film.
Synchronization
C-1
Digital 8•Bus
LTC vs. VITC
There are two common methods for recording
time code, described as follows:
Longitudinal Time Code — LTC can be
used on either audio or video tape. On audio
tape, it is recorded onto one track of the tape.
On video tape, it is recorded on one of the linear
audio tracks of the tape.
This method of recording SMPTE time code
is the most common in the audio industry. The
time code is recorded onto tape as a square
wave. Due to the high-frequency harmonics of
a square wave, some precautions must be exercised when putting SMPTE time code onto
audio tape.
The process of putting the time code onto
tape is called striping the tape . It is best to
record the time code on an outside track, since
it can only bleed through to one adjacent track.
If you’re using an 8-track recorder, this means
recording the time code onto either track 1 or
track 8. If possible, leave the adjacent track
blank to further isolate the time code track
from the audio tracks. This also prevents anything from the audio tracks from bleeding into
the time code track, which can degrade and
interfere with the synchronization.
Typically, time code is recorded at a –6 dBu
(or –6 VU) level onto the tape. For the most
stable signal, record directly from the output of
the time code generator to the input of the recorder. (If you do record through a mixer, don’t
use any equalization or processing on the signal.) Stripe the entire tape first, before
recording any audio. Allow at least one minute
of running time code before program material
begins. This leader area provides time for the
system to synchronize, and to get beyond any
tape imperfections (dropouts) that may occur
at the beginning of the tape.
Vertical Interval T
ime Code — VITC (pronounced “Vit-see”) is used exclusively for video
editing. The SMPTE information is recorded
within the video picture, during the vertical
blanking interval. VITC offers some advantages
over LTC for video editing because it can be
read from a still frame and provides half-frame
accuracy.
Although SMPTE is still primarily used in
video production, it is often used in digital audio
production as the master clock, while MIDI is
used as the interface between the various
pieces of equipment.
C-2
Synchronization
MIDI
Before we delve into the MIDI world, let’s
explore the concept of absolute timing versus
relative timing. SMPTE provides absolute timing , based on actual hours, minutes, seconds,
and frames. It is tempo-independent, meaning
that even if the tempo changes, the time code
remains constant.
Relative timing is tempo dependent and is
based on beats and bars (measures). If the
tempo speeds up or slows down, the time code
speeds up and slows down along with it.
MIDI Song Position Pointer (SPP)
An SPP message keeps track of how many
16th notes have elapsed since the beginning of
the song. Since it is based on the tempo of the
song, it is considered relative timing.
MIDI Clock Messages
The MIDI clock emits 24 MIDI clock messages every quarter note. This, too, is relative
timing because it is tempo dependent.
These MIDI sync signals cannot be recorded
to tape because they run at 31.25kHz, too high
for multitrack recorders to handle. They are
primarily used between MIDI devices such as
sequencers, drum machines, and keyboards.
MIDI Time Code (MTC)
MTC is generated from SMPTE by a
SMPTE-to-MIDI converter, which translates
SMPTE time in hours, minutes, seconds, and
frames into SPP data.
MTC contains the same absolute timing information as SMPTE, but takes the form of a
digital signal traveling down a MIDI cable
rather than an audio signal on an audio path.
This allows MIDI devices to sync to absolute
time if necessary.
Put the kettle on, it’s time for that nice cup
of tea.
Dither And UV22 :
The Apogee Difference
In the analog world, as a signal dies away, it
does so smoothly (if nothing is wrong with the
system). As the level drops, the signal gets
progressively quieter. At some point it reaches
the same level as the noise, and as the signal
level continues to drop, you can still hear it,
even though it lies below the “noise floor.” This
constitutes an important aspect of the way that
analog signals behave—you can hear coherent
audio information even when it has a significantly
lower level than random noise.
In the raw digital environment, things are different. As the level of a signal drops, fewer and
fewer binary digits represent the audio information. Ultimately, you simply run out of bits, and
when this happens, the signal just stops, and in
a 16 bit system, this happens at an audible level.
This behavior is one of the factors that gave
early digital recordings a bad name, and led
some pundits to claim that digital audio sounded
fundamentally inferior to analog.
Adding noise to the signal provided one
solution to the problem. At low levels, this
effectively turns the last few bits on and off at
random, smoothing out the sound and ensuring
that everything does not simply disappear as the
level falls. We call this noise “dither noise” or
simply “dither.” The word literally means to
tremble or quiver—a reference presumably to the
least significant bits turning on and off at random.
The disadvantage of this process: you
introduce noise into the system and therefore
effectively degrade performance. More than
that, the noise actually sounds quite objectionable. Truly random (white) noise contains all
frequencies and it sounds particularly obnoxious.
As a result, several manufacturers and researchers have attempted to improve the situation by
developing methods of hiding or “shaping” the
noise created by the dithering process.
This may appear even more important when
you record a signal, say, in 24-bit form and want
to reduce it to 16 bit for compact disc. If we
could preserve the detail of a 24-bit recording by
making the noise floor more transparent—more
like analog—then we would achieve an audible
improvement in the quality of the final CD, and
we would enjoy audible benefits by recording beyond the 16 bit level, even for a conventional
16-bit compact disc.
Most of these “noise shaping” techniques
rely on the fact that the ear seems more sensitive to midrange frequencies (around 4kHz)
than to either low or high frequencies. In transferring a 20-bit recording to the 16-bit world of
compact disc, for example, we remove the last
four bits of the 20-bit signal and feed them
back into the input signal through a filter that
both adds dither and changes the spectral
shape. Originally, the filter shape proposed by
researchers (primarily at the Audio Research
Group at Waterloo University, Ontario) and
based on psychoacoustic principles added more
noise in the upper frequencies while lowering
the noise floor at around 4kHz—the frequency
at which measurements indicate the ear’s
maximum sensitivity.
In fact, they could have achieved even better
results by adding the noise back in at low frequencies, to which the ear is even less sensitive
(hence “loudness” controls on your receiver or
car stereo) but this requires significantly more
processing.
More recently, a number of manufacturers
have claimed that their own proprietary filter
shapes sound audibly superior to the theoretical
designs. Unfortunately, these noise shaping
techniques can cause problems. First, although
they lower the noise floor at the most audible
frequency, they unavoidably increase the overall
noise. They also, according to independent measurements, add audible artifacts to the sound.
The fact remains that dithering is an important tool for digital audio. But how can we do it
so that the results sound good? Apogee has the
answer. Apogee takes a completely different
approach with the UV22® process, incorporated
in Apogee’s converters and now, for the first
time, in your Mackie Digital 8•Bus console.
UV22 does not constitute a “new flavor” of
dither noise. Instead, UV22 essentially modulates the data from the least significant bits of a
signal on to the 16-bit signal according to a
special algorithm, which adds an inaudible highfrequency “bias” to the digital bit stream,
placing a “clump” of energy at around 22kHz.
This results in an essentially flat noise floor, at
the theoretical 16-bit level—4 to 5 dB below
that of conventional “flat dither.” In addition, the
noise floor does not have the distinctive and annoying “hissiness” of conventional dither. The
UV22 noise floor sounds audibly quieter and
less objectionable than other techniques. In addition, you cannot hear any audible artifacts.
Yet, as with analog, you can hear coherent audio
signals several dB below the noise “floor”—thus
retaining much of the detail and audio quality
inherent in the original signal.
SUPER CD ENCODING
Apogee UV22
Owner’s Manual
Appendix D
Apogee UV22
D-1
Digital 8•Bus
D-2
Apogee UV22
The Interface
Owner’s Manual
Appendix E
IVL Vocal Studio
About the IVL Vocal Studio
The IVL Vocal Studio is a truly unique tool
that offers natural sounding harmonies, wild vocal effects, and vocal utilities. You will hear that
Vocal Studio can help you to quickly create killer
vocal tracks. In order to get you excited—and
for your general information—here is what’s
packed into IVL Vocal Studio:
• Formant-Preserving Pitch Shifting
• Intelligent Vocal Harmony (with four
operating modes)
• Pitch Corrector
• Vocal Special Effects
• Integral Reverb Effect
Mode/Utilities
Technologies Used
Formant-Preserving Pitch Shifting: No
chipmunks or Darth Vader here! With IVL’s
patented formant-preserving pitch shifting
algorithm, the Vocal Studio uses precise
analyzation techniques on the input voice to
naturally shift it higher or lower.
Pitch recognition: IVL does more than just
take a note and shift its pitch. The pitch shifting
algorithm detects the exact pitch of the note in
order to provide the most natural shifted sound.
Intelligent Harmony: The Vocal Studio has
musical knowledge. It took lessons from some
amazing musicians. By using different control
modes, you can choose how much of this intelligence the Vocal Studio will use when creating
your harmonies. By selecting the key and scale
that the vocal passage is in, and with IVL Vocal
Studio’s pitch recognition, an intelligent harmony
can be created with 1 to 4 voices.
Harmony: This button puts the IVL Vocal
Studio into harmony mode, allowing 4 voices of
harmony or doubled voices to be added to a mix.
Pitch Correct: This button puts the IVL
Vocal Studio into pitch correct mode, allowing
a vocal line to be nudged to the note your ear
wants to hear.
On/Off: This button turns the IVL Vocal
Studio on or off.
Name: This button is used to name or
change the name of a preset.
Store: This button saves any changes made
to a preset to the same preset number.
Output Mode
Stereo: This button selects two independent
mono in/stereo out effects blocks. One effects
block is used for pitch shifting, harmony, and
doubling. The second effects block, assigned to
IVL Vocal Studio
E-1
Digital 8•Bus
a second aux send, is used for reverb. The
input to the reverb effects block comes from a
mix of its assigned aux send and the output of
the harmony effects block. Each effects block
then returns its processed signal to an
individual stereo return.
Quad: Selects mono in/quad out. Input from
one auxiliary send is routed to the harmony
processor. Four harmony voices are given discrete outputs to two stereo returns.
Control Mode
Manual: Any notes played on a MIDI keyboard become the harmony parts. These parts
will stay on the note assigned by the keyboard
even when your voice shifts to a new pitch.
Using pitch bend and/or a modulation wheel,
realistic expression is introduced.
SmartChord: Chords played from a MIDI
keyboard are interpreted by the Vocal Studio to
create natural harmony parts that move in
tandem with your voice.
Edit–Harmony Ensemble
Interval: In SmartChord, SmartKey and
Pitch Shift control modes, “Interval” determines
how much higher or lower the harmony note is
than the lead note. In SmartChord and Smart
Key modes, the intervals are intelligent; that is,
they will sharpen or flatten automatically to
make the harmonies sound musically correct.
For Pitch Shift, the interval chosen is always
in parallel with the lead, regardless of the key
and scale.
Gender: The gender of each harmony voice
can be changed to create mixed vocal ensembles
without needing to see that special doctor in
Sweden.
Detune: Who sings a perfect third? No one,
really. “Detune” adjusts a harmony note’s pitch
to be slightly above or below the exact note it
is creating.
Volume: Controls the level for each
harmony voice.
Pan: Controls the stereo placement of each
harmony voice.
SmartKey: Enter the key and scale once, at
the beginning of a song, and the Vocal Studio
automatically creates natural harmonies in real
time. This mode produces the most common
type of harmony in popular music.
Styles: Styles are preset modifiers you can
use to add realism to the harmony voices.
Pitch Shift: Use this button to set a
chromatic interval between the lead vocal and
pitch-shifted voices to create true parallel
melody lines. This is useful more for special
effects than harmonies because our ear is
tuned to the “moving third” interval that
parallel (chromatic) harmonies don’t provide.
Scoop: This controls how a harmony part
slides into each note. Do they bend up to it?
How much do they bend?
Timing: This allows you to control the entries of the harmony parts, from 10 millisecond
to random delays.
Vibrato: This controls the amount of vibrato
in your harmony parts.
Envelope: This control is used with the
“Manual” control mode. When in “Manual” control mode, a MIDI keyboard is used to trigger
harmony notes. The “Envelope” control adjusts
the attack and release timing of the harmony
MIDI notes. This can add bite or smooth out
the manual harmony sound.
Key/Scale: When the SmartKey control
mode is used, the key and type of scale of the
song must be selected for the intelligent harmony to choose musically correct harmonies.
E-2
IVL Vocal Studio
Interval
Pitch Bender: Use the bender to manually
raise or lower the pitch of the shifted voices.
This works just like a spring-loaded keyboard
pitch bender.
Pitch Bend Range: The range parameter
lets you set the maximum amount of pitch bend
that can be applied to the vocal.
Pitch Controller: Use the keyboard to force
the vocal to an exact pitch.
Pitch Octave Spin Dial: As we could only
fit one reasonably-sized keyboard octave on
screen, the octave spin dial lets you decide
which octave the keyboard represents.
Slope: Use this lovely window to set the
transition rate between the original vocal
sound and the pitch-corrected sound.
Using the interval sliders, you can adjust the
interval of each of the four harmony voices.
Basically, “Interval” controls the voicing of the
harmonies relative to your lead note. When in
the SmartChord and SmartKey control modes,
the interval settings are divided into seven
coarse steps. Each step directs the voice in a
different way. The following table describes the
individual intervals in musical and nonmusical
terms. Note that, although the descriptions for
the SmartChord and SmartKey intervals are
similar, SmartChord intervals follow the lead
voice “loosely” and SmartKey intervals follow
the lead voice’s every pitch movement.
Step
SmartChord
non-musical
description
SmartChord
musical
description
SmartKey
non-musical
description
SmartKey
musical
description
Bass
lowest
root of chord,
octave down
lowest
octave below lead
3rd of chord, in
the octave down
low
3rd of chord, in
the octave below
Baritone low
On/Off: This turns the pitch corrector on or
off.
Operation–Harmony
Harmony mode is used to create everything
from harmonies to doubled voices. To make
sure you are in Harmony mode, make sure it is
selected.
Tenor
just underneath 5th of chord, in
lead
the octave below
just underneath
the lead
5th of chord, in
the octave below
Unison
same as lead
unison
the same note
as the lead
unison
Alto
just above
lead
3rd of chord
just above
the lead
intelligent 3rd
Mezzo
high
5th of chord
high
5th above lead
an octave above
the root
highest
octave above lead
Soprano highest
Owner’s Manual
Pitch Correct Mode
When using the Pitch Shift control mode, Interval works in a different, but simple way. Pitch
Shift interval is set from –24 to +24 for each
The editing parameters are the tools that
allow you to put some spice into your harmonies voice. Each digit corresponds to one semitone
above or below the lead pitch. For example, –24
or doubled voices. Some of the editing parawould be two octaves below the lead, +12 would
meters are used in all control modes, and
be an octave above the lead. The intervals for
others are specific to one control mode.
Pitch Shift are represented with numbers as
they are not “intelligent” intervals.
Parameter Manual
SmartChord
SmartKey
PitchShift
Pitch Shift intervals are always a paralInterval
yes
yes
yes
lel distance away from the lead note no
Gender
yes
yes
yes
yes
Detune
yes
yes
yes
yes
matter what the key and scale of the
Volume
yes
yes
yes
yes
music.
The Editing Parameters
Pan
Styles
Envelope
Key/Scale
yes
yes
yes
yes
yes
yes
yes
yes
yes
yes
IVL Vocal Studio
E-3
Digital 8•Bus
Gender
1. Harmonies: Detuning each harmony
voice can create natural-sounding harmonies.
In real life nobody sings perfectly in tune, so
why should the IVL Vocal Studio have to?
2. Doubling: Detuning unison harmony
voices can create the fattest of phat vocal
sounds without singing a vocal line four times.
Volume
Using these sliders, you can adjust the
gender of each of the four harmony voices.
So, what is this gender thing?
gender (jen’der) m. 1. The condition or
quality of being of the male or female sex.
In IVL Vocal Studio, “Gender” will give your
harmony voices distinct character. When the
gender amount is set at 0 (in the middle) there
is no gender effect applied to the harmony
voice. As you lower the gender amount, more
male qualities are introduced into the voice. As
you raise the gender amount, more female
qualities are introduced into the voice. This is
the control that gets you that deep bottom end
you have been undoubtedly waiting for.
Detune
The detune sliders can be adjusted independently for each harmony voice. Detune is like a
fine-tune adjustment on a keyboard. The
detune amount ranges from –50 cents to +50
cents (50 cents is equal to 1 semitone). There
is also a “normal” or “random” button located
in the top-right corner of the detune window.
When “normal” is selected, the detune amounts
are fixed at their settings. With “random” selected, the detune amounts are randomly
generated from 0 detune to the setting for each
harmony voice. Detune is very useful for two
different applications:
E-4
IVL Vocal Studio
These sliders provide individual level control over your voices. If you are in QUAD
output mode, VOLUME edit will not be available; volume will be controlled via the four
assigned aux return faders. If you are using the
Vocal Studio in Stereo output mode you will
want to mix your voices using the Vocal Studio
volume controls.
Pan
Now the sliders are going the other way! The
pan controls are used to place your harmony
voices in a stereo field. Just as with the volume
controls, you will want to set your pan controls
differently depending on which output mode you
are using. When in QUAD output mode, PAN is
not available to edit. Instead, you control the
pan on their dedicated aux returns.
Vibrato adds another level of human quality
to the harmony voices. The majority of singers
use some amount of vibrato. Basically, Vibrato
is like the modulation wheel on a keyboard,
which modulates a harmony voice’s pitch by a
small amount. The Vibrato presets are based
on the amount of modulation, the rate of the
modulation, and when the modulation starts.
In “Styles,” you can create that extra amount
of personality and realism for your harmony
voices. Each style is controlled by a spin dial.
Spin the dial up or down to change the parameter; all of the Style parameters are adjusted
globally for each harmony voice.
Timing adjusts the entrances of the harmony voices. With “Timing” turned off, the
harmony voices enter at the same time as the
lead voice. Each timing parameter delays the
harmony voices from the lead vocal. Just like
tuning, no group of singers sings the notes at
exactly the same time. The timing presets have
been created using individual delays for each
voice. Additionally, some time delay presets
use randomization. Randomization randomly
creates delay time for each voice from 0 delay
to the delay time specified. The timing presets
are listed below.
Number
0
1
2
3
4
5
6
7
8
9
10
Name
Off
Tight Mix
Medium Mix
Loose Mix
5ms + Rand.
10ms +Rand.
20ms +Rand.
30ms +Rand.
40ms +Rand.
50ms +Rand.
80ms +Rand.
Delay
none
between 5 and 12ms
between 10 and 32ms
between 20 and 36ms
Max. Delay of 5ms
Max. Delay of 10ms
Max. Delay of 20ms
Max. Delay of 30ms
Max. Delay of 40ms
Max. Delay of 50ms
Max. Delay of 80ms
Randomization
none
none
none
per voice
per voice
per voice
per voice
per voice
per voice
per voice
Scoop adjusts how a voice attacks a note.
Even professional singers never hit a note right
on pitch. They hit their note slightly lower than
the pitch they are aiming for and then “scoop”
up to the correct note. The scoop presets are
created using the amount of scoop (how far below the note) and how long it takes for the
harmony voice to scoop to the actual note.
Number
0
1
2
3
4
5
Name
Off
The Pros#1
The Pros#2
Semi Pro#1
Semi Pro#2
Swoopy
Number
0
1
2
3
4
5
6
7
8
9
10
Name
off
Light
Medium
Heavy
Light & Fast
Med & Fast
Heavy & Fast
Light & Slow
Med & Slow
Heavy & Slow
Chorale
Description
no vibrato
low depth, medium rate with onset delay
medium depth, medium rate with onset delay
high depth, medium rate with onset delay
low depth, fast rate with onset delay
medium depth, fast rate with onset delay
heavy depth, fast rate with onset delay
low depth, slow rate with onset delay
medium depth, slow rate with onset delay
high depth, slow rate with onset delay
low depth, very slow rate with no onset delay
Owner’s Manual
Styles
Portamento is used to limit the hard stepping between moving harmony notes.
Portamento can add realism to the movement
of harmonies. With Portamento, each harmony
note slides into the next at a selected rate. The
rates are selected with the Portamento spin
dial from 0 (fastest) to 10 (slowest).
PitchBend Range sets the pitch bend range
that can be applied to the harmony voices using
a MIDI device. The pitch bend range can be set
from 0 to 12 semitones.
Key/Scale is an edit mode used only in
“SmartKey” mode. The use of Key/Scale is
described farther on under the “SmartKey”
section.
Envelope is used only in the “Manual”
control mode. The use of “Envelope” is
described in the “Manual” section on page E-6.
The Harmony Control Modes
Harmony Control Modes determine the way
in which harmonies are created. IVL Vocal
Studio has four control modes. Each of these
modes is tailored toward a different application.
They can be categorized by two items:
1. Requires MIDI input: Using the D8B’s
MIDI input, a keyboard or sequencer sends
note information to the IVL Vocal Studio to
create harmonies.
Description
no scooping
low amount, fast rate scooping
high amount, medium-fast rate scooping
low amount, medium-slow rate scooping
high amount, slow rate scooping
low amount, very slow rate scooping
IVL Vocal Studio
E-5
Digital 8•Bus
2. Intelligent Harmonies: IVL Vocal
Studio uses intelligence to help create natural
harmonies.
Action
Requires MIDI Input
Use intelligent harmonies
Smart
Manual Chord
yes
yes
no
yes
Smart Pitch
Key
Shift
no
no
yes
no
SmartChord
Manual
Because you can choose exactly which
harmony notes you want, Manual mode is
excellent for creating unusual harmony treatments. Where the SmartKey and SmartChord
control modes follow the ascending and
descending direction of your voice, Manual
mode allows you to play a descending harmony
line over an ascending melody line, for
example. You can combine this aspect with the
ability to play dense chord voicings with lots of
sixths, sevenths, and ninth color notes to
create harmony parts that are truly unique.
When using Manual or SmartChord modes
(the keyboard control modes), you can save
time by using a MIDI sequencer to play any or
all of the instrumental parts in your composition. As there are often pad chords on a synth or
piano track, these can also be used to trigger
harmonies.
When you choose Manual mode in this situation, the harmony parts won’t follow the
melody lines you sing; they’ll stay on the notes
played on the instrument track. Because you’ll
probably want to add notes here and there to
your control track, it’s often a good idea to
copy the instrument track to another open
track in your sequencer and use the copy as
your starting point.
In manual mode there is an editing parameter called “Envelope.” You can use “Envelope”
to shape the entrances and exits of harmony
notes triggered through MIDI.
The graph in the Envelope window represents
volume against time. Adjusting the Attack time
with the spin dial will vary the slope on the
leading edge of the graph. A shallow slope will
fade-in the harmony notes after Vocal Studio is
E-6
triggered through MIDI. Adjusting the release
time will vary the slope on the trailing edge of
the graph. A shallow slope will fade the harmony notes out after the MIDI trigger is
released. Steep slopes will make instantaneous
attacks and releases.
IVL Vocal Studio
SmartChord uses the intelligent harmonies of
the Vocal Studio in conjunction with a MIDI keyboard hooked up to the D8B. On the keyboard,
you would play the chords of a song in real time
with the lead vocal. IVL Vocal Studio recognizes
the chords and creates correct harmonies.
SmartChord mode will follow the melody of your
voice while staying musically related to the
chords on the MIDI control track.
To get harmonies in SmartChord mode you
first need to select intervals for one to four of
the harmony voices. You can select the intervals from the “Interval” edit window. See the
previous section on Intervals.
SmartChord mode, on the other hand, will
follow the melody of your voice while staying
musically related to the chords on the MIDI
control track.
SmartKey
With the right combination of input vocal
melody and underlying chord structure, the
SmartKey mode can produce harmonies that
sound unbelievably real. When you have a song
that has a simple chord structure like those
found in country and blues, you can dial up
SmartKey mode and be on your way to a killer
harmony line in mere moments.
The “key” to making SmartKey work properly is to set the key and scale correctly. While
it sounds like you’d need some music theory
background to do this, don’t despair—if you
can lean over and tell a fellow musician what
key you’re going to play the next song in, you
can set up SmartKey mode effectively.
Let’s break it down into the two components
of key and scale. Determining the key is easy;
it’s often the first chord in a song. However,
some songs are in a different key than the first
chord (such as “Sweet Home Alabama,” which
is in G but starts with a D chord). Scale can be
either major or minor, and depends on the
notes that make up the scale.
When any of the harmony modes are being
used, you can also add a reverb harmony effect.
However, to engage the reverb harmony effect
you must be in Stereo Output mode. This sends
your harmonies to one set of stereo returns on
your D8B, and your reverb to another set of
stereo returns. Reverb can be very useful in
placing your harmonies deeper in your mix.
.
Operation–Pitch Correction
Mode
To select Key and Scale, you want to be in
the Key/Scale Edit mode, shown above. Once in
this editing window, Key is selected by clicking
on a note on the piano. Select the scale using
the spin dial above the piano keys.
The Difference
SmartKey harmony usually requires you to
enter the one key that works for a whole song.
SmartKey harmonies will sound correct in
many songs but not all, and this is why you
have a choice between it and SmartChord.
SmartKey harmonies are also more active in
harmony motion.
SmartChord harmony requires you to input
a different chord change for every chord in a
song. They can be applied to almost any song
you can play. This is the only practical difference between the two harmony types.
Pitch Shift
This mode doesn’t have the “smarts” that
the other control modes do, so you’re best to
stay away from harmonies and use this for special effects and doubling (unless you actually
want your harmonies to sound like Gregorian
chants). You can produce some interesting
spoken-word effects by muting your input
voice and pitch-shifting a single effect voice
down a few tones or even an octave. Combine
this with a little male gender and you can get
pretty close to a newscast voiceover. Subtle
pitch shifts are better, though, for changing
male to female and vice versa.
Pitch Shift mode is also handy for unison or
octave-doubling effects. Turn on all four voices
and place the interval settings in the middle. If
you add detuning and a bit of scoop style, this will
thicken up your vocal as if you had quadrupletracked your voice. You can also take one or
two of the effect voices and put them in octave
positions for interesting effects, too.
To make sure you are in Pitch Correction
mode select “Pitch Correct” from the Vocal
Studio screen.
What is Pitch Corrector Mode?
Owner’s Manual
Reverb
Everyone mixing vocals has experienced
out-of-tune vocal tracks. Typically, there hasn’t
been much at your finger tips to fix those nasty
notes. Some lucky folks have been able to invest thousands of dollars in computer editing
suites to do pitch correction. IVL Vocal Studio
gives a simple yet effective pitch corrector to
doctor your vocal tracks with your D8B. Vocal
Studio’s pitch corrector is operated manually.
Therefore, you have control over pitch fixing at
all times. Generally, the less you correct the
note, the more natural the result. However, the
pitch corrector can force a vocal note anywhere.
What are the Controls?
The Pitch Corrector screen is separated into
four control areas:
Pitch Bender is used to bend out-of-tune
vocal notes to the desired pitch. The pitch
bender works just as a spring-loaded pitch
bender would work on a keyboard. Use the
mouse to drag the pitch bender up to raise the
pitch. Drag the pitch bender down to lower the
pitch. When you release your mouse button,
the pitch bender will spring back to the center
position, where the pitch will be unaffected.
You can also use an external pitch bender from
a MIDI keyboard with the same results.
IVL Vocal Studio
E-7
Digital 8•Bus
Pitch Bend Range sets a maximum amount
the pitch can be corrected using the Pitch
Bender. The pitch bend range is set by grabbing
the red circle (located in the Pitch Bend Range
window) with your mouse. When the range is
set to maximum, the pitch can be corrected by
±12 semitones (1 octave) with the Pitch Bender.
When the pitch bend range is set to its minimum
the pitch can be corrected by ±50 cents (1
semitone). Set the range for the maximum
amount of pitch correction needed. If the vocal
track travels a full semitone out of tune, set the
range to 1 or 2 semitones.
Pitch Controller is used to force the vocal line
to an exact pitch. With the spin dial located
above the pitch controller keyboard, set the octave of the note you want to force the vocal line
to sound. Once you have set the octave, trigger
the note you want using the Pitch Controller
keyboard. As long as you are holding/triggering
the note with the mouse or MIDI keyboard, the
vocal line will sing the corrected pitch indefinitely. Only when you release the note will the
vocal line return to the original pitch. An external MIDI keyboard can also be used to give
immediate access to multiple octaves.
E-8
IVL Vocal Studio
Slope controls the switching rate between
the pitch corrected sound and the original
sound when using the Vocal Studio’s keyboard
control graphic. Use the red circle in the Slope
window to adjust the slope. When the Slope is
pulled all the way to the left, the switch
between original and pitch-corrected sound is
instantaneous. The more you pull the slope to
the right, the more gradual the fade between
original and pitch-corrected sound becomes.
This parameter can be set to make pitch
correction more natural.
There are several optional cards available
for the Digital 8•Bus which you can install into
the card cage in the rear panel of the console.
These cards provide additional inputs and
outputs for specific applications, or additional
digital signal processing power for effects.
AIO•8
The connection for ADAT is made with a
fiber optic cable, sometimes referred to as a
“lightpipe.” This connector provides 8 channels
of bidirectional digital audio. You can purchase
this cable from your Alesis dealer.
Connections for DA-88
This card provides 8 analog line-level inputs
and 8 analog line-level outputs. Connections are
made through two 25-pin D-Sub connectors. You
can install this card in any of the Tape In/Out
slots, or in the ALT I/O slot.
Connections for AIO•8
The connection for T/DIF-1 is made with a
25-pin D-Sub connector. This connector
provides 8 channels of bidirectional digital
audio. This connection requires a proprietary
cable made by Tascam (Part Number PW-88D).
AES/EBU Card
Tape 9-16
Tape 17-24
Ch 8
Ch 8
Ch 7
Ch 6
Ch 6
Ch 5
Ch 4
Ch 4
Ch 3
Ch 2
Ch 2
Ch 1
Ch16
Ch16
Ch15
Ch14
Ch14
Ch13
Ch12
Ch12
Ch11
Ch10
Ch10
Ch 9
Ch24
Ch24
Ch23
Ch22
Ch22
Ch21
Ch20
Ch20
Ch19
Ch18
Ch18
Ch17
Figure F-1. DB-25 Pin-out Identification
AES/EBU is a standard two-channel digital
protocol used for long balanced cable
applications. Thus, each conductor actually
transmits two channels of digital audio data.
Refer to Figure F-2 on the next page for the
pin-out diagram of the 25-pin connector.
Pin 14
Pin 15
Pin 16
Pin 17
Pin 18
Pin 19
Pin 20
Pin 21
Pin 22
Pin 23
Pin 24
Pin 25
Tape 17-24
Tape 1-8,
Bus 1-8,
and ALT I/O
+
shield
–
+
shield
–
+
shield
–
+
shield
–
N/C
Connections for AES/EBU
Tape 9-16
Signal
Description
This card provides 8 digital inputs and 8
digital outputs. Connections are provided in
both ADAT Multichannel Optical Interface and
Tascam T/DIF-1 formats. You can install this
card in any of the Tape In/Out slots, or in the
ALT I/O slot. You can mix any combination of
the AIO•8 and DIO•8 cards in the Tape I/O
slots to suit your particular application.
You can configure the card in software and
select which I/O connector you want to use.
Refer to the section “Configuring Digital I/O” in
Chapter 3 for more information.
Tape 1-8
Bus 1-8,
and ALT I/O
DIO•8
This card provides 8 digital inputs and 8
digital outputs in the AES/EBU standard
format. Connection is made through a single
25-pin D-Sub connector. You can install this
card in any of the Tape In/Out slots, or in the
ALT I/O slot.
Signal
Description
Refer to Figure F-1 for the pin-out diagram
of the 25-pin connectors.
Pin 1
Pin 2
Pin 3
Pin 4
Pin 5
Pin 6
Pin 7
Pin 8
Pin 9
Pin 10
Pin 11
Pin 12
Pin 13
Connections for ADAT
Owner’s Manual
Appendix F
Installation and Connection of
Optional I/O Cards
–
+
shield
–
+
shield
–
+
shield
–
+
shield
Ch 8
Ch 7
Ch 7
Ch 6
Ch 5
Ch 5
Ch 4
Ch 3
Ch 3
Ch 2
Ch 1
Ch 1
Ch16
Ch15
Ch15
Ch14
Ch13
Ch13
Ch12
Ch11
Ch11
Ch10
Ch 9
Ch 9
Ch24
Ch23
Ch23
Ch22
Ch21
Ch21
Ch20
Ch19
Ch19
Ch18
Ch17
Ch17
Optional I/O Cards
F-1
Digital 8•Bus
MFX
This card provides
two additional DSP
engines for running
internal effects. The
Digital 8•Bus is
shipped with one MFX
card installed in Slot A.
You can install up to
three more MFX cards
in Slots B, C, and D.
Make sure to install
them in that order. In
other words, if you
install a second card, it
must go into slot B, and
not into slot C or D.
Signal Description
Pin 1
Pin 2
Pin 3
Pin 4
Pin 5
Pin 6
Pin 7
Pin 8
Pin 9
Pin 10
Pin 11
Pin 12
Pin 13
Ch 7&8 Out (+)
Ch 7&8 Out (Gnd)
Ch 5&6 Out (–)
Ch 3&4 Out (+)
Ch 3&4 Out (Gnd)
Ch 1&2 Out (–)
Ch 7&8 In (+)
Ch 7&8 In (Gnd)
Ch 5&6 In (–)
Ch 3&4 In (+)
Ch 3&4 In (Gnd)
Ch 1&2 In (–)
N/C
Signal Description
Pin 14
Pin 15
Pin 16
Pin 17
Pin 18
Pin 19
Pin 20
Pin 21
Pin 22
Pin 23
Pin 24
Pin 25
Ch 7&8 Out (–)
Ch 5&6 Out (+)
Ch 5&6 Out (Gnd)
Ch 3&4 Out (–)
Ch 1&2 Out (+)
Ch 1&2 Out (Gnd)
Ch 7&8 In (–)
Ch 5&6 In (+)
Ch 5&6 In (Gnd)
Ch 3&4 In (–)
Ch 1&2 In (+)
Ch 1&2 In (Gnd)
Figure F-2. DB-25 Pin-out Identification for AES/EBU card
Installation Instructions for FX Cards
IMPORTANT: Shut off power to the Digital
8•Bus’s remote CPU before installing or removing cards. Also, install your FX cards in order.
For example, put your first FX card in the slot
marked “A,” your second FX card in slot “B,” etc.
1. Loosen the four spring-loaded screws
on the blank cover plate to the FX card slot
you want to fill. See Figure F-3
Figure F-3. FX Card Cover Plate Removal
2. With your finger in the hole on the FX
card (and the components on the circuit
board facing to the left), push the card firmly
into the white connector slots so it fits
snugly. See Figure F-4. Do not touch any of the
circuit board components or solder joints.
3. Replace the cover plate and hand-tighten
the screws. Do not use a screwdriver, as
overtightening the screws may strip the
threads on the D8B.
Figure F-4. FX Card Installation
F-2
Optional I/O Cards
Owner’s Manual
Installation Instructions for I/O Cards
IMPORTANT: Shut off power to the Digital
8•Bus’s remote CPU before installing or
removing cards. Also, install your I/O cards in
order. That is, put your first I/O card in the slot
marked “Tape 1-8,” your second card in the
slot marked “Tape 9-16,” etc.
1. Using a #2 Phillips screwdriver, unscrew
the blank cover plate corresponding to the I/O
card slot you want to fill. See Figure F-5.
Figure F-5. Remove Cover Plate for Tape I/O Card
2. Holding the I/O card so that the
components on the green circuit board face to
the left (see diagram), line up the card so the
top and bottom edges fit into the white guide
slots. Do not touch any of the circuit board
components or solder joints.
Be sure to push the card in all the way—
until the front of the I/O card is flush
with the back panel of the D8B. This may
require a good, solid push, so don’t be shy.
See Figure F-6.
Figure F-6 Installing a Tape I/O Card
3. Hand-tighten the spring-loaded screws on
the I/O card. Do not use a screwdriver, as
overtightening the screws may strip the
threads on the D8B. Now is a good time to be
shy—a very endearing quality. See Figure F-7.
Figure F-7. Hand-Tighten thumbscrews
on Tape I/O Card
Optional I/O Cards
F-3
Digital 8•Bus
F-4
Optional I/O Cards
60 dB gain
40 dB gain
0
20 dB loss
20 dB gain
0
20 dB loss
+22 dBu max input
line in 13 - 24
mic in
1-12
+2 dBu max input
+22 dBu max input
line in
1-12
digital trim
0
0
level up +10
0
0
+22 dBu max input
gain dn –15 dB
gain up +15 dB
4 band EQ
TRS +22 dBu max out
XLR +28 dBu max out
mix
st. aux pan cntr -3 dB
0
level up +10 dB
+22 dBu max out
compressor
level up +20 dB
Inputs 25-48, Returns 1-8, 2 Trk A-C
0
0
ch aux level
Main L-R
0
level up +10 dB
Aux send
0
level up +10 dB
fat DSP
pan
0
0
Control Room
0
0
+22 dBu max out
EQ
gain dn –12 dB
gain up +12 dB
Mackie Designs
Digital 8•Bus
Gain Structure Diagram
8/10/98
Max Level @ Unity gain
0
level up +10 dB
Bus 1-8
Studio Out +22 dBu max out
Phones 1&2
channel fader
pan cntr –3 dB
level up +10 dB
Mackie Effects
Digital 8•Bus Gain Structure Diagram
Technical Info
Owner’s Manual
Appendix G
Technical Info
G-1
MIC/LINE 1 (through 12)
INS/RET
TRIM
MIC IN
TAPE 1–8
TAPE 9–16
TAPE 17–24
PFL SOLO
SOLO L
SOLO R
MAIN LEFT
MAIN RIGHT
BUSES 1–8
AUX SEND 1–8
AUX SEND 9
AUX SEND 10
AUX SEND 11
AUX SEND 12
Digital 8•Bus
Digital 8•Bus Block Diagram
PHASE
HI PASS
COMP
GATE
EQ
MIC/LINE TRIM
METER
A to D
48V
LINE IN
LINE 13 (through 24)
TRIM
PHASE
HI PASS
COMP
GATE
EQ
TRIM
LINE IN
A to D
DIRECT ASSIGN
FROM TAPE 25 (through 32)
TRIM
PHASE
HI PASS
COMP
GATE
EQ
A to D
DIRECT ASSIGN
Analog 8 channel TAPE CARD (optional)
FROM TAPE 33 (through 40)
TRIM
PHASE
HI PASS
COMP
GATE
EQ
A to D
PAN
MUTE
Analog 8 channel TAPE CARD (optional)
FADER
FROM TAPE 41 (through 48)
TRIM
PHASE
HI PASS
COMP
GATE
EQ
PRE/
POST
AUX 1–8
A to D
AUX
LEVEL
Analog 8 channel TAPE CARD (optional)
FX card A. inputs 49–52
AUX
PAN
AUX 9/10
AUX
LEVEL
Inputs 53–64 (optional — B, C, D cards)
AUX
LEVEL
ALT I/O CARD 65 (through 72) (optional)
AUX
PAN
A to D
AUX 11/12
AUX
LEVEL
TDIF/ADAT 8 channel format (optional)
AES/EBU & S/PDIF STEREO INPUT
TAPE 1–8
TAPE 9–16
TAPE 17–24
PFL SOLO
SOLO L
SOLO R
MAIN LEFT
MAIN RIGHT
BUSES 1–8
AUX SEND 1–8
AUX SEND 9
AUX SEND 10
AUX SEND 11
AUX SEND 12
TO CONTROL ROOM
SELECT
G-2
Technical Info
TAPE 1–8
TAPE 9–16
TAPE 17–24
PFL SOLO
SOLO L
SOLO R
MAIN LEFT
MAIN RIGHT
BUSES 1–8
AUX SEND 1–8
AUX SEND 9
AUX SEND 10
AUX SEND 11
AUX SEND 12
SOLO TO
MAINS
S/PDIF
DIGITAL OUT LEFT
(R)
AES / /EBU
DIGITAL OUT LEFT
(R)
MASTER
FADER
SOLO/PFL
MAIN OUT LEFT
(R)
D/A
MAIN OUT LEFT
(R)
SOLO
LEVEL
D/A
AUX SOLO 9 (10)
( )
AUX 9/10 MASTER
D/A
AUX 9/10
TO SOLO BUS
PHONES SELECT
CTRL RM
D/A
AUX SOLO 11 (12)
PH 1
9/10
PH 1 LEVEL
11/12
( )
CTRL RM
AUX 11/12 MASTER
PHNS 1 LEFT
PH 2
9/10
D/A
Owner’s Manual
D8B OUTPUT SECTION
X2 LEFT AND (RIGHT)
PH 2 LEVEL
11/12
PHNS 2 LEFT
D/A
AUX 11/12
TB SELECT
PH 1
PH 2
TB LEVEL
STUDIO
(R)
TB ON/OFF
FROM
S/PDIF IN
D/A
FROM
AES/EBU IN
D/A
CONTROL ROOM SELECT
DIG IN 1
2 TRK IN
DIG IN 2
A
STUDIO OUT LEFT
(R)
LEVEL
MAINS
2 TRK A
B
2 TRK B
C
METERS
DIM
2 TRK C
MUTE
LEVEL
NEARFIELD
SPKR LEFT
(R)
LEVEL
MAIN
SPKR LEFT
(R)
D/A
SOLO
BUS SOLO
DIM
MONO LEFT
(R)
MUTE
ASSIGN
8•BUS LEVEL
D/A
MUTE
BUS 1–8
LEVEL TO TAPE
TAPE 1–8
LEVEL TO TAPE
LEVEL TO TAPE
TAPE 9–16
TAPE 17–24
AUX SOLO 1 (of 8)
TAPE 1–8
TAPE 9–16
TAPE 17–24
PFL SOLO
SOLO L
SOLO R
MAIN LEFT
MAIN RIGHT
BUSES 1–8
AUX SEND 1–8
AUX SEND 9
AUX SEND 10
AUX SEND 11
AUX SEND 12
AUX 1 (of 8)
MASTER
LEVEL
ALT I/0
D/A
AUX 1 – AUX 8
TO FX METER SELECT
FX CARDS
Technical Info
G-3
Digital 8•Bus
Specifications
Analog Input/Output Section
Inputs
Outputs
Frequency Response
Maximum Output Levels
20Hz-20kHz ±0.5 dB
(0 dBu = 0.775v rms)
Left and Right Outputs:
Crosstalk
(0 dBu @ 1kHz)
Adjacent channels
Aux sends feed through
Main outputs
–90 dBu
–90 dBu
–90 dBu
Bus (Tape) out:
Aux send:
Inserts:
+22dBu balanced 1/4" TRS
+28dBu balanced XLR
+22dBu balanced 1/4" TRS
+22dBu balanced 1/4" TRS
+22dBu unbalanced 1/4" TRS
Output gain ranges
E.I.N.
Aux Send:
Off to +10 dB
Bus:
Off to +10dB
Master L/R Fader:
–100 dB to +10 dB
Solo:
–100 dB to +10 dB
Talkback:
fixed at +60 dB gain on panel mic
Dim:
–20 dB attenuation on control room outputs
Speaker (Mains/Near Field):
–100 to 0 dB
Studio:
–100 dB to +10 dB
To Tape Level:
–100 dB to +10 dB
–129.5dBu 150Ω source
–131.2dBV 150Ω source
Output Impedances
CMRR
All balanced outputs:
All unbalanced outputs:
Channel Section (Mic/Line)
Line input:
Mic Input:
balanced 1/4" TRS input
balanced XLR input
Preamp dynamic range
114 dB max.
–83 dB @1kHz
Meters
Distortion
26 LED ladders
24 LEDs per channel from –50 to 0 dB FS
(0 dB FS = +20 dBu)
0.005% @ 1kHz, +14dBu output level
(20Hz–20kHz filter)
Mic gain range
Digital Input/Output
Unity to +60 dB
AES/EBU:
Line In gain range
–100 to +10 dB
Connector Type: XLR 3-Pin
Impedance: 600Ω
Maximum Output: 0 dB FS
Maximum Input: 0 dB FS
Bit Resolution: Output = 24/Input = 24
Format: IEC958 Professional
2 Track Input gain
S/PDIF:
0 dBu
Connector Type: RCA
Impedance: 75Ω
Maximum Output: 0 dB FS
Maximum Input: 0 dB FS
Bit Resolution: 24 bit (input and output)
Format: IEC958 Consumer
–20 dB to +40 dB (channels 1–12)
–20 dB to +20 dB (channels 13–24)
Ch. fader gain range
Line Input max. level
+4 dBu nominal, +22dBu clipping
Input Impedances
Mic preamp input:
Line inputs: Balanced
2.4kΩ
>10kΩ
Converters
24-Bit, 115 dB Signal-to-Noise-Ratio (EIAJ),
106 dB Dynamic Range, 128X oversampling
G-4
Technical Info
240Ω
120Ω
Owner’s Manual
DSP
32 bit (>190dB dynamic range)
Apogee UV22 16-bit Super CD Encoding on-board
Digital Trim gain range:
–100 dB to +10 dB
Equalizer
±15 dB
20–20kHz split into 4 bands
1/12 to 3 octave
Gain range:
Frequency range:
Q:
Compressor
Threshold:
Attack:
Release:
Ratio:
Output:
–60.00 dB to –1.00 dB
0.31 ms to 2560.00 ms
10.00 ms to 2500.00 ms
1.00:1 to 19.99:1
0.00 dB to 20.00 dB
Gate
Threshold:
Attack:
Release:
Range:
–60.00 to –1.00 dB
0.10 ms to 599.99 ms
10.00 ms to 2500.00 ms
0.00 dB to 100.00 dB
Remote CPU
Processor
166 MHz Pentium-compatible CPU
Storage
via floppy drive, internal hard drive or 10-base-T
Ethernet network.
I/O Connections
Mouse:
Keyboard:
Video:
MIDI:
Ethernet:
6-pin mini-DIN, PS/2 style
5-pin DIN, IBM compatible
High Density 15-pin D-Sub, SVGA
output, 1024x768 pixel resolution,
72Hz minimum refresh rate
9-pin D-Sub, MIDI IN/MIDI OUT
(Supplied adapter converts 9-pin
D-Sub to two 5-pin MIDI
connectors)
10-base-T
Power Requirements
US
Europe
Japan
Korea
120VAC, 60Hz
240VAC, 50/60Hz
100VAC, 50/60Hz
240VAC, 60Hz
Mackie Designs is always striving to improve it’s
products by incorporating new and improved materials,
components, and manufacturing methods. Because
we’re always trying to make things better, we reserve
the right to change these specifications at any time
without notice.
Technical Info
G-5
8.7"
(221mm)
37.6" (955mm)
27.1" (688mm)
Digital 8•Bus
Digital 8•Bus and Remote CPU Dimensions
D8B
CONSOLE
SHIPPING
WEIGHT
73 lbs.
(33.1 kg)
D8B CPU
SHIPPING
WEIGHT
50 lbs.
(22.7 kg)
CPU
19.00" (48.3cm)
G-6
Technical Info
5.25"
(13.3cm)
3U
20" (50.8cm)
17.25" (43.8cm)
Owner’s Manual
Appendix H
Upgrading
Your Mackie Digital 8•Bus console came with
a package containing, among other things, a
floppy disk with the current Mackie OS at the
time of manufacture. From time to time, the
operating software for the Digital 8•Bus may be
revised to improve its performance and add more
features. See “Determining the Operating System
Version” in Chapter 3 to find out what version of
the software is installed in your console.
You can check our web site at
www.mackie.com, or call our Tech Support
department to find out what version of the
operating software is currently shipping. If you
determine that the operating system (OS)
version on your console requires updating, you
can download a new version from our web site,
or request that a floppy disk update be mailed
to you.
Note: Always back up any crucial data such as
Sessions, Patches, etc., before upgrading the
console. See “Saving Sessions to Floppy Disk”
in Chapter 5 for information about backing up
files.
Upgrading the OS with a Floppy Disk
You must have a keyboard, mouse, and
monitor connected to the console to perform
this operation.
• Turn the power switch OFF on the Remote
CPU.
• Insert the first disk (Disk 1) containing the
new operating system into the floppy drive
on the Remote CPU.
• Turn the power switch ON. The console will
boot off the disk. Follow the instructions on
the screen to complete the operation.
Upgrading
H-1
H-2
Upgrading
Digital 8•Bus
Feature
Surface
Keyboard
Mouse (click or pull down)
New Session
[New]
Ctrl-N
File > New session
Open Session
[Load]
Ctrl-O
File > File Manager
Save Session
[Save Session]
Ctrl-S
Save Session As
[Save Session As]
File > Save session
File > Save session as
Save As Default
Save as Startup (bootup session)
File > Save (Startup file)
Disk Manager
[Load]
Ctrl-D
File > Disk Manager
Preferences
[General]
Ctrl-1
Setup
Undo
[Undo]
Ctrl-Z
Edit > Undo (channels or moves)
Edit > Cut (channels or moves)
Cut / Zero set
[Cut]
Ctrl-X
Copy
[Copy]
Ctrl-C
Edit > Copy (channels or moves)
Paste
[Paste]
Ctrl-V
Edit > Paste(channels or moves)
Delete Time
Edit > Delete time
Insert Blank Time
Edit > Insert blank time
Modify Events
Ctrl-M
Edit > Modify Events
Select All
(multiple actions)
Ctrl-A
Edit > Select all
View ch 1–24
[Mic/Line]
F9
[Mic/Line]
View ch 25–48
[Tape]
F10
[Tape]
View ch 49–64
[Effects]
[Effects]
View Master fader
[Mute]
[Master]
Time Code Counter
[set time, #’s, enter]
Sort by column title in …window
Owner’s Manual
Appendix I
Shortcuts
[tab], #’s, [enter]
click on counter, #’s , [enter]
[tab] highlight column, [enter] click on title in window
(New, Open, Save, Snap, Locate – any listing window)
For the following window views, [ctrl] + [the number]
will both open and close these windows:
Feature
Surface
View Setup
General/Plug-ins and I/O Card Ctrl-1
Keyboard
Mouse (click or pull down)
View Mix Editor
Ctrl-2
Ctrl-2
Window> Mix Editor
View Snapshots
Ctrl-3
Ctrl-3
Window> Snapshots
View Locator
Ctrl-4
Ctrl-4
Window> Locator
View Compressor
Ctrl-5
Ctrl-5
Window> Compressor
View EQ
Ctrl-6
Ctrl-6
Window> EQ
View Gate
Ctrl-7
Ctrl-7
Window> Gate
View Surround
Ctrl-8
Ctrl-8
Window> Surround
View Card A (FX 1 & 2)
Ctrl-9
Ctrl-9
Window> Card A
View Card B (FX 3 & 4)
Ctrl-0
Ctrl-0
Window> Card B
View Card C (FX 5 & 6)
Ctrl-(-)
Ctrl-(–)
Window> Card C
View Card D (FX 7 & 8)
Ctrl-(=)
Window> Setup
Ctrl-(=)
Window> Card D
Front Window
Ctrl-W
File> Close Window
Close All
Ctrl-\
Window> Close All
Shortcuts
I-1
Digital 8•Bus
FUNCTIONS on SELECT(ed) Channel
Example: Select channels 1–5 and type the letter [M] and these channels will mute. To unmute these same selected channels,
type either a comma [ , ] or hold down the shift key and type the letter [M].
Feature
Surface
Keyboard
Track Selection
[select]
arrow
Mouse (click or pull down)
Click on ch. selector
Multiple Track Selection
[shift][select]
[shift] L/R arrow
[shift] Swipe across channel [select]s
or
Right mouse button/swipe across
channel [select]s
Single Event Selection
(up/down arrow)
Multiple Event Selection
[shift] up/down arrow
Unselect All faders
press any [select]
Fade Shapes
[shift-click]
left or right arrow
Click on any [select]
Ctrl-K
Faders > Fade shapes
Group
[Group][select]
Ctrl-G
Faders > Group
UnGroup
[Group][select]
Ctrl-U
Faders > UnGroup
Go to Unity
Ctrl- ]
Faders > Go to Unity
Go to Off
Ctrl-[
Faders > Go to off
Fade In
[G]
Faders > Fade in
Fade Out
[F]
Faders > Fade out
Ctrl-L
Faders > Stereo Link
Link Faders
hold adj. [select]s
UnLink Faders
hold adj. [select]s
Write toggle
[Write]
Faders > UnLink
[W] (enable)
[Write]
[E] or [shift] [W] (disable)
Solo toggle
[Solo]
[S] (enable)
[Solo]
[D] or [shift] [S] (disable)
Mute toggle
[Mute]
[M] (enable)
[Mute]
[ , ] or [shift] [M] (disable)
All Mutes toggle
T
Mute button
TRANSPORT FUNCTIONS
Feature
Surface
Keyboard
Mouse (click or pull down)
Play/Stop
[Play][Stop]
[space bar]
[Play][Stop]
Play
[Play]
F8
[Play][Stop]
Stop
[Stop]
F7
[Play][Stop]
Record mode
[Record]
F9
[Record]
Location 00-99
in locate mode: 00-99 numeric entry, followed by [Enter]
Locate window, double-click line
Store Locate
in locate mode: 00-99 numeric entry, followed by [Store]
Locate window, click [New]
Return to Zero (RTZ)
empty locate, [enter]
Rewind
[<<]
Fast forward
[>>]
F6
Next Locate/Snapshot
Ctrl-Enter-[+]
surface only
F5
Alt-Enter-[–]
ODDS ’N’ ENDS
Feature
Surface
Channel strip name
Equal aux/trim levels
Keyboard
Mouse (click or pull down)
Click on name field, enter [text], [tab] (right) or [shift] [tab] (left)
(see clipboard ops)
(see clipboard ops)
Click bar, right mouse button
swipe either direction
Bus assigns
[Bus #], swipe [Assign]s
Click bus, any mouse button
swipe either direction
DSP function On/off toggles (Phase, EQ, Gate, Compressor)
Click button, any mouse button
swipe either direction
Sort
Bypass Automation
Motor Faders off
Motor Faders off button
Toggle checkbox / edit field
I-2
Shortcuts
Click title bar
Bypass Sync
Bypass Automation
Space bar
Mouse Click
Owner’s Manual
Appendix J
Screen Shots
Here are some of the panels and dialog
boxes you will be using on-screen:
Startup Screen
EQ Control Panel
Gate Control Panel
Compressor Control Panel
Screen Shots
J-1
Digital 8•Bus
General Setup
Aux/Surround Setup
Digital Setup
MIDI Setup
Plug-Ins Setup
Mix Editor
Locator Window
Snapshot Window
J-2
Screen Shots
Owner’s Manual
Surround Sound Matrix
Mackie FX Control Panel
IVL Vocal Studio Control Panel
Screen Shots
J-3
Digital 8•Bus
Disk Manager
File Menu
Channel Menu
Edit Menu
Automation Menu
Windows Menu
J-4
Screen Shots
Owner’s Manual
Appendix K
Recommended Books
You may have an interest in reading more
about recording, digital mixing, and audio in
general. Here is a list of titles we recommend
for reference or further reading:
•
•
•
•
•
•
•
•
•
•
•
The Art of Digital Audio , by John Watkinson
The Audio Dictionary , by Glenn White
Handbook for Sound Engineers , by GlenBallou
Mackie Mixer Book , by Rudy Trubitt
Modern Recor ding Techniques , by Huber &
Runstein
Practical Recor ding Techniques , by Bruce &
Jenny Bartlett
Principles of Digital Audio , by Ken C.
Pohlmann
Random Access Audio , by David Miles Huber
Sound Reinforcement Handbook , by Gary
Davis
Sound System Engineering , Davis & Davis
Tech Terms , by Peterson and Oppenheimer
Recommended Books
K-1
K-2
Digital 8•Bus
This manual was a collaborative effort.
Written and laid out by David Franzwa,
with assistance from the following team
members: Final production assistance by
Steve Eborall; final editing and compositional assistance by Marsh Gooch (whom we
just call “Gooch”); technical information and
support provided by Tom Bain and Brian
McCully; final proofreading provided by the
inimitable Linn Compton; cover designed by
Sheila Smith.
Hookup diagram art by Sara Delahan and
Bruce Yunker; typesetting assistance by creative guru Ron Koliha; real-world perspectives
provided by Paul Larson, Keith Medley, Randy
Neiman, Jay Schlabs, and Michael Worona; fun
at the Christmas party provided, in part, by the
Naked Mole Rats; (adult super)vision provided
by Greg Mackie, Bob Tudor, and Peter Watts.
Owner’s Manual
Colophon
Thanks go to Richard Elen for “dithering”
away at the Apogee appendix.
Preliminary text was written on a Power
Macintosh® 8100/100AV using Microsoft Word
6.0. Typesetting was performed on the same
Power Macintosh using Adobe® PageMaker®
6.5. (Steve and Gooch worked on inferior Mac
clones, souped-up beyond belief, with so many
accelerator cards and RAM upgrades that they
lost count sometime back in the late ’70s.)
Console graphics and illustrations were
created using Adobe® Illustrator® 7.0. Screen
shots were created by tracing them on an old
Winky-Dink screen transparency with a
sharpened crayon.
No animals were harmed during the
production of this manual.
ADAT is a trademark of Alesis Corporation.
TASCAM is a registered trademark of TEAC
Corporation. Apogee and UV22 Super CD
Encoding are trademarks of Apogee Electronics.
IVL is a trademark of IVL Ltd. The following
are trademarks or registered trademarks of
Mackie Designs Inc.: The Mackie Logo,
Mackie Real Time OS, V-Pot, the “Running
Man” figure, and the D8B “Badge” design. All
other brand names mentioned are trademarks
or registered trademarks of their respective
holders, and are hereby acknowledged.
©1998 Mackie Designs Inc.
All rights reserved.
®
Colophon
Digital 8•Bus
Session:
Date:
0
TRIM
TRIM
TRIM
TRIM
TRIM
TRIM
TRIM
TRIM
TRIM
TRIM
TRIM
TRIM
LINE
MIC
LINE
MIC
LINE
MIC
LINE
MIC
LINE
MIC
LINE
MIC
LINE
MIC
LINE
MIC
LINE
MIC
LINE
MIC
LINE
MIC
LINE
MIC
-20dB
60
+40dB
0
-20dB
60
+40dB
0
-20dB
60
+40dB
0
-20dB
60
+40dB
0
-20dB
60
+40dB
0
-20dB
60
+40dB
0
-20dB
60
+40dB
0
-20dB
60
+40dB
0
-20dB
60
+40dB
0
-20dB
60
+40dB
0
-20dB
60
+40dB
0
-20dB
60
+40dB
1
2
3
4
5
6
7
8
9
10
11
12
MIC
MIC
MIC
MIC
MIC
MIC
MIC
MIC
MIC
MIC
MIC
MIC
Digital 8•Bus Track Sheet
TRIM
-20
+20
13
TRIM
-20
+20
14
TRIM
-20
+20
15
TRIM
-20
+20
16
TRIM
-20
+20
17
TRIM
-20
+20
18
TRIM
-20
+20
19
TRIM
-20
+20
20
TRIM
-20
+20
21
TRIM
-20
+20
22
TRIM
-20
+20
23
TRIM
-20
+20
24
Digital 8•Bus
Owner’s Manual
Index
A
ADAT Connection ............................................................ F-1
ADAT Optical .................................................................. B-4
Advanced Techniques ...................................................... 8-1
AES/EBU .................................................................. B-4, F-1
AFL ................................................................................. A-1
AFL/PFL ....................................................................... 6-14
AFL SOLO Button ........................................................... 2-6
AIO•8 .............................................................................. F-1
Aliasing ........................................................................... A-1
ALL Button ..................................................................... 2-9
ALT Button ...................................................................... 2-8
ALT I/O ......................................................................... 2-13
Analog
Analog vs. Digital ................................................... 1-1
Analog to Digital Converter ............................ A-1, B-1
Analog I/O ............................................................ 2-12
Audio Connections .................................................. 4-1
External Effects Devices ................................ 4-2
Headphones ................................................... 4-5
Microphones and Line Level Connections ...... 4-1
Monitors ........................................................ 4-4
Recording Devices ......................................... 4-2
Channels 1-24 Tape Outs ...................... 4-2
Channels 25-48 Tape Returns ............... 4-2
Bus Out 1-8 Connections (Surround
Outputs) ................................................ 4-2
Final Mix Deck ...................................... 4-5
Metering ................................................................. 4-1
TRS ...................................................................... 2-14
XLR ...................................................................... 2-14
Apogee Digital I/O ......................................................... 2-13
Apogee UV22 ............................................ 6-26, Appendix D
ASSIGN Button ............................................................... 2-1
Assign ..................................................................... A-1
Assign Channels to a Bus Output. .......................... 6-9
Assign Channels to a Tape Output: ........................ 6-8
Assign Channels to Virtual Groups ......................... 8-6
Attenuate ........................................................................ A-1
Automation ..................................................................... 7-1
Advanced Automation ............................................ 8-1
Recording changes ......................................... 8-1
Automation Filters ................................................. 7-3
Automation Section ................................................ 2-9
Introduction ............................................................ 1-3
Dynamic Automation .............................................. 7-1
Absolute Mode ............................................... 7-1
Auto Touch Mode ........................................... 7-1
Bypass ........................................................... 7-1
Trim Levels Mode .......................................... 7-2
Looping ................................................................. 7-13
Recording ............................................................... 7-4
Bus Assignments ......................................... 7-10
Channel V-Pot Moves ..................................... 7-8
Fader Moves in Trim Mode ............................ 7-6
Mutes ............................................................. 7-7
Snapshot Automation ............................................. 7-2
Writing Snapshots into Automation ............. 7-11
The Mix Editor ..................................................... 7-14
Undo Edit .............................................................. 7-12
Auto Fading ..................................................................... 8-6
Auto Save, Configuring ................................................... 3-7
AUTO TOUCH Button ...................................................... 2-9
Aux Buttons
AUX 1 Button ......................................................... 2-4
AUX 2 Button ......................................................... 2-4
AUX 3-8 Buttons .................................................... 2-4
AUX 9-10 LEVEL Button ........................................ 2-4
AUX 11-12 LEVEL Button ...................................... 2-4
AUX 9-10 PAN Button ............................................ 2-4
AUX 11-12 PAN Button .......................................... 2-4
AUX 9-10 Button .................................................... 2-7
AUX 11-12 Button .................................................. 2-7
Aux Buses ....................................................................... 4-4
Auxiliary ......................................................................... A-1
Aux Outputs .................................................................. 2-14
Aux Sends,
Setting Pre or Post Fader .............................. 3-8, 6-63
Setting the Levels ................................................. 6-68
Soloing .................................................................. 6-15
B
Balanced ......................................................................... A-1
Bandwidth ....................................................................... A-1
Changing the Bandwidth ...................................... 6-32
Binary Number System .................................................... B-1
Bit ................................................................................... A-1
Blank Time, Inserting ................................................... 7-18
Block Diagrams ....................................................... G-2, G-3
Books, Recommended ........................................ Appendix K
Bouncing Down Tracks ................................................. 6-19
Bus .................................................................................. A-1
Assigning Channels to Bus Outputs: ...................... 6-9
Assigning to the L-R bus ...................................... 6-66
Assigning to Bus 1-8 ............................................ 6-67
Buses, Aux ............................................................. 4-4
Bus Out 1-8 (Surround Out) .......................... 2-13, 4-2
Routing Channels to Tape Outputs and Buses ....... 6-8
Bypass ............................................................................. 7-1
C
Card Cage Section ......................................................... 2-12
Cards, Installation .............................................. Appendix F
Center Frequency Setting .............................................. 6-30
Channels
Arming Channels for Recording: .......................... 6-10
Assigning Channels to a Tape Output: .................... 6-8
Assigning Channels to Bus Outputs: ...................... 6-9
Assigning to the L-R Bus ..................................... 6-66
Assigning to Bus 1-8 ............................................ 6-67
Channels 1-12 ....................................................... 2-12
Channels 13-24 ..................................................... 2-12
Channel Inserts ...................................................... 4-3
Channel PAN Control, Adjusting: ............................ 6-3
Channel Phase, Setting ........................................ 3-15
Channel Select Display ........................................... 2-5
Channel Strip Description ............................... 2-1, A-1
Channel V-Pots, Using ............................................ 6-3
Fat Channel ............................................................ 1-3
Display ......................................................... 6-28
Section ........................................................... 2-5
Input Sensitivity Adjustment
Channels 1-24 ................................................ 6-1
Channels 25-48 ............................................ 6-23
Muting .................................................................. 6-28
Routing to Mains and Subs .................................. 6-66
Routing Channels to Tape Outputs and Buses ....... 6-8
Soloing .................................................................. 6-14
Chorusing ........................................................................ A-1
CLEAR SOLO Button ...................................................... 2-7
Clipboard ....................................................................... 5-17
Clipboard Section ................................................... 2-8
Copy ...................................................................... 5-18
Cut ........................................................................ 5-17
Clipping ................................................................... A-1, B-4
Compressor ................................................... A-1, 6-28, 6-38
COMPRESSOR Button ........................................... 2-6
Adding Compression ............................................. 6-70
Adjusting the Compressor Settings ...................... 6-39
Compressor Files: ................................................. 6-41
Loading ........................................................ 6-42
Saving .......................................................... 6-41
Editing Compressor Settings ................................ 6-43
Recording Changes ................................................. 8-1
Resetting the Compressor: ................................... 6-43
Selecting ............................................................... 6-39
Connections ..................................................................... 4-1
Control Room Monitors .......................................... 4-4
Digital Audio Connections ...................................... 4-6
Ethernet ................................................................. 4-7
External Effects Devices ........................................ 4-2
Final Mix Deck ....................................................... 4-5
Headphones ............................................................ 4-5
IEC ....................................................................... 2-16
Keyboard ................................................................ 4-7
Line Level Devices ................................................. 4-1
Microphones ........................................................... 4-1
MIDI Connections ................................................... 4-6
Mouse ..................................................................... 4-7
Monitor, SVGA ........................................................ 4-7
Recording Devices .................................................. 4-2
Studio Monitors ...................................................... 4-5
Console Data ................................................................. 2-15
CONTROL Button ............................................................ 2-8
CONTROL ROOM Button ................................................ 2-7
Control Room Section ..................................................... 2-7
Control Room, Monitoring ............................................. 6-12
COPY Button ................................................................... 2-8
COPY MIX TO CUE Button ............................................. 2-7
Copying Files to Floppy Disk .......................................... 5-4
Copying Files between Folders ........................................ 5-4
Index
IN-1
Digital 8•Bus
IN-2
CPU/Power Supply Description ..................................... 2-15
CR Main L-R Outputs .................................................... 2-14
CR Near Field L-R Outputs ........................................... 2-14
Creating
Creating Locate Points ......................................... 5-13
Creating a New Folder ............................................ 5-2
Creating a Session .................................................. 5-5
Creating Snapshots .............................................. 5-11
Cue Mix ........................................................................... A-1
Cue Mix, Setting up ..................................... 6-16, 6-17
Cues (Stereo): ............................................................... 6-73
CUT/ZERO SET Button ................................................... 2-8
D
DA88, Connecting ........................................................... F-1
DAT ................................................................................. A-2
Data
Console Data ........................................................ 2-15
Data and Synchronization I/O ............................... 2-15
Power/Data Section .............................................. 2-15
Date Setting .................................................................. 3-15
DAW (Digital Audio Workstation) ................................... A-2
dB, dBu, dBv, dBV, dog biscuit ........................................ A-2
dBu Equivalents ..................................................... 4-1
DB-25 Pinout Identification ............................................ 4-3
Deck, Connecting your Final Mix Deck ........................... 4-5
Default Settings, Recalling ............................................. 3-1
Delay ............................................................................... A-2
Deleting a Mute ............................................................. 7-16
Deleting Time: ............................................................... 7-18
Detune, Vocal Studio ....................................................... E-4
Dial Encoder, Rotary ..................................................... 2-11
Digital
Analog to Digital Converter (ADC) ......................... B-1
Digital Audio Connections ...................................... 4-6
AES/EBU ....................................................... 4-6
S/PDIF ........................................................... 4-6
Digital Basics ......................................................... B-1
Digital Cards .............................................. Appendix F
Digital Interface Standards .................................... B-4
Digital I/O
Button .......................................................... 2-10
Configuring .................................................. 3-11
Digital Effects .............................................. 2-13
RCA S/PDIF Input ....................................... 2-13
RCA S/PDIF Output ..................................... 2-13
XLR AES/EBU Input .................................... 2-13
XLR AES/EBU Output ................................. 2-13
DIGITAL IN 1 Button ............................................. 2-7
DIGITAL IN 2 Button ............................................. 2-7
Digital vs Analog .................................................... 1-1
Digital to Analog Converter (DAC) ......................... A-2
Digital vs Analog Metering ..................................... 4-1
Digital Trim ............................................................ 2-4
Adjusting ....................................................... 6-6
DIM Button ..................................................................... 2-8
Dimensions, Physical ...................................................... G-6
DIO•8 Card ..................................................................... F-1
Disk Manager .................................................................. 5-4
Copying files between Folders ................................ 5-4
Copying files to Floppy Disk ................................... 5-4
Display
Channel Select Display ........................................... 2-5
Fat Channel Display ...................................... 2-5, 6-28
Position LED Display ........................................... 2-10
Range LED Display .............................................. 2-10
Display Intensity Setting ................................................. 3-9
Dither ............................................................... A-2, B-3, D-1
Downloading Plug-Ins to the FX Cards ......................... 3-14
Drives
Built-in Hard Drive and Floppy Drive ..................... 1-3
Copying Sessions to Floppy Disk ............................ 5-4
Saving and Retrieving Files from the Hard-Drive ... 5-1
Saving and Retrieving Files from a Floppy Disk .... 5-4
Dry .................................................................................. A-2
DSP Plug-ins ................................................................... 1-3
DSP (Digital Signal Processing) ..................................... A-2
Dynamics
Adding Dynamics to Input Signals ....................... 6-69
Adding Dynamics to Tape Returns ....................... 6-28
Processor ................................................................ A-2
Dynamic Automation ....................................................... 7-1
Dynamic Range ............................................................... A-2
Index
E
Echo ................................................................................ A-2
Editing Gate Settings .................................................... 6-51
Editor (the Mix Editor) .................................................. 7-15
Edit Menu ............................................................. 7-14
Mackie Real Time OS Automation Event Insight . 7-14
To enter time values in the From/To boxes: .......... 7-14
To select multiple events in the Event List: ......... 7-14
Using The Mix Editor ........................................... 7-15
Effects
Adding Effects ...................................................... 6-71
Adjusting the Effects Settings .............................. 6-56
Editing Effects Settings ........................................ 6-60
Copying Effects Settings: ............................. 6-61
Cutting Effects Settings: .............................. 6-60
Pasting Effects Settings: ............................. 6-61
Effects .................................................................... 2-3
Effects Devices ....................................................... A-3
Saving, Loading, and Resetting Effects Settings .. 6-58
Loading an Effects Patch: ............................ 6-59
Resetting the Effects: .................................. 6-59
Saving an Effects Patch: .............................. 6-58
Selecting Internal Effects ............................ 6-53, 6-55
Turning the Effects On and Off ............................. 6-57
EIN .................................................................................. A-3
Encoder, Rotary Dial ..................................................... 2-11
ENTER Button .............................................................. 2-11
EQ
Adding EQ to Input Signals ......................... 6-12, 6-69
Adding EQ to Tape Returns .................................. 6-28
Changing the Display Matrix of the EQ: ............... 6-33
Changing the Frequency Bandwidth ..................... 6-32
Editing EQ Settings .............................................. 6-36
Cutting ......................................................... 6-36
Copying ........................................................ 6-36
Pasting ......................................................... 6-37
Equalization ............................................................ A-3
EQ Button ............................................................... 2-6
EQ Curve ................................................................ A-3
Loading an EQ Patch: ........................................... 6-34
Resetting the EQ: ................................................. 6-35
Selecting ............................................................... 6-29
Saving an EQ Patch: ............................................. 6-33
Recording changes ................................................. 8-1
Ethernet ................................................................. 2-15, 4-7
Event List ...................................................................... 7-15
Creating a Fade-In and Fade-Out Event ............... 7-16
Deleting a Fade-In or Fade-Out Event .................. 7-17
Editing Fade-In And Fade-Out Events .................. 7-17
Including And Removing Channels ....................... 7-15
Mackie Real Time OS Automation Edit… ............ 7-17
Name, Type, Value, Time ...................................... 7-15
Selecting Events By Type ..................................... 7-16
External Effects Devices, Connecting ............................. 4-2
External MIDI Effects Processors, Connections for ....... 4-6
Controlling from the Console .................................. 8-9
External Processing, using ........................................... 6-62
External Recorders, Arming from the Console .............. 6-10
F
Faders
Fader Automation ................................................... 7-3
Recording Fader Moves in Trim Mode ........... 7-2
Fader Bank Select LEDs ........................................ 2-2
FADERS Button ...................................................... 2-9
Fader Motors Off .................................................... 7-4
FADER MOTORS OFF Button ....................... 2-9
Fader Pairing .......................................................... 8-8
MASTER L-R Fader ............................................... 2-3
Motorized 100mm Faders ....................................... 1-3
Setting an Auto-Fade .............................................. 8-6
Setting Aux Sends Pre/Post Fader ......................... 3-8
Fade-in/Fade-out
Creating a Fade-In and Fade-Out Event ............... 7-16
Deleting a Fade-In or Fade-Out Event .................. 7-17
Editing Fade-In And Fade-Out Events .................. 7-17
FAST FWD Button ........................................................ 2-11
Fat Channel ..................................................................... 1-3
Display .......................................................... 2-5, 6-28
Section .................................................................... 2-5
File Structure Hierarchy ................................................. 5-1
Filters, Automation ......................................................... 7-3
Final Mix, Monitoring ................................................... 6-26
G
Gain ................................................................................. A-3
Gain Setting, changing ......................................... 6-29
Gain Stage .............................................................. A-3
Gain Structure Diagram ......................................... G-1
Gate
Adding Gate .......................................................... 6-71
Adjusting Gate Settings ........................................ 6-47
Copying Gate Settings .......................................... 6-52
Cutting Gate Settings ........................................... 6-51
Gate ........................................................................ A-3
GATE Button .......................................................... 2-6
Loading a Gate Patch ........................................... 6-50
Pasting Gate Settings: .......................................... 6-53
Recording Changes ................................................. 8-1
Resetting .............................................................. 6-51
Saving a Gate Patch ............................................. 6-49
Selecting the Gate ................................................ 6-46
Using the Gate ...................................................... 6-46
GENERAL Button ......................................................... 2-10
General Setup ................................................................. 3-2
Gender, Vocal Studio ....................................................... E-4
Glossary ............................................................. Appendix A
GROUP Button .............................................................. 2-10
H
Hard Drive ....................................................................... 1-3
Saving and Retrieving Files .................................... 5-1
Harmony, Vocal Studio .................................................... E-3
Harmony Control .................................................... E-5
Headphones ................................................................... 6-69
Connecting Headphones ......................................... 4-5
Setup of Cue/Headphone Mixes for Performers .... 6-16
Headroom ........................................................................ A-3
HELP Button ................................................................... 2-6
Hertz ............................................................................... A-3
Hookup Diagrams
Analog Recording/Mixdown ................................. 6-77
Analog Recording/Overdub ................................... 6-78
Analog Recording/Tracking .................................. 6-75
Digital Recording/Tracking .................................. 6-76
Live Sound Reinforcement ................................... 6-79
Post Production .................................................... 6-80
How to use Help .............................................................. 1-5
How to use this Manual .................................................. 1-4
I
IEC Connectors ............................................................. 2-16
Introduction .................................................................... 1-1
IN/OUT
ALT I/O ................................................................. 2-13
Analog I/O ............................................................ 2-12
Analog In Connections (ch.25-48 Tape Returns) .... 4-2
Apogee Digital I/O ................................................ 2-13
Data and Synchronization I/O ............................... 2-15
Digital I/O ............................................................. 2-13
Cards, Installing ............................... Appendix F
Configuring Digital I/O ................................. 3-11
DIGITAL I/O Button .................................... 2-10
RCA S/PDIF Input ....................................... 2-13
RCA S/PDIF Output ..................................... 2-13
XLR AES/EBU Input .................................... 2-13
XLR AES/EBU Output ................................. 2-13
Input Signals, Adding EQ, Dynamics and Effects . 6-69
Input Levels, Adjusting ................................. 6-8, 6-65
Master Input/Output Section ................................ 2-13
MIDI IN ................................................................ 2-15
PUNCH I/O ........................................................... 2-14
Tape In/Outs ......................................................... 2-12
Input Sensitivity Adjustment Procedure for Ch.25-48 .. 6-23
Inserts, Channel .............................................................. 4-3
Intensity, Display Setting ................................................ 3-9
Internal Effects, Selecting ............................................ 6-55
Internal Effects ............................................................... A-3
Owner’s Manual
Floppy Disk
Copying Files to Floppy Disk .................................. 5-4
Floppy Drive, Internal ............................................ 1-3
Saving Sessions to a Floppy Disk ........................... 5-9
Frame .............................................................................. C-1
Frequency ....................................................................... A-3
Changing the Center Frequency ........................... 6-30
From/To Boxes .............................................................. 7-14
FX, Downloading Plug-Ins to the FX Cards ................... 3-14
IVL, Vocal Studio ............................................... Appendix E
Editing .................................................................... E-3
Harmony Control Mode ........................................... E-5
Interface ................................................................. E-1
Pitch Corrector Mode ............................................. E-7
Operation ................................................................ E-3
J
Jitter ................................................................................ B-4
JOG & SHUTTLE Button .............................................. 2-11
K
Keyboard .................................................................. 1-3, 4-7
Keyboard Port ............................................................... 2-16
Keyboard Shortcuts ............................................. Appendix I
L
L-R
Analog TRS L-R Outputs ...................................... 2-14
Analog XLR L-R Outputs ...................................... 2-14
CR Main L-R Outputs ........................................... 2-14
CR Near Field L-R Outputs ................................... 2-14
Master L-R Button ................................................. 2-7
Master L-R Section ................................................. 2-8
Studio L-R Outputs ............................................... 2-14
2 Track A, B, and C L-R Inputs ............................ 2-14
Language, Selecting ........................................................ 3-2
LED
Fader Bank Select LEDs ........................................ 2-2
Left-Right LED Ladders ......................................... 2-5
Meter LED Ladder .................................................. 2-2
Position LED Display ........................................... 2-10
Range LED Display .............................................. 2-10
Levels
Adjusting the Aux Send levels: ...................... 6-4, 6-68
Adjusting for Nominal Input and Output Levels ..... 6-8
AUX 9-10 LEVEL Button ........................................ 2-4
AUX 11-12 LEVEL Button ...................................... 2-4
Level ....................................................................... A-3
LEVEL to TAPE ...................................................... 2-4
Level V-Pot ............................................................. 2-7
SOLO LEVEL Button .............................................. 2-7
Speaker Level V-Pot ............................................... 2-8
STUDIO LEVEL Button .......................................... 2-7
TALKBACK LEVEL Button .................................... 2-7
TRIM LEVELS Button ............................................ 2-9
Trim Control ........................................................... 2-1
Trim Levels Mode ................................................... 7-2
LCRS, Surround Mode .................................................. 8-11
Light, Rude Solo ............................................................. 2-7
Line level ......................................................................... A-3
Line Level, Connecting ........................................... 4-1
Live Mixing ................................................................... 6-64
LOAD Button ................................................................ 2-10
LOAD PATCH Button ...................................................... 2-6
Loading
Loading a Compressor Patch ................................ 6-42
Loading an Effects Patch ..................................... 6-59
loading an EQ Patch ............................................. 6-34
Loading a Gate Patch ........................................... 6-50
Locate Points
Creating ................................................................ 5-13
Looping Between Two Locate Points ................... 5-16
Recalling .............................................................. 5-15
LOCATOR Button .......................................................... 2-11
LOOP Button ................................................................. 2-11
Looping ......................................................................... 7-13
LTC (Longitudinal Timecode) .......................................... C-2
M
MAIN Button ................................................................... 2-8
Main L-R Outputs, Control Room .................................. 2-14
Main Outputs, Routing Tape Returns ............................ 6-22
Mains and Subs, Routing channels to ........................... 6-66
Master
Analog TRS Outputs ............................................. 2-14
Analog XLR Outputs ............................................ 2-14
Digital RCA Input and Output .............................. 2-13
Digital XLR Input and Output .............................. 2-13
Masters .................................................................. 2-3
Master Input/Output Section ................................ 2-13
Master L-R Button ................................................. 2-7
Master L-R Fader ................................................... 2-3
Index
IN-3
Digital 8•Bus
Master L-R Section ................................................. 2-8
Master PAN Button ................................................ 2-3
Master SOLO Button .............................................. 2-4
Master V-Pot ........................................................... 2-3
Master V-Pot Section .............................................. 2-3
Matrix, Changing the Display Matrix of the EQ ............ 6-33
MEMORY A and B Buttons ............................................. 2-6
Metering, Analog vs. Digital ........................................... 4-1
MFX ................................................................................ F-2
Microphones
Connecting .............................................................. 4-1
MIC Button ............................................................. 2-1
Mic/Line (Track) ..................................................... 2-3
Level ....................................................................... A-3
Talkback ................................................................. 2-4
Microphone Preamp ........................................................ A-4
MIDI
Configuring MIDI Parameters ................................ 3-4
External Effects Processors ................................... 4-6
MIDI ....................................................................... A-4
MIDI In and Out ................................................... 2-15
MIDI Connections ................................................... 4-6
MMC (MIDI Machine Control) ................................ 4-6
Synchronization ...................................................... C-2
Mix, Copying an Entire Segment ................................... 7-17
To Copy Moves from One Time to Another: .......... 7-17
Mixdown ................................................................ 1-6, 6-22
Mixdown Solo ................................................................ 6-16
MIXDOWN SOLO Button ........................................ 2-6
Mixes, setup of Cue/Headphones .................................. 6-16
Cue Mix ................................................................ 6-17
Mix Effects, Adding to Main Outputs ............................ 6-64
Mixing, Live .................................................................. 6-64
Mixer Channels, Routing to Tape Outputs and Buses ..... 6-8
Mix Editor ..................................................................... 7-14
Edit Menu ............................................................. 7-14
Mackie Real Time OS Automation Event ............. 7-14
Using The Mix Editor ........................................... 7-15
The Event List ............................................. 7-15
Automation Edit Example… ............... 7-17
Changing a Time ................................. 7-16
Copying An Entire Segment Of Mix ..... 7-17
Creating Fade-In and Fade-Out Event . 7-16
Deleting Fade-In or Fade-Out Event .... 7-17
Deleting a Mute ................................... 7-16
Editing Fade-In And Fade-Out Events . 7-17
Inserting Blank Time/Delete Time ...... 7-18
Including/Removing Channels ............ 7-15
Selecting Events By Type .................... 7-16
Modes
Absolute Mode ........................................................ 7-1
Auto Touch Mode ................................................... 7-1
Surround Modes ................................................... 8-10
Trim Levels Mode ................................................... 7-2
Monitor, SVGA ................................................................ 1-3
Color Monitor Port ................................................ 2-16
Monitor (Tape In) ............................................................ 2-3
Monitors, Connecting ...................................................... 4-4
Monitoring ....................................................................... 1-5
Monitoring in the Control Room ........................... 6-12
Monitoring in Surround Mode .............................. 8-13
Monitoring the Final Mix ...................................... 6-26
Setup Monitor Mixes for Performers .................... 6-68
MONO Button .................................................................. 2-7
Morphing ....................................................................... 6-38
Morph in Surround Mode ...................................... 8-13
Motorized Faders ............................................................ 1-3
Mouse Port .................................................................... 2-16
Moves
Recording Fader Moves .......................................... 7-5
Recording Moves in Trim Mode .............................. 7-6
Recording Channel V-Pot Moves ............................ 7-8
MUTES Button ................................................................ 2-9
Muting Channels ........................................................... 6-28
Mutes .............................................................................. 7-3
Recording a Mute ................................................... 7-7
Deleting a Mute .................................................... 7-16
N
IN-4
NEAR FIELD Button ....................................................... 2-8
NEW Button .................................................................. 2-10
New Session .................................................................... 6-1
Nominal Input and Output Levels, Adjusting ......... 6-8, 6-64
Number Buttons 0-9 ...................................................... 2-10
Number System, Binary ................................................... B-1
Nyquist Sampling Theorem ............................................. A-4
Noise/Hum, Troubleshooting ........................................... 9-2
Index
O
Off, Turning the Effects On and Off ............................... 6-57
Fader Motors Off .................................................... 7-4
ON Button ....................................................................... 2-6
Output
Adding Effects to the Main Outputs ..................... 6-73
Adjusting for Nominal Output Levels ............ 6-8, 6-64
ALT I/O ................................................................. 2-13
Analog XLR Outputs ............................................ 2-14
Analog TRS Outputs ............................................. 2-14
Analog Connections (1-24 Tape Outs) .................... 4-2
Apogee Digital I/O ................................................ 2-13
Assigning channels to Bus Outputs: ....................... 6-9
Assigning Channels to a Tape Output: .................... 6-8
AUX Outputs ........................................................ 2-14
Bus Out 1-8 (Surround Out) .......................... 2-13, 4-2
CR Main L-R Outputs ........................................... 2-14
Output
CR Near Field L-R Outputs ................................... 2-14
Digital RCA Output .............................................. 2-13
Digital XLR Output ............................................... 2-13
Master Input/Output Section ................................ 2-13
MIDI Out .............................................................. 2-15
PHONES 1 and 2 Output ...................................... 2-14
PUNCH I/O ........................................................... 2-14
Routing Mixer Channels to Tape Outputs ............... 6-8
Routing Tape Returns to the Main Outputs .......... 6-22
Selecting UV22 on the Tape, ALT and Stereo Outputs
6-27
STUDIO L-R Outputs ............................................ 2-14
Tape In/Outs ......................................................... 2-12
Operating System, Determining the Version ................. 3-10
Mackie Real Time OS Automation ............... 7-14, 7-17
Upgrading the Operating System ............... Appendix H
Optical, ADAT ................................................................. B-4
Optional Digital Cards ........................................ Appendix F
Overdub ......................................................................... 6-19
P
Paired Faders .................................................................. 8-8
Pan
AUX 9-10 PAN Button ............................................ 2-4
AUX 11-12 PAN Button .......................................... 2-4
Master PAN Button ................................................ 2-3
Pan, Automation Filter ........................................... 7-3
PAN Button ............................................................. 2-9
PAN Control, Adjusting .......................................... 6-3
Pan, Vocal Studio .................................................... E-4
Paste, Clipboard ............................................................ 5-18
Parametric EQ ................................................................. A-4
Parametric EQ Frequency Bandwidth ........................... 6-32
Paste
Pasting EQ Settings: ............................................ 6-37
Pasting Compressor Settings: .............................. 6-45
Pasting Gate Settings: .......................................... 6-53
Pasting Effects Settings: ...................................... 6-61
PASTE Button ........................................................ 2-8
LOAD PATCH Button ...................................................... 2-6
SAVE PATCH Button ....................................................... 2-6
PFL ........................................................................ 6-14, A-4
PFL SOLO Button ........................................................... 2-6
Phantom Power ........................................................ 4-2, A-4
Phasing ........................................................................... A-4
Phase, Setting ............................................................... 3-15
Phone Jack and Plug ....................................................... A-4
Phones/Cue Mix Section ................................................. 2-7
Phones 1 and 2 Output .................................................. 2-14
Pitch Correction, Vocal Studio ......................................... E-7
Pitch Shift, Vocal Studio ................................................. E-7
PLAY Button ................................................................. 2-11
PLUG INS Button ................................................... 2-6, 2-10
Plug-Ins, Downloading to the FX Cards ........................ 3-14
Plugs, TRS and TS .......................................................... 4-1
Ports
Color Monitor Port ................................................ 2-16
Keyboard Port ....................................................... 2-16
Mouse Port ........................................................... 2-16
Parallel Port ......................................................... 2-16
Serial Controllers Port .......................................... 2-16
Position LED Display .................................................... 2-10
Post-Fader, Pre-Fader ..................................................... A-4
Setting Aux Sends to be Pre or Post Fader ... 3-8, 6-63
Power Supply ................................................................ 2-15
Power Supply Cable ...................................................... 2-16
Power Switch (Front Panel) .......................................... 2-16
Power Down .................................................................... 3-2
Q
Q (bandwidth) ................................................................. A-4
Changing the Q Setting: ........................................ 6-31
Quad, Surround Sound .................................................. 8-10
Quantization ............................................................ A-4, B-2
Figure 4. Quantization ............................................ B-3
Quick Start Guide ............................................................ 1-4
Quick Start Video ............................................................ 1-4
R
RAM (Random Access Memory) ..................................... A-4
RANGE LED Display ..................................................... 2-10
RCA S/PDIF MASTER Input ........................................ 2-13
RCA S/PDIF STEREO MASTER OUTput ...................... 2-13
Rear Panel Description ................................................. 2-12
Rebooting After Power Failure: ...................................... 3-2
Recalling
Recalling Console snapshots ................................ 6-74
Recalling Factory Default Settings: ........................ 3-1
Recalling Locate Points ........................................ 5-15
Recalling a Snapshot ................................... 5-12, 6-74
Recalling a Session ................................................ 5-8
Recommended Books ......................................... Appendix K
Recording ........................................................................ 6-1
Arming Channels and Recorders .......................... 6-10
Bouncing Down Tracks: ........................................ 6-20
Recording Bus Assignments ................................. 7-10
Recording Channel V-Pot Moves ............................ 7-8
Recording Devices, Connecting .............................. 4-2
Recording EQ, Compressor, Effects Changes ......... 8-1
Recording Fader Moves .......................................... 7-5
Recording Fader Moves in Trim Mode .................... 7-6
Recording Mutes .................................................... 7-7
RECORD Button ............................................................ 2-11
REC/RDY Enable Button ................................................. 2-1
Registration Card ............................................................ 1-4
Remote CPU/Power Supply Description ......... 1-3, 2-15, G-5
Removing Channels In The Event List .......................... 7-15
Repair ............................................................................. 9-1
Resetting
Resetting the Compressor: ................................... 6-43
Resetting the Effects: ........................................... 6-59
Resetting the EQ: ................................................. 6-35
Resetting the Gate: ............................................... 6-51
Retrieving Files from the Internal Hard-Drive ................ 5-1
Return ............................................................................. A-4
Reverberation .................................................................. A-5
REWIND Button ............................................................ 2-11
ROM (Read Only Memory) .............................................. A-5
Rotary Dial Encoder ...................................................... 2-11
ROUTE TO TAPE Button ................................................ 2-9
Routing channels to Mains and Subs ............................ 6-66
Routing Mixer Channels to Tape Outputs and Buses ...... 6-8
Routing Tape Returns to the Main Outputs .................. 6-22
RUDE SOLO LIGHT ........................................................ 2-7
S
Sampling Frequency ........................................................ A-5
Sample Rate, Setting .................................................... 3-13
Sampling ......................................................................... B-2
Saving and Retrieving Files from a Floppy Disk ............. 5-4
Saving and Retrieving Files from the Hard-Drive ........... 5-1
SAVE Button ................................................................... 2-9
SAVE AS Button ............................................................ 2-10
SAVE PATCH Button ....................................................... 2-6
Saving
Compressor Patches ............................................. 6-41
Effects Patches ..................................................... 6-58
EQ Patches ........................................................... 6-33
Gate Patches ........................................................ 6-49
Screen Shots ....................................................... Appendix J
Sections
Automation Section ................................................ 2-9
Bus Assignment Section ......................................... 2-8
Card Cage Section ................................................ 2-12
Clipboard Section ................................................... 2-8
Control Room Section ............................................. 2-7
Fat Channel Section ............................................... 2-5
Master Fader/Bank Select Section ......................... 2-3
Master Input/Output Section ................................ 2-13
Master L-R Section ................................................. 2-8
Master Section Description .................................... 2-3
Phones/Cue Mix Section ......................................... 2-7
Session Setup Section ............................................ 2-9
Shortcuts Section ................................................... 2-8
Studio/Solo Section ................................................ 2-6
Transport Section ................................................. 2-10
V-Pot Select Section ............................................... 2-4
SELECT Button ........................................................ 2-2, 2-8
Selecting Events By Type .............................................. 7-16
Send ................................................................................ A-5
Sensitivity, Input Adjustment for Ch. 1-24 ...................... 6-1
Serial Controllers Port .................................................. 2-16
Service ............................................................................ 9-1
Sessions
Creating a Session .................................................. 5-5
Preparing a Session ............................................... 5-1
Recalling a Session ................................................ 5-8
Saving a Session ..................................................... 5-6
Saving a Session under a New Name ............. 5-7
Saving Sessions to Floppy Disk ..................... 5-9
Starting a New Session .......................................... 6-1
Setup .............................................................. 6-1
SET TIME Button ......................................................... 2-10
Setup ............................................................................. 6-64
Setup, General ................................................................ 3-2
SETUP Button ................................................................. 2-6
Shelving .......................................................................... A-5
SHIFT Button .................................................................. 2-3
Shortcuts ............................................................. Appendix I
SHUTTLE Button .......................................................... 2-11
Signal-to-Noise Ratio (S/N) ............................................. A-5
SmartChord, Vocal Studio ............................................... E-6
SmartKey, Vocal Studio ................................................... E-6
SMPTE ............................................................................ C-1
SMPTE VIEW Button .................................................... 2-10
Snapshots
Creating and Storing Snapshots ........................... 5-11
Recalling Console Snapshots Live ........................ 6-74
Recalling Snapshots .................................... 5-12, 6-74
Snapshot ................................................................. A-5
Snapshot Automation ............................................. 7-2
Writing Snapshots into Automation ............. 7-11
SNAPSHOT Button ............................................... 2-11
SOLO
AFL SOLO Button .................................................. 2-6
CLEAR SOLO Button .............................................. 2-7
Master SOLO Button .............................................. 2-4
Mixdown Solo ....................................................... 6-16
MIXDOWN SOLO Button ........................................ 2-6
PFL SOLO Button ................................................... 2-6
Rude Solo Light ...................................................... 2-7
SOLO LEVEL Button .............................................. 2-7
Solo ........................................................ 2-2, 6-13, A-5
Soloing an Aux Send .................................... 6-15
Soloing a Channel ........................................ 6-14
Sound and Signal ............................................................ B-1
S/PDIF ..................................................................... 4-6, B-4
Speaker Level V-Pot ........................................................ 2-8
Specifications .................................................................. G-4
Split-Console Approach ................................................... 1-5
Start Up ........................................................................... 3-1
Stereo Cues ................................................................... 6-73
Stereo Paired Faders ....................................................... 8-8
STOP Button ................................................................. 2-11
STORE Button .............................................................. 2-11
Studio
Studio L-R Outputs ............................................... 2-14
STUDIO LEVEL Button .......................................... 2-7
Studio Monitors, Connecting .................................. 4-5
TALKBACK TO STUDIO Button ............................. 2-7
Subs, Routing Channels to ............................................ 6-66
Surround Sound ....................................................... 8-9, A-5
Monitoring in Surround Sound ............................. 8-13
Surround Control Panel ........................................ 8-12
Surround Modes ................................................... 8-10
Setting ........................................................... 3-3
Stereo, Quad ................................................ 8-10
LCRS, 5.1 ..................................................... 8-11
7.1 ................................................................ 8-12
Surround Outputs, Bus Out 1-8 ..................... 2-13, 4-2
SVGA Monitor .......................................................... 1-3, 4-7
Sync .............................................................................. 2-13
Synchronization .................................................. Appendix C
Data and Synchronization I/O ............................... 2-15
Synchronizing MIDI Time Code Source .................. 4-6
Owner’s Manual
Power Failure, Rebooting After ...................................... 3-2
Power Up, Initial ............................................................. 3-1
Preparing for a Session ................................................... 5-1
PREVIOUS and NEXT Arrow Buttons ............................ 2-5
Processing, External ..................................................... 6-62
DSP Plug-ins ................................................................... 1-3
PUNCH I/O .................................................................... 2-14
Index
IN-5
Digital 8•Bus
T
W
Talkback ............................................................... 2-14, 6-19
TALKBACK LEVEL Button .................................... 2-7
Talkback Mic .......................................................... 2-4
Talkback System .................................................... A-5
TALKBACK TO STUDIO Button ............................. 2-7
Tape
Adding EQ, Dynamics, Effects to Tape Returns ... 6-28
LEVEL TO TAPE .................................................... 2-4
ROUTE TO TAPE Button ........................................ 2-9
Tape, Adjusting the Level ....................................... 6-7
Tape In (Monitor) ................................................... 2-3
Tape In/Outs ................................................ 2-12
Tape Outputs
Assigning Channels ....................................... 6-8
Routing Mixer Channels ................................ 6-8
Selecting UV22 on the Tape Outputs ........... 6-27
Tape Outs, (Ch. 1-24) ..................................... 4-2
Tape Returns, (Ch. 25-48) ...................................... 4-2
Technical Information ........................................ Appendix G
TDIF ................................................................................ B-4
Threshold, Gate ............................................................. 6-46
Time
Deleting Time: ...................................................... 7-18
Inserting Blank Time: ........................................... 7-18
Set Time Button ................................................... 2-10
Time and Date setting: ......................................... 3-15
Timecode ................................................................ C-1
Timecode Source, MIDI Synchronization ............... 4-6
Track, Mic/Line ............................................................... 2-3
Tracks, Bouncing Down ....................................... 6-19, 6-20
Tracking ................................................................... 1-5, 6-1
2 TRACK A, B and C Buttons .......................................... 2-7
2 TRACK A, B, and C L-R Inputs ......................... 2-14
Transport Section .......................................................... 2-10
Transport Controls ................................................ 2-11
Trim ................................................................................. A-5
Digital Trim ...................................................... 2-4 6-6
Trim Control ........................................................... 2-1
Trim Levels Button ................................................. 2-9
Trim Levels Mode ................................................... 7-2
Touch, Auto Touch Mode ................................................. 7-2
Auto Touch Button ................................................. 2-9
Troubleshooting .............................................................. 9-1
TRS Plug .................................................................. 4-1, A-5
TS Plug .................................................................... 4-1, A-6
Types, Included ............................................................. 7-14
Warranty/Registration Card ............................................ 1-4
Warranty Service ............................................................. 9-1
Wet .................................................................................. A-6
Write ............................................................. see Recording
WRITE Button .................................................. 2-1, 2-8, 7-4
Write Fader Moves .......................................................... 7-5
Write Fader Moves in Trim LEVELS Mode ..................... 7-6
Write Mutes .................................................................... 7-7
Write Channel V-Pot Moves ............................................. 7-8
Write Bus Assignments ................................................. 7-10
Writing Snapshots into Automation .............................. 7-11
U
Unbalanced, twisted and warped .................................... A-6
Undo .............................................................................. 5-19
UNDO Button .................................................................. 2-8
Undo Edit ...................................................................... 7-12
Unity gain ........................................................................ A-6
Upgrading the Operating System ....................... Appendix H
UV22
Apogee UV22 ............................................. Appendix D
Selecting UV22 on the Outputs ............................ 6-27
Using Apogee UV22 .............................................. 6-26
V
Version, Determining the Operating System ................. 3-10
Video, Quick Start ........................................................... 1-4
Virtual Grouping/Ungrouping .......................................... 8-4
VITC ................................................................................ C-2
Vocal Studio ....................................................... Appendix E
V-Pots™ ............................................................ 1-3, 2-2, A-6
Channel V-Pots ....................................................... 6-3
Level V-Pot, Phones ................................................ 2-7
Master V-Pot ........................................................... 2-3
Master V-Pot Section .............................................. 2-3
Recording Channel V-Pot Moves ............................ 7-8
Speaker Level V-Pot ............................................... 2-8
V-Pot Controllers .................................................... 2-5
V-Pot Select Buttons ............................................... 2-5
V-Pot Select Section ............................................... 2-4
IN-6
Index
X
XLR
Analog XLR L-R Master Output ........................... 2-14
Digital XLR AES/EBU Stereo Master Input ......... 2-13
Digital XLR AES/EBU Stereo Master Output ....... 2-13
XLR connectors, Figure .......................................... 4-1
XLR microphone Connector .................................. 2-12
Z
CUT/ZERO SET Button ................................................... 2-8
Owner’s Manual
Addendum
The following notes may prove helpful:
Powering Up- see Chapter 3
If you are using Digital I/O cards, you should power-up the console first, then turn on your
Tape machines, or whatever is connected to the cards. The console is the synch master and so
must be on before the slaves are powered up.
Automation Recall
The FX window level input master, as far as automation recall is concerned, is part of the console (i.e. it is part of the Aux master), not part of the patch module settings. This is not a
recallable wet/dry mix control. This level indicator doesn’t get updated when a patch is recalled
(nor does the on/off state of the module), and is actually updated by the console operation (via
manual control or snapshot recall).
Addendum
AD-1
™
Mackie Designs Inc.
16220 Wood-Red Rd. NE • Woodinville, WA 98072 • USA
800/898-3211 • Outside the US: 425/487-4333
Fax: 425/487-4337 • www.mackie.com
email: [email protected]
©1998 Mackie Designs Inc. All rights reserved. #820-076-00