1
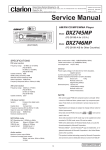
Owner’s manual
Mode d’emploi
Manual de instrucciones
DVH940
5.1CH SURROUND DECODER
•
DÉCODEUR SURROUND 5.1 CANAUX
•
DECSCODIFICADOR DE 5.1CH SURROUND
•
DVH940
Clarion Co., Ltd.
2003/12 (ABE/K)
All Rights Reserved. Copyright © 2003: Clarion Co., Ltd.
Printed in China / Imprimé en Chine / Impreso en China /
GP-978B
280-8080-00
English
Thank you for purchasing the Clarion product.
∗ Please read this owner’s manual in its entirety before operating this equipment.
∗ After reading this manual, be sure to keep it in a handy place (e.g., glove compartment).
∗ Check the contents of the enclosed warranty card and keep it carefully with this manual.
∗ The DVH940 can be operated by the CeNET-compatible Clarion Center Units.
These operating instructions note functions which change as the result of connecting the DVH940 to
one of the above components.
Contents
1.
2.
3.
4.
5.
6.
7.
8.
9.
PRECAUTIONS .............................................................................................................................. 2
FEATURES ...................................................................................................................................... 3
SPECIFICATIONS ........................................................................................................................... 4
CONFIRM BEFORE OPERATION .................................................................................................. 5
OPERATIONS ................................................................................................................................. 7
Operations (DXZ745MP) ................................................................................................................. 7
Setting Acoustic Features ................................................................................................................ 8
WIRING TECHNIQUES .................................................................................................................. 11
Name of Parts ................................................................................................................................. 11
How to Wire This Unit .................................................................................................................... 12
INSTALLATION ............................................................................................................................. 13
Installation Precautions ................................................................................................................. 13
Installation Example (for installation beneath seat) ....................................................................... 13
SYSTEM EXPANSION .................................................................................................................. 14
IN CASE OF DIFFICULTY ............................................................................................................ 16
1. PRECAUTIONS
1. The DVH940 can easily be damaged by
moisture, high temperatures or high humidity.
Keep the inside of the car clean and well
ventilated.
2. Never subject the DVH940 to strong shocks
or open its case. Doing so may result in
damage.
3. Use a soft, dry cloth to wipe dirt off the
DVH940. Never use a hard cloth or thinner,
alcohol, etc. For tough dirt, apply some cold
or lukewarm water to a soft cloth and wipe off
the dirt gently.
4. When the main unit is switched to the traffic
announcement or PTY interrupt reception
while using the DVH940, the effect from
DVH940 doesn’t work.
5. Some tracks may sound distored when
adjustment; this is normal and not a cause for
concern.
2
DVH940
CAUTION
CHANGES OR MODIFICATIONS NOT
EXPRESSLY APPROVED BY THE
MANUFACTURER FOR COMPLIANCE COULD
VOID THE USER’S AUTHORITY TO OPERATE
THE EQUIPMENT.
INFORMATION FOR USERS:
CHANGES OR MODIFICATIONS TO THIS
PRODUCT NOT APPROVED BY THE
MANUFACTURER WILL VOID THE
WARRANTY.
■
English
2. FEATURES
Onboard DTS/Dolby Digital/Pro Logic II Decoder
• Independent playback of DVD video surround format DTS, Dolby Digital 5.1ch.
• Utilizes Pro Logic II with advanced digital matrix technology for 5.1 channel decoding of 2channel CD and radio.
■
Newly developed 32-bit DSP LSI with advanced processing
performance
• DSF function allows application of 6 sound field effect patterns following decoding of DTS,
Dolby Digital 5.1ch format, or Dolby Pro Logic II signals.
• The parametric equalizer function allows you to adjust the frequency characteristics to suit the
car.
■
High precision 96 kHz / 24 bit D/A converter used in all channels
■
New-type digital input connectors
• New digital input connectors support sampling rate of 96 kHz.
32 kHz: MP3 etc.
44.1 kHz: CD, CD-R, CD-RW, MD
48 kHz: DVD video
96 kHz: DVD video
■
Supports analog input connectors (RCA 2ch)
(when optional control unit is connected)
• When center unit or other RCA 2ch output is connected to analog input connectors, Dolby Pro
Logic II function can convert to 5.1ch output.
■
Thin-line chassis can be installed beneath seat.
■
DTS
• DTS (Digital Theater System) is an audio compression technology developed by Digital
Theater Systems, Inc. Its low compression ratio provides a higher quantity of data and thus
higher quality sound.
∗ Manufactured under license from Digital Theater Systems, Inc. US Pat. No. 5,451,942,
5,956,674, 5,974,380, 5,978,762 and other world-wide patents issued and pending.
“DTS” and “DTS Digital Surround” are registered trademarks of Digital Theater Systems, Inc. ©
1996, 2000 Digital Theater Systems, Inc. All Rights Reserved.
■
Dolby Pro Logic II
• Using the newest in digital matrix technology, Dolby Pro Logic II is a matrix decoder technology
which further improves earlier Dolby Pro Logic. This new technology produces superb 5.1ch
sound even with CDs and other stereo sources.
The surround channel is converted to full-band (20 Hz-20 kHz) stereo, thus allowing stereo
sources to be enjoyed with the impact of 5.1ch sound. Four modes can be set in accordance
with the playback source, including MUSIC mode, MATRIX mode, MOVIE mode, and
VIRTUAL mode.
• Dolby Digital is a totally discrete digital 5.1 channel format. Signals for the front 3 channels, 2
surround channels, and the low-frequency 0.1 channel are recorded discretely, so no crosstalk
occurs between channels, and the sense of placement and depth of the sounds is reproduced
faithfully.
∗ Manufactured under license from Dolby Laboratories.
“Dolby”, “Pro Logic” and double-D symbol are trademarks of Dolby Laboratories.
DVH940
3
English
3. SPECIFICATIONS
Digital/Analog Processing Section
List of accessories
Frequency response:
20 Hz - 44 kHz (Linear PCM 96 kHz)
S/N ratio:
95 dB or more
(IHF-A, sound-field effects OFF)
Separation:
80 dB or more (with digital input)
Total harmonic distortion:
0.01% or less (with digital input)
Analog output / impedance:
4 V / 330 Ω (6ch output)
6
DSP/EQ section
DSF:
6 patterns
P.EQ functions
Band:
3-band × 3 ch (center, front, surround)
F (central frequency):
20 Hz - 20 kHz (1/3 octave step, 31 points)
Q curve:
1 - 20 (5 points)
Gain:
±12 dB
7
8
9
0
!
General
Power supply:
DC 14.4 V (10.8 - 15.6 V)
Ground:
Negative ground
Power consumption:
480 mA
Dimensions:
230 (W) × 25 (H) × 170 (D) mm
Weight:
900 g
Note:
• Specifications and design are subject to change
without notice for further improvement.
4
DVH940
×2
1
2
3
4
5
6
7
8
9
0
!
×2
×4
×4
×1
DVH940 ......................................................
CeNET cable (5 m) .....................................
Owner’s manual ..........................................
Warranty .....................................................
Optical Digital Cable (5 m) ..........................
RCA PIN Cable (5 m) .................................
Mounting brackets ......................................
Cord clamps ...............................................
Canoe clips .................................................
Mounting screws .........................................
Cable Clip ...................................................
1
1
1
1
1
1
2
2
4
4
1
English
4. CONFIRM BEFORE OPERATION
This component does not operate independently as an stand-alone unit and must be used in
conjunction with an operational Clarion Source Unit (CeNET supported), or a 5.1 CH surround
decoder control unit (DVC920).
See section “8. SYSTEM EXPANSION” (P. 14) for details regarding other compatible components.
■
CeNET Cable
The CeNET cable used must not be over 20 m long (including the length of the CeNET branch cable
CCA-519). When making connections be sure that your cable length is not over 20 m.
■
Optical Digital Cables (sold separately or furnished)
Optical digital cables (sold separately or furnished) connected to this unit differ depending on the
model of CeNET component involved.
Consult your dealer regarding the kind of optical digital cable required for your component.
Likewise, consult the operating instructions accompanying your component for details regarding
connections.
CeNET connections
DCA-005 (5m)
(furnished)
DCA-008 (1.5m)
(sold separately)
(Gray)
CeNET AV center unit
CeNET DVD changer
(Black)
(Black)
5.1ch surround
decoder
(Gray)
CeNET CD changer
DCA-006 (5m)
(sold separately)
DVH940
5
■
Speaker System
English
• To get maximum enjoyment from the
sound-field functions of this component,
the use of a 5.1ch speaker system is
recommended. To demonstrate optimum
audio response, modify the adjust
mode’s default settings for “SP-SEL,”
“FILTER,” “SP-GAIN,” and “DELAY” in
accordance with the composition of your
speaker system (see P.8-10).
Note that in order to play 2-ch sound
sources (music CDs, etc.) in 5.1ch mode,
one of the Dolby Pro Logic II modes must
be selected, or DSF must be set to ON
(see P. 7).
Center
speaker
Front speaker
(L)
Front
speaker (R)
Rear
speaker
(R)
Rear
speaker (L)
Sub-woofer
■
DVD Video
• When playing a DTS-compatible DVD video or music CD, some noise may be heard for the
short interval required for this unit to detect the DTS signal.
• During playback of Dolby digital or DTS source, some sound interruption may be heard if the
search/skip/pause modes are operated before playback.
■
Digital Inputs (When Optical Digital Cable is Connected)
• When optical digital cable is used to connect components like a DVD changer, the digital
signals are given precedence in processing.
• When Dolby Digital (other than 2ch), DTS, Linear PCM (96 kHz) or other digital signals are
input, the Dolby Pro Logic II mode can be selected, but the mode will not perform ordinary
audio processing.
• When MP3 (32 kHz) and Linear PCM (96 kHz) digital signals are input, the Parametric
Equalizer (P.EQ) function can be operated, but it will not perform audio processing.
■ Sound Effects and Sound-Field Compensation with Digital and Analog Signals
Input Signal
Sampling Rate
fs=32 kHz
fs=44.1 kHz
Digital signals
Analog signals
Recording
Format
MP3 etc.
CD-DA
Linear PCM
fs=48 kHz
Dolby Digital
fs=96 kHz
—
DTS
Linear PCM
—
Recording
channels
2ch
2ch
2ch
2ch
(Not 2ch)
2ch~5.1ch
2ch
2ch
PLII
function
O
O
O
O
×
×
×
O
DSF
function
O
O
O
O
O
O
O
O
P.EQ
function
×
O
O
O
O
O
×
O
O: Adjustable
×: Adjustable without audio processing
(Analog signals: when connected to CeNET connectors or analog input connectors)
6
DVH940
English
5. OPERATIONS
Operations (DXZ745MP)
Dolby Pro Logic II Menu Selection
About the Dolby Pro Logic II Mode
• Initial setting is [PL II OFF].
■ MUSIC mode
• Suitable for CDs and other stereo sources.
■ MATRIX mode
• Suitable for AM/FM radio sources.
■ MOVIE mode
• Suitable for DVD video movies.
■ VIRTUAL mode
• Suitable for movies and other audio sources.
1. Press the [ADF] button to enter PLII mode.
2. Press the [a] or [d] button to select PLII.
[MUSIC] ➜ [MATRIX] ➜ [MOVIE] ➜
[VIRTUAL] ➜ [PLII OFF]
3. Press the [ADF] button to return to the
original mode.
Notes:
• The PL II menu cannot be selected when [SPSEL] has been used to set center speakers and
rear (surround) speakers to [OFF].
• Sound is produced from the center speaker only
when either Dolby Pro Logic II mode, or DSF
mode is set to ON (2-channel source playback).
DSF Setting
DSF(Digital Sound Field) makes it possible
through sound simulation to enjoy the acoustic
experience you would have in a concert hall or a
live performance hall.
• Initial setting is [OFF].
1. Press the [ADF] button to enter DSF mode.
2. Press the [a] or [d] button to select DSF
menu.
1 HALL: Large concert hall.
2 CHURCH: Charch with a vaulted ceiling.
3 STADIUM: Large stadium without roof or
walls.
4 LIVE: Live performance hall, larger than a
jazz club.
5 JAZZCLUB: Jazz club with a low ceiling.
6 THEATER: Movie or drama theater.
7 OFF: DSF off.
3. Press the [ADF] button to return to the
original mode.
Setting parametric equalizer
(P.EQ)
The parametric equalizer function allows you to
adjust the frequency characteristics to suit the
car.
• The initial value provides the following settings
for all speakers.
FREQ = 1kHz, Q =1, GAIN = 0dB
• Some distortion may be heard if the [ROTARY]
knob is turned rapidly.
1. Press and hold the [ADJ] button for 1 second
or longer to enter adjust mode.
2. Press the [a] or [d] button to change to
the [P.EQ E] display.
3. Press the [ENT] button to display the
adjustment item.
Press the [a] or [d] button to select
[EFFECT], [SIGNAL], [SP-SEL], [BAND],
[FREQ], [Q], [GAIN] or [SIGNAL].
●EFFECT: P.EQ effect is turned on or off.
• Initial setting is [OFF]
●SIGNAL: selects the adjustment signal.
• SGNL P-NOIS: set when pink noise is to
be used
• SGNL MUSIC: set to use music signals
●SP-SEL: selects the speakers whose P.EQ
value is to be adjusted.
• SP FRONT: front speaker
• SP CENTER: center speaker
• SP SURROUND: surround speaker
●BAND: selects the frequency band (Band
1 to 3) to adjust.
●FREQ: selects the frequency for bands 1
to 3.
• The range of adjustments is from 20 Hz
to 20 kHz.
●Q: sets the Q curve.
• Larger numbers produce a sharper Q
characteristics curve while smaller
numbers produce gentler characteristics.
Adjustments are made in the range Q1
to Q20.
●GAIN: adjusts the output level.
• Adjustments are made in the range -12
dB to +12 dB.
DVH940
7
English
Operations (DXZ745MP)
Setting Acoustic Features
4. Turn the [ROTARY] knob clockwise or
counterclockwise to adjust each value.
Turning speakers on or off
(SP-SEL)
5. Press the [ADJ] button to return to the
original mode.
The center speaker, rear (surround) speakers
and sub woofer have to be set to on or off to
achieve maximum sound quality.
• The initial setting is [ON].
1. Press and hold the [ADJ] button for 1 second
or longer to enter adjust mode.
2. Press the [a] or [d] button to change to
the [SP-SEL E] display.
3. Press the [ENT] button to display the
adjustment item.
Press the [a] or [d] button to select
[CENTER-SP], [SURROUND-SP] or [SUBWOOFER].
• CENTER-SP: center speaker
• SURROUND-SP: rear (surround) speaker
• SUB-WOOFER: subwoofer
4. Turn the [ROTARY] knob clockwise or
counterclockwise to select [ON] or [OFF].
• ON: Speaker installed
• OFF: Speaker not installed
• When a sub woofer is used, set [ON+],
[ON-] or [OFF]. The normal setting is
[ON+], but use the [ON-] setting when this
provides a better effect for low frequency
range.
5. Press the [ADJ] button to return to the
original mode.
Setting speaker filter
frequency (FILTER)
This function is used to set a filter frequency that
suits the frequency characteristics of the used
speakers.
• The initial value of [FRONT HPF], [SRD HPF]
is [THRGH] (no filter).
• The initial value of [CENTER HPF], [SUB-W
LPF] is [120 Hz]
• A speaker that was turned off in the Section
“Turning speakers on or off (SP-SEL)” is not
displayed.
1. Press and hold the [ADJ] button for 1 second
or longer to enter adjust mode.
2. Press the [a] or [d] button to change to
the [FILTER E] display.
3. Press the [ENT] button to display the
adjustment item.
8
DVH940
Setting Acoustic Features
5. Turn the [ROTARY] knob clockwise or
counterclockwise to select the frequency.
• In case of [FRONT HPF] and [SRD HPF],
the frequency is 50 Hz, 80 Hz, 120 Hz and
[THRGH] (no filter).
• In case of [SUB-W LPF], [CENTER HPF]
the frequency is 50 Hz, 80 Hz or 120 Hz.
6. Press the [ADJ] button to return to the
original mode.
Adjusting speaker output
level (SP-GAIN)
Use the built-in test tone function of the unit to
adjust the speaker output level to the same level.
• The initial value is [0 dB].
• A speaker that was turned off in the Section
“Turning speakers on or off (SP-SEL)” is not
displayed.
Adjusting speaker delay time
(DELAY)
The timing when the sound of each speaker
reaches the listening position depends on
speaker installation and the size of the car.
Adjust the delay time of each speaker so that the
sound of all speakers reach the listening position
at the same time as the sound from the front
speakers.
• The initial value is [0 ms].
• A speaker that was turned off in the Section
“Turning speakers on or off (SP-SEL)” is not
displayed.
1. Press and hold the [ADJ] button for 1 second
or longer to enter adjust mode.
2. Press the [a] or [d] button to change to
the [DELAY E] display.
3. Press the [ENT] button to display the
adjustment item.
4. Press the [a] or [d] button to select the
speaker to adjust.
• CTR-SP: center speaker
• SRD-SP: rear (surround) speaker
1. Press and hold the [ADJ] button for 1 second
or longer to enter adjust mode.
5. Turn the [ROTARY] knob clockwise or
counterclockwise to select the delay time.
• The [CTR-SP] adjustment range is 0 to 5
ms.
• The [SRD-SP] adjustment range is 0 to 15
ms.
2. Press the [a] or [d] button to change to
the [SP-GAIN E] display.
6. Press the [ADJ] button to return to the
original mode.
3. Press the [ENT] button to display the
adjustment item.
• In the adjustment mode, the test tone is
output from the selected speaker.
4. Press the [a] or [d] button to select the
speaker to adjust.
• FRONT-L: front left speaker
• CENTER: front center speaker
• FRONT-R: front right speaker
• SURROUND R: right rear (surround)
speaker
• SURROUND L: left rear (surround)
speaker
• SUB-WOOFER: rear subwoofer
5. Turn the [ROTARY] knob clockwise or
counterclockwise to adjust the gain.
• The adjustment range is –10 dB to +10 dB.
6. Press the [ADJ] button to return to the
original mode.
DVH940
9
English
4. Press the [a] or [d] button to select the
speaker to adjust.
• FRONT HPF: high pass filter for front
speakers
• CENTER HPF: high pass filter for the
center speaker
• SRD HPF: high pass filter for the rear
(surround) speakers
• SUB-W LPF: low pass filter for the
subwoofer
Setting Acoustic Features
English
Setting the Dolby Digital
functions (Dolby D)
● Dynamic range compression
function (D-RANGE):
This function compresses the dynamic range of
Dolby Digital to maintain low level sounds such
as actor conversation and suppress loud sound
volumes.
These functions are only available on Dolby
Digital DVD discs.
1. Press and hold the [ADJ] button for 1 second
or longer to enter adjust mode.
2. Press the [a] or [d] button to change to
the [Dolby D] display.
3. Turn the [ROTARY] knob clockwise or
counterclockwise to select the value from
[MAX], [STD] or [MIN].
• The initial value is [MAX].
• MAX: maximum dynamic range mode of
the original source
• STD: recommended mode for standard
listening
• MIN: the most compressed dynamic range
mode that renders even low sounds easy
to hear.
4. Press the [ADJ] button to return to the
original mode.
MUSIC Mode Fine
Adjustments (PL II CONT)
When MUSIC Mode has been selected on the
PL II menu, finer adjustments can be made when
desired.
CTR WIDTH is not available when center
speaker is turned off in the section “Turning
speakers on or off (SP-SEL)”.
1. Press and hold the [ADJ] button for 1 second
or longer to enter adjust mode.
2. Press the [a] or [d] button to show the [PL
II CONT E] display.
3. Press the [ENT] button to display the
adjustment item.
4. Press the [a] or [d] button to select the
item.
10
DVH940
● PANORAMA (Y or N):
Selecting PANORAMA mode will extend the
front sound field image to the rear. If
surround effect does not seem to be
presented sufficiently, select the setting
position [Y].
• The initial setting is [N].
● DIMENSION (0 to 6):
Selecting DIMENSION mode will shift the
sound field image to the front or the rear. If
the balance of the sound field image is too
much pulled towards the front or rear, the
balance front/rear can be corrected.
The adjusting value 3 is the center position.
The range of 3 to 0 shifts the balance front/
rear to the rear. The range of 3 to 6 shifts the
balance front/rear to the front.
• The initial value is [3].
● CTR WIDTH (0 to 7):
Selecting CTR WIDTH mode will adjust the
localization of the center channel between
the center speaker and the front speaker L/R.
Distributing the center channel sound to the
right and left will increase the integrated
sound field image, providing you with an
natural spatial feeling of sound.
Setting to the value 0 will produce the center
sound with the center speaker.
Setting to the value 7 will distribute the center
sound to the front speaker L/R as the existing
stereo sound does.
• The initial value is [3].
5. Turn the [ROTARY] knob clockwise or
counterclockwise to adjust the value.
6. Press the [ADJ] button to return to the
original mode.
English
6. WIRING TECHNIQUES
Name of Parts
[STAND-ALONE/SLAVE] switch
* The factory default setting is
SLAVE position.
SLAVE
STAND
ALONE
1 CeNET connectors
Connect to center unit using CeNET cable.
2 Front RCA output connectors
Connect to external power amplifier using
RCA pin cable.
3 Rear RCA output connectors
Connect to external power amplifier using
RCA pin cable.
4 Sub-woofer RCA output connectors
Connect to external power amplifier using
RCA pin cable.
5 Center speaker RCA output connectors
Connect to external power amplifier using
RCA pin cable.
6 Digital input connector
Connect to DVD/CD changer using optical
digital cable (sold separately or included).
* Connect to black connector side
7 Cable clip hole
Insert cable clip to hold optical digital cable in
place.
8 RESET switch
Press to reset circuitry if no sound is
produced.
Use When Connecting Optional
Control Unit (DVC920)
9 [STAND-ALONE / SLAVE] switch
• Set to STAND ALONE when connecting
a control unit.
• Leave at SLAVE position when no
control unit is connected.
0 Analog input connectors (RCA)
Connect to center unit’s RCA 2ch output.
Note:
• The following are enabled only when a
control unit is connected.
! Control unit 8P mini DIN plug
Connect to control unit.
@ Control unit power connector
Connect control unit’s power cable here.
* Leave tape in place when not in use.
Note:
• Be sure the CeNET cable is connected when
pressing the [RESET] switch.
DVH940
11
How to Wire This Unit
English
Perform the settings and
connections in the order
indicated by the drawing
below.
1
2
3
4
CAUTION
Throughout the process of wiring this
unit, disconnect the negative (–) terminal
of your automobile’s battery, and leave it
disconnected until completely finished.
Handling wires while the terminal is
connected could result in dangero
electrical shock or injury if an scccidental
short circuit shoud occur.
CeNET Cable
• To connect a CeNET cable, hold it with the
connector facing as shown, and insert
securely.
• When disconnecting a CeNET cable, grasp
the slide cap and squeeze gently.
Optical Digital Cable
• Insert the black connector securely into the
digital signal input connector until it locks.
The cable clip can be used to secure up to
two optical digital cables.
• When disconnecting a optical digital cable,
squeeze the tabs at the right and left sides
of the connector, and pull gently.
Note:
• The optical digital cable should not be bent
with a gentle arc radius of 1.5 cm or less. If
it is bent sharper than this, the performance
of the cable will be greatly reduced and the
cable may be damaged.
CeNET connector
Sliding cap
CeNET cable
Note:
• Route the CeNET cable with plenty of extra room
so that the connector will not become
disconnected accidentally.
Optical Digital cable
(black connection)
RCA Pin Cable
• When connecting an RCA pin cable, be
sure to confirm the source of the
connection first.
[RESET] switch
• Following completion of wiring, press the
[RESET] switch to return to default
settings.
Cable clip
Squeeze right/
left tabs
Note:
• Always turn the main [POWER] switch [OFF]
before connecting or disconnecting digital fiberoptic cables.
12
DVH940
English
7. INSTALLATION
Installation Precautions
Case
CAUTION!
Case
• Install correctly, using only the screws
supplied as accessories. Using other
screws may result in damage or injury.
Damage
8 mm max.
Installation Example (for installation beneath seat)
1. Use the supplied screws (M4x8) to attach the accessory mounting bracket to the sides of the unit.
• The main unit’s case has been provided with 3 screw holes on either side. Select the screw
holes required for your installation conditions.
2. Position the unit on the floor mat, then mark and open holes in the floor mat so they are aligned
with the mounting bracket’s holes.
3. Press the accessory canoe clips from the underside upward through the mat and into the mounting
bracket holes.
Mounting
screws
Mounting bracket
Mounting
bracket
Mounting
screws
Floor mat
Canoe clips
Canoe clips
DVH940
13
English
8. SYSTEM EXPANSION
Refer to the Owner’s manual for the DVC920 for an example of the stand-alone system connections.
RCA video cable (yellow);
(furnished with DVD changer)
Monitor
CeNET DVD Changer
Gray
1-DIN Center Unit
CeNET Cable (furnished with
component to be connected)
RCA pin cable (sold separately)
4CH power
amplifier
5.1ch surround
decoder
Speaker wire
Black
RCA pin cable
(furnished)
Optical Digital cable
DCA-005 (5 m) (furnished)
DCA-008 (1.5 m) (sold separately)
* Connect properly in accordance
with color of connectors
RCA pin cable (sold separately)
Set the 5.1ch surround decoder’s
[STAND-ALONE / SLAVE] switch to
the [SLAVE] position.
SLAVE
14
DVH940
STAND
ALONE
Front speakers
Rear speakers
RCA pin cable
(furnished with center speaker)
Powered center speaker
Built-in amplifier
Amplifier
Powered sub-woofer
Built-in amplifier
English
RCA video cable (yellow);
(furnished with DVD
changer)
Monitor
CeNET DVD Changer
Gray
1-DIN Center Unit
(DXZ935)
CeNET Cable (furnished with
component to be connected)
RCA pin cable
(sold separately)
4CH power amplifier
5.1ch surround
decoder
Speaker wire
Black
Optical Digital cable
DCA-005 (5 m) (furnished)
DCA-008 (1.5 m) (sold separately)
* Connect properly in accordance
with color of connectors
RCA pin cable
(sold separately)
Set the 5.1ch surround decoder’s
[STAND-ALONE / SLAVE] switch to
the [SLAVE] position.
SLAVE
Front speakers
Rear speakers
RCA pin cable
(furnished with center speaker)
Powered center speaker
Built-in amplifier
Amplifier
Powered sub-woofer
Built-in amplifier
STAND
ALONE
DVH940
15
English
9. IN CASE OF DIFFICULTY
Problem
Nothing happens when
buttons are pressed.
Cause
Measure
Use a narrow stick to press the [RESET] switch on
The microprocessor has
malfunctioned due to noise, the side of the 5.1ch surround decoder. Note that
when the [RESET] switch is pressed, all titles and
etc.
other data placed in memory will be erased.
5.1ch surround
decoder
No sound produced
from center speaker
The source being played is
a 2-ch source lacking a
center channel (music CD,
linear PCM stereo, etc.).
[RESET] switch
Either choose one of the Dolby Pro Logic II modes,
or set DSF effect to ON (see P. 7).
Dolby Pro Logic II or DSF
is set to OFF.
The center speaker setting
is OFF (default setting is
ON).
16
DVH940
Set center speaker (SP-SEL) to ON (see P. 8)