1
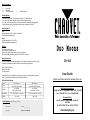
Package Contains:
1 x
2 x
1 x
Duo Moons
BRL Bulbs
Colored Moonflower
1 x
White Moonflower
Troubleshooting
•
•
•
•
If
If
If
If
the unit is not functional – check main power supply is ‘on’ and check fuses.
the unit is functional but lamp does not light - lamp may require replacing.
the unit is not moving to the music check the sound-activation adjustment (when applicable)
after trying this solution you still have a problem contact your dealer or CHAUVET.
Contact Chauvet
USA
Tecnical Assistance: 1-800-762-1084 (954) 929-1115
E-Mail [email protected]
Europe
Technical Assistance: (0113) 276-0755
E-Mail [email protected]
Duo Moons
Caution
Do not obstruct the air vents.
Do not touch unit or lamps while hot.
Never put any objects through the air grill on the top of the unit.
No user serviceable parts inside, please refer to CHAUVET for service.
Power Connections
The unit is supplied with a power plug appropriate to its voltage and destination. Should any other
connections be required they must be carried out with the following configuration.
CH-160
Earth = Green/Yellow cable
Neutral = Blue cable
Live = Brown cable
In the USA & Europe, it is required that all plugs are 3-pin type i.e. with Earth/Ground connection.
In the UK, it is required that all mains plugs are fitted with 5A fuses.
Please read these instructions carefully befor use
Technical Specifications
Power
120V~60Hz AC
Fuse
Dimensions
20mm Glass 0.5A Fast Blow
2 x 12V 50W
Part No BRL 12V 50W
2 x 12V 50W
Part No BRL 12V 50W
279 x 279 x 160mm / 11 x 11 x 6.3in
279 x 279 x 160mm / 11 x 11 x 6.3in
5kg / 11lbs
5kg / 11lbs
Weight
User Informtion
(Please complete for your records)
Date Purchased:
Dealer Stamp
230V~50Hz AC
20mm Glass 1A Fast Blow
Lamps
/
User Guide
/
World-wide Headquarters:
3000 North 29th Ct., Hollywood, Florida, USA, FL 33020
Tel: +1-954-929-1115 Fax: +1-954-929-5560
European Office:
Unit 18, Hunslet Trading Estate, Leeds, UK
LS10 1BL
Tel: (0113) 276-0755 Fax: (0113) 277-6675
Serial No: ________________
Model: CH-160 DUO MOONS
www.ChauvetLighting.com
Remember CHAUVET also provide a selection of effect dishes which are interchangeable for this unit.
At the Rear:
• Screw Cap Fuseholder
• Mounting Bracket
Replacing Lamps
• Fan
1. Disconnect from main power supply before attempting to replace either lamps or fuse.
2. Ensure that the unit is sufficiently cool, before removing blown lamps.
3. Never touch new lamps with your fingers; use a tissue or a cloth.
• Lamp Replacment Cover
• Lenses
Fig. 1
In order to replace the lamp, disconnect from main power supply first, and unscrew the lamp replacement
cover, which is highlighted on the diagram (fig.1). Only use the appropriately rated lamps as use of any
other lamp type may cause the unit to be non-operational.
Introduction
Due to the nature of halogen lamps it is vitally important that you do not touch the new replacement lamp
with your fingers, as this will reduce lamp life considerably. Once again a tissue or cloth can be used for
fitting the replacement lamp.
Congratulations on the purchase of your new CHAUVET lighting effect. We are confident you will enjoy
many trouble free hours with this unit. To assist with the care and use of the product we have prepared this
short guide.
Finally before using, check that the lamp is housed correctly in the lamp holder and that the lamp replacement cover has been screwed back into place.
Operation
If after replacement of the lamp, the unit is still not working then please contact your dealer or CHAUVET
for servicing.
Before connecting this unit to the mains power supply for the first time you must first install the lamps.
(See ‘Replacing Lamps’ for details).
Replacing Fuses
This lighting effect has been designed to function on a mains power supply of either 120V~60Hz or
230V~50Hz and has been fitted with a suitable power plug for use with your local voltage. Check the label
and voltage selector switch (if fitted) on the unit and the power plug for the correct voltage.
When connected to the mains power supply the unit should illuminate. The unit will also begin to run
through its pre-programmed patterns. Some of these patterns are sound activated.
Due to the high operating temperature of halogen lamps it is advisable that the effect be used in well
ventilated areas taking care not to obstruct the air vents. After use allow time to ‘cool’ for safety and to
ensure lamp life before moving or touching.
The duty cycle for this effect should be no more than 15 minutes on then 15 minutes off.
If the unit does not function at all when connected to the main power supply i.e. the mechanism does not
spin. Then it is highly likely that the fuse has blown.
Disconnect from main power supply before attempting to replace either lamps or fuse.
In order to replace the fuse, disconnect from the main power supply first, and then unscrew the fuseholder
cover to reveal the fuse. The unit has a label attached which indicates the correct fuse rating and you will
also find this listed as part of the specifications for the unit later in this guide. It is most important that
replacement fuses are of the correct rating. Failure to use the correct fuse could damage the lighting effect
beyond economic repair.
The fuse should simply be placed inside the holder and the screw cap replaced, when this is done connect
to the main power supply to check. If the unit is still not working then please contact your dealer or
CHAUVET for servicing.
Installation / Mounting
Although this unit can be used in an upright position, it is recommended that, for safety purposes, your
lighting effect be properly mounted using a suitable hanging clamp and safety cable. CHAUVET offers a
range of items, which are ideal for safe mounting.
Cleaning
Use in a well-ventilated area without obstruction to air vents.
The most important part of your lighting effect to keep clean is the lens as it allows the light output to transmit. This should be cleaned with a soft damp cloth. The body of the unit may also be cleaned in the same
way. We recommend internal cleaning be carried out by a fully qualified technician.
Replacing Effect Dish
Maintenance & Servicing
Disconnect from main power supply before attempting to replace effects dish.
Work on internal parts should be carried out by a qualified technician. Removal of covers other than the
front to replace lamp or effect dish, or the fuseholder is considered a breach of warranty and will not be
covered under any such agreement unless authorized first by the company.
Simply remove top cover which will reveal the lamps, holders and dishes. The cover is removed by
unscrewing four screws on the top and each side. The dish is held in place with two small screws, which
when removed allow the dish to be manipulated from the motor shaft. Replace with chosen effect dish,
tighten screws and replace cover.