1
Für die Serie/
For series / .
Para la serie
DP151
DP161
DE
Digitaler Foto-Schlüsselanhänger
Benutzerhandbuch.............................................Page 2
EN
Digital Photo Keychain
Instruction Manual...........................................Page 15
ES
Llavero de Fotografía Digital
Manual de Instrucciones................................Pagina 27
Dieses Benutzerhandbuch vor dem Gebrauch sorgfältig durchlesen •
Please read carefully before use • Léa el manual antes de usar
SICHERHEITSHINWEISE
Deutsch
Vom Kunden auszufüllen:
Geben Sie nachfolgend die Seriennummer ein;
diese finden Sie an der Unterseite des Geräts. Diese
Informationen für zukünftige Verwendungszwecke
aufbewahren.
Modellnr
Seriennr
Der Blitz mit Pfeilspitze im gleichseitigen Dreieck soll den Benutzer vor nicht isolierter
„gefährlicher Spannung“ im Inneren des Gehäuses warnen, welche zu einem Stromschlag führen kann.
Das Ausrufezeichen im gleichseitigen Dreieck soll den Benutzer auf wichtige Bedienungs- und Wartungshinweise in der dem Produkt beiliegenden Literautur hinweisen.
WARNUNG:
Um die Gefahr eines Stromschlags zu vermeiden, dieses Gerät vor Regen und Feuchtigkeit schützen.
Im Inneren des Geräts befindet sich gefährliche Hochspannung. Gehäuse nicht öffnen.
Um Informationen über das Recycling oder die Entsorgung dieses Produkts zu
erfahren, wenden Sie sich bitte an Ihre Behörden vor Ort oder besuchen Sie die
Electronics Industries Alliance unter: www.eiae.org.
Coby Electronics GmbH [2]
www.cobygermany.de
VERPACKUNGSINHALT
INHALTSVERZEICHNIS
SICHERHEITSHINWEISE................................................. 2
INHALTSVERZEICHNIS.................................................... 3
Deutsch
Please make sure the following items are included in the
product packaging. If any items are missing, contact your
local dealer.
●● Photo Keychain
VERPACKUNGSINHALT................................................... 4
●● USB Cable
EIGENSCHAFTEN & TECHNISCHE DATEN................... 4
●● Installation Manual
TASTEN AUF EINEN BLICK............................................. 5
EIGENSCHAFTEN & TECHNISCHE DATEN
DISPLAY AUF EINEN BLICK............................................ 5
●● Speichert und zeigt bis zu 60 oder 120 Bilder*
FOTO-SCHLÜSSELANHÄNGER AUFLADEN UND ANSCHLIESSEN..................................................................... 5
●● Unterstützt die Bildformate JPEG, BMP und GIF
●● LCD-Farbbildschirm
INBETRIEBNAHME........................................................... 6
●● Bilder-Slideshow und digitale Uhr
PHOTO VIEWER SOFTWARE FÜR WINDOWS.............. 6
●● USB-Port für Datenübertragung und zum Aufladen
●● Integrierte, wiederaufladbare Batteri
PHOTO VIEWER SOFTWARE FÜR MACINTOSH.......... 8
FUNKTIONEN HAUPTMENÜ.......................................... 11
WICHTIGE SICHERHEITSHINWEISE............................ 13
COBY Electronics Technischer Kundendienst.......... 14
Coby Electronics GmbH
[3]
Die maximale Kapazität kann je nach Ursprung
der Bilder variieren.
DP151: 60 Bilder
DP161: 120 Bilder
www.cobygermany.de
TASTEN AUF EINEN BLICK
Deutsch
1
Zurück
2
Wiedergabe / Enter (Einmal drücken)
Einschalten (Gedrückt halten)
Weiter
3
Coby Electronics GmbH [4]
4
Ring
5
LCD-Display
6
USB-Port: Den FOTO-SCHLÜSSELANHÄNGER per USB-Port an einen
Computer anschließen, um 1) die
Batterie zu laden und 2) Bilder auf
das Gerät zu übertragen.
www.cobygermany.de
DISPLAY AUF EINEN BLICK
Der FOTO-SCHLÜSSELANHÄNGER ist mit einer integrierten, wiederaufladbaren Batterie ausgestattet. Schließen
Sie zum Aufladen der Batterie diese an den USB-Port
eines eingeschalteten Computers an.
FOTO-SCHLÜSSELANHÄNGER aufladen:
2
●● Schließen Sie ein Ende des USB-Kabels an den USBPort des FOTO-SCHLÜSSELANHÄNGERS und das
andere Ende an den USB-Port eines eingeschalteten
Computers an.
●● Bei richtiger Verbindung erscheint die Anzeige
„USB Connected“.
Bildindikator:
●● Falls der FOTO-SCHLÜSSELANHÄNGER an einen
USB-Hub angeschlossen ist, muss dieser selbstbetrieben sein, um die Batterie aufladen zu können.
Die erste Nummer steht für die Nummer des
aktuellen Bildes.
1
Die zweite Nummer kennzeichnet die
Gesamtzahl an Bildern, die auf dem FOTOSCHLÜSSELANHÄNGER gespeichert sind.
Der FOTO-SCHLÜSSELANHÄNGER sollte vor
dem erstmaligen Gebrauch mindestens 4 Stunden
aufgeladen werden.
Nach einigen Sekunden verschwindet dieser
Indikator automatisch.
Uhrzeitanzeige:
2
Diese Anzeige kann über das Setupmenü einoder ausgestellt werden (Clock Disp > Display
Clock ON/OFF).
Coby Electronics GmbH
[5]
Eine neue oder leere Batterie muss vor dem
ersten Gebrauch aufgeladen werden, um eine
optimale Leistung über die Laufdauer hinweg zu
gewährleisten.
www.cobygermany.de
Deutsch
1
FOTO-SCHLÜSSELANHÄNGER AUFLADEN UND ANSCHLIESSEN
Deutsch
Bitte beachten Sie bei der Nutzung
dieses Geräts: Das Gerät darf nicht demontiert,
modifiziert, zerquetscht oder zerschlagen werden.
Übertriebene Krafteinwirkungen können zu Fehlfunktionen am Gerät führen.
Vor Temperaturen über 140°F (60°C) schützen.
Nicht verbrennen; ordnungsgemäß entsorgen.
Bei Temperaturen zwischen -4°F und 122°F (-20°C
und 50°C) lagern.
Von Kindern fernhalten.
INBETRIEBNAHME
Inbetriebnahme des FOTO-SCHLÜSSELANHÄNGERS:
Bilder auf den FOTO-SCHLÜSSELANHÄNGER übertragen
1. Schließen Sie den FOTO-SCHLÜSSELANHÄNGER
mithilfe des USB-Kabels an Ihren Computer an. Die
Photo Viewer Software startet automatisch.
2. Übertragen Sie die Bilder mithilfe der Photo Viewer
Software auf den FOTO-SCHLÜSSELANHÄNGER.
3. Beenden Sie die Photo Viewer Software und trennen
Sie den FOTO-SCHLÜSSELANHÄNGER von Ihrem
Computer.
FOTO-SCHLÜSSELANHÄNGER einschalten: Die
gedrückt halten, bis im Display „COBY“ erTaste
scheint.
FOTO-SCHLÜSSELANHÄNGER ausschalten:
●●
drücken, um das Hauptmenü zu öffnen. „OFF“
auswählen.
●●
erneut drücken, um das Gerät auszuschalten.
Coby Electronics GmbH Bilder auf dem FOTO-SCHLÜSSELANHÄNGER
anschauen
Nach dem Übertragen von Bildern auf das Gerät:
gedrückt halten, um das Gerät ein1. Die Taste
zuschalten.
2.
[6]
oder
drücken, um entweder das vorhergehende
oder nächste Bild anzuzeigen.
www.cobygermany.de
PHOTO VIEWER SOFTWARE FÜR WINDOWS
3
1
Wenn Ihr Computer mit Microsoft Windows
Betriebssystem ausgestattet ist, informieren Sie sich bitte
in diesem Abschnitt.
Software starten
4
2
Die Photo Viewer Software startet
automatisch, sobald Sie den FOTOSCHLÜSSELANHÄNGER an Ihren Computer angeschlossen haben. Mithilfe der Software können Sie Bilder
anzeigen, löschen und herunterladen.
Falls die Photo Viewer Software nach dem Anschluss
des FOTO-SCHLÜSSELANHÄNGERS an den Computer nicht automatisch startet, doppelklicken Sie auf
den Icon „Photo_Viewer“, um die Software vom Menü
„My Computer“ aus zu starten.
Die Photo Viewer Software erfordert Microsoft
Windows 2000, XP, oder Vista.
5
6
7
Software-Fenser auf einen Blick
1. Browser-Feld
2. Bedienfeld mit grundlegenden Funktionen
3. Gerät
4. Bilder auf dem FOTO-SCHLÜSSELANHÄNGER
5. Nummer des gewählten Bildes;
6. Gerätekapazität
Coby Electronics GmbH
[7]
www.cobygermany.de
Deutsch
Die mitgelieferte Photo Viewer Software ist
erforderlich, um Ihre digitalen Bilder auf den FOTOSCHLÜSSELANHÄNGER zu übertragen.
●● Die erste Nummer gibt an, wie viele Bilder sich auf
dem FOTO-SCHLÜSSELANHÄNGER befinden.
Bilder werden dem FOTO-SCHLÜSSELANHÄNGER
nicht hinzugefügt, bis Sie auf die Gerätefunktion] drücken.
staste [
●● Die zweite Nummer gibt an, wie viele Bilder
maximal auf den FOTO-SCHLÜSSELANHÄNGER
passen.
Deutsch
7. Statusleiste: Zeigt an, wann welche Funktion ausgeführt wird.
Bilder für das Display des FOTO-SCHLÜSSELANHÄNGERS vorbereiten
Computer-Funktionen
Im Bedienfeld für die grundlegenden Funktionen können Sie
für das FOTO-SCHLÜSSELANHÄNGER Display auf dem
Computer manuell die Größe einstellen, Bilder drehen und
ausschneiden:
●● Ausschneiden: Den gestrichelten Rahmen anklicken
und auf die gewünschte Position ziehen.
] oder [
●● Drehen: Klicken Sie auf [
] um das Bild entweder links oder rechts herum zu
drehen.
Funktionen des Geräts
Mit den Tasten im Feld „Gerät“ können Sie Bilder vom FOTO-SCHLÜSSELANHÄNGER übertragen oder löschen.
●● Bilder vom FOTO-SCHLÜSSELANHÄNGER auf Ihren
Computer übertragen: a) Wählen Sie vom FOTOSCHLÜSSELANHÄNGER das Bild, das übertragen
]
werden soll; b) klicken Sie dann auf die Taste [
] um alle Bilder von Ihrem
●● Klicken Sie auf [
FOTO-SCHLÜSSELANHÄNGER direkt auf Ihren
Computer zu übertragen.
●● Bilder vom FOTO-SCHLÜSSELANHÄNGER löschen:
a) Wählen Sie auf dem FOTO-SCHLÜSSELANHÄNGER die Bilder, die gelöscht werden sollen; b) klicken
].
Sie dann auf die Taste [
Um alle Bilder auszuwählen, klicken Sie im Feld
Gerät auf [
].
]
●● Speichern: Klicken Sie am Ende auf [
um die Einstellungen zu speichern und das Bild zum
„Gerät“ hinzuzufügen.
Dateien auf dem FOTO-SCHLÜSSELANHÄNGER
synchronisieren (übertragen)
Coby Electronics GmbH [8]
www.cobygermany.de
●● Beenden Sie die Photo Viewer Software und trennen
Sie den FOTO-SCHLÜSSELANHÄNGER vom
Computer.
Um Schäden am FOTO-SCHLÜSSELANHÄNGER oder
Ihren Bildern zu vermeiden, sollten Sie den FOTOSCHLÜSSELANHÄNGER nicht vom Computer trennen,
solange der Synchronisationsprozess im Gange ist.
PHOTO VIEWER SOFTWARE FÜR MACINTOSH
Die mitgelieferte Photo Viewer Software ist
erforderlich, um Ihre digitalen Bilder auf den FOTOSCHLÜSSELANHÄNGER zu übertragen.
Software installieren und starten
Installieren Sie die Photo Viewer Software auf Ihrem Computer, um Bilder auf
den FOTO-SCHLÜSSELANHÄNGER zu
übertragen. Mithilfe der Software können
Sie Bilder anzeigen, löschen und herunterladen.
Die Photo Viewer Software erfordert einen Computer mit Mac OS X 10.3.9 oder neuer.
8. Schließen Sie den FOTO-SCHLÜSSELANHÄNGER
an Ihren Computer an.
9. Öffnen Sie den Ordner „Photo_Viewer“ und doppeklicken Sie auf die Datei „MacDPFmate.zip“,um das
Programm zu installieren.
10.
Doppelklicken Sie auf den Icon „MacDPFmate“ auf Ihrem Computer, um die Photo Viewer
Software zu starten.
Wenn Ihr Computer mit Macintosh
Betriebssystem ausgerüstet ist, lesen
Sie bitte diesen Abschnitt durch.
Coby Electronics GmbH
[9]
www.cobygermany.de
Deutsch
Klicken Sie nach dem Abschluss aller Einstellungen
(Computer oder Gerätefunktionen) auf die Taste [
] um alle Vorgänge abzuschließen.
Photo Viewer Software auf einen Blick
SELANHÄNGER / Gesamtzahl der Bilder, die auf dem
FOTO-SCHLÜSSELANHÄNGER gespeichert werden
können.
4
FOTO-SCHLÜSSELANHÄNGER Bildfunktionen
Deutsch
1
5
Sie können Bilder auf den FOTO-SCHLÜSSELANHÄNGER übertragen oder davon löschen.
●● Um alle Bilder vom FOTO-SCHLÜSSELANHÄNGER auf
].
Ihren Computer zu übertragen, klicken Sie auf [
6
2
7
●● Bilder auf dem FOTO-SCHLÜSSELANHÄNGER
löschen: a) Wählen Sie auf dem FOTO-SCHLÜSSELANHÄNGER die Bilder, die gelöscht werden sollen;
].
b) klicken Sie auf die Taste [
auf „Delete
●● Klicken Sie neben der Taste
All“, um alle Bilder auf dem FOTO-SCHLÜSSELANHÄNGER zu löschen.
3
1. Bildvorschau
2. Browser
3. Bedienfeld mit grundlegenden Funktionen
4. Gerät
5. Bilder auf dem FOTO-SCHLÜSSELANHÄNGER
6. Aktuelle Anzahl der Bilder auf dem FOTOSCHLÜSSELANHÄNGER
7. Aktuelle Anzahl der Bilder auf dem FOTO-SCHLÜSCoby Electronics GmbH Bilder für das FOTO-SCHLÜSSELANHÄNGER Display vorbereiten
Sie können im Feld für „grundlegende Funktionen“
jedoch auch manuall die Größe einstellen, und Bilder
drehen und ausschneiden. Wählen Sie im „Browser
Panel“ ein Bild; danach können Sie:
●● Ausschneiden: Klicken Sie auf den markierten
gestrichelten Rahmen und schieben ihn auf die
gewünschte Position. Im Abschnitt „Translate“
können Sie den „X“-Wert (horizontal) und „Y“-Wert
[10]
www.cobygermany.de
(vertikal) einstellen, um den markierten Rahmen zu
verschieben.
FUNKTIONEN HAUPTMENÜ
●● Skalieren: Klicken Sie HOCH oder RUNTER der
„Scale“-Taste, um den gewünschten Bereich zu
vergrößern oder zu verkleinern.
●● Drehen: Klicken Sie auf HOCH oder RUNTER der
„Rotate“-Taste, um das Bild entweder rechts oder links
herum zu drehen.
] um die
●● Speichern: Klicken Sie am Ende auf [
Einstellungen zu speichern und das Bild dem „Device
Panel“ hinzuzufügen.
●● Drücken Sie
wählen.
oder
●● Drücken Sie
um die Auswahl zu bestätigen.
Menüoptionen
Menüeintrag
Dateien auf dem FOTO-SCHLÜSSELANHÄNGER
synchronisieren (übertragen)
Aus
Übertragen Sie alle im Gerät gespeicherten Bilder auf
den FOTO-SCHLÜSSELANHÄNGER.
1. Klicken Sie auf [
starten.
um eine Einstellung auszu-
] um die Übertragung zu
2. Schließen Sie nach dem Abschluss der Übertragung
die Photo Viewer Software und trennen Sie den FOTOSCHLÜSSELANHÄNGER von Ihrem Computer.
Löschen
Funktion
Schalten Sie den FOTO-SCHLÜSSELANHÄNGER aus.
Bilder vom FOTO-SCHLÜSSELANHÄNGER löschen.
●● 1 löschen: das akutuelle Bild löschen;
●● Alle löschen: Alle Bilder löschen.
●● Abbrechen. Zum Hautpmenü zurückkehren.
Um Schäden am FOTO-SCHLÜSSELANHÄNGER oder
Ihren Bildern zu vermeiden, sollten Sie den FOTOSCHLÜSSELANHÄNGER nicht vom Computer trennen,
solange der Synchronisationsprozess im Gange ist.
Coby Electronics GmbH
[11]
www.cobygermany.de
Deutsch
Drücken Sie
um das Hauptmenü zu öffnen. In diesem
Menü können Sie die Einstellungen des Geräts ändern.
Deutsch
Menüeintrag
Funktion
Display-Modus
Für die Slideshow den manuellen oder
automatischen Modus einstellen.
●● Automatische Slideshow: Der FOTOSCHLÜSSELANHÄNGER zeigt die
Bilder automatisch nacheinander an. Bei
dieser Funktion werden Sie aufgefordert,
den Zeitraum zwischen den Slides
einzustellen.
●● Manuelle Slideshow: Bilder manuell
anzeigen (drücken Sie
oder , um
entweder das vorhergehende oder nächste Bild anzuschauen).
Menüeintrag
Automatisch
EIN/AUS
Uhrzeitanzeige
1. Drücken Sie , um ein Datums- oder
Uhrzeitfeld auszuwählen, das bearbeitet
werden soll. Das ausgewählte Feld
blinkt.
2. Drücken Sie
oder , um den Wert
des ausgewählten Felds einzustellen.
Drücken Sie , um die Einstellung
abzuschließen und das nächste Feld
auszuwählen.
Coby Electronics GmbH Die interne Zeit zum automatischen EIN
oder AUS einstellen. Zur gegebenen Zeit
wird sich der FOTO-SCHLÜSSELANHÄNGER ein- oder ausschalten.
Die Uhrzeit anzeigen.
●● Uhrzeit/Datum anzeigen: Uhrzeit und
Datum werden angezeigt.
●● Drücken Sie
oder , um das Display zwischen analoger und digtaler
Uhrzeit umzuschalten.
●● Drücken Sie
, um die Einstellung
zu beenden und zur Bildanzeige
zurückzukehren.
●● Uhrzeitanzeige EIN/AUS: Die Zeitüberlagerung ein- oder ausschalten. Datum und Zeit einstellen.
Uhrzeit
Funktion
Beenden
[12]
Das Hauptmenü verlassen.
www.cobygermany.de
1. Anleitungen lesen: Lesen Sie vor dem ersten Gebrauch alle
Sicherheits- und Bedienungsanleitungen.
2. Handbuch aufbewahren: Bewahren Sie die Sicheheits- und
Bedienungsanleitungen für zukünftige Verwendungszwecke auf.
3. Warnungen beachten: Befolgen Sie alle Warnhinweise auf dem
Produkt und in dem Benutzerhandbuch.
4. Anleitungen befolgen: Befolgen Sie alle Bedienungsanleitungen.
5. Reinigung: Nehmen Sie das Gerät vor der Reinigung vom Netz.
Keine flüssigen Reiniger oder Sprayreiniger verwenden. Verwenden Sie einen nassen Lappen.
6. Zubehör: Verwenden Sie nur vom Hersteller empfohlenes Zubehör. Der Gebrauch anderer Zubehörteile kann gefährlich sein.
7.
Wasser und Feuchtigkeit: Dieses Gerät nicht in der Nähe von
Wasser (z.B. Badewannen, Waschschüsseln, Küchenspülen,
nassen Kellern oder Schwimmbecken usw. verwenden).
8. Gegenstände und Flüssigkeiten: Keine Gegenstände, egal
welcher Art, in die Öffnungen des Gerät einführen; Gegenstände
könnten Teile mit gefährlicher Hochspannung oder Kurzschluss
berühren, was wiederum zu Personen- oder materiellem
Schaden oder Verletzungen führen kann, einschließlich Feuer
und Stromschlag. Keine Flüssigkeiten über das Gerät schütten.
9. Hitze: Das Gerät nicht in der Nähe von Heizkörpern wie Heizstrahlern, Wärmespeichern, Öfen oder anderen Produkten (einschließlich Verstärkern), die Hitze erzeugen, aufstellen.
Coby Electronics GmbH
10. Netzanschluss: Dieses Gerät darf nur an ein Netz angeschlossen
werden, welches den Angaben auf dem Typenschild enspricht.
Falls Sie sich nicht über die Stromversorgung in Ihrem Haus im
Klaren sind, wenden Sie sich bitte an Ihren Einzelhändler oder
Ihr örtliches Elektrizitätswerk. Lesen Sie bei Geräten, die mit
Batterien oder anderen Quellen betrieben werden, die Bedienungsanleitung.
11. Reparatur: Reparieren Sie dieses Gerät nicht selbst. Das Öffnen
oder Entfernen der Abdeckungen kann gefährliche Strahlung
freisetzen und andere Risiken verursachen. Lassen Sie Reparaturen nur von qualifizierten Experten durchführen.
12. Schadensersatzansprüche: a) falls Flüssigkeit über dem Fernseher ausgeschüttet wurde oder Gegenstände in das Gerät gefallen sind; b) falls das Gerät Regen und Feuchtigkeit ausgesetzt
war, c) das Gerät funktioniert nicht mehr ordnungsgemäß gemäß
den Anleitungen. Nur die Funktionen durchführen, die in diesem
Handbuch beschrieben sind; das unsachgemäße Einstellen anderer Funktionen kann Schäden verursachen und erfordert viel
Arbeit von einem Techniker, um den normalen Betrieb des Geräts
wieder herzustellen; d) falls das Gerät fallengelassen oder auf
irgendeine Art und Weise beschädigt wurde; e) falls die Leistung
des Geräts auffällig nachlässt – dann besteht die Notwendigkeit,
das Gerät zu warten.
13. Ersatzteile: Wenn Ersatzteile erforderlich sind, stellen Sie sicher, dass der Techniker nur vom Hersteller empfohlene Teile
oder Teile ähnlicher Charakteristk verwendet. Nicht autorisierte
Ersatzteile können Feuer, Stromschläge oder andere Gefahrensituationen verursachen.
[13]
www.cobygermany.de
Deutsch
WICHTIGE SICHERHEITSHINWEISE
14. Sicherheitscheck: Fragen Sie nach Abschluss jeglicher Art von
Reparatur Ihren Techniker, Sicherheitschecks durchzuführen, um
sicherzustellen, dass das Produkt in seinem normalen Betriebszustand ist.
COBY Electronics Technischer Kundendienst
Deutsch
Sollten Sie ein Problem mit diesem Gerät haben, sehen
Sie sich bitte zunächst die häufig gestellten Fragen
(FAQs) auf unserer Support-Website unter www.digitest.
de/coby-support an. Dort finden Sie auch die neuesten
Produkt-Updates. Sollte Ihnen das nicht weiterhelfen,
wenden Sie sich bitte an den technischen Kundendienst.
Coby Electronics Technical Support
Hotline: Mo.-Fr.: 9.00 Uhr bis 17.00 Uhr
Deutschland 0800-1010345
Österreich
0800-022562
Schweiz
0800-001622
UK 0800-6121667
Spain
900-800771
Email [email protected]
Internet www.digitest.de/coby-support
Coby Electronics GmbH [14]
www.cobygermany.de
For Customer Use:
Enter below the serial number that is located on
the bottom of the unit. Retain this information for
future reference.
Model No.
Serial No.
The lightning flash with arrowhead symbol within an equilateral triangle is intended to
alert the user to the presence of uninsulated “dangerous voltage” within the product’s
enclosure that may be of sufficient magnitude to constitute a risk of electric shock.
The exclamation point within an equilateral triangle is intended to alert the user to the
presence of important operation and servicing instructions in the literature accompanying
the appliance.
WARNING:
To prevent fire or shock hazard, do not expose this device to rain or moisture. Dangerous high voltage is
present inside the enclosure. Do not open the cabinet.
For recycling or disposal information about this product, please contact your local
authorities or the Electronics Industries Alliance: www.eiae.org.
Coby Electronics GmbH [15]
www.cobygermany.de
English
Precautions
Table of Contents
Package Contents
Precautions..................................................................... 15
Table of Contents........................................................... 16
English
Package Contents.......................................................... 16
Features & Specifications............................................. 16
Please make sure the following items are included in the
product packaging. If any items are missing, contact your
local dealer.
●● Photo Keychain
●● USB Cable
●● Installation Manual
Controls at a Glance...................................................... 17
Features & Specifications
Display at a Glance......................................................... 18
Charging and Powering the Player.............................. 18
●● Stores and displays up to 60 or 120 photos*
●● Supports JPEG, BMP, and GIF photo files
Getting Started............................................................... 19
●● LCD color screen
Photo Viewer Software for Windows........................... 20
●● Photo slideshow and digital clock modes
Photo Viewer Software for Macintosh......................... 22
●● USB Port for file transfers and charging
●● Integrated rechargeable battery
Main Menu Operations................................................... 24
Important Safety Instructions...................................... 25
Technical Support.......................................................... 26
Coby Electronics GmbH
[16]
The maximum capacity may vary depending on
the source photographs used.
DP151: 60 Photos
DP161: 120 Photos
www.cobygermany.de
Controls at a Glance
2
3
Coby Electronics GmbH [17]
Previous
Play / Enter (Press once)
Power On (Press and hold)
Next
4
Key Chain Ring
5
LCD Display
6
USB Port: Connect the Player to a computer
over USB to 1) charge the battery,
and 2) transfer photos to the unit.
www.cobygermany.de
English
1
Charging and Powering the Player
Display at a Glance
1
The Player comes with an integrated rechargeable battery. Charge the battery by connecting it to the USB port
of a powered-on computer.
English
To charge the Player:
2
●● Plug one end of the USB cable into the Player’s USB
port and plug the other end into the USB port of a
computer that is awake.
●● If the connection is made correctly, the display will
read “USB Connected”.
●● If the Player is connected to a USB hub, the hub
must be self-powered to charge the battery.
Photo Indicator:
The player should be charged a minimum of four
hours before initial use.
The first number indicates the number of the
current photo.
1
The second number indicates the total number
of photos loaded on the player.
This indicator will automatically fade from the
screen after a few seconds.
A new or exhausted battery should be charged fully
before its initial use to ensure optimum lifetime
performance.
Clock Display Indicator:
2
This indicator can be turned on or off in the
Setup Menu (Clock Disp > Display Clock
ON/OFF).
Coby Electronics GmbH
[18]
www.cobygermany.de
Getting Started
Please observe the following when using
this item: Do not disassemble, modify, crush,
or puncture the unit in any way. Any excessive impact
may cause the unit to malfunction.
Do not expose to high temperatures above 140°F (60°C).
Do not incinerate; dispose of properly.
Store between -4°F and 122°F (-20°C and 50°C).
Keep away from children.
Transfer your photos onto the Player
1. Connect the Player to your computer using the supplied USB cable. The Photo Viewer Software will start
automatically.
2. Transfer photos to the Player via the Photo Viewer
Software.
3. Quit the Photo Viewer software and then disconnect
the Player from your computer.
To turn on the Player, press and hold
displays “COBY”.
until the screen
View your photos on the Player
To turn off the Player:
After you have loaded photos onto the unit:
●● Press
to enter the Main Menu. “OFF” will be
selected.
1. Press and hold
●● Press
again to finish turning off the unit.
Coby Electronics GmbH or
2. Press
respectively.
[19]
to turn the unit on.
to view the previous or next photo,
www.cobygermany.de
English
To get started using the Player:
Photo Viewer Software for Windows
Software Window at a Glance
3
The included Photo Viewer software is required to transfer 1
your digital photos to the Player.
English
Refer to the instructions in this section if your computer is
running the Microsoft Windows operating system.
4
Starting the Software
The Photo Viewer software will start
automatically once you connect the
Player to your computer. The software
will allow you to view, delete, and
download photos.
If the Photo Viewer software don’t start automatically once you connect the Player to your computer,
double-click the “Photo_Viewer” icon to start the
software from the “My Computer” screen.
2
5
6
7
1. Browser Panel
2. Basic Operations Panel
3. Device Panel
The Photo Viewer software requires a computer running Microsoft Windows 2000, XP, or Vista.
4. Photos on the Player
5. Number of the selected photo;
6. Device Capacity
●● The first number indicates how many photos are on
the Player.
●● The second number indicates the maximum number
Coby Electronics GmbH
[20]
www.cobygermany.de
Select the photo on the Player to transfer, then; b) Click
the [
] button.
of photos that can fit on the Player.
7. Status Bar: Indicates which and when an operation is
under way.
Preparing Photos for Player Display
●● To delete photos on the Player: a) Select the photos
]
on the Player to delete, then; b) Click the [
button.
Computer Functions
You can manually adjust the size, rotate and crop the
photos in the “Basic Operations Panel” on the computer
for Player display :
To select all photos, click [
Panel.
●● Crop: Click and drag the dashed crop box to the
desired location.
] in the Device
Synchronize (Transfer) Files to the Player
] or [
] to rotate the
●● Rotate: Click [
photo counter-clockwise or clockwise, respectively.
After all adjustments have been made (computer or
] button to complete
device functions), click the [
all of the operations.
] when you are finished to save
●● Save: Click [
the adjustments and add the photo to the “Device
Panel”.
●● Quit the Photo Viewer software and then disconnect
the Player from the computer.
Photos are not transferred to the Player until you click
the [
] device function button.
To avoid damage to the Player or your photos, do not
disconnect the Player from the computer while the
synchronization process is underway.
Device Functions
Use the buttons in the “Device Panel” to transfer or delete
photos from Player.
●● To transfer photos from the Player to your computer: a)
Coby Electronics GmbH [21]
www.cobygermany.de
English
] to save all photos from the Player
●● Click [
to your computer directly.
Photo Viewer Software for Macintosh
The included Photo Viewer software is required to transfer
your digital photos to the Player.
3. Double-click the “MacDPFmate” icon
on the computer desktop to start the
Photo Viewer software.
Photo Viewer Software at a Glance
English
Refer to the instructions in this section if your computer is
running the Macintosh OS X operating system.
4
Installing and Start the Software
Install the Photo Viewer software on your computer to
transfer photos to the Player. The software will allow you
to view, delete, and download photos.
1
5
The Photo Viewer software requires a computer
running Mac OS X 10.3.9 or later.
6
2
7
3
1. Photo preview windows
1. Connect the Player to your computer.
2. Open the “Photo_Viewer” folder and
double click the “MacDPFmate.zip” file to
install the program.
Coby Electronics GmbH
[22]
2.
Browser Panel
3.
Basic Operations Panel
4.
Device Panel
5.
Photos on the Player
www.cobygermany.de
6. Current number of photos on the Player
Player Photo Functions
] when you are finished
●● Save: Click “Add”[
to save the adjustments and add the photo to the
“Device Panel”.
You can transfer or delete photos from your Player.
Synchronize (Transfer) Files to the Player
●● To transfer all photos from the Player to your com].
puter, click the “Save All” button [
●● To delete photos on the Player: a) Select the photos
on the Player to delete, then; b) Click the “Delete”
].
button [
●● Select “Delete All” beside the
delete all photos on the Player.
button to
Transfer the photos collected in the Device Panel to the
Player.
1. Click [
] to start the transfer process.
2. When the transfer is complete, close the Photo Viewer
software and then disconnect the Player from the
computer.
To avoid damage to the player or your photos, do not
disconnect the Player from the computer while the
synchronization process is underway.
Preparing Photos for Player Display
You may, however, manually adjust the size, rotate and
crop the photos in the "Basic Operations Panel". Select a
photo in the “Browser Panel” and then:
●● Crop: Click and move the highlight crop box to the
desired location. Or you can adjust the "X"(horizontal)
and "Y"(upright) value in the "Translate" section to
move the highlight crop.
●● Free-Size Crop: Click UP or DOWN of the "Scale"
button to enlarge or reduce the desired area.
●● Rotate: Click UP or DOWN of the “Rotate” button
Coby Electronics GmbH [23]
www.cobygermany.de
English
7. Current quantity of photos on the Player /
Total quantity of photos that the Player can store.
to rotate the photo clockwise or counter-clockwise,
respectively.
Main Menu Operations
Menu Item
Set the date and time options.
Press
to enter the Main Menu. You can adjust the
unit’s options from this menu.
English
●● Press
or
●● Press
to confirm a selection.
Clock Set
to select an option.
Menu Options
Menu Item
Power off the Player.
Delete
Delete Photos from the Player.
●● Delete One: Delete the current photo;
●● Delete All: Delete all photos.
●● Cancel: Return to the Main Menu.
Display Mode
Auto ON/OFF
Function
Off
Clock Disp
Set the Slideshow Mode to Auto or Manual.
●● Auto Slide: The Player will automatically
display photos one at a time. Upon selecting this option, you will be prompted
to set the time interval between slides.
●● Manual Slide: Display photos manually
(press
or
to view the previous or
next photo, respectively).
Coby Electronics GmbH
Function
Exit
[24]
to select a Date or Time field
1. Press
to adjust. The selected field will flash.
2. Press
or
to adjust the value of
the selected field. Press
to finish and
select the next field.
Set the internal time of Auto ON or OFF.
The Player will power on or off automatically at the set time.
Display the clock.
●● Disp Time/Date: View the time and date.
●● Press
or
to change the display
between the analog or digital clock.
●● Press
to exit and return to the
photo display.
●● Disp Clock ON/OFF: Toggle the time
overlay on or off.
Exit the Main Menu.
www.cobygermany.de
1. Read Instructions: All the safety and operating instructions
should be read before the product is operated.
2. Retain Instructions: The safety and operating instructions should
be retained for future reference.
3. Heed Warnings: All warnings on the product and in the operating
instructions should be adhered to.
4. Follow Instructions: All operating and usage instructions should
be followed.
5. Cleaning: Unplug this product from the wall outlet before cleaning. Do not use liquid cleaners or aerosol cleaners. Use a damp
cloth for cleaning.
6. Attachments: Use only attachments recommended by the manufacturer. Use of other attachments may be hazardous.
7.
Water and Moisture: Do not use this product near water (e.g.,
near a bath tub, washbowl, kitchen sink, laundry tub, in wet basements, or near a swimming pool and the like).
8. Object and Liquid Entry: Never push objects of any kind into this
product, through openings or otherwise; this may result in objects
touching dangerous voltage points or short-out parts that could
result in a personal or property damage or injury, including fire or
electric shock. Never spill liquid of any kind on the product.
9. Heat: The product should be situated away from heat sources
such as radiators, heat registers, stoves, or other products (including amplifiers) that produce heat.
Coby Electronics GmbH 10. Power Sources: This product should be operated only from the
type of power source indicated on the rating label. If you are
not sure of the type of power supply to your home, consult your
product dealer or local power company. For products intended to
operate from battery power or other sources, refer to the operating instructions.
11. Servicing: Do not attempt to service this product yourself as opening or removing covers may expose you to dangerous voltage or
other hazards. Refer all servicing to qualified service personnel.
12. Damage Requiring Service: a) if liquid has been spilled or if
objects have fallen into the product; c) if the product has been exposed to rain or water; d) if the product does not operate normally
by following the operating instructions. Adjust only those controls
that are covered by the operating instructions as improper adjustment of other controls may result in damage and will often require
extensive work by a qualified technician to restore the product to
its normal operation; e) if the product has been dropped or damaged in any way; f) when the product exhibits a distinct change in
performance—this indicates a need for service.
13. Replacement Parts: When replacement parts are required, be
sure that your service technician has used replacement parts
specified by the manufacturer or have the same characteristics
as the original part. Unauthorized substitutions may result in fire,
electric shock, or other hazards.
14. Safety Check: Upon completion of any service or repairs to this
product, ask the service technician to perform safety checks to
ensure that the product is in proper operating condition.
[25]
www.cobygermany.de
English
Important Safety Instructions
Technical Support
English
If you have a problem with this device, please check our
website at www.digitest.de/coby-support for Frequently
Asked Questions (FAQs) and firmware updates. If these
resources do not resolve the problem, please contact
Coby Technical Support.
Coby Electronics Technical Support
Hotline: Mo.-Fr.: 9.00 Uhr bis 17.00 Uhr
Deutschland 0800-1010345
Österreich
0800-022562
Schweiz
0800-001622
UK 0800-6121667
Spain
900-800771
Email [email protected]
Internet www.digitest.de/coby-support
Coby Electronics GmbH
[26]
www.cobygermany.de
Precauciones
ATENCIÓN
Para uso del consumidor:
El número de serie se encuentra situado en la
parte baja de la unidad. Conserve ésta información para el futuro.
ADVERTENCIA:PELIGRO DE
ELECTROCUCIÓN, NO ABRIR
AVIS:RISQUE DE CHOC ELECTRIQUE,
NE PAS OUVRIR.
ATENCIÓN: PARA REDUCIR EL RIESGO DE INCENDIO Y
DE ELECTROCUCIÓN, NO QUITE LA TAPA (NI LA PARTE
TRASERA) DE LA UNIDAD, ACUDA EXCLUSIVAMENTE A
PERSONAL CUALIFICADO.
Modelo No.
El símbolo del rayo dentro del triángulo equilátero pretende alertar al usuario ante la
presencia de un “peligroso voltaje” no aislado, que puede constituir un riesgo de descarga eléctrica.
El símbolo de exclamación dentro del triángulo equilátero pretende alertar al usuario de
la presencia de instrucciones de servicio en la literatura que acompaña a la aplicación.
CUIDADO:
Para evitar fuego o una descarga eléctrica, no exponga éste aparato a la lluvia o niebla. Dentro de la
carcasa hay un peligroso alto voltaje. No abra el compartimiento.
Para reciclaje o información disponible sobre éste producto, por favor, póngase en
contacto con las autoridades locales o la Alianza Electronic Industries: www.eiae.org.
Coby Electronics GmbH .
[27]
www.cobygermany.de
Español
No. de Serie
Contenido del paquete
Tabla de Contenidos
Precauciones ................................................................. 27
Table of Contents........................................................... 28
Tabla de Contenidos...................................................... 28
Características & Especificaciones............................. 28
Por favor, asegúrese de que los siguientes elementos
están incluidos en el paquete. Si falta algún elemento,
póngase en contacto con su distribuidor local.
●● Cadena de Fotografía Reproductor
●● Cable USB
●● Manual de instrucciones
Controles Rápidos......................................................... 29
Español
Features & Specifications
Pantalla Rápida............................................................... 30
Iniciando.......................................................................... 30
●● Almacena hasta 60 o 120 Fotografías*.
●● Muestra archivos de Foto Digital (JPEG, GIF, BMP)
Cómo empezar................................................................ 31
●● Pantalla de Color LCD
Software Visor de Foto (para Microsoft Windows) . . 32
●● Pase de diapositivas de fotos y los modos de reloj
digital
Software Visor de Foto (para Macintosh OS X).......... 34
●● Puerto USB para Transferencias y Cargar Archivos.
Operaciones de Menú Principal................................... 36
●● Pila recargable integrada de Litio-Polímero
La capacidad máxima varía según el tipo de
fotografías.
DP151: 60 Fotografías
DP161: 120 Fotografías
Importantes Instrucciones de Seguridad................... 37
Soporte Técnico............................................................. 38
Coby Electronics GmbH.
[28]
www.cobygermany.de
1
Anterior
2
Reproducir/ Enter (pulsar una vez)
Encender/Apagar (pulsar y mantener)
Siguiente
3
Coby Electronics GmbH .
[29]
4
Anilla del llavero
5
Pantalla LCD
6
Puerto USB:Conectar el reproductor al ordenador mediante el puerto USB para:
1) cargar la batería, y 2) transferir
fotos a la unidad.
www.cobygermany.de
Español
Teclas a primera vista
Pantalla a primera vista
Cargar y Conectar/Desconectar el Reproductor
1
El Reproductor incluye una batería recargable integrada.
Cargar la batería conectando la unidad al puerto USB de
un ordenador encendido.
Para cargar el Reproductor
●● Conecte un extremo del cable USB al Reproductor y el
otro extremo al puerto USB del ordenador.
●● Si la conexión es correcta, el mensaje “USB Connected” aparecerá en la pantalla.
2
Español
●● Si el reproductor está conectado a un hub USB, el
hub deberá recibir suministro eléctrico para cargar
la bateria.
Indicador de fotos
El reproductor deberá cargarse durante al menos
cuatro horas antes del primer uso.
El primer número indica el número de la foto en uso.
1
El segundo número indica el número total de
fotos cargadas en el reproductor.
Este indicador desaparecerá automáticamente de la pantalla transcurridos unos
segundos.
Una batería nueva o completamente descargada
deberá cargarse totalmente antes del primer uso
para asegurar una vida útil adecuada.
Reloj de pantalla:
2
Este indicador se puede encender o apagar desde el menú configuración (Clock
Disp>Display Clock ON/OFF).
Coby Electronics GmbH.
[30]
www.cobygermany.de
PARA EMPEZAR
AVISO:
Por favor, tenga en cuenta el siguiente mensaje
cuando utilice este aparato: No desmontar, modificar,
aplastar o agujerear la unidad bajo ninguna circunstancia. Cualquier impacto fuerte puede causar un
mal funcionamiento de la unidad.
No exponer a temperaturas superiores a los 140ºF
(60ºC)
No incinerar; desecharlo adecuadamente
Almacenar entre -4ºF y 122ºF (-20ºC y 50ºC).
Mantener fuera del alcance de los niños.
Para empezar a usar el Reproductor:
Transferir tus fotos al Reproductor
1. Conectar el Reproductor al ordenador mediante el
cable USB suministrado. El software “Photo Viewer”
arrancará automáticamente.
2. Utilice el software “Photo Viewer” para transferir las
fotos al Reproductor.
3. Detener el software ‘Photo Viewer” y desconectar el
Reproductor del ordenador.
Ver tus fotos en el Reproductor
Para encender el Reproductor, pulsar y mantener
hasta que la pantalla muestre el mensaje “COBY”.
Después de haber cargado las fotos en la unidad:
para encender la unidad.
Para apagar el Reproductor:
1. Pulsar y mantener
●● Pulsar
para acceder al menú principal. Seleccionar
la opción “OFF”.
o
para ver la anterior o siguiente foto
2. Pulsar
respectivamente.
●● Pulsar
de nuevo para apagar la unidad.
Coby Electronics GmbH .
[31]
www.cobygermany.de
Español
Software a primera vista
Software ‘Photo Viewer” para Windows
3
1
Para trasnferir sus fotos digitales al Reproductor es
preciso utilizar el software ‘Photo Viewer” que se incluye.
Consulte las intrucciones de esta sección si su ordenador
tiene instalado el sistema operativo de Microsoft
Windows.
4
Arrancar el software
Español
El software ‘Photo Viewer” arrancará
automáticamente una vez que haya
conectado el Reproductor a su ordenador. El software le permitirá ver, borrar y descargar fotos.
Si el software ‘Photo Viewer” no arranca automáticamete una vez que haya conectado el Reproductor a
su ordenador, haga doble click en el icono de “Photo_
Viewer” para arrancar el software desde la pantalla
de “Mi ordenador”.
El software ‘Photo Viewer” precisa un ordenador con
Microsoft Windows 2000, XP, o Vista.
2
5
6
7
1. Panel de Navegación
2. Panel de Operaciones
3. Panel Dispositivo
4. Fotos en el Reproductor
5. Número de la foto seleccionada
6. Capacidad del Dispositivo
●● El primer número indica cuántas fotos hay en el
Reproductor.
●● El segundo número indica el número máximo de
Coby Electronics GmbH.
[32]
www.cobygermany.de
●● Para transferir fotos desde el Reproductor a su
ordenador: a) Seleccione en el Reproductor la foto que
desea transferir, y después; b) b) Haga click el botón [
].
fotos que entran en el Reproductor.
6. Barra de Estado: Indica qué operación se está
realizando.
] para guardar directamente
●● Haga click en [
todas las fotos del Reproductor en su ordenador.
Preparar las fotos para mostrar en el Reproductor
Funciones del ordenador
●● Para borrar en el Reproductor: a) Seleccione en el
Reproductor las fotos que desea borrar, y después; b)
].
Haga click en el botón [
Para seleccionar todas las fotos, haga click en [
] en el Panel Dispositivo.
●● Cortar: Hacer click y arrastrar la herramienta de cortar/
editar fotos a la localización deseada.
]o[
] para girar
●● Girar: Hacer click [
la foto en el sentido contrario a las agujas del reloj o en
sentido de las agujas del reloj, respectivamente.
] cuando haya
●● Guardar: Hacer click [
terminado para guardar los ajustes para añadir la foto
al “Panel Dispositivo”.
Las fotos no se transferirán al Reproductor hasta que
haga click en el botón [
].
Transferencia Sincronizada de Archivos al Reproductor
Después de haber realizado todos los ajustes (funciones
del ordenador o del dispositivo), haga click en el botón
[
] para completar todas las operaciones.
●● Salga del software “Photo Viewer” y después desconecte el Reproductor del ordenador.
Para evitar daños en el Reproductor o en sus fotos,
no desconecte el Reproductor del ordenador mientras se esté realizando el proceso de sincronización.
Funciones del Dispositivo
Utilice las teclas del Panel Dispositivo para transferir o
borrar las fotos del Reproductor.
Coby Electronics GmbH .
[33]
www.cobygermany.de
Español
Puede ajustar manualmente el tamaño así como girar y
cortar las fotos en el “Panel de Operaciones” del ordenador
para mostrarlas en el Reproductor:
zip” para instalar el programa.
Software ‘Photo Viewer” para Macintosh
Para trasnferir sus fotos digitales al Reproductor es
preciso utilizar el software ‘Photo Viewer” que se incluye.
Consulte las intrucciones de esta sección si su ordenador
tiene instalado el sistema operativo Macistosh OS X.
3. Haga doble click en el icono “MacDPFmate” situado en el escritorio del
ordenador para arrancar el software
“Photo Viewer”.
Software “Photo Viewer” a primera vista
4
Instalar y arrancar el software
Instale el software “Photo Viewer” en su ordenador para
trasferir las fotos al Reproductor. El software le permitirá
ver, borrar y descargar fotos.
Español
1
El software ‘Photo Viewer” precisa un ordenador con
Mac OS X 10.3.9 o actualizaciones posteriores.
5
6
2
7
3
1. Conecte el Reproductor a su ordenador.
1. Ventanas de previsionado de fotos.
2. Abra la carpeta “Photo_Viewer” y haga
doble click en el archivo “MacDPFmate.
3. Panel de Operaciones
Coby Electronics GmbH.
2. Panel de Navegación
[34]
www.cobygermany.de
4. Panel Dispositivo
6. Número actual de fotos en el Reproductor
7. Cantidad actual de fotos en el Reproductor/ Cantidad
total de fotos que se pueden almacenar en el
Reproductor.
Funciones de Foto del Reproductor
Permite transferir o borrar fotos desde su Reproductor.
●● Para transferir todas las fotos desde el Reproductor a su
].
ordenador, haga click en el botón “Save All” [
●● Para borrar fotos en el Reproductor: a) Seleccione las
fotos que desea borrar del Reproductor, y después; b)
].
Haga click en el botón [
●● Seleccione “Delete All” (Borrar Todos) al lado
para borrar todas las fotos del
del botón
Reproductor.
Preparar las fotos para mostrar en el Reproductor
Puede ajustar manualmente el tamaño así como girar y
cortar las fotos en el “Panel de Operaciones”. Seleccione
una foto en el “Panel de Navegación” y después:
●● Corte a Escala: Hacer click UP (Arriba) o DOWN
(Abajo) en el botón “Scale”(Escala) para aumentar o
reducir el área deseada.
●● Girar: Hacer click UP (Arriba) o DOWN (Abajo) en el
botón “Rotate” (Girar) para girar la foto en el sentido
contrario a las agujas del reloj o en sentido de las
agujas del reloj, respectivamente.
] cuando haya terminado
●● Guardar: Hacer click[
para guardar los ajustes para añadir la foto al “Panel
Dispositivo”.
Transferencia Sincronizada de Archivos al Reproductor
Transferir al Reproductor las fotos almacenadas en el
Panel Dispositivo
] para comenzar
1. Hacer click en el botón [
el proceso de transferencia de fotos.
2. Cuando haya terminado la transferencia, salga del
software “Photo Viewer” y después desconecte el
Reproductor del ordenador.
Para evitar daños en el Reproductor o en sus fotos,
no desconecte el Reproductor del ordenador mientras se esté realizando el proceso de sincronización.
●● Cortar: Hacer click y arrastrar la herramienta de
cortar/editar fotos a la localización deseada. También
puede ajustar el valor “X”(horizontal) y el valor
Coby Electronics GmbH .
[35]
www.cobygermany.de
Español
5. Fotos en el Reproductor
“Y”(vertical) en la sección “Translate” para mover la
herramienta seleccionada de cortar fotos.
Operaciones del Menú Principal
Menú Item
Ajustar la fecha y la hora.
Pulsar
para acceder al Menú Principal. Permite ajustar
las opciones de la unidad desde este menú.
●● Pulsar
o
●● Pulsar
para confirmar una selección.
para seleccionar una opción.
Reloj
Opciones del Menú
Menú Item
Español
Encendido/
Apagado Automático
Función
Off (Apagado)
Apagar el reproductor
Mostrar
Borrar fotos del reproductor.
●● Borrar Una: permite borrar la foto en uso.
●● Borrar Todas: permite borrar todas las fotos.
●● Cancelar: para regresar al Menú Principal.
Display Mode
Para ajustar el modo de Pase de Diapositivas en Automático o Manual.
●● Automático: El Reproductor mostrará las
fotos automáticamente, una por una. Seleccionando esta opción, tendrá que ajustar el
intervalo de tiempo entre diapositivas.
●● Manual: Para mostrar las fotos manualmente (pulsar o
para ver la anterior o la siguiente foto, respectivamente).
Coby Electronics GmbH.
Función
Mostrar Reloj
para seleccionar el campo
1. Pulsar
Fecha u Hora. La opción seleccionada
parpadeará.
2. Pulsar
o
para ajustar el valor del
campo seleccionado. Pulsar
para
finalizar y seleccionar el siguiente campo.
Ajustar el intervalo de tiempo para que se
active el Encendido/Apagado automático.
El Reproductor se encenderá o apagará automáticamente según el tiempo establecido.
Mostrar el reloj.
●● Mostrar Fecha/Hora: permite ver la
fecha y la hora.
●● Pulsar
o
para cambiar el modo
de visión entre analógico y digital.
●● Pulsar
para salir y regresar a la
muestra de fotos.
●● Mostrar reloj Encendido/Apagado: permite u ocultar la hora.
Salir
[36]
Salir del Menú Principal.
www.cobygermany.de
productos para operarse con pilas u otras fuentes de energía,
diríjase a las instrucciones operativas.
Instrucciones de Seguridad
2. Retenga las instrucciones: Las instrucciones de seguridad y
operativas deberían guardarse para futuras referencias.
3. Advertencias: Todas las advertencias del producto y en las instrucciones operativas deberían tenerse en cuenta.
4. Seguir instrucciones: Siga las instrucciones operativas y de uso.
5. Limpieza: Antes de limpiar desenchufe éste producto del enchufe
de la pared. No use limpiadores líquidos ni de aerosol. Use un
trozo suave de tela.
6. Adjuntos: Use únicamente adjuntos recomendados por el fabricante. El uso de otros adjuntos puede resultar peligroso.
7.
Agua y Humedad: No use éste producto cerca del agua (ej, cerca
de una bañera, fregaderos, piscina..etc).
8. Entrada de Objetos y líquidos: Nunca trate de insertar objetos
en éste producto; ya que puede provocar una descarga eléctrica
con daños personales o materiales, incluso fuego. No vierta
ningún tipo de líquido en el producto.
11. Servicio: No intente abrir éste producto ni quitar cubiertas ya
que se puede exponer un voltaje peligroso u otros peligros. Para
cualquier necesidad diríjase al personal cualificado.
12. Servicio Requerido por Daños: a) si ha vertido liquido u objetos
han caído sobre el producto; c) si se ha expuesto el producto
a la lluvia o al agua; d) si el producto n o opera normalmente
siguiendo las instrucciones. Sólo ajuste los controles según las
instrucciones ya que una mala operación del producto puede
causar daños que solo podrá resolver un técnico y que así vuelva
a funcionar por las instrucciones; e) si el producto ha sido golpeado o dañado de alguna forma; f) cuando el producto muestra
un cambio en su funcionamiento – esto indica la necesidad de
una revisión del mismo.
13. Piezas de recambio: Cuando se requieren piezas de recambio,
asegúrese de que el servicio técnico ha usado piezas homologadas por el fabricante. Piezas de recambio no autorizadas pueden
ocasionar fuego, descargas eléctricas u otros daños.
14. Check de Seguridad: Una vez finalizado cualquier tipo de reparación, pida al técnico que verifique lo checks de seguridad.
9. Calor: Mantenga el producto alejado de radiadores, calentadores
o cualquier otro objeto de calor ( incluyendo amplificadores).
10. Fuentes de Energía: Éste producto solo debería usarse con la
fuente de energía indicada en la tarjeta. Si no está seguro de
la fuente de energía a usarse consulte con el fabricante. Para
Coby Electronics GmbH .
[37]
www.cobygermany.de
Español
1. Lea las instrucciones: Todas las instrucciones de seguridad y
operativas deberían leerse antes de operar con el producto.
Soporte Técnico
Si tiene algún problema con éste producto, por favor, diríjase a nuestra página Web www.digitest.de/coby-support
para Preguntas Frecuentes (FAQs) y actualizaciones de
la firma. Si estos recursos no resuelven el problema, por
favor, póngase en contacto con el Soporte Técnico de
COBY.
Soporte técnico de Coby Electronics
Teléfono: Mo.-Fr.: 9.00 Uhr bis 17.00 Uhr
Español
Deutschland 0800-1010345
Österreich
0800-022562
Schweiz
0800-001622
UK 0800-6121667
Spain
900-800771
Correo Electrónico [email protected]
Sitio Web
www.digitest.de/coby-support
Coby Electronics GmbH.
[38]
www.cobygermany.de
Español
Coby Electronics GmbH .
[39]
www.cobygermany.de
Coby Electronics GmbH
Mergenthalerallee 77
D-65760 Eschborn
www.cobygermany.de
Coby ist eine eingetragene Marke der Coby Electronics Corporation. Gedruckt in China.
Coby is a registered trademark of Coby Electronics Corporation.
Printed in China.
COBY es la marca registrada de COBY Electronics Corporation.
Imprimido en China.
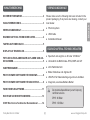


![fazevi_comp_fasevi_c-test_anl_ben_ger.pd[...]](http://vs1.manualzilla.com/store/data/006782911_2-6ab21cb7984cd619e2ac3f804408fdf9-150x150.png)