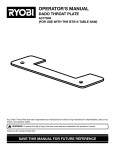
1
MARK V – MOUNTED OVERARM PIN ROUTER
555970
MARK V
MOUNTED OVERARM PIN ROUTER
555970
TABLE OF CONTENTS
INTRODUCTION ........................................................................................................................ 2
SAFETY ...................................................................................................................................... 3
TYPES OF ROUTER BITS ......................................................................................................... 8
TERMS TO KNOW ................................................................................................................... 10
OVERARM ROUTER ASSEMBLY ........................................................................................... 11
ALIGNMENT AND ADJUSTMENT ........................................................................................... 16
OVERARM PIN ROUTING OPERATIONS ............................................................................... 18
GENERAL GUIDELINES FOR BOTH TYPES OF OVERARM ROUTING .............................. 18
ROUTER DUPLICATION USING SHOP MADE FIXTURES .................................................... 20
CONVENTIONAL ROUTING OPERATIONS WITH THE OVERARM ROUTER ..................... 30
CARING FOR YOUR SHOPSMITH OVERARM PIN ROUTER ............................................... 39
MAINTENANCE ........................................................................................................................ 41
TROUBLESHOOTING GUIDE ................................................................................................. 42
1
555970
MARK V – MOUNTED OVERARM PIN ROUTER
INTRODUCTION
Shopsmith’s MARK-V Mounted Overarm
Pin Router can perform many jobs that are
normally intended for other tools . . . and it
can usually perform these operations much
faster and with far greater precision and repeatability than you could hope to achieve
using more conventional methods.
It’s called an Overarm Router because it operates with the rotating bit above the
workpiece rather than below it . . . providing
a clear view of what’s going on at all times
while you’re cutting . . . unlike a typical router
table set-up where the bit makes its cuts on
the underside of your workpiece.
This approach also means that you won’t
need a costly, under-table router motor lift
to help you make precise depth-of-cut adjustments. With the MARK-V Mounted
Overarm Pin Router, these adjustments are
made using your Overarm Router’s Quill
Lever, just as you would when drilling holes
or performing similar operations with a drill
press or your MARK V.
WHAT CAN I DO WITH THIS TOOL?
Those who are familiar with Pin Routers often believe that the only operation such a
machine will perform is duplicate routing,
This simply isn’t true!
In fact, Shopsmith’s Overarm Pin Router will
perform any operation that can be performed with a typical router table. As a result, you’ll soon find yourself reaching for
your Overarm Router for a multitude of
woodworking operations, including:
• Basic straight-line routing operations
• Routing decorative edges and surface designs on straight, round or curved
workpieces of all types, including furniture, cabinets, tabletops, etc.
• Cutting precision dadoes, grooves, rab2
•
•
•
•
•
•
bets, dovetails and other types of structural joints
Making all types of stopped cuts
Repairing furniture and veneers
Jointing the edges of workpieces
“Sawing” straight and irregular shapes
Drilling holes
Pin routing duplicate workpieces with
matchless repeatability
WHAT IS PIN ROUTING ?
Pin Routing is a simple operation through
which you can quickly and easily make
many duplicate copies of a particular project
and have each one turn out exactly the same.
In fact, prior to the introduction of CNC
(computer numerically controlled) Routers,
this was one of the primary processes used
by most furniture manufacturers when cutting-out odd-shaped project components.
In a nutshell, here’s how it works:
• A template or fixture is created by cutting
3/8" deep grooves (1/4", 3/8" or 1/2"
wide) that exactly match the shape of the
workpieces you’re making
• A straight router bit is then inserted into
your router motor . . .which is mounted in
the Overarm Router
• A tracing pin (same size as your straight
bit: either 1/4", 3/8" or 1/2") is inserted
into the Overarm Router’s Table Plate –
and the pin and router bit are aligned perfectly with one another
• A workpiece blank is temporarily attached
to the back side of the template containing
the pattern groove
• The template or fixture is flipped over
(workpiece attached) and its groove
dropped over the tracing pin
• The router is turned on and the bit lowered into the workpiece while the groove
MARK V – MOUNTED OVERARM PIN ROUTER
is traced over the table pin, creating a finished piece that’s exactly the same size and
shape as the groove in your template or
fixture
• Remove the workpiece, replace with a new
blank and repeat the process above . . . as
many times as you like
Once you’ve made a template or fixture, cut
out as many parts as you like, then set the
template aside until the next time you want
to make more of the same project. It will be
ready when you are.
We know that you’re eager to get started using your Overarm Router, but please take the
time to read this manual before you begin.
Then keep it handy for future reference.
OVERARM ROUTER
SPECIFICATIONS:
Maximum router motor HP .......................... 3 hp
Diameters of router motors
accepted (round motors only)................. 2-1/2" to 4"
Throat depth (router bit
centerpoint to Way Tubes)* ......... 10-1/2" to 18-1/2"†
Vertical motor travel (lever-controlled) ............ 3-1/2"
Maximum workpiece thickness ............. Approx 11"‡
Worktable size
(laminate-covered MDF) ....... 18-1/2" d x 28" w x 3/4"
555970
SAFETY
WARNING
Read this safety section and complete
the Assembly procedures BEFORE operating your Shopsmith Overarm Pin
Router
Shopsmith’s MARK V-mounted Pin Router
offers many built-in safety features. However, the effectiveness of these features depends on you. Power tool safety requires
good common sense, and misuse of this
tool can cause serious injury.
To protect yourself from injury:
• READ, UNDERSTAND AND FOLLOW
ALL the information in this Owners
Manual.
• Also, READ, UNDERSTAND AND FOLLOW ALL the information in the Owners Manual that came with your router
motor.
• READ, UNDERSTAND AND FOLLOW
ALL the information in the MARK V
Owners Manual.
Fence size (2) .......................... 13-1/4" w x 1-1/4" h
Guide pin diameters furnished ...... 1/4", 3/8" and 1/2"
Starter pin diameter furnished .......................... 1/4"
Maximum router bit diameter (with insert) ...... 1-3/8"
Maximum router bit diameter (without insert) ....... 2"
Dust port diameter ....................................... 2-1/4"
* With a 3-1/2" diameter router motor. Distances will
vary, depending on router motor diameter.
† Maximum dimensions, based on which set of four
Arm mounting holes are used
‡ Varies, depending on router motor and bit used
3
555970
MARK V – MOUNTED OVERARM PIN ROUTER
Throughout this manual, we list WARNINGS, CAUTIONS, and NOTES. We advise
that when you come to one of these listings,
please read and understand it fully. Their
meanings are:
WARNING
A WARNING is given when failure to
follow the directions is likely to result
in injury, loss of limb, or life.
CAUTION
A CAUTION is given when failure to follow the directions is likely to result in
damage to the equipment.
NOTE
A NOTE is used to highlight an important
procedure, practice or condition.
EYE PROTECTION
Always wear eye protection when you use
power tools. Use goggles, safety glasses or a
face shield to protect your eyes.
• Goggles completely surround and protect
your eyes. Many goggles will also fit over
regular glasses. Be sure your goggles fit
closely, but comfortably.
• Safety glasses don’t fog as easily as
goggles and can be worn all the time.
Regular glasses normally have only impact resistant lenses. They are not safety
glasses.
• A face shield protects your entire face, not
just your eyes.
4
HEARING PROTECTION
Prolonged exposure to high intensity noise
from high speed power tools will damage
your hearing.
• Hearing protectors screen out certain frequencies and noise levels that can damage your hearing. For that reason, we
recommend that you ALWAYS wear hearing protection when using your Overarm
Pin Router.
GUARDING FOR ROUTING
Most shop accidents happen to woodworkers who fail to follow instructions, or fail to
use guards and safety devices. Although
proper use of guards and safety devices often requires additional setup, the protection
for you and your family is well worth the
effort.
DRESS
Loose hair and clothing which could be entangled in rotating bits are very hazardous.
• Tuck long hair under a hat or tie it up. Do
not wear ties, gloves, loose clothing, rings
or other jewelry. Roll sleeves up above
your elbows.
ELECTRICAL REQUIREMENTS
Follow the electrical requirements that appear in the Owners Manual that came with
your router. Do not overload your electrical
circuits.
ROUTER MOTOR — OVERARM
Use the following specifications required to
mount a router in the OVERARM:
MARK V – MOUNTED OVERARM PIN ROUTER
NOTE
Customer Service representatives and Store
personnel will help you select the proper
motor.
• Use only UL Approved router motors.
• Motor housing must be round, not square,
for router arm.
• Motor must be 2-1/2" to 4" in diameter.
• Motor power cord must be located so it
comes out the top section of the router.
• Motor power cord should be securely attached to the top of the Arm during operation with tape or rubber bands to keep
it safely out of your way during routing.
• Switch must be located so that it can be
positioned toward the front of the Overarm Router and be easily accessible during operations.
• You must be able to remove the handles
and base from the motor without removing the switch.
• Motor must properly mount on the Overarm Router so that base locating pins on
the motor housing do not interfere with
the router motor holding clamps.
• Motor must not exceed 3 hp.
SAWDUST AND CHIPS
Sawdust and chips can be a fire hazard and
breathing sawdust can be a health hazard.
The sawdust from some woods is toxic. To
help protect yourself from sawdust:
• Attach your Overarm Pin Router to a dust
collection system to help capture flying
chips and debris.
• Or wear a close-fitting dust mask. Clean
or replace the filters in the mask regularly.
Also, open a window or use a fan to ventilate your shop.
555970
MOUNTING ROUTER BITS
• Turn off and unplug the router motor before mounting router bits.
• Follow the recommendations of the router
motor manufacturer as to the sizes and
types of router bits to use.
• Make sure the router bit is secured properly in the collet. Loose bits could work
free and cause serious injury. Insert the bit
all the way into the collet and retract it
about 1/8" to avoid the transition between
shank and cutter.
• If your using an arbor-style bit with interchangeable cutters, be sure the cutting
edge is facing to the left when mounted
on the arbor.
• Listen for chatter or signs of looseness at
start-up. If you hear, see or suspect problems, stop the tool immediately, unplug it,
and check the tool thoroughly. Correct any
problem before proceeding. If you are unable to locate the problem, you can contact your Shopsmith Service Representative or store personnel for advice. Never
operate the Overarm Router if it is not
functioning properly.
• Keep bits clean, maintained and sharp.
• Don’t try to make your own collet adapter
to hold different sized bits. Balance is important at high speeds, so always buy
appropriately sized collets.
GENERAL SAFETY RULES
FOR POWER TOOLS
• Know your power tool. Read the owners
manual. Learn its application and limitations as well as the specific potential
hazards peculiar to this tool.
• Ground all tools (unless double insulated). If tool is equipped with an approved 3-conductor cord and a 3-prong
grounding type plug to fit the proper
5
555970
•
•
•
•
•
•
•
•
•
•
•
6
grounding type receptacle, the green conductor in the cord is the grounding wire.
Never connect the green wire to a live
terminal.
Wear proper eye and ear protection. Also,
wear a dust mask.
Keep guards in place. Always keep
guards in working order and in proper
alignment and adjustment. Most injuries
occur on unguarded power tools.
Remove adjusting keys and wrenches.
Wear proper apparel. Do not wear loose
clothing, ties, gloves, rings or other jewelry. Roll sleeves up above your elbows,
wear nonslip footwear, and tuck long
hair under a hat.
Do not operate power tools if you are
tired, taking medication, or under the influence of alcohol or drugs.
Avoid dangerous environments. Don’t
use power tools in damp, wet or explosive atmospheres.
Keep work areas well lit, clean, and free
from clutter.
Do not force the tool. It will do the job
better and safer at the rate for which it
was designed.
Use the right tool. Don’t force a tool or
accessory to do a job for which it is not
designed.
For direction of feed — ALWAYS feed the
workpiece into the cutter against the rotation of the cutter. NEVER feed the
workpiece into the cutter with the rotation of the cutter.
Check damaged parts. A damaged guard
or part should be properly repaired or replaced before further use. If a strange
noise or vibration develops, immediately
turn off the power, unplug the machine
and correct the problem. Never operate
a power tool that is not functioning
properly.
MARK V – MOUNTED OVERARM PIN ROUTER
• Secure workpieces. Use clamps, fixtures,
and other devices to hold workpieces
when practical. It’s safer than using your
hands and it frees your hands to operate
the tool.
• Do not overreach. Keep proper footing
and balance at all times.
• Turn off the tool and wait until it comes
to a complete stop before removing
workpieces and scraps.
• Do not try to stop the tool by grabbing
the workpiece or any part of the tool.
Turn off the tool and let it come to a complete stop by itself.
• Do not leave the tool running unattended. Turn power off. Don’t leave tool
until it comes to a complete stop.
• Avoid unintentional starting. Make sure
the switch is in the “off” position before
plugging in or unplugging the tool.
• Disconnect tools. Turn off and unplug
tools before changing accessories and setups, making adjustments, and performing maintenance and repair.
• Do not stand or lean on the tool. You
could fall onto the tool or it could tip
over injuring you and/or damaging the
tool.
• Maintain tools. Keep parts and tools
sharp, clean and maintained according to
the Owners Manual.
• Make your workshop childproof. Use
padlocks, master switches or remove
starter keys.
• Keep children away. All visitors should
stay a safe distance from power tools, and
wear eye and ear protection.
• Do not permit anyone who is inexperienced to use your power tools without
supervision.
MARK V – MOUNTED OVERARM PIN ROUTER
555970
SAFETY RULES FOR THE
SHOPSMITH OVERARM ROUTER
wood. Limit depth-of-cut to 3/8" for each
pass when using bits up to 1/2"
diameter in softwood. When using bits
over 1/2" diameter, limit depth-of-cut to
half the recommended depths for 1/2"
diameter bits.
Always use a fixture, fence, and/or starter
and guide pins to help control the
workpiece.
Always feed the workpiece against the
rotation of the bit, not with it. Otherwise
the bit will grab and throw the
workpiece.
Keep a firm grip on the workpiece at all
times and never hold the workpiece with
your hands in line with the router bit.
Always clamp a straight piece of scrap
stock to your worktable surface for use
in holding your workpiece against the
fence during straight-line routing operations. Also use a long piece of scrap stock
to feed a narrow workpiece underneath
the guard to complete a cut.
Cut with the grain instead of against the
grain. You will get a smoother cut and
the operation will be safer.
Avoid standing in-line with the
workpiece being fed. In the event of a
kickback you could be hit.
Feed the workpiece slowly. Use extra care
in routing workpieces that contain figured grain or knots, as these may cause
kickbacks.
When you are routing stock up to 10"
wide across the grain, use a piece of scrap
stock cut at a 90° angle to guide the
workpiece through the cut. The
workpiece must extend 5-1/2" away from
router bit.
When stop routing, always use stop
block(s) to control the length of cut. Failure to use stop block(s) could cause the
bit to grab and throw the workpiece.
• Be sure to read and understand this entire
Owners Manual before using the Overarm
Router. Also, do not use the Overarm
Router unless you are sure it is assembled
properly, all safety devices are installed,
and you understand the operations you
are attempting to perform.
• Keep the guard in place and in working
order. Always set the guard no more than
1/4" above the workpiece.
• Keep your hands, fingers and other parts
of your body at least 3" away from the
rotating bit.
• Use a push stick, push block, featherboard(s), miter gauge with safety grip,
fixtures, or other safety devices to maneuver a workpiece into a rotating bit. If a
kickback occurs, these devices help to
protect your hands and fingers.
• Use only Shopsmith parts and accessories on your Overarm Router. NEVER use
non-Shopsmith replacement parts or accessories. They are not designed like
Shopsmith parts. Using non-Shopsmith
parts may create a hazardous condition
and will void your warranty. Follow your
router manufacturer’s recommendations
as to replacement of router parts.
• Do not rout second-hand lumber. If you
hit a nail, screw, or other foreign object,
you could be hit by pieces of metal or
there could be kickback.
• Do not “freehand” rout stock less than
12" X 12" or equivalent.
• Support long boards and sheet materials
with a roller stand(s) placed 1' -4' from
the worktable.
• Avoid taking deep cuts. With the exception of single-pass dovetail cuts, limit
depth-of-cut to 1/4" for each pass when
using bits up to 1/2" diameter in hard-
•
•
•
•
•
•
•
•
•
7
555970
• When routing oversize stock, always use
at least one push block to help control
the workpiece firmly against the fence.
• Do not work with stock that is too small
or too large to handle safely; that is
warped, bowed or cupped; or that has
loose knots or other defects.
• Plan the operation before you begin. If
you are in doubt about how to complete
an operation safely, do not attempt it. You
can contact your Shopsmith Customer
Service Representative or Store personnel for advice.
• Secure the router, overarm assembly,
depth stop rod, depth control handle,
worktable, accessories, safety devices,
fences, and fixtures before turning on the
motor.
TYPES OF
ROUTER BITS
Router bits come in a wide variety of shapes
and sizes designed to be used at very high
speeds.
MARK V – MOUNTED OVERARM PIN ROUTER
speed steel bits are heat treated for extra
hardness and to hold keen cutting edges.
Carbide bits (solid or tipped) are the finest
bits available today. Although more expensive, they will outlast high speed steel bits
at a 15 to 1 ratio on softwoods and are highly
recommended for use on hardwoods, plastic laminates, plywood and particleboard.
Router bits are generally classified into four
different categories — grooving bits, edge
cutting bits, panel bits and laminate and veneer trimming bits. (See Chart.)
CARE AND MAINTENANCE
You’ll enjoy longer use of your router bits if
you make it a point to handle, use and
sharpen them properly.
• Use your router bits only for the job they
are intended to do.
• Make sure the bit is mounted rigidly in
the collet.
• Learn to cut your workpiece at the proper
speed to prevent heat buildup that can
cause the loss of bit hardness.
• Between operations, set your bits in a safe
place where they will not fall or get hit.
CAUTION
The part of the bit mounted in the router
chuck is called the shank and the rounded
extension beyond the cutter on some bits is
called the pilot. The cutting edge of the bit
is called a flute. Router bits have one, two
or three flutes and the more flutes there are
on the bit, the more cuts that can be made
per minute. A higher number of flutes reduces the load on the motor and produces a
smoother cut.
Quality bits are made of high speed steel,
solid carbide or carbide-tipped steel. High
8
Never use solvent on a bearing piloted
bit without first removing the bearing.
• After use, clean bits thoroughly.
• Sharpen your bits with a small slip-stone
or oilstone with oil. Hone the face of each
cutter with light strokes in one direction.
Never hone the outside edge because it reduces the diameter of the cutter. Hone
each cutter edge with the same number
of strokes.
• If the cutting edge is nicked, take the bit
to a professional sharpening service.
MARK V – MOUNTED OVERARM PIN ROUTER
555970
9
555970
MARK V – MOUNTED OVERARM PIN ROUTER
T-NUT
DEPTH
STOP ROD
DOVETAIL
ASSEMBLY
DEPTH
CONTROL
HANDLE
BRASS GIB
MOTOR
BRACKETS
MOUNTING
BRACKET
CLAMPS
WAY TUBE
MOUNTING
BRACKETS
WORKTABLE
GUARD
ASSEMBLY
DUST
CHUTE
CIRCULAR
TABLE INSERTS
TWO-PIECE
ROUTER FENCE
TERMS TO KNOW
It’s important that you become familiar with
all of your Overarm Router‘s functions and
parts before you begin to use it.
The functioning parts of the Router Arm are:
1. Worktable – Made of a durable laminate-covered MDF (medium density
fiberboard) the Overarm Router’s Worktable mounts to your MARK’s Worktable in one of two ways:
Models 505, 510 and 520 – Mounts
into the right-hand Worktable Miter
Gauge slot with two sliding T-Nuts
and setscrews.
Model 500 – Mounts into the two
threaded Table Insert mounting
10
holes in your Model 500 MARK V
with two buttonhead setscrews and
washers through the elongated
travel slots in the Overarm Router
Table surface.
Two sets of threaded inserts are provided in the Worktable surface for attaching the two-piece Router Fence.
2. Guard Assembly – The clear guard protects your fingers and hands, keeps
chips away from you and gives you a
clear, open view of the surface being
routed at all times.
3. Dust Chute – Your dust collection system attaches to the chute to help collect
sawdust and chips.
MARK V – MOUNTED OVERARM PIN ROUTER
4. Motor Brackets – Firmly hold any
round, hand-held router motor from
2-1/2" to 4" in diameter. These dimensions are for the motor only (the router
base is removed during operations).
5. Brass Gib – Adjusts with four Allen set
screws to eliminate side-to-side movement of the motor while allowing
smooth, vertical movement of the dovetail slide.
555970
head capscrews, threaded into the holes
on the back sides of the Mounting
Brackets.
13. SLIDING T-Nuts – Used to attach your
Overarm Router Table to your Model
505, 510 or 520 MARK V Worktable.
OVERARM ROUTER
ASSEMBLY
6. Depth Stop Rod – Locks into any position to limit your depth-of-cut during
operations.
7. Dovetail Assembly – Moves up-anddown by means of a steel rack-and-pinion gear mechanism. The dovetail slide
provides 3-1/2" of vertical motor travel.
8. Depth Control Handle – Conveniently
raises and lowers the router motor. A
simple twist locks the handle in place.
9. Circular Table Inserts – Two provided:
One with a 1-3/8" diameter center hole
and an offset threaded insert for the
Starting Pin (included) . . . and another
with a center threaded insert for the
three interchangeable Overarm routing
Guide Pins (three included: 1/4", 3/8"
and 1/2" diameters).
10. Two-Piece Router Fence – Adjustable
aluminum Fences attach to the Worktable mounting holes with threaded
plastic Knobs, Spacers and washers for
straight-line routing operations.
11. MARK V Way Tube Mounting Brackets – Upper and lower Mounting Brackets attach to the Overarm . . . then around
the MARK V Way Tubes with mating
Clamps, supporting the Overarm
Router above the Worktable.
WARNING
Your safety and the ability to use your
new Shopsmith Overarm Pin Router
properly depends on your following
these assembly and use instructions
exactly.
NOTE
Reference numbers that appear in parentheses following the part names correspond
with the numbers on the figures in this section and the exploded view in the Parts List
section of this Manual.
TOOLS & SUPPLIES NEEDED:
•
•
•
•
•
•
1/8" Allen wrench
5/32" Allen wrench
1/4" Allen wrench
5/16" Allen wrench
7/16" Open end wrench
Furniture or floor paste wax (do NOT use
car wax or spray furniture polish)
• Mineral spirits
• Fine file or emery cloth (optional)
12. Mounting Bracket Clamps – Clamp
around the “back side” of your Way
Tubes with 3" long x 3/8" dia. socket
11
555970
BEFORE YOU BEGIN . . .
It’s a good idea to clean all major metal parts
with mineral spirits to remove any dirt or
grease residue. Any burrs found on parts
should be removed with a fine file or emery
cloth. If required, clean your router motor
according to the instructions in its Owner’s
Manual.
MARK V – MOUNTED OVERARM PIN ROUTER
sitions in the Brackets. For most operations,
the 2nd and 3rd set of holes nearest the business-end of the Arm are used as shown in
Figure 1. If you need more throat depth,
choose the four holes that best suit your
needs.
Wax and buff the Worktable surface, applying the wax sparingly, then buffing it out
thoroughly. If you apply too much wax or
fail to buff it out properly, the wax will mix
with the sawdust you generate, impede the
movement of the Overarm Router’s parts
and leave residue on your workpieces.
Remove all accessories from the MARK V’s
Headstock and prepare the machine as you
would for Drill Press operations. Remove the
Worktable from the Carriage (this will make
it easier for you to raise the machine to vertical position).
Slide the Headstock all the way to the left
until it rests against the Way Tube Tie Bar.
Tighten the Headstock Lock lever.
Position the Carriage so the distance between
the Carriage and the Headstock is about 15".
Tighten the Carriage Lock Handle. Raise the
MARK V into Drill Press position. NOTE:
Shopsmith’s Lift-Assist Accessory will make
this task much easier.
WHICH MOUNTING HOLES ?
Before mounting the Overarm Router to the
MARK V, the two Mounting Brackets (11)
must be bolted to the Arm of the tool with
four 5-1/4" long x 5/16" dia. socket head cap
screws, washers and wing nuts (finger-tight
only at this time). Do not install your router
motor yet.
There are six pairs of mounting holes in the
Arm, providing a total of five mounting po-
12
Figure 1. Normal Mounting Position
NOTE
When mounting, drop the capscrews
through the TOP of the Brackets and into
the Arm, with flat washers and wing nuts
on the bottom. This way, the bolts won’t
drop out of position when you remove the
wing nuts and washers to change Arm positions.
INSTALL THE
DEPTH STOP ROD (6)
Thread the 1/4"-20 wing nut onto the Depth
Stop Rod, then thread the Rod (with wing
nut) into the threaded hole in the top of the
Dovetail Slide.
Once the Brackets are mounted to the Arm,
use the Depth Control Handle (8) to “lower”
your Motor Brackets (4) to the “bottom” of
their travel in the Dovetail Assembly
(7) . . . and unscrew the Depth Stop Rod (6)
so it is all the way to the “top” of its travel.
MARK V – MOUNTED OVERARM PIN ROUTER
RE-INSTALL THE MARK V
WORKTABLE
Loosen the Table Tilt Lock Lever, tilt your
Table to 90° (as you would when setting up
for Drill Press) and tighten the Lever. Install
the Worktable in the Carriage, slide it “back”
until its edge is 3" from the Way Tubes.
Tighten the Table Height Lock.
Place a piece of scrap plywood or cardboard
on your table. With the Overarm Router’s
Deflector (20) resting on your MARK V’s
Worktable surface (See Fig. 2), position the
semi-circular cut-outs of the Brackets (29)
against the Way Tubes. Hold the assembly
in position while you screw the two 3" long
x 3/8" dia. socket head capscrews through
the Clamps (30) and into the threaded holes
in the Mounting Brackets (29). See Fig. 3.
555970
Adjust the Overarm’s position so the Depth
Stop Rod Knob doesn’t collide with the end
of the MARK V’s Quill when the Stop Rod
is adjusted to its full “up” position and
tighten the two large capscrews using a
5/16" Allen wrench.
INSTALL YOUR ROUTER MOTOR
IN THE OVERARM
Remove your Router motor from its base (see
instructions included with your router.)
Place the motor between the front and rear
motor Brackets on the Overarm until it bottoms out against the Deflector (20) . . . then
raise it approximately 1/8" to allow for
proper air circulation.
CAUTION
Always position the Router Motor so it is
raised about 1/8" off the Deflector to allow for proper airflow and cooling during operation. Without this 1/8" clearance,
overheating and damage to your router
motor will result.
Figure 2. Attaching the Overarm Router
to the MARK V
Figure 3. Tighten the Clamp capscrews
with the 5/16" Allen wrench.
Use a 7/16" open end wrench to tighten the
two Motor Bracket nuts (See Fig. 4). Be sure
your router’s switch is located for easy accessibility during operations . . . and that none
of the small lugs or other protruding parts
on the motor’s housing interfere with a good
“seating” in the Motor Brackets. When positioning your router motor, be sure its collet
or bit locking nuts are accessible without the
need for additional motor adjustments.
Figure 4. Install the
router motor in
the Overarm.
13
555970
MARK V – MOUNTED OVERARM PIN ROUTER
CAUTION
Over-tightening the Motor Bracket nuts
may cause damage to the motor and/or
housing of your router.
FOR MODEL 500
INSTALL THE REAR GUARD AND
DUST COLLECTOR ASSEMBLY
FOR MODELS 505, 510,520
Install a flat washer over each stud of the
front Motor Clamp, and then slip the rear
guard/dust chute with strip brushes onto
the clamp studs and secure with two more
flat washers and wing nuts. See Figure 5 for
correct assembly order.
Figure 5. Overhead view of proper motor
clamp hardware assembly order
(looking down from above).
MOUNT THE OVERARM ROUTER
TABLE ONTO THE MARK V
WORKTABLE
Model 500
Remove the MARK V Table Insert. Use the
two buttonhead Allen capscrews with washers to mount the Overarm Router Table to
the MARK V Worktable by inserting them
through the two elongated mounting holes
in the Router Table and threading them directly into the Model 500 MARK V Table Insert mounting holes (See Fig. 6).
14
Figure 6. Use the left hole of each pair
when mounting the Worktable on
Model 505, 510 and 520 MARK V’s for
most applications. Use counterbored
slots for Model 500.
Models 505, 510, 520
Use the sliding T-nuts and 1/4"-20 flat head
machine screws provided. Lay the Router
Table right-side-up on a flat surface in front
of you with the eight threaded insert holes
away from you. You will notice two pairs of
countersunk holes in the Table surface, about
7-1/2" in from the “front” edge of the Table
(See Fig. 6). These are the holes you will use
to mount your Overarm Router’s Table to
your Model 505, 510 or 520 MARK V’s Worktable.
For the majority of your conventional and
pin routing operations, you will use the two
left holes in each pair to mount the Table to
the “front” Miter Gauge slot in your MARK
V’s Worktable. This approach will provide
the maximum workpiece support in “front”
of your Router bit and motor . . . and allow
you to use your Two-Piece Router Fence (included).
If you would prefer to have more workpiece
support “behind” your Router bit and motor, use the two right holes in each pair to
mount the Table to the “back” Miter Gauge
slot in your MARK V’s Worktable. When using this approach, the Table must be rotated
180° and installed with the eight threaded
Fence inserts toward the “front” of the Table.
MARK V – MOUNTED OVERARM PIN ROUTER
555970
WARNING
CAUTION
This set-up will make it impossible for
you to use your Two-Piece Overarm
Router Fence safely.
Never operate the Overarm Router unless
the Table Tubes are extending flush with
the bottom of the Carriage or beyond. Doing so will not provide adequate support
for the Table and could result in damage
to the machine.
Position the two T-nuts in the “front” Miter
Gauge slot of your MARK V’s Worktable,
near the two ends of the slot. Lay the Overarm Router Table onto the surface of the
MARK V Table.
Align the left hole in the left pair of countersunk mounting holes in your Router Table
surface over the outside (or left) 1/4"
threaded hole in the left T-Nut. Insert a
1/4"-20 flathead machine screw through the
countersunk Table hole and thread it into the
T-Nut hole. Use a 5/32" Allen wrench to run
the screw down into the hole but do not
tighten it at this time.
Slide the Router Table to the right slightly
until the left hole in the right pair of countersunk mounting holes in your Router Table
surface align over the outside (or right)
1/4" threaded hole in the right T-Nut. Insert a 1/4"-20 flathead machine screw
through the countersunk Table hole and
thread it into the T-Nut hole. Use a 5/32"
Allen wrench to run the screw down into the
hole but do not tighten it at this time.
Loosen MARK V Carriage Lock and raise the
Worktable and Carriage assembly up on the
way tubes to within 5" to 6" of the Deflector
bottom (20). Lock the carriage in place.
Extend the Worktable until the bottoms of
the MARK V Table Tubes are flush with the
bottom of the carriage, then lock the MARK
V table into position.
For any operation where the cut profile is
such that the Router Bit extends below the
top surface of the Worktable, the Table
should always be aligned so that its center
hole is aligned with the centerpoint of the
Router Bit.
CAUTION
Adequate Worktable Support is
critical for the best results.
It is recommended that you always use
the Telescoping Legs and Connector
Tubes that came with your Model 510 or
520 MARK V to support the outer edge of
the Overarm Router Worktable during operations.
This is especially true if you’re working
with heavier-than-normal workpieces – or
if you have the Arm of your Overarm
Router extended far forward to provide
additional throat capacity.
If you own a Model 505 Anniversary
Edition MARK V, you must purchase two
Connector Tubes (Part # 514439), two
Telescoping Legs (Part # 514529) and two
Adjustable Fittings (514620).
If you own a Model 500 MARK V, a single
Support Leg (Part # 555627) is available
for your machine that attaches around the
lip of the front edge of your Worktable.
15
555970
MARK V – MOUNTED OVERARM PIN ROUTER
This approach allows you to make whatever
minute adjustments may be required to bring
the Inserts to a flush position by shimming
them with small pieces of masking or duct
tape stuck to the underside of the Inserts on
either side of the mounting screw holes.
Once the Inserts are flush, further adjustments shouldn’t be necessary.
Attach the table insert with the 3 screws and
the 1/8" Allen wrench provided.
Figure 7. The two Table Inserts: Left insert
for common routing operations –
Right insert for pin routing.
There are 2 Table Inserts (60/61), see Fig. 7).
• The one on the left in Fig. 7 offers a 1-3/8"
diameter round hole in the center and a
brass threaded insert at its outer edge for
a Starter Pin. This insert is used for most
conventional, non pin-routing operations.
• The other features two brass threaded
inserts . . . one in the center and another at
its outer edge for a Starter Pin. This insert
is used when performing pin routing operations.
Both inserts are installed in the Overarm
Router Table surface with three 10-24 x 3/4"
machine screws, using a 1/8" Allen wrench.
BRINGING THE INSERT FLUSH
WITH THE WORKTABLE SURFACE
It’s important to note that the Overarm
Router Worktable is made of MDF. . . an unstable material that can fluctuate in size
based on humidity and other factors. It’s also
important to note that MDF is a wood-based
material and holding exact tolerances when
machining the Insert cutouts is virtually
impossible. For those reasons, we have purposely made the Insert cutout slightly
deeper, so the Inserts are sub-flush once
installed.
16
ALIGNMENT AND
ADJUSTMENT
RE-POSITIONING THE DEPTH
CONTROL HANDLE
If the Depth Control Handle (40) is positioned too far forward or backward for comfortable operation, its position can be
changed. Here’s how. First, raise the depth
stop rod, then loosen the depth control
handle by twisting its knob counterclockwise
about one-half turn.
Rotate the Depth Control Handle forward so
the Router motor is in its approximate cutting position (Typically with the Router collet
approximately 2" to 3" above the Worktable
surface.)
If the handle position is uncomfortable, reposition it by twisting the handle counterclockwise about one-half turn . . . grasping the
clutch and handle assembly. . . and pulling it
outward (to the right) to disengage it from
the rack. Move it to a comfortable position
and push it back inward (to the left) to reengage the rack and pinion mechanism.
Twist the Depth Control Handle clockwise
to lock your height setting. If this is difficult, loosen the setscrew (41) until the clutch
and
handle
snap
in
and
out
easily.
MARK V – MOUNTED OVERARM PIN ROUTER
CAUTION
Before disengaging the Clutch and
Handle assembly, always adjust the Depth
Stop Rod so it makes contact with the top
of the Arm or hold the Dovetail Slide so
the Router Motor doesn’t drop and damage your workpiece or the Worktable.
ADJUSTING THE BRASS GIB
The tightness of the Brass Gib should be adjusted so the Router Motor won’t slip and
drop abruptly when the Depth Control
Handle is unscrewed prior to re-setting your
depth-of-cut.
Figure 8. If required, use a 1/8" Allen wrench
to achieve proper Gib pressure.
If it does slip, the Brass Gib is set too loose
against the side surface of the Dovetail Slide.
To adjust the Gib, use a 1/8" Allen wrench
to tighten the four setscrews (26) uniformly
in small increments until the proper Gib
pressure is achieved (see Figure 8). When adjusted properly, the Depth Control Handle
should move the motor freely without any
“slop” between the arm and the dovetail
slide.
555970
ROUTER BIT TO GUIDE
PIN ALIGNMENT
When performing pin routing operations, it’s
critical that the Router Bit and Guide Pin be
in perfect alignment with one another.
To check this alignment, insert a 3/8" diameter straight Router Bit into the collet of your
Router Motor and tighten securely. Screw the
3/8" Guide Pin into the threaded center hole
in the Overarm Router Table Insert. Lower
the motor so your Bit is approximately 1"
above the Guide Pin.
Figure 9. Use the handle portion of a
combination square as a gauge for
checking the bit-to-guide-pin alignment
at three points, 90° apart.
Use the base of the combination square (See
Fig. 9) to check Bit-to-Guide-Pin alignment
at three points 90 degrees apart. If the Bit
and Guide Pin are not in perfect alignment,
front-to-back and/or left-to-right Worktable
adjustments will be required.
Front-to-back adjustments are made by loosening the MARK V Table Height Lock Knob
and using the MARK V’s Table Height adjustment handles or knobs.
Left-to-right adjustments are made on
MARK V Models 505, 510 and 520 machines
by loosening the two 1/4"-20 flathead machine screws that hold the Overarm Router
17
555970
MARK V – MOUNTED OVERARM PIN ROUTER
Table to the MARK V Worktable . . . then sliding the table left or right and tightening the
screws once proper alignment is achieved.
On Model 500 MARK V’s, these adjustments
are made by loosening the two roundhead
machine screws in the elongated slots to the
left and right of the Router Table Insert cutout.
OVERARM PIN
ROUTING OPERATIONS
SAFETY FIRST
WARNING
To protect yourself from injury, read,
understand, and follow all the instructions in the safety section before you
operate the routing system.
USING YOUR SHOPSMITH
OVERARM PIN ROUTER
The information in this section of your
manual will provide the basic understanding you’ll need to perform overarm routing
operations. To get the “feel” of your Overarm Pin Router, it’s best to practice doing
simple work before you tackle more difficult
operations.
Before we look at each of the different types
of operations in-depth, let’s review some basic Overarm Routing guidelines that apply
to both approaches.
GENERAL GUIDELINES
FOR BOTH TYPES OF
OVERARM ROUTING
1. Installing the Router Bit . . . Always insert the router bit all the way into the
router motor’s collet . . . then retract it
about 1/16" to 1/8" to avoid locking the
router collet on the transition between
the shank and the cutter of the router
bit.
WARNING
Always make sure the router bit is secured properly in the collet. Loose bits
can easily work free and cause serious
injury.
2. Mounting your accessories . . . Depending on the type of routing you’re doing,
mount the pin insert, appropriate starter
and/or guide pins, fixture, fences, and/
or other safety devices to help you
maintain control of your workpieces
during operation and avoid personal
injury.
There are two ways to use this versatile tool:
1. As a duplication tool . . . for making
multiples with fixtures or other guiding
devices
2. As an overhead routing tool . . . for performing common routing operations
such as decorative edging, dadoing,
grooving, mortising and creating other
types of specialized joinery.
18
WARNING
• Always use a starter pin, guide pin,
fixture, fence, shop-made featherboard(s), push stick, push block or
other safety device to control
workpieces. Never freehand rout
stock less than 12" x 12" or equiva-
MARK V – MOUNTED OVERARM PIN ROUTER
lent size. Small workpieces can be
very difficult to control during operations without appropriate holding
and guiding devices.
• For overarm routing operations, the
Table Insert must always be positioned with the threaded brass starter
pin hole to the left of the threaded
Guide Pin hole or center hole
(depending on which Insert you’re
using.
3. Setting your final depth-of-cut . . . With
the Depth Control Handle unscrewed
about one-half turn, lower the router
motor by rotating the Depth Control
Handle counter-clockwise. Position
your workpiece next to the bit and determine your final depth-off-cut. Tighten
the Depth Control Handle to lock the
motor in position, then screw the Depth
Stop Rod downward until it contacts the
Overarm casting. Tighten the wing nut
to lock the Rod in position
WARNING
• Avoid taking deep cuts. Your depthof-cut should typically be limited to
no more than 1/4" for each pass when
using bits up to 1/2" diameter in
hardwoods.
• For single-pass dovetail bits, always
cut a groove first, then cut the dovetail profile in the groove.
• Limit your depth-of-cut to 3/8" for
each pass when using bits up to 1/2"
diameter in soft woods.
• When using bits over 1/2" in diameter, limit your depth-of-cut to half
555970
the recommended depths for bits less
than 1/2" diameter.
4. Adjusting the Guard . . . Lower the
Guard so it clears the workpiece by
1/4", then tighten its wing nut securely.
WARNING
• Never rout without the Guard in
place
• Always position the Guard about
1/4" to not more than 1/2" above the
workpiece surface.
5. Making your cut . . . Loosen the Depth
Control Handle, raise the motor and retighten the Handle. Set the workpiece
in position on the Worktable.
Turn on the motor, loosen the Depth
Control Handle and pull it forward to
lower the router bit slowly into your
workpiece until the approximate depth
for the first pass is reached.
Tighten the depth control handle, then
make your cut . . . ALWAYS moving
the workpiece counter-clockwise,
AGAINST the rotation of the Router
Bit.
WARNING
ALWAYS move your workpiece
AGAINST the direction of the rotating router bit and NEVER WITH the
rotation of the bit. Moving WITH the
rotation of the bit is referred to as a
“climb-cut”, which could cause the bit
to grab the workpiece, resulting in personal injury.
19
555970
MARK V – MOUNTED OVERARM PIN ROUTER
Re-position the depth control handle for
each additional pass until the final
depth-of-cut is attained. Once you’ve
completed your final pass, loosen the
Depth Control Handle, raise the motor,
retighten the Handle and turn off the
motor. Only when the motor has
stopped completely should you remove and inspect your workpiece.
NOTE
The quality of your cut will depend on
three factors: (1) The depth-of-cut, (2) Your
feed rate and (3) The condition of your
Router Bit. Shallow cuts, a slow feed rate
and a sharp Bit will always produce the
best quality cut.
AN IMPORTANT NOTE ABOUT
ROUTER MOTOR SPEEDS
Router motors operate at the highest speeds
of any woodworking tools. For this reason,
unsightly burn marks can often appear
where the Bit meets the wood. This is especially true with hard woods such as maple,
cherry, oak, etc. which are best worked at
slower speeds.
Here are three valuable tips for avoiding
burn marks:
1. Always use sharp, clean bits.
2. Never attempt to make deep cuts in a
single pass. Taking multiple light passes
will always produce better results. For
best results, make the depth-of-cut on
your final pass 1/16" or less.
3. Always work in a continuous motion
without dwelling and don’t forget to
raise the rotating bit from the workpiece
before turning the motor off.
4. If your Router is a single speed model,
consider purchasing a plug-in after20
market electronic router speed control
device. Such devices are fairly inexpensive and allow you to slow your Router
motor down to the correct speed for
making smooth, burn-free cuts on even
the hardest of woods.
ROUTER DUPLICATION
USING SHOP-MADE
FIXTURES
If you’re planning to make a large quantity
of the same product, the fixture duplicating
method is best for speed and accuracy – and
making your own fixtures to cut out and
shape these products is easier than you
might think.
Fixtures are usually made from plastic laminate-covered materials such as countertop
cut-outs for sinks. That’s because these materials will hold up under continuous use
much better than ordinary wood. Sink cutouts are readily available at plumbing supply houses, from contractors, at cabinet
shops, or even at many home centers or
hardware stores...and are usually very inexpensive.
TYPES OF FIXTURES
There are three basic types of fixtures for pin
routing:
1. Screw-down fixtures . . . are the easiest
fixtures to make, but require more time
to attach and remove your workpieces
than clamp-in or profile fixtures With
this type of fixture, screws (or nails) are
used to hold your workpiece to the fixture.
When building a screw-down fixture, be
sure to position the screw holes so your
router bit will not cut into the screws
once the workpiece is attached. The ex-
MARK V – MOUNTED OVERARM PIN ROUTER
ample fixture shown in Figure 10 will
produce two different sized oval picture
frames, one oval plaque and a rectangular picture frame with an oval
opening . . . all from a single workpiece.
555970
2. Clamp-in fixtures . . . are best used when
the outside profile of the product you’re
building is already cut, since any cutting on outside edges will damage the
clamping device (See Fig. 11).
In our example, we’ve used a clamp-in
fixture to cut out a coach lantern that
just happens to have straight, square
outside edges. This fixture features attached sides that form a perimeter
around your workpiece (protruding
above the surface of the fixture, not
quite as high as your workpieces will
be thick) . . . and uses a straight, wooden
clamping bar on the left side that’s
clamped down with thumbscrews
threaded through ordinary drive-in Tnuts.
Figure 10. A typical screw-down fixture
(lower left) — and the projects made with it.
CAUTION
Be sure to use screws to hold every piece
of stock that will be separated when you
make your through-cuts. If you fail to do
this, once these cuts are made, scrap
stock could be caught by your rotating
router bit, causing a dangerous kick-back.
This does not apply to the outside scrap
piece that may be removed after you
make your first cut.
NOTE
When using screw-down fixtures for massproduction, it’s a good idea to use your
original fixture to make several more of the
same design. This way, you won’t be continually removing and replacing workpieces to make different types of cuts with
different profile bits.
Figure 11. A typical clamp-in fixture and
the project made with it.
As an alternative to this side clamping
method, the clamp could just as easily
work from the top of the fixture, as long
as your clamping device won’t interfere
with your cuts.
3. Profile fixtures . . . are used for shaping
edges only, such as candle sconces or the
tops of picket fences (See Fig 12). This
type of fixture features protruding screw
or nail tips which help hold the
workpiece in position in the fixture and
21
555970
keep it from sliding around while you
make your cuts. To seat the stock in a
profile fixture, just position it properly
and tap it gently with the heel of your
hand or a non-metallic mallet to seat the
screw or nail tips.
MARK V – MOUNTED OVERARM PIN ROUTER
4. Trace the grooves you cut in step two
over the Table Pin, transferring your design to the workpiece
Now, let’s review the specific procedures for
making the various types of fixtures and using them to duplicate your projects.
HOW TO MAKE SCREW-DOWN
AND CLAMP-IN FIXTURES
The fixture-making process is really quite
simple. Here’s the step-by-step process:
Figure 12. A typical profile fixture and
the picket fence top made with it.
AN OVERVIEW OF PIN ROUTING
WITH FIXTURES
The basic principle of all Pin Routing fixtures
is the same, no matter which style of fixture
you decide to use, with one difference:
• With screw-down and clamp-in style fixtures, a template is first cut and guided
against the Table Pin, while the router bit
transfers the design to the laminate side
of the fixture. This process creates the fixture grooves that will guide the Router Bit
as it cuts your duplicates.
• With profile style fixtures, the cut-out
template IS the fixture.
The basic, four-step Pin-Routing
process, in a nutshell:
1. Make a template in the shape of your
desired finished piece.
2. Use the template to cut the grooves in
the laminate side of your fixture
3. Attach a workpiece blank to the opposite side of the fixture
22
1. Make a Template – Start by tracing a
full-size pattern for your project onto a
piece of 1/2" thick solid (without voids)
plywood or MDF.
Why 1/2" thick? Because the screw-in
Pins that you’ll be routing against (and
over) are 3/8" high and the template
must be thicker than the height of the
pin to allow for free movement.
Cut out your shape carefully with a
Bandsaw and/or Scroll Saw. Keep outside of your cutting lines at all times.
Always leave a small amount of material that you can sand down to its exact
shape when you’ve finished with a
drum sander or your choice of sanding
device.
Alternative Method
As an alternative to making a template
from scratch, you can also use an existing item as your fixture-making template. In our Figure 13 example, we’ve
screwed an existing awards plaque to
our fixture blank.
With the item attached to the particleboard side of your fixture blank, trace
it against the table pin to form the
grooves in the laminate side of your fixture (See Fig. 14).
MARK V – MOUNTED OVERARM PIN ROUTER
555970
WHY MAKE A GROOVED FIXTURE?
The question is often asked...
”Why should I cut grooves in a fixture instead of just screwing a template to one side of
the fixture, the workpiece to the other, and guiding my template against the Table Pin,
as I would when making the fixture?”
The answer is simple. When guiding your fixture against a Table Pin, you must constantly maintain a steady pressure against the Pin at all times. A momentary lapse in
concentration can easily result in a cut going outside your desired shape. As a result,
against-the-pin routing is always a slower, more risky process than dropping the fixture
over the Table Pin.
When routing over a Table Pin, the Pin is captive in its groove and cannot go outside
your desired shape unless the fixture is raised off the table surface, releasing the Pin from
its groove. Over-the-Pin routing allows you to move more rapidly through the cut, with
little fear of slip-ups that could ruin your workpieces.
2. Cut out your fixture blank – As mentioned, fixtures should be made of a
laminate-covered material, such as 3/4"
thick sink cut-outs. Be sure to make
your fixture blank about 4" longer and
4" wider than your finished project, so
you have room to grip your fixture and
still keep your hands well out of harm’s
way.
Figure 13. Using an existing item
(in this case a plaque) as a template
for making your fixture
Figure 14. Guide the edge of your existing
item against the pin to cut a matching
groove in the laminate side of your fixture.
3. Mount your template to the fixture
blank – Mount it to the non-laminatecovered side of your fixture blank. Center the template in the fixture and use
screws or nails to hold the template
firmly in position. Be sure to put screws
or nails through each segment of the
template and don’t forget to countersink all screw or nail heads to keep
them from marring your Router Table
surface.
If there are to be multiple grooves in
your fixture (such as those in Figure 10),
be sure to leave adequate space between
the template segments for your Guide
Pin to ride in while you make your
fixture.
23
555970
For most applications, we recommend
using a 3/8" diameter Guide Pin.
IMPORTANT: The distances between
your template segments must remain
exact, all the way around its perimeter.
Any variations here and your fixture
will not function properly.
4. Set up your Overarm Router for fixture-making – For most projects, we recommend using a 3/8" Guide Pin and a
matching 3/8" carbide-tipped straight
router bit. Align the Pin and bit exactly
with one another as shown in Figure 8.
Adjust the Overarm Router’s Depth
Stop Rod to make a cut 7/16" deep
(remember . . . the Guide Pins are 3/8"
high). Lower your see-through Guard to
about 1/2" above the fixture surface. Attach your dust collection hose to the
port.
5. Cut the outside groove first – With the
router motor turned off, position your
fixture blank on the Overarm Router’s
Table...laminate side up and template
side down. Move the outside edge of
your template forward until it rests solidly against the Guide Pin.
MARK V – MOUNTED OVERARM PIN ROUTER
6. Cut all remaining guide grooves – Follow the same procedures outlined in
step #5 above. Remove the template
pieces from the particleboard side of the
fixture.
7. SCREW-DOWN FIXTURES – Drill
your mounting screw pilot holes
through the laminate side of your fixture, being sure to countersink your
screw heads well below the surface.
CLAMP-IN FIXTURES – Attach sides
around the perimeter of your fixture
(protruding above the surface of the fixture, but not quite as high as your
workpieces will be thick). For durability, use oak, maple or similar hard
woods for the sides and clamping bar.
Before attaching the side you select to
contain your clamp-down thumbscrews,
insert ordinary drive-in, threaded TNuts from the INSIDE of your frame
piece. Cut a straight, wooden clamping
bar to fit inside the perimeter. Once assembled, tightening the thumbscrews
will press the clamping bar against the
blank workpiece, holding it in position
while you cut out your shape. See Figure 15.
Turn on your router (and dust collector) and slowly lower the rotating bit
into the top of your fixture. Lock the
Depth Control Handle into position and
make an initial cut about 1/8" deep. Rotate your workpiece slowly and cautiously in a counter-clockwise direction
(Against the rotation of the bit) – being
careful to maintain a steady, even pressure against the Table Pin at all times
– until you’ve completed the first 1/8"
deep pass.
Repeat the process above two more
times, until you’ve created a guide
groove in the laminate side of your fixture that’s 7/16" deep.
24
Figure 15. Construction of a typical
clamp-in fixture
MARK V – MOUNTED OVERARM PIN ROUTER
8. Save your fixture-making templates –
Set your templates aside in the event
you need to make more fixtures or replace one that has been damaged.
HOW TO MAKE
PROFILE FIXTURES
Profile fixtures are used for shaping the outside edges of workpieces only. In our picket
fence example (See Fig. 12), the protruding
screw or nail tips and sides hold the
workpiece in position during operations.
Here’s the simple, three-step process:
1. Cut the profile shape – In our example,
we selected a piece of 3/4" thick, laminate-covered sink cut-out for our fixture
base that was the same, exact width as
our fence pickets. Make it a minimum
of 18" long, if possible to provide adequate support for the workpiece. We
used a bandsaw to cut out the profiled
shape on one end of our fixture . . . then
sanded the edges smooth with a drum
sander.
2. Attach fixture sides, if practical – Since
our fence pickets will have straight
sides, we were then able to attach 8"
long side pieces to the fixture, being sure
to keep them away from the shaped area
so they won’t interfere with the router
bit while we’re making our cuts. Make
the sides out of an appropriate hardwood such as oak, maple, hickory or
ash.
3. Install holding points – Use 8-penny
nails or 1" long drywall screws with
sharp points...driven up through the
bottom of the fixture, so they protrude
no more than about 1/4" above the surface. We prefer screws because they
won’t drive back out when you tap the
workpiece down onto the fixture.
555970
If you’re able to include sides on your
fixture to help hold your workpiece, you
should only need two or three holding
points. If your workpiece is odd-shaped
and sides are not an option, you may
need more holding points. Be sure
screw or nail heads are countersunk
below the surface of the fixture
bottom.
NOTE
If you’re planning to make a large quantity
of any project, it’s often a good idea to make
several identical fixtures. This is especially
true if you’ll be using different shaped router
bits to cut out your shape, form decorative
edges and cut sliding dovetails, grooves, dadoes or rabbets using different bits.
This way, you can have several components
mounted in their fixtures and make a number of cuts with the same profile bit, instead of frequently changing from bit-tobit.
HOW TO USE PIN
ROUTING FIXTURES
Routing over a pin with a
screw-down fixture
As we’ve explained, with a screw-down fixture (See Fig 16), your workpiece is secured
to the non-grooved (particleboard) side of
the fixture with screws. The fixture is then
flipped over and the grooves (in the shape
of your intended finished piece) in the laminate side of the fixture are traced over the
Guide Pin.
This process transfers your design exactly to
the workpiece you’ve mounted to the opposite (or particleboard) side of the fixture.
25
555970
MARK V – MOUNTED OVERARM PIN ROUTER
(2) A plaque-shaped picture frame with a
plaque-shaped opening.
(3) A smaller plaque for tole painting or
decoupage.
Figure 16. Routing with a screw-down
fixture.
Screw-down fixtures are the easiest type of
fixture to use and generally take less time to
make than clamp-in fixtures. As shown in
our example, they can be used to duplicate
such things as award or tole painting
plaques, round or oval picture frames and
similar items.
If you’re making a large quantity of duplicate products, assembly and disassembly
time can be reduced by using needlepoint
utility screws to eliminate starter holes, and
a power screwdriver or variable speed reversible hand drill with a screwdriver bit to
drive them into position.
Figure 17. Getting multiple projects from
a single workpiece.
Step 1: Screw the appropriate sized guide
pin into the center hole of the Router Table
Insert and align it with the same sized router
bit, as explained previously.
This approach may not work and pilot holes
could be required if the screws are near the
edges of your workpieces. And remember . . .
making several identical fixtures also will
speed up large quantity production time.
Step 2: Drop the fixture groove over the
Table Pin, turn on your router motor, and
set your final depth-of-cut so the bit just
barely breaks through the surface of the particleboard side of your fixture. Turn off your
router motor.
NOTE
Step 3: Attach your workpiece to the fixture
In our plaque example, by adding an additional groove to the fixture (see broken
lines in Figure 17) and making the overall
size of the fixture larger, you can actually
form three projects from a single piece of
stock .
Step 4: Drop the fixture groove over the
Table Pin, turn on your router motor, plunge
your rotating bit into the workpiece about
1/4" and start moving your fixture (with
workpiece attached) in a counter-clockwise
motion until you’ve completed your initial
cut in the first groove.
(1) A square picture frame with a plaqueshaped opening.
Step 5: Repeat the process for each groove
in your fixture.
26
MARK V – MOUNTED OVERARM PIN ROUTER
555970
Step 6: Remove your completed project
from the fixture, attach a new workpiece
blank and repeat steps 4, 5 and 6.
NOTE
• Apply a coating of furniture PASTE wax
to the Guide Pin, the bottom of your fixture and the insides of the grooves to
ease the movement of the fixture through
your cuts. Be sure to buff out the wax and
not leave blobs in the grooves that could
mix with sawdust and inhibit proper fixture movement.
• When guiding the fixture over the pin,
always move in a counter-clockwise direction, against the rotation of the bit and
maintain a steady force against the same
groove wall (push in against the inner
wall — or pull out against the outer wall)
throughout your cut. Don’t let the fixture
shift from wall-to-wall against the Guide
Pin.
Routing over a pin with
a clamp-in fixture
With a clamp-in fixture (See Fig 18), your
workpiece is secured to the non-grooved
(particleboard) side of the fixture by a movable clamp bar. The fixture is then flipped
over and the grooves (in the shape of your
intended finished piece) in the laminate side
of the fixture are traced over the Guide Pin.
As with a screw-in fixture, this process transfers your design exactly to the workpiece
you’ve mounted to the opposite (or particleboard) side of the fixture.
Clamp-in fixtures take longer to make than
screw-down fixtures and function much like
screw-down fixtures, except that the
workpiece is clamped into rather than
screwed to, the fixture. As a result, they offer the advantages of greatly reduced
Figure 18. A typical clamp-in fixture.
workpiece insertion and removal times and
not damaging any surface of the workpiece.
Clamp-in fixtures are best for projects where
only internal cuts are made and two opposing sides of the workpiece can be left uncut
and used to clamp against. (The clamp and
fixture could be designed to follow a profile
of a workpiece.)
Step 1: Screw the appropriate sized guide
pin into the center hole of the Router Table
Insert and align it with the same sized router
bit, as explained previously.
Step 2: Drop the fixture groove over the
Table Pin, turn on your router motor, and
set your final depth-of-cut so the bit just
barely breaks through the surface of the particleboard side of your fixture. Turn off your
router motor.
Step 3: Clamp your workpiece firmly to the
fixture.
27
555970
MARK V – MOUNTED OVERARM PIN ROUTER
Step 4: Drop the fixture groove over the
Table Pin, turn on your router motor, plunge
your rotating bit into the workpiece about
1/4" and start moving your fixture (with
workpiece attached) in a counter-clockwise
motion until you’ve completed your initial
cut in the first groove (See Fig. 19).
Figure 20. Construction of a typical
profile fixture.
However, this lack of guiding grooves means
that you must be certain to maintain a constant, steady pressure against the edge of the
fixture throughout the routing process. A
momentary loss of concentration could ruin
your project and result in personal injury.
Figure 19. Routing with a clamp-in fixture.
Step 5: Repeat the process for each groove
in your fixture.
Step 6: Remove your completed project
from the fixture, clamp a new workpiece
blank into position and repeat steps 4, 5
and 6.
Routing against a pin using
a profile fixture
Our example profile fixture shown in Figure 20 is used to cut the shaped tops of fence
pickets. Similar fixtures could be used for the
tops of wall sconces, shaped fence or porch
rail balusters and similar projects. You can
even make double-ended fixtures, with a different design on each end.
Blank workpieces can be inserted and removed from profile fixtures very rapidly and
they’re usually much easier to make that
screw-in or clamp-in fixtures because they
require no template (they are the template)
and have no grooves.
28
Here’s the 4-step process for using a profile
fixture:
Step 1: Screw the appropriate sized guide
pin into the center hole of the Router Table
Insert and align it with the same sized router
bit, as explained previously.
Step 2: Position the workpiece on top of the
fixture with its tip either flush with or protruding 1/8" beyond the end of the fixture
so the router Guide Pin will engage the fixture before the router bit begins cutting the
workpiece. Tap the workpiece firmly with a
mallet or the heel of your hand to “seat” it
properly in the fixture.
Step 3: Cut one side of your profile. Once
again, it’s important that you be careful to
maintain a constant, steady pressure against
the Guide Pin throughout the cut.
Step 4: Rotate the fixture and cut the opposite side of your profile. Remove the
workpiece and repeat the process with all
subsequent workpieces.
MARK V – MOUNTED OVERARM PIN ROUTER
Cutting decorative internal and external
edges using a fixture
Figure 21 shows a finished plaque, still attached to its fixture. Only the top surface of
the edge was cut.
Figure 21. A plaque with external
decorative edging completed. We used
a 1/2", non-piloted core box bit to form
our example edge.
555970
Step 2. Cut the edge. The routing method
used is similar to routing against a pin. Remember to always move the fixture against
the rotation of the bit, and keep the same
wall of the groove against the Guide Pin at
all times. Usually, only two passes are required to achieve the final depth-of-cut. It’s
OK to make about 75 percent of the cut on
the first pass, and the balance on the second.
Cutting decorative surface
features using a fixture
An unlimited variety of attractive surface
decorations can be created by guiding an existing (or additional) groove in your fixture
over a Guide Pin, such as our Figure 22 example of cutting a V-groove in the surface
of an oval picture frame.
Step 1. Set your router bit to produce the
desired depth-of-cut. To do this, use your
fixture to cut out a practice sample of your
finished product. Be sure it’s the same thickness as the finished piece you plan to make.
Use this practice sample to make a few cuts
until you achieve your desired profile.
NOTE
When using a fixture to guide your
workpiece through decorative edging cuts,
you can alter the profiles produced by
changing to a Guide Pin that’s smaller than
your groove and/or changing the side of the
fixture groove you guide against.
During operation, it’s important that you always guide your fixture against the same
side of the groove throughout your cut. If
you’re using the outside edge of the groove,
you must pull against the Guide Pin as you
make your cut. If you’re using the inside
edge of the groove, you must push against
the Guide Pin as you make you cut.
Remember . . . changing groove sides in midcut will alter the profile of the cut and ruin
your edge.
Figure 22. Using a V-groove bit to cut
a decorative surface feature in an
oval picture frame.
Since the entire bit is in contact with the
workpiece while making surfacing cuts, you
must always use a Guide Pin that’s the same
size as the groove in your fixture for safety
reasons. As a result, the profile of your cut
is controlled entirely by altering the depthof-cut of the bit. Decorative surfacing cuts
cannot be made with a piloted router bit
unless a straight bit is used first to form a
groove that the pilot can ride in.
29
555970
CONVENTIONAL
ROUTING OPERATIONS
WITH THE OVERARM
ROUTER
The Shopsmith Overarm Pin Router is also
well suited for more ordinary routing
operations . . . functioning in a very similar
fashion to more conventional under-table
router set-ups. There are a few differences:
• With the Overarm Router, your rotating
bit is almost always in plain view, providing an added measure of accuracy.
• Changing your depth-of cut (and seeing
your change as you make it) is a much
simpler matter with an Overarm Router.
For maximum efficiency, under-table routing requires a special router lifting device.
Such devices often expensive, adding a
couple of hundred dollars to the cost of a
router table.
• The improved visibility of your work-inprocess also makes forming stopped cuts
(such as travel slots, grooves, dadoes and
mortises) much easier and safer with an
Overarm Router.
MARK V – MOUNTED OVERARM PIN ROUTER
rative cuts with non-piloted profile Bits.
Here’s the step-by-step process.
1. Set up your Overarm Router, following
the “General guidelines for overarm
routing” on page 18 in the front section
of this Manual.
2. Once you get started, always set your
depth-of-cut to make your first pass
very shallow. Doing so will give you far
better control over the accuracy of your
cut, since the rotating bit is much less
likely to grab or pull your workpiece off
your planned profile when your cuts are
shallow.
NOTE
In some cases, your lateral depth-of-cut
must also be adjusted to produce the profile you desire. With straight-edged workpieces, this can be accomplished by sliding your guiding Fence in or out. With irregular-shaped edges, just change the size
of the Guide Pin you’re using.
ROUTING AGAINST A TABLE PIN
3. Screw the appropriate sized Guide Pin
into the threaded hole in the center of
the Pin Routing Table Insert and tighten
it securely.
Against-the-Guide-Pin routing is usually
performed with a non-piloted router bit – on
a workpiece with irregular or rounded edges
that cannot be guided by the Fences. That’s
because the job of the pilots (solid or bearing-types) on piloted Bits are to control your
lateral depth-of-cut . . . and the profile they’re
making.
4. Position the Table Insert as shown in
Figure 23 and screw the 1/4" Starter Pin
into the threaded hole just to the left of
the center hole in the Plate. Tighten securely. When installing the Table Insert, the Starter Pin must always be positioned in the Insert so it is to the left
of the Guide Pin.
Since non-piloted Bits have no pilots to control their lateral depths-of-cut, you must rely
on Guide Pins to control this for you. Some
typical against-the-Pin operations include
creating special rabbet cuts (usually with
straight bits or slot cutters) and making deco-
5. Prepare to make your cut. Lower the
Router into the position and lock it securely. Turn on your Router motor. Resting the edge of your workpiece against
the Starter Pin, ease it gradually into the
rotating bit to start your cut. Continue
30
MARK V – MOUNTED OVERARM PIN ROUTER
GUIDE
PIN
STARTER
PIN
Figure 23. Use the Pin Routing Table Insert
when routing against a pin.
555970
With the Overarm Router, the process is almost identical . . . with two differences:
• First and foremost, with the Overarm
Router, your hands are used to grip the
workpiece instead of the router motor.
This provides improved visibility of the
cut and allows you to rout the edges of
workpieces that may be too small or
oddly-shaped to grip properly with
clamping devices.
moving your workpiece into the bit until the edge of your stock also makes
contact with the Guide Pin.
WARNING
Once contact is made with the Guide
Pin, move the workpiece around and
away from the Starter Pin, maintaining
contact with the Guide Pin at all times
until you’ve completed your cut.
NEVER attempt to work with a small
piece of stock less than 12" x 12" or that
puts your hands closer than 3" from
the guard.
Re-position the Depth Control Handle
for each subsequent pass until your desired final depth-of-cut is reached. Once
you’ve completed the final pass, loosen
the Depth Control Handle, raise the
Router, re-tighten the Handle and turn
off the Motor. Only when the Motor has
stopped completely should you remove
and inspect the workpiece.
USING PILOTED BITS FOR
DECORATIVE EDGING
Cutting decorative edges on workpieces with
piloted bits is a common operation for a
hand-held router. With this operation, the Bit
pilot controls your lateral depth-of-cut, while
the vertical depth-of-cut is controlled by the
plunge mechanism of your hand-held router
(in the case of plunge-style routers), or by
changing the height relationship between the
router motor and its base through some
other method.
• And secondly, with the Overarm Router,
your stock is supported by the Worktable,
while your vertical depth-of-cut is controlled with micro-precision by the updown action of the Arm.
Piloted router Bits come in two styles: 1) Bits
with solid steel pilots . . . or . . . 2) Bits with a
ball bearing pilot.
When making cuts with a piloted Bit, your
up-down depth-of-cut — and the number
of cuts you’ll have to make to form the
complete profile — can vary, based on two
factors:
• The amount of stock that must be removed to produce the profile you want.
If you’re forming an edge on thick stock,
you may not be able to cut a full profile
all at once without workpiece burning or
tear-out. In these cases, you’ll have to
make more than one pass . . . l owering the
Arm with each subsequent pass until the
profile you desire is achieved.
31
555970
MARK V – MOUNTED OVERARM PIN ROUTER
• The hardness of the stock you’re cutting.
If you’re working with hard maple, oak,
ash, cherry, hickory or other tough stock,
it may be necessary to make two or three
passes to produce your full profile without burning or tear-out.
Performing these operations is basically the
same, whether you’re cutting an external
edge or an internal edge.
your cut. When the Bit pilot contacts the
workpiece edge, gradually rotate the
workpiece off the Starter Pin and continue to move the workpiece against the
rotation of the bit, pushing steadily
against the Bit Pilot, which now serves
as your guide. (See Figure 24). If a second pass is required, repeat the procedure until the desired profile is
achieved.
External edges
1. Set up your Overarm Router, following
the “General guidelines for overarm
routing” on page 18 in the front section
of this Manual and install the Bit of your
choice.
2. With your router motor turned off,
move the workpiece next to the Bit and
adjust your up-down depth-of-cut
NOTE
In some cases, your lateral depth-of-cut
must also be adjusted to produce the profile you desire. In the case of a bearing-piloted Bit, this is accomplished by changing the size of the bearing. Most Bit manufacturers offer a variety of bearing pilots
with the same I.D. (internal diameter) and
differing O.D.’s (outside diameters). With
a solid-piloted Bit, the lateral depth-of-cut
cannot be altered.
3. Screw the 1/4" diameter Starter Pin into
the threaded Starter Pin hole in the Pin
Routing Table Insert and tighten it securely.
4. Move the workpiece away from the Bit
area, turn on the motor and lock everything in position to make your first pass.
Resting the external edge of your
workpiece against the Starter Pin, ease
it gradually into the rotating Bit to start
32
Figure 24. Cutting a decorative external
edge on an oval picture frame using a
solid pilot router bit.
Internal edges
To decorate the internal edges of projects, follow steps one through three, as outlined
above . . . then move to step four below.
4. Move the workpiece away from the Bit
area, turn on the motor and lock everything in position to make your first pass.
Resting the internal edge of your
workpiece against the Starter Pin, pull
it against the Pin. Maintain a steady
pulling force against the starter pin until the Bit pilot contacts the workpiece
edge, then move it gradually off the
Starter Pin and against the rotation of
the Bit, as its pilot takes over as your
guide. If additional passes are required,
repeat this procedure until the desired
profile is achieved.
MARK V – MOUNTED OVERARM PIN ROUTER
USING NON-PILOTED BITS
FOR DECORATIVE EDGING
This method is basically the same as for
decorative external or internal edging with
a piloted Bit. However, since these Bits have
no pilot to control your lateral depth-of-cut,
you’ll have to rely on a Guide Pin (of a
smaller diameter than your router Bit) to
control this for you.
555970
round workpieces, build a special V-shaped
Fence like the one shown in Figure 25
below.
One half the difference between the Guide
Pin diameter and the outside diameter of
your router Bit will be your lateral depthof-cut.
If using a smaller Guide Pin fails to produce
the desired results on a piece of scrap stock,
set the machine up so the Guide Pin and the
Bit are offset about the same distance as the
lateral depth-of-cut you want.
Re-position the edge of the workpiece
against the Guide Pin, turn on your router
motor and gradually move the workpiece
from the Guide Pin into the Bit, taking a very
light pass as first.
Figure 25. A shop-made, wooden
V-shaped Fence like the one shown here
is used for edging round workpieces
with non-piloted router Bits.
MAKING RABBET CUTS
Rabbets are edge or step cuts for such things
as the inside back edges of picture frames
(See Fig. 26).
NOTE
Since the bit and Guide Pin are not in perfect alignment during this operation, it’s
important that you always keep the
workpiece in the same plane throughout
the cut. If you begin by feeding the stock
into the Bit from a position in front of the
Guide Pin and end by feeding the stock
into the bit from a position to the left or
right of the Guide Pin, you will change
your lateral depth-of-cut and not achieve a
smooth, consistent profile. It’s a good idea
to make some practice cuts before attempting this operation on an actual project piece
When forming decorative edges on straight
workpieces with a non-piloted Bit, use your
Overarm Router Fence to control your lateral depth-of-cut. If you’re working with
Figure 26. Cutting a rabbet in the back side
of a round picture frame.
This method is basically the same as cutting
decorative internal edges using a pilot
bit . . . except . . . a large diameter straight Bit
and a Guide Pin are used.
The following equation will help you determine the size Bit and Guide Pin to use for
producing a rabbet of a specific size.
33
555970
MARK V – MOUNTED OVERARM PIN ROUTER
Bit dia. minus Guide Pin dia. = rabbet width
2
For example: A 3/4" diameter straight bit minus a 1/4" diameter Guide Pin equals 1/2".
1/2" divided by 2 equals a 1/4 wide rabbet.
STRAIGHT-LINE ROUTING
To perform straight-line routing, you will
need to use the two-piece aluminum Overarm Router Fence that came with your machine.
This fence can be used for decorative edging of projects as well as for jointing the
edges of workpieces for assembly, making
grooves, dadoes, rabbets, stop cuts and other
joints in straight workpieces.
The position of the fence is determined by
its intended use. If your operation calls for
removing the entire edge of a workpiece, it
is important that the outfeed side of the
Fence be moved forward to provide adequate support for the stock after its edge
has been removed (See Fig. 27).
If you’re not going to be removing the entire edge of the workpiece, attach a one-piece
shop-made face to the two-piece face; or adjust both sides of your two-piece Fence so
that they are exactly in-line, with no offset.
NOTE
Your Overarm Router Table contains eight
#10-24 threaded holes in its surface to accommodate the included Router Fence. It
also includes four #10-24 x 1" plastic Knobs,
four plastic Spacer/Bushings and four #10
Washers for attaching the Fence to the
Table.
34
Figure 27. When removing the entire edge
of a workpiece, the two halves of the
Fence must be offset (A). When removing
only a portion of the edge, the two halves
of the Fence must be perfectly aligned
with one another (B).
CAUTION
If you’re using a Bit with a pilot, the pilot
must be behind the plane of the Fence’s
contact surface in order to prevent interference with the leading edge of the
workpiece.
Follow all “General guidelines for overarm
routing” on page 18 in the front section of
this Manual for installing and aligning your
router Bit and Guard.
Turn on your router the motor and feed the
workpiece from left to right, maintaining
pressure against the Fence and Bit throughout the cut.
MARK V – MOUNTED OVERARM PIN ROUTER
555970
WARNING
Depending on the size of your
workpiece, you may have to use a push
stick (see Fig. 28), push block (see Fig.
29) or Feather Board(s) (see Fig. 30) in
order to keep you hands at a safe distance when feeding the workpiece
against the Fence and Bit.
NOTE
Figure 29. Cross-grain routing using
a push block.
For some operations, you may need to use a
featherboard to hold your workpiece down
to provide additional accuracy and safety. To
do this, you will need to build a vertical
Fence extension with a 3/4" wide groove to
accommodate the Shopsmith Featherboard
(see Figure 30).
LEFT FENCE BOARD
FACE VIEW
Figure 28. Straight-line routing using
a push stick.
CUTTING GROOVES AND DADOES
Grooves are cuts made with the wood grain,
while dado cuts are made across the grain.
Both of these straight line cuts must be performed using a Fence.
Grooves
1. Set up your Overarm Router, following
the “General guidelines for overarm
5/32" DIA. x 5/8" DEEP HOLES ON
BACK FACE FOR #12 SCREWS AND
WASHERS. ALIGN MOUNTING HOLES
WITH FENCE SLOTS.
END
VIEW
Figure 30. Straight-line routing using
feather boards mounted to wooden
fence boards and push sticks.
routing” on page 18 in the front section
of this Manual and install the Bit of your
choice.
2. Install the two-piece Overarm Router
Fence, as described in the straight-line
routing section above. For this operation, both halves of the Fence should be
installed in perfect alignment with one
another.
35
555970
MARK V – MOUNTED OVERARM PIN ROUTER
3. Select and install the appropriate
straight router Bit and set your depthof-cut. It’s best to make a trial cut in a
piece of same-sized scrap stock first, to
“prove” the location and depth of your
cut, before cutting your actual workpiece. Adjustments to the position of
your groove can be made by moving
your MARK V Worktable in and out.
Similar adjustments can be made for creating odd-width grooves (or dadoes) by
starting with a Bit that’s narrower than
your intended groove or dado, then moving the MARK V Worktable in or out to
widen your cut.
4. Turn on your router motor and feed the
workpiece from left to right (against the
rotation of the Bit), maintaining a steady
pressure against the fence during the cut
(See Fig. 31).
Figure 32. Cutting a dado across
the grain with a wooden pusher. Guide
stock against the Fence.
workpiece, be sure your wooden push block
has a 90° corner.
Place one of the block’s 90° edges against the
Fence and the other against your
workpiece . . . then use the block to push the
stock through the cut, as shown in Fig. 32.
NOTE
Figure 31. Cutting a groove with the grain
by guiding it against the Overarm
Router Fence.
Dadoes
The dado-cutting process is identical to the
process for cutting grooves, except that you
will need to make a wood back-up block to
hold the workpiece perpendicular to the
Fence and guide it through the cut. If your
cut is to be 90° to the edge of your
36
If you’re planning to cut a dado that is to
be at an angle other that 90°, you’ll need to
make a push block with one corner cut at
the same angle as your intended dado.
Then, position one edge of that corner
against the Fence and the other against your
stock as you guide it through the cut.
WARNING
Always use push sticks, push blocks,
and similar safety devices to keep you
hands out of harm’s way when making your cuts.
MARK V – MOUNTED OVERARM PIN ROUTER
555970
Making stopped cuts
using the Fence
A stopped cut is any cut made in a
workpiece that does not go completely from
end-to-end or from side-to-side. Some examples of stopped cuts include mortises,
travel slots and similar cuts. If your project
calls for square-ended cuts, the rounded ends
left by routing will need to be squared with
a chisel once you’ve finished.
Start by following steps one through three
outlined above for cutting grooves and dadoes.
4. Limiting the length of your cut. Mark
your workpiece where the stop cut is to
start and end. Clamp a stop block or a
wooden handscrew clamp onto the
Fence to limit the length of your cut. If
you’re using a stop block, position the
block above the worktable so that the
sawdust will not be trapped at the side
of the stop block (See Fig. 33). If the cut
is to be in the center of the workpiece
and the workpiece is short enough, use
a stop block to limit the travel at both
ends.
If the piece is longer than the Fence,
screw a suitable extension board to the
Fence . . . then clamp the second stop
block to that extension board. Another
option for long workpieces is to clamp
your stop block directly to your
workpiece so that it will limit your cut
by engaging the edge of the Router
Table.
5. With the router motor turned off, position the workpiece so the bit will be at
your starting mark.
Figure 33. Making a stopped cut for
a mortise.
6. Turn on the router motor, lower it into
your stock, lock it firmly in position,
then move the workpiece against the rotation of the bit and through the cut until it contacts the stop block. If your cut
is to be deep, multiple passes will be required.
Repairing furniture and veneers
Another handy use for your Shopsmith
Overarm Router is the repair of damaged
furniture and veneers. This is accomplished
by routing out the damaged area, making a
plug to match and then gluing it into the
routed area.
1. Install the two-piece Overarm Router
Fence, as you would for any straightline routing operation, positioning the
faces of both Fences in perfect alignment
with one another.
2. Select a straight router Bit that’s larger
in diameter than your damaged area is
wide. If the damaged area is wider than
any of your Bits, plan on making multiple passes.
37
555970
MARK V – MOUNTED OVERARM PIN ROUTER
3. Rout out a slot. To repair damage such
as that shown in Figure 34, rout out a
rounded-end slot that’s longer and
wider than the damaged area (See Fig.
35). Set your depth-of-cut to be only as
deep as the damaged wood. If you’re
repairing a surface defect on a veneer,
cut only to the depth of the veneer.
case of our thin panel cabinet door), you
can turn the damaged piece over and
use a pencil to trace around the outline
directly onto your workpiece . . . rather
than using the tracing paper approach.
As with the tracing approach, you
should cut your plug about 1/16" larger
than your routed slot.
5:
Figure 34. A damaged area on a
cabinet door.
Sand the plug to size. Use a Disc
Sander to sand around the edges of the
plug with your MARK V Worktable
tilted to about a 2° angle so it will be
tapered slightly and smaller at the bottom than it is at the top. Start by sanding it to within about 1/64" of your pencil line. Be careful! If you sand it too
far, you’ll have to make the plug over
again (See Fig. 36).
Figure 36. Cut and sand a plug to fit.
Figure 35. Rout a slot to remove the
damaged area.
4. Make the plug. Tape a piece of tracing
paper over the slot and pencil an outline about 1/16" larger all around than
the slot to allow for sanding your plug
to size. Transfer the outline to a piece of
the same species of wood. Try to match
the wood grain as closely as possible.
Cut out your plug with your Scroll Saw
or Bandsaw. If your slot has to go all
the way through your wood (as in the
38
Stop frequently and
size to see if it fits.
the edges of the plug
the opening and its
flush with the surface
repairing.
test the plug for
Continue sanding
until it drops into
top surface rests
of the item you’re
6. Install and finish the plug. Glue the
plug into position. If necessary, use glue
or plastic wood to fill in any voids on
the backside of your restored item left
by the plug’s taper. Use a test stick
method to stain or finish the plug until
it matches the original item perfectly.
MARK V – MOUNTED OVERARM PIN ROUTER
555970
STRUCTURAL JOINTS
The versatile Shopsmith Overarm Pin Router
makes easy work of forming all the joints
you need for structural framework- with
greater accuracy and finer precision than
most other tools. Here are some examples
of the joints that can be formed with the
Overarm Router (See Fig. 37).
CARING FOR YOUR
SHOPSMITH OVERARM
PIN ROUTER
As is the case with all Shopsmith tools, your
Overarm Router is designed to deliver years
of reliable service with a minimum of maintenance. However, like any other power tool,
it performs better and safer if you maintain
it properly.
WARNING
Always turn off and unplug your
router motor before you begin any
maintenance procedure.
Before you begin any maintenance procedure, be sure that the motor is unplugged.
Then remove the router Bit and any other
accessories, Fences or fixtures that are
mounted on the Overarm Router.
CLEANING
As you work, sawdust will accumulate on
the Overarm Router and this residue can affect its performance. We suggest that you
clean the Overarm Router and motor frequently with your shop vacuum. Use
brushes on all surfaces and crevice tool attachments to get into the tightest spots.
Figure 37. Structural joints that can
be formed with the Shopsmith Overarm
Pin Router.
39
555970
MARK V – MOUNTED OVERARM PIN ROUTER
After vacuuming, clean all major metal parts
of the Overarm Router (except the router
motor) with mineral spirits to remove all
dirt, grease, and any built-up wood pitch.
Use a clean, slightly damp cloth to wipe all
residue from the Guard and Worktable.
Clean your router motor as instructed in the
router owners manual.
WAXING
After a through cleaning, wax and buff the
Overarm Router’ Worktable surface. Apply
the wax sparingly, then buff it thoroughly. If
you apply too much wax or don’t buff it
thoroughly, the wax will mix with the sawdust, impede the movement of parts, and
leave residue on the stock.
CAUTION
Do not wax or use solvents on plastic
parts.
• The router motor holds its position when
the Depth Control Handle is unscrewed
• The Worktable slides forward or backward
without side play and locks securely in position
• The router Bit and Guide Pin (if being
used) are in alignment.
If any part of the Overarm Router requires
alignment or adjustment, follow the procedures in the Overarm Router’s assembly,
setup & alignment, and adjustment sections.
STORING YOUR
OVERARM ROUTER
In normal use, regular cleaning, lubricating
and waxing will prevent the ferrous parts of
the Overarm Router from rusting. However,
if the machine is to be stored for an extended
period or under unusually humid or corrosive conditions, spray all ferrous parts including pins, bits and accessories with a rustinhibiting light oil. Remove this oil with mineral spirits and re-wax the Overarm Router
before using it again.
RE-ALIGNING AND RE-ADJUSTING
Proper alignment and adjustment of all major parts of your Overarm Router are essential for good woodworking results. Check
that:
• The Depth Control Handle works properly
• The Dovetail Slide moves freely without
binding
40
ADJUSTING THE BRASS GIB
If you find that your router motor fails to
hold its position when the Depth Control
Handle is released (unscrewed), adjust the
Brass Gib, following the instructions in the
Alignment and Adjustment section of this
Manual.
MARK V – MOUNTED OVERARM PIN ROUTER
555970
MAINTENANCE
The maintenance intervals listed here are
based on normal operation and assume that
you will be careful not to abuse your Overarm Router. Obviously, if you work the unit
unusually hard, you’ll need to maintain it
more often. If an unusual noise or vibration
develops, turn off the motor immediately
and check to see what could be causing the
problem. Do not operate the routing system
again until you have corrected the cause of
the unusual noise or vibration.
As needed: Have your router Bits sharpened.
Every 5 hours of running time: Clean the
Overarm Router thoroughly. Check alignments and adjustments. Check tightness of
all critical hardware.
Every 6 months or as needed: Clean and
wax the Overarm Router
To estimate running times, use this rule:
The average woodworker will use power
tools only 10 percent of the total time spent
in the shop, at the most. You may not use
your Overarm Router as much as other
power tools. If you work in your shop for
25 hours, you’ve probably logged less than
an hour of running time on your Overarm
Router.
41
555970
MARK V – MOUNTED OVERARM PIN ROUTER
TROUBLESHOOTING GUIDE
Problems with your Overarm Router usually have simple solutions. Under normal use, you should
rarely have to service the Tool. Most problems can be corrected by simple maintenance, alignment,
adjustment or a change in your work habits. This Troubleshooting Guide has been developed to
help you diagnose and remedy any problems which may arise when using your Shopsmith Overarm Router.
Problem
Poor quality cut
Solution
Depth-of-cut excessive
Reduce depth-of-cut on each pass
Feed rate too fast
Feed workpiece into the bit at a slower rate
Router bit dull
Sharpen or replace bit
Overarm or motor loose,
causing “wobble”
Tighten Overarm on MARK V Way Tubes, Gibs
or Router Motor Clamp
Dull Router Bit
Sharpen or replace Bit
Motor running too fast
Slow down your variable speed Router Motor or
purchase an electronic motor speed control for
single-speed Routers
Router Table – to MARK V
Table mounting screws loose
Tighten screws – re-align Pin & Bit
Table Insert loose
Tighten Table Insert - re-align Pin & Bit
Arm Clamps loose
Tighten Arm Clamps around MARK V Way Tubes
– re-align Pin & Bit
Motor Clamp and Guard loose
Tighten Motor Clamp and Guard - re-align Pin & Bit
Loose nut (44) on left side
of Clutch Shaft
Tighten nut (44)
Poor seating surface on
Control Handle
Unscrew Depth Control Handle from Clutch Hub and
examine seating surface at end of Handle shaft. If
surface is rounded, file a new, FLAT seating surface
on end of Handle shaft.
Dovetail Slide sticks or grabs
Brass Gib adjusted too tightly
Loosen Gib adjustment setscrews (26)
Depth Control casting
won’t release
Ball Plunger (41) screwed in
too far – or defective
Unscrew Ball Plunger in quarter-turn increments until
casting releases from and engages groove in Depth
Control casting shaft, replace Ball Plunger if defective.
Walls of your cuts are
“stepped”
Worktable and Router Bit are
not perpendicular to one another
Adjust MARK V Worktable
Router motor overheats
Motor too close to Deflector (20)
Loosen motor and raise to allow 1/8" clearance
between bottom of router motor and Deflector
Workpiece “burning”
Guide Pin and Router
Bit work out of alignment
Depth Control Handle won’t
hold position when tightened
Depth-of cut changes while
making a cut
42
Possible Cause
Overworking motor
Stop and allow motor to cool
Taking too heavy a cut
Reduce depth-of-cut
Feeding stock too rapidly
through the cut
Slow down your feed rate
Bit loose in Router motor
Tighten Bit
Router motor loose in Motor
Clamp (1 & 9)
Tighten Clamp, by tightening nuts (7)
MARK V – MOUNTED OVERARM PIN ROUTER
How to Order Parts
To order replacement parts, first consult the Parts
List. Then write or call for current price information.
How to Return Parts
Should you need to return the equipment, call
Customer Services for packing and shipping information.
Customer Services
Where to Write — Send inquiries to:
Shopsmith, Inc.
Customer Services
3931 Image Drive
Dayton, Ohio 45414
Email — [email protected]
555970
Where to Phone — Shopsmith maintains toll-free
telephone numbers during normal business
hours.
For service call:
1-800-762-7555 (Continental U.S., Hawaii, Alaska,
Puerto Rico and U.S. Virgin Islands)
To place an order call:
1-800-543-7586 (Continental U.S., Hawaii, Alaska,
Puerto Rico and U.S. Virgin Islands)
When you write or call, tell us your Customer
Number and the Date Code of your equipment.
(Your customer number appears on the invoice
and the mailing labels of the literature we send
you. The date code is stamped on the equipment.)
Please write the numbers in the space provided
here.
Customer No. _____________________________
Date Code ________________________________
43
555970
MARK V – MOUNTED OVERARM PIN ROUTER
– NOTES –
The contents of this publication may not be reproduced either in whole or in part without the consent of the copyright owner.
Shopsmith ® is a registered trademark of Shopsmith, Inc. Patents pending on the design of the Shopsmith Overarm Router.
44
6530 Poe Avenue
Dayton, OH 45414-2591
845556 Rev. A 6/05
©2005 Shopsmith, Inc.
All Rights Reserved
Printed in U.S.A.