1
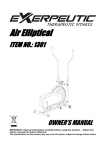
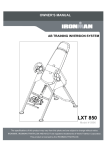
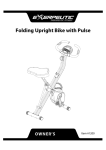
AIR ELLIPTICAL
IMPORTANT: Read all instructions carefully before using this product.
owner’s manual for future reference.
Retain this
The specifications of this product may vary from this photo and, subject to change without
notice.
OWNER’S MANUAL
Item #1308
TABLE OF CONTENTS
SERVICE ------------------------------------------------------------------------------ 2
LABEL PLACEMENT --------------------------------------------------------------- 3
IMPORTANT SAFETY INSTRUCTIONS -------------------------------------- 4
OVERVIEW DRAWING ------------------------------------------------------------ 5
PARTS LIST -------------------------------------------------------------------------- 6
HARDWARE & TOOLS PACK --------------------------------------------------- 8
ASSEMBLY --------------------------------------------------------------------------- 9
COMPUTER -------------------------------------------------------------------------- 18
TENSION ADJUSTMENT --------------------------------------------------------- 19
LEVEL ADJUSTMENTS ----------------------------------------------------------- 20
HOW TO USE U SHAPE GRAB BAR ------------------------------------------ 21
MAINTENANCE ---------------------------------------------------------------------- 22
TROUBLESHOOTING ------------------------------------------------------------- 23
WARM UP ----------------------------------------------------------------------------- 25
WARRANTY -------------------------------------------------------------------------- 26
FAX FORM ---------------------------------------------------------------------------- 27
1
SERVICE
IMPORTANT: FOR NORTH AMERICA ONLY
To request product service and order
replacement parts, please call our
customer service department at:
1-866-924-1688
Monday through Friday, 8:00 AM-5:00 PM Pacific Standard Time,
or email us at: [email protected]
Please visit our website at www.paradigmhw.com.
Please have the following information ready when requesting for service:
Your name
Phone number
Model number
Serial number
Part number
Proof of Purchase
Before returning this product to the store please contact
customer service at the contact number.
Paradigm Health & Wellness, Inc.
1189 Jellick Ave.
City of Industry, CA 91748 USA
2
LABEL PLACEMENT
3
IMPORTANT SAFETY INSTRUCTIONS
Basic precautions should always be followed, including the following safety
instructions when using this equipment. Read all instructions before using this
equipment.
1. Before exercising and to avoid injuring your muscles, it is highly recommended
that you perform warm-up exercises for each muscle group. Please refer to
Warm Up section of the Owner’s Manual.
2. Please make sure all components are not damaged and are working order
before using. This equipment should be placed on a stable, flat surface.
Using a mat or similar material on the ground is recommended.
3. Please wear proper clothes and shoes when using this equipment. Do not
wear loose clothing that may get caught by any part of the equipment.
4. Only perform maintenance or adjustments that are instructed in this manual.
Should any problems arise, discontinue use and consult with customer service
at Paradigm.
5. Be careful when stepping on or stepping off the pedals. Always hold onto the
handlebars first and make sure the pedal at your side is at its lowest position,
then step on. With your other leg, stride over the main frame and come to rest
onto the other pedal. To ensure the pedals run smoothly, push or pull on the
handlebars first, then follow with leg motion. To dismount, reduce pedaling
speed gradually before you stop. When stepping off the machine, make sure
one pedal is at its lowest position and step out of there before stepping out of
the pedal at the highest position.
6. Keep dry - do not operate in wet or moist condition.
7. Do not use the equipment outdoors.
8. This equipment is for household use only.
9. Only one person should be on the equipment at a time.
10. Keep children and pets away from the product at all times.
11. This machine is designed for adults only.
12. This product requires a minimum of 6 feet of space for safe operation.
13. If you feel any chest pains, nausea, dizziness, or short of breath, you should
stop exercising immediately and consult with your physician before continuing.
14. The maximum weight capacity for this product is 250 lbs/113 kgs.
WARNING: Before beginning any exercise program consult your
physician.
This is especially important for the people who are over 35 years old
or who have pre-existing health problems.
CAUTION: Read all instructions carefully before operating this product.
Retain this Owner’s Manual for future reference.
4
5
35
32
47
42
36
41
81
80
10 34
34 86
86
33
30
24
30
31
6
63
95
42
10
39 31
29
5
100
8
46
82
48
40
38
37
11
81
99
88
80
32
7
2
101 102
44
12
8
45
15
16
9
4
47
99
1
103
98
14
49
88
16
17
18
23
20
3
22
21
8
8
92
53
48
46
82
93
99
57
58
53
97 68
89
79
92
28
83
67
94
27
44
94
56
78
26
65
45
52
93
54
55
25
13
8
51
96
91
24
50
14
14
22
19R
66
65
43
8
69
71
70
105
113
59
106
85
56
55
78
25
115
60
71
70
61
66
107
88
62
14
80
74
61
100
113
12
81
8
73
22
72
52
108
109
110
111
112
114
15
16
77
8
102
11
88
24
27
75
16
8
14
91
18
65
84
20
66
99
96
14
25
13
103
90
76
5
87
7 6
97
99
47
4
101
104
8
3
22
23
64
20
65
19L
43
65
OVERVIEW DRAWING
PARTS LIST
No.
001
Description
Right U Shape Grab Bar
Ø25x1.8
Right Handrail Arm Ø25x1.8
U-Shaped Grab Bar Foam Grip
Ø24xØ34x410
Handrail Arm Plastic Bushing
Ø32x1.5
Qty No.
Description
Qty
1
028 Nylon Nut for Right Crank 1/2”
1
1
029 Computer M1202
Hand Pulse Handlebar End Cap
030
Ø25x1.5
1
2
031 Hand Pulse Sensor
2
005 Bolt M10x18
2
032
006 Spring Washer Ø10xØ18x3
007 Washer Ø28xØ16xδ5
Powder Metal Bushing
008
Ø24.5xØ16x14
009 Right Handrail Ø32x1.5
Extension Sensor Wire
010
L=650 mm
011 Bolt M10x55
012 Handrail End Cap Ø32x1.5
Serrated Lock Washer External
013
Teeth Ø10
2
2
033
034
002
003
004
2
10 035
Hand Pulse Handlebar Foam Grip
Ø24xØ30x240
Hand Pulse Handlebar Ø25x1.5
Wire Grommet Ø12.1
Hand Pulse Sensor Wire
L=500 mm
Spring Washer Ø8
2
2
1
2
2
1
036
1
037 Tension Control Knob L=40 mm
1
2
2
038 Bolt M5x15
039 Carriage Bolt M8x35
3
2
2
040 Bottle Holder
1
014 Nylon Nut M10
6
041
015 Foot Bar End Cap 30x30x1.5
2
Powder Metal Bushing
Ø14xØ10x10
017 Right Foot Bar
Foot Pedal Support Bracket
018
245x38xδ3.0
019L Left Foot Pedal 349x150x56
019R Right Foot Pedal 349x150x56
020 Bolt M10x45
Right Bolt for Right Crank
021
Ø16x89xL23
016
Hand Pulse Handlebar Support
Frame
Hand Pulse Handlebar Support
042
Frame End Cap 30x20x2
4
1
2
4
043 Cover Cap Ø25
2
1
044 Eyebolt M6x33
2
2
045 Nut M10x1xB5
2
1
1
4
046 Tension Bracket
047 Bolt M8x38
048 Nut M6
2
8
2
1
049 Fan Wheel Ø503x85
1
022 Wave Washer Ø28xØ17x0.3
4
050
023
024
025
026
027
4
8
7
1
2
051
052
053
054
055
Bolt M8x43
Washer Ø8
Nylon Nut M8
Right Crank 6.7"
Spring Washer Ø20xØ13x2
6
Fan Wheel Axle
M10x1xL150xL25xL40
Spacer Ø16xØ10x20
Bolt M10x57
Front Stabilizer End Cap Ø50
Front Stabilizer Ø50x1.5x540
Curve Washer Ø10xØ25x2
1
1
4
2
1
4
PARTS LIST
No.
056
057
058
059
060
061
062
063
064
Description
Cap Nut M10
Adjustable Leveler M8x45
Nut M8
Mainframe
Rotation Rod Ø15.8x376
Rear Stabilizer End Cap Ø50
Rear Stabilizer Ø50x1.5x550
Tension Strap 1150x18
Left Bolt for Left Crank
Ø16x89xL23
Screw ST4.8x40
Phillips Self Drilling Screw
ST4.8x20
Chain Pulley
Washer Ø40x24x3
Bearing Nut II 15/16"
Bearing
Bearing Cup
Bearing Nut I 7/8"
Washer Ø34.5x23x2.5
Nut 7/8"
Left Crank 6.7"
Left Foot Bar
Left Handrail
Sensor with Wire L=900 mm
Tension Cable L=1020 mm
Cap Nut M8
Big Curve Washer Ø8xØ20x2
Flange Nut M10x1xB10
Qty
4
2
2
1
1
2
1
1
No.
086
087
088
089
090
091
092
093
Description
Screw ST4.2x20
Nylon Nut for Left Crank 1/2”
Nut Cap S16
Small Magnet Ø15x7
Left Handrail Arm Ø25x1.8
Crank Cover Ø22
Bolt M6x45
Transport Wheel Ø23xØ6x32
Qty
2
1
4
1
1
2
2
2
1
094 Nylon Nut M6
2
7
095 Plastic Clip 20
1
3
096 Flange Nut M10x1.25
2
1
1
1
2
2
1
1
1
1
1
1
1
1
6
6
2
097
098
099
100
101
102
103
104
105
106
107
108
109
110
111
112
2
1
6
4
4
4
4
1
1
1
1
1
1
1
1
1
083 Right Cover 705x362
1
113
084 Left Cover 705x362
085 Chain
1
1
114
115
065
066
067
068
069
070
071
072
073
074
075
076
077
078
079
080
081
082
7
Nut Cap S18
Spring Ø12x1.8x32
Round Plug Ø25x1.5
Cap Nut M6
Big Curve Washer Ø6xØ16x1.5
Conical Washer Ø6xØ10.5x5
Bolt M6x30
Left U Shape Grab Bar Ø25x1.8
Seat Post Knob M12
Seat Post Plastic Bushing
Seat Post Plastic Tube
Seat Adjustment Knob M10
Washer Ø10xØ20x2
Seat Post
U Shape Bolt M10
Seat Sliding Tube
Seat Sliding Tube End Cap
38x38x1.5
Seat Cushion DD-98-4T
Big Washer Ø8xØ20x2
2
1
3
HARDWARE & TOOLS PACK
STEP 1
STEP 6
STEP 2 & 3
STEP 4
STEP 5
8
ASSEMBLY
B
52
55
62
56
58
56
55
A
52
52
52
93
Tool:
59
56
55
57
54
Open-Ended Flat Wrench
C
1. Front/Rear Stabilizers and Adjustable Levelers Installation:
Step A: Align the Front Stabilizer (54) onto the front curve of the Mainframe (59).
Make sure the arrow is pointing UP on the front stabilizer and that the Transport
Wheels (93) position toward the front and parallel off the floor. Attach two Bolts (52)
and on the other ends of bolts with two Curve Washers (55) and two Cap Nuts (56).
Using the flat wrench, tighten the cap nuts until firm.
Step B: Align and attach the Rear Stabilizer (62) onto the rear curve of the Mainframe
(59) with two Bolts (52) and the other ends with two Curve Washers (55) and two Cap
Nuts (56). Using the flat wrench, tighten the cap nuts until firm.
Step C: Remove the Nut (58) from the Adjustable Leveler (57). Screw the levelers
onto the bottom of the Mainframe (59) and hand-tighten the nut to the leveler.
Repeat for the other side. Note: Finish assembling the elliptical first and then refer to
page 20 on adjusting the levelers as needed.
IMPORTANT: To prevent Elliptical from wobbling, make sure you adjust the
levelers as instructed on Page 20.
Hardware:
Front Stabilizer
Hardware (Step A)
(Step C)
Rear Stabilizer
Hardware (Step B)
(52) Bolt
(55) Curve Washer
(56) Cap Nut
4 PCS
4 PCS
4 PCS
9
(57) Adjustable Leveler
(58) Bolt
2 PCS
2 PCS
ASSEMBLY
G
5
6
17
Tools:
22
7
S6 Allen Wrench
8
9
88
H
14
11
59
88
D
S6 Allen Wrench with
Phillips Screwdriver
8
22
60
F
7 6
5
77
76
88
Open-Ended Flat Wrench
14
E
11
88
2. Handrails, Foot Bars and Rotation Rod Installation:
Step D: Attach the Right Foot Bar (17) onto the bottom end of the Right Handrail (9)
with one Bolt (11) and one Nylon Nut (14).
Note: Make sure the right foot bar is angled downward for correct installation.
Use one flat wrench to secure the bolt and the other flat wrench to tighten the nylon
nut until firm. For correct tightness, the bolt’s threads MUST protrude out through the
nylon nut until no longer turns.
Step E: Repeat step above for the left side.
Step F: Cover both Bolts (11) and Nylon Nuts (14) with four Nut Caps (88).
Step G: Using S6 Allen Wrench, remove two Bolts (5), two Spring Washers (6), two
Washers (7), and two Wave Washers (22) PRE-ASSEMBLED from both ends of the
Rotation Rod (60).
Insert the Rotation Rod (60) into the hole on top of the Mainframe (59). Slide the
Right Handrail (9) onto the Rotation Rod (60) and secure in place with one set of the
above hardware that was removed. Use one S6 Allen Wrench to secure the bolt on
one end of the rod and the other S6 Allen Wrench to the bolt on the other end of the
rod to tighten the bolts until firm.
Step H: Repeat step above for the left side.
Hardware:
(11) Bolt
(14) Nylon Nut
(Step D&E)
10
2 PCS
2 PCS
ASSEMBLY
Tools:
K
S10 Allen Wrench
Important:
Installing right bolt into right
crank can only be done by
turning right (clockwise).
97
75
R for right bolt
21
22
17
8
I
26
27
87 Open-Ended Flat Wrench
27
Important:
Installing left bolt into left
crank can only be done
by turning left
8
(counterclockwise).
59
28
97
76
22
64
J
L for left bolt
K
3. Right and Left Bolts for Right and Left Cranks Installation:
It is important that you first read and understand the procedures before installing the
bolts to the cranks. Left bolt and left nylon nut are reverse threaded and the correct
direction to tighten is by turning to the left (counterclockwise). If not done correctly,
59 cranks may be damaged or stripped.
the bolts and/or
Step I: Insert the Right Bolt for Right Crank (21) and Wave Washer (22) through the
right side of the Right Foot Bar (17). Align the right foot bar with the Right Crank (26)
so that they are perfectly center. Screw the Right Bolt for Right Crank (21) through
the crank by turning right (clockwise) by hand until it stops. Put a Spring Washer (27)
and screw the Nylon Nut (28) by turning right onto the bolt by hand until it stops. Use
one flat wrench to secure the nylon nut and S10 Allen Wrench to tighten the bolt
through the nylon nut until firm. For correct tightness, the bolt’s threads MUST
protrude out through the nylon nut until no longer turns. Proper tightness is extremely
important to prevent parts from coming loose or damage during use.
Step J: Repeat this procedure for the left side assembly and note that left bolt and left
nylon nut are tighten by turning to the LEFT (counterclockwise).
Step K: Cover both Nylon Nuts (28, 87) with two Nut Caps (97).
CORRECT
INCORRECT
INCORRECT
Note: In order to install the bolt properly, keep it perfectly
straight when the bolt goes through the foot bar and the
crank. If the bolt is connected to the crank at an angle,
damage to the bolt and/or the crank may occur.
Please make sure the right bolt is for the right crank only
and the left bolt is for the left crank only. If done
incorrectly, the bolts and/or cranks may be damaged or
stripped.
11
ASSEMBLY
Hardware:
Step F
(88) Nut Cap
4 PCS
Step I
Step J
(21) Right Bolt for Right Crank
(22) Wave Washer
(27) Spring Washer
(28) Nylon Nut for Right Crank
(64) Left Bolt for Left Crank
(87) Nylon Nut for Left Crank
Step K
(97) Nut Cap
2 PCS
12
1 PC
2 PCS
2 PCS
1 PC
1 PC
1 PC
ASSEMBLY
A
N
O
Q
B
P
C
D
R
M
Tool:
L
S6 Allen Wrench with
Phillips Screwdriver
Open-Ended Flat Wrench
4. Hand Pulse Handlebar Support Frame, Tension Control Knob, Bottle Holder,
and Hand Pulse Handlebar Installation:
Step L: Attach the Hand Pulse Handlebar Support Frame (41) onto the Mainframe
(59) with four Bolts (47), four Spring Washers (36), and four Washers (24). Using the
S6 Allen Wrench with Phillips Screwdriver, tighten the bolts until firm.
Step M: Insert the Tension Cable (79) through the bottom hole of Hand Pulse
Handlebar Support Frame (41) and pull it out through the opening hole to connect with
the Tension Control Knob (37). See Figure D.
Step N: Connect the Sensor Wire (78) coming out from the Mainframe (59) to the
Extension Sensor Wire (10) coming from the bottom of the Hand Pulse Handlebar
Support Frame (41). Make sure the connectors “click” when connected. See Figure
A.
Step O: Turn the Tension Control Knob (37) to the lowest setting (counterclockwise).
Caution: Do not continue to turn the Tension Control Knob (37) after reaching its
lowest or highest setting for it may damage the knob.
Put the cable end of resistance cable of Tension Control Knob (37) into the spring
hook of Tension Cable (79). See Figure B. Align the resistance cable of Tension
Control Knob (37) into the gap of metal bracket of Tension Cable (79) with the nuts
sitting above the metal bracket. Turn the tension control knob towards the highest
setting (clockwise) until the nuts are seated firmly on top of the metal bracket. See
Figure C. Tuck cable inside the Hand Pulse Handlebar Support Frame (41).
13
ASSEMBLY
Step P: Install the Tension Control Knob (37) by inserting the tab into a square hole on
the Hand Pulse Handlebar Support Frame (41) and push down on the knob slightly in
order to align the opening with the bolt hole. Using the screwdriver, tighten the Bolt
(38) until firm. See Figure D.
Step Q: Attach the Bottle Holder (40) onto the Hand Pulse Handlebar Support Frame
(41) with two Bolts (38). Using the screwdriver, tighten both Bolts (38) until firm.
Step R: Attach the Hand Pulse Handlebar (33) onto the top end of the Hand Pulse
Handlebar Support Frame (41) with two Carriage Bolts (39), two Cap Nuts (80), and
two Big Curve Washers (81). Using the flat wrench, tighten the cap nuts until firm.
Hardware:
(Step L)
(47) Bolt
(36) Spring Washer
(24) Washer
4 PCS
4 PCS
4 PCS
(Step P&Q)
(38) Bolt
3 PCS
(Step R)
(39) Carriage Bolt
(80) Cap Nut
(81) Big Curve Washer
14
2 PCS
2 PCS
2 PCS
ASSEMBLY
20
U
20
T
19L
Tools:
19R
S6 Allen Wrench
Open-Ended Flat Wrench
76
18
25
14
24 14
S
23
5. Right and Left Foot Pedals Installation:
Step S: Attach two Foot Pedal Support Brackets (18) onto both the Right/Left Foot
Bars (17, 76) with four Bolts (23) and the other ends with four Washers (24) and four
Nylon Nuts (25). Use a flat wrench to secure the nylon nut and S6 Allen Wrench to
tighten the bolt through the nylon nut until firm. For correct tightness, the bolt’s
threads MUST protrude out through the nylon nut until no longer turns.
Step T: Attach the Right Foot Pedal (19R) onto the Right Foot Bar (17) with two Bolts
(20) and two Nylon Nuts (14). Using a flat wrench, tighten the nylon nuts until firm.
For correct tightness, the bolt’s threads MUST protrude out through the nylon nut until
no longer turns.
Step U: Repeat step above for the left side.
Hardware:
(Step T)
(Step S)
(14) Nylon Nut
(20) Bolt
(23) Bolt
(24) Washer
(25) Nylon Nut
4 PCS
4 PCS
15
4 PCS
4 PCS
4 PCS
ASSEMBLY
V
Tools:
Y
S6 Allen Wrench
Open-Ended Flat Wrench
X
W
6. Left/Right U Shape Grab Bars, Left/Right Handrail Arms, and Computer
Installation:
Step V: Insert the Left U Shape Grab Bar (104) into the Left Handrail Arm (90) and
secure with two Bolts (103), two Conical Washers (102), and two Big Curve Washers
(101), and two Cap Nuts (100). Use a flat wrench to secure the cap nut and S6
Allen Wrench to tighten the bolt through the cap nut until firm. Repeat step above
for the right side.
Step W: Insert the Left Handrail Arm (90) onto the Left Handrail (77) and secure with
two Bolts (47), two Cap Nuts (80), and two Big Curve Washers (81). Use a flat wrench
to secure the cap nut and S6 Allen Wrench to tighten the bolt through the cap nut until
firm. Repeat step above for the right side.
Step X: Connect the Extension Sensor Wire (10) coming out from the top side of the
Hand Pulse Handlebar Support Frame (41) to the wire with a male connector coming
out from the Computer (29). Make sure the connectors “click” when connected.
Connect the two Hand Pulse Sensor Wires (35) from the Hand Pulse Handlebar (33) to
the two wires with female connectors coming out from the Computer (29). Make sure
the connectors “click” when connected.
Step Y: Place the Computer (29) onto the plate of the Hand Pulse Handlebar (33) then
slide it down to lock in position.
Hardware:
(Step W)
(Step V)
(100) Cap Nut
(101) Big Curve Washer
(102) Conical Washer
(103) Bolt
4 PCS
4 PCS
4 PCS
4 PCS
(47) Bolt
(80) Cap Nut
(81) Big Curve Washer
16
4 PCS
4 PCS
4 PCS
ASSEMBLY
114
25
Z
Z-1
112
111
115
110
109
Z-2
108
Z-5
Tool:
Open-Ended Flat Wrench
107
105
Z-4
Z-3
106
59
7. Seat Cushion, Seat Sliding Tube, Seat Post, and Seat Post Plastic Tube
Installation:
Step Z: Remove three Nylon Nuts (25) and three Big Washers (115) from underside of
the Seat Cushion (114). Using the flat wrench to remove the nylon nuts.
Step Z-1: Guide bolts on underside of the Seat Cushion (114) through holes on top of
the Seat Sliding Tube (112), attach with three removed Nylon Nuts (25) and Big
Washers (115). Using the flat wrench, tighten the nylon nuts until firm.
Step Z-2: Remove one Washer (109) and one Seat Adjustment Knob (108) from
the U Shape Bolt (111). Guide the U Shape Bolt (111) on underside of the Seat
Sliding Tube (112) through hole on top of the Seat Post (110), attach with one Washer
(109) and one Seat Adjustment Knob (108).
Step Z-3: Slide the Seat Post Plastic Tube (107) up to the Seat Post (110).
Step Z-4: Remove the Seat Post Knob (105) from the tube of the Mainframe (59)
Step Z-5: Insert the Seat Post (110) into the Seat Post Plastic Bushing (106) on the
tube of the Mainframe (59) and then attach the Seat Post Knob (105) onto the tube of
the Mainframe (59) by turning it in a clockwise direction to lock the Seat Post (110) in
the suitable position.
17
COMPUTER
SPECIFICATIONS:
TIME ---------------------------------------------------- 00:00-99:59 MIN: SEC
SPEED ------------------------------------------------- 0.0-999.9 MPH
DISTANCE -------------------------------------------- 0.00-99.99 MILE
CALORIE ---------------------------------------------- 0.0-999.9 KCAL
PULSE ------------------------------------------------- 40-200 BPM
USING YOUR COMPUTER
The computer can be activated by pressing the MODE button or by pedaling.
leave the equipment idle for 4 minutes, the power will turn off automatically.
If you
MODE BUTTON FUNCTIONS:
Press the MODE button once to select the desired function of the computer.
Press and hold the MODE button for 4 seconds to reset all data values.
COMPUTER FUNCTIONS:
SCAN: Press the MODE button until the arrow points to SCAN, the computer will
automatically scan through each function except the PULSE function every 6
seconds.
TIME: Press the MODE button until the arrow points to TIME, the computer will
display your elapsed workout time in minutes and seconds.
SPEED: Press the MODE button until the arrow points to SPEED, the computer will
display the current training speed.
DISTANCE: Press the MODE button until the arrow points to DISTANCE, the
computer will display the cumulative distance traveled during workout.
CALORIE: Press the MODE button until the arrow points to CALORIE, the
computer will display the ESTIMATED number of calories you are burning during
the workout. Please note that the readings are only estimates and there are many
factors that can’t be accounted for such as fitness level, body fat percentage, age,
weight and gender.
PULSE: Press the MODE button until the arrow points to PULSE, the computer will
display your current heart-rate readings only if BOTH hands are gripping the
hand-pulse sensors. No readings or inaccurate readings may occur if only one hand
is gripping the hand-pulse sensor.
HOW TO INSTALL THE BATTERIES:
1. Remove the battery cover on the back of the computer.
2. Place two "SIZE-AA" batteries into the battery housing.
3. Insure batteries are correctly positioned and battery springs are in proper contact
with batteries.
4. Re-install the battery cover.
5. If the display is illegible or only partial segment appears, remove the batteries
and wait 15 seconds before reinstalling.
18
TENSION ADJUSTMENT
Adjusting the Tension Control Knob
To increase the tension, turn the tension control knob in a
clockwise direction.
To decrease the tension, turn the tension control knob in a
counterclockwise direction.
Tension Control Knob
After prolong use of the elliptical trainer, the strap will
begin to stretch out and it will become necessary to
tighten the strap for optimum performance.
1.
Before tightening the strap, the tension knob must be
set to its lowest setting. To do this turn the knob in a
counterclockwise direction until it is at its lowest setting.
Do not continue to turn the knob after reaching its
lowest or highest setting for it may damage the knob.
2.
To tighten, undo the buckle of the plastic clip and then
pull the top strap on the front of the unit away
(downward). Close the buckle of the plastic clip to lock
in place. Only minimal adjustment is needed.
3.
Without changing the tension, you should now be able
to feel a little resistance (i.e. the flywheel is not turning
freely). If you are satisfied with the base level tension,
then you may select the desired tension and continue
exercising.
19
LEVEL ADJUSTMENTS
Adjusting the Rear Stabilizer
End Cap or Adjustable Leveler
The Elliptical has to be set up on a
flat surface. Otherwise, shaking
or wobble might occur during the
workout. Please use the following
two methods to adjust the Elliptical
Level.
B. Adjustable Leveler
A. Rear Stabilizer End Cap
IMPORTANT: Please follow these important steps to ensure the stability of the
elliptical when in use.
A. Adjusting the Rear Stabilizer End Cap #61:
The Rear Stabilizer End Cap #61 is designed
with different angle surfaces to level the Elliptical.
Please rotate the Rear Stabilizer End Cap #61 till
one of the surfaces firmly settle on the floor.
B. Adjusting the Adjustable Leveler #57:
The Adjustable Leveler #57 is designed to
distribute the Elliptical and User’s weight to
the ground level evenly. You should adjust the
Adjustable Leveler #57 until it slightly contacts
with the floor, so that they are at the same level
as the front and rear stabilizer end cap. If the
Elliptical is set up on a carpet, please make sure
the Adjustable Leveler #57 reaches the floor
instead of the carpet surface.
20
HOW TO USE U SHAPE GRAB BARS
Hand Pulse Handlebar
U Shape Grab Bar
U Shape Grab Bar
This AIR ELLIPTICAL can be used either as an elliptical trainer or an exercise bike.
User can choose to stand up when you want to use the elliptical trainer or sit down on
the seat when you use the exercise bike. User can choose whether to engage your
upper body muscles more with moving U Shape Grab Bar while using as an elliptical
trainer, or focus on your lower body muscles with the fixed Hand Pulse Handlebar
when using as an exercise bike. If user wants to sit down on the seat and grab the
U Shape Grab Bar for bike riding workout, this would be for a person who has longer
arm length. If user wants to stand up on the foot pedals and grab the U Shape Grab
Bar for elliptical workout, this would be for a person who has shorter arm length.
21
MAINTENANCE
Regular maintenance of your elliptical is necessary to extend the life of your
machine and allow it to continue to function properly. lease keep the elliptical,
especially the computer console, out of direct sunlight to prevent screen damage
or premature wear.
Cleaning
Keep the machine clean and free of any debris by vacuuming around the moving
parts and wiping the machine down with a clean cotton cloth. The elliptical can be
cleaned with a soft cloth and mild detergent. Do not use abrasives or solvents on
plastic parts. Be careful not get excessive moisture on the computer display panel
as this might cause an electrical hazard or electronics to fail. Immediately wipe
your perspiration off the elliptical after each use.
Lubrication
Regularly inspect your machine for any loose connections and tighten them.
Creating a consistent lubrication routine on the moving parts of the elliptical can
stop it from squeaking.
1. Check the floor where the elliptical sits to verify the floor is level. An Uneven
floor could create unnecessary stress on the moving parts of the elliptical,
creating a squeak.
2. Spray an aerosol multi-purpose or silicon-based lubricant onto the bolts that
connect the handlebars to the lower arms. The lower arms support the
footpads or pedals on the elliptical.
3. Spray the lubricant onto the bolts connecting the foot bars to the crank and the
bolts connecting the crank to the mainframe.
Storage
Store the elliptical trainer in a clean and dry environment away from children.
22
TROUBLESHOOTING
PROBLEM
SOLUTION
1.
The computer will not power up.
There is no readings on the computer
display.
The elliptical makes a squeaking
noise.
Check that the batteries are inserted
properly with the correct polarity (see
marking inside the battery compartment).
2. Check that the battery springs are in
proper contact with batteries.
3. Remove the old batteries and replace with
the new batteries.
1. Check that the Sensor Wire (78) coming
out from the Mainframe (59) is securely
connected to the Extension Sensor Wire
(10) coming from the bottom of the Hand
Pulse Handlebar Support Frame (41).
See Step 4 page 13.
2. Check that the Extension Sensor Wire
(10) coming out from the top side of the
Hand Pulse Handlebar Support Frame
(41) is securely connected to the wire with
a male connector coming out from the
Computer (29). See Step 6 page 16.
3. Check that the two Hand Pulse Sensor
Wires (35) from the hand pulse handlebar
are connected to the two wires with female
connectors coming out from the Computer
(29). See Step 6 page 16.
1. The bolts may be loose on the elliptical,
please inspect and tighten any loose
bolts.
2. See page for lubrication.
After prolong use, the chain may get loose and
start to have a clicking noise. Open the Right
& Left Covers (83, 84) to reach the Nut (48).
Tighten the chain by turning the Nut (48)
clockwise. Repeat for the other side.
Clicking Noise.
23
TROUBLESHOOTING
PROBLEM
The elliptical is not sturdy enough.
Tension adjustment doesn't work.
Pedal assembly is coming loose.
SOLUTION
Make sure both the Adjustable Levelers (57)
are touching the ground. Make sure the
elliptical is leveled. Please refer to page 20
Undo the buckle of the plastic clip and then
pull the top strap on the front of the unit away
(downward) to re-tighten the tension belt.
See page 19
Make sure the bolt is secured to the footbar
and into the crank with the nylon nut. When
tightening the bolt, make sure the bolt threads
protrude out through the nylon nut. Proper
tightness is extremely important to prevent
parts from coming loose or damage during
use. See page 11.
24
WARM UP
Quadriceps Stretch
With one hand against a wall for balance, reach behind
you and pull your right foot up. Bring your heel as close
to your buttocks as possible. Hold for 15 counts and
repeat with left foot up.
Inner Thigh Stretch
Sit with the soles of your feet together with your knees
pointing outward. Pull your feet as close to your groin
as possible. Gently push your knees towards the floor.
Hold for 15 counts.
Toe Touching
Slowly bend forward from your waist, letting you back and
shoulders relax as you stretch toward your toes. Reach
down as far as you can and hold for 15 counts.
Hamstring Stretch
Sit with your right leg extended. Rest the sole of your left
foot against your right inner thigh. Stretch toward your
toe as far as possible. Relax and hold for 15 counts.
Repeat with left leg extended.
25
WARRANTY
MANUFACTURER’S LIMITED WARRANTY
Paradigm Health & Wellness warrants to the original purchaser that this product is free from defects in
material and workmanship when used for the purpose intended, under the conditions that it has be
installed and operated in accordance with Paradigm’s Owner’s Manual. Paradigm’s obligation under
this warranty applies to the following:
COMPONENT
LENGTH OF WARRANTY
Structural Frame
2 Years
All Other Components
90 days
(computer display, electronics, upholstery, foam, ball bearings, pulleys, belts, cables, wires, shocks,
covers, tension, internal mechanism, wheels, pedals, knobs, accessories and hardware)
Exclusions from Warranty Coverage:
Paradigm does not warrant against and is not responsible for, and no implied warranty shall be deemed to cover, any
product failure, product malfunction, or damages attributable to:
1. improper installation and/or failure to abide by Paradigm’s installation guidelines;
2. use of this product beyond normal home use, or in an application for which it was not designed;
3. cosmetic items such as scratches, dents or discolorations;
4. damage caused by normal wear and tear, vandalism, accidental or by animals;
5. any act of Nature (such as fire, flooding, snow, ice, hurricane, earthquake, lightning or other natural diasters),
environmental condition (such as air pollution, mold, mildew, etc.), or staining from foreign substances (such as dirt, grease,
oil, etc.);
6. normal weathering due to exposure to sunlight, weather and atmosphere which can cause colored surfaces to, among
other things, flake, chalk, or accumulate dirt or stains; or
7. improper operation, alteration, handling, storage, abuse or neglect of the products.
Paradigm, using its sole discretion, will either repair or replace free of charge any part(s) proven to be
defective under normal home use. Any repair or replacement shall provide no new warranty
coverage, but shall retain only the remaining portion of the original product’s warranty. This warranty is
offered only to the original purchaser and is not transferable. Proof of original purchase is required.
Ordering Replacement Parts
Replacement parts can be ordered by calling or emailing our customer service dept:
1-866-924-1688
Monday through Friday 8:00 AM - 5:00 PM (PST).
[email protected]
When ordering replacement parts please have the following information ready:
1. Owner’s Manual
2. Model Number
3. Description of Parts
4. Part Number
5. Date of Purchase
26
FAX FORM
Paradigm Health & Wellness, Inc.
PARTS REQUEST FAX FORM
Please fax this form to (1-626-810-2166)
OR YOU CAN EMAIL CUSTOMER SERVICE REQUESTS TO
[email protected]
NAME: _______________________________________________________
ADDRESS: ____________________________________________________
CITY ______________ STATE ______________ ZIP ___________________
TELEPHONE: (Day) _____________________________________________
(Night) ____________________________________________
(Email Address) ____________________________________
SERIAL#: __________________________________________
ITEM/MODEL#: _____________________________________
PURCHASE DATE: ______________________________________________
PURCHASE FROM: ______________________________________________
PART #
DESCRIPTION
REASON
QTY
“YOUR ORDER WILL BE PROCESSED WITHIN 3 BUSINESS DAYS”
OFFICIAL USE ONLY (MD)
SHIP DATE: ___________________________________________
TRK #: _______________________________________________
BACK ORDER: ________________________________________
27