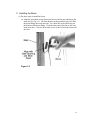
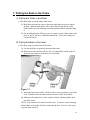
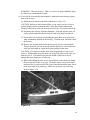
1
Congratulations! You have purchased one of the best known trailerable cruising vessels available. We invite you to spend a few moments with the following pages to become better acquainted with your new West Wight Potter. If at any point in this process, we at the factory can assist please give us a call. 1 (877) 674-8021 Best wishes for many pleasant sailing adventures! Sincerely, West Wight Potter 1 1. Safety ............................................................................................................................................... 1 US Coast Guard Requirements: ................................................................................................... 3 Safe Operation: ........................................................................................................................... 4 Safe Towing ............................................................................................................................... 5 2. One-Time Rigging ............................................................................................................................ 7 A. Connecting the Shrouds .............................................................................................................. 7 B. Installing the Main Sheet ............................................................................................................. 9 C. Installing the Furling Line and a Headsail on a CDI Roller Furler .............................................. 10 D. Initial Mast Tuning: .................................................................................................................. 13 3. Setup Before Launching .................................................................................................................. 16 A. Raising the Mast: ...................................................................................................................... 16 B. Installing the Boom ................................................................................................................... 23 C. Installing the Main Sail: ............................................................................................................ 26 D. Installing a Hanked-on Headsail (Jib, Lapper, or Genoa): .......................................................... 29 4. Launching Your Boat ...................................................................................................................... 32 A. Final checks before Launching .................................................................................................. 32 B. Launching the Boat: .................................................................................................................. 33 5. Setup After Launching .................................................................................................................... 35 A. Lowering the Dagger Board ...................................................................................................... 35 B. Installing the Rudder ................................................................................................................. 37 6. Preparing the Boat to Go Back on the Trailer ................................................................................... 38 A. Raise the Daggerboard .............................................................................................................. 38 B. Remove the Rudder................................................................................................................... 40 7. Putting the Boat on the Trailer ................................................................................................... 41 A. Putting the Trailer in the Water ................................................................................................. 41 B. Putting the Boat on the trailer: ................................................................................................... 41 8. Packing the Boat Back Up ......................................................................................................... 44 A. Removing the sails .................................................................................................................... 44 B. Removing the Boom ................................................................................................................. 46 C. Lowering the mast .................................................................................................................... 46 D. Securing the Mast, Shrouds, Stays, and Lines ............................................................................ 50 9. Maintenance ............................................................................................................................. 54 A. Trailer Maintenance .................................................................................................................. 54 B. Boat Maintenance ..................................................................................................................... 55 10. Using Hatches, Ports, Lights, Etc. ............................................................................................. 57 A. Forward Hatch .......................................................................................................................... 57 B. Main Hatch ............................................................................................................................... 57 C. V-Berth Hatches ....................................................................................................................... 57 D. V-Berth Filler board.................................................................................................................. 58 E. Under Sink and Under Stove Hatches ........................................................................................ 58 F. Opening Ports (optional) ........................................................................................................... 58 G. Interior Light ............................................................................................................................ 59 H. Navigation Lights ..................................................................................................................... 59 11. The Electrical System ............................................................................................................... 60 A. Options ..................................................................................................................................... 60 B. Charging the Battery ................................................................................................................. 60 C. Fuses ........................................................................................................................................ 62 D. Wiring Diagram ........................................................................................................................ 64 12. Using Accessories ..................................................................................................................... 65 B. Built-in Fresh Water Tank, Filling and Cleaning ........................................................................ 65 C. Using the Fresh Water Pump ..................................................................................................... 66 D. Emptying the Holding tank (boats with a built-in marine head) .................................................. 67 13. Links………………………………………………………………………………………………..69 14. Glossary ................................................................................................................................... 70 A. B. C. 2 1. Safety A. US Coast Guard Requirements: (1) The United States Coast Guard requires you to have the following safety equipment on your boat. This is the minimum safety equipment you should have. There may be other laws (state, local, etc.) that require additional safety equipment. Check with park and recreation, or law enforcement agencies in your area. Most have safety brochures that will help your determine what additional safety equipment is required. Additionally, if you sail outside the USA, there may be different requirements. (a) Life jackets -- One Type I, II, III, or V wearable PFD (personal flotation device) for each person on board. (must be USCG approved) (b) Life Ring -- One Type IV (throwable) PFD. Some cushions meet this requirement. The tag on the cushion will say if it qualifies. (c) One orange distress flag or one electric distress light- or -Three hand-held or floating orange smoke signals and One electric distress light- or -Three combination (day/night) red flares: hand-held, meteor or parachute type. (d) One fire extinguisher (USCG approved, rated B-I) (e) Horn - Some means of making an "efficient" sound signal - audible for a half mile for 4 to 6 seconds. (f) Navigation Lights - Required to be displayed from sunset to sunrise and in or near areas of reduced visibility. 3 B. Safe Operation: WARNINGS: Carefully follow all of the following warnings. Failure to follow these warnings can result in serious injury or death. (1) Your Potter is a very safe boat, but all boats pose some dangers. Following these warnings will help keep you safe as you use your boat. (a) Do not raise the mast near power lines, or take the boat near power lines when the mast is up. The mast can conduct electricity. If the mast touches power lines, or even gets close to them, you could be electrocuted. Electricity can jump through the air to the mast from very high voltage power lines. While most power lines do not have this high voltage, play it safe and keep the mast a minimum of 10 feet from all power lines. (b) Always wear a lifejacket. While we recommend that everyone always wear their lifejacket when out on their Potter, it is especially important for children and non-swimmers to wear one. It is also very important to wear one when operating in cold water, when operating in rough conditions, and when you are sailing alone or with inexperienced crew. If you fall off the boat, you will NOT be able to catch it by swimming. Unless someone onboard can sail the boat back to you, you will be all alone in the water as the boat sails merrily away from you. (c) Only sail your boat with the daggerboard fully down and locked in that position. Your Potter is a very stable boat, and part of this stability is due to the weight of the daggerboard. Your boat can tip-over more easily if the daggerboard is not locked in the down position. It is OK to motor (or paddle) your boat with the daggerboard up. But, the sails need to be down anytime the daggerboard is up. (d) If you are motoring with the daggerboard up, your maneuverability will be very poor. With the daggerboard up, your boat will slide sideways a lot. This can make it difficult to control the boat when turning, or if there is a wind blowing. Keep the daggerboard down as far as possible even when motoring your boat. Even a few inches down helps with maneuverability. If you must motor with the daggerboard up, then make sure you have lots of room to make maneuvers. (e) When raising the sails, raise the main sail first. If you raise the jib first, it can make it impossible to keep your boat pointed into the wind. If the wind is strong enough, it can turn your boat sideways to the wind and then tip your boat oven on its side. 4 C. Safe Towing (1) A normally equipped Potter 19 on a trailer will weigh about 2000 pounds when empty. Adding things like water, anchors, coolers, supplies, etc will increase the weight. Make sure your tow vehicle and hitch are rated to tow the full weight of your boat, trailer, and gear. (2) Before towing, make sure the following things are in good working order: (a) Make sure the trailers hitch is properly seated on the trailer ball, and latched and locked (see Fig 1-1). It is possible for the hitch to be latched, but not actually gripping the trailer ball (see Fig 1-2). This usually happens when you have the trailer too far forward when you try to attach it to the trailer ball (even a 1/2 inch forward can cause this problem). It can also happen when the hitch is not fully open as you lower it onto the trailer ball. To avoid this problem, open the hitch fully and, most importantly, make sure the trailer ball is slightly off-center to the FORWARD side of the trailers hitch before you lower the hitch onto the ball (see Fig 1-3). Figure 1-1 5 Figure 1-2 Figure 1-3 (b) Make sure the safety chains are attached to the tow vehicle. (c) Make sure all the trailer lights -- turn signals, break lights, and running lights (parking lights) -- work. (d) If you have trailer brakes, make sure the break-away cable is attached to the tow vehicle. 6 2. One-Time Rigging A. Connecting the Shrouds (1) Some people disconnect the shrouds from their chainplates every time they tow their boat. Others leave them attached. (2) When connecting the shrouds, the lower shroud connects to the forward hole in the chainplate. The upper shroud connects to the aft hole in the chainplate. Refer to Figure 2-1. Figure 2-1 7 (3) To attach the shroud to the chainplate, install a pin and cotter ring at the bottom of the turnbuckle. It is a good safety practice to tape cotter rings. Refer to Figure 2-2. Figure 2-2 8 B. Installing the Main Sheet (1) Here’s how to route the main sheet (See Fig 2-3): Figure 2-3 (a) If the two pulleys are not installed on the aft deck, then install them. The pulley with the becket (the extension to tie the end of the line to) goes on the port side. Note: The pulley with the becket can be installed on the other side. But, in order to get the correct main sheet arrangement (of 2 lines going up to the boom from each side of the boat) the mainsheet must go from the cam-cleat to the pulley with the becket first. If you mount the pulley with the becket on the starboard side, then the mainsheet will have to run from the cam-cleat over the hump of the stern deck. (b) Take one end of the line and run it through these items in order: the camcleat -- the port side pulley -- the aft sheave of the boom-block -- the starboard pulley -- the forward sheave of the boom-block -- tie the end to the becket on the port pulley. Look at the picture for a view of this threading. 9 C. Installing the Furling Line and a Headsail on a CDI Roller Furler (1) The following procedure tells how to put the reefing line and a sail on the CDI roller furler. If you need instructions for installing the roller furler on the forestay, then refer to CDI’s instructions. Refer to Figure 2-4. Figure 2-4 (2) To install reefing line on the CDI roller furler, follow these steps: NOTE: The furling line is easiest to install with the mast up. But, before you put the mast up, read the instructions below about installing the head sail. It has a few things that you should check before you raise the mast. (a) Put one end of the furling line in through the big hole on the side of the cup. 10 (b) Poke the end of the line up through the small hole in the spool. (c) Tie a knot in the end of the line so it will not go back down through the hole in the spool. (d) Route the other end of the furling line through its guides on the deck and to its cleat. After it is routed, tie a stopper knot in the end of the line. (e) Spin the furler around about 20 times to wrap 20 turns of the furling line on the spool. (3) Do the following steps with the mast down (to install a headsail for the first time): NOTE: Many of these steps are not necessary if the sail has already been fitted to the roller furler. (a) Examine the furler luff. The furler luff is the long plastic piece that runs the length of the forestay. Near the bottom, you should find a cutout (the feed cutout) in one of the slots of the furler luff. We will refer to the slot with the cutout as the sail slot or the aft slot. We will refer to the slot WITHOUT the cutout as the forward slot. (b) Look for the halyard line, which should be running through the top of the furler from the forward slot to the aft slot. In the forward slot, you should find the ferrule (a small metal cylinder) on the halyard. (c) Tie a messenger line (any line that is at least 20 feet long will work) to the end of the halyard that is in the forward slot. This end of the halyard should be the short end of the halyard when measured from the ferrule. The messenger line will only be used temporarily to raise the headsail. It is removed once the sail is up. (d) Pull the sail end of the halyard (the long end without the extra line attached) until the ferrule is at the top of the forward slot. (e) You are now ready to raise the mast. Refer to the section of this manual about raising the mast. (4) Do these steps with the mast up (to install a headsail for the first time): (a) If you have more than one headsail, select the one with the shortest luff length. (b) Tie the halyard to the head of your sail. Tie it such that the top of the sail is just below the top of the feed cutout. Pull down on the sail-end of the halyard before doing this to make sure the halyard is all the way down. (c) Feed the top of the bolt rope on the sail into the feed cutout. Pull the sail up by pulling down on the messenger line that you attached earlier to the halyard. While you pull on the messenger line, you will need to help feed the sail into the feed slot. (d) Pull the sail up as for as it will go. 11 (e) Measure the distance from the tack of the sail (its lower forward corner) to the tack tension shackle. Normally this distance should be 2 to 10 inches. (f) If the distance is not in the suggested range, then lower the sail and adjust the length of the halyard to adjust the height of the sail. Adjust the halyard length by untying the halyard from the sail and re-tying it at a different length. NOTE: The 2 to 10 inches is not a critical dimension. If you are fitting a genoa, you will probably be closer to the low end of this range because the genoa’s luff is so long the head of the sail will hit the top of the furler. If you are fitting a lapper or jib, you will have a larger gap, and will probably need to lower the sail some. (g) Re-hoist the sail, and see if it is in the right position. If it is, then continue, if it is not at the right height, then lower it and adjust the halyard again. (h) When the sail is at the correct height, untie the messenger line from the halyard. (i) Feed this end of the halyard through the halyard anchor shackle and tie it to the shackle. A bowline or 3 half hitches work well for this knot. (j) Take the tack tension line and loop it through the tack of the sail and the tack tension shackle. Form two or three loops with this line. Then pull the line tight (to tension the luff of the sail), and then tie the line off. (5) Now that the sail is fully adjusted, you can cut the ends of the halyard line off. You can trim any extra length from both ends of the halyard. After you cut the line, melt the end so it doesn’t unravel. You want the ends of the halyard short enough so that they don’t get tangled as you furl and unfurl the sail. But, you want to leave enough length to allow you to easily re-tie the knots should you remove and reinstall the sail. Also, if you might add a smaller sail in the future, then you will need the sail end of the halyard longer to reach to the shorter sail. (6) Do these steps to get the correct number of turns of furling line on the spool: (a) While holding tension on the clew (back corner) of the sail, pull on the furling line. Pull the furling line until the sail is completely furled. (b) Count the number of turns of furling line that are still on the drum. Around six turns on the drum is good. NOTE: The extra six turns is good for two things. First, if you roll your sail up in a strong wind, it will roll tighter. This will require more turns to furl it completely. Second, it’s a good idea to furl the sail until the sheets are wrapped two times or so around the sail. This helps make sure the sail won’t unfurl accidentally in a high wind. (c) If you have more turns than this, just continue pulling on the furling line until the correct number of turns of line remains. This needs to be done when the sheets are NOT attached to the sail. 12 (d) If you have fewer than 6 turns, then grab the sail and wind more turns of line on the spool. Make sure the sail stays furled as you do this. Again, this must be done when the sheets are NOT attached to the sail. D. Initial Mast Tuning: (1) Do these steps to get the stays and shrouds to approximately the correct length: (a) Use the tongue jack to level the boat for and aft. Level the boat such that the cockpit seats are level. Use a level if you have one. (b) Raise the mast as explained in the “Raising the Mast” section of this guide. (c) Loosen all four side shrouds just loose enough so you can pull them about 3 inches sideways with a gentle pressure from two fingers hooked around them. Refer to Figure 2-5. Figure 2-5 (d) Get the mast vertical fore and aft: Lengthen or shorten the forestay and backstay as necessary to get the mast vertical. Use a level (if you have one) placed against the back of the mast to see if the mast is vertical. If you don’t have a level, stand back 100 -150 feet and “eyeball” the mast to see if it is vertical. NOTE: To adjust the forestay with a CDI roller furler, see the CDI manual. 13 (e) Tighten the forestay and back stay alternately, keeping the mast vertical in the fore and aft direction until you can pull the backstay about 2 inches with two fingers (placed about 5 feet above the deck) before the resistance increases noticeably. Refer again to Figure 2-5. (f) Using the main halyard to measure, get the mast vertical from side to side as follows: Lower the sail-end of the halyard until it reaches the chainplate on the side of the boat. Pull the halyard tight and bring it to one chainplate. Put a finger on the halyard where it meets the base of the chainplate. Keep your finger there and pull the halyard to the opposite chainplate. If the mast is vertical, your finger should be at the base of the chainplate on the second side. Refer to Figure 2-6. Figure 2-6 (g) If the halyard measurement shows difference in length from one side to the other, then adjust the two upper shrouds until the measurement is equal. This will put the top of the mast in its correct vertical position. (h) Once the upper shrouds are the same length, tighten the shrouds equally alternating from one side to the other. Adjust the shrouds until they are tight enough so that you can pull them sideways about 2 -3 inches with two fingers before you notice it gets significantly harder to pull them. Place your two fingers (measure about 5 feet above the chainplate). Refer to Figure 2-5. (i) Get the mast straight from side to side, with no sideways curve as follows: Pull the main halyard tight along the back of the mast with one hand. Place your cheek against the aft surface of the mast and sight up the mast track. Refer to Fig 2-7. Adjust the lower shrouds until the mast is straight from side to side. Also, tighten the lower shrouds until you can pull them about 2 -3 inches with two fingers placed 5 feet above the chainplate. 14 Figure 2-7 (j) The side shrouds should be just tight enough to make a very low pitched "musical tone" when you strike the bare wire with a small wrench or pliers. That's about 10% of breaking strength, or a little tighter. If the shrouds don’t “ring”, then tighten them a little more. Always tighten both sides equally. (k) That's the basic starting place for tuning the mast. Go out and sail in moderate winds to stretch the new wires and then re-tune the mast. (l) The fine tune of the mast is done while sailing on the water. You may have to adjust the forward and aft tilt of the mast to get the right amount of weather helm. If your boat wants to turn into the wind, then it has “weather helm”. If it wants to turn away from the wind, then it has “lee helm”. When sailing close hauled, your boat should have a little weather helm. If you boat has lee helm, then you should adjust the forestay and backstay to move the top of the mast aft. If you boat has too much weather helm, then you can adjust the top of the mast forward. Refer to a book on rigging for more detail. (m) Make sure you secure all the turnbuckles with cotter pins and rigging tape before you go sailing. Also safety-wire the turnbuckles. Don't forget the turnbuckle under the CDI roller furling drum. 15 3. Setup Before Launching E. Raising the Mast: Note: There are two basic ways to raise the mast: 1. Physically lift it directly, or 2. Use a mast raising system. This manual has instructions for both methods. The mast can be raised by one person, but if this is your first time raising the mast, then find a second person to help. Things can happen as you raise the mast, like caught shrouds, and a second person might be necessary to avoid unexpected problems. WARNING: If you are not experienced at raising the mast, then only do it on level ground and in light winds. Winds or an angle (either side-to-side, or for-andaft) will make it more likely that you could lose control of the mast. (1) Do these steps to position the mast for raising: (a) Remove all straps, etc., that you have holding the mast down and holding stuff to the mast. (b) Install the wind vane, radio antenna, etc. on the top of the mast. (c) Remove the pin that attaches the mast to the bow pulpit and gently set the end of the mast down. (d) Go back to the cockpit and pick up the mast and move it back. We find standing on the front of the cockpit seat and reaching forward a bit with one had allows you to move the mast most easily. Continue to move the mast back until it is aligned with the mast step (see Fig 3-1). Be careful not to trip over the stays that are dangling off the mast. Figure 3-1 (e) Go to the mast step and install the aft pivot pin and its cotter ring (see Fig 3-1). You can use the same pin that held the mast to the bow pulpit. 16 (f) Connect the electrical connector at the base of the mast (see Fig 3-1). (2) Arrange all the stays and shrouds as follows: (a) Bring the bottom end of the forestay forward and make sure it is on top of all the other wires and not tangled with other things. (b) Put the backstay (if you have one) on the ground behind the boat. Make sure it is not tangled. (c) Loosely arrange the shrouds on either side of the boat. Make sure the turnbuckles are not terribly twisted. (d) Note: If you haven’t raised the mast before and don’t know if the shrouds are the correct length, then loosen the turnbuckles on the four shrouds to make sure the mast will go all the way up. (e) Make sure there are no lines that will get pinched in the mast step (see Fig 3-1). (f) JUST BEFORE RAISING THE MAST, make sure the top of each of the four shrouds is not twisted around its tang (see Fig 3-2). This is a common problem, and if you don’t catch it the mast tuning will be out-of-whack. Figure 3-2 (3) Do the following steps to lift the mast without using the mast raising system: 17 WARNING: Look up! Make sure there is nothing up there that the mast will hit as you lift it. Especially, make sure there is a lot of distance between you and any power lines. If the mast hits or even comes near a power line, it can kill you. With some high-voltage lines, the electricity can jump a foot or more from the wire to your mast. We recommend that you keep the mast a minimum of 10 feet from any power line. While you are looking up, also look for power lines, trees, etc. between you and the water where you will launch. NOTE: If you have the CDI roller furler, then a second person is required to carry the bottom of the furler forward as you lift the mast. (a) If you are NOT using the mast raising system, then we find this works: Stand on the cabin top to one side of the mast. Place one foot next to the cabin hatch, right at aft edge of the cabin top. Place the other foot just forward of the (closed) cabin hatch. Squat down, grab the mast, and lift with your legs. Once the mast is half way up, things get a lot easier, so try to do the initial lift with a quick jerk. Refer to Figure 3-3. REMEMBER, YOU MUST CONTROL THE SIDE-TO-SIDE MOTION OF THE MAST. A second person can make this easier. Have the second person stand in the cockpit and help lift the mast. The second person can stand on a cockpit seat so they can lift higher Figure 3-3 (b) Once the mast is vertical, the shrouds should keep it from going too far forward, or from going sideways. At this point, grab the forestay and hold it tightly. While pulling on the forestay, walk forward to the bow. 18 (c) Attach the forestay to its chain-plate with its pin (See Fig 3-4). It attaches to the forward hole in the chain-plate (the tack of the jip attaches to the aft hole). When the mast is properly tuned, it will be difficult to pull the forestay hard enough to install the quick-release pin. You might need help form another person, or the installation of a shroud lever, to get it tight enough. Figure 3-4 Note: If you have not tuned the mast, then do NOT install the forward pin in the mast step. If you have already tuned the mast, then you can install the forward pin in mast base BEFORE you connect the forestay. The second pin is never necessary. There is some discussion about whether it is better to install the second pin or not. (4) Do the following steps to lift the mast with the mast raising system: WARNING: Look up! Make sure there is nothing up there that the mast will hit as you lift it. Especially, make sure there is a lot of distance between you and any power lines. If the mast hits or even comes near a power line, it can kill you. With some high-voltage lines, the electricity can jump a foot or more from the wire to your mast. We recommend that you keep the mast a minimum of 10 feet from any power line. While you are looking up, also look for power lines, trees, etc. between you and the water where you will launch. (a) Attach the sail-end of the jib halyard and the block and tackle to the top of the gin-pole (see Fig 3-5). 19 Figure 3-5 (b) Attach other end of the block and tackle to the clip on the bow pulpit, or to the AFT hole in the forestay’s chain-plate. See Figure 3-6. Figure 3-6 (c) Connect the two baby stays and the gin-pole to the mast (see Fig 3-7). 20 Figure 3-7 (d) Connect the baby stays to the fittings on the cabin top (see Fig 3-6). 21 (e) Pull on the free end of the jib halyard until the gin pole is held vertical. Then cleat the halyard off securely to its cleat on the mast to hold the ginpole vertical. Lengthen the block and tackle as necessary. Refer to Figure 3-8. Figure 3-8 (f) Run the free end of the block and tackle line back to the cockpit. Run it through the cam-cleat on the back edge of the cabin top (on the port side). (g) Pull on the free end of the block and tackles line to lift the mast. REMEMBER, if you don’t have baby stays YOU MUST CONTROL THE SIDE-TO-SIDE MOTION OF THE MAST. If you have the CDI furler, then guide the drum of the furler forward as you raise the mast. (h) When the mast is up, attach the forestay to its chain-plate with its pin (see Fig 4-4). It attaches to the forward hole in the chain-plate (the tack of the jip attaches to the aft hole). Note: If you have not tuned the mast, then do NOT install the forward pin in the mast step. If you have already tuned the mast, then you can install the forward pin in mast base BEFORE you connect the forestay. The second pin is never necessary. There is some discussion about whether it is better to install the second pin or not. (i) Remove the lifting tackle and the gin-pole. 22 F. Installing the Boom (1) Do these steps to install the boom: (a) Align the gooseneck on the front of the boom with the gate-opening in the mast slot (see Fig 3-9). The little shackle on the gooseneck goes up. Slide the boom fitting down the mast slot. Tie a short line to the metal loop on the bottom of the boom fitting. Cleat the other end of this line to the cleat in the mast slot. Cleat it with an inch or two of line between the boom and the cleat. Figure 3-9 23 (b) If you have a topping lift, disconnect the aft end of it from the mast and clip it to the aft most attachment on the end of the boom (see Fig 3-10). Adjust and cleat the other end of the topping lift so that the boom is roughly level. Figure 3-10 (c) Loosen the mainsheet and pull the boom block (pulley) up and attach it to the bottom of the boom (see Fig 3-11). A quick-release pin is useful here. Note: Rigging goes faster if you keep the mainsheet run through the pulleys at all times and just disconnect the boom block from the boom. Figure 3-11 24 (d) Connect the boom-vang (if you have one) to the mast with a shackle and pin (see Fig 3-12). Note: Some people prefer to have the adjustable end of the boom vang at the boom instead of at the mast. Do whichever you prefer. Figure 3-12 25 G. Installing the Main Sail: (1) Do these steps to install the main sail: (a) Attach the lower forward corner of the sail (the “tack”) to the shackle on the gooseneck (see Fig 3-13). Figure 3-13 (b) Tie the outhaul line to the lower aft corner of the sail (the “clew”). Refer to Figure 3-14. If you have a track and car for adjusting the tension in the foot of the sail, then attach the clew to this car. Figure 3-14 (c) Disconnect the sail-end of the main halyard from the mast and connect it to the top of the sail (the sail’s “head”). 26 (d) Insert the top end of the boltrope (the fat rope at the front edge of the sail), or the first slug (if you have sail slugs) into the slot in the mast. Refer to Figure 3-15. Pull the sail up a foot or so with the halyard and cleat the halyard. Note: When you start the sail up the track, you must make sure there is not a twist in the sail. You can do this by starting at the tack (the bottom forward corner of the sail), and working your hands all the way to the head of the sail, making sure the sail doesn't cross itself as you go. Figure 3-15 27 (e) If the battens are not in the sail, now is the time to put them in. Do these steps (see Fig 3-16): Figure 3-16 Determine which batten goes in each pocket. Note: On the mainsail, the top batten is probably the shortest, the bottom batten is the next shortest, and the two center battens are the same length. Check as your sail may be different. It’s a good idea to number the battens with a permanent pen after you figure out where they go. This will save time the next time you install them. Start the batten into its pocket. If one end of the batten is thinner or more flexible, that end goes in first. Work the batten in until the back end can be pushed completely into the pocket. When it’s all the way in, you will be able to push the back end of the batten down slightly so that it is no longer aligned with the opening in the pocket. This will keep the batten from falling out. Note: It is OK to store the sail with the battens installed, but if you do, make sure the battens are not bent. Often the sail won’t fit in its bag with the battens installed. If you store the sail with the battens bent, the battens will take a permanent set. Bent battens are not good for sail performance. Note: The sail is now ready to hoist. Don’t raise the sail before you are ready to actually sail. You don’t want the boat trying to sail when launching it. Neatly “flake” (fold) the sail over the boom and tie it with short lines or bungee cords. 28 H. Installing a Hanked-on Headsail (Jib, Lapper, or Genoa): (1) Do these steps to install the jib, lapper, or genoa: Note: This applies to hank-on sails only. It does not apply to the CDI furler. Refer to the “One-Time Rigging -- Installing the furling line and a headsail on a CDI Roller Furler” for instructions on installing a headsail on a CDI furler. (a) Use a shackle to connect the tack of the sail to the aft hole in the forestay’s chain-plate (see Fig 3-17). To find the tack corner of the sail, find the edge of the sail that has the hanks on it. Then find the corner on this edge that is LESS sharp. This is the tack (the bottom forward corner). The sharp corner is the head (top corner). Figure 3-17 (b) After the tack is attached, clip the hanks onto the forestay. Start with the bottom hank and work your way up. It is possible to get a hank on the wrong direction; all the hanks should face the same direction. If a hank is backwards, it will put a wrinkle in the sail when it is up. (c) After all the hanks are connected, then connect the jib halyard to the head (top) of the sail. 29 (d) Tie the jib sheets to the clew of the sail (the clew is the third unattached corner of the sail). You can either use one long line or two shorter lines for the jib sheets. If you use one long line, then tie the middle of it to the clew. Refer to Figure 3-18. Figure 3-18 (e) Run one sheet to each side of the boat. (Refer to Figure 3-19 which show an example of the routing for the sheet on the lapper) . Figure 3-19 30 Ideally, the sheets will run as follows, depending on which sail you are using: If you are flying the jib (the smallest headsail) -- Run the sheet through a lead block (pulley) at about the center of the forward of the two main cabin windows. Run the sheet from here to the cam-cleat at the cockpit. If you are flying the lapper (the medium size headsail) -- Run the sheet between the upper and lower shrouds to a lead block at about the center of the aft cabin window. Run the sheet from here to the camcleat at the cockpit. If you are flying the genoa (the largest headsail) -- Run the sheet outside both of the shrouds to a lead block at about the forward edge of the cockpit. Run the sheet from here to the cam-cleat at the cockpit. (f) After the sheets are run correctly, tie a stopper knot in the end of each sheet so it will not slip back through the cam-cleat. Note: The sail is now ready to hoist. Don’t raise the sail before you are ready to actually sail. You don’t want the boat trying to sail when launching it. A bungee cord or sail tie is a good way to keep the headsail constrained until you are ready to raise it. 31 4. Launching Your Boat I. Final checks before Launching (1) Make these final checks before you launch your boat: (a) Make sure there are no power lines, trees, or other obstructions between you and the launch ramp. (b) Make sure the drain plug is installed in the back of your boat (see Fig 4-1). Figure 4-1 (c) Attach mooring lines to the cleats on the boat deck. (d) If you will be tying the boat to a dock, then hang fenders on the side of the boat to protect it from the dock. (e) Remove the tie-down straps that hold your boat to the trailer. We recommend you keep the winch strap attached to the bow of your boat, and the winch locked. While boats will usually stay on the trailer without the winch strap attached, if the ramp is steep and you stop fast the boat might slide off. If you spray the trailer bunks with a lubricant, or add plastic sliders to the trailer bunks, then the boat is very likely to slide off the trailer if you don't keep the winch strap attached. (f) Unplug the trailer’s lights and let them cool before backing into the water. 32 Launching the Boat: (2) Do these steps to actually launch the boat (a) Back the boat into the water. Back it in until most of the boat is floating, with just the bow still touching the trailer. With the Baja trailer, this is often about where the top of the trailer fenders submerge in the water. However, this depends on how steep the ramp is -- experiment to see how deep you must go for the boat to come off easily. (b) Set the parking brake AND put your car in park (or turn-off the engine and put it in gear if you have a manual transmission). You really don’t want to be one of the people that loses their car into the water! (c) Have someone hold the dock lines to control the boat once it is off the trailer. (d) Let the winch strap out (this may require you to get your feet wet). Make sure you are holding the winch handle tightly when you release the ratchet lock on the winch (see Fig 4-2). The boat may want to pull on the winch strap and spin the handle. Let the strap out until it is slack, and then disconnect it from the boat. Figure 4-2 (e) If the boat doesn't float off the trailer by its self, then push on it gently. If it still doesn't come off the trailer, then back the trailer further into the water if possible. If you can't back the boat in deeper and you must push on it hard, then push on the fiberglass hull. The bow pulpit (the railing) is not designed to be repeatedly pushed on hard; doing so can cause cosmetic stress cracks in the gel coat of the deck. 33 (f) Once the boat is clear of the trailer and secured to the dock or shore, then drive the trailer out of the water. If you don't have the boat completely clear of the trailer, then the boat can catch on the trailer as you pull the trailer out of the water. This can damage the boat or the trailer. 34 5. Setup After Launching A. Lowering the Dagger Board (1) Do these steps to lower the daggerboard: (a) Raise the daggerboard an inch or so by turning the winch handle clockwise (as viewed looking aft). Refer to Figure 5-1. Figure 5-1 (b) Remove the two bolts from the daggerboard (See Fig 5.2). Also, if you use one, remove the wood wedge that keeps the daggerboard from moving for-and-aft. Figure 5-2 35 WARNING: Make sure everything is clear of the daggerboard, especially people. The daggerboard is heavy and could crush fingers or other body parts. (c) Lower the daggerboard by turning the winch handle counter-clockwise (See Fig 5-1). Note: to make it easier to connect the hold-down latches, stop the daggerboard just before it is all the way down. (d) With the daggerboard still up a tiny bit, flip all 4 hold-down latches into place (See Fig 5-3). Push or pull on the daggerboard if necessary to get all 4 latches engaged. Figure 5-3 (e) Lower the daggerboard the last little bit. Turn the winch handle until the cable is just barely slack. This takes the load off the cabin top, but keeps the cable tight enough so that it does not tangle on the winch drum. (f) Tighten the nuts on the four hold-down latches -- just snug is good. If you tighten them tighter than snug, it can be hard to loosen them later. 36 B. Installing the Rudder (1) Do these steps to install the rudder: (a) Move the rudder into the correct position. (b) Make sure the main sheet lines are above the tiller. (c) Align the upper pintle with the hole in the upper gudgeon and start it into the hole (see Fig 5-4). Note: The upper pintle is longer so it can be started first. Figure 5-4 (d) Align the lower pintle with the lower gudgeon and push the rudder all the way down. Note: Turning the rudder slightly can help you to align the lower pintle. WARNING: Make sure the rudder does not lift out of the gudgeons. If the rudder accidentally comes out of the gudgeons when sailing, you will lose control of the boat. (e) Pull up on the rudder and make sure the latch on the upper gudgeon holds the rudder from coming up out of the gudgeons. If the rudder slips out, then bend the latch back a little so it will hold better (see Fig 5-4). 37 6. Preparing the Boat to Go Back on the Trailer A. Raise the Daggerboard (1) Do the following steps to raise the daggerboard: (a) Unscrew the four hold-down latches and drop them to the side of the daggerboard trunk. Refer to Figure 6-1 Figure 6-1 (b) Crank the daggerboard winch clockwise until the bolt holes in the daggerboard clear the top of the daggerboard trunk. Refer to Figure 6-2. Figure 6-2 38 (c) Insert each of the two daggerboard bolts through the daggerboard. It doesn’t matter which direction you put them in. Refer to Figure 6-2. (d) Turn the winch handle counter-clockwise until there is a tiny bit of slack in the cable (see Fig 6-3). This takes the load off the cabin top, but doesn’t give the cable enough slack to tangle on the winch drum. Figure 6-3 (e) Install the nuts on the daggerboard bolts. Tighten them just enough to engage the ny-lock feature. This will keep them from rattling off. 39 B. Remove the Rudder (1) Do the following steps to remove the rudder: (a) Press the locking tab on the upper gudgeon. Push it forward toward the hull (see Fig 6-4). Figure 6-4 (b) Lift the rudder up and remove it. 40 7. Putting the Boat on the Trailer A. Putting the Trailer in the Water (1) Do these steps to put the trailer in the water: (a) Back the trailer into the water to the same depth that you used to launch the boat. With the Baja trailer, this is often about where the top of the trailer fenders are just submerged, but this depends on how steep the ramp is. (b) Set the parking brake AND put your car in park (or turn-off the engine and put it in gear if you have a manual transmission). Don’t risk losing your car into the water! B. Putting the Boat on the trailer: (1) Do these steps to put the boat on the trailer: (a) Use the dock lines to guide the boat onto the trailer. (b) Release the winch ratchet lock (see Fig 7-1) and pull the winch strap out until you can connect it to the bow-eye of the boat. Figure 7-1 (c) Winch the boat on the trailer. Guide it to the correct position as you winch it on. Winch the boat on until it touches the bow-chock on the trailer. (d) Make sure the ratchet lock on the winch is locked, and then pull the boat out of the water. NOTE: You want the boat centered on the trailer. You don’t want it touching either fender or the fender will rub a mark into the boat. Here are a few ways to get the boat centered: 41 You can have a second person watch the boat as you pull the boat out of the water. This person can adjust the position of the boat by pulling on the stern dock line and pushing with a pole or paddle. If you don’t have a second person, you can pull the boat out just a little until the boat starts to rest a little on the trailer. Then you can stop and go back and adjust the position of the boat. Finally, if you prefer, you can pull the boat completely out of the water and then manually jockey the boat into position. It may require two people to do this. The easiest way to push the boat seems to be to put your back against side of the hull (near the stern), griping the lower edge of the hull with your fingers, and using you legs to push. Refer to Figure 7-2. Figure 7-2 42 (e) Install the rear hold-down strap across the cockpit of the boat. If you have cockpit railings, then we recommend you put the strap through the railing. Refer to Figure 7-3. Figure 7-3 43 8. Packing the Boat Back Up A. Removing the Sails (1) If you have the CDI roller furler, and your headsail has a UV cover on it, then you can leave the headsail on all of the time. If the sail doesn’t have a UV cover, then you must either remove the sail, put a cover on it, or store the boat where the sail will not be exposed to the sun. (2) If you are leaving the headsail on the CDI furler, then check these things: (a) Make sure it is rolled smoothly and snugly. (b) Make sure it is rolled up completely -- a wrap or two of the sheets around the sail is a good idea. This ensures the sail does not blow open in a wind. (c) Make sure the free end of the furling line is attached securely to something. If it comes free, the sail might unroll in a wind and destroy something. (3) If you are keeping the boat in the water, or where the mast can stay up, then you can leave the mainsail on the boom if you have a sail cover for it. (4) If you are leaving the mainsail on the boom, then do these things: Flake the sail over the boom. That is, fold it smoothly back-and-forth across the boom. Sail slugs make this easier, but it can be done even if you don’t have them. You may need ties or bungee cords to hold the sail on the boom until you can get the cover on. Put the sail cover over the sail and boom, and around the mast. (5) If you don’t have roller-furling, then do these steps to remove the headsail: (a) Remove the stopper knots from the jib sheets and pull the jib sheets clear of all the deck hardware. Note: You can leave the sheets attached to the headsail or remove them from the sail as you prefer. (b) Disconnect the jib halyard from the top of the sail. Secure the halyard to the mast so it doesn’t get away. (c) Unclip the hanks from the forestay. (d) Disconnect the tack of the sail from the bow of the boat. (e) Fold the sail as shown in Fig 8-1. 44 Figure 8-1 (6) Do these steps to remove the mainsail: (a) Disconnect the clew of the sail from the back of the boom (the outhaul). (b) Disconnect the halyard from the top of the mainsail. Secure the halyard to the mast so it doesn’t get away. (c) If your sail has slugs, then pull them all out of the track on the mast. (d) If your sail doesn’t have slugs, then pull the bolt-rope out of the track on the mast. (e) Disconnect the tack of the sail from the gooseneck at the front of the boom. (f) Fold the sail as shown in Fig 8-1. 45 B. Removing the Boom (1) Do these steps to remove the boom (see Fig 8-2): Fig 8-2 (a) Disconnect the boom-vang from the mast (if you have a boom-vang). (b) Disconnect the downhaul line from its cleat on the mast. (c) Disconnect the mainsheet pulley from the back end of the boom. (d) Disconnect the topping lift from the back end of the boom. (e) Lift the front of the boom up until you it comes out of the gate in the mast track. C. Lowering the Mast WARNING: Make sure there is room for the mast to come down before you start to lower it. Look especially carefully for power lines. If the mast touches or gets too close to a power line, you could be electrocuted. We recommend that you allow for a minimum of 10 feet between the mast and any power lines. (1) The mainsail and boom must be removed before you lower the mast. (2) If you have roller furling, furl the sail fully before starting to lower the mast. If you have a hank-on jib, remove it from the forestay before you start to lower the mast. (3) If you will be using the mast raising system to lower the mast, then do these steps: (a) Install the mast crutch at the back of the boat (see Fig 8-3) 46 Figure 8-3 (b) If they are not connected, connect the baby stays to the cabin top and mast (see Fig 8-4). (c) Connect the gin-pole to the mast (see Fig 8-4). Fig 8-4 47 (d) Connect the jib halyard to the forward end of the gin-pole (see Fig 8-4). (e) Connect the mast raising block and tackle to the bow chainplate and to the forward end of the gin-pole. Run the free end of the block and tackle line back through the cam cleat at the cockpit. (f) Tighten the jib halyard until the gin-pole is about horizontal (loosen the block and tackle as necessary. Then, secure the free end of the jib halyard securely to its cleat on the mast. (g) After the jib halyard is adjusted and secured, pull the block and tackle tight. (h) Disconnect the forestay from the chainplate. If the pin doesn’t come out easily, tighten the block and tackle a little to take the tension off the forestay. (i) After the forestay is disconnected, slacken the block and tackle a little so you can remove the forward pin from the mast base (if it is installed). (j) Now, continue to slacken the block and tackle until the mast is fully down. (k) Remove the block and tackle and the gin-pole. (l) Remove the aft pin from the mast base. (m) From the cockpit, lift the mast and move it forward until the mast base is aligned with its bracket on the bow pulpit. (n) Go forward and secure the mast base to the bow pulpit with a pin. Use one of the same pins that are used in the mast base when the mast is up. Refer to Figure 8-5. Figure 8-5 48 WARNING: The mast is heavy. Don’t try to lower it single-handedly unless you know you can handle the weight. (4) If you will be lowering the mast manually (without the mast raising system), then do these steps: (a) Install the mast crutch at the back of the boat (see Fig 11-3). CAUTION: Hold on to the forestay tightly as you remove its pin, or have a second person push forward on the mast. Once the pin that connects the forestay to the boat is removed, the mast will fall over if you don’t hold it up. (b) Disconnect the forestay from the chainplate. If the pin doesn’t come out easily, pull down hard on the forestay to remove the load from the pin. (c) If you don’t have someone else holding the mast, then move to the mast while maintaining tension on the forestay. Grab the mast, and then release the forestay. (d) Remove the forward pin from the mast base (if you have one installed). This pin generally can’t be removed until the forestay is released because it has too much load on it with the forestay pulling on the mast. CAUTION: You must prevent the mast from swinging side-to-side as you lower it. Without baby stays, the mast can swing from side-to-side once you start to lower it. You must keep it near the middle of the boat or it will damage the mast, mast base, or cabin top. (e) While still holding the mast, move yourself back on the cabin top, letting the mast tip back a little as you go. We find it works well to move back until one foot is just forward of the closed cabin hatch and the other foot is at the back edge of the cabin top. Make sure you have a good footing. Refer to Figure 11-6. Figure 8-6 49 (f) Lower the mast to about chest height, and then squat down to lower it the last part of the way. If you have a second person, they are probably most useful if they stand at the front of the cockpit with one foot on each seat. They can then help hold the mast when it gets down low. (g) After the mast is all the way down, remove the aft pin from the mast base. (h) From the cockpit, lift the mast and move it forward until the mast base is aligned with its bracket on the bow pulpit. (i) Go forward and secure the mast base to the bow pulpit with a pin. Use one of the same pins that are used in the mast base when the mast is up. Refer to Fig 8-5. D. Securing the Mast, Shrouds, Stays, and Lines (1) If you are going to trailer the boat, all of the lines, shrouds, and stays must be secured so they don’t bang on things or drag on the ground. Every owner seems to have their own way of doing this, so the following are just to give you ideas. (2) The forestay and backstay can be coiled up and either tied to the mast or put in a bag that you hang on the handle of the motor-mount. Refer to Figure 8-7. Figure 8-7 (3) Some people disconnect the shrouds from the chainplates and coil them up and tie them to the mast. 50 (4) Other people leave the shrouds attached and use shock-cords or lines to pull the middle of the shroud forward. If you choose this approach, we recommend you put plastic shroud sleeves on the shrouds. These are available at most marine stores and will keep the shrouds from leaving black marks where they hit the cabin. (a) If you run the shrouds forward, the other end of the shock-cord can be hooked to the halyard cleats, spinnaker pole ring, or bow pulpit. Do not pull the shrouds too tight in this direction. The turnbuckles sit at odd angles, and if you pull the shrouds forward hard, it can bend the turnbuckle. Refer to Figure 8-8. Figure 8-8 (b) The halyards and toping lift can be secured by securing both ends of them near the bottom of the mast and then using three or four shock-cords or ties spaced along the mast to hold the lines to the mast. Refer to Fig 8-8. Any extra length at the end of the line can just be run back along the mast and secured under these same shock-cords or ties. (5) In addition to the mast being connected to the bow pulpit, the top of the mast and the mast crutch must be secured so that they do not bounce off the back of the boat when you are towing it. There are two ways to do this: (a) You can secure the mast to the top of the crutch with a shock-cord or line, and then install a small pin through small hole in the upper attachment pin of the crutch (see Fig 8-9). 51 Figure 8-9 (b) Or, you can tie a line between the mast and something secure on the transom of the boat. This eliminates the need to put the small pin in the attachment pin of the crutch. We do not recommend a shock-cord here as it may have too much stretch, allowing the mast to bounce out of the crutch. Refer to Figure 8-10. Figure 8-10 (c) Finally, the free end of the mainsheet can be made into a tight coil and then secured under the part of the main sheet that still crosses the transom. The boom block on the main sheet can be placed on top of the coiled main sheet to keep it from rattling on the deck. Refer to Figure 8-11. 52 Figure 8-11 53 9. Maintenance A. Trailer Maintenance (1) The trailer has 3 things that require routine maintenance. These are the tires, the wheel bearings, and the winch. CAUTION: Never let air out of the tires as they heat-up. The pressure should be checked when the tires as cold. The pressure will increase as the tires warm up. This is supposed to happen – don’t release any air. Releasing air could cause the tire to overheat and fail. (a) Before each trip, you should check the air pressure in the trailer tires. Make sure the pressure is at the maximum pressure shown on the tires (usually 50 psi). Check the tire pressure before you tow the trailer a significant distance. The tires get warm when you tow the trailer and this will give you an incorrect pressure reading. (b) Before each trip, make sure the Bearing-Buddy on each wheel is mostly full of grease. You can tell how full it is by how far the plunger is out. You can see the plunger move out when you put more grease in through the grease fitting. Refer to Fig 9-1. Figure 9-1 (c) Once a year, remove the trailer wheels and hubs and make sure there is no water in the wheel bearing grease. If you find water, clean the old grease out and replace it with new grease. If the bearings are rusty, replace them and their races. (d) Once a year, oil the moving parts of the trailer winch. Put a small amount of light oil on each bearing and on the gears. 54 B. Boat Maintenance (1) The only routine maintenance is lubrication of the pulleys and general cleaning. But, also refer to the Electrical section of this guide for information on charging the batteries. (a) Once a year, oil each pulley with light oil. Oil the pulleys for the daggerboard cable, the pulleys on the mast and boom, and the pulleys for the main sheet and jib sheets. Just a drop of oil at the axle of each pulley is enough. More just makes a mess. Use a rag to wipe off extra oil. (b) The exterior of the boat can be washed with any mild detergent, such as car washing soap or hand dishwashing soap. It can also be waxed if you like, but don’t wax any surfaces you will walk on. (c) The interior can be cleaned using normal household cleaners. (d) Sails can be washed using mild detergents. We recommend washing sails in a bathtub or the like. Don’t wash them in a washing machine. A washing machine can damage the fabric, causing the sail to lose its shape. (2) If cold weather is expected, drain the water from the systems on the boat: (a) Drain the water from the fresh-water system and operate the fresh water pump to remove any remaining water from it. (b) Drain the water from the clean water tank of the Porta-Potti. The dirty water tank should already be empty! You don’t want to leave dirty water in the Porta-Potti. (3) If you get water in the interior of the boat, do these steps to remove it. (a) If your boat is out of the water, then remove the drain plug and tilt the boat up a little at the bow. (b) If your boat is in the water, then pump and sponge the water out of the boat. (c) In both cases, there are locations where a small amount of water can be trapped. Sponge the water out of these locations. If you don’t sponge the water out of these locations, it may leak onto the cabin floor from around the daggerboard trunk. This water is NOT leaking from outside the boat. Refer to Figure 9-2. 55 Figure 9-2 To remove water from the area under the V-berth seat, open the access hatch to get under the V-berth and look for water at the center of the hull. To remove water from each side storage area (under the sink and under the stove), open the hatch on each cabinet. Note: the boat must be approximately level for the water to be here. If you have the bow raised to drain water from the drain plug, then look for the water under the two quarter-berths. 56 10. Using Hatches, Ports, Lights, Etc. A. Forward Hatch (1) The forward hatch is held closed by two lines that attach to small cleats. This hatch should be secured closed with the lines anytime you tow the boat. This will keep it from accidentally blowing or bouncing open. B. Main Hatch (1) The lower part of the main hatch board slides into the slots on either side of the companionway. The top latch is secures to the sliding top, usually a padlock is used. (2) The main hatch board can be used as a cockpit table (See Fig 10-1). To make a table, attach the prop stick to the latch on the hatch board. It attaches with a screw and wing-nut. Once the prop stick is attached, fold the top of the hatch board aft and down. And, swing the prop stick so that its bottom end rests at the forward edge of the cockpit. The bottom of the hatch board stays in the companionway slots. Figure 10-1 C. V-Berth Hatches (1) If you have the V-berth filler board, you will need to push it forward to open the V-berth hatches. You can just slide it forward under the cushions. It does not need to be removed. 57 D. V-Berth Filler board (1) The V-berth filler board is located as shown in Fig 10-2. Figure 10-2 (View looking Aft from above V-Berth) E. Under Sink and Under Stove Hatches (1) Sometimes these hatches can bounce open if you fit a bump in the road. If you find that this happens on your boat, then we recommend you leave these hatches open when trailering. This will keep them from banging hard if they fly open when trailering. F. Opening Ports (optional) (1) If your boat has opening ports they open as follows: (a) Pull the four latch handles out and swing them either down or to the side. Then pull the bottom of the window open. (b) To close the window, push it shut. Then, swing the latches in and push the latch handles in to tighten the latches. (c) If the window leaks when it is closed, then you can increase the tightness of the latches. To tighten the latches, turn the latch handles clockwise on their threaded screws. You can only turn them when they are open. Don’t tighten them more than necessary to keep the window from leaking. Tightening the latches excessively can compress the gasket, and warp or even crack the window. Refer to Figure 10-3. 58 Figure 10-3 G. Interior Light (1) The interior light has a switch on it to turn it on and off. H. Navigation Lights (1) Anchor (mast) Light: (a) When anchored at night you generally need to display an all-around white light. (b) To turn on the anchor light (at the top of the mast), turn on BOTH of the “Mast Light” switches that are on the switch panel near the stove. (2) Running Lights: (a) Any time you are moving the boat when it is dark or in fog, you must have the running lights on. (b) When Sailing – If you are under sail alone, then you need the red/green combination light on the bow on, and you need the white stern light on. To turn these lights on, turn on the switch labeled “Running Light”. This switch turns on both lights. (c) When Motoring – If you are using the motor (even if you are using the sails also), then in addition to the red/green bow light and the white stern light, you also need the FORWARD part of the mast light on. To turn on this light, turn on only one of the “Mast Light” switches. Watch the light to see which switch turns on the forward part. 59 11. The Electrical System A. Options (1) The electrical system on the Potter 19 has a number of options. It may have one or two batteries. The battery may be located in the compartment under the stove or it may be under the V-berth. Your Potter may have wet-cell batteries or gel-cell batteries. It may or may not have a built-in charger. Refer to the appropriate sections below depending on what equipment you have. B. Charging the Battery (1) General comments about batteries: (a) The following comments apply to all lead-acid batteries. Both the flooded-cell and gel-cell batteries offered in the Potter are lead-acid batteries. Other types of rechargeable batteries (like Ni-Cad) behave entirely differently. (b) Batteries discharge all by themselves over time. You should charge your batteries at least every 2 months, even when you don’t use them. This includes when the boat is out of use, such as during the winter. (c) Batteries don’t like being discharged, it shortens their life. If you are using the batteries, it is best if you can charge them after each use. But, if you don’t use them much (for example running the interior light for just an hour or two), then you can go longer between charges if necessary. (2) How to check the water level in your battery and fill it if necessary: WARNING: Wear protective goggles when opening the caps from the battery. Batteries contain sulfuric acid. Don’t get it on you or in your eyes, it will burn your eyes and skin. If you get the acid on you wash it off immediately with lots of water. If you spill any of the acid, it can damage what it spills on. Clean it up as quickly as possible with baking soda and water. (a) Only flooded-cell batteries need to have their water level checked. Gelcell batteries have nothing to check or fill. (b) To check the water level, you need to remove the caps on the top of the battery. You will find six holes. Each of the six needs to be checked and filled individually. (c) When you look in the holes you should be able to see the plates of the battery. You will appear as a bunch of lines running crosswise to the battery. The water must be over the top of these plates. (d) You will also see that the walls of the hole extend down around an inch into the battery cell. You should see a slot on one side of the lower part of the hole. 60 (e) When you fill the battery with water, fill it only to the BOTTOM of the hole or slot. If you fill it to the top of the slot, the acid will overflow when you charge the battery. Always use distilled water (or equivalent, like reverse osmosis processed water) when filling the battery. Don’t confuse regular bottled water or mineral water with distilled water. These waters may have minerals or chemicals in them that can damage the battery. (f) After you fill each cell, put the caps back on and clean the battery with baking soda and water to neutralize any acid that may have escaped. But, keep the baking soda out of the battery cells. (3) How to charge your batteries if you have a built-in charger: (a) If you have a built-in charger and a single battery, then when you plug in the charger, it will automatically charge the battery. Usually the battery will recharge within a day. But, if it is fully discharged, then it might take two days. (b) If you have a built-in charger and two batteries, then you can charge them both at the same time or individually. To charge them at the same time, plug in the charger and set the battery switch to “Both” or “All”. To charge just one battery, plug in the charger and set the battery switch to the battery you want to charge. If you know one battery is much more discharged than the other, then it is beast to charge the two batteries separately. But, if both batteries are at roughly the same charge, then charging them together works well. For example a good time to charge the two batteries together is when topping off the batteries when the boat is being stored during the off season. (4) How to charge your batteries if you have a portable charger: (a) If you don’t have a built-in charger, then you will need to have a portable charger to charge your batteries. An inexpensive 12 volt automotive charger will work fine, but a multi-stage charger may be more convenient. CAUTION: Gel-cell batteries are particularly sensitive to high voltages. They must never be charged at voltages higher than 14.1 volts. If you are using an automotive charger to charge gel-cell batteries, then we recommend that you always charge them on a low setting (like 2 amps) unless you have a voltmeter and monitor the voltage closely. If you charge them on a higher setting, the voltage may exceed 14.1 volts and the battery may be permanently damaged. (b) If you use an automotive charger, then it probably has multiple settings like 2 amps and 10 amps. If you know the battery is significantly discharged, then the higher setting (like 10 amps) can be safely used (on flooded-cell batteries). The higher setting will charge the battery more quickly. But, if the charger is left on the high setting for too long it can damage the battery. If the battery starts to bubble or boil, it is time to turn the charger down to a lower setting. 61 (c) WARNING: Always unplug the charger before connecting or disconnecting it from the battery. Also keep all open flames and sparks away from the battery when it is charging. Batteries produce hydrogen gas when they are charging. This gas can explode if there is a spark near the battery. If the charger is plugged in, then it will produce a spark when it is connected or disconnected from the battery. (d) If your boat has one battery, then just connect the battery chargers clamps to the batteries terminals to charge the battery. Make sure you don’t reverse the plus and minus connections (connect red to plus and black to minus). (e) If your boat has two batteries and you want to charge them both, then connect the charger to either battery, and then set the battery switch to “Both” or “All”. Make sure you don’t reverse the plus and minus connections (connect red to plus and black to minus). (f) If your boat has two batteries and you want to charge only one of them, then connect the charger to the battery you want to charge. Then set the battery switch to any position EXCEPT the “Both” or “All” position. Make sure you don’t reverse the plus and minus connections (connect red to plus and black to minus). C. Fuses (1) There is a fuse next to each switch on the switch panel. If the switch does not turn on its light, then check the fuse next to the switch. The little black fuse caps unscrew. Refer to Figure 11-1. Figure 11-1 62 (2) There are glass-tube type fuses on the forward wall of the cabinet under the stove. Refer to Figure 14-2. If you have a light or other electrical equipment that doesn’t come on, then check these fuses to see if they are blown. Figure 11-2 CAUTION: Do NOT install fuses bigger than 10 amps. A larger fuse will not protect the wiring properly and could result in a fire. (3) If you find one of the above fuses blown, then replace it with a 10 amp fuse. If you continue to blow the fuse, you either have a short circuit or you have connected too much additional equipment to the circuit. Take your boat to a good electrical technician to find your problem. Bypassing the fuse or using a larger fuse is likely to cause a fire. (4) Optional equipment, like radios and depth-sounders, may have their own inline fuses. For the correct size fuse for these items, refer to the owner’s manual for that piece of equipment. 63 D. Wiring Diagram (1) Figure 11-3 shows a typical wiring diagram for a Potter 19. Fig 11-3 64 12. Using Accessories A. Built-in Fresh Water Tank, Filling and Cleaning (1) To fill the water tank, remove the deck cap and fill the tank with clean water (see Fig 12-1). Figure 12-1 (2) If the water tank gets contaminated, do these steps: (a) Drain the water from the tank. (b) Fill the tank halfway with clean water. (c) Add a ¼ cup of laundry bleach to the water tank. (d) Fill the water tank the rest of the way with clean water. (e) Pump the water pump until bleach-water comes out of the spigot. (f) Let the bleach-water soak in the system for about 15 minutes. (g) Drain the bleach water. NOTE: If the boat is out of the water, you can drain the water into the bottom of the boat and then remove the drain plug from the transom of the boat to allow the water to drain from there. Make sure you don’t drain the water where the bleach might hurt something. If you drain the water this way, tilting the boat back may help the water drain. But, when all finished, you will likely still need to mop some water out of the compartment where the water tank is. (h) Pour a ¼ cup of baking soda into the water tank. (i) Fill the water tank with clean water. 65 (j) Pump the water pump until baking soda water comes out the spigot. (k) Let the baking soda water soak for 15 about minutes. (l) Drain the backing soda water. (m) Rinse the tank with fresh water. B. Using the Fresh Water Pump (1) Pushing and pulling the handle on the water pump will pump water. (2) Sometimes if the pump is not used for an extended period of time the valves in the pump can stick and it will not pump water. If this occurs, then do these steps: (a) Remove the supply hose from the bottom of the pump. (b) Hold a cup of water to the bottom of the pump. (c) With the cup of water in place, operate the pump handle. This should prime the pump. (d) Once water comes out of the spigot, remove the cup and re-attach the water supply hose. C. Emptying the Holding tank (boats with a built-in marine head) (1) To empty the holding tank, you need a suction pump. These are generally available at marinas and are usually free to use. (2) To empty the tank, do these steps: (a) Remove the cap on the deck. (b) Start the vacuum pump. (c) Connect the end of the pump’s hose to the deck fitting. You must get a good seal that is nearly air tight or the pump won’t be able to suck out the water. Note: If the vacuum pump is not in good condition, it may not suck well if it is dry. If the pump doesn’t seem to suck, then try sucking water out of the lake, etc. to prime the pump. When the pump is primed, then continue pumping out your tank. (d) Open the valve on the hose (assuming it has one). (e) When the tank is empty, close the valve on the hose and remove the hose. Most hoses have a viewing port so you can see when the water stops flowing. (f) Rinse the holding tank by pouring clean water down the deck fitting and then pumping it out again. You probably want to rinse the tank at least two times. 66 (g) When you are finished pumping the tank for the last time, put the hose end in the water (i.e., lake, etc.) and open the valve. Let the pump suck water like this for around half a minute. This will clean out the hose and pump. (h) Close the valve, shutoff the vacuum pump, and coil its hose. 67 13. Links (1) The following are some websites that relate to Potters and Sailing. Sorry about any links that are out-of-date, but, of course, it is impossible to update these links once this guide is printed. (a) The home of Potters, International Marine web site: http://www.wwpotter.com (b) The Trailer Sailor site: http://www.trailersailor.com/index2.html This site has forums in which you can post questions and get answers from other sailors. The two forums of the most interest to Potter owners will be the Potter forum and the general forum for all trailer sailors: http://www.trailersailor.com/forums/potter/ http://www.trailersailor.com/forums/trailersailor/ (c) The Yahoo Potter group: http://groups.yahoo.com/group/WWPotter http://groups.yahoo.com/group/WWPotterP14-15OwnerGroup (d) The Potter Yachters. One of the larger (probably the largest) Potter group: http://potter-yachters.org/ (e) The USCG – for information on recreational boating safety, and safety equipment: http://www.uscgboating.org/default.asp (f) The FCC – For information about marine radio licenses: http://wireless.fcc.gov/marine/ 68 14. Glossary Baby-Stay – Short wires that go from the deck to the side of the mast. They keep the mast from swinging sideways as it is raised. Backstay – The wire that goes from the back of the boat to the top of the mast. It helps hold the mast up. Batten – A “stick” placed in the back edge of a sail (usually the mainsail). It supports the back edge of the sail so that the edge can extend back further, giving more sail area. Becket - Small fitting on a pulley that gives you a place to tie a line to the pulley. Baja Trailer – The larger trailer that is an option for the Potter 19. Its tires and fenders sit outside the boats hull, unlike the standard trailer where the tires are under the hull. This is a Potter 19 specific term. “Baja Trailer” is not a generic term and is not generally used with regard to other boats. Berth – A place to sleep. Block – A pulley. Bolt-rope – The rope sewed into the front edge of a sail (also see: Slug) Bow – The front of the boat. Bow Pulpit – The railing at the front of the boat. Boom – The pole along the bottom of the main sail. Boom-vang – A set of pulleys and line that connects between the boom and the bottom of the mast. It helps control the shape of the mainsail by holding the boom down. Centerboard – A keel that swings to retract (also see: Daggerboard) Chainplate – A fitting (often a metal strap) that is attached to the boats hull or deck. It is what the shrouds and stays connect to. Clew - The lower aft corner of a sail Crutch – A pole, stick, etc. used to support the free end of a spar (boom, mast, etc.). In the case of the Potter 19 it is used to support the top of the mast when the mast is down in the trailering position. Daggerboard – A keel that lifts vertically such as on your Potter 19. It is also called a centerboard by many people. Daggerboard Trunk – The structure that the daggerboard slides up and down in. Foot – The bottom edge of a sail Forestay – The wire that goes from the front of the boat to a location high on the mast. It helps hold the mast up and supports the front edge of the headsail Genoa – Generally a large headsail that significantly overlaps the mainsail. In the 69 case of the Potter 19, it is used specifically to describe the largest factory headsail. See also: Jib and Lapper. Gin-pole – A pole used to help raise the mast. It is connected to the lower part of the mast and sticks out forward when the mast is up. Halyard – A line used to raise a sail. Hank – The clips on the front of a headsail. If you have roller furling, then your headsail does not have hanks. Head – The top corner of a sail. Headsail – Any sail that is flown from the forestay. See: Jib, lapper, and Genoa. Jib – Often used as a generic term for any headsail. In the case of the Potter 19, it is used specifically to describe the smallest factory headsail. See also: Lapper and Genoa. Lapper – The medium size factory headsail. See also: Jib and Genoa. Leech – The back edge of a sail Luff (n) – The front edge of a sail. Luff (v) – When the front edge of the sail flaps. Main – Short for Mainsail. Mainsail – The sail that connects to the back of the mast and to the boom. Port – Left Quarter-Berth – The two places to sleep, one on either side, at the back of the boat. Reef (n) – The part of the sail that can be tied down to reduce the size of the sail Reef (v) – To reduce the size of a sail by tying it down or rolling it up to a smaller size. This is done so the sail can be used in higher winds. Starboard - Right Sheet (n) – A line used to control the back corner (clew) of a sail. Sheet (v) – To adjust the sails position by letting out or pulling in on its sheet. Shroud – Wires that run from the side of the boat to the mast. They help hold the mast up (also see: Stay). Slug (Sail) – Small plastic slides attached to the front edge of the mainsail. They slide into the track on the mast. Not all mainsails have these. If your sail doesn’t have slugs, then its bolt-rope slides into the track on the mast. Stay – A wire holding the mast up (see: Forestay, Backstay, and Baby-Stay; also see: Shroud). Stern – The back of the boat. Stopper Knot – A knot used to keep the end of a line from slipping through a 70 guide or other fitting. It is not a particular type of knot, but a figure eight knot is a good choice (refer to a knot tying book). Tack (n) – The forward lower corner of a sail. Tack (v) – To change course by swinging the bow of the boat through the wind. This is commonly done to make the zigzag course required to sail to windward. Tang – A small piece of metal that connects the wire stay to the mast. Transom – The vertical part of the back of the boat. V-Berth – The sleeping place at the front of the boat (also see: Quarter-Berth) Whisker Pole – An adjustable pole used to hold the clew of a headsail out away from the boat. 71