1
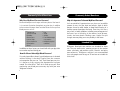
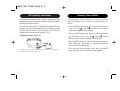
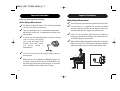
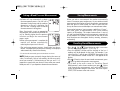
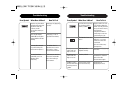
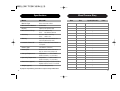
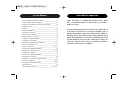
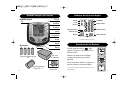
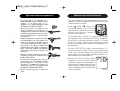
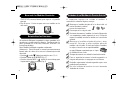
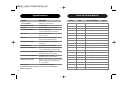
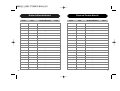
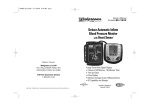
Owner’s Manual
for model: BD-7181W
Deluxe Automatic Inflate
Blood Pressure Monitor
with Heart Sense
Made in Taiwan
Walgreens c/o SAI
105 CHALLENGER ROAD, 6FL
RIDGEFIELD PARK, NJ 07660
Toll Free Customer Service
1.800.261.0130
Heart Sense and Healthy Living are registered trademarks used under license from Samsung America, Inc.
•Large Three Row Digital Display
• 3 Zones of 30 Memory - 90 Memory Total
• Time and Date
• Pulse Display
• Memory Average of last 3 Measurements
• AC Capability and Adapter
Distributor: Walgreen Co.
Deerfield, IL 60015
In This Manual
Important Warnings/Medical Disclaimer
Important Warnings/Medical Disclaimer ________________1
Healthy Living _________________________________2-3
Commonly Asked Questions ________________________4-7
Intended Use _____________________________________7
Accuracy ________________________________________8
Measurement Method_______________________________8
Special Conditions _________________________________9
Special Features ___________________________________9
Main Unit and Accessories___________________________10
Digital Display Symbols _____________________________11
Battery Installation ________________________________11
AC Capability and Adapter __________________________12
Selecting Time and Date ____________________________13
Important Reminders ____________________________14-15
Applying the Cuff _________________________________16
Taking a Blood Pressure Measurement ________________17-18
Storing Measurements _____________________________19
Recalling Stored Measurements ____________________19-20
Reset Function ___________________________________20
Taking Care of Your Monitor__________________________21
Troubleshooting ________________________________22-23
Limited Lifetime Warranty _________________________24-25
Specifications____________________________________26
Blood Pressure Diary_____________________________27-29
Before using your blood pressure monitor, you should
read and understand all instructions and follow all
warnings.
Information in this manual is provided for informational
purposes only. This manual and product are not meant
to be a substitute for the advice provided by your own
physician or other medical professional. You should not
use the information contained herein or this product
for diagnosing or treating a health problem or disease,
or prescribing any medication. If you have or suspect
that you have a medical problem, promptly contact your
healthcare provider.
1
Healthy Living
Healthy Living
This blood pressure monitor is the first step to living a healthier
life. But monitoring your blood pressure at home is just the
beginning, it’s also important to:
BE HAPPY! - A positive attitude is a big part of a healthy body.
Try not to get too stressed out over things. Daily relaxation
techniques such as gentle yoga or even quiet time by yourself
can do a lot of good for the mind and body. Stay focused on the
good things in life. Begin by congratulating yourself for that
short walk you just took or the smart food choice you made. It’s
your first step to a healthier life!
EXERCISE REGULARLY - Start out by taking a short
walk each day. Before you know it, you’ll feel energized. That’s
because along with being an easy way to shed a few pounds,
walking also helps bones and hearts to become stronger.
EAT RIGHT - Remember, you are what you eat! So when
you reach for a snack, try grabbing a piece of fruit or a
vegetable. When cooking meals at home try to use fats and
oils sparingly. Sometimes a healthy diet is the best medicine
of all! It’s also a good idea to monitor your sodium intake
because about one-third of individuals who have high blood
pressure are also sodium sensitive.
2
KEEP AN EYE ON YOUR WEIGHT! - Surprisingly, losing even
a small amount of weight can often times help control high
blood pressure. Talk with your doctor to find a “healthy” weight
for you and strive to come within a range of it.
Remember to consult your physician prior to beginning
exercise, vitamin/mineral/dietary changes or programs and
blood pressure monitoring.
3
Commonly Asked Questions
Why Should I Monitor My Blood Pressure At Home?
By monitoring at home, you can manage your health between
doctor visits. Home monitoring also provides you with a record
of blood pressure measurements over time to give to your
doctor - a valuable tool in monitoring hypertension.
Home monitoring may also help alleviate White Coat
Hypertension. This term refers to the medical phenomena
which causes many individuals’ blood pressure to be higher
when taken in a medical office setting. That’s because many
times the stress of being in the doctor’s office may cause blood
pressure to rise as much as 20-50 points higher than normal.
When monitoring at home, you can get a truer indication of your
blood pressure in a normal, relaxed state.
What Is Blood Pressure?
The commonly used term “blood pressure” refers to the force or
pressure that is exerted on the body’s arteries as blood
flows through them. Each time the heart beats or
contracts it produces pressure in the arteries.
This blood pressure is what moves blood
through the body, supplying oxygen and
nutrients to every organ.
4
Commonly Asked Questions
When the heart contracts it sends
blood out into the body. This force
of blood within the arteries is
called systolic pressure.
The pressure that remains as the
heart relaxes between beats is
called diastolic pressure.
systolic
diastolic
pulse
What Is Considered Normal Blood Pressure?
The well-respected World Health Organization (WHO) has set
forth the following guidelines regarding high (commonly
referred to as hypertension), low and borderline blood pressure.
Hypertension
Borderline
Normal
5
Commonly Asked Questions
Commonly Asked Questions
Why Does My Blood Pressure Fluctuate?
Because blood pressure changes with every beat of the heart it
is in constant fluctuation throughout any given day. In addition
to these natural changes there are other factors that may affect
blood pressure such as:
Why Is It Important To Control My Blood Pressure?
Left uncontrolled, hypertension can place an incredible
amount of stress on your heart and arteries, both of which
become forced to work harder to keep blood flowing in a
healthy manner throughout the body. Over time, this stress
may result in health problems including over-enlargement of
the heart, loss of elasticity of the arteries, heart disease,
stroke, and even death. Making some simple lifestyle
changes now may help you to stay healthy in the future.
•
•
•
•
•
•
•
Temperature
(too hot or cold)
Humidity
Restlessness
Lack of sleep
Physical exercise
Constipation
Stress
Fear
Anger
Anxiety
Food and beverage
consumption
• Individual physical
conditions
•
•
•
•
In addition to these factors you should talk with your physician
to see what may be affecting you.
How Do I Know I Have High Blood Pressure?
It’s nearly impossible to know if your blood pressure is elevated
without having it checked. People have the common
misconception that one can “feel” their blood pressure rise.
It is because of this mystery that hypertension has been
named “the silent killer.” Don’t let it sneak up on you! Start
monitoring your blood pressure every day with your new
Walgreens monitor.
6
Intended Use
Walgreens blood pressure monitors are intended for home
use. They are noninvasive, meaning no part of the monitor
enters your body, and provide systolic, diastolic and pulse
measurements. Walgreens monitors are recommended
for use by people over the age of 18 and are not suitable for
clinical use.
7
Accuracy
Special Conditions
Walgreens monitors have been clinically tested against a
scientific device called a sphygmomanometer, considered the
gold standard in blood pressure measurement. All Walgreens
monitors have performed equivalent to measurements taken
with this scientific device and are within the accuracy limits
prescribed by the American National Standard for Electronic
or Automated Sphygmomanometers.
All Walgreens blood pressure monitors are safe and accurate
to use with arrhythmias such as atrial or ventricular premature
beats and atrial fibrillation.
Measurement Method
Walgreens monitors measure blood pressure and pulse by
using what’s called an oscillometric method, meaning they
measure the fluctuations in pressure. This is done by first
wrapping a fitted cuff around the upper arm. The monitor
then automatically fills the cuff with air creating pressure
around the arteries inside of the arm. Mounted inside of the
cuff is a special gauge that is capable of sensing the small
oscillations (fluctuations) in pressure. These fluctuations are
produced as a result of the pressure the cuff has placed
around the arm and are, in a basic sense, the arteries pulsing
(getting larger and smaller) with each heart beat. The monitor
then measures how high and how quickly these pulses occur
and converts that information into a digital value. A special
valve, called an electrode, deflates the monitor automatically
when the measurement is complete.
8
Special Features
This Walgreens monitor with Heart Sense technology
senses your blood pressure before the measurement is
complete - the monitor then adjusts the air pressure amount
according to your individual level. The results are quick,
comfortable measurements each time your check your blood
pressure.
Large Three Row Display
A large LCD displays the time, date and your blood pressure systolic over diastolic - to make measuring your blood pressure
easy to read.
Memory Feature
Your Walgreens Deluxe Automatic Inflate monitor features a
3 party memory capability or 3 "zones" - each zone stores 30
measurements for a total storage capacity of 90
measurements. This unique feature allows 3 users to use and
store their blood pressure readings separately all on one
monitor!
Time and Date
This monitor automatically keeps track of the time and date
and remains on when the monitor is not in use for easy
reference.
9
Digital Display Symbols
Main Unit and Accessories
Time
Main Unit
Date
Systolic
Month/Day
Hour/Minute
Inflate
Systolic Display
Deflate
mmHg
Diastolic
Diastolic Display
Replace Battery
Pulse
Error Symbol
Memory Display
Pulse Display
Start/Stop
Up
Mode
Memory
Accessories
Down
Storage Pouch
9"~13"
Regular Cuff
10
Battery Installation
When the display shows
, it’s time to
replace the batteries. This monitor uses 4
"AA" alkaline batteries.
Insert the batteries into the monitor making
certain to align the polarities correctly.
4 "AA" Alkaline Batteries
X
DE
IN
Measuring Symbol
Flashes During Measurement
Close the battery cover securely. It will snap
into place when it is fully closed.
* It’s a good idea to remove the batteries if you know you will not
be using your batteries for an extended amount of time.
AC Adapter
11
AC Capability and Adapter
Selecting Time and Date
This Walgreens blood pressure monitor is equipped with AC
capability should you choose to use electric power instead of
batteries to operate your unit.
Your Walgreens monitor will keep track of the time and date
unless the batteries have run down or are removed from the
monitor.
Use only the authorized AC adapter included with your
monitor. Use of any other adapter may cause damage to the
monitor and will void the user warranty. For warranty or
replacement information refer to pages 24-25.
•
Press the MODE button on the unit. The month will begin to
(Up) or
(Down) button until the
flash. Press the
correct month appears on the display.
•
Press the MODE button once again to store and now the
(Up) or
(Down)
day will begin to flash. Press the
button until the correct day appears on the display.
•
Press the MODE button to store and the hour will begin to
flash. Follow the same process as setting the month and
day to set the hour and minute.
•
Once you have selected the minute, press the MODE
button. The unit will now display the time and date.
AC Adapter Output: 6V DC 1A
*It is suggested that you remove the batteries from the compartment if you are going to use
an AC adapter for an extended amount of time.
12
13
Important Reminders
Important Reminders
Here are some important reminders:
While Taking a Measurement
Sit quietly for about 10 minutes. This will allow your body
to return to its normal, resting state.
✓ Sit with your legs uncrossed and your feet flat on the floor.
✓ For consistency, it's a good idea to measure your blood
not too cold, not too hot - as temperature may affect your
measurement.
✓ Relax. Sit still and quietly while measuring. Talking or
Before Taking a Measurement
✓
✓ Take your blood pressure in a comfortable environment -
✓ If you've just consumed beverages containing caffeine
TIME
.
SYS g
mmH
E
DAT
DIA. g
mmH
mm
Hg
SE
PUL .
/MIN
RY
STO
P
MEMO
RT/
M
STA
such as coffee, non-herbal
tea, or cola wait about 30-45
minutes. Also, don't smoke
just before taking a
measurement.
E
ME
MOD
MO
RY
pressure using the same arm and at about the same time
each day. If possible, we suggest using the left arm.
moving may elevate measurements. Do not touch the cuff
or monitor during the measurement.
taking multiple measurement right after each other,
✓ When
make to wait at least 8-10 minutes in between. Waiting
allows your blood vessels to return to their normal state.
✓ Insert the cuff plug into the monitor before taking a
PULSE
/MIN.
DIA.
mmHg
TIME
SYS.
mmHg
P
STO
RT/
MEMORY
M
DATE
mmHg
MODE
STA
✓ Make sure the cuff is properly assembled before use. To
/STOP
measurement.
ME
MO
RY
assemble, insert the end of the cuff marked INDEX into
the metal ring with the velcro side facing out. The smooth
material should be on the inside of the cuff loop.
14
15
Taking a Blood Pressure Measurement
Applying the Cuff
1.Once the cuff is properly applied and you are seated with your
feet flat on the floor you are ready to take a measurement.
2.Press
TIME
SYS.
mmHg
mmHg
DIA.
mmHg
MEMORY
PULSE
/MIN.
TO
P
M
/STOP
MODE
ST
AR
T/S
Y
OR
0.8" - 1.2"
DATE
EM
the
(Up) or
(Down) button
and you will see a number appear: 1,2, or
3. These are each of the 3 party memory
zones explained on page 9 (Special
Features).
M
16
1.If your arm measures 9"-13" around, use the
regular cuff included with your monitor. If your
arm measures 13"-17" around, please use a
Walgreens Large Cuff (Model #BC-200W).
2.Before taking a measurement, read the Important
Reminders on pages 14-15. Make certain the cuff
plug is inserted securely in the monitor and the
cuff is assembled properly. Remove any
constricting or thick clothing from your upper arm.
3.Slide your arm through the cuff loop. The cuff
should be positioned on your bicep about 1/2"
above the elbow. With your palm facing up, the
red arterial marker should be in the center of your
arm over the brachial artery. The cuff tube should
run down the center of your arm. Instructions are
also printed on the cuff for reference.
4.Secure the cuff around your arm using the velcro
so it fits securely but is not too tight. You should
be able to place 2 fingers in between the cuff
and your arm.
5.The velcro tab should fall within the "OK" range
printed on the cuff for proper use. If your arm is
larger than 13" around and the cuff does not fall
within the "OK" range, please use a Walgreens
Large Cuff (Model #BC-200W).
6.Relax your arm and place your elbow on the
table.
*If you select zone No. 1 your blood
pressure will be recorded as one of the 30 readings available
for that zone. The same is true for zones 2 and 3. When taking
measurements, be sure and select the correct zone number so
that the measurement is stored in the appropriate zone.
3.Press
the START/STOP button. The monitor will begin to
inflate to the level that's right for you. An upwards facing
arrow on the digital display indicates the monitor is inflating.
Remain still and do not talk during the measurement process.
............................
4.You
will feel the cuff get tighter around
your arm - this is normal. It should not
inflate to the point of discomfort. If this
occurs, the cuff may be secured too tightly.
To stop the inflation, press START/STOP.
The cuff will deflate automatically. Rewrap
the cuff allowing more room between your
arm and the cuff.
Inflation
17
Storing Measurements
Taking a Blood Pressure Measurement
5.Inflation
will stop automatically to begin
the measurement process. You will see a
downward facing arrow and the numbers
decreasing as the cuff is deflating. You
will also see a flashing heart to indicate
the measurement is taking place.
Note: Occasionally, to get an appropriate
measurement, the monitor may reinflate the
cuff to 30mmHg higher than the previous
inflation and begin the measurement
process again.
Deflation
6.When
your measurement is complete the
monitor will deflate automatically,
releasing the air pressure in the cuff.
7.The
entire measurement process should take less than a
minute. Your blood pressure and pulse readings are displayed
and automatically stored in the memory.
* The monitor will automatically power off after about one minute.
NOTE: Blood pressure constantly changes during the course of
a day. Occasionally, high or low readings do not necessarily
mean your monitor is malfunctioning or that you are ill. It is
important to speak with your doctor to learn what your normal
blood pressure is if you experience abnormal measurements.
18
When you take a measurement the monitor automatically
stores it in memory space number one. As you continue to take
measurements the monitor will push the previous measurement
back one space. In other words, the value in space one will
always be the most recent blood pressure measurement taken.
Your monitor features a 3 party memory capability or 3 "zones" each zone stores 30 measurements a for a total memory
capacity of 90 readings. This unique feature allows 3 users to
use and store their blood pressure measurements separately all
on one monitor. This feature is also useful for one user to track
their blood pressure throughout the day: morning, afternoon,
and evening.
Recalling Stored Measurements
1.Press
the
(Up) or
(Down) button to select a user zone.
You will see a number appear: 1, 2, or 3. (Fig. 1)
2.Press the MEMORY button and the average of the last 3
readings will be displayed for that zone. For example, if you
select zone No. 1 and you press MEMORY, the average of the
last 3 measurements stored in zone No. 1 will appear on the
display.
(Down) to view the next stored measurement; press
3.Press
(Up) to go back to the previous measurement.
4. To go back to the main screen for "Recalling Stored
Measurements" and to choose another zone, press
(Up) to
scroll through the measurements until you reach the most
recent measurement and press once more. You can also press
START/STOP to return to the main screen.
19
Recalling Stored Measurements
Taking Care of Your Monitor
steps 1-3 once again to review measurements in
another zone.
It’s important to treat your monitor with care. Here are some
basic tips:
5.Follow
M
Y
OR
EM
/STOP
*Fig.1
*Fig.2
Reset Function
✓ Keep the monitor out of direct sunlight, high humidity and
extreme temperature changes.
✓ Try not to drop it on the floor.
not take the monitor or the cuff apart. None of the
✓ Do
monitor’s parts are fixable at home. If your monitor needs
repair, see details in the warranty section of this manual.
Your Walgreens monitor will not lose the data stored in the
memory even when you change the batteries. To erase all of the
data in memory zone, refer to the instructions below.
Note: Single measurements cannot be erased.
Warning: Resetting the memory will permanently erase all of the
stored data in the memory zone that you select.
•Press
(Up)
(Down) to choose a zone: 1, 2, or 3.
•Press the MEMORY button. (Fig. 3)
•Press the MODE and
(Up) button at the same time to clear
all of the stored data. (Fig. 4)
✓ Keep the monitor free of dust and other materials. Avoid
getting any part of the monitor or cuff extremely wet. If
the monitor needs cleaning it’s best to wipe it with a cloth
slightly dampened with water. We recommend that you
clean your monitor about once a month.
✓ Do not harshly fold or bend the cuff as
this may damage it on the inside.
✓ Do not inflate the monitor’s cuff if it is not wrapped
around your arm.
✓ Always remove the cuff tube from the monitor with care.
✓ For your safety, do not wrap the cuff around any other
body part other than your arm.
MM
Y
OR
Y
OR
EM
EM
/STOP
MODE
*Fig.3
20
*Fig.4
21
Troubleshooting
Troubleshooting
Error/Symbol
What Does It Mean?
How To Fix It
Monitor may have been
inflated without the cuff
around the arm OR
Cuff may not be
positioned correctly on
the arm.
Read page 16 (Applying
the Cuff).
The cuff tube may be
folded OR You may have
moved while the cuff was
inflating.
Read pages 14 & 15
(Important Reminders).
You may have moved
or spoken during the
measurement process.
Remember that it is
important not to move
and speak as it may
elevate measurements.
You may have been
startled by a noise or
vibration while
measuring.
Make sure you are in a
quiet and comfortable
place when taking a
measurement.
Error/Symbol
What Does It Mean?
How To Fix It
You have been ignoring
the flashing replace
battery symbol (
).
Replace with four new
"AA" alkaline batteries.
Make sure the polarities
are positioned correctly
in the battery
compartment before
continuing to measure
your blood pressure.
Replace with 4 "AA"
batteries so you may
continue to measure
your blood
pressure without any
interruptions.
Read page 16 (Applying
the Cuff).
The batteries have run
down.
Blood pressure
value seems too
high or too low
Cuff may not be
aligned correctly.
Blood pressure
value seems too
high or too low
Circuitry locked.
Unable to take a
The cuff may not be
measurement after positioned correctly.
receiving an error
symbol.
22
Remove then reinsert
the batteries and then
proceed to take
measurement again.
Read page 16
(Applying the Cuff).
23
Specifications
Date
Time
Systolic/Diastolic
Model
BD-7181W
Monitor Type
Deluxe Automatic Inflate
/
Measurement Method
Oscillometric
/
Display
Liquid crystal digital display
/
Measurement Range
Pressure: 0-260 mm Hg
Pulse: 40-199 beats/Minute
/
Accuracy
Pressure: within ± 3mm Hg
Pulse: within ± 5%
/
/
Automatic Power Off
About 1 minute after measurement
is complete
/
Battery Type
4 AA batteries (Alkaline)
Battery Life
About 6 months when used once a
day, less when using a large cuff
Storage Temperature
Temperature:
-4°F to 140°F
Relative Humidity: less than 95%
/
Operating Temperature
Temperature:
50°F to 104°F
Relative Humidity: less than 95%
/
Dimensions (approx.)
Monitor: 4 3/4" (w) x 5 1/8" (d) x 2 7/8" (h)
Regular Cuff: fits arms 9"-13" around
Weight (approx.)
14 oz (including batteries)
For purposes of improvement, specifications are subject to change without notice.
Pulse
/
Stores up to 30 measurements for
each zone (90 memory total)
Memory
26
Blood Pressure Diary
/
/
/
/
/
/
/
/
/
27
Blood Pressure Diary
Date
28
Time
Systolic/Diastolic
Blood Pressure Diary
Pulse
Date
Time
Systolic/Diastolic
/
/
/
/
/
/
/
/
/
/
/
/
/
/
/
/
/
/
/
/
/
/
/
/
/
/
/
/
/
/
/
/
/
/
/
/
/
/
Pulse
29
En este Manual
Aviso Medico Importante
Aviso Importante/Invalidación médica __________________1
Healthy Living (Vida Saludable)____________________2-3
Preguntas más precuentes sobre la presión arteríal _______4-7
Proposito del uso _________________________________7
Precisión _______________________________________8
Metodo de Medición ______________________________8
Condiciones especiales ____________________________9
Características especiales __________________________9
Unidad principal y accesorios _______________________10
Símbolos de la pantalla digital ______________________11
Instalación de las baterias _________________________11
Capacidad de adaptador de energia AC ________________12
Selección de la fecha y hora ________________________13
Consejos importantes __________________________14-15
Colocación de la banda ergométrica ___________________16
Medición de la presión arterial ____________________17-18
Guardando las medídas ___________________________19
Buscando las medídas guardadas____________________ 19
Reinicializar las funciones __________________________20
Cuidados de su medidor de presión arterial _____________21
Solución de problemás__________________________22-23
Garantía de Limitada de por Vida___________________24-25
Especificaciones ________________________________26
Díario de presión arterial ________________________27-31
Antes de ultilizar su medidor de presión arterial, debe
leer y comprender todas las instrucciones y atender a
todos los avisos.
La información contenida en este manual y producto no
sirve como sustituto a los consejos ofrecidos por su
médico de cabecera o por otros profesionales médicos.
No debe utilizár esta información o este producto como
medio de díagnóstico, para tratar un problema de salud
o enfermedad o para prescrbir medicación alguna. Si
tiene, o sospecha que tiene un problema médico,
consulte cuanto antes a su médico.
1
Healthy Living / Vida Saludable
Healthy Living / Vida Saludable
Este medidor de presión arterial es el primer paso a una vida
Sana. Sin embargo, el control de su presión arterial en casa es
sólo el primer paso para una vida sana. Tambíen es importante:
SEA POSITIVO. Una mente sana está íntimamente ligada a un
cuerpo sano. Las técnicas de relajación díaria como la
meditación y el yoga pueden ser lo que necesite para aliviar el
estrés díario. Centre su mente hacia las cosas positivas de la
vida y antes dé que se de cuenta de los aspectos negativos no
parecerán tan malos. Comience con esos paseos cortos o con
esa buena alimentacion que acaba de elegir para una mejor
salud.
PERMANECER ACTIVO: Comience con un corto paseo
díario. Con el tiémpo comenzará a sentirse con más energía. ¡El
andar no sólo le ayuda a perder peso, sino también a cimentar
unos huesos más fuertes y un corazón más sano!
COMA SANO: Un buen comienzo sería agregar más frutas
y verdures a su dieta. ¡Los estudios han demostrado que la
mejor medicaion es atenerse a una dieta alta en estos
alimentos, además de cereales integrals, pescado y
productos bajos en grasa. Tambíen es importante controlar el
consumo de sodio, pues un tercio de la gente con la tensíon
alta es sensible a este mineral.
2
¡VIGILE EL PESO! Sorpresivamente si pierde un poco de peso,
puede ayudarle a controlar la presión arterial. Si ya ha
comenzado a comer sano y a permanecer activo, ya puede
despedirse de su peso!
RECUERDE: Consultar a su médico antes de comenzar con el
ejercicio, tomar vitaminas/minerals, realizar cambios de dieta o
programás de control de presión arterial.
3
Preguntas más Frecuentes Sobre la Presión Arterial
¿Porque medir mi presión arterial en casa?
Al comprobar su presión arterial en casa, puede controlar su
salud entre las visitas al médico. La medición en casa también
le proporciona los datos de sus controles a lo largo de los días
para entregárselos a su médico-una gran herramienta para el
control de personas hipertensas. El control en casa también
ayuda a aliviar la Hipertensión de la bata blanca. Esta expresión
se refiere al fenómeno médico que sufren muchas personas,
dando como resultado una presión arterial mayor cuando se
comprueba en una consulta. Por ello muchas veces el estrés
que causa la consulta del médico puede provocar que suba la
tensión hasta unos 20-50 puntos más de lo normal. Al medirse
la presión en casa, obtendrá un resultado más verídico de su
presión arterial en un estado normal de relajación.
¿Qué es la presión arterial?
El término común "Presión arterial " se refiere a la fuerza
o presión que la sangre ejerece al fluir por las
arterias del cuerpo humano. Cada vez que el
corazón palpita o se contrae, produce una
presión en las arterias. Esta presión arterial
es lo que mueve la sangre por todo el cuerpo, suministrando
oxígeno y nutrientes a todo el organismo.
4
Preguntas más Frecuentes Sobre la Presión Arterial
Cuando el corazón se contrae,
expulas la sangre hacia el cuerpo.
Esta presión se denomina
sistólica.
La presión creada cuando el
corazón recibe la sangre se
denomina díastólica.
La presión arterial se
graba como sistólica y
díastólica tal y como se
muestra en la figura.
sistólica
díastólica
pulso
¿Qué es considerada una presión arterial normal?
La bien reconocida World Health Organization (WHO) ha
estabelcido las siquientes pautas relativas a la presión
arterial alta (más conocida como hipertención), baja y
estable.
5
Preguntas más Frecuentes Sobre la Presión Arterial
Preguntas más Frecuentes Sobre la Presión Arterial
¿Por qué varía mi presión arterial?
Puesto que la presión arterial cambia con cada latido del
corazón, varía constantemente a lo largo de un día. Además de
estos cambios naturales, existen otros factores que pueden
afectar a la presión arterial como:
¿Por qué es importante controlar la presión arterial?
Si no se controla, la hipertensión puede provocar una
incredible cantidad de estrés en su corazón y arterias, los
cuales se ven forzados a trabajar más para que la sangre
fluya de manera normal por todo el cuerpo. Con el tiémpo
este estrés puede causar problemás de salud como en el
aumento del tamaño del corazón, pérdida de elasticidad en
las arterias, problemás de corazón, ataques o incluso la
muerte. Unos simples cambios en el estilo de vida pueden
ayudarle a mantenerse sano en el futuro.
•
•
•
•
•
•
•
Temperatura
(mucho calor o frío)
Humedad
Cansancio
Humedad
Ejercicio físico
Resfriado
Estrés
Miedo
Enojo
Ansiedad
Consumo de comida
y bebida
• Condiciones físicas
individuales
•
•
•
•
Además de estos factores, debe consultar con su médico para
comprobar qué más podría afectarle.
¿Cómo sé si tengo la presión arterial alta?
Es prácticamente imposible saber si su presión arterial es
alta sin haberlo comprobado. La gente generalmente piensa
que uno puede “sentir” sus subidas de tensión arterial. Es
por este misterio que la hipertensión se ha llamado “el
asesino silencioso”. ¡No deje que se acerque
silenciosamente a ustéd! Comience a controlar la presión
arterial a díario con su nuevo medidor Walgreens.
6
Propósito del uso
Los medidores de presión arterial de Walgreen's ofrecen un
uso doméstico y cómodo. No son penetrantes, lo que
significa que ninguna parte del medidor entra en su cuerpo y
ofrecen las mediciónes sistólicas, díastólicas y del pulso. Los
medidores Walgreen's se recomiendan para personas mayors
de 18 años y no son aptos para uso clínico.
7
Precision
Condiciones Especiales
Los medidores Walgreens han sido clinicamente probados
con un dispositivo científico llamado esfigmómetro,
considerado como el estandar de oro para la medición de la
presión arterial. Todos los medidores Walgreens han dado
resultados equivalents a los tomados con este dispositivo
científico y se encuentran dentro de los limites establecidos
por el estandar Nacional Americano para Esfigmómetros
Electronicos o Automatizados.
Todos los medidores de presión arterial Walgreens son seguros
y precisos para el uso con arritmias como latidos prematuros,
arteriales ó ventriculares y fibrilación arterial.
Metodo de Medición
Los medidores Walgreens miden la presión arterial y el pulso
con el metodo denominado oscilométrico, lo que significa que
miden las variaciones en la presión. En primer lugar, debe
ponerse la banda ergométrica en el brazo. La banda se
llenará de aire creando presión en las arterias del brazo. En
la parte interior de la banda ergométrica hay un medidor
capaz de detectar las más minimas oscilaciones (variaciones)
en la presión. Estas variaciones se producen como resultado
de la presión que ejerce la banda alrededor del brazo y se
trata de las arterias pulsando (aumentando y disminuyendo)
con cada latido del corazon. El medidor comprueba entonces
la magnitud y rapidéz con que ocurren las pulsaciones y
convierte esa información en un valor digital. Una valvúla
especial, denominada electródo, desinfla el medidor
automaticamente cuando finalize la medición.
8
Características Especiales
Este monitor de Walgreens con Sensor del Corazon
tecnologicamente percibe la presión de la sangre antes que
la medición sea completada. El medidor luego ajusta la
cantidad de la presión de aire necesaria conforme al nivel de
cada indivudo. Los resultados son rapidos, medídas comodas
cada vez que se mide su presión sanguinea.
Trés largas hileras en la pantalla
Un largo LCD exhibe el tiémpo, día y su medída de presión sistólica sobre distólica - para hacer que la medída de su presión
sea más facil de leer.
Características de la memoria
Su Monitor Walgreens para la presión sanquinea inflable
Ultra Lujosa muestra 3 partes de memoria con la capacidad
de 3 “Zonas”- cada zona guarda 30 medídas con la capacidad
total de almacenar 90 medídas. Esta característica única
permite que tres personas usen y guarden sus medídas
separadamente en un solo monitor!
Tiémpo y Día
Este monitor automaticamente mantiene el transcurso del
tiémpo y día y se mantiene encendido cuando el monitor no
está en uso para una referencia fácil.
9
Simbolos de la Pantalla Digital
Unidad Principal y Accesorios
Tiémpo
Unidad Principal
Día
Sistólico
Mes/Dia
Hora/Minuto
Inflar
Medída Sistólica
Desinflar
mmHg
Distólico
Medída Diastólica
Reemplazar baterias
Pulso
Simbolo de error
Memoria
Comenzar/
Detener
Arriba
Modo
Accesorios
Memoria
4 Baterias Alcalinas tipo
“AA”
Abajo
Bolsa de
Almacenaje
X
DE
IN
Banda Ergométrica
Regular 9"-13"
10
Medída de el Pulso
Simbolo de Medída
(se alumbrara durante la medicion)
Instalación de las Baterias
Cuando la pantalla muestre
, debe
cambiar las baterias. Este medidor utiliza 4
baterias tipo AA.
Introduzca las baterias en el medidor y
asegúrese de respetar la posición de
polaridad.
Cierre la tapa de las baterias. Encajará en su
posición cuando se cierre por completo.
Adaptador de
Energia AC
*Si no va a utlizar el medidor durante mucho tiempo, lo mejor es
quitar las baterias.
11
Capacidad de Adaptador de Energia AC
Selección de la Fecha y la Hora
El medidor de presión Walgreens esta equipado con un
adaptador de energia AC en caso que quiera usar
electricidad en vez de baterias para operar su unidad.
Su monitor de Walgreens mantendrá el transcurso del
tiémpo, més y días a no ser que las batteries hayan expirado
o se hayan removido del monitor.
Use solo su adaptador AC autorizado para su monitor. El uso
de otro adaptador puede causar daños al monitor y
envalidara el uso de la garantia. Para garantia o remplazos
vea la pagina 24-25.
•
Presioné el botón MODE en la unidad. El més empezará a
(arriba) o
(abajo)
saltar intermitentemente. Presióne
hasta que el més correcto aparezca en la pantalla.
•
Presióne el botón MODE una vez más para guardar y ahora
el día empezará a saltar intermitentemente. Presióne
(arriba) o
(abajo) hasta que el día correcto aparezca en
la pantalla.
•
Presióne el botón MODE para guarder y la hora empezará a
brincar intermitentemente. Siga los mismos pasos para
guarder el més y día para cambiar la hora y minutos.
•
Una vez que haya selecciónado los minutos, presióne el
botón MODE. La unidad ahora mostrará el tiémpo y el día.
Enchufe del Adaptador AC: 6V DC 1A
*Se le sugiere que remueva las baterias de su compartimiento si va a usar el adaptador AC
por una cantidad extensa de tiémpo.
12
13
Consejos Importantes
Consejos Importantes
Siga los consejos de su médico sobre cómo y cuándo
tomarse la presión arterial. Estas son algunas
sugerencias:
tranquilo durante unos 10 minutos. Esto hará que
✓ Siéntese
su cuerpo vuelva a su estado normal de descanso.
✓ Tomese la presion arterial en un entorno comodo y no muy
frio o caluroso, pues la temperatura puede afectar el
resultado.
✓ No debe de haber tomado ninguna bebida con cafeína
TIME
.
SYS g
mmH
E
DAT
DIA. g
mmH
Hg
SE
PUL .
/MIN
mm
RY
STO
P
MEMO
RT/
M
STA
como café, té no herbal o
refrescos de cola.
Tampoco fume antes
de tomarse la presión.
Debería esperar unos
30-45 minutos.
ME
E
MOD
MO
RY
Durante la medición
✓ Sientese callado y quietamente al tomarse la presion. El
hablar o moverse puede elevar las medídas de su presion.
✓ Para mejores resultados, es recommendable tomarse la
presion siempre en el mismo brazo y a la misma hora
todos los dias. Si es posible, le sugerimos que use su
brazo izquierdo.
✓ Cuando realice varias mediciones una tras otra, asegúrese
de esperar al menos 3 minutos entre una y otra. Esto hará
que los vasos sanquíneos vuelvan a su estado normal.
✓ Siéntese con las piernas sin cruzar y los pies apoyados en
el suelo. No toque la banda o el monitor en ningún
momento durante la medición. Relájese.
✓ Asegurese de enchufar la banda al monitor antes de
tomarse la presion.
PULSE
/MIN.
DIA.
mmHg
SYS.
mmHg
TIME
STO
P
MEMORY
mmHg
MODE
RT/
14
STA
M
RY
DATE
que la banda este en samblada
apropiadamente, introduzca las puntas de la banda
marcada con INDEX entre el anillo metálico con el lado
del velcro hacia afuera. El material sedoso debe de
quedar dentro del cierre de la banda.
/STOP
✓ Asegurese
MO
ME
15
Medición de la Presión Arterial
Aplicando la banda ergométrica
1.Si
1.Una
vez la banda haya sido apropiadamente puesta y este
sentado con sus pies separados y tocando el suelo, ustéd está
listo para tomarse la medída.
TIME
SYS.
mmHg
mmHg
DIA.
mmHg
MEMORY
PULSE
/MIN.
TO
P
M
Y
OR
0.8" - 1.2"
DATE
/STOP
EM
(arriba) o
(abajo) y vera
los números aparecer: 1,2 o 3. Estos son
cada una de las 3 partes de la zona de la
memoria explicado en la pagina 9
(características especiales).
MODE
ST
AR
T/S
2.Presióne
M
su brazo mide 9”-13” alrededor, use la
banda ergométrica regular incluida con su
monitor. Si su brazo mide 13”-17”
alrededor, use la banda ergométrica larga
de Walgreens (Modelo #BC-200W)..
2. Antes de tomarse su medída, lea los
consejos importantes en la pagina 14-15.
Asegurese que el conector de la banda sea
introducido aseguradamente en el monitor.
Remueva obstrucciones o ropa gruesa de
su ante brazo.
3.Coloque la palma de su mano hacia arriba.
La banda debe de ser posicionada en el
bícep y la marca arterial roja debe de estár
en el centro adentro de su brazo y sobre la
marca arterial. El tubo de la banda tiene
que desplazarse hacia abajo al centro de su
brazo. Instruciones tambien son imprentas
directamente dentro de la banda para
referencias.
4.Coloque la banda curvada en su bícep y
asegurela firmemente alrededor de su
brazo usando el Vélcro.
5.El cierre del Vélcro tiene que caer en el
área imprenta con “OK” dentro de la banda
para un major uso. Si su brazo es más
grande de 13” alrededor de la banda y no
cae en el alcance “OK” use la banda larga
de Walgreens (Modelo #BC-200W).
6.Relaje su brazo y ponga su codo en la
16 mesa.
*Si ustéd selecciona la zona No. 1 sus medídas de la presión
serán grabadas como la primera de 30 lecturas disponibles
para esa zona. Lo mismo pasará para las zonas 2 y 3. Cuando
se tome las medídas, asegurese de selecciónar la zona de
números correcta para que sus medídas sean guardadas en la
zona apropiada.
3. Presióne
............................
START/STOP (el botón comenzar/detener). El
monitor comenzará a inflarse al nivel que sea correcto para
ustéd. Una flecha hacia arriba en la pantalla digital indica
que el monitor se esta inflando. Mantengase quieto y no
hable durante el proceso de medición.
4. Cuando
sienta que la banda le apreta
fuertemente, esto es muy normal. No infle
la banda a un punto de inconformidad. Si
esto ocurriese la banda puede estar muy
tallada, presióne el botón comenzar/parar,
afloje la banda dejando más espacio entre
su brazo y la banda.
Inflation
17
Guardando las Medídas
Medición de la Presión Arterial
5.La inflación se detendrá automaticamente
para comenzar el proceso de su primer
medída. Ustéd verá una flecha iendo
hacia abajo y los números disminuiran
cuando la banda vaya desinflandose.
Ustéd tambien observará un corazon
intermitente indicando que las medídas
están en progreso.
Deflation
Nota: Ocacionalmente, para obtener una
medída apropiada, el monitor puede reinflar la banda a 30 mmhg más arriba de la
inflación prevista y comenzar el proceso de
medición otra vez.
6.Cuando
la medída haya sido completada
el monitor se desinflará automaticamente,
soltando la presión de aire de la banda.
7.El proceso complete de la medída debe de tomar menos de un
minuto. Su presión arterial y lectura de pulso serán
mostrados automaticamente y guardados en la memoria.
* El monitor se apagará automaticamente despues de un minuto.
Nota:La presión arterial cambia constantemente durante el
transcurso del día. Ocacionalmente, las lecturas altas o bajas
no necesariamente signifícan que su monitor está en mal
estado ó que ustéd esté enfermo. Es importante que hable con
su médico para aprender cuál és su presión arterial normal para
saber si su experiencia le da mediciónes anormales.
18
Cuando ustéd se toma una medída el monitor automaticamente
lo guardará en el espacio de la memoria número uno. A medída
que se tome las mediciónes el monitor irá empujando la más
reciente medída un espacio hacia atras. En otras palabras, el
valor del espacio número uno será siempre la más reciente
medición de su presión arterial tomada.
Su monitor muestra capacidad para 3 partes en la memoria o 3
“Zonas”- cada zona almacená 30 lecturas para una capacidad
de memoria total de 90 lecturas. Esta característica única
permite a 3 personas usar y guarda sus medídas
separadamente todas en un monitor. Esta característica és
tambien de gran uso para que una sola persona mantenga trés
lecturas diferentes durante todo el día: mañana, tarde y noche.
Buscando las Medídas Guardadas
1.Presióne
(arriba) o
(abajo) para selecciónar la zona.
Vera unos números aparecer : 1, 2 o 3 (Fig. 1)
2.Presióne el botón de la MEMORY y el average de las 3
últimas lecturas será mostrado para esa zona. Por ejemplo, si
ustéd seleccióna la zona no. 1 y apreta MEMORY, el average
de las tres lecturas guardadas en la zona no 1 aparecerán en
la pantalla.
Presióne
(abajo) para revisa la próxima medída guardada;
3.
presióne (arriba) para volver a la medída previamente tomada.
4.Para regresar a la pantalla principal para “Buscando Medídas
Guardadas” y para elegir otra zona, presióne
(arriba) para
bajar hacia las medídas y llegar a la recientemente tomada y
precione una vez más. Ustéd tambien puede presiónar 19
Cuidados de su Medidor de Presión Arterial
START/STOP (comenzar/detener) para regresar a la pantalla
principal.
5.Siga los pasos 1-3 otra vez para revisa sus medídas en las
otras zonas.
Es importante manejar con cuidado el medidor. A
continuación se detallan algunos consejos:
Mantenga el medidor alejado de la luz directa del sol,
mucha humedad y cambios
bruscos de temperatura.
Procure que no se caiga al suelo
M
Buscando las Medídas Guardadas
Y
OR
EM
/STOP
*Fig.1
*Fig.2
Reinicializar las Funciones
Su monitor de Walgreens no perderá los datos guardados en la
memoria aun y cuando cambie las baterias. Para borrar todos los
datos guardados en la zona de la memoria, refierase a las
instrucciones de abajo.
Nota: Medídas individuales no pueden ser borradas.
Advertencia: Reinicializando la memoria permanentemente
borrará todos los datos de la zona en la memoria que ustéd
seleccióné.
• Presióne
(arriba)
(abajo) para elegir la zona: 1,2 o 3
• Presióne el botón de la MEMORY (Fig. 3)
• Presióne el botón MODE y
(arriba) al mismo tiémpo para
limpiar todo los datos guardados (Fig. 4)
Y
OR
EM
EM
MM
/STOP
Y
OR
MODE
20
*Fig.3
*Fig.4
✓
✓
intente desmontar el medidor y la banda. Ninguno de
✓ No
sus componentes pueden repararse en casa. Si necesita
✓
reparar su medidor, consulte los detalles en la sección de
garantía.
Mantenga el medidor alejado del polvo y otros
materials. Evite que se moje cualquier parte del
medidor o de la banda. Si tiene que limpiar el medidor,
lo mejor es hacerlo con un trapo humedecido
en agua. Walgreens recomienda que se limpie
el medidor una vez al més.
Siempre desconecte con cuidado la banda del monitor.
✓
✓ Para su seguridad no amarre la banda ergométrica a
ninguna otra parte de su cuerpo que no sea el brazo.
✓ No doble asperamente la banda ergométrica pues esto
podria danarla por dentro.
✓ No infle la banda del monitor sino está amarrada
alrededor de su brazo.
21
Solución de Problemas
Solución de Problemas
Error/Símbolo
¿Qué significa?
¿Cómo arreglarlo?
Error/Símbolo
Pude que se haya Vuelva a leer las páginas
movido mientras la 14 y 15
banda se estaba inflando (Consejos importantes).
y ahora intenta volver a
inflarse.
Asegúrese que la banda
este bien colocada.
22
Recuerde que es importante no moverse o
hablar mientras realiza
una medición.
Puede que se haya
sobresaltado por un
ruido o vibración durante
la medición.
Asegúrese de estar en
un lugar cómodo y
tranquilo cuando realice
una medición.
¿Cómo arreglarlo?
Ha ignorado el símbolo Reemplace cuatro nuevas
(parpadeante para) batterias estilo doble A
cambiar las baterias.
(AA) asegurandose que las
polaridades esten
correctamente colocadas
en el compartimiento de
las baterias antes de
iniciar la medida de
presión arterial.
El medidor se pudo Vuelva a leer la página 16
haber inflado sin estar (Colocacion de la banda
puesto en su brazo o ergométrica).
puede que la banda no
este bien colocada.
Puede que se haya
movido o hablado con
alguien durante el
proceso de medición.
¿Qué significa?
Se han acabado las Cámbielas rápidamente
baterias.
para poder continuar
midiéndose la presión
arterial sin problemas.
El valor de la
presión arterial es
muy alto o bajo
El medidor sigue
inflándose
Puede que la banda
esté situada demasiado
alta o baja en el brazo.
Circuito cerrado.
Vuelva a leer la página
16(Colocación de la )
Banda.
Saque y reemplaze las
baterias para proceder
nuevamente a tomarse
la presión arterial.
No se puede realizar Puede que la muñequera Vuelva a leer la página
no esté bien colocada.
16 (Colocación de la
una medición tras
otra puede aparecer
Banda).
un símbolo de error.
23
Especificaciones
Modelo
BD-7181W
Fecha
Hora
Sistólica/Distólica
Tipo de Medidor
Inflado de Lujo Automatico
Metodo de Medicion
Oscilométrico
Pantalla
Pantalla digital de crystal líquido
Alcance de Medición
Presión: 0-260mmHg
Pulso: 40-199 pulsaciones/minutos
Precisión
Presión: entre 3mm Hg
Pulso: entre 5%
Memoria
Guarda hasta 30 mediciones por
cada zona (total de 90 memoria)
Apagado Automático
Cerca de 1 minuto trás completar
la medición.
/
Tipo de Baterias
4 Baterias tipo ”AA” (Alcalinas)
/
Duración de las Baterias
Unos 6 méses con el uso diario y menos
con el uso de banda ergométrica larga
/
Almacenaje de Temperatura Temperatura:-4°F a 140°F
Humedad relativa: menos de 95%
/
/
/
/
/
/
/
/
/
Temperatura : 50°F a 104°F
Humedad relativa: menos de 95%
Dimensiones (aprox)
Monitor: 4 3/4" (w) x 5 1/8" (d) x 2 7/8" (h)
Banda ergométrica: para un brazo de
9”- 13” alrededor
/
14oz (incluyendo las baterias)
/
Por propositos de mejorar el producto, las especificaciones están destinadas a
cambiar sin previo aviso.
Pulso
/
Operación deTemperatura
Peso (aprox)
26
Diario de Presión Arterial
/
/
/
/
27
Diario de Presión Arterial
Fecha
28
Hora
Sistólica/Distólica
Diario de Presión Arterial
Pulso
Fecha
Hora
Sistólica/Distólica
/
/
/
/
/
/
/
/
/
/
/
/
/
/
/
/
/
/
/
/
/
/
/
/
/
/
/
/
/
/
/
/
/
/
/
/
/
/
Pulso
29
Diario de Presión Arterial
Fecha
30
Hora
Sistólica/Distólica
Diario de Presión Arterial
Pulso
Fecha
Hora
Sistólica/Distólica
/
/
/
/
/
/
/
/
/
/
/
/
/
/
/
/
/
/
/
/
/
/
/
/
/
/
/
/
/
/
/
/
/
/
/
/
/
/
Pulso
31