1
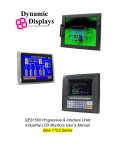
Dynamic
Displays
QUALITY EXCELLENCE SATISFACTION
QES1500 Progressive & Interlace Series
Industrial LCD Monitors User’s Manual
Please read this manual to learn about the safety precautions and get the most out of the design
features of your new monitor.
Table of Contents
TABLE OF CONTENTS................................................................................................................................................................... 2
INTRODUCTION.............................................................................................................................................................................. 4
PRODUCT DESCRIPTION .................................................................................................................................................................... 4
PRODUCT SAFETY PRECAUTIONS ...................................................................................................................................................... 4
MONITOR SETUP............................................................................................................................................................................ 5
DISPLAY FEATURES .......................................................................................................................................................................... 5
UNPACKING THE MONITOR .............................................................................................................................................................. 5
PACKAGE CONTENTS ........................................................................................................................................................................ 6
Optional Items: ............................................................................................................................................................................ 6
CONNECTING THE MONITOR ............................................................................................................................................................ 6
SIGNAL INPUT CONNECTIONS ........................................................................................................................................................... 7
VGA High Density HD15 Connector Pin Out.............................................................................................................................. 7
Female BNC’s to HD15 Adaptor Cable (Optional) ..................................................................................................................... 7
CGA 9 Pin D-Sub Connector (Optional) ..................................................................................................................................... 8
EGA 9 Pin D-Sub Connector (Optional)...................................................................................................................................... 8
MDA 9 Pin D-Sub Connector (Optional)..................................................................................................................................... 9
Touch Screen 9 Pin D-Sub connector, Serial Port (Optional). .................................................................................................... 9
CONTROLS & FUNCTIONS ........................................................................................................................................................ 10
DEFINITIONS OF VIDEO INPUTS: ...................................................................................................................................................... 10
MENU OSD CONTROL BUTTONS: ................................................................................................................................................... 10
MENU OPERATING INSTRUCTIONS:................................................................................................................................................. 10
DIRECT ACCESS FEATURES:............................................................................................................................................................ 10
Definitions of PC and OSD ........................................................................................................................................................ 11
PC ADJUSTMENTS: .................................................................................................................................................................... 12
Contrast Adjustment (Changes the contrast of the image): ....................................................................................................... 12
Brightness Adjustment (Changes the brightness of the image):................................................................................................. 12
Color Mode adjustment (Changes the color of the image): ....................................................................................................... 13
Horizontal or Vertical Position (Adjusts the screen positioning): ............................................................................................. 13
Clock adjustment (Changes the fine adjustment on the horizontal position of the video signals): ............................................ 14
Phase adjustment (Should be adjusted until the screen image is sharp): .................................................................................. 14
Auto-Setup (Automatically adjust for optimum image):............................................................................................................. 14
OSD ADJUSTMENTS .................................................................................................................................................................. 15
Language adjustment (English Only): ....................................................................................................................................... 15
Horizontal or Vertical Position (Adjusts the OSD positioning):................................................................................................ 15
Duration (Adjusts The timer to display the OSD menu): ........................................................................................................... 16
Halftone (Adjusts Transparency of OSD menu):........................................................................................................................ 16
Information displays (The resolution of the timing being used): ............................................................................................... 16
Memory Recall (Restores the image to the factory settings):..................................................................................................... 17
Screen Adjust (Changes the horizontal and vertical size, aspect ratio or scaling factor of the image):.................................... 17
SCALING: .................................................................................................................................................................................. 17
HORIZONTAL SIZE: ................................................................................................................................................................. 18
VERTICAL SIZE: ....................................................................................................................................................................... 18
HOW TO PERMANENTLY STORE USER SETTINGS TO MEMORY:.................................................................................... 18
Test Your Saved Settings:........................................................................................................................................................... 19
RESTORING VIDEO INPUT SELECT TO FACTORY SETTING: ............................................................................................................. 19
Return Flat Panel To PC Operation Once It Has Been Changed To DVI ................................................................................. 19
Return Flat Panel To PC Operation Once It Has Been Changed To TV Input.......................................................................... 20
HOW TO SET THE FLAT PANEL IN BURN-IN MODE ............................................................................................................ 20
TROUBLESHOOTING .................................................................................................................................................................. 21
Dynamic Displays, Inc
1625 Westgate Road
Eau Claire WI, 54703
Doc # 0048058
Manual, QES1500 Progressive/Interlace Series
Rev: D
Page 2 of 33
CLEANING INSTRUCTIONS....................................................................................................................................................... 23
QES1508 SERIES 8.4-INCH LCD SPECIFICATION................................................................................................................. 24
QES1512 SERIES 12.1-INCH LCD SPECIFICATION............................................................................................................... 25
QES1514 SERIES 14.1-INCH LCD SPECIFICATION............................................................................................................... 26
QES1515 SERIES 15-INCH LCD SPECIFICATION.................................................................................................................. 27
QES1518 SERIES 18.1-INCH GRAYSCALE LCD SPECIFICATION ..................................................................................... 28
QES1519 SERIES 19-INCH LCD SPECIFICATION.................................................................................................................. 29
QES1524 SERIES 24-IN LCD SPECIFICATIONS...................................................................................................................... 30
UNIVERSAL VIDEO INPUT UNIT OPTION ............................................................................................................................. 31
CONNECTING THE UNIVERSAL VIDEO (UVI) BOX .......................................................................................................................... 31
UNIVERSAL VIDEO INPUT BOX SPECIFICATION: ............................................................................................................................. 32
CONTACT INFORMATION:........................................................................................................................................................ 33
Dynamic Displays, Inc
1625 Westgate Road
Eau Claire WI, 54703
Doc # 0048058
Manual, QES1500 Progressive/Interlace Series
Rev: D
Page 3 of 33
INTRODUCTION
Thank you for purchasing the QES1500 Progressive & Interlace Series Color Monitor. We are confident that you will
be pleased with the performance and reliability of your new monitor. The QES1500 Progressive & Interlace Series
Color Monitor was designed to meet the screen performance requirements of today's demanding industrial
applications. While complying with a wide variety of industrial video formats, it delivers a larger screen area, higher
resolutions, and greater color accuracy than many monitors in its price range.
Product Description
The QES1500 Progressive & Interlace Series Industrial LCD Displays are high performance, Active Matrix
color/monochrome TFT LCD monitors designed for those demanding applications that require a rugged, high quality
computer display capable of sub-VGA through SXGA resolutions. These premium displays accept a broad range of
standard signal formats, enabling them to function in most modern industrial environments. For legacy or replacement
applications, this LCD display can be configured to accept a wide variety of sub-VGA formats and video signal inputs.
Options available are; Touch Screen, Vandal Protection Shield, Enhanced Sunlight Readability, Open Frame
Configurations, Rack mount Configurations, Wall/Arm Mount Configurations, NEMA 4X stainless steel panel mount
bezel and front touch controls. These computer display panels have all the features necessary for use in those
industrial, manufacturing, financial, transportation and other severe environments that require bright, crisp computer
imaging.
Note: For a more detail specification see specific model number spec sheet.
Product Safety Precautions
Read all of these instructions and save this manual for later use. Follow all warnings and instructions on the
product.
1. Do not cover or block the ventilation holes in the enclosure.
2. Do not insert sharp objects or spill liquid into the monitor through the cabinet slots. This may cause accidental fire,
electric shock or failure.
3. Unplug the unit when not in use for an extended period of time.
4. Do not attempt to service this product yourself, since opening or removing the cover may expose you to potential
electric shock. Only a qualified technician should service this product.
Dynamic Displays, Inc
1625 Westgate Road
Eau Claire WI, 54703
Doc # 0048058
Manual, QES1500 Progressive/Interlace Series
Rev: D
Page 4 of 33
MONITOR SETUP
Unlike CRT displays, the LCD panel has a fixed pixel format over a set area. So for best performance, the “native
resolution” setting is always recommended. Use the following notes as a reference to setup your display.
•
For 8.4” and 12.1” monitors: The native resolution of the LCD panel is 800 X 600; Recommended resolution
is 800 X 600 @ 60 KHZ
•
For 14.1” and 15” monitors: The native resolution of the LCD panel is 1024 X 768; Recommended
resolution is 1024 X 768.@ 60 KHZ
•
For 17”, 18.1” and 19” monitors: The native resolution of the LCD panel is 1280 X 1024; Recommended
resolution is 1280 X 1024 @ 60 KHZ or 1024 X 768 @ 60 Hz.
•
For 24” Monitors: The native resolution of the LCD panel is 1920 x 1200; recommended resolution is 1920 x
1200 @ 60 or 75 Hz.
Display Features
•
Analog RGB Sync On Green Capable
•
RS-170A and RS-343 Video Signal Capable (Interlace Formats)
•
VESA 75/100 Standard Mounting
•
DDC2B Plug & Play
•
Universal Power Supply with VESA Power Management
•
User Friendly OSD interface
•
High Brightness and Contrast
•
Wide Viewing Angle
•
Front Remote Controls on Specific Models
•
Tilt and Swivel Base on Specific Models
•
Heavy Duty Cold Roll Steel Chassis on Specific Models
•
3/4/5 Wire BNC Inputs Option
•
Anti-Reflective Protective Faceplate Option
•
RCA (NTSC/PAL) and 5 Pin Mini Din (S-video) Optional
•
Strengthen Anti-Reflective Protective Faceplate Optional
•
Sun Light Readable Option
•
TTL Input for EGA, CGA and MDA Timings Option
•
Touch Screen: Resistive, Capacitive and SAW Option
Unpacking The Monitor
Your LCD monitor package will consist of the following components listed on section 2.3 below. Open shipping
container and lay all the components on a flat clean surface. If any component is missing, please contact Dynamic
Displays as soon as possible.
NOTES:
•
We recommend you to keep the packing box for transportation.
•
In case of transporting and packing the unit in the packing box, carefully place it, in the packing box
keeping its panel from touching any objects
Dynamic Displays, Inc
1625 Westgate Road
Eau Claire WI, 54703
Doc # 0048058
Manual, QES1500 Progressive/Interlace Series
Rev: D
Page 5 of 33
Package Contents
Before operating this monitor, please make sure that all items listed are present in your package:
•
LCD Monitor
•
AC/DC Adapter
•
AC Power Cord
•
VGA Cable
•
Users Manual - Download from WEB page
Optional Items:
These are optional items and can be ordered by contacting Dynamic Displays, Inc.
•
Composite Video Cable
•
5 BNC to HD15 adaptor cable
•
Audio Cable
•
Mounting Hardware
•
CD with Touch Screen Drives (Optional with Touch Screen)
•
Universal Video Input Box (Optional)
Connecting The Monitor
No tools are required to install the LCD monitor. Simply follow the instructions outlined in the next few steps. Connectors for the
signal and power are located on the back panel
•
Connect Signal Cable (VGA): Attached the VGA cable connector with the ferrite bead closest to it to the
graphics card adaptor on your computer system and attached the other end to the monitor. Be cautious in
inserting the cable properly into both connectors. If the cable does not fit it may be facing the wrong direction.
Turn the cable over and try to match the shape of the connector with that of the graphics adapter.
•
Connect Power Adapter and Cable: Connect the round shape plug end of the AC/DC adapter to the DC
Power input connector of the LCD monitor. Connect the female end of the power cable to the AC power input
receptacle on the AC/DC adapter. Then plug the male end of the power cable into an AC outlet.
•
Connect DVI (Digital Video Interface) Cable (Optional): If you have a DVI digital graphics card adapter and a
DVI cable, connect it to the DVI (IN) connector of the monitor. The optional DVI graphics adapter and the DVI
cable can be ordered by contacting Dynamic Displays.
•
Connect Audio signal Cable (Optional): Connect Audio In connector of the LCD monitor and an Audio Out
device (PC. DVD, CD) with the attached stereo mini cable.
•
Connect Touch Screen Cable (Optional): Connect the optional USB or RS 232 serial touch screen
connection to the driver card or system driving the touch screen controller.
If your computer was off, turn on your computer/system. Your display should now operate as a normal computer
display showing your windows or whatever video is being sent to the flat panel.
Note: If for any reason the display goes blank and gives an “out of Range” or “No Input Signal”, your system
source is putting out a signal that is out of range or non compatible with the LCD’s video A/D board. If this
happens, make sure you are inputting the correct signal. If the display doesn’t work properly, it may be because:
•
•
The resolution is to high or low for the LCD.
The power source is incorrect.
Dynamic Displays, Inc
1625 Westgate Road
Eau Claire WI, 54703
Doc # 0048058
Manual, QES1500 Progressive/Interlace Series
Rev: D
Page 6 of 33
Signal Input Connections
Following are the pin out descriptions for the standard and optional connectors provided on the monitor:
VGA High Density HD15 Connector Pin Out
Pin Assignments for VGA Video HD15 Input Connector
PIN
CONNECTION
CONNECTION
PIN
1
Red Video (75 Ohm, 0.7 Vpp)
9
Key (No pin)
2
Green Video (75 Ohm, 0.7 Vpp)
10
Sync Ground
3
Blue Video (75 Ohm, 0.7 Vpp)
11
Monitor ID Bit 0
4
Monitor ID Bit 2
12
Monitor ID Bit 1 – Bidirectional
Data
5
Ground
13
Horizontal Sync (or Composite
Sync)
6
Red Video Ground
14
Vertical Sync
7
Green Video Ground
15
Monitor ID Bit 3 - DDC Clock
8
Blue Video Ground
Female BNC’s to HD15 Adaptor Cable (Optional)
BNC to HD15 Adaptor Connections
Signal Description
Red
Green
Video Signal
Input Available
Sync on Green
(SOG)
Composite Sync
(C-Sync).
Separate
Horizontal and
Vertical Sync
Composite Sync: Horizontal and
Vertical Sync signals are on the
Green Video Signal.
Separate Composite Sync: Horizontal
and Vertical Sync signals are on the
Horizontal Sync Cable only.
Separate Sync: Both signals
(Horizontal & Vertical) are on
individual cables as identified on the
chart.
Dynamic Displays, Inc
1625 Westgate Road
Eau Claire WI, 54703
Blue
Horz.
Sync or
C-Sync
(Gray
Cable)
Connect
Connect
Connect
Connect
Connect
Connect
Connect
Connect
Connect
Connect
Connect
Doc # 0048058
Manual, QES1500 Progressive/Interlace Series
Vertical
Sync
(Black
Wire)
Connect
Rev: D
Page 7 of 33
CGA 9 Pin D-Sub Connector (Optional)
Pin Assignments for 9 Pin Optional CGA Color Graphics Adapter. Video Type: TTL
PIN
CONNECTION
DESCRIPTION
1
GND
Ground
2
GND
Ground
3
R
Red Video
4
G
Green Video
5
B
Blue Video
6
I
Intensity
7
RES
Reserved
8
HSYNC
Horizontal Sync
9
VSYNC
Vertical Sync
EGA 9 Pin D-Sub Connector (Optional)
Pin Assignments for 9 Pin Optional EGA=Enhanced Graphics Adapter. Video Type: TTL
PIN
CONNECTION
DESCRIPTION
1
GND
Ground
2
SR
Secondary Red
3
PR
Primary Red
4
PG
Primary Green
5
PB
Primary Blue
6
SG/I
Secondary Green / Intensity
7
SB
Secondary Blue
8
HSYNC
Horizontal Sync
9
VSYNC
Vertical Sync
Dynamic Displays, Inc
1625 Westgate Road
Eau Claire WI, 54703
Doc # 0048058
Manual, QES1500 Progressive/Interlace Series
Rev: D
Page 8 of 33
MDA 9 Pin D-Sub Connector (Optional)
Pin Assignments for 9 Pin Optional MGA – Hercules Mono Graphics Adapter. Video Type: TTL
PIN
CONNECTION
DESCRIPTION
1
GND
Ground
2
GND
Ground
3
N/C
No Connection
4
N/C
No Connection
5
N/C
No Connection
6
I
Intensity
7
M
Monochrome Video
8
HSYNC
Horizontal Sync
9
VSYNC
Vertical Sync
Touch Screen 9 Pin D-Sub connector, Serial Port (Optional).
Pin Assignments for 9 Pin Optional Touch Screen
PIN
Dynamic Displays, Inc
1625 Westgate Road
Eau Claire WI, 54703
CONNECTION
DESCRIPTION
1
CD
Carrier Detect
2
RDX
Receive Data
3
TXD
Transmit Data
4
DTR
Data Terminal Ready
5
GND
System Ground
6
DSR
Data Set Ready
7
RTS
Request to Send
8
CTS
Clear to Send
9
RI
Ring Indicator
Doc # 0048058
Manual, QES1500 Progressive/Interlace Series
Rev: D
Page 9 of 33
CONTROLS & FUNCTIONS
Definitions of Video inputs:
FUNCTION
DESCRIPTION
VGA / DVI
Selects analog or digital input
(Only works on DVI model option)
Analog Input
Select VGA input connector, HD15
Digital Input
Select Digital Input Connector, DVI
The monitor will NOT enter Auto Setup automatically the first time the unit is first turned on.
The OSD interface is composed of 5 membrane switches (as shown below) and a Bi-color LED. All the adjustments
required for the monitor are done through these buttons which interface with the Menu selections on the OSD.
Menu OSD Control Buttons:
• MENU:
Selects command function.
• “DOWN” button: Decreases value.
• “UP” button:
Increase value.
• AUTO
Automatically adjusts for an optimal image.
Exits the function on OSD setup.
•
LED:
Power ON: Green Light
Power Saving or No Signal: Orange Light.
•
POWER
Power on/off control.
Menu Operating Instructions:
Your LCD monitor allows you to easily adjust the characteristics of the image being displayed. All of these
adjustments are made using the OSD control buttons on the front or rear of the monitor. While you use these buttons
to adjust the controls, the OSD shows you their numeric values as they change.
Direct Access Features:
1. Push “Auto” to set display to the optimal image.
Selecting and executing this control makes automatic adjustments to: Horizontal and Vertical Size, Horizontal
and Vertical positions, Frequency, Quality and Phase. This is a quick and easy setup of the display. There will
be a few seconds of delay while the Auto Setup function is in process.
Dynamic Displays, Inc
1625 Westgate Road
Eau Claire WI, 54703
Doc # 0048058
Manual, QES1500 Progressive/Interlace Series
Rev: D
Page 10 of 33
Definitions of PC and OSD
Description
Definition / Description / Function
Definition: Personal Computer.
Description: Generator image (Video Signal) on Flat Panel screen.
PC
Function: When in “PC Mode” the adjustments made will affect the Video Image
on the screen with one exception, the Horizontal & Vertical Picture Size (This is
done in OSD mode).
Definition: On Screen Display.
Description: Image (Menu) superimposed on a screen picture.
OSD
Function: When in “OSD Mode” the adjustments made will change the “On
Screen Display” appearance. You can also read the resolution of the Video
Input and adjust the Horizontal & Vertical Picture Size of the Video/Image.
2. With the OSD off, push the “MENU” button to display the main OSD menu.
3. While the OSD is on use the “UP” / “DOWN” buttons to select between PC & OSD menus. Push “MENU”
button to select the desired option :
PC
OSD
4. Use the “UP” / “DOWN” buttons to select the function to be adjusted.
Press the “MENU” button to activate the data to be read by the MCU”.
Use the “UP” / “DOWN” buttons to allow you to adjust the setting using the incremental bar or read information
displayed by OSD.
Dynamic Displays, Inc
1625 Westgate Road
Eau Claire WI, 54703
Doc # 0048058
Manual, QES1500 Progressive/Interlace Series
Rev: D
Page 11 of 33
PC ADJUSTMENTS:
Contrast Adjustment (Changes the contrast of the image):
Press the “MENU” button to select “CONTRAST”.
Use the “UP” / “DOWN” buttons to increase or decrease contrast.
Select the “AUTO” button to exit contrast adjustment.
Contrast
Incremental Bar
Brightness Adjustment (Changes the brightness of the image):
Press the “MENU” button then the “DOWN” button to select “BRIGHTNESS”.
Use the “UP” / “DOWN” buttons to increase or decrease brightness.
Select the “AUTO” button to exit brightness adjustment.
Brightness
Incremental Bar
Dynamic Displays, Inc
1625 Westgate Road
Eau Claire WI, 54703
Doc # 0048058
Manual, QES1500 Progressive/Interlace Series
Rev: D
Page 12 of 33
Color Mode adjustment (Changes the color of the image):
Press the “MENU” button then the “DOWN” button to select “COLOR MODE”.
Use the “MENU” buttons to select “NORMAL” / “WARM” / “COOL” / “sRGB” or “USER”.
•
Note: When selecting “USER” you may adjust each individual color one at a time. Use the “UP” / “DOWN”
buttons to increase or decrease color.
Select the “AUTO” button to exit color adjustment.
COLOR MODE
USER SELECTION
EXAMPLE ADJUSTING RED
Horizontal or Vertical Position (Adjusts the screen positioning):
Press the “MENU” button then the “DOWN” button to select “H-POSITION” or “V-POSITION”.
Use the “UP” / “DOWN” buttons to shift the image horizontally (left / right) or vertically (up / down).
Select the “AUTO” button to exit horizontal or vertical position adjustment.
(EXAMPLE “H-POSITION” ADJUSTMENT)
H-Position
Incremental Bar
Dynamic Displays, Inc
1625 Westgate Road
Eau Claire WI, 54703
Doc # 0048058
Manual, QES1500 Progressive/Interlace Series
Rev: D
Page 13 of 33
Clock adjustment (Changes the fine adjustment on the horizontal position of the video signals):
Press the “MENU” button then the “DOWN” button to select “CLOCK”.
Use the “UP” / “DOWN” buttons to increase or decrease clock adjustment.
Select the “AUTO” button to exit clock position adjustment.
Clock
Incremental Bar
Phase adjustment (Should be adjusted until the screen image is sharp):
Press the “MENU” button then the “DOWN” button to select “PHASE”.
Use the “UP” / “DOWN” buttons to increase or decrease phase adjustment.
Select the “AUTO” button to exit phase adjustment.
Incremental Bar
Phase
Auto-Setup (Automatically adjust for optimum image):
Press the “MENU” button then the “DOWN” button to select “AUTO”.
(During Alignment)
Text Displayed On Image
Auto
Dynamic Displays, Inc
1625 Westgate Road
Eau Claire WI, 54703
Doc # 0048058
Manual, QES1500 Progressive/Interlace Series
Rev: D
Page 14 of 33
OSD ADJUSTMENTS
With the On Screen Display (OSD) off, push the “MENU” button to display the main OSD menu. While the OSD is on,
use the “UP” / “DOWN” buttons to select “OSD Menu”. Push “MENU” button to select “OSD Menu” option:
OSD Menu
Language adjustment (English Only):
Press the “MENU” button to select “LANGUAGE” (English Only).
Select the “AUTO” button to exit language adjustment.
English
Language
Horizontal or Vertical Position (Adjusts the OSD positioning):
Press the “MENU” button then the “DOWN” button to select “H-POSITION” or “V-POSITION”.
Use the “UP” / “DOWN” buttons to shift the OSD horizontally (left / right) or vertically (up / down).
Select the “AUTO” button to exit horizontal or vertical position adjustment.
(EXAMPLE MENU “H-POSITION” ADJUSTMENT)
H-Position
Dynamic Displays, Inc
1625 Westgate Road
Eau Claire WI, 54703
Doc # 0048058
Manual, QES1500 Progressive/Interlace Series
Rev: D
Page 15 of 33
Duration (Adjusts The timer to display the OSD menu):
Press the “MENU” button then the “DOWN” button to select “DURATION”.
Use the “UP” / “DOWN” buttons to increase or decrease the timer for the OSD display.
Select the “AUTO” button to exit duration adjustment.
Duration
Incremental
Bar
OSD H-Position
(During Alignment)
Halftone (Adjusts Transparency of OSD menu):
Press the “MENU” button then the “DOWN” button to select “HALFTONE”.
Use the “UP” / “DOWN” buttons to increase or decrease the transparency of OSD menu.
Select the “AUTO” button to exit halftone adjustment.
Halftone
Incremental Bar
Information displays (The resolution of the timing being used):
Press the “MENU” button then the “DOWN” button to select “INFORMATION”.
Select the “AUTO” button to exit information.
Timing
Displayed
Information
Dynamic Displays, Inc
1625 Westgate Road
Eau Claire WI, 54703
Doc # 0048058
Manual, QES1500 Progressive/Interlace Series
Rev: D
Page 16 of 33
Memory Recall (Restores the image to the factory settings):
Press the “MENU” button then the “DOWN” button to select “MEMORY RECALL”.
Memory
Recall
Screen Adjust (Changes the horizontal and vertical size, aspect ratio or scaling factor of the image):
Press the “MENU” button then the “DOWN” button to select “SCREEN ADJUST”.
OPTIONS:
•
•
•
SCALING
HORIZONTAL SIZE
VERTICAL SIZE
SCALING:
With Scaling selected, press the “MENU” button to choose from the following options:
•
•
•
FULL (Fills entire screen)
OFF (No up-scaling to fill screen, uses native resolution.)
1:1 (Vertical and Horizontal size is same size.)
(Example Menu “Full” Scaling)
Scaling Option
Screen
Adjust
Dynamic Displays, Inc
1625 Westgate Road
Eau Claire WI, 54703
Doc # 0048058
Manual, QES1500 Progressive/Interlace Series
Rev: D
Page 17 of 33
HORIZONTAL SIZE:
Press the “MENU” button then the “DOWN” button to select “H SIZE”.
Use the “UP” / “DOWN” buttons to increase or decrease the Horizontal Size. The image width will change on
the right side. Adjust to desired size. Once desired size is achieved you will have to adjust the
“HORIZONTAL POSITION” to center the image. (See PC Adjustments, step #4)
H. Size
VERTICAL SIZE:
Press the “MENU” button then the “DOWN” button to select “V SIZE”.
Use the “UP” / “DOWN” buttons to increase or decrease the Vertical Size. The image height will change on
the bottom edge. Adjust to desired size. Once desired vertical size is achieved adjust the “VERTICAL
POSITION” to center the image. (See PC Adjustments, step #4)
V. Size
HOW TO PERMANENTLY STORE USER SETTINGS TO MEMORY:
1. Power monitor up. (Use the membrane keypad “POWER” button)
2. Select the “AUTO” button. No OSD will be displayed. The monitor will recall the factory settings.
3. Select the “MENU” button. The OSD will be displayed.
4. Make adjustments and set the image to optimum viewing.
5. Select the “AUTO” button TWICE. (The OSD will disappear.) This will save your adjustments. It’s very
important that you select the “AUTO” button following your adjustments.
Dynamic Displays, Inc
1625 Westgate Road
Eau Claire WI, 54703
Doc # 0048058
Manual, QES1500 Progressive/Interlace Series
Rev: D
Page 18 of 33
Test Your Saved Settings:
Power the unit OFF and back ON using the POWER BUTTON on the keypad. The image should stay as you
set it.
Restoring Video Input Select To Factory Setting:
Return Flat Panel To PC Operation Once It Has Been Changed To DVI
1. Power up the Flat Panel Monitor without Video Input.
2. DVI will be displayed in the upper right hand corner of image.
3. Select the “UP” button until TV is displayed in the upper right hand corner of image.
4. Push the “MENU” button.
5. Push “UP” button, selecting OSD mode.
OSD
MODE
6. Push “MENU” button to (Enter).
7. Push “UP” button, selecting MEMORY RECALL.
MEMORY
RECALL
8. Push the “MENU” button.
THIS WILL RETURN YOU TO PC OPERATION.
Plug in Video input to Flat Panel Monitor.
Dynamic Displays, Inc
1625 Westgate Road
Eau Claire WI, 54703
Doc # 0048058
Manual, QES1500 Progressive/Interlace Series
Rev: D
Page 19 of 33
Return Flat Panel To PC Operation Once It Has Been Changed To TV Input
1. Power up the Flat Panel Monitor without Video Input.
2. TV will be displayed in the upper right hand corner of image.
3. Push the “MENU” button.
4. Push “UP” button, selecting OSD mode.
OSD
MODE
4. Push “MENU” button to (Enter).
5. Push “UP” button, selecting MEMORY RECALL.
MEMORY
RECALL
6. Push the “MENU” button.
THIS WILL RETURN YOU TO PC OPERATION.
Plug in Video input to Flat Panel Monitor.
HOW TO SET THE FLAT PANEL IN BURN-IN MODE
1. With no video signal applied to the monitor, power on the LCD. The OSD will show “no signal”.
2. On the membrane switch, push the Up key and Down key at the same time. This will change the monitor to “burnin” mode.
3. During “burn-in” mode if the external power is turned off and then on again the LCD monitor will stay in “burn-in”
mode.
4. To disable the “burn-in” mode: apply any signal input.
Dynamic Displays, Inc
1625 Westgate Road
Eau Claire WI, 54703
Doc # 0048058
Manual, QES1500 Progressive/Interlace Series
Rev: D
Page 20 of 33
TROUBLESHOOTING
LCD Pixel Statement - The LCD unit is produced with high-precision manufacturing techniques. Nevertheless, some
pixels may occasionally misfire or appear as black or colored dots. This has no effect on the recorded image and does
not constitute a malfunction.
Normally a 17” SXGA (1280 X 1024) display has nearly 4 million sub-pixels. Industry standard specification allows 8
non-performing pixels on the LCD screen, which is only 0.0002% of the total sub-pixels.
Troubleshooting
Suggestion
Symptom
There Is No Picture On The Screen
1. Check the color of the LED indicator on the LCD
monitor.
•
“GREEN”: During normal operation the LED light
will be green. If it is green and there is no picture,
contact the customer service line.
•
“ORANGE”: Check the connection of the VGA
cable to the monitor and the connection to the
computer.
•
“NO POWER”: Make sure the power cord is
securely connected to the adapter and the light
on the adapter is green.
2. The signal cable should be properly connected to the
display card and computer. Try disconnecting the
video cable from the display and connecting to a
known working display (if available) to confirm the
presence of proper video.
3. Check whether the LCD monitor and computer power
cords are connected and whether there is a supply of
power.
4. Make sure the resolution mode is supported by the
display and check settings of the display card.
5. Confirm that the video cable is not defective.
No Signal Input
Check the signal connection between the computer and
LCD monitor.
Missing Colors
If the red, green or blue colors are missing, check the
signal cable to make sure it is plugged correctly. The pins
in the cable could be loose and cause a bad connection.
Image Too Bright/Image Too Dark
Adjust brightness and contrast by OSD.
Irregular Image
Check the signal connection between the computer and
LCD monitor.
Select “Auto Adjust” button.
Distorted Image
Reset the LCD monitor. (Select “Recall” function by using
OSD)
Image Is Not Centered / Size Is Not Appropriate
Use OSD Image Menu to adjust H. Position and V.
Position.
Check image size setting.
Select Auto Adjust.
Dynamic Displays, Inc
1625 Westgate Road
Eau Claire WI, 54703
Doc # 0048058
Manual, QES1500 Progressive/Interlace Series
Rev: D
Page 21 of 33
Uneven Color / Color Too Dark / Dark Area Distorted /
White Color Is Not White
Use OSD Color Temperature Menu to adjust color setting.
No Sound
Check the audio signal cable connection between the
computer and LCD monitor.
Try pressing the “+MUTE” button to disable the volume
Mute function.
* Some models do not have speakers (sound)
The Display Is Dark / Bright Or Saturated
Verify video input levels are appropriate; 0.7VPP for Analog
inputs or 5 VPP for TTL input video signal.
The Display Blinks
Check the signal connection between the computer and
LCD monitor.
Image Blinks On And Off
The timing is special and not programmed in the MCU.
Contact the Sales department at Dynamic Displays, Inc.
800-793-6862.
The LCD monitor needs the Universal Video Input Box.
Contact the Sales Department at Dynamic Displays, Inc.
Hook On Top Of The Image
1. Adjust the brightness and contrast by OSD.
Dim Image
2. The timing is special and not programmed in the
MCU. Contact the Sales Department at Dynamic
Displays.
3. Flat Panel may have come unplugged from
inverter.
4. Lamp in Flat Panel may have failed.
* Contact Dynamic Displays, Inc. and return unit for repair
if suggestion 1 or 2 does NOT fix the Dim Image.
The timing is special and not programmed In the MCU.
Lines Missing Or Not Displaying On Top Or Bottom Of The
Image
Contact the Sales department at Dynamic Displays, Inc.
800-793-6862.
The timing is special and not programmed In the MCU.
Characters Missing On Left Or Right Of Image
Dynamic Displays, Inc
1625 Westgate Road
Eau Claire WI, 54703
Contact the Sales department at Dynamic Displays, Inc.
800-793-6862.
Doc # 0048058
Manual, QES1500 Progressive/Interlace Series
Rev: D
Page 22 of 33
CLEANING INSTRUCTIONS
•
When cleaning, unplug the AC adapter from the LCD display and outlet for safety.
•
Lightly wipe dirt from the cabinet and LCD panel surface with a clean lint-free cloth soaked in a neutral cleaning
solution. This removes dust and other particles that can scratch the screen
•
Treat the LCD panel with care. Do not rub the LCD panel surface with a rough item or hit it on the surface.
Also, do not strongly press the LCD panel surface. This can lead to unevenness in the screen and also failure
of the product.
•
Cleaners recommended for the LCD panel are isopropyl alcohol (without abrasive), non-ammonic glass
cleaner, and watered-down neutral cleaning solution. Do not use organic solvent such as acetone and toluene.
•
Do not use thinner, benzine, alcohol or such on the plastic cabinet. These can damage the cabinet, alter its
quality and cause the paint to peel off.
•
Do not apply insecticides and other volatile items to the cabinet. Also do not leave rubber and vinyl products or
such in contact with it for long hours. This can cause the quality to alter and the paint to peel off.
Dynamic Displays, Inc
1625 Westgate Road
Eau Claire WI, 54703
Doc # 0048058
Manual, QES1500 Progressive/Interlace Series
Rev: D
Page 23 of 33
QES1508 Series 8.4-inch LCD Specification
Size/Technology
8.4 inch SVGA Color TFT LCD Module
Viewing Area
170.4 mm x 127.8 mm
Pixel Pitch
0.213 mm x 0.213 mm
Native Resolution
800 x 600 Pixels
Back Light (Typical)
20,000 Hours
Viewing Angle (H/V)
60°(Up) - 40°(Down) / 60°(Right) - 60°(Left)
Contrast Ratio (Typical)
350:1
Brightness (Typical)
220 Cd/m2
Response Time (Typical)
10 mSec Rising – 25 mSec Falling
Colors
262K Colors – 6 Bits
640 x 400 @ 85Hz
640 x 480 @ 60/72/75/85Hz;
Supported Video Formats - Standard
720 x 400 @ 70/85Hz;
800 x 600 @ 56/60/72/75/85Hz – Native Resolution
Optional - EGA; CGA; MDA; TTL Video Timings (*1)
Optional - Legacy Products Timings - Horizontal: 15 to 68KHz; Vertical 50 to 85Hz
Standard - Analog Video: 0.7Vpp @ 75 Ohms
Video Input Signals
Optional - TTL Video Input for EGA, CGA and MDA (*1)
Optional - RCA (NTSC/PAL) and 5 Pin Mini-DIN (S-video)
Sync Input Signals
Standard Sync: Separate, Composite TTL Level Sync or Sync on Green Video (Positive)
0.7Vpp-Sync (negative) 0.3Vpp
Standard - HD15 (VGA Analog), DVI-D
Video Input Interface
Optional DB-9 Input (*2)
Optional 3, 4, & 5-Wire BNC Inputs, HD15 and DB-9 (TTL) (*1)
External Connectors
Analog HD15 D-Sub Input; Digital DVI Input: DC Input.
Power Requirements
100-240VAC 50-60Hz or +12VDC @ 1 A
Approvals
Designed to Comply with: FCC, CE, UL
Temperature: Operating
Temperature: Storage
0° to 50°C @ 10-90% R.H.
-20° to 60°C @ 10-90% R.H
Altitude: Operating
0 to 10,000 ft
Altitude: Storage
0 to 40,000 ft
Mechanical Configurations
Dimensions
Warranty
Open Frame and Legacy Configurations
Open Frame: Contact DDI or Visit WEB for Mechanical Dimension
Legacy Replacement: Contact DDI or Visit WEB for Mechanical Dimensions
Three Years Limited Warranty
Universal Video Input Option - 3/4/5 BNC Input (RGB) (*2)
TTL Video Input for EGA, CGA and MDA (*1)
Touch Screen: Resistive, Capacitive or SAW (USB or Serial)
3M - http://solutions.3m.com/wps/portal/3M/en_US/TouchSystems/TouchScreen/?WT.mc_
Options
Elo TouchSystems - http://www.elotouch.com/Support/default.asp
ATouch Technologies Co., Ltd - http://www.a-touch.com.tw/service.htm
Screen Protection from Impact - Strengthened Glass
Optional RCA (NTSC/PAL) and 5 Pin Mini Din (S-video)
HD15 to 5 BNC Female Interface cable
Sunlight Readable
Note (1) – With TTL Video Input Option, Note (2) – With Universal Video Input Option.
Dynamic Displays, Inc
1625 Westgate Road
Eau Claire WI, 54703
Doc # 0048058
Manual, QES1500 Progressive/Interlace Series
Rev: D
Page 24 of 33
QES1512 Series 12.1-inch LCD Specification
Size/Technology
12.1 inch SVGA Color TFT LCD Module
Viewing Area
246.0 mm x 184.5 mm
Pixel Pitch
0.3075 mm x 0.3075 mm
Native Resolution
800 x 600 Pixels
Back Light (Typical)
50,000 Hours
Viewing Angle (H/V)
70°(R) - 70°(L) / 60°(U)- 50°(L)
Contrast Ratio (Typical)
500:1
Brightness (Typical)
200 Cd/m2
Response Time (Typical)
10 mSec Rising – 25 mSec Falling
Colors
262K Colors – 6 Bits
640 x 400 @ 85Hz
640 x 480 @ 60/72/75/85Hz
Supported Video Formats - Standard
720 x 400 @ 70/85Hz
800 x 600 @ 56/60/72/75/85Hz
Optional - EGA; CGA; MDA; TTL Video Timings (*1)
Optional - Legacy Products Timings - Horizontal: 15 to 68KHz; Vertical 50 to 85Hz
Standard - Analog Video: 0.7Vpp @ 75 Ohms
Video Input Signals
Optional - TTL Video Input for EGA, CGA and MDA (*1)
Optional - RCA (NTSC/PAL) and 5 Pin Mini-DIN (S-video)
Sync Input Signals
Standard Sync: Separate, Composite TTL Level Sync or Sync on Green Video (Positive)
0.7Vpp-Sync (negative) 0.3Vpp
Standard - HD15 (VGA Analog), DVI-D
Video Input Interface
Optional DB-9 Input (*2)
Optional 3, 4, & 5-Wire BNC Inputs, HD15 and DB-9 (TTL) (*1)
External Connectors
Analog HD15 D-Sub Input; Digital DVI Input:: DC Input.
Power Requirements
100-240VAC 50-60Hz @ 1 Amp
Approvals
Designed to Comply with: FCC, CE, UL
Temperature: Operating
-10° to 65°C @ 10-90% R.H.
Temperature: Storage
-30° to 70°C @ 10-90% R.H.
Altitude: Operating
0 to 10,000 ft
Altitude: Storage
0 to 40,000 ft
Mechanical Configurations
Dimensions
Warranty
Open Frame and Legacy Configurations
Open Frame: Contact DDI or Visit WEB for Mechanical Dimension
Legacy Replacement: Contact DDI or Visit WEB for Mechanical Dimensions
Three Years Limited Warranty
Universal Video Input Option - 3/4/5 BNC Input (RGB) (*2)
TTL Video Input for EGA, CGA and MDA (*1)
Touch Screen: Resistive, Capacitive or SAW (USB or Serial)
3M - http://solutions.3m.com/wps/portal/3M/en_US/TouchSystems/TouchScreen/?WT.mc_
Options
Elo TouchSystems - http://www.elotouch.com/Support/default.asp
ATouch Technologies Co., Ltd - http://www.a-touch.com.tw/service.htm
Screen Protection from Impact - Strengthened Glass
Optional RCA (NTSC/PAL) and 5 Pin Mini Din (S-video)
HD15 to 5 BNC Female Interface cable
Sunlight Readable
Note (1) – With TTL Video Input Option, Note (2) – With Universal Video Input Option.
Dynamic Displays, Inc
1625 Westgate Road
Eau Claire WI, 54703
Doc # 0048058
Manual, QES1500 Progressive/Interlace Series
Rev: D
Page 25 of 33
QES1514 Series 14.1-inch LCD Specification
Size/Technology
14.1 inch XGA Color TFT LCD Module
Viewing Area
285.7 mm x 214.3 mm
Pixel Pitch
0.279 mm x 0.279 mm
Native Resolution
1024 x 768 Pixels
Back Light (Typical)
50,000 Hours
Viewing Angle (H/V)
40°(R) - 40°(L) / 10°(U)- 30°(L)
Contrast Ratio (Typical)
300:1
Brightness (Typical)
200 Cd/m2
Response Time (Typical)
25 mSec
Colors
262K Colors – 6 Bits
640 x 400 @ 85Hz
640 x 480 @ 60/72/75/85Hz
Supported Video Formats - Standard
720 x 400 @ 70/85Hz
800 x 600 @ 56/60/72/75/85Hz
Optional - EGA; CGA; MDA; TTL Video Timings (*1)
Optional - Legacy Products Timings - Horizontal: 15 to 68KHz; Vertical 50 to 85Hz
Standard - Analog Video: 0.7Vpp @ 75 Ohms
Video Input Signals
Optional - TTL Video Input for EGA, CGA and MDA (*1)
Optional - RCA (NTSC/PAL) and 5 Pin Mini-DIN (S-video)
Sync Input Signals
Standard Sync: Separate, Composite TTL Level Sync or Sync on Green Video (Positive)
0.7Vpp-Sync (negative) 0.3Vpp
Standard - HD15 (VGA Analog), DVI-D
Video Input Interface
Optional DB-9 Input (*2)
Optional 3, 4, & 5-Wire BNC Inputs, HD15 and DB-9 (TTL) (*1)
External Connectors
Analog HD15 D-Sub Input; Digital DVI Input:: DC Input.
Power Requirements
100-240VAC 50-60Hz @ 1 Amp
Approvals
Designed to Comply with: FCC, CE, UL
Temperature: Operating
-10° to 65°C @ 10-90% R.H.
Temperature: Storage
-30° to 70°C @ 10-90% R.H.
Altitude: Operating
0 to 10,000 ft
Altitude: Storage
0 to 40,000 ft
Mechanical Configurations
Dimensions
Warranty
Open Frame and Legacy Configurations
Open Frame: Contact DDI or Visit WEB for Mechanical Dimension
Legacy Replacement: Contact DDI or Visit WEB for Mechanical Dimensions
Three Years Limited Warranty
Universal Video Input Option - 3/4/5 BNC Input (RGB) (*2)
TTL Video Input for EGA, CGA and MDA (*1)
Touch Screen: Resistive, Capacitive or SAW (USB or Serial)
3M - http://solutions.3m.com/wps/portal/3M/en_US/TouchSystems/TouchScreen/?WT.mc_
Options
Elo TouchSystems - http://www.elotouch.com/Support/default.asp
ATouch Technologies Co., Ltd - http://www.a-touch.com.tw/service.htm
Screen Protection from Impact - Strengthened Glass
Optional RCA (NTSC/PAL) and 5 Pin Mini Din (S-video)
HD15 to 5 BNC Female Interface cable
Sunlight Readable
Note (1) – With TTL Video Input Option, Note (2) – With Universal Video Input Option..
Dynamic Displays, Inc
1625 Westgate Road
Eau Claire WI, 54703
Doc # 0048058
Manual, QES1500 Progressive/Interlace Series
Rev: D
Page 26 of 33
QES1515 Series 15-inch LCD Specification
Tabletop Models
All Other Models
Size/Technology
15” TFT Active Matrix LCD
15” TFT Active Matrix LCD
Viewing Area
304.128 mm x 228.096 mm
308.8 mm x 231.9 mm
Pixel Pitch
0.297 mm x 0.297 mm
Native Resolution
1024 x 768 Pixels
Back Light (Typical)
50,000 Hours
Viewing Angle (H/V)
60° (Left), 60° (Right) / 40° (Up), 60° (Down)
Contrast Ratio (Typical)
400:1
350:1
Brightness (Typical)
250 Cd/m2
450 Cd/m2
Response Time (Typical)
Colors
16 mSec (Tr + Tf)
262K – (6 Bits for R, G, B)
16.2 Million – (6 Bits + FRC for RGB)
Supported Video Formats Standard
640 x 400 @ 85Hz
640 x 480 @ 60/72/75/85Hz
720 x 400 @ 70/85Hz
800 x 600 @ 56/60/72/75/85Hz
1024 x 768 @ 60/70/75/85Hz - Native Resolution
Optional - EGA; CGA; MDA; TTL Video Timings (*1)
Optional - Legacy Products Timings - Horizontal: 15 to 68KHz; Vertical 50 to 85Hz
Video Input Signals
Standard - Analog Video: 0.7Vpp @ 75 Ohms
Optional - TTL Video Input for EGA, CGA and MDA (*1)
Optional - RCA (NTSC/PAL) and 5 Pin Mini-DIN (S-video)
Sync Input Interface
Standard Sync: Separate, Composite TTL Level Sync or Sync on Green Video (Positive) 0.7Vpp-Sync (negative) 0.3Vpp
Video Input Interface
Standard - HD15 (VGA Analog), DVI-D
Optional DB-9 Input (*2)
Optional 3, 4, & 5-Wire BNC Inputs, HD15 and DB-9 (TTL) (*1)
External Connectors
Analog HD15 D-Sub Input; Digital DVI Input:: DC Input.
Power Requirements
100-240VAC 50-60Hz or +12VDC @ 4A
Approvals
Designed to Comply with: FCC, CE, UL
Temperature: Operating
Temperature: Storage
0° to 50°C @ 10-90% R.H.
-20° to 60°C @ 10-90% R.H
Altitude: Operating
Altitude: Storage
0 to 10,000 ft
0 to 40,000 ft
Mechanical Configurations
Table Top with Tilt & Swivel
Open Frame, NEMA Panel Mount, Rack Mount & Wall Mount
Dimensions
Tabletop or Desktop enclosure with Tilt & Swivel
Open Frame;
NEMA 4/12 Panel Mount
Rack mount; EIA RS310 D – 7 Unit
Wall/Arm Mount
Weight
7 Lb.
12 Lb.
Warranty
Three Year Limited Warranty
Universal Video Input Option - 3/4/5 BNC Input (RGB) (*2)
TTL Video Input for EGA, CGA and MDA (*1)
Touch Screen: Resistive, Capacitive or SAW (USB or Serial)
3M - http://solutions.3m.com/wps/portal/3M/en_US/TouchSystems/TouchScreen/?WT.mc_
Options
Elo TouchSystems - http://www.elotouch.com/Support/default.asp
ATouch Technologies Co., Ltd - http://www.a-touch.com.tw/service.htm
Screen Protection from Impact - Strengthened Glass
Optional RCA (NTSC/PAL) and 5 Pin Mini Din (S-video)
HD15 to 5 BNC Female Interface cable
Sunlight Readable
Note (1) – With TTL Video Input Option, Note (2) – With Universal Video Input Option..
Dynamic Displays, Inc
1625 Westgate Road
Eau Claire WI, 54703
Doc # 0048058
Manual, QES1500 Progressive/Interlace Series
Rev: D
Page 27 of 33
QES1518 Series 18.1-inch Grayscale LCD Specification
Size/Technology
18.1 SXGA Monochrome TFT/LCD Module
Viewing Area
359.0 mm x 287.2 mm
Pixel Pitch
0.280 mm x 0.280 mm
Native Resolution
Back Light
1280 x 1024 Pixels
50,000 Hours Typical
Viewing Angle (H/V)
Contrast Ratio (Typical)
Brightness (Typical)
170°/170°
550:1
700 Cd/m2
Response Time (Typical) 40 mSec
Colors
256 Gray Scales ( 8 Bits)
640 x 400 @ 85Hz
640 x 480 @ 60/72/75/85Hz
720 x 400 @ 70/85Hz
Supported Video Formats
800 x 600 @ 56/60/72/75/85Hz
1024 x 768 @ 60/70/75/85Hz
1280 x 1024 @ 60/75 - Native Resolution
Optional - EGA; CGA; MDA; TTL Video Timings (*1)
Optional - Legacy Products Timings - Horizontal: 15 to 68KHz; Vertical 50 to 85Hz
Video Input Signals
Sync Input Signals
Standard - Analog Video: 0.7Vpp @ 75 Ohms
DVI-D
Optional - TTL Video Input for EGA, CGA and MDA (*1)
Optional - RCA (NTSC/PAL) and 5 Pin Mini-DIN (S-video)
Standard Sync: Separate, Composite TTL Level Sync or Sync on Green Video (Positive) 0.7Vpp-Sync (negative) 0.3Vpp
Video Input Interface
HD15 D-Sub; DVI Socket, BNC, 5 Pin mini DIN, DC Input.
Power Requirements
100-240VAC 50-60Hz or +12VDC @ 5A
Approvals
Designed to Comply with: FCC, CE, UL
Temperature: Operating
Temperature: Storage
0° to 50°C @ 10-90% R.H.
-20° to 60°C @ 10-90% R.H
Altitude: Operating
0 to 10,000 ft
Altitude: Storage
0 to 40,000 ft
Mechanical
Configurations
Dimensions
Weight
Rack Mount 9 Units – EIA RS310D and VESA 75/100
Rack Mount: 9 Units – EIA RS310 D and VESA 75/100
25 Lb.
Warranty
Three Year Limited Warranty
Universal Video Input Option - 3/4/5 BNC Input (RGB) (*2)
TTL Video Input for EGA, CGA and MDA (*1)
AGC Video
Touch Screen: Resistive, Capacitive or SAW (USB or Serial)
3M - http://solutions.3m.com/wps/portal/3M/en_US/TouchSystems/TouchScreen/?WT.mc_
Options
Elo TouchSystems - http://www.elotouch.com/Support/default.asp
ATouch Technologies Co., Ltd - http://www.a-touch.com.tw/service.htm
Screen Protection from Impact - Strengthened Glass
Optional RCA (NTSC/PAL) and 5 Pin Mini Din (S-video)
HD15 to 5 BNC Female Interface cable
Sunlight Readable
Note (1) – With TTL Video Input Option, Note (2) – With Universal Video Input Option..
Dynamic Displays, Inc
1625 Westgate Road
Eau Claire WI, 54703
Doc # 0048058
Manual, QES1500 Progressive/Interlace Series
Rev: D
Page 28 of 33
QES1519 Series 19-inch LCD Specification
Size/Technology
Viewing Area
Pixel Pitch
19” TFT Active Matrix LCD
376.3 mm x 301.1 mm
0.294 mm x 0.294 mm
Native Resolution
1280 x 1024 Pixels
Back Light( Typical)
50,000 Hours
Viewing Angle (H/V)
140°/130°
Contrast Ratio (Typical)
Brightness (Typical))
Response Time (Typical)
Colors
600:1
250 Cd/m2
12 mSec
16.2 Million – (6 Bits + FRC)
640 x 400 @ 85Hz
640 x 480 @ 60/72/75/85Hz
720 x 400 @ 70/85Hz
Supported Video Formats –
Standard
800 x 600 @ 56/60/72/75/85Hz
1024 x 768 @ 60/70/75/85Hz
1280 x 1024 @ 60/75Hz – Native Resolution
Optional - EGA; CGA; MDA; TTL Video Timings (*1)
Optional - Legacy Products Timings - Horizontal: 15 to 68KHz; Vertical 50 to 85Hz
Standard - Analog Video: 0.7Vpp @ 75 Ohms
Video Input Signals
Optional - TTL Video Input for EGA, CGA and MDA (*1)
Sync Input Signals
Standard Sync: Separate, Composite TTL Level Sync or Sync on Green Video (Positive) 0.7Vpp-Sync (negative) 0.3Vpp
Optional - RCA (NTSC/PAL) and 5 Pin Mini-DIN (S-video)
Video Input Interface
HD15 (VGA Analog) - DVI-D
External Connectors
Analog HD15 D-Sub Input; Digital DVI Input:: DC Input.
Power Requirements
100-240VAC 50-60Hz or +12VDC @ 4A
Approvals
Designed to Comply with: FCC, CE, UL
Temperature: Operating
Temperature: Storage
0° to 50°C @ 10-90% R.H.
-20° to 60°C @ 10-90% R.H
Altitude: Operating
0 to 10,000 ft
Altitude: Storage
0 to 40,000 ft
Tabletop or Desktop enclosure with Tilt & Swivel
Mechanical Configurations
Open Frame
NEMA 4/12 Panel Mount:
Rack mount; EIA RS310 D – 7 Unit or Wall/Arm Mount
Tabletop: http://www.industrial-panels.com/19_in_desktop_lcd.htm
Dimensions
Panel mount: http://www.industrial-panels.com/panel_mount_lcd_monitors.htm
Rack mount: http://www.industrial-panels.com/rack_mount_rugged_industrial_monitor.htm
Wall/Arm Mount: http://www.industrial-panels.com/flat_panel_wall_mount.htm
Warranty
Three Year Limited Warranty
Universal Video Input Option - 3/4/5 BNC Input (RGB) (*2)
TTL Video Input for EGA, CGA and MDA (*1)
Touch Screen: Resistive, Capacitive or SAW (USB or Serial)
3M - http://solutions.3m.com/wps/portal/3M/en_US/TouchSystems/TouchScreen/?WT.mc_
Options
Elo TouchSystems - http://www.elotouch.com/Support/default.asp
ATouch Technologies Co., Ltd - http://www.a-touch.com.tw/service.htm
Screen Protection from Impact - Strengthened Glass
Optional RCA (NTSC/PAL) and 5 Pin Mini Din (S-video) or HD15 to 5 BNC Female Interface cable.
Note (1) – With TTL Video Input Option, Note (2) – With Universal Video Input Option..
Dynamic Displays, Inc
1625 Westgate Road
Eau Claire WI, 54703
Doc # 0048058
Manual, QES1500 Progressive/Interlace Series
Rev: D
Page 29 of 33
QES1524 Series 24-In LCD Specifications
Size/Technology
24.0” WUXGA Color TFT-LCD
Viewing Area
518.4 (H) mm x 324 (V) mm
Pixel Pitch
0.270 mm x 0.270 mm
Back Light (Typical)
50,000 Hours
Viewing Angle (H/V, Typical)
89° (Left), 89° (Right) / 89° (Up), 89° (Down) @ CR = 10
Contrast Ratio (Typical)
800:1
2
Brightness (Typical)
300 cd/m @ IL = 6 mA
2
270 cd/m @ IL = 6 mA with IntelliTouch SAW Touch Screen
Response Time
16 mSec Typical, on/off; 6 mSec Average
Colors
16.7M Colors (R G B Bit Data)
640 x 480 @ 60, 72 and 75 Hz
720 x 400 @ 70 Hz
800 x 600 @ 56, 60, 72 and 75 Hz
1024 x 768 @ 60, 70 and 75 Hz
Supported Video Formats
1152 x 864 @ 75 Hz
1280 x 960 @ 60 Hz
1280 x 1024 @ 60 and 75 Hz
1600 x 1200 @ 60, 65, 70 and 75Hz
1920 x 1200 @ 60 and 75Hz Hz– Optimal Native Resolution
Legacy Products 15 to 68KHz Horizontal Freq.
Standard - Analog Video: 0.7Vpp @ 75 Ohms
Video Input Signals
Optional - TTL Video Input for EGA, CGA and MDA (*1)
Optional - RCA (NTSC/PAL) and 5 Pin Mini-DIN (S-video)
Sync Input Signals
Standard Sync: Separate, Composite TTL Level Sync or Sync on Green Video (Positive) 0.7Vpp-Sync
(negative) 0.3Vpp
Video Input Interface
HD15 (VGA Analog) - DVI-D
External Connectors
Analog HD15 D-Sub Input; Digital DVI Input:: DC Input.
Power Requirements
100-240 VAC 50-60 Hz or +24 VDC @ 5A
Agency Approvals
Designed to Comply with FCC, CE, UL
Temperature: Operating
0° to 50°C @ 5-90% R.H.
Temperature: Storage
-20° to 60°C @ 5-90% R.H.
Altitude: Operating
0 to 10,000 ft
Altitude: Storage
0 to 40,000 ft
Mechanical Configuration
Table Top or Wall Mount (VESA 100mm)
16.5” (H) x 24” (W) x 3” (D) without Tilt & Swivel
Dimensions
22” (H) x 24” (W) 10.5” (D) With Tilt & Swivel
Bezel Finish
Aluminum - Black Epoxy Powder Paint with Wrinkle Finish
Construction
Ruggedized for Industrial Applications
18 Lb. with SAW Touch Screen or Screen Protection and without Tilt & Swivel
Weight
23.5 Lb With Tilt & Swivel
Warranty
Three Year Limited Warranty
Note (1) – With TTL Video Input Option, Note (2) – With Universal Video Input Option..
Dynamic Displays, Inc
1625 Westgate Road
Eau Claire WI, 54703
Doc # 0048058
Manual, QES1500 Progressive/Interlace Series
Rev: D
Page 30 of 33
Universal Video Input Unit Option
Dynamic Display’s unique Universal Video Input Option was designed to accept a wide variety of non-standard legacy
video timing formats. It converts the signal to a VGA-style video format that is acceptable to most modern LCD
displays. The Universal Video unit has a unique sync discriminator circuit that will filter out extraneous sync pulses
found in some legacy video signals. The phase lock loop design supplies sync pulses that are missing in other legacy
video formats.
With the Universal Video Input Option, the user has the choice of switching between two separate video input ports.
The first video input port is a standard HD-15 D-sub connection with fixed 75 ohm termination. The second video port
has five BNC connections; Red, Green, Blue Video, Vertical Sync, and Horizontal/Composite Sync. The input
impedance of each BNC inputs may be switched between 75 Ohms and Hi impedance for video loop-through
applications.
Either of these two video ports can accept the following video signal format types:
•
•
•
Three-wire RS170 and RS343-style analog composite sync-on-green video formats - with and without serrations
and equalizing pulses.
Four-wire analog video formats with separate composite sync.
Five-wire Red, Green, Blue Video, with separate horizontal and vertical syncs.
In addition to these analog video timings, the Universal Video Input Option also accepts TTL video signals on Port one
via a 9-pin D-sub connector for CGA and EGA monitors.
Connecting The Universal Video (UVI) Box
Follow the instructions below to install the Universal Video Box to your Flat/Panel monitor.
Required tools: #2 Phillips Screw Driver
1. Mounting The UVI Box:
• Power down the Flat Panel Monitor and unplug the Power Adapter Cable (A/C - D/C Power Supply) going to
the Flat Panel monitor unit.
• Unplug the Video Input Cable (SUB-D, 15HD) from your system going to the Flat Panel monitor unit.
• Mounting the (UVI) Box hardware is determined by which Flat/ Panel monitor you have. The following list is
for Dynamic Displays Flat Panel systems:
a. 15” Flat Panel Plastic Enclosure
8115061: Screw, Metric, Pan Head, Philips Head, Size M 4X8, Quantity of 4
8120030: Washer ,Locking, Number 8, Quantity of 4
b. 19” Flat Panel Plastic Enclosure
8115032: Screw ,Metric, Pan Head, Philips Head, Size M 3X8, Quantity of 4
8120027: Washer, Locking External, Size 4, Quantity of 4
c.
Rack Mount and Panel Mount
8114455: Screw SEM, Pan Head, Philips Head ,Size 8-32 by 0.375, Quantity of 4
•
Mount the (UVI) box to the VESA 100 mounting holes located on the rear of the Flat / Panel monitor.
2. Connect Video and Power to UVI and Flat Panel Monitor
•
•
•
•
•
Plug the (VGA, SUB-D, 15HD) cable from the (UVI) box to the Flat / Panel monitor.
Plug the Power Adapter / Cable (A/C - D/C Power Supply) into the input connector (12 VDC) on the (UVI) box.
Plug one end of the DC Jumper Power Cable into the output connector (12 VDC) on the (UVI) box.
Plug the other end of the DC Jumper Power Cable into the Flat/Panel (12VDC) input - located on the rear of
Flat / Panel monitor.
Determine Video Plug input from your System:
The (UVI) box supports D-SUB or BNC:
Dynamic Displays, Inc
1625 Westgate Road
Eau Claire WI, 54703
Doc # 0048058
Manual, QES1500 Progressive/Interlace Series
Rev: D
Page 31 of 33
•
• D-SUB, 15HD (VGA)
• D-SUB, 9HD (CGA / EGA) TTL
• BNC (COMPOSITE / SYNC ON GREEN / SEPARATE SYNC / SEPARATE COMP. SYNC)
After the correct input is determined set switch on (UVI) box for the correct input (D-SUB) or (BNC.) Switch
located next to the last BNC on the right.
Universal Video Input Box Specification:
BNC Connector; 3/4/5 Wire RGB with Separate Sync, Composite Sync or Sync on Green.
Supported Video Input
HD15 VGA Standard Connector: Five Wire RGB with Separate Sync, Composite Sync or Sync on Green.
D-sub 9 Pin: TTL input for EGA & CGA.
Frequency Range
Input Interface
Power Connectors
Power Requirements
Dimensions
Mounting
Construction
Weight
Warranty
Dynamic Displays, Inc
1625 Westgate Road
Eau Claire WI, 54703
15 to 68 KHz
5 BNC’s - HD15 (VGA Analog) - 9-pin D-Sub
+12VDC Input and Loop through Voltage
12VDC @ .0.25A
8” (L) x 4.3” (W) x 2” (H)
VESA 75/100
Rugged for Industrial Applications
1 Lb.
One Year Limited Warranty
Doc # 0048058
Manual, QES1500 Progressive/Interlace Series
Rev: D
Page 32 of 33
Contact Information:
Dynamic Displays, Inc
1625 Westgate Road
Eau Claire, WI 54703
USA
Phone: 800-793-6862
Fax: 715-835-2436
E-mail: [email protected]
www.dynamicdisplay.com
www.industrial-panels.com
Dynamic Displays, Inc
1625 Westgate Road
Eau Claire WI, 54703
Doc # 0048058
Manual, QES1500 Progressive/Interlace Series
Rev: D
Page 33 of 33