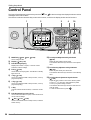
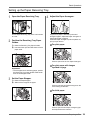
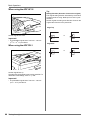
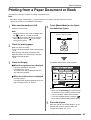
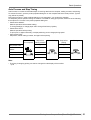
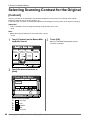
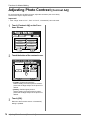
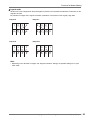
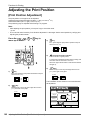
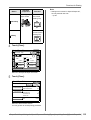
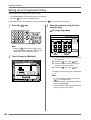
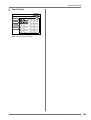
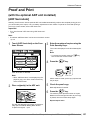
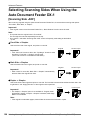
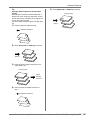
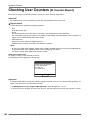
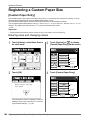
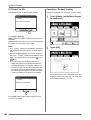
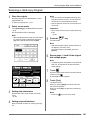
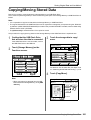
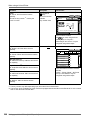
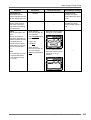
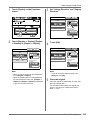
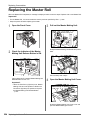
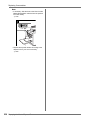
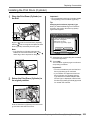
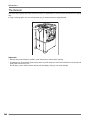
1
Riso shall not be responsible for any damage or expense that might result from the use of this manual. As we are constantly improving our products, the machine may differ in some respects from the illustrations used in this manual. Riso shall not be liable for any direct, incidental, or consequential damages of any nature, or losses or expenses resulting from the use of this product or included manuals. BCaution: • Make sure to read the important operational safety information. • Store this manual close-by, and fully acquaint yourself with the printing machine. is a registered trademark of RISO KAGAKU CORPORATION in Japan and other countries. is a trademark of RISO KAGAKU CORPORATION. is a trademark of RISO KAGAKU CORPORATION. - The information contained in this document is subject to change without notice. Copyright © 2010 RISO KAGAKU CORPORATION 1 Contents Contents Welcome to the RZ Series Model........................................................................................ 8 About This User’s Guide...................................................................................................... 8 Icons Used in This Manual .................................................................................................. 9 Before Starting to Use 12 Safety Guide - Installation ................................................................................................. 12 Installation .........................................................................................................................12 Power connection ...............................................................................................................12 Safety Guide - Handling and Operation............................................................................. 13 Operation Environment.......................................................................................................13 Machine Handling...............................................................................................................13 USB Flash Drive .................................................................................................................14 Consumables......................................................................................................................14 Ink Handling........................................................................................................................14 Connection with a Computer ............................................................................................. 15 Connection Method ............................................................................................................15 Software Installation ...........................................................................................................16 Paper Recommendations .................................................................................................. 17 Size and Weight Restrictions..............................................................................................17 Tips for Better Paper Feeding ............................................................................................18 Storing Environment ...........................................................................................................18 Originals ............................................................................................................................ 19 Size and Weight Restrictions..............................................................................................19 Maximum Printing Areas and Margins................................................................................20 Materials Not to Be Printed ................................................................................................20 Getting Acquainted 22 Function and Name of Each Part ...................................................................................... 22 Optional Devices ................................................................................................................25 Control Panel..................................................................................................................... 26 Display............................................................................................................................... 28 The Screens and their Various Stages ...............................................................................28 About Modes ......................................................................................................................30 Basic Screen Layout...........................................................................................................33 Basic Process.................................................................................................................... 35 Printing from a Paper Document ........................................................................................35 Printing from a Computer Data ...........................................................................................35 2 Contents Basic Operations 36 Preparing to Print............................................................................................................... 36 Setting up the Paper Feed Tray and Loading Paper .........................................................36 Setting up the Paper Receiving Tray .................................................................................39 Setting up the Auto-control Stacking Tray (Optional) .........................................................41 Placing the original ............................................................................................................ 43 When placing on the Glass Platen .....................................................................................43 When placing in the ADF unit (Option) ...............................................................................43 Printing from a Paper Document or Book.......................................................................... 45 Printing from a Computer Data [Direct Print] [USB Job List] ............................................................................................... 50 Printing Computer Data [Direct Print] .................................................................................52 Printing USB Data [USB Job List].......................................................................................55 Changing Output Directions ...............................................................................................57 Changing Stop Timing ........................................................................................................59 Functions for Master-Making 60 Selecting Image Processing Mode [Image] ...................................................................... 60 Selecting Scanning Contrast for the Original [Contrast] .................................................. 62 Enlarging/Reducing Originals [Standard Ratio] [Margin+] [Auto] [Free] [Zoom] .............. 63 Enlargement and Reduction by Standard Ratio [Standard Ratio] [Margin+] [Auto]............64 Enlargement/Reduction of a Changed Aspect Ration [Free]..............................................65 Enlarging and Reducing with the Zoom Function [Zoom] ..................................................66 Using Custom-Sized Paper [Paper] .................................................................................. 67 Automatic Printing [Auto-Process] .................................................................................... 68 Processing Photos with Dot Screen [Dot Process] ........................................................... 69 Adjusting Photo Contrast [Contrast Adj] ............................................................................ 70 Adjusting Photo Gradation [Tone Curve]........................................................................... 71 Saving Ink [Ink Saving] ..................................................................................................... 72 Printing Multiple Originals on One Sheet [2 Up] [Multi-Up Print] ..................................... 73 Original Orientation and Print Results ................................................................................74 Margin.................................................................................................................................76 Orientation of Print Paper ...................................................................................................76 Multi-Up Interval .................................................................................................................76 2 Up Operation ...................................................................................................................77 Operation for Multi-Up Printing ...........................................................................................78 Operation for Multi-Up Tickets ............................................................................................80 Laying out continuous originals on one sheet of paper [Layout] ...................................... 82 Printing from Bound Documents [Book Shadow] ............................................................. 86 Erasing Shadows when Printing .........................................................................................87 Splitting Facing Pages of a Bound Original when Printing [Page split] ..............................88 Cutting the Top Margin of the Original and Printing [Top Margin] ..................................... 89 Adjusting the Master-Making position [Binding Margin]..................................................... 90 Making a Master that Utilizes the Maximum Printing Area [Max. Scan] ........................... 92 Rotating the Original 180 Degrees to Make a Master [Rotate].......................................... 93 Checking the Print Image Prior to Making Master [Preview] ............................................. 94 3 Contents Actions Available on the Preview Screen ...........................................................................95 Checking and Printing the Preview Display ........................................................................95 Functions for Printing 98 Changing the Print Speed [Print Speed Adjustment] ....................................................... 98 Printing at High Speed [180ppm]....................................................................................... 99 Printing More Quietly [Silent] ........................................................................................... 100 Adjusting the Print Density [Print Density Adjustment] ................................................. 101 Adjusting the Print Position [Print Position Adjustment] .................................................. 102 Printing Proof Copies [Proof] .......................................................................................... 104 Prevent Paper Jams When Using Special Paper [D-Feed Check].................................. 105 Extending the drying time [Interval] ................................................................................ 106 Paper Feed/Output Settings for Special Paper and Printing Types [Jump Wing Control] [Special Paper Ctrl] ........................................................................ 107 Setting the Jump Wing Control [Jump Wing Control] .......................................................108 Saving Settings and Renaming the Parameter Names in the Parameter List ..................109 Retrieving Settings from the Parameter List .....................................................................111 Making changes to Special Paper Ctrl Setting .................................................................112 Clearing Special Paper Ctrl Settings ................................................................................113 Adjusting the Auto-control Stacking Tray (when using the optional Auto-control Stacking Tray) [Receive Tray] .............................114 Advanced Features 116 Setting Up User Management [User Management]......................................................... 116 Functions of User Management .......................................................................................116 Operation flow of User Management ................................................................................118 Selecting Recognition and Identification System..............................................................119 Setting Up the Management Level ...................................................................................121 Registering Administrator/Users .......................................................................................122 Changing Administrator/User Registration .......................................................................127 Clearing User Registration ...............................................................................................128 Renaming Groups ............................................................................................................129 Reset All User Counters ...................................................................................................130 Automatic Sorting Into Groups [Program] ...................................................................... 131 How to Program Print .......................................................................................................133 Setting Up for Programed Printing....................................................................................134 Saving Programs .............................................................................................................136 Renaming a Program ......................................................................................................137 Retrieving a Program........................................................................................................139 Clearing Programs............................................................................................................140 Making changes to Stored Programs ...............................................................................141 Using Job Memory Functions [Job Memory] ................................................................... 142 Storing Job Memory .........................................................................................................143 Renaming a Job Memory .................................................................................................144 Retrieving a Job Memory and Printing .............................................................................146 Clearing Job Memory .......................................................................................................148 4 Contents Protecting Confidential Documents [Confidential] .......................................................... 149 Extending the Reserve Period [Reservation] .................................................................. 150 Idling Action [Idling Action] ............................................................................................ 151 Reproducing the Master [Renew Page][Auto Page Renewal]......................................... 152 Using Page Renewal ........................................................................................................153 Using Auto Page Renewal................................................................................................154 Print the original from the last page [Output reversal] ..................................................... 155 Proof and Print (with the optional ADF unit installed) [ADF Semi-Auto] ......................... 157 Selecting Scanning Sides When Using the Auto Document Feeder DX-1 [Scanning Side -ADF] ...................................................................................................... 158 Specifying the Scanning Side ...........................................................................................160 Checking User Counters [ID Counter Report] ................................................................. 162 Outputting the Counter Report .........................................................................................163 Setting Up the Monthly Reminder.....................................................................................164 Showing Usage Status [Meter Display] ........................................................................... 165 Customizing the Direct Access Area [My Direct Access] ................................................ 166 Changing Default Settings [Admin.] ................................................................................ 168 Configurable Functions.....................................................................................................168 Customizing the Default Settings .....................................................................................175 Setting Up Direct Access Area and Selections Tab [DirectAccess Entry] [Selections Entry] ........................................................................... 178 Registering a Custom Paper Size [Custom Paper Entry] ................................................ 180 Entering sizes and changing names.................................................................................180 Deleting a Custom Paper Size .........................................................................................183 Keeping Masters Secure After Printing [Protect] ............................................................. 184 Preventing Leaks of Masters After Creation or Disposal ..................................................185 Storing Original Data and Use Method 188 Converting Hard-copies to Stored Data (Scan Mode) ..................................................... 190 Scanning a Hard-copy Original.........................................................................................191 Setting Data Information ...................................................................................................192 Specifying Stored Size .....................................................................................................194 Retrieving Stored Data and Printing [Storage Memory][USB Job List]............................ 195 Retrieving Stored Data .....................................................................................................195 Changing the Data Order .................................................................................................197 Using the Storage Retrieve/USB Job List Screen ............................................................198 Overlaying Storage Data onto a Print Job [Overlay]........................................................ 199 Copying/Moving Stored Data........................................................................................... 201 5 Contents When using a Linked Printer 204 Print Functions for Using Linked Printers ........................................................................ 204 Auto-Link Function............................................................................................................204 Link Mode Function ..........................................................................................................204 Setting up a Linked Printer [Link Properties] .................................................................. 205 Setting up a Linked Printer ...............................................................................................205 Linked Printer Setup List ..................................................................................................206 Printing Scanned Original from a Linked Printer [Link Mode].......................................... 209 Using Optional Functions on a Linked Printer ................................................................. 211 Configurable Functions.....................................................................................................212 Duplex Printing [Duplex] ................................................................................................. 215 Using the Glass Platen or Auto Document Feeder AF-VI ................................................215 When Equipped with the Auto Document Feeder DX-1 ...................................................218 Replacing Consumables 222 Check for Remaining Amount of Consumables............................................................... 222 Replacing the Master Roll ............................................................................................... 224 Replacing the Ink Cartridge ............................................................................................ 227 Emptying the Master Disposal Box ................................................................................. 229 Replacing the Print Drum (Cylinder) (Color Change) ...................................................... 231 Removing the Print Drum (Cylinder).................................................................................231 Installing the Print Drum (Cylinder)...................................................................................233 Disposal of Depleted Consumables ................................................................................ 234 Maintenance 236 Cleaning .......................................................................................................................... 236 Thermal Print Head ..........................................................................................................237 Glass Platen and Platen Cover Pad .................................................................................237 Scanner Glass and White Sheet of ADF unit (Option) .....................................................238 Pressure Roller .................................................................................................................239 The Exterior ......................................................................................................................240 Troubleshooting 242 When a Message Displays .............................................................................................. 242 Error Message Layout ......................................................................................................242 Pop-Up Message Layout ..................................................................................................252 Consumable Information Screen ......................................................................................262 Troubleshooting............................................................................................................... 265 6 Contents Appendix 276 Optional Accessories....................................................................................................... 276 Specifications .................................................................................................................. 277 Index................................................................................................................................ 281 To Administrator 285 Canceling the Protect Setting .......................................................................................... 285 7 Welcome to the RZ Series Model Thank you for your purchase of this printing machine. This machine is a digital printer-duplicator with the following functions. • • • • This machine is equipped with an easy-to-use Touch Screen LCD display and features. With an interactive guidance system, highly-sophisticated printer settings can be made with ease. 180ppm ultra high speed printing gets the job done faster than ever before. 600dpi resolution High Quality printing will give you clear and crisp documents. About This User’s Guide This machine comes with the following 3 user’s guides. RISO RZ1090/1070 User’s Guide (this manual) This user’s guide explains basic printer operations, handy tips, and how to set up the high-speed print function. It also contains user cautions, information on storing and changing consumables, and troubleshooting procedures. It also contains an explanation for using “Link Mode” when an optional linked printer is attached. RISO Editor User’s Guide This user’s guide explains the RISO Editor functions. RISO Printer Driver User’s Guide / Installation Guide (included as a PDF file in the attached CD-ROM) This user’s guide explains the procedures for printing from a computer. This manual shows you the machine’s basic and advanced operations using various functions. It also contains cautionary notes, usage and replacement information on consumable supplies and troubleshooting tips. Please read this manual carefully before using this machine. Reference at any time as needed for more tips and ideas. 8 Welcome to the RZ Series Model Icons Used in This Manual The following icons are used in this manual. About the notation The following icons are used throughout the document. AWARNING: BCaution: Ignoring this warning could cause death or serious injury. Important!: Indicates items that require special attention or that are prohibited actions. Read carefully and follow the directions as instructed. Note: Gives you useful information. Tip: Gives you additional hints for more convenience. Ignoring this caution could cause injury or damage to property. Indicates a reference page. [ ] Indicates a button or item name on the LCD display. Indicates which button to touch on the LCD display. Indicates the original document. Indicates printed copies. Icons Used in This Manual 9 The notation for Operational Instructions and Function Descriptions The following conventions are used to explain functions and operations. Functions for Master-Making Functions for Master-Making 3 Touch [OK]. Returns to the Master Making Basic Screen. Image Processing mode is updated. Note: Some functions are not available in certain Image Processing mode settings. Selecting Image Processing Mode [Image] In order to make a master best suited for the original document, select an appropriate mode depending on whether original contain only text (Line), photo, or both of them. Note: 1 Photo Duo Pencil Contrast (1-5) Contrast Adj Touch [Page] on the Master Making Basic Screen. Ready to Make Master Basic Page (A4) Selections Functions Contrast Size Admin. Paper Auto Line A4 Touch [Photo], [Duo] or [Pencil] to select more detailed settings. Image (Detailed settings) Black READY Idle Info Select for photos other than [Portrait] or [Group]. Portrait Use this setting for pictures of one or two individuals from the bust up. This type of image processing is particularly good for printing photos of faces. Group This setting is for group photos that are over-exposed. This process is effective for restoring facial features that have become washed out by a flash. The Group setting is not for photos with faces that are overly dark. It may be more effective to select [Standard] for such photos. Ready to Make Master Image Cancel Basic Page Line Line OK Admin. Image Type Photo Standard Duo Portrait Pencil Group Multi-Up Print Black READY Idle : not available In the [Line] mode, when [Contrast] is set to [Auto], the background color (colour) of the original is automatically deleted. p.58 [Duo] Line Select to print small text clearly. Photo Select to print photos more clearly (brightly). Shadow off Select to clear the background color (colour) of the dark-color (colour) originals (such as newspapers). [Shadow off] is selectable aside from [Line] and [Photo]. Info [Line]: Only text contained; e.g., text document, newspaper [Photo]: Only photos contained [Duo]: Both text and photos contained [Pencil]: pencil drawings or lightly printed documents : available Standard Select the appropriate Image Processing mode for the original. Tone Curve Description [Photo] D-Feed Check Multi-Up Print 2 Line Dot Process Contrast (Auto) Default Image Processing mode can be set on the Admin. screen. p.163 [Pencil] Darker Select to print faint originals clearly. Lighter Select to print cut-and-pasted pencil drawings with shadows. Selecting Image Processing Mode [Image] 57 56 Selecting Image Processing Mode [Image] 1) Chapter Title 2) Operation Procedure 3) Display Shows the screen as seen on each step. The operational procedures are outlined in steps. Follow these steps. About the content of this manual and the illustrations • The illustrations included in this document depict the RZ1070A model in most cases. • Displays are illustrated as if currently activated. Some buttons presented in this manual may not be available by default setting, or when the optional device is not installed. • The optional Auto Document Feeder AF-VI and Auto Document Feeder DX-1 are collectively described as the “ADF unit”. Important!: • Measurements in the text body will be shown in both metric and inch (imperial) formats, but diagrams will show only metric measurements. 10 Icons Used in This Manual Icons Used in This Manual 11 Before Starting to Use Safety Guide - Installation This section describes the precautions to be observed when installing the machine. Read this section before installing the machine. Note: • Your dealer will help you to determine a proper location for the machine at the time of delivery. Installation AWARNING: • Place the machine on the dedicated stand for this model or on a flat and stable surface (maximum of 10 mm (3/8 inches) differential allowed). Injury might occur if the machine falls. • Install the machine in a well-ventilated area. Failure to do so may result in serious health problems. BCaution: • Install the machine near the electrical outlet to avoid using an extension cord between the machine and the electrical outlet. If an extension cord is absolutely required, do not use one longer than 5m (15 feet). • Allow at least 10 cm (4 inches) or more of clearance behind the machine so that you can unplug the machine in case of technical difficulties. • Keep the machine away from dusty environments. Failure to do so may result in fire. Important!: • Avoid installing the machine in the locations listed below. Failure to observe this precaution may lead to machine failure. • Locations with exposure to direct sunlight, such as locations close to windows (Curtain all windows that might expose the machine to direct sunlight) • Locations that are subject to sudden changes in temperature • Extremely hot and humid locations or cold and dry locations • Heated locations • Locations exposed to direct cold air, direct hot air, or direct radiant heat • Locations of poor permeability and ventilation Power connection AWARNING: • Do not overload the electrical outlet or extension cord, nor damage the power cord by placing heavy objects on it or pulling or bending it. This can result in fire or electric shock. • Do not pull the power cord but hold the plug itself when unplugging it. This can damage the cord and result in fire or electric shock. • Do not plug or unplug the power cord if your hands are wet. This can result in electric shock. BCaution: • Pull out the power cord plug from the electrical outlet more than once a year and clean the prongs of the plug and their surroundings. Dust collected on these areas can result in fire. Important!: • Check the power cord and plug for poor connections. Plug the power cord securely into a nearby electrical outlet. • Be sure to turn off the POWER switch when connecting or disconnecting a cable. 12 Safety Guide - Installation Before Starting to Use Safety Guide - Handling and Operation This section describes the precautions to be observed when handling the machine. Read this section before operating the machine. Operation Environment Important!: • Operate the machine under the following appropriate environment conditions. Temperature range: 15° C to 30° C (59° F to 86° F) Humidity range: 40% to 70% (noncondensing) Machine Handling AWARNING: • Do not place water containers or metallic objects on the machine. Fire or electric shock may occur if water or metallic objects fall into the machine. • Do not use combustible spray and flammable solvent near the machine. If sprayed gas and flammable solvent contact electronic components inside the machine, fire or electric shock might occur. • Do not insert any metallic material or flammable substance into the machine through any opening. This can result in fire or electric shock. • Do not remove machine covers. Exposing internal parts may result in electric shock. • Do not disassemble or rebuild the machine by yourself. This can result in fire or electric shock. • If the machine emits excessive heat, smoke or foul odor, immediately turn off the POWER, unplug the power cord and contact your service representative. Failure to do so can result in fire or electric shock. • If something drops inside the machine, immediately turn off the POWER, unplug the power cord and contact your service representative. Failure to do so can result in fire or electric shock. • Never stick your hands or fingers in the openings of the machine during operation. • Keep loose clothing or long hair away from moving parts to avoid becoming entangled. • Do not place heavy objects on the machine. The objects might fall and cause injury. • Contact your service representative before moving the machine. BCaution: • Never insert fingers, etc. into the openings around Paper Feed Tray and Paper Receiving Tray. This can result in injury. • Because ink may have stuck to areas around the Print Drum (Cylinder) or inside the machine when the Print Drum (Cylinder) was removed, be careful not to contact them with your hands or clothes. When ink has stuck to your hands, etc., wash it off with detergent as soon as possible. • When you remove paper by inserting a hand inside the machine, be careful not to touch the paper separation hook. Because the tip of paper separation hook is sharp, it might cause injury. • Do not open any covers or move the machine during operation. • Unplug the power cord, if you do not use the machine for a long time. • The machine has precision parts and driving parts inside. Do not handle the machine in other ways than described in this manual. • Do not apply any shock to the machine. • Do not stand the Print Drum (Cylinder) vertically. Doing so may pollute the floor, etc. Important!: • Do not unplug the power cord or turn off the power during operation. • Be sure to open and close all machine covers gently. Safety Guide - Handling and Operation 13 Before Starting to Use USB Flash Drive Important!: • Use USB Flash Drive compatible with Mass Storage Class. Depending on the types of USB Flash Drive, the machine does not work properly. • When connecting or disconnecting the USB Flash Drive, follow the proper procedures. • We cannot guarantee data saved in the USB Flash Drive against loss caused by accidents or unforeseen events. We recommend that you use your computer to make back-up copies of any important documents. Consumables Important!: • For ink and Master Roll, it is recommended to use the products specified by Riso. • Store consumables such as Master Roll and ink properly. Do not store consumables in the following places: – Locations that are subject to direct sunlight or bright locations that are close to windows (If there is no other choice, curtain the window.) – Locations that are subject to rapid changes in temperature – Extremely hot and humid locations or extremely cold and dry locations For more details, please read the packaging of the consumables. Ink Handling BCaution: • If ink gets into your eyes, flush it out immediately with plenty of water. If irritation continues, seek medical attention. • If ink comes into contact with your skin, wash it off thoroughly using soap. • If someone swallows ink by mistake, force large quantities of water (or milk) without inducing vomiting, and watch his/her condition. • Allow plenty of ventilation during printing. • If you feel unwell during use, seek medical advice. • Only use the ink for printing purposes. • Keep the ink out of the reach of children. 14 Safety Guide - Handling and Operation Before Starting to Use Connection with a Computer You can directly send data from a connected computer to the machine as an original for printing. Because digital data itself is used for making a master, the finish of prints becomes outstanding. Connection Method One-to-one connection with a Windows PC USB port on the machine USB port • Cable: USB cable Less than 3m (10 feet) Hi-Speed USB Important!: • Before making the USB connections, turn on both the machine and computer, and wait until the Initial screen is displayed. • The maximum allowable voltage for USB connector input and output is 5 V. • For the USB connections, use a commercially available USB cable (that conforms to the USB 2.0 standard). USB port on your computer Network connections • Cable: Ethernet cable Shielded cable that supports 10BASE-T or 100BASE-TX Important!: • Before making the Ethernet connections, turn off both the machine and computer. Note: • The RISO Network Card is required. Connection with a Computer 15 Before Starting to Use Software Installation Before printing from a computer connected to the machine via a USB cable, the RISO Printer Driver must be installed. Before printing from a computer connected to the machine via a network, both the RISO Printer Driver and RISO Network Card must be installed. Refer to the Printer Driver User’s Guide and RISO Network Card User’s Guide for instructions on installation. The software supplied with this machine is as follows: RISO Printer Driver RISO Utility Software The software package includes the “RISO COPY COUNT VIEWER” and “RISO USB PRINT MANAGER”. • “RISO USB PRINT MANAGER” Application that manages the original data stored in the USB Flash Drive on the computer. • “RISO COPY COUNT VIEWER” Application that manages the counter data (number of prints, masters, etc.) output to the USB Flash Drive on the computer. 16 Connection with a Computer Before Starting to Use Paper Recommendations Size and Weight Restrictions The table shows the specifications of the usable print paper. Usable Printing Paper Size Weight Minimum Size 100 mm × 148 mm (315/16" × 513/16") Maximum Size 320 mm × 432 mm (1210/16" × 17")* 46 g/m2 to 210 g/m2 (12-lb bond to 110-lb index) *Up to 555 mm (2114/16") of vertical paper dimension may be used when the machine is on “Extended Paper” mode )p.180, )p.182 Important!: • Even when using paper whose sizes and weight are supported by the machine, it may not pass through the machine depending on such factors as the paper quality, ambient conditions, and storage conditions. For more information, consult your dealer. Do not use the following types of paper, as they can cause jams or misfeeds: • Extremely thin paper Using the Paper Feed Tray: less than 46 g/m2 (12-lb bond) • Extremely thick or heavy paper Using the Paper Feed Tray: greater than 210 g/m2 (110-lb index) • Wrinkled, curled, folded, or torn paper • Chemically treated or coated paper (such as thermal or carbon paper) • Paper having a sticky section or holes (such as an envelope and label paper) Note: • Paper with a horizontal grain direction can cause problems with paper supply. Use paper with a vertical grain direction. • Images are not output onto the entire area of usable print paper. The maximum printing areas differ among models. )p.20 • When using poorly cut paper or coarse surfaced paper (drawing paper, etc.), arrange the paper neatly before use. • Depending on the type of paper used, paper dust may be generated when using the machine. Please clean and ventilate the area adequately. Riso does not assure that paper outside the above specifications pass through the machine and can be used for printing. Paper Recommendations 17 Before Starting to Use Tips for Better Paper Feeding To prevent paper jams and misfeeds, follow the directions below: • When using standard or light-weight paper, set the Paper Feed Pressure Adjustment Lever to “NORMAL” ( ). Then open all four Paper Arrangers. )p.37, )p.38 • When using thick paper (such as card stock), set the Paper Feed Pressure Adjustment Lever to “CARD” ( ), and open the two inner Paper Arrangers. )p.37, )p.38 • When using slippery paper, set the Paper Feed Pressure Adjustment Lever to “CARD” ( ). )p.37, )p.38 • Use flat printing paper that is free of folds. If curled paper is unavoidable, place the printing paper so that the curl faces down. • Paper may stick to the Print Drum (Cylinder) surface if the top margin is too narrow on the original or if the upper portion of the original uses a large amount of ink. To solve this problem, lower the print position to provide a wider top margin or reverse the top and bottom of the original. Then restart printing from the beginning. Storing Environment Store printing paper in a level, dry area. Storing the paper in an excessively humid area can result in paper jams or poor print quality. After unpacking printing paper, keep the remaining paper wrapped and store it in a moisture-proof box. It is highly recommended to put silica gel in the paper storage box. 18 Paper Recommendations Before Starting to Use Originals Size and Weight Restrictions Usable originals are as follows. Used Device Name Glass Platen Document Feeder AF-VI (Option) Document Feeder DX-1 (Option) Size Weight 50 mm × 90 mm to 310 mm × 432 mm (115/16" × 39/16" to 123/16" × 17") Max. 10 kg (22 lb) 100 mm × 148 mm to 310 mm × 432 mm (315/16" × 513/16" to 123/16" × 17") 50 g/m2 to 128 g/m2 (13-lb bond to 34-lb bond) 105 mm × 128 mm to 297 mm × 432 mm (41/8" × 51/16" to 1111/16" × 17") The weight differs depending on the setting on the scanning side. <Front Side -> Simplex>* 40 g/m2 to 128 g/m2 (11-lb bond to 34-lb bond) <Back Side -> Simplex or Duplex -> Simplex> 52 g/m2 to 105 g/m2 (14-lb bond to 28-lb bond) * The paper weight limit differs depending on which sides of the original are scanned. Scanning sides can be specified using “Scanning Side -ADF”. )p.158 • Originals are scanned according to the size of paper placed on the Paper Feed Tray when masters are made; for the same width, the positions of the Feed Tray Paper Guides. When the placed paper is smaller than an original, not the entire original will be scanned. When the placed paper is larger than an original, dirt on the glass or shade of the original, for example, may result in unexpected dirt in the area beyond the size of the original. • Bound originals can also be used on the Glass Platen. • You can feed automatically up to 50 original sheets 80 g/m2 (21-lb bond) when using the optional ADF (Auto Document Feeder) unit. Note: • Use the Glass Platen when printing the following originals: – – – – – – Patched or worn originals Wrinkled, curled, folded, or torn originals Transparent originals (such as tracing paper or OHP transparencies) Chemically treated originals (such as thermal or carbon paper) Originals with correction fluid or glue Extremely thin originals Using the optional Auto Document Feeder AF-VI: less than 50 g/m2 (13-lb bond) Using the optional Auto Document Feeder DX-1: less than 40 g/m2 (11-lb bond) (Front Side -> Simplex) / less than 52 g/m2 (14-lb bond) (Duplex -> Simplex) – Extremely thick originals Using the optional Auto Document Feeder AF-VI: greater than 128 g/m2 (34-lb bond) Using the optional Auto Document Feeder DX-1: greater than 128 g/m2 (34-lb bond) (Front Side -> Simplex) / greater than 105 g/m2 (28-lb bond) (Duplex -> Simplex) – Heavy drawing paper – Originals with staples or clips • If an original is wrinkled, curled, or creased flatten it thoroughly so that the originals can be pressed directly onto the Glass Platen during processing. Originals 19 Before Starting to Use • If correction fluid or glue is used on an original, thoroughly dry it before placement. • For an original patched with thick paper, the shade of the patched paper may also be printed. Maximum Printing Areas and Margins The maximum printing areas are as follows. Model Maximum Printing Area RZ1090 291 mm × 425 mm (1115/32" × 1623/32") Usable Maximum Print Paper Size 320 mm × 432 mm (1210/16" × 17") RZ1070 291 mm × 413 mm (1115/32" × 161/4") Important!: • Even when paper of the maximum size (320 mm × 432 mm (1210/16" × 17")) or Ext.Paper (top-bottom length up to 555 mm (2114/16")) is used, printing is performed within the maximum printing areas mentioned above. • Regardless of the size of the original, the printing area is decided by the paper size set in the Paper Feed Tray. The printing area is the printing paper size excluding the margins shown in the figure below. The original needs to be prepared with advanced consideration for the margins. Top Side Materials Not to Be Printed Do not use the machine in any manner which violates the law or infringes on established copyrights, even when making copies for personal use. Consult your local authorities for further details. In general, use discretion and common sense. 20 Originals Before Starting to Use Originals 21 Getting Acquainted Function and Name of Each Part 6 1 7 2 8 3 4 9 5 1) Master Disposal Box ()p.229) Holds discarded masters. 2) Feed Tray Ascent/Descent Button ()p.38) Lowers the Paper Feed Tray when changing or adding paper. 3) Paper Feed Pressure Adjustment Lever ()p.37) Adjusts the paper feed pressure according to paper in use. 4) Paper Feed Tray ()p.36) Load print paper on this tray. 5) Feed Tray Paper Guide ()p.36) Holds and guides paper. Slide to fit to the sides of paper. 22 Function and Name of Each Part 6) Platen Cover Opened and closed when placing the original. 7) Glass Platen ()p.43, )p.237) Place the original face-down. 8) Control Panel ()p.26, )p.27) Press the keys to perform various print operations. 9) Display ()p.28) Displays various screens needed for print operations. Touch the buttons on the screen to execute various print operations. Getting Acquainted 29 27 19 28 30 31 10 20 11 21 12 22 Auto-Control Stacking Tray (Option) 32 33 23 34 24 13 14 36 15 16 17 18 26 10) Ink Cartridge Cap Holder ()p.227) Secure the Ink Cartridge cap. 11) Front Cover 12) Print Drum (Cylinder) ()p.231) 13) Ink Cartridge ()p.227) 14) Print Drum (Cylinder) Handle ()p.231) 15) Print Drum (Cylinder) Release Button ()p.231) Unlocks the Print Drum (Cylinder) for removal. 16) Counter Counts the number of rotations of the Print Drum (Cylinder) (total Drum (Cylinder) rotation counter) and the number of made masters (master counter). 17) Master Making Unit Handle ()p.224) 18) Master Making Unit Release Button ()p.224) Unlocks the Master Making Unit for removal. 19) Master Making Unit ()p.224) 20) USB Slot ()p.49) Connect the USB Flash Drive. 21) Paper Jump Wing ()p.108) Automatically adjusts to keep printed paper neatly stacked. 22) Paper Arranger ()p.39) Press to open for aligning printed paper. 23) Receiving Tray Paper Guides ()p.39) 35 25 24) Paper Stopper ()p.39) Slide to adjust to the length of print paper size. 25) Paper Receiving Tray ()p.39) Printed copies are output to this tray. 26) Power Switch ()p.36) 27) Master Making Unit Cover ()p.224) Open and close to install Master Roll. 28) Master Guide Flap ()p.224) 29) Thermal Print Head ()p.237) 30) Master Roll Holder ()p.224) 31) Master Roll ()p.224) 32) Paper Arranger ()p.41) Press to open for aligning printed paper. 33) Receiving Tray Paper Guides ()p.41) Aligns printed paper neatly. Automatically adjusted to the width of paper to be printed. 34) Paper Stopper ()p.41) Automatically adjusted to the length of print paper size. 35) Auto-control Stacking Tray ()p.41) Printed copies are output to this tray. 36) Receiving Tray Paper Guides’ Opening Button ()p.24, )p.42) For details, refer to the next page. Aligns printed paper neatly. Slide according to the width of paper to be printed. Function and Name of Each Part 23 Getting Acquainted Tip: Using the Receiving Tray Paper Guides’ Opening Button The Opening Button for the Receiving Tray Paper Guides on the Auto-control Stacking Tray is used as follows, depending on machine status: • During standby: when paper is discharged onto the Auto-control Stacking Tray – Press the Opening Button to open the Receiving Tray Paper Guides/Stopper so that paper can be removed. • During standby: when the Auto-control Stacking Tray is empty – Press the Opening Button to move the Receiving Tray Paper Guides/Stopper to the storage position so that the Auto-control Stacking Tray can be closed. • During printing – Press the Opening Button to move the Receiving Tray Paper Guides 1 mm (3/64") outwards each time. The Opening Button can be used in this way to jog paper on the receiving tray, etc. 24 Function and Name of Each Part Getting Acquainted Optional Devices Auto Document Feeder AF-VI The Feeder can hold approximately 50 sheets of the original sheets (80 g/m2 (21-lb bond)). Place the original facedown. ()p.43) 1 2 3 1) ADF Original Receiving Tray 3) ADF Original Guide Scanned originals are ejected into this tray. Slides and adjusts to the width of the original to hold together. 2) ADF Original Release Lever ()p.248) If an original is jammed, pull this lever to the right to eject from the ADF unit. Auto Document Feeder DX-1 The Feeder can hold approximately 50 sheets of the original sheets (80 g/m2 (21-lb bond)). ()p.43) Both sides of the original can be scanned automatically. Select the side (front or reverse) to be scanned. ()p.160) 1 2 1) Auto Document Feeder Cover ()p.249) Open to remove jammed or misfed originals from the ADF unit. 3 3) ADF Original Receiving Tray Scanned originals are ejected into this tray. 2) ADF Original Guide Slides and adjusts to the width of the original to hold together. Function and Name of Each Part 25 Getting Acquainted Control Panel The Control Panel features permanent keys such as and . It also has a large-size display that shows various messages and function buttons. This section introduces hardware Key names and functions, as well as the display window and its functions. 1 2 3 4 10 65 12 Paper 9 1) MODE Key ()p.28, )p.32, )p.168) Use to change modes. 2) Display ()p.28 ∼p.34) 3) Print Quantity Display Displays the number of copies, or numeric values entered for various settings. 4) P Key ()p.134) Use to retrieve stored programs. The indicator on the key lights when set. 5) × Key ()p.134) Use to move between fields in setup screens, or set up programed printing. 6) + Key ()p.134) Use to move between fields in setup screens, or set up programed printing. 7) C Key Cancels entered numerical values, or reset the counter to 0. 8) Print Quantity Keys (0 to 9 Keys) Use to enter the number of copies, or the numerical values for various settings. 9) Key ()p.131, )p.142) Use to move between items in a setup screen, or retrieve stored memory. 26 Control Panel 8 7 11 10) Print Speed Adjustment Keys/Indicator ()p.98) Select the print speed from five levels. The indicator above the keys shows the current speed level. 11) Print Density Adjustment Keys/Indicator ()p.101) Select the print density from five levels. The indicator above the keys shows the current density level. 12) Print Position Adjustment Keys/Indicator ()p.102) Adjust the print position in the horizon direction (within ±15 mm (±19/32")) and in the vertical direction (within ±10 mm (±3/8)) after making a master. The indicator above the keys shows the offset amount from the center. To clear the offset amount, press . Getting Acquainted 20 21 19 18 17 13 14 15 16 13) Start Key Starts master-making or printing process or executes specified operations. The key is lighted only when the key is active. 14) Proof Key ()p.104) Use when you want to check print result after adjusting the print position, for example. This allows you to print proof copies without affecting the value on the Print Quantity Display. 15) Stop Key Stops current operation in progress. During the mastermaking procedure, the machine will not stop until the master-making process is completed. 16) Reset Key Returns all settings to the initial settings, and clears the error screen on the display after a system error has been resolved. 17) Wake-Up Key Wakes up the printer in Energy Saving mode. Use this key also to log out from the machine. 18) Auto-Process Key ()p.68) Performs non-stop operation from master-making through printing. When activated, the indicator besides the key lights. 20) Master-Making Key Makes the printer be ready for making masters. 21) Progress Arrows Indicates master-making and printing progress status. 1) Master-Making 2) 3) 4) Indicator Master-Making Stop Bar Print Indicator Printing Stop Bar Ready to make a master (Auto ON): when 1 is blinking Ready to make a master: when 1,2 are blinking Ready to print: when 3,4 are blinking The indicator increases one bar at a time from the left, indicating the progress of the current master-making or printing job. • Indicator 1 or 3 blinks during the master-making/printing operation. • If a master-making or printing job is halted, the progress bar stays lit at that position. (Ready for resume) 19) Print Key Makes the printer be ready for printing. Control Panel 27 Getting Acquainted Display The Screens and their Various Stages When the power is turned on, after a brief display of the start-up screen, the initial screen appears. Power ON Mode Screen Initial Screen (Ex.) Start-Up Screen (Ex.) Select an Operation Mode RISO RZ 1070A Do Not Set Original Yet MasterMake Printing Booting When the optional Document Storage Card DM128CF or USB Flash Drive is attached Note: • Start-Up screen settings Select [Start-Up Screen] on the Admin. screen. • Initial screen settings You can select [Mode Screen], [RISO Print], [Link Mode] or [Scanning] as the initial screen to best suit your needs. Select [Display Priority] on the Admin. screen. Refer to the following pages for more information about the different types of Initial screen. • About the key By pressing the key, you can switch the [Mode Screen] and [Basic Screen]. )p.32 Select an Operation Mode RISO RZ 1070A MasterMake Printing When the optional Linked Printer is connected Select an Operation Mode RISO RZ 1070A LBP MasterMake Link Print Printing 28 Display Scanning Getting Acquainted Basic Screen Other Screens • Touch [MasterMake] to display the Master Making Basic Screen. Ready to Make Master Basic Page (A4) Selections Functions Contrast Size Selections Screen Quickly change settings for a function or open its screen. Admin. Ready to Make Master Paper Auto L i ne Basic Selections Functions Admin. A4 Renew Page Interval Confidential Contrast Adj Book Shadow Job Memory D-Feed Check Multi-Up Print Black Id le READY In fo • Touch [Printing] to display the Print Basic Screen. Ready to Print Basic Selections Functions Admin. Paper Print Position 180ppm Functions Screen Access to a variety of functions. 0 mm A4 Slient Ready to Make Master 0 mm D-Feed Check Renew Page Black READY Basic Idle Selections Info • Touch [Scanning] to display the Scan Basic Screen. Ready to scan data Functions Admin. Program Tone Curve Job Memory Multi-Up Print Dot Process 2 Up Contrast Adj Book Shadow Page No.1 P. 1/4 File Name scan_0001 Owner Directory 1_folder Owner-1 Basic Functions Page (B4) Contrast Admin. Size Format Auto Line Admin. Screen Changes the default values of various functions. B4 Ready to Make Master Book Shadow Preview Admin. Basic Selections Ready for Link Print 1 A4 Basic Page(A4) Line Admin. Idle MP 2 A3 Admin. OK • Touch [Link Print] to display the Link Basic Screen. LBP1 Functions Resets current settings once opened B4 Selections Contrast Functions Size All DirectAccess Entry Display Selections Entry Admin. Feed Tray Auto Default Display Priority Mode Screen System Mode Key Pattern Mode Select. Link Mode Start-Up Screen A4 Book Shadow Editor Logo(RZ) P. 1/10 Note: • Depending upon the usage environment, some of the “Admin.” features may not be available (“Admin.” tab may not be displayed). Consult your dealer (or authorized service representative) for details. Display 29 Getting Acquainted About Modes Touch the Mode button on the Mode Screen to view the basic screens of the various modes. RISO RZ1070A Master Make LBP Scanning Link Print B C Printing A A) RISO Print On the Operation screen displayed after selecting the Print Mode, you can select the operation of the machine (the operation you are going to do). RISO RZ1070A Master Make Scanning LBP Link Print Printing 1 2 1) Master Make Scan the original set on the Glass Platen and making a master. 30 Display 2) Printing Print with the master currently on the Print Drum (Cylinder). Select [Printing] when the master-making operation is not required further after the completion of master-making. Getting Acquainted B) Scan Mode This mode scans the original set on the Glass Platen and stores the scanned data in Storage Memory. Ready to scan data Page No.1 File Name scan_0001 Owner Directory 1_folder Owner-1 Basic Functions Admin. Page (B4) Contrast Size Format Auto Line B4 Book Shadow Preview This setting is available when the optional Document Storage Card DM-128CF or USB Flash Drive is attached. The data in Storage Memory can be edited using Editor functions. See “Converting Hard-copies into Stored Data (Scan Mode)”()p.190) for information on the Scan Mode. C) Link Mode This mode scans the original set on the Glass Platen and outputs the data using an optional Linked Printer connected to the machine. This process is called “Link Print”. When optional Linked Printer is connected to the machine, we recommend that you select [Link Print]. The Link Basic screen displays at start-up. Ready for Link Print Idle LBP1 1 A4 Basic Page (A4) MP 2 A3 B4 Selections Contrast Line Functions Size Admin. Feed Tray Auto A4 Book Shadow When printing a small number of copies, it is more economical to use Link Print than making a master and printing with the machine. See “When Using a Linked Printer” ()p.204) for information on the Link Mode. Original Printed Paper Linked Printer Display 31 Getting Acquainted Note: • Tip: key key can be set to function as “Mode Selection” or “Loop”. Select “Mode Key Pattern” on the Admin. screen. Touch the Mode button on the Mode Screen to view the basic screens of the various modes. [Mode Selection] Pressing the key will open the Mode Screen no matter which screen you are currently on. [Loop] The screen changes as shown below when the key is pressed. • Normally: “Master Making Basic Screen” ←→”Print Basic Screen” • When a Linked Printer is connected: “Link Basic Screen” ←→“Master Making/ Print Basic Screen” • When the optional Document Storage Card is installed: “Scan Basic Screen” ←→ “Master Making/Print Basic Screen” 32 Display About the Recognition Screen This machine is equipped with a User Management function. ()p.116, )p.168 “Admin.”). If “User Management” is set, the Recognition Screen is displayed. If the one of these screens shown below is displayed, input the PIN code or connect the registered USB Flash Drive. Consult your administrator for the PIN code and the registered USB Flash Drive. PIN code Input Screen Registered USB Flash Drive Screen Getting Acquainted Basic Screen Layout The name and function of each area of the basic screens are explained below. The display of the basic screen differs depending on whether you are scanning a paper document or printing from a computer. Printing from a Paper Document Ready to Make Master Basic Page (A4) Selections Functions Contrast Size Line Multi-Up Print Admin. Paper Auto A4 D-Feed Check Black 1) Tab Area Touch a tab to display its screen. 2) Functions Area The main functions for master-making/printing steps. Each button shows the current setting. Touch the button to make changes. 3) Direct Access Area Up to four buttons can be selected in advance. Use this area to store most frequently-used functions. You can make selections on the Admin. screen. )p.178 READY Id l e In fo 4) Status Area Displays the current status of the machine and the Linked Printer. : Color (Colour) of the currently installed Print Drum (Cylinder). : Current status of the Linked Printer. (A Linked Printer will not be displayed unless entered on the Admin. screen.) • [ERROR]: Error in network, etc.. • [- - -]: Linked Printer information cannot be retrieved. • [READY]: Linked Printer is ready Pause : Status of data sent from a computer. Touch to display the list of data being received. • [Idle]: Ready to receive data • [Data-Map]: Processing data for printing. • [Pause]: Ready for output. • [Error]: Error in data transmission. • [Blocked]: Cannot receive data : Touch to display information (consumables information, Disposable Box Space, Print Drum (Cylinder) information, date/time, My Counter. )p.223 Display 33 Getting Acquainted Printing from a Computer Data 3 Ready to Make Master 1 2 Basic Selections Document_1.doc Owner: RISO Date&Time: Nov30,10 05:30 Format: A4 Functions Admin. P.1/4 Preview Paper 4 Skip Page A4 Clear All 5 Process: 7 Pause before “Master” Black READY 1) Tab Area (“Selections” and “Admin.” tabs are disabled) Touch a tab to display its screen. 2) Job Properties Area Properties of the current print job is displayed. Refers to the computer data ready for print output. 3) Job Operation Area • [Preview]: Displays the master making image of the page currently awaiting creation. (Available only in the Master Making Basic Screen.) • [Renew Page]: Create another master when current one is damaged or compromised, without having to download data from the computer. • [Skip Page]: Stops processing the current page and moves on to process the next page. • [Clear All]: Stops the current process altogether. Job Separation Idle 6 Info 4) Paper Button 5) Process A printing operation can be set to stop at certain points. (overrides driver settings) 6) Optional Device Area Displays when an optional device is attached. Touch to activate. Note: • When no optional device is attached, “180ppm” button is displayed. 7) Status Area Displays the current status of the machine and its Linked Printer. This area shows the same information as that on the “Printing from a paper Document” screen. ()p.33) Buttons on Touch Screen Select buttons by lightly touching with a finger. Touch again to cancel the selection. Avoid pressing with excessive force. Not Selected. Frequently Used Buttons Selected. Activates/Executes a setting. Buttons in gray cannot be selected. Cancels a setting. Closes a current window. Press a button with a + on the right side to expand options or display Setup screens. 34 Display Switch pages. Increases/decreases selected values (numbers, location, etc.). Scrolls through screens. Getting Acquainted Basic Process Printing from a Paper Document Master-making process Printing process A placed original is scanned by the scanner, and a generated master is rolled around the Print Drum (Cylinder). After a while, proof copy is performed. After checking the print result, enter the number of copies to be printed and start printing. Printing from a Computer Data Master-making process Printing process or PC Transfer the original data created with a computer to the machine via a network or USB Flash Drive. A generated master is rolled around the Print Drum (Cylinder). After a while, proof copy is performed. After checking the print result, enter the number of copies to be printed and start printing. Basic Process 35 Basic Operations Preparing to Print First, set up the Paper Feed Tray and Paper Receiving Tray of the machine. Important!: • Do not use unsuitable paper, or mix paper of different sizes. Doing so can cause paper jams and damage the machine. )p.17 Setting up the Paper Feed Tray and Loading Paper 1 3 Turn the power ON. ON Load paper. 1) Place paper in the printing orientation. 2) Slide the Feed Tray Paper Guides to fit to the sides of the paper. Then turn the right and left Feed Tray Paper Guide Levers to lock the guides. OFF 2 Open the Paper Feed Tray. : Unlock : Lock Pull the Paper Feed Tray to open until it comes to a rest. Important!: • Make sure that the Feed Tray Paper Guides fit tight up against the paper. Failure to do so can produce undesired results. Note: • Custom size paper must be registered on the Admin. screen before use. )p.180 Failure to do so may create an incomplete master. 36 Preparing to Print Basic Operations 4 Select the paper feed pressure. NORMAL ( CARD ( ): For standard or thin paper ): For thick or smooth-surface paper Note: • The setting condition of the paper feed pressure is displayed at the top of the [Paper] button on the Basic Screen. 5 Check the Basic Screen. 1) Select a mode. 2) Touch [MasterMake] on the Operation Selection Screen. The Master Making Basic Screen appears. Ready to Make Master Basic Page (A4) Line Multi-Up Print Black Selections Functions Contrast Size Admin. Paper Auto A4 D-Feed Check READY Idle Info Note: • The paper size is automatically detected. When the size display shows “Custom” even if standard-sized paper has been set, the Feed Tray Paper Guides are not properly set against the paper. Make sure that the Feed Tray Paper Guides fit tightly against the paper. )p.67 Preparing to Print 37 Basic Operations Adding or Replacing Paper When you add paper or replace with paper of a different size at the time of printing, press the Feed Tray Ascent/ Descent Button to lower the Paper Feed Tray. • The Paper Feed Tray is lowered while you press and hold the button, and when you release the button, the tray stops at that position. • When the tray runs out of paper or you remove all paper, the tray is automatically lowered to the bottom. • After paper has been replenished, the Paper Feed Tray automatically rises when you press the Key on the Control Panel. Feed Tray Ascent/ Descent Button Important!: • When changing to a different paper size, remember to readjust the Receiving Tray Paper Guides and Paper Stopper. • When changing to a different quality paper, remember to adjust the Paper Feed Pressure Adjustment Lever. Note: • When the Paper Feed Tray has been lowered to the bottom, if you press this button after paper has been replenished, the Paper Feed Tray rises. Closing the Paper Feed Tray Before closing the Paper Feed Tray, remove the paper and widen the Feed Tray Paper Guides to the limits. Then close the Paper Feed Tray. 38 Preparing to Print Basic Operations Setting up the Paper Receiving Tray 1 Open the Paper Receiving Tray. 4 Adjust the Paper Arrangers. Push out plates Pull the Paper Receiving Tray down until it comes to a rest. 2 Position the Receiving Tray Paper Guides. 1) Raise the Receiving Tray Paper Guides. 2) Hold their lower part and slide them to fit the Pull In Alignment of paper is affected by sizes and strength of paper. Adjust the Paper Arrangers so that printed paper is aligned. Press the Paper Arranger to push the plates out, pull up to pull them in. For plain paper paper width. Press to open all of the four Paper Arrangers. For plain paper with images Important!: lopsided on page • For thick paper such as drawing paper, position the Receiving Tray Paper Guides a little wider than the actual paper width. 3 Set the Paper Stopper. 1) Raise the Paper Stopper. 2) Slide to fit the length of the paper. Press to open the two Paper Arrangers on the more heavily printed side. For thick paper Press to open the two Paper Arrangers (right and left) closer to the machine. Preparing to Print 39 Basic Operations Closing the Paper Receiving Tray Remove all printed copies and follow the steps below. 1) Slide the Paper Stopper to the edge of the Paper Receiving Tray and fold in. 2) Pull up the Paper Arrangers, slide the Receiving Tray Paper Guides to the left and right as far as they will go and fold in. 3) Close the Paper Receiving Tray. 40 Preparing to Print Basic Operations Setting up the Auto-control Stacking Tray (Optional) 1 Open the Auto-control Stacking Tray. 4 Adjust the Paper Arrangers. Push out plates Pull the Auto-control Stacking Tray down until it comes to a rest. 2 Raise the Receiving Tray Paper Guides. 3 Raise the Paper Stopper. The Receiving Tray Paper Guides/Stopper positions are automatically adjusted for paper size used. Pull In Alignment of paper is affected by sizes and strength of paper. Adjust the Paper Arrangers so that printed paper is aligned. Press the Paper Arranger to push the plates out, pull up to pull them in. For plain paper Press to open all of the four Paper Arrangers. For plain paper with images lopsided on page Note: • The Receiving Tray Paper Guides/Stopper positions can be adjusted on the Touch Panel. )p.114 • Pressing the Receiving Tray Paper Guides' Opening Button during printing moves the Receiving Tray Paper Guides for about 1 mm (3/64") outward each time. Press to open the two Paper Arrangers on the more heavily printed side. Preparing to Print 41 Basic Operations For thick paper Press to open the two Paper Arrangers (right and left) closer to the machine. Closing the Auto-control Stacking Tray Follow the steps below to close the Auto-control Stacking Tray. Important!: • If any printed copies remain on the Auto-control Stacking Tray, press the Receiving Tray Paper Guides’ Opening Button to remove them. 1) Make sure there is no paper on the Auto-control Stacking Tray, then press the Receiving Tray Paper Guides’ Opening Button. 2) Fold in the Paper Stopper. 3) Pull up the Paper Arrangers. 4) Fold in the Receiving Tray Paper Guides. 5) Close the Auto-control Stacking Tray. 42 Preparing to Print Basic Operations Placing the original When placing on the Glass Platen Open the Platen Cover and place the original facedown. Align the center of the original with the mark on the left-hand side of the glass. After placing the original, slowly close the Platen Cover. Magazines, books, scrap books, etc. should be placed on the Glass Platen. Note: • If the Gauge Cover is installed, place the original underneath. Gauge Cover Grasp here and lift up the gauge cover Place the original face-down When placing in the ADF unit (Option) Use the ADF unit if you are printing multiple originals in succession. Place originals so that the one to be scanned first is on the top. Afterwards, align the ADF Original Guide with the page width and set originals fully to the rear of the ADF. Important!: • If the original is smaller than the paper size that can be set in the ADF unit, place the original on the Glass Platen. • Do not place multiple originals of differing sizes or otherwise unsuitable originals into the ADF unit. It might cause paper jams and damage the machine. )p.19 • Once the originals are placed into the ADF unit, “Auto Process” setting is turned ON. Press the key to turn it OFF. Default “Auto Process” setting for the ADF unit can be changed on the Admin. screen. )p.169, )p.170 Note: • Up to 50 sheets of 80 g/m2 (21-lb bond) paper can be placed in the ADF unit. • To print a proof copy after each master-making process, select [ADF Semi-Auto]. )p.157 Placing the original 43 Basic Operations When using the ADF AF-VI Tip: Setting Direction (direction of text on the original) The original setting direction is decided by the number of pages set when using “Multi-Up Print” and “Layout” functions. Set the original according to the direction of text on the original seen from the touch panel side. or 1 Set the original face-down. 1 Align Top Important!: • The placeable original size of 100 mm × 148 mm (315/16" × 513/16") and above. Align Side When using the ADF DX-1 1 Set the original face-up. The side of the original that is read can be specified. For details about the settings, refer to )p.158. Important!: • The placeable original size of 105 mm × 128 mm (41/8" × 51/16") and above. 44 Placing the original or 1 Basic Operations Printing from a Paper Document or Book The steps for scanning an original for printing is explained below. Note: • See “When using a Linked Printer” ()p.204) to print from a Linked Printer with Auto-Link function. (“Auto-Link” function is not available for RZ1090U.) 1 Make sure the machine is ON. Check the Control Panel. 4 Touch [MasterMake] on the Operation Selection Screen. Note: • When the power is OFF, both the Display and the key are off. Turn the power ON. • If the key is lit, the machine is in Energy Saving mode. Press the key to cancel Energy Saving mode. 2 3 Select an Operation Mode RISO RZ 1070A Check for printing paper. MasterMake Make sure paper is loaded. To load or to change the paper, see the following page: )p.39 After replacing with paper of a different size, adjust the position of the Receiving Tray Paper Guides and Paper Stopper. )p.38 Printing Check the Display. The Master Making Basic screen appears. When the recognition screen is displayed. Ready to Make Master Follow the message on the screen. For details, see )p.116. The initial screen will be displayed after the user has been identified. Basic Page (A4) When the initial screen is displayed Line Proceed to step 4. The initial screen differs depending on the setting of “Display Priority” of “Admin.”. Multi-Up Print Black Selections Functions Contrast Size Admin. Paper Auto A4 D-Feed Check READY Id l e In fo Note: • When you see [Data-Map] in the Status Area, the machine is busy receiving electronic data from the computer. Please wait a moment. • If you see Link Basic Screen, press the key to switch to Master Making Basic Screen. 5 Place the original. Place the original on the Glass Platen or in the optional ADF (Auto Document Feeder) unit. To place the original, see )p.43. Printing from a Paper Document or Book 45 Basic Operations 6 Configure print functions. • Overlay ()p.199) This setting is available when the Document Storage Card DM-128CF (option) is attached. • Job Separation*2 This setting is available when the Job Separator (option) is installed. • Auto-Link*3 *1 This setting is available when the optional ADF unit is installed. *2 This setting is available when the optional Job Separator is installed. *3 This setting is available when connecting a Linked Printer to the machine. This setting is not available for RZ1090U. Ready to Make Master Basic Page (A4) Line Multi-Up Print Black Selections Functions Contrast Size Admin. Paper Auto A4 D-Feed Check READY Idle Info In the Master Making Basic Screen, select functions as needed. Note: The following selections are available: • Auto Process ()p.68) • Image (Image Processing mode) ()p.60) • Scanning Contrast ()p.62) • Size (Enlargement/Reduction) ()p.63) • Paper ()p.67) • Program ()p.131) • Job Memory ()p.142) • Dot Process ()p.69) • Contrast Adj ()p.70) • Tone Curve ()p.71) • Ink Saving ()p.72) • 2 Up/Multi-Up Print ()p.73) • Layout ()p.82) • Book Shadow ()p.86) • Top Margin ()p.89) • Binding margin ()p.90) • Preview ()p.94) • D-Feed Check ()p.105) • Interval ()p.106) • Jump Wing Control ()p.108) • Special Paper Ctrl ()p.107) • Max. Scan ()p.92) • Output reversal ()p.155) • ADF Semi-Auto*1 ()p.157) This setting is available when the ADF unit (option) is installed. • Idling Action ()p.151) • Renew Page ()p.152) • Scanning Side -ADF ()p.158) This setting is available when the Auto Document Feeder DX-1 (option) is installed. 46 Printing from a Paper Document or Book 7 Check the Paper Receiving Tray. 8 Press the Adjust the position of the Receiving Tray Paper Guides and Paper Stopper to match the paper size used. key. RESET PROOF START STOP Starts scanning of the original. A master is made once the scan is completed, and a proof copy will be printed. Note: • When “Auto Process” is selected, the process will be different. )p.68 • You can change the setting of “Auto Idling”. )p.172 9 Check the proof copy result. Select Print Quantity Basic Selections Functions Admin. Print Position Paper 180ppm 0.0 mm A4 Slient Renew Page Black 0.0 mm D-Feed Check READY Idle Info Basic Operations When a proof copy is printed, the Print Basic Screen will be displayed automatically. Check the proof copy; e.g., print position and density. If necessary, change print position and density. • • • • Print Position ()p.102) Print Density ()p.101) Interval ()p.106) Jump Wing Control ()p.107) After adjustment, press the proof copy. key to print a Period”. We recommend that you activate the “Reservation” setting when printing leaflets, etc. to prevent interruption. )p.150 • Easily restore current settings by saving them into memory. Saved settings can be retrieved even when the key is pressed, or after turning the power off. )p.142 Press the 12 complete. key when print job is Important!: • When the machine has not been used for a long period of time, the print quality may suffer due to dry ink on the Print Drum (Cylinder). Press the key to print proof copies several times. Note: • You can also adjust the print position, the density, and the speed while print process is in progress. Enter the number of copies using 10 the Print Quantity Keys. The specified number is displayed on the Print Quantity Display. Note: • To change the number, press the then re-enter the correct number. 11 Press the key, key. The setting returns to its default value. Note: • After printing is completed, the master remains on the Print Drum (Cylinder). To protect confidential documents from unauthorized duplication, use the “Confidential” feature to discard the master after printing. )p.149 • Even if you do not press the key, with the passage of a certain amount of time (factory default setting: 5 minutes), the setting will be automatically reset. )p.142 Remove the printed paper. 13 Open the Receiving Tray Paper Guides and remove the paper. RESET PROOF START STOP The specified number of copies will be printed. Note: • Press the key to interrupt printing operation currently underway. • When printing from a computer, if the machine is inactive for a certain period of time, it determines that the current job is completed, even if the actual printing is still under way. If another person accidentally initiates another job from the computer, this will cause a new master to be made, discarding the current one. To prevent this from occurring, you may set a “Reserve For the machine equipped with the Auto-control Stacking Tray, press the Receiving Tray Paper Guides’ Opening Button and remove the paper. Printing from a Paper Document or Book 47 Basic Operations Tip: Tip: When Linked Printer is connected to the machine (Not available for RZ1090U) “Auto-Link” changes the Output Tray according to the print quantity. The factory default setting is output from the machine when the print quantity is 20 or more and output from a Linked Printer when the print quantity is 19 or less. When the following functions are set, however, the machine will print copies regardless of the number of copies. Operations on the Recognition Screen When “User Management” is set by the administrator, the users will be asked to identify themselves (“User identification access”: if he/she is registered or not) during operations. The user identification procedures will differ according to the Recognition and Identification System decided by the administrator. • • • • • • 2 Up Multi-Up Print Layout Program Scanning Side - ADF Ink Saving Important!: • Make sure to enter the print quantity before pressing the key. The original is printed by switching the Output Tray to match on the quantity. If you press the key when the print quantity is 0, master-making from the machine will start. Note: • You can change “Link-Free Volume” from “Admin.” so as to switch the Output Tray. )p.174 Tip: Auto Idling When “Auto Idling” is set to ON, idling operations may be activated when master-making process is initiated. Factory default is set to idle automatically at the beginning of the master-making when the machine is inactive for over 12 hours. To toggle “Auto Idling” ON/OFF, or to modify number of hours before activating next idling, go to the Admin. screen. )p.172 Idling can also be manually initiated when making a master. )p.151 48 Printing from a Paper Document or Book Note: • A PIN code and USB Flash Drive are used in the Recognition and Identification System. Contact your administrator for the PIN code and the USB Flash Drive you have to use. When the PIN code Input Screen is displayed Enter the PIN code using the Print Quantity Keys and touch [OK]. The initial screen will be displayed after the user has been identified. Note: • If an incorrect PIN code is entered, an error message will be displayed. Re-enter the correct PIN code. Basic Operations When registered USB Flash Drive Screen is displayed Connect the registered USB Flash Drive to the USB slot. The initial screen will be displayed after the user has been identified. Note: • If an unregistered or unusable USB Flash Drive is connected into the machine, an error message will be displayed. Connect the registered USB Flash Drive. Important!: • After printing is completed, press the key to log out before leaving the machine. If you do not log out, the logged-in state will remain until “Auto Clear” is activated. During this time, anyone can use the machine (as you) without logging in. )p.172 Printing from a Paper Document or Book 49 Basic Operations Printing from a Computer Data [Direct Print] [USB Job List] This machine can directly print the original created on the computer by connecting the computer and machine by cable. The data will be digitally processed into a master, thus achieving higher quality prints than the master-making of scanned originals. Furthermore, a USB slot for connecting a USB Flash Drive is supplied with this machine so that you can print by connecting a USB Flash Drive that stores the data of originals to the machine even if the computer and machine are not connected by cable. USB Flash Drive Connect the USB Flash Drive to the USB slot Note: • First, install a proper printer driver on your computer. See the RISO Printer Driver User’s Guide for installation details. • Document data created on your PC can be stored in the optional Document Storage Card DM-128CF attached to the machine. • This manual provides only a summary of functions available when printing from a computer. See RISO Printer Driver User’s Guide for further details on sending data and other settings. 50 Printing from a Computer Data [Direct Print] [USB Job List] Basic Operations Auto Process and Stop Timing Auto Process is a combined automated steps of receiving data from the computer, making a master, and printing. To activate “Process”, open the printer properties dialog box on the computer and select “Auto-process”. (A proof copy will not be printed.) During each process, in order to adjust settings or to change paper, you can stop the operation. To temporarily halt an operation during the creation of a master or during print process, select one of the following three options for “Process” in the printer properties dialog box. • Pause before “Master” Halts the operation before master-making: To change settings, to change paper and to change Print Drum (Cylinder) • Pause before “Print” Halts the operation before printing: To print proof, to adjust ink density, to adjust positioning and to change printing speed • Auto-process “OFF” Stops twice; before making a master, and again before printing. Receive data from computer Auto-process “ON” Stop before making a master Master Making Stop before printing --- --- Yes --- Pause before “Print” --- Yes Auto-process “OFF” Yes Yes Pause before “Master” Printing Note: • The timing for stopping printing can also be changed from the display of the machine. )p.59 Printing from a Computer Data [Direct Print] [USB Job List] 51 Basic Operations Printing Computer Data [Direct Print] The computer and printer must be connected by cable. Note: • When “User Management” is set by the administrator, the users will be asked to identify themselves during operations. )p.49 1 Make sure the machine is ON. Check the Control Panel. 5 Note: • When the power is OFF, both the Display and the key are off. Turn the power ON. )p.36 • The machine automatically wakes up from Energy Saving mode when data is sent from a computer, and it starts processing the data. 2 Check for printing paper. Make sure paper is loaded. To load or to change the paper, see the following page. )p.39 After replacing with paper of a different size, adjust the position of the Receiving Tray Paper Guides and Paper Stopper. )p.38 3 Set printing options from your computer screen. Use the printer driver. Perform printing from the control panel. The displayed screen and operation procedure differ depending on the “Auto-Process” (Guide tab) setting of the printer driver. Printing with Pause before “Master” The Master Making Basic Screen in step 2) is halted depending on the use of the machine or Admin. settings. In this case, press the key. 1) Touch [Pause]. Ready to Make Master Multi-Up Print D-Feed Check Black Important!: • Make sure to remove the checkmark from the “Collate” option in the Print dialog box. Note: • If you are using RISO Network Card, you can check the machine status (power ON/OFF, paper settings, etc.) remotely from your computer monitor. 4 Click [OK] on the print dialog box. Data is sent from the computer. When the machine receives data, a print job automatically starts in accordance with the printer driver settings. Skip to step 6 if you are printing in Full Auto. 52 Printing from a Computer Data [Direct Print] [USB Job List] The Job List screen is displayed. Basic Operations 2) Touch [Output]. Note: If you want to operate the ID print, touch [ID Print Job]. )p.54 )p.195 Document_1.doc RISO 100 10 Document_2.doc RISO 200 1 Document_3.doc RISO 50 2 • If the data contains multiple pages, repeat the same steps for each page. • Entering the number of copies from the Print Quantity Keys will override the number specified in the Print dialog box. • For “ID Print”, printing starts with specified Auto Process mode after recognition. • To manually stop a job during master-making or printing operation, press the key. In mastermaking process, the machine will stop after the master is made. In the printing process, the machine will stop printing. Press the key to resume the job. 6 Remove the printed paper. The following screen appears. Ready to Make Master Document_1.doc Owner: RISO Date&Time: Nov25,10 05:30 Format: A4 Open the Receiving Tray Paper Guides and remove the paper. Note: • After printing is completed, the master remains on the Print Drum (Cylinder). To protect confidential documents from unauthorized duplication, use the Confidential feature to discard the master after printing. )p.149 Black 3) Press the key. After making a master, start printing. Tip: Printing with Pause before “Print” A master is made after receiving the data. The machine stops after printing a proof copy. 1) Check the proof copy and adjust the settings as needed. key. Printing starts. When Linked Printer is connected to the machine (Not available for RZ1090U) “Auto-Link” changes the Output Tray according to the print quantity. )p.168 )p.204 2) Press the Printing with Auto-process “OFF” 1) Follow steps 1 to 3 in “Pause before “Mas- 2) 3) ter””. Stop after making a master and printing a proof copy. Check the proof copy and adjust the settings as needed. Press the key. Printing starts. Printing from a Computer Data [Direct Print] [USB Job List] 53 Basic Operations Tip: Job List Screen Job List Close Pause Owner Document_1.doc RISO Clear Cps. Page 100 10 Output Waiting Job(s) Document_2.doc RISO 200 1 Document_3.doc RISO 50 2 Clear File name only ID Print Job Pause Once the data is received, touch on the Basic Screen to review current Job List. From the Job List screen, you can initiate output for jobs pausing for output, or cancel jobs that are “Paused/Data-Mapping/Waiting”. Tip: ID Print The data sent from the printer driver as the “ID Print” is retrieved from the ID Print Job Screen and printed. Touch [ID Print Job] to display the Recognition Screen, and follow the message on the screen. The timing of the Recognition Screen differs depending on the “User Management” setting set by the administrator. )p.172 Document_4.doc RISO 25 3 Document_5.doc RISO 300 1 Note: • To set the “ID Print” in the printer driver, a user registration number (ID) is required (one or two digits). Contact your administrator for the PIN code or registered USB Flash Drive, and the user registration number (ID). 54 Printing from a Computer Data [Direct Print] [USB Job List] Basic Operations Printing USB Data [USB Job List] Even if the computer and machine are not connected by cable, you can print original data via a USB Flash Drive. It is useful when the computer and printer are placed in different places or printing with RZ10 Series in outside location. Note: • When “User Management” is set by the administrator, the users will be asked to identify themselves during operations. For details, see )p.116. 1 Connect the USB Flash Drive to the computer. 6 Note: Connect the USB Flash Drive that contains the original data to print to the USB slot. • If the Recognition and Identification System (“Recognized by”) is set to “USB Flash Drive”in the “User Management”, it is also convenient for you to use the registered USB Flash Drive for outputting data. 2 Set printing options from your computer screen. Use the USB flash-via-Printer Driver. Note: • Make sure to remove the checkmark from the “Collate” option in the Print dialog box. 3 4 Important!: • While processing the data, do not remove the USB Flash Drive. This will cause data to disappear and the USB to malfunction. Click [OK] in the print dialog box. The data created on the computer is stored in the USB Flash Drive. Note: • If the “USB print (Auto Process)” has been set as the output method (Guide tab), connecting the USB Flash Drive starts master-making/ printing process as per the “Process” setting. For detailed settings, refer to the “RISO Printer Driver User's Guide”. Make sure the machine is ON. Check the Control Panel. Note: • When the power is OFF, both the Display and the key are off. Turn the power ON. )p.36 • If the key is lit, the machine is in the Energy Saving mode. Press the key to cancel the Energy Saving mode. 5 7 Touch [Functions] on the Master Making Basic Screen. Ready to Make Master Basic Check for printing paper. Page (A4) Make sure paper is loaded. To load or to change paper, see following page. )p.39 After replacing with paper of a different size, adjust the position of the Receiving Tray Paper Guides and Paper Stopper. )p.38 Line Multi-Up Print Black Selections Functions Contrast Size Admin. Paper Auto A4 D-Feed Check READY Id l e In fo Printing from a Computer Data [Direct Print] [USB Job List] 55 Basic Operations 8 Confirm the retrieved data. 10 Use the thumbnail to check whether the specified Touch [USB Job List]. data is the desired data or not. Ready to Make Master NewsLetter Format: A4 Ink Saving Owner:RISO Date&Time:Nov25,10 19:04 Interval Renew Page Auto Page Renewal From the “USB Job List” retrieve screen, you can confirm retrieved data and specify output settings. See )p.198 for operational details. USB Job List 1_usb_folder Close Free Area: 98 appears. NewsLetter.doc Nov25,10 FaxReport.doc Nov25,10 SummaryTable.xls Nov25,10 Report.doc Nov25,10 View edit [Retrieve]. 11 TheTouch data is retrieved and the following screen ID Print Job Ready to Make Master NewsLetter.doc Owner: RISO Date&Time: Nov25,10 19:04 Format: A4 Storage Memory The USB Job List Screen (with “Non-ID Print”) is displayed. (The “ID Print Job” button is displayed on the screen.) Black 9 Touch the data to print. Note: The “USB Job List” retrieve screen is displayed. If you are selecting data stored in a different folder, touch “Cancel”, and touch that folder’s tab. • You can change the output directions and stop timing settings on Master Making Basic Screen. For details, see )p.28 and )p.57. Note: • To retrieve the ID print, touch [ID Print Job]. • When “Management Level” is set to “Low/ Admin tab only” in the “User Management”, [ID Print Job] will not be displayed. • If the stored data is not shown on the screen, touch or to display it. Enter the number of copies using 12 the Print Quantity Keys. The entered number is displayed on the Print Quantity Display. Press the 13 Data is printed. key. After this, follow the same operations for paper documents. 56 Printing from a Computer Data [Direct Print] [USB Job List] Basic Operations Changing Output Directions Output can be controlled from the Master Making/Print Basic Screens. Ready to Make Master Master Making Basic Screen Basic • [Preview] You can check the master making image of the page currently awaiting creation. Selections Document_1.doc Owner: RISO Date&Time: Nov25,10 05:30 Format: A4 Functions P.1/4 Preview Admin. Paper Skip Page A4 Note: Clear All • In “Preview”, all received original data is displayed as a master making image. Portions outside the print area do not actually print. Process: Black Auto-process “OFF” READY Pause Job Separation Info • [Skip Page] Cancels a pending page, and start processing the next page. Use this button when current file has extra, unwanted pages. • [Clear All] Deletes all currently queued jobs. Use this button to delete a job sent by a mistake, or pending jobs no longer needed. Print Basic Screen • [Renew Page]: You can recreate another master when the current one is damaged without having to receive original data from the computer. Note: • If multiple pages exist, only the last page will be processed. • “Rotate” can also be specified. • The confirmation screen for each respective button appears when touched. Touch [OK] to implement the instructions. Important!: • [Skip Page] and [Clear All] are disabled during master-making or printing processes. Press the key to modify directions while master-making or printing is in progress. (In master-making process, the operation will stop after the master is made. In print process, the print job is halted.) Note: • Pressing either the key or the key while waiting for a command (under Ready to Make Master/Ready to Print screens) will delete the pending job. Printing from a Computer Data [Direct Print] [USB Job List] 57 Basic Operations When selecting [Skip Page] When selecting [Clear All] 1 1 Touch [Skip Page]. Ready to Make Master Ready to Make Master Document_1.doc Owner: RISO Date&Time: Nov25,10 05:30 Format: A4 Document_1.doc Owner: RISO Date&Time: Nov25,10 05:30 Format: A4 Black Black 2 Touch [Clear All]. 2 Touch [OK]. Master-Making for Next Page will be Started OK? Cancel OK Stops processing the current page and moves on to process the next page. 58 Printing from a Computer Data [Direct Print] [USB Job List] Touch [OK]. Current Job will be Cleared OK? Cancel OK Clears current job. Starts processing next data in queue. Basic Operations Changing Stop Timing Stop timing as set on the printer driver takes priority by default. However, the settings can be changed on the machine while the machine is halted. Note: • If “Process” is set to “Auto-process “ON” in the Printing Property of the printer driver, press the operation and to make changes. 1 Touch the “Process” function button. 3 key to stop the Touch [OK]. Returns to Basic Screen. Auto Print setting is updated. Ready to Make Master Basic Selections Document_1.doc Owner: RISO Dete&Time: Nov25,10 05:30 Format: A4 Functions P.1/4 Preview Admin. Paper Skip Page A4 Clear All Process: Black Pause before “Master” READY Pause Job Separation Info The Process screen appears. 2 Select the desired function. Process Cancel OK Auto-process “ON” Pause before “Master” Pause before “Print Print” Auto-process “OFF” • [Auto-process “ON”]: Makes a master then automatically prints. • [Pause before “Master”]: The operation stops before making a master. • [Pause before “Print”]: After a master is made and a proof copy is printed, the operation stops. • [Auto-process “OFF”]: Stops before making a master, and then again before printing. Note: • See )p.52 for details regarding operations after each stop. Printing from a Computer Data [Direct Print] [USB Job List] 59 Functions for Master-Making Selecting Image Processing Mode [Image] In order to make a master best suited for the original document, select an appropriate mode depending on whether original contain only text (Line), photo, or both of them. Note: • Default Image Processing mode can be set on the Admin. screen. )p.169 1 Touch [Page] on the Master Making Basic Screen. Ready to Make Master Basic Page (A4) Selections Functions Contrast Size Auto Line A4 Image (Detailed settings) Black READY Idle Info Standard Select for photos other than [Portrait] or [Group]. Portrait Use this setting for pictures of one or two individuals from the bust up. This type of image processing is particularly good for printing photos of faces. Group This setting is for group photos that are over-exposed. This process is effective for restoring facial features that have become washed out by a flash. The Group setting is not for photos with faces that are overly dark. It may be more effective to select [Standard] for such photos. Select the appropriate Image Processing mode for the original. Ready to Make Master Image Cancel Basic Page Line Line OK Admin. Image Type Photo Standard Duo Portrait Pencil Group Multi-Up Print Black READY Idle [Duo] Line Select to print small text clearly. Photo Select to print photos more clearly (brightly). Shadow off Select to clear the background color (colour) of the dark-color (colour) originals (such as newspapers). [Shadow off] is selectable aside from [Line] and [Photo]. Info • [Line]: Only text contained; e.g., text document, newspaper • [Photo]: Only photos contained • [Duo]: Both text and photos contained • [Pencil]: pencil drawings or lightly printed documents 60 Selecting Image Processing Mode [Image] Description [Photo] D-Feed Check Multi-Up Print 2 Admin. Paper Touch [Photo], [Duo] or [Pencil] to select more detailed settings. [Pencil] Darker Select to print faint originals clearly. Lighter Select to print cut-and-pasted pencil drawings with shadows. Functions for Master-Making 3 Touch [OK]. Returns to the Master Making Basic Screen. Image Processing mode is updated. Note: • Some functions are not available in certain Image Processing mode settings. Line Dot Process Photo Duo — Contrast (Auto) Pencil — — — — — — Contrast (1-5) Contrast Adj — Tone Curve — : available — : not available • In the [Line] mode, when [Contrast] is set to [Auto], the background color (colour) of the original is automatically deleted. )p.62 Selecting Image Processing Mode [Image] 61 Functions for Master-Making Selecting Scanning Contrast for the Original [Contrast] Scanning contrast can be adjusted to accommodate background color (Colour) or ink density of the original. Specify by selecting Auto or numeric levels (1-5). In the Auto mode, “Contrast” is automatically adjusted to the background color (Colour) of the original for printing. Important!: • “Auto” is available only when Image Processing mode has been set to “Line”. )p.60 Note: • Default Scanning Contrast can be set on the Admin. screen. )p.169 1 Touch [Contrast] on the Master Making Basic Screen. 3 Ready to Make Master Basic Page (A4) Selections Functions Contrast Size Auto Line A4 D-Feed Check Multi-Up Print Black 2 Admin. Paper READY Idle Info Touch the desired contrast or [Auto]. Ready to Make Master Contrast Cancel Basic Page Admin. Auto A4 Line Multi-Up Print Black OK D-Feed Check READY Idle Info Levels of scanning contrast 1) 2) 3) 4) 5) : Very Light : Light : Standard : Dark : Very Dark 62 Selecting Scanning Contrast for the Original [Contrast] Touch [OK]. Returns to the Master Making Basic Screen. “Contrast” is updated. Functions for Master-Making Enlarging/Reducing Originals [Standard Ratio] [Margin+] [Auto] [Free] [Zoom] The document can be printed enlarged or reduced. The following methods can be used to enlarge/reduce the original. Standard Ratio Enlarging or reducing a standard-sized original (A4, B5, Letter, Legal etc.) to print in another standard size. Margin+ Reducing the original slightly. This feature is useful when allowing binding margins, or when text or diagram extends beyond the printing area. )p.20 Specify reduction rate of 90%-99% on the Admin. screen. )p.171 Note: • “Margin+” and “Standard Ratio” can be selected at the same time. Auto The original can be automatically enlarged or reduced to according to the paper size in the Paper Feed Tray. Free The top/bottom and left/right of the original can be magnified or reduced and printed as desired. Specify the zoom ratio between 50% and 200% in increments of 1%. Zoom Allows you to specify numerical resize ratio. Specify the zoom ratio between 50% and 200% in increments of 1%. Note: • To avoid paper jam, flipping or ink smudges on the back side by design the machine does not print too close to the edge. The top edge in particular needs 5 mm (3/16") of margin space. )p.20 5 mm (3/16") wide area on the top edge (marked ) of the Glass Platen (or the ADF unit) cannot be scanned, regardless of enlargement or reduction settings. • Do not position the original within 5 mm (3/16") of the top edge, or the top edge of its printed image will be cut off. This 5 mm (3/16") margin will remain even in the “Max. Scan” setting. )p.92 • If the original document has no margin on its top edge, the top 5 mm (3/16") of its print will be cut off even when “Margin+” is selected. Move the original about 5 mm (3/16") inwards from the top edge of the Glass Platen and reduce the size. Enlarging/Reducing Originals [Standard Ratio] [Margin+] [Auto] [Free] [Zoom] 63 Functions for Master-Making Enlargement and Reduction by Standard Ratio [Standard Ratio] [Margin+] [Auto] 1 Touch [Size] on the Master Making Basic Screen. Note: • “Standard Ratio” and “Margin+” can be selected at the same time. The “Current” field will indicate the combined result of “Standard Ratio” × “Margin-Plus Rate” when both are selected. • When the page size (original size) is not detected, “---” is displayed. Ready to Make Master Basic Page (A4) Selections Functions Contrast Size Line Multi-Up Print Black 2 Admin. Paper Auto B4 Margin+ D-Feed Check READY Idle Info Touch the button corresponding to the desired size. 3 Touch [OK]. Returns to the Master Making Basic Screen. “Size” is updated. Touch [100%] to restore the original size. For original with no margins, touch [Margin+] before printing. Important!: • The “Margin+” setting is not available when “Auto”, “Zoom” or “Free” is selected. 64 Enlarging/Reducing Originals [Standard Ratio] [Margin+] [Auto] [Free] [Zoom] Functions for Master-Making Enlargement/Reduction of a Changed Aspect Ration [Free] 1 Touch [Size] on the Master Making Basic Screen. Note: • Print Quantity Keys can also be used to enter numbers. • Press the key to restore the original size (100%). Ready to Make Master Basic Page (A4) Line Multi-Up Print Black Selections Functions Contrast Size Admin. Paper Auto B4 READY Idle 3 Touch or to adjust zoom ratio in horizontal or vertical directions. Cancel Cancel Recommend: 100% Current: 129% OK OK Margin+ ( Auto Legl Horizon Zoom 94%) Ldgr Lttr Ve r t i c a l Free Returns to the Master Making Basic Screen. “Size” is updated. Info Touch [Free]. Paper: Ldgr Feed Touch [OK]. D-Feed Check 2 Size Page: Lttr Free 4 Ldgr (Numeric keypad is available for input) 121% Legl Ldgr The reproduction size can be increased/ decreased in increments of 1%. Enlarging/Reducing Originals [Standard Ratio] [Margin+] [Auto] [Free] [Zoom] 65 Functions for Master-Making Enlarging and Reducing with the Zoom Function [Zoom] 1 Touch [Size] on the Master Making Basic Screen. Note: • Print Quantity Keys can also be used to enter numbers. • Press the key to restore the original size (100%). Ready to Make Master Basic Page (A4) Line Multi-Up Print Selections Functions Contrast Size Auto B4 READY 2 Touch [Zoom]. 3 Touch Paper: Ldgr 4 Touch [OK]. Returns to the Master Making Basic Screen. “Size” is updated. D-Feed Check Black Size Page: Z Lttr oom Admin. Paper or Idle Info to change ratio. Cancel Cancel Recommend: 129% Current: 100% OK OK Margin+ B5 Auto ( 94%) Ldgr Lttr Legl Ldgr Free (Numeric keypad is available for input) Zoom 121% Legl Ldgr The reproduction size can be increased/ decreased in increments of 1%. 66 Enlarging/Reducing Originals [Standard Ratio] [Margin+] [Auto] [Free] [Zoom] Functions for Master-Making Using Custom-Sized Paper [Paper] The machine automatically detects standard-sized paper in the Paper Feed Tray to create a correct size master for printing. However, because non-standard paper sizes cannot be detected, they must be manually specified before a master can be made. Important!: • Custom paper size must be registered on the Admin. screen. Failure to do so may make an incomplete master. )p.180 1 Touch [Paper] on the Master Making Basic Screen. Ready to Make Master Basic Page (A4) Selections Functions Contrast Size Line Multi-Up Print Auto A4 D-Feed Check Black 2 Admin. Paper READY Idle Info Touch the desired paper size. Important!: • Previously recorded custom paper sizes is displayed on this screen. Make sure to register any custom sizes not displayed here prior to use. )p.180 Note: • Touch [Auto] to use standard-size paper. 3 Touch [OK]. Returns to the Master Making Basic Screen. “Paper Size” is updated. Using Custom-Sized Paper [Paper] 67 Functions for Master-Making Automatic Printing [Auto-Process] Master-making and printing can be performed automatically in sequence. When “Auto-Process” is selected, simply enter number of copies to print, then press the key. Note: • When printing is completed, Print Quantity will restore the number originally entered. • On the Admin. screen, you can make such a setting that “Auto-Process” is always set to ON when you reset or start the machine. )p.170 Press the key. The Auto-Process indicator turns on. Note: • To cancel “Auto-Process”, press the The indicator turns off. key again. • With factory default setting, if multiple originals are placed in the optional ADF unit and “Auto-Process” is set to ON, all originals will be printed automatically. 68 Automatic Printing [Auto-Process] Functions for Master-Making Processing Photos with Dot Screen [Dot Process] “Dot Process” function processes photo originals with dot screening in order to print more clearly. Select from four types of dot patterns. Important!: • “Dot Process” is not available when Image Processing mode has been set to “Line” or “Pencil”. 1 Touch [Dot Process] on the Functions Screen. 3 Touch [OK]. Returns to the Functions screen. “Dot Process” setting is updated. Ready to Make Master Basic Selections Functions Admin. Program Tone Curve Job Memory Multi-Up Print Dot Process 2 Up Contrast Adj Book Shadow P . 1/4 2 Select a dot pattern. Ready to Make Master Dot Process Basic Selections Cancel Functions OK Admin. OFF P .1 / 4 Number Equivalent Lpi 1 2 3 4 212 106 71 53 Note: • Touch [OFF] to cancel the “Dot Process”. Processing Photos with Dot Screen [Dot Process] 69 Functions for Master-Making Adjusting Photo Contrast [Contrast Adj] For originals that have ill-defined photos, adjust the contrast to print more clearly. There are two ways to adjust contrast. Important!: • If the “Image” is set to “Line”, “Duo” or “Pencil”, “Contrast Adj” cannot be used. 1 Touch [Contrast Adj] on the Functions Screen. Ready to Make Master Basic Selections Functions Admin. Program Tone Curve Job Memory Multi-Up Print Dot Process 2 Up Contrast Adj Book Shadow P. 1/4 2 Touch the button of the contrast to use. Ready to Make Master Contrast Adj Basic Selections OFF Cancel Functions Lighter OK Admin. Darker P.1 / 4 • [Lighter]: Lightens dark sections. Use this setting if the entire photo is underexposed and the target subject of the photo is illdefined. • [Darker]: Clarifies lighter portions. Use this setting if the entire photo is overexposed and the target subject of the photo is illdefined. 3 Touch [OK]. Returns to the Functions screen. “Contrast Adj” setting is updated. 70 Adjusting Photo Contrast [Contrast Adj] Functions for Master-Making Adjusting Photo Gradation [Tone Curve] You can adjust the light and shadow portions of a photo by 3 tones respectively. Important!: • If the “Image” is set to “Line”, “Tone Curve” cannot be used. 1 Touch [Tone Curve] on the Functions Screen. Ready to Make Master Basic Selections Functions Admin. Program Tone Curve Job Memory Multi-Up Print Dot Process 2 Up Contrast Adj Book Shadow P. 1/4 2 Touch the “Lights” and “Shadows” adjustment buttons. Ready to Make Master Tone Curve Basic Cancel Selections Functions Gradation Image Lights OK Admin. Shadows P.1 / 4 • Lights: Adjusts the portion of the picture most exposed to light. • Shadows: Adjusts the portion of the picture least exposed to light. Use [+1] or [-1] to strengthen or weaken each respectively. 3 Touch [OK]. Returns to the Functions screen. “Tone Curve” setting is updated. Adjusting Photo Gradation [Tone Curve] 71 Functions for Master-Making Saving Ink [Ink Saving] Selecting “Ink Saving” makes a master that requires less ink when printing. Important!: • The ink consumption save process may result in lighter prints than usual. • This function is not available at the time of printing. It must be selected before the master-making process is started. • “Contrast” and “Print Density Adjustment” functions are not available when “Ink Saving” is selected. )p.62 )p.101 Touch [Ink Saving] on the Functions Screen. Ready to Make Master Ink Saving Basic Selections Functions Admin. Editor Ink Saving D-Feed Check Interval Idling Action Paper Interposal Confidential Renew Page P . 3/4 “Ink Saving” is set. “ Ink Saving” will appear in the message area. Note: • “Ink Saving” is a useful function for master-making. Even if this function is set or canceled during printing, it doesn't reflect on the master that is currently rolled around the Print Drum (Cylinder). The setting will be reflected in the next master. 72 Saving Ink [Ink Saving] Functions for Master-Making Printing Multiple Originals on One Sheet [2 Up] [Multi-Up Print] “Multi-Up” function prints multiple originals on one sheet. 2 Up Prints two copies of the same original side-by-side on one sheet of paper. Multi-Up Print One or multiple originals (up to 4) can be printed on a single sheet of paper. “Multi-Up Print” has the following three types: • Single-Original: A single original is printed multiple times. • Multiple-Original: Multiple originals are printed multiple times. • Multi-Up Tickets: You can print multiple long, thin custom originals such as tickets. Single-Original and Multiple-Original can print in quantities of 2, 4, 8 and 16 respectively. Important!: • Use standard-sized paper when using the “Multi-Up” function. With custom size paper placed, you cannot perform “Multi-Up” printing even when the size is stored on the Admin. screen. Note: • These functions cannot be used with the following functions. – – – – – – – – – Auto-Link Auto 90° Rotation Top Margin Book Shadow Binding margin Size (Auto) Layout Format (Auto) (in Scanning Mode) Ink Saving (If you change the “Image” setting between originals in Multiple-Original) Printing Multiple Originals on One Sheet [2 Up] [Multi-Up Print] 73 Functions for Master-Making Original Orientation and Print Results The orientation of the original differs depending upon the number of images. The orientation and print results for each possibility is shown below. 2 Up Prints two copies of the same original side-by-side on one sheet of paper. Glass Platen Multi-Up Print For Single-Original and Multiple-Original: Note: • When “Multiple-Original” is used in Multi-Up Print, the actual number of pages to be scanned is specified. In the case that the actual number of pages in the document is less than the number of pages specified in the mode settings, set an equivalent number of blank pages in the machine to make up for the specified number. (For example, if you want to make eight pages and there are only three originals, add a blank page to the originals and set the four sheets for scanning.) 2 Up (2 on 1) Single original For multiple originals Glass Platen 2nd original 1st original Up to 2 originals can be scanned. 74 Printing Multiple Originals on One Sheet [2 Up] [Multi-Up Print] Functions for Master-Making 4 Up (4 on 1) Prints four images of the original on one sheet of paper. Single original For multiple originals Glass Platen 2nd original 1st original Up to 2 originals can be scanned. 8 Up (8 on 1) Prints eight images of the original on one sheet of paper. Single original For multiple originals Glass Platen 1st original 2nd original 3rd original 4th original Up to 4 originals can be scanned. 16 Up (16 on 1) Prints 16 images of the original on one sheet of paper. Single original For multiple originals Glass Platen 1st original 2nd original 3rd original 4th original Up to 4 originals can be scanned. Printing Multiple Originals on One Sheet [2 Up] [Multi-Up Print] 75 Functions for Master-Making For Multi-Up Tickets: Glass Platen “Multi-Up Tickets” cannot be used with multiple originals. The number of images printed is determined by the width of the ticket. Margin Leave a margin of at least 5 mm (3/16") on the top edge of the Glass Platen. Allowing a proper margin is critical in wellbalanced Multi-Up positioning. )p.20 Note: • A margin on the top edge will remain regardless of enlargement or reduction settings. 5mm (3/16") Set Position (Top Side) Orientation of Print Paper Always place paper in the Feed Tray as shown below. Paper feeding direction Multi-Up Interval “Multi-Up” performs scanning for the number of sheets. The interval between the first scan and the second scan is called “Multi-Up Interval”. Replace originals or change settings for the second scan during the “Multi-Up Interval”. Note: • Default “Multi-Up Interval” can be set on the Admin. screen. The factory default is 15 seconds.)p.171 76 Printing Multiple Originals on One Sheet [2 Up] [Multi-Up Print] Functions for Master-Making 2 Up Operation 1 Set the original and print paper. Important!: 3 • Pay attention to the orientation of the original. For “2 Up”, make sure to place the original as the diagram demonstrates. The same is true when using the ADF unit. Make necessary settings. Afterwards, perform the same operation as the normal master-making and printing process. The reproduction size needs to be set according to the combination of the original size and printing paper size. Set the reproduction size by referring to the table below. Original • Make sure to load paper as shown below (Portrait direction). Printing Paper A4 B5 A5 B6 A3 100% 116% 141% 163% B4 87% 100% 123% 142% A4 71% 82% 100% 116% B5 61% 71% 87% 100% Original Paper output direction Printing Paper Note: • With the optional ADF unit you can print two different originals side by side on a single sheet of paper (2 in 1 printing). Set the two originals one above the other. • To print two copies of the same original side by side on a single sheet of paper (2 Up printing), set the original on the Glass Platen. 2 Touch [2 Up] on the Functions Screen. Ready to Make Master Multi-Up Basic Selections Functions Admin. Program Tone Curve Job Memory Multi-Up Print A6 B7 A7 B8 A3 200% --- --- --- B4 173% 200% --- --- A4 138% 163% 200% --- B5 122% 141% 173% 200% Original Printing Paper 4 Letter Statement Ledger 100% 127% Legal 77% 100% Letter 66% 100% Statement 50% 66% Press the key. RESET PROOF Dot Process 2 Up Contrast Adj Book Shadow P . 1/4 START STOP Starts scanning of the original. Printing Multiple Originals on One Sheet [2 Up] [Multi-Up Print] 77 Functions for Master-Making Operation for Multi-Up Printing 1 Set the original and print paper. Important!: 3 • Pay attention to the orientation of the original. )p.74 • Make sure to load paper as shown below (Portrait direction). Select the Page Size to use. Touch the Page Size same as the original and touch [Next]. Ready to Make Master Page Size Basic Selections Cancel Functions A3 B5 B4 B5 Next> Admin. A4 A4 Paper output direction P .1 / 4 Reproduction Size is set automatically and MultiUp Print screen is displayed. Note: • It is convenient to place all originals in the optional ADF unit when using the “MultipleOriginal” mode. )p.43 2 4 Touch [Single] for Single-Original, touch [Multiple] for Multiple-Original. Touch [Multi-Up Print] on the Functions Screen. Ready to Make Master Multi-Up Print Basic Ready to Make Master Basic Selections Functions Selections Admin. Admin. Single Program Tone Curve Job Memory Multi-Up Print Dot Process 2 Up Contrast Adj Book Shadow P . 1/4 Close Functions Multiple Ticket P .1 / 4 5 Touch the button of the number of images to use. To cancel the “Multi-Up Print” settings or return to the previous screen, touch [Cancel]. 78 Printing Multiple Originals on One Sheet [2 Up] [Multi-Up Print] Functions for Master-Making 6 Touch [OK]. Note: Returns to the Functions screen. “Multi-Up Print” setting is updated. The reproduction size is automatically set according to the selected number of images based on the paper size and original size to use. 7 Make necessary settings. • When “Multiple-Original” is used in Multi-Up Print, the actual number of pages to be scanned is specified. In the case that the actual number of pages in the document is less than the number of pages specified in the mode settings, set an equivalent number of blank pages in the machine to make up for the specified number or tkey in the status of waiting for press the the next original. Master-making starts. )p.74 “Original Orientation and Print Results” • When using the “Auto Process” setting, printing will continue automatically when an original is set on the ADF unit. • To cancel a “Multi-Up Print” setting once it has been confirmed, follow step 2, touch [OFF] and then [ON] on the screen. 8 Press the Make various settings as needed. • When the reproduction size is set before setting Multi-Up Print, the reproduction size is invalidated and changes to the size setting suitable for the selected number of images. • The image of the 2nd original and subsequent originals can be changed to something different from the image of the 1st original. key. RESET PROOF START STOP Scanning of the original starts. After scanning has finished, follow the usual steps to print. Important!: • After displaying the message, “Place Another Original and Press Start Key To Cancel, Press Stop Key” the machine waits for the next original to be loaded. Set the next original and press . Press to cancel the “Multi-Up Print” mode. • The Glass Platen and the optional ADF unit cannot be used at the same time. If using the Glass Platen to scan the first sheet of the original, you must continue to use the Glass Platen to scan the rest of the document. • To scan the original with the optional ADF unit and use the “Single-Original”, you need to set the original twice. Printing Multiple Originals on One Sheet [2 Up] [Multi-Up Print] 79 Functions for Master-Making Operation for Multi-Up Tickets For “Multi-Up Tickets”, the specification of the short edge size of the original (the width) is used to calculate the number of images that can be printed on one sheet of paper (print paper size divided by short edge size of the original). A ticket width of between 50 mm (2") and 210 mm (84/16") can be specified. Ex.) Short edge of the original 50 mm (2") Long edge of the print paper 297 mm (1111/16") (A4 size) 297÷50=5 (1111/16"÷2"=5) with a remainder of 47 mm (111/16") In this example, 5 images print on one sheet of paper. original 50mm (2") Printed paper 297mm (11 11/ 16") Paper output direction More than 5mm (3/16") 1 Blank Set the original and print paper. Place the original on the Glass Platen. Important!: • Pay attention to the orientation of the original. • Make sure to load paper as shown below. 3 Select the Page Size. Touch the Page Size same as the original and touch [Next]. (In “Multi-Up Tickets”, the Page Size selection will not affect the rest of the procedures.) Ready to Make Master Page Size Basic Paper output direction 2 Basic Selections Functions Tone Curve Job Memory Multi-Up Print Dot Process 2 Up Contrast Adj Book Shadow A3 B5 B4 B5 Next> Admin. A4 P .1 / 4 Reproduction Size is set automatically and MultiUp Print screen is displayed. Admin. Program Cancel Functions A4 Touch [Multi-Up Print] on the Functions Screen. Ready to Make Master Selections P . 1/4 80 Printing Multiple Originals on One Sheet [2 Up] [Multi-Up Print] Functions for Master-Making 4 Touch [Ticket]. Important!: • If you have enlarged/reduced size in step 8 (setting print functions), be careful about the following points. Ready to Make Master Multi-Up Print Basic Selections Single Close Functions Multiple Admin. Ticket P .1 / 4 5 – Specify the ticket width after enlarging/reducing. – If you magnified the size, make sure that the bigger size does not exceed the specified “Page Width” or the short edges of the print paper. – When magnifying, make sure to prepare paper that fits the enlarged size. 7 Touch [OK]. 8 Make necessary settings. 9 Press the Touch [ON]. Returns to the Functions screen. “Multi-Up Tickets” setting is updated. Make various settings as needed. key. Starts scanning of the original. After this, please follow the same operations for normally printing. Note: • To cancel a “Multi-Up Print” setting once it has been confirmed, follow step 2, touch [OFF] and then [OK] on the screen. You can specify the “Page Width”. 6 Touch or to specify the short edge size of the original (the width). Printing Multiple Originals on One Sheet [2 Up] [Multi-Up Print] 81 Functions for Master-Making Laying out continuous originals on one sheet of paper [Layout] Continuously arranging several originals on one sheet of paper is called “Layout”. This function is convenient when you want to save paper and make stapled documents. Important!: • “Layout” function cannot be used with “Auto 90°Rotation”. Setting items Page Size setting Set the size of original to use. Important!: • The reproduction size is determined from the page size and printing paper size. When the reproduction size is not appropriate, an error message is displayed. In such case, use printing paper of a different size or change the size of original. Number of images Set the quantity of originals to be laid out on one sheet of paper. • • • • 2UP 4UP 8UP 16UP Original orientation (direction of text on the original) The original orientation is determined by the set number of images. Set the original according to the orientation of characters on the original seen from the front side. Align Side or 1 1 Align Top 1 82 Laying out continuous originals on one sheet of paper [Layout] or 1 Functions for Master-Making Layout order Set the order of the images when the printed paper is placed in the orientation that allows the characters on the original to be read. Ex.) Number of images: 8UP, Original orientation (orientation of characters on the original): Align Side L-top to R R-top to L 1 2 3 4 4 3 2 1 5 6 7 8 8 7 6 5 L-top to B R-top to B 1 3 5 7 7 5 3 1 2 4 6 8 8 6 4 2 Note: • Depending on the “Number of images” and “Original orientation” settings, the possible settings for “Layout order” differ. Laying out continuous originals on one sheet of paper [Layout] 83 Functions for Master-Making 1 Set the original and print paper. Place the original on the Glass Platen or in the optional ADF unit. To place the original, see )p.43. Important!: The reproduction size is automatically set and the Layout screen is displayed. 4 Touch the button for the number of images to set. Touch the button for the number of images to be laid out and touch [Next>]. • Be careful with the orientation of the original. • Make sure to set the printing paper in the orientation shown in the figure below (the long side points in the direction of transfer). Paper output direction 2 Touch [Layout] on the Functions screen. Important!: • Check if the orientation of the originals has been set in the direction determined for the set number of images. Ready to Make Master Note: • To cancel the Layout setting, touch [Cancel]. 5 Set the orientation of characters of the original. Select [Align Top] or [Align Side] for the orientation of characters on the original seen from the touch panel side. 3 Select the page size to use. Touch the button corresponding to the size of the original and touch [Next>]. Ready to Make Master 6 7 Touch the layout order button to set. Touch [OK]. “Layout” is set and the Functions screen appears. 84 Laying out continuous originals on one sheet of paper [Layout] Functions for Master-Making 8 Configure print functions. 9 Press the Set various functions as needed. key. Scanning of the 1st page of the original starts. Scan all originals and make a mas10 ter. When you set the original on the Glass Platen, replace the original and repeat steps 8 and 9. Repeat scanning until the set number of images have been scanned. If the original has less pages than the set number of pages, touch Î [Yes] after all of the original has been scanned. The unscanned part becomes a blank. Ready to scan data Layout Page No.4 Basic Selections Functions Page (A4) Contrast Size Line Multi-Up Print Black Admin. Paper Auto A4 D-Feed Check READY Idle Info When original scanning is complete, a master is made and the Printing Basic Screen is displayed. Note: • The original is laid out in the scanned order. • If you want to cancel the layout setting after setting the number of images, perform step 2 to display the Layout screen. Touch [OFF] and then [OK]. Laying out continuous originals on one sheet of paper [Layout] 85 Functions for Master-Making Printing from Bound Documents [Book Shadow] You can erase the binding “spine” shadow in the center when printing from such bound originals with facing as magazines and books. The area to be erased (erasure width) can be selected. Moreover, magazines or books can be spread open on the Glass Platen and their pages printed onto separate sheets. Important!: • The original must be placed aligning center on the Glass Platen as shown below. When erasing the binding shadow or printing an original onto separate sheets by splitting the pages, set the original in the direction of A. A B • The following image areas are also erased (or half-toned). – A continuous black image area (non-white) from the edge of the original – A continuous black image area from the center of the original Note: • Book Shadow function cannot be used with the following functions. – – – – – – – Top Margin (when [Page split] is selected) Binding margin Ink Saving Scanning Contrast ([Auto]) Multi-Up Print Scanning Side -ADF Layout • If you use the “Book Shadow” with the Gauge Cover installed, the surrounding image gets black on the master. If the Gauge Cover is installed, remove the Gauge Cover and then use the “Book Shadow”. • If you are scanning a thick book such as an encyclopedia, raise the hinge of the glass platen cover and press down for best results. 86 Printing from Bound Documents [Book Shadow] Functions for Master-Making Erasing Shadows when Printing 1 Touch [Book Shadow] on the Functions Screen. • If you specify the erasure width, original detection is not performed automatically. Touch [Erasure Width], and then touch the [Page Size] for the magazine or book you have placed. Ready to Make Master Basic Selections Functions Note: Program Tone Curve Job Memory Multi-Up Print Dot Process 2 Up Contrast Adj Book Shadow P . 1/4 2 • If you also select “Page split”, you can print the left and right pages of a bound original separately. See “Splitting Facing Pages of a Bound Original when Printing” ()p.88). Admin. 4 Touch [OK]. Returns to the Functions screen. “Book Shadow” setting is updated. Touch [Erase] or [Halftone] for “Process”. • [OFF]: Book Shadow is not performed. • [Erase]: Erases shadows near the center and around the original. Select the size of spread original from “Page Size”. • [Halftone]: Photo processes the center shadow for a natural feel and deletes shadows that it can around the original. 3 Touch [Erasure Width] and [Page Size]. • If you set “Process” to “Halftone”, you can only select “Auto”. • If you set “Erasure Width” to “Auto”, original detection is performed automatically, and the erasure width is calculated from the detected size. Printing from Bound Documents [Book Shadow] 87 Functions for Master-Making Splitting Facing Pages of a Bound Original when Printing [Page split] 1 Touch [Book Shadow] on the Functions Screen. 4 Touch [B5], [A4], [B4] or [A3] for the magazine or book you have placed. Note: Ready to Make Master Basic Selections Functions • Select the size of the bound original. Admin. Program Tone Curve Job Memory Multi-Up Print Dot Process 2 Up Contrast Adj Book Shadow 5 Touch [OK]. Returns to the Functions screen. “Book Shadow” setting is updated. Note: • When “Page split” is set, the original is scanned twice. P . 1/4 2 Touch [Erase] or [Halftone] for “Process”. • In this case, “B” is printed first. Important!: 3 • When “Page split” is set, use A4 or B5 as printing paper. • To set the reproduction size, it is recommended to use [Auto]. • Make sure to set the printing paper in the orientation shown in the figure below (the long side points in the direction of transfer). Touch [Page split]. Paper output direction Page split If you set “Process” to “OFF”, you cannot select “Page split”. 88 Printing from Bound Documents [Book Shadow] Functions for Master-Making Cutting the Top Margin of the Original and Printing [Top Margin] You can cut the top portion of the margin to between 0 to 99 mm (0.0" to 3.9") and make a master. This feature enables you to skip the Registration marks* on the original and print on the finish-sized paper without any of these marks. * About the Registration Mark In the field of commercial printing, it is normal to print on paper that is larger than the finished size and then cut down to the finished size afterwards. The symbol that indicates the position to cut in this event is known as the registration mark. Important!: • When you are setting the “Size”, magnify/reduce using the area that skips the set value. • Do not use “Auto Reproduction Size”. • This function cannot be used with “Multi-Up Print” or “2 Up”. 1 2 Place an original. Place the original face down on the Glass Platen. Align center on the top edge, and close Platen Cover. )p.43 4 Touch width. Cancel Top Margin Basic Selections Functions The top margin of originals can be cut by a specified range OK Admin. OFF Ready to Make Master Selections to specify the cut Ready to Make Master Touch [Top Margin] on the Functions Screen. Basic or ON Functions Admin. Top Margin ADF Semi-Auto Binding Margin Preview Max. Scan Overlay Reservation Storage Memory 0 mm (0-99) (Numeric keypad is available for input) P. 2 / 4 You can set from 0 to 99 mm (0.0" to 3.9"). Note: • Print Quantity Keys can also be used to enter a value. P . 2/4 3 5 Touch [ON]. Touch [OK]. Returns to the Functions screen. “Top Margin” setting is updated. Ready to Make Master Cancel Top Margin Basic Selections Functions The top margin of originals can be cut by a specified range OK Admin. OFF ON 0 mm (0-99) (Numeric keypad is available for input) P. 2 / 4 Cutting the Top Margin of the Original and Printing [Top Margin] 89 Functions for Master-Making Adjusting the Master-Making position [Binding Margin] You can make a master by putting the binding margin on either the top, bottom, left and right of the original. The adjustable range is from 0 to 50 mm (0.0" to 115/16") on the top, bottom, left and right. Important!: • “Binding margin” is a function for adjusting the master-making position and not a function for adding a binding margin. • When the original has no margin, the image may extend out of the area for master-making. The part that is outside the master-making area is not used for master-making. • The position of the binding margin is the side that appears first when printed copies are discharged to the Paper Receiving Tray. • The binding margin can be set to either the Top, Bottom, Right, and Left of printed copies. • When auto reproduction is set, move the image to where it should appear after the magnification has been adjusted. • This function is available with “90° Rotation” or “Rotate”. Note: • When the Print Position Adjustment on the control panel is used in combination with the “Binding margin”, the Output Print Position can be moved by up to approx. 65 mm (29/16") against the position of the original image. • This function can be used to set the binding margins even when the original is set on the Glass Platen. • This function cannot be used with the following functions. – – – – – 1 Multi-Up Print 2 Up Overlay Scanning Side -ADF Layout Touch [Binding Margin] on the Functions Screen. Ready to Make Master Basic Selections Functions Admin. Top Margin ADF Semi-Auto Binding Margin Preview Max. Scan Overlay Reservation Storage Memory P . 2/4 90 Adjusting the Master-Making position [Binding Margin] 2 Touch [Top], [Bottom], [Left] or [Right] to adjust. Functions for Master-Making 3 Touch or distance. to specify the shift Note: • Print Quantity Keys can also be used to enter a value. • When you touch [Reduction], the image without a Shift designated for the Margin mode becomes the print image and the size is reduced around the center of the print image so that the original is completely printed within the paper. 4 Touch [OK]. The binding margin shift is set and the Functions Screen appears. Note: • When you want to cancel the once fixed binding margin, either press the key or touch [OFF] in step 2, and then touch [OK]. Adjusting the Master-Making position [Binding Margin] 91 Functions for Master-Making Making a Master that Utilizes the Maximum Printing Area [Max. Scan] When a master is made, automatic paper size detection and image size adjustment applies to allow appropriate print margins. This is to prevent paper jams, and to keep internal roller free of ink stains. By selecting “Max. Scan”, maximum printing area will apply to the scanned image, regardless of the print paper size or original document size. Be sure to check the sizes of the original document and the printing paper first. )p.17 Maximum printing area RZ1090: 291 mm × 425 mm (1115/32" × 1623/32") RZ1070: 291 mm × 413 mm (1115/32" × 161/4") Important!: • The 5 mm (3/16") margin on the top cannot be scanned even in the “Max. Scan” setting. • Do not use print paper smaller than the area of the image made on the master. • The entire surface of the Glass Platen must be clean. This may cause ink stains. By scanning the maximum size, dirt found outside the original document area will also be included in the master. This may cause the internal roller to be stained with ink. Touch [Max. Scan] on the Functions Screen. Ready to Make Master Basic Selections Functions Admin. Top Margin ADF Semi-Auto Binding Margin Preview Max. Scan Overlay Reservation Storage Memory P . 2/4 “Max. Scan” is selected. 92 Making a Master that Utilizes the Maximum Printing Area [Max. Scan] Functions for Master-Making Rotating the Original 180 Degrees to Make a Master [Rotate] When you are direct printing, you can rotate the original data received from a computer 180 degrees to make a master. When this function is used for the original data of a wide range of solid colors (colours) on the top side, you can prevent paper jams. After the machine receives the original data, touch [Rotate] on the Functions Screen. Ready to Make Master Basic Selections Functions Admin. Auto Page Renewal Special Paper Ctrl Rotate P . 2/2 “Rotate” setting is updated. Note: • When you send the original data from a computer, set “Auto Process” to [OFF] or [Pause before “Master”]. Rotating the Original 180 Degrees to Make a Master [Rotate] 93 Functions for Master-Making Checking the Print Image Prior to Making Master [Preview] You can check what the actual master will look like by previewing an image of the scanned original or an image of data sent from a computer. This function is handy for checking the layout or final image of a Multi-Up job. The operation and display timing differ depending upon the mode. Mode name (original type) When set When to display If “Auto Processing” is ON Printing from the Original Document When setting functions related to Master Making (settings from Functions) After Scanning the Original Scans the original, then temporarily stops to display preview. Scan Mode When setting functions (master making functions) related to Scanning (setting from Functions) After Scanning the Original When in scan mode, an original is scanned and then saved, so there is no “Auto Process” operation. However, if multiple originals are placed in an ADF unit, you can touch [Close] after reviewing the preview to start the scan of the next original. Printing Original Data from a Computer Stopping the print job prior to making a master (Pause before “Master”/Autoprocess “OFF”), after the machine has received the original data Displays when touching [Preview] A preview is not shown if data is sent from the printer driver with “Auto Print” “ON”. Retrieving Stored Data and Printing When retrieving stored data (set on the Storage Basic Screen) Displays when touching [Preview] If you touch [Preview], it displays immediately. Note: • It shows the scanned original as-is. A margin is required when actually printing. Check to make sure that the margins are sufficient. • In “Direct Print” operation, [Preview] will be displayed on the Master Making Basic Screen when data is received from the computer. )p.57 • When in Link mode (when a Linked Printer is connected), the original image after scanning and prior to output from the Linked Printer is previewed. 94 Checking the Print Image Prior to Making Master [Preview] Functions for Master-Making Actions Available on the Preview Screen Preview Cancel Continue 25% 1 2 3 4 5 1) Rotate Image Button 6 4) Reduce Button Allows you to rotate the displayed image 90 degrees. 2) Displays the size of the current display. 3) Enlarge Button Shrinks the preview display each time it is touched. 5) Show All Button Shows the entire image. Magnifies the preview display each time it is touched. 6) Scroll Button The image moves in the direction of the displayed arrow. Checking and Printing the Preview Display The operational procedures for “Printing from the Original Document” are explained below. 1 2 4 Place an original. Press the key. Touch [Preview] on the Functions Screen. RESET PROOF Ready to Make Master Basic Selections Functions START STOP Admin. Top Margin ADF Semi-Auto Binding Margin Preview Max. Scan Overlay Reservation Storage Memory A scan of the original begins, and can be previewed on the Preview screen. P . 2/4 “Preview” setting is updated. 3 Make necessary settings. Make various settings as needed. Checking the Print Image Prior to Making Master [Preview] 95 Functions for Master-Making 5 Check the preview image. Preview Cancel Continue 25% 6 Touch [Continue]. A master is created. After this, please follow the same operations for normally making a master. Note: • Touching [Cancel] will cancel the image, returning to the Master Making Basic Screen. To resume preview operation, repeat from step 3. 96 Checking the Print Image Prior to Making Master [Preview] Functions for Master-Making Checking the Print Image Prior to Making Master [Preview] 97 Functions for Printing Changing the Print Speed [Print Speed Adjustment] You can select the print speed from five levels; from 60 to 130 copies/minute. The print speed may be adjusted while printing is in progress. Note: • In cases where printing noise is excessive, decrease print speed or use “Silent” mode. )p.100 • Set the default print speed on the Admin. screen. The factory default is level 3 (approximately 100 copies/minute). )p.169 Press the print speed. or key to adjust the • The Functions Screen has a “180 ppm” function for faster printing. )p.99 1) Print Speed Indicator Shows the current print speed. 2) Key Increases the print speed incrementally. 3) Key Decreases the print speed incrementally. Indicator level and print speed Indicator Level Print Speed (copies/ minute) 1 Note: 2 3 4 5 Approx. Approx. Approx. Approx. Approx. 60 80 100 120 130 98 Changing the Print Speed [Print Speed Adjustment] Functions for Printing Printing at High Speed [180ppm] By using “180ppm”, you can print faster than if you were to simply adjust the “Print Speed”. Important!: • When internal temperature of the machine is lower than 15° C (59° F), “180ppm” button is grayed-out and cannot be used. Use the normal print speed adjustment (1 to 5) until the internal temperature of the machine is highter than 15° C (59° F). The time it takes for the internal temperature to rise depends upon the machine environment. Touch [180ppm] on the Print Basic Screen. Select Print Quantity Basic Selections Functions 180ppm 0.0 mm A4 Silent Renew Page Black Admin. Paper Print Position 0.0 mm D-Feed Check READY Idle Info Print speed is set at “180ppm” and the Print Speed indicator on the Control Panel is off. Note: • To slow down printing speed from “180ppm”, press the key on “Print Speed” adjustment keys/indicator. • By registering to the Direct Access area, you can set “180ppm” by a single touch during a printing process. )p.166 • Paper jams may occur more often, depending on the type of paper you use. In this case, print at the normal speed. Printing at High Speed [180ppm] 99 Functions for Printing Printing More Quietly [Silent] In “Silent” mode, print speed is automatically adjusted to reduce noise levels. Touch [Silent] on the Print Basic Screen. Select Print Quantity Basic Selections Functions 180ppm 0.0 mm A4 Silent Renew Page Black Admin. Paper Print Position 0.0 mm D-Feed Check READY Idle Info “Silent” mode is set. Selecting “Silent” mode reduces the print speed. (Print Speed 1). Note: • To cancel “Silent” mode during printing, touch [Silent] to return to the previous speed. • The Print Speed Adjustment Keys on the Control Panel can also be used to change print speed. 100 Printing More Quietly [Silent] Functions for Printing Adjusting the Print Density [Print Density Adjustment] You can select the print density from five levels. The print density may be adjusted while printing is in progress. Important!: • “Print Density” is not available when “Ink Saving” is selected. )p.72 Note: • The default print density can be set on the Admin. screen. The factory default is set at level 3 (Standard). )p.169 Press the or print density. key to adjust the 1) Print Density Adjustment Indicator Shows the current setting of the print density. 2) Key Increases the print density incrementally. 3) Key Decreases the print density incrementally. Adjusting the Print Density [Print Density Adjustment] 101 Functions for Printing Adjusting the Print Position [Print Position Adjustment] The print position on the paper can be adjusted. Adjustment range Vertical direction (bottom ←→ top): ±15 mm (±19/32") Horizontal direction (left ←→ right): ±10 mm (±3/8") The positioning may be adjusted while Printing is in progress. Note: • After adjusting the print position, print a proof copy to check the result. )p.104 • The numerical value formed by “Print Position Adjustment” is the target. Set the actual position by verifying and adjusting the printed material. Press the , move up or down. , or key to 3) Key Each press shifts the print position upward in steps of about 0.5 mm (1/64"). Bottom 4) Top Key/Original Position Indicator Press to return to original position. To restore the original Print Position during printing, hold the button down for more than 1 second. When the original Print Position is restored the indicator will light up. 5) 1) Key Each press shifts the print position downward in steps of about 0.5 mm (1/64"). Key Press the key to move the print image about 0.5 mm (1/64") to the right on the paper. Left Side Right Side Bottom 2) Top Key Press the key to move the print image about 0.5 mm (1/64") to the left on the paper. Left Side The Print Basic Screen shows current vertical/horizontal adjustment. Select Print Quantity Basic Selections Functions Print Position 180ppm Admin. Paper 2.5 mm Right Side A4 Silent Renew Page Black 102 Adjusting the Print Position [Print Position Adjustment] 3.0 mm D-Feed Check READY Id l e In fo Functions for Printing Tip: Making Fined Adjustments to the Print Position If the “Fine Adjust Mode” option is included in the machine settings, you can make detailed adjustments to the Print Position in approximately 0.1 mm (1/254") increments (ordinary mode is 0.5 mm (1/64")). To use “Fine Adjust Mode” settings, please contact your dealer (or authorized service representative). When “Fine Adjust Mode” is available, the button [Fine Adjust Mode] is displayed on the Functions screen. Touch [Fine Adjust Mode] to turn “Fine Adjust Mode” ON (the button is highlighted) and enable adjustment in 0.1 mm (1/254") increments. When “Fine Adjust Mode” is OFF, adjustments will be in 0.5 mm (1/64") increments. Select Print Quantity Basic Selections Functions Admin. Editor Confidential Fine Adjust Mode Ink Saving D-Feed Check Interval Idling Action Paper Interposal P . 3/4 Adjusting the Print Position [Print Position Adjustment] 103 Functions for Printing Printing Proof Copies [Proof] After making adjustments to the print position or density, check the print quality in a proof copy. Proof copies are not counted towards the number of copies displayed on the Print Quantity Display. Note: • The machine will continue to print proof copies if the • A proof copy cannot be printed from a Linked Printer. Press the key. A single proof copy is printed. 104 Printing Proof Copies [Proof] key is held down. Functions for Printing Prevent Paper Jams When Using Special Paper [D-Feed Check] This printer monitors for multiple paper feeds. If a feed of more than one sheet is detected, the print job automatically stops and “D-Feed Check” is executed. The multiple paper feed detector is calibrated for normal print paper. Depending on the type of paper used, double feeding may be detected and an error displayed even when one sheet of paper is properly supplied. In the following instances, please set “D-Feed Check” to “OFF”. • When a multi-feed detection message is occasionally displayed, even though no multi-feed has occurred • When using dark paper (black, red, dark blue) • When using paper already printed on the back side Note: • In the factory setting, “D-Feed Check” is set to “ON”. )p.170 Touch [D-Feed Check] on the Functions Screen. Ready to Make Master Basic Selections Functions Admin. Editor Ink Saving D-Feed Check Interval Idling Action Renew Page Confidential Auto Page Renewal P . 3/4 The button changes from being highlighted (b/w) to the normal display, and “D-Feed Check” is set to “OFF”. Prevent Paper Jams When Using Special Paper [D-Feed Check] 105 Functions for Printing Extending the drying time [Interval] A sheet of paper is normally fed and printed with each Print Drum (Cylinder) rotation, but by extending the paper feed interval, the ink has more time to dry, which prevents ink marks on the back of the next sheet. The paper feed interval (skip rotation) can be set from 1 - 10. 1 Touch [Interval] on the Functions Screen. Note: • Print Quantity Keys can also be used to enter numbers. • If you are using extended paper and set the Print Drum (Cylinder) skip rotation to an odd number, the actual skip rotation is the “Set Number +1”. )p.182 Ready to Make Master Basic Selections Functions Admin. Editor Ink Saving D-Feed Check Interval Idling Action Renew Page Confidential Auto Page Renewal 4 P . 3/4 2 Touch [ON]. Select Print Quantity Interval Basic Selections OFF Cancel Functions OK Admin. Skip Rotation - ON (Numeric keypad is available for input) P.3 / 4 3 Touch or to set the number of Skip Rotations for the Print Drum (Cylinder). Select Print Quantity Interval Basic Selections OFF ON Cancel Functions OK Admin. Skip Rotation - (Numeric keypad is available for input) P .3 / 4 106 Extending the drying time [Interval] Touch [OK]. Returns to the Functions screen. “Interval” setting is updated. Functions for Printing Paper Feed/Output Settings for Special Paper and Printing Types [Jump Wing Control] [Special Paper Ctrl] Paper feed and output settings can be adjusted when using special paper or uneven print finishes. Jump Wing Control Paper Jumping Wing The following steps retrieves pre-configured custom settings for the Paper Jumping Wing. Use this feature to eject certain printing paper that is hard to eject with automatically adjusted normal Paper Jumping Wing setting. Important!: • “Jump Wing Control” feature is not available unless pre-configured. • Only one setting can be pre-configured. • To pre-configure or to change settings, please contact your dealer (or authorized service representative). Note: • The Paper Jumping Wing is a device which helps eject printed paper onto the Auto-control Stacking Tray or the Paper Receiving Tray. It automatically adjusts according to the position of the Paper Feed Pressure Adjustment Lever (NORMAL or CARD). Special Paper Ctrl You can save settings for easy retrieval next time. The “Special Paper Ctrl” menu contains the following options: Paper Feed Adj. Adjust Paper Feed Tray position and paper-feed amount to suit special paper characteristics. For adjustment methods, please contact your dealer (or authorized service representative). Paper Eject Adj Some types of original image/paper may be printed with an uneven or blurred finish due to air blow or separation fan settings. This option can be used to change air blow and separation fan settings. For adjustment methods, please contact your dealer (or authorized service representative). Receive Tray (when using the optional Auto-control Stacking Tray) The positions of the Receiving Tray Paper Guides/Stopper on the Auto-control Stacking Tray are automatically adjusted according to the paper size. Detailed adjustments to these positions can also be made using the display buttons where appropriate. For information on adjusting the Receiving Tray Paper Guides/Stopper, see “Adjusting the Auto-control Stacking Tray” ()p.114). Important!: • In cases where the Receiving Tray Paper Guides/Stopper are not raised, adjustments cannot be made to the Auto-control Stacking Tray. Paper Feed/Output Settings for Special Paper and Printing Types [Jump Wing Control] [Special Paper Ctrl] 107 Functions for Printing Setting the Jump Wing Control [Jump Wing Control] Touch [Jump Wing Control] on the Functions Screen. Ready to Make Master 180ppm Jump Wing Control “Jump Wing Control” is selected. 108 Paper Feed/Output Settings for Special Paper and Printing Types [Jump Wing Control] [Special Paper Ctrl] Functions for Printing Saving Settings and Renaming the Parameter Names in the Parameter List 1 Touch [Special Paper Ctrl] on the Functions Screen. 4 Touch [Entry/Call]. Special Paper Ctrl Select Print Quantity Basic Selections Functions Close Entry/Call Admin. Auto Page Renewal Counter Display Sorter Scanning Side -ADF Job Separation Duplex(Link) Revise Auto Auto Paper Feed Adj. S-Tray Upper Limit Paper-Feed Amount Paper Eject Adj Air Blow Separation Fan ON 2 Pre-suction Fan Suction Fan OFF 4 Special Paper Ctrl P. 4/4 2 Parameter List screen is displayed. Adjust [Paper Feed Adj.] and [Paper Eject Adj]. 5 Special Paper Ctrl Note: Close Parameter List Close Entry/Call Revise Select a Register Frame for a Button S-Tray Upper Limit Auto PaperRegister Feed Adj. Paper Auto A-1Feed AmountA-4 • For details of adjustments, see )p.107. 3 Touch an unused button. Confirm the adjustments on the Special Paper Ctrl screen. PaperRetrieve Eject Adj. Rename Special Paper Ctrl Close Entry/Call Air Blow A-2 Separation Fan A-5 ON 2 Pre-suction Fan A-3 Fan Suction A-6 OFF 4 Clear Revise Auto Auto Paper Feed Adj. S-Tray Upper Limit Paper-Feed Amount Paper Eject Adj Air Blow Separation Fan ON 2 Pre-suction Fan Suction Fan OFF 4 Unused buttons are displayed with a solid line. Used buttons are grayed-out and are not available. 6 Touch [OK]. Special Paper Ctrl Parameter List Close Entry/Call Close A-2 S-Tray Upper Limit Paper Feedbe AmountA-4 This Setting will A-1 Registered Air Blow PaperRetrieve Eject Adj. A-2 A-5 Separation Fan OK? PaperRegister Feed Adj. Rename Clear Pre-suction Fan A-3 Fan Suction Cancel Side A-6 Revise Auto Auto ON 2 OFF 4 OK Paper Feed/Output Settings for Special Paper and Printing Types [Jump Wing Control] [Special Paper Ctrl] 109 Functions for Printing Returns to the Parameter List after the settings have been saved. The name of each parameter can be changed for your convenience. To change parameter names, proceed to the next step. Note: • After saving the settings, touch [Close] on the Parameter List screen to return to the Special Paper Ctrl screen. • Touch [Close] on the Special Paper Ctrl screen to return to the Functions screen. Printing will be done with the saved settings. • If you do not wish to print after saving the settings, press key on the control panel. 7 Note: • To delete the current name, touch or press the key. button Touch [OK] after entering all the 10 characters. Returns to the Parameter List screen and the name is updated. Touch [Close]. 11 Returns to the Special Paper Ctrl screen. Touch [Rename]. Special Paper Ctrl Close Parameter List Close Entry/Call Revise Select a Button Name to be Changed S-Tray Upper Limit Auto PaperRegister Feed Adj. Paper Auto A-1Feed AmountA-4 PaperRetrieve Eject Adj. Rename Air Blow A-2 Separation Fan A-5 ON 2 Pre-suction Fan A-3 Fan Suction A-6 OFF 4 Clear 8 Touch the button to rename. 9 Touch character buttons to enter a new name. Unregistered buttons are grayed-out and are not available. Rename Cancel OK Poster Small Capital Change capitalization by selecting [Small] or [Capital] button. )p.138 110 Paper Feed/Output Settings for Special Paper and Printing Types [Jump Wing Control] [Special Paper Ctrl] Functions for Printing Retrieving Settings from the Parameter List 1 Touch [Special Paper Ctrl] on the Functions Screen. 4 Select Print Quantity Basic Selections Functions Admin. Unregistered buttons are grayed-out and are not available. Returns to the Special Paper Ctrl screen and the desired setting is retrieved. Confirm the settings made. Note: Auto Page Renewal Counter Display Sorter Scanning Side -ADF Job Separation Duplex(Link) • Repeat steps 2 to 4 to retrieve other settings. 5 Special Paper Ctrl P. 4/4 2 Touch the button to retrieve. Touch [Close]. Returns to the Functions screen and the settings are updated. After this, follow the same operations for normal printing. Touch [Entry/Call]. Special Paper Ctrl Close Entry/Call Revise Auto Auto Paper Feed Adj. S-Tray Upper Limit Paper-Feed Amount Paper Eject Adj Air Blow Separation Fan ON 2 Pre-suction Fan Suction Fan OFF 4 Display the Parameter List screen. 3 Touch [Retrieve]. Special Paper Ctrl Parameter List Close Close Entry/Call Select a Button to be Retrieved S-Tray Upper Limit PaperRegister Feed Adj. Paper A-1Feed AmountA-4 PaperRetrieve Eject Adj. Rename Revise Auto Auto Air Blow Poster Fan Separation A-5 ON 2 Pre-suction Fan A-3 Fan Suction A-6 OFF 4 Clear Paper Feed/Output Settings for Special Paper and Printing Types [Jump Wing Control] [Special Paper Ctrl] 111 Functions for Printing Making changes to Special Paper Ctrl Setting 1 Display the Parameter List screen. 2 Touch [Retrieve]. Follow steps 1 to 2 ()p.111). 5 Touch [Revise] on the Special Paper Ctrl screen. Special Paper Ctrl Poster Special Paper Ctrl Close Parameter List Close Entry/Call Revise Select a Button to be Retrieved S-Tray Upper Limit Auto PaperRegister Feed Adj. Paper Auto A-1Feed AmountA-4 PaperRetrieve Eject Adj. Rename Air Blow Poster Fan Separation A-5 ON 2 Pre-suction Fan A-3 Fan Suction A-6 OFF 4 Close Entry/Call Revise Paper Feed Adj. S-Tray Upper Limit Paper-Feed Amount +1 +2 Paper Eject Adj Air Blow Separation Fan ON 2 Pre-suction Fan Suction Fan OFF 4 Clear 6 3 Touch the button to change. Special Paper Ctrl Touch [OK]. Returns to the Special Paper Ctrl screen after parameters have been revised. Close Close Parameter List Entry/Call Revise Select a Button to be Retrieved S-Tray Upper Limit Auto PaperRegister Feed Adj. Paper Auto A-1Feed AmountA-4 PaperRetrieve Eject Adj. Rename Air Blow Poster Fan Separation A-5 ON 2 Pre-suction Fan A-3 Fan Suction A-6 OFF 4 Clear 4 Change the setting parameters. Parameters for the following can be changed: “Paper Feed Adj.” and “Paper Eject Adj”. Note: • For details of changes, see )p.107. 112 Paper Feed/Output Settings for Special Paper and Printing Types [Jump Wing Control] [Special Paper Ctrl] Functions for Printing Clearing Special Paper Ctrl Settings 1 Display the Parameter List screen. Follow steps 1 to 2 ()p.111). 4 Special Paper Ctrl Important!: Close Entry/Call Select a Button to be Cleared P o sAdj. t e r S-Tray Upper Limit PaperRegister Feed T h i s S e t tPaper i n A-1 g Feed w i l lAmount b e A-4 C l e a r e d Air Blow PaperRetrieve Eject Adj. O K? Poster Fan Separation Touch [Clear]. Rename Clear Special Paper Ctrl Close Parameter List • First, check whether the setting can be cleared. (Retrieve the appropriate setting and follow the steps beginning with step 2.) • Cleared settings cannot be recovered. 2 Touch [OK]. Pre-suction Fan A-3 Fan Suction Cancel Revise +1 +2 A-5 ON 2 A-6 OFF 4 OK Close Parameter List Close Entry/Call Revise Select a Button to be Cleared S-Tray Upper Limit +1 PaperRegister Feed Adj. Paper +2 A-1Feed AmountA-4 PaperRetrieve Eject Adj. Rename Air Blow Poster Fan Separation Pre-suction Fan A-3 Fan Suction A-5 ON 2 A-6 OFF 4 Returns to the Parameter List screen. The selected setting is cleared. 5 Touch [Close]. Returns to the Special Paper Ctrl screen. Clear 3 Touch the button to clear. Special Paper Ctrl Close Parameter List Close Entry/Call Revise Select a Button to be Cleared S-Tray Upper Limit +1 PaperRegister Feed Adj. Paper +2 A-1Feed AmountA-4 PaperRetrieve Eject Adj. Rename Air Blow Poster Fan Separation A-5 ON 2 Pre-suction Fan A-3 Fan Suction A-6 OFF 4 Clear Unregistered buttons are grayed-out and are not available. Paper Feed/Output Settings for Special Paper and Printing Types [Jump Wing Control] [Special Paper Ctrl] 113 Functions for Printing Adjusting the Auto-control Stacking Tray (when using the optional Auto-control Stacking Tray) [Receive Tray] 1 Touch [Special Paper Ctrl] on the Functions Screen. Selections Functions Admin. Auto Page Renewal Counter Display Sorter Scanning Side -ADF Job Separation Duplex(Link) Detailed adjustments of the Receiving Tray Paper Guides/ Stopper Touch either one of the four “Narrower” or “Wider” buttons to move the Receiving Tray Paper Guides/Stopper in approximately 0.5 mm (1/64") increments. Special Paper Ctrl P . 4/4 2 Touch [Receive Tray]. Special Paper Ctrl Close Entry/Call 3 Revise Auto Auto Paper Feed Adj. S-Tray Upper Limit Paper-Feed Amount Paper Eject Adj Air Blow Separation Fan ON 2 Pre-suction Fan Suction Fan OFF 4 Side End 0mm 0mm Receive Tray Receiving Tray Paper Guides/ Stopper Touch [Auto] to adjust the position of the Receiving Tray Paper Guides/Stopper automatically to the standard positions for the paper size. Select Print Quantity Basic Automatic adjustment of the Touch the relevant adjustment buttons. • The adjustment value for the Receiving Tray Paper Guides is displayed under “Side”, while the Stopper adjustment is displayed under “End”. • Detailed adjustments will be effective after paper size is set. • Touch [Auto] to reset both “Side” and “End” to the default value of 0 mm (0") and reactivate automatic adjustment. Note: • The Receiving Tray Paper Guides (side) can be widened by pressing the Receiving Tray Paper Guides’ Opening Button during printing. )p.24 Buttons, components activated and direction of movement Button Special Paper Ctrl Receive Tray Auto Paper Feed Adj. Side Paper Eject Adj. 0mm Wider Narrower Reseive Tray Close Entry/Call Activated component Stopper Close Revise S-Tray Upper Limit Paper Feed Amount End Air Blow Separation Fan 0mm Auto Auto Pre-suction Fan Wider Suction Fan Narrower Side End OFF 4 Towards the machine [ Narrower] ON 2 0mm 0mm Direction [ Wider] Outwards on the Auto-control Stacking Tray 114 Paper Feed/Output Settings for Special Paper and Printing Types [Jump Wing Control] [Special Paper Ctrl] Functions for Printing Activated component Button Receiving Tray Paper Guides [ [ 4 Direction Inwards on the Auto-control Stacking Tray Note: • Settings can be saved in “Special Paper Ctrl”, for easy retrieval next time. )p.109 Narrower] Outwards on the Auto-control Stacking Tray Wider] Touch [Close]. Special Paper Ctrl Receive Tray Close Entry/Call Close Revise Auto Paper Feed Adj. S-Tray Upper Limit Paper Feed Amount End Side Air Blow Paper Eject Adj. +0.5mm Separation Fan +2.0mm Wider Narrower Reseive Tray Pre-suction Fan Wider Suction Fan Narrower Side End Auto Auto ON 2 OFF 4 0mm 0mm Returns to the Special Paper Ctrl screen. 5 Touch [Close]. Special Paper Ctrl Close Entry/Call Revise Auto Auto Paper Feed Adj. S-Tray Upper Limit Paper-Feed Amount Paper Eject Adj Air Blow Separation Fan ON 2 Pre-suction Fan Suction Fan OFF 4 Receive Tray Side End +0.5mm +2.0mm Returns to the Functions screen. You can go back to normal printing processes. Paper Feed/Output Settings for Special Paper and Printing Types [Jump Wing Control] [Special Paper Ctrl] 115 Advanced Features Setting Up User Management [User Management] Functions of User Management This machine is equipped with a User Management function to ensure security and enhance user management. The User Management function has 3 Management Levels. The following features are available according to the level. Management Level Feature High/Full Management Mid/ID Print Only Low/Admin tab Only [ID Counter Report] for managing the number of prints/masters. )p.162 Available Available For ID print only Not Available [Limit] for setting the upper limit of the number of copies/masters per user set. )p.125 Available Available Not Available [ID Print] for printing data sent from PC. )p.53 Available Available Not Available [My Direct Access] for registering the frequently-accessed functions displayed in the Direct Access Area. )p.166 Available Not Available Not Available Saving scanned originals for [ID Print]. )p.53 Available Not Available Not Available Allowing only the administrator to change the [Admin.] settings. )p.168 Available Available Available All users must be registered to manage the machine at the High/Full Management level. Also, users must input a PIN code (or connect a registered USB Flash Drive) to use the machine. This section explains settings for using the User Management function and how to make those settings set by the Administrator. 116 Setting Up User Management [User Management] Advanced Features Management Level and access timing of user identification access When “Management Level“ is set to “High/Full Management” or “Mid/ID Print Only”, the users will be asked to identify themselves (“User identification access”) during operations. The Recognition and Identification System can be selected from either “PIN code” or “USB Flash Drive” which set by the administrator in advance. When Operating the Machine When Outputting the ID Print User identification access is required USB Flash Drive PIN code or High/Full Management User identification access is not required OK User identification access is required USB Flash Drive PIN code or User identification access is not required Mid/ID Print Only Low/Admin tab only User identification access is not required OK ID Print cannot be performed User Management Options To activate the User Management function, the administrator must set up User Management. The setting options of User Management and details are explained below. “Recognized by” ()p.119) Select the Recognition and Identification System. PIN code: When user identification access is required, input the PIN code. Set up to 8 digits for each user in “Create User”. USB Flash Drive: When user identification access is required, connect the registered USB Flash Drive to the USB slot. Prepare the number of USB Flash Drives for the individual users and register them with the machine. OFF/Delete: Delete the information registered in User Management (administrator/user registration included), and return to the factory setting. Important!: • If the “Recognized by” setting is changed, all settings in User Management, including the administrator’s registration, will be deleted. Set “Recognized by” first, then operate the other settings. “Management Level” ()p.121) Select the Management Level from among 3 levels. High/Full Management: Users require identifying themselves when operating the machine and outputting the ID Print. Mid/ID Print Only: Users require identifying themselves when outputting the ID Print. Low/Admin tab only: Manages the users without any use of security features. Users don't require identifying themselves when operating the machine and cannot perform ID print. This level allows only the administrator to change the [Admin.] settings. For details, see the table of )p.116. Setting Up User Management [User Management] 117 Advanced Features Create User ()p.122) Register the administrator/users. Up to 100 users (administrator included) can be registered. Set following options when registering. • PIN code or USB Flash Drive PIN code: A PIN code can be set for user identification access. We recommend that you prepare a list of the registered users and record the user registration numbers (ID) and PIN codes for each user. Notify each user of the set PIN code and user registration number (ID). USB Flash Drive: A USB Flash Drive can be set for user identification access. We recommend that you record which USB Flash Drives you distribute to which user. Distribute to each user a registered USB Flash Drive and a user registration number (ID). • Rename • Group: User groups can be set. • Limit: The upper limit of the copies/masters can be set. • Disable: User identification access can be enabled or disabled. Registered settings can be changed or cleared. In order to register users or operate other settings in User Management, the administrator must be registered in advance. The User Management functions are activated after registering the administrator. Rename Group ()p.129) Set a group name when operating group management. Up to 32 groups can be registered. Reset Counter ()p.130) Clear the usage counters of all users and groups. Operation flow of User Management We recommend that you set up User Management in following order. Select the Recognized by Select the Management Level Create User (Administrator) Create User (User) * Setting the Rename Group *Set when you want to count user usage by group using “ID Counter Report”. See )p.162. 118 Setting Up User Management [User Management] Advanced Features Selecting Recognition and Identification System Set the Recognition and Identification System using “Recognized by” in advance when setting up User Management. Important!: • If “Recognized by” is changed, all settings in User Management, including the administrator’s registration, will be cleared. 1 Touch [Admin.] on the Basic Screen for each mode. 3 Identify the administrator. When “Recognized by” is set to “PIN code” Ready to Make Master Input the administrator’s PIN code. Ready to Make Master Renew Page D-Feed Check Black 2 Touch [OK]. Ready to Make Master When “Recognized by” is set to “USB Flash Drive” Connect the administrator’s registered USB Flash Drive to the USB slot. Ready to Make Master Skip to step 4 if the administrator is not registered. If the administrator is already registered, the Recognition Screen is displayed here. See step 3. Setting Up User Management [User Management] 119 Advanced Features 4 Touch [User Management]. 5 Touch [Recognized by]. 7 Touch [OK]. Returns to the User Management screen. “Recognized by” is updated. Continue User Management settings. See the subsequent pages. 6 Touch the button to select the “Recognized by” option. Note: • If you touch [OFF/Delete], all settings set in User Management will be deleted and returned to the factory setting. 120 Setting Up User Management [User Management] Advanced Features Setting Up the Management Level Important!: • Set “Recognized by” in advance. )p.119 1 Display the User Management screen. Follow steps 1 to 4 in “Selecting Recognition and Identification System” ()p.119). 2 Touch [Management Level]. 3 Touch the button to select the “Management Level” option. 4 Touch [OK]. Returns to the User Management screen. “Management Level” is updated. You can continue registering users and renaming groups if needed. To close the User Management setting, touch [Close] on the User Management screen to return to the Admin. screen. See )p.116 for details of Management Level options. Setting Up User Management [User Management] 121 Advanced Features Registering Administrator/Users In order to activate the User Management function, the administrator must be registered. Up to 100 users can be registered (administrator included). Note: • The user registration number (ID) is required when operating “ID print” from the printer driver. Create User Close Select a Register Frame for a Button Register 0 Admin 5 U-5 Change 1 U-1 6 U-6 Clear 2 U-2 7 U-7 3 U-3 8 U-8 4 U-4 9 U-9 P .1/10 User Registration Number (ID) Basic operation for registering administrator/users 1 Display the User Management screen. Follow steps 1 to 4 in “Selecting Recognition and Identification System” ()p.119) Important!: • Set “Recognized by” in advance. • If you set the group to assign, we recommend that you set “Rename Group” first. ( )p.129) 122 Setting Up User Management [User Management] 2 Touch [Create User]. Advanced Features 3 Touch an unused button. When “Recognized by” is set to “USB Flash Drive” Connect the registered USB Flash Drive to the USB slot. Unused buttons are displayed with a solid line. Used buttons are grayed-out and are not available. (Another user has been registered.) The number that identifies the registered USB Flash Drive is displayed. Important!: • Be sure to register the administrator first. • If the administrator is not registered, buttons are not available except “0 Admin”. • The “0” button is only available to the administrator. Even if you rename this button, it will be treated as the administrator. 4 Note: • If you register multiple USB Flash Drives, we recommend that you ready them to be distinguished later (for example, put a user name on the USB Flash Drive). • If you input the assigned PIN code (“Recognized by”: PIN code) or connect the USB Flash Drive that you already registered (“Recognized by”: USB Flash Drive), the following message is displayed when touching [OK]. Input the PIN code or connect the USB Flash Drive. When “Recognized by” is set to “PIN code” Input the PIN code using the Print Quantity Keys. Touch [Close] and input the unassigned PIN code or connect the unregistered USB Flash Drive. 5 Up to 8 digits can be input. Press the key to clear the PIN code. Set various settings. Set the following settings if needed. • • • • Rename ()p.124) Group ()p.125) Limit ()p.125) Disable ()p.126) Setting Up User Management [User Management] 123 Advanced Features 6 7 Touch [OK]. Enter the User Name Returns to the Create User screen. The administrator or the user is registered. To register multiple users, touch [Register] and repeat steps 3 to 6. 1 Touch [Rename] on the Register screen. 2 Touch the character buttons to enter a new name. Touch [Close]. Returns to the User Management screen. You can continue registering users and renaming groups if needed. To close the User Management setting, touch [Close] on the User Management screen to return to the Admin. screen. Change capitalization by selecting the [Small] or [Capital] button. )p.138 Note: • To clear the current name, touch press the key. 3 124 Setting Up User Management [User Management] Touch [OK]. Returns to the Register screen. The user name is renamed. button or Advanced Features Setting the Group to assign Setting the Upper Limit of the User’s Usage When you set up a group by user, user usage can be counted by group. )p.162 It is recommended to enter the group name in advance. )p.129 1 2 Touch [Group] on the Register screen. Touch the Group button to set. Set the upper limit of the number of copies/masters. Up to 99,999,999 can be set. The present copy count and master count can also be cleared on the same screen. 1 Touch [Limit] on the Register screen. 2 Touch the limit input box and enter the upper limit number using the Print Quantity Keys. C/C: Copy Count M/C: Master Count Note: • If you are not setting up a group, touch [OFF]. • Set “Rename Group” if needed. )p.129 3 Note: • To clear the number, press the key. • “Present C/C” and “Present M/C” show the current amount of copies and masters that the user used. • To clear the “Present C/C” and “Present M/C”, touch each button. Touch [OK]. Returns to the Register screen. The user is assigned to the group that you set. 3 Touch [OK]. Returns to the Register screen. “Limit” is updated. Setting Up User Management [User Management] 125 Advanced Features Disabling User identification access Touch [Disable] on the Register screen to turn it “ON”. User identification access is disabled and the user cannot use the machine. Note: • To inactivate “Disable”, touch [Disable] to turn it “OFF”. • On the Register screen for the administrator, a [Disable] button is not available. 126 Setting Up User Management [User Management] Advanced Features Changing Administrator/User Registration 1 Display the User Management screen. 4 Touch the User Button to change. Follow steps 1 to 4 in “Selecting Recognition and Identification System” ()p.119) 2 Touch [Create User]. Registered buttons are displayed with a solid line. Unregistered buttons are grayed-out and are not available. 3 5 Change various settings. 6 Touch [OK]. 7 Touch [Close]. Touch [Change]. Follow steps 4 to 5 in “Basic operation for registering administrator/users” ()p.122). Returns to the Create User screen. Registered setting is updated. Returns to the User Management screen. To close the User Management setting, touch [Close] on the User Management screen to return to the Admin. screen. Setting Up User Management [User Management] 127 Advanced Features Clearing User Registration 1 Display the User Management screen. 4 Touch the User Button to clear. Follow steps 1 to 4 in “Selecting Recognition and Identification System” ()p.119) 2 Touch [Create User]. Registered buttons are displayed with a solid line. Unregistered buttons and “0 Admin” button are grayed-out and are not available. Important!: 5 Touch [OK]. • Once the user registration is cleared, it cannot be recovered. 3 Touch [Clear]. Returns to the Create User screen. The setting of the selected user is cleared. 6 Touch [Close]. Returns to the User Management screen. To close the User Management setting, touch [Close] on the User Management screen to return to the Admin. screen. 128 Setting Up User Management [User Management] Advanced Features Renaming Groups 1 Display the User Management screen. 4 Touch the character buttons to enter a new name. Follow steps 1 to 4 in “Selecting Recognition and Identification System” ()p.119) 2 Touch [Rename Group]. Change capitalization by selecting the [Small] or [Capital] button. )p.138 Note: 3 • You can enter up to 10 characters. Touch the Group button to rename. 5 Touch [OK]. 6 Touch [Close]. Returns to the Rename Group screen. The group name is renamed. Returns to the User Management screen. To close the User Management setting, touch [Close] on the User Management screen to return to the Admin. screen. Setting Up User Management [User Management] 129 Advanced Features Reset All User Counters All user counters can be cleared in a single procedure. Important!: • After the counter is cleared, it cannot be recovered. 1 Display the User Management screen. Follow steps 1 to 4 in “Selecting Recognition and Identification System” ()p.119) 2 Touch [Reset Counter]. 3 Touch [OK]. Returns to the User Management screen. All user counters are cleared. To close the User Management setting, touch [Close] on the User Management screen to return to the Admin. screen. 130 Setting Up User Management [User Management] Advanced Features Automatic Sorting Into Groups [Program] “Program” feature saves you from repeatedly having to enter how many copies to print, by assigning the number of copies per sets in advance. Operation stops after printing each set of copies. Store a “Program” setting for easy retrieval later. Sample usage for this feature; in a school setting, the number of copies (sheets) per class (set) can be pre-assigned, then the number of grades (groups) in the entire school. “Program” consists of two types: “Single” and “Multiple”. Important!: • “Program” is not available when “Auto Page Renewal” is selected. Single Page Mode From a single original document, print into multiple groups of sets. A maximum of 50 groups can be created, each having up to 99 sets. Each set can be up to 9999 copies. The machine can be configured to specify how many copies (sheets) per set, then how many sets are to be created for each group. Note: • If you are printing multiple originals with “Single Page” program, place multiple originals (up to 50) in the optional ADF unit, and as long as “Auto Process” is “ON”, the set program can be repeated and all the originals are divided into groups to print the various number of copies specified. Automatic Sorting Into Groups [Program] 131 Advanced Features Multi-Page Mode For multiple originals, a different number of copies are printed for each original. From a single original, up to 9999 copies can be made. Each original can reproduce a pre-assigned number of sheets (up to 20 originals). 1st original 2nd original 3rd original 10 sheets 20 sheets 30 sheets A maximum of 9999 sheets A maximum of 20 originals Note: • This function cannot be used for printing from a computer data (direct print). )p.50 132 Automatic Sorting Into Groups [Program] Advanced Features How to Program Print There are two ways to print in sets using “Program” printing feature. • Program, then print (without saving the settings) )p.134 • Retrieve a saved program, then print (when program is registered) )p.139 Choose from the following actions on the Print Basic Screen. Touch a button to proceed. Ready to Print Program-A Basic 03G 3- Selections Functions Admin. Paper Print Position Renew Page 180ppm Go to Next Silent Renew Page Black 0.0 mm 0.0 mm Cancel Job A4 D-Feed Check READY Idle Info [Renew Page]: Creates a master from the last Master-Making data. [Next Page] or [Go to Next]: Stops current print job, skips to the next original, set or group. [Cancel Job]: Cancels execution of the Program. Note: • The optional Job Separator is useful for Programed Printing. The Job Separator releases a piece of tape after each set or original document, thereby automatically separating sets or groups. It eliminates the need to manually remove a stack of sheets or insert a marker between sets. Remember to activate “Job Separation” in the Functions screen when printing with the Job Separator. You must remove each stack from the Paper Receiving Tray, or insert a marker during the pause if not using the Job Separator. Automatic Sorting Into Groups [Program] 133 Advanced Features Setting Up for Programed Printing There are two ways to display the Program screen. • Touch [Program] on the Functions screen on the display. • Press the key of the Print Quantity Keys. In the following steps, the explanation will be for pressing the 1 Press the 3 key. key of the print quantity keys. Enter the numbers using the Print Quantity Keys. For Single Page Mode Single Page Mode Program-A Cps. Note: • Press the key and skip to step 3 of the “Single Page Mode”. Press the key and skip to step 3 of the “Multi-Page Mode”. 2 Touch [Single] or [Multiple]. Program Type Page Close Admin. 01G A4 Renew Page Black Multiple Idle Sets Cps. Sets Entry/Call Revise 20 2 04G 50 5 02G 30 1 05G 60 3 03G 40 2 06G 70 10 Clear All P.1/9 1) Enter the number of copies using the Print 2) Press the key or the key. 3) Enter the number of sets (in the group) using the Print Quantity Keys. Press the key or the key. To program more than one group, repeat steps 1) - 4). Note: Program List READY Total:1280 01G 4) 02G Single OK Quantity Keys. Ready to Make Master Basic Cancel Info 134 Automatic Sorting Into Groups [Program] • To cancel or change a number, press the key and enter again. • To clear all (number of copies and number of sets), touch [Clear All]. • The total number of all copies to be printed is shown on the top of the screen. Advanced Features Important!: • To save the current Programed Printing setting, touch [Entry/Call]. Once [OK] is touched, the setting cannot be saved. See “Saving Programs” ()p.136) for further information. For Multi-Page Mode Multi-Page Mode Program-B Cancel OK Total:21 Cps. Cps. Page01 1 Page04 4 Page02 2 Page05 5 Page03 3 Page06 6 Entry/Call Revise Clear All P.1/4 1) Enter the number of copies using the Print 2) 3) Quantity Keys. Press the key or the key. Repeat steps 1 and 2 above to enter the number of copies for each original. Note: • and keys can also move the entry box from top to bottom. • To cancel or change a number, press the key and enter again. • To clear all (number of copies and number of sets), touch [Clear All]. • The total number of all copies to be printed is shown on the top of the screen. Important!: • To save the current Programed Printing setting, touch [Entry/Call]. Once [OK] is touched, the setting cannot be saved. See “Saving Programs” ()p.136) for further information. 4 Touch [OK]. Returns to the original screen. Ready to print in accordance with the program. Note: • Alternatively, after entering number of copies or sets, press the key to start printing without touching [OK]. Automatic Sorting Into Groups [Program] 135 Advanced Features Saving Programs Store frequently-used Program settings for later retrieval and printing. A total of 12 settings (Single or Multiple Mode) can be stored. 1 2 Create and enter a Programed Printing settings. 4 Touch [OK]. Follow steps 1-3 in “Setting Up for Programed Printing” ()p.134). Program List Touch [Entry/Call] on the Program screen. P-04 Register Close Select a Register Frame for a Button This Setting will be Retrieve Registered OK? Rename Single Page Mode Program-A Cps. Cancel OK Clear Total:1280 Sets Cancel Cps. Sets Entry/Call Revise 01G 20 2 04G 50 5 02G 30 1 05G 60 3 03G 40 2 06G 70 10 Clear All P.1/9 OK Returns to the Program List screen. The Program is stored. Each Program can be named for your convenience. See step 3 in “Renaming a Program” ()p.137). Note: 3 Touch an unused button. Program List Close • After saving the Program, touch [Close] on the Program List screen to return to the Program screen. Touch [OK] on the Program screen to print from a saved Program. Select a Register Frame for a Button Register Retrieve Rename Clear Unused buttons are displayed with a solid line. Used buttons are grayed-out and are not available. 136 Automatic Sorting Into Groups [Program] Single Page Mode P-04 Cancel OK Total:1280 Cps. Sets Cps. Sets Entry/Call Revise 01G 20 2 04G 50 5 02G 30 1 05G 60 3 03G 40 2 06G 70 10 P.1/9 Clear All Advanced Features Renaming a Program Program names can be changed to better describe their usage or purpose. 1 Touch [Program] on the Functions screen. 3 Touch [Rename]. Program List Select a Button Name to be Changed Ready to Make Master Basic Selections Functions Close Register P-01 P-05 P-09 Retrieve P-02 P-06 P-10 Rename P-03 P-07 P-11 Clear P-04 P-08 P-12 Admin. Program Tone Curve Job Memory Multi-Up Print Dot Process 2 Up Contrast Adj Book Shadow P. 1/4 Note: • Each Program button has an icon on top left. indicates Single Page Mode Program, indicates Multi-Page Mode Program. Note: • If [Program] is already highlighted, touching it will again display the Program screen, and not the Rename a Program screen. Touch [Cancel Job] then [OK] to return to Functions screen. Touch [Program] again. 2 Touch [Program List]. Program Type Selections 01G Functions Close Select a program to rename. Touch character buttons to enter a new name. Rename Ready to Make Master Basic 4 5 Cancel OK Admin. Small Capital 02G Single Multiple Program List P. 1/9 Change capitalization be selecting [Small] or [Capital] button. )p.138 Note: • To delete the current name, touch or press the key. button Automatic Sorting Into Groups [Program] 137 Advanced Features 6 When entered, touch [OK]. Tip: Returns to the Program List screen. The program is renamed. Small Rename screen Rename Small Cancel OK Cancel OK Capital Capital Rename Small Capital Note: • You can enter up to 10 characters. • Print Quantity Keys may also be used for entering numbers. • button or the key clears previously saved or current entry. Touch to clear one character at a time. 138 Automatic Sorting Into Groups [Program] Advanced Features Retrieving a Program Retrieve a stored program and modify its settings. 1 Press the 4 key. Touch [OK]. Single Page Mode Program-A Cps. 2 Selections 01G Functions Cps. 04G 02G 05G 03G 06G Sets Entry/Call Revise Clear All Returns to the original screen. Ready to print using the retrieved program. Close Admin. Note: • To cancel the program printing, press (or touch [Functions] → [Program]) and then touch [Cancel Job] on the next screen displayed. Cancelling program printing by pressing the button will reset other settings. 02G Single Sets P. Ready to Make Master Program Type OK To t a l 01G Touch [Program List]. Basic Cancel Multiple Program List P. 1/9 3 Touch a button to select a Program to retrieve. Program List Close Select a Button to be Retrieved Register Program-A Pattern-A P-09 Retrieve Program-B Program-X P-10 Rename Program-C P-07 P-11 Clear Job 1 P-08 P-12 Automatic Sorting Into Groups [Program] 139 Advanced Features Clearing Programs 1 Display the Program List screen. 2 Touch [Clear]. Follow steps 1-2 in “Retrieving a Program” ()p.139). Program List Close Select a Button to be Cleared 3 Register Program-A Pattern-A P-09 Retrieve Program-B Program-X P-10 Rename Program-C P-07 P-11 Clear Job 1 P-08 P-12 Select a program to delete. Program List Close Select a Button to be Cleared 4 Register Program-A Pattern-A P-09 Retrieve Program-B Program-X P-10 Rename Program-C P-07 P-11 Clear Job 1 P-08 P-12 Touch [OK]. Program List Close Select a Register Frame for a Button Register Program-AP-01 This SettingP-02 will be Cleared OK? Rename P-03 Retrieve Clear P-04 Cancel P-05 P-09 P-06 P-10 P-07 P-11 P-08 OK P-12 Returns to the Program List screen. The program is deleted. 140 Automatic Sorting Into Groups [Program] Advanced Features Making changes to Stored Programs 1 Retrieve a program to modify. 2 Make changes to the Program. Follow steps 1 and 3 in “Retrieving a Program” ()p.139). Modify number of copies or sets in the current screen. Note: • See “Setting Up for Programed Printing” ()p.134) for details on how to set up a program. 3 Touch [Revise]. Single Page Mode Program-A Cps. Cancel OK To t a l Sets Cps. 01G 04G 02G 05G 03G 06G Sets Entry/Call Revise Clear All P. 4 Touch [OK]. Single Page Mode Program-A Cps. 01G 02G 03G Cancel OK To t a l Sets Cps. Program-A This Setting 04G will be Revised OK? 05G 06G Cancel Sets Entry/Call Revise OK Clear All P. Returns to the Program screen. “Program” settings are updated (overwritten). Automatic Sorting Into Groups [Program] 141 Advanced Features Using Job Memory Functions [Job Memory] Save the settings of the last print job into “Job Memory”. Simply retrieve those “Job Memory” settings when doing a similar print job. Up to 10 jobs can be saved. The following attributes can be saved to “Job Memory”. MasterMaking/Print Image Multi-Up Print Print Position Auto Page Renewal Dot Process Layout Paper Feed Adj. Scanning Side-ADF* Contrast Top Margin D-Feed Check Air Blow Ink Saving Contrast Adj Jump Wing Control Separation Fan Size Tone Curve Auto Process Pre-suction Fan Margin+ Binding margin Interval Suction Fan Paper Size Print Quantity ADF Semi-Auto* Max. Scan Print Speed Sorter* Book Shadow Print Density Job Separation* *: Available with optional device Link Mode (available with Linked Printer) Image Feed Tray Print Quantity Punch* Dot Process Book Shadow Duplex* Mailbox* Contrast Top Margin Printer Collate* Output Reversal* Size Contrast Adj Offset Pages* Margin+ Tone Curve Staple* *: Available with optional device 142 Using Job Memory Functions [Job Memory] Advanced Features Storing Job Memory 1 2 Set various settings for a print job. 4 Touch [Job Memory] on the Functions Screen. Confirm settings. Status Check M-2 Basic Selections Functions Admin. Program Tone Curve Job Memory Multi-Up Print Dot Process 2 Up Contrast Adj Book Shadow P. 1/4 3 Touch OK P. 1 / 4 Register Image Dot Process Contrast Ink Saving Size Margin+ Paper Size Max. Scan Book Shadow Multi-Up Print Ready to Make Master Cancel Photo OFF OFF OFF Auto OFF OFF OFF and scroll down to check all items. Note: Note: • Job Memory screen can also be invoked by pressing the key on the Print Quantity Keys. • To change a setting, touch [Cancel] and start over again. (Return to step 1.) Touch an unused button. Job Memory Close Select a Register Frame for a Button Register M-1 M-6 Retrieve M-2 M-7 Rename M-3 M-8 Clear M-4 M-9 M-5 M-10 5 Touch [OK]. Returns to the Job Memory screen. Settings are updated. Each job memory can be named for your convenience. See step 2 in “Renaming a Job Memory” ()p.144). Unused buttons are displayed with a solid line. Used buttons are grayed-out and are not available. Note: • If you pressed the key to open the screen, first touch [Register] then select an available button. Using Job Memory Functions [Job Memory] 143 Advanced Features Renaming a Job Memory 1 Touch [Job Memory] on the Functions Screen. 4 Rename Ready to Make Master Basic Selections Touch character buttons to enter a new name. Functions Cancel OK Admin. Program Tone Curve Job Memory Multi-Up Print Dot Process 2 Up Contrast Adj Book Shadow Small Capital P . 1/4 2 Change capitalization by selecting [Small] or [Capital] button. )p.138 Touch [Rename]. Job Memory Note: Close • To clear the current name, touch press the key. Select a Button Name to be Changed Register M-1 M-6 Retrieve M-2 M-7 Rename M-3 M-8 Clear M-4 M-9 M-5 M-10 5 When entered, touch [OK]. Rename Small 3 button or Cancel OK Capital Select a Job Memory to rename. Job Memory Close Select a Button Name to be Changed Register M-1 M-6 Retrieve M-2 M-7 Rename M-3 M-8 Clear M-4 M-9 M-5 M-10 Unregistered buttons are grayed-out and are not available. 144 Using Job Memory Functions [Job Memory] Returns to the Job Memory screen. The name is updated. Advanced Features 6 Touch [Close]. Job Memory Close Select a Button Name to be Changed Register Retrieve Rename Clear Returns to the Functions screen. Using Job Memory Functions [Job Memory] 145 Advanced Features Retrieving a Job Memory and Printing There are two ways to display the Job Memory screen. • Touch [Job Memory] on the Functions screen on the display. • Press the key of the Print Quantity Keys. In the following steps, the explanation will be made for touching the display. 1 Touch [Job Memory] on the Functions Screen. 3 Select a Job Memory to retrieve. Job Memory Ready to Make Master Basic Selections Functions Close Select a Button to be Retrieved Register Admin. Retrieve Program Tone Curve Job Memory Multi-Up Print Dot Process 2 Up Contrast Adj Book Shadow Rename Clear P . 1/4 2 Note: • A job setting can also be retrieved using the Print Quantity Keys. M-1 to 9: to M-10: Touch [Retrieve]. Job Memory Close Select a Button to be Retrieved Register 4 Confirm the settings and touch [OK]. Status Check Retrieve RISO NEWS Image Dot Process Contrast Ink Saving Size Margin+ Paper Size Max. Scan Book Shadow Multi-Up Print Rename Clear Unused buttons are displayed with a solid line. Used buttons are grayed-out and are not available. Cancel OK P. 1 / 4 Retrieve Photo OFF OFF OFF Auto OFF OFF OFF Returns to the Functions screen. Ready to print using the retrieved job settings. Continue with the normal printing processes. Note: • To cancel a retrieved job memory, press the key. 146 Using Job Memory Functions [Job Memory] Advanced Features Tip: Quick Retrieval A job setting can be retrieved via hardware keys without touching the Touch Screen. For example, to retrieve and print job M-2, press the , , key in that order. M-2 is retrieved and starts the master-making process. Registered Number Using Job Memory Functions [Job Memory] 147 Advanced Features Clearing Job Memory 1 Touch [Job Memory] on the Functions Screen. 4 Touch [OK]. Status Check Ready to Make Master Basic Selections Functions RISO NEWS Program Tone Curve Job Memory Multi-Up Print Dot Process 2 Up Contrast Adj Book Shadow OK P. 1 / 4 Clear Image Dot Process Contrast Ink Saving Size Margin+ Paper Size Max. Scan Book Shadow Multi-Up Print Admin. Cancel Photo OFF OFF 100% OFF Auto OFF OFF OFF P . 1/4 2 5 Touch [Clear]. Touch [Close]. Job Memory Job Memory Close Select a Button to be Cleared - Cleared Register Register Retrieve Retrieve Rename Rename Clear Clear Returns to the Functions screen. 3 Select a Job Memory to clear. Job Memory Close Select a Button to be Cleared Register Retrieve Rename Clear Important!: • Make sure it is the job setting you want to delete. • Once deleted, it cannot be restored. 148 Using Job Memory Functions [Job Memory] Close Advanced Features Protecting Confidential Documents [Confidential] After printing is complete, the master remains on the Print Drum (Cylinder) and is ready for printing another set of copies. To protect confidential documents from unauthorized duplication, use the Confidential feature to discard the master after printing. Note: • When “Confidential” is performed, the discarded master may no longer be reproduced, and “Renew Page” feature is disabled. • If “Idling Action” is set to “ON”, “Idling Action” is executed using a confidential master (use this function when not using the Print Drum (Cylinder) for extended periods of time). • You can set the machine to remind users to use the “Confidential” feature every time it is used. )p.184 1 Make sure printing is completed. 2 Touch [Confidential] on the Functions Screen. Confirm that everything is printed. Ready to Make Master Basic Selections Functions Admin. Editor Ink Saving D-Feed Check Interval Idling Action Renew Page Confidential Auto Page Renewal P . 3/4 3 Touch [OK]. Select Print Quantity Confidential Basic Selections Cancel Functions OK Admin. Confidential Mode P.3 / 4 The current master is discarded, and a new master is set on the Print Drum (Cylinder). Protecting Confidential Documents [Confidential] 149 Advanced Features Extending the Reserve Period [Reservation] This function is useful when the machine is connected to a computer. When the machine is inactive for a certain period of time, it determines that the current job is completed, even if the actual printing is still under way. If another person accidentally initiates another job from the computer, this will cause a new master to be made, discarding the current one. By extending “Reserve Period”, such interruption can be prevented. We recommend that you activate the “Reservation” setting when temporarily pausing a job or when printing leaflets etc. to prevent interruption. Note: • Select from 5, 10, or 30 minutes as the “Reserve Period” on the Admin. screen. The factory default is 5 minutes. )p.171 • The following operations do not count towards reservation period. – – – – When the machine is operating (making a master, printing, confidential action, idling, etc.) When the Job Separator (option) is operating When Control Panel buttons are being entered When the setup screen for some function is displayed • Auto Sleep and Auto Power-OFF will be disabled during the reservation period. Auto Sleep/Auto Power-OFF: timer re-activates after the reservation period is up. Power-OFF Schedule: Will not shut off until next day on time. )p.172 Touch [Reservation] on the Functions Screen. Ready to Make Master Basic Selections Functions Admin. Top Margin ADF Semi-Auto Binding Margin Preview Max. Scan Overlay Reservation Storage Memory P. 2/4 Reservation period is extended. 150 Extending the Reserve Period [Reservation] Advanced Features Idling Action [Idling Action] Idling action prevents the machine from printing the first several copies with faint ink after the Print Drum (Cylinder) has been exchanged or the machine has not been used for an extended period of time. Idling action before the master-making process assures consistent print quality from the start. Important!: • “Idling Action” is effective only in conjunction with the master-making process. When performing print processes only, “Idling Action” will have no effect. Note: • To perform “Idling Action” automatically when making a master after a specified period of time since the last print job, set “Auto Idling” on the Admin. screen. )p.172 1 Touch [Idling Action] on the Functions Screen. Ready to Make Master Basic Selections Functions Admin. Strage Memory Confidential Editor Ink Saving D-Feed Check Interval Idling Action Paper Interposal P. 3/4 appears on screen. 2 Press the key. After “Idling Action” has been finished, the mastermaking process is started. Note: • If displays in the screen message area even though it is not set, this indicates that the “Auto Idling” time has elapsed. If you make a master in this status, “Idling Action” is executed. Ready to Make Mast Master Basic Selections Functions • Remember to load the originals before pressing as the master will be made immediately after “Idling Action” finishes. Idling Action [Idling Action] 151 Advanced Features Reproducing the Master [Renew Page][Auto Page Renewal] The data from the last master-making process is temporarily stored on the machine. Using this data, another master can be reproduced without repeating steps to scan the same original. You can “Rotate” the original and recreate a master. “Auto Page Renewal” is a function that automatically recreates a master when a specified number of pages are printed. If you are printing a large-volume job of thousands or tens of thousands of copies, the master may degrade before the job is completed. If you set “Auto Page Renewal” to “ON” prior to starting a large-volume print job, a master will be automatically recreated when the specified number of copies is reached (Auto Renewal Point). This allows you to maintain a consistent print quality from start to finish. Note: • “Renew Page” works with data sent from a computer as well. However, if multiple pages exist, only the last page will be processed with “Renew Page”. • The “Renew Page” function is not available under the conditions below: – – – – – – – immediately after startup after pressing the key after executing “Auto Clear” (“Changing Default settings” )p.172) after performing “Confidential” when an error has occurred during master-making after performing “Link Print” after master-making for Data Output Mode (when the optional Key Card Counter is installed.) • When “Renew Page” or “Auto Page Renewal” is selected, 2 proof copies will be made. When the print position has been adjusted, the printer will center the Print Drum (Cylinder) to their original position, recreate the master and print a proof copy. Then, the Print Drum (Cylinder) will move to the previously adjusted position and print another proof copy. • The number of pages in the proof copy when using “Auto Page Renewal” can be adjusted using “Admin.”. )p.173 • When the print position has been adjusted, 2 proof copies will be made. (When the print position has not been adjusted and when the print position has been adjusted) 152 Reproducing the Master [Renew Page][Auto Page Renewal] Advanced Features Using Page Renewal 1 Touch [Renew Page] on the Functions Screen. Select Print Quantity Basic Selections Functions Admin. Editor Ink Saving Paper Feed Adj. Interval Idling Action Renew Page Confidential Auto Page Renewal P . 3/4 Note: • If you touch and select [Rotate], you can rotate the original 180 degrees for renewing the master. • When “Rotate” is set, the machine rotates 180 degrees for renewing the master while excecuting “Auto Page Renewal”. • To cancel “Rotate”, touch [Rotate] again. Select Print Quantity Renew Page Basic Selections Cancel Functions OK Admin. Master Renewal Mode Rotate P.4 / 4 2 Touch [OK]. “Renew Page” begins reproducing the master. Reproducing the Master [Renew Page][Auto Page Renewal] 153 Advanced Features Using Auto Page Renewal In order to use “Auto Page Renewal”, you must enable it in “Admin.” prior to use. If “Auto Page Renewal” is activated and “Auto Page Renewal” is set to “ON”, “Auto Page Renewal” can be executed during a print job. Important!: • If “Auto Page Renewal” is not activated in “Admin.”, “Auto Page Renewal” cannot be set to “ON”. )p.173 • The “Auto Page Renewal” is set to “OFF” in the following instances. – When printing with “Program” – When the or the is pressed – When attempting to process the next job with direct print Note: • The factory settings are such that a master is recreated every 1000 copies, with a setting to print 3 proofs. This setting can be changed in “Admin.”. )p.173 Turning ON “Auto Page Renewal” Touch [Auto Page Renewal] on the Functions Screen. Select Print Quantity Basic Selections Functions Admin. Auto Page Renewal Counter Display Internal Scanning Side -ADF Job Separation Duplex(Link) Special Paper Ctrl P. 4/4 “Auto Page Renewal” is activated. When you print with these settings, “Auto Page Renewal” will be executed after the specified number of copies are printed. Note: • If [Auto Page Renewal] is grayed-out, go to “Admin.” and turn “Auto Page Renewal” ON. )p.173 154 Reproducing the Master [Renew Page][Auto Page Renewal] Advanced Features Print the original from the last page [Output reversal] By reversing the page order of the originals of several pages in length, print the originals from the last page. In normal printing Flow of original In output reversal Important!: • To use this function, the optional Document Storage Card DM-128CF is required. • While scanning the original, if there is no free memory space, the scanning stops to display a message. After canceling original scanning or arranging (clearing) the storage data, scan the original once again. • You cannot use “Output Reversal” unless you set “CI Select” to “Internal CI” on the Admin. screen. See “Changing Default Settings/CI Select” ()p.170). Note: “Output reversal” is not available in combination with the functions below. • Program ([Multiple]) • Preview • Overlay • Storage Memory 1 2 Set the original and print paper. Place the original on the Glass Platen or in the optional ADF unit. To place the original, see )p.43. 3 Configure print functions. 4 Press the 5 When the original has several pages, replace the originals and repeat steps 3 and 4. Touch [Output reversal] on the Functions screen. Ready to scan data Page No. 1 Reverse 180ppm Set various functions as needed. key. Scan the 1st original. When the optional ADF unit is used, proceed to step 6 after all the originals are scanned automatically. The button is inverted, and “Output Reversal” is set to “ON”. Print the original from the last page [Output reversal] 155 Advanced Features 6 Touch . Ready to scan data Reverse Page No. 4 Admin. Renew Page D-Feed Check Black The confirmation screen for master-making is displayed. 7 Touch [Yes]. The Master Making Basic Screen for storage data is displayed. Various output instructions can be changed. )p.28 Note: • To cancel output reversal without making a master, touch [No]. To return to the previous step, touch [<Back]. 8 Press the 9 Enter the print quantity using the Print Quantity Keys. key. The master-making starts from the last page scanned, and Print Basic Screen for storage data is displayed. The entered quantity is displayed on the Print Quantity Display. Press the 10 Printing starts. key. Afterwards, repeat steps 8 to 10. 156 Print the original from the last page [Output reversal] Advanced Features Proof and Print (with the optional ADF unit installed) [ADF Semi-Auto] Selecting “Auto Process” with the optional ADF unit installed automatically performs the complete printing job, but you cannot make proof copies, or any necessary adjustments of each master. To pause for check after printing a proof copy of each master, select “ADF Semi-Auto”. Important!: • Turn “Auto Process” OFF when using “ADF Semi-Auto”. )p.68 Note: • The default “ADF Semi-Auto” can be set on the Admin. screen. )p.170 1 Touch [ADF Semi-Auto] on the Functions Screen. 3 The number is displayed on the Print Quantity Display. Ready to Make Master Basic Selections Functions Enter the number of copies using the Print Quantity Keys. Note: Admin. Top Margin ADF Semi-Auto Binding Margin Preview Max. Scan Overlay Reservation Storage Memory • To change the number, press the then re-enter the correct number. 4 Press the key, key. P. 2/4 RESET PROOF “ADF Semi-Auto” is selected. START STOP Note: • When “ADF Semi-Auto” is not displayed (or displayed in gray), turn off the “Auto Process” key on the Control Panel. 2 Place original(s) in the ADF unit. After a master is made, a proof copy is printed and the job stops. 5 Check the proof copy. 6 Press the Make adjustments if needed. key. The machine prints specified number of copies. Master for the next original is made, its proof copy is printed, then the machine stops again. Repeat steps 5 and 6. The ADF unit detects the document, and automatically opens the Master Making Basic Screen. To place the original, )p.43. Proof and Print (with the optional ADF unit installed) [ADF Semi-Auto] 157 Advanced Features Selecting Scanning Sides When Using the Auto Document Feeder DX-1 [Scanning Side -ADF] When scanning originals using the optional Auto Document Feeder DX-1, there are three scanning side options: “Front Side”, “Back Side”, or “Duplex”. Important!: • If the original is set on Auto Document Feeder DX-1, “Book Shadow” function cannot be used. Note: • The upside when the original is set is “Front Side”. The set original is scanned sequentially from the top. • Go to “Admin.” and select “Scanning Side -ADF” to save a frequently used setting as the default. )p.169 Front Side -> Simplex Scans the front side of the original, and prints on one side. Original Printed Copies Original Printed Copies Important!: • If the “Auto-Link” function is ON or the “Top Margin” function is used, the setting, “Front Side -> Simplex” must be used. (“Auto-Link” function is not available for RZ1090U.) Back Side -> Simplex Scans the back side of the original, and prints on one side. Important!: • When “Sorter” is set to ON, “Back Side -> Simplex” is automatically selected. Place the original face-down. Duplex -> Simplex Scans both sides of the original and prints on one side. The front side is scanned first and then the back side. “Setting Direction” and “Paging Direction” of the original must be specified. Original Printed Copies Important!: • The “Duplex -> Simplex” option is not available in “Program; MultiPage Mode” Likewise, if “Duplex -> Simplex” is selected, “Multi-Page Mode” is not available. Note: • If the original includes blank pages, these will also be scanned and included in copies. 158 Selecting Scanning Sides When Using the Auto Document Feeder DX-1 [Scanning Side -ADF] Advanced Features The processing order of the original and output The original set in Auto Document Feeder DX-1 is scanned and printed from the top. Note: • In “Program; Multi-Page Mode”, the first page of the original scanned is displayed as “Page01” on the Setup screen. e.g. With the “Back Side -> Simplex” option, the last page of the original is displayed as “Page01” on the Setup screen because scanning starts from the last (topmost) page. Front Side -> Simplex Original 1 2 1 3 2 3 Printed Copies Back Side -> Simplex Original 3 1 2 2 3 1 Printed Copies Duplex -> Simplex Printed Copies 3 4 6 2 5 1 6 4 3 5 2 1 Original Printed Copies 3 4 1 2 5 6 1 3 4 2 5 6 Original Selecting Scanning Sides When Using the Auto Document Feeder DX-1 [Scanning Side -ADF] 159 Advanced Features Specifying the Scanning Side 1 Touch [Scanning Side -ADF] on the Functions Screen. When you select [Duplex -> Simplex] Touch to select [Setting Direction] and [Paging Direction] buttons, shown on the screen. Ready to Make Master Scanning Side -ADF Front Side Simplex Back Side Simplex Duplex Simplex Align Top A Align Side Simplex Left / Right Top / Bottom Touch a scanning option button. See )p.158 for details of scanning options. Front Side Simplex Back Side Simplex Duplex Simplex Cancel OK Front Side Simplex Only front sides (upsides) of originals will be scanned by the ADF. 3 Touch [OK]. Scanning Side -ADF Front Side Simplex Back Side Simplex Duplex Simplex A Setting Direction Align Top A Align Side Cancel OK Duplex Simplex Both sides of originals will be scanned by the ADF. Paging Direction AA Scanning Side -ADF A A 2 Duplex Paging Direction AA A Setting Direction OK Both sides of originals will be scanned by the ADF. A A 180ppm Cancel Left / Right Top / Bottom Returns to the basic screen after the “Scanning Side -ADF” settings have been saved. Note: • To confirm the current “Scanning Side -ADF” settings, open the “Scanning Side -ADF” screen once more. The selected settings buttons are highlighted. 160 Selecting Scanning Sides When Using the Auto Document Feeder DX-1 [Scanning Side -ADF] Advanced Features 5) Select [Back Side -> Simplex] for printing. Tip: 4 Output 6 1) Set the original for duplex printing. Printing Paper 2 Scanning duplex originals for manual duplex printing With the optional Auto Document Feeder DX-1, the buttons on the “Scanning Side -ADF” screen can be used to scan both sides of an original and print on both sides of paper. e.g.) Scanning the duplex original for duplex printing. 6 5 3 4 1 2 Original orientation 2) Select [Front Side -> Simplex] for printing. 5 3 Output 1 3) Place the printing paper face down in the Paper Feed Tray. Printing Paper 1 Paper feeding direction 3 5 4) Set in the same orientation as shown in step 1. 6 4 5 3 1 2 Original orientation Selecting Scanning Sides When Using the Auto Document Feeder DX-1 [Scanning Side -ADF] 161 Advanced Features Checking User Counters [ID Counter Report] Each user can output counter data (number of prints, etc.) when checking usage status. Important!: • “ID Counter Report” can be outputted only when the “User Management” function is set. Report Output Counter data can be outputted by following methods. • Print Prints the counter data. • E-mail E-mail attached with the counter data is sent to the e-mail addresses set as the destination. The mail settings must be set in advance. For details on mail settings, the RISO Network Card is required. For details, see the “RISO Network Card User’s Guide”. • USB Flash Drive Outputs the counter data to the USB Flash Drive. USB Flash Drive must be connected to the USB slot in advance. Note: • By using the “RISO Utility Software” (RISO COPY COUNT VIEWER) included on the provided CD-ROM, the counter data output to the USB Flash Drive can be managed by a computer. For details, see the “RISO Utility Software User’s Guide”. Setting the reminder date For regular counting, a reminder date can be set. The following screen is displayed on the set date. Please inform this message to your administrator Due date for ID counter report Close Important!: • To manage usage status correctly, the following setting is required. If you do not make the following setting, you cannot count the number of prints/masters correctly. – Set [Management Level] to [High/Full Management] in User Management. )p.116 – If you print from the computer, be sure to use “ID Print”. See the “RISO Printer Driver User’s Guide” for detail. 162 Checking User Counters [ID Counter Report] Advanced Features Outputting the Counter Report 1 Touch [ID Counter Report] on the Functions screen. Ready to Make Master 180ppm 2 Touch the button of the desired output method. E-mail USB Flash Drive Returns to the Basic screen after output. If the mail setting is not set, [E-mail] is not available. Consult your dealer (or authorized service representative) about mail settings. If the USB Flash Drive is not connected, [USB Flash Drive] is grayed-out and is not available. Checking User Counters [ID Counter Report] 163 Advanced Features Setting Up the Monthly Reminder 1 Touch [ID Counter Report] on the Functions Screen. Note: • Print Quantity Keys can also be used to enter numbers. • The set date can be selected between 1 and 31. • When setting the reminder date between the 29th - 31st, and if the number of days in the month is less than this range such as in February, the reminder screen is displayed on the last day of the month. • If you are not setting the reminder date, touch [OFF]. Ready to Make Master 180ppm 4 2 Touch [OK]. Touch [Set Date]. E-mail USB Flash Drive Returns to the ID Counter Report screen. The reminder date is updated. 3 Touch date. or to set the reminder 5 Touch [Close]. Returns to the Functions screen. Note: • Once the reminder date is set, a “reminder screen” is displayed on each reminder date. In fact, this message is displayed each time the machine is turned ON until the counter report is output. If you do not want to output the counter data on the set date of this month, touch [Stop Reminder]. The reminder screen is not displayed until the reminder date of the next month. If the [Date] button is grayed-out, touch [OFF] and input the date. 164 Checking User Counters [ID Counter Report] Advanced Features Showing Usage Status [Meter Display] The machine can record and display the following information: A4/Letter and Under: Total number of copies A4/Letter-sized and smaller that have been printed. Above A4/Letter: Total number of copies larger than A4/Letter that have been printed. Total: The total number of copies printed by the machine. A3/Ledger Master Count: Total number of A3/Ledger-sized masters that have been made. A4W/LetterW Master Count: Total number of A4W/LetterW-sized masters that have been made. Master Count: The total number of masters made by the machine. Print Drum: The number of copies that have been printed with the currently installed Print Drum (Cylinder). Job Count: Start and stop as needed. For example, to keep track of the number of prints made in a day, set “Job Count” to 0 in the morning, and check the counter at the end of the work day to get the count. Note: • When using more than one Print Drum (Cylinder), install the Print Drum (Cylinder) for which you need information before displaying the Counter Display screen. 1 Touch [Meter Display] on the Functions screen. 2 Ready to Make Master Basic Selections Functions Meter Display Renew Page Auto Page Renewal Admin. Scanning Side -ADF Job Separation Duplex(Link) Review counts. A4/Letter and Under 0 Above A4/Letter 0 Total 0 A3/Ledger Master Count 0 A4W/LetterW Master Count 0 Master Count Total 0 Print Drum Meter 0 Special Paper Ctrl P . 4/4 Note: • Using the “Job Count” 1) Touch to set the counter to 0. 2) Touch [Close] to close the Meter Display screen. Operate the machine as normal. 3) To display and review the Job Count, follow step 1. 3 Touch [Close] to close the window. Returns to the Functions screen. Showing Usage Status [Meter Display] 165 Advanced Features Customizing the Direct Access Area [My Direct Access] Normally, the functions displayed in the Direct Access Area of the Basic Screen are already registered by default setting or changed by the administrator. However, if User Management is set up, each user can register the functions displayed in the Direct Access Area using “My Direct Access”. The functions that can be displayed in the Direct Access Area can individually be registered in each mode (Master Making/Print/Scanning). Up to 4 functions can be registered. Ready to Make Master Multi-Up Print D-Feed Check Black Direct Access Area “My Direct Access” kept by each user can be displayed after the user has been identified and cannot be changed by other users. Note: • “My Direct Access” can be set when “Management Level” is set to “High/Full Management” in “User Management”. • If “My Direct Access” is not set, the functions registered via the usual methods are displayed in the Direct Access Area. ()p.178) 1 Touch [My Direct Access] on the Functions screen. Ready to Make Master Note: • Consult your administrator for Management Level. 2 Select a mode tab to register new buttons. 180ppm D-Feed Check If “Management Level” is not set to “High/Full Management” in “User Management”, the [My Direct Access] button is grayed-out and is not available. 166 Customizing the Direct Access Area [My Direct Access] Advanced Features 3 Select a button to assign a function to. 6 Touch [OK]. Returns to the Functions screen. D-Feed Check If the button has a function already assigned to it, the newly selected function will overwrite the previous function. 4 Select a function to assign. 180ppm Note: • Touch or to display more functions if necessary. • To remove a function that is accidentally assigned, touch [No Entry]. • Functions already assigned are grayed-out and are not available. • Some functions display only when optional devices are installed. 5 Touch [OK]. Returns to “My Direct Access” screen. The selected functions are added. To add more functions or to replace a button with another function, repeat step 3 to 6. Customizing the Direct Access Area [My Direct Access] 167 Advanced Features Changing Default Settings [Admin.] The default settings can be modified to best suit your needs. They may be edited as needed. Important!: • If the administrator is registered in User Management, only the administrator can change the [Admin.] settings. (This operation requires input of the administrator's PIN code or connection of the registered USB Flash Drive.) )p.122 • Depending upon the usage environment, the “Admin.” features may not be available (the “Admin.” tab may not be displayed). Consult your dealer (or authorized service representative) for details. Note: • The default settings are the values restored when the machine is turned ON or when the key is pressed. Configurable Functions :Initial setting (factory default) * This function can be set only when the option is installed. Display Access Button Functions Description DirectAccess Entry Store frequently-used functions on the Basic Screen for each mode. )p.178 Selections Entry Store frequently-used functions on the Selections screen for each mode. )p.178 Display Priority Select first screen to display following the Startup. Mode Screen/RISO Print/ Scanning/Link Mode Note: • The Mode Screen is available only when “Mode Key Pattern” is set to “Mode Selection”. [Display] Mode Key Pattern Select screens to display when the pressed. Mode Selection/Loop key is [Mode Selection] Pressing the key will open the Mode Screen no matter which screen you are currently on. [Loop] The screen changes as shown below when the key is pressed. • Normally: “Master Making Basic Screen” ←→”Print Basic Screen” • When a Linked Printer is connected: “Link Basic Screen” ←→“Master Making/Print Basic Screen” • When the optional Document Storage Card is installed: “Scan Basic Screen” ←→“Master Making/ Print Basic Screen” 168 Changing Default Settings [Admin.] Advanced Features Display Access Button Functions Description Start-Up Screen Select an animation to display at Start-up. Logo(RISO)/Logo(RZ)/Character Metric/Inch Switch Change the format for displaying measurements to metric or inches (imperial). Inch/mm Display Adjustment Change background color (colour), density and brightness of the Touch Screen. Background:Blue/White Display Density -5, -4 ... -1, 0, +1 ... +4, +5 Backlight Lightness: -2, -1, 0, +1, +2 Job list display Change the file name display of the stored data in Storage Selection Screen, Job List Screen and USB Job List Screen. From top, From bottom Displayed Language Select the language displayed on the screen. #01, #02, #03 ... [Display] Important!: • Contact your dealer (or authorized service representative) to change the settings. Image Processing Change the default setting for the “image processing mode”. Line/Photo/Duo (Text and Photo)/Pencil Scanning Contrast • Contrast Range: Change the default setting for the “scanning contrast”. Lighter/Standard/Darker • Contrast: 1, 2, 3, 4, 5, Auto [Default] Reproduction Size Change the default setting for the “size”. 100%, Auto Print Speed Change the default setting for the “print speed”. 1, 2, 3 ,4 ,5 Print Density Change the default setting for the “print density”. • Print Density Level: Lighter/Standard/Darker • Print Density: 1, 2, 3, 4, 5 Scanning Side -ADF* If the machine is equipped with the optional Auto Document Feeder DX-1, select the default scanning side for simplex original using “Scanning Side -ADF”. )p.158 Front Side -> Simplex, Back Side -> Simplex OP Auto Process* Change the default setting for the “Auto Process” when an optional ADF unit or Job Separator is installed. ON, OFF Changing Default Settings [Admin.] 169 Advanced Features Display Access Button [Default] Functions Description ADF Semi-Auto* Change the default setting for the “ADF Semi-Auto” when the ADF unit (option) is installed. ON, OFF Auto Process Mode Change the default setting for the “Auto Process”. ON, OFF Double Feed Check Change the default setting for the “D-Feed Check”. ON, OFF Job Separation* Change the default setting for the “Job Separation” when the Job Separator (option) is installed. ON, OFF Jump Wing Control Change the default positioning of the Paper Jumping Wing. ON, OFF Important!: • This option is available only when the special paper setting is pre-configured. Contact your dealer (or authorized service representative) to pre-configure this setting. [System] Paper Ejection Adj Change the default settings for “Paper Ejection Adj”. )p.170 Air Blow: OFF, ON Separation Fan: OFF, 1, 2, 3, 4 Pre-suction Fan: ON, OFF Suction Fan: 1, 2, 3, 4 Default Folder* When the optional Document Storage Card DM128CF is attached, change the folder in which to save the data scanned in the scan mode and the folder to save the data sent from the computer. Scan Data Folder: 6 folders PC Job Folder: 6 folders Custom Paper Entry Specify paper dimensions before using non-standard sized paper. )p.180 Irregular Fitter Specifies to scan custom-size originals as standardsized. OFF, Ledger, Legal, Letter, LetterR, Statement Folder Renaming* When the optional Document Storage Card DM128CF is attached, changes the folder name of the folder used to save data. 6 folders CI Select Choose between “Internal CI” and “External CI” settings. If the machine is equipped with the optional IS300, select “External CI”. Internal CI, External CI 170 Changing Default Settings [Admin.] Advanced Features Display Access Button Functions Description External CI Info * • When using a DHCP server If the machine is equipped with the optional IS300, set [Use DHCP] the IP address to connect the machine to the network. • When entering IP address IP address settings differ depending on the type of network. manually [Manual Input] Note: or the Print Quantity • To change an input source, touch the applicable Keys. box, or press the key to rotate options. • If the message “Network Communication is Not Possible” is displayed when touching [External CI Info], touch [Cancel] and wait for the IS300 to finish starting up, then try again. Base IP Address Set the IP address for connecting the machine to a network. IP address settings differ depending on the type of network. Note: • To change an input source, touch the applicable box, or press the key to rotate options. • If the message “Starting Up Network Card” is displayed when touching [Base IP Address], touch [Cancel] and wait for the RISO Network Card to finish starting up (approx. 1 minute), then try again. [System] Margin-Plus Rate 90 to 99 % Specify default size-reduction rate for the “Margin+” setting. (Factory default is 94%) Auto 90°Rotation When setting an original of the same size but with a different orientation from that of the paper loaded in the Paper Feed Tray, on the Glass Platen or the optional ADF unit, the 90-degree rotation setting can be used to align original and output documents. ON, OFF Clock/Calendar Set the internal clock of the machine. The time/date displays on the Info screen. )p.223 Year/Month/Day Hour:Minute Multi-Up Interval Select the interval time (seconds) between first and second scans when using Multi-Up Printing. 15s, 30s Reserve Period Select a duration of time (seconds) for the inactive machine to receive data from a computer but restricts processing any output command. OFF/15s/30s/60s Ex. Reserve Period When “Reserve Period” is set, extends the Reserve Period (minutes) to prevent data interruption. 5mn/10mn/30mn Changing Default Settings [Admin.] 171 Advanced Features Display Access Button Functions Auto Clear Select whether to reset all settings to default automatically when the machine is inactive for a set period (minutes). After executing “Auto Clear”, the “Renew Page” function cannot be used. If you use “Renew Page” frequently, we recommend setting this to “OFF”. • Auto Clear OFF/ON • Waiting Time 1-60 mn (factory default is 5 mn) Energy Saving Mode Select to activate Sleep Mode or Shutdown Power when the machine is inactive for a set period of time. • Energy Saving Mode OFF/Auto Sleep/Auto PowerOFF • Waiting Time 1-60 mn (factory default is 5 mn) • OFF “Energy Saving Mode” is not activated. Power is turned ON/OFF using the power switch. • Auto Sleep The machine is standing by to receive data from the computer, but the rest of its functions are powered off. • Auto Power-OFF Automatically shuts the power off. (Data cannot be received.) [System] Description Power-OFF Schedule Set a time of the day to automatically shut power to the machine off. If the machine (or its Linked Printers) are in use, or receiving data, power will not shut off. • Power-OFF Schedule OFF/ON • Shut-Off time Hour: Minute User Management Set the User Management function. )p.116 • Management Level Set the “Management Level”. • Create User Register the administrator and users of this machine. • Rename Group Change the group name. • Reset Counter Reset all user counters for master-making/printing. • Recognized by Set the Recognition and Identification System. Protect Determine the “Protect” setting. )p.184 OFF, ON Auto Idling Select whether to perform “Auto Idling” when making a master after a set period of non-use. Also selects a period of non-use before initiating “Auto Idling”, as well as the number of idle rotations. • Auto Idling OFF/ON • Non-Use Time 1-12 hour • Rotation 1-3 (times) 172 Changing Default Settings [Admin.] Advanced Features Display Access Button Functions Description Auto Page Renewal Allows you to set when to recreate a new master. Once the specified number of copies is reached, the master in use is automatically discarded and a new one created. You can also specify the number of proof copies to make after recreating the master. Minimum Print Q’ty Set minimum number of copies to print. This prevents master from being made when a smaller quantity is entered for printing. • Auto Page Renewal OFF, ON • Auto Renewal Point 1-9999 copies (Factory default is 1000 copies) • Sample Copy Output 0-99 copies (Factory default is 3 copies) OFF/ON (2-99 copies) Important!: • This setting can be locked to prevent alteration. Consult your dealer (or authorized service representative) for details. [System] Stock Management In order to check current stock quantity, insert the number of consumables purchased. When stock quantity falls below the “Remaining Qty to be notified”, a message will appear on the display. • Purchase Qty 0-99 Pcs. • Remaining Qty to be notified 0-99 Pcs. Note: • To switch an entry, directly touch the button or press the key. Beep Sound Select whether to activate a beep sound when a key/ button is pressed, or when an error occurs. OFF/Limited/ON • ON Beeps when any key/button is pressed. Beeps when an event is caused/completed. • Limited Does not beep when keys/buttons are pressed. Does not beep when restarting the machine. • OFF Does not beep. Changing Default Settings [Admin.] 173 Advanced Features Display Access Button Functions Description Link Properties )p.205 Linked Printer If only one Linked Printer is attached to the machine (there are no other Linked Printers or networked computers), it is “One-to-One”. PC Network, One-to-One Link-Free Volume Set a number of copies by which the output device is determined. When print quantity does not reach the set value, the job is to be output from a Linked Printer. When printing more copies than Link-Free Volume, the machine will perform printing. ON [Link-Free Volume] 2-99 copies/OFF (Factory default is 20 copies) Note: [Link Mode] Only displayed when a Linked Printer is connected. • This function is not available for RZ1090U. • The default value is 20 copies. • “Minimum Print Q’ty” cannot be set when “Link-Free Volume” is ON. Duplex Interval Select the interval time (seconds) between first and second scans when using Double-sided Printing. 15 seconds/30 seconds Online Auto-Link Select whether to automatically output a job from the Linked Printer when print quantity is less than LinkFree Volume. ON/OFF Note: • This function is not available for RZ1090U. • When “Link-Free Volume” is OFF, this item is grayed out and not available. Link Info Refresh Set how frequently the machine receives data from a Linked Printer. 10-999 seconds (Factory Default is 15 seconds) Link Scanning Mode You can select “Speed-based” or “Image-based” when outputting from a connected machine. Speed-based, Image-based Print Colors (Colours) See RISO Editor User’s Guide for details. Tool Bar Position [Editor] Sub Tool Bar Page Orientation 174 Changing Default Settings [Admin.] Advanced Features Customizing the Default Settings The default settings can be changed when the machine is not in operation. Make sure there is no pending or current Print Job operation. Note: • If the administrator is registered in User Management, only the administrator can change the [Admin.] settings. (This operation requires input of the administrator's PIN code or connection of the registered USB Flash Drive.) )p.122 • On the Admin. screen, the current setting is displayed on the right side of each button. 1 Touch [Admin.] on the Basic Screen for each mode. Ready to Make Master Renew Page When “Recognized by” is set to “PIN code” Input the administrator’s PIN code using the Print Quantity Keys and touch [OK]. D-Feed Check Black 2 Touch [OK]. Ready to Make Master When “Recognized by” is set to “USB Flash Drive” Connect the administrator’s registered USB Flash Drive to the USB slot. Note: • When an administrator is registered in User Management, the Recognition Screen is displayed. Operate the screen to log in as the administrator. If already identified as the administrator, the Recognition Screen will not be displayed. Users other than administrator are prohibited. The Admin. screen is displayed once access has been identified. Changing Default Settings [Admin.] 175 Advanced Features 3 Select a function to modify. Additional Setup Screen Available Button Style Choosing a button makes it the default. Admin. All DirectAccess Entry Display Selections Entry Default Display Priority Mode Screen System Mode Key Pattern Mode Select. Link Mode Start-Up Screen Editor Logo(RZ) P.1/11 Display Access Buttons Display Access Buttons allow for quick selection of desired functions by displaying only relevant groups of function buttons. [All]: All Functions [Display]: Functions related to Screen Display [Default]: Basic Operational Functions [System]: Functions affecting the entire System [Link Mode]: Functions related to Linked Printer [Editor]: Functions related to Editor Additional Setup Screen Available Numeric Value Style Touch to increase/decrease value. Numbers may be entered using the Print Quantity Keys. • [Link Mode] is only displayed when a Linked Printer is connected. 4 Change settings. Some functions have their own Setup screens, some don't. There are several styles for setting values. Following samples demonstrate different value setting styles. No additional Setup Screen (2 or more options to choose from) Touch the function name button to change the value displayed to the right. Admin. All DirectAccess Entry Display Selections Entry Default Display Priority Mode Screen System Mode Key Pattern Mode Select. Link Mode Start-Up Screen Editor Logo(RZ) P.1/11 176 Changing Default Settings [Admin.] Additional Setup Screen Available Multi Level Entry Style Select a button, then set its values either by touching more buttons or entering a value numerically. Advanced Features Additional Setup Screen Available Data Specification Type A screen to specify the stored data displays. See )p.195 for details on specifying the data. Storage Selection 1_folder Touch [ON] to display more options on the right. Additional Setup Screen Available Text Input Type Input the name after touching the button of the name to change. Touch the button and the Rename screen appears. Free Area: Nov25,10 Fax-cover.doc Nov25,10 Newsletter.doc Nov25,10 Images.doc Nov25,10 ID Print Job Folder Renaming USB Job List Touch [OK]. Base IP Address Cancel 98 NewsLetter.doc View edit 5 Close Cancel OK OK Manual Input 1 folder Use DHCP 2 folder 3 folder 4 folder 5 folder (Numeric keypad is available for input) 6 folder Skip to step 6 if there is no additional setup screen. Note: Rename Small Cancel • Touch [Cancel] to cancel the changes and return to the Admin. screen. • The selected value is displayed to the right of the button (for most functions). OK Capital 6 Touch . Returns to the original Basic Screen. Touch the character buttons to enter text. Change capitalization by selecting [Small] or [Capital] button. )p.138 Changing Default Settings [Admin.] 177 Advanced Features Setting Up Direct Access Area and Selections Tab [DirectAccess Entry] [Selections Entry] Frequently-accessed functions for each mode can be placed on “Direct Access” area in the Basic Screen, or on “Selections” screen. This allows quick changes and direct access to each function's Setup screens, eliminating the need to search from a long list of functions. Each mode (Master Making/Print/Scanning/Link) is capable of storing its own unique settings. Basic Screen Master Make Print Scanning Link Direct Access 4 4 4 4 Selections 9 9 - 6 Ready to Make Master Basic Page(A4) Line Multi-Up Print Selections Functions Contrast Size Ready to Make Master Admin. Auto A4 D-Feed Check Black Direct Access Area READY Idle Basic Selections Functions Admin. Paper Renew Page Interval Confidential Contrast Adj Book Shadow Job Memory Info Selections Screen Note: • Choose functions that are relevant to each mode. • The machine comes with factory default “Direct Access” area and “Selections” screen entries, which can be changed. • Any functions available in the “Functions” screen can be selected. • When there are multiple Linked Printers, select a device first, then make changes in the “Admin.” tab to select/modify “Direct Access” area and “Selections” screen. • Optional attachment is automatically added to the “Direct Access” area and “Selections” tab if a space is available for another button. (Optional devices to a Linked Printer must be entered on the Admin. screen.) • When the Management Level is set to “High/Full Management”, each user can set the functions displayed in the Direct Access Area (My Direct Access). )p.166 178 Setting Up Direct Access Area and Selections Tab [DirectAccess Entry] [Selections Entry] Advanced Features In the following steps, the registration on DirectAccess Entry and Selections Entry are explained at the same time. 1 Touch [DirectAccess Entry] or [Selections Entry] on the Admin. screen. 4 Select a function to assign. Function List Cancel OK No Entry Paper Feed Adj. Ink Saving D-Feed Check Interval Idling Action Renew Page Confidential Auto Page Renewal P. 3/4 Rogo (RISO) Note: 2 Select a mode tab to store new buttons. Multi-Up Print 3 • Touch or to display more functions if necessary. • To remove a function accidentally assigned, touch [No Entry]. • Functions already assigned are grayed out and not available for selection. • Some functions display only when optional devices are installed. D-Feed Check No Entry MasterMake Printing Cancel Scanning Touch [OK]. 6 Touch [OK]. No Entry Select a button to assign a function. DirectAccess Entry 5 OK 7 Returns to DirectAccess Entry screen or Selections Entry screen. The selected functions are added. To add more functions, or to replace a button with another function, repeat steps 2-5. Returns to the Admin. screen. “Direct Access” area or “Selections” screen is updated. Touch . Returns to the Master Making Basic Screen or Print Basic Screen. Link Frame1 Frame2 Frame3 Frame4 Multi-Up Print D-Feed Check No Entry No Entry If the button has a function already assigned to it, the newly selected function will overwrite the previous function. Setting Up Direct Access Area and Selections Tab [DirectAccess Entry] [Selections Entry] 179 Advanced Features Registering a Custom Paper Size [Custom Paper Entry] Non-standard paper sizes must be pre-entered into memory. Once a paper size is stored into memory, it can be retrieved with the [Paper] button from the Master Making Basic Screen. Up to 30 different sizes may be entered. Previously stored sizes can be modified or deleted. You can register paper sizes between 100 mm × 148 mm (315/16" × 513/16") to 340 mm × 555 mm (136/16" × 2114/16"). However, any paper longer than 436 mm (173/16") prints in extended paper mode. )p.182 Important!: • Custom paper sizes must be entered. Failure to do so may result in incorrect scanning. Entering sizes and changing names 1 Touch [Admin.] on the Basic Screen for each mode. 3 Ready to Make Master Renew Page Touch [System] or to display [Custom Paper Entry] on the screen. Admin. D-Feed Check All DirectAccess Entry Display Selections Entry Default Display Priority Mode Screen System Mode Key Pattern Mode Select. Link Mode Start-Up Screen Editor P.1/11 Black 2 Touch [OK]. 4 Ready to Make Master Touch [Custom Paper Entry]. Admin. All Custom Paper Entry Display Irregular Fitter Default Folder Renaming System CI Select Link Mode Base IP Address Editor If the Recognition Screen is displayed, follow the message on the screen. See step 2 in “Customizing the Default Settings”. ()p.175) 180 Registering a Custom Paper Size [Custom Paper Entry] Logo(RZ) OFF Internal CI P.1 / 5 Advanced Features 5 Touch character buttons to enter a 10 new name. Touch an unused button. Custom Paper Entry Close Select a Register Frame for a Button Register U-1 No Entry Change U-2 No Entry U-3 No Entry U-4 No Entry U-5 No Entry Rename Clear CardA Unused buttons are displayed with a solid line. Used buttons are grayed-out and are not available. 6 Change capitalization by selecting [Small] or [Capital] button. )p.138 Enter the paper size. Note: Custom Paper Entry S e l e c tSai zRee gEi snt et rr yF r a m e f oCancel r a Button U-1 Register Feed Retrieve • To clear the current name, touch press the key. Close OK 11 Touch [OK] when done. W Note: 100 mm Rename • To change a name, repeat from step 8. (100-340) H Clear 1 4 8 mm (148-555) button or Confirm the name and touch 12 [Close]. (Numeric keypad is available for input) Returns to the Admin. screen. Feed Tray (Paper) is updated. Facing towards the paper feeding direction (into Feed Tray), enter W (width) and H (height). Touch either , or use Print Quantity Keys. 7 Touch [OK]. 8 9 Touch [Rename]. Rename as necessary. Touch [Close] to skip renaming the size. Select a button to rename. Registering a Custom Paper Size [Custom Paper Entry] 181 Advanced Features Tip: Printing on Extended Paper The machine can print on paper 436 mm-555 mm (173/16"-2114/16") long (top to bottom facing the paper feeding direction) by storing the size as a custom-size. )p.180 When entering a size longer than 436 mm (173/16") (top to bottom facing the paper feed direction) on the Custom Paper Entry screen, the paper will be treated as “Extended Paper”. When “Extended Paper” is selected on the Feed Tray (Paper) screen, the machine switches into “Extended Paper” mode. Important!: • Some Extended Paper may fail to pass through the machine due to its paper characteristics, or may get smudged with ink due to its image positioning. Consult your dealer (or authorized service representative) for advice. “Extended Paper” Mode • When the machine is on “Extended Paper” mode, it is indicated in the message area as either “Ready to Make Master <Ext.Paper>” or “Ready to Print <Ext.Paper>”. • On “Extended Paper” mode, the machine can print papers measuring 436 mm-555 mm (173/16"-2114/16") lengthwise from top to bottom facing the paper feed direction. However, maximum printing area and top/bottom Print Positioning range remains as usual. )p.20 )p.102 • Print timing and speed is different on “Extended Paper” mode in comparison to normal printing. This is to be expected, so do not be alarmed. • Contact your dealer (or authorized service representative) for suggestions about placing paper on the Paper Receiving Trays when on “Extended Paper” mode. 182 Registering a Custom Paper Size [Custom Paper Entry] Advanced Features Deleting a Custom Paper Size 1 Touch [Admin.] on the Basic Screen for each mode. 4 Touch [Clear]. Custom Paper Entry Ready to Make Master CardA Change U-2 No Entry U-3 No Entry U-4 No Entry U-5 No Entry Clear 5 Touch [OK]. Select the paper size to delete. Custom Paper Entry Close Select a Button to be Cleared Ready to Make Master CardA Change U-2 No Entry U-3 No Entry U-4 No Entry U-5 No Entry Clear 6 Register CardA This Setting Retrieve Cleared OK? Rename Display Irregular Fitter Default Folder Renaming System CI Select Link Mode Base IP Address Editor Close Select a Button to be Cleared Admin. Custom Paper Entry H 300 mm Touch [OK]. Custom Paper Entry Touch [Custom Paper Entry] on the Admin. screen. All W 200 Register Rename 3 H 300 mm D-Feed Check Black 2 W 200 Register Rename Renew Page Close Select a Button to be Cleared will be Clear Cancel OFF OK Internal CI Returns to the Custom Paper Entry screen. The selected paper size is deleted. P.1 / 5 7 Touch [Close]. Returns to the Admin. screen. Paper size is updated. Registering a Custom Paper Size [Custom Paper Entry] 183 Advanced Features Keeping Masters Secure After Printing [Protect] After printing is completed, the master remains on the Print Drum (Cylinder). To protect confidential documents from unauthorized duplication, use the Confidential feature to discard the master after printing. (i.e. “Confidential” function) Used masters are held in the Master Disposal Box. The machine is equipped with a protection function to prevent the master from being removed from the Master Disposal Box and leaked by any ill-intended third party. “Protect” Setting When the “Protect” setting is ON: • When printing is complete, the “Confidential” function is activated to show the message to discard the master remaining on the Print Drum (Cylinder). • The Master Disposal Box is locked and cannot be removed while the machine is standby. (However, the Master Disposal Box can be unlocked and removed if the master is jammed in the Disposal Unit or the Master Disposal Box is full.) Locking the Master Disposal Box To prevent any leak of master documents after printing, the Master Disposal Box can be locked with a padlock so that no-one apart from the administrator of the machine can remove it. (Purchase an ordinary padlock whose loop will fit through the hole, which is 7 mm (9/32") wide.) Status of Protect functions and restrictions Status of [Protect] functions Restrictions Protect: OFF Padlock: No No restrictions on printer access *1 Protect: ON Padlock: No “Confidential” message is displayed Master Disposal Box is locked*2 Protect: OFF Padlock: Locked No “Confidential” message is displayed Nobody but the administrator can dispose of the master. Protect: ON Padlock: Locked “Confidential” message is displayed Nobody but the administrator can dispose of the master. *1 The ordinary “Confidential” function is available. *2 The lock is released if a master jams in the Disposal Unit or if the Master Disposal Box becomes full. 184 Keeping Masters Secure After Printing [Protect] Advanced Features Preventing Leaks of Masters After Creation or Disposal Turning the Protect Setting ON 1 Touch [Admin.] on the Basic Screen for each mode. Ready to Make Master Renew Page D-Feed Check Black 2 Touch [OK]. Ready to Make Master 3 Touch [Protect]. Admin. All Energy Saving Mode 5mn Display Power-OFF Schedule OFF Default Protect ON System Auto Idling Link Mode Auto Page Renewal Editor 12hour OFF P.7/11 “Protect” is turned ON. Note: • When “Protect” is set to “ON”, “Energy Saving Mode” (Auto Sleep or Auto Power-OFF) is automatically set to ON and the waiting time is set to one minute. (The set time cannot be changed.) • If “Protect” is ON, [Renew Page] is grayed-out with no access allowed. If the Recognition Screen is displayed, follow the message on the screen. See step 2 in “Customizing the Default Settings”. ()p.175) Keeping Masters Secure After Printing [Protect] 185 Advanced Features If “Protect” is ON Cancel the “Protect” setting The following screen is displayed after printing. Only the administrator can cancel the “Protect” setting. 1 F95-008 -- Protect -- Touch [Admin.] on the Basic Screen for each mode. Discard Current Master Ready to Make Master OK Cancel Touch [OK] or [Cancel]. [OK]: Discards the master remaining on the Print Drum (Cylinder). [Cancel]: Choose this when you do not wish to discard the master or wish to print further copies. Note: • The “-- Protect -- Discard Current Master” message is also displayed when printing from computer data on a PC. • If you select [Cancel] while the “Protect” setting is active, the “-- Protect -- Discard Current Master” message is on appears each time you press key or key. • The screen shows the message below when: Renew Page D-Feed Check Black 2 Touch [OK]. Ready to Make Master – setting the Print Drum (Cylinder) that has been removed without the “Confidential” operation, or – the machine goes into the sleep mode after a certain period of time has passed after the confirmation message was displayed, and then the sleep mode is cancelled (or the power is turned ON). If the Recognition Screen is displayed, follow the message on the screen. See step 2 in “Customizing the Default Settings”. ()p.175) F94-007 -- Protect -Discard Current Master OK Touch [OK] to discard the master remaining on the Print Drum (Cylinder). 186 Keeping Masters Secure After Printing [Protect] Advanced Features 3 Touch [Protect]. After “Please Wait a Moment” is displayed, the “Protect” setting is canceled. Keeping Masters Secure After Printing [Protect] 187 Storing Original Data and Use Method The machine can store original data. To use this function, the optional Document Storage Card DM-128CF or USB Flash Drive is required. Stored original data can be repeatedly retrieved for printing. There are two methods of storing original data: “Storage Memory” and “USB Flash Drive”. “Storage Memory” allows you to store original data on the internal optional Document Storage Card DM-128CF of the printing machine. “USB Flash Drive” allows you to store original data in a USB Flash Drive. Both methods can store original data as follows. • Storing data from a hard-copy original by using the scanner of the machine. • Storing original data created on a computer. The methods of storing data from a hard-copy original and printing the stored original data are explained here. Details on how to store the data created on a computer, see the “RISO Printer Driver User’s Guide”. Store Retrieve and print Originals scanned in scan mode Document Storage Card DM-128CF Original data sent from a computer Original data retrieval (Storage Memory) Original data storage (Storage Memory) Document Storage Card DM-128CF Document Storage Card DM-128CF USB Flash Drive Stored original data created on a computer. USB Flash Drive PC USB Flash Drive Stored original data scanned in scan mode USB Flash Drive Original data retrieval 188 Storing Original Data and Use Method • The following operations are available with data stored in “Storage Memory” or “USB Flash Drive”. – Stored original data can be repeatedly retrieved for printing. – If the storage data contains multiple pages, you can choose to output only odd or even pages, or indicate the specific pages to print using “Output”. )p.198 – The storage data also can be overlaid onto a hard-copy original and printed. )p.195 • All users of this machine can use the 6 folders in “Storage Memory”. It is convenient to store and use the data in common with others. • 6 folders are created in each “USB Flash Drive”. Use the folders as needed, such as when selecting a folder for storing any specified data. Important!: • We cannot guarantee storage data or USB Flash Drive data against loss caused by accidents or unforeseen events. We recommend that you use your computer to make back-up copies of any important documents. Note: • You can easily delete unnecessary stored data when remaining free space of the optional Document Storage Card DM-128CF or USB Flash Drive is limited. The free space is displayed in the Storage Selection screen or USB Job List screen. )p.198 • As to the folder for storing original data, 6 folders are prepared for the optional Document Storage Card DM-128CF and 6 folders are prepared for each memory in the case of USB Flash Drives. When you use folders to share data, you are recommended to devise folder rules (e.g. dividing the folders by department or type of data) • Folder names of the optional Document Storage Card DM-128CF can be changed on the Admin. screen. )p.170 • To change folder names of the USB Flash Drives, use the “RISO Utility Software” (RISO USB PRINT MANAGER) included on the provided software CD-ROM. (If you change folder names by Explorer, they will not be recognized by the machine.) For details, see the “RISO Utility Software User's Guide” (CD-ROM). • You can change the order of the storage data and USB Flash Drive data. )p.197 189 Storing Original Data and Use Method Converting Hard-copies to Stored Data (Scan Mode) Scan mode is a function that allows you to scan a hard-copy original with the machine's scanner to save as storage data or USB Flash Drive data. You can repeatedly retrieve and print previously scanned and stored original data. This saves you the trouble of rescanning documents when repeatedly printing the same materials. )p.188 This function also prevents documents from getting lost or damaged over time. Important!: • The storage function is not available in the machine equipped with the optional RISO IS300 controller. The data scanned in the Scan Mode is stored in the IS300. Note: • Delete unnecessary stored data when remaining free space of the optional Document Storage Card DM-128CF or USB Flash Drive is limited. )p.198 The following functions can be used in scan mode: See the explanation of each function for more details. • • • • • • Image ()p.60) Contrast ()p.62) Size (enlargement/reduction) ()p.63) Dot Process ()p.69) Contrast Adj ()p.70) Tone Curve ()p.71) The following functions are specific to scan mode. • Format ()p.194) 190 Converting Hard-copies to Stored Data (Scan Mode) • • • • • • 2 Up/Multi-Up Print ()p.73) Preview ()p.94) Book Shadow ()p.86) Layout ()p.82) Scanning Side - ADF ()p.160) My Direct Access ()p.166) Storing Original Data and Use Method Scanning a Hard-copy Original 1 2 Place the original. Note: • You can check scanned data instantly by enabling the “Preview” function. You can also use this function to check data before saving. Place the original on the Glass Platen or in the optional ADF unit. To place the original, see )p.43. • See the previous section for the functions that can be set. Select a scan mode. Important!: Touch [Scanning] on the Mode Selection Screen. )p.28 The Scan Basic Screen is displayed. • Set “Format” when scanning custom-sized originals. )p.194 Note: • After selecting the Scan mode and if the following “Format” screen is displayed, select the page size (original size) and touch [OK]. 5 Press the key. The scan starts. Note: • After scanning the original, a preview shows on the display if “Preview” is set. Check the image on the display and touch [Close]. 6 Repeat steps 1, 4 and 5 if the original has multiple pages. Note: • If multiple originals were placed on the optional ADF unit, all originals will be scanned at the same settings. Ready to scan data Page No.1 File Name Directory Basic Page (A4) Line Preview 3 4 scan_0001 Owner 1_folder Owner-1 Functions Contrast 7 Touch 8 Touch [Yes]. Admin. Size Format Auto B4 Book Shadow Setting data information. Sets the data name, save location and owner name. )p.192 . Once the original to be saved as one set of data is scanned, touch . A confirmation screen appears. The data is saved. When you touch [<Back], the screen returns to the previous operation. When you touch [No], the scanned contents are canceled. Note: • Press the key to exit scan mode. Setting required functions. Set the required functions for scanning the original. Converting Hard-copies to Stored Data (Scan Mode) 191 Storing Original Data and Use Method Setting Data Information Settings for the data to be scanned and stored are configured on the Scan Basic Screen. The file name, directory and owner name are automatically allocated when scan mode is started, but you can change this preset information if needed. Note: • Default settings for the “Directory” folder can be changed in “Admin.”. ()p.170) 1 2 Enter a file name. 1) Touch the file name input box. File Name scan_0001 Owner Directory 1_folder Owner-1 Basic Functions Admin. Contrast • If the machine is equipped with the optional RISO Controller IS300, you cannot specify where to store the data. 1) Touch the directry input box. Format Auto Line Preview Size When saving in the USB Flash Drive, connect the USB Flash Drive to the USB slot in advance. Note: Ready to scan data Page No.1 Page (A4) Specifying a Directory A4 Book Shadow Ready to scan data Page No.1 File Name Report Owner Directory 1_folder Owner-1 Basic The Rename screen appears. 2) Touch the Page (A4) button to delete the current Line name. Preview Rename Cancel Admin. Size Format Auto A4 Book Shadow OK The Directory screen appears. scan_0001 Small Functions Contrast 2) Touch [Storage Memory] or [USB Flash Capital Drive]. Note: • You can also press the delete. key to 3) Touch the text button and enter the file name. )p.137 4) Touch [OK]. The file name is confirmed and the screen returns to the Scan Basic Screen. 192 Converting Hard-copies to Stored Data (Scan Mode) Storing Original Data and Use Method 3) 4) 5) If the USB Flash Drive is not connected, [USB Flash Drive] is grayed-out and is not available. Touch [ID Print] or [Non-ID Print]. [ID Print] and [Non-ID Print] are displayed only when “Management Level” is set to “High/Full Management”. Touch the folder to save the data. Touch [OK]. The “Directory” folder is confirmed and the screen returns to the Scan Basic Screen. Tip: Changing the Owner Name 1) Touch [Rename] on the Owner screen. Ready to scan data Page ONo.2 wner Specifying an Owner. 1) Touch the owner input box. 3) 4) Page No.1 File Name Report Owner Directory 2_folder Owner-1 Basic Functions Admin. Line Preview RenameFunctionsOwner-2 Basic Owner-6 Admin. Contrast Preview 2) Ready to scan data Page (A4) Owner-5 Owner-1 Line • The folder name of the “Directory” folder of storage data can be changed in “Admin.”. ()p.170) 3 :scan_0001 File Name Specify :2_folderOwner-1 Directory Page (Lttr) Note: Size Format Close Contrast Size Owner-3 Auto Owner-4 Owner Format Owner-7 Auto Owner-8 Letter Book Shadow Touch the button of the owner to rename. The Rename screen appears. Touch the button to delete the current name. Enter the Owner name. Touch [OK]. Rename Cancel OK RISO-2 Small Capital Auto A4 Book Shadow The Owner screen appears. 2) Touch the button of the owner to set. Ready to scan data PageONo.2 wner Close :scan_0001 File Name Specify :2_folderOwner-1 Directory Owner-5 Owner-1 RenameFunctionsOwner-2 Basic Owner-6 Admin. Page (Lttr) Line Preview The owner name is confirmed and the screen returns to the Owner screen. Contrast Size Owner-3 Auto Owner-4 Owner Format Owner-7 Auto Owner-8 Letter Book Shadow The owner name is confirmed and the screen returns to the Scan Basic Screen. Converting Hard-copies to Stored Data (Scan Mode) 193 Storing Original Data and Use Method Specifying Stored Size Specify the size at which to save the scanned original. It is necessary to set the Format size when: • you place the originals on the glass platen • you set the custom-sized originals in the optional ADF unit • you want to save at a size that differs from the size of the original When the standard-sized original is set in the optional ADF unit, the original size is detected automatically. The original is saved by original format. 1 Touch [Format] on the Scan Basic Screen. Ready to scan data Page No.1 File Name scan_0001 Owner Directory 2_folder Owner-1 Basic Page (A4) Functions Contrast Admin. Size Format Auto Line A4 Book Shadow Preview The Format screen appears. 2 Touch the paper size button to be set. Ready to Make Master B4 If you select [Auto], the same size as the original will automatically be set. Note: • When Format is set to “Auto”, you cannot select “Auto” under the Size. 194 Converting Hard-copies to Stored Data (Scan Mode) 3 Touch [OK]. The paper size is confirmed and the screen returns to the Scan Basic Screen. Storing Original Data and Use Method Retrieving Stored Data and Printing [Storage Memory][USB Job List] Retrieving and printing stored data. Retrieving Stored Data When retrieving the USB Flash Drive data, connect the USB Flash Drive to the USB slot in advance. For details on how to print USB Flash Drive data, see )p.50 “Printing from a Computer Data”. Note: • When “User Management” is set up by the administrator, the users will be asked to identify themselves during operations. For details, refer to )p.116. • When “Recognized by” is set to “PIN code” in User Management and the USB Flash Drive is connected while the Basic Screen for each mode is displayed, the USB Job List screen is automatically displayed. See step 2. 1 Touch [Storage Memory] on the Functions screen. When retrieving data set with “ID Print Job” Touch [ID Print Job]. Ready to Make Master Basic Selections Storage Selection Functions Close Admin. Top Margin ADF Semi-Auto Binding Margin Preview Max. Scan Overlay Reservation Storage Memory 1_folder Free Area: 98 NewsLetter.doc Nov22,10 Fax-cover.doc Nov22,10 Newsletter.doc Nov22,10 Images.doc Nov22,10 P . 2/4 View edit The Storage Selection screen or USB Job List screen (with “Non-ID Print”) is displayed. (The “ID Print Job” button is displayed on the screen.) 2 Select [ID Print Job] or [Non-ID Print]. ID Print Job USB Job List When retrieving data set with “Non- ID Print” When “Non-ID Print” is displayed on the screen, touch “Non-ID Print”. Storage Selection Note: • When “Management Level” is set to “Low/ Admin tab only” in User Management, [ID Print Job] will not be displayed. Free Area: Close 98 P. Nov22,10 Nov22,10 Nov22,10 Nov22,10 View edit Non-ID Print USB Job List Retrieving Stored Data and Printing [Storage Memory][USB Job List] 195 Storing Original Data and Use Method 3 Touch the stored data to print. Storage Selection 5 Close 1_folder Touch [Retrieve]. The data is retrieved and Storage Mode Basic Screen appears. Ready to Make Master P. Nov22,10 Basic Nov22,10 Selections document_1.doc Owner: Admn Date&Time: Nov22,10 10:58 Format: A4 Nov25,10 Nov25,10 Functions P.1/4 Preview Admin. Feed Tray Skip Page A4 Clear All View edit ID Print Job USB Job List Process: If you are selecting data stored in a different folder, touch that folder's tab. Black Auto Process “OFF” READY Idle Job Separation Info Note: • If the stored data is not shown on the screen, touch or to display. • Touching [USB Job List] or [Storage Memory] displayed in the bottom right corner of the screen switches to the Storage Selection screen or USB Job List screen. 4 6 Press the A master is made from the data. After this, please follow the same operations for normally making a master/printing. Confirm the retrieved data. Use the thumbnail to determine whether the retrieved data is the data desired. Storage Retrieve document-1.doc Format: A4 Cancel Retrieve Owner: Admn Date&Time: Nov22,10 10:58 Rotate Output key. :Al l Pages Ascend Clear Color:Black P. 1/4 From the Storage (USB Job List) Retrieve screen, you can confirm retrieved data and specify output settings. See )p.198 for operational details. 196 Retrieving Stored Data and Printing [Storage Memory][USB Job List] Storing Original Data and Use Method Changing the Data Order You can change the order of the storage data displayed on the storage data selection screen. Note: • The factory setting is “Date Descend”. 1 3 Touch [View edit]. Note: • [View edit] is inactive if there is no storage data/USB Flash Drive data or only one stored item. Storage Selection Touch [OK]. Returns to the Storage Selection screen (USB Job List screen). Close 1_folder P. Nov22,10 Nov22,10 Nov25,10 Nov25,10 View edit 2 ID Print Job USB Job List On the View edit screen, touch the button of the order you want. Note: • By using ON (inverted)/OFF of [File name only], the dada display format can be switched on the Storage (USB) Selection screen. OFF: File Name + Owner Name + Date ON (inverted): File Name Retrieving Stored Data and Printing [Storage Memory][USB Job List] 197 Storing Original Data and Use Method Using the Storage Retrieve/USB Job List Screen Each section of the Storage Retrieve/USB Job List screen is shown below. An example of the Storage Retrieve screen is explained here. Storage Retrieve document-1.doc Format: A4 1 Cancel Retrieve Owner: Admn Date&Time: Nov22,10 10:58 Rotate Copy/Move Output :Al l Pages Ascend Clear 3 5 4 6 Color:Black 2 P. 1 /4 1) A thumbnail is displayed for each page. 2) If the data contains multiple pages, touch to change page. 3) Touch to rotate the storage data/USB Flash 4) Drive data 180 degrees and output. Output Range 5) Copy/Move Copy/Move the stored data between the Storage Memory and USB Flash Drive. From the Storage Retrieve screen, copy/move data to the USB Flash Drive. From the USB Job List retrieve screen, copy/move data to the Storage Memory. For details, see )p.201. If the storage data consists of multiple pages, you can specify which pages to print. Touch [Output] to display the Output screen. Storage Retrieve document-1.doc Output Format: Letter Ascend Cancel Retrieve Owner: Admin OK Cancel Date&Time: Nov22,05 10:58 Descend Rotate All Pages Odd Pages Output Even Pages :Al l Pages Ascend Specified Page Only Clear (Numeric keypad is available for input) Color:Black P. 1/4 Touch the corresponding buttons to print all pages, only odd pages, or only even pages.You can also specify whether to print the selected pages in [Ascend] or [Descend] order. To specify a page range, touch the page input box and touch either or to specify the pages. 6) Clear Touch [Clear] and a confirmation screen appears. Storage Retrieve Cancel Retrieve Owner: Admin Date&Time: Nov22,05 10:58 document-1.doc Format: Letter This data will be cleared Rotate OK? Output Clear Cancel OK Color:Black P. 1 /4 Touch [OK] to delete the data. 198 Retrieving Stored Data and Printing [Storage Memory][USB Job List] :Al l Pages Ascend Storing Original Data and Use Method Overlaying Storage Data onto a Print Job [Overlay] You can overlay stored data onto a hard-copy original. For example, this function can be used to overlay a stamp over multiple originals indicating “Sample”. Important!: • To use this function, the optional Document Storage Card DM-128CF or USB Flash Drive is required. • This function cannot be used with the following functions. – – – – – 1 2 Ink Saving Top Margin Binding Margin Storage Memory (“Overlay” images cannot be stored.) When sending original data from the computer Place an original. Place the original on Glass Platen or in ADF unit (option). See the “Basic Operations” chapter for information on placing the original. Touch [Overlay] on the Functions screen. Ready to Make Master Basic Selections Functions When overlaying data stored in the USB Flash Drive, connect the USB Flash Drive to the USB slot and touch [USB Job List]. Storage Selection 1_folder Close Free Area: 98 NewsLetter.doc Nov22,10 SAMPLE.doc Nov22,10 Newsletter.doc Nov22,10 Images.doc Nov22,10 Admin. Top Margin ADF Semi-Auto Binding Margin Preview Max. Scan Overlay Reservation Storage Memory P . 2/4 View edit ID Print Job USB Job List USB Job List screen is displayed. Important!: • Do not remove the USB Flash Drive until printing is finished. The Storage Selection screen appears. Overlaying Storage Data onto a Print Job [Overlay] 199 Storing Original Data and Use Method 3 Select the storage data to overlay. Important!: • Only one page of data can be retrieved for Overlay. Storage Selection Close 1_folder 5 P. Nov22,10 SAMPLE.doc Touch [Retrieve]. Storage Retrieve Nov22,10 Retrieve Owner: RISO Date&Time: Nov22,10 SAMPLE Format: A4 Nov25,10 Cancel 10:58 Nov25,10 View edit ID Print Job E L P M SA USB Job List Details on how to select data, see steps 3 and 4 in “Retrieving Stored Data and Printing” )p.195. P. 1 /4 4 Check the stored data. Check the thumbnail to make sure that the data is the data you want to retrieve. When there are several pages (editions), display the data by touching or button. “Overlay” is set and the screen returns to the Functions screen. 6 Make necessary operation to print. For subsequent operations, see step 6 of “Printing from a Paper Document or Book. ()p.45) Tip: Overlaying Storage Data The stored data overlays at the size it was saved. You cannot enlarge/reduce the size to match the original or paper size. Stored data Original Print results Stored data Original Print results The storage data is overlaid after being centered at the top of the original. You cannot adjust the overlay position. 200 Overlaying Storage Data onto a Print Job [Overlay] Storing Original Data and Use Method Copying/Moving Stored Data Data can be copied or moved between the Storage Memory and USB Flash Drive. This is useful for performing backup or when the remaining free space of the Storage Memory or USB Flash Drive is limited. Note: • It is not possible to copy/move data within the Storage Memory or USB Flash Drive. • The original data stored in the USB Flash Drive can be organized or managed by a computer using the “RISO Utility Software” (RISO USB PRINT MANAGER) included on the provided CD-ROM. For details, see the “RISO Utility Software User’s Guide” (CD-ROM). • The [ID Print Job] is maintained even if it is copied or moved The procedure for copying/moving data from the Storage Memory to the USB Flash Drive is explained here. 1 Confirm that the USB Flash Drive that will store the data is connected. 3 If the USB Flash Drive is not connected, connect the USB Flash Drive to the USB slot. 2 Storage Selection Touch [Storage Memory] on the Functions screen. 1_folder Ready to Make Master Basic Selections Functions Touch the storage data to copy/ move. Close Free Area: 98 NewsLetter.doc Nov22,10 Fax-cover.doc Nov22,10 Newsletter.doc Nov22,10 Images.doc Nov22,10 Admin. Top Margin ADF Semi-Auto Binding Margin Preview Max. Scan Overlay Reservation Storage Memory P . 2/4 Note: • When copying/moving the data from the USB Flash Drive to the Storage Memory, touch [USB Job List]. View edit ID Print Job USB Job List For details on how to select data, see steps 3 and 4 in “Retrieving Stored Data and Printing” )p.195. 4 Touch [Copy/Move]. Storage Retrieve Newsletter.doc Format: A4 Cancel Retrieve Owner: Admn Date&Time: Nov22,10 10:58 Rotate Copy/Move Output :Al l Pages Ascend Clear Color:Black P. 1 /4 Copying/Moving Stored Data 201 Storing Original Data and Use Method 5 Touch [Copy to] or [Move to]. 6 Touch the button of the destination folder that you want to copy or move the data to. 7 Touch [OK]. Data is copied/moved and the selected destination folder is displayed. Important!: • While processing the data, do not remove the USB Flash Drive. This will cause data to disappear and the USB to malfunction. Note: • When the remaining free space of the USB Flash Drive is limited, the following message is displayed. Touch [USB Job List] to organize the data of USB Flash Drive, or touch [Cancel] to cancel copying/moving. The file size is too large to store on USB flash drive Change the USB flash drive or delete some files to make spaces USB Job List Cancel 202 Copying/Moving Stored Data Storing Original Data and Use Method Copying/Moving Stored Data 203 When using a Linked Printer Print Functions for Using Linked Printers The machine may be connected with Linked Printers for more convenient operations. 2 special printing functions Auto-Link Function and Link Mode are available; Important!: • The RISO Network Card is required in order to connect the machine and Linked Printers. • Please contact your dealer (or authorized service representative) for the compatible printer. Auto-Link Function (This function is not available for RZ1090U.) Automatically select an output device, the machine or a Linked Printer, based on a pre-determined number of copies (Link-Free Volume). )p.174 Even when you print by retrieving the original data stored in a USB Flash Drive or the optional Document Storage Card DM-128CF, you can print the data by automatic allocation depending on the quantity. )p.174 Linked Printer Printed Paper Original Low volume printing Standard quantity * High volume printing * Automatically allocated in comparison with standard quantity Important!: • In the case of hard-copy originals, you need to enter print quantity before master-making. If you press the when the quantity is “0”, the machine prints the data unconditionally. Link Mode Function The original is scanned on the machine and printed from the Linked Printer. )p.209 Special Linked Printer functions such as double-sided printing can be achieved. 204 Print Functions for Using Linked Printers key When using a Linked Printer Setting up a Linked Printer [Link Properties] Linked Printer data must be entered in the machine in order to operate. “Link Properties” are explained below. See “Link Mode” ()p.174) for more information about Link Mode and other Admin. settings. Important!: • Make sure that the Linked Printer is physically connected to the machine. A Linked Printer cannot be recognized by the machine unless physically connected. • Enter information for each attached Linked Printer one device at a time. • When there’s only one Linked Printer to the machine, set “Linked Printer” as “One-to-One”. • Unless the Linked Printer data is entered in the machine, the device will not print, and its optional features will not be available. Setting up a Linked Printer 1 Touch [Link Mode] on the Admin. screen. 3 Select a tab for the Linked Printer. Link Properties Cancel OK Admin. Printer Name All Link Properties Display Linked Printer Total Trays PC Network Default Link-Free Volume _ 20 System Duplex Interval 15s Link Mode Online Auto-Link ON Editor LBP1 IP Address P. 1/2 StandardTray Duplex OFF Printer Collate OFF Offset Pages OFF Note: • Up to 6 Linked Printers may be entered. 2 Touch [Link Properties]. 4 Select the button to enter information. Admin. Link Properties All Link Properties Display Linked Printer Default Link-Free Volume 20 System Duplex Interval 15s Link Mode Online Auto-Link ON Editor PC Network Printer Name _ Cancel OK LBP2 IP Address Total Trays P. 1/2 StandardTray Duplex OFF Printer Collate OFF Offset Pages OFF Note: • To display other functions that are not visible on the screen, touch or . Setting up a Linked Printer [Link Properties] 205 When using a Linked Printer 5 6 Change settings. See “Linked Printer Setup List” ()p.206) to change settings. Touch . Returns to the Basic Screen. “Admin.” settings are updated. Note: • If the function has additional Setup screens, enter necessary settings then touch [OK]. Returns to the Link Properties screen. The changes are updated. Touch [Cancel] to cancel the changes and return to the Link Properties screen. Linked Printer Setup List : Initial setting (factory default) Functions Printer Name Enter a name for the Linked Printer. Description How to Enter Rename Cancel OK Note: • The entered name will be displayed on the Link Mode screen. Small Capital Touch character button to enter a new name. Once the name is entered, touch [OK] to store it as the Printer Name. See “Rename screen” ()p.138) for more details. IP Address Enter the IP address of the Linked Printer to connect to the network. Link Properties IP Address Cancel Cancel OK OK Note: • Touch [Proof Printing] to execute a data transmission test to the Linked Printer. When successful, the test results will print from the Linked Printer. • [Proof Printing] is disabled until “Base IP Address” is correctly entered on the Admin. screen. )p.171 206 Setting up a Linked Printer [Link Properties] Proof Printing (Numeric keypad is available for input) Offset Pages OFF • Use , or enter using the Print Quantity Keys. • To move to another field, touch the field, or press the key to move. When using a Linked Printer Functions Total Trays Enter total number of trays other than the Standard Tray. Description How to Enter 0-99 Link Properties To t a l T r a y s Important!: Cancel Cancel OK OK Input the total number of trays available for output from a Linked Printer and its peripherals. • If the number is less than the number of trays set in other options, other options will be disabled. • Enter the actual number of trays available for the linked printer. Entering an incorrect number will result in output from the Standard Tray. StandardTray (Numeric keypad is available for input) Offset Pages OFF • When printing from the standard tray of the Linked Printer, enter “0”. • Use , or enter using the Print Quantity Keys. Staple Set “Staple” ON if the device has the capability. Also set the tray number *1 used by the “Staple” function and whether it is fixed/ variable. OFF: No Staple capability (disabled) ON: Staple function available Tray number used, Invariable/variable Link Properties Staple OFF Cancel Cancel OK OK Tray No. ON Staple Position Invaliable Valiable (Numeric keypad is available for input) Staple OFF Touch to select a button. Use , or enter using the Print Quantity Keys for “Tray No.”. Offset Pages Set “Offset Pages” ON if the device has the capability. Also set the tray number *1 used by the “Offset Pages” function. OFF: No Offset Pages function (disabled) ON: Offset Pages available Tray number used Link Properties Offset Pages OFF Cancel Cancel OK OK Tray No. ON (Numeric keypad is available for input) Offset Pages OFF Touch to select a button. Use , or enter using the Print Quantity Keys for “Tray No.”. “Offset Pages”and “Punch” may be configured using similar steps. Setting up a Linked Printer [Link Properties] 207 When using a Linked Printer Functions Description Punch Set “Punch” ON if the device has the capability. Also set the tray number *1 used by the “Punch” function. OFF: No Punch capability ON: Punch function available Tray number used How to Enter Link Properties Punch OFF Cancel Cancel OK OK Tray No. ON (Numeric keypad is available for input) Punch OFF Touch to select a button. Use , or enter using the Print Quantity Keys for “Tray No.”. “Offset Pages” and “Punch” may be configured using similar steps. Duplex Set “Duplex” ON if the device has the capability. Printer Collate Set “Printer Collate” ON if the device has the capability. ADF Auto Face-up Set “ADF Auto Face-up” ON if the device has the capability. Output Reversal*2 Set “Output Reversal” ON if the device has the capability. ADF Auto Reversal Set “ADF Auto Reversal” ON if the device has the capability. ON/OFF Link Properties Cancel Duplex OFF Printer Collate OFF Offset Pages OFF Staple OFF Punch OFF Output Reversal OFF OK Touch each button to switch between OFF/ON. “Duplex”, “Printer Collate”, “ADF Auto Face-up” and “Mailbox” may be configured using similar steps. Mailbox Set “Mailbox” ON if the device has the capability. *1 The tray number may differ depending upon the model of the Linked Printer. *2 This function is only available only if the machine is equipped with the Auto Document Feeder AF-VI. It is not available on Auto Document Feeder DX-1. 208 Setting up a Linked Printer [Link Properties] When using a Linked Printer Printing Scanned Original from a Linked Printer [Link Mode] The mode in which an original is scanned into the machine and printed from a Linked Printer is called “Link Mode”. In Link Mode, the original is printed from the Linked Printer, regardless of the number of copies to print. 1 2 Place the original. Place the original on the Glass Platen or in the optional ADF unit. To place the original, see )p.43. Switch to Link Mode. Press the key on the machine to switch to Link Mode. From Mode Screen, touch [Link Print] to switch to the Link Basic Screen. When “Mode Key Pattern” is set to “Loop”, press the key until the Link Basic Screen is displayed. )p.28 1 A4 Basic Page (---) Line If the Linked Printer has multiple feed trays, touch [Feed Tray] to specify the tray (paper size). 1) Touch [Feed Tray] in the Link Basic Screen. Ready for Link Print Idle LBP1 1 A4 MP 2 A3 Basic B4 Selections Page (A4) Contrast Functions Size Admin. Feed Tray Auto Line A4 2) Select the desired paper size. Idle MP 2 A3 Select printing paper. Book Shadow Ready for Link Print LBP1 3 B4 Selections Contrast Functions Size Ready for Link Print Admin. FeedLBP1 Tray Feed Tray 1 Auto A4 --- Basic Book Shadow Page Line A3 Cancel OK Idle MP 2 Auto B4 1 A4 Admin. 2 A3 Feed Tray MP B4 1 A4 Note: • While the message “Starting Up Network Card / Acquiring Linked Printer Configuration Data Please Wait a Moment” is displayed on the machine, the Linked Printer information is being retrieved via the network. Wait until the message disappears. Book Shadow 3) Touch [OK]. Printing Scanned Original from a Linked Printer [Link Mode] 209 When using a Linked Printer 4 Select the print functions as needed. The following functions are available: • • • • • • • • • • • 7 Press the is complete. The setting returns to its default value. Image Processing mode ()p.60) Scanning Contrast ()p.62) Size ()p.63) Dot Process ()p.69) Memory ()p.142) Contrast Adj ()p.70) Tone Curve ()p.71) Book Shadow ()p.86) Top Margin ()p.89) Preview ()p.94) Overlay ()p.199) Tip: When multiple Linked Printers are connected to the network When multiple Linked Printers are connected to the network, output device can be selected as needed. 1) Touch the “Printer Name” button in the Link Basic Screen. Ready for Link Print • If the Linked Printer has optional devices such as a duplex unit, the optional functions are also available. )p.211 • Print Speed, Contrast, or Positioning cannot be adjusted. • When a computer sends an output signal to the machine while it is in operation, such interrupting data may take priority, initiating a new print job over current one. We recommend that you set “Reservation” on the Admin. screen to set higher priority on output jobs from Linked Printers. Data received from the computer within specified time frame will not be processed. )p.150 1 A4 Basic B4 Selections Contrast Line Functions Size Admin. Feed Tray Auto A4 Book Shadow 2) Select the Linked Printer to print from. Enter the number of copies using the Print Quantity Keys. Ready for Link Print Link LBP1 Sw. Close Idle LBP1 MP 1 2 A4 A3 B4 LBP2 Basic Page Line LBP3 LBP4 LBP5 Admin. Feed Tray 1 A4 LBP6 Book Shadow Note: • To change the number, press the then re-enter the correct number. Press the MP 2 A3 Page (A4) The number is displayed on the Print Quantity Display. 6 Idle LBP1 Note: 5 key when the print job key, key. The scan of the original begins. The scanned original data is sent to the Linked Printer, and the specified number of copies is printed from the Linked Printer. Note: • The current settings can be stored in Job Memory for future retrieval of the same settings. )p.142 210 Printing Scanned Original from a Linked Printer [Link Mode] Note: • If a Linked Printer is experiencing an error, that device is not available to be selected. • If an error occurs on the selected Linked Printer while in Link Mode, the Link Sw. screen opens. Reselect another Linked Printer currently available for printing. For information on purchasing additional Linked Printers, contact your dealer (or authorized service representative). When using a Linked Printer Using Optional Functions on a Linked Printer Steps for setting up optional functions are shown below. These are available when the Linked Printer has an optional device such as a sorter or a duplex unit installed. Note: • See Linked Printer User’s Guide for further details on each function. 1 Touch [Functions] in the Link Basic Screen. Ready for Link Print Idle LBP1 1 MP 2 A4 A3 B4 Basic Selections Page (A4) Contrast Functions Admin. Size Feed Tray Auto Line A4 Book Shadow 2 Select a function to modify. Ready for Link Print Idle LBP1 1 2 A4 A3 Basic MP B4 Selections Functions Admin. Duplex Offset Pages Printer Collate Staple P.1/6 3 Make changes as needed. See “Configurable Functions” ()p.212) to select correct settings. Using Optional Functions on a Linked Printer 211 When using a Linked Printer Configurable Functions : Initial setting (factory default) Functions Meter Display Displays the number of printed copies for each Linked Printer recognized by the machine. Description Screens and Steps Related Admin. Settings Ready for Link Print MeterLBP1 Display --- 1LBP1 2 A4 A3 LBP2 Close B4 Basic Selections LBP3 Idle 389,855 MP 843 Functions 421,356 LBP4 700,000 LBP5 101 --- Admin. 84 LBP6 P.1/6 Mailbox Select a paper receiving tray as an Output Tray. Tray No. 1 to n (n is the total number of trays set on “Total Trays” on the Admin. screen.) Ready for Link Print Mailbox LBP1 1 2 A4 OFF A3 Basic ON Cancel OK Idle MP Note: B4 Selections Total Trays: The total number of trays. Set at 1 or more. Tray No. Functions 0 Admin. (0--0) (Numeric keypad is available for input) P.1/6 • When the “Sort” function is set to ON, you cannot set the “Total Trays” function. Touch or enter using the Print Quantity Keys. Offset Pages Enable a feature to alternately eject multiplepage print copies. ON/OFF Staple Specify the positioning of staples on printed copies. Differs depending on how the “Staple Position” is set on the Admin. screen. Offset Pages: Available only when “Offset Pages” option is ON. --- Ready for Link Print StapleLBP1 1 2 A4 OFF A3 Cancel OK Idle MP B4 Basic Selections Functions Admin. • When set to “Invariable”: Front Center Rear ON/OFF P.1/6 • When set to “Variable”: OFF /Front/Center/ Touch to select a button. Rear Punch Select whether to punch holes on the printed copies. ON/OFF Note: • When the “Sort” function or the “Offset Pages” function is set to ON, you cannot set the “Staple” function. Punch: Available only when “Punch” option is ON. --- 212 Using Optional Functions on a Linked Printer Staple: Available only when “Staple” option is ON. Note: • When the “Sort” function or the “Offset Pages” function is set to ON, you cannot set the “Punch” function. When using a Linked Printer Functions Description Output Reversal This enables reverse output of originals scanned with the optional ADF unit. ON/OFF Printer Collate Select to retain original page order of the multipage prints while ejecting into a single tray. ON/OFF Duplex Print on both sides of the paper. Different screens and steps apply depending on whether or not the machine is equipped with the optional Auto Document Feeder AF-VI unit or Auto Document Feeder DX-1 unit. • When the Auto Document Feeder AFVI is installed OFF/Long Edge/Short Edge Note: • For instructions on how to print double-sided, See “Duplex Printing” ()p.215). Screens and Steps Related Admin. Settings --- Output Reversal: Available only when “Output Reversal” option is ON. Printer Collate: Available only when “Printer Collate” option is ON. --- Page Total: Odd/Even • When the Auto Document Feeder AFVI is not installed OFF/Long Edge/Short Edge • When the Auto Document Feeder AF-VI is installed Ready for Link Print Duplex LBP1 1 2 A4 A3 Basic Cancel MP B4 OK Idle A A B B FunctionsShort Edge Admin. Long Edge OFFSelections Page Total Even Odd P.1/6 Touch to select a button. • When the Auto Document Feeder AF-VI is not installed --- Ready for Link Print Duplex LBP1 1 2 A4 A3 Basic Cancel MP B4 A B OK Idle A B FunctionsShort Edge Admin. Long Edge OFFSelections P.1/6 Using Optional Functions on a Linked Printer 213 When using a Linked Printer Screens and Steps • When Auto Document Feeder DX-1 is installed OFF/ Simplex -> Duplex/ Duplex -> Simplex/ Duplex -> Duplex • When the Auto Document Feeder DX-1 unit is installed Duplex Cancel OK Align Top A Align Side Simplex -> Duplex Duplex -> Simplex Duplex -> Duplex Paging Direction of Output A A Setting Direction: Align Top, Align Side Paging Direction: Left / Right, Top / Bottom Related Admin. Settings Setting Direction A OFF AA (Duplex) Description Duplex Cancel OFF Left / Right Top / Bottom OK Setting Direction A Functions Align Top A Align Side Simplex -> Duplex Duplex -> Simplex A A Duplex Cancel Left / Right Top / Bottom OK Setting Direction A OFF --- Paging Direction of Output AA Duplex -> Duplex Align Top A Align Side Simplex -> Duplex Duplex -> Simplex Paging Direction of Output A A AA Duplex -> Duplex Left / Right Top / Bottom Touch to select a button. Important!: • Some optional functions may not be enabled concurrently, depending on the model and option configuration of the Linked Printer. 214 Using Optional Functions on a Linked Printer When using a Linked Printer Duplex Printing [Duplex] Double-sided printing is possible when a Duplex Unit (Option) is installed to a Linked Printer. Note: • The “Duplex” settings can be made from either Master Making or Print Functions screens. Linked Printer will print following the specifics set via either of these screens. Using the Glass Platen or Auto Document Feeder AF-VI This setting is available when a connected Linked Printer is equipped with the optional duplex printing unit. 1 Touch [Duplex] on the Functions screen. Scanning orientations and duplex binding directions. Original Orientation Ready for Link Print Idle LBP1 1 2 A4 A3 Basic MP B4 Selections Functions Vertical (Portrait) Horizontal (Landscape) Binding Direction Admin. Duplex Offset Pages Printer Collate Staple Long Edge P.1/6 Short Edge 2 Set duplex binding direction. Set the binding direction as shown below. The combination of scanning orientation and binding direction will result in different styles. 3 Select the number of originals. When scanning an original from the optional ADF unit, select either [Even] or [Odd] numbers to match the number of original sheets. Duplex Printing [Duplex] 215 When using a Linked Printer Important!: • This step is not necessary unless using the ADF unit. Continue on to step 4. 6 1 2 A4 A3 Basic Cancel MP B4 OK Idle A A B B FunctionsShort Edge Admin. Long Edge OFFSelections Page Total Even Odd P.1/6 4 Touch [OK]. 7 Ready for Link Print Duplex LBP1 1 2 A4 A3 Basic Cancel MP B4 OK Idle Page Total Odd P.1/6 5 Enter the number of copies using the Print Quantity Keys. Note: B • To change the number, press the then re-enter the correct number. FunctionsShort Edge Admin. Long Edge OFFSelections Even Image Processing mode ()p.60) Scanning Contrast ()p.62) Size ()p.63) Paper Size ()p.180) Dot Process ()p.69) Memory ()p.142) Contrast Adj ()p.70) Tone Curve ()p.71) Book Shadow ()p.86) Top Margin ()p.89) Preview ()p.94) Overlay ()p.199) Storage Memory ()p.197) The number is displayed on the Print Quantity Display. A A B The following functions are available: • • • • • • • • • • • • • Ready for Link Print Duplex LBP1 Select Print functions as needed. 8 Press the key, key. The next steps are different, depending on whether the original is scanned from Glass Platen, or from the ADF unit. Perform one of the following steps: Note: Important!: • To cancel Duplex Printing, touch [OFF] then [OK]. • Either Glass Platen or ADF unit may be used, but not both at a time. Place the original. Note: • For information about placing the original, see step 4, “Printing from a Paper Document or Book”.()p.45) • To scan a single sheet of an original, place it on the Glass Platen. • When Duplex Printing from odd number of originals scanned in the ADF unit, the reverse side of the last page will be blank. 216 Duplex Printing [Duplex] When using a Linked Printer Using the Glass Platen Place the first original document on the Glass Platen, wait for the message “Duplex Processing for Linked Printer” to disappear, then place the second original and press the key. <Duplex Processing for Linked Printer> Reverse-Page Scan->START / Simplex->STOP Idle LBP1 1 A4 MP 2 A3 Basic Image (A4) Line B4 Selections Functions Contrast Size Admin. Feed Tray Auto A4 Book Shadow Once data for both sides of the paper is transmitted, the Linked Printer will print the specified number of copies. To print multiple Duplex Print copies, repeat steps 5-8 of Duplex Printing. Important!: • Once the first original is scanned, the next original must be placed within pre-determined Duplex Interval period on the Admin. screen ()p.174). Failure to do so will result in the Linked Printer printing one side only. Note: • Pressing the key without placing the second original will also result in the Linked Printer printing one side only. • Setting adjustment can be made on the following functions after placing the second original and before its scan starts: – – – – – – Image Processing mode ()p.60) Scanning Contrast ()p.62) Size ()p.63) Dot Process ()p.69) Contrast Adj ()p.70) Tone Curve ()p.71) Using the ADF unit The top sheet is scanned first. As each original page is scanned, the Linked Printer prints specified number of copies. Duplex Printing [Duplex] 217 When using a Linked Printer When Equipped with the Auto Document Feeder DX-1 Duplex originals can be scanned when the machine is equipped with the optional Auto Document Feeder DX-1. Setting/Paging Direction of the Original and Resulting Output Setting Direction: Direction of the original when set as seen from the front of the machine. Paging Direction: Binding direction of the original (or output) Button icons on the screen indicate the direction in which the original is set. Simplex -> Duplex (when a connected Linked Printer is equipped with the optional duplex printing unit) Select this setting to print simplex originals on both sides of output paper. Place the original face-up in the Auto Document Feeder DX-1. Simplex Originals Setting Direction Select either one. Paging Direction for Output How the output looks like Select “Left / Right”. Left / Right Left / Right Select “Top / Bottom”. Align Top Align Side Top / Bottom Top / Bottom Duplex -> Duplex (when a connected Linked Printer is equipped with the optional duplex printing unit) Select this setting to print duplex originals on both sides of output paper. If the machine is equipped with the optional Auto Document Feeder DX-1, originals are scanned in the following order: front of original 1 → reverse of original 1 → front of original 2 → reverse of original 2, etc. Duplex Originals Setting Direction Paging Direction for the original Select either one. For “Left / Right” direction. Left / Right Left / Right For “Top / Bottom” direction. Align Top Align Side Top / Bottom Top / Bottom 218 Duplex Printing [Duplex] How the output looks like When using a Linked Printer Touch [Duplex] on the Functions screen. 3 Ready for Link Print Duplex Idle LBP1 Align Top A Align Side Simplex -> Duplex B4 Functions Admin. Offset Pages Printer Collate Staple Paging Direction of Output Duplex -> Duplex A A Duplex Duplex -> Simplex P.1/6 Duplex Cancel A Align Side Align Top A Align Side Paging Direction of Output Duplex -> Duplex AA Paging Direction of Output Left / Right A A AA Setting Direction Duplex -> Simplex Duplex -> Simplex Top / Bottom Left / Right Top / Bottom Note: Note: • When you set the original on the Glass Platen, touch [Simplex -> Duplex]. • When the Linked Printer is not equipped with the optional duplex printing unit, [Simplex -> Duplex] and [Duplex -> Duplex] are displayed in gray and cannot be touched. OK Simplex -> Duplex Simplex -> Duplex Duplex -> Duplex Cancel OFF Setting Direction Align Top Top / Bottom Touch [OK]. Duplex OK A OFF 4 Left / Right A Touch [Simplex -> Duplex], [Duplex > Simplex] or [Duplex -> Duplex]. A A 2 OK Setting Direction OFF MP Selections Cancel AA 1 2 A4 A3 Basic Set “Setting Direction” and “Paging Direction”. A 1 • If you do not require duplex printing, touch [OFF] and then [OK]. 5 Place the original. Place the original on Glass Platen or in the Auto Document Feeder DX-1. For information about placing the original, see step 4 in “Printing from a Paper Document or Book” ()p.45). Duplex Printing [Duplex] 219 When using a Linked Printer 6 7 Select Print functions as needed. The following functions are available: Platen • • • • • • • • • • • • Place the first original document on the Glass Platen, wait for the message “Duplex Processing for Linked Printer” to disappear, then place the second original and press the key. Image Processing mode ()p.60) Scanning Contrast ()p.62) Size ()p.63) Paper Size ()p.180) Dot Process ()p.69) Memory ()p.142) Contrast Adj ()p.70) Tone Curve ()p.71) Book Shadow ()p.86) Preview ()p.94) Overlay ()p.199) Storage Memory ()p.197) <Duplex Processing for Linked Printer> Reverse-Page Scan->START / Simplex->STOP 1 A4 Basic Line Note: Press the key, key. MP 2 A3 Image (A4) B4 Selections Functions Contrast Size Admin. Feed Tray Auto A4 Book Shadow Enter the number of copies using the Print Quantity Keys. • To change the number, press the then re-enter the correct number. Idle LBP1 The number is displayed on the Print Quantity Display. 8 Setting the original on the Glass Once data for both sides of the paper is transmitted, the Linked Printer will print the specified number of copies. To print multiple Duplex Print copies, repeat steps 5-8 of Duplex Printing. Important!: Subsequent procedures will be different depending on whether you place the original on the Glass Platen or in the Auto Document Feeder DX-1. Follow the processes below suitable for each case. • Once the first original is scanned, the next original must be placed within pre-determined Duplex Interval period on the Admin. screen ()p.174). Failure to do so will result in the Linked Printer printing one side only. Important!: Note: • You cannot use both the Glass Platen and the Auto Document Feeder DX-1 at the same time to scan the original. • Pressing the key without placing the second original will also result in the Linked Printer printing one side only. • Setting adjustment can be made on the following functions after placing the second original and before its scan starts: – – – – – – Image Processing mode ()p.60) Scanning Density ()p.62) Size ()p.63) Dot Process ()p.69) Contrast Adj ()p.70) Tone Curve ()p.71) Using the Auto Document Feeder DX-1 The top sheet is scanned first. As each original page is scanned, the Linked Printer prints specified number of copies. 220 Duplex Printing [Duplex] When using a Linked Printer Tip: Printing duplex originals on one side of paper If the machine is equipped with the optional Auto Document Feeder DX-1, both sides of an original duplex document can be printed on one side of the output paper. Set [Duplex -> Simplex] on the Duplex screen for printing. Duplex Cancel OK A Setting Direction OFF Align Top A Align Side Simplex -> Duplex Duplex -> Simplex Paging Direction of Output AA Duplex -> Duplex A A Left / Right Top / Bottom Duplex Originals or Setting Direction Select either one. Align Top Align Side Paging Direction for the original Select the Paging Direction for the original Left / Right Top / Bottom Left / Right Top / Bottom How the output looks like Duplex Printing [Duplex] 221 Replacing Consumables Check for Remaining Amount of Consumables The machine checks and reports on remaining amount of ink, master, paper, as well as the space left in the master disposal box. Note: • The report may not be displayed if detection fails. • The reported amount is for reference only and may not be perfectly accurate. • If the ink or master is depleted or the Master Disposal Box is full, a warning message is displayed and the machine stops. 1 Touch [i Info] on the Basic Screen. Indicator/Message Ready to Make Master Basic Page(A4) Selections Functions Contrast Size Feed Tray A4 Multi-Up Print D-Feed Check Black READY Idle Info Check for remaining amount of consumables. Info Close Description The black bar indicates the remaining amount. Ex: approximately 10% left Admin. Auto Line 2 Display Details (Unknown), ---, no display Indicates that consumable data is not available, is not set, etc. About the “My Counter” screen When the “Management Level” in the User Management is set to “High/Full Management”, touch [My Counter] to display “My Counter” screen. On the “My Counter” screen, you can confirm the current user’s Limit C/C, M/C and Present C/C, M/C. Limit C/C and M/C are set by the administrator. Consult your administrator for details. Consumables Amount Master My Counter Standard-T Ink U-1(G-1) Disposal Box Space Nov23,10 11:25 Disposal Limit C/C Date and Time My Counter Drum Information A3 Black When running low, be sure to restock supply. • Master ()p.224) • Ink ()p.227) • Master Disposal (used master) ()p.229) 222 Check for Remaining Amount of Consumables Present C/C Limit M/C Present M/C Close Replacing Consumables Tip: Information Button icon on the Information Button displays current status of the consumables as detected by the machine. The icon will change depending on the matching information detected from the consumable. • When matching information was correctly retrieved from the consumable (normal display) • When matching information is not available (gray display) When the icon is grayed, the remaining amount of master/ink cannot be displayed. When the master material or ink runs low, (master) or (ink) icon blinks on the right of the button to let you know that the item should soon be replaced. Note: • If the machine is unable to retrieve matching data from the consumable, you must enter the correct setting value. )p.262 Check for Remaining Amount of Consumables 223 Replacing Consumables Replacing the Master Roll When the Master Roll is depleted, a message is displayed and the machine stops. Replace with a new Master Roll. Important!: • For the Master Roll, it is recommended to use the products specified by Riso. )p.234 • Keep the power ON while replacing the master. 1 Open the Front Cover. 3 Pull out the Master Making Unit. Master Making Unit 2 Grasp the Master Making Unit Handle and pull forward. Check the indicator of the Master Making Unit Release Button is ON. Master Making Unit Release Button Pull out slowly until it stops. If the indicator is off, press the Master Making Unit Release Button to turn it on. Important!: • When the Print Drum (Cylinder) is out, Master Making Unit cannot be pulled out. Return the Print Drum (Cylinder) into position and press the Master Making Unit Release Button. )p.231 4 Open the Master Making Unit Cover. Master Making Unit Cover Master Making Unit Cover Lever Grasp the Master Making Unit Cover Lever and open the Master Making Unit Cover. 224 Replacing the Master Roll Replacing Consumables 5 Open the Master Roll Holder. Important!: • Take care not to damage the section when removing the shrink wrap. If the section is bent or the perforation cut, the master will become unusable. • Do not remove the tape yet. Master Roll Holder 8 6 Close the Master Roll Holder. Remove the depleted Master core. Remove the tape once the Master Roll Holder has been closed. 9 Insert the leading edge of the master under the Master Guide Flap. Master Guide Flap. Note: • Dispose the depleted master core according to the disposal rule of your local community. )p.234 7 Install a new Master Roll. Flange Insert the leading edge of the master into its entrance under the Master Guide Flap and advance it as far in as it will go ( ). If the Master is loose, turn the flange at the right towards the rear and rewind ( ). Do not remove the tape Remove the plastic shrink wrap from the new Master Roll, and place in with the mark to the left. Replacing the Master Roll 225 Replacing Consumables Tip: If You Cannot Insert the Master Insert the leading edge of the Master using the following steps. 1) Raise the Master Guide Flap 2) 3) Turn the dial on the edge of the Master Guide Flap towards the rear and raise the Master Guide Flap. Pull out the master to the line indicated by the arrow. Lower the Master Guide Flap. Return each part to its original posi10 tion. Close the Master Making Unit Cover. Return the Master Making Unit to its original position and close the Front Cover. 226 Replacing the Master Roll Replacing Consumables Replacing the Ink Cartridge When the ink is depleted, a message is displayed and the machine stops. Replace with a new Ink Cartridge. BCaution: • Ink may be left on the area around the Print Drum (Cylinder), so take care not to smudge your hands or clothes. • Wash immediately with soap if you should get ink on your hands, etc. Important!: • For the Ink Cartridge, it is recommended to use the products specified by Riso. )p.231 • Keep the power ON while replacing the Ink Cartridge. • Replace with an Ink Cartridge of the same ink color (colour). If you want to change the ink color (colour), replace the Print Drum (Cylinder) itself. )p.231 1 Open the Front Cover. 3 Remove the cap on the new Ink Cartridge. Turn the Ink Cartridge cap to remove. 2 Pull the empty Ink Cartridge out of the holder. Important!: • Do not touch or give impact to the outlet surface of the new Ink Cartridge. Do not peel off the label beside the Ink Cartridge opening. Unlock Turn the Ink Cartridge to the counter clockwise ( ) and then pull it out. Label Note: • Dispose the empty Ink Cartridge according to the disposal rule of your local community. Replacing the Ink Cartridge 227 Replacing Consumables Note: • You can store the Ink Cartridge cap on the upper left of the Print Drum (Cylinder). Ink Cartridge Cap Holder 4 Insert the new Ink Cartridge. Align the arrow on the Ink Cartridge to the mark on the print drum (cylinder) unit, and insert until it stops. 5 Lock the Ink Cartridge. Lock Turn the Ink Cartridge clockwise ( position. 228 Replacing the Ink Cartridge ) and lock in 6 Close the Front Cover. Replacing Consumables Emptying the Master Disposal Box Used masters are held in the Master Disposal Box. When the Master Disposal Box becomes full, a message displays and the machine stops. Discard the used masters. BCaution: • Wash immediately with soap if you should get ink on your hands, etc. Important!: • The Master Disposal Box can be padlocked to prevent the information contained in the discarded master from being leaked. If the Master Disposal Box is safely protected by the padlock, be sure to contact the administrator before discarding the master. • When “Protect” is ON, you can remove the Master Disposal Box only when the messages such as “Master Disposal Box is Full” or “Master Jammed in Disposal Unit” are displayed. )p.184 1 Remove the Master Disposal Box. If the Master Disposal Box lever is locked, slide the lever to the right to unlock. 2 Discard the ejected masters. Push Out Lever Unlock Tilt the Master Disposal Box forward and directly discard the used master into the garbage box (or bag) by grasping the Push Out Lever. 3 Place the Master Disposal Box into position. Grasp the Master Disposal Box handle and pull the box forward. Master Disposal Box handle Insert the Master Disposal Box until it stops. Important!: • If the Master Disposal Box is padlocked, contact the administrator to undo the padlock. Emptying the Master Disposal Box 229 Replacing Consumables Note: • If necessary, slide the lever to the left to lock the Master Disposal Box and also have the padlock for further safety. )p.184 Lock • Dispose the ejected masters according to the disposal rule of your local community. )p.234 230 Emptying the Master Disposal Box Replacing Consumables Replacing the Print Drum (Cylinder) (Color Change) When replacing with a Color Print Drum (Cylinder) to change colors(colours), or when removing jammed paper, follow the steps to remove Print Drum (Cylinder). Be sure to use a Color Print Drum (Cylinder) specifically designed and approved for use with this machine. BCaution: • Do not stand the Print Drum (Cylinder) upright. Doing so may stain the floor, etc. Important!: • Use only Print Drum (Cylinder) specifically designed and approved for use with this machine. • Keep the power ON while removing or replacing the Print Drum (Cylinder). • Make sure to place the changed Print Drum (Cylinder) into the Print Drum (Cylinder) case and store horizontally. Removing the Print Drum (Cylinder) 1 Open the Front Cover. 3 Pull out the Print Drum (Cylinder). Print Drum (Cylinder) Handle 2 Check that the indicator of the Print Drum (Cylinder) Release Button is ON. Grasp the Print Drum (Cylinder) Handle and slowly pull until the Print Drum (Cylinder) is completely extended. 4 Remove the Print Drum (Cylinder). Firmly grasp the Green Handle Print Drum (Cylinder) Release Button If the indicator is off, press the Print Drum (Cylinder) Release Button to turn it on. Important!: • When the Master Making Unit is out, the Print Drum (Cylinder) cannot be pulled out. Return the Master Making Unit into position and press the Print Drum (Cylinder) Release button. )p.224 Use both hands to lift the Print Drum (Cylinder) straight up to remove from the rail. Proceed with replacing the Print Drum (Cylinder), removing the paper jam, etc.. Replacing the Print Drum (Cylinder) (Color Change) 231 Replacing Consumables BCaution: • Do not touch the connector on the Print Drum (Cylinder). Neglecting this may result in malfunction of the Print Drum (Cylinder) because of static electricity or other factors. 232 Replacing the Print Drum (Cylinder) (Color Change) Replacing Consumables Installing the Print Drum (Cylinder) 1 Place the Print Drum (Cylinder) on the Rail. Important!: • Do not grasp the Print Drum (Cylinder) Handle when pushing in the Print Drum (Cylinder). Tip: Changing the Print Drum (Cylinder) Type When you install a different type of Print Drum (Cylinder), the Confirm Print Drum (Cylinder) Type screen appears. Ready to Make Master F17 Basic Align the mark on the Print Drum (Cylinder) with the mark on the guide, and place the Print Drum (Cylinder) horizontally onto the guide. Note: Selections Functions Admin. !!The Print Drum (Cylinder) Type has been Changed!! Select the Current Print Drum (Cylinder) Type A3 Cylinder A4-R Cylinder OK P.1/3 • If the Print Drum (Cylinder) was manually rotated, be sure to turn it back so that and marks align, after it is placed on the guide. 1) Select the type corresponding to the installed Print Drum (Cylinder). 2) Touch [OK]. The Print Drum (Cylinder) type is confirmed and printing is enabled. Important!: 2 Return the Print Drum (Cylinder) to its original position. • You will not be able to print until the Print Drum (Cylinder) type is confirmed. • If you install a non-approved Color Print Drum (Cylinder), the message “WrongType Print Drum Installed Replace with Correct Type” is displayed. Install a Color Print Drum (Cylinder) specifically approved for use with this machine. Push the Print Drum (Cylinder) in as far as it will go, and then close the Front Cover. Replacing the Print Drum (Cylinder) (Color Change) 233 Replacing Consumables Disposal of Depleted Consumables Dispose of depleted Ink Cartridges, Master cores, ejected masters according to the regulations in your local community. If required, separate the specific components using the following procedures to dispose them properly. Ink Cartridge Remove the label (metal included) at the arrow from the outlet surface of the Ink Cartridge, and then dispose them separately. Because ink may have adhered to the outlet surface of the Ink Cartridge, be careful not to smudge your clothes. Parts Ink Cartridge material Label material Ink Materials plastic (polypropylene/polyethylene) plastic (metal included) Soy oil, petroleum hydrocarbons, water, pigments Master core A metallic component has been attached to the bottom of the end section having the mark stamped. Because the component section has been perforated for cutout convenience, tear along the perforation for proper disposal. Parts Core material Master material Material of the cutout component 234 Disposal of Depleted Consumables Materials Paper plastic, Japanese paper plastic (metal included) and paper Replacing Consumables Ejected Master Parts Master material Ink material Materials plastic, Japanese paper Soy oil, petroleum hydrocarbons, water, pigments Note: • It is made of carbon and hydrogen compounds. If fully combusted, it will turn into water and carbon dioxide. Disposal of Depleted Consumables 235 Maintenance Cleaning The print quality may suffer if parts such as Thermal Print Head of the Master Making Unit, Scanner Glass of the optional ADF unit, White Roller, etc. are contaminated with dust, dirt, ink, white-out, etc.. Follow the steps below for periodic cleaning. AWARNING: • Before cleaning any part of the machine, turn off the power. • Do not remove any fixed covers. • Contact your service representative immediately if you suspect any dangerous situations or have questions or problems with the machine. • Contact your service representative before moving the machine. • Do not allow unauthorized persons to make adjustments or repairs. BCaution: • The machine has precision moving parts inside. Do not handle the machine in any other way than described in this manual. • Be careful of the edge of metal parts, otherwise it may cause an injury. • Do not make any modifications to the machine or remove any parts. • Neither Riso nor its dealer is responsible for maintenance service performed by non-Riso-authorized personnel. 236 Cleaning Maintenance Thermal Print Head Clean the Thermal Print Head each time you replace the Master Roll. Open the Master Making Unit Cover, and gently wipe the Thermal Print Head in the back of the unit several times with a soft cloth or tissue. Important!: • Since the Thermal Print Head is very delicate, avoid shocks or scratches with a hard object. • Since Thermal Print Head is susceptible to (damage by) static electricity, please be sure to remove the static electricity charged in the body before cleaning. Glass Platen and Platen Cover Pad If the Glass Platen and/or Platen Cover Pad is stained, gently wipe them with a soft cloth or tissue. Glass Platen Platen Cover Pad Important!: • Since the Glass Platen is very delicate, avoid shocks or scratches with a hard object. Cleaning 237 Maintenance Scanner Glass and White Sheet of ADF unit (Option) Gently wipe the Scanner Glass, and the White Sheet several times with a soft cloth or tissue. Important!: • Since the Glass Platen is very delicate, avoid shocks or scratches with a hard object. For the Auto Document Feeder AF-VI Clean while rotating the white roller. For the Auto Document Feeder DX-1 The white Sheet does not rotate. 238 Cleaning Maintenance Pressure Roller If the Pressure Roller, which presses print paper against the Print Drum (Cylinder), is stained, smudged strips may appear on the back of copies. If this happens, gently wipe the Pressure Roller with a soft cloth dampened with alcohol. To remove the Print Drum (Cylinder), see )p.231. BCaution: • Be sure to turn OFF power to the machine when cleaning the Pressure Roller. • When putting your hand into the unit, do not touch the paper separation hook. The sharp tip of the hook can hurt your hand. • Ink may be left on the area near the Print Drum (Cylinder), so take care not to smudge your hands or clothes. Wash immediately with soap if you should get ink on your hands, etc. Separation Hook Cleaning 239 Maintenance The Exterior Use a soft cloth to gently wipe down the entire printer on a regular basis in order to prevent the exterior from getting dirty. If using a cleaning agent, use one recommended by your authorized service representative. Important!: • Because the machine exterior is plastic, never use alcohol or solvent when cleaning. • The Display may be cleaned by gently wiping with a dry cloth. Dampen a cloth with a small amount of cleaner and gently wipe to remove any ink. Do not spray or pour cleaner solution directly onto the display. Doing so can cause damage. 240 Cleaning Maintenance Cleaning 241 Troubleshooting When a Message Displays Refer to the following information to determine the cause and take appropriate actions when the machine stops operating and a message is displayed. Error Message Layout A message and a troubleshooting illustration will be displayed in accordance with the message type to show how to resolve the problem. 1) Error Number 1 A34 Master Not Set in Place Insert Lead Edge of Master into Master Entrance and Close Master Making Unit 2 3 Counter Display Error Number Error Types error type and error ID number 2) Error Messages 3) 4) description of the error and actions to resolve the problem Graphic Area visually demonstrates how to resolve the problem Counter Display touch to display the “Counter Display” window 4 Description Reference page T00-000 Service Call Error Errors that require repair or inspection by a authorized service representative. To resolve a Service Call Error, contact your dealer (or authorized service representative) with the error number. A00-000 Jam Error Displays when the master is jammed, etc.. )p.243 B00-000 Optional Device Error Displays when an error occurs on the optional device or Linked Printer. )p.244 C00-000 Consumable Error Displays when a consumable such as ink or master roll is depleted. )p.245 D00-000 Installation Error Displays when a part or unit is not properly installed. )p.246 J00-000 Paper Jam Error Displays when an original document or printing paper is jammed. )p.248 242 When a Message Displays )p.243 Troubleshooting T00-000:Service Call Error (in alphabetical order) Message !!Battery Replacement!! Call Service Possible Cause Action The battery is low or depleted. Contact your dealer (or authorized service representative) and have the battery replaced. Press the key or the key to clear the error message display. !!System Error!! A system error has occurred. Press Reset Key If Recovery has Failed, Call Service Press the key. If the problem persists, contact your dealer (or authorized service representative). !!System Error!! Turn Main Power SW OFF Then ON If Recovery has Failed, Call Service Shut off power, then restart. If the problem persists, contact your dealer (or authorized service representative). A00-000:Jam Errors (in alphabetical order) Message Master Disposal Error Pull Out Print Cylinder and Discard Master Possible Cause The master was not properly discarded. Action 1) Pull out the Print Drum (Cylinder) and 2) 3) remove the master from the Print Drum (Cylinder). )p.231 Return the Print Drum (Cylinder) in place. Press the key. Master Jammed in Disposal Unit Pull Out Master Disposal Box and Remove Jammed Master The master is jammed in the Master Disposal Unit. Pull out the Master Disposal Box and remove the jammed master. If the masters are difficult to remove, pull out the Print Drum (Cylinder) and then remove. )p.229 )p.231 If the error persists, contact your dealer (or authorized service representative). Master Loading Error Pull Out Print Cylinder and Discard Master The master did not properly attach to the Print Drum (Cylinder). 1) Pull out the Print Drum (Cylinder) and 2) 3) Master Mis-Feed Pull Out Master Making Unit and Rewind Master Roll, then Reset Master in Place The master is improperly installed. remove the master from the Print Drum (Cylinder). )p.231 Return the Print Drum (Cylinder) in place. Press the key. Pull out the Master Making Unit, rewind the master and reinstall. )p.224 When a Message Displays 243 Troubleshooting Message Possible Cause Master Not Set in Place Insert Lead Edge of Master into Master Entrance and Close Master Making Unit The master is improperly installed or is missing. Master Remains on Print Drum Pull Out Print Drum and Remove Master An unnecessary master remains on the Print Drum (Cylinder). Action Pull out the Master Making Unit and reinstall the master. )p.224 Important!: • If the leading edge of the master is wrinkled or torn, cut the edge straight and reinstall. 1) Pull out the Print Drum (Cylinder) and 2) remove the master from the Print Drum (Cylinder). )p.231 Return the Print Drum (Cylinder) in place. 3) Press the key. Paper Jam Remove Paper in Indicated Areas and Press [OK] Button Paper jammed in indicated area. 1) Remove the jammed paper. Safety SW on Paper Feed Tray is Activated Reset paper on Paper Feed Tray The safety switch for the Paper Feed Tray has been activated. Check underneath the Paper Feed Tray and on top of the printing paper for any obstructions. Remove if any exist. System Error in Master Making Unit The cutter mechanism for the Take Out Master and then master malfunctioned. Close Master Making Unit Cover 2) Press the key or touch [OK]. Pull out the Master Making Unit and remove the master. )p.224 Closing the Master Making Unit Cover will reset the error. Setup the master again. B00-000:Optional Device Error (in alphabetical order) Message Possible Cause Action Can not identify • Something other than the Connect a USB Flash Drive for this USB Flash Drive is machine. connected to the USB slot. )p.49 • A defective USB Flash Drive is connected to the USB slot. • A USB Flash Drive not recognized for this machine is connected to the USB slot. Can not identify (USB hub) A USB hub is connected to the USB slot. Connect the correct corresponding USB Flash Drive. )p.49 Insert Card in Key/Card Counter No card in the Key Card Counter (option). Insert Card in the Key Card Counter. !! Job Separator is OFF !! Turn On Power Switch of it The Job Separator (option) is turned OFF. Turn on the Job Separator. Linked Printer in Error A Service Call Error has occurred on the Linked Printer. Check the Linked Printer and resolve the error. 244 When a Message Displays Troubleshooting Message Possible Cause Action No IP Address Assigned to This IP address for the machine is Printer not properly set. Contact Your Network Administrator Contact your system administrator and set the machine IP address correctly. )p.171 !! No Linked Printer Detected !! Linked Printer may not be Check Cable Connection and Power turned ON; cable may not be Supply for Linked Printer properly connected; connection may be interrupted. Check that the Linked Printer has been switched on. Check to make sure all cables are properly connected. If properly connected, check the server and network communication status and consult with the server and network communication administrator. No Paper Tape in Job Separator Replace Tape Roll No tape in the Job Separator (option). Load new tape into the Job Separator. No Toner in Linked Printer No toner in the Linked Printer. Replace toner in the Linked Printer. Paper Jam Remove Paper in Indicated Areas and Press [OK] Button Paper jammed in indicated area. 1) Remove the jammed paper. Paper Tape Jam in Job Separator Remove Paper Tape Tape jam occurred in the Job Separator (option). Check the Job Separator and remove jammed tape. !!System Error!! A system error has occured. Turn Main Power SW OFF Then ON If Recovery has Failed, Call Service 2) Press the key or touch [OK]. Shut off power, then restart. If recovery has failed, contact your dealer (or authorized service representative). C00-000:Consumable Errors (in alphabetical order) Message Possible Cause Action Add Paper No printing paper in the Paper Feed Tray. Load paper into the Paper Feed Tray. )p.36 Master Disposal Box is Full Empty Master Disposal Box The Master Disposal Box is full. Empty the Master Disposal Box. )p.229 No Ink Replace Ink Cartridge The ink is depleted. Replace and install a new Ink Cartridge. Use the Ink Cartridge specifically designed and approved for use with this machine )p.227 Important!: • If the error persists after replacing the Ink Cartridge, check for proper installation of the Ink Cartridge. No Master Replace Master Roll The Master Roll is depleted. Install a new Master Roll. Use Master Roll specifically designed and approved for use with this machine )p.224 When a Message Displays 245 Troubleshooting D00-000:Installation Error (in alphabetical order) Message Possible Cause Action Close Front Cover The Front Cover is open or improperly closed. Check for the magnet underneath the Front Cover and firmly close. Close Master Making Unit Cover The Master Making Unit Cover is open or is improperly installed. Pull out the Master Making Unit, check and firmly close its cover. Close the ADF Cover Optional Auto Document Feeder DX-1 cover is open or incorrectly set. Check the ADF Cover and close it firmly. Install Ink Cartridge The Ink Cartridge is improperly installed or is missing. Properly install the Ink Cartridge. )p.227 Master Making Unit has been Unlocked The Master Making Unit is ready to be pulled out. Pull out the Master Making Unit. Print Drum has been Unlocked The Print Drum (Cylinder) is ready to be pulled out. Pull out the Print Drum (Cylinder). Print Drum (Cylinder) Not Set in Place Press Drum (Cylinder) Release Button and Pull Out Print Drum (Cylinder) after the Button Lights The Print Drum (Cylinder) is locked but not pushed in properly. Press the Print Drum (Cylinder) Release Button . Remove the Print Drum (Cylinder) after the button is lit and reinstall. Rear Cover of Main Body is Off Call Service The machine rear cover is removed. Contact your dealer (or authorized service representative). Set Master Disposal Box in Place The Master Disposal Box is improperly set or is missing. Properly set the Master Disposal Box. )p.229 Set Master in Place No master is installed. Install a Master Roll. )p.224 Set Master Making Unit in Place The Master Making Unit is missing or is improperly installed. Properly install the Master Making Unit. )p.224 Set Print Drum (Cylinder) in Place The Print Drum (Cylinder) is improperly set or is missing. Properly install the Print Drum (Cylinder). )p.231 246 When a Message Displays Troubleshooting Message Wrong-type Ink Cartridge Installed or Cannot Read Ink Info Replace Ink Cartridge or Contact dealer/Riso office Wrong-type Master Installed or Cannot Read Master Info Replace Master Roll or Contact dealer/Riso office Wrong-Type Print Drum (Cylinder) Installed Replace with Correct Type Possible Cause Inappropriate Ink Cartridge is installed. Action Properly install a correct Ink Cartridge. )p.227 Important!: • Use the Ink Cartridge specifically designed and approved for use with this machine. Failure to do so may cause problems or damage to the machine. The label on the Ink Cartridge outlet surface has come off or surface is with dirt. The label on the Ink Cartridge outlet surface contains information needed for printing. If the machine cannot read the information, it does not operate. Set an Ink Cartridge that is specific to the machine and that is with label attachment and free from dirt. Incorrect master is installed. Set a correct Master Roll. )p.224 Important!: • Use a Master Roll specifically designed and approved for use with this machine. Failure to do so may cause problems or damage to the machine. The section on the master core is missing, or it has worn off, or it has been tilted. The section on the master core contains information needed for making masters. If the machine cannot read the information, it does not operate. Set a dedicated Master Roll that has the mark and is free from wear and tilt. Incorrect Print Drum (Cylinder) is installed. Install a correct Print Drum (Cylinder). )p.231 Important!: • Use a Print Drum (Cylinder) specifically designed and approved for use with this machine. Failure to do so may cause problems or damage to the machine. When a Message Displays 247 Troubleshooting J00-000:Paper Jam Error Displays when the original document or printing paper is jammed inside the machine, the ADF unit (option). The location of the paper jam is indicated by the flashing icon ( - ) in the illustration. Refer to the table below ( - ) and resolve the issue as indicated. J08 Paper Jam Remove Paper in Indicated Areas and Press [OK] Button Note: • Use appropriate printing paper to prevent paper jams. Also select appropriate original document suitable for the ADF unit. )p.17 )p.19 Area Indicated/ Blinking OK Possible Cause Paper is jammed in the Paper Feed area. Action 1) Check the paper feed side and remove the 2) jammed paper. Touch [OK]. Note: • When using special paper, adjust the Paper Feed Pressure Adjustment Lever according to the paper characteristics. )p.36 The original is jammed in the optional ADF unit. For Auto Document Feeder AF-VI Removing in the document insertion direction Pull the ADF Original Release Lever to the right, and pull out the original. ADF Original Release Lever Removing in the document ejection direction Raise Platen Cover, turn the ADF Original Release Dial and remove the original. Original Release Dial 248 When a Message Displays Troubleshooting Area Indicated/ Blinking Possible Cause Action The original is jammed in the optional ADF unit. For Auto Document Feeder DX-1 Important!: • Take care not to touch the roller inside the unit. It may cause smudges on the original or a paper jam. Removing originals jammed in the document feeder Open the ADF Cover ( ), and pull out the original ( ). Removing originals jammed in the document carrier Open the ADF Cover ( ), and raise the feed roller as shown ( ). Open the inside cover ( ), and pull out the original ( ). When a Message Displays 249 Troubleshooting Area Indicated/ Blinking Possible Cause Action The original is jammed in the optional ADF unit. For Auto Document Feeder DX-1 Removing originals jammed in the duplex document carrier Open the ADF Cover ( ), and raise the document tray as shown ( ). Pull out the original ( ). Removing originals jammed in the original receiving unit Lift the Platen Cover Pad up ( ), pull the release lever toward you ( ), and pull out the original ( ). 250 When a Message Displays Troubleshooting Area Indicated/ Blinking Possible Cause Paper is jammed in the Print Drum (Cylinder) area. Action 1) Pull out the Print Drum (Cylinder). 2) )p.231 Remove the jammed paper. 3) Return the Print Drum (Cylinder) in place. 4) Touch [OK]. BCaution: • Do not touch the separation hook or master removal hook when putting your hand into the unit to remove paper. The sharp tips of the hooks can hurt your hand. Separation Hook Paper did not eject correctly. 1) Check for any jammed paper on the paper 2) exit area. Touch [OK]. Note: • When using special paper, adjust the Paper Arranger on the Receiving Tray Paper Guides according to the paper characteristics. )p.36 When a Message Displays 251 Troubleshooting Pop-Up Message Layout Pop-Up Messages communicates various operational statuses. You can continue operation over some of them, but depending upon the context, others will require your action before operations can be resumed. 1) Error Number 1 F02 Page Format is Larger than Paper Size !! Possible Ink Smudges on Prints !! Cancel 2) A reference letter (E/F) and an ID number. Pop-Up Messages Content of the message. 2 Continue Error Number Error Types Description Referen ce page E00-000 Maintenance Call Pops up when battery replacement or a routine inspection by a service personnel is required. )p.252 F00-000 Warning Messages Pops up when printing job cannot proceed due to a conflict between a Control Panel setting and the status of the machine or the Linked Printer. )p.253 E00-000:Maintenance Call (in alphabetical order) Message Symptom/Action How to Clear a Pop-Up Message !!Low Battery!! Call Service (Symptom) Low battery. Touch [Close]. (Alternatively, press the key to clear.) key or the Touch [Close]. (Alternatively, press the key to clear.) key or the (Action) Contact your dealer (or authorized service representative) and have the battery replaced. !!Maintenance!! Call Service (Symptom) Notifies user of need for a periodic maintenance. (Action) Consult your dealer (or authorized service representative). 252 When a Message Displays Troubleshooting F00-000:Warning Messages (in alphabetical order) Message Symptom/Action How to Clear a Pop-Up Message Acquiring Linked Printer Configuration Data Please Wait a Moment (Symptom) The machine system is retrieving Linked Printer information. Link Mode printing is disabled while the retrieval is underway. Touch [Close] to clear the Pop-Up Message and return to the previous screen. (Action) Start printing after the information has been completely retrieved from Linked Printer. Or, print from the machine. Auto Page Size Selection is Not Available for Irregular-Size Original Select Format Size to Store and then Restart (Cause 1) Attempting to scan an irregular-size original using “Auto” in scanning mode. (Action) Select the original size manually. • When printing from the machine; Press the key or the key. • When printing from a Linked Printer; Wait until the information has been retrieved. (This may take several minutes.) • To specify the format for saving Touch [Saving Format]. • To cancel scanning Touch [Cancel]. (Alternatively, press the key or the key to clear.) (Cause 2) A normal-size original has been set in the wrong position. (Action) Lift the Platen Cover Pad up and set the original correctly. !!Auto-Link Operation is Not Available!! Specified Linked Printer may be in Error or Turned OFF (Symptom) Linked Printer is sending an error signal. Link Mode has been activated due to low print volume since “Link-Free Volume” is currently set to ON. (Action) After canceling the Linked Printer error, print again. Or, print after switching to another Linked Printer or print from the machine. )p.174 • When returning to the Master Screen;. Touch [Cancel]. (Alternatively, press the key or the key to clear.) • When changing to another available Linked Printer; Touch [Link Switch] and select another Linked Printer on the Link Sw. screen. ([Link Switch] will not display if no other Linked Printer is available.) )p.210 When a Message Displays 253 Troubleshooting Message Symptom/Action How to Clear a Pop-Up Message Auto Paper Size Selection is Not Available for Irregular-Size Original Select Paper Size Manually and then Press START Key (Cause 1) Attempting to copy an irregular-size original using “Auto”. • To select the Feed Tray Touch the button of the Feed Tray you wish to use. • To stop the print job; Touch [Cancel]. (Alternatively, press the key or the key to clear.) (Action) Select a Feed Tray with the correct size paper. (Cause 2) A normal-size original has been set in the wrong position. (Action) Lift the Platen Cover Pad up and set the original correctly. !! Book Shadow Editor is Not Available with ADF !! Place Original on Glass Platen (Symptom) Auto Document Feeder is disabled while Book Shadow function is active. Can not use this setting with current paper Set the appropriate standard sized paper on the feeding tray (Symptom) Binding margin function cannot be used when custom-sized paper is in the Paper Feed Tray. Touch [Close]. (Alternatively, press the key to clear.) key or the Touch [Close]. (Alternatively, press the key to clear.) key or the (Action) Place the original on the Glass Platen. )p.86 (Action) Load standard size paper in the Paper Feed Tray. Check Paper Receiving Tray (Symptom) Receiving Tray Paper Guides of the Auto-control Stacking Tray are incorrectly set. (Action) Check the Receiving Tray Paper Guides of the Auto-control Stacking Tray. Check Stock of Required Ink and Please Order If Needed Check Stock of Required Master and Please Order If Needed 254 When a Message Displays (Symptom) The remaining quantity of Ink Cartridge or Master Roll has become less than specified on “Stock Management”. )p.173 (Action) Order Ink Cartridges or Master Rolls if necessary. • When resuming the print job; Touch [Continue]. (Alternatively, press the key to print.) • When stopping the print job; Touch [Cancel]. (Alternatively, press the key or the key to clear.) Touch [Close]. (Alternatively, press the key to clear.) key or the Touch [Close]. (Alternatively, press the key to clear.) key or the Troubleshooting Message Symptom/Action How to Clear a Pop-Up Message Check the Original Size The Original Size is larger than Max. Printing Area (Symptom) As the original size is larger than the maximum printing area, extra areas may not be printed. • To change the “Size” setting; Touch [Size Setting]. • When resuming the print job; Touch [Continue]. (Alternatively, press the key to print.) • When stopping the print job; Touch [Cancel]. (Alternatively, press the key or the key to clear.) (Action) Modify the reproduction size. Check the Settings The Sellected Reproduction Ratio will not fit the Max. Printing Area (Symptom) Reproduction size is too large for the detected original size and exceeds the maximum printing area. (Action) Modify the reproduction size, or set printing paper of the appropriate size. Close Platen Cover If original moves you may not get desired result (Symptom) The Platen Cover was opened during the editing process of the RISO Editor function. • When changing the “Size” setting; Touch [Size Setting]. • When resuming the print job; Touch [Continue]. (Alternatively, press the key to print.) • When stopping the print job; Touch [Cancel]. (Alternatively, press the key or the key to clear.) When the Platen Cover is closed, the warning message is erased. Touch [Close]. (Alternatively, press the key or the key to clear.) (Action) Close the Platen Cover gently. Enter Print Quantity Over [N], (Symptom) Programed Minimum Value You are trying to print fewer copies than previously specified on “Minimum Print Quantity”. Touch [Close], and specify the number of copies higher than the number displayed on the message. (Action) Enter a larger number to print, or change “Minimum Print Quantity” on the Admin. screen. )p.173 !! Images may not fit in Frame of Paper with This Reproduction Size !! Check Current Selection (Symptom) Reproduction size for the detected original size is larger than paper size. (Action) Modify the reproduction size. )p.63 • When resuming the print job; Touch [Continue]. (Alternatively, press the key to print.) • When stopping the print job; Touch [Cancel]. (Alternatively, press the key or the key to clear.) When a Message Displays 255 Troubleshooting Message Symptom/Action How to Clear a Pop-Up Message !! Improper Paper for Rotation Sorting !! Set Same Sized Paper in 2 Trays, One in Horizontal and Other in Vertical Direction (Symptom) The proper sized papers for Rotation Sort are not set in the paper tray. Touch [Close]. (Alternatively, press the key to clear.) Invalid Print Drum (Cylinder) has been Selected Change Print Drum (Cylinder), or Reselect Print Drum (Cylinder) Size (Symptom) You have selected a different Print Drum (Cylinder) than the one currently in place, as confirmed in the Confirm Print Drum (Cylinder) Type screen when it was installed. (Action) Place the proper sized papers in 2 trays of the optional Linked Printer, one in horizontal and other in vertical direction. (Action) Select the type of Print Drum (Cylinder) currently installed. Alternatively, you can change the Print Drum (Cylinder). )p.231 !! Layout is not available with this paper size !! Replace with proper paper of standard size key or the (Symptom) Layout functions cannot be used when custom-sized papers are set in the Paper Feed Tray. • When changing a setting; In the Confirm Print Drum (Cylinder) Type screen, select the type of Print Drum (Cylinder) currently installed and touch [OK]. • When installing a different Print Drum (Cylinder); Pull out the Print Drum (Cylinder) and replace with the correct one. When the Print Drum (Cylinder) is reinstalled, the Warning Message will clear. Touch [Close]. (Alternatively, press the key to clear.) key or the (Symptom) Touch [Close]. Multi-up functions cannot be used when (Alternatively, press the custom-sized paper is in the Feed Tray. key to clear.) key or the (Action) Load standard size paper in the Paper Feed Tray. )p.36 !! Multi-Up is Not Available with This Paper Size !! Replace with Proper Paper of Standard Size (Action) Load standard size paper in the Feed Tray. !! No Auto Reproduction Size Selection with This Combination of Original and Printing Paper !! Select Size Manually (Symptom) With the size of set original and printing paper, auto reproduction cannot be performed. (Action) Modify the reproduction size. 256 When a Message Displays • When changing the “Size” setting; Touch [Size Setting]. • When stopping the print job; Touch [Cancel]. (Alternatively, press the key or the key to clear.) Troubleshooting Message Symptom/Action How to Clear a Pop-Up Message !! No Auto Paper Size Selection with Irregular Size Original !! Select Paper Size and then Restart (Cause 1) Attempting to print an irregular-size original using “Auto” in Link mode. • To select the Feed Tray Touch the button of the Feed Tray you wish to use. • To cancel scanning; Touch [Cancel]. (Alternatively, press the key or the key to clear.) (Action) Select the paper tray of the optional Linked Printer. (Cause 2) A normal-size original has been set in the wrong position. (Action) Lift the Platen Cover Pad up and set the original correctly. !! No Auto Reproduction Size Selection with This Combination of Original and Printing Paper !! Select Size Manually (Symptom) Auto Reproduction Size is less than 50% or more than 200%. !! No Auto Reproduction with This Original and Printing Paper !! Select Size Manually (Symptom) Auto reproduction is not available because the size of the original could not be detected. (Action) Modify the reproduction size. (Action) Set the reproduction size manually. • When changing the “Size” setting; Touch [Size Setting]. • When stopping the print job; Touch [Cancel]. (Alternatively, press the key or the key to clear.) • When changing the “Size” setting; Touch [Size Setting]. • When stopping the print job; Touch [Cancel]. (Alternatively, press the key or the key to clear.) No Master on Print Drum (Cylinder) (Symptom) Touch [Close]. Make a New Master You are attempting to print, but there is Set the original and create a master. no master on the Print Drum (Cylinder). Important!: !! Number of Copies is set to “0”!! Printing Operation will Start on this Printer (Action) Set the original and create a master. • Do not leave the Print Drum (Cylinder) without a master. This dries out the Print Drum (Cylinder) and causes damage. You must either create a master or perform a “Confidential” operation to wrap a master around the Print Drum (Cylinder). (Symptom) Number of print copies is set to “0”, yet “Link-Free Volume” is set to ON when Linked Printer is connected. • When printing from the machine; Touch [Continue]. (Alternatively, press the key to print.) • When stopping the print job; Touch [Cancel]. (Alternatively, press the key or the key to clear.) (Action) Enter print quantity. )p.174 When a Message Displays 257 Troubleshooting Message Symptom/Action How to Clear a Pop-Up Message Original size exceeds limitation of layout Specify the original size (Symptom) “Layout” is not available for the original size. • When changing the “Original Size” setting; Touch [Original Size]. • When resuming the print job; Touch [Continue]. (Alternatively, press the key to print.) • When stopping the print job; Touch [Cancel]. (Alternatively, press the key or the key to clear.) (Action) Specify the original size. )p.82 Original Size Exceeds Limitation of Multi-Up Specify Original Size (Symptom) “Multi-Up” is not available for the original size. (Action) Specify the original size. )p.73 Original Undetected Reset Original (Symptom) The machine failed to detect the original document. The original document may not be placed. (Action) Re-position the original. Page Format is Larger than Paper Size !! Possible Ink Smudges on Prints !! (Symptom) The printing paper is smaller than the Master. (Action) Use a correct size printer paper. Page Format is Larger than Paper Size !! Possible Ink Smudges on Prints !! (Continue->PROOF Key) (Symptom) The printing paper is smaller than the Master. Paper Size cannot be Defined by Specified Reproduction Size Select Paper Size Manually (Symptom) The proper sized papers for the specified reproduction size are not set. (Action) Use a correct size printer paper. (Action) Select the Paper Tray. 258 When a Message Displays • When changing the “Original Size” setting; Touch [Original Size]. • When resuming the print job; Touch [Continue]. (Alternatively, press the key to print.) • When stopping the print job; Touch [Cancel]. (Alternatively, press the key or the key to clear.) • When resuming the print job; Touch [Continue]. (Alternatively, press the key to print.) • When stopping the print job; Touch [Cancel]. (Alternatively, press the key or the key to clear.) • When printing from the machine; Touch [Continue]. (You can also print by pressing the key or the key.) • When stopping the print job; Touch [Cancel]. (You can also stop by pressing the key or the key.) • To override the message and to print with possible ink smears on the roller; Press the key. • When stopping the print job; Touch [Cancel]. (You can also stop by pressing the key or the key.) • To select the Paper Tray; Touch [Paper Select] or [Manual Feed] to select the Paper Tray. • When stopping the print job; Touch [Cancel]. (You can also stop by pressing the key or the key.) Troubleshooting Message Symptom/Action How to Clear a Pop-Up Message Please inform this message to your administrator Due date for counter report (Symptom) Due date for Counter Report. Touch [Close]. (Alternatively, press the key to clear.) key or the Please inform this message (Symptom) to your administrator Due date for ID Counter Report. Due date for ID counter report (Action) Report to your administrator. )p.162 Touch [Close]. (Alternatively, press the key to clear.) key or the !! Possible Multiple Paper Feed !! Check Printed Copies Touch [Cancel]. (Alternatively, press the key to clear.) key or the (Action) Report to your administrator. )p.164 Check printed copies. • For canceling “D-Feed Check” Touch [D-Check OFF] to change from being highlighted (b/w) to the normal display. Printer Temperature is Low “180ppm” is Not Available (Symptom) When the temperature of use is low, you cannot use “180ppm”. (Action) Use the printer at the normal print speed until the temperature inside the printer increases to 15ºC (59ºF) or higher. When you touch “Continue”, printing at the normal speed starts. When you touch “Cancel”, the Printing Basic screen appears. • When resuming the print job; Touch [Continue]. (Alternatively, press the key to print.) • When stopping the print job; Touch [Cancel]. (Alternatively, press the key or the key to clear.) Processing Print Data from PC Scanning Mode is Not Available while Processing Current Data The machine is receiving the document data from the computer. While the data is being transmitted, Scan Mode is disabled. Touch [Close]. (Alternatively, press the clear.) Processing Print Data from PC This Function is Not Available while Processing Current Data The machine is receiving the document data from the computer. While the data is being transmitted, Link Mode printing and Scan mode are disabled. Touch [Close]. Initiate the Print job after the transmission is complete, or print from the machine. Proper Size Paper is Not Set on Linked Printer Set Proper Paper, or Select Paper Size Manually and then Press START Key (Symptom) The proper sized papers are not set for the detected original. • When printing with Manual Feed Tray; Touch [Manual Feed] (printed with A3). (Action) Check the paper and set the proper sized paper in the Linked Printer. key to • To select the Feed Tray Touch the button of the Feed Tray you wish to use. • When stopping the print job; Touch [Cancel]. (You can also stop by pressing the key or the key.) When a Message Displays 259 Troubleshooting Message Symptom/Action How to Clear a Pop-Up Message -- Protect -- (Symptom) “Protect” funtion is set to ON. • To set the “Confidential”; Touch [OK]. • To cancel the “Confidential”; Touch [Cancel]. (Alternatively, press the key to clear.) Discard Current Master (Action) Perform “Confidential” if necessary . )p.185 Reached to the limit count Contact the administrator (Symptom) The upper limit for master-making/ printing set by the administrator was reached. Touch [Close]. (Alternatively, press the key to clear.) key or the Touch [Close]. (Alternatively, press the key to clear.) key or the Touch [Close]. (Alternatively, press the key to clear.) key or the Touch [Close]. (Alternatively, press the key to clear.) key or the Touch [Close]. (Alternatively, press the key to clear.) key or the (Action) Contact your Administrator. Saddle Stitching is Not Available with This Paper Size (Symptom) The proper sized papers are not set in the paper tray of the Linked Printer when pressing the key with the Saddle Stitching function set to ON in Link Mode. (Action) Set either of the following papers: A3, B4 and A4. ! Scanning is Not Possible ! External CI is not Connected or Processing Connection Check Cable Connection (Symptom) The scanning function is unavailable due to a lost connection with an external controller or because connection processing has not finished. (Action) Check the connection with the external controller. Set Original and Press Start Key Re-scanning will be Started to Add Image Processing (Symptom) No original is set on the machine to rescan for image processing by the RISO Editor. (Action) Set the original and scan again. Starting Up Network Card (Symptom) RISO Network Card is starting up. Please Wait a Moment (Action) Please wait a moment. Alternatively, print from the machine. 260 When a Message Displays Troubleshooting Message Symptom/Action How to Clear a Pop-Up Message !! The Data Storage Area has Become Full !! Clear Old Storage Data (Symptom) Insufficient free space on the Document Storage Card DM-128CF. Touch [Cancel]. (Alternatively, press the key to clear.) (Action) Check the stored data and delete unnecessary jobs. The file size is too large to store on USB Flash Drive Change the USB Flash Drive or delete some files to make spaces (Symptom) Insufficient free space on the USB Flash Drive. (Action) Check the USB Flash Drive data and delete unnecessary jobs. !!The Print Drum (Cylinder) Type (Symptom) has been Changed!! A different type of Print Drum (Cylinder) Select the Current has been installed. Print Drum (Cylinder) Type (Action) Select the type of Print Drum (Cylinder) currently installed. Alternatively, change back to the same type of Print Drum (Cylinder) as before. )p.231 !! Unmatched Paper Size !! Interposal Paper is Smaller than Printing Paper Check Interposal Paper Size (Symptom) Interposal Papers are smaller than paper size. key or the • For checking the storage memory Touch [Storage Memory]. Touch [Close]. (Alternatively, press the key to clear.) key or the • For checking the USB Flash Drive data Touch [USB Job List]. • When changing a setting; In the Confirm Print Drum (Cylinder) Type screen, select the type of Print Drum (Cylinder) currently installed and touch [OK]. • When installing a different Print Drum (Cylinder); Pull out the Print Drum (Cylinder) and replace with the same one as before. When the Print Drum (Cylinder) is reinstalled, the Warning Message will clear. Touch [Close]. (Alternatively, press the key to clear.) key or the (Action) Load Interposal Papers of appropriate size in the tray. !! Unmatched Size-Current Page and Printing Paper !! Check Paper Size (Symptom) The original data sent from the computer does not match the print paper size. (Action) Check the print paper size and change paper or size as needed. • When resuming the print job; Touch [Continue]. (Alternatively, press the key to print.) • When stopping the print job; Touch [Cancel]. (Alternatively, press the key or the key to clear.) When a Message Displays 261 Troubleshooting Consumable Information Screen In order to assure optimum printing, the machine acquires information from the consumables. If acquired matching information is not proper, the Consumable Information screen is shown. Enter appropriate values. The icon on the Info Button will be grayed out when this occurs. )p.223 Note: • Entering an inappropriate value does not affect usual operations but may result in bad print quality. • When you perform the following operations, the values set on the “Consumables Information Input Wizard” screen disappears and thus you need to enter the values again. – After the power switch is set to (OFF), the switch is set to – After the machine is placed into the Sleep status. – After the key is pressed (ON) again Ink Information Input Screen This screen pops up when data could not be obtained from the Ink Cartridge. Ready to Make Master Basic Admin. Ink Page (A4) Feed Tray Cannot Get Consumables Info Values Required Line Input OK Black READY Idle Info Touch [OK] and enter values as shown below. Screen Display Description [H1] Ink Color Setting Select the same color (colour) as the Print Drum (Cylinder) currently in use. 262 When a Message Displays Values 1: Black 2: Color Troubleshooting Screen Display Description Values [H2] Print Density Fine Adjustment Select a Print Density level to match the ink to fine-tune print result. 1 (Light) - 5 (Dark) [H3] First Print Density Adjustment Select a Print Density level of the first print to match the ink. This can be selected independent of [H2] Print Density Fine Adjustment setting. 1 (Light) - 5 (Dark) A confirmation screen displays when done. Press the key to approve selection. Returns to the Basic Screen. Note: • Master Information Input screen may also display. If so, enter Master Information as well. )p.263 Master Information Input Screen This screen pops up when data could not be obtained from the Master Roll. Touch [OK] and enter values as shown below. Ready to Make Master Basic Admin. Master Page (A4) Feed Tray Cannot Get Consumables Info Values Required Line Input OK Black READY Idle Info When a Message Displays 263 Troubleshooting Screen Display Description Consumables Information Input Wizard Master Information Input Values [H4] Master Density Select the standard density to be applied during creation of the master. 1 (Light) - 10 (Dark) [H5] Print Density Fine Adjustment Select a Print Density level to match the master to fine-tune print result. 1 (Light) - 5 (Dark) [H6] First Print Density Adjustment Select a Print Density level of the first print to match the master. This can be selected independent of [H5] Print Density Fine Adjustment. 1 (Light) - 5 (Dark) H4 Master Density 1 2 3 6 4 7 5 8 9 10 Next> Consumables Information Input Wizard Master Information Input H5 Print Density Fine Adjustment 1 2 3 4 <Back 5 Next> Consumables Information Input Wizard Master Information Input H6 First Print Density Adjustment 1 2 3 4 <Back 5 Next> A confirmation screen displays when done. Consumables Information Input Wizard Master Information Input Confirm the input data shown below. Press the START key if those set values are OK. Item Value H4 Master Density 1 H5 Print Density Fine Adjustment 1 H6 First Print Density Adjustment 1 <Back Press the key to approve selection. Returns to the Basic Screen. 264 When a Message Displays Troubleshooting Troubleshooting If you run into a problem, consult the following chart first to find answers before calling for a repair. Problem The machine does not start up when the power switch is pressed. Possible Cause Action You may have pressed the power switch while the machine was in the Sleep Mode. Try pressing the power switch again. Before pressing the power switch, you may want to find out whether the machine is indeed in the Sleep Mode, by checking the indicator on the Control Panel. If the key is lit, the machine is in sleep mode. Press the key to end sleep mode and to activate the machine. Power has been disconnected. • Check the power cord for proper connection to both the machine and the electrical outlet. • Check the power breaker. The front cover is closed, but the error message still does not clear. The Front Cover has not been firmly closed. Completely close the Front Cover. The magnetic latch should properly engage. The Paper Feed Tray cannot be closed. The Feed Paper Tray Guides have not been widen up to the limit. Turn the power on and lower the Paper Feed Tray to the bottom. Set the Feed Tray Paper Guide Lock Lever to , widen the Feed Tray Paper Guides up to the limit, and close the Paper Feed Tray. The power was turned off before the Paper Feed Tray was lowered to the bottom. The Print Drum (Cylinder) The Print Drum (Cylinder) was cannot be placed into position. stopped at an inappropriate position after rotation. The Print Drum (Cylinder) has not been correctly set to the guide. After manually rotating the Print Drum (Cylinder), make sure that the mark and the mark meet as shown. Set the Print Drum (Cylinder) to the guide correctly. )p.233 Troubleshooting 265 Troubleshooting Problem An error indication does not disappear even though consumables (ink, master roll) are set. Possible Cause The consumables (ink, master roll) have not been correctly set. Action After inserting the Ink Cartridge, turn it clockwise ( ) to lock. Or set the Ink Cartridge again. )p.227 Set a master roll so that the mark comes to the left, and set the Master Making Unit. )p.224 The Master Disposal Box cannot be removed. There is no image on copies. Some areas are missing in the printed copy. 266 Troubleshooting The Ink Cartridge does not contain ink information. Do not remove the label attached on the Ink Cartridge outlet section. If you did so, set a new Ink Cartridge. )p.227 The master roll does not contain master information. Do not remove the section from the master core. If you did so, set a new master roll. )p.224 The “Protect” setting is ON. If the “Protect” setting is ON, the Master Disposal Box cannot usually be removed. )p.184 The Master Disposal Box lever is locked. Slide the Master Disposal Box lever to the right to unlock. If the Master Disposal Box is padlocked, contact the administrator to undo the padlock. )p.229 The original is placed face up. Check which side of the original was placed on the Glass Platen or in the ADF unit. See “Placing the original” ()p.43). The master is installed with the incorrect side out. Reinstall the Master Roll with correctly. )p.224 The Glass Platen (and/or the ADF Scanner Glass) is not clean. Clean the Glass Platen (and/or the ADF Scanner Glass). )p.237 A foreign object may exist on the master. Pull out the Print Drum (Cylinder) and check if any object exists on the master. If a foreign object exists between the master and the Print Drum (Cylinder), remove the master. Then set the Print Drum (Cylinder) and perform the master-making operation again. • The paper size placed on the Feed Tray was not the same as the size of the original at the time of the master-making process. • The Feed Tray Paper Guides were not fit to the width of paper at the time of the master-making process. A master is made according to the size of paper placed on the Feed Tray; namely the width of the Feed Tray Paper Guides and the length of paper. If the size of paper placed on the tray is smaller than the size of the original, a master is not made for the entire original. Set the same size of paper on the tray as the original and perform the master-making operation. Troubleshooting Problem Possible Cause Action Vertical blank lines are found on printed copies. The Thermal Print Head of the Master Making Unit or the Scanner Glass of Auto Document Feeder has been stained with dirt, white-out, etc. Gently wipe the Thermal Print Head or Scanner Glass with a soft cloth. )p.237 The unwanted background of an original is picked up on copies. If newspaper or colored (coloured) paper is used as an original, the background is picked up on copies. Lighten the “Contrast” and create a new master. )p.62 Dirt is found on printed copies. The Glass Platen (and/or the ADF Scanner Glass) is not clean. Clean the Glass Platen (and/or the ADF Scanner Glass). )p.237 The edges of printed copies are smudged with ink. Because a master was made according to a larger size than the original, the edges of the original were processed as shadows. Set the same size of paper as the original and perform the master-making operation again. Or attach tape as described below to solve the problem. Larger size of paper than the original was placed on the Paper Feed Tray at the time of the master-making process. Did you use [Max. Scan] setting when making the master? When printing thick paper such as cards, corners of the paper contacted and damaged the master. Make another master and print with the new master. Or pull out the Print Drum (Cylinder) and attach cellophane tape to the damaged section on the master. However, if attached with cellophane tape, a master may not been properly sent to the Master Disposal Box. Troubleshooting 267 Troubleshooting Problem Possible Cause Action The back of the printed paper is smudged with ink The Pressure Roller has been stained with ink. Remove the Print Drum (Cylinder) and clean the Pressure Roller. )p.239 If the print position is outside the print paper, this may cause the Pressure Roller to be stained with ink. Be careful when changing the size of print paper or shifting the print position. The Feed Tray Paper Guides were not fit to the width of paper at the time of the master-making process. Adjust the Feed Tray Paper Guides to the width of the paper. If the Feed Tray Paper Guides are set wider than the width of the paper, a master will become wider than necessary. )p.36 Are you using a paper that does not efficiently absorb ink? The ink did not dry fast enough, marking onto the reverse side of the next paper. Either change the paper or try “Ink Saving” or “Interval” features. )p.72 )p.106 If the machine is not used for an extended period of time, ink on the surface of the Print Drum (Cylinder) may dry. This results in faint or blurred printing just after printing is started. The ink on the Print Drum (Cylinder) will dry when the machine is not in use for an extended period. Printing with dried ink will produce light or faded copies. Press the key and make several copies before making copies to be actually used. Or use the “Idling Action”. )p.151 Faint originals result in faint images. Increase the scanning level and perform the master-making operation again. )p.62 For originals written with a pencil, select the Pencil mode. )p.60 If the temperature is low (below 15° C (59° F)) in a place where the machine is installed or Ink Cartridges are stored, ink does not flow smoothly. Use the machine after keeping it at room temperature for a while. )p.12 The Ink Saving mode has been set. With the “Ink Saving” mode selected, the ink on printed copies is fainter than usual. )p.72 The left/right position control was not set to “Center” when the document was printed. First lower the Paper Feed Tray, then adjust the position and print a proof copy to check the new position. )p.102 Are the Paper Guides set properly? Make sure to align the Paper Guides with the paper, and turn the Paper Guide Lock Levers until they are secured. See “Preparing to Print” ()p.36). Printed images are faint. Printed texts are blurred. The position of printed text is shifted to the left or right. 268 Troubleshooting Troubleshooting Problem Possible Cause Action Paper sticks to the surface of the Print Drum (Cylinder). The margin at the top of the original or print is too small. The margin of the original (top of the print in the paper output direction) must be 5mm (3/16") at least. Lower the vertical print position. If this adjustment is impossible, reproduce an original with enough margin and perform the mastermaking operation again. )p.63 The print paper is inappropriate. Use the recommended paper. )p.17 The original has a solid black portion at its top. If an original has a solid black portion at the top, printed copies may not properly output. Replace the original in the reverse direction and restart the master-making process. Printed and curled copies are output. The print paper is loaded at a horizontal grain direction. Load print paper with a vertical grain direction. Paper gets jammed in the Auto Document Feeder AF-VI (option). There is any paper caught in the Auto Document Feeder AF-VI. Pull the ADF Original Release Lever to the right or turn the Release Original Dial and remove the jammed paper. ADF Original Release Lever Original Release Dial Troubleshooting 269 Troubleshooting Problem Possible Cause Paper gets jammed in the Auto Document Feeder DX-1 (option). Paper is caught in the Auto Document Feeder DX-1. Action Follow the steps below to remove the jammed paper. Important!: • Take care not to touch the roller inside the unit. It may cause smudges on the original or a paper jam. Removing originals jammed in the document carrier Open the auto document feeder cover ( ), and raise the feed roller as shown in ( ). Removing originals jammed in the document carrier Open the auto document feeder cover ( ), and raise the feed roller as shown in ( ). Open the inside cover ( ), and pull out the original ( ). 270 Troubleshooting Troubleshooting Problem Possible Cause Paper gets jammed in the Auto Document Feeder DX-1 (option). There is any paper caught in the Auto Document Feeder DX-1. Action Removing originals jammed in the original reversal unit Open the auto document feeder cover ( ), and raise the document tray as shown in ( ). Pull out the original ( ). Removing originals jammed in the original receiving unit Lift the Platen Cover Pad up ( ), and pull the release lever toward you ( ), and pull out the original ( ). Printed copies are not neatly aligned in the Paper Receiving Tray. The positions of the Receiving Tray Paper Guides and the Paper Stopper are inappropriate. Adjust the Receiving Tray Paper Guides and the Paper Stopper to the size of paper. For thick paper, slightly widen them as necessary. If you have adjusted the horizontal position on the Paper Feed Tray, shift the Receiving Tray Paper Guides in the same direction. )p.39 The Paper Arrangers are not properly set. Set the Paper Arrangers properly. )p.39 The Paper Feed Pressure Adjustment Lever is positioned incorrectly. If the Paper Feed Pressure Adjustment Lever is set to “Thick Paper”, printed copies may not be correctly aligned when using standard paper. Set the Paper Feed Pressure Adjustment Lever to “Standard”. )p.36 Troubleshooting 271 Troubleshooting Problem Possible Cause Action Paper goes over the receiving tray stopper. --- Follow the steps to level the receiving tray as follows: 1) Fold the Receiving Tray Paper Guides/Stopper. 2) Lift up the sides of the receiving tray with both hands, and move the receiving tray shaft to position B. Position A is recommended in most cases. A B A: Ordinary position B: Move to this position when paper goes over the tray. Paper is not smoothly fed from the Paper Feed Tray. (skipped paper, or multiplesheet feeding) The print paper is inappropriate. Use paper that falls within the recommended range. )p.17 The position of the Paper Feed Pressure Adjustment Lever was inappropriate. When using thick or slippery paper, set the Paper Feed Pressure Adjustment Lever to “Thick Paper”. )p.36 Multi-up did not function. There is nothing printed on one side. Did you place the second original in time after the beep, while the message “Place Another Original and Press Start Key” was showing? When you print using “Multi-Up”, the machine will beep during the Multi-Up Interval. Place the second original during that interval. If the machine starts scanning for the second time without a beep, even when you are scanning from the Glass Platen, you will need to adjust “Multi-Up Interval” settings on the Admin. screen. )p.175 Did you accidentally press the key while the original was being scanned? The print operation will stop if the key is pressed while scanning is in progress. Do not press the key until all originals have been scanned. 272 Troubleshooting Troubleshooting Problem Paper is not fed smoothly from the Paper Feed Tray. (Skipped paper, or multiplesheet feeding) Possible Cause The angle of the Stripper Plate is inappropriate. Action Turn the Stripper Plate Angle Adjustment dial as follows; • When the feeding skips Turn the dial to the left. • When multiple sheets are fed Turn the dial to the right. Important!: • Before making the adjustment, be sure to remove all paper from the Paper Feed Tray and confirm that the tray has lowered to the bottom. Troubleshooting 273 Troubleshooting Problem Paper is not smoothly fed from the Paper Feed Tray. (Skipped paper, or multiplesheet feeding) Possible Cause Paper handling pressure is not correctly adjusted. Action • For paper that easily creates paper powder, skips, or for the back side of postcards that is turn up: Turn the dial to the left. : Normal : Strong : Medium : Weak • If paper is being multi-fed: Turn the dial to the right. Important!: • Before making the adjustment, be sure to remove all paper from the Paper Feed Tray and confirm that the tray has lowered to the bottom. The Paper Feed Adjustment on the Functions screen is not properly set. Adjust the “Paper Feed Adj.”. Contact your dealer (or authorized service representative) for details on making the adjustment. The back of the printed card is peeling, or the leading edge gets wrinkled. The angle of the Stripper Plate is in appropriate Turn the Stripper Plate Angle Adjustment Dial to adjust the angle. An error message displays even though there is no paper jam. Is the lifted paper getting ejected at the second rotation of the Print Drum (Cylinder)? Check the printed copy, and if the top margin is less than 5 mm (3/16"), slightly lower Print Position. Is sunlight directly hitting the machine? The sensor is affected by direct sunlight. Install shades or curtains, or move the machine out of direct sunlight. Is “Print in Units” option selected in the Printer Driver? Delete the current print job. Deselect “Print in Units”, and resend the data to the machine. See )p.50, step 3. )p.57 When printing a multiple page computer file, the machine repeats the master-making process one page at a time. 274 Troubleshooting Troubleshooting Problem Possible Cause Action The computer sent the file, but it was not received by the machine. Is the Admin. screen currently showing on the display? Touch and switch to the Basic Screen from the Admin. screen. The Received data is waiting for output? Press the key is lighting. key and proceed to print. Troubleshooting 275 Appendix Optional Accessories A variety of optional accessories are available to enhance the capabilities of the machine. For details about the optional accessories, see your dealer (or authorized service representative). Auto Document Feeder AF-VI Feed up to 50 sheets of originals automatically. Auto Document Feeder DX-1 Feed up to 50 sheets of originals automatically. Both sides of original can be scanned automatically. Color Print Drum (Cylinder) Simply change the Drum (Cylinder) to print in multiple colors (colours). (Case included) Auto-control Stacking Tray II The Receiving Tray Paper Guides/Stopper are automatically adjusted according to paper and reproduction size. Wide Stacking Tray This unit can take paper up to 340 mm × 555 mm (136/16" × 2114/16") in size. Key Card Counter With a single button press, shows the numbers of printed copies and consumed masters within a given period of time. This can help you manage costs. Job Separator With the Programed Printing function, allows the machine to print and sort into groups separated by tape. Document Storage Card DM-128CF A Storage Card for using the Storage Memory function. RISO Controller IS300 A custom controller enabling the machine to be used as a network-connected PostScript 3 printer. 276 Optional Accessories Appendix Specifications RISO RZ1090 Master-making/printing methods High-speed digital master-making/full automatic stencil printing Original Type Book (10 kg (22 lb) or less), sheet Original Size (max./min.) When using the Glass Platen : 50 mm × 90 mm (115/16" × 39/16") - 310 mm × 432 mm (123/16" × 17") When using Auto Document Feeder AF-VI (option) : 100 mm × 148 mm (315/16" × 513/16") - 310 mm × 432 mm (123/16" × 17") When using Auto Document Feeder DX-1(option) : 105 mm × 128 mm (41/8" × 51/16") - 297 mm × 432 mm (1111/16" × 17") Original Paper Weight When using the Glass Platen : 10 kg (22 lb) or less When using the Auto Document Feeder AF-VI : 50 g/m2 (13-lb bond) - 128 g/m2 (34-lb bond) When using Auto Document Feeder DX-1 (option) : Single-sided feeding: 40g/m2 (11-lb bond) - 128g/m2 (34-lb bond) Duplex-sided feeding: 52g/m2 (14-lb bond) - 105g/m2 (28-lb bond)) Print Paper Size (max./min.) 100 mm × 148 mm (315/16" × 513/16") - 320 mm × 432 mm ( 1210/16" × 17")* *Up to 555 mm (2114/16") of vertical paper dimension may be used. Paper Supply Capacity 1000 sheets (64 g/m2 (17-lb bond)) Print Paper Weight 46 g/m2 (12-lb bond) - 210 g/m2 (110-lb index) Image Processing mode Line, Photo, Duo, Pencil Master-making Time Approx. 20 seconds (for A4/landscape/100% reproduction ratio) Printing Area (max.) 291mm × 425mm (1115/32" × 1623/32") Print Reproduction Ratio Zoom : 50 - 200% Standard reproduction ratio (enlargement) : 163%, 141%, 122%, 116% Standard reproduction ratio (reduction) : 87%, 82%, 71%, 61% Margin+ : 90 - 99 % Print Speed Approx. 60 - 180 sheets per minute (control panel: five steps variable, touch panel: 180 ppm) Print Position Adjustment Vertical : ±15 mm (±19/32") Horizontal : ±10 mm (±3/8") Ink Supply Full automatic (1000 ml per cartridge) Master Supply/Disposal Full automatic (approx. 215 sheets per roll) Master Disposal Capacity 100 sheets User Interface LCD Touch Panel with Progress Arrow indicators, front-side operation Optional Accessories Auto Document Feeder AF-VI, Auto Document Feeder DX-1, Color Print Drum (Cylinder), Auto-Control Stacking Tray, Wide Stacking Tray, Key Card Counter, Job Separator, Document Storage Card DM-128CF, RISO Controller IS300 Power Source RZ1090U : 100V-120V AC, 50/60Hz <5.0A> Specifications 277 Appendix Dimensions When in use : 1415 mm(W) × 705 mm(D) × 665 mm(H) (5523/32"(W) × 273/4"(D) × 263/16"*(H)) When in storage : 780 mm(W) × 705 mm(D) × 665 mm(H) (3023/32"(W) × 273/4"(D) × 263/16"*(H)) Weight*1 Approx. 116 kg (256 lb) Safety Standard IEC-60950-1 compliant, Indoor, pollution degree 2*2, At altitudes of 2000m or lower Note: • Please note that due to improvements and changes to the machine, some images and explanations in this manual may not correspond to your machine. • The specifications are subject to change without prior notice. *1 The weight does not include Ink and Master. *2 The pollution degree of the usage environment due to dirt and dust in the air. Degree “2” corresponds to a general indoor environment. 278 Specifications Appendix RISO RZ1070 Master-making/printing methods High-speed digital master-making/full automatic stencil printing Original Type Book (10 kg (22 lb) or less), sheet Original Size (max./min.) When using the Glass Platen : 50 mm × 90 mm (115/16" × 39/16") - 310 mm × 432 mm (123/16" × 17") When using Auto Document Feeder AF-VI (option) : 100 mm × 148 mm (315/16" × 513/16") - 310 mm × 432 mm (123/16" × 17") When using Auto Document Feeder DX-1(option) : 105 mm × 128 mm (41/8" × 51/16") - 297 mm × 432 mm (1111/16" × 17") Original Paper Weight When using the Glass Platen : 10 kg (22 lb) or less When using the Auto Document Feeder AF-VI : 50 g/m2 (13-lb bond) - 128 g/m2 (34-lb bond) When using Auto Document Feeder DX-1 (option) : Single-sided feeding: 40g/m2 (11-lb bond) - 128g/m2 (34-lb bond) Duplex-sided feeding: 52g/m2 (14-lb bond) - 105g/m2 (28-lb bond)) Print Paper Size (max./min.) 100 mm × 148 mm (315/16" × 513/16") - 320 mm × 432 mm (1210/16" × 17")* *Up to 555 mm (2114/16") of vertical paper dimension may be used. Paper Supply Capacity 1000 sheets (64 g/m2 (17-lb bond)) Print Paper Weight 46 g/m2 (12-lb bond) - 210 g/m2 (110-lb index) Image Processing mode Line, Photo, Duo, Pencil Master-making Time Approx. 20 seconds (for A4/landscape/100% reproduction ratio) Printing Area (max.) 291mm × 413mm (1115/32" × 161/4") Print Reproduction Ratio Zoom : 50 - 200% Standard reproduction ratio (enlargement) : 163%, 141%, 122%, 116% Standard reproduction ratio (reduction) : 87%, 82%, 71%, 61% Margin+ : 90 - 99 % Print Speed Approx. 60 - 180 sheets per minute (control panel: five steps variable, touch panel: 180 ppm) Print Position Adjustment Vertical : ±15 mm (±19/32") Horizontal : ±10 mm (±3/8") Ink Supply Full automatic (1000 ml per cartridge) Master Supply/Disposal Full automatic (approx. 220 sheets per roll) Master Disposal Capacity 100 sheets User Interface LCD Touch Panel with Progress Arrow indicators, front-side operation Optional Accessories Auto Document Feeder AF-VI, Auto Document Feeder DX-1, Color Print Drum (Cylinder), Auto-Control Stacking Tray, Wide Stacking Tray, Key Card Counter, Job Separator, Document Storage Card DM-128CF, RISO Controller IS300 Power Source RZ1070A : 100V-240V AC, 50/60Hz <2.2-5.0A> RZ1070E : 220V-240V AC, 50/60Hz <2.2A> Dimensions When in use : 1415 mm(W) × 705 mm(D) × 665 mm(H) (5523/32"(W) × 273/4"(D) × 263/16"*(H)) When in storage : 780 mm(W) × 705 mm(D) × 665 mm(H) (3023/32"(W) × 273/4"(D) × 263/16"*(H)) Specifications 279 Appendix Weight*1 Approx. 116 kg (256 lb) Safety Standard IEC-60950-1 compliant, Indoor, pollution degree 2*2, At altitudes of 2000m or lower Note: • Please note that due to improvements and changes to the machine, some images and explanations in this manual may not correspond to your machine. • The specifications are subject to change without prior notice. *1 The weight does not include Ink and Master. *2 The pollution degree of the usage environment due to dirt and dust in the air. Degree “2” corresponds to a general indoor environment. 280 Specifications Index Index Symbols * Key ...............................................................26, 134 + Key ..............................................................26, 134 × Key ..............................................................26, 134 Numerics 180ppm .................................................................. 99 2 Up ..................................................................73, 77 A ADF Cover ...................................................249, 250 ADF Original Guide ............................................... 25 ADF Original Receiving Tray ................................ 25 ADF Original Release Dial .................................. 248 ADF Original Release Lever .........................25, 248 ADF Semi-Auto ............................................157, 170 ADF unit ................................................................. 25 Admin. .................................................................. 168 Admin. Screen ....................................................... 29 Advanced Features ............................................. 116 Auto 90°Rotation ................................................. 171 Auto Clear ............................................................ 172 Auto Document Feeder AF-VI ......................25, 276 Auto Document Feeder Cover .............................. 25 Auto Document Feeder DX-1 .......................25, 276 Auto Idling ..............................................48, 151, 172 Auto Page Renewal ....................................152, 173 Auto Power-OFF .................................................. 172 Auto Process Mode ............................................. 170 Auto Sleep ........................................................... 172 Auto-control Stacking Tray ..............................41, 42 Auto-Link Function .............................................. 204 Auto-Process ...................................................51, 68 Auto-Process Indicator .......................................... 68 Auto-Process Key .................................................. 27 Auto-process “OFF” ........................................53, 59 Auto-process “ON” ................................................ 59 B Base IP Address .................................................. 171 Basic Screen .......................................................... 33 Beep Sound ......................................................... 173 Binding margin ....................................................... 90 Book Shadow ......................................................... 86 C C Key ........................................26, 66, 134, 135, 157 Changing Administrator/User Registration ........ 127 Changing Output Directions ................................. 57 Changing the Data Order .................................... 197 Changing the Owner Name ................................ 193 Check for Remaining Amount of Consumables 222 CI Select ............................................................... 170 Cleaning ...............................................................236 Clear All ..................................................... 34, 57, 58 Clearing Programs ...............................................140 Clearing User Registration ..................................128 Clock/Calendar ....................................................171 Closing the Auto-control Stacking Tray ................42 Closing the Paper Feed Tray ................................38 Closing the Paper Receiving Tray ........................40 Color Drum (Cylinder) ..........................................276 Computer Connection ............................................15 Confidential ..........................................................149 Configurable Functions .......................................212 Connection Method ...............................................15 Consumable Error ....................................... 242, 245 Consumables ................................................ 14, 222 Contrast Adj ............................................................70 Control Panel .........................................................26 Copying Stored Data ...........................................201 Counter ...................................................................23 Create User ................................................. 118, 172 Custom Paper ......................................................180 Custom Paper Entry ................................... 170, 180 Custom Paper Size ..............................................183 D Data Information ..................................................192 Data-Map ................................................................33 Default Folder .......................................................170 Default Settings ........................................... 168, 175 Density (Print Density) .........................................101 D-Feed Check ......................................................105 Direct Access ................................................ 33, 178 Direct Print ..............................................................50 DirectAccess Entry ..............................................168 Disable ..................................................................126 Disabling User identification Access ..................126 Display ................................................. 22, 26, 28, 34 Display Adjustment ..............................................169 Display Priority .....................................................168 Displayed Language ............................................169 Disposal of Depleted Consumables ...................234 Document Storage Card DM-128CF ..................276 Dot Process ............................................................69 Double Feed Check .............................................170 Duo .........................................................................60 Duo (Line) ...............................................................60 Duo (Photo) ............................................................60 Duo (Shadow off) ...................................................60 Duplex Interval .....................................................174 Duplex Printing .....................................................215 E E-mail ....................................................................162 281 Index Energy Saving Mode ........................................... 172 Enlargement/Reduction ........................................ 65 Enlarging/Reducing Originals ............................... 63 Entering the User Name ..................................... 124 Error Messages ................................................... 242 Ex. Reserve Period .....................................150, 171 Extended Paper ................................................... 182 Extended Paper Mode ........................................ 182 External CI Info .................................................... 171 Job ..........................................................................34 Job list display ......................................................169 Job List Screen ......................................................54 Job Memory ......................... 142, 143, 144, 146, 148 Job Operation Area ...............................................34 Job Properties Area ...............................................34 Job Separation .....................................................170 Job Separator .............................................. 133, 276 Jump Wing Control ............................. 107, 108, 170 F K Feed Tray Ascent/Descent Button .................22, 38 Feed Tray Paper Guide ......................................... 22 Flanges ................................................................ 225 Folder Renaming ................................................. 170 Format .................................................................. 194 Free ........................................................................ 65 Front Cover ............................................................ 23 Function and Name of Each Part ......................... 22 Functions Area ...................................................... 33 Functions Screen .................................................. 29 Key Card Counter ................................................276 G Gauge Cover ......................................................... 43 Glass Platen ..................................................43, 237 Group ...........................................................125, 131 H High Speed ............................................................ 99 High/Full Management ................................116, 117 Humidity Range ..................................................... 13 I i Information ...................................................33, 223 Icons Used in This Manual ..................................... 9 ID Counter Report .......................................162, 163 ID Print ................................................................... 54 ID Print Job .......................................................... 195 Idling Action ......................................................... 151 Image ..................................................................... 60 Image Processing ................................................ 169 Image Processing Mode ....................................... 60 Initial Screen .......................................................... 28 Ink .................................................................227, 234 Ink Cartridge ..........................................23, 227, 234 Ink Cartridge Cap Holder ..............................23, 228 Ink Handling ........................................................... 14 Ink Information Input ........................................... 262 Ink Saving .............................................................. 72 Installation .............................................................. 12 Installation Error ..........................................242, 246 Installation Location ............................................... 12 Interval .................................................................. 106 Irregular Fitter ...................................................... 170 J Jam Error ............................................................. 242 282 L Layout .....................................................................82 Limit ......................................................................125 Line .........................................................................60 Link Basic Screen ................................................211 Link Info Refresh ..................................................174 Link Mode ...............................................................31 Link Mode Function .............................................204 Link Properties ............................................ 174, 205 Link Scanning Mode ............................................174 Linked Printer .............................................. 174, 204 Linked Printer Setup List .....................................206 Link-Free Volume .................................................174 Low/Admin tab only .................................... 116, 117 M Machine Handling ..................................................13 Maintenance .........................................................236 Maintenance Call .................................................252 Management Level ..................... 116, 117, 121, 172 Margin+ ............................................................ 63, 64 Margin-Plus Rate .................................................171 Margins ...................................................................20 Master ...................................................................235 Master core ................................................. 225, 234 Master Disposal Box ..................................... 22, 229 Master Disposal Box Handle ...............................229 Master Guide Flap ........................................ 23, 225 Master Information Input .....................................263 Master Jam Error .................................................243 Master Making Unit ....................................... 23, 224 Master Making Unit Cover ............................ 23, 224 Master Making Unit Cover Lever ........................224 Master Making Unit Handle .......................... 23, 224 Master Making Unit Release Button ............ 23, 224 Master Removal Hook .........................................251 Master Replacement ...........................................224 Master Roll .............................................................23 Master Roll Holder ........................................ 23, 225 Master-Making Key ................................................27 Materials Not to Be Printed ...................................20 Max. Scan ..............................................................92 Message ...............................................................242 message area ......................................................151 Index Meter Display ....................................................... 165 Mid/ID Print Only .........................................116, 117 Minimum Print Q’ty .............................................. 173 MODE Key ............................................................. 26 Monthly Reminder ............................................... 164 Moving Stored Data ............................................. 201 Multi-Page Mode .........................132, 135, 136, 137 Multiple Paper Feed Detection ........................... 105 Multiple-Original ..................................................... 73 Multi-Up function ..............................................73, 78 Multi-Up Interval ............................................76, 171 Multi-Up Print ...................................................73, 78 Multi-Up Tickets ...............................................76, 80 My Counter .......................................................... 222 My Direct Access ................................................. 166 N Non-ID Print ......................................................... 195 O Online Auto-Link .................................................. 174 OP Auto Process ................................................. 169 Operation Environment ......................................... 13 Operation flow of User Management ................. 118 Operation Safety Guide ........................................ 13 Optional Accessories .......................................... 276 Optional Device Area ............................................ 34 Optional Device Error ..................................242, 244 Optional Functions (Linked Printer) ................... 211 Orientation of Print Paper ..................................... 76 Original ................................................................... 19 Original Margin ...................................................... 20 Output reversal .................................................... 155 Overlay ................................................................. 199 owner name ......................................................... 192 P P Key ...................................................................... 26 Page Orientation .................................................. 174 Paper ...................................................................... 67 Paper Arranger ....................................23, 39, 40, 41 Paper Document .................................................... 45 Paper Ejection Adj ............................................... 170 Paper Feed Adj. ................................................... 107 Paper Feed Pressure Adjustment Lever .......22, 38 Paper Feed Tray ........................................22, 36, 38 Paper Guide ........................................................... 36 Paper Jam Error ..........................................242, 248 Paper Jumping Wing .....................................23, 107 Paper Receiving Tray ................................23, 39, 40 Paper Recommendations ..................................... 17 Paper Size .....................................................67, 209 Paper Stopper ......................................23, 39, 40, 41 Pause before “Master” ....................................52, 59 Pause before “Print” ........................................53, 59 Pencil ...................................................................... 60 Pencil (Darker) ....................................................... 60 Pencil (Lighter) .......................................................60 Photo ......................................................................60 Photo Contrast .......................................................70 Photo Gradation .....................................................71 Photo (Group) ........................................................60 Photo (Portrait) .......................................................60 Photo (Standard) ....................................................60 PIN code ...................................... 117, 119, 123, 175 PIN code Input Screen ................................... 32, 48 Platen Cover Pad .................................................237 Pop-Up Message .................................................252 Power Connection .................................................12 Power Switch .................................................. 23, 36 Power-OFF Schedule ..........................................172 Pressure Roller ....................................................239 Preview ...................................................... 34, 57, 94 Print .......................................................................162 Print Colors (Colours) ..........................................174 Print Density .......................................... 26, 101, 169 Print Density Adjustment Indicator .............. 26, 101 Print Density Adjustment Keys .................... 26, 101 Print Drum (Cylinder) .................................... 23, 231 Print Drum (Cylinder) Handle ....................... 23, 231 Print Drum (Cylinder) Release Button ......... 23, 231 Print Drum (Cylinder) Replacement ...................231 Print Key .................................................................27 Print Paper ...................................................... 17, 38 Print Paper Handling .............................................18 Print Paper Setting .................................................36 Print Position Adjustment ....................................102 Print Position Adjustment Keys .............................26 Print Quantity Display ................................... 26, 104 Print Quantity Keys (0 to 9 Keys) .................. 26, 47 Print Speed .............................................. 26, 98, 169 Print Speed Adjustment Indicator .........................26 Print Speed Adjustment Keys ........................ 26, 98 Print Speed Indicator ...................................... 26, 98 Printer Exterior .....................................................240 Printing Cautions ....................................................20 Printing from Computer .................................. 34, 50 Printing from Paper Document ...................... 33, 45 Process ...................................................................34 Program ....................................................... 131, 134 Progress Arrows ....................................................27 Proof .............................................................. 46, 104 Proof copy ..................................................... 46, 104 Proof Key ....................................................... 27, 104 Protect ......................................................... 172, 184 Push Out Lever ....................................................229 R Receive Tray ........................................................114 Receiving Tray Paper Guides ............ 23, 39, 40, 41 Receiving Tray Paper Guides’ Opening Button ...24 Recognition and Identification System ...............119 Recognition Screen ........................................ 32, 48 283 Index Recognized by .....................117, 119, 123, 172, 175 Registering Administrator/Users ........................ 122 Reminder Date .................................................... 162 Removing the Print Drum (Cylinder) .................. 231 Rename ................................................................ 124 Rename Group ....................................118, 129, 172 Rename screen ................................................... 138 Renew Page ............................................34, 57, 152 Replacing Batteries .....................................243, 252 Replacing Consumables ..................................... 222 Reproduction Size ............................................... 169 Reservation .......................................................... 150 Reserve Period .................................................... 171 Reset All User Counters ..................................... 130 Reset Counter ......................................118, 130, 172 Reset Key .............................................................. 27 Retrieving a Program .......................................... 139 Retrieving Stored Data ........................................ 195 RISO Controller IS300 ........................................ 276 RISO COPY COUNT VIEWER ............................ 16 RISO Print .............................................................. 30 RISO USB PRINT MANAGER ............................. 16 RISO Utility Software ............................................ 16 Rotate ..................................................................... 93 S Safety Guide .......................................................... 12 Scan Mode ............................................................. 31 Scanner Glass ..................................................... 238 Scanning Contrast .........................................62, 169 Scanning Side -ADF ....................................158, 169 Selections Entry ................................................... 178 Separation Hook ..........................................239, 251 Service Call Error ........................................242, 243 Setting Data Information ..................................... 192 Setting the Auto-countrol Stacking Tray .............. 41 Setting the Group to assign ................................ 125 Setting the Management Level ........................... 121 Setting the Paper Receiving Tray ......................... 39 Setting Up the Monthly Reminder ...................... 164 Silent .................................................................... 100 Single Page Mode .......................................131, 134 Size and Weight Restrictions ..........................17, 19 Skip Page .........................................................34, 57 Software Installation .............................................. 16 Special Paper Ctrl ................................................ 107 Specifications ....................................................... 277 Speed (print speed) ............................................... 98 Standard Ratio .................................................63, 64 Start Key ................................................................. 27 Start-Up Screen ..................................................... 28 Status Area ......................................................33, 34 Stock Management .............................................. 173 Stop Key ................................................................. 27 Stop Timing ......................................................51, 59 Storage Memory .................................................. 195 284 Storing Environment ..............................................18 Storing Original Data ...........................................188 Sub Tool Bar .........................................................174 T Tab Area .......................................................... 33, 34 Temperature Range ...............................................13 Text and Photo (Image Processing mode) ...........60 Text (Image Processing mode) .............................60 The Screens and their Various Stages .................28 Thermal Print Head ..............................................237 Tips for Better Paper Feeding ...............................18 Tone Curve .............................................................71 Tool Bar Position ..................................................174 Top Margin ..............................................................89 Troubleshooting ...................................................242 U Usage Status ........................................................165 USB Flash Drive ........... 14, 117, 119, 123, 162, 175 USB Flash Drive Screen ................................ 32, 49 USB Job List ........................................... 50, 55, 195 USB slot ........................................................... 23, 55 User Counter ........................................................130 User identification access .......................... 117, 126 User Management ...................................... 116, 172 User Name ...........................................................124 User Registration Number (ID) ...........................122 User’s Usage ........................................................125 W WAKE-UP Key ................................................ 27, 55 Warning Messages ..............................................253 White Sheet ..........................................................238 Wide Stacking Tray ..............................................276 Z Zoom ................................................................ 63, 66 To Administrator To Administrator Canceling the Protect Setting Cancellation of the “Protect” setting should be always done by the administrator. Important!: • To attach more importance to security, cut out this page, which should be stored by the administrator. 1 Touch [Admin.] on the Basic Screen for each mode. 3 Admin. Ready to Make Master Renew Page Touch grayed-out [Protect]. D-Feed Check All Energy Saving Mode 5mn Display Power-OFF Schedule OFF Default Protect ON System Auto Idling Link Mode Auto Page Renewal Editor 12hour OFF P.7/11 Black 2 Touch [OK]. Ready to Make Master 4 Remove the Master Disposal Box. 5 Touch [Protect] again after removing the Master Disposal Box. )p.229 The “Protect” setting is cancelled. Admin. All Energy Saving Mode 5mn Display Power-OFF Schedule OFF Default Protect ON System Auto Idling Link Mode Auto Page Renewal Editor 12hour OFF P.7/11 After confirming that the display indicates “OFF”, set the Master Disposal Box to the original position. Canceling the Protect Setting 285 286