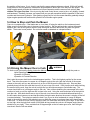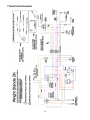
1
Instruction Manual Wright Manufacturing 4600X Wedgewood Blvd Frederick, Md 21703 Stander ZK serial # 55138 and higher WARNING: READ THIS MANUAL BEFORE USING For your safety and for proper operation and maintenance read carefully and keep readily available for future reference. 01/2012 1 Foreword Welcome to the progressive group of mowing professionals who use Wright mowers. We are focused on giving you advanced engineering and quality construction in each mower we build. This manual explains the features and promotes safer use of the mower. Please read it in its entirety and follow the instructions carefully so that you can have many years of safe and productive operation with your Wright product. For service, remember that your Wright dealer knows your mower best and is interested in your satisfaction. Your dealer can provide you with quality maintenance and other assistance that you may need. Please provide this manual to anyone who may operate the mower for them to study before operation. Additionally, make the manual and service documents available to anyone to whom you may sell the mower in the future. It is important that the next owner receive this information also. As Wright Manufacturing, Inc. is constantly seeking ways to improve its products, the mower you have may differ slightly from the information and specifications in this manual. Wright reserves the option to make changes at any time without notice, in the process of continually improving our products. Wright Manufacturing, Inc. SAFETY ALERT This is the safety alert symbol. It is used throughout this manual and on the mower’s safety labels to alert you to potential personal injury hazards. Obey all safety messages that follow this symbol to avoid possible injury or death. Read these instructions carefully. It is essential that you read the instructions and safety precautions before you attempt to work on or use this unit. WARNING This symbol with the “WARNING” indicates a potentially hazardous situation which, if not avoided, could result in death or serious injury. CAUTION This symbol with the word “CAUTION” indicates a potentially hazardous situation which, if not avoided, may result in minor or moderate injury. 1998-2012 Wright Manufacturing, Inc. All rights reserved. This material may not be reproduced or copied, in whole or part, without written permission from Wright Manufacturing, Inc. Grass Gobbler, Gobbler, Leaf Gobbler, Velke, Pro 1, X2, Stander, and Sentar are trademarks of Wright Manufacturing, Inc 2 TABLE OF CONTENTS PRE-DELIVERY SERVICE OF MOWER BY DEALER .............................................................................................................................. 5 1. INTRODUCTION .......................................................................................................................................................................................... 7 1.1 TECHNICAL DATA..................................................................................................................................................................................... 7 1.2 GENERAL SAFETY RULES......................................................................................................................................................................... 8 1.2.1 DO'S AND DON’TS ................................................................................................................................................................................. 8 1.2.2 WARNINGS ........................................................................................................................................................................................... 8 1.3 IMPORTANT INFORMATION ........................................................................................................................................................................ 9 1.4 SAFETY FOR OPERATION ......................................................................................................................................................................... 9 1.5 USER QUALIFICATIONS ............................................................................................................................................................................ 9 1.6 USER CLOTHING...................................................................................................................................................................................... 9 1.7 INSPECT THE MOWER BEFORE EACH USE................................................................................................................................................. 9 1.8 REGULAR MOWER SAFETY..................................................................................................................................................................... 10 1.9 WORK AREA CONDITIONS AND INSPECTION............................................................................................................................................. 10 1.10 INITIAL OPERATING SAFETY GUIDELINES............................................................................................................................................... 10 1.11 SAFETY FOR MAINTENANCE ................................................................................................................................................................. 11 1.12 OPERATION IN FORWARD DIRECTION ........................................................................................................................................ 11 1.13 OPERATION IN REVERSE ...................................................................................................................................................................... 11 1.14 ZERO-RADIUS TURN OPERATION ................................................................................................................................................ 11 1.15 OPERATING ON SLOPES ............................................................................................................................................................... 12 1.16 FUEL SAFETY .................................................................................................................................................................................. 13 1.17 HYDRAULIC SAFETY ....................................................................................................................................................................... 13 1.18 USING A SPARK ARRESTER ......................................................................................................................................................... 13 1.19 REPLACEMENT PARTS .................................................................................................................................................................. 13 2. WARNING, SAFETY AND INSTRUCTIONAL DECALS ..................................................................................................................... 14 3. SPECIFICATIONS ................................................................................................................................................................................ 14 4. MACHINE DESCRIPTION & OVERVIEW ............................................................................................................................................ 16 4.1 OPERATOR'S AREA .......................................................................................................................................................................... 17 4.2 MODEL & SERIAL LOCATION ........................................................................................................................................................... 17 4.3 CONTROL PANEL & STEERING CONTROL LEVERS ..................................................................................................................... 18 4.4 FUEL SYSTEM / FUEL SHUT OFF VALVE ....................................................................................................................................... 18 4.5 DIGITAL HOUR METER ..................................................................................................................................................................... 18 4.6 DECK LIFT LEVER ............................................................................................................................................................................. 19 4.7 SAFETY INTERLOCK SYSTEM ......................................................................................................................................................... 19 5. OPERATING INSTRUCTIONS ............................................................................................................................................................. 20 5.1 INSPECT MOWER BEFORE EACH USE .......................................................................................................................................... 20 5.2 HOW TO START THE MOWER .......................................................................................................................................................... 20 5.3 HOW TO DRIVE THE MOWER ........................................................................................................................................................... 20 5.4 HOW TO STOP AND PARK THE MOWER ......................................................................................................................................... 21 5.5 DRIVING THE MOWER OVER THE CURB ........................................................................................................................................ 21 5.5.1 NEVER DRIVE STRAIGHT ONTO OR OFF A CURB....................................................................................................................... 22 5.6 MOWING ON VARYING TERRAIN .................................................................................................................................................... 22 5.7 HOW TO ADJUST NEUTRAL ............................................................................................................................................................. 22 5.8 CHANGING THE SPEED/SENSITIVITY ADJUSTMENT .................................................................................................................... 22 5.9 HOW TO PERFORM THE TRACKING ADJUSTMENTS .................................................................................................................... 23 5.9.1 TRACKING IN THE 10 & 12 MPH SETTING .................................................................................................................................... 23 5.9.2 TRACKING IN THE 13.5 MPH SETTING ........................................................................................................................................ 23 5.10 HOW TO TEST/USE THE BLADE CLUTCH/BRAKE SWITCH ........................................................................................................ 24 5.11 HOW TO TEST THE OPERATOR PRESENCE CONTROL (OPC) SWITCH .................................................................................. 24 6 SERVICE AND ADJUSTMENTS .......................................................................................................................................................... 24 6.1 TIRE MAINTENANCE AND PRESSURE ........................................................................................................................................... 24 6.2 HEIGHT OF CUT ................................................................................................................................................................................ 24 6.2.1 DECK ADJUSTMENTS ................................................................................................................................................................... 25 6.2.2 DECK LIFT ASSIST SPRING .......................................................................................................................................................... 25 6.3 SPRING PLATFORM ADJUSTMENT................................................................................................................................................. 25 6.4 BELT TENSION ADJUSTMENT ......................................................................................................................................................... 25 6.4.1 REPLACING THE DRIVE BELT ...................................................................................................................................................... 26 6.4.2 REPLACING THE CUTTER DECK BELTS ..................................................................................................................................... 26 3 6.5 HOW TO MOVE THE MOWER IF THE ENGINE WON'T START ...................................................................................................... 27 6.6 HYDRAULIC SYSTEM ....................................................................................................................................................................... 27 6.7 OIL COOLER SCREEN REMOVAL AND CLEANING........................................................................................................................ 27 6.8 OIL COOLER REMOVAL AND CLEANING ....................................................................................................................................... 28 6.9 HYDRAULIC OIL TANK CHECK / FILL .............................................................................................................................................. 28 6.10 BATTERY SERVICE ......................................................................................................................................................................... 28 6.11 FUEL EVEPORATION SYSTEM ...................................................................................................................................................... 29 6.12 CUTTING BLADES ........................................................................................................................................................................... 30 6.13 TRANSPORTING ............................................................................................................................................................................. 30 6.14 LOADING AND UNLOADING ........................................................................................................................................................... 30 6.15 LUBRICATION .................................................................................................................................................................................. 30 6.16 CLEANING THE MOWER ................................................................................................................................................................ 31 6.17 SPINDLE & DRIVE PULLEY SPLIT HUB R&R ................................................................................................................................ 31 6.18 KAWASAKI ENGINE MANUAL / MAINTENANCE ........................................................................................................................... 32 7 ELECTRICAL SCHEMATIC .................................................................................................................................................................. 33 MAINTENANCE INTERVAL CHART ....................................................................................................................................................... 34 MAINTENANCE RECORD ....................................................................................................................................................................... 35 WRIGHT MFG POWER EQUIPMENT LIMITED WARRANTY ................................................................................................................ 36 FEDERAL AND CALIFORNIA EMISSION CONTROL WARRANTY STATEMENT ............................................................................... 37 CUT QUALITY AND MOWING TIPS........................................................................................................................................................ 39 4 Pre-Delivery Service of Mower by Dealer WARNING If you are not completely familiar with the Safety Instruction Manual read it now before proceeding with the Pre-Delivery Service of the mower. Only your authorized Wright dealer should perform the Pre-Delivery Service of the mower. The Wright Stander ZK is shipped completely assembled and has been adjusted and tested at the factory. However, due to jostling during the shipping process and the delivery time lapse the following items need to be repeated again before starting the mower. After you have uncrated the mower, follow these procedures in the order indicated: • Inspect the mower for any damage, unusual conditions or missing parts. • Inspect the mower for all of its decals, especially the warning decals. There should be one blade warning decal on each side of the deck, the “shield missing” under the blade belt covers, and the dash decal. • Check service, parts and recall bulletins to ensure unit does not need any updates. • Check (and fill if necessary) engine oil level according to the engine manufacturer’s recommendation. • Check (and fill if necessary) hydraulic fluid level. Use fully SYNTHETIC oil: Mobil-1 15W-50 (see Hydro Check/Fill section of this manual). • Check rear tire pressure - 18 to 22 psi. is recommended. It should be even on both sides. Use the higher pressures for heavier operators. Front Casters are equipped with non-pneumatic tires and do not require any air. Lowering tire pressure will affect deck pitch. Always check pitch any time tire pressure is set below recommended pressures. • Check the battery to see that the cables are tight and connected properly. The battery is 12 volts and is a maintenance-free battery. Only charge the battery if it will not start the mower properly. • Check the cutter deck for proper adjustment. The deck should be approximately ¼” lower in the front than in the rear and the deck should be level side-to-side. If the deck is not adjusted properly, please adjust at this time. See Deck adjustments section of this manual for further instructions. • Lubricate all moving parts (see Maintenance Items section of this manual). • Add regular unleaded gasoline to fuel tank. Turn fuel valve, located on the right side of upright to the “ON” position. The down position controls the right tank, the up position controls the left tank. Center position is “OFF”. (Use a minimum of 87 octane gasoline) (You may use gasoline containing up to 10% ethanol and gasoline containing up to 5% of methanol.) • Check brake safety interlock. o Try starting the engine with the parking brake released. (Engine should not start. If engine starts, service the parking brake locking system) o With hand controls in the middle or neutral position, apply the parking brake. • Start the engine according to the engine manufacturer’s recommendation. Let the engine run at low - mid RPM for several minutes to ensure the engine oil reaches all of the engine parts and gets the hydraulic fluid circulating through the pumps, etc. o Check if the parking brake locking system prevents the units from being driven while engaged. If not, service the parking brake locking system. • Release the parking brake. Next, move the hand control levers, one at a time, to make the wheels move in forward and backward rotation. 5 • Before testing the blade clutch/brake operation, make sure the area is clear and there is nothing vulnerable to possible thrown objects from under the mower. No one should be near the mower deck or in its line of discharge at this or at any time. The discharge chute deflector should be in the down position. • Move the engine throttle control to ¾ RPM speed setting. • Turn on the blade clutch switch. Run blades for approximately one minute. Next, engage and disengage the blades a few times about 10 seconds apart. If the blades do not start and stop in a few seconds each time, service the blade brake system. • With the blades on, disengage the OPC switch to test the Operator Presence Control switch (OPC). A time delay has been added to the OPC system. The engine should die and the blades should stop with-in 6-9 seconds after stepping off of the foot platform. If not, service the OPC system. • Disengage the blades. • Drive the mower around on a level parking lot. ZK’s are being set at the factory at the 12 MPH setting of the Speed/Sensitivity Adjustment. (See further in this manual for information on Speed/Sensitivity Adjustment)(Ground speeds are estimates and could vary from machine to machine plus or minus 1.0 – 0.5 mph.) Be sure that the mower drives in a straight line when both hand controls are held to the full speed position which is up against the stationary control bar. If not, see further in this manual for information on tracking adjustment. • As you drive the mower, listen for any unusual noises and test for irregular operation and adjust or service as necessary. Next, go over the safety information and operating procedures in this manual with the customer. Instruct the customer in proper operation and observe the customer during their initial operation on a level parking lot. Make sure the customer is familiar and comfortable with the basic operation and use of the mower. • Dealer: Register the mower online within 14 days from the date of retail purchase. (If unable to use the online registration process, contact your Distributor to register for you) Registering the product indicates you have successfully completed the pre-delivery service checklist. The limited warranty is considered invalid unless the unit is registered and the above steps are taken. Remember, the purchaser is both your customer and our customer and his/her satisfaction is very important. Thank you for supporting our products. • The mower is now ready for delivery to your customer 6 1 Introduction This mower is built to the highest standards in the industry. However, carelessness or operator error may result in serious bodily injury or death. Accident and hazard prevention are dependent upon the awareness, concern, wisdom, and proper training of the personnel involved in the operation, transport, maintenance, and storage of the equipment. Make sure every operator is properly trained and thoroughly familiar with all of the information in this manual before operating the equipment. This machine is constructed only for mowing grass on lawns without obstacles such as stones, tree stumps etc. The machine can also be used for other tasks when equipped with special accessory attachments; Grass Gobbler, Rear Bagging System and JRCO attachments. All other types of uses are incorrect. The manufacturer’s directions concerning operation, maintenance, and repairs must be carefully followed. Lawn mowers and all power equipment, can be potentially dangerous if used improperly. Safety requires good judgment, careful use in accordance with these instructions and common sense. The machine must only be operated, maintained and repaired by persons familiar with the machine’s special characteristics and who are also knowledgeable about the safety instructions. Use only approved repair parts to maintain. Accident prevention regulations, other general safety regulations, occupational safety rules, and traffic regulations must be followed without fail. Unauthorized modifications to the design of the machine will absolve the manufacturer from liability for any resulting personal injury or property damage. This machine is not intended for use in extreme environments, as a tow vehicle, on steep slopes greater than 15 degrees or in an enclosed area without good ventilation. 1.1 Technical Data Weight of overall machine 132cm = 522kg, (27hp), 544kg (31hp), 155cm = 567kg Machine dimensions W = Deflector down 132cm = 171 L X 165 W X 118 H 155cm = 175 L X 188 W X 118 H Speed Fwd 22 kmh, Rev 11 kmh Power supply 12V DC 7 1.2 General Safety Rules The Wright Stander ZK is designed with your safety in mind. It has the following safety systems with which you should be familiar: • The warning decals on the mower including the instrument panel warning • The blade switch must be “off” before starting the engine • Your feet must be on the foot platform in order to engage the blades • If you remove your feet from the foot platform while the blades are running the engine will stop and the blades will brake in seconds • Letting go of the hand controls will stop the wheels instantly • Spring loaded chute deflector helps reduce trajectory of thrown objects • Belt/pulley covers on cutter deck • Anti-tip rollers are provided at the rear of the mower to minimize the possibility of tipping back and over on the operator 1.2.1 Do’s and Don’ts Do's Read the operators manual before attempting to operate this machine Don'ts Don't disable safety switches Use all PPE's, eye protection, ear protection and safety shoes Don't operate when lightening is seen Ensure all safety switches are operational Don't lift with a forklift Keep all shields and covers in place Don’t change RPM's outside of operating limits Clean flammable material from machine Don’t tow or push Inspect fuel system and fuel lines for cracks, leaks and dryrott Don’t operate on slopes when wet Inspect area to be mowed for hazards Don’t leave a running machine unattended Only operate in daylight Don’t change the engines governor setting or overspeed the engine Mow safe distances away from drop-offs and other hazards Don’t operate the machine wearing sandals, sneakers or any loose fitting clothes Maintain a safe distance from people and pets Don’t back up without being aware of what is behind the machine Follow daily and weekly maintenance checklists Don’t suddenly push in forward direction while machine is in a rearward motion Observe traffic laws while driving machine from one location to another Don’t operate a poorly maintain machine Thoroughly inspect the machine after striking a foreign object Don’t allow persons to operate this machine without reading the operator manuals Turn off blades when not mowing Don’t put hands or feet under any part of the machine while it is running Slow down before turning Don’t ever carry passengers Stop engine before removing Grass Gobbler or cleaning under deck Don’t discharge material towards anyone Use caution when loading or unloading the machine onto a truck or trailer Don’t operate the machine if you are sick, fatigued or under the influence of alcohol or drugs 1.2.2 Warnings! These warnings are provided to improve safety and should be carefully read before using or maintaining the machine. CAUTION WARNING This symbol with the word “CAUTION” indicates a potentially hazardous situation which, if not avoided, could result in minor or moderate injury. This symbol with the word “WARNING” indicates a potentially hazardous situation which, if not avoided, could result in death or serious injury. 8 1.3 Important Information It is vital that these instructions are available to machine users. It is also important to retain with the machine if the machine is sold or transferred to another user. 1.4 Safety for Operation WARNING The Stander ZK should only be used by fully trained operators to prevent the risk of injury to themselves or other personnel. The owner’s/user’s obligation is to instruct themselves and all potential users in the safe operation of this equipment and be sure they read and follow the instructions in this safety manual and other material provided by Wright Manufacturing, Inc. before using or allowing others to operate the equipment. DO NOT operate this unit unless you carefully read, understand and follow the operation and safety instructions contained in this manual and the warning decals provided on the unit. DO NOT allow other persons to use this unit unless you make sure they carefully read, understand and follow these instructions. Never allow children to operate or play on the unit. 1.5 User Qualifications WARNING This product is designed for use by physically fit, experienced, professional commercial mower operators who have a minimum of 160 hours of experience operating twelve horsepower and greater industrial mowers. Operators must be 18 years or older and weigh at least 120 pounds and no more than 350 pounds. They must have read and understood this manual. DO NOT allow children to operate the mower. Do not allow adults to operate the mower without proper instruction mentioned above. Never allow passengers on the mower. DO NOT allow adults to operate the mower without proper instruction as mentioned above. 1.6 User Clothing WARNING DO NOT operate the mower while wearing sandals, tennis shoes, sneakers, or shorts. Always wear long non-baggy pants. Wear high-top leather work boots with thick, textured tread, soft-rubber soled at all times. Hard or smooth soled shoes are too slippery for a good footing on mower platform. NEVER wear loosefitting clothing or jacket pockets that can get caught to the handlebars or control levers of any mower you drive. Wearing safety glasses, ear protection and safety shoes is advisable and required by some local ordinances and insurance regulations. 1.7 Inspect the Mower Before Each Use WARNING DO NOT use the mower if any parts are not maintained in good operating condition. Examine the moving parts prior to each use. Look for excessive wear, bald or worn tires, cracks in parts, loose or missing bolts, cotter, linchpin or “hair” pins or cable yoke pins and replace before operating the mower. Make sure all safety equipment provided with the mower is in good operating order, including all the warning decals and the required operator-presence device which stops the engine and blades when the foot-operated Operator Presence Control (OPC) switch is released. (To test the OPC, follow instructions in the Operating Instructions section of this manual.) Inspect the two anti-tip rollers and their respective bolts at the rear of the mower for tightness and proper operation. Be sure that all parts of the hand-operated transmission control system are tight and secure. This is to reduce the possibility that the mower could have a loss of control or safety. 9 WARNING 1.8 Regular Mower Safety Keep your Wright mower in good operating condition, and keep safety devices and shields in place and in working condition. Replace worn tire(s) with less than 3/32” of any tread groove left. Use tires with the tread pattern specified by Wright Mfg., Inc. only. DO NOT change the engine governor settings or over-rev the engine contrary to engine manufacturer specifications. Failure to comply can compromise operator safety, shorten equipment life and void your manufacturer’s warranty. Keep all nuts, bolts, and screws tight to be sure the equipment is in safe working condition. Check the blade mounting bolts for proper tightness every eight (8) hours of operation. Check the blades for excessive wear and sharpness every four to eight (4-8) hours of operation. Sharpen dull blades. Replace blades when they become excessively worn. The mower should not be used after the blades or other part of the mower strikes a foreign object, until conducting a thorough inspection and any damage is repaired. Make sure the chute deflector is always in place and operating properly. Replace if the deflector becomes worn or ceases to properly deflect the grass in a safe manner. See the instructions in the Recommended Maintenance section of this manual for other items of required maintenance. 1.9 Work Area Conditions and Inspection WARNING Prior to operating the unit, carefully inspect all lawn/ground areas where you plan to use the mower for hidden, hard-to-see objects or uneven ground that may be hidden in the grass. Clear the work area of moveable objects such as wires, rocks, glass, etc. that might be picked up by the mower and dangerously thrown. Remove, if possible, or mark the location of all immovable objects or irregular areas and be sure not to hit them with any part of the mower, its deck or the blades. Obstacles such as holes, abrupt changes in ground contour, tree trunks, stumps or roots, pipes protruding from the ground, paving edges, etc. in the path of operation can abruptly turn or stop the mower. This could throw you off the mower or into and possibly over the handle bars causing serious injury or death. The faster you are moving, the more potential there is for injury. Mow only in daylight or in good artificial light. Keep away from drop-offs, the edges of ponds, streams, pools, etc. especially at the bottom of slopes. Do not mow when children or others are around. When the Wright mower is in use, never direct the grass discharge toward bystanders, traffic, cars or buildings nor allow anyone within 50 feet of the machine while in operation. Thrown objects can pass through glass windows and some walls of buildings. There is extreme risk of danger from thrown objects or being cut by the blades of the mower or being run over if you lose control. Never operate the mower in an enclosed area without good, approved ventilation. Exhaust fumes are dangerous. 1.10 Initial Operating Safety Guidelines • • • • • • • • • WARNING Read and understand the warnings on the instrument panel of the mower. Keep a firm hold on the stationary handle at all times. Keep both feet on the foot platform at all times. Know the controls and how to stop quickly. Before attempting to start the engine, follow all starting instructions below and in the engine operator’s manual. Look behind before backing up. Before leaving the operator’s position, even momentarily, turn off the blade clutch engagement switch and apply the parking brake. Keep others from coming near the mower. Get back on the mower as soon as possible. When leaving the Wright mower unattended, turn off the blade clutch engagement switch, apply the parking brake, stop the engine and remove the key. Never leave the machine unattended on a slope in case someone disengages the parking brake which would be hazardous if the mower were to roll. When transporting, driving onto transport vehicles, into buildings, across parking lots or otherwise not mowing grass, turn off the blade clutch engagement switch to reduce risk of thrown objects and rotating blade hazard. After coming to a stop apply the parking brake, stop the engine and remove the key. 10 • Before performing any maintenance or repair service, disengage power to blades, apply the parking brake, stop the engine, remove ignition key and spark plug wire from spark plug(s). • All operators of this mower should exercise caution when driving this mower at high speeds. Sudden stops from excessive speeds may cause serious injury. • DO NOT allow inexperienced people to operate the mower until they have read and understood these safety instructions. Operate the mower at slower speeds while becoming familiar with it. • The grass discharge chute deflector must be installed at all times and in the down position except that it may be raised when the grass catcher is completely installed or a mulch kit is completely installed. • If the mower discharge clogs, turn off the blade clutch switch, apply the parking brake, stop the engine and remove the key before removing obstruction. • Keep all shields and covers in place, especially grass discharge chute deflector and the blade belt covers. • Keep hands, feet and clothing away from rotating parts, especially the rear wheels, blades, engine flywheel, belts and pulleys. • Do not touch engine or muffler while engine is running or soon after it is stopped. These areas can be so hot as to cause severe burns. • Clean grass, leaves and lubricant spills from surfaces after use to prevent fire hazard. • Be alert for traffic when crossing roads or operating near roadways. • Before climbing curbs, crossing gravel drives, sidewalks or roads, turn off the blades and wait for them to stop, then place the deck into transport position. 1.11 Safety for Maintenance WARNING • Repairs carried out by untrained or unauthorized personnel may result in personal injury or serious malfunction of the Stander ZK. • If Guarding is removed for inspection and component replacement, ensure the parking brake is applied and key is removed prior to inspecting or making repairs and that the guarding is replaced before operation. 1.12 Operation in Forward Direction WARNING Always keep a firm grip on the mower stationary handlebar with both hands. Operate the mower slowly until you become familiar with how the mower operates. Do not operate the mower faster than conditions allow. For example, hills, wet or bumpy ground, dim light or high grass are all conditions requiring slower speeds. Never operate the mower at the highest speed unless you are on level, wide, open areas of clearly visible ground or transporting on paved areas. Speeding with any mower is dangerous, and so is traveling faster than conditions should permit on this mower. Sudden stops from excessive speed or falling off the mower may cause serious injury or death. 1.13 Operation in Reverse WARNING Always keep a firm grip on the mower stationary handlebar with both hands. Keep both feet firmly on the foot platform. Look behind you before backing to prevent injuring yourself or anyone behind you. Operate the mower very slowly, inching it backward until you become familiar with how the mower operates. Always operate slowly if in an awkward location or position. While backing up, never place your foot or feet on the ground near the back edge of the mower to prevent serious personal injury if the mower were to run over you. 1.14 Zero-Radius Turn Operation WARNING During zero-radius turns (when one mower wheel rotates backwards while the other rotates forward) drive extra slowly to reduce the possibility of losing traction, or control, or becoming dizzy. This will help prevent 11 you from being thrown off the mower. Be aware that if you do a turn on a slope you may go through all of the orientations to a slope mentioned below and must handle the mower accordingly. 1.15 Operation on Slopes WARNING DO NOT operate on steep slopes. Do not operate the mower on slopes steeper than you can feel secure about the traction of the tires and the stability of the mower. Do not operate the mower on slopes at all when the grass is wet. There is a danger of suddenly sliding sideways or down the hill. When operating on a slope, travel across the grade whenever possible, not in an up or down pattern. Reduce speed and exercise extreme caution on slopes and in sharp turns to prevent tipping or loss of control. Be especially cautious when changing direction on slopes. When pointing up a slope, your mower has the most weight on the drive wheels and therefore the most traction at the tires. However, this is the angle that it has the most tendency to tip back (“pop a wheelie.”) This is the preferred angle for mowing small areas of steeper slopes. Recommendations for this angle: • Lean as far forward as possible to add your weight to the front of the mower. • Accelerate gently. Do not accelerate quickly to avoid “popping a wheelie”. • If backing down the hill, do not stop suddenly but slow down gradually. When pointing down a slope, your mower has the least weight on the rear drive wheels and therefore the least traction at the tires. This is the angle that the mower has the most tendency to slide. However, this is the angle that it has the least tendency to tip back. Avoid this angle, as it has the least advantage for your mower. Recommendations for this angle: • Lean back with arms stretched out straight while holding onto the stationary handlebar. This transfers more of your body weight to the rear drive wheels for more traction. • Do not change speed suddenly to minimize the tendency of going into a slide. Accelerate and decelerate gently. If you ever go into an uncontrolled slide while pointing down a slope the recommended procedure is to let go of the handles and jump off if necessary. Otherwise, control the mower gently and stay off slopes that tend to make the wheels slide. When crossing a slope sideways, your mower has the average amount of weight on the drive wheels versus the front wheels, similar to level ground. However, this angle leaves the least weight on the higher side drive wheel, tending to make it slip. This is the preferred angle for mowing large areas of gentle slopes. Recommendations for this angle: • Stand straight, but lean sideways, toward the uphill side and stand on the uphill side of the foot platform. This adds weight to the higher side drive wheel and will allow you to mow more quickly across the slope without sliding. • To reduce the chances of “popping-a-wheelie”, do not accelerate quickly. Note: Excessively worn tire tread is dangerous. Replace tire(s) with less than 3/32” of any tread groove left. Use tires with the tread pattern recommended by Wright Mfg., Inc. only. Keep the tire pressure in the drive tires between 18 and 22 psi. Higher pressures will cause the tires to have less traction which may prevent safe operation. 12 1.16 Fuel Safety WARNING Handle gasoline with care – it is highly flammable. Do not smoke while handling gasoline. Use an approved gasoline container. Never remove the fuel cap or add gasoline to a running or hot engine or an engine that has not been allowed to cool for several minutes after running. Never fill the tank indoors and always clean up spilled gas. NEVER store the equipment with gasoline in the tank inside a building where fumes may reach an open flame or spark. Allow the engine to cool before storing in any enclosure. WARNING 1.17 Hydraulic Safety Keep body and hands away from pin holes or fittings that eject hydraulic fluid under high pressure. Use paper or cardboard and not hands to search for leaks. Hydraulic fluid escaping under high pressure may have sufficient force to penetrate skin and cause serious injury. If foreign fluid is injected into the skin, it must be surgically removed within a few hours by a doctor familiar with this form of injury or gangrene may result. Seek medical attention immediately. Make sure all hydraulic fluid connections are tight and all hydraulic hoses and lines are in good condition before starting your Wright mower. Hydraulic fluid is under high pressure. If you need service on your hydraulic system, please see your authorized Wright dealer. 1.18 Using a Spark Arrester The engine in this machine is not equipped with a spark arrester muffler. It is in violation of California Public Resources Code Section 4442 to use or operate the engine on or near any forest-covered, brush-covered, or grass covered land unless the exhaust system is equipped with a spark arrester meeting any applicable local or state laws. Other states or federal area may have similar laws. 1.19 Replacement Parts Use of parts other than specified parts supplied by Wright Manufacturing, Inc. may compromise the safe use of the mower, are not recommended and their use could void the warranty. Always check with your Dealer or the Wright Mfg website for the latest Illustrated Parts List for your equipment. Wright is fully concerned with your safety. Please read the above again and again until you fully understand the methods to promote the safest operation possible. REMEMBER – YOUR MOWER CAN BE ONLY AS SAFE AS THE OPERATOR. FAILURE TO FOLLOW SAFE OPERATING PRACTICES MAY RESULT IN SERIOUS INJURY OR DEATH. 13 2 Warning, Safety and Instructional Decals • • • • Specific safety warning decals are located on the equipment near immediate areas of potential hazards. Keep all safety signs legible. Remove all grease, dirt and debris from safety signs and instructional decals. Replace worn, damaged or missing safety decals. If an attachment or accessory has been installed, make sure current safety decals are visible. 1. Blade engage/disengage switch 2. Ignition switch, Off 3. Ignition switch, Run 4. Ignition switch, Start 5. Apply parking brake to start 2 3 1 4 5 76490013 DECAL, MAIN INST PANEL Throttle, Fast/Full Steering controls Throttle, Slow/Idle 76490005 DECAL, THROTTLE/INSTRUCTIONS 76490001 DECAL, SHIELD MISSING 76490053 DECAL, PARKING BRAKE 76460001 DECAL, DANGER BLADE HAZARD 3 Specifications Engine • • See your engine owner’s manual RPM: Full speed 3600 +/- 50 RPM (no load) / Idle: 1550 RPM Electrical System • • • • Charging System: Internal stator coil Battery Type: Maintenance free Battery Voltage: 12 Volts Fuses: Two, 20 amp blade type 14 Fuel System • • • • Capacity: 17.5 gal, 66 liter Type of Fuel: Unleaded regular gasoline, minimum 85 octane. Do not use gasoline containing more than 10% ethanol. Do not mix oil with gasoline. Fuel Filter: In line Fuel shut off: Three Way Valve Safety Interlock System • • PTO switch must be disengaged, brake engaged and the control handles in the neutral and locked position to start the engine. Operator must have feet on the platform to engage the PTO and brake off or engine will stop. Drive System • • Two Hydro Gear 16cc w/fans variable displacement piston pumps Two Hydro Gear 15cu in. wheel motors Hydro Oil System • • • • Hydro Oil: fully SYNTHETIC motor oil: Mobil-1 15W-50 Hydro Filter: Spin-on, 25 micron, no bypass / PN 34490002 Total Capacity: 6qts, 5.7liters Tank Fill Level: Fill until fluid comes from fill port. Torque Specifications Critical Application Wheel motor bolts / nuts (Securing motor to support) Clutch to engine shaft Wheel hub to wheel motor Wheel lug nuts Split Hub (Spindle & Drive) (Gr 8) Blade Bolts Thread Locker Torque Range N/A 140-169 Nm Loctite 2760 N/A N/A N/A N/A 68-75 Nm 217-325 Nm 108-122 Nm 18-23 Nm 95-108 Nm 52" (132cm) Stander ZK Width, deflector down 65" (165 cm) Width, deflector up 53" (135 cm) Length 67.5" (171 cm) Height 46.5" (118 cm) Weight 27hp 1150 lbs (521.6 kg) 31hp 1200 lbs (544.3 kg) 61" (155cm) Stander ZK Width, deflector down 74" (188 cm) Width, deflector up 62" (157 cm) Length 69" (175 cm) Height 46.5" (118 cm) Weight 1250 lbs (567 KG) 15 4 Machine Description & Overview The Wright Stander ZK is meant to solely cut, bag or mulch grass. The use for any other purpose is not recommended. Do not disconnect any safety switches or remove any decals. 1. 2. 3. 4. 5. Flexible Chute Deflector Rear Drive Tire Fuel Tank Deck Lift Handle Control Handles 6. Stationary Handle Bar 7. 8. 9. 10. 11. Brake Handle Engine Muffler Front Caster Tire Anti Scalp Wheels 12. Cutter Deck 13. Deck Covers 5 4 7 6 3 3 8 2 2 9 13 13 13 1 12 11 11 11 11 10 10 16 4.1 Operator’s Area 1. Foot Platform 2. Foot Platform Adjustment Springs 3. Anti Tip Wheels 4. Brake Handle 5. Dash/Control Panel 6. Deck Lift Handle 7. Upright Pad 8. Shin Pad 5 6 4 7 8 2 1 3 3 4.2 Model & Serial Location 1- The plate is affixed to the tractor body below the shin pad. 2- Stated on the plate will be the model and serial number, these will be needed when ordering parts. 17 4.3 Control Panel & Steering Control Levers The Stander ZK speed and direction are controlled by using the control handles. Moving the control handles equal distance forward or backward the machine moves in a straight line. By releasing the control handles during operation, the controls will return to the neutral position and the machine will stop. 1. Forward Control Levers 2 2 2. Reverse Control Levers 3. Stationary Handlebar 3 4. Throttle 5. Choke 6. Digital Hour Meter 4 6 7. Ignition Switch 5 8. PTO Switch 1 1 8 7 4.4 Fuel System / Fuel Shut Off Valve The fuel shut-off valve is located on the right side of the upright. The valve should be in the “OFF” position at all times when the mower is not in use. Do Not fill the tank completely. Fill level is 1 inch below the bottom of the fill neck. This will allow for the gas to expand. 3-Way Valve 4.5 Digital Hour Meter The Stander is equipped with a digital hour meter. Refer to operating/reset instructions below. The programming specified is: Default display: Hours Press once (TMR1): Timer 1, press for 3 sec to reset Press twice (TMR2): Timer 2, press for 3 sec to reset Press three times (svc ENG): Will display time remaining until next service point, hold down to reset. The first interval is 8hr, thereafter 100hr. Beginning 5hr before service point the meter will flash “svc ENG, in [remaining hours]” every 5 sec. Shut off engine: Will display how many times the engine has started. 18 4.5 Deck Lift Lever The “Quick Cut” height selector will adjust the cut height in ¼” increments. To operate, ensure the cutter deck is in the full up and locked position, insert detent pin in desired cut height hole, grab deck lift handle and pull back to unlock the deck lift locking mechanism. Lower to the selected cut height. Deck Lift Handle, full up and locked position Detent Pin 4.6 Safety Interlock System The Wright Stander ZK is equipped with a safety interlock system. The PTO must be disengaged, brake applied and control levers in the neutral position in order to start the machine. With the brake applied, the controls are locked in the neutral position. Parking brake applied, locks control levers Parking brake Off, levers free to move Parking brake safety switch 19 5.0 Operating Instructions WARNING If you are not completely familiar with the Safety Instruction Manual read it now before proceeding with the operation of the mower. REMEMBER THERE ARE CERTAIN PRECAUTIONS LISTED IN THIS MANUAL THAT YOU MUST NOW TAKE BEFORE STARTING THE MOWER. 5.1 Inspect Mower Before Each Use Inspection of Mower: Do not use the mower if any parts are not maintained in good operating condition. Examine all moving parts prior to each use. Look for excessive wear, bald drive tires or worn out front tires (normally smooth), cracks in parts, loose or missing bolts, cotter, linchpin or “hair” pins or cable yoke pins and replace before operating the mower. Make sure all safety equipment provided with the mower is in good operating order, including all warning decals and the operator-presence device which stops the engine and blades when the foot-operated Operator Presence Control (OPC) switch is released. To test the OPC, follow the instructions given later in this manual. Inspect the two anti-tip rollers and their respective bolts at the rear of the mower for tightness and proper operation. Ensure that all parts of the Quad-Lever™ control system are tight and secure. This is to reduce the possibility that the mower could have a loss of control or safety. Basic Operation: The following procedures are to guide you through the basic operation of the mower. You should be a qualified mower operator according to the safety section of this manual. If this is your first time, operation should only be done with the assistance of your dealer on a level area. You should go through each step, in the order indicated, every time you start the mower. 5.2 How to Start the Mower Before starting the engine • Make sure the control levers are in the exact neutral position • Apply the parking brake if it is not already set. • Turn OFF the blade engaging switch if it is on. • Turn fuel valve to the “ON” position. Starting the engine Electric Start: •Start the engine according to the engine manufacturer’s recommendation, see engine manual. Set the throttle control lever near mid throttle, pull out on the choke control knob and turn the key to the start position. Do not engage the starter for more than ten (10) seconds at a time. This may overheat the starter and the wiring systems. Wait ten (10) seconds between attempts. If the engine does not start after several attempts or stalls frequently, take the mower in for service. After starting the engine according to the engine manufacturer’s recommendation, push in on the choke control knob to open the choke valve, let the engine run for several minutes to get the hydraulic fluid circulating through the pumps, etc. and to allow the engine to warm up. Do not over-rev a cold engine. Unusual noises or irregular operation: As you drive the mower, listen for any unusual noises and test for irregular operation and adjust or service as necessary. 5.3 How to Drive the Mower While standing, both feet should be firmly placed on the foot platform. Set the engine speed about a fourth of the way from idle. Release the parking brake. Now try moving the hand control levers, one at a time, very slightly, forward and backward. Check to see if the wheels move forward and backward according to 20 the position of the levers. If not, check to see that the pump release valves are closed. With both feet still firmly placed on the foot platform, increase the engine speed to about half of the way from idle speed. The higher engine speed will make the controls much more responsive and the mower much quicker; Use caution if it is your first time. Now try moving the hand control levers, one at a time, very slightly, forward and backward. Gradually increase your speed until you are well acquainted with the operation of the hand controls and the mower’s behavior. After gaining a good feel for how the mower handles, gradually attempt higher engine speeds until familiar with operation at full throttle engine speed. 5.4 How to Stop and Park the Mower Come to a complete stop. If the blades are on, turn them off using the switch on the instrument panel. Make sure the control levers are in the exact neutral position. Set the parking brake, reduce the engine speed to idle, shut off the ignition switch to stop the engine and then remove the key from the ignition switch. The mower is now parked. Do not leave mower unattended on a sloped surface. Brake OFF Brake ON 5.5 Driving the Mower Over a Curb WARNING To climb a curb, first see the Safety Instruction Manual section of this manual, especially the parts on: •Initial Operating Safety Guidelines •Operation In Reverse •Operation In Forward Direction Next, raise the mower deck into the locked transport position. This is the highest position for the mower deck. Then drive the mower in reverse at a 45 degree angle to the curb (with the left side of the mower closest to the curb) until you are within an inch or two of the left-rear tire hitting the curb. Stop and then gradually bump into the curb with that tire until it is just on top of the curb. If the tire slips even while lurching the mower into the curb, then the curb is too high and you should use ramps or find another way. The mower should still be at a 45 degree angle to the curb. Now, while maintaining the same angle to the curb, continue to back up until the right-rear tire is close to the curb. Using the same technique lurch the right tire onto the curb. After both wheels are on top of the curb, turn the mower counterclockwise and back up so the left caster wheel comes over and last should be the right caster wheel as the mower is twisting to the left (counterclockwise). The technique works the best if you try not to drive backwards at a near 90 degree angle to the curb but get all of the wheels to go over while the mower is moving at least a 45 degree angle to the curb. To drive off a curb, first try driving up onto it to make sure the curb is not too high. If the curb is not too high, drive the right-front caster off first while driving toward the curb at a 45 degree angle (the curb should be to your right). Then, maintain that 45 degree angle so the left caster goes over, then the rightrear wheel, then the left rear wheel. 21 5.5.1 Never Drive Straight Onto or Off a Curb WARNING Never drive straight onto or off a curb. If you do the whole procedure at a very sharp angle it will tend to minimize the contact of the mower deck with the curb and you will be able to more safely control the mower. 5.6 Mowing on Varying Terrain See the Safety Instruction Manual section of this manual, especially the parts on: •Initial Operating Safety Guidelines •Operation On Slopes •Operation In Reverse •Operation In Forward Direction •Operation During Zero-Radius Turns 5.7 How to Adjust Neutral Neutral refers to the mower movement when the engine is set to full throttle, parking brake is off, and the control levers are in the neutral position. The mower should not move forward or backward during this time. If the mower is moving forward or rearward, the neutral setting must be adjusted. The hydraulic pump has a Return-to-Neutral (RTN) device built into the linkage of the pump. To make the adjustment, loosen the ¼” allen bolt and rotate the RTN device until the neutral position is found and then retighten the ¼” allen bolt. Use care not to over tighten the allen bolt. A 5.8 Changing the Speed/Sensitivity Adjustment The WZK has three Speed/Sensitivity settings. The settings are changed by removing the control rod at the control levers and inserting into the alternate holes. Slow Hole 10 MPH Factory Setting 12 MPH Fast Hole 13.5 MPH The controls are initially set with the Speed/ Sensitivity adjustment in the 12 MPH position. With operators not completely familiar with the mower operation the operator may desire to leave the controls in the factory setting or move to the slow hole position until becoming familiar with the operation. The faster setting has a corresponding increase in the sensitivity of the controls. In other words, a given amount of movement of the control levers will cause about a 10-15% increase in the ground speed making the controls more sensitive. After stopping the engine, the adjustment is made by removing rod ends connected to the control rods from the current holes in the control levers and reinstalling them into the alternate holes. The holes closest to the operators position are for the faster, more sensitive setting and the holes farthest from the operators position are the slower, less sensitive setting. You must then perform the Tracking Adjustment described below. 22 5.9 How to Perform the Tracking Adjustments WARNING First ensure that the tire pressure is equal on both rear drive tires. Drive the mower on a level parking lot with engine at full throttle. Check that the mower drives in a straight line when both hand controls are held to the full speed position which is up against the stationary control bar. If not, park the mower and stop the engine. Before proceeding to adjusting the mower tracking, check and make sure both controls move freely through the forward and reverse range. Make sure that debris has not hindered the movement of the upper and lower control rods and linkages. If all control linkages move freely and mower tracking is off, proceed to the next step. 5.9.1 Tracking in the 10 & 12 MPH Setting It is essential to start with the lower (and shorter) control rods located near the pumps. With the control levers in the neutral position, the right and left lower control rod should be adjusted to allow their respective torsion bar to remain level at the end connected to the lower control rod. Specifically, with the pump in the Return-To-Neutral position, the lower rod end should be the same height as the rigidly fixed ball joint connected on the same end of the torsion rod. NOTE: This adjustment may not be necessary if tracking is slightly off. Upper control rods should be the only adjustment required. Perform this adjustment on both the right and left side. Now that the lower end of both torsion rods are set, proceed to the upper control rods connected to the control levers. Loosen the jam nuts on both ends of the upper control rod. Note: the Speed Sensitivity setting on both sides should be set together in the middle hole (factory) position. Rotate control rod to either lengthen or shorten. So, if the mower is tracking to the left, either the left side needs to go faster (by lengthening the upper control rod on the right) or the right side needs to go slower (by shortening the upper control rod on the left). If the mower is tracking to the right, either the right side needs to go faster (by lengthening the upper control rod on the left) or the left side needs to go slower (by shortening the upper control rod on the right). 5.9.2 Tracking in the 13.5 MPH Setting It is essential to start with the lower (and shorter) control rods located near the pumps. With the control levers in the neutral position, the right and left lower control rod should be adjusted to allow their respective torsion bar to remain level at the end connected to the lower control rod. Specifically, with the pump in the Return-To-Neutral position, the lower rod end should be at the same height as the rigidly fixed ball joint connected on the same end of the torsion rod. Perform this adjustment on both the right and left side. Now that the lower end of both torsion rods are level, proceed to the upper control rods connected to the control levers. Loosen the jam nuts on both ends of the upper control rod. Note: the Speed Sensitivity setting should be set to the fast position. Before changing the length of the control rods several facts are important to know. In the faster Speed/Sensitivity setting neither control rod should be shortened so much that at full speed it pulls the pump control lever (on the sides of the pumps) against the pump’s internal stop. The pumps have an internal stop that is not designed to take this type of force and could eventually cause pump leakage or other damage to the pump. Therefore, to reach the maximum capable speed, the rods should be lengthened one turn at a time until you can feel in the hand control that the internal stop has been contacted with the control handles in the maximum forward position. Then shorten the cable one turn. This will enable the stationary bar to stop the control handle and protect the internal pump stop from damage. Remember, this procedure does not apply if the Speed/Sensitivity Adjustment is in the slower setting. So, if the mower is tracking to the left, either the left side needs to go faster (by lengthening the upper control rod on the right) or the right side needs to go slower (by shortening the upper control rod on the left). If the mower is tracking to the right, either the right side needs to go faster (by lengthening the upper control rod on the left) or the left side needs to go slower (by shortening the upper control rod on the right). The only reference point to limit the adjustment from becoming extremely off is the relative position of the pump internal stop and the stationary bar in the faster Speed/Sensitivity setting. Therefore, if everything is 23 extremely off either because you are installing new parts or other reasons you should only use the faster Speed/ Sensitivity setting to get the tracking to be accurate. After getting the mower to track straight, readjust the neutral adjustment, if necessary. It is normal to need to make these adjustments from time to time as the linkage breaks in or wears. 5.10 How to Test/Use the Blade Clutch/Brake Switch WARNING Before testing the blade clutch/brake operation, make sure the area is clear and there is nothing vulnerable to thrown objects from under the mower. No one should be near the mower deck or in its line of discharge. The discharge chute deflector should be in the down position. The parking brake should now be applied. Move the engine throttle to ¾ speed setting. (When mowing, the engine speed should always be at its highest setting. The engine governor will regulate the engine according to the different mowing conditions at that setting.) Place both feet firmly on the foot platform and turn on the blade clutch switch. Run blades for a minute or so. Try engaging and disengaging the blades a few times about 10 seconds apart. If the blades do not start and stop within 6-9 seconds each time, inspect the clutch or contact your local Wright dealer. Under mowing load, the clutch’s life will be the greatest at the highest RPM setting. 5.11 How to Test the Operator Presence Control (OPC) Switch With the parking brakes applied and the blades ON, try lifting your feet off the foot platform to test the Operator Presence Control switch (OPC). The engine should kill and the blades should stop within 6-9 seconds. If not, service the OPC system or contact your local Wright dealer. 6 Service and Adjustments 6.1 Tire Maintenance and Pressure WARNING Excessively worn tire tread is dangerous on all hills. Replace drive tires with less than 3/32” of any tread groove left. Use tires with the tread pattern recommended by Wright Mfg., Inc. only. Keep the tire pressure in the drive tires between 18 and 24 psi. Higher pressures will cause the tires to have less traction which will force you to go slower and with less safety and give you a harder ride. Front Casters are equipped with non-pneumatic tires and do not required any air. They do not have any tread but should be replaced when excessively worn. 6.2 Height of Cut Before adjusting the height-of-cut be sure the mower blades are not spinning, and rear tires have proper air pressure. Check for even tire wear. The heightof-cut can be adjusted the following ways: • Pull the deck lift lever on the right hand side of the mower towards the rear of the mower until it clicks once into the locked transport position. Then set the mower blade height with the selector pin on the left hand side of the mower. Once the proper height setting is set on the left, pull back on the deck lift lever on the right hand side and then lower the lever towards the front of the machine until it stops at the set height of cut. 24 6.2.1 Deck Adjustments The mower deck can be adjusted for pitch and side-to-side lever. Pitch is the relationship between the front of the deck and the rear of the deck in regards to height of cut. In most cases, a positive pitch (front of the deck lower than the rear of the deck) of ¼” is the optimum setting. These two adjustments can easily be made by using the deck lift rod assemblies attached to the front deck arms and the threaded deck hangers located at the rear of the deck frame. These hangers are connected to the chains that hold the deck. Adjust the rear deck hangers (by using a socket through the hole above the toe area of the platform) to achieve a ¼” pitch. These hangers are right-han ded threads. If you raise any of these settings above the factory setting, the deck may not raise all the way up into transport position. Be sure and check the deck height of cut range after any adjustments are made to these hangers to ensure that the height of cut adjustments work properly. If unable to make the adjustments needed by only using these hangers, contact your dealer for assistance. Lengthening the rod will lower the deck on the side adjusted. Shortening the rod and the deck we raise on the side adjusted 6.2.2 Deck Lift Assist Spring To adjust deck spring tension, tighten or loosen the eye-bolt Nylock jam nut located in the front tank bracket. If tightening for more lift assist make sure not to over tighten creating the deck to hop over rough terrain. 6.3 Spring platform Adjustment The factory setting is both springs set at the most forward position. The more rearward the spring position, the stiffer the platform gets. Adjustment will be to preference of feel. The two adjustment springs should at all times, be positioned next to each other not one forward or back more than the other. To adjust, loosen each spring retaining bolt from the top just enough to slide it, then tighten with impact wrench. The nut may spin using hand wrench. NOTE, do not loosen too much, if the nut falls off, the foot platform will have to be removed to reinstall. There is an extra hole for a third spring for operators heavy enough to bottom out the duel spring stock set up. 6.4 Belt Tension Adjustment The pump drive belt is self-adjusting, and requires no adjustment, just replacement. The blade drive belts are self-adjusting also and require no adjustment, just replacement. 25 6.4.1 Replacing the Drive Belt • Stop engine and remove the key and wait for all moving parts to stop. • Remove deck covers. • Remove cutter deck engine to blade belt from clutch. • Raise front of unit and secure • Remove the clutch stop • Remove belt by using a ½” ratchet and extension to relieve belt tension. • Reinstall in reverse order. Figure shows belt configuration. NOTE: Ensure clutch stop is reinstalled. 6.4.2 Replacing the Cutter Deck Belts • • • • Stop engine and remove the key and wait for all moving parts to stop. Remove deck covers Remove belt by using a ½” ratchet and extension to relieve belt tension. Reinstall in reverse order. Figure shows belt routing and spring compression direction. 26 6.5 How to Move the Mower if the Engine Won’t Start Rotate both of the manual “release” valve levers on the rear of each hydraulic pump about ½ turn counterclockwise. It is important not to over tighten these levers. Damage may occur to the pump if this valve is over tightened. WARNING 6.6 Hydraulic System Whenever servicing the hydraulic system, it is of the utmost importance to keep any dirt or debris from getting into the system. Clean off all parts before disassembly and assembly. When any of the hydraulic parts are disconnected or removed or when the oil is changed, air must be bled from the system. If air is entrained in the system, loss of power, excessive heat, and damage to the hydraulic pumps may occur. First, make sure the oil level in the reservoir is correct. Use fully synthetic oil: Mobil1 15W-50. Lift the mower so that the rear wheels are off the ground. Be careful to support the mower so that it will not fall or tip while the system is bled of air. With the bypass valves open and the engine running, slowly move the control levers back and forth five or six times. Now close the bypass valves and with the engine running, slowly move the control levers back and forth five or six times. It may be necessary to repeat the above steps until all the air is purged and the rear wheels are turning at normal speed. After purging is complete, adjust the oil level in the reservoir if necessary. • Low Pressure Hose • High Pressure Hose • Arrow indicates direction of flow 6.7 Oil Cooler Screen Removal and Cleaning WARNING Your Stander ZK is equipped with an oil cooler, the oil cooler debris screen will need to be cleaned several times a day. Clean more often in bush hog conditions. To clean, “STOP ENGINE” lift thigh pad for access, either wipe screen or remove screen for cleaning. To remove screen, lift and rotate spring locks to free the screen. The screen is bowed to prevent a rattle and should be installed hump down, like a “U”. Using compressed air or water to clean may or may not be necessary. 27 6.8 Oil Cooler Removal and Cleaning WARNING Clean oil cooler weekly. Clean more often in dry conditions. To remove oil cooler for a thorough cleaning “STOP ENGINE”, lift thigh pad for access. Loosen knob (1) as far as necessary to slide the cooler back about 3/81/2” until clears locking tabs and then lift up and out. (The cooler knob does not need to be removed) Watch cooler hoses so they do not snap pump fans. The debris screen should be removed before blowing cooler out from the bottom. When reinstalling the cooler, make sure the cooler hoses do not interfere with the fans and ensure the cooler housing is secure under the four tab points of the cooler bracket. Tighten knob securely. 1 6.9 Hydraulic Oil Tank Check/Fill Checking Oil Level 1. Ensure mower is on a level surface. 2. Remove hex socket plug from oil level port located under the upright pad. 3. Hydro oil should be at the bottom of the threads. Filling Oil Level 1. Remove hex socket plug 2. Using a funnel, fill tank through oil level port until oil reaches bottom threads of port. 6.11 Battery Service The battery is 12 volts and is a maintenance free battery. Charge the battery only if it will not start the mower effectively. Remove the battery from the mower before charging. Follow the instructions of the battery charger for proper and safe charging of the battery. Always make sure the Positive terminal is connected to the Positive battery post and the Negative terminal is connected to the Negative battery post. Reversal could cause damage to the electrical system. 1. Remove Terminal cover to access. 2. Keep the battery and terminals Clean. 3. Keep battery bolts tight. 28 + -- 6.12 Fuel Evaporation System All Wright Stander ZK’s need to have this mandatory feature. • Do Not alter or remove. • Do Not fill past the “Max Fill Level” line. • Over-filling could result in clogging the roll-over vent and/or contaminating the purge canister. • The vapor canister is located under the dash. • Inspect and clean dust filter every 500 hrs or annually. 29 To Tank Vent / Purge Dust Filter 6.13 Cutting Blades WARNING In order to maintain the best cut, it is important that the blades are well sharpened and not damaged. Bent or cracked blades or blades with large nicks need to be replaced. Blades must be balanced after sharpening. To change the blades: • Stop engine, remove the key and wait for all moving parts to stop. • Engage the parking brake • Lift front of mower and secure in the raised position with jack stands. • Remove the blade bolt by turning counterclockwise. • Apply anti-seize to the blade bolt. • Install new or re-sharpened blade, start mounting bolt by hand. (Ensure the blade spacers are reinstalled with the same qty and location) • Torque blade bolt to 70-80 ft/lbs / 95-108 Nm 6.14 Transporting Use a heavy duty trailer or truck to transport the Stander ZK. Lock brake and block wheels. Securely fasten the unit to the trailer or truck with straps, chains, cable or ropes. 6.15 Loading and Unloading WARNING Use extreme caution when loading and unloading units on/off trailers or trucks. One full width ramp that extends beyond the rear tires is recommended rather than individual ramps for each side of the unit. The ramp should be long enough so that the angles between the ramp and the trailer or truck does not exceed 15 degrees. A steeper angle may cause the mower deck components to get caught as the unit moves from ramp to trailer or truck. Always put the deck in the transport (up & locked) position when loading or unloading. Never attempt to turn the mower around on the ramp. Avoid sudden acceleration when driving up a ramp and sudden deceleration when backing down a ramp. 6.16 Lubrication Grease with No. 2 general purpose lithium base or molybdenum base grease. • Set parking brake, stop the engine and remove the key. • Clean grease fittings with a rag. • Connect grease gun to fitting and pump until grease begins to ooze out from the bearings. • Wipe off excess grease. • Do not use spray lube of any kind on choke and/or throttle cables. • Service intervals: First 8 hours Every 25 hours Also see Maintenance chart Check monthly Caster Pivots - Remove dust cap, cotter pin and hex nut. Inspect grease seal and bearings. Fill chamber with grease and reinstall in reverse order. 30 6.17 Cleaning the Mower The underside of the mower deck should be checked and cleaned twice daily and more often if the grass being mowed is lush or wet. The entire mower should be cleaned daily at the end of the work day. Cleaning should be done with a leaf blower or low-pressure compressed air. Wash with water only when necessary and do not use a pressure washer or nozzle as the water can enter bearings and electrical connections causing an electrical short, rust and corrosion. When washing with water, avoid spraying near the hydro cap and do so when the unit has cooled down. Washing a hot machine can cause various unseen system damage. If water is used for cleaning, immediately dry it with a leaf blower or low-pressure compressed air and run with blades engaged for approximately 10 minutes. Once the wash is complete, always lubricate and grease all applicable areas. 6.18 Spindle and Drive Pulley Split hub R&R • • • • Remove 2, ¼” bolts from split hub and install in threaded holes in hub. Slowly tighten each bolt, alternating as you tighten bolts against the pulley. The hub will separate from the pulley. Replace grade 8 bolts and install in reverse order using the assembly holes to tighten hub onto pulley and spindle shaft. Assembly hole Threaded Removal holes Tightening will separate the hub from the pulley Assembly hole 31 6.19 Kawasaki Engine Manual / Maintenance It is very important that all users of this unit read and understand the Kawasaki Engine Owner’s Manual. This manual contains; safety awareness, emissions, maintenance and warranty information that is critical for the care of your Kawasaki engine. Below is the periodic maintenance chart directly from the Kawasaki Owner’s Manual, which is included with the sale of the Stander ZK. 32 7 Electrical Schematic 33 Maintenance Interval Chart 34 Maintenance Record Date Maintenance/Service Performed 35 Unit Hours Shop/Technician WRIGHT MANUFACTURING, INC. POWER EQUIPMENT LIMITED WARRANTY THIS WARRANTY SUPERSEDES ALL PREVIOUS ON UNITS WITH A RETAIL SALES DATE ON OR AFTER 04/01/05 The WMI mower, including any defective part, must be returned to an Authorized WMI Service Dealer within the warranty period. The expense of lost production time and delivering the mower to the Authorized WMI Service Dealer for warranty work and the expense of returning it to the Owner after repair will be paid for by the Owner. WMI’s responsibility is limited to making the required repairs and no claim of breach of warranty shall be cause for cancellation or rescission of the contract of sale of any WMI mower. This Warranty does not apply to any mower that was delivered to an Owner prior to the Pre-Delivery Service as specified in the Owner’s Manual. This Warranty does not apply to any mower that was shipped in a crate to the Owner or delivered to the Owner by non-employees of an Authorized Dealer. For the Owner’s protection and a valid Warranty, please note: WMI does not permit Authorized Dealers to make non-face-to-face deliveries of the mower and any who are found doing so are subject to immediate cancellation as Authorized Dealers. This Warranty does not cover any mower that has been subject to misuse, neglect, negligence, burning in any fire, an accident, or that has been operated or maintained in any way contrary to the operating and maintenance instructions as specified in the Owner’s Manual. The Warranty does not apply to any damage to the mower that is the result of improper maintenance or to any mower or parts that have not been assembled or installed as specified in the Owner’s Manual. The Warranty does not cover any mower that has been altered or modified changing performance or durability. In addition, the Warranty does not extend to repairs made necessary by normal wear, or by the use of parts or accessories which, in the reasonable judgment of WMI, are either incompatible with the WMI mower or adversely affect its operation, performance or durability. Wright Manufacturing, Inc. (hereinafter: WMI) warrants to the original owner that the new WMI mower accompanying this document will be free from manufacturing defects in materials or workmanship subject to the following limitations and exclusions. Any part of the WMI commercial mower manufactured by WMI and found, in the reasonable judgment of WMI, to be defective in materials or workmanship, will be repaired or replaced by an Authorized WMI Service Dealer without charge for parts and (except as excluded below) labor. This Warranty is limited to the original Owner and the mower this document was provided with and is not transferable. Dealer demo units with less than fifty hours when first retailed shall also be covered by this limited warranty. Proofs of Purchase, Authorized Dealer performed Pre-Deliver Service and the First Eight Hour Service will be required by the Authorized WMI Service Dealer to substantiate any warranty claims. All WMI warranty work must be performed by an Authorized WMI Service Dealer and item must be delivered to the dealer prior to the expiration of the warranty period. This Warranty is limited to the following specified periods from the date of the original retail purchase for defects in materials or workmanship and will commence upon the date of original retail purchase. This warranty shall apply only if the warranty registration form has been completed and returned to Wright Manufacturing, Inc. within 14 days from the date of original retail purchase. This warranty includes only the cost of parts and labor (when applicable). This warranty applies only to the replacement of defective or otherwise warrantable WMI OEM parts being replaced with WMI OEM parts. • • • • All parts and components (except as noted below) – 2 years Belts – 90 days Battery – 90 days Engine – warranty covered by engine manufacturer and handled through the respective Authorized engine Dealers WMI reserves the right to change or improve the design of any mower without assuming any obligation to modify any mower previously manufactured. All other implied warranties are limited in duration to the two (2) year warranty period or ninety (90) days for mowers used for rental purposes. Accordingly, any such implied warranties including merchantability, fitness for a particular purpose, or otherwise, are disclaimed in their entirety after the expiration for the appropriate two (2) year or ninety (90) day warranty period. WMI’s obligation under this Warranty is strictly limited to the repair or replacement of defective parts and WMI does not assume, or authorize anyone to assume for them, any other obligation. Some states do not allow limitations on how long an implied warranty lasts, so the above limitation may not apply. Exclusions: Any damage or deterioration due to normal use, wear and tear or exposure All filters, engine oil, hydraulic oil, tires and tubes Bent, fractured or broken parts occurring through impact or hard use Clutch: linings, anti-rotation failure or other failure due to improper replacement installation Cost of regular maintenance service, parts or adjustments Worn bearings (other than spindle bearings; see above) Worn bushings, cotters, clips, pins and retainers Grease fittings/zerks Paint, paint fading, cosmetic imperfections and steel surface imperfections Fabric, cushion and rubber grip wear or damage Cutting blades, light bulbs, fuses Damage due to loose pulleys on shafts Damage due to loose wheel hubs on tapered hydraulic motor shafts Fire Damage Abrasion or corrosion wear or damage WMI assumes no responsibility for incidental, consequential or other damages including, but not limited to, expense for gasoline, expense of delivering the mower to an Authorized WMI Service Dealer and expense of returning it to the Owner, damage by fire, mechanic’s travel time, telephone charges, rental of a like product during the time warranty repairs are being performed, travel, loss or damage to personal property, loss of revenue, loss of use of the power equipment, loss of time or inconvenience. Some states do not allow the exclusion or limitation of incidental or consequential damages, so the above limitation or exclusion may not apply. Repair Parts Replaced During Original Warranty All Repair parts (excluding wear or otherwise excluded items) installed during the warranty period are warranted until the end of the respective original period according to the categories above except in the case that the respective original warranty period expires in less than ninety (90) days after the installation of the part(s). If this happens then the parts are warranted for a total of ninety (90) days from the time of their installation. This Warranty gives you specific legal rights, and you may also have other rights which vary from state to state. This Warranty applies to all WMI mowers sold in the United States of America and Canada. For the location of the Authorized WMI Service Dealer nearest you or other information, such as, Parts Lists and Owner’s Manuals visit our website at: www.wrightmfg.com Rental Use The above warranty periods are limited to maximum of ninety (90) days for mowers that are used for rental purposes. Wright Manufacturing, Inc. 4600-X Wedgewood Blvd. Frederick, MD 21703 36 FEDERAL AND CALIFORNIA EMISSION CONTROL WARRANTY STATEMENT YOUR WARRANTY RIGHTS AND OBLIGATIONS The United States Environmental Protection Agency (EPA), California Air Resources Board (CARB) and Wright Manufacturing, Inc. (WMI) are pleased to explain the evaporative emission control system (EECS) warranty on your 2012 - 2013 commercial mower. In the United States, new equipment that use small off-road engines must be designed, built and equipped to meet the Federal’s stringent evaporative emissions standards. In California, new equipment that use small off-road engines must be designed, built and equipped to meet the State’s stringent anti-smog standards. WMI must warrant the EECS on your commercial mower for the period of time listed below provided there has been no abuse, neglect or improper maintenance of your equipment. Your EECS may include parts such as the carburetor, fuel-injection system, the ignition system, catalytic converter, fuel tanks, fuel lines, fuel caps, valves, canisters, filters, vapor hoses, clamps, connectors, and other associated emission-related components. Where a warrantable condition exists, WMI will repair your commercial mower at no cost to you including diagnosis, parts and labor. MANUFACTURER’S WARRANTY COVERAGE: This evaporative emission control system is warranted for two years. If any evaporative emission-related part on your equipment is defective, the part will be repaired or replaced by WMI. OWNER’S WARRANTY RESPONSIBILITIES: • • • As the commercial mower owner, you are responsible for performance of the required maintenance listed in your owner’s manual. WMI recommends that you retain all receipts covering maintenance on your commercial mower but WMI cannot deny warranty solely for the lack of receipts. As the commercial mower owner, you should however be aware that WMI may deny you warranty coverage if your commercial mower or a part has failed due to abuse, neglect, or improper maintenance or unapproved modifications. You are responsible for presenting your commercial mower to WMI’s distribution center or service center as soon as the problem exists. The warranty repairs should be completed in a reasonable amount of time, not to exceed 30 days. If you have a question regarding your warranty coverage, you should contact WMI’s warranty claims department at (301) 360-9810. GENERAL EMISSIONS WARRANTY COVERAGE: WMI warrants to the ultimate purchaser and each subsequent purchaser that the commercial mower is: Designed, built and equipped so as to conform with all applicable regulations; and Free from defects in materials and workmanship that cause the failure of a warranted part to be identical in all material respects to that part as described in WMI’s application for certification. The warranty period begins on the date the commercial mower is delivered to an ultimate purchaser or first placed into service. The warranty period is two years. Subject to certain conditions and exclusions as stated below, the warranty on emission-related parts is as follows: (1) Any warranted part that is not scheduled for replacement as required maintenance in the written instructions supplied, is warranted for the warranty period stated above. If the part fails during the period of warranty coverage, the part will be repaired or replaced by WMI according to subsection (4) below. Any such part repaired or replaced under warranty will be warranted for the remainder of the period. (2) Any warranted part that is scheduled only for regular inspection in the written instructions supplied is warranted for the warranty period stated above. Any such part repaired or replaced under warranty will be warranted for the remaining warranty period. (3) Any warranted part that is scheduled for replacement as required maintenance in the written instructions supplied is warranted for the period of time before the first scheduled replacement date for that part. If the part fails before the first scheduled replacement, the part will be repaired or replaced by WMI according to subsection (4) below. Any such part repaired or replaced under warranty will be warranted for the remainder of the period prior to the first scheduled replacement point for the part. 37 (4) Repair or replacement of any warranted part under the warranty provisions herein must be performed at a warranty station at no charge to the owner. (5) Notwithstanding the provisions herein, warranty services or repairs will be provided at all of our distribution centers that are franchised to service the subject engines or equipment. (6) The commercial mower owner will not be charged for diagnostic labor that is directly associated with diagnosis of a defective, emission-related warranted part, provided that such diagnostic work is performed at a warranty station. (7) WMI is liable for damages to other engine or equipment components proximately caused by a failure under warranty of any warranted part. (8) Throughout the commercial mower warranty period stated above, WMI will maintain a supply of warranted parts sufficient to meet the expected demand for such parts. (9) Any replacement part may be used in the performance of any warranty maintenance or repairs and must be provided without charge to the owner. Such use will not reduce the warranty obligations of WMI. (10) Add-on or modified parts that are not exempted by the Air Resources Board may not be used. The use of any nonexempted add-on or modified parts by the ultimate purchaser will be grounds for disallowing a warranty claims. WMI will not be liable to warrant failures of warranted parts caused by the use of a non-exempted add-on or modified part. WARRANTED PARTS: The repair or replacement of any warranted part otherwise eligible for warranty coverage may be excluded from such warranty coverage if WMI demonstrates that the commercial mower has been abused, neglected, or improperly maintained, and that such abuse, neglect, or improper maintenance was the direct cause of the need for repair or replacement of the part. That notwithstanding, any adjustment of a component that has a factory installed, and properly operating, adjustment limiting device is still eligible for warranty coverage. The following emission warranty parts listed below are covered: (1) Fuel Tank (2) Fuel Cap (3) Fuel Valve (4) Fuel Line (5) Fuel Line Fittings (6) Fuel Line Clamps (7) Vapor Hoses (8) Carbon Canister (9) Carbon Canister Mounting Brackets (10) Carburetor Purge Port Connector 38 Cut Quality and Mowing Tips Problem Description Possible Cause Streaking is when strips of uncut grass are left behind. Streaking Stepped cutting is sharp ridges left in the lawn surface. Stepped cutting is ussually caused by deck damage or misadjustment, or blade damage Stepped Cutting Blades are not sharp Sharpen blades Blades are worn down too far Replace blades Engine RPM is too low Mow at full throttle GROUND SPEED IS TOO FAST SLOW DOWN Deck is plugged with grass Clean deck Deck is not leveled correctly Level the deck Tires are not properly installed/inflated Check and inflate tires Blades are damaged Replace blades Deck shell is damaged Repair or replace deck Spindle is bent or loose Repair or replace spindle Blades are installed incorrectly Reinstall the blades correctly Scalping is when the deck comes close to or hits the ground. Scalping can be caused by the deck is misadjusted, Lawn is uneven or bumpy uneveness in the lawn, or by deck bounce because ground Scalping speed is too fast. Deck cutting hieght is set too low Stringers are sparse patches of uncut grass left behind the mower. Stringers Tall Fescue Kentucky Bluegrass Bahia Grass Bermuda Grass St. Augustine Grass Zoysia Grass Roll or level the lawn Raise cutting height Deck is not leveled correctly Level the deck Tire pressure is uneven Check and inflate tires Blades are not sharp or are nicked Sharpen blades Blades are worn down too far Replace blades Engine RPM is too low Mow at full throttle GROUND SPEED IS TOO FAST SLOW DOWN Deck is plugged with grass Clean deck Recommended Mowing Heights Grass Solution Minimum Height Maximum Height 1 1/2" 1 1/2" 2" 1/2" 1" 1/2" 3" 2 1/2" 3" 1" 3" 1" Mowing Tips Always mow at full throttle Check deck pitch, front blade tip MUST be 1/4" - 3/8" lower than the back of the blade tip. Cut 1/3 of the grass blade, cutting more is not recommended unless grass is sparse Use a slower ground speed when grass is wet and lush or when using a mulch kit. Clean the under side of the cutter deck after each use. Grass build up WILL eventually effect cut quality. 39 4600X Wedgewood Blvd Frederick, MD 21703 www.wrightmfg.com 40