1
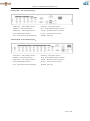
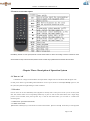
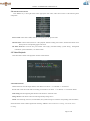
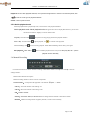
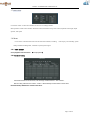
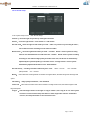
Data Card (16) Series DVR
USER MANUAL
MAGUS 16 SERIES DVR USER MANUAL
Contents
Chapter One Product Description .................................................................................................... 3
1.1 General ............................................................................................................................... 3
1.2 Technical Parameters ......................................................................................................... 3
Chapter Two Structure Appearance Description .............................................................................. 3
2.1 Panel Description ............................................................................................................... 3
2.2 Product Interface Description ............................................................................................ 4
2.3 Remote Control Description .............................................................................................. 5
Chapter Three Description for Operation System ............................................................................ 5
3.1 Turn on / off ....................................................................................................................... 5
3.2 Preview .............................................................................................................................. 5
3.3 Menu basic operation instructions ..................................................................................... 6
3.3.1Enter menu mode ..................................................................................................... 6
3.3.2 Menu Composition instruction................................................................................ 6
3.3.3 Exit menu mode ...................................................................................................... 6
3.4 Main Menu Introduction .................................................................................................... 6
3.5 Video Playback .................................................................................................................. 7
3.5.1 Video Search ........................................................................................................... 7
3.5.2 Article replay tools .................................................................................................. 7
3.6 Manual Recording.............................................................................................................. 8
3.7 PTZ Control ....................................................................................................................... 8
3.8 Menu .................................................................................................................................. 8
3.8.1 Video Search ........................................................................................................... 8
3.8.2 File Backup ............................................................................................................. 9
3.8.3 System Setup ......................................................................................................... 9
3.8.3.1 Miscellaneous Setup .................................................................................... 9
3.8.3.2 Encode Setup ............................................................................................. 10
3.8.3.3 Record Setup .............................................................................................. 11
3.8.3.4 Network Setup ........................................................................................... 11
3.8.3.5 Screen Setup............................................................................................... 12
3.8.3.6 Motion Detection ....................................................................................... 13
3.8.3.7 PTZ Setup ............................................................................................... 13
3.8.3.8 Sensor Setup............................................................................................... 14
3.8.4 Management Tools ........................................................................................................ 15
3.8.4.1 User Management...............................................................................................15
3.8.4.2 HDD Management..............................................................................................15
3.8.4.3 System Maintencance ........................................................................................16
3.8.4.4 Factory Setting......................................................................... . ........................16
3.9 Information System .............................................................................................. 16
3.9.1 HDD Information......................................................................................... 17
3.9.2 System Information ...................................................................................... 17
3.9.3 Log Information ........................................................................................... 17
3.10 System Logout ............................................................................................................... 17
Page 2 of 20
MAGUS 16 SERIES DVR USER MANUAL
Chapter one Product Description
1.1 General
This equipment is designed specifically for the field of a number of digital security surveillance products, which uses an
Embedded Processor Init (MPU) and operating systems, combined with the field of the latest IT technologies, such as video
and audio encode/decode, high-capacity hard disk recorder, TCP / IP network technology, firmware in FLASH, making
system operation more stable. This equipment, with digital video and audio recorder (DVR) and digital video and audio
server (DVS) features at the same time, can works not only in local independently,but also be networked to form a powerful
security monitoring network. It applies to bank, telecommunications, electric power, justice, transportation,residencel,
factory, warehouses, water conservancy facilities and other areas and departments of the safety precautions.
Model
4 channel DVR
8 channel DVR
16 channel DVR
Operation system
Embedded Linux operation system
System resource
4/8/16 channel CIF real-time video and network-wide transmission, 1 ,4,9or 16-channel
CIF Playback at the same time.
Operation interface
Graphical user interface (GUI), mouse, panel, remote control operation
Video standard
PAL、NTSC
Image compression
H.264
Audio compression
ADPCM
Recoding mode
Manual, timing, alarm, motion detection
Video Search
Time search, event search, channel search, the log search
Backup
network backup, USB backup
4BNC
Video input
8BNC
16BNC
1BNC,1VGA out
Video output
Audio input
2ch
2ch
2ch
Audio output
1ch
1ch
1ch
Monitoring quality
PAL:720x576(D1);NTSC:720x480(D1)
Playback quality
PAL:352x288(CIF);NTSC:352x240(CIF)
Image Control
6 shifts for regulable
Motion Detection
for each channel of the detection area (16 × 16), multi-level sensitivity can be set
Image display
1,4 Image display
Video Speed
PAL: 25 frames / sec (adjustable) NTSC: 30 frames / sec (adjustable)
Video Save
The hard drive, network
Local playback
1,4 Image display
Alarm Input/output
4 channel/in&1 channel out (optional)
PTZ
RS485
HardDisk Interface
1 SATA interfaces
Network interface
Self-adaptive Ethernet interface.
1,4,8 Image display
1,4,8 Image display
2 SATA interfaces
1,4,9,16 Image display
1,4,9,16 Image display
2 SATA interfaces
RJ45 10MB/100MB,TCP/PPPOE/DHCP/DDNS/FTP/UPNP
USB Interface
2USB2.0 high-speed interface;
Power
12v power
Page 3 of 20
MAGUS 16 SERIES DVR USER MANUAL
Chapter Two: Structure Appearance Description
2.1 Panel Description
Keys
Identifier
Power indicator
POWER
Features
The DVR is powered when the power indicator lights up
HDD LED
HDD
REC lamp flashes when the hard disk working
Status indicator
RUN
Flashes when the machine working
Infrared receiver
IR
Infrared remote control receiver
Menu key
MENU
Press the Menu key to enter the menu interface
Exit key
ESC
Exit the current screen
The number keys
0-9
Digital input,full screen to enlarge the corresponding channel
under the preview mode
Function of auxiliary
F1、F2
Auxiliary function
keys
PTZ control key
PTZ
Video button
REC
To enter the PTZ control interface
Enter into the video settings interface , you can choose the
automatic recording, manual recording , stop recording
Play button
PLAY
Arrow keys
▲▼◄ ►
Start playback
Switch the current activated control,to move up and down ,left and
right
Enter key
Operation confirmed
Window switching key
For 1/4/8/9/16 picture segmentation mode switch
2.2 Product Interface Description
4 channel DVR
Rear Panel Description:
AUDIO OUT:Audio Output Connector
AUDIO IN:Audio Input Connecor
VIDEO IN:Video Input Connector
NET:RJ-45 Standard Network Connector
VIDEO OUT:Video Output Connector
RS-485:485 Pan/Tile Device Connector
USB:Standard USB Connector
DC12V:12V(DC) Power Connector
VGA:Video Output Connector(Optional)
POWER:Power key
Page 4 of 20
MAGUS 16 SERIES DVR USER MANUAL
8 channel DVR
Rear Panel Description:
AUDIO OUT:Audio Output Connector
AUDIO IN:Audio Input Connecor
VIDEO IN:Video Input Connector
NET:RJ-45 Standard Network Connector
VIDEO OUT:Video Output Connector
RS-485:485 Pan/Tile Device Connector
USB:Standard USB Connector
DC12V:12V(DC) Power Connector
VGA:Video Output Connector(Optional)
POWER:Power key
16channel DVR
Rear Panel Description:
AUDIO OUT:Audio Output Connector
AUDIO IN:Audio Input Connecor
VIDEO IN:Video Input Connector
NET:RJ-45 Standard Network Connector
VIDEO OUT:Video Output Connector
RS-485:485 Pan/Tile Device Connector
USB:Standard USB Connector
DC12V:12V(DC) Power Connector
VGA:Video Output Connector(Optional)
POWER:Power key
Page 5 of 20
MAGUS 16 SERIES DVR USER MANUAL
2.3 Remote Control Description
Note:Many devices in near space,remote control should select a device according to device number.So each
device needs a unique device number,unless remote control may operate devices with the same number.
Chapter Three: Description of Operation System
3.1 Turn on / off
Confirm that AC voltage accessible matches the requirements of digital video recorder.Ensure that the digital video
recorder power outlet to a good middle ground termination. Access to power, the device started 【POWER】 light is on, into
the system, the panel RUN light flashing as normal conditions.
3.2 Preview
Preview screen can be seen immediately after equipment is normally starts. In the preview screen you can see the system
date, time, channel name. Press corresponding number key of panel or click the left mouse button, then a single image
preview can be available; Press panel "QUAD" key or click the left mouse button, you can return to a multi-screen
monitoring state.
3.3 Menu basic operation instructions
3.3.1Enter menu mode
【Main Menu / MENU】 key to enter the device's main menu interface. 【PLAY / PLAY】 shortcut keys to enter playback
Page 6 of 20
MAGUS 16 SERIES DVR USER MANUAL
interface.
【Video / REC】 shortcut keys to enter manually recording interface. 【PTZ】 shortcut keys into PTZ control interface.
Description: Default password is empty, click "enter" can into menu directly.
3.3.2 composition of the menu
Menu component units mainly in the following categories:
(1) Check box: providing two kinds of status options, "√" represent enable, "□" disable, use 【confirmation /
】
button or 【↑】, 【↓】 key or click the left mouse button to choose.
For example: file search menu page, the "Select Channel" and the "video type" check box.
(2) Selection box: According to the system, the contents of the drop-down box options, select the target content.
Use 【↑】, 【↓】 key or click the left mouse button to select.
For example: in the encode setup menu,choose "Select Channel" and the "video type" check box.
(3) List Box: Displays the inquiry results of information in the list, you can select one option for operation in the
provided list.
For example: Choosing the file in the Video backup result list by pressing 【OK/
】 button or the left mouse button.
(4)Edit box: Enter the target name into edit box
For example: System Configuration menu pages, the “equipment name” edit box, enter numbers, English letters,
punctuation and so on
use panel key 【↑】【↓】【←】, 【→】or after positing the edit box by mouse, press "
" key or click the left
mouse button, then the enter keyboard appears, select the desired input target characters through the arrow keys or
click the left mouse button.
b)
Safe or Exit the editing status by pressing 【ENTER】 【CANCEL】 button or button【ESC】
(5) Button: used to implement a specific function or enter the next setting menu, enter by clicking 【OK /
key and the left mouse button.
3.3.3 Exit Menu mode
Press 【MENU】, 【Exit / ESC】 or the right mouse button to exit the menu mode
Click the right mouse button, return to the previous menu level.
Page 7 of 20
】
MAGUS 16 SERIES DVR USER MANUAL
3.4 Main Menu Introduction
Press MENU key or the right mouse button pop-up the main menu, main menu consists of the following three
components
Preview mode: in the menu column, select the corresponding screen preview mode.
Shortcut menu: in menu column, there are: video playback, manual recording, PTZ control, sound shortcut menu can be
directly into the corresponding pages in the menu.
The main menu bar: Click into the post includes video inquiry, document backup, system setting,
management
information, system information , exit menu column.
3.5 Video Playback
Click main menu column "video playback" into file search interface.
3.5.1 Video Search
Channel selection: select the target channel, click check box to choose. "√" is checked; "□" not selected.
Record mode: select the record mode of searching, click check box to choose. "√" is checked; "□" not selected. DATE
Time setting: enter the beginning and end time in the edit box to search the video.
Storage device: in the selection box select the target backup storage device.
Search : after searching criteria set, click the button, the system will begin to search the corresponding video information,
and list the search results. “RED”-regular time recording,” GREEN”- Motion Detection recording, ”YELLOW”-alarm
recording.
Page 8 of 20
MAGUS 16 SERIES DVR USER MANUAL
Playback: Go into video playback interface, use up-down-left-right button or mouse to set the time period, click
【
】or left of mouse go into playback interface.
Cancel : back to previous menu
3.5.2 Article playback tools
Select the playback file or playback by time, it will enter the video playback interface.
Article playback tools: Article playback tools will appear below the in the playback interface, you can click
the left mouse button to magnify or narrow channel video.
Stop Play: Click the button
, the system will stop playing and exit the playback interface
Pause / Play: Click the button
Fast forwarding: click
to pause playback, click
to continue video playback.
can fast forwarding playback. Times fast forwarding can be set by click again.
Exit playback:Click “ESC” or
button to withdraw playback screen at any time; After play all,it will
quit the
playback screen voluntarily
3.6 Manual Recording
Click left mouse button to choose "manual recording" in main menu column or click【Video / REC】to enter its
settings interface.
Manual Video Interface Description
Manual recording interface consists of several components:
Channel number:correspond to the equipment video channel.“☑” open;“□”close。
Full On:choose all channels video settings "on"
Full Off:choose all channels video settings "off"。
OK:Confirm and exit。
Cancel:Click return button, it will exit Manual recording interface and back to main menu column
Remark:Manual recording must be stopped by manual,or it will record continually
Page 9 of 20
MAGUS 16 SERIES DVR USER MANUAL
3.7 PTZ Control
Click "PTZ control" in main menu interface for access to its settings interface
Main operation of PTZ control include: directional control; horizontal sweep; zoom control; adjust the focal length; adjust
aperture; PTZ speed.
3.8 Menu
Click "menu" in shortcut menu enter into the main menu interface, including:
video inquiry, record backup, system
settup, information management , information system,system logout.
3.8.1 video inquiry
In the playback shortcut menu (see3.5playback)
3.8.2document backup
Choose"channel"and "record mode", set the range of date and time,click "search".
After choosing a file from the column--"enter". It will be backup success when it show 100%.
Remark: Backup USB device must be fat32 form.
Page 10 of 20
MAGUS 16 SERIES DVR USER MANUAL
3.8.3System Setup
In the main menu interface, select "System Settings" to enter its sub-menu interface. Including: Miscellaneous,Encode
setup,record setup,network setup,screen setup,video detection,PTZ set up,sensor setup.
3.8.3.1Miscellaneous
Choose"system setup"
DATE TIME:preview time show in DVR . After setting,click"refresh".Notice: Recording will stop during
time change period. OK,safe.
Date Format:setting in :Y/M/D”、“D/M/Y”、“M/D/Y”
Key Lock:system will logoff present user if there is 10munite without operate. It needs login again to
operate.
Key Buzzer :"enable"--controller and panel key with sound ."disable"--without sound选
Language:Chinese and English can be used.
Video standard:PAL and NTSC can be choose. PAL is default setting. It will work after setting,safe and
reboot.
DVR ID : controller connect by device number when it is used to control.The controller must
correspond it's ID so that it can work. (see 2.3)
After setting this interface,click"ok",the information will safe and exit.click"cancel",the information will
not safe and exit.
Page 11 of 20
MAGUS 16 SERIES DVR USER MANUAL
3.8.3.2 Encode setup
In the "system setup" menu, click "Encode setup "
Channel :chose the right CH you like by clicking the select box
Stream: chose the right stream : "main stream" or "sub stream "
Encode mode:chose the right encode model you need : "video only "means only encoding for video ;
"AV combined" means encoding for both video and audio.
Bitrate mode :chose the right bitrate mode you need : "constant
bitrate " means system encoding
video as user-defined bitrate and and frame rate. "variable
bitrate" means system encoding
according to user-defined image quality and video frame rate , but bit rate is automatically
adjusted by the system depending on the video sceen. "average birtrate " means system
automatically adjusted fluctuation as user- defined bitrate.
Encode format: encoding resolutions defined by user' need : (QCIF)176*144、 (CIF)352*288
(HD1)576*288
(D1)704*576
Bitrate: users select the encoding bitrate as needed. The higher bitrate ,the better image but with large disk
space
Fluctuation: image quality fluctuations , user identified.
Frame rate :users select the video frame rate as needed. The higher frame rate ,the better image but with
large disk space
Copy to : select the target channel on the right of "copy to "button ,click "copy to" & ''ok " then system
will set the current channel setup information to other target video channel. Click button
"cancel", the setup information is non-saved but to exit.
Page 12 of 20
MAGUS 16 SERIES DVR USER MANUAL
3.8.3.3Recode setup
In the "system setup" menu, click "Record
Setup "
Channel :chose the right CH as needed by clicking the inverted triangle
Weekday : chose the right day as user's need, "ALL" means all days in a week.
Image mode and time : every time slot can set different recoding mode in all 4 time slot. "Time "
recording with red color , "Motion" recording with green color , "Sensor"recording with
yellow color ; “☑" means working , “□” means invalid. The bottom parts has times status
display,
whole schedule from time 0~24 hours
Copy to : select the target channel on the right of "copy to "button ,click "copy to" & ''ok " then system
will set the current channel setup informations to other target video channel. Click button
"cancel", the setup informations is non-saved but to exit.
3.8.3.4Network setup
In the "system setup" menu, click " Network Setup "
MAC address:showing the device's MAC address
DHCP:select whether to start up DHCP to automatically obtain IP 。“☑”means works ;“□” means non-work
IP address :the IP address must be unique and can not be in conflict with the host or workstation on
the same network segment
Subnet Mask :subnet for the network segment。
Page 13 of 20
MAGUS 16 SERIES DVR USER MANUAL
Gateway:need to set the gateway address to achieve communication between the different network
segments.
DNS address :devices used PPPOE protocol to access network to gain a dynamic IP address
HTTP port :port number IE browser visit , default port is "80"
Client port ;port number device and mobile visit ,
suggest to set above 2000
ESeenet ID: after connecting internet , click“☑Eseenet” to gain a Eseenet ID , which can be used in
IP remote monitoring in ESeenet network server
Mobile Internet configuration 4G, 3G & 2G
Start using :“☑3G”means to start up PPPOE dial-up. “□” means not to start up
Dial Number for: *99# or #777
APN Setting: internet
PPPOE user: Nil
PPPOE password :Nil
After the page setup is completed, click '"OK " to save the changes ; click "cancel " , non-save but exit.
Page 14 of 20
MAGUS 16 SERIES DVR USER MANUAL
DDNS setting: automatic analytical function of dynamic domain name, supported Magus free DDNS
In the "network setup" menu,
click " DDNS "
Start using :“☑”means DDNS dynamic domain services start using ;“□”means not to start up。
Select the right network server and input user name, password and domain name
edit method pls refer to 3.3.2(4))
In the "system setup" menu, click " Network Setup "
3.8.3.5 Screen setup
In the "system setup" menu, click "
Screen setup "
Channel :chose the right CH as needed by clicking select box
title :edit any channel title as needed
OSD title : “☑” means display channel title, “□”means non-display
OSD Alpha: OSD menu transparency. Can be adjusted as needed
OSD time :“☑”display system time,“□” non- display;
Sequence Dwell :the time of auto switching preview image , can be single screen or 4 Channels screen.
Start using:“☑”start using ,“□” non-start using
Page 15 of 20
MAGUS 16 SERIES DVR USER MANUAL
After the page setup is completed, click '"OK " to save the changes ; click "cancel " , non-save but exit. 3.8.3.6
video detection
In the "system setup" menu, click "
video detection "
Sensor :chose the right CH as needed by clicking the inverted triangle
Sensitivity : chose the trigger video detection sensitivity
Detection type:select detection type --motion, video loss ,“keep out" alarm
Alarm duration: after chose the trigger video detection, the time alarm last
Area edit : set motion detection area ;move by choosing left of mouse.
Record channel :
system defaulted channel after trigger video detection,,
Alarm:“☑”means start ,“□”means non start 。
Buzzer :“☑”means start ,“□”means non start。
OSD :“☑”means '"detection " marks shows on screen,,“□” means non show
E-Mail notice :“☑” means E-Mail valid,“□” means E-Mail invalid。
Page 16 of 20
MAGUS 16 SERIES DVR USER MANUAL
Copy to : select the target channel on the right of "copy to "button ,click "copy to" & ''ok " then system
will set the current channel setup information’s to other target video channel. Click button
"cancel", the setup information’s is non-saved but to exit.
3.8.3.7 PTZ Control
In system setup,click"PTZ set up"
Channel: choose the right channel, click the select box to choose
Protocal: the selected one must be the same with the one of PTZ
Data bit: choose the matched one of the PTZ
Address: input the address of appointed decoder
Stop bit: choose the matched one of the PTZ
Baudrate: choose the matched one of the PTZ
Parity check: choose the matched one of the PTZ
Copy set: choose the object route in the right select box, click the button of copy setting, then the
informations of setting will be showed, which also can be applied in other object routes. After the setting,
click the button of sure to exit with saving the , or click the botton of cancle to exit without saving.
3.8.3 8 Sensor setup
In the system setup , choose the "PTZ setup"
Channel: choose the right channel, click the select box to choose
Work mode: setting to start alarm or not
Alarm duration: set up the alarm duration time
Alarm: “☑”start alarm, “□”close alarm
Buzzer: “☑”start buzzer, “□” close buzzer
Screen note: “☑”alarm icon shows on the displayer, “□” no alarm icon showson the displayer
Page 17 of 20
MAGUS 16 SERIES DVR USER MANUAL
E-mail: “☑”start "e-mail" senting function, “□”shows close the function
Copy to setup: choose the target channel in the right select box, click" copy to" ,the setting information
will be applied to other channel.
After the setting, click "OK" to exit with saving the , or click"cancle"to exit without saving.
3.8.4 management tool
In main menu, choose"management tool", it includes four interface of the user management, disk
control, system maintainance and factory reset.
3.8.4.1 user management
In the management tool, click" user management ".
Add user: input a new user name in the edit box and set up the operational authority. Choosing in the right
check box, “☑” users can use it, “□” users can not use it. Click the "password setup" to set the password, or it
can be the default password.
Delete user: delete the secelted user
Edit user: edit the selected user
Set password : set up the password
After the setting, click "OK" to save and exit, or click t"cancle" to exit without saving.
3.8.4.2 HDD management
Page 18 of 20
MAGUS 16 SERIES DVR USER MANUAL
In the " management tool", click "HDD management"
Overwrite: “☑” early videos will be covered when the disk is full, “□"shows not cover.
Format: “☑” stands selected, “□” stands not selected, when click "format" a confirm interface will pop up, then
click confirm to format, click cancle to return the main interface.
3.8.4.3 system maintenance
In the " management tool", click "HDD management".
Auto reboot: setting the time of automatic reboot, it can set" Saturday to Sunday" . "Never" means donnot
reboot automatically.
sysytem upgrade: copy the upgraded file to the root directory of USB drive, select the USB storage device,
then click "begin" to upgrade the system. After upgrading,click"OK" then system auto reboot.
Remarks: the upgrade document name must be: FWHI1504A_***.rom(4ch), FWHI1508A_***.rom (8ch),
“***” means the publish time: such as FWHI1504A_20110520.rom
3.8.4.4 factory setting
Page 19 of 20
MAGUS 16 SERIES DVR USER MANUAL
In the " management tool", click"factory setting"
Select the terms which need factory setting, click "OK"to save and exit or click "cancle" to exit without
saving.
Remarks: after factory setting, all the settings will be the initial one, please use carefully.
3.9 system information
In the main menu,click"system information"which include HDD information, system information and
system log .
3.9.1 HDD information
The listbox shows the HDD status information
3.9.2 system information
Device name,device model,H/W version, S/W version could be check here.
3.9.3 system log
Choosing the log type which need checking from listbox, First select the type in the , and input the time in
the editbox, then click" search", the relevant informations will showed below, you can turn the page by
click " former" and "next", or input the No. of the page.
3.10 system logout
Page 20 of 20
MAGUS 16 SERIES DVR USER MANUAL
In the main menu, click"system logout"
User logout: uesd for exit users. After logout, if you want to use the device continue, it is necessary to
relogin after logout.
System reboot: It will reboot after "OK".
Page 21 of 20
MAGUS 16 SERIES DVR USER MANUAL
Recommended list USB modem
#
#
#
#
#
#
#
#
#
#
#
#
#
#
#
#
#
#
#
#
#
#
#
#
Huawei E270+
Huawei E1820
Huawei K3765
Huawei K4505
Huawei K4605 (for Vodafone)
Huawei E352 (for T-Mobile)
Huawei K3770 (for Vodafone)
Huawei K3771 (for Vodafone)
Huawei E535
Huawei E171
Huawei E353
Huawei E173Bu (Airtel E1731)
Huawei E173Du (Idea E1732)
ZTE MF620
ZTE MF628
ZTE MF622
ZTE MF626
ZTE MF628+
ZTE MF633
ZTE MF636
ZTE MF637
ZTE AC8710
ZTE AC2726
ZTE AC2710
#
#
#
#
#
#
#
#
#
#
#
#
#
#
#
#
#
#
#
#
#
#
#
#
#
ZTE MF110 (for Variant)
ZTE MF112
ZTE K3806-Z (for Vodafone)
ZTE MF638
ZTE 6535-Z
ZTE K3520-Z
ZTE K3565
ZTE MF190
ZTE MF652
Huawei E261 (WCDMA Open modem)
Huawei E220
Huawei E230
Huawei E270
Huawei E870
Huawei E169
Huawei E630
Huawei E1550
Huawei E1750
Huawei E1612
Huawei E1690
Huawei E1692
Huawei E1762
Huawei EC168C
Huawei EC156
Huawei E180
*Above said modem list is suggested but not test, please make sure well-matching before buy
Page 22 of 20
MAGUS 16 SERIES DVR USER MANUAL
Default Setting for various service provider (APN & Dial number)
Sl.No. Service Provider
APN
4G Mobile Data Service
1
Airtel 4G
airtelgprs.com
2G & 3G Mobile Data Service
2
Airtel-3G
airtelgprs.com
3
Idea Netseter-3G internet
imis
4
Aircel-3G
aircelgprs.com
5
MTNL-3G
gprsmtnldel or
gprsmtnlmum or
www
6
BSNL-3G
Dialup Number
User Name
Password
*99#
None
None
*99#
*99#
*99***1#
*99***1#
*99#
None
None
None
None
None
mtnl
None
mtnl123
None
None
None
None
None
None
None
None
None
None
7
8
9
Reliance-3G
rcomnet
Vodafone-3G
www
TATA DOCOMO-3G tatadocomo3g
*99***1#
*99#
*99#
*99#
*99#
10
Loop (BPL) Mobile bplgprs.com
mizone
*99***1#
*99#
bplmobile
None
None
#777
#777
internet
internet
[email protected] 123
Internet or
None
None
#777 or
*99#
#777
None
None
None
None
CDMA
12
Tata Photon+
13
MTS Mblaze
14
Reliance Net
connect
15
BSNL-EVDO
None
*APN & Dial number are by default used by the various service provider, however you can use current
setting of your Data card.
Page 23 of 20
MAGUS 16 SERIES DVR USER MANUAL
Esee net operational description
1.DVR connect with network and insure it is running.
2.Setup the UPNP function from Router: this Router is TP-LINK, just find the UPNP out and setup.
1. Turn into DVR: click right button of mouse-setup-system setup-network setup,as below:
IP Address:Default for:192.168.1.114(fill out according to your actual situation:1 segment:
192.168.1.114,0 segment: 192.168.0.114,If IP without conflict, no need to change.)
Subnet Mask:default for 55.255.255.0
Gateway:default for 192.168.1.1(can be change according to the actual situation)routers running
status can check from segment.
DNS Address:192.168.1.1, change into user's network DNS. (can check the DNS address from router)
After full fill all the information and save, exit to menu then turn into above menu again. Esee ID will
appear.
4、visit IE browser and input:
www.e-seenet.com
First setup enable the active-X as picture:
Page 24 of 20
MAGUS 16 SERIES DVR USER MANUAL
Click Tool- internet option- security-user defined safety level-enable all section
related to Active x . Remark:if there is a remark showing (not safe),can ignore-then
choose ok. Download and install the Active x. Before install,pls close all IE windows.
5、input Esee ID into Device ID, user name and passwords as DVR. Default user name: admin, passwords:
nothing.
1.1 video monitoring homepage:
Monitoring homepage including: preview window, PTZ control,preview mode, code stream selection,
channel opening,setting,playback, user logout as below:
Turn on preview:click the target channel with left button of mouse, red color means select already. Double
click the channel can open or close the correspond preview channel, such as:
open;
close
Page 25 of 20
MAGUS 16 SERIES DVR USER MANUAL
Preview mode:can click
multi-channel mode.
to choose the mode, or double click preview window to switchover into
Disclaimers
This series specifically meant for mobile network video transmission application. Always check the DVR
with data card at the installation location of the DVR before buying data card.
Don’t go by standards, refer suggested list of hardware& services.
Page 26 of 20