1
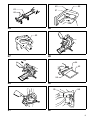
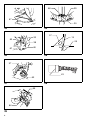
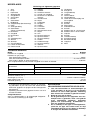
GB Cordless Compound Miter Saw
Instruction Manual
F
Scie à coupe d’onglet mixte sans fil
Manuel d’instructions
D
Akku Gehrungs-und Kappsäge
Betriebsanleitung
I
Sega a quartabuono composta a batteria Istruzioni per l’uso
NL Accu-gecombineerde verstekzaag
Gebruiksaanwijzing
E
Sierra de inglete mixta a batería
Manual de instrucciones
P
Serra de esquadria composta a bateria
Manual de instruções
DK Akku afkorter-geringssav
Brugsanvisning
S
Sladdlös kap-och gerings- kombinationssåg Bruksanvisning
N
Batteridreven kombinert kapp- og
gjæringssag
Bruksanvisning
SF Akkuyhdistetty jiirlsaha
Käyttöohje
GR Ασύρµατο σύνθετος πριονωτς δίσκος
Οδηγίες χρήσεως
BLS820
66
45
66
45
8
8
1
67
2
2
5
3
4
1
3
4
6
7
5
7
6
8
11
3
9
12
5
3
10
7
2
13
8
15
16
14
17
12
13
5
3
13
9
10
9
11
3
10
8
10
11
12
19
18
20
21
13
14
24
15
21
22
15
23
25
26
16
3
27
26
28
32
31
29
25
17
30
18
34
35
33
19
36
37
38
20
25
40
39
41
34
45
44
26
42
43
21
22
46
47
42
23
4
24
43
49
43
50
51
48
25
26
52
27
28
53
54
42
55
29
30
25
31
56
32
5
58
29
57
30
33
34
57
15
33
59
28
38
61
60
35
36
37
63
62
37
38
65
64
39
6
Symbols
The followings show the symbols used for tool. Be sure that you understand their meaning before use.
Symboles
Nous donnons ci-dessous les symboles utilisés pour l’outil. Assurez-vous que vous en avez bien compris la signification avant d’utiliser l’outil.
Symbole
Die folgenden Symbole werden für die Maschine verwendet. Machen Sie sich vor der Benutzung unbedingt mit ihrer
Bedeutung vertraut.
Simboli
Per questo utensile vengono usati i simboli seguenti. Bisogna capire il loro significato prima di usare l’utensile.
Symbolen
Voor dit gereedschap worden de volgende symbolen gebruikt. Zorg ervoor dat u de betekenis van deze symbolen
begrijpt alvorens het gereedschap te gebruiken.
Símbolos
A continuación se muestran los símbolos utilizados con esta herramienta. Asegúrese de que entiende su significado
antes de usarla.
Símbolos
O seguinte mostra os símbolos utilizados para a ferramenta. Certifique-se de que compreende o seu significado antes
da utilização.
Symboler
Nedenstående symboler er anvendt i forbindelse med denne maskine. Vær sikker på, at De har forstået symbolernes
betydning, før maskinen anvendes.
Symboler
Det följande visar de symboler som används för den här maskinen. Se noga till att du förstår deras innebörd innan
maskinen används.
Symbolene
Følgende viser de symblene som brukes for maskinen. Det er viktig å forstå betydningen av disse før maskinen tas i
bruk.
Symbolit
Alla on esitetty koneessa käytetyt symbolit. Opettele näiden merkitys, ennen kuin käytät konetta.
Σύµβολα
Τα ακλουθα δείχνουν τα σύµβολα που χρησιµοποιούνται για το µηχάνηµα. Βεβαιωθείτε τι καταλαβαίνετε
τη σηµασία τους πριν απ τη χρήση.
❏ To avoid injury from flying debris, keep holding the saw head down, after making cuts, until the
blade has come to a complete stop.
❏ Pour éviter toute blessure résultant du vol de débris, tenez l’outil avec sa tête dirigée vers le bas
lorsque la coupe est terminée, jusqu’à ce que la lame soit complètement arrêtée.
❏ Um Verletzungen durch herausgeschleuderte Teile zu vermeiden, halten Sie den Maschinenkopf
nach Ausführung von Schnitten abgesenkt, bis die Trennscheibe völlig zum Stillstand gekommen
ist.
❏ Per evitare le ferite causate dalle schegge volanti, mantenere abbassata la testa della fresa dopo
i tagli finché la lama non si è fermata completamente.
❏ Na het maken van sneden, moet u de zaagkop omlaag blijven houden totdat het zaagblad volledig
tot stilstand is gekomen, om mogelijke verwonding door vliegende brokstukken te voorkomen.
❏ Para evitar heridas a causa de restos volanderos, después de efectuar los cortes
mantenga bajada la cabeza del tronzador hasta que el disco se pare completamente.
❏ Para evitar injúrias causadas por fragmentos que se soltem, mantenha a cabeça da serra para
baixo, depois de fazer cortes, até que a lâmina esteja completamente parada.
❏ For at undgå tilskadekomst forårsaget af flyvende afskær skal savhovedet holdes nede efter
afskæringen, indtil skiven er helt standset.
❏ Håll såghuvudet nedåt, efter avslutad kapning, tills klingan har stannat helt, för att undvika skador
från flygande skräp.
❏ For å forhindre skader fra spon og flis som spres omkring, må saghodet holdes nede etter at kuttene er gjort helt til bladet har stoppet.
❏ Estä lentävien roskien aiheuttama loukkaantuminen pitämällä sahan kärkiosa sahauksen jälkeen
alhaalla, kunnes terä on kokonaan pysähtynyt.
❏ Για να αποφύγετε τραυµατισµ απ ιπτάµενα γρέζια, κρατάτε τον κπτη προς τα κάτω,
αφού κάνετε την κοπή, µέχρι η λεπίδα να σταµατήσει εντελώς.
7
❏ For your safety, remove the chips, small pieces, etc. from the table top before operation.
❏ A des fins de sécurité, débarrassez la table de tous les copeaux et autres petits débris avant le travail.
❏ Zur Sicherheit sollte die Tischplatte vor dem Betrieb von Spänen, Kleinteilen usw. gesäubert werden.
❏ Per la propria sicurezza, rimuovere le bave, scorie, ecc., da sopra il tavolo dopo il lavoro.
❏ Voor uw veiligheid, verwijder spaanders, brokstukjes, enz. van het tafelblad alvorens het gereedschap te bedienen.
❏ Para su propia seguridad, quite las virutas, pequeÞos trozos, etc., de encima de la mesa antes de
realizar la operaciün de corte.
❏ Para sua segurança, retire as aparas, peças pequenas, etc. de cima da bancada antes de começar
a operação.
❏ For Deres sikkerheds skyld skal alle metalspåner, små dele og så videre fjernes fra bordets overflade før anvendelse.
❏ Ta bort spån, småpartiklar osv. från sågbordets ovansida före användningen, för din egen säkerhets skull.
❏ Av sikkerhetsmessige årsaker må spon, metallstykker, etc. fjernes fra bordet før arbeidet starter.
❏ Poista oman turvallisuutesi vuoksi lastut, pienet kappaleet yms pöydän pinnalta ennen työskentelyä.
❏ Για την ασφάλεια σας , αποµακρύνετε τα υπολείµατα, µικρά κοµµάτια κλπ. απ το τραπέζι
προτού χρησιµοποιείσετε το µηχάνηµα.
8
❏
Only for EU countries
Do not dispose of electric equipment together with household waste material!
In observance of European Directive 2002/96/EC on waste electrical and electronic equipment and its
implementation in accordance with national law, electric equipment that have reached the end of their life must be
collected separately and returned to an environmentally compatible recycling facility.
❏
Pour les pays européens uniquement
Ne pas jeter les équipements électriques dans les ordures ménagères !
Conformément à la directive européenne 2002/96/EG relative aux déchets d’équipements électriques ou
électroniques (DEEE), et à sa transposition dans la législation nationale, les équipements électriques doivent être
collectés à part et être soumis à un recyclage respectueux de l’environnement.
❏
Nur für EU-Länder
Werfen Sie Elektrogeräte nicht in den Hausmüll!
Gemäß Europäischer Richtlinie 2002/96/EG über Elektro- und Elektronik-Altgeräte und Umsetzung in nationales
Recht müssen verbrauchte Elektrogeräte getrennt gesammelt und einer umweltgerechten Wiederverwertung
zugeführt werden.
❏
Solo per Paesi UE
Non gettare le apparecchiature elettriche tra i rifiuti domestici.
Secondo la Direttiva Europea 2002/96/CE sui rifiuti di apparecchiature elettriche ed elettroniche e la sua attuazione
in conformità alle norme nazionali, le apparecchiature elettriche esauste devono essere raccolte separatamente, al
fine di essere riciclate in modo eco-compatibile.
❏
Alleen voor EU-landen
Geef elektrische apparaten niet met het huisvuil mee!
Volgens de Europese richtlijn 2002/96/EG inzake oude elektrische en elektronische apparaten en de toepassing
daarvan binnen de nationale wetgeving, dient gebruikt elektrische apparaten gescheiden te worden ingezameld en
te worden afgevoerd naar een recycle bedrijf dat voldoet aan de geldende milieu-eisen.
❏
Sólo para países de la Unión Europea
¡No deseche los aparatos eléctricos junto con los residuos domésticos!
De conformidad con la Directiva Europea 2002/96/CE sobre residuos de aparatos eléctricos y electrónicos y su
aplicación de acuerdo con la legislación nacional, los aparatos eléctricos cuya vida útil haya llegado a su fin se
deberán recoger por separado y trasladar a una planta de reciclaje que cumpla con las exigencias ecológicas.
❏
Apenas para países da UE
Não deite ferramentas eléctricas no lixo doméstico!
De acordo com a directiva europeia 2002/96/CE sobre ferramentas eléctricas e electrónicas usadas e a sua
aplicação para as leis nacionais, as ferramentas eléctricas usadas deven ser recolhidas em separado e
encaminhadas a uma instalação de reciclagem dos materiais ecológicos.
❏
Kun for EU-lande
Elværktøj må ikke bortskaffes som almindeligt affald!
I henhold til det europæiske direktiv 2002/96/EF om bortskaffelse af elektriske og elektroniske produkter og
gældende national lovgivning skal brugt elværktøj indsamles separat og returneres til miljøgodkendt genindvinding.
❏
Gäller endast EU-länder
Elektrisk utrustning får inte kastas i hushållssoporna!
Enligt direktivet 2002/96/EG som avser äldre elektrisk och elektronisk utrustning och dess tillämpning enligt
nationell lagstiftning ska uttjänt elektrisk utrustning sorteras separat och lämnas till miljövänlig återvinning.
❏
Kun for EU-land
Kast aldri elektriske produkter i husholdningsavfallet!
I henhold til EU-direktiv 2002/96/EF om kasserte elektriske og elektroniske produkter og direktivets iverksetting i
nasjonal rett, må elektriske produkter som ikke lenger skal brukes, samles separat og returneres til et miljøvennlig
gjenvinningsanlegg.
❏
Koskee vain EU-maita
Älä hävitä sähkölaitteita tavallisen kotitalousjätteen mukana!
Vanhoja sähkö- ja elektroniikkalaitteita koskevan EU-direktiivin 2002/96/ETY ja sen maakohtaisten sovellusten
mukaisesti sähkölaitteet on toimitettava ongelmajätteen keräyspisteeseen ja ohjattava ympäristöystävälliseen
kierrätykseen.
❏
Μνο για τις χώρες της ΕΕ
Μη πετάτε τα είδη ηλεκτρικού εξοπλισµού µαζί µε τα οικιακά απορρίµµατα.
Σε τήρηση της Eυρωπαϊκής Oδηγίας 2002/96/ΕΚ, περί απορριµµάτων ειδών ηλεκτρικού και ηλεκτρονικού
εξοπλισµού και την εφαρµογή της σύµφωνα µε την εθνική νοµοθεσία, τα είδη ηλεκτρικού εξοπλισµού που
έχουν φθάσει στο τέλος της ζωής τους πρέπει να συλλέγονται ξεχωριστά και να επιστρέφονται σε µιά
περιβαλλοντικά συµβατή εγκατάσταση ανακύκλωσης.
9
ENGLISH
Explanation of general view
1
2
3
4
5
6
7
8
9
10
11
12
13
14
15
16
17
18
19
20
21
22
23
24
Battery cartridge
Button
Socket wrench
Wrench holder
Blade case
Stopper pin
Bolts
Hex bolt
Center cover
Safety cover (Safety guard)
Arrow
Shaft lock
Hex bolt (left-handed)
Outer flange
Saw blade
Inner flange
Spindle
Dust nozzle
Dust bag
Fastener
Kerf board
Left bevel cut
Straight cut
Adjusting bolt
25
26
27
28
29
30
31
32
33
34
35
36
37
38
39
40
41
42
43
44
45
46
47
48
Guide fence
Turn base
Periphery of blade
Top surface of turn base
Miter scale
Pointer
Grip
Lock lever
Lever
Loosen
Tighten
Bevel scale
Pointer
Arm
Vise rod
Vise arm
Vise knob
Holder
Holder assembly
Vise knob
Base
Vise shaft
Projection
Rods 12
49
50
51
52
53
54
55
56
57
58
59
60
61
62
63
64
65
66
67
Lock-off button
Handle
Switch trigger
Lock lever
Apply pressure in parallel with
blade
Set plate
Screw
Hex bolt
Triangular rule
Screw
45° bevel angle
adjusting bolt
0° bevel angle
adjusting bolt
Sub arm
Screw
Limit mark
Screwdriver
Brush holder cap
Auxiliary plate
Nut
SPECIFICATIONS
Model
BLS820
Blade diameter....................................................................................................................... 210 mm – 216 mm
Hole (arbor) diameter
For European countries.......................................................................................................................... 30 mm
For all other countries.......................................................................................................... 25.4 mm or 25 mm
For North and Central American countries........................................................................................ 15.88 mm
Max. cutting capacities (H x W) with blade 216 mm in diameter
Bevel angle
Miter angle
0°
45° (left and right)
0°
45° (left)
61 mm x 122 mm
45 mm x 122 mm
61 mm x 85 mm
45 mm x 85 mm
-1) ................................................................................................................................. 2,300
No load speed (min
Dimensions (L x W x H) .........................................................................................528 mm x 430 mm x 486 mm
Net weight (with battery cartridge) ........................................................................................................... 10.1 kg
Rated Voltage ...................................................................................................................................... D.C. 24 V
• Due to our continuing program of research and development, the specifications herein are subject to change
without notice.
• Note: Specifications may differ from country to country.
IMPORTANT SAFETY INSTRUCTIONS FOR
BATTERY CARTRIDGE
ENC005-1
1.
Safety hints
For your own safety, please refer to the enclosed safety
instructions.
2.
3.
4.
10
Before using battery cartridge, read all instructions and cautionary markings on (1) battery
charger, (2) battery, and (3) product using battery.
Do not disassemble battery cartridge.
If operating time has become excessively
shorter, stop operating immediately. It may result
in a risk of overheating, possible burns and even
an explosion.
If electrolyte gets into your eyes, rinse them out
with clear water and seek medical attention right
away. It may result in loss of your eyesight.
5.
6.
7.
8.
Do not short the battery cartridge:
(1) Do not touch the terminals with any conductive material.
(2) Avoid storing battery cartridge in a container
with other metal objects such as nails, coins,
etc.
(3) Do not expose battery cartridge to water or
rain.
A battery short can cause a large current flow,
overheating, possible burns and even a breakdown.
Do not store the tool and battery cartridge in
locations where the temperature may reach or
exceed 50°C (122°F).
Do not incinerate the battery cartridge even if it
is severely damaged or is completely worn out.
The battery cartridge can explode in a fire.
Be careful not to drop or strike battery.
SAVE THESE INSTRUCTIONS.
Tips for maintaining maximum battery life
1.
2.
3.
4.
Charge the battery cartridge before completely
discharged.
Always stop tool operation and charge the battery cartridge when you notice less tool power.
Never recharge a fully charged battery cartridge.
Overcharging shortens the battery service life.
Charge the battery cartridge with room temperature at 10°C – 40°C (50°F – 104°F). Let a hot battery cartridge cool down before charging it.
Charge the Nickel Metal Hydride battery cartridge when you do not use it for more than six
months.
ADDITIONAL SAFETY RULES FOR TOOL
ENB041-3
1.
Be aware that this tool is always in an operating
condition, because it does not have to be
plugged into an electrical outlet.
2. Wear eye protection.
3. Keep hands out of path of saw blade. Avoid contact with any coasting blade. It can still cause
severe injury.
4. Do not operate saw without guards in place.
Check blade guard for proper closing before
each use. Do not operate saw if blade guard
does not move freely and close instantly. Never
clamp or tie the blade guard into the open position.
5. Do not perform any operation freehand. The
workpiece must be secured firmly against the
turn base and guide fence with the vise during
all operations. Never use your hand to secure
the workpiece.
6. Never reach around saw blade.
7. Turn off tool and wait for saw blade to stop
before moving workpiece or changing settings.
8. Remove battery from tool before chaging blade
or servicing.
9. Don’t use the tool in the presence of flammable
liquids or gases.
10. Check the blade carefully for cracks or damage
before operation. Replace cracked or damaged
blade immediately.
11. Use only flanges specified for this tool.
12. Be careful not to damage the arbor, flanges (especially the installing surface) or bolt. Damage to
these parts could result in blade breakage.
13. Make sure that the turn base is properly secured
so it will not move during operation.
14. For your safety, remove the chips, small pieces,
etc. from the table top before operation.
15. Avoid cutting nails. Inspect for and remove all
nails from the workpiece before operation.
16. Make sure the shaft lock is released before the
switch is turned on.
17. Be sure that the blade does not contact the turn
base in the lowest position.
18. Hold the handle firmly. Be aware that the saw
moves up or down slightly during start-up and
stopping.
19. Make sure the blade is not contacting the workpiece before the switch is turned on.
20. Before using the tool on an actual workpiece, let
it run for a while. Watch for vibration or wobbling
that could indicate poor installation or a poorly
balanced blade.
21. Wait until the blade attains full speed before cutting.
22. Stop operation immediately if you notice anything abnormal.
23. Do not attempt to lock the trigger in the on position.
24. Be alert at all times, especially during repetitive,
monotonous operations. Don’t be lulled into a
false sense of security. Blades are extremely
unforgiving.
25. Always use accessories recommended in this
manual. Use of improper accessories such as
abrasive wheels may cause an injury.
26. Do not use the saw to cut other than wood or
similar materials.
27. Connect miter saws to a dust collecting device
when sawing.
28. Select saw blades in relation to the material to be
cut.
29. Take care when slotting.
30. Replace the kerf board when worn.
Do not use saw blades manufactured from high speed
steel.
Some dust created from operation contains chemicals
known to cause cancer, birth defects or other reproductive harm. Some examples of these chemicals are:
• lead from lead-based-painted material and,
• arsenic and chromium from chemically-treated lumber.
Your risk from these exposures varies, depending on how
often you do this type of work.
To reduce your exposure to these chemicals: work in a
well ventilated area and work with approved safety equipment, such as those dust masks that are specially
designed to filter out microscopic particles.
To reduce the emitted noise, always be sure that the
blade is sharp and clean.
The operator is adequately trained in the use, adjustment
and operation of the machine.
Use correctly sharpened saw blades. Observe the maximum speed marked on the saw blade.
Refrain from removing any cut-offs or other parts of the
workpiece from the cutting area whilst the machine is
running and the saw head is not in the rest position.
SAVE THESE INSTRUCTIONS.
11
OPERATING INSTRUCTIONS
Installing auxiliary plate (Fig. 1 & 2)
Always installing the auxiliary plate using the notch in the
tool’s base and secure it by tightening the hex bolt before
operation.
Installing or removing battery cartridge (Fig. 3)
• Always switch off the tool before insertion or removal of
the battery cartridge.
• To remove the battery cartridge, withdraw it from the
tool while sliding the button on the side of the cartridge.
• To insert the battery cartridge, align the tongue on the
battery cartridge with the groove in the housing and slip
it into place. Always insert it all the way until it locks in
place with a little click. If not, it may accidentally fall out
of the tool, causing injury to you or someone around
you.
• Do not use force when inserting the battery cartridge. If
the cartridge does not slide in easily, it is not being
inserted correctly.
Socket wrench (Fig. 4)
The socket wrench is stored as shown in Fig. 4. When
using the socket wrench, pull it out of the wrench holder.
After using the socket wrench, return it to the wrench
holder.
Bench mounting saw (Fig. 5 & 6)
When the tool is shipped, the handle is locked in the lowered position by the stopper pin. Release the stopper pin
by lowering the handle slightly and pulling the stopper
pin.
This tool should be bolted with four bolts to a level and
stable surface using the bolt holes provided in the tool’s
base. This will help prevent tipping and possible injury.
Installing or removing saw blade
CAUTION:
• Always be sure that the tool is switched off and the battery cartridge is removed before installing or removing
the blade.
• Use only the Makita socket wrench provided to install
or remove the blade. Failure to do so may result in overtightening or insufficient tightening of the hex bolt. This
could cause serious injury to operator or others in the
general vicinity of the tool.
Lock the handle in the raised position by pushing in the
stopper pin. (Fig. 5)
To remove the blade, use the socket wrench to loosen the
hex bolt holding the center cover by turning it counterclockwise. Raise the safety cover and center cover.
(Fig. 7)
Press the shaft lock to lock the spindle and use the
socket wrench to loosen the hex bolt (left-handed) clockwise. Then remove the hex bolt, outer flange and blade.
(Fig. 8)
To install the blade, mount it carefully onto the spindle,
making sure that the direction of the arrow on the surface
of the blade matches the direction of the arrow on the
blade case. Install the outer flange and hex bolt, and then
use the socket wrench to tighten the hex bolt (lefthanded) securely counterclockwise while pressing the
shaft lock. (Fig. 9 & 10)
12
CAUTION:
For all countries other than European countries
The inner flange has a 25 mm diameter on one side and
a 25.4 mm diameter on the other. The side with 25.4 mm
diameter is marked by “25.4”. Use the correct side for the
hole diameter of the blade you intend to use. Mounting
the blade on the wrong side can result in dangerous
vibration.
Return the safety cover and center cover to its original
position. Then tighten the hex bolt clockwise to secure
the center cover. (Fig. 11)
Release the handle from the raised position by pulling
the stopper pin. Lower the handle to make sure that the
safety cover moves properly.
Safety cover (Fig. 12)
When lowering the handle, the safety cover rises automatically. The cover returns to its original position when
the cut is completed and the handle is raised. NEVER
DEFEAT OR REMOVE THE SAFETY COVER. In the
interest of your personal safety, always maintain the
safety cover in good condition. Any irregular operation of
the safety cover should be corrected immediately.
NEVER USE THE TOOL WITH A FAULTY SAFETY
COVER. If the see-through safety cover becomes dirty, or
sawdust adheres to it in such a way that the blade and/or
workpiece is no longer easily visible, remove the battery
cartridge and clean the cover carefully with a damp cloth.
Do not use solvents or any petroleum-based cleaners on
the plastic cover.
Dust bag (Fig. 13)
The use of the dust bag makes cutting operations clean
and dust collection easy. To attach the dust bag, fit the
bag’s entry port over the dust nozzle. When the dust bag
is about half full, remove the dust bag from the tool and
pull the fastener out. Empty the dust bag of its contents,
tapping it lightly so as to remove particles adhering to the
insides which might hamper further collection.
Positioning kerf board (Fig. 14 & 15)
This tool is provided with the kerf boards in the turn base.
The kerf boards are factory adjusted so that the saw
blade does not contact the kerf boards. Before use,
adjust the kerf boards as follows:
First, remove the battery cartridge. Loosen the all screws
(2 each on left and right) securing the kerf boards. Retighten them to the extent that the kerf boards can be
easily moved by hand. Lower the handle fully and push in
the stopper pin to lock the handle in the lowered position.
Adjust the kerf boards so that the kerf boards just contact
the sides of blade teeth slightly. Tighten the screws (do
not tighten firmly). After adjusting the kerf boards,
release the stopper pin and raise the handle. Then
tighten the all screws securely.
CAUTION:
After changing the bevel angle, always readjust the kerf
boards as described above.
Maintaining maximum cutting capacity
(Fig. 16 & 17)
This tool is factory adjusted to provide the max. cutting
capacity for a 216 mm saw blade. When using a saw
blade other than 216 mm saw blade, adjust the lower limit
position of the blade as follows:
First, remove the battery cartridge. Lower the handle
completely. Use the socket wrench to turn the adjusting
bolt until the periphery of the blade extends slightly below
the top surface of the turn base at the point where the
front face of the guide fence meets the top surface of the
turn base. With the battery cartridge removed, rotate the
blade by hand while holding the handle all the way down
to be sure that the blade does not contact any part of the
lower base. Re-adjust slightly, if necessary.
Securing workpiece
WARNING:
It is extremely important to always secure the workpiece
properly and tightly with the vise. Failure to do so can
cause the tool to be damaged and/or the workpiece to be
destroyed. PERSONAL INJURY MAY ALSO RESULT.
Also, after a cutting operation, DO NOT raise the blade
until the blade has come to a complete stop.
1.
Vertical vise (Fig. 21)
The vertical vise can be installed in two positions on
either the left or right side of the guide fence, or the
holder assembly (optional accessory). Insert the
vise rod into the hole in the guide fence or the holder
assembly and tighten the screw to secure the vise
rod. (Note: When using the holder assembly, install it
on the holder as shown in Fig. 21.)
Position the vise arm according to the thickness and
shape of the workpiece and secure the vise arm by
tightening the screw.
Make sure that no part of the tool contacts the vise
when lowering the handle fully. If some part contacts
the vise, re-position the vise. Press the workpiece
flat against the guide fence and the turn base. Position the workpiece at the desired cutting position and
secure it firmly by tightening the vise knob. The maximum thickness of workpieces which can be secured
by the vertical vise is 61 mm.
2.
Horizontal vise (optional accessory)
(Fig. 22 & 23)
The horizontal vise can be installed on either the left
or right side of the base. By turning the vise knob
counterclocwise, the screw is released and the vise
shaft can be moved rapidly in and out. To grip workpieces, turn the vise knob gently clockwise until the
projection reaches its topmost position, then fasten
securely. If the vise knob is forced in or pulled out
while being turned clockwise, the projection may
stop at an angle. In this case, turn the vise knob
back counterclockwise until the screw is released,
before turning again gently clockwise. The maximum
width of workpieces which can be secured by the
horizontal vise is 122 mm.
3.
Holders and holder assembly (optional accessory)
The holders and the holder assembly can be
installed on either side as a convenient means of
supporting workpieces horizontally. Install them as
shown in Fig. 24. Then tighten the screws firmly to
secure the holders and the holder assembly.
(Fig. 24)
When cutting long workpieces, use the holder-rod
assembly (optional accessory). It consists of two
holder assemblies and two rods 12. (Fig. 25)
CAUTION:
After installing a new blade, always be sure that the blade
does not contact any part of the lower base when the
handle is lowered completely. Always do this with the battery cartridege removed.
Positioning for adjusting the miter angle (Fig. 18)
The turn base turns up to 52° to the left and right. Loosen
the grip by turning counterclockwise. Turn the turn base
while pressing down the lock lever. When you have
moved the grip to the position where the pointer points to
the desired angle on the miter scale, securely tighten the
grip clockwise.
CAUTION:
• When turning the turn base, be sure to raise the handle
fully.
• After changing the miter angle, always secure the turn
base by tightening the grip firmly.
Positioning for adjusting the bevel angle
(Fig. 19 & 20)
The saw blade tilts up to 45° to the left. To adjust the
bevel angle, loosen the lever at the rear of the tool. Push
the handle to the left to tilt the saw blade until the pointer
points to the desired angle on the bevel scale. Tighten
the lever to secure the arm.
CAUTION:
• When tilting the saw blade, be sure to raise the handle
fully.
• After changing the bevel angle, always secure the arm
by tightening the lever.
CAUTION:
Always support long workpieces level with the top
surface of the turn base for accurate cuts and to prevent dangerous loss of control of the tool.
13
CAUTION:
• During a bevel cut, it may create a condition
whereby the piece cut off will come to rest against
the side of the blade. If the blade is raised while
the blade is still rotating, this piece may be caught
by the blade, causing fragments to be scattered
around which is dangerous. The blade should be
raised ONLY after the blade has come to a complete stop.
• When pressing down the handle, apply pressure in
parallel with the blade. If a force is applied perpendicularly to the turn base or if the pressure direction is changed during a cut, the precision of the
cut will be impaired.
Switch action (Fig. 26)
CAUTION:
• Before inserting the battery cartridge into the tool,
always check to see that the switch trigger actuates
properly and returns to the “OFF” position when
released.
• When not using the tool, remove the lock-off button and
store it in a secure place. This prevents unauthorized
operation.
To prevent the switch trigger from being accidentally
pulled, a lock-off button is provided.
To start the tool, press in the lock-off button and pull the
trigger. Release the switch trigger to stop.
Lock lever (Fig. 27)
4.
For European countries only
When cutting, push the lock lever to the left to release the
handle from the raised position. When the cut is completed, release the lock lever after returning the blade to
its fully elevated position. The handle will be automatically locked in the raised position.
Operation
CAUTION:
Do not apply excessive pressure on the handle when cutting. Too much force may result in overload of the motor
and/or decreased cutting efficiency.
1. Press cutting (Fig. 28)
• Workpieces up to 61 mm high x 122 mm wide can
be cut in the following way.
• Secure the workpiece with the vise. Switch on the
tool and wait until the blade attains full speed
before lowering gently into the cut. When the cut is
completed, switch off the tool and WAIT UNTIL
THE BLADE HAS COME TO A COMPLETE STOP
before returning the blade to its fully elevated position.
2.
Miter cutting
Refer to the previously covered “Positioning for
adjusting the miter angle”.
3.
Bevel cut (Fig. 29)
• At a left 45° bevel angle, workpieces up to 45 mm
high x 122 mm wide can be cut.
• Loosen the lever and tilt the saw blade to set the
bevel angle. Refer to the previously covered “Positioning for adjusting the bevel angle”. Secure the
workpiece with the vise. Switch on the tool and
wait until the blade attains full speed. Then gently
lower the handle to the fully lowered position while
applying pressure in parallel with the blade. When
the cut is completed, switch off the tool and WAIT
UNTIL THE BLADE HAS COME TO A COMPLETE STOP before returning the blade to its fully
elevated position.
14
Compound cutting
Compound cutting is the process in which a bevel
angle is made at the same time in which a miter
angle is being cut on a workpiece. Compound cutting can be performed at angle shown in the table
below.
Miter angle
Bevel angle
Left and right 45°
Left 0° – 45°
Left and right 52°
Left 0° – 40°
At the miter angle of left 45° and bevel angle of left
45°, workpieces 45 mm high x 85 mm wide can be
cut. When performing compound cutting, refer to
“Press cutting”, “Miter cutting” and “Bevel cut” explanations.
5.
Cutting repetitive lengths (Fig. 30)
When cutting several pieces of stock to the same
length, ranging from 220 mm to 365 mm, use of the
set plate (optional accessory) will facilitate more efficient operation. Install the set plate on the holder as
shown in Fig. 30. Align the cutting line on your workpiece with either the left or right side of the groove in
the kerf board, and while holding the workpiece from
moving, move the set plate flush against the end of
the workpiece. Then secure the set plate with the
screw. When the set plate is not used, loosen the
screw and turn the set plate out of the way.
NOTE:
Use of the holder-rod assembly (optional accessory)
allows cutting repetitive lengths, ranging from
220 mm to 2,230 mm.
Carrying tool (Fig. 5 & 31)
Make sure that the battery cartridge is removed. Secure
the blade at 0° bevel angle and the turn base at 52° miter
angle to the right. Lower the handle fully and lock it in the
lowered position by pushing in the stopper pin. Carry the
tool by the carrying grip as shown in Fig. 31.
MAINTENANCE
Replacement of carbon brushes (Fig. 38 & 39)
CAUTION:
Always be sure that the tool is switched off and the battery cartridge is removed before carrying out any work on
the tool.
Remove and check the carbon brushes regularly.
Replace when they wear down to the limit mark. Keep
the carbon brushes clean and free to slip in the holders.
Both carbon brushes should be replaced at the same
time. Use only identical carbon brushes.
Adjusting the cutting angle
This tool is carefully adjusted and aligned at the factory,
but rough handling may have affected the alignment. If
your tool is not aligned properly, perform the following:
1.
2.
Miter angle
Loosen the grip which secures the turn base. Turn
the turn base so that the pointer points to 0° on the
miter scale. Then turn the turn base slightly clockwise and counterclockwise to seat the turn base
cozily in the 0° miter notch. (Leave as it is if the
pointer does not point to 0°.) Loosen the four hex
bolts securing the guide fence using the socket
wrench. (Fig. 32)
Lower the handle fully and lock it in the lowered position by pushing in the lock pin. Square the side of the
blade with the face of the guide fence using a triangular rule, try square, etc. Then securely tighten the
hex bolts on the guide fence in the order from right
side. (Fig. 33)
Make sure that the pointer points to 0° on the miter
scale. If the pointer does not point to 0°, loosen the
screw which secures the pointer and adjust the
pointer so that it will point to 0°. (Fig. 34)
Bevel angle
i) 0° bevel angle
Lower the handle fully and lock it in the lowered
position by pushing in the lock pin. Loosen the
lever at the rear of the tool. Turn the 0° bevel
angle adjusting bolt (lower bolt) on the right side
of the arm two or three revolutions counterclockwise to tilt the blade to the right. (Fig. 35)
Carefully sqaure the side of the blade with the top
surface of the turn base using the triangular rule,
try square, etc. by turning the 0° bevel angle
adjusting bolt clockwise. Then tighten the lever
securely. (Fig. 36)
Make sure that the pointer on the sub arm points
to 0° on the bevel scale on the arm. If it does not
point to 0°, loosen the screw which secures the
pointer and adjust the pointer so that it will point
to 0°. (Fig. 37)
ii) 45° bevel angle
Adjust the 45° bevel angle only after performing
0° bevel angle adjustment. To adjust left 45° bevel
angle, loosen the lever and tilt the blade 45° to the
left. Make sure that the pointer on the sub arm
points to 45° on the bevel scale on the arm. If the
pointer does not point to 45°, turn the 45° bevel
angle adjusting bolt (upper bolt) on the right side
of the arm until the pointer points to 45°. (Fig. 35)
Use a screwdriver to remove the brush holder caps. Take
out the worn carbon brushes, insert the new ones and
secure the brush holder caps.
To maintain product safety and reliability, repairs, maintenance or adjustment should be carried out by a Makita
Authorized Service Center.
ACCESSORIES
CAUTION:
• These accessories or attachments are recommended
for use with your Makita tool specified in this manual.
The use of any other accessories or attachments might
present a risk of injury to persons. Only use accessory
or attachment for its stated purpose.
If you need any assistance for more details regarding
these accessories, ask your local Makita service center.
•
•
•
•
•
•
•
•
•
•
•
•
•
Dust bag
Holder
Socket wrench 10
Triangular rule
Auxiliary plate
Lock-off button (Switch button)
Vertical vise
Carbide-tipped saw blade
Safety goggle
Vise assembly (horizontal vise)
Set plate
Holder assembly
Various type of Makita genuine batteries and chargers
15
NEDERLANDS
Verklaring van algemene gegevens
1
2
3
4
5
6
7
8
9
10
11
12
13
14
15
16
17
18
19
20
21
22
23
Accu
Knop
Dopsleutel
Sleutelhouder
Zaagbladkast
Aanslagpen
Bouten
Zeskantbout
Middenkap
Veiligheidskap (Beschermkap)
Pijltje
Asvergrendeling
Zeskantbout
(linkse schroefdraad)
Buitenflens
Zaagblad
Binnenflens
As
Verbindingsstuk
Stofzak
Sluitstrip
Zaagsnedeplaat
Linkse versteksnede
Rechte snede
24
25
26
27
28
29
30
31
32
33
34
35
36
37
38
39
40
41
42
43
44
45
46
Stelbout
Geleider
Draaibaar voetstuk
Omtrek van zaagblad
Bovenvlak van draaibaar
voetstuk
Verstekschaal
Wijzer
Handgreep
Borgpen
Hendel
Losmaken
Vastmaken
Schuine-hoek schaal
Wijzer
Arm
Spanschroefstang
Spanschroefarm
Spanschroefknop
Houder
Houdermontage
Spanschroefknop
Voetstuk
Spanschroefas
47
48
49
50
51
52
53
54
55
56
57
58
59
60
61
62
63
64
65
66
67
Uitsteeksel
Stangen 12
Ontgrendelknop
Handvat
Trekschakelaar
Vergrendelknop
Oefen druk uit evenwijdig met
het zaagblad
Stelplaat
Schroef
Zeskantbout
Driehoeksliniaal
Schroef
Stelbout voor 45° schuine hoek
Stelbout voor 0° schuine hoek
Hulparm
Schroef
Limietmerkstreep
Schroevendraaier
Borstelhouderdop
Hulpplaat
Moer
TECHNISCHE GEGEVENS
Model
BLS820
Diameter van zaagblad ..................................................................................................................... 210 mm — 216 mm
Diameter van gat (asgat)
Voor alle Europese landen ..................................................................................................................................30 mm
Voor alle niet-Europese landen .........................................................................................................25,4 mm of 25 mm
Voor landen in Noord- en Centraal-Amerika ................................................................................................. 15,88 mm
Max. zaagkapaciteiten (H x B) met een zaagblad van 216 mm in diameter
Schuine hoek
Verstekhoek
0°
45° (links en rechts)
0°
45° (links)
61 mm x 122 mm
45 mm x 122 mm
61 mm x 85 mm
45 mm x 85 mm
–1
Toerental onbelast (min ) .......................................................................................................................................2 300
Afmetingen (L x B x H) ........................................................................................................ 528 mm x 430 mm x 486 mm
Netto gewicht (met accu) ......................................................................................................................................10,1 kg
Nominale spanning ............................................................................................................................................. DC 24 V
• In verband met ononderbroken research en ontwikkeling behouden wij ons het recht voor bovenstaande
technische gegevens te wijzigen zonder voorafgaande
kennisgeving.
• Opmerking: De technische gegevens kunnen van land
tot land verschillen.
BELANGRIJKE
VEILIGHEIDSVOORSCHRIFTEN VOOR ACCU
Veiligheidswenken
Voor uw veiligheid dient u de bijgevoegde Veiligheidsvoorschriften nauwkeurig op te volgen.
2.
3.
1.
4.
Lees alle voorschriften en waarschuwingen op
(1) de acculader, (2) de accu, en (3) het product
waarvoor de accu wordt gebruikt, aandachtig
door alvorens de acculader in gebruik te nemen.
Neem de accu niet uit elkaar.
Als de gebruikstijd van een opgeladen accu aanzienlijk korter is geworden, moet u het gebruik
ervan onmiddellijk stopzetten. Voortgezet
gebruik kan oververhitting, brandwonden en
zelfs een ontploffing veroorzaken.
Als er elektrolyt in uw ogen is terechtgekomen,
spoel dan uw ogen met schoon water en roep
onmiddellijk de hulp van een dokter in. Elektrolyt
in de ogen kan blindheid veroorzaken.
35
5.
6.
7.
8.
Voorkom kortsluiting van de accu:
(1) Raak de accuklemmen nooit aan met een
geleidend materiaal.
(2) Bewaar de accu niet in een bak waarin
andere metalen voorwerpen zoals spijkers,
munten e.d. worden bewaard.
(3) Stel de accu niet bloot aan water of regen.
Kortsluiting van de accu kan oorzaak zijn van
een grote stroomafgifte, oververhitting, brandwonden, en zelfs defecten.
Bewaar het gereedschap en de accu niet op
plaatsen waar de temperatuur kan oplopen tot
50°C of hoger.
Werp de accu nooit in het vuur, ook niet wanneer
hij zwaar beschadigd of volledig versleten is. De
accu kan namelijk ontploffen in het vuur.
Wees voorzichtig dat u de accu niet laat vallen
en hem niet blootstelt aan schokken of stoten.
BEWAAR DEZE VOORSCHRIFTEN.
Tips voor een maximale levensduur van de accu
1.
2.
3.
4.
Laad de accu op voordat hij volledig ontladen is.
Stop het gebruik van het gereedschap en laad de
accu op telkens wanneer u vaststelt dat het vermogen van het gereedschap is afgenomen.
Laad een volledig opgeladen accu nooit opnieuw
op. Als u de accu te veel oplaadt, zal hij minder
lang meegaan.
Laad de accu op bij een kamertemperatuur tussen 10°C en 40°C. Laat een warme accu afkoelen
alvorens hem op te laden.
Laad de nikkel-metaalhydride accu op telkens
wanneer u hem langer dan zes maanden niet
hebt gebruikt.
AANVULLENDE
VEILIGHEIDSVOORSCHRIFTEN VOOR HET
GEREEDSCHAP
1.
2.
3.
4.
5.
6.
7.
8.
9.
36
Denk eraan dat dit gereedschap altijd gebruiksklaar is, aangezien het niet hoeft te worden aangesloten op een stopcontact.
Draag oogbescherming.
Houd uw handen uit de buurt van het zaagblad.
Raak het freewheelende zaagblad niet aan, aangezien dit nog ernstige verwondingen kan veroorzaken.
Gebruik de zaag niet zonder dat de beschermkappen zijn aangebracht.
Zaag nooit met het werkstuk in uw hand. Zet het
werkstuk met behulp van de spanschroef altijd
stevig vast tegen het draaibare voetstuk en de
geleider. Gebruik nooit uw hand om het werkstuk tijdens het zagen vast te houden.
Probeer nooit om tijdens het zagen iets vast te
pakken in de omgeving van het zaagblad.
Schakel het gereedschap uit en wacht totdat het
zaagblad volledig tot stilstand is gekomen alvorens het werkstuk te verwijderen of de instelling
van het gereedschap te veranderen.
Verwijder de accu uit het gereedschap alvorens
het zaagblad te vervangen of met onderhoudswerkzaamheden te beginnen.
Gebruik het gereedschap niet in de nabijheid
van ontvlambare vloeistoffen of gassen.
10. Controleer het zaagblad zorgvuldig op barsten of
beschadiging alvorens te gaan zagen. Vervang
een gebarsten of beschadigd zaagblad onmiddellijk.
11. Gebruik alleen flenzen die voor dit gereedschap
gemaakt zijn.
12. Let op dat u de as, de flenzen (vooral hun montagevlak) of de bout niet beschadigt. Beschadiging
van deze onderdelen kan zaagbladbreuk veroorzaken.
13. Controleer of het draaibare voetstuk goed vastzit, zodat het tijdens het zagen niet kan bewegen.
14. Verwijder voor uw eigen veiligheid zaagafval,
kleine stukjes hout e.d. van de werktafel alvorens te gaan zagen.
15. Zaag niet op spijkers. Inspecteer het werkstuk en
trek alle eventuele spijkers eruit alvorens te gaan
zagen.
16. Zet de asvergrendeling in de vrije stand alvorens
de trekschakelaar in te drukken.
17. Zorg ervoor dat het zaagblad in zijn laagste positie niet in aanraking komt met het draaibare voetstuk.
18. Houd het handvat stevig vast. Denk eraan dat de
zaag bij het starten en stoppen een beetje op en
neer gaat.
19. Controleer vóór het inschakelen of het zaagblad
het werkstuk niet raakt.
20. Laat het gereedschap een tijdje draaien alvorens
het op uw werkstuk te gebruiken. Controleer op
trillingen of schommelingen die kunnen wijzen
op onjuiste installatie of een slecht gebalanceerd zaagblad.
21. Wacht totdat het zaagblad op volle toeren draait,
alvorens het werkstuk te zagen.
22. Stop onmiddellijk met zagen indien u iets abnormaals opmerkt.
23. Probeer niet om de trekschakelaar in de AAN
positie te vergrendelen.
24. Laat nooit uw aandacht verslappen, vooral niet
wanneer het werk saai is en uit herhalingen
bestaat. Laat u niet misleiden door een vals
gevoel van veiligheid. Zaagbladen kunnen altijd
gevaar opleveren.
25. Gebruik uitsluitend de accessoires die in deze
gebruiksaanwijzing worden aanbevolen. Het
gebruik van ongeschikte accessoires, zoals
slijpschijven, kan verwonding veroorzaken.
26. Gebruik de zaag niet voor het zagen van andere
materialen dan hout of gelijksoortige materialen.
27. Sluit verstekzagen tijdens het zagen aan op een
stofvanginrichting.
28. Kies de zaagbladen in overeenstemming met het
te zagen materiaal.
29. Wees voorzichtig wanneer u gleuven zaagt.
30. Vervang de zaagsnedeplaat indien deze versleten is.
Zaagbladen van hooggelegeerd snelstaal (HSS) mogen
niet worden gebruikt.
Stof dat tijdens de werkzaamheden vrijkomt, kan chemische bestanddelen bevatten die kanker, geboortedefecten of andere voortplantingsschade kan (kunnen)
verwekken. Enkele voorbeelden van deze chemische
stoffen zijn:
• lood van loodhoudende verfstoffen en
• arsenicum en chroom van chemisch behandeld hout.
Uw risico van deze blootstellingen varieert en hangt af
van het feit hoe vaak u dit soort bewerkingen uitvoert.
Om blootstelling aan deze chemische bestanddelen te
verminderen, moeten de werkzaamheden uitgevoerd
worden in een goed geventileerde werkomgeving en
gebruikmakend van goedgekeurde veiligheidsmiddelen,
zoals stofmaskers die ontworpen zijn om microscopisch
kleine deeltjes te kunnen filteren.
Zorg omwille van een lager geluidsniveau dat het zaagbladaltijd scherp en schoon is.
De operator moet voldoende goed zijn opgeleid in het
gebruik, de afstelling en het onderhoud van het gereedschap.
Gebruik een zaagblad dat op de juiste wijze geslepen is.
Houd u aan de maximale snelheid aangegeven op het
zaagblad.
Verwijder nooit afgezaagde delen of andere delen van
het werkstuk uit het zaaggebied terwijl de machine draait
en het zaagblad nog niet in de ruststand staat.
BEWAAR DEZE VOORSCHRIFTEN.
BEDIENINGSVOORSCHRIFTEN
Installeren van de extra plaat (Fig. 1 en 2)
Zorg ervoor dat bij het installeren van de extra plaat de
inkeping in de voet van het gereedschap gebruikt wordt
en dat de extra plaat wordt vastgezet door de zeskantbout aan te draaien alvorens het gereedschap te gebruiken.
Installeren of verwijderen van de accu (Fig. 3)
• Schakel het gereedschap altijd uit alvorens de accu te
installeren of te verwijderen.
• Om de accu te verwijderen, neemt u deze uit het
gereedschap terwijl u de knop op de zijkant van de
accu verschuift.
• Om de accu te installeren, past u de tong op de accu in
de groef in het accuhuis en dan schuift u de accu erin.
Schuif de accu zo ver mogelijk erin, totdat deze met
een klikgeluid vergrendelt. Indien u dit niet doet, kan de
accu per ongeluk uit het gereedschap vallen en uzelf of
anderen verwonden.
• Probeer niet de accu met geweld in het accuhuis te
duwen. Indien de accu niet gemakkelijk erin gaat, betekent dit dat u hem niet op de juiste wijze erin steekt.
Dopsleutel (Fig. 4)
De dopsleutel is aangebracht zoals afgebeeld in Fig. 4.
Wanneer u de dopsleutel wilt gebruiken, moet u deze uit
de sleutelhouder trekken. Breng de dopsleutel na gebruik
weer in de sleutelhouder aan.
De zaag op een werktafel monteren
(Fig. 5 en 6)
Bij de verscheping uit de fabriek, is het handvat van het
gereedschap in de omlaagpositie vastgezet door middel
van de aanslagpen. Ontgrendel de aanslagpen door het
handvat een beetje omlaag te drukken en de aanslagpen
naar buiten te trekken.
Dit gereedschap moet op een horizontaal en stabiel
oppervlak worden gemonteerd door middel van vier bouten die u door de boutgaten in het voetstuk van het
gereedschap steekt. Hierdoor wordt voorkomen dat het
gereedschap omkantelt en mogelijk verwondingen veroorzaakt.
Installeren of verwijderen van het zaagblad
LET OP:
• Controleer altijd of het gereedschap is uitgeschakeld
en de accu ervan is verwijderd alvorens het zaagblad
te installeren of te verwijderen.
• Gebruik voor het installeren of verwijderen van het
zaagblad uitsluitend de bijgeleverde Makita dopsleutel.
Doet u dit niet, dan kan de zeskantbout te vast of te los
worden aangedraaid, hetgeen ernstige verwonding van
de gebruiker van het gereedschap of van anderen in de
nabije omgeving tot gevolg kan hebben.
Druk de aanslagpen naar binnen om het handvat in de
omhoogpositie vast te zetten. (Fig. 5)
Om het zaagblad te verwijderen, gebruik de dopsleutel
om de zeskantbout, die de middenkap op zijn plaats
houdt, naar links los te draaien. Breng de veiligheidskap
en de middenkap omhoog. (Fig. 7)
Druk de asvergrendeling in om de as te vergrendelen en
draai met de dopsleutel de zeskantbout (linkse schroefdraad) naar rechts los. Verwijder vervolgens de zeskantbout, de buitenflens en het zaagblad. (Fig. 8)
Om het zaagblad te installeren, monteert u het zaagblad
voorzichtig op de as, ervoor zorgend dat de pijltjes op het
zaagblad en op de zaagbladkast in dezelfde richting wijzen. Monteer de buitenflens en de zeskantbout, en draai
dan met de dopsleutel de zeskantbout (linkse schroefdraad) stevig naar links vast terwijl u daarbij de asvergrendeling ingedrukt houdt. (Fig. 9 en 10)
LET OP:
Voor alle niet-Europese landen
De binnenflens heeft een diameter van 25 mm aan de
ene zijde, en een diameter van 25,4 mm aan de andere
zijde. De zijde met een diameter van 25,4 mm is gemarkeerd met “25.4”. Gebruik de zijde die overeenkomt met
de asgatdiameter van het zaagblad dat u gaat gebruiken.
Indien het zaagblad aan de verkeerde zijde wordt
gemonteerd, kan gevaarlijke trilling worden veroorzaakt.
Monteer de veiligheidskap en de middenkap weer in hun
oorspronkelijke posities. Zet daarna de middenkap vast
door de zeskantbout naar rechts vast te draaien. (Fig. 11)
Trek de aanslagpen naar buiten om het handvat uit zijn
omhoogpositie te ontgrendelen. Breng het handvat
omlaag om te controleren of de veiligheidskap behoorlijk
beweegt.
Veiligheidskap (Fig. 12)
Wanneer het handvat omlaag wordt gebracht, gaat de
veiligheidskap automatisch omhoog. De veiligheidskap
keert naar haar oorspronkelijke positie terug wanneer het
zagen beëindigd is en het handvat omhoog wordt
gebracht. ZET DE VEILIGHEIDSKAP NOOIT VAST EN
VERWIJDER DEZE NOOIT. Voor uw persoonlijke veiligheid dient de veiligheidskap altijd in goede staat te worden gehouden. Elke onregelmatige werking van de
veiligheidskap dient onmiddellijk te worden hersteld.
GEBRUIK HET GEREEDSCHAP NOOIT MET EEN
DEFECTE VEILIGHEIDSKAP. Wanneer de doorzichtige
veiligheidskap vuil is of met zaagsel is bedekt zodat u het
zaagblad en/of het werkstuk niet meer behorlijk kunt
zien, verwijder dan de accu van het gereedschap en reinig de veiligheidskap zorgvuldig met een bevochtigde
doek. Gebruik geen oplosmiddelen of benzinehoudende
schoonmaakmiddelen op de plastic kap.
37
Stofzak (Fig. 13)
Instellen van de verstekhoek (Fig. 18)
Door de stofzak te gebruiken wordt het zaagsel opgevangen en kunt u schoon werken. Voor het bevestigen van
de stofzak monteert u de inlaat van de stofzak over het
verbindingsstuk op het gereedschap. Wanneer de stofzak ongeveer halfvol is, verwijdert u deze van het
gereedschap en trekt u de sluitstrip eraf. Maak de stofzak
leeg en tik er lichtjes op voor het verwijderen van achtergebleven stofdeeltjes waardoor de stofopvanging zou
kunnen worden belemmerd.
Het draaibaar voetstuk draait maximaal 52° naar links en
naar rechts. Draai de handgreep naar links los. Verdraai
het draaibaar voetstuk terwijl u de borgpen ingedrukt
houdt. Beweeg de handgreep naar de positie waarbij de
wijzer de gewenste hoek op de verstekschaal aanwijst en
draai dan de handgreep weer stevig naar rechts vast.
Afstellen van de zaagsnedeplaten
(Fig. 14 en 15)
Dit gereedschap is voorzien van zaagsnedeplaten in het
draaibaar voetstuk. De zaagsnedeplaten zijn in de
fabriek zodanig afgesteld dat het zaagblad niet met de
zaagsnedeplaten in aanraking komt. Stel de zaagsnedeplaten als volgt af alvorens het gereedschap in gebruik te
nemen:
Verwijder eerst de accu van het gereedschap. Draai alle
schroeven (2 aan de linkerzijde en 2 aan de rechterzijde)
waarmee de zaagsnedeplaten zijn vastgemaakt los. Trek
de schroeven weer aan zodanig dat de zaagsnedeplaten
gemakkelijk met de hand kunnen worden bewogen.
Breng het handvat volledig omlaag en druk de aanslagpen naar binnen om het handvat in de omlaagpositie te
vergrendelen. Stel de positie van de zaagsnedeplaten
zodanig af dat deze lichtjes in aanraking komen met de
zijkanten van de zaagbladtanden. Trek de schroeven aan
(niet te hard aantrekken). Nadat de zaagsnedeplaten zijn
afgesteld, ontgrendelt u de aanslagpen en brengt u het
handvat omhoog. Trek vervolgens alle schroeven stevig
aan.
LET OP:
Telkens nadat u de schuine hoek hebt gewijzigd, dient u
de zaagsnedeplaten opnieuw af te stellen op de bovenstaande wijze.
Handhaven van de maximale zaagcapaciteit
(Fig. 16 en 17)
Dit gereedschap is in de fabriek ingesteld voor het leveren van maximale zaagcapaciteit met een 216 mm zaagblad. Wanneer u een ander dan een 216 mm zaagblad
gebruikt, dient u de laagste positie van het zaagblad als
volgt af te stellen:
Verwijder eerst de accu van het gereedschap. Breng het
handvat helemaal omlaag. Gebruik de dopsleutel en verdraai de stelbout totdat de omtrek van het zaagblad een
beetje onder het bovenvlak van het draaibaar voetstuk
komt te zitten op het punt waar het voorvlak van de geleider in aanraking komt met het bovenvlak van het draaibaar voetstuk. Zorg dat de accu uit het gereedschap is
verwijderd en draai met de hand het zaagblad rond terwijl
u het handvat volledig omlaag gedrukt houdt, en controleer of het zaagblad met geen enkel deel van het onderste voetstuk in aanraking komt. Stel opnieuw een beetje
af, indien nodig.
LET OP:
Na het installeren van een nieuw zaagblad, dient u altijd
te controleren of het zaagblad met geen enkel deel van
het onderste voetstuk in aanraking komt wanneer het
handvat volledig naar omlaag is gebracht. Verwijder voor
deze controle altijd de accu uit het gereedschap.
38
LET OP:
• Voor het verdraaien van het draaibaar voetstuk dient u
het handvat in de hoogste positie te plaatsen.
• Na het wijzigen van de verstekhoek, dient u het draaibaar voetstuk altijd vast te zetten door de handgreep
stevig vast te draaien.
Instellen van de schuine hoek (Fig. 19 en 20)
Het zaagblad kan 45° schuin omhoog naar links worden
gezet. Om de schuine hoek in te stellen, maakt u de hendel aan de achterzijde van het gereedschap los. Duw het
handvat naar links om het zaagblad te kantelen totdat de
wijzer naar de gewenste hoek op de schuine-hoek schaal
wijst. Draai daarna de hendel weer vast om de arm te
vergrendelen.
LET OP:
• Voor het schuin zetten van het zaagblad, dient u het
handvat in de hoogste positie te plaatsen.
• Na het wijzigen van de schuine hoek, dient u de arm
altijd vast te zetten door de hendel vast te draaien.
Vastzetten van het werkstuk
WAARSCHUWING:
Het is uiterst belangrijk dat u het werkstuk altijd juist en
stevig vastzet met behulp van de spanschroef. Indien u
dit nalaat, kan het gereedschap beschadiging oplopen
en/of het werkstuk worden vernield. OOK KAN PERSOONLIJK LETSEL HET GEVOLG ZIJN. Nadat het
zagen is beëindigd, dient u het zaagblad NIET omhoog
te brengen alvorens het volledig tot stilstand is gekomen.
1. Verticale spanschroef (Fig. 21)
De verticale spanschroef kan in twee posities aan
de linkerzijde of de rechterzijde van de geleider of
houdermontage (los verkrijgbaar accessoire) worden geïnstalleerd. Steek de stang van de spanschroef in het gat in de geleider of in de
houdermontage en trek de schroef aan om de stang
vast te zetten. (Opmerking: Wanneer u de houdermontage gebruikt, dient u deze op de houder te
monteren zoals afgebeeld in Fig. 21.)
Zet de arm van de spanschroef in de positie die
geschikt is voor de dikte en vorm van het werkstuk
en zet de arm vast door de schroef vast te draaien.
Zorg ervoor dat geen enkel deel van het gereedschap in aanraking komt met de spanschroef wanneer het handvat volledig omlaag wordt gebracht.
Indien een of ander deel met de spanschroef in aanraking komt, moet u de positie van de spanschroef
opnieuw afstellen. Druk het werkstuk vlak tegen de
geleider en het draaibaar voetstuk. Plaats het werkstuk in de gewenste zaagpositie en zet het stevig
vast door de spanschroefknop vast te draaien. De
maximale dikte van werkstukken die met de verticale spanschroef kunnen worden vastgezet is
61 mm.
2.
3.
Horizontale spanschroef (los verkrijgbaar accessoire) (Fig. 22 en 23)
De horizontale spanschroef kan aan de linker- of
rechterzijde van het voetstuk worden geïnstalleerd.
Door de spanschroefknop naar links te draaien
wordt de spanschroef in de vrije stand gezet en kunt
u de spanschroefas snel naar binnen en naar buiten
bewegen. Om het werkstuk te grijpen, draait u de
spanschroefknop langzaam naar rechts totdat het
uitsteeksel in zijn hoogste positie komt te staan, en
dan draait u de spanschroefknop stevig vast. Indien
de spanschroefknop naar binnen of naar buiten
wordt getrokken terwijl u deze naar rechts draait,
kan het uitsteeksel in een schuine positie stoppen.
In dat geval draait u de spanschroefknop terug naar
links totdat de spanschroef los komt, en dan draait u
deze weer langzaam naar rechts. De maximale
breedte van werkstukken die met de horizontale
spanschroef kunnen worden vastgezet is 122 mm.
Houders en houdermontage (los verkrijgbaar accessoire)
De houders en de houdermontage kunnen aan
beide zijden van het gereedschap worden aangebracht als een handig middel voor het horizontaal
ondersteunen van de werkstukken. Monteer deze
zoals afgebeeld in Fig. 24. Trek de schroeven stevig
aan om de houders en de houdermontage vast te
zetten. (Fig. 24)
Gebruik de houder/stang montage (los verkrijgbaar
accessoire) voor het zagen van lange werkstukken.
Deze bestaat uit twee houdermontages en twee
stangen 12. (Fig. 25)
LET OP:
Om nauwkeurige zaagsneden te verkrijgen en
gevaarlijk controleverlies van het gereedschap te
voorkomen, dient u lange werkstukken altijd zo te
ondersteunen dat deze op gelijke hoogte staan met
het bovenvlak van het draaibaar voetstuk.
Bediening
LET OP:
Oefen tijdens het zagen geen overmatige druk op het
handvat uit. Wanneer u te hard drukt, kan de motor overbelast raken en/of de zaagcapaciteit verminderen.
1. Drukkend zagen (Fig. 28)
• Werkstukken die maximaal 61 mm dik en 122 mm
breed zijn kunt u als volgt zagen.
• Zet het werkstuk vast met de spanschroef. Schakel het gereedschap in, wacht totdat het zaagblad
op volle toeren draait, en laat dan de zaag voorzichtig op het werkstuk neerzakken. Nadat het
zagen is beëindigd, schakelt u het gereedschap
uit. WACHT TOTDAT HET ZAAGBLAD VOLLEDIG
TOT STILSTAND IS GEKOMEN alvorens het
zaagblad in zijn hoogste positie terug te zetten.
2. Verstekzagen
Zie de paragraaf “Instellen van de verstekhoek” hierboven.
3. Schuine sneden zagen (Fig. 29)
• Bij een linkse schuine hoek van 45°, kunt u werkstukken zagen die maximaal 45 mm dik en 122
mm breed zijn.
• Draai de hendel los en houd het zaagblad schuin
om de schuine hoek in te stellen. Zie de paragraaf
“Instellen van de schuine hoek” hierboven. Zet het
werkstuk vast met de spanschroef. Schakel het
gereedschap in en wacht totdat het zaagblad op
volle toeren draait. Breng dan het handvat langzaam tot in de laagste positie door druk uit te oefenen evenwijdig met het zaagblad. Nadat het zagen
is beëindigd, schakelt u het gereedschap uit.
WACHT TOTDAT HET ZAAGBLAD VOLLEDIG
TOT STILSTAND IS GEKOMEN alvorens het
zaagblad in zijn hoogste positie terug te zetten.
Werking van de schakelaar (Fig. 26)
LET OP:
• Alvorens de accu in het gereedschap aan te brengen,
dient u altijd te controleren of de trekschakelaar goed
werkt en bij loslaten naar de “OFF” positie terugkeert.
• Verwijder de ontgrendelknop en bewaar deze op een
veilige plaats wanneer u het gereedschap niet gebruikt.
Hierdoor voorkomt u ongeoorloofd gebruik van het
gereedschap.
Een ontgrendelknop is voorzien om te voorkomen dat de
trekschakelaar per toeval wordt ingedrukt.
Om het gereedschap te starten, drukt u eerst de ontgrendelknop en vervolgens de trekschakelaar in. Om het
gereedschap te stoppen, de trekschakelaar loslaten.
Vergrendelknop (Fig. 27)
Alleen voor Europese landen
Om te zagen, duwt u de vergrendelknop naar links om
het handvat uit de omhoogpositie vrij te zetten. Nadat het
zagen voltooid is, brengt u het zaagblad terug naar zijn
hoogste positie en dan zet u de vergrendelknop in de
vrije stand. Het handvat wordt dan automatisch in de
omhoogpositie vastgezet.
4.
LET OP:
• Tijdens het zagen van schuine sneden kan het
gebeuren dat het afgezaagd stuk tegen de zijkant
van het zaagblad komt te liggen. Indien het zaagblad omhoog wordt gebracht terwijl het nog draait,
kan dit stuk door het zaagblad worden gegrepen
zodat brokstukken in het rond worden geslingerd,
hetgeen natuurlijk gevaarlijk is. Breng daarom het
zaagblad omhoog ALLEEN nadat dit volledig tot
stilstand is gekomen.
• Wanneer u het handvat omlaag drukt, dient u druk
uit te oefenen evenwijdig met het zaagblad. Indien
u verticale druk op het draaibaar voetstuk uitoefent
of de drukrichting tijdens het zagen verandert, zal
de zaagsnede minder nauwkeurig zijn.
Gecombineerd zagen
Gecombineerd zagen betekent dat het werkstuk
tegelijk met een schuine hoek en een verstekhoek
wordt gezaagd. Gecombineerd zagen is mogelijk
voor hoeken aangegeven in de onderstaande tabel.
Verstekhoek
Schuine hoek
45° links en rechts
0° – 45° links
52° links en rechts
0° – 40° links
39
5.
Bij een verstekhoek van 45° links en een schuine
hoek van 45° links, kunnen werkstukken die maximaal 45 mm dik en 85 mm lang zijn worden
gezaagd. Voor de bedieningen voor gecombineerd
zagen, zie de uitleg onder “Drukkend zagen”, “Verstekzagen” en “Schuine sneden zagen.”
Stukken van gelijke lengte zagen (Fig. 30)
Wanneer u verschillende stukken van dezelfde
lengte tussen 220 mm en 365 mm wilt zagen, kunt u
doeltreffender werken door de stelplaat (los verkrijgbaar accessoire) te gebruiken. Monteer de stelplaat
op de houder zoals afgebeeld in Fig. 30. Breng de
zaaglijn op uw werkstuk op één lijn met de linkerzijde of de rechterzijde van de groef in de zaagsnedeplaat. Houd het werkstuk vast zodat het niet kan
bewegen, en plaats de stelplaat vlak tegen het einde
van het werkstuk. Zet daarna de stelplaat vast met
de schroef. Wanneer u de stelplaat niet gebruikt,
draait u de schroef los en draait u de stelplaat uit de
weg.
OPMERKING:
Door de houder/stang montage (los verkrijgbaar
accessoire) te gebruiken, kunt u stukken van
dezelfde lengte tussen 220 mm en 2 230 mm zagen.
Dragen van het gereedschap (Fig. 5 en 31)
Zorg ervoor dat de accu uit het gereedschap is verwijderd. Zet het zaagblad vast op de 0° schuine hoek en het
draaibaar voetstuk op de 52° verstekhoek naar rechts.
Breng het handvat helemaal omlaag en vergrendel het in
de laagste positie door de aanslagpen naar binnen te
drukken. Draag het gereedschap bij de handgreep zoals
afgebeeld in Fig.29.
ONDERHOUD
LET OP:
Controleer altijd of de machine is uitgeschakeld en de
accu is losgekoppeld vooraleer onderhoud uit te voeren
aan de machine.
Afstellen van de zaaghoek
Dit gereedschap werd in de fabriek nauwkeurig afgesteld
en uitgelijnd, maar door ruwe behandeling kan de uitlijning verslechterd zijn. Indien uw gereedschap niet meer
juist is uitgelijnd, doet u het volgende:
1. Verstekhoek
Draai de handgreep los om het draaibaar voetstuk
los te maken. Draai het voetstuk zodanig dat de wijzer naar 0° op de verstekschaal wijst. Draai daarna
het voetstuk een beetje naar rechts en naar links
zodat het netjes in de 0° verstekinkeping komt te zitten. (Laat het voetstuk zoals het is indien de wijzer
niet naar 0° wijst.) Draai de vier zeskantbouten met
de dopsleutel los om de geleider los te maken.
(Fig. 32)
Breng het handvat helemaal omlaag en vergrendel
het in de laagste positie door de borgpen in te drukken. Zet de zijde van het zaagblad haaks ten
opzichte van het vlak van de geleider door gebruikmaking van een driehoeksliniaal of een winkelhaak
e.d. Zet vervolgens de zeskantbouten op de geleider
stevig vast, beginnend vanaf de rechterzijde.
(Fig. 33)
Controleer of de wijzer 0° op de verstekschaal aanwijst. Indien de wijzer niet naar 0° wijst, draait u de
bevestigingsschroef van de wijzer los en richt u de
wijzer juist naar 0°. (Fig. 34)
40
2.
Schuine hoek
i) 0° schuine hoek Breng het handvat helemaal
omlaag en vergrendel het in de laagste positie
door de borgpen in te drukken. Draai de hendel
aan de achterzijde van het gereedschap los.
Draai de stelbout voor de 0° schuine hoek (onderste bout) op de rechterzijde van de arm twee of
drie slagen naar links om het zaagblad naar
rechts te doen hellen. (Fig. 35)
Zet de zijde van het zaagblad haaks ten opzichte
van het bovenvlak van het draaibaar voetstuk
door de stelbout voor de 0° schuine hoek voorzichtig naar rechts te draaien; gebruik hiervoor
een driehoeksliniaal of een winkelhaak e.d. Draai
daarna de hendel stevig vast. (Fig. 36)
Controleer of de wijzer op de hulparm wijst naar
0° op de schuine-hoek schaal op de arm. Indien
niet, maak dan de bevestigingsschroef van de wijzer los en richt de wijzer juist naar 0°. (Fig. 37)
ii) 45° schuine hoek Stel de 45° schuine hoek pas in
nadat de 0° schuine hoek is ingesteld. Voor het
instellen van de linkse 45° schuine hoek, draait u
de hendel los en doet u het zaagblad 45° naar
links hellen. Controleer of de wijzer op de hulparm wijst naar 45° op de schuine-hoek schaal
op de arm. Indien niet, dan verdraait u de stelbout
voor de 45° schuine hoek (bovenste bout) op de
rechterzijde van de arm totdat de wijzer naar 45°
wijst. (Fig. 35)
Vervangen van de koolborstels (Fig. 38 en 39)
Verwijder en controleer de koolborstels regelmatig. Vervang de koolborstels wanneer deze tot aan de limietmerkstreep versleten zijn. Houd de koolborstels schoon
zodat deze gemakkelijk in de houders glijden. Beide
koolborstels dienen tegelijkertijd te worden vervangen.
Gebruik uitsluitend identieke koolborstels.
Gebruik een schroevendraaier om de borstelhouderdoppen te verwijderen. Neem de versleten koolborstels eruit,
steek de nieuwe erin en zet de borstelhouderdoppen
goed vast.
Opdat het gereedschap veilig en betrouwbaar blijft, dienen alle reparaties, onderhoud of afstellingen te worden
uitgevoerd bij een erkend Makita service centrum.
ACCESSOIRES
LET OP:
• Deze accessoires of hulpstukken worden aanbevolen
voor gebruik met het Makita gereedschap dat in deze
gebruiksaanwijzing is beschreven. Bij gebruik van
andere accessoires of hulpstukken bestaat er gevaar
voor persoonlijke verwonding. Gebruik de accessoires
of hulpstukken uitsluitend voor hun bestemde doel.
Raadpleeg het dichtstbijzijnde Makita Servicecentrum
voor verder advies of bijzonderheden omtrent deze
accessoires.
•
•
•
•
•
•
•
•
•
•
•
•
•
Stofzak
Houder
Dopsleutel 10
Driehoeksliniaal
Hulpplaat
Ontgrendelknop (Schakelknop)
Verticale spanschroef
Hardmetalen zaagblad
Veiligheidsbril
Spanschroefmontage (horizontale spanschroef)
Stelplaat
Houdermontage
Diverse types originele Makita accu’s en acculaders
41